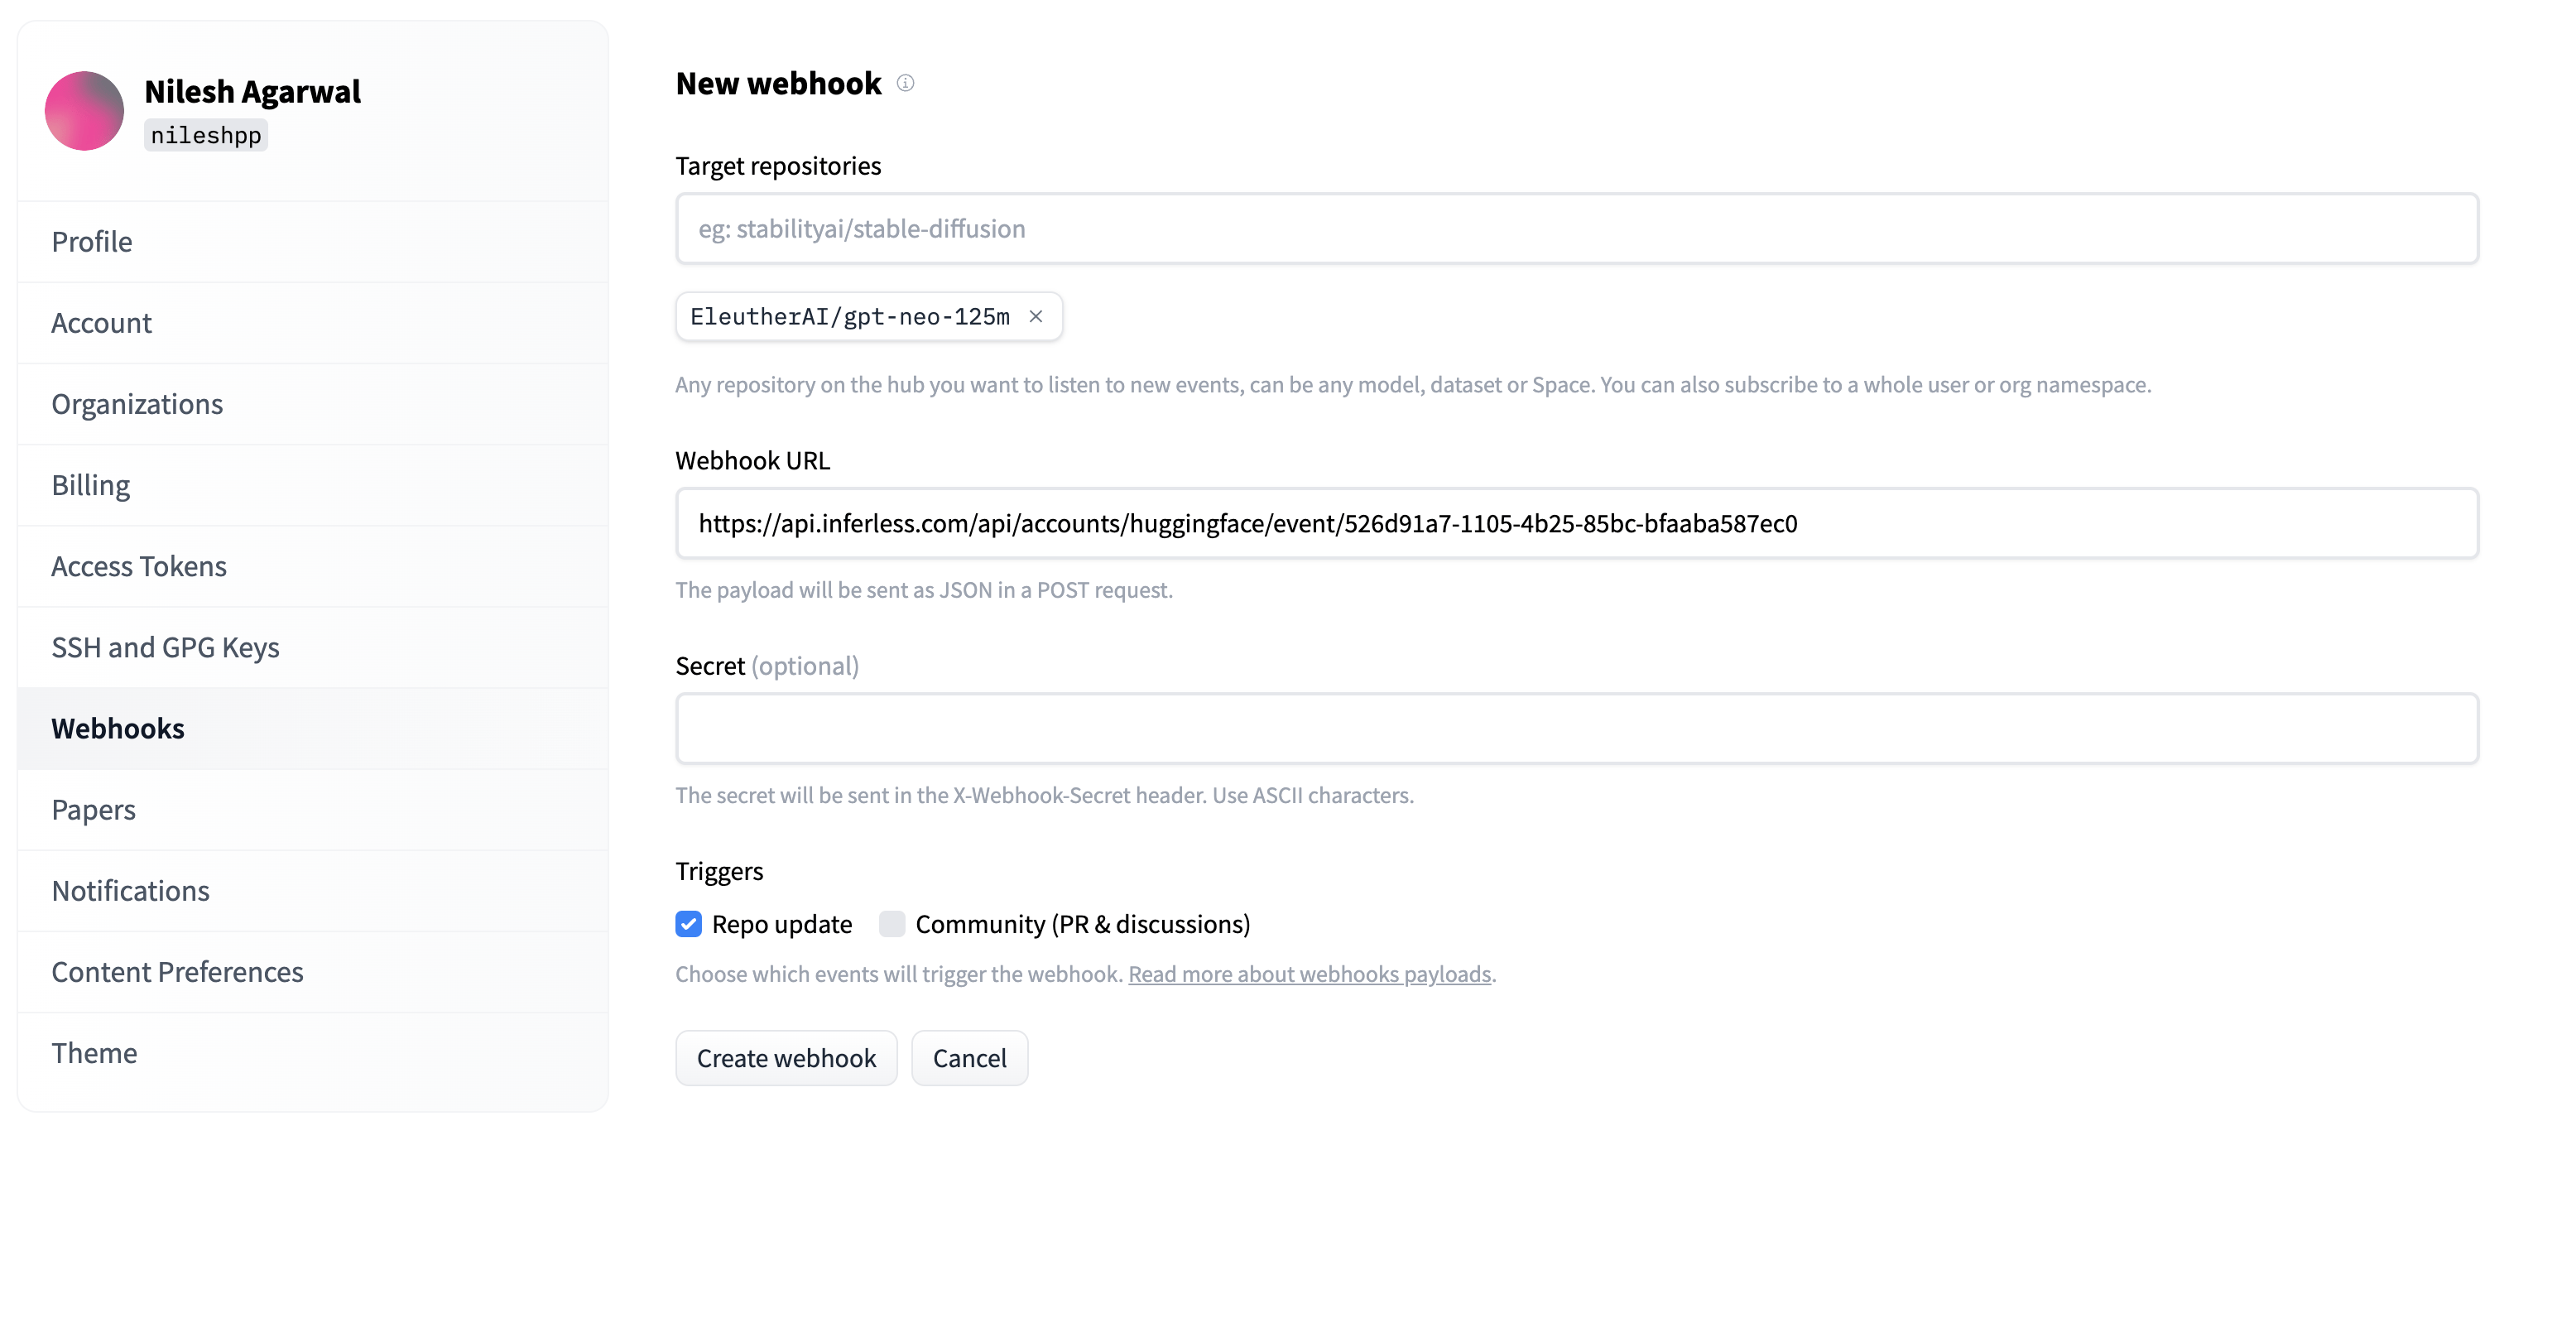
Steps to enable Webhook in Hugging Face
Below are the steps that are to be followed to enable a Webhook:- Log into your Hugging Face account which contains the model that you wish to load.
-
Go to
Settings->Webhooks. -
Click
"add a new Webhook". -
Choose the
target repository, which is your model. -
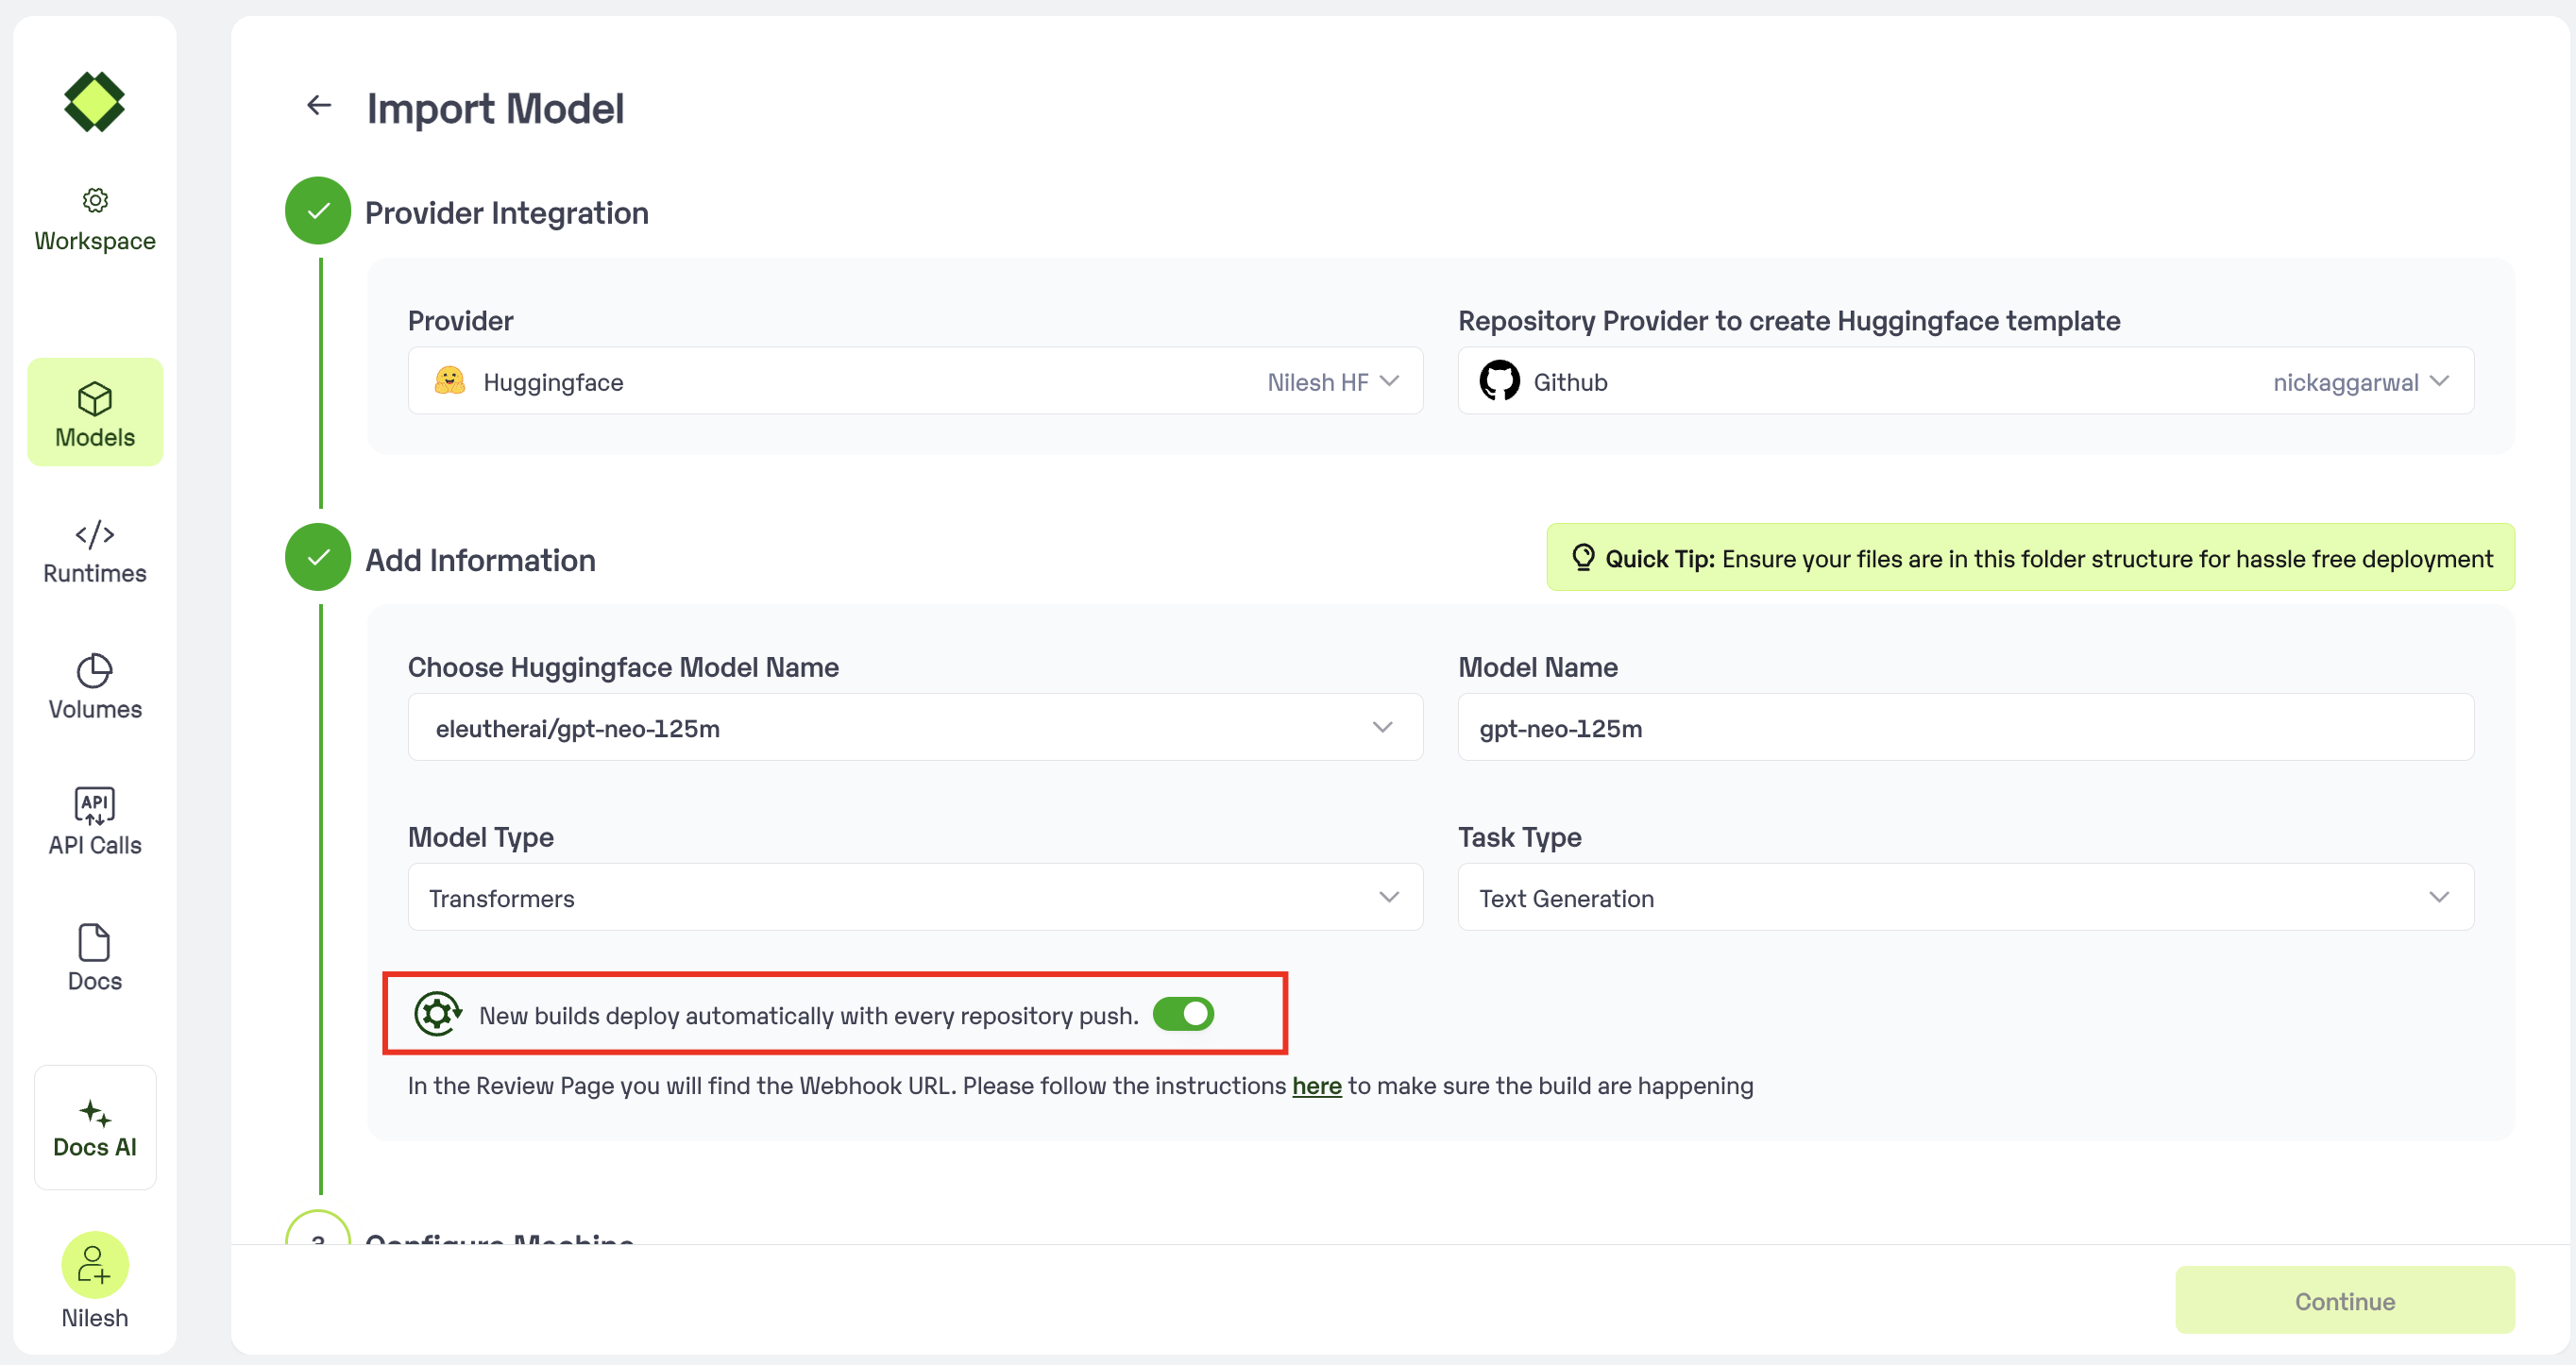
Add the
API URL, which can be copied from your model Page- In case you are doing this during onboarding, the API URL would be displayed during the model import
- View the screenshot below:
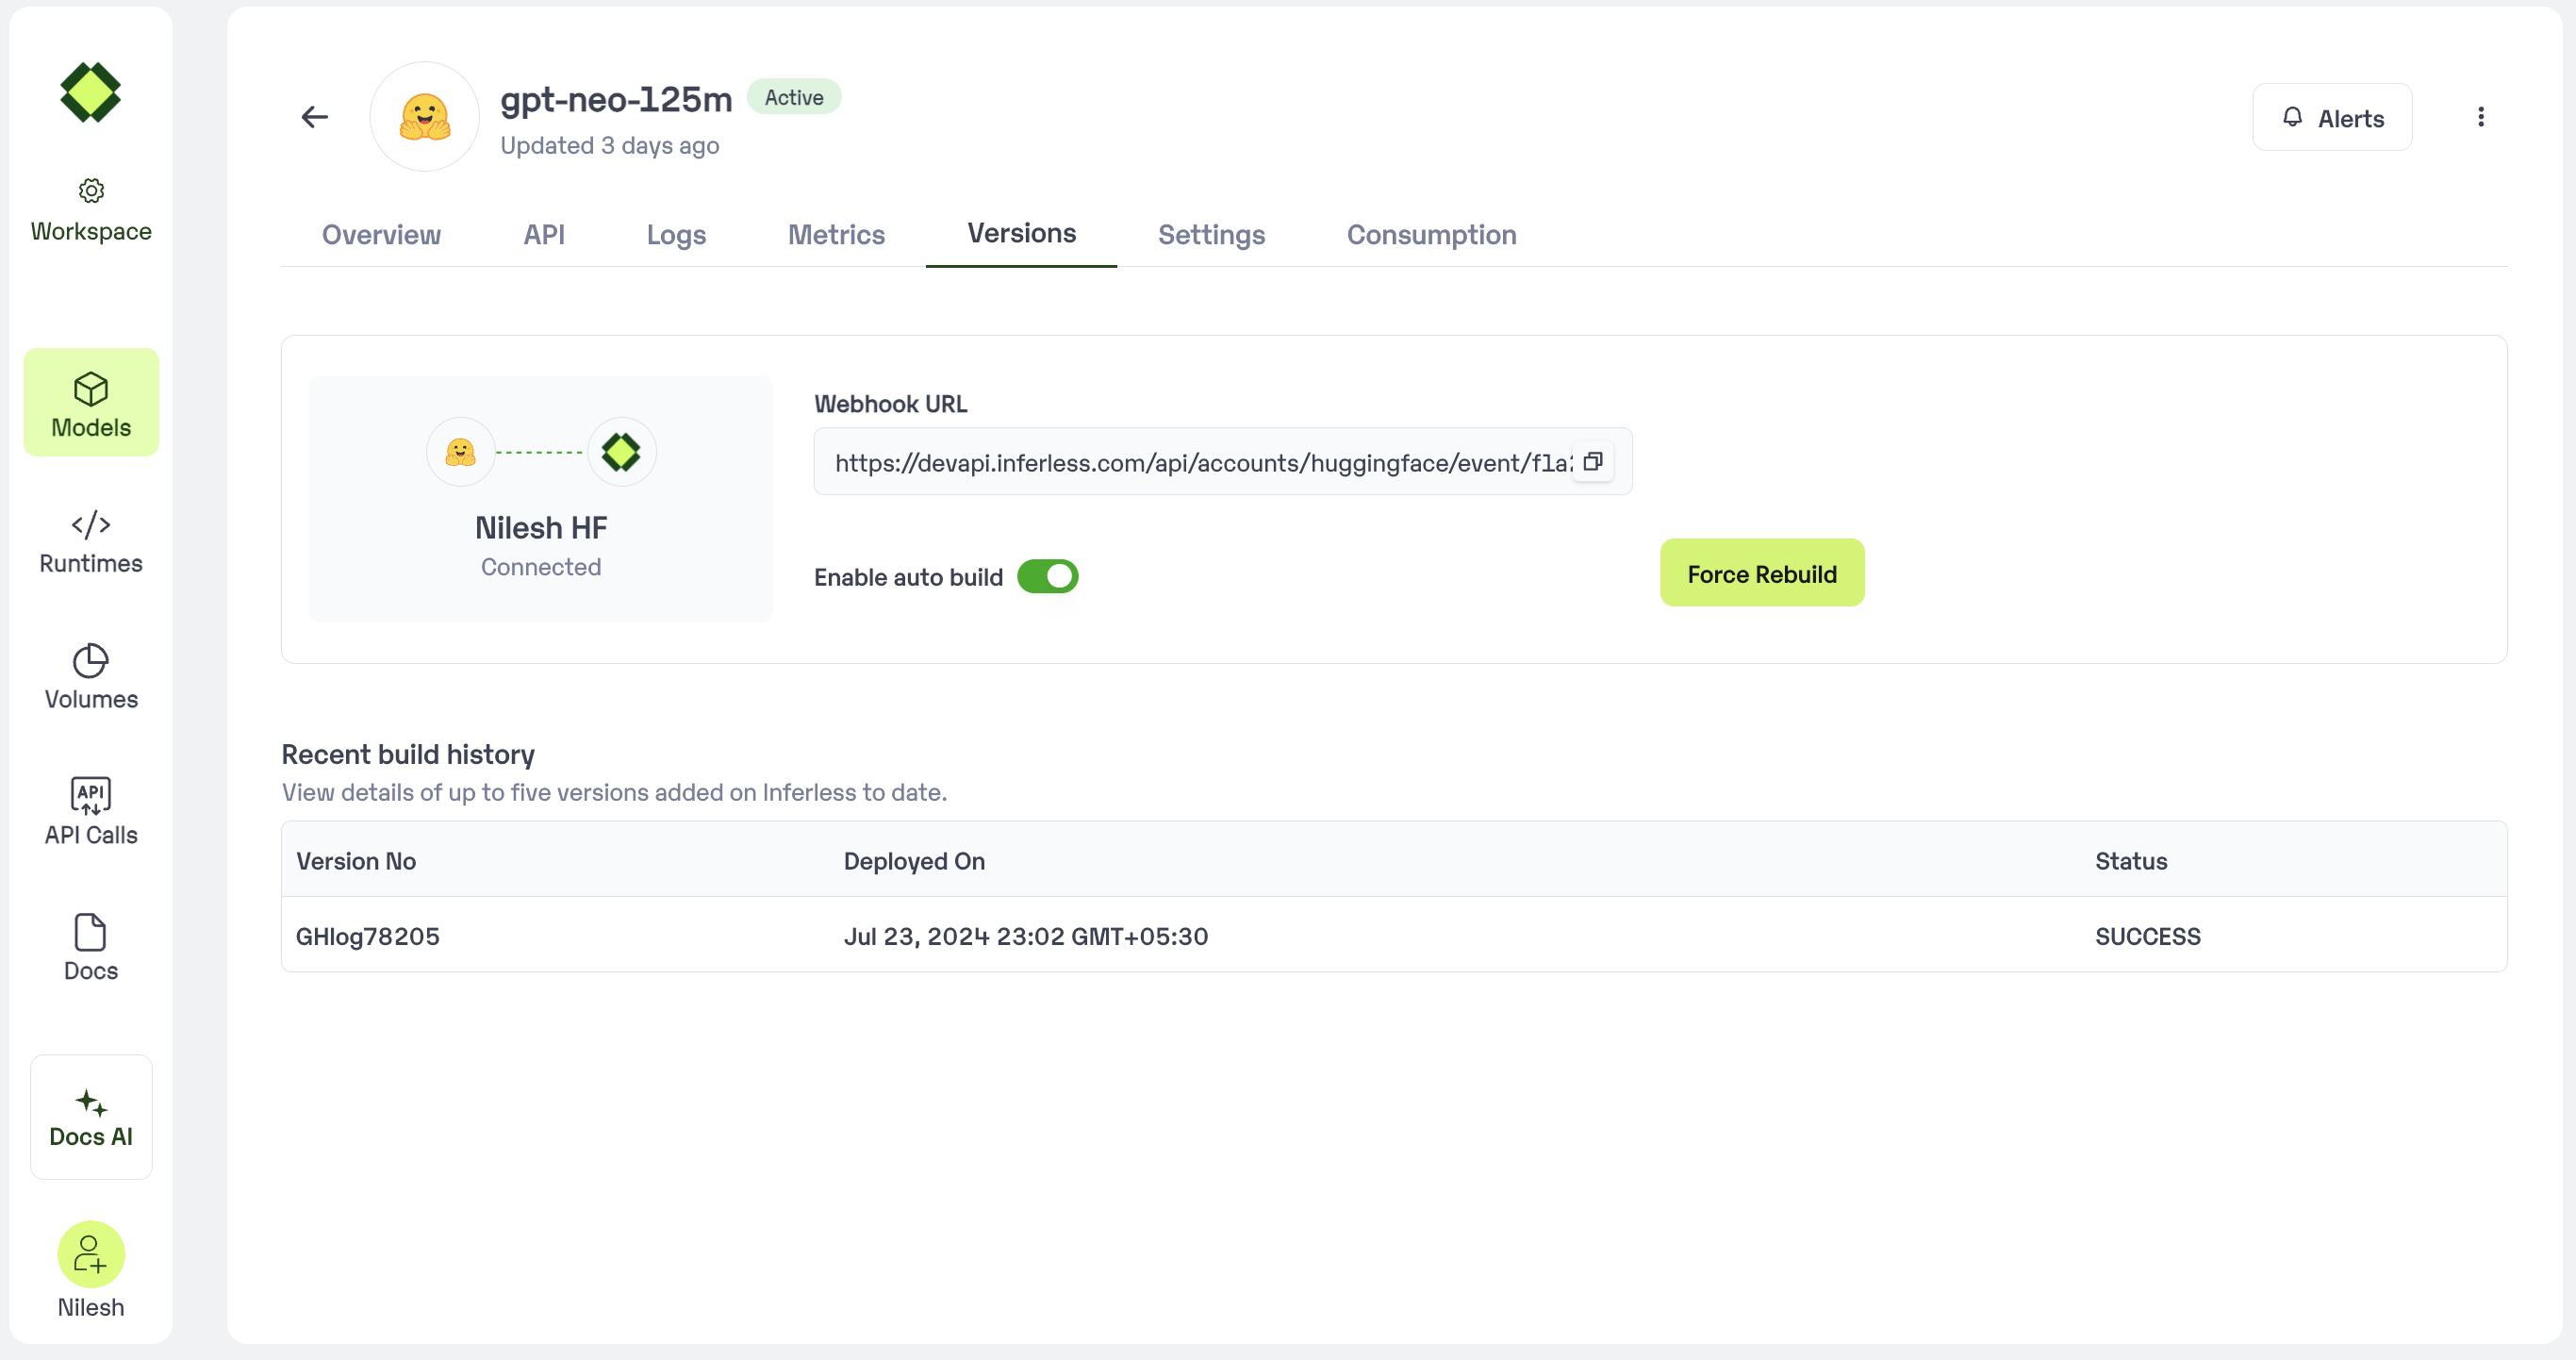
- In case you are doing this post-model import, you can view this under
Model page -> Versions
-
Enable the
Repo Updateoption undertriggers. Click “Create Webhook” to complete the process. - View the screenshot below for a sample completed “New Webhook” Page.