The Logo Generator’s primary steps
For this application, we will use a logo finetuned LoRA with the Stable Diffusion XL model, which will indeed yield impressive results. Here are the primary steps for logo generation using this approach:- Text Input: The user provides a text description(prompt) of the desired logo, such as “a logo for a coffee shop, coffee”, along with a negative prompt and colors.
- Model Processing: This text prompt is fed into the Stable Diffusion XL model, which processes the inputs and generates a corresponding logo representation.
- Logo Output: Finally, the model outputs a unique logo based on the given text description, capturing the desired visual elements and style.
Crafting Your Application
To build the logo generator application, we’ll be using these tools:- Diffusers: A library specifically designed for diffusion models, offering utilities for loading, processing, and generating images.
- Inferless: A serverless platform that simplifies the deployment and scaling of machine learning models, allowing us to serve our logo generator application easily.

Core Development Steps
Text-to-Logo Generation
- Objective: Accept user text input, generate a logo image using the Stable Diffusion XL model with LoRA, and return the generated logo.
- Action: Implement a Python class (InferlessPythonModel) that handles the entire text-to-logo generation process, including input handling, model integration, and logo generation.
Setting up the Environment
Dependencies:- Objective: Ensure all necessary libraries are installed.
- Action: Run the command below to install dependencies:
Deploying Your Model with Inferless CLI
Inferless allows you to deploy your model using Inferless-CLI. Follow the steps to deploy using Inferless CLI.Clone the repository of the model
Let’s begin by cloning the model repository:Deploy the Model
To deploy the model using Inferless CLI, execute the following command:--gpu A100: Specifies the GPU type for deployment. Available options includeA10,A100, andT4.--runtime inferless-runtime-config.yaml: Defines the runtime configuration file. If not specified, the default Inferless runtime is used.
Demo of the Logo Generator
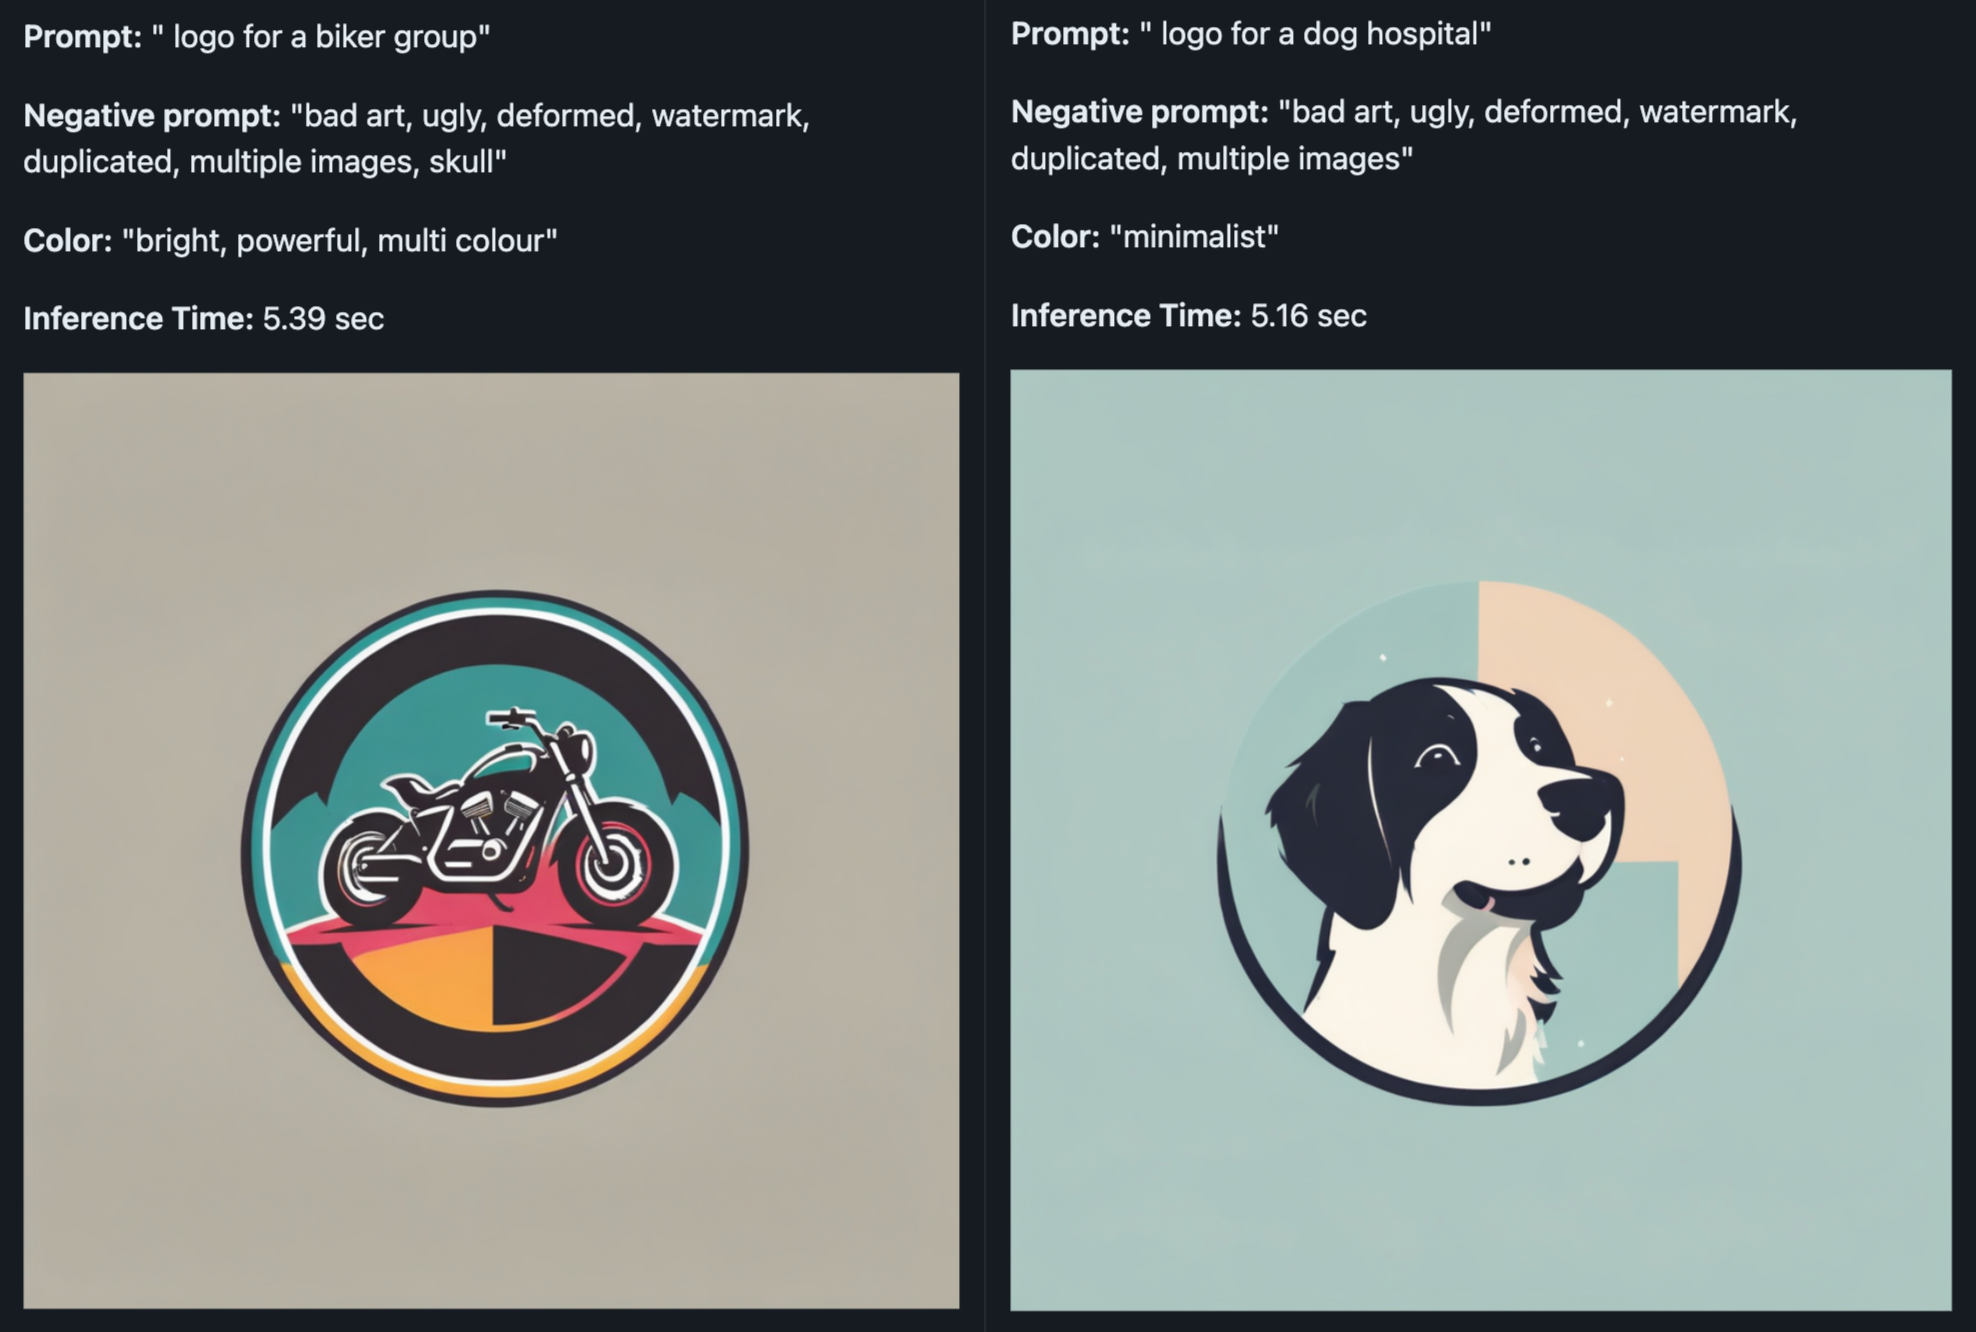
Here are a few examples of logos generated from our application:
Alternative Deployment Method
Inferless also supports a user-friendly UI for model deployment, catering to users at all skill levels. Refer to Inferless’s documentation for guidance on UI-based deployment.Choosing Inferless for Deployment
Deploying your Logo Generator app with Inferless offers compelling advantages, making your development journey smoother and more cost-effective. Here’s why Inferless is the go-to choice:- Ease of Use: Forget the complexities of infrastructure management. With Inferless, you simply bring your model, and within minutes, you have a working endpoint. Deployment is hassle-free, without the need for in-depth knowledge of scaling or infrastructure maintenance.
- Cold-start Times: Inferless’s unique load balancing ensures faster cold-starts. Expect around 5.32 seconds to process each logo, significantly faster than many traditional platforms.
- Cost Efficiency: Inferless optimizes resource utilization, translating to lower operational costs. Here’s a simplified cost comparison:
Scenario 1
You are looking to deploy a Logo Generator application for processing 100 logos per day.Parameters:
- Total number of Logo: 100 daily.
- Inference Time: All models are hypothetically deployed on A100 80GB, taking 5.32 seconds of processing time and a cold start overhead of 11.72 seconds.
- Scale Down Timeout: Uniformly 60 seconds across all platforms, except Hugging Face, which requires a minimum of 15 minutes. This is assumed to happen 100 times a day.
- Inference Duration:
Processing 100 logos and each takes 5.32 seconds
Total: 100 x 5.32 = 532 seconds (or approximately 0.15 hours) - Idle Timeout Duration:
Post-processing idle time before scaling down: (60 seconds - 5.32 seconds) x 100 = 5468 seconds (or 1.52 hours approximately) - Cold Start Overhead:
Total: 100 x 11.72 = 1172 seconds (or 0.33 hours approximately)
Total Billable Hours with Inferless: 2 hours
Scenario 2
You are looking to deploy a Logo Generator application for processing 1000 logos per day.Key Computations:
- Inference Duration:
Processing 1000 logos and each takes 5.32 seconds Total: 1000 x 5.32 = 5320 seconds (or approximately 1.48 hours) - Idle Timeout Duration:
Post-processing idle time before scaling down: (60 seconds - 5.32 seconds) x 100 = 5468 seconds (or 1.52 hours approximately) - Cold Start Overhead:
Total: 100 x 11.72 = 1172 seconds (or 0.33 hours approximately)
Total Billable Hours with Inferless: 3.33 hours
Scenario 3
You are looking to deploy a Logo Generator application for processing 10000 logos per day. Key Computations:- Inference Duration:
Processing 10000 logos and each takes 5.32 seconds Total: 10,000 x 5.32 = 53,200 seconds (or approximately 14.78 hours) - Idle Timeout Duration:
Post-processing idle time before scaling down: (60 seconds - 5.32 seconds) x 100 = 5468 seconds (or 1.52 hours approximately) - Cold Start Overhead:
Total: 100 x 11.72 = 1172 seconds (or 0.33 hours approximately)
Total Billable Hours with Inferless: 16.63 hours
Pricing Comparison for all the Scenario
| Scenarios | AWS SageMaker Cost | Inferless Cost |
|---|---|---|
| 100 requests/day | $28.8 (24 hours billed at $1.22/hour) | $2.44 (2 hours billed at $1.22/hour) |
| 1000 requests/day | $28.8 (24 hours billed at $1.22/hour) | $4.06 (3.33 hours billed at $1.22/hour) |
| 10000 requests/day | $28.8 (24 hours billed at $1.22/hour) | $20.29 (16.63 hours billed at $1.22/hour) |
Please note that we have utilized the A100(80 GB) GPU for model benchmarking purposes, while for pricing comparison, we referenced the A10G GPU price from both platforms. This is due to the unavailability of the A100 GPU in SageMaker. Also, the above analysis is based on a smaller-scale scenario for demonstration purposes. Should the scale increase tenfold, traditional cloud services might require maintaining 2-4 GPUs constantly active to manage peak loads efficiently. In contrast, Inferless, with its dynamic scaling capabilities, adeptly adjusts to fluctuating demand without the need for continuously running hardware.