Introduction
Stable Diffusion 3 sets a new benchmark in image generation, delivering unparalleled image quality with enhanced efficiency. Utilizing a sophisticated Multimodal Diffusion Transformer (MMDiT) architecture, it significantly reduces noise and improves clarity. The model incorporates three advanced text encoders (OpenCLIP-ViT/G, CLIP-ViT/L and T5-xxl) to better understand and execute complex prompts. With innovative sampling methods like Rectified Flow, Stable Diffusion 3 ensures a streamlined path from noise to a detailed image, making it a powerful tool for creating high-fidelity images efficiently.Our Observations
We have deployed this model using A100 GPU and observed that the model took an average cold start time of9.9 sec and an average inference time of 4.4 sec for 28steps image generation.
Defining Dependencies
We are using the HuggingFace Diffusers library for the deployment.Constructing the GitHub/GitLab Template
Now quickly construct the GitHub/GitLab template, this process is mandatory and make sure you don’t add any file namedmodel.py
Create the class for inference
In the app.py we will define the class and import all the required functions-
def initialize: In this function, you will initialize your model and define anyvariablethat you want to use during inference. We are usinghuggingface access tokenwhich will help us to download the gated model. -
def infer: This function gets called for every request that you send. Here you can define all the steps that are required for the inference. You can also pass custom values for inference through theinputsparameter. -
def finalize: This function cleans up all the allocated memory.
Create the Input Schema
We have to create ainput_schema.py in the GitHub/Gitlab repository this will help us create the Input parameters. You can checkout our documentation on Input / Output Schema.
For this tutorial, we have defined four parameters prompt, negative_prompt, num_inference_steps and guidance_scale which are required during the API call. Now lets create the input_schema.py.
Creating the Custom Runtime
This is a mandatory step where we allow the users to upload their own custom runtime through inferless-runtime-config.yaml.Test your model with Remote Run
You can use theinferless remote-run(installation guide here) command to test your model or any custom Python script in a remote GPU environment directly from your local machine. Make sure that you use Python3.10 for seamless experience.
Step 1: Add the Decorators and local entry point
To enable Remote Run, simply do the following:- Import the
inferlesslibrary and initializeCls(gpu="A10"). The available GPU options areT4,A10andA100. - Decorated the
initializeandinferfunctions with@app.loadand@app.inferrespectively. - Create the Local Entry Point by decorating a function (for example,
my_local_entry) with@inferless.local_entry_point. Within this function, instantiate your model class, convert any incoming parameters into aRequestObjectsobject, and invoke the model’sinfermethod.
Step 2: Run with Remote GPU
From your local terminal, navigate to the folder containing yourapp.py and your inferless-runtime-config.yaml and run:
--exclude or -e flag.
Method A: Deploying the model on Inferless Platform
Inferless supports multiple ways of importing your model. For this tutorial, we will use GitHub.Step 1: Login to the inferless dashboard can click on Import model button
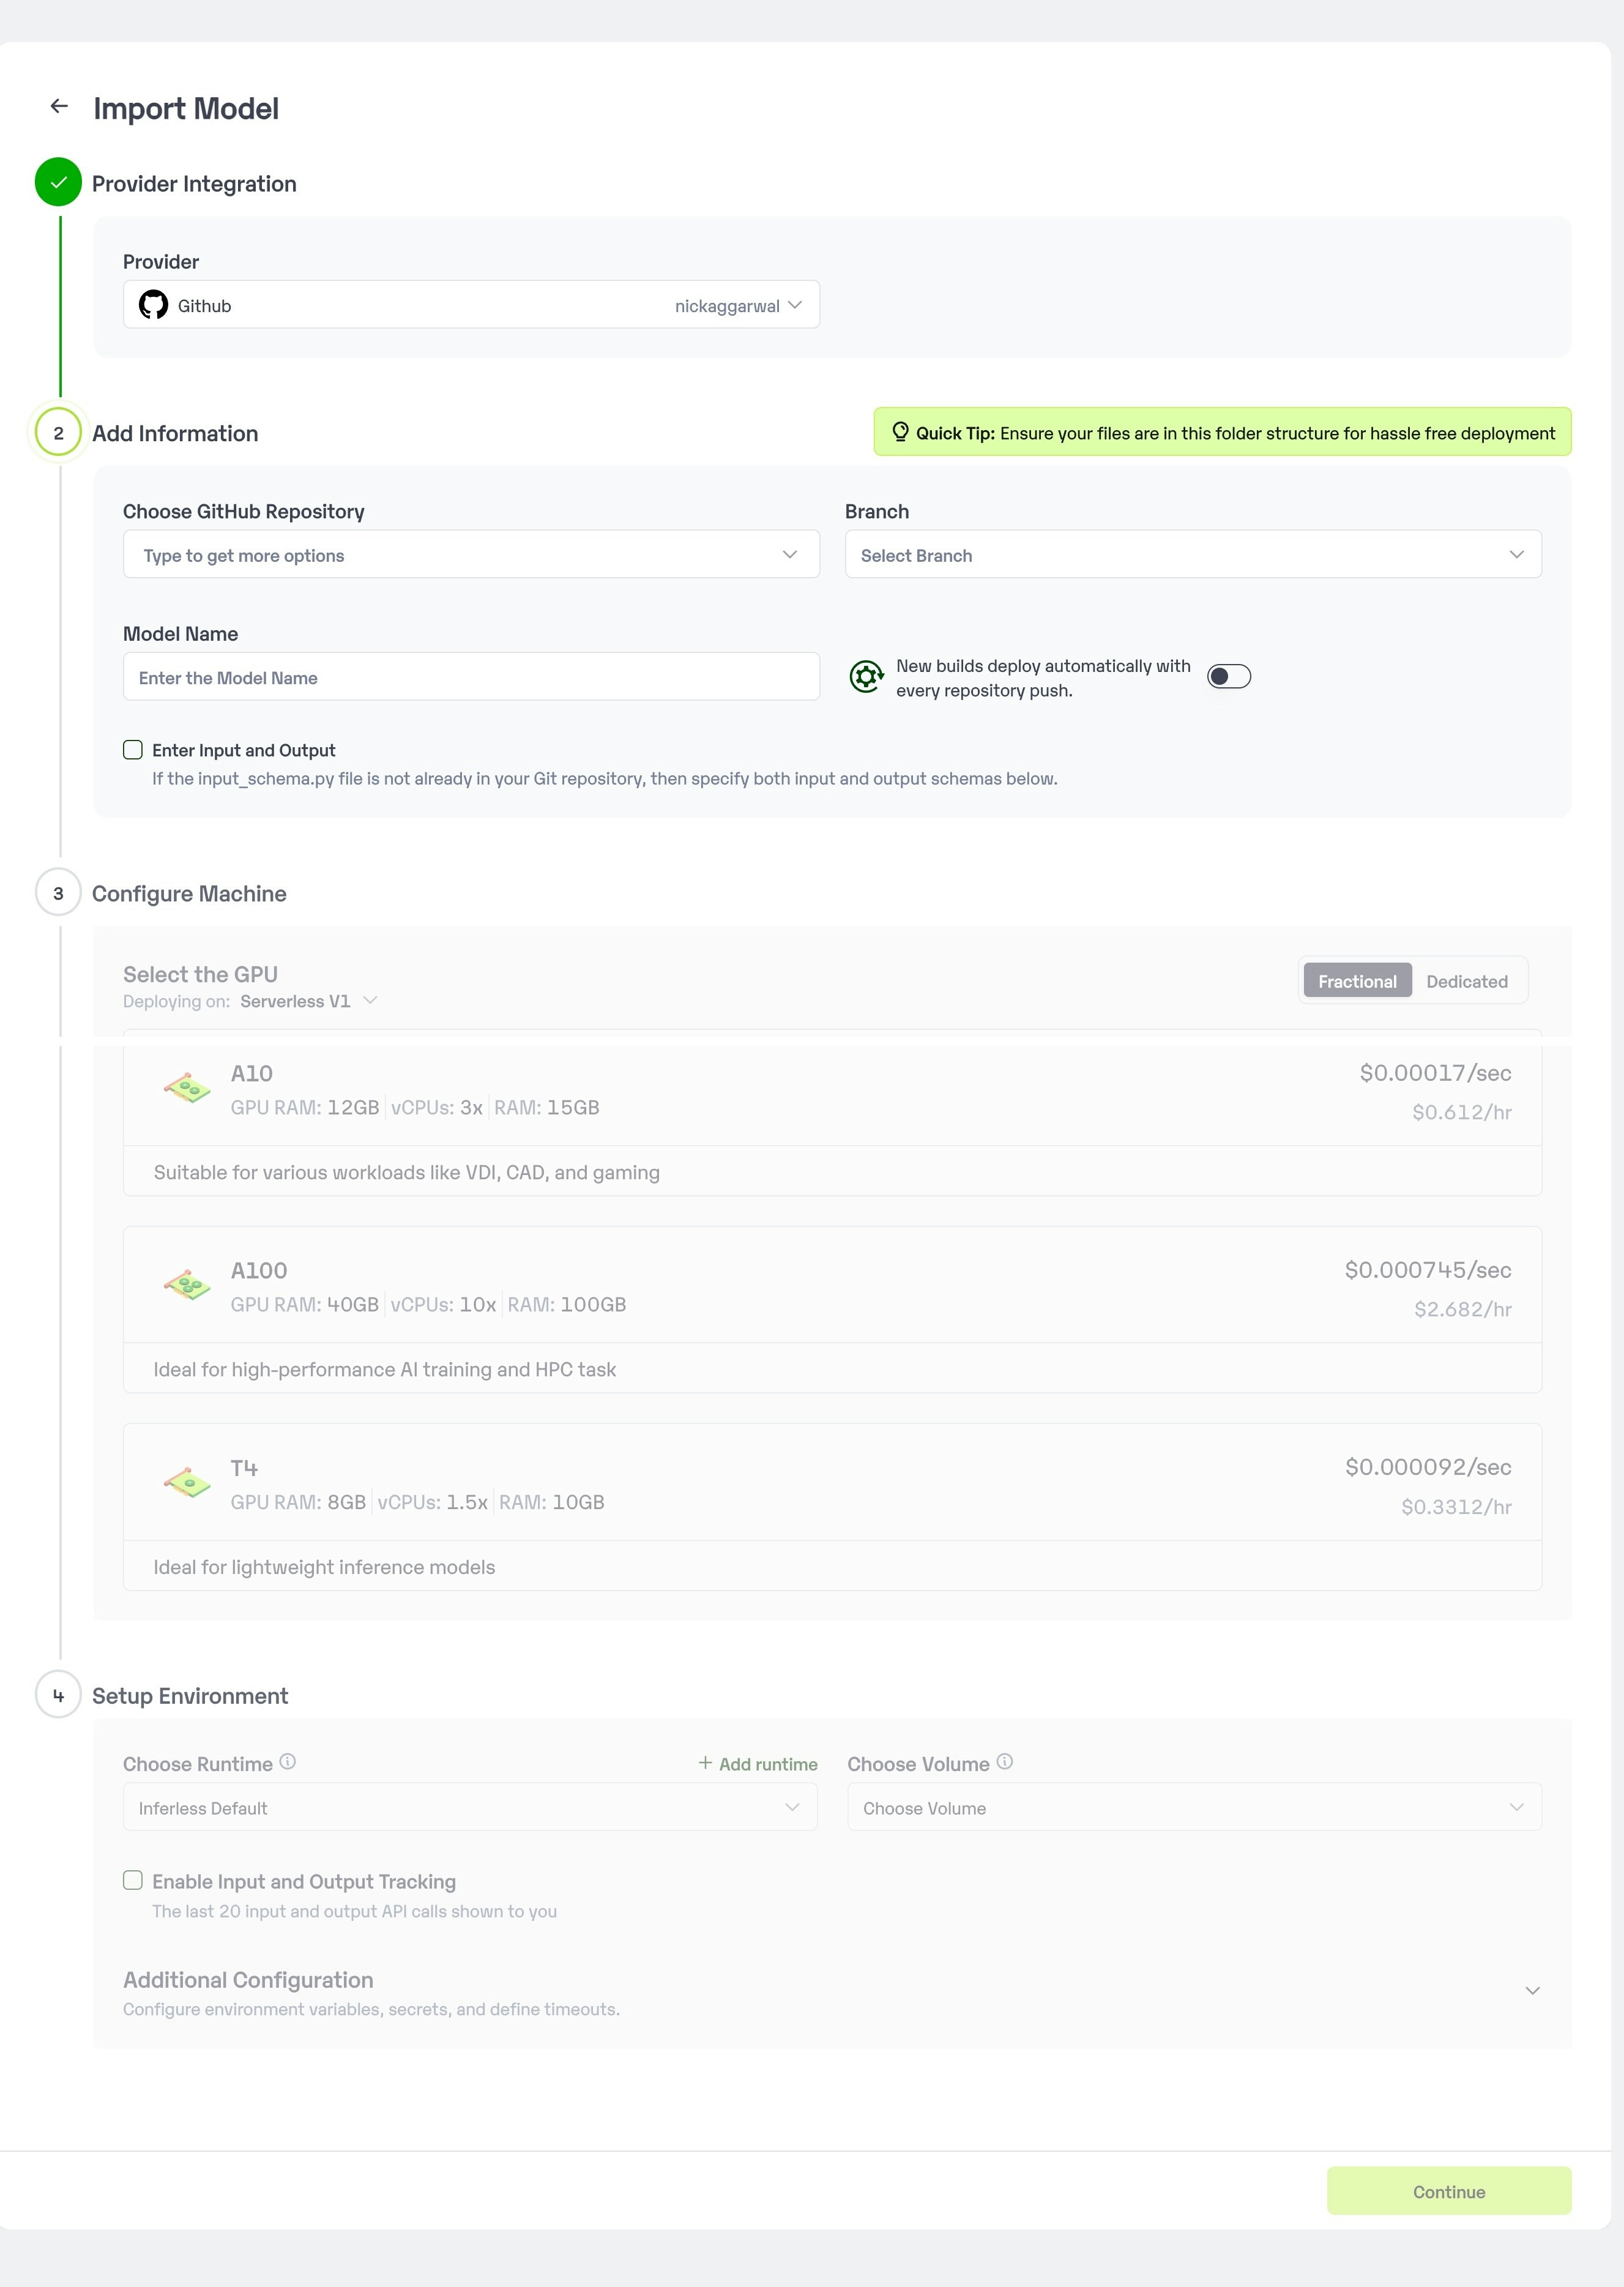
Navigate to your desired workspace in Inferless and Click onAdd a custom model button that you see on the top right. An import wizard will open up.
Step 2: Follow the UI to complete the model Import
- Select the GitHub/GitLab Integration option to connect your source code repository with the deployment environment.
- Navigate to the specific GitHub repository that contains your model’s code. Here, you will need to identify and enter the name of the model you wish to import.
- Choose the appropriate type of machine that suits your model’s requirements. Additionally, specify the minimum and maximum number of replicas to define the scalability range for deploying your model.
- Optionally, you have the option to enable automatic build and deployment. This feature triggers a new deployment automatically whenever there is a new code push to your repository.
- If your model requires additional software packages, configure the Custom Runtime settings by including necessary pip or apt packages. Also, set up environment variables such as Inference Timeout, Container Concurrency, and Scale Down Timeout to tailor the runtime environment according to your needs.
- Wait for the validation process to complete, ensuring that all settings are correct and functional. Once validation is successful, click on the “Import” button to finalize the import of your model.

Step 3: Wait for the model build to complete usually takes ~5-10 minutes
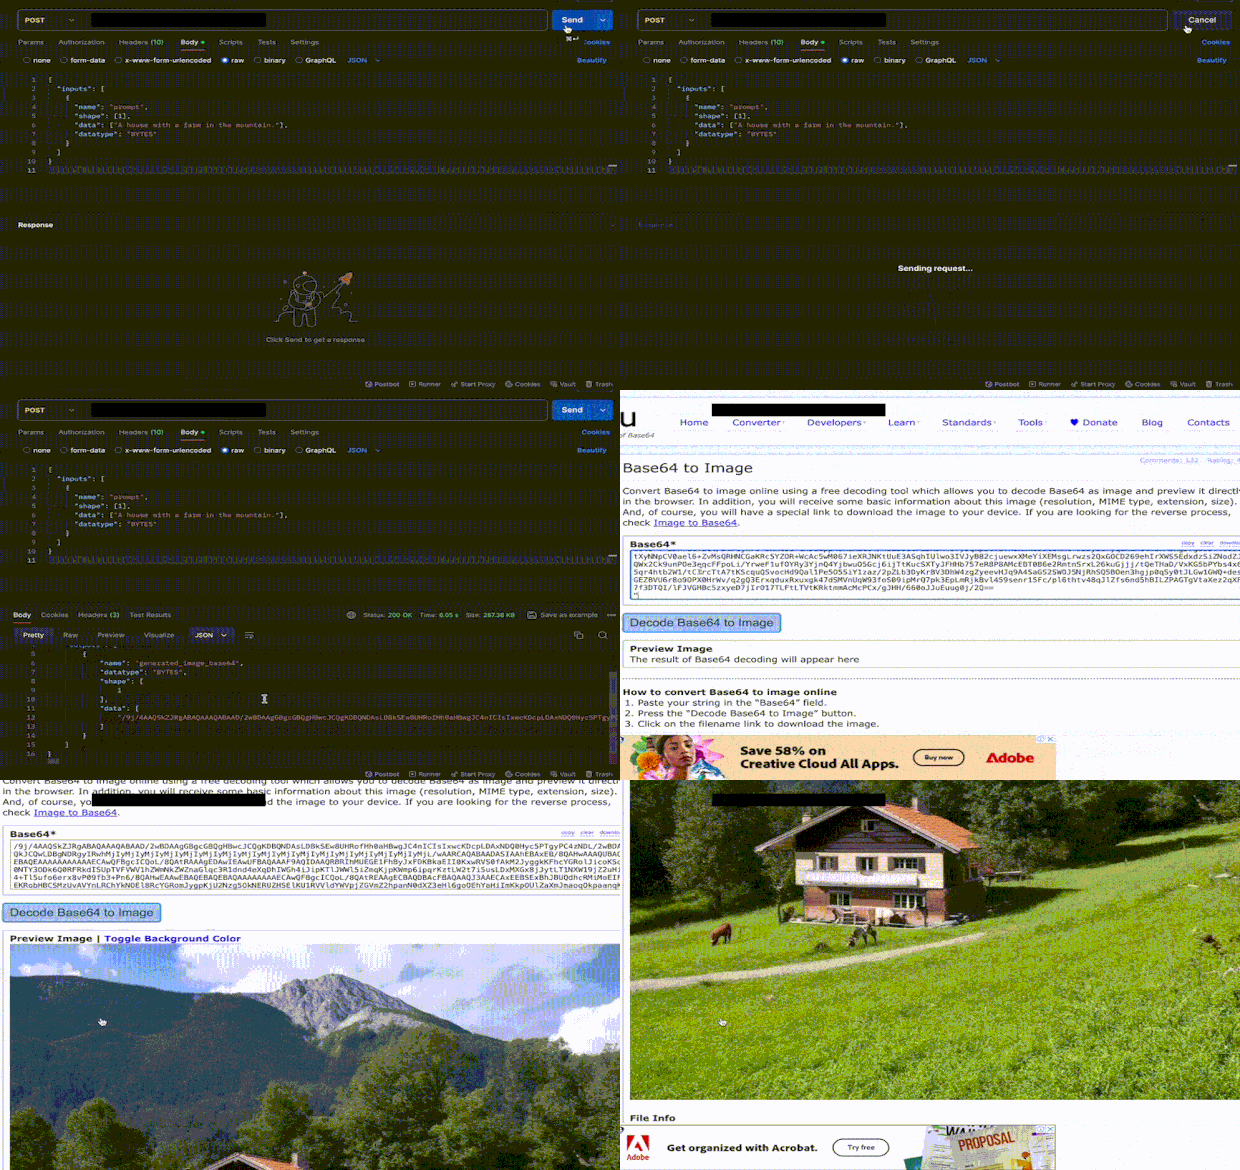
Step 4: Use the APIs to call the model
Once the model is in ‘Active’ status you can click on the ‘API’ page to call the modelHere is the Demo:

Method B: Deploying the model on Inferless CLI
Inferless allows you to deploy your model using Inferless-CLI. Follow the steps to deploy using Inferless CLI.Clone the repository of the model
Let’s begin by cloning the model repository:Deploy the Model
To deploy the model using Inferless CLI, execute the following command:--gpu A100: Specifies the GPU type for deployment. Available options includeA10,A100, andT4.--runtime inferless-runtime-config.yaml: Defines the runtime configuration file. If not specified, the default Inferless runtime is used.