Hugging face
Supported Frameworks
You can use a transformer or a diffuser the based model from Hugging face.
Steps to load your model
To import a model from Hugging Face, below are the requirements.
As a next step, we would need to import the Hugging Face model into GitHub before we push it to Inverness. How Inferless works is:Hugging Face-> Copy and create a repo in GitHub -> Load the model repo into Inferless.
You can use the imported GitHub Repo to change the pre-processing and post-processing code.
Pre Requisite: Note the Model Name, Type, and Framework
-
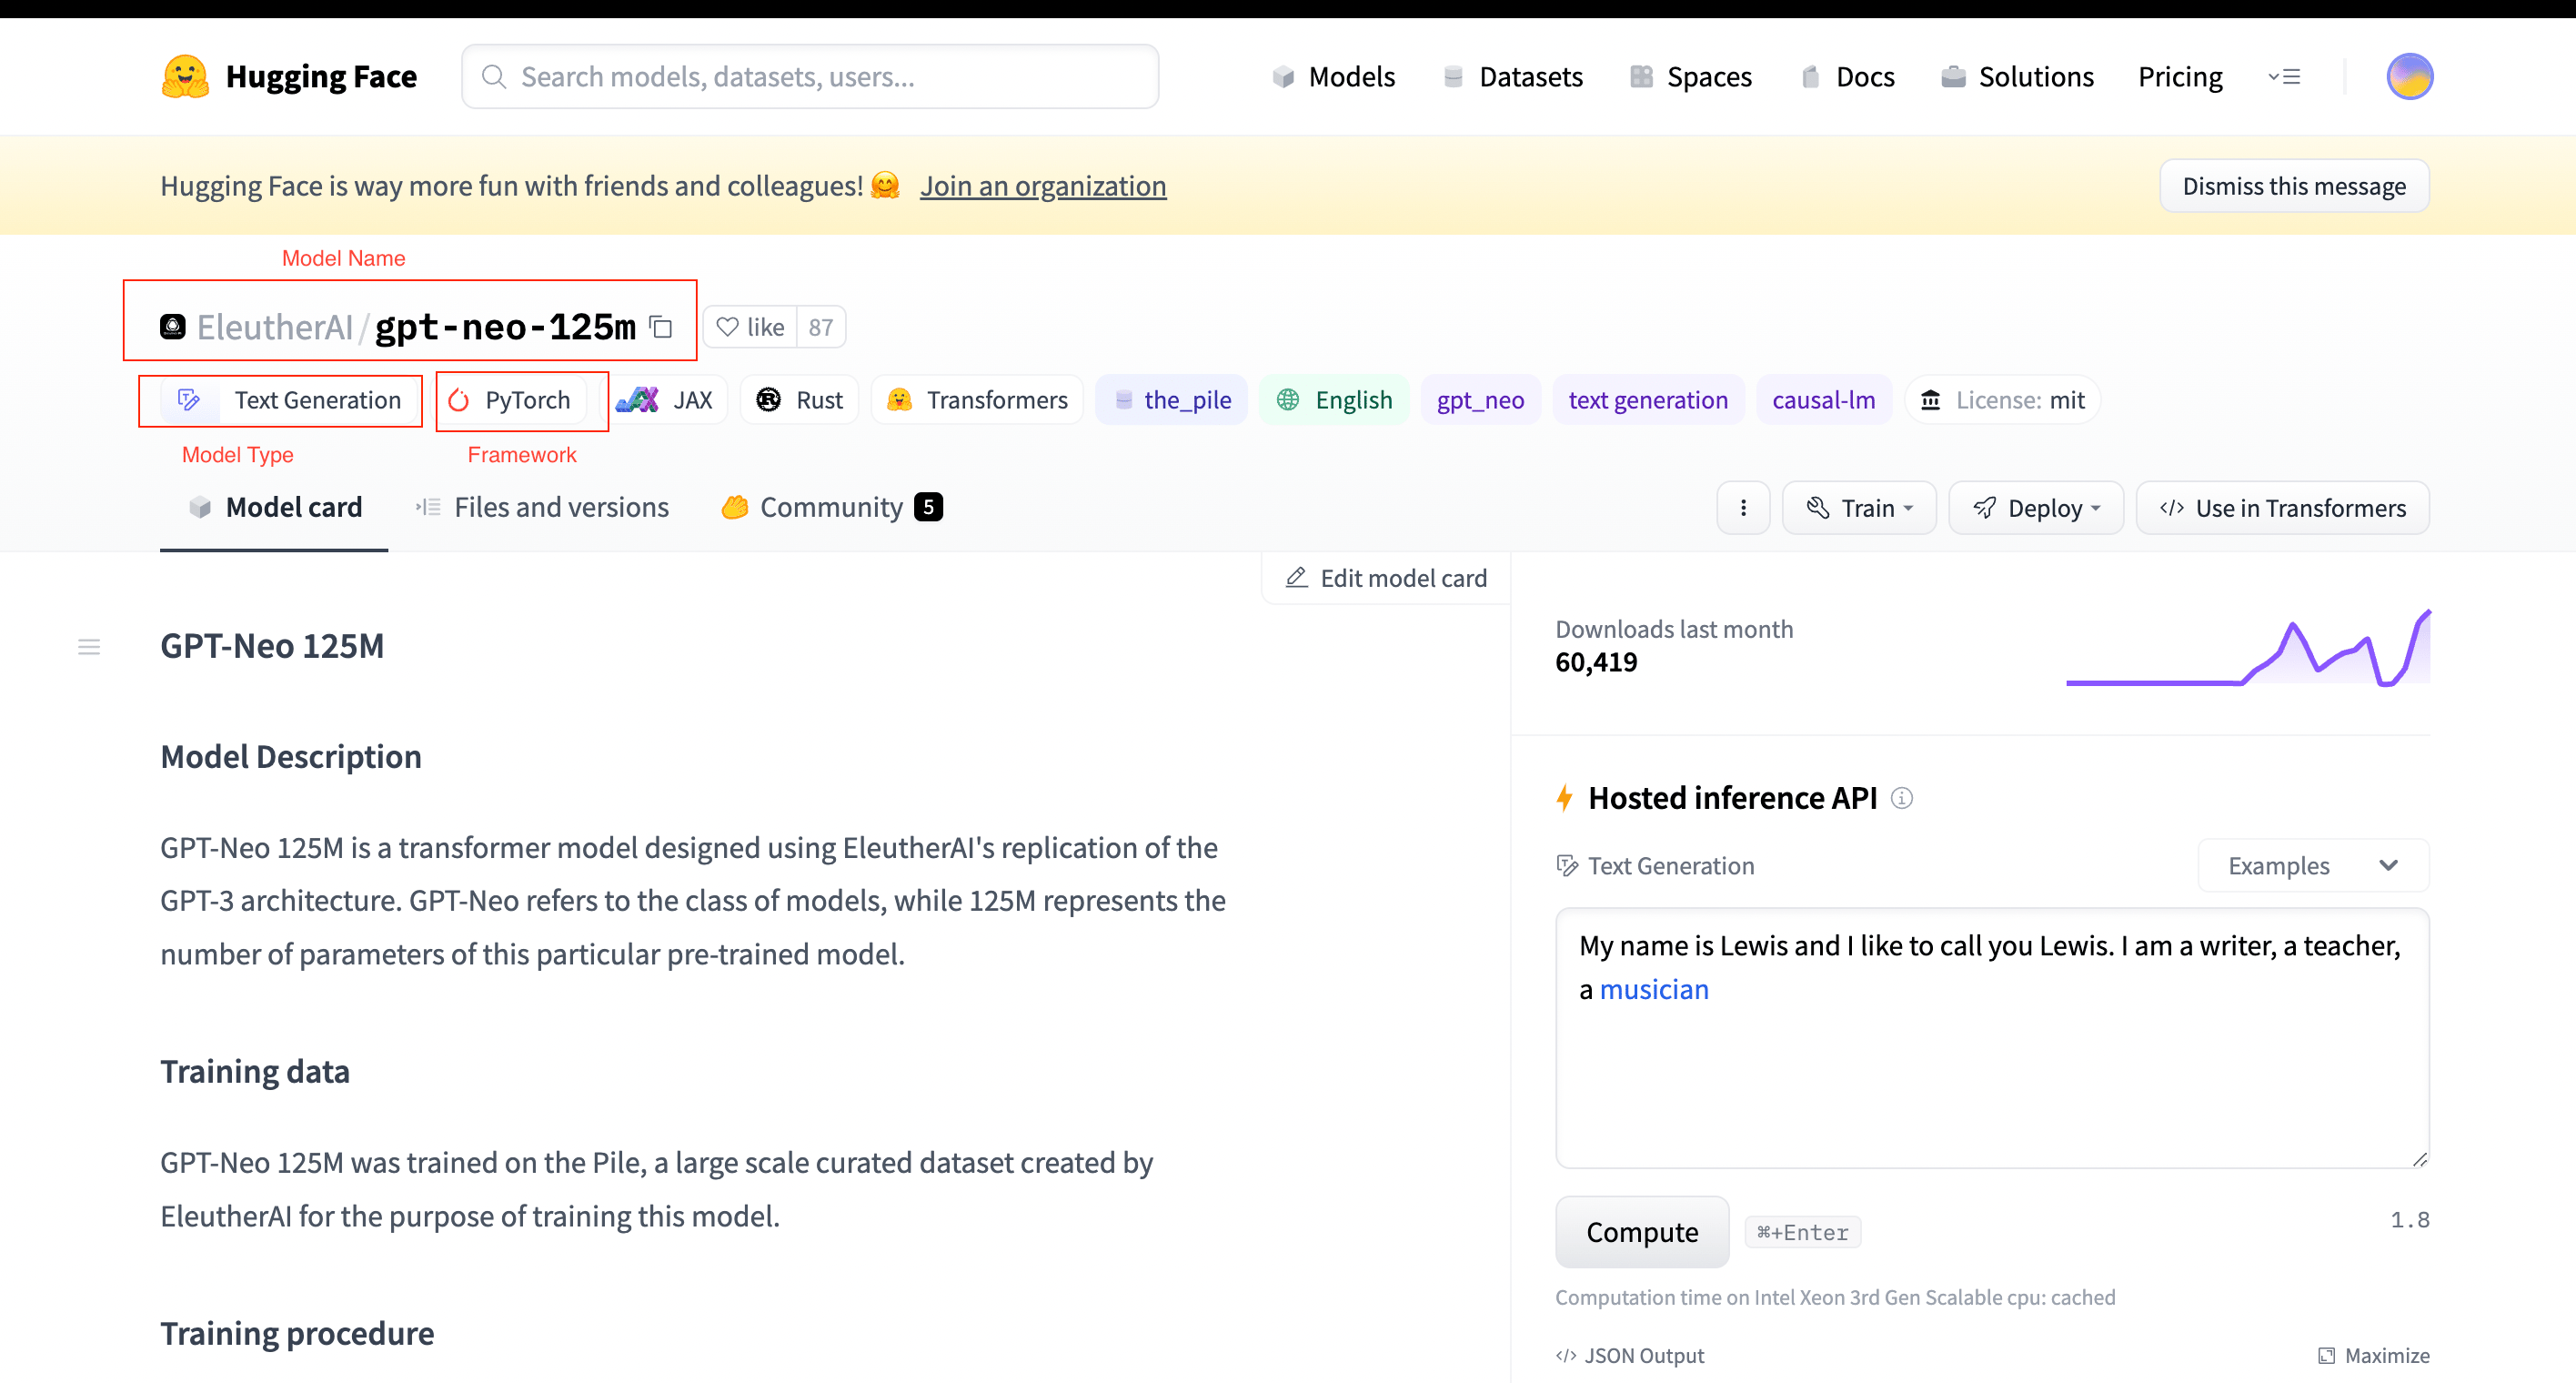
Navigate to the Hugging Face model page of your choice that you want to import into Inferless.
-
Take note of the
"Model Name"(you can also use the copy button),Task Type,Model Framework,andModel Type. These will be required for the next steps.

The fields to be copied/noted are mentioned in RED.
- Navigate to your desired workspace in Inferless and Click on
"Add a Model"button that you see on the top right. An import wizard will open up.

Click on Add Model
Step 1: Choose the framework on which your model was trained.
-
Choose your
**model training framework.**You have noted this from hugging face in the previous step -
In case your desired framework is not available, we have provided detailed how-to guides for your reference
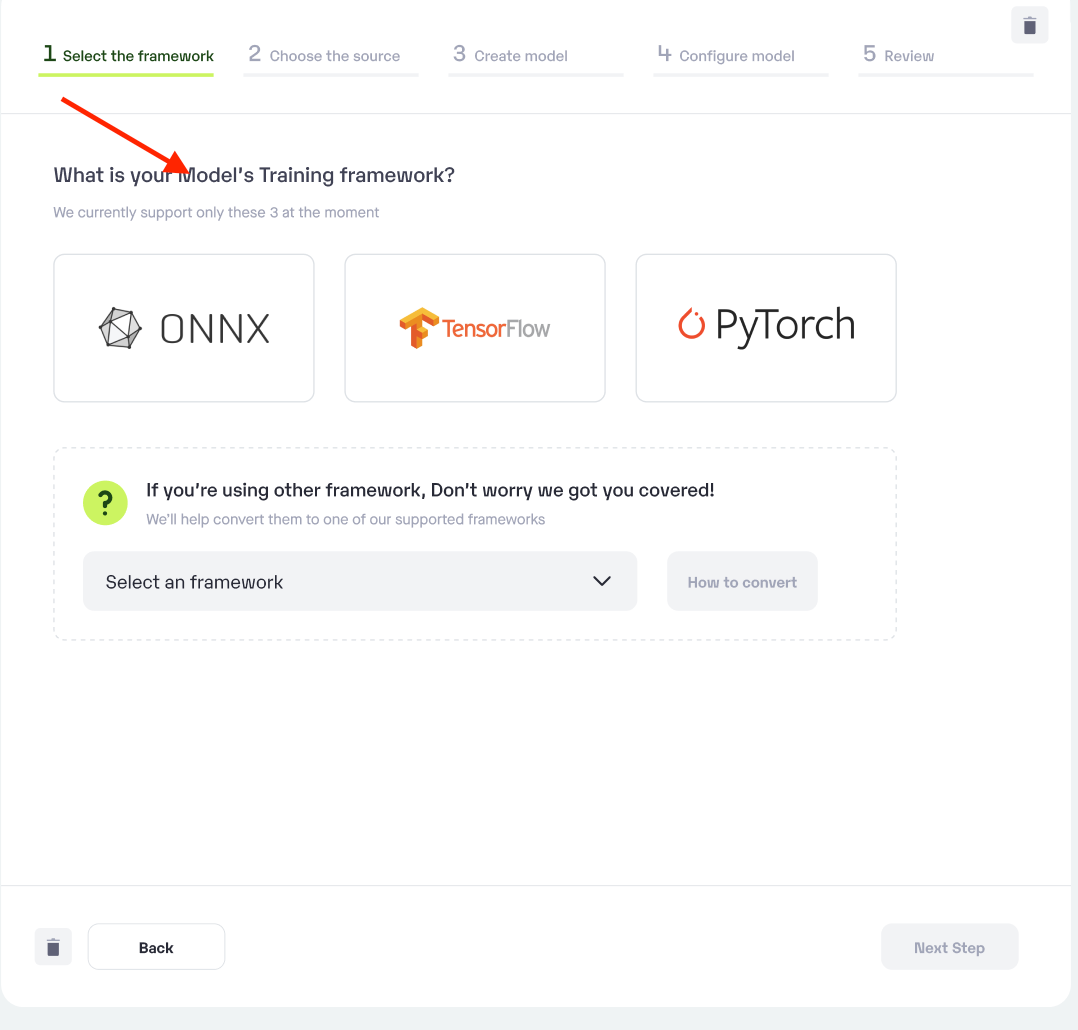
Choose the training framework used for your model
Step 2: Choose the source of your model.
-
Since we are using a model from Hugging Face in this example, select
Hugging Faceas the method of uploading. -
To proceed with the upload, you will need to connect your
Hugging Face accountand a privateGitHub account. This is a mandatory step as the Hugging Face credentials enable us to import your private repositories, while GitHub creates the template of the Hugging face repo where you can make changes later to modify your pre-processing and post-processing function -
For more information: Inferless works by copying the model from Hugging Face and creating a new repository in GitHub. The model repository is then loaded into Inferless.
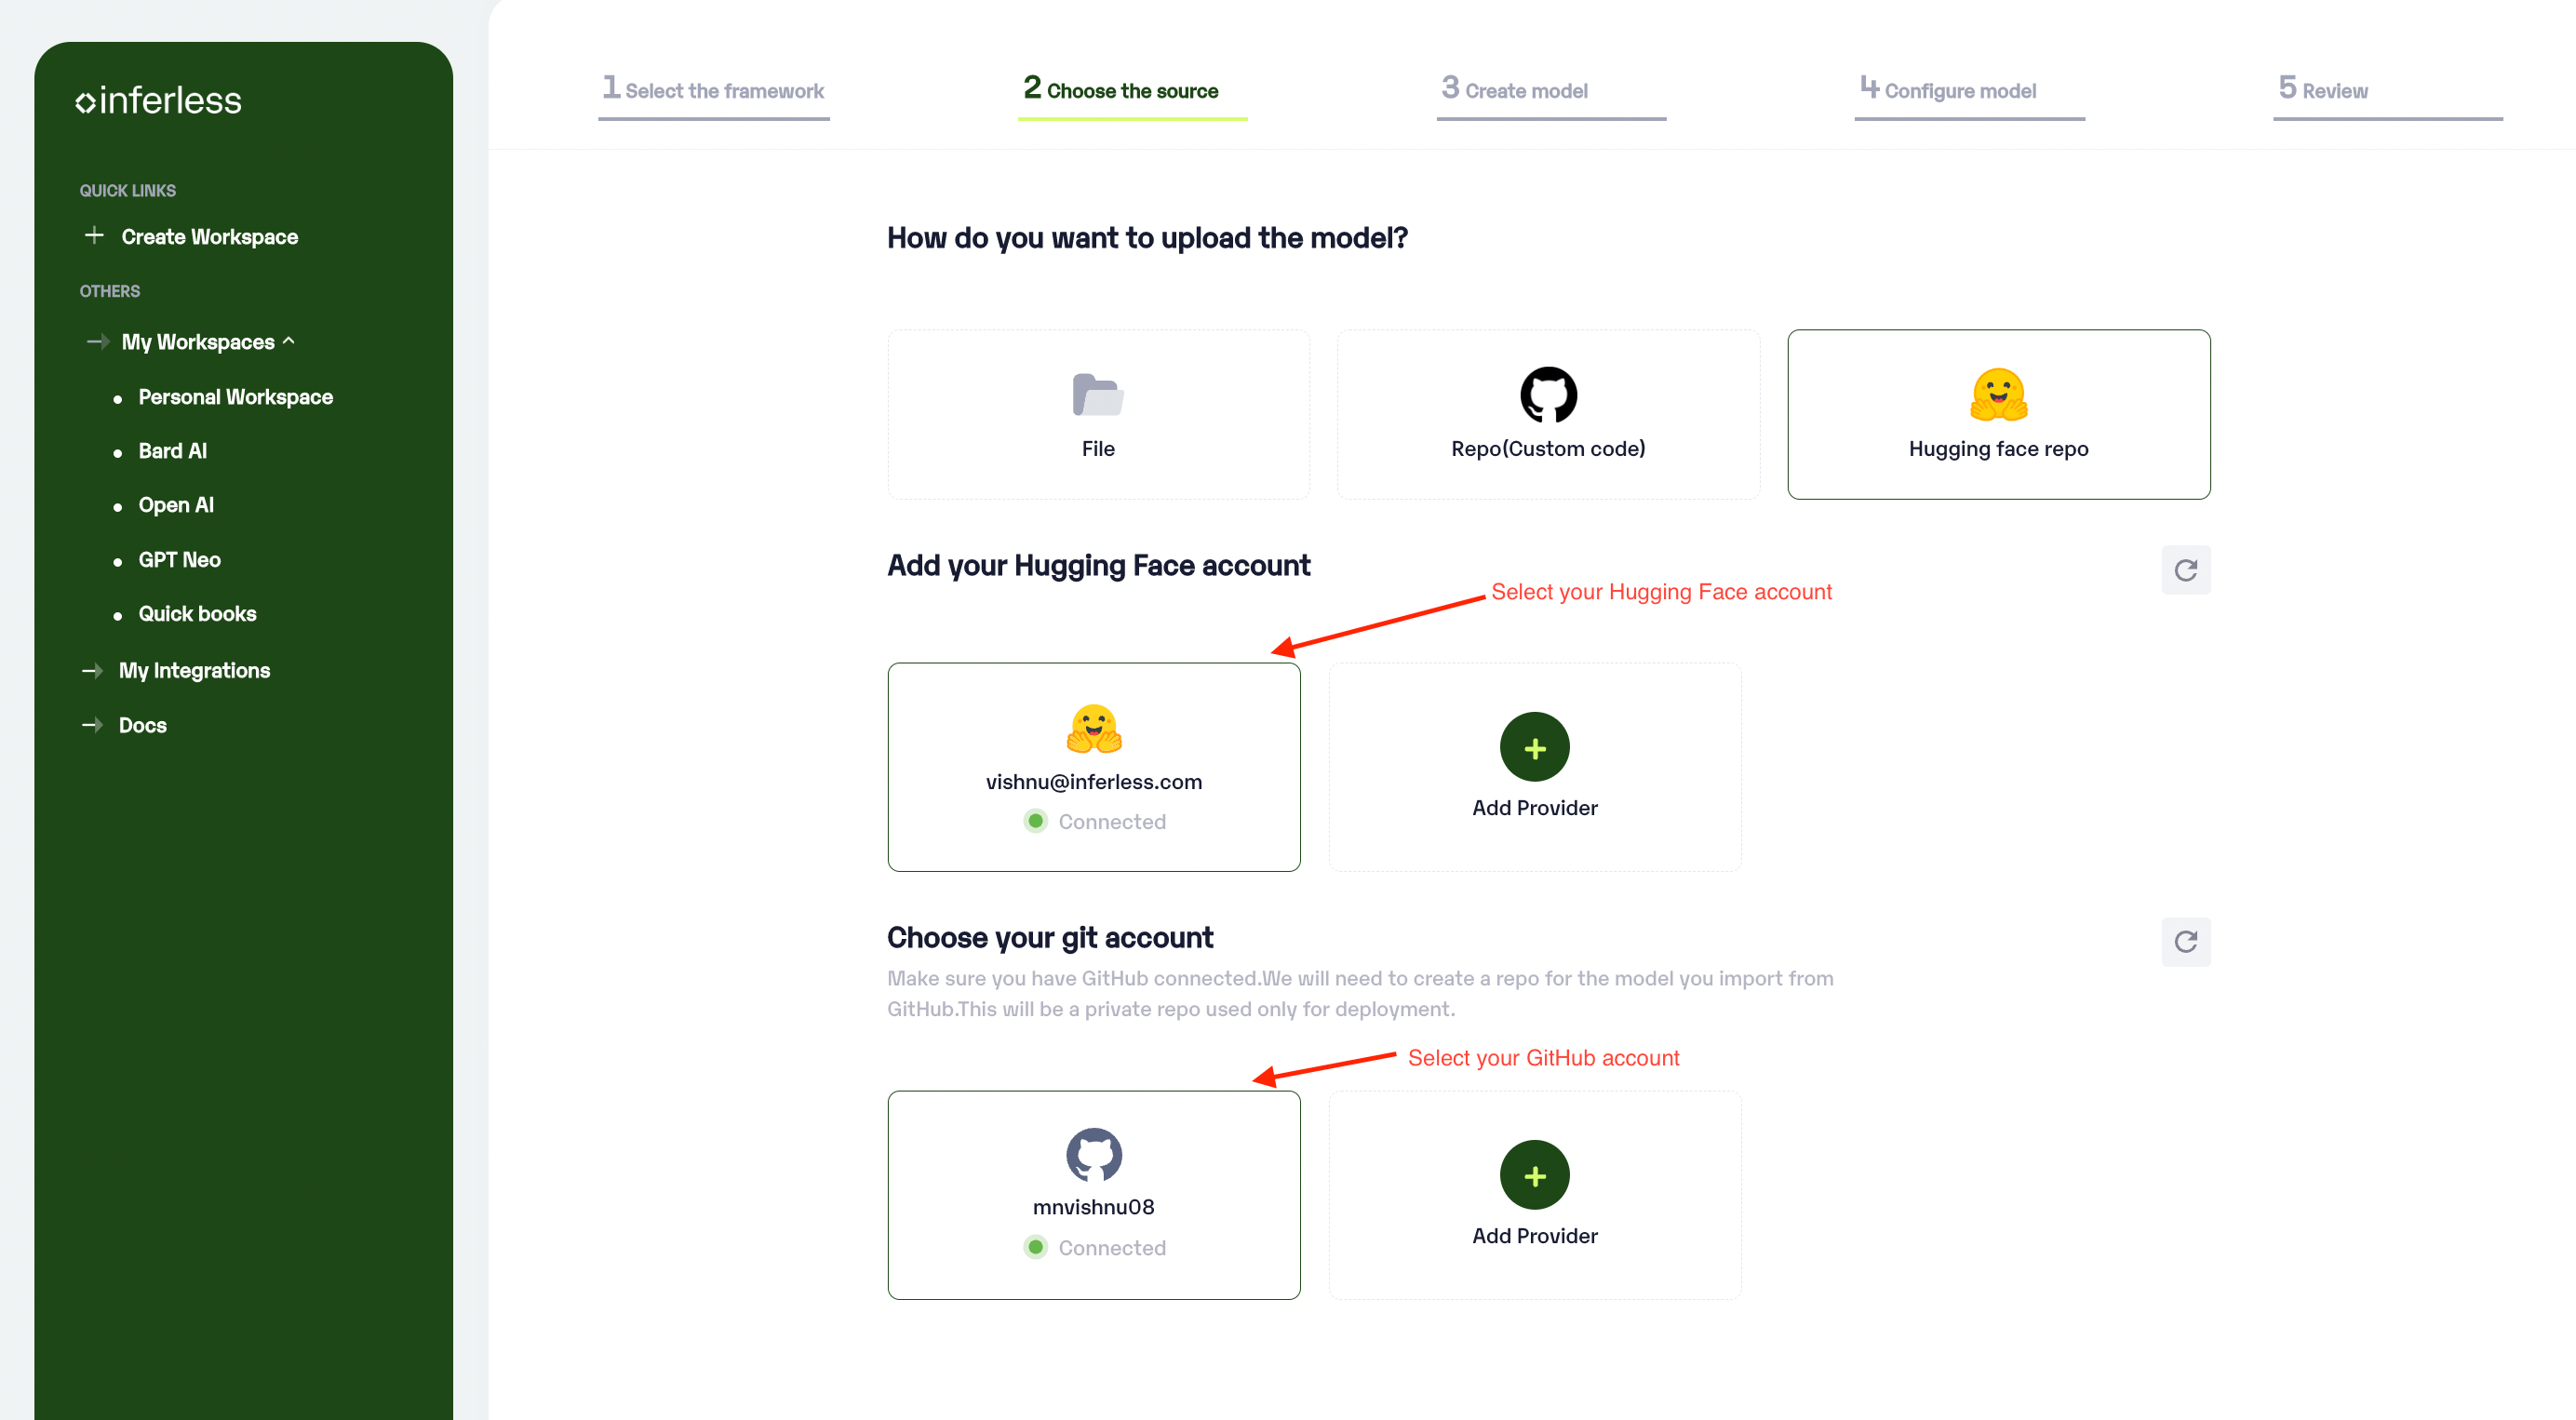
Select Hugging Face and also add the neccesary accounts
- If you are using Inferless for the first time and have not added any providers before, click on the
"Add Provider"button (+).
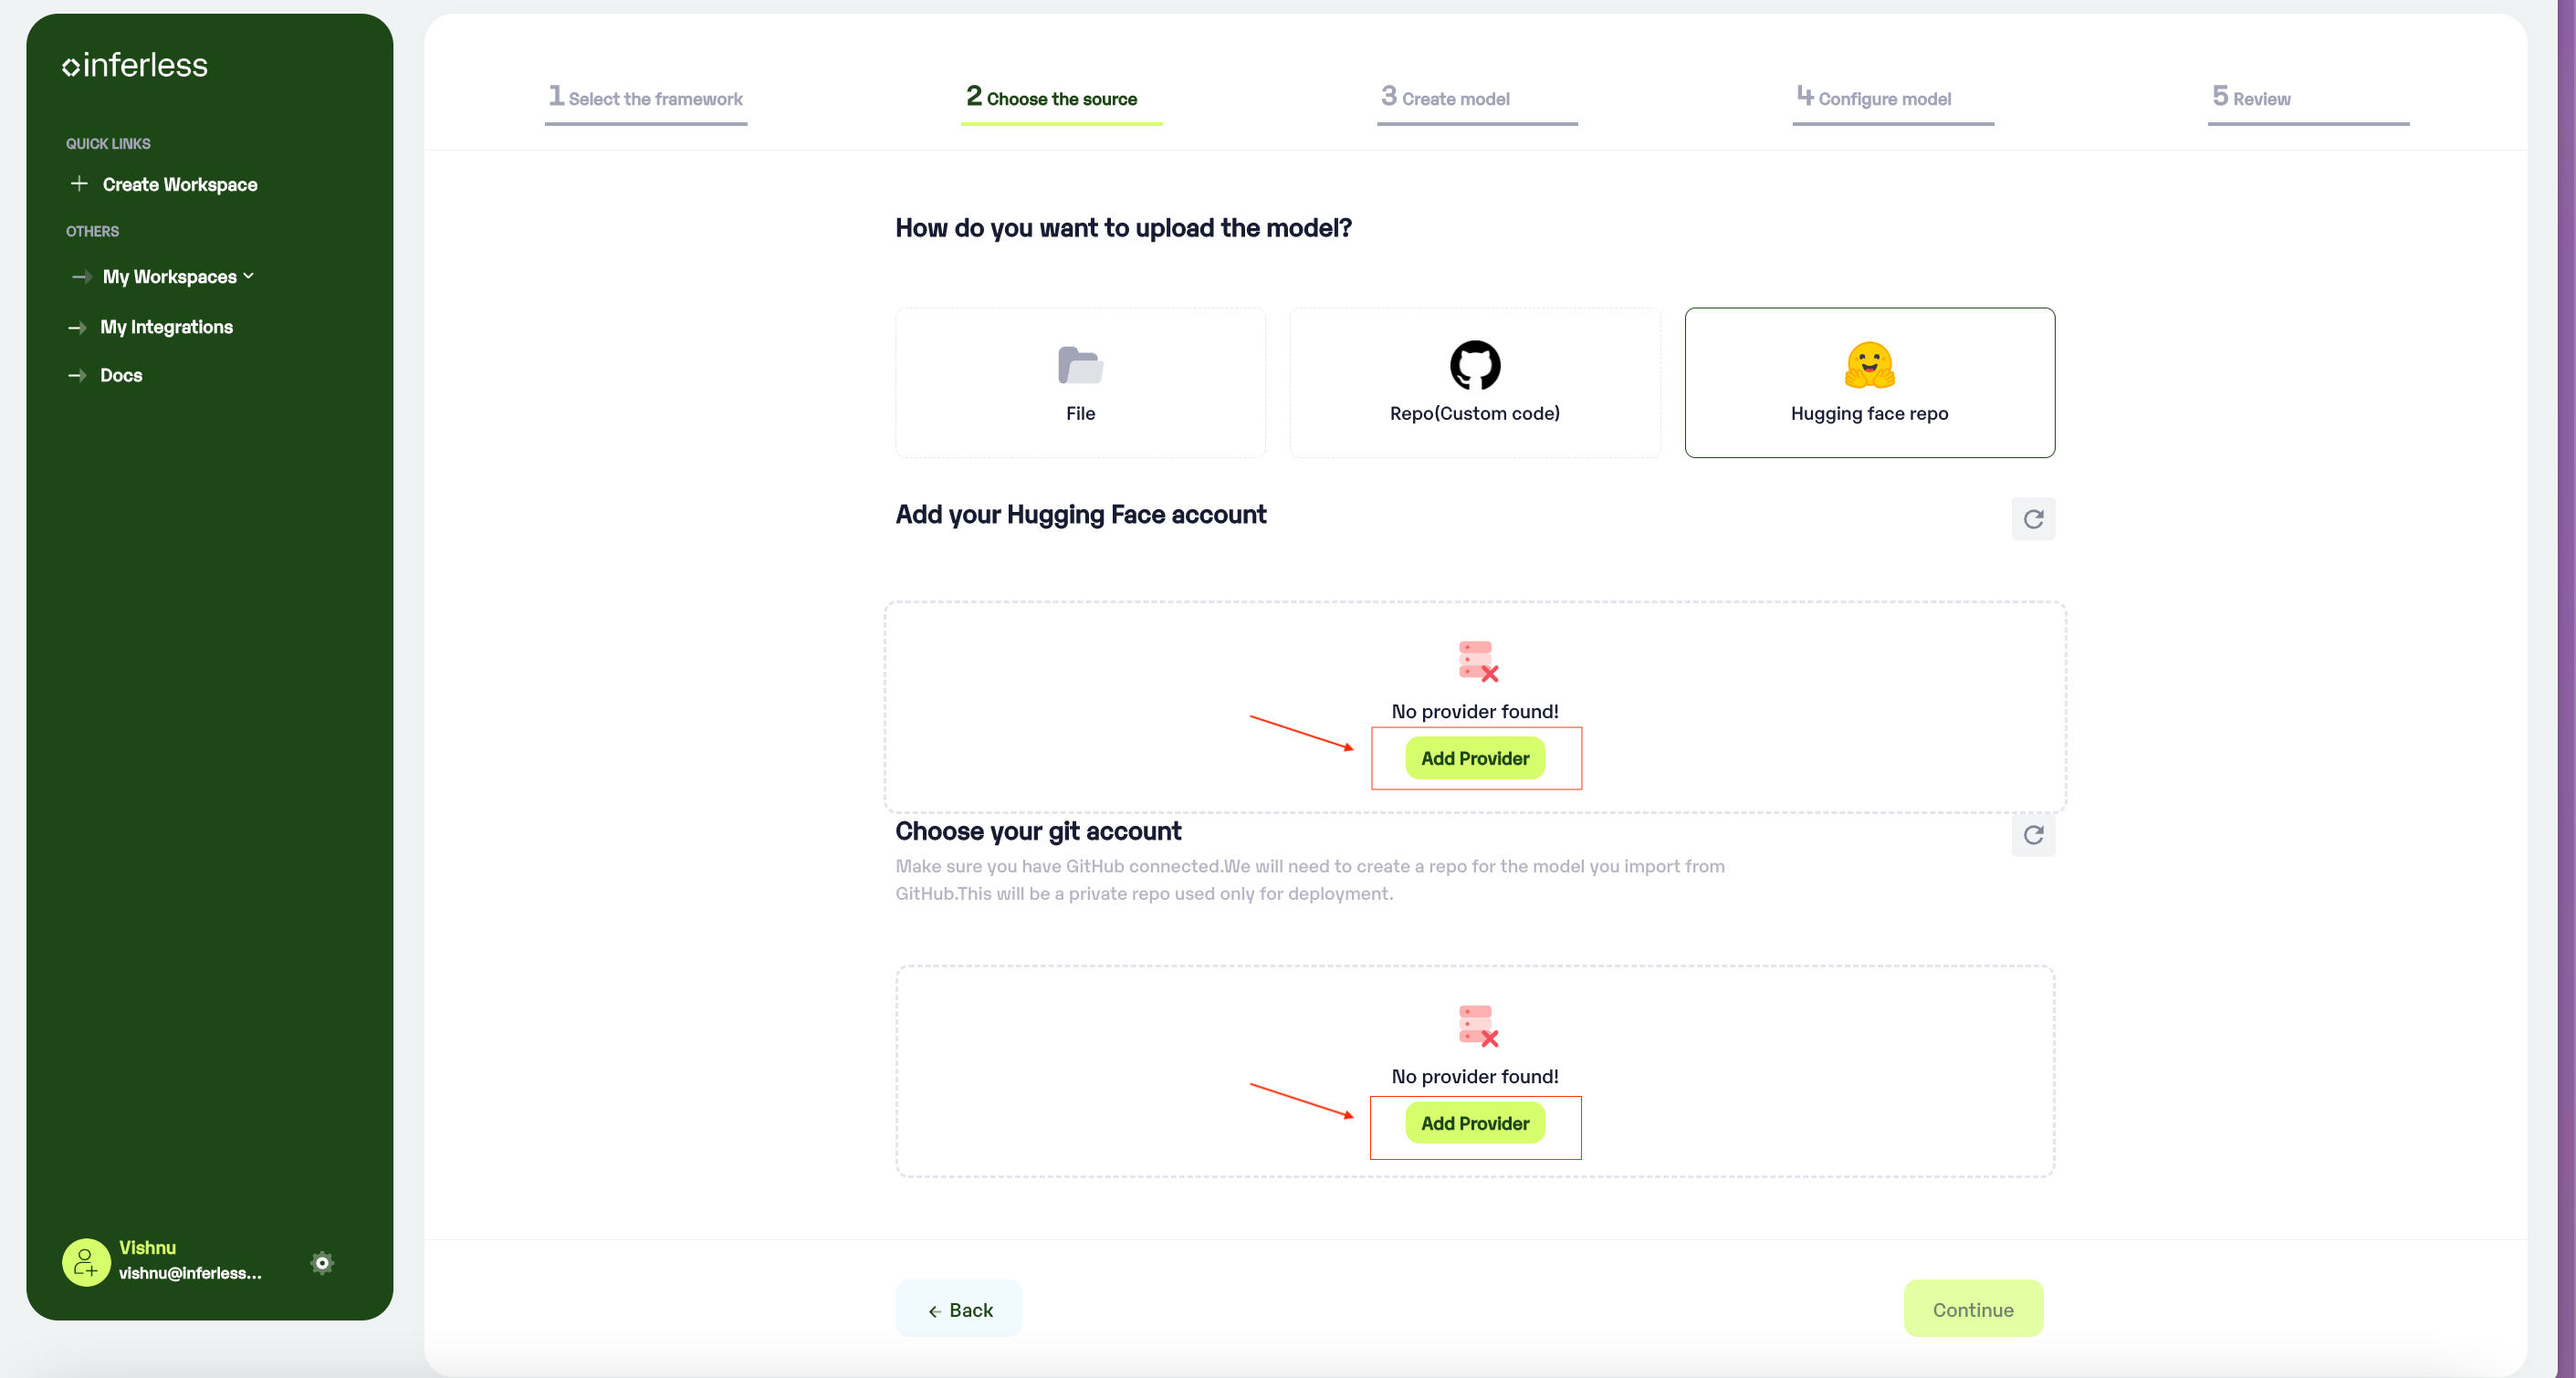
Click on Add provider to add your HF and Github accounts
- This would open a new tab with
"My Integrations". You can click connect on the necessary accounts there.
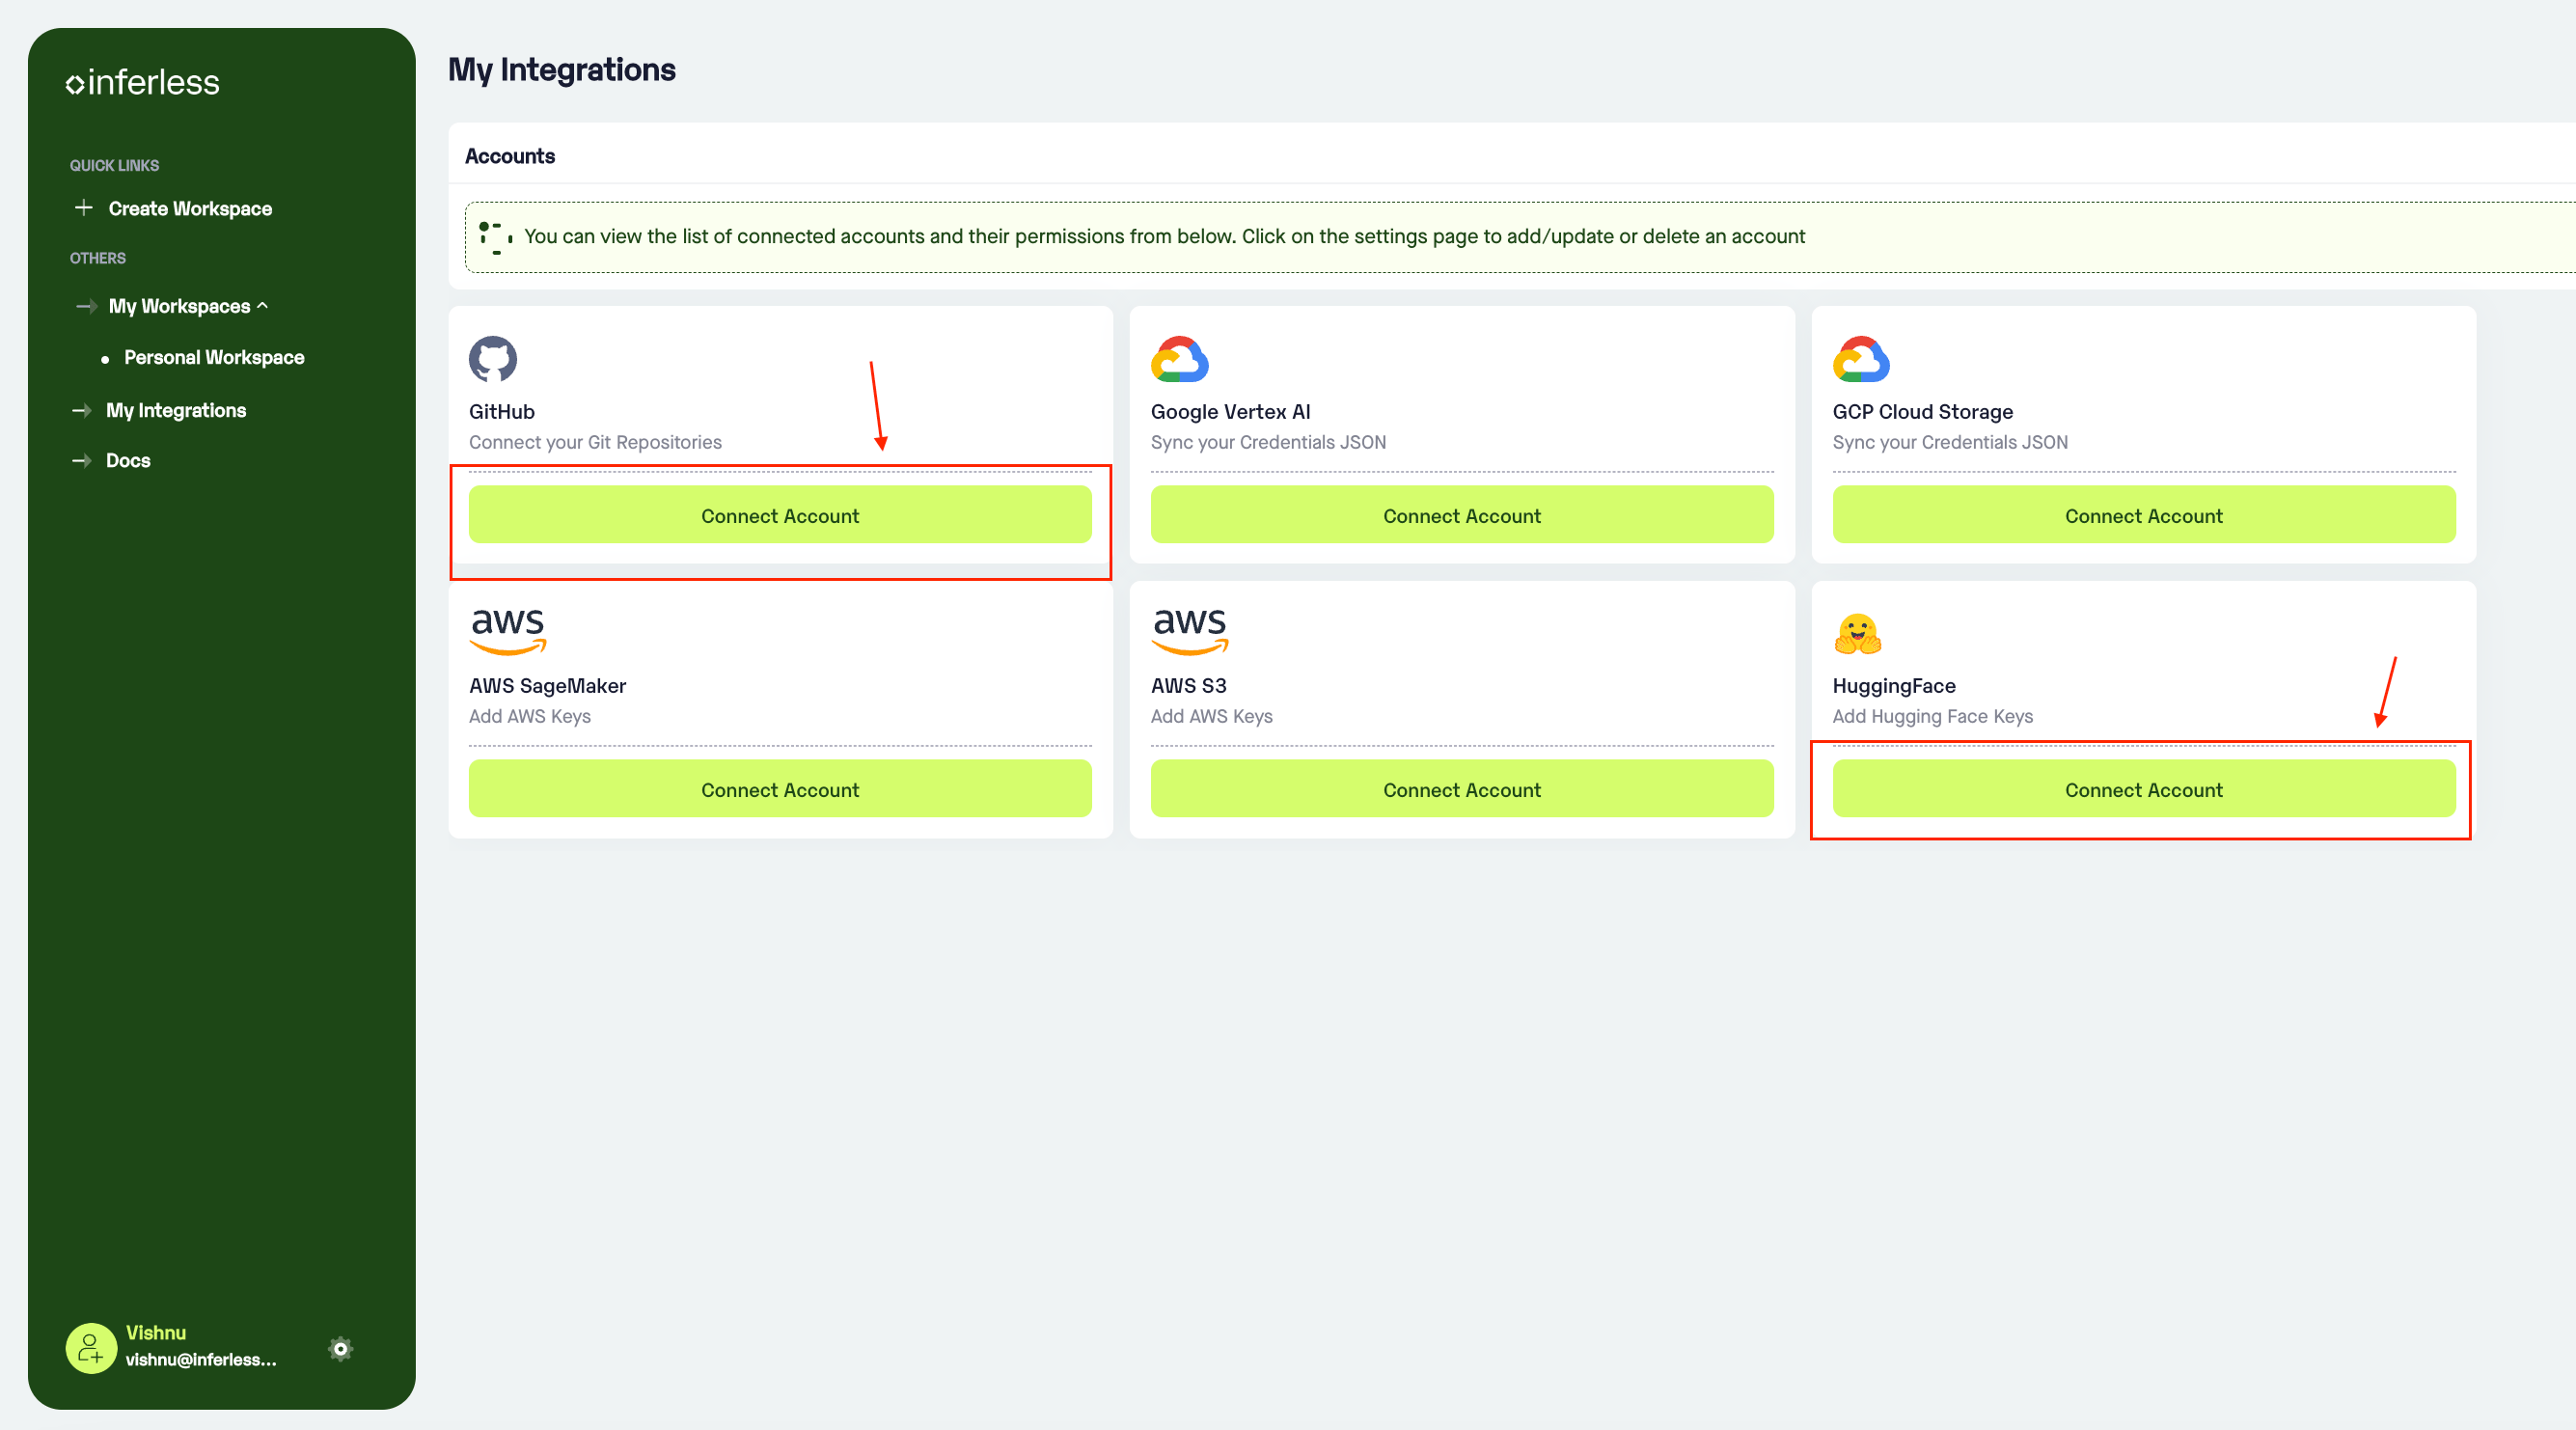
Click connect account and follow the process.
- Once you have completed it, you can come back to this page and click the
refreshbutton provided. You would be able to see the added accounts then.
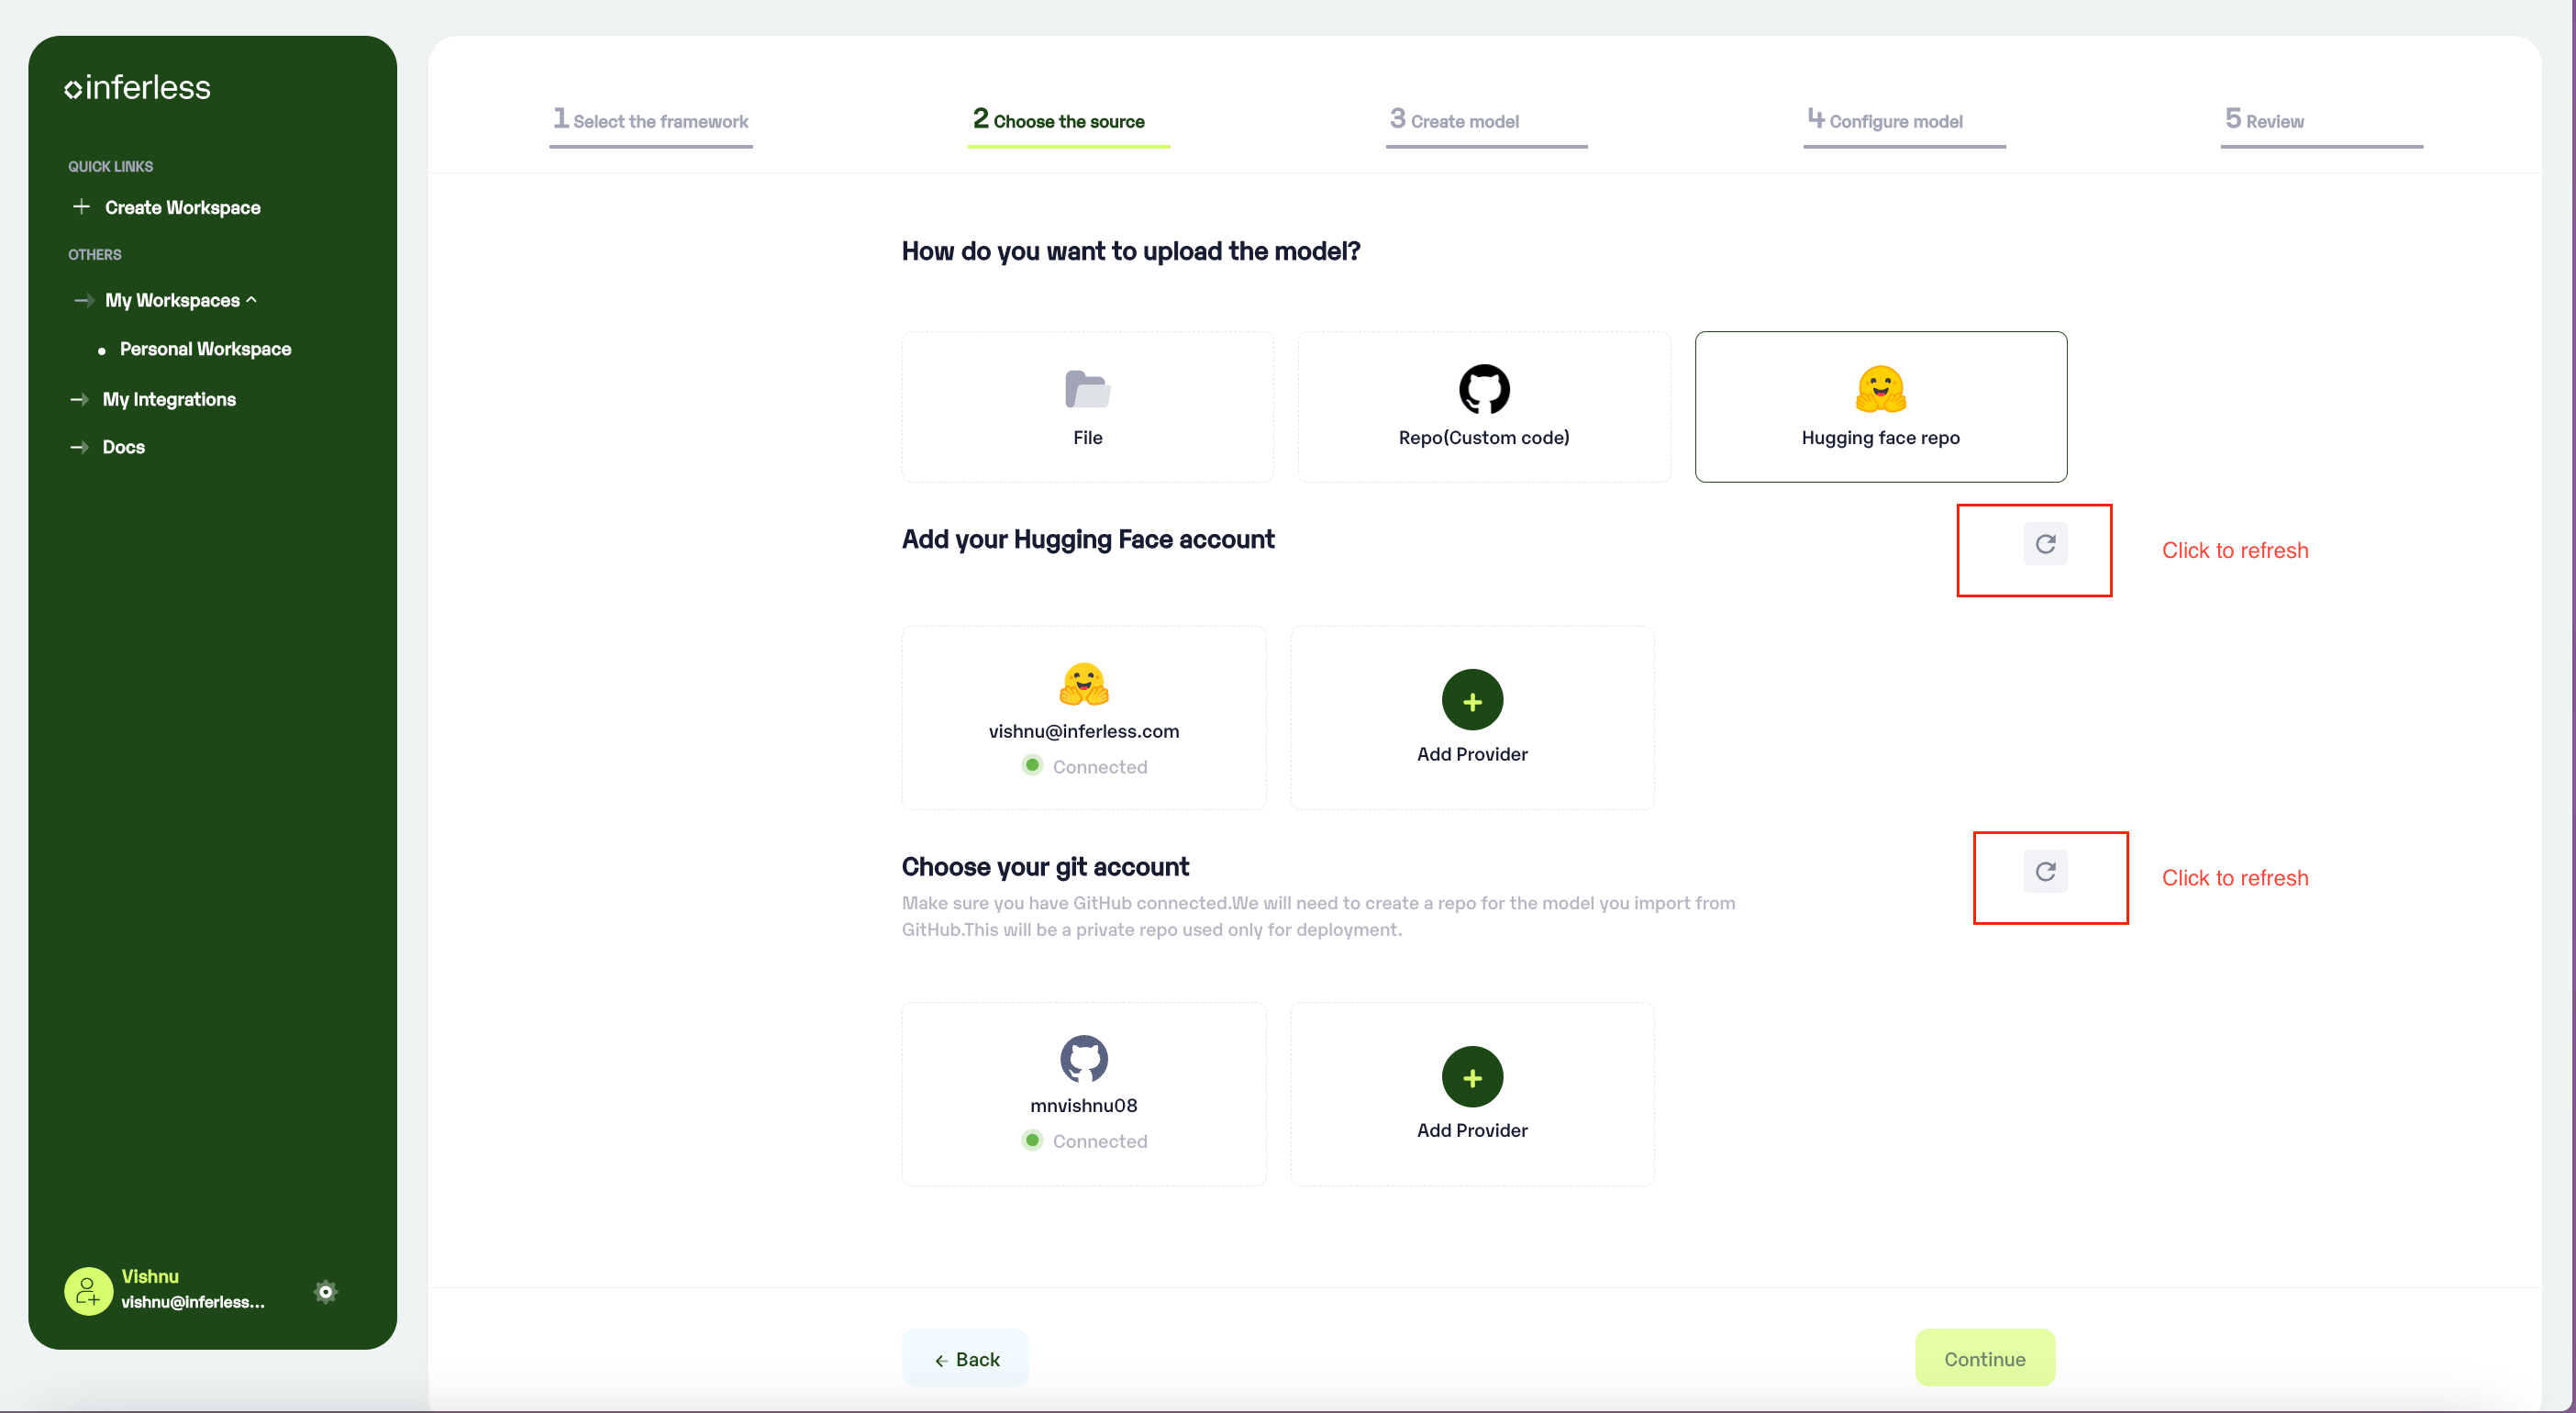
Click on the refresh button to view the connection details
Step 3: Enter the model details
-
Model Details: In this step, Add your
model name(The name that you wish to call your model), Choose thetype of model(Eg: Transformer), Choose thetask type(Eg: Text generation) andHugging Face model name (paste the name of the HF model from the hugging face portal). -
Sample Input / Output: It will automatically generate the Input/Output contract for the Model import.
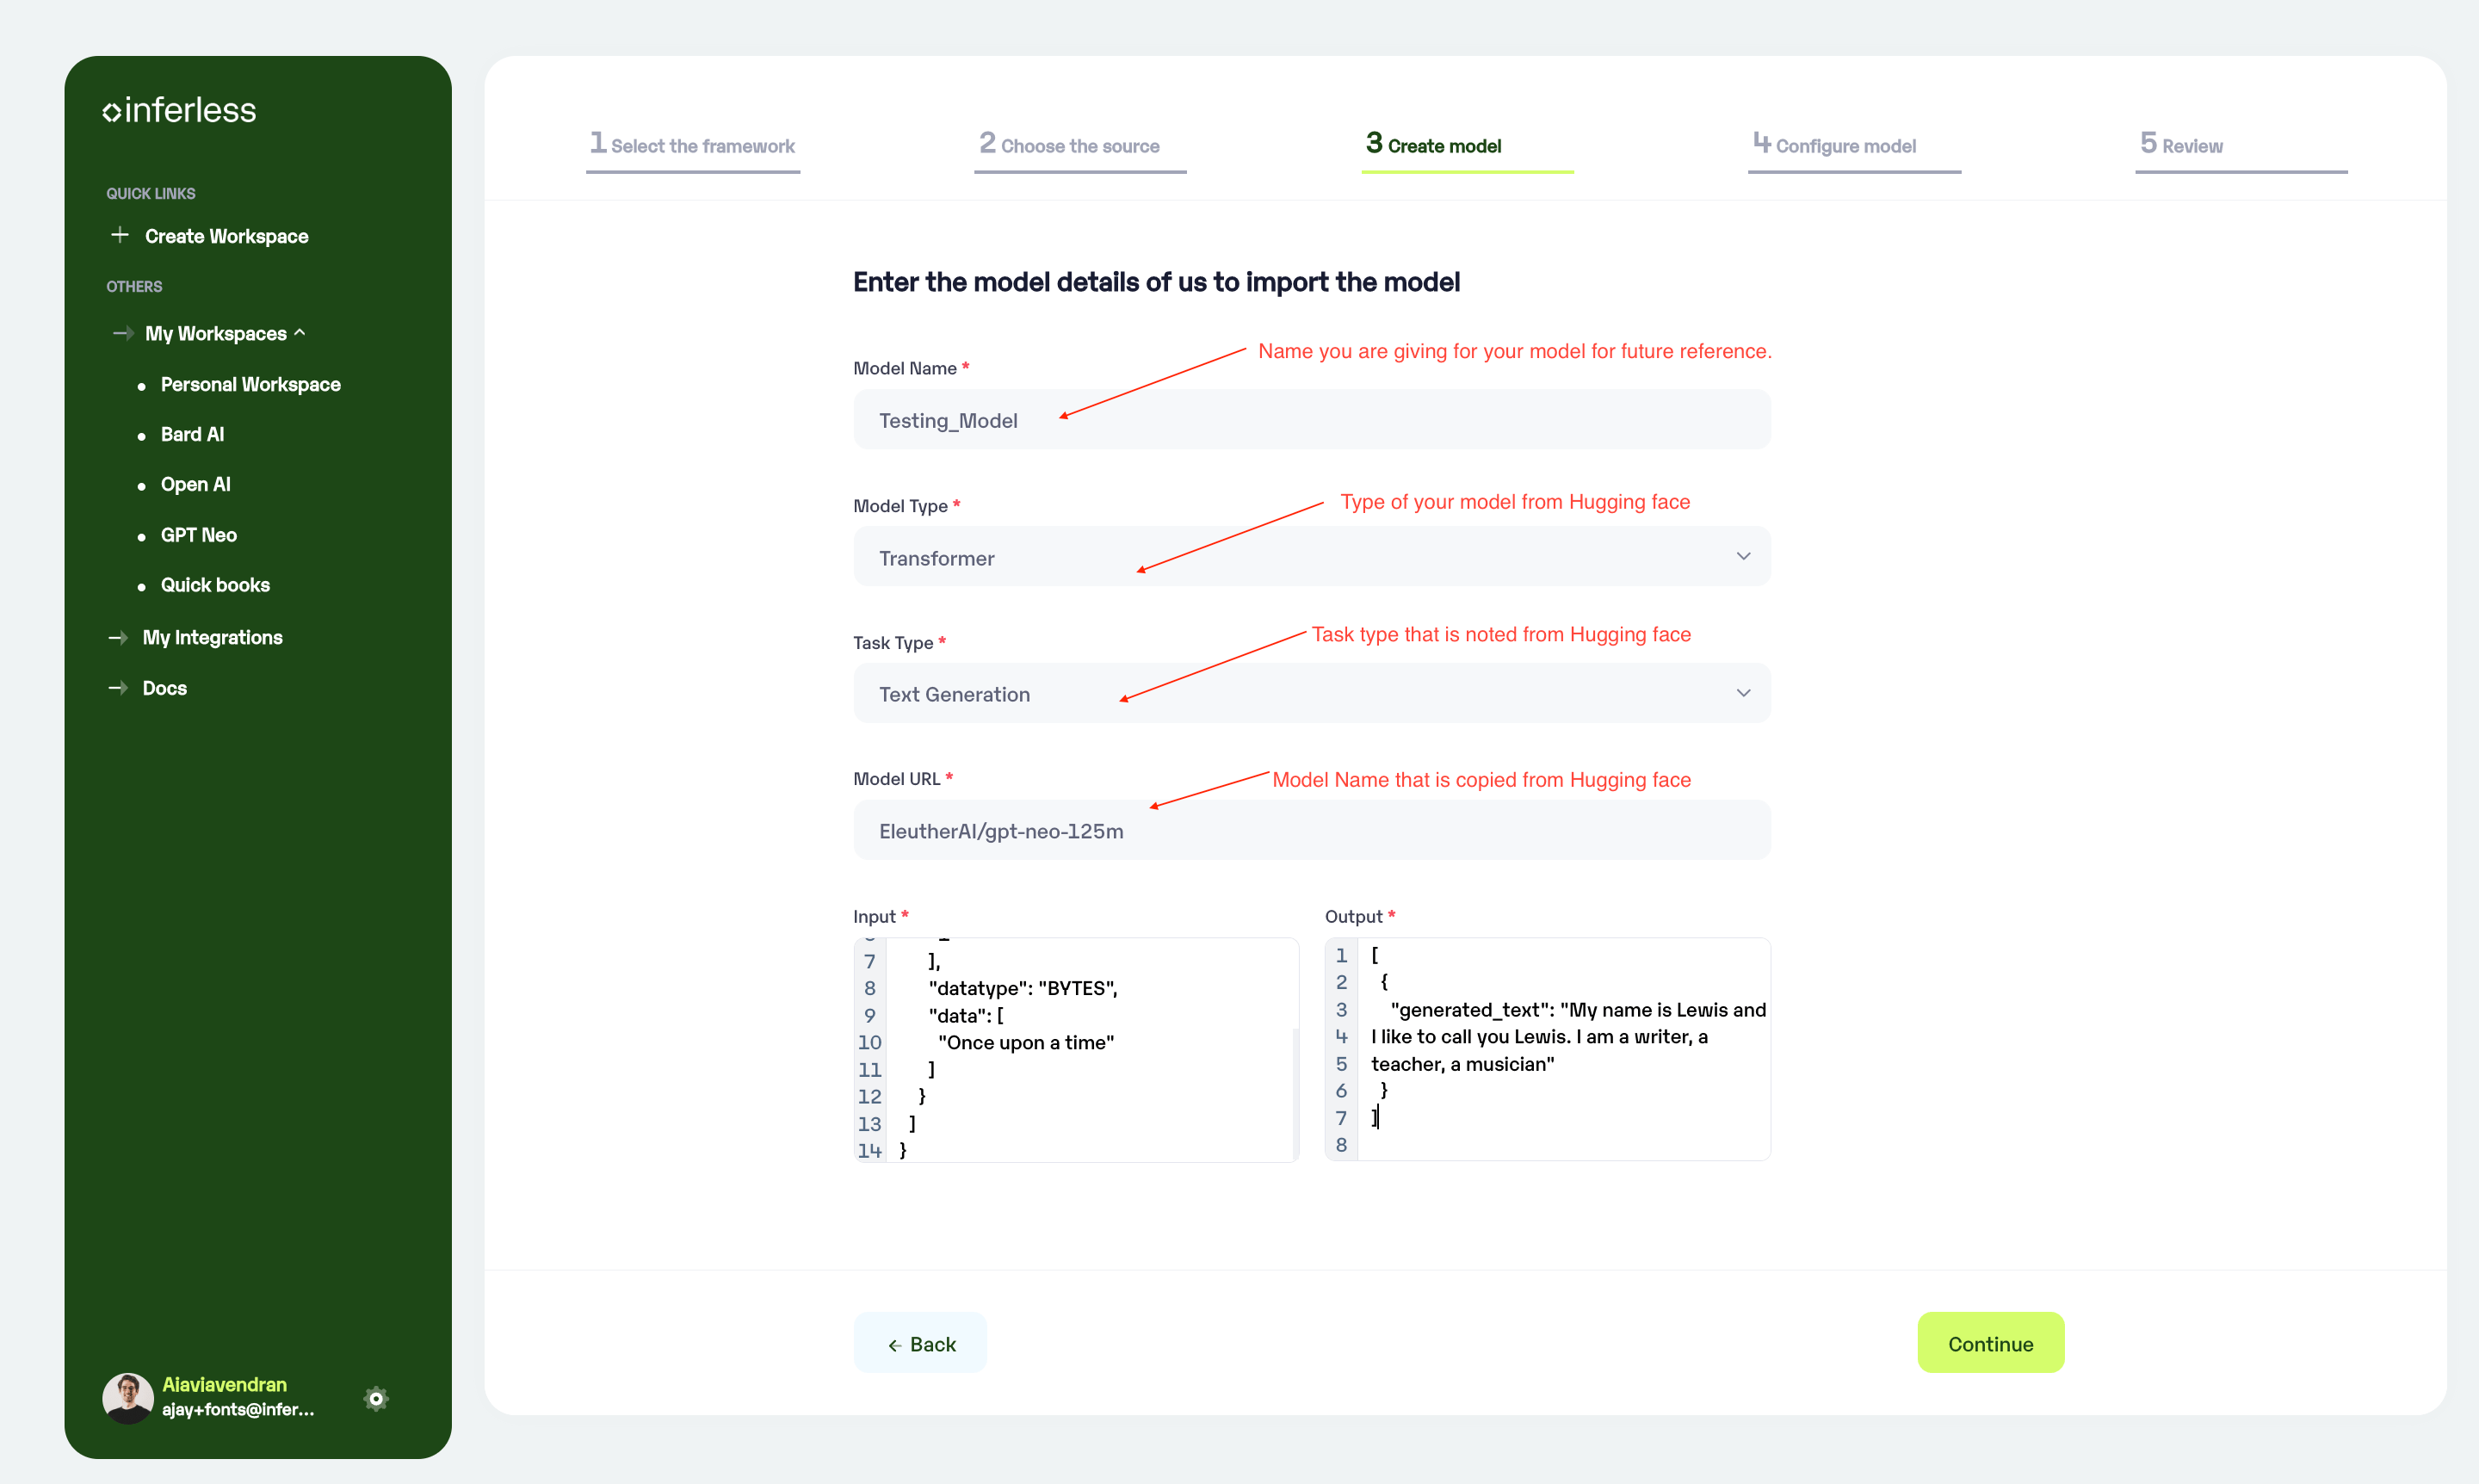
Enter the details as noted
Reference if required.
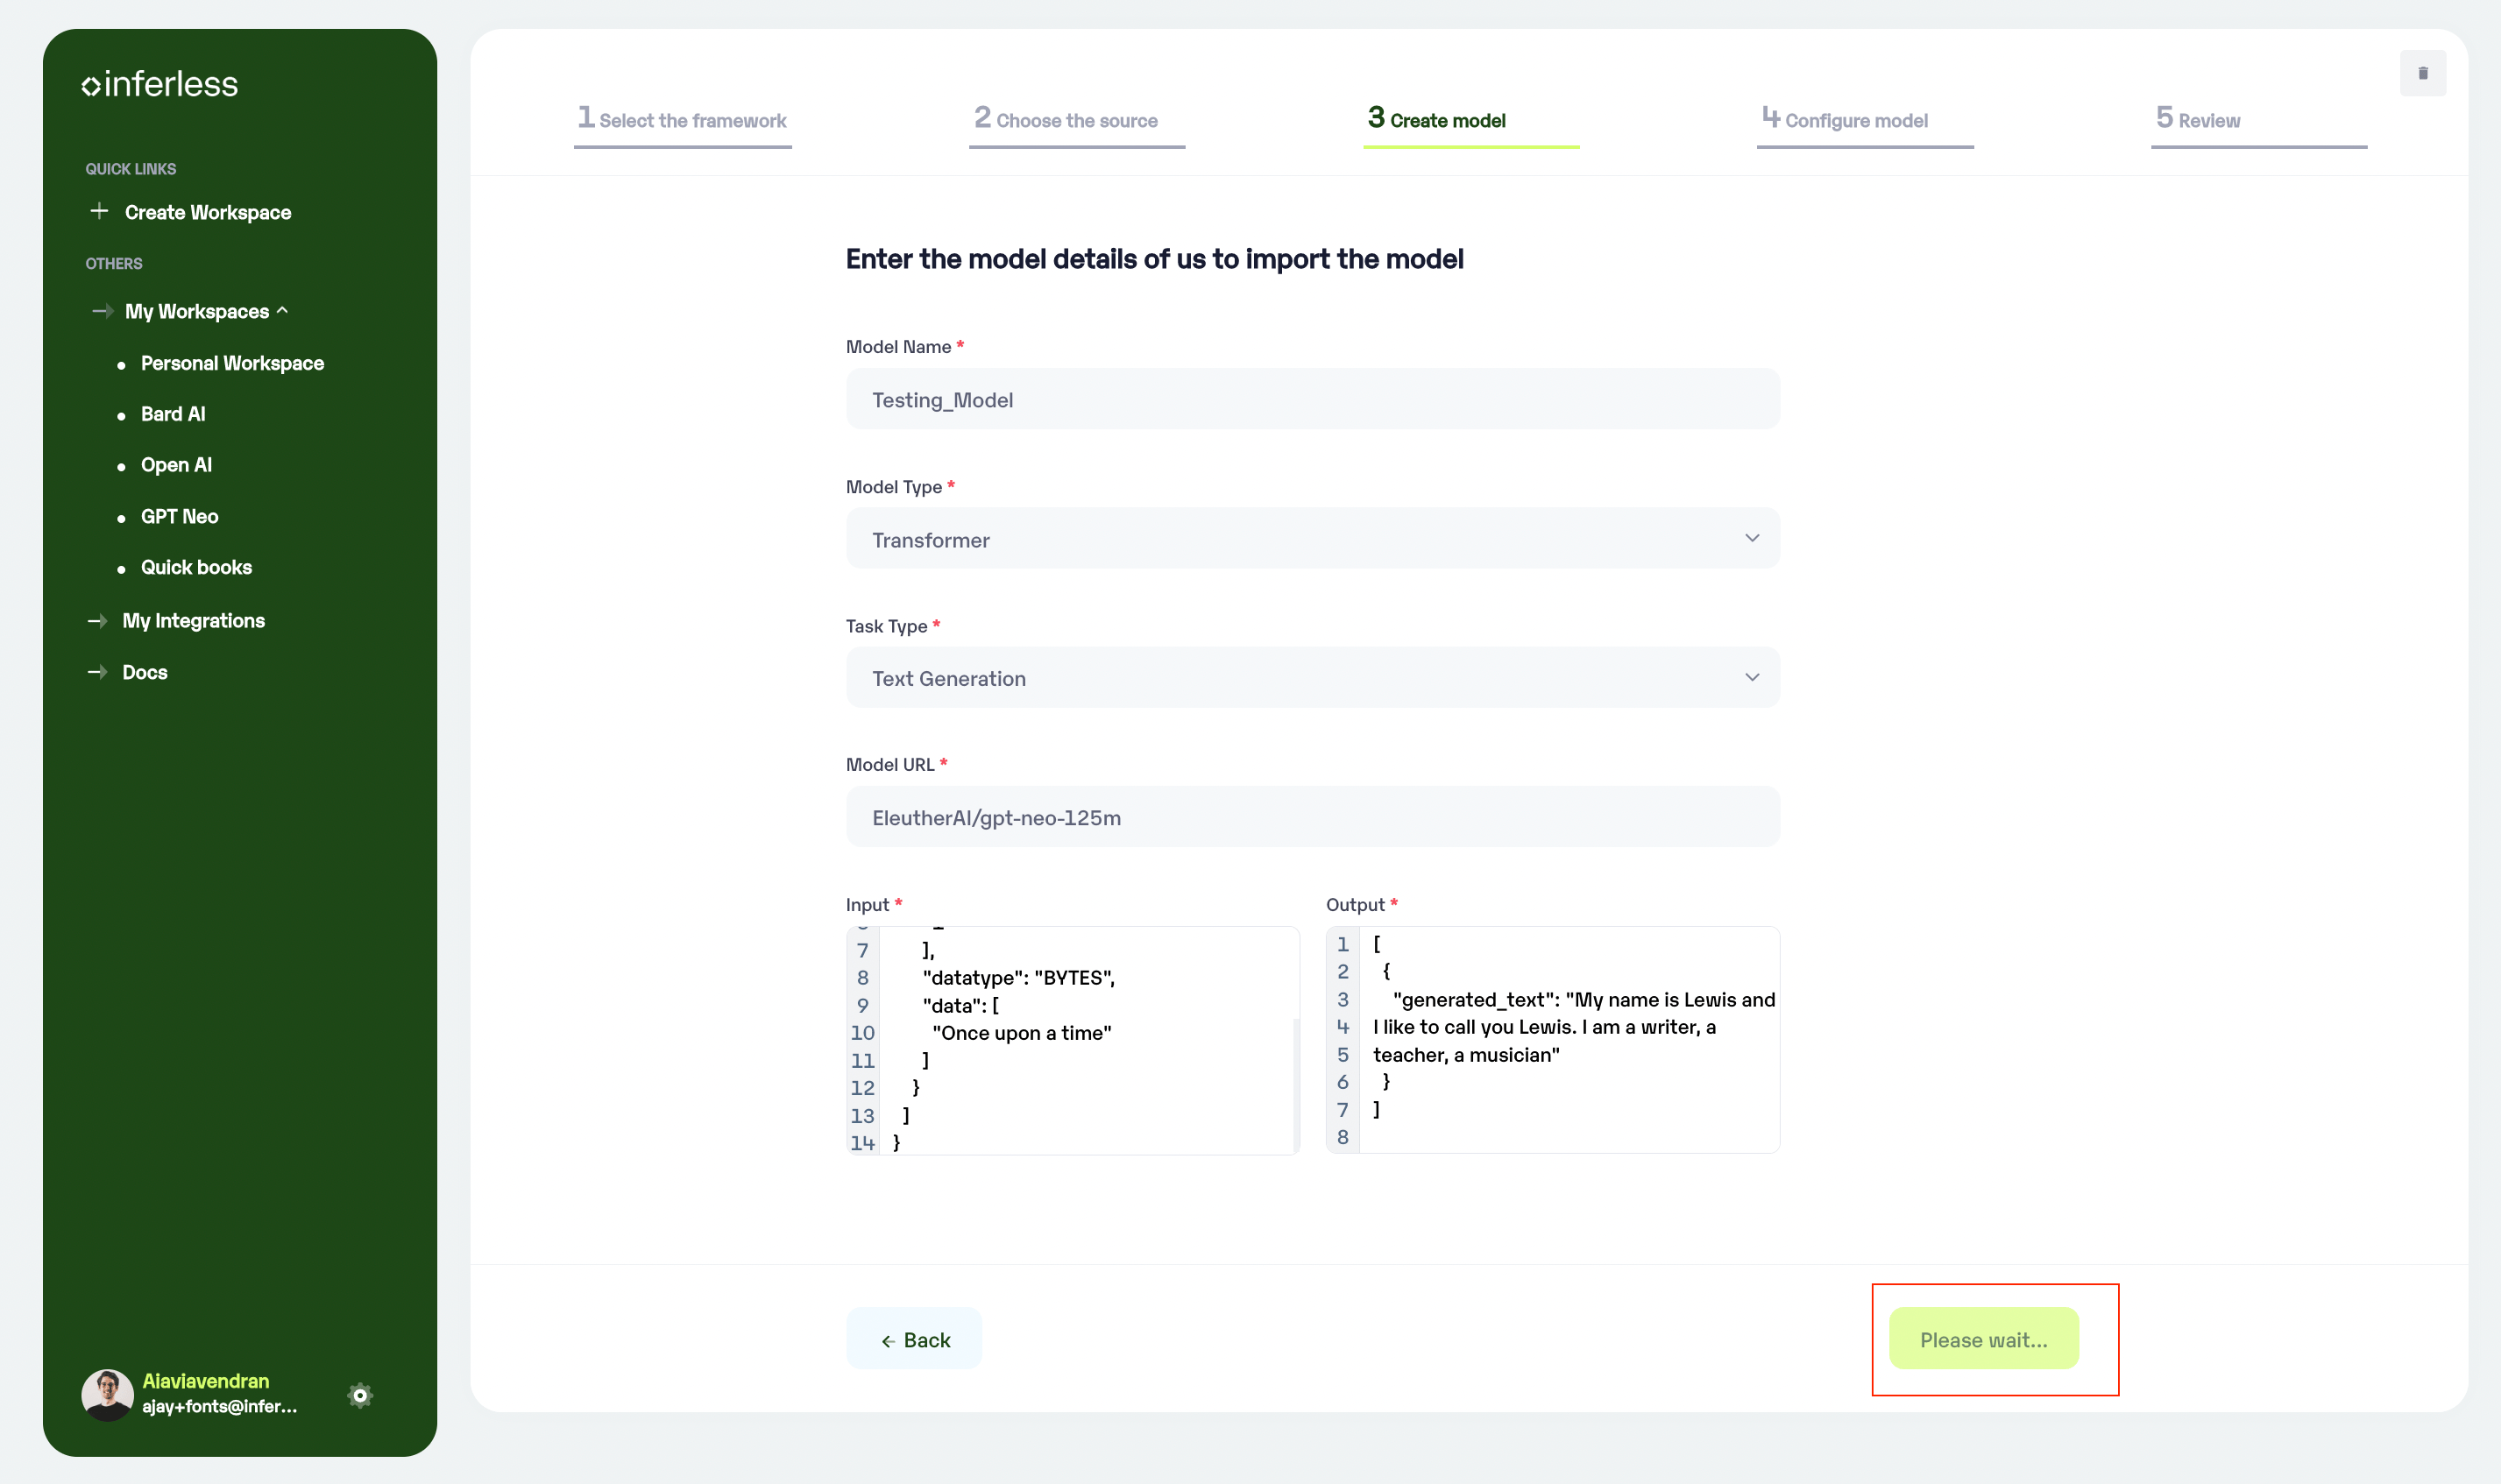
- After clicking next, you may notice a “Please Wait” status, which means that we are validating your model for requirements. If the validation is successful, the next step will open up. If there are any validation issues, they will be notified to you.
Step 4: Configure the Runtime details and machine configuration.
- After successful validation, you will move to the next step where you will be asked to choose your desired runtime and machine configurations.
- We suggest using ONNX for the most optimal results. If we are unable to convert to ONNX, we will use your native framework and load the model.
- If you would like to keep the same framework as your input model, you can select it from the dropdown.
- Choose the Minimum and Maximum replicas that you would need for your model
- Min replica -
The number of inference workers to keep on at all times.- Max replica -
The maximum number of inference workers to allow at any point of time - In case you would like to set up
Automatic rebuildfor your model, enable it- You would need to set up a webhook for this method. Click here for more details.
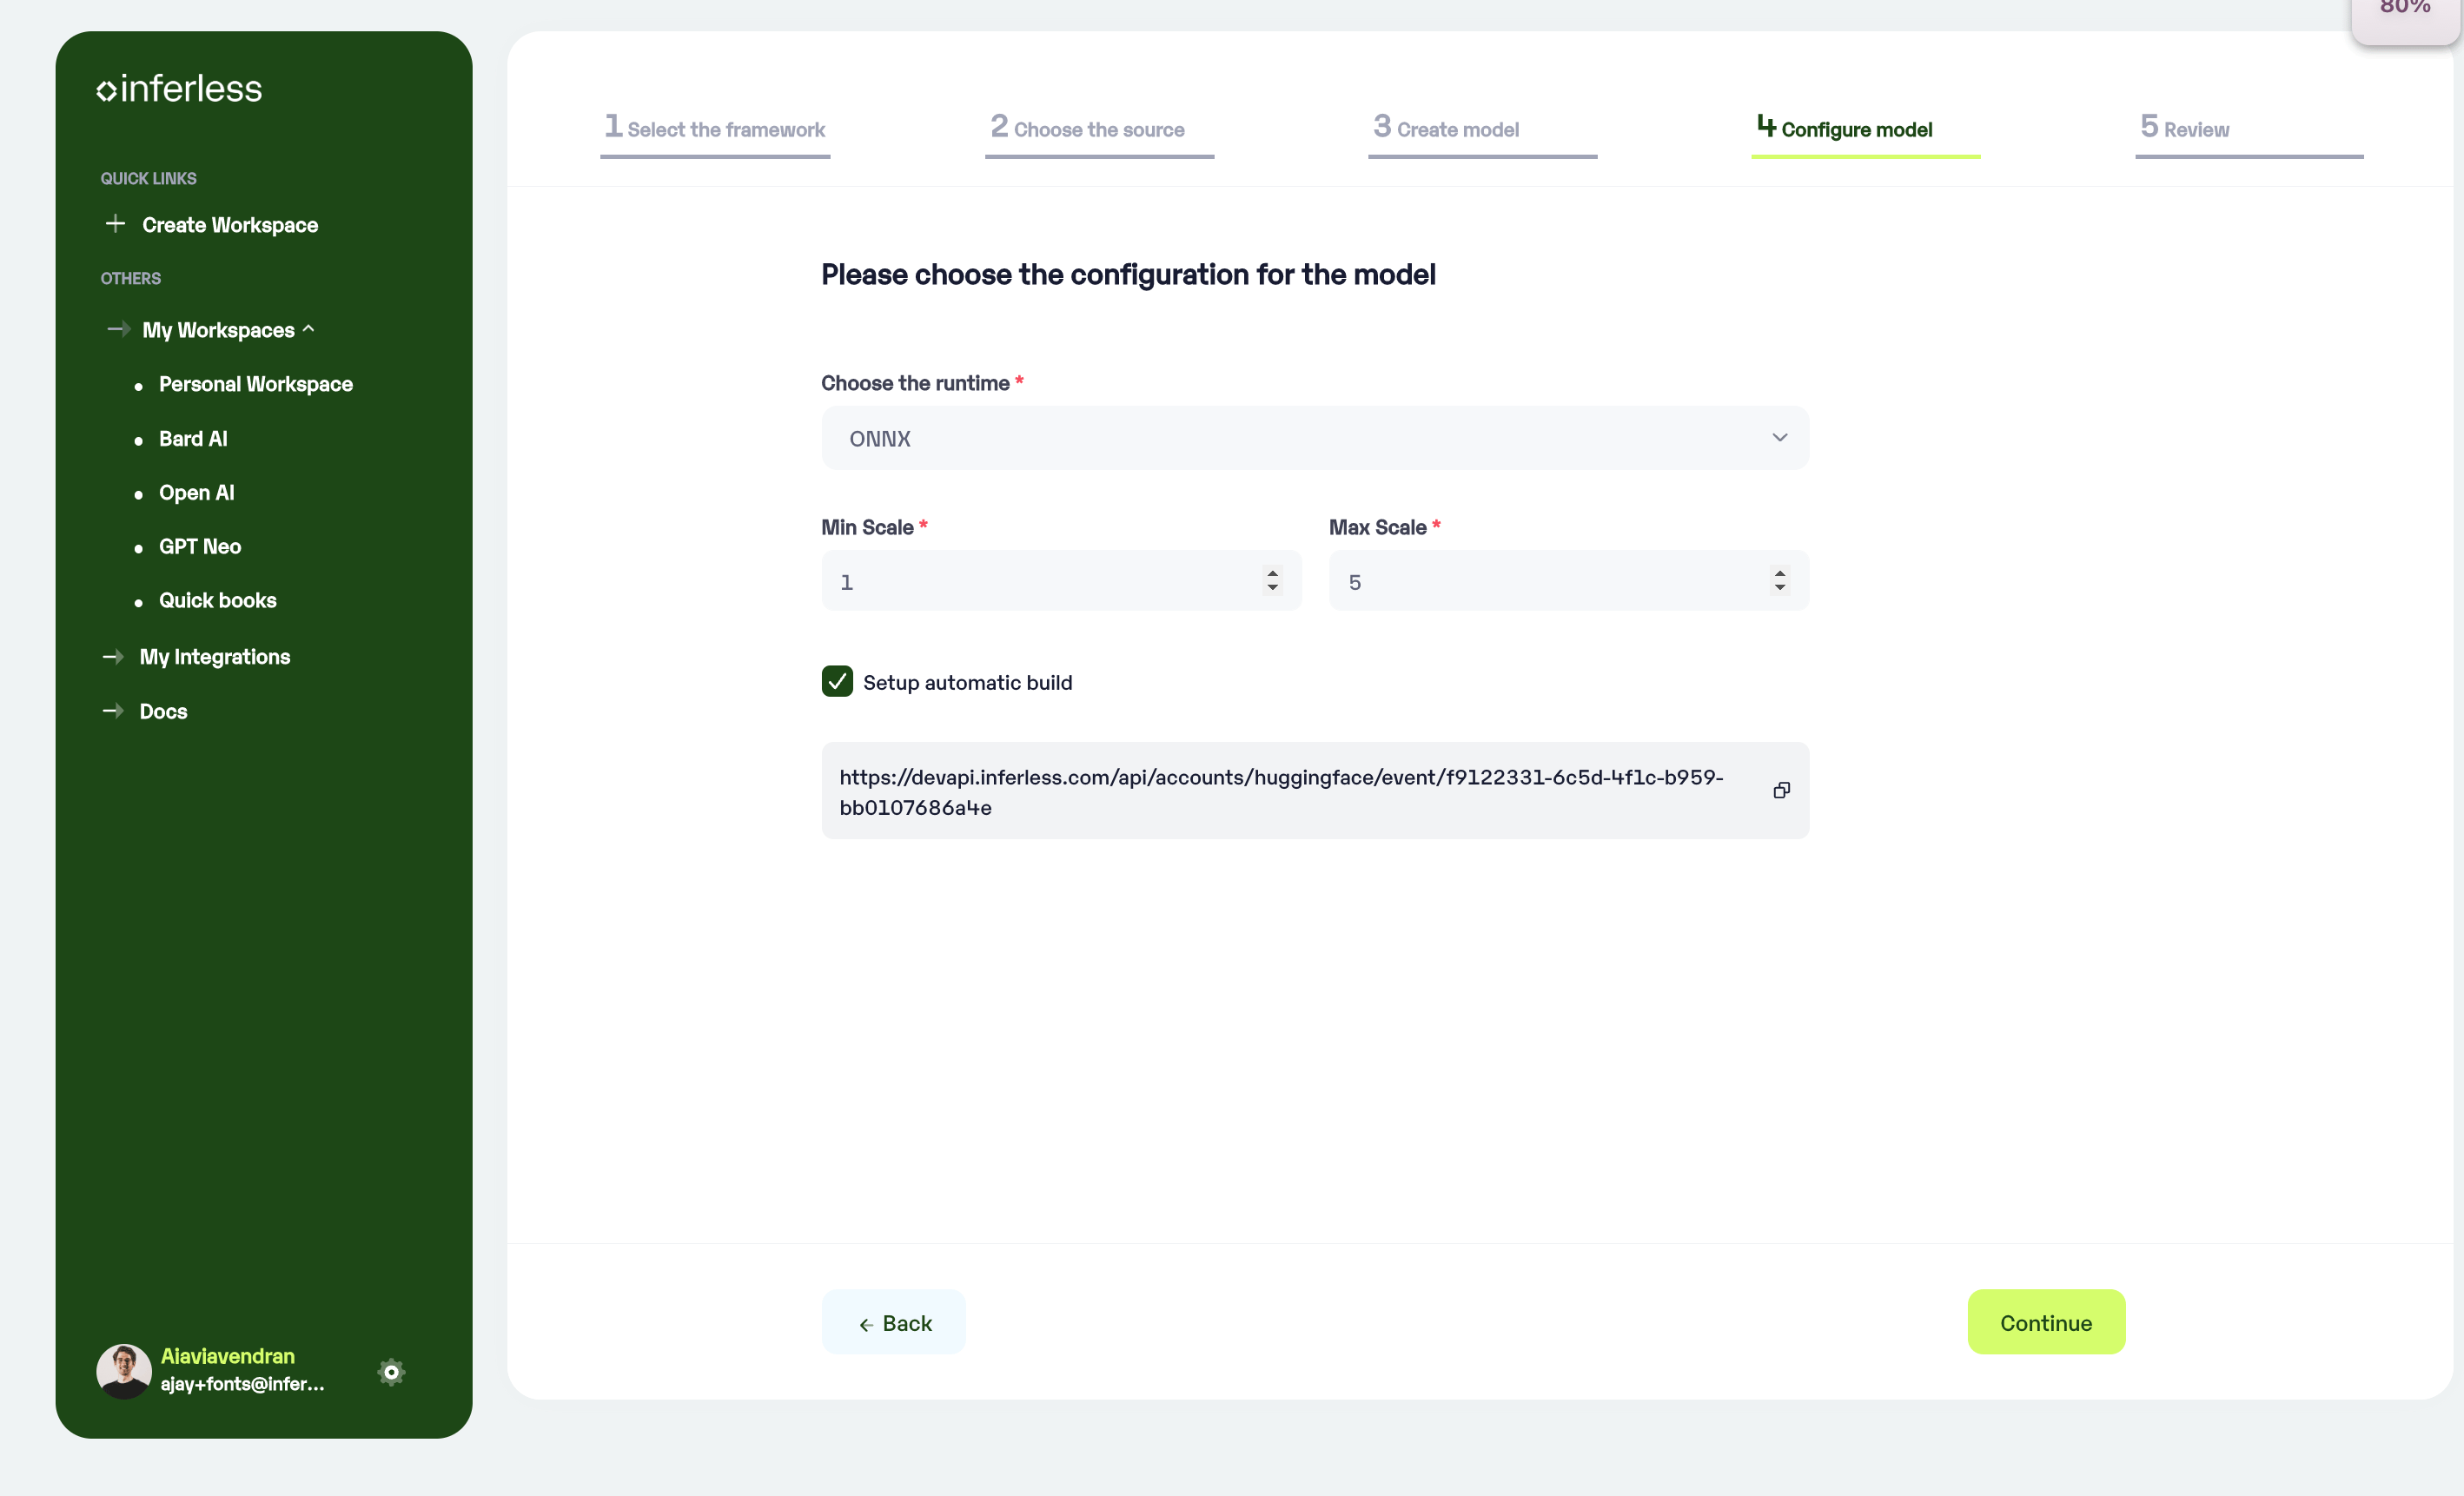
Set runtime and configuration
Step 5: Review your model details
-
Once you click “Continue,” you will be able to review the details added for the model.
-
If you would like to make any changes, you can go back and make the changes.
-
Once you have reviewed everything, click “Submit” to start the model import process.
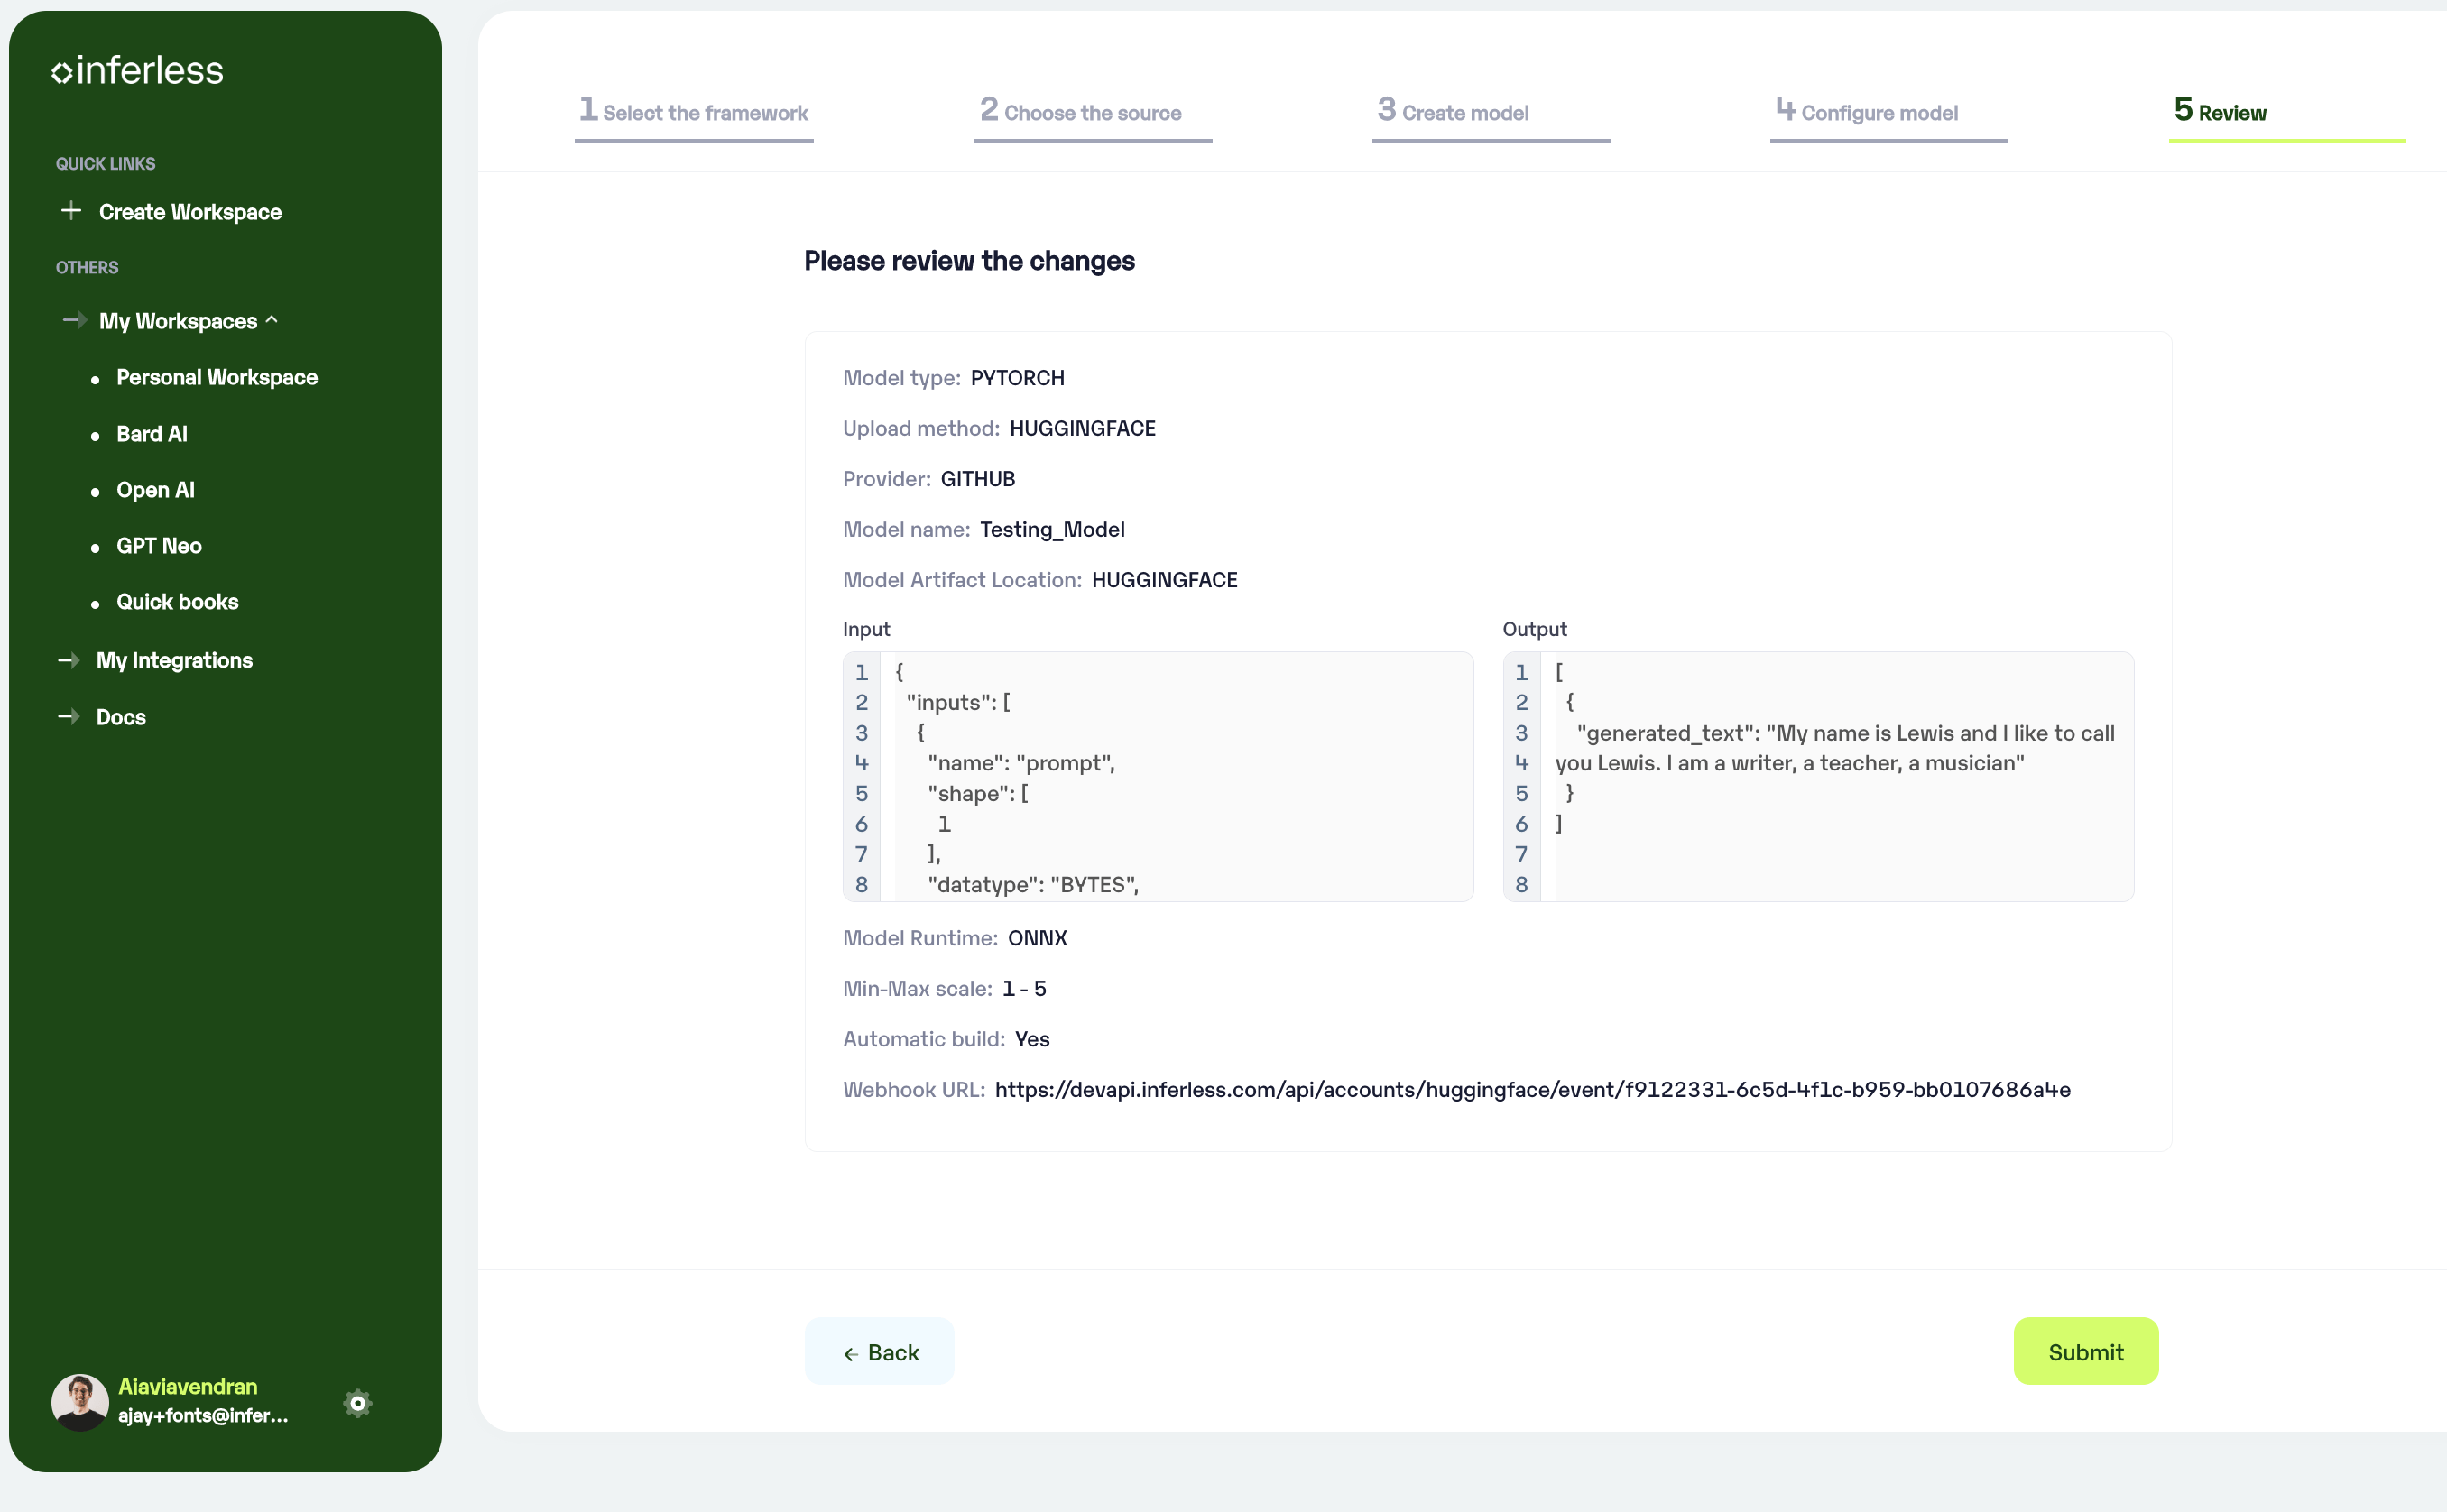
Review all the details carefully before proceeding
Step 6 : Run your model
- Once you click submit, the model import process would start.
-
It may take some time to complete the import process, and during this time, you will be redirected to your workspace and can see the status of the import under
"In Progress/Failed"tab.

View the model under `In-Progress/ Failed`
-
If you encounter any errors during the model import process or if you want to view the build logs for any reason, you can click on the three dots menu and select “View build logs”. This will show you a detailed log of the import process, which can help you troubleshoot any issues you may encounter.
-
Post-upload, the model will be available under “My Models”
-
You can then select the model and go to
-> API -> Inference Endpoint details.Here you would find the API endpoints that can be called. You can click on the copy button on the right and can call your model.
-
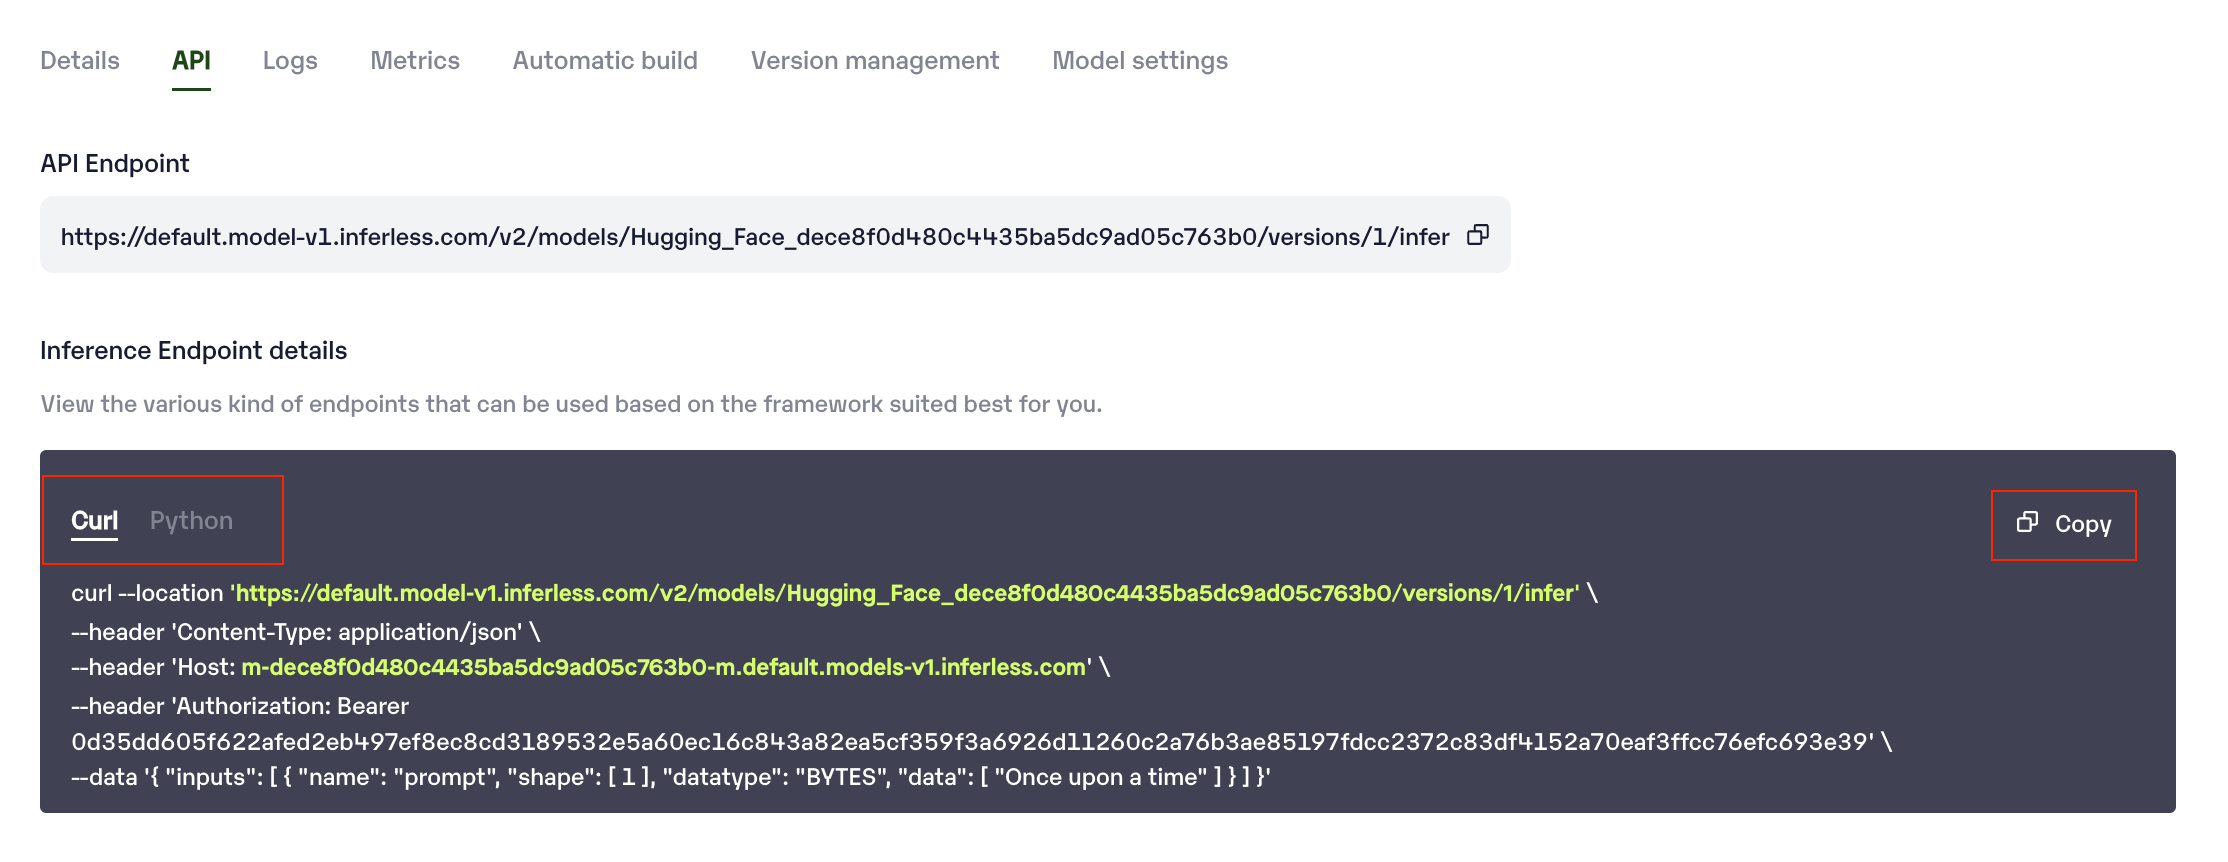
Under the API Tab, you can view the API endpoint details.
Extra Step: Getting API key details
-
Make sure you change the “API Key” with your Key and “Input” with your custom input.
-
You can now call using this from your end. The inference result would be the output for these calls.
- In case you need help with API Keys:
- Click on settings, available on the top, next to your Workspace Name
- Click on “Workspace API keys”
- You can view the details of your key or generate a new one

Sample for now