Experimentation with different libraries
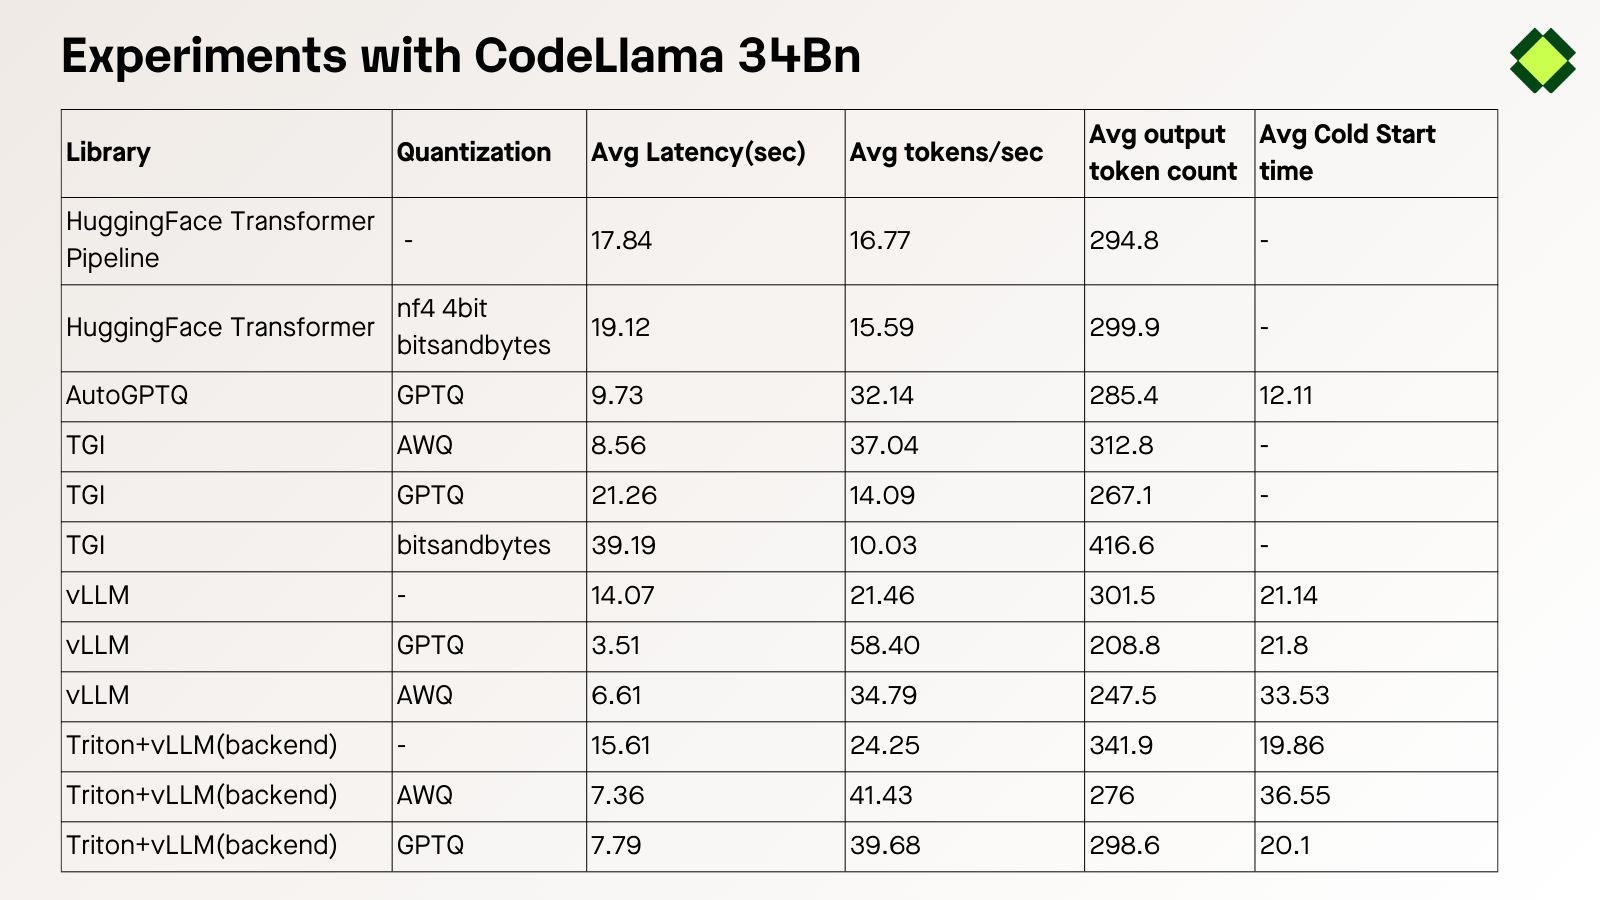
We have considered using 4 different inference libraries and tested the CodeLlama-34b-Python model with a max_token of 512, with the default configuration of all the inference libraries.- Hugging Face: Transformer provides an easy-to-use pipeline for quick deployment of LLM but is not a good choice for LLM inference. We have used BitsandBytes with 4bit quantization, however it didn’t help in improving the inference latency.
- AutoGPTQ: AutoGPTQ enables you to run LLM on low memory. We deploy a GPTQ 4bit quantized model and are able to achieve better inference latency and token/sec than Hugging Face(unquantized and bitsandbytes).
- Text Generation Inference (TGI): TGI allows you to deploy and serve LLM. We have deployed and tested different type of quantized versions where 4bit quantized AWQ perform better.
- vLLM: vLLM is a library use for deployment and serving LLM. We have deployed both quantized and unquantized versions, both using vLLM and vLLM as a backend with the Triton inference server. We have used vLLM-GPTQ(vLLM GPTQ brach) for deploying GPTQ quantized model, as of 24/11/23 vLLM doesn’t support GPTQ quantization.
Our Observations
In our experiment, we found that using the vLLM with GPTQ 4bit quantized model is a good setup. You can expect an average lowest latency of3.51 sec and average token generation rate of 58.40/sec. This setup has an average cold start time of 21.8 sec.
Note: You can use the vLLM-GPTQ to deploy the same.
GPU Recommendation
We recommend the users to use NVIDIA A100(80GB) GPU to achieve similar results.Results with Different Experimentation
Defining Dependencies
This tutorial utilizesvLLM to load and serve the model. Define this library on the inferless-runtime-config.yaml file which you need to upload during the deployment.
Constructing the Github/Gitlab Template
While uploading your model from GitHub/Gitlab, you need to follow this format:- The app.py (Check the Github URL) file will load and serve the model.
- The inferless-runtime-config.yaml (Check the Github URL) file will have all the software and Python dependencies.
- You can also have any additional dependency files.
Creating the class for inference
In the app.py (Check the Github URL) file, first, you will import all the required classes and functions and then create a model class, for example, “InferlessPythonModel”.This class will have three functions:-
def initialize: This function will load the model and tokenizer into the memory whenever the container starts. -
def infer: This function helps to serve the loaded model. You can create a complex inference pipeline or chain multiple models together here. -
def finalize: This function deallocates the allocated memory for the model and tokenizer whenever the container shuts down.
Creating the custom runtime
Whenever you upload the model through GitHub/GitLab, you must upload a custom runtime, i.e. ainferless-runtime-config.yaml file. This allows the user to add all the system and Python packages required for the model. For this tutorial, we are using the libssl-dev system package, and we use the Python packages mentioned in section 1.
Test your model with Remote Run
You can use theinferless remote-run(installation guide here) command to test your model or any custom Python script in a remote GPU environment directly from your local machine. Make sure that you use Python3.10 for seamless experience.
Step 1: Add the Decorators and local entry point
To enable Remote Run, simply do the following:- Import the
inferlesslibrary and initializeCls(gpu="A100"). The available GPU options areT4,A10andA100. - Decorated the
initializeandinferfunctions with@app.loadand@app.inferrespectively. - Create the Local Entry Point by decorating a function (for example,
my_local_entry) with@inferless.local_entry_point. Within this function, instantiate your model class, convert any incoming parameters into aRequestObjectsobject, and invoke the model’sinfermethod.
Step 2: Run with Remote GPU
From your local terminal, navigate to the folder containing yourapp.py and your inferless-runtime-config.yaml and run:
inputs dictionary.
If you want to exclude certain files or directories from being uploaded, use the --exclude or -e flag.
Method A: Deploying the model on Inferless Platform
Inferless supports multiple ways of importing your model. For this tutorial, we will use GitHub.Step 1: Login to the inferless dashboard can click on Import model button
Navigate to your desired workspace in Inferless and Click onAdd a custom model button that you see on the top right. An import wizard will open up.
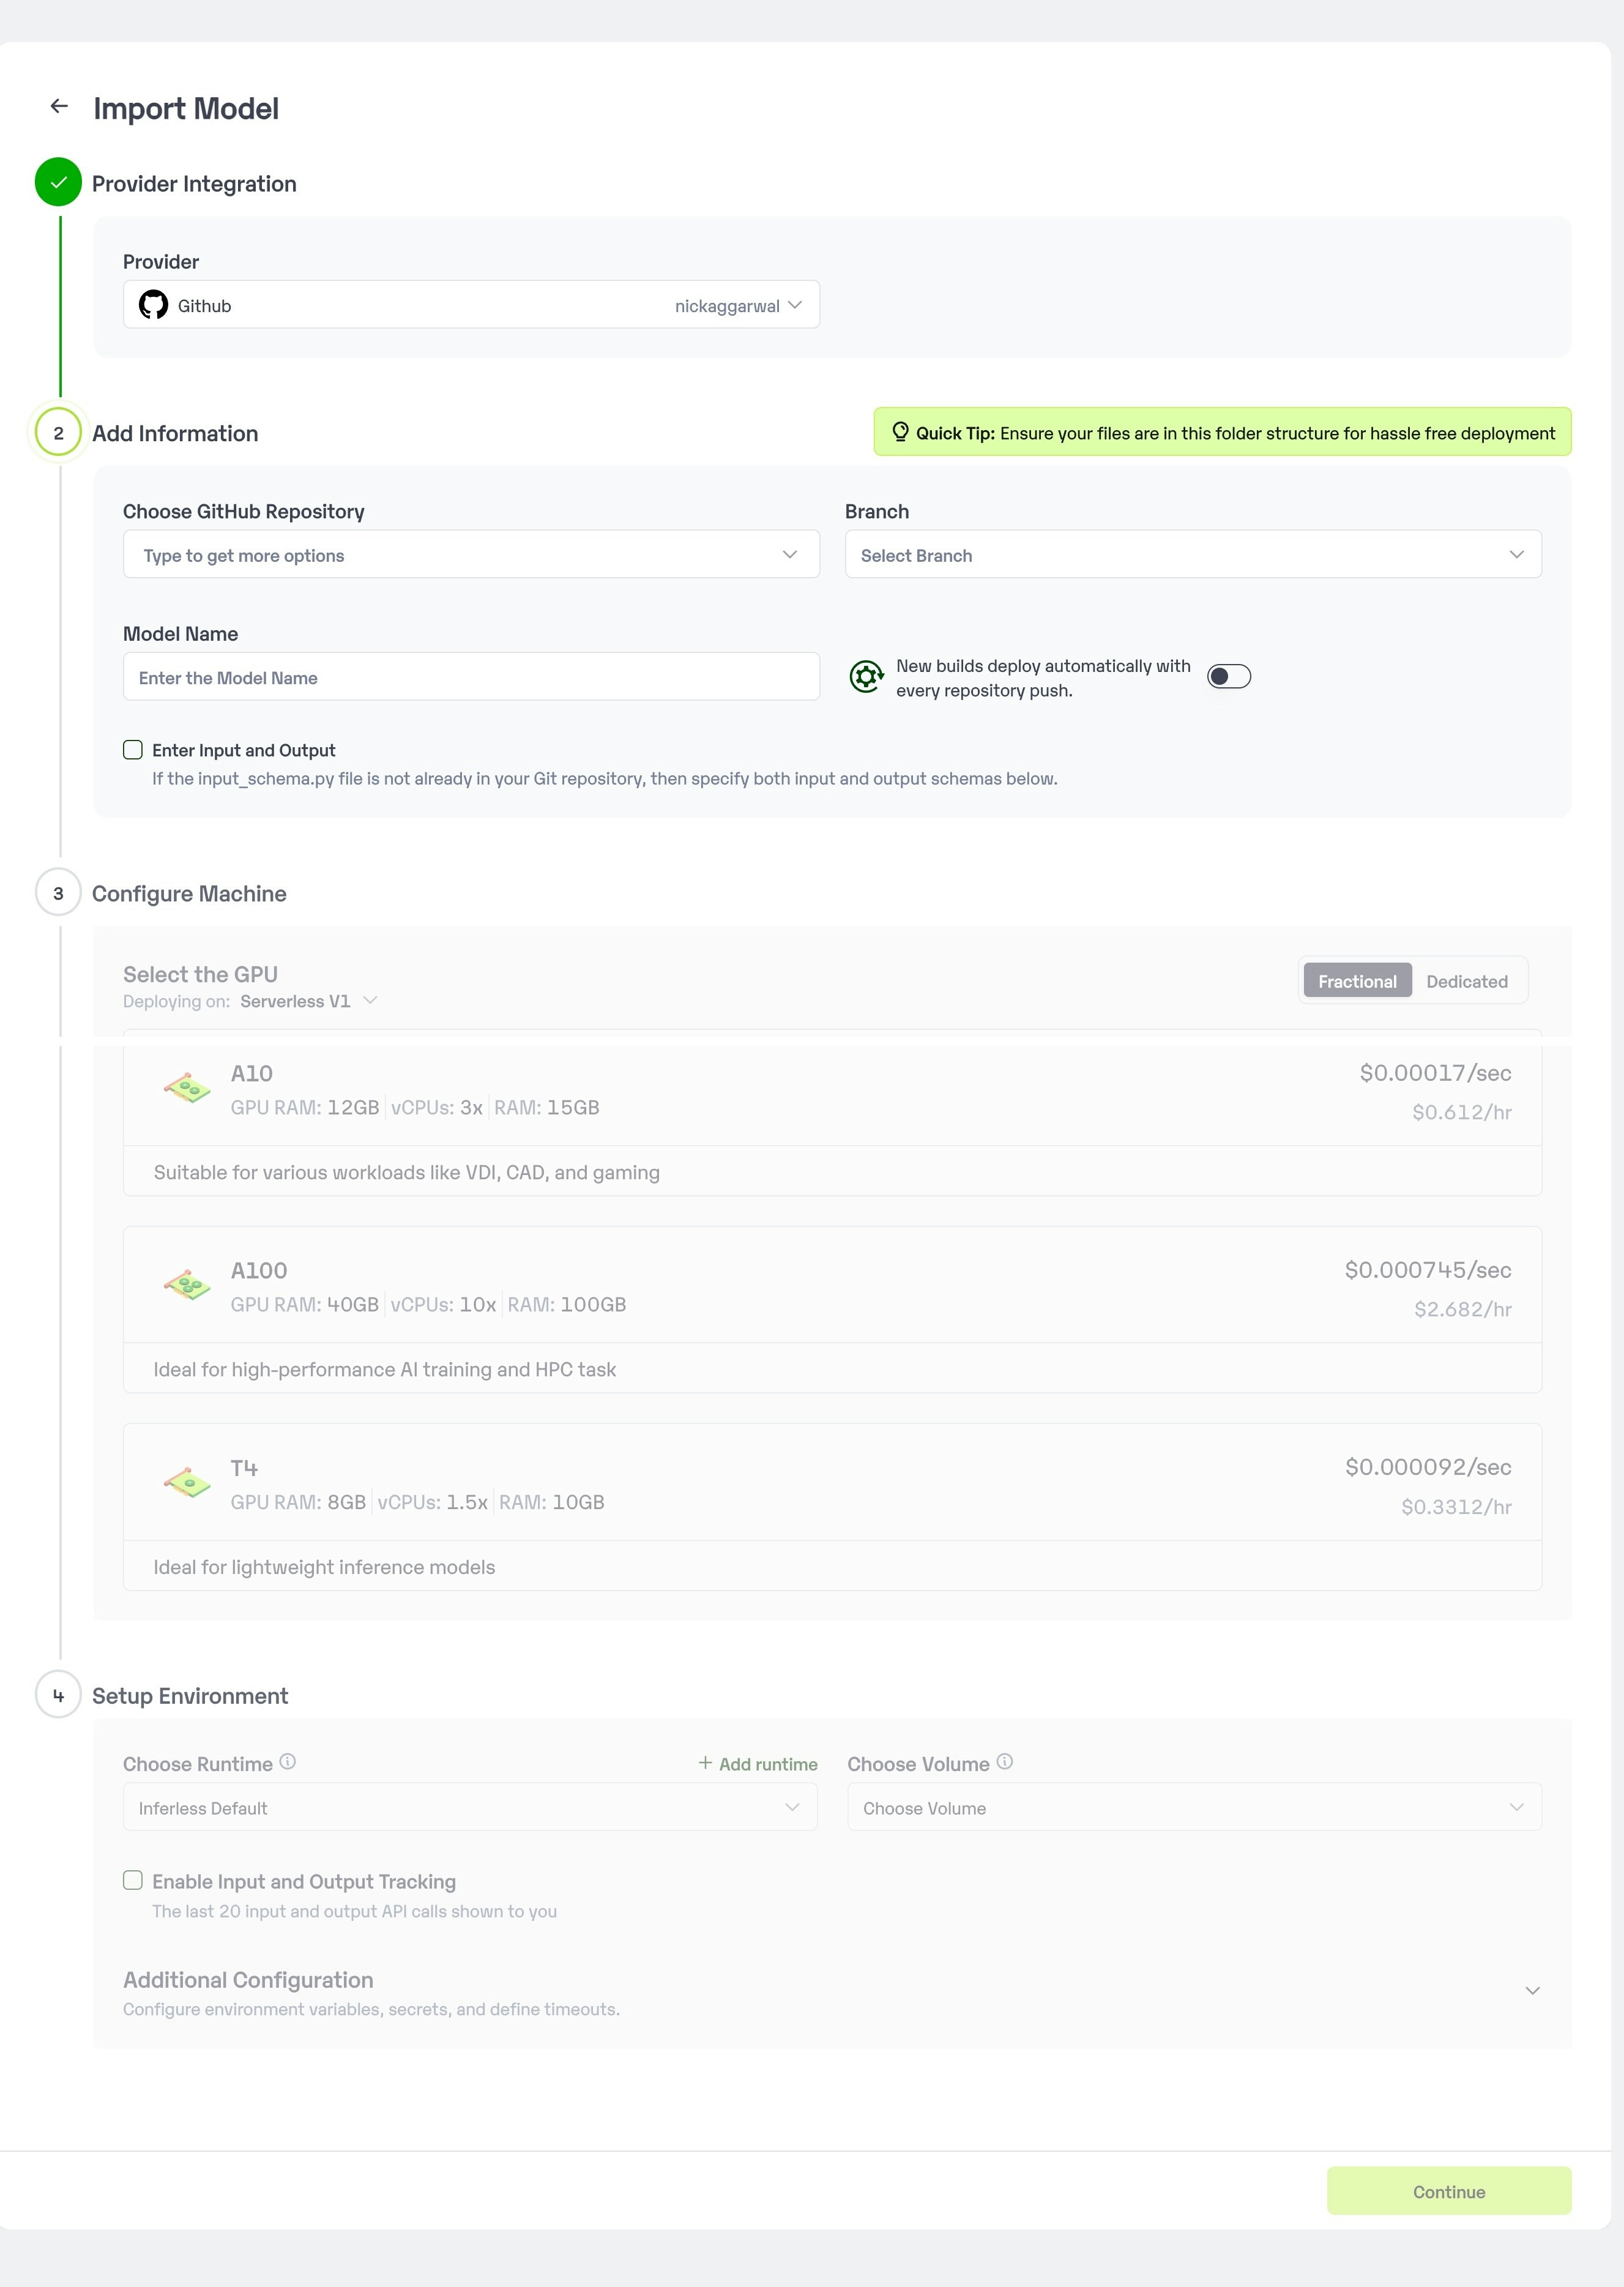
Step 2: Follow the UI to complete the model Import
- Select the GitHub/GitLab Integration option to connect your source code repository with the deployment environment.
- Navigate to the specific GitHub repository that contains your model’s code. Here, you will need to identify and enter the name of the model you wish to import.
- Choose the appropriate type of machine that suits your model’s requirements. Additionally, specify the minimum and maximum number of replicas to define the scalability range for deploying your model.
- Optionally, you have the option to enable automatic build and deployment. This feature triggers a new deployment automatically whenever there is a new code push to your repository.
- If your model requires additional software packages, configure the Custom Runtime settings by including necessary pip or apt packages. Also, set up environment variables such as Inference Timeout, Container Concurrency, and Scale Down Timeout to tailor the runtime environment according to your needs.
- Wait for the validation process to complete, ensuring that all settings are correct and functional. Once validation is successful, click on the “Import” button to finalize the import of your model.
Step 3: Wait for the model build to complete usually takes ~5-10 minutes
Step 4: Use the APIs to call the model
Once the model is in ‘Active’ status you can click on the ‘API’ page to call the modelHere is the Demo:
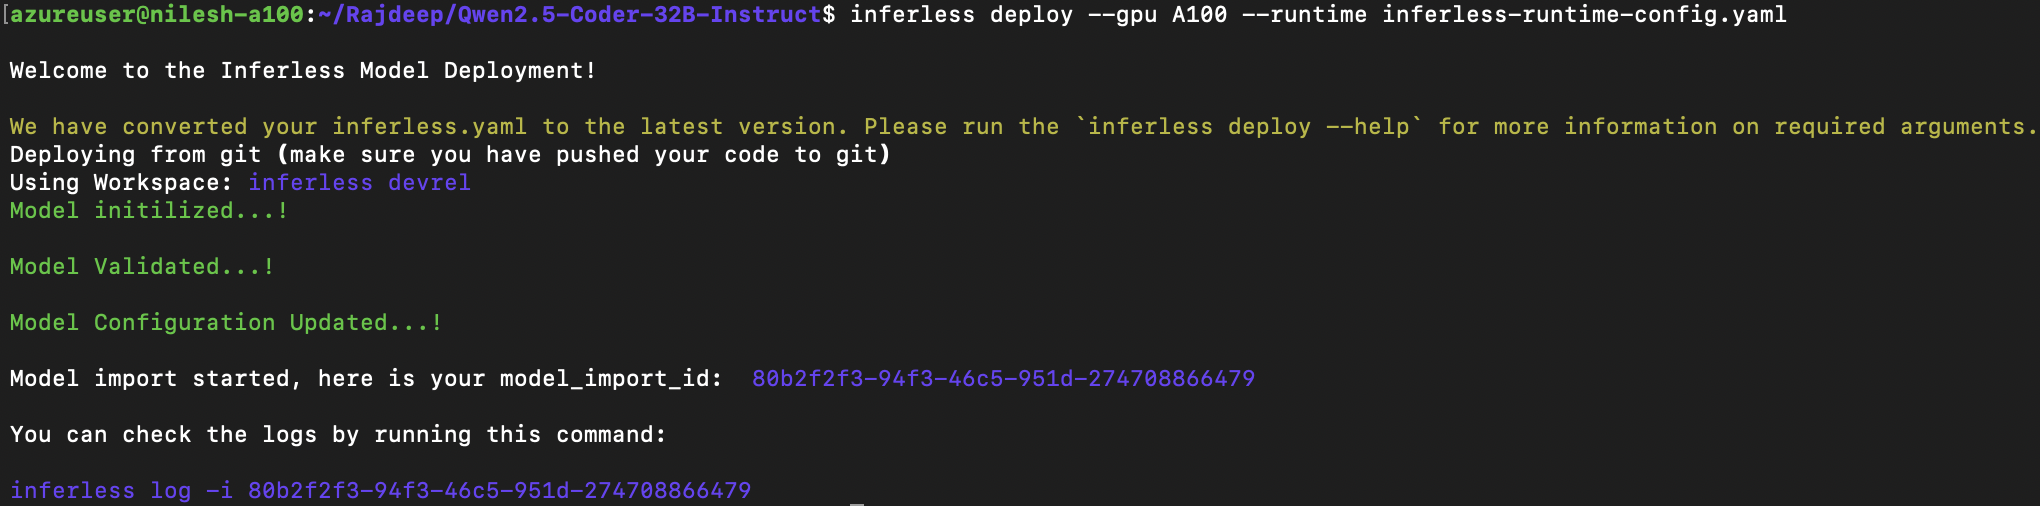
Method B: Deploying the model on Inferless CLI
Inferless allows you to deploy your model using Inferless-CLI. Follow the steps to deploy using Inferless CLI.Clone the repository of the model
Let’s begin by cloning the model repository:Deploy the Model
To deploy the model using Inferless CLI, execute the following command:--gpu A100: Specifies the GPU type for deployment. Available options includeA10,A100, andT4.--runtime inferless-runtime-config.yaml: Defines the runtime configuration file. If not specified, the default Inferless runtime is used.