Pre Requisite : Note the Model Name, Type and Framework
- Navigate to the Hugging Face model page of your choice that you want to import into Inferless.
- Take note of the
"Model Name"(you can also use the copy button),Task Type,Model Framework,andModel Type. These will be required for the next steps.

Step 1: Add Model in your workspace.
- Select on
"HuggingFace"button that you see on dashboard. An import wizard will open up.
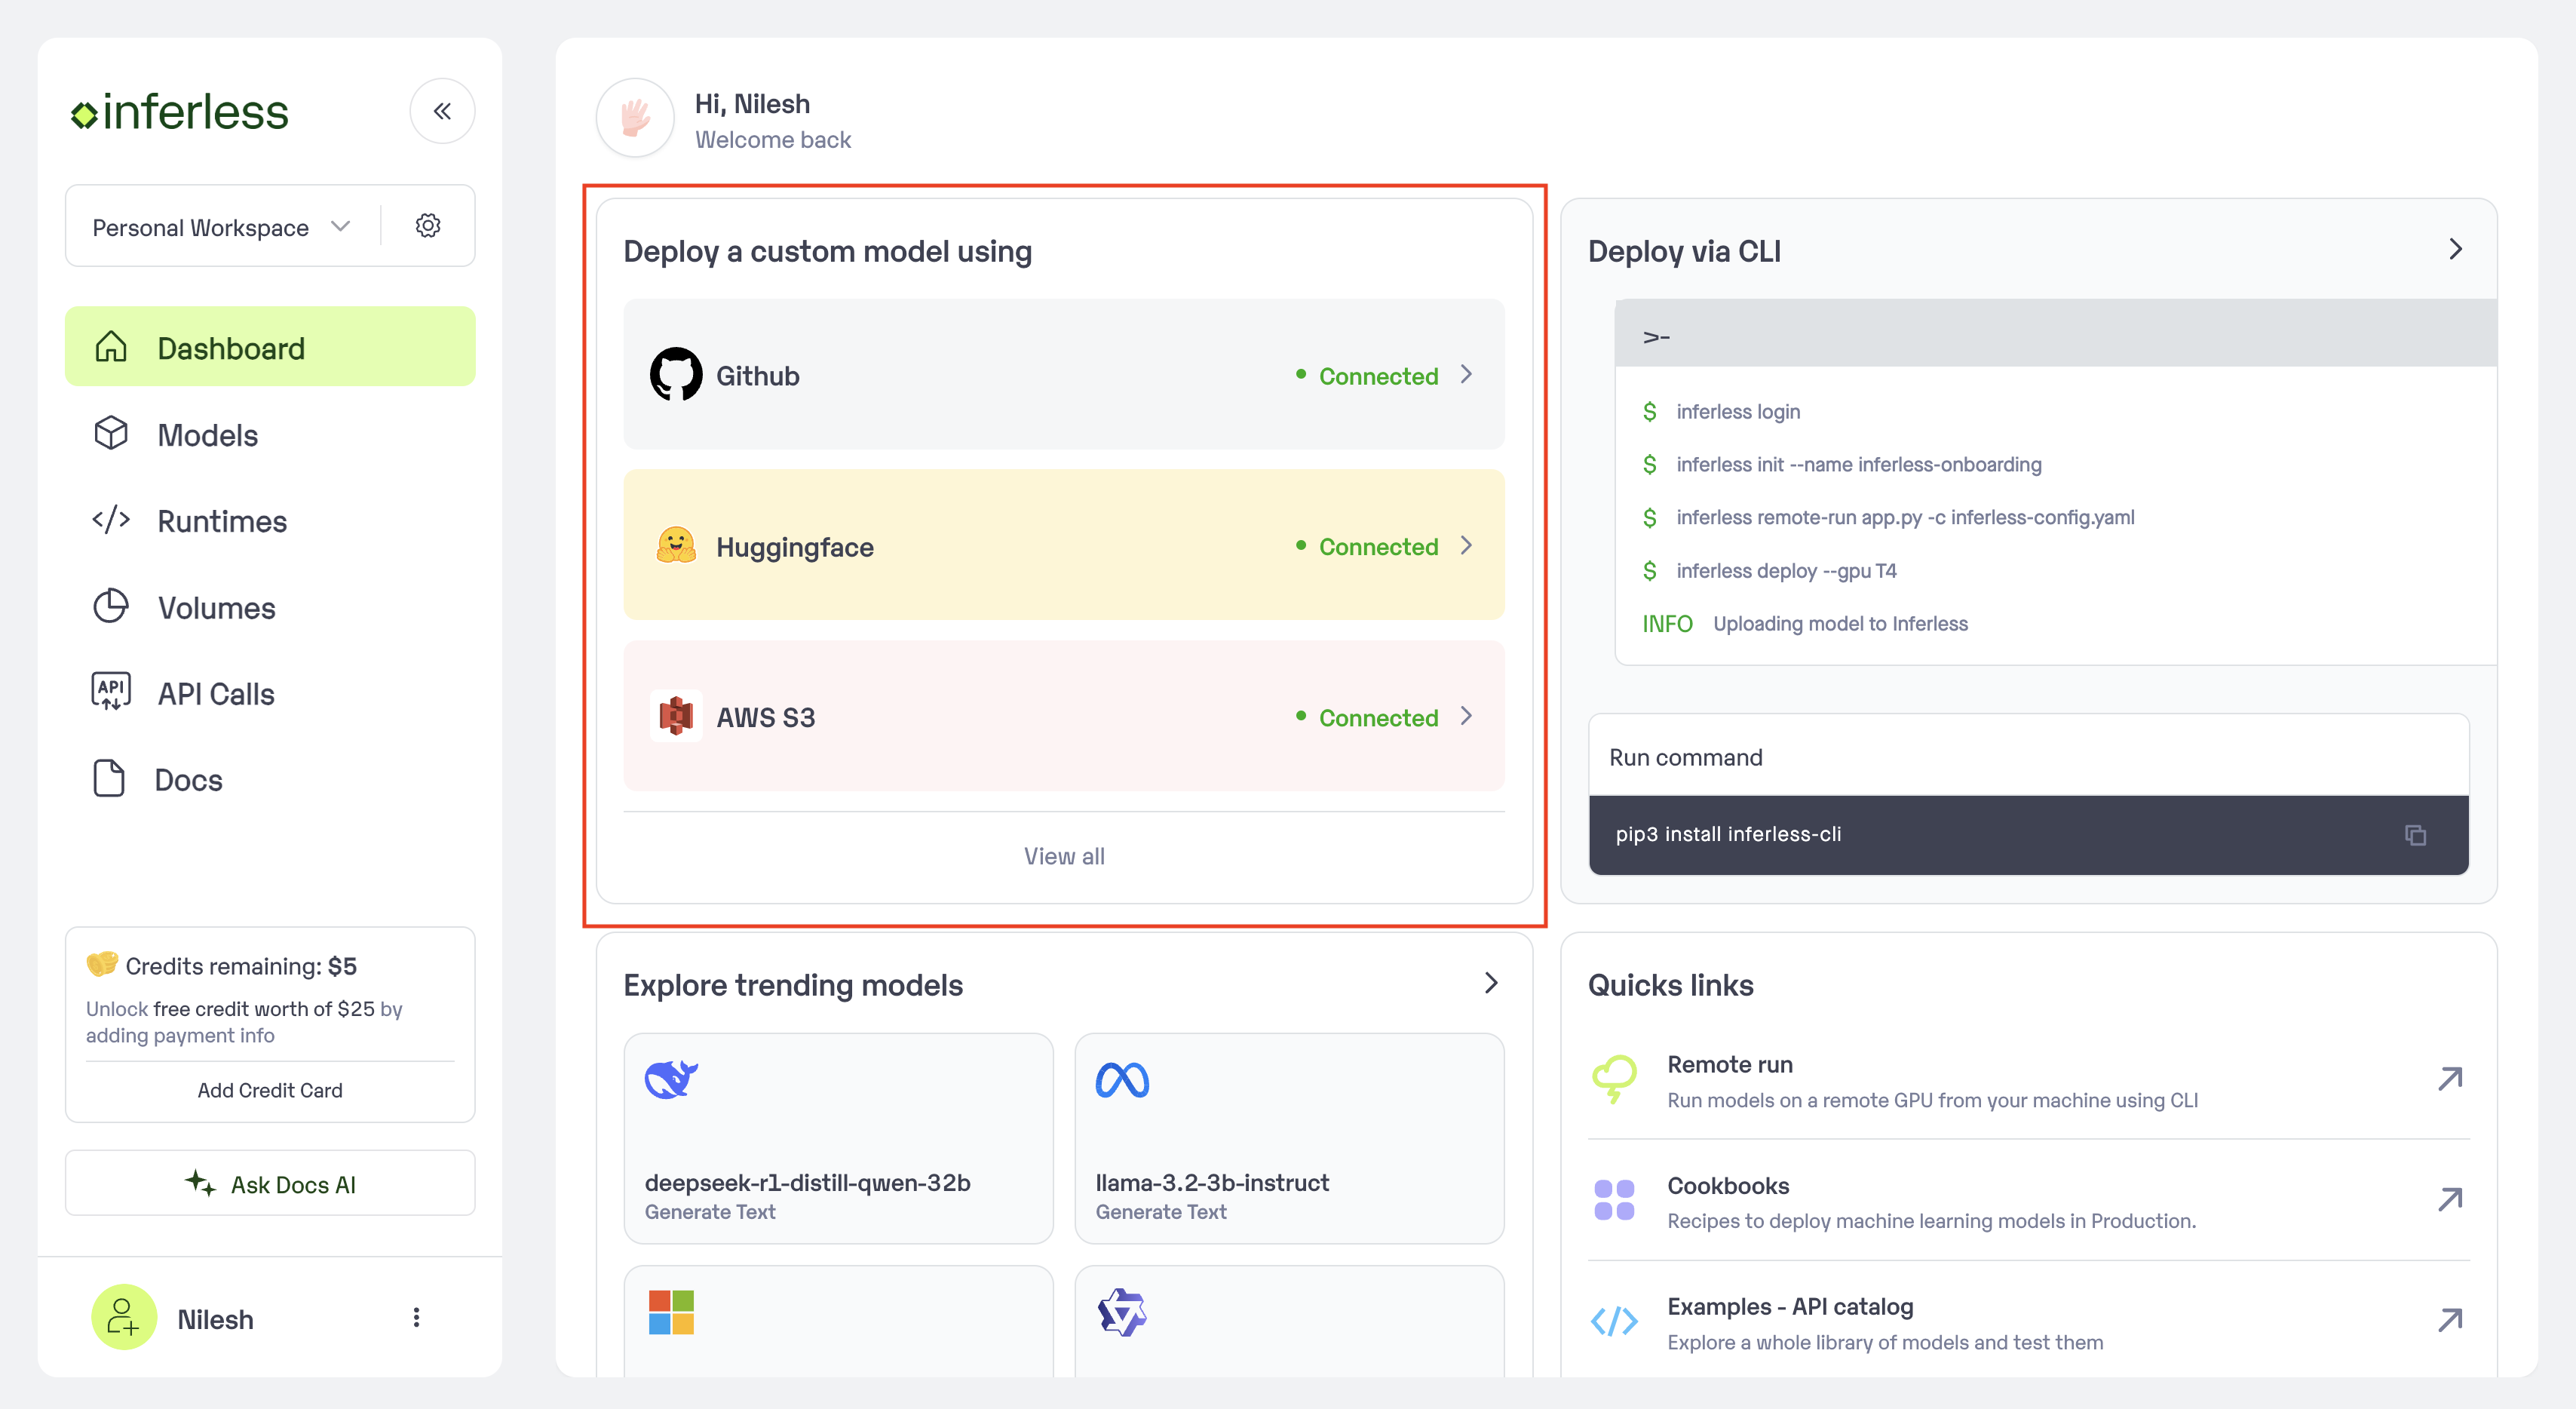
Click on Add Model
Step 2: Enter the model details
- **Model Details: In this step, Add your
model name(The name that you wish to call your model), Choose themodel type(Eg: Transformer), Choose thetask type(Eg: Text generation) andHuggingface model name.
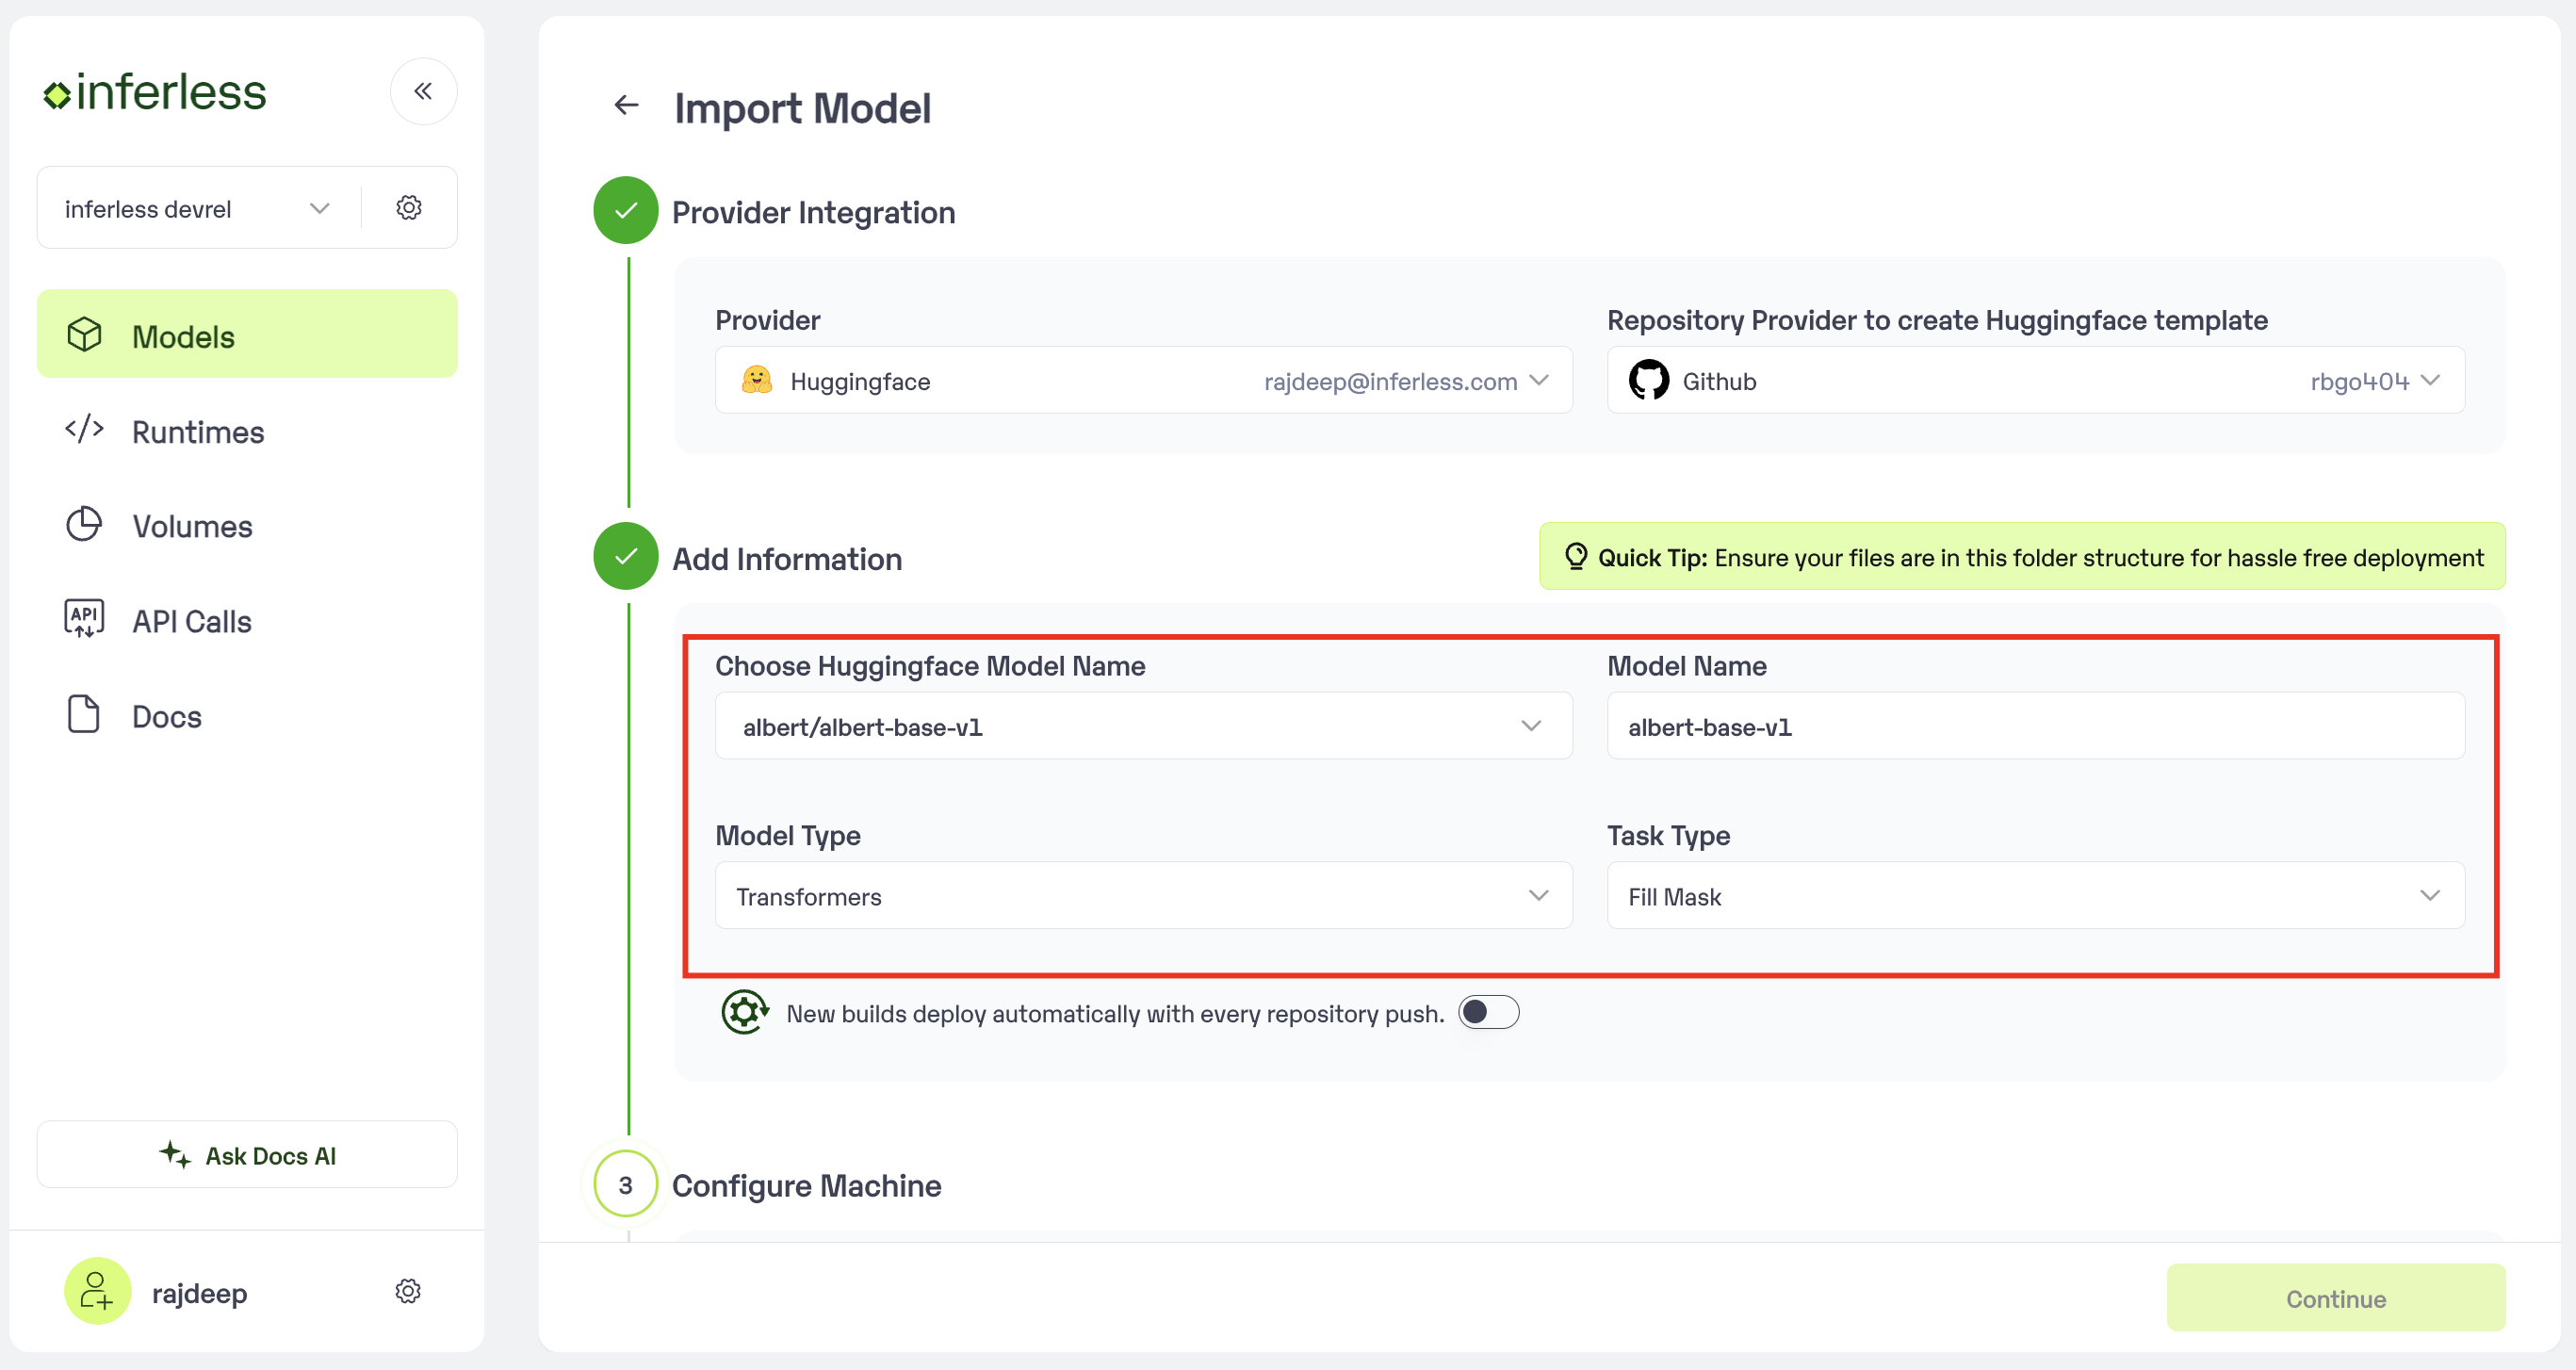
Enter the details as noted
- In case you would like to set up
Automatic rebuildfor your model, enable it- You would need to set up a webhook for this method. Click here for more details.
Step 3: Modify the Code
- After you have selected the model you can modify the app.py to change the model loading code and the inference code
- If you want to change the input and get more param you can modify the input_schema.py
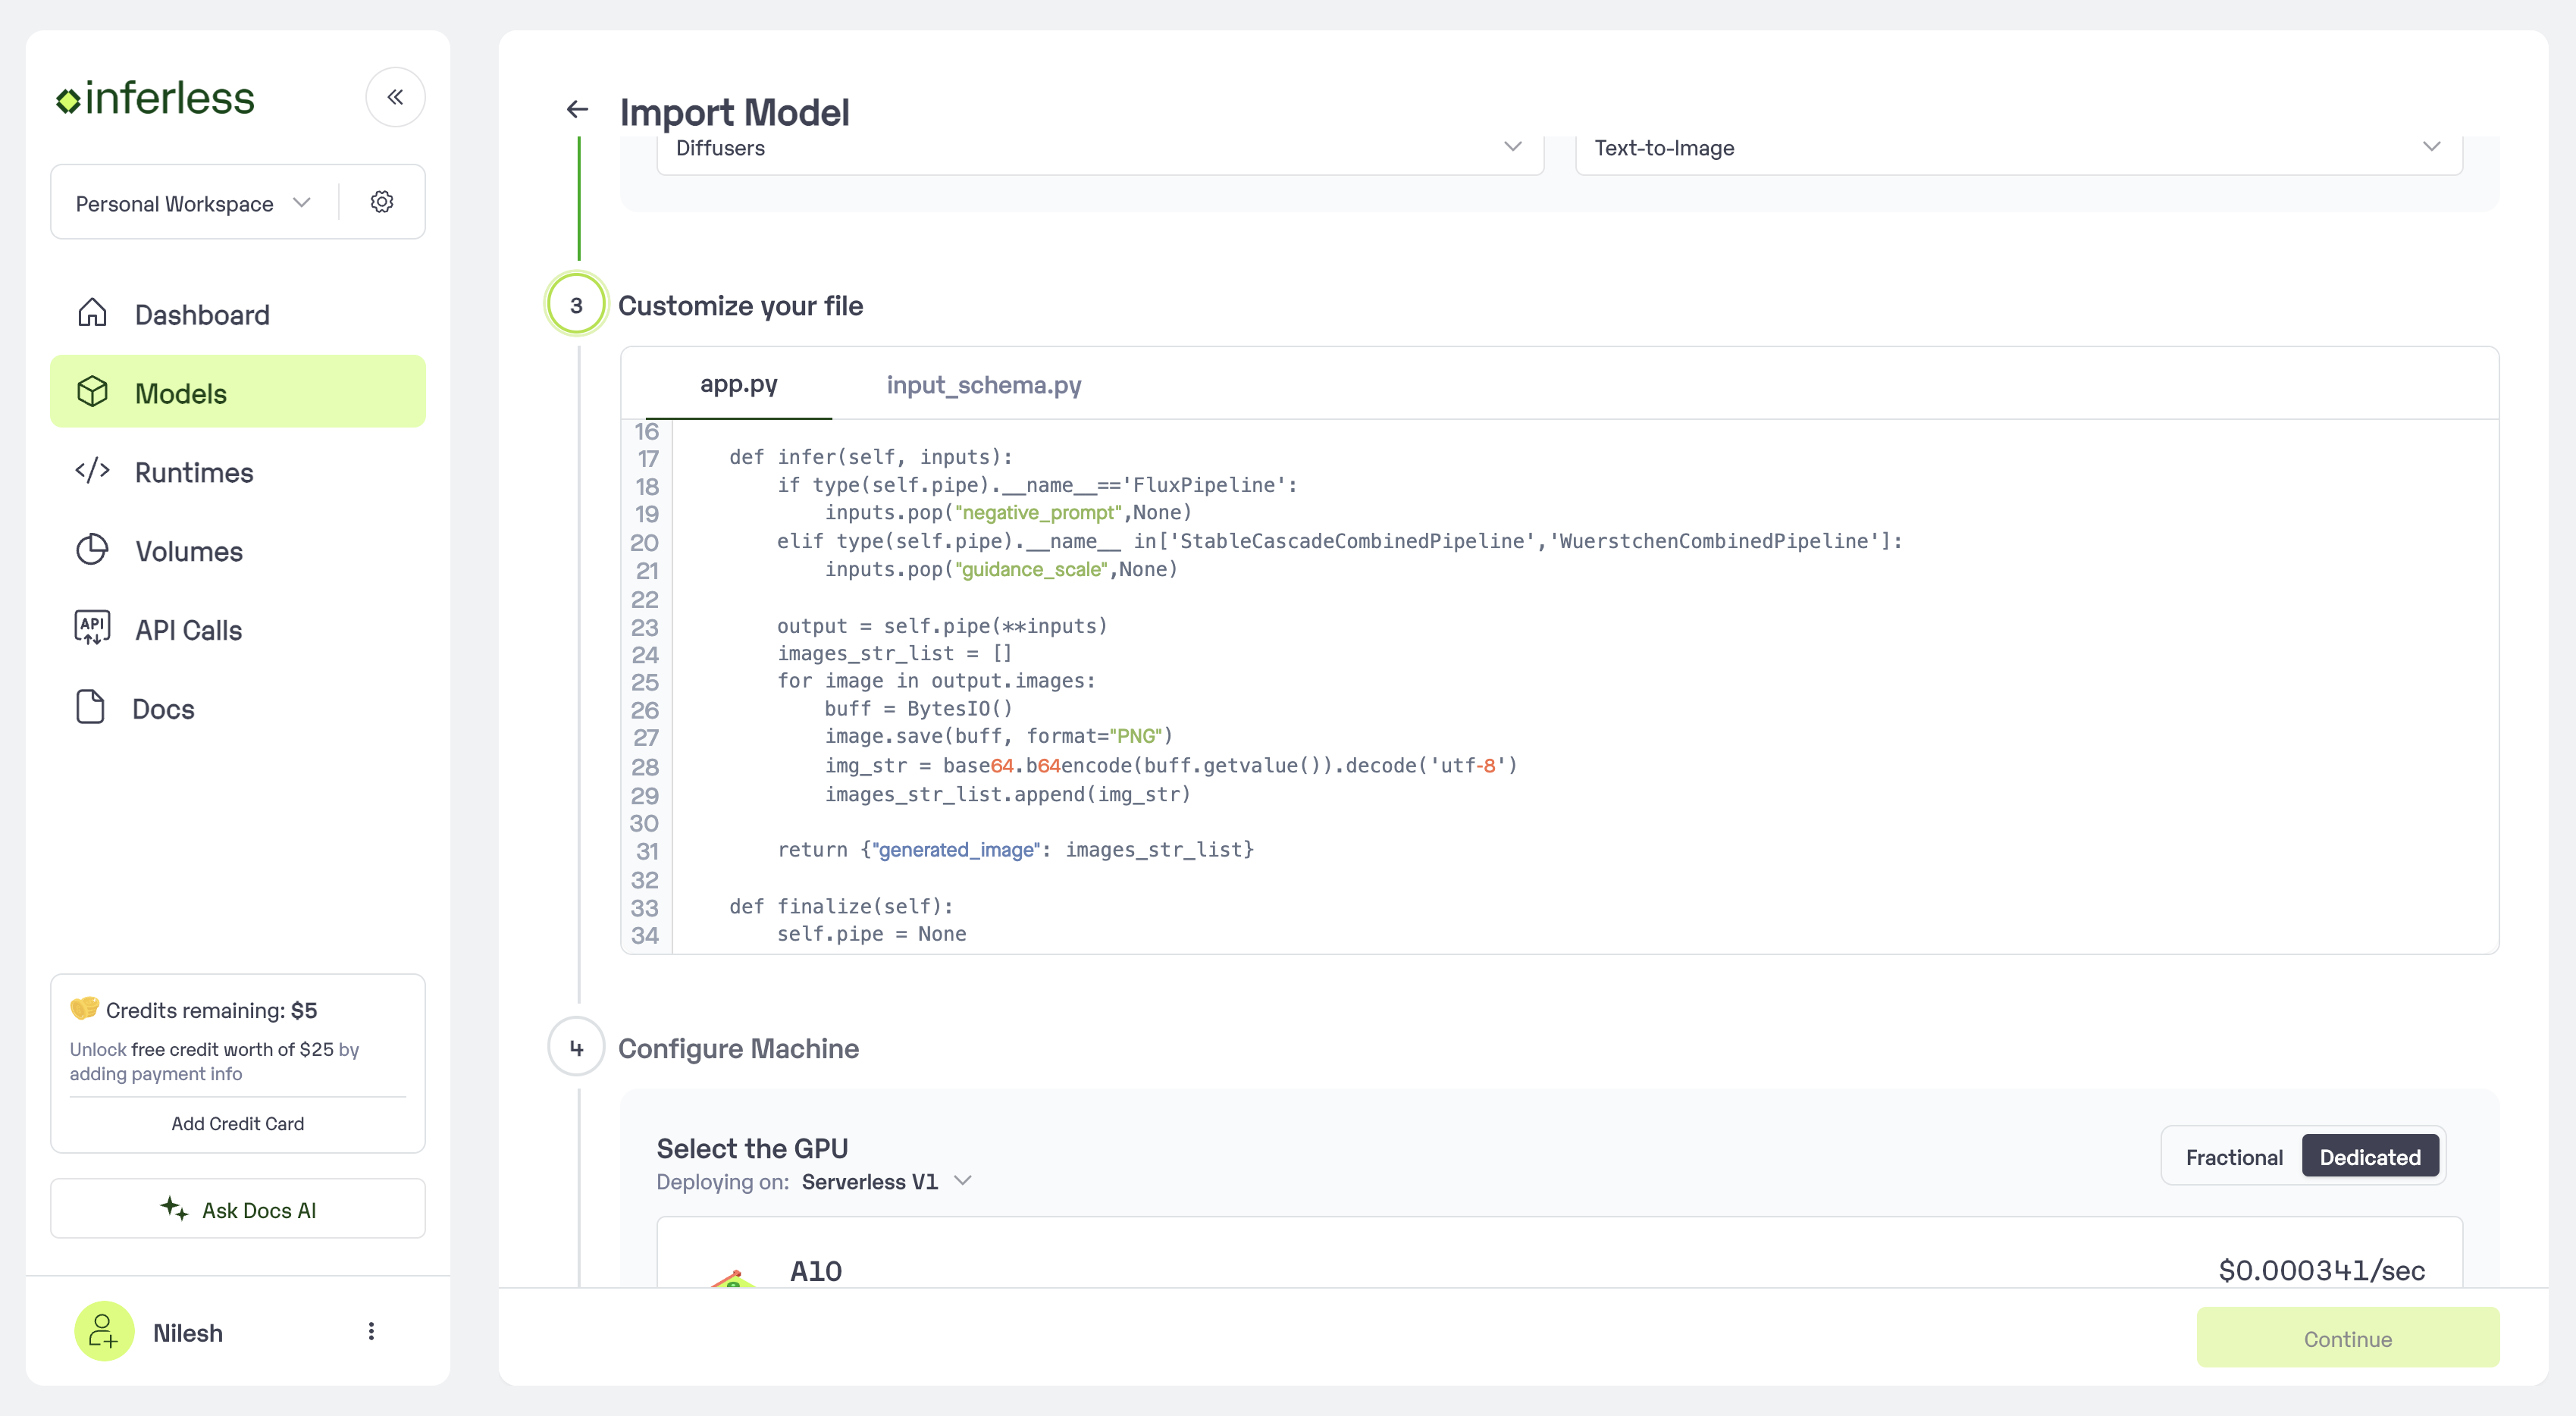
Modify the code
Step 4: Configure Machine and Environment.
- Choose the type of machine, and specify the minimum and maximum number of replicas for deploying your model.
- Min scale -
- Max scale -
- Configure Custom Runtime ( If you have pip or apt packages), choose Volume, Secrets and set Environment variables like Inference Timeout / Container Concurrency / Scale Down Timeout
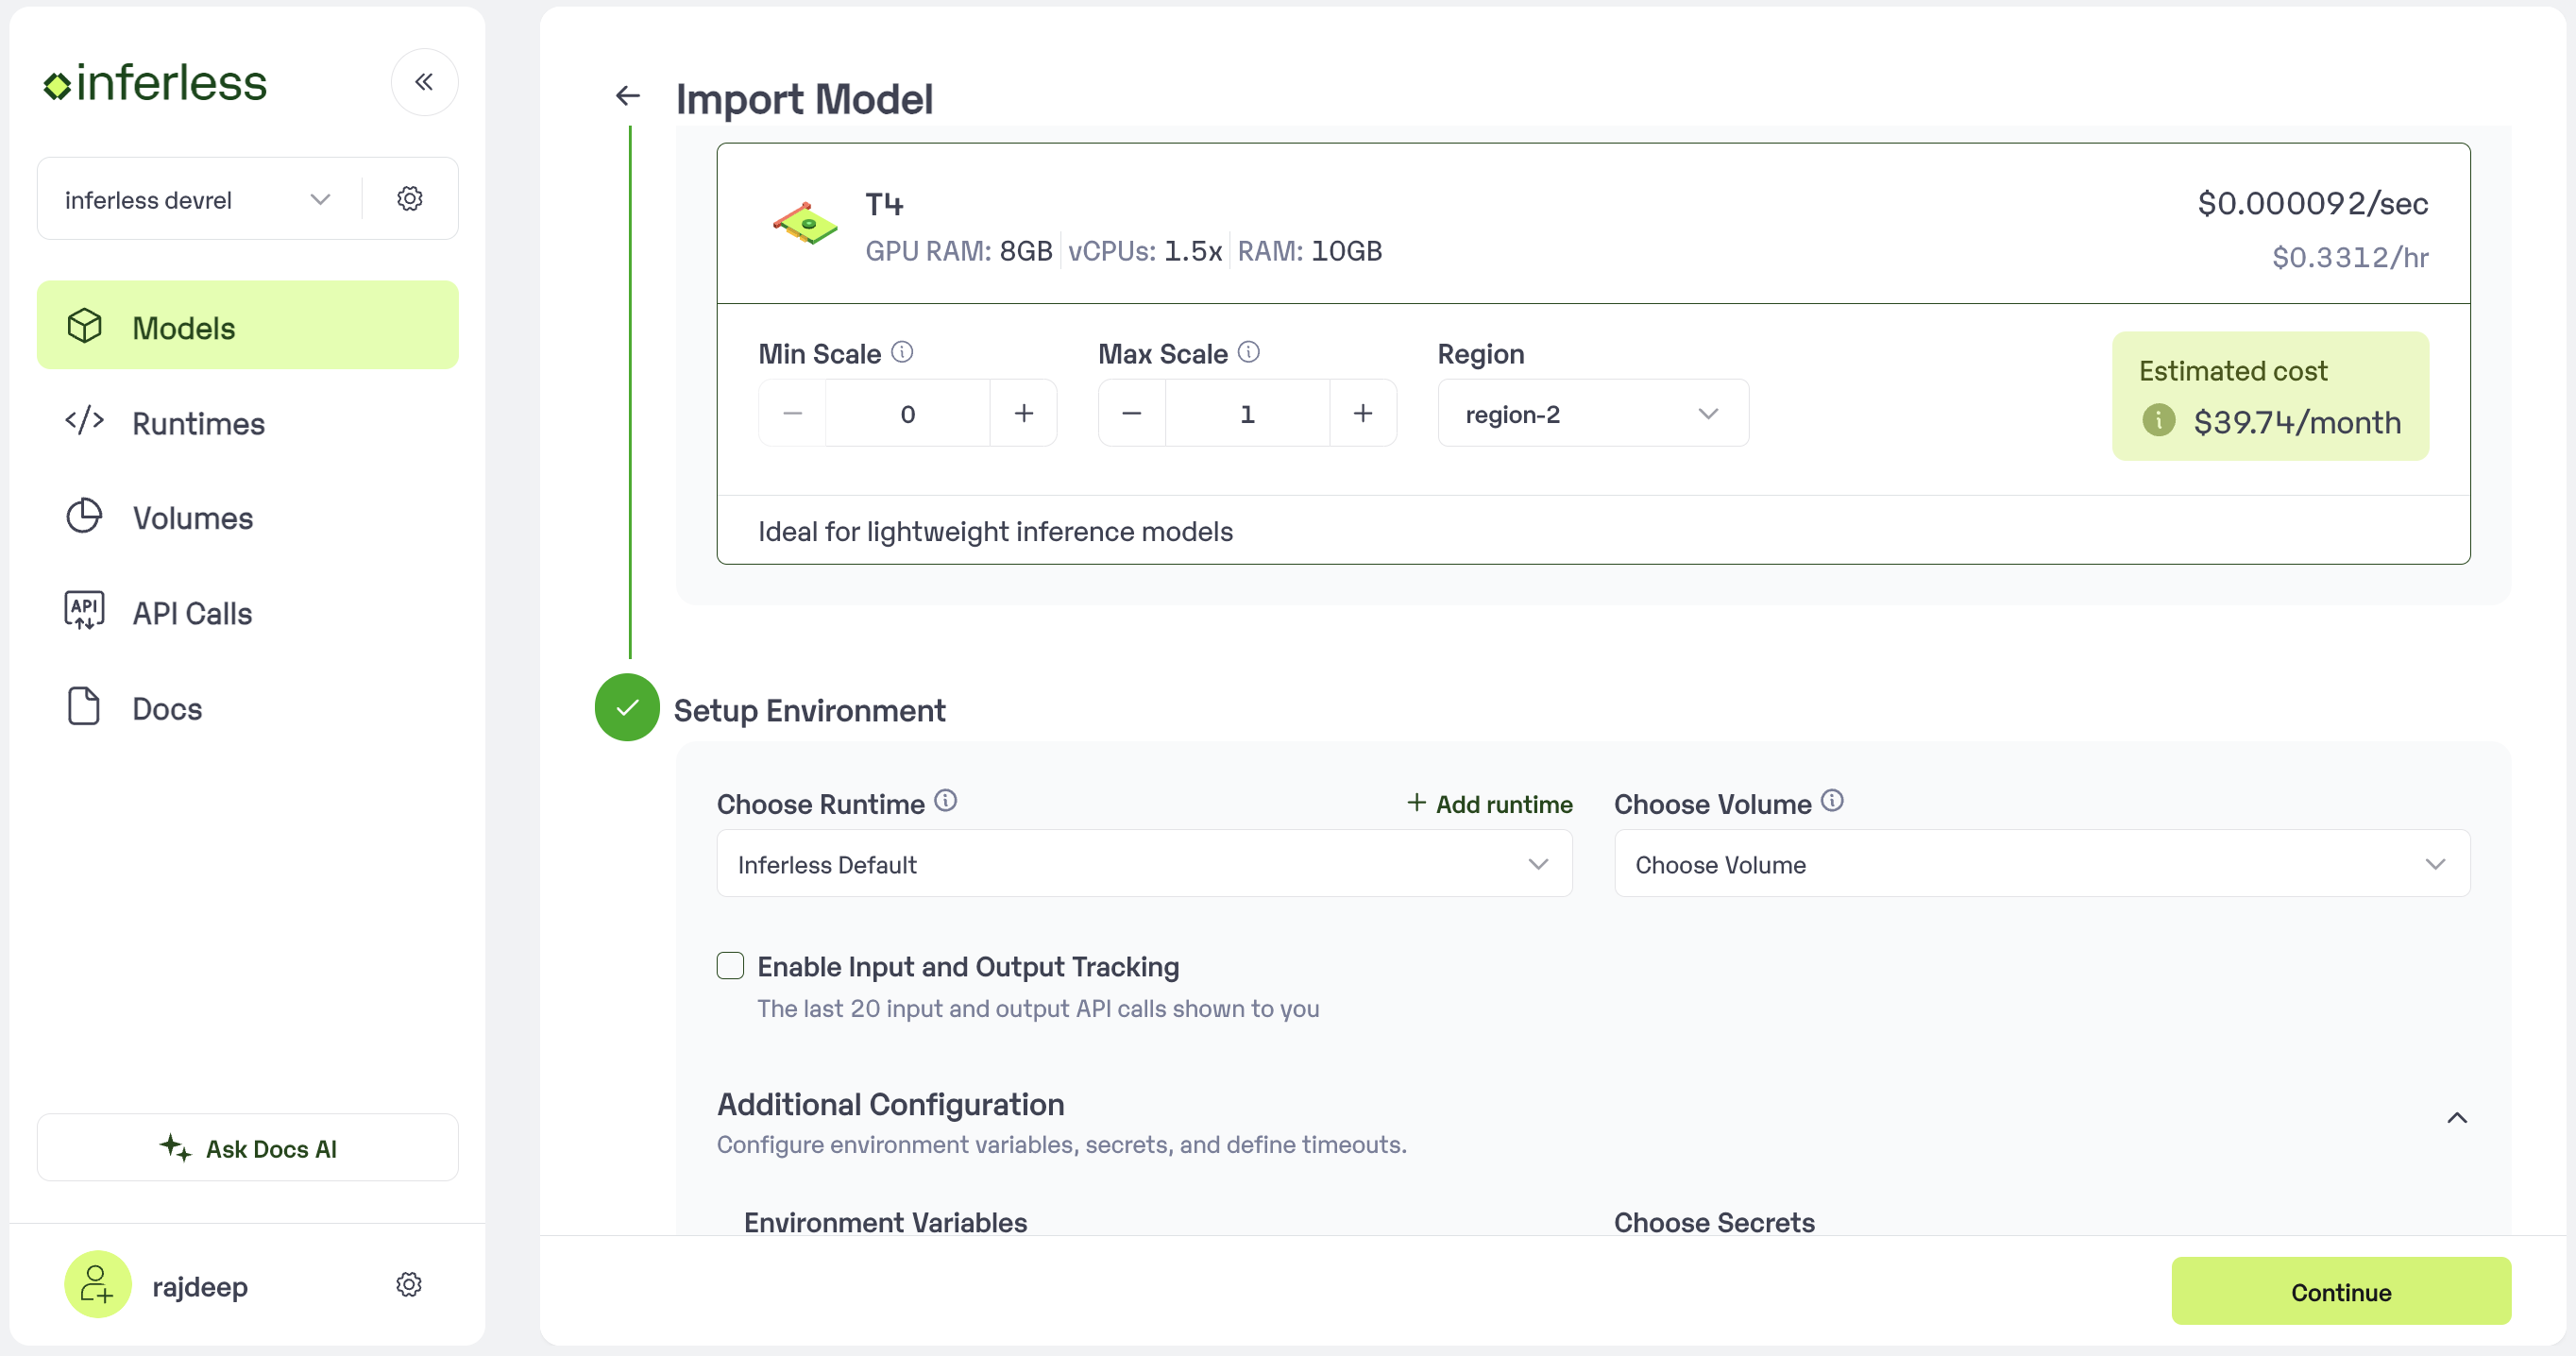
Set runtime and configuration
Step 5: Review your model details
- Once you click “Continue,” you will be able to review the details added for the model.
- If you would like to make any changes, you can go back and make the changes.
-
Once you have reviewed everything, click
Deployto start the model import process.
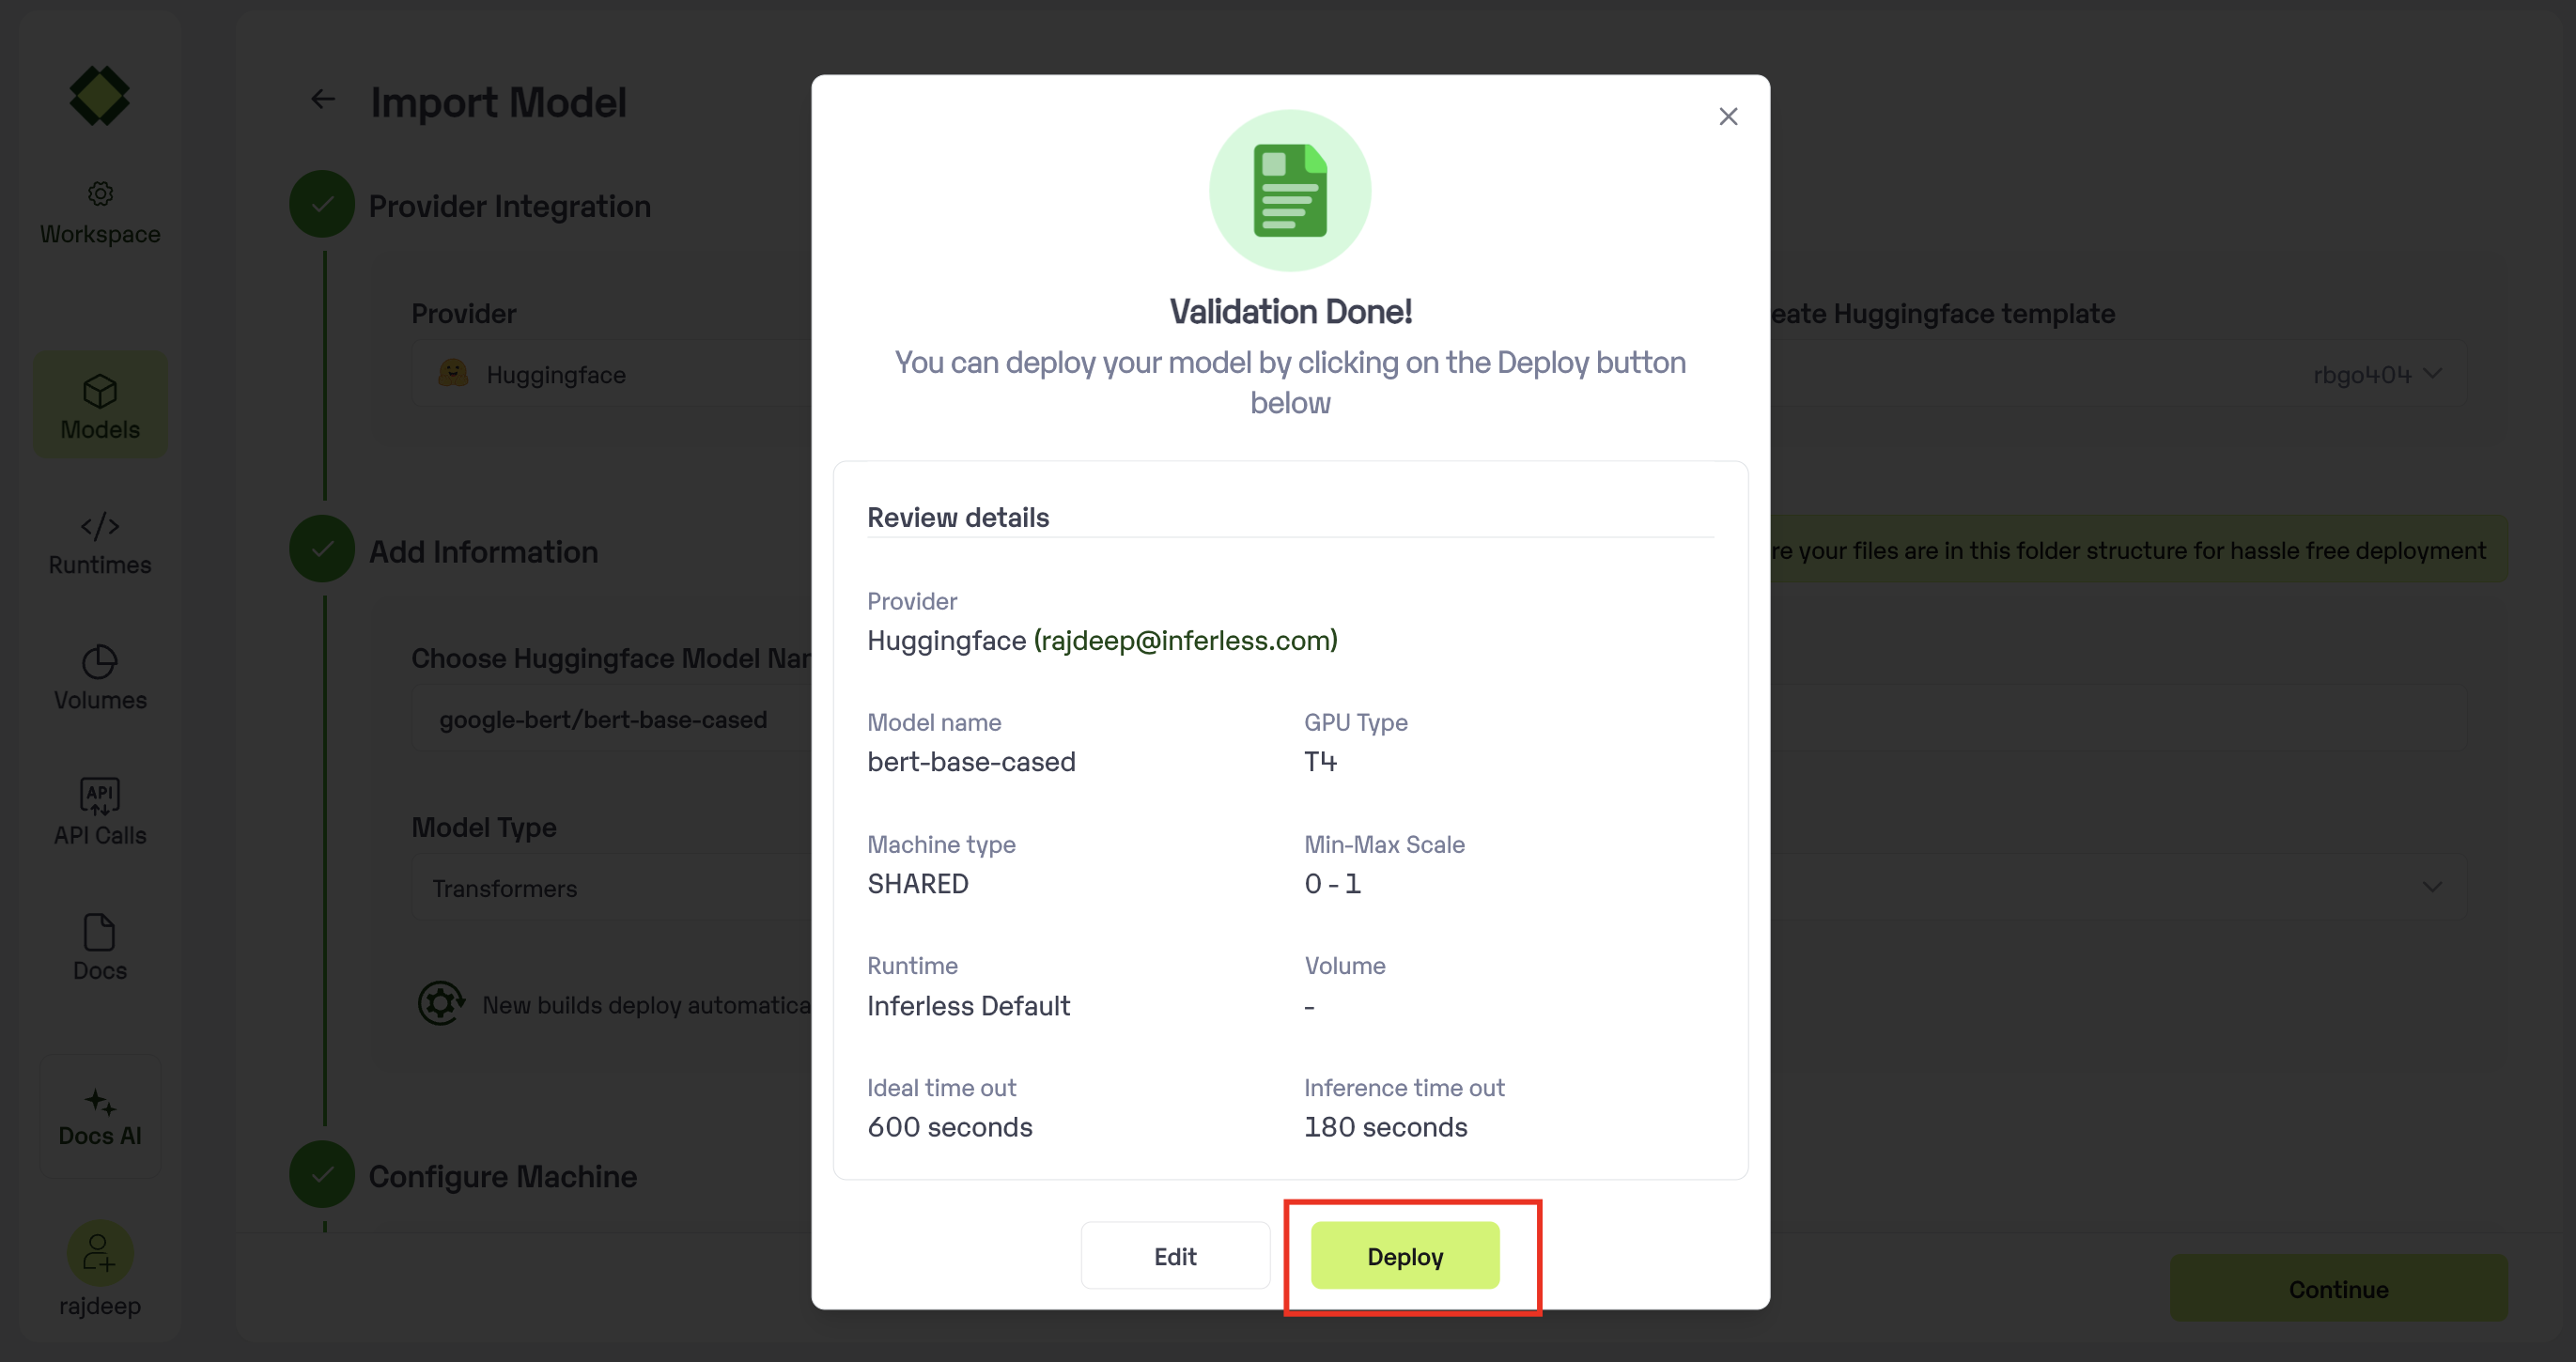
Review all the details carefully before proceeding
Step 6 : Run your model
- Once you click submit, the model import process would start.
-
It may take some time to complete the import process, and during this time, you will be redirected to your workspace and can see the status of the import under
"In Progress/Failed"tab.\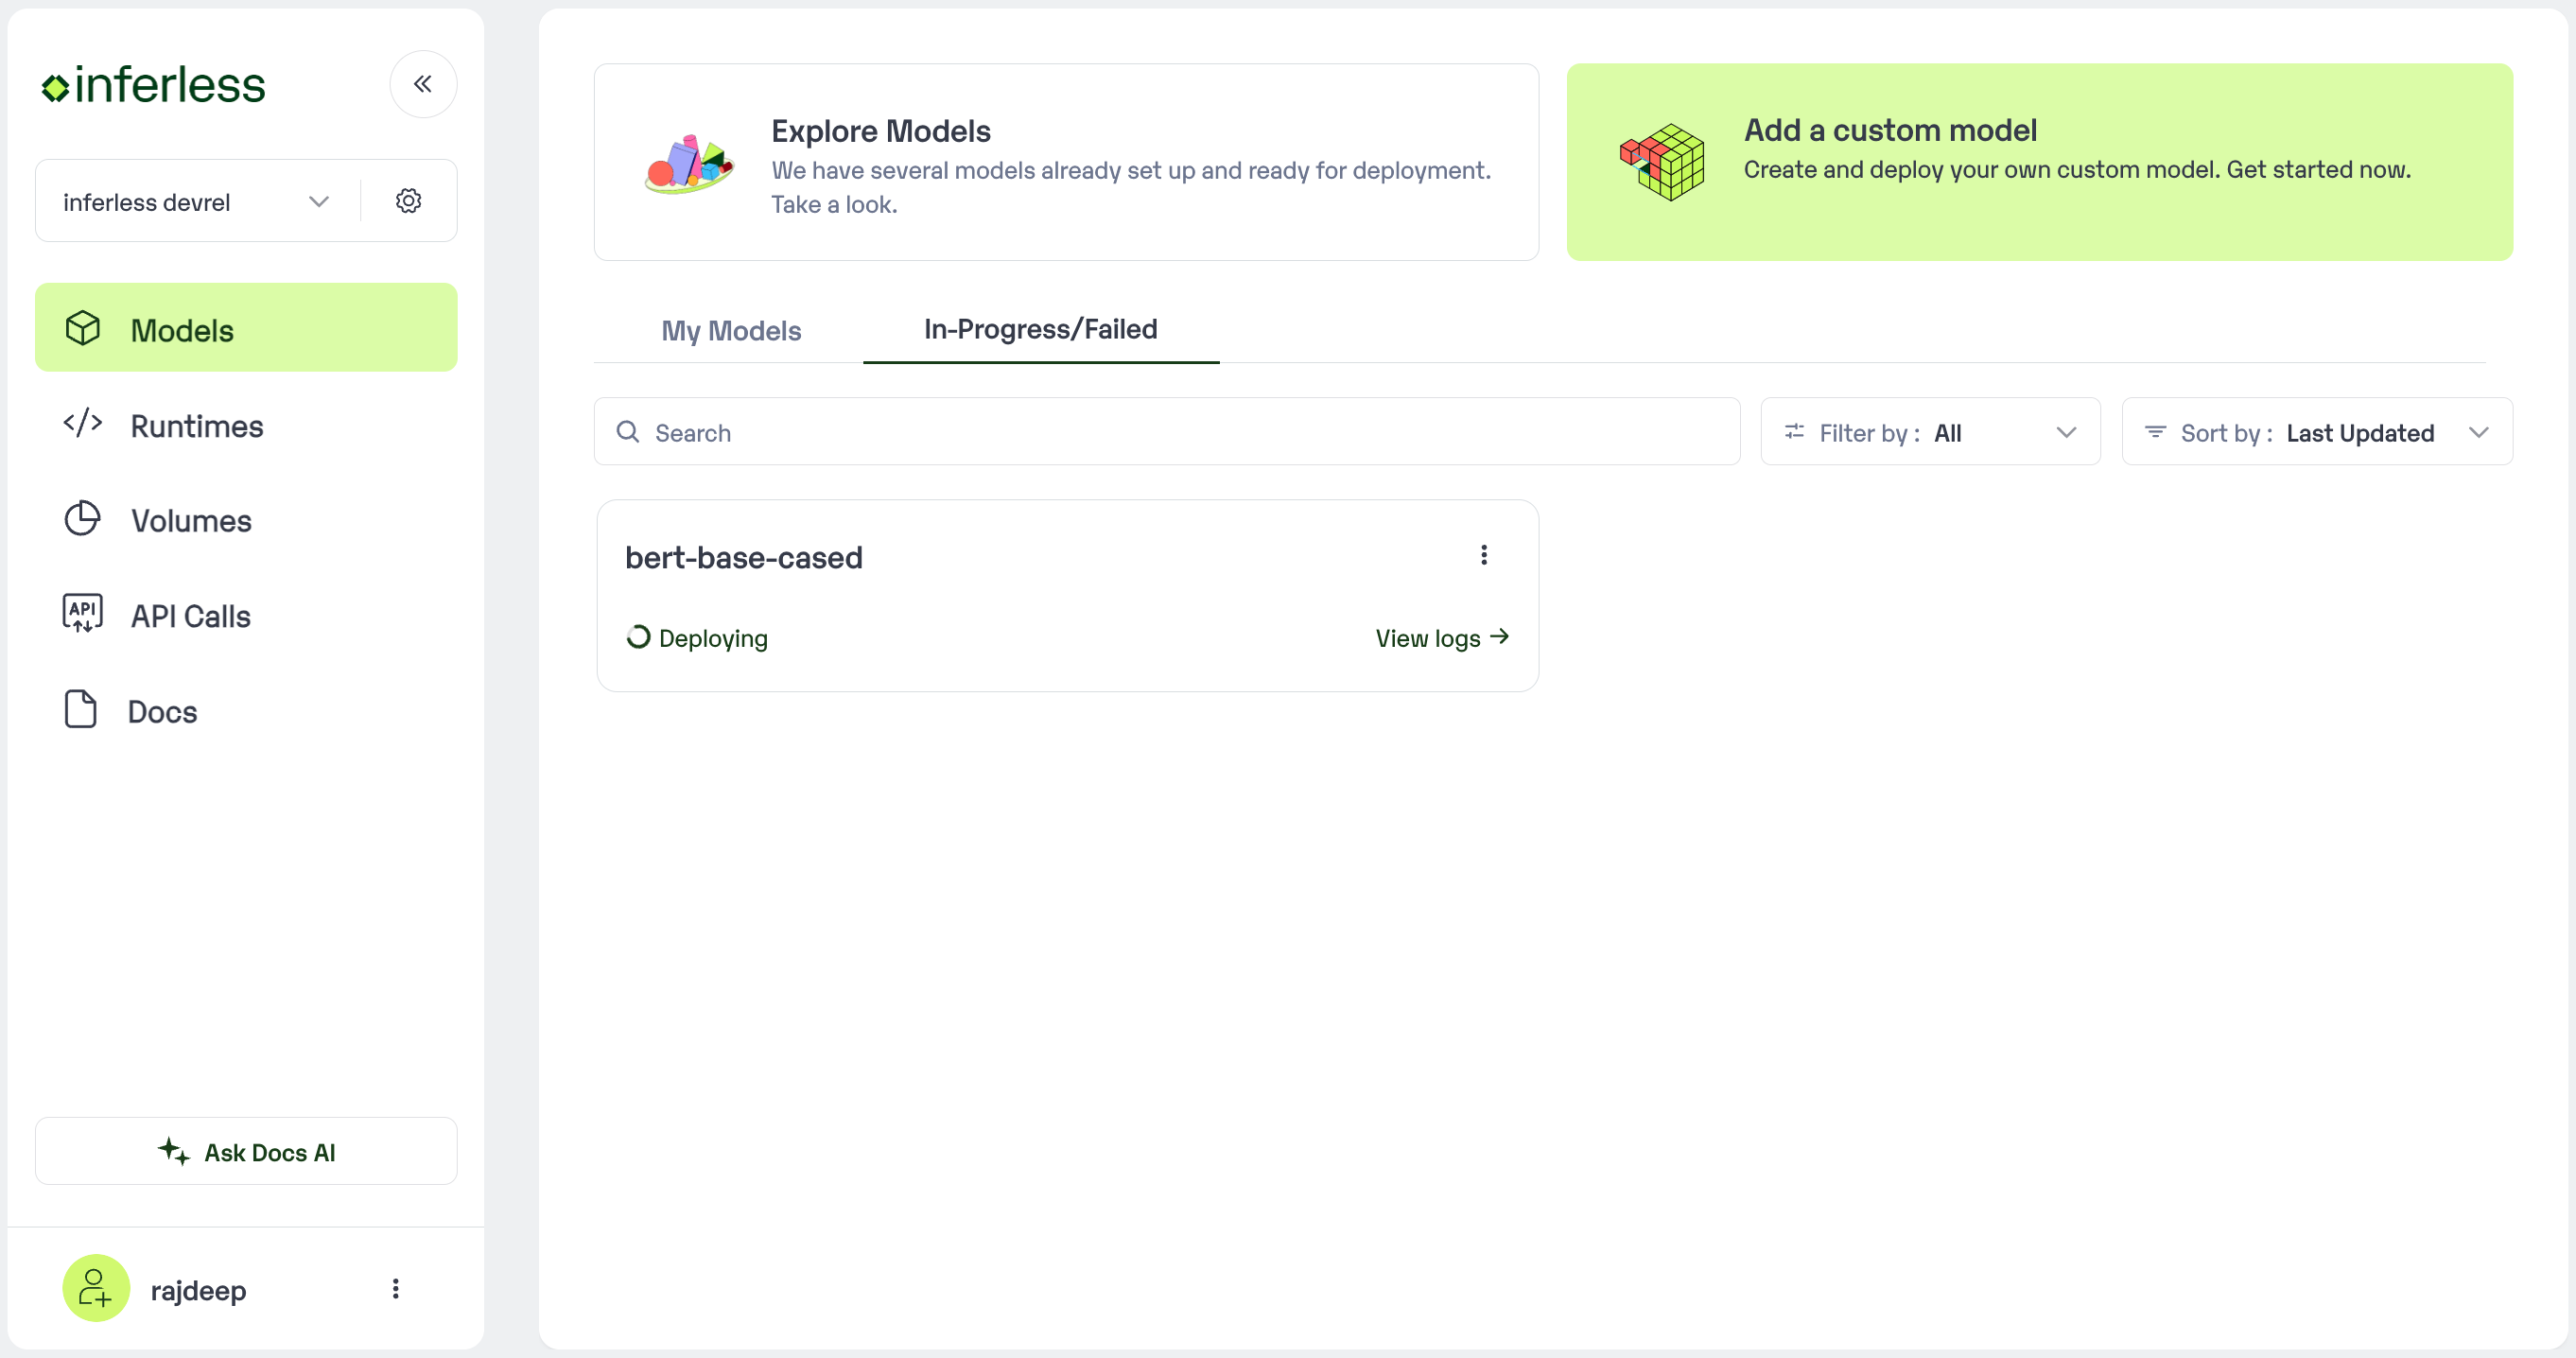
View the model under `In-Progress/ Failed`
- If you encounter any errors during the model import process or if you want to view the build logs for any reason, you can click on the three dots menu and select “View build logs”. This will show you a detailed log of the import process, which can help you troubleshoot any issues you may encounter.
- Post-upload, the model will be available under “My Models”
-
You can then select the model and go to
-> API -> Inference Endpoint details.Here you would find the API endpoints that can be called. You can click on the copy button on the right and can call your model.
-
It may take some time to complete the import process, and during this time, you will be redirected to your workspace and can see the status of the import under
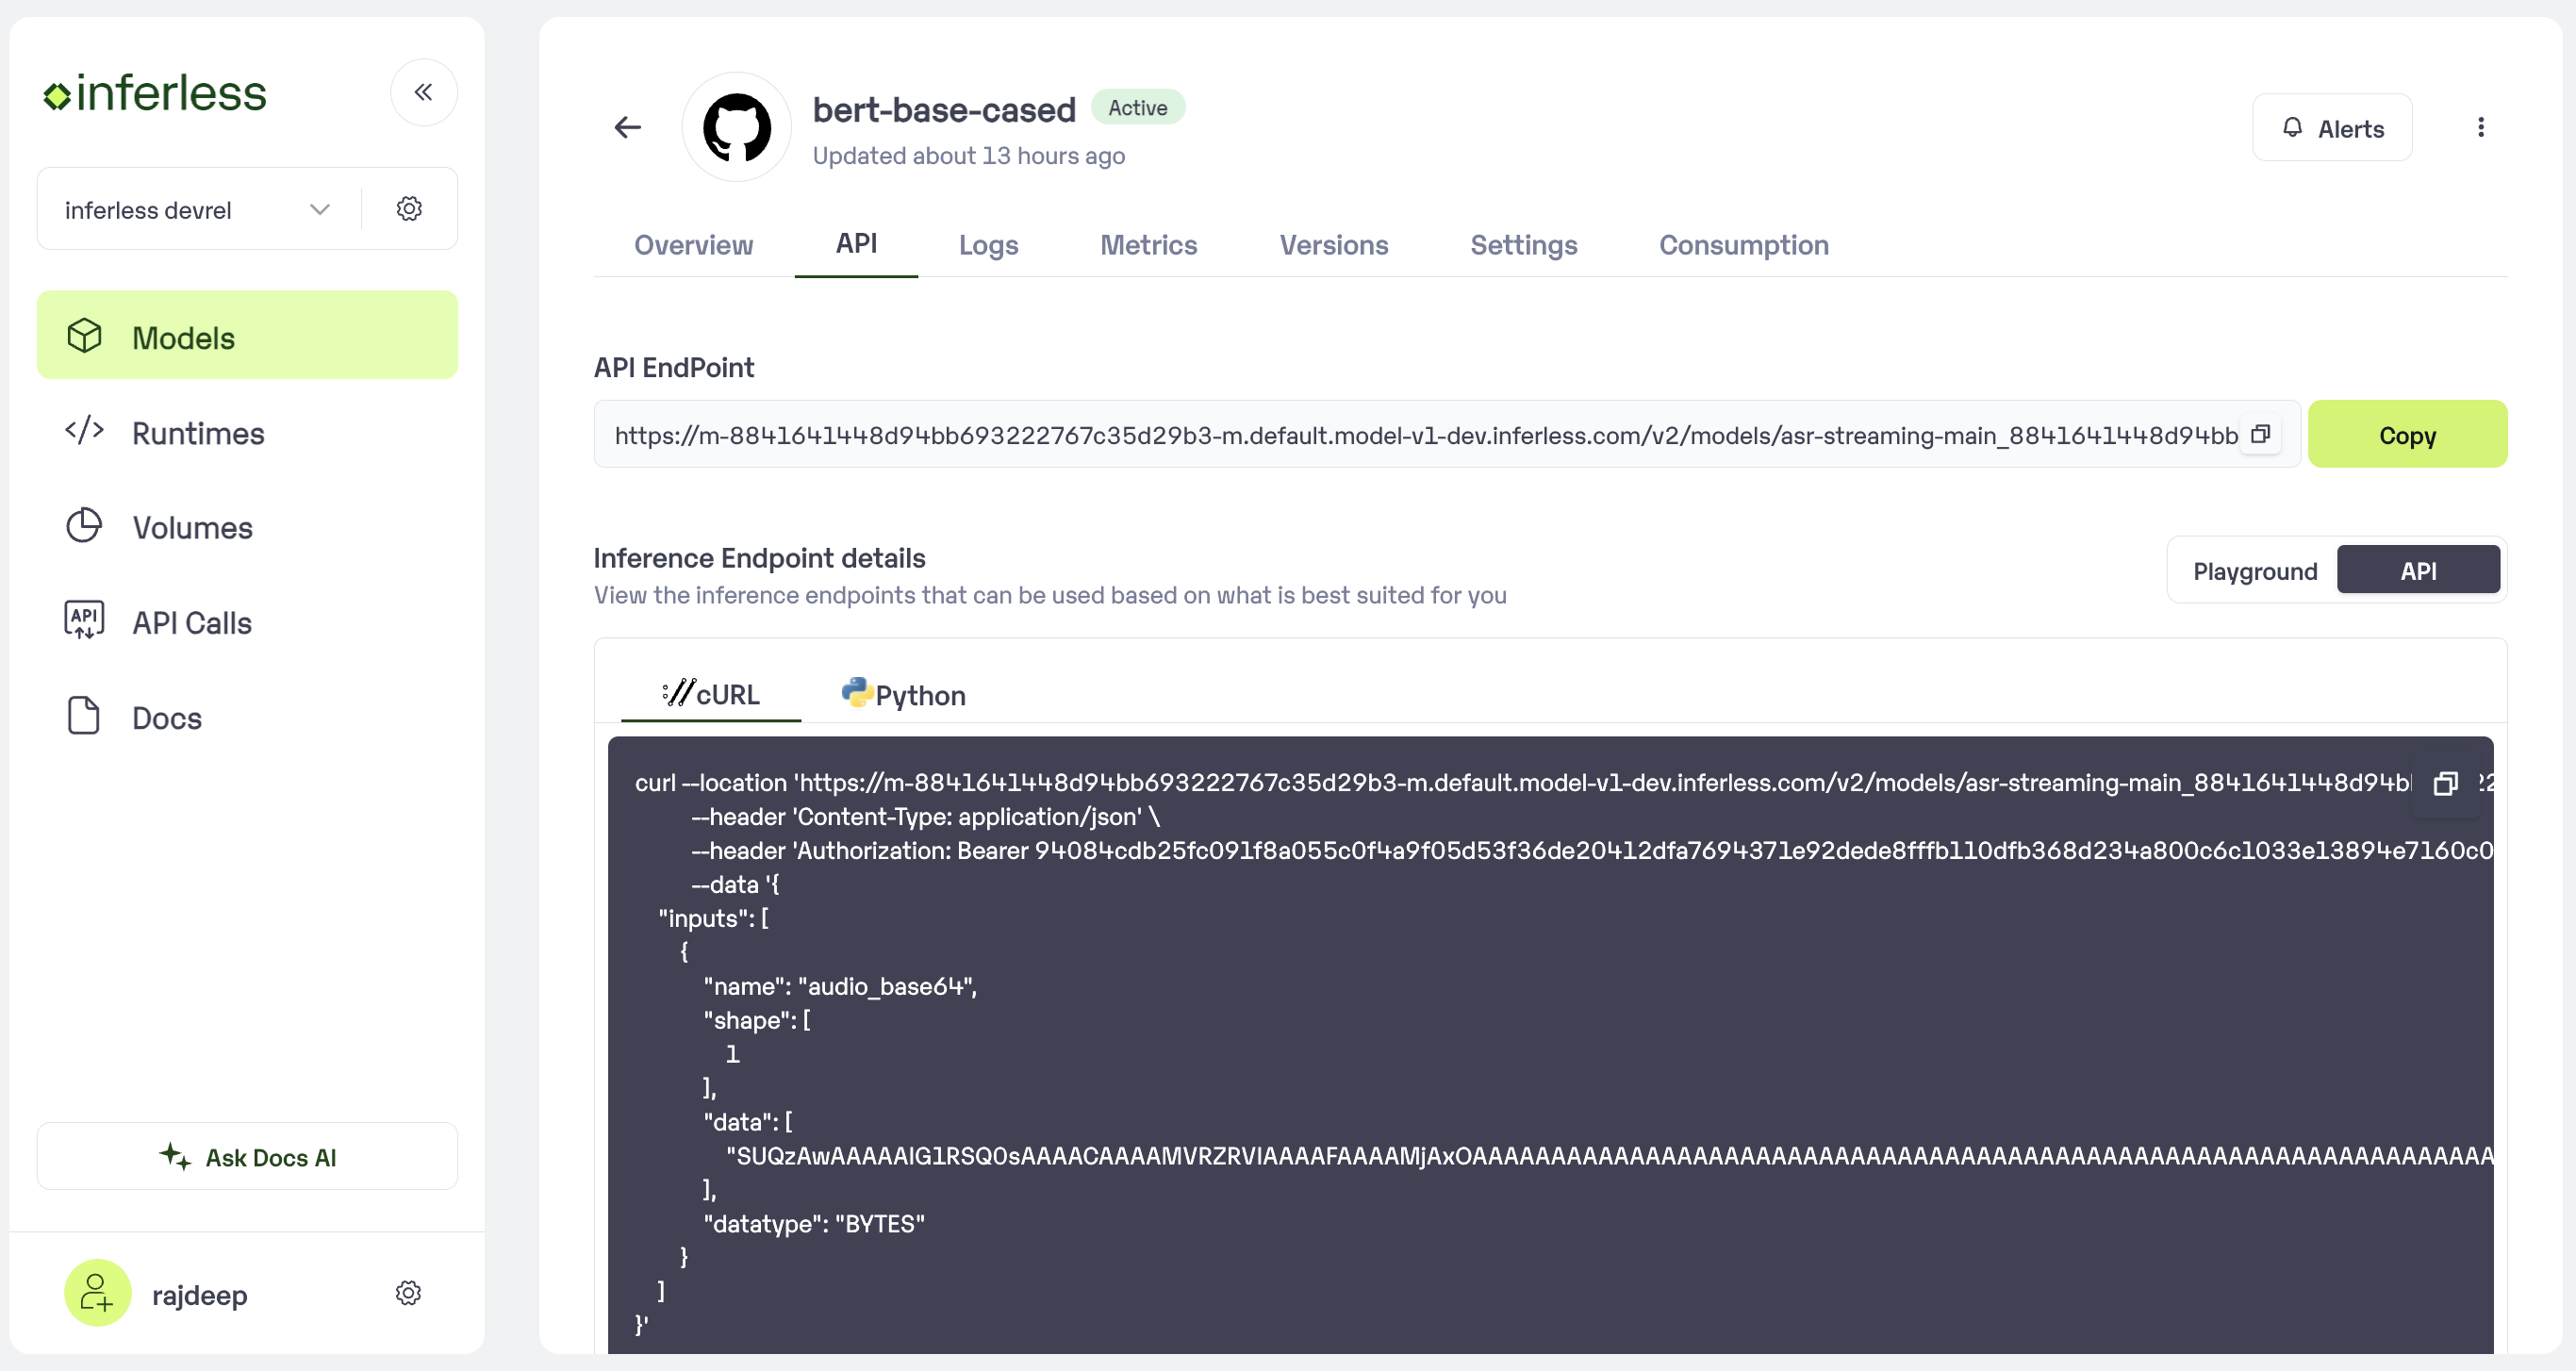
Under the API Tab, you can view the API endpoint details.