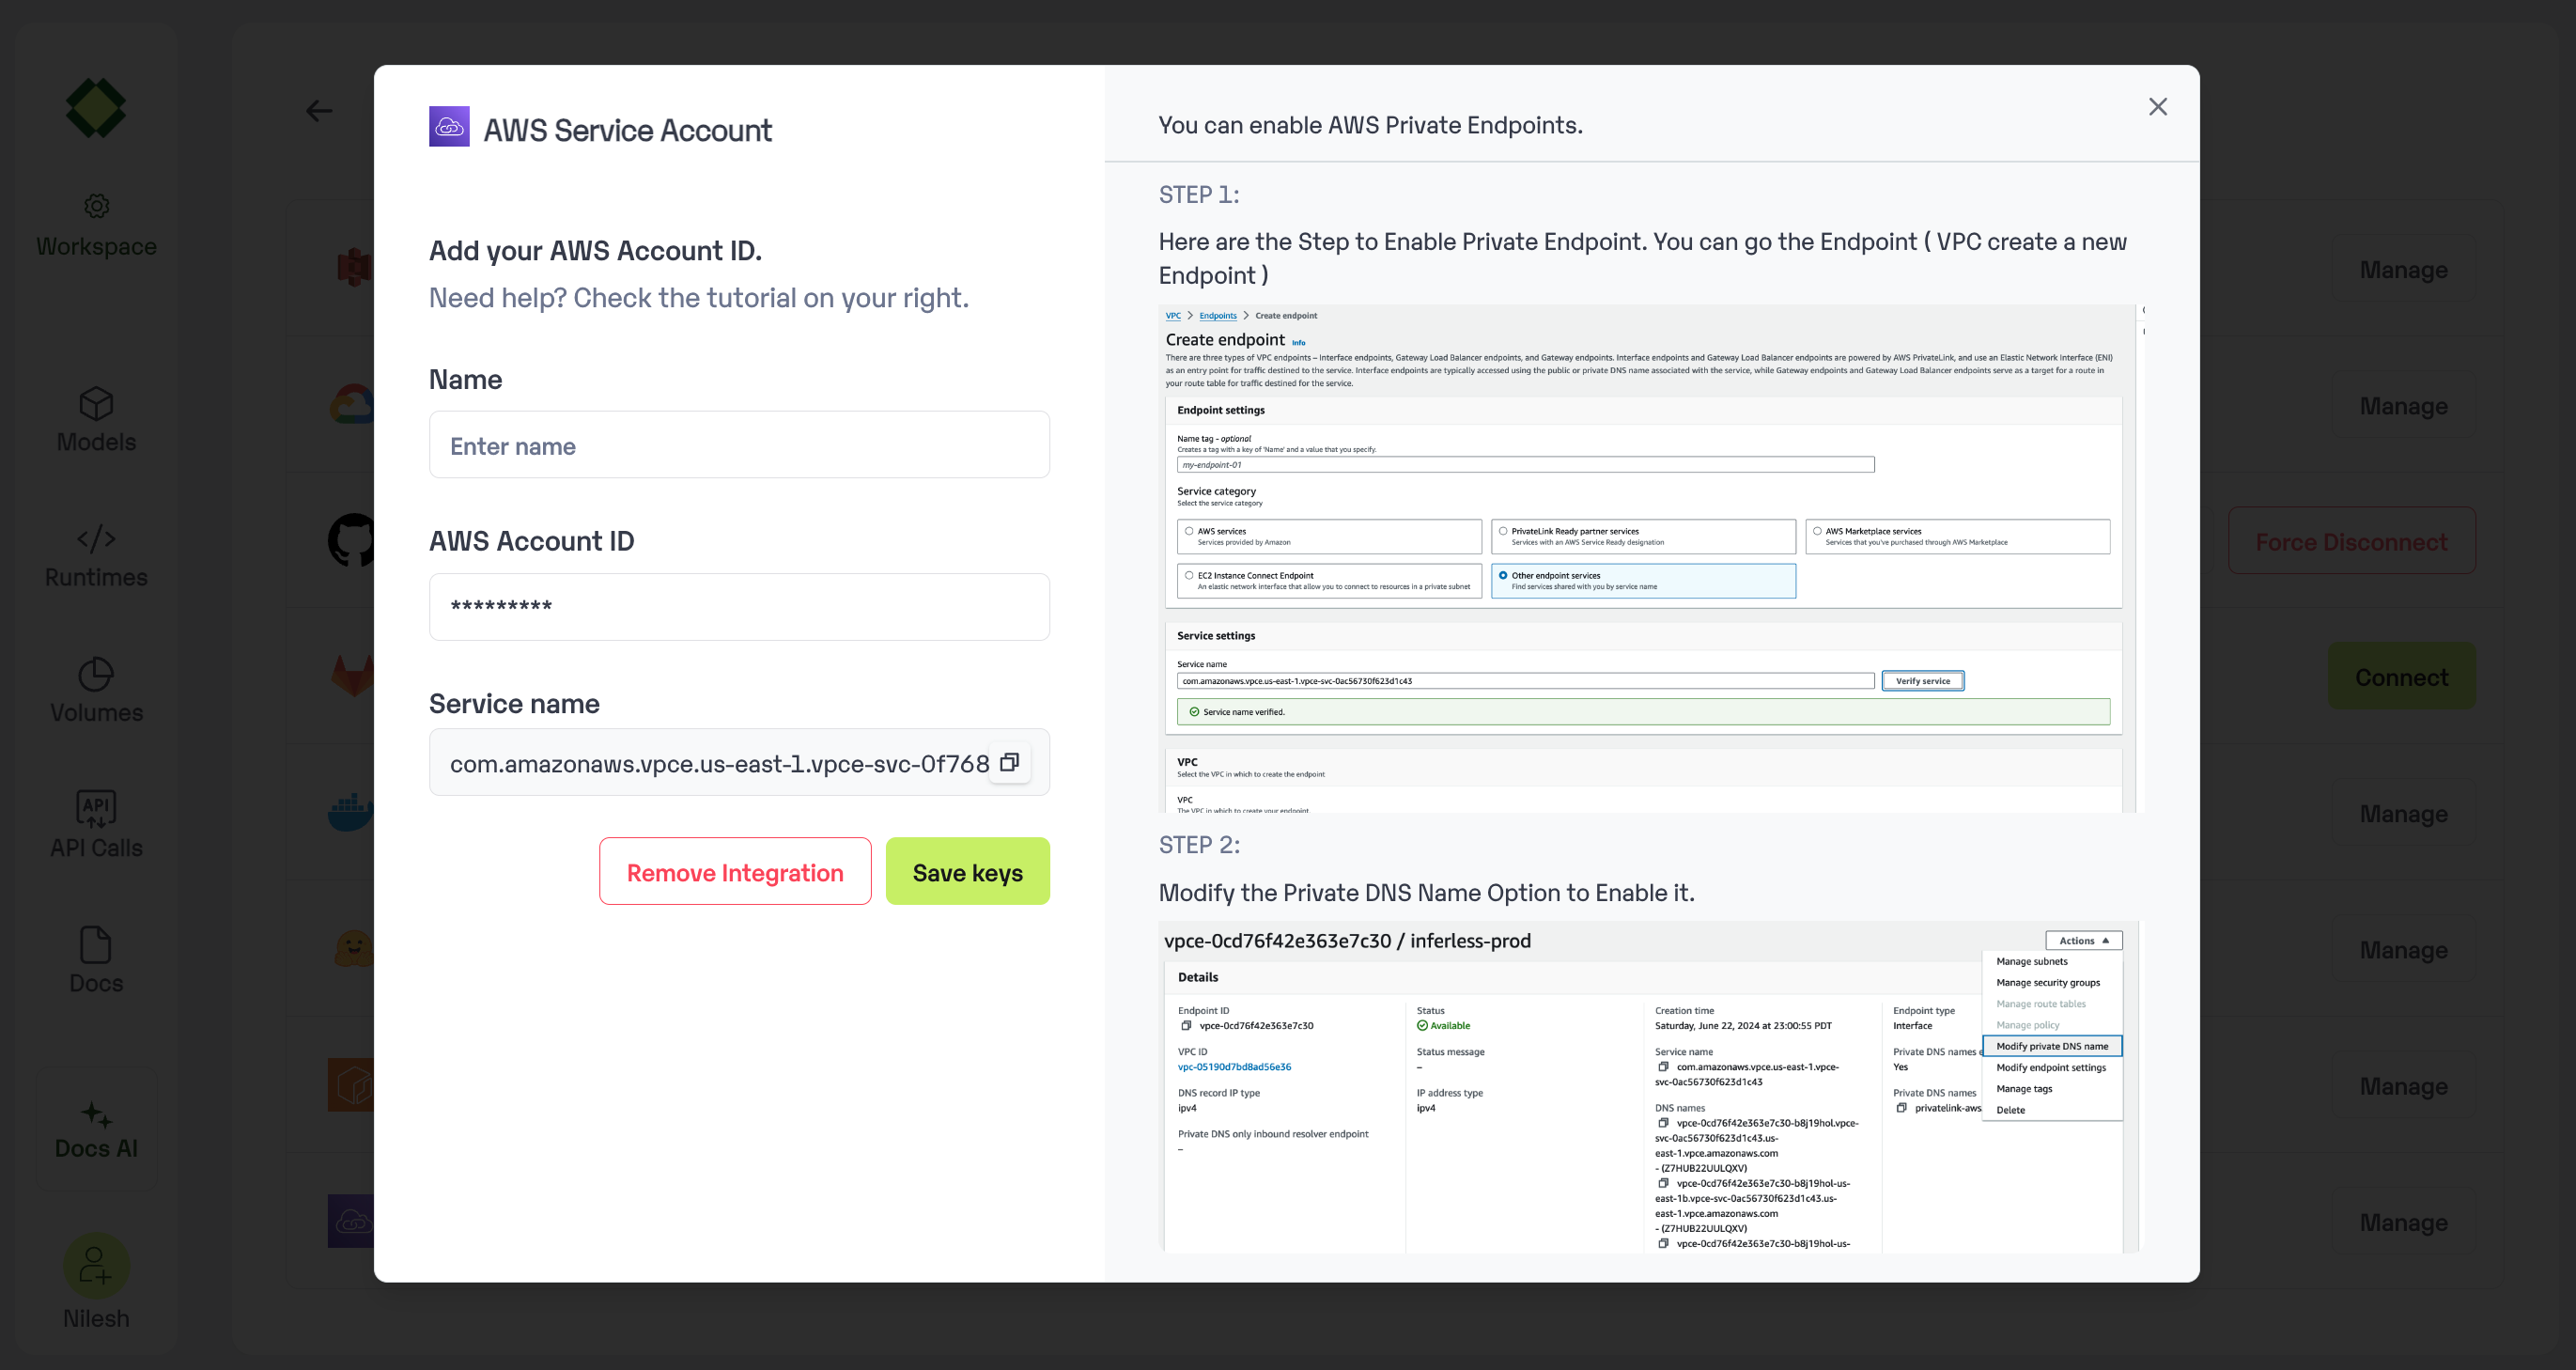
 * Copy the you VPC Endpoint Service name and keep it handly.
### Step 2: Go to your AWS account and open Endpoints - VPC feature .
* Click on your `** Create endpoint **`
* In Service category select `"Other endpoint services"?`
* Paste the VPC Endpoint Service name that you copied from Inferless and click on Verify Service.
* Copy the you VPC Endpoint Service name and keep it handly.
### Step 2: Go to your AWS account and open Endpoints - VPC feature .
* Click on your `** Create endpoint **`
* In Service category select `"Other endpoint services"?`
* Paste the VPC Endpoint Service name that you copied from Inferless and click on Verify Service.
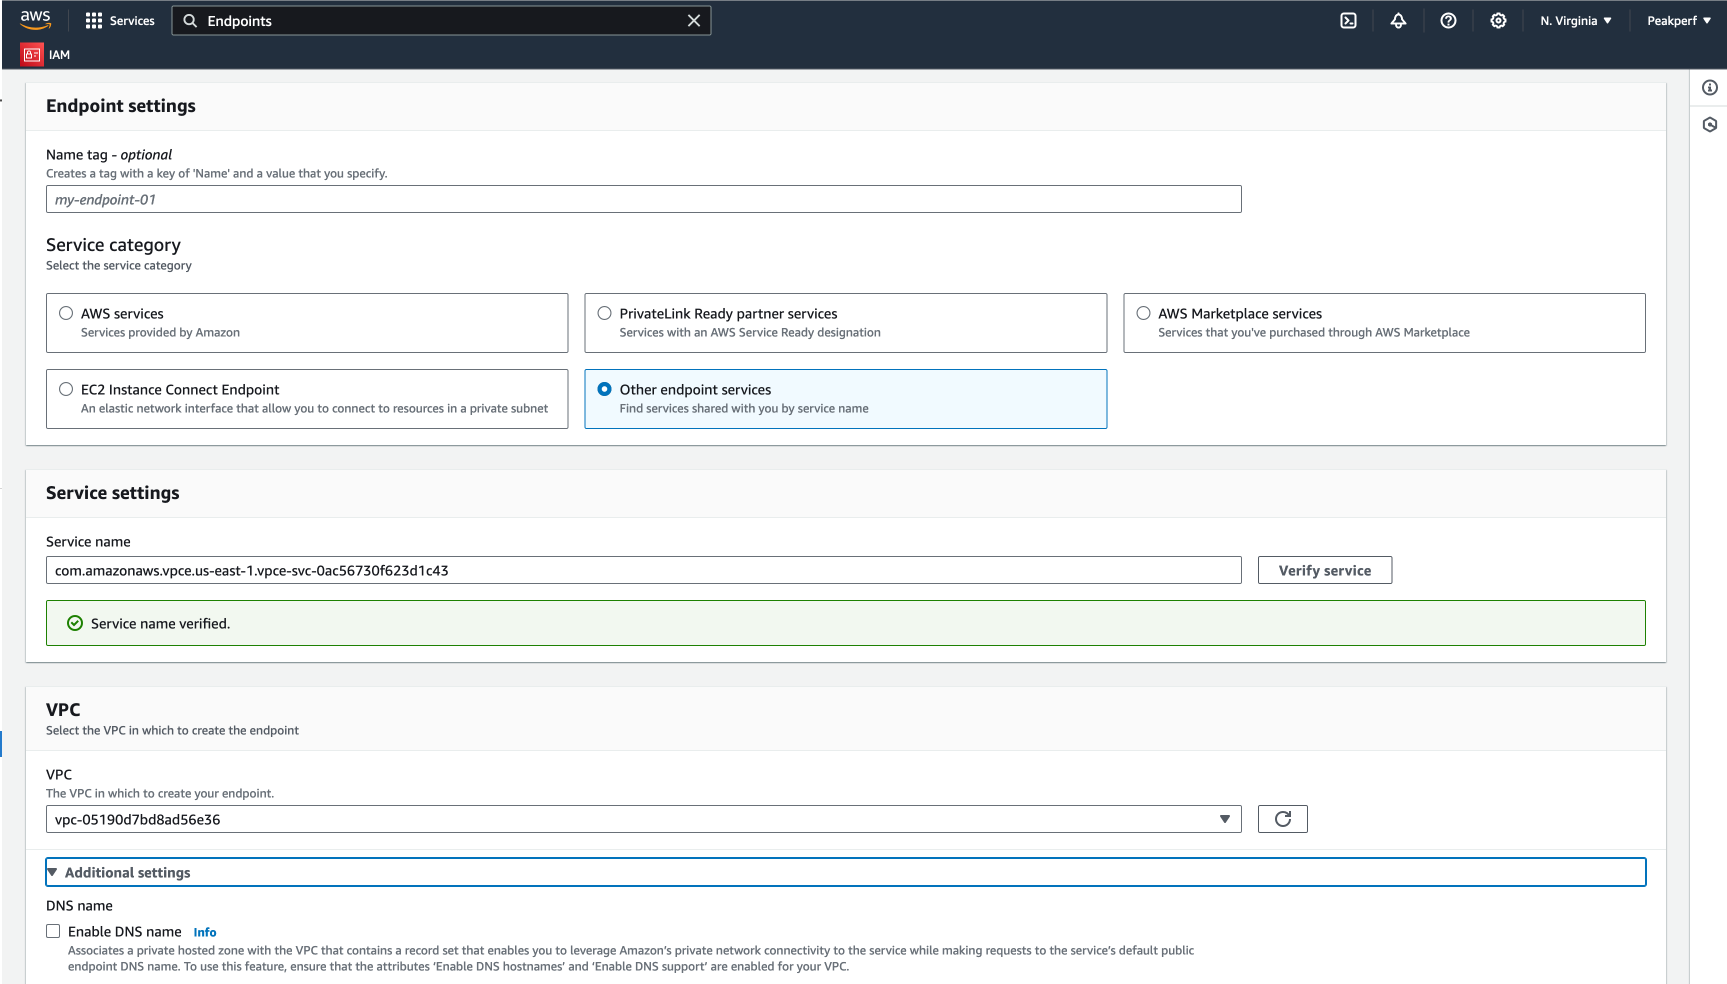 * Select the VPC that you want to connect to Inferless and Modify the Additional Settings as per your requirements.
* In DNS name section click on "Enable DNS name" and click on Next.
* Select the SubNet that you want to connect to Inferless and click on Next.
* Select the Security group that you want to attach to the endpoint and click on Next. ( Make sure you have 80 and 443 ports open in the security group)
* Click on Create Endpoint.
### Step 3: Go to the Model details
* Click on your `** API **` Tab.
* You will see a checkbox to enable Private Endpoint.
* Select the VPC that you want to connect to Inferless and Modify the Additional Settings as per your requirements.
* In DNS name section click on "Enable DNS name" and click on Next.
* Select the SubNet that you want to connect to Inferless and click on Next.
* Select the Security group that you want to attach to the endpoint and click on Next. ( Make sure you have 80 and 443 ports open in the security group)
* Click on Create Endpoint.
### Step 3: Go to the Model details
* Click on your `** API **` Tab.
* You will see a checkbox to enable Private Endpoint.
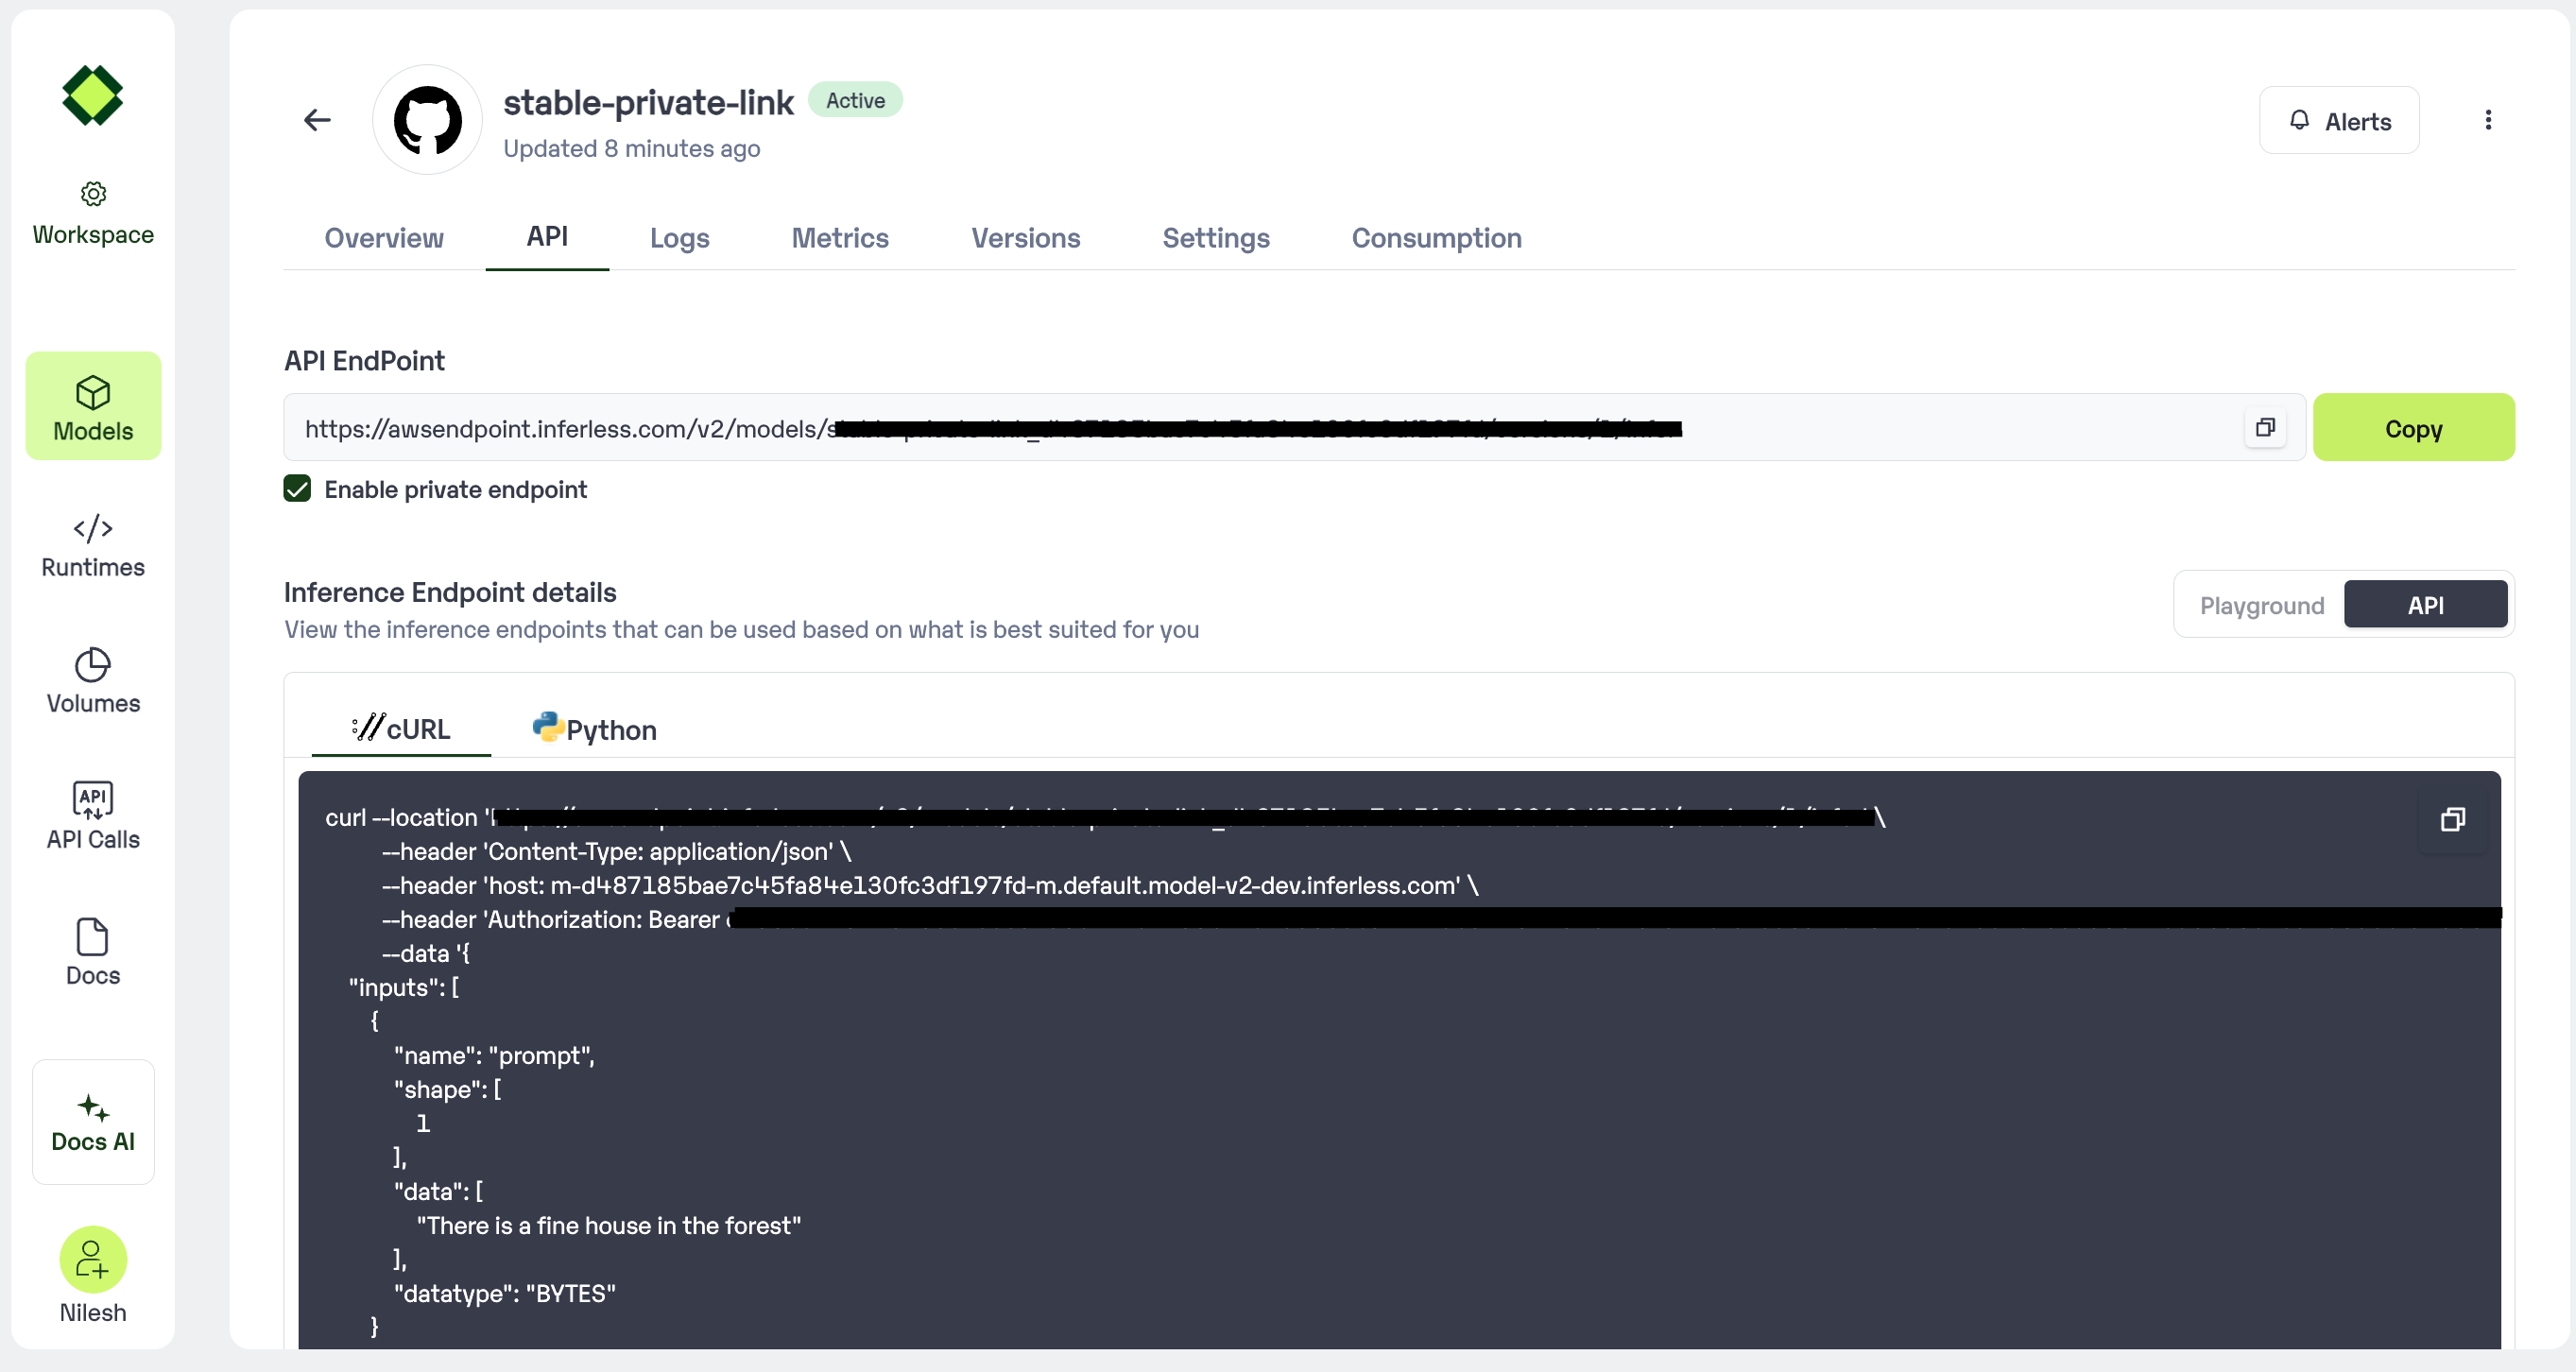 * After clicking on it, the API will change and you will no longer be able to access it from Public internet
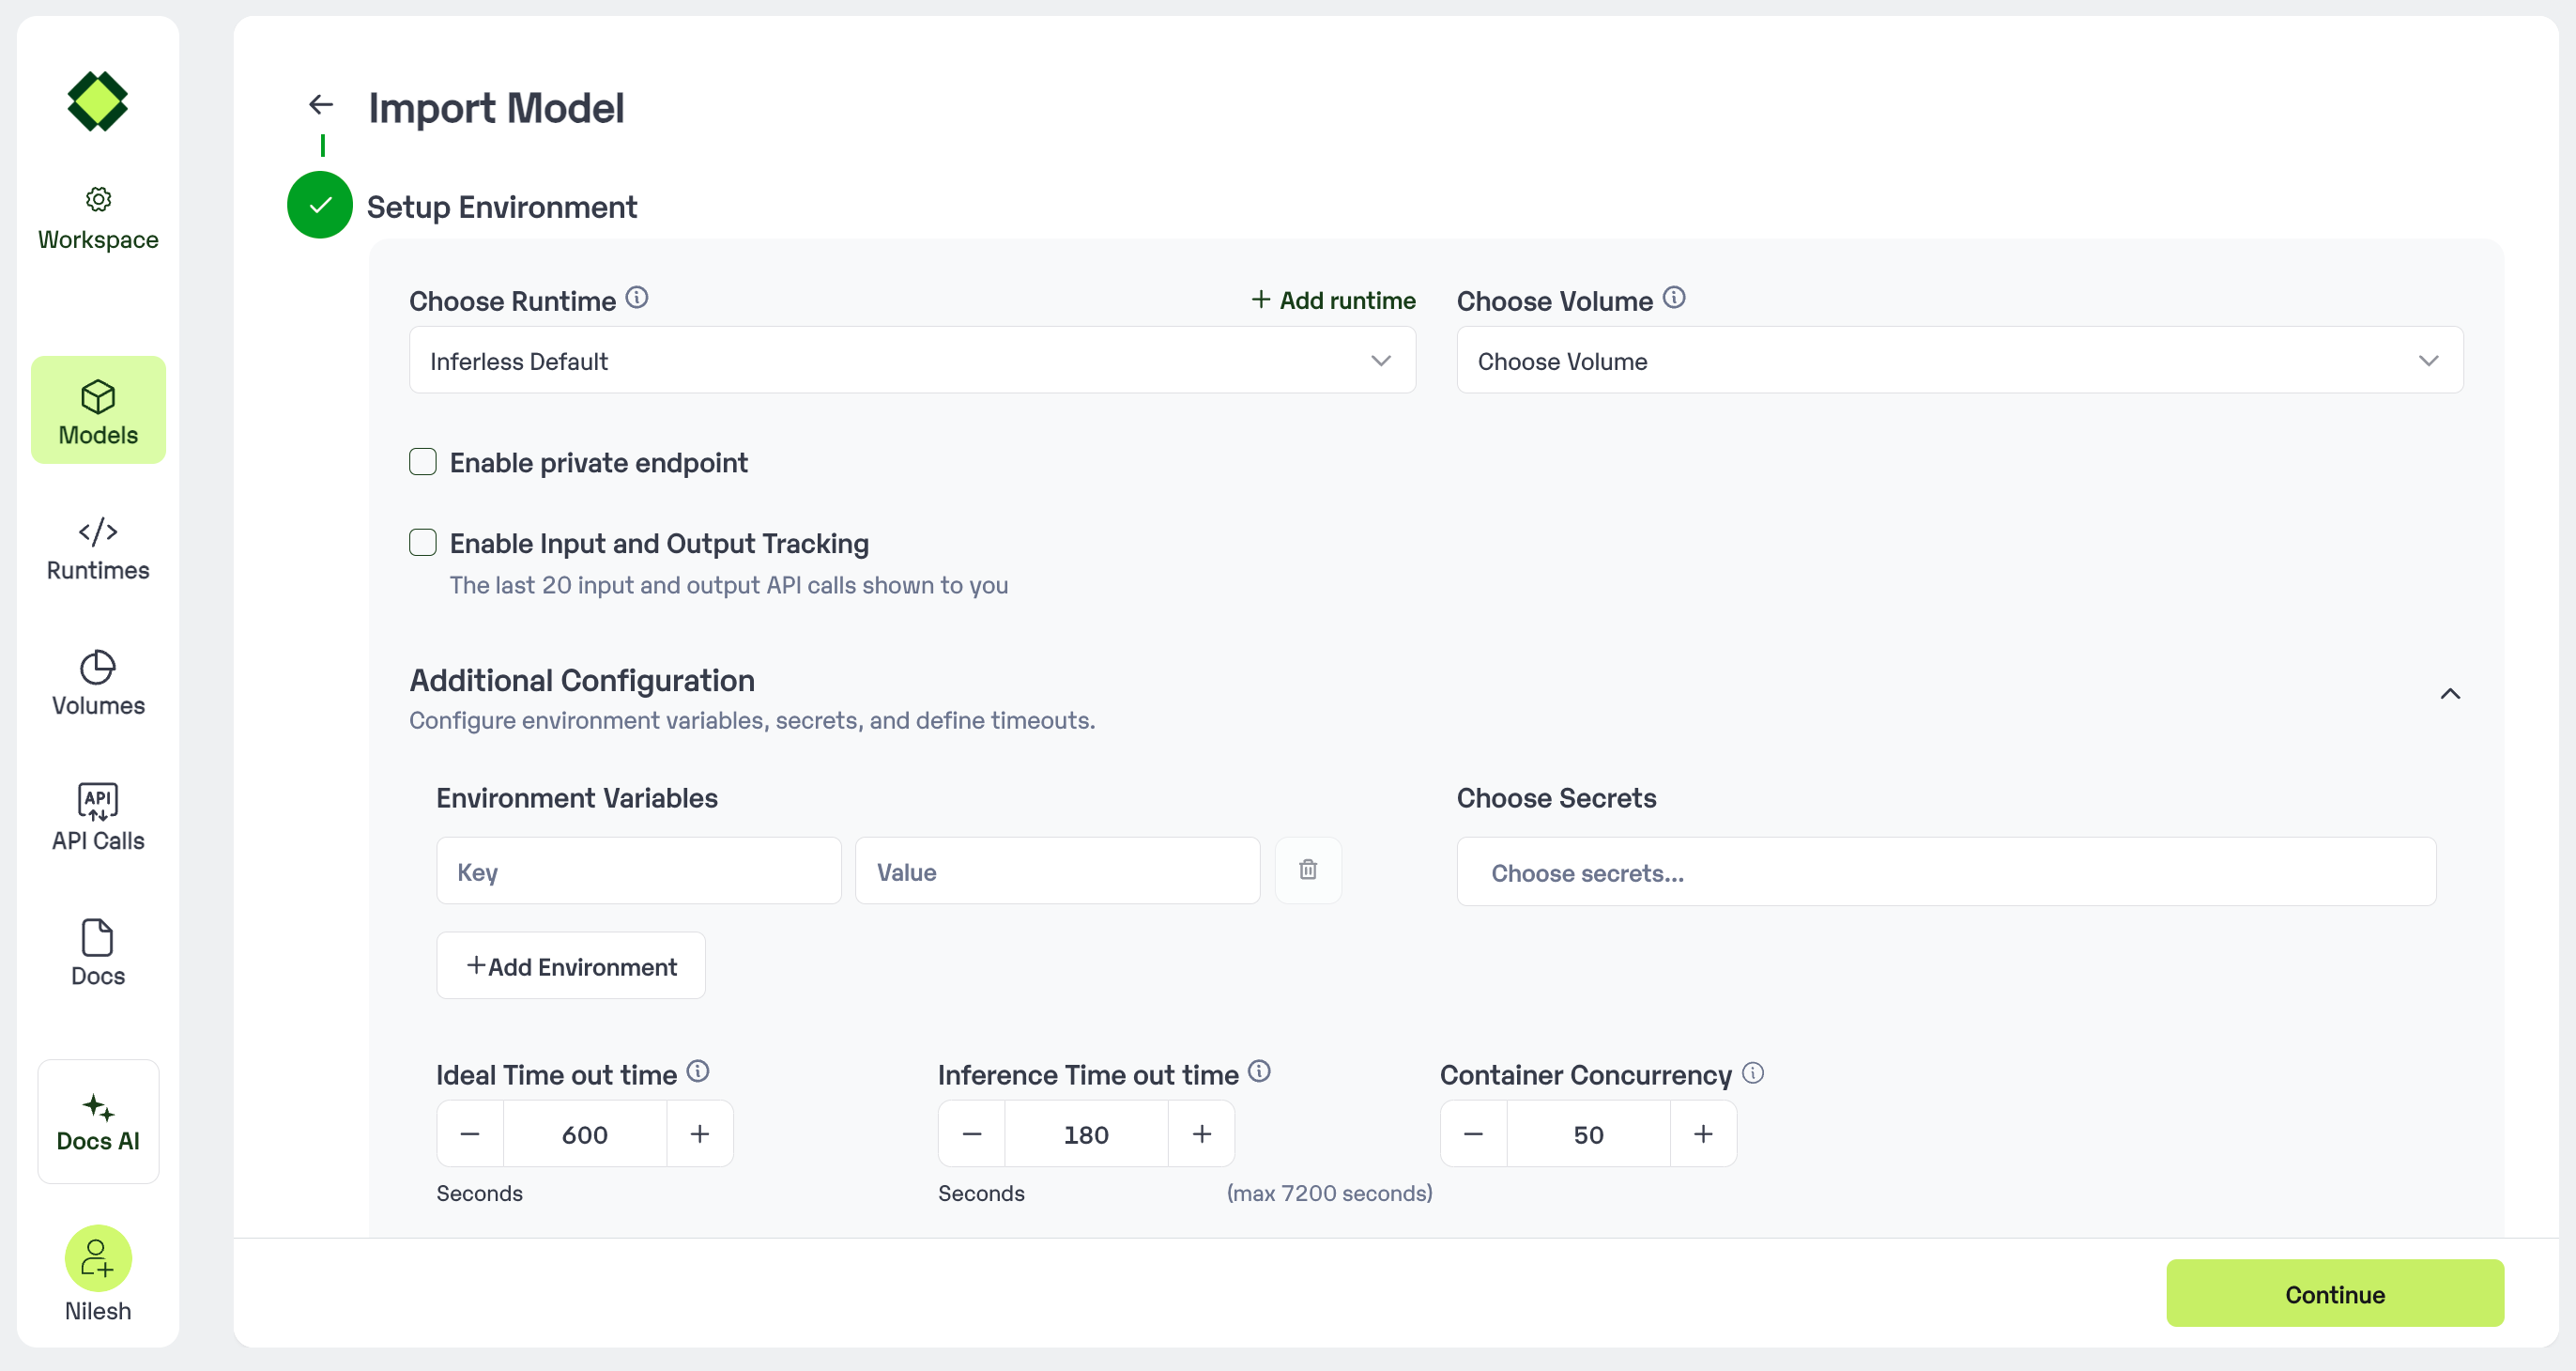
### During Model Import
You can also enable this during model import in Step 4 of the model import process.
* After clicking on it, the API will change and you will no longer be able to access it from Public internet
### During Model Import
You can also enable this during model import in Step 4 of the model import process.
 # Build Logs
Source: https://docs.inferless.com/api-reference/debugging-model/build-logs
## How to view build logs?
**Pre Deployment: While Importing a Model**
* `Go to Workspace -> In Progress/Failed -> Choose Model`
# Build Logs
Source: https://docs.inferless.com/api-reference/debugging-model/build-logs
## How to view build logs?
**Pre Deployment: While Importing a Model**
* `Go to Workspace -> In Progress/Failed -> Choose Model`
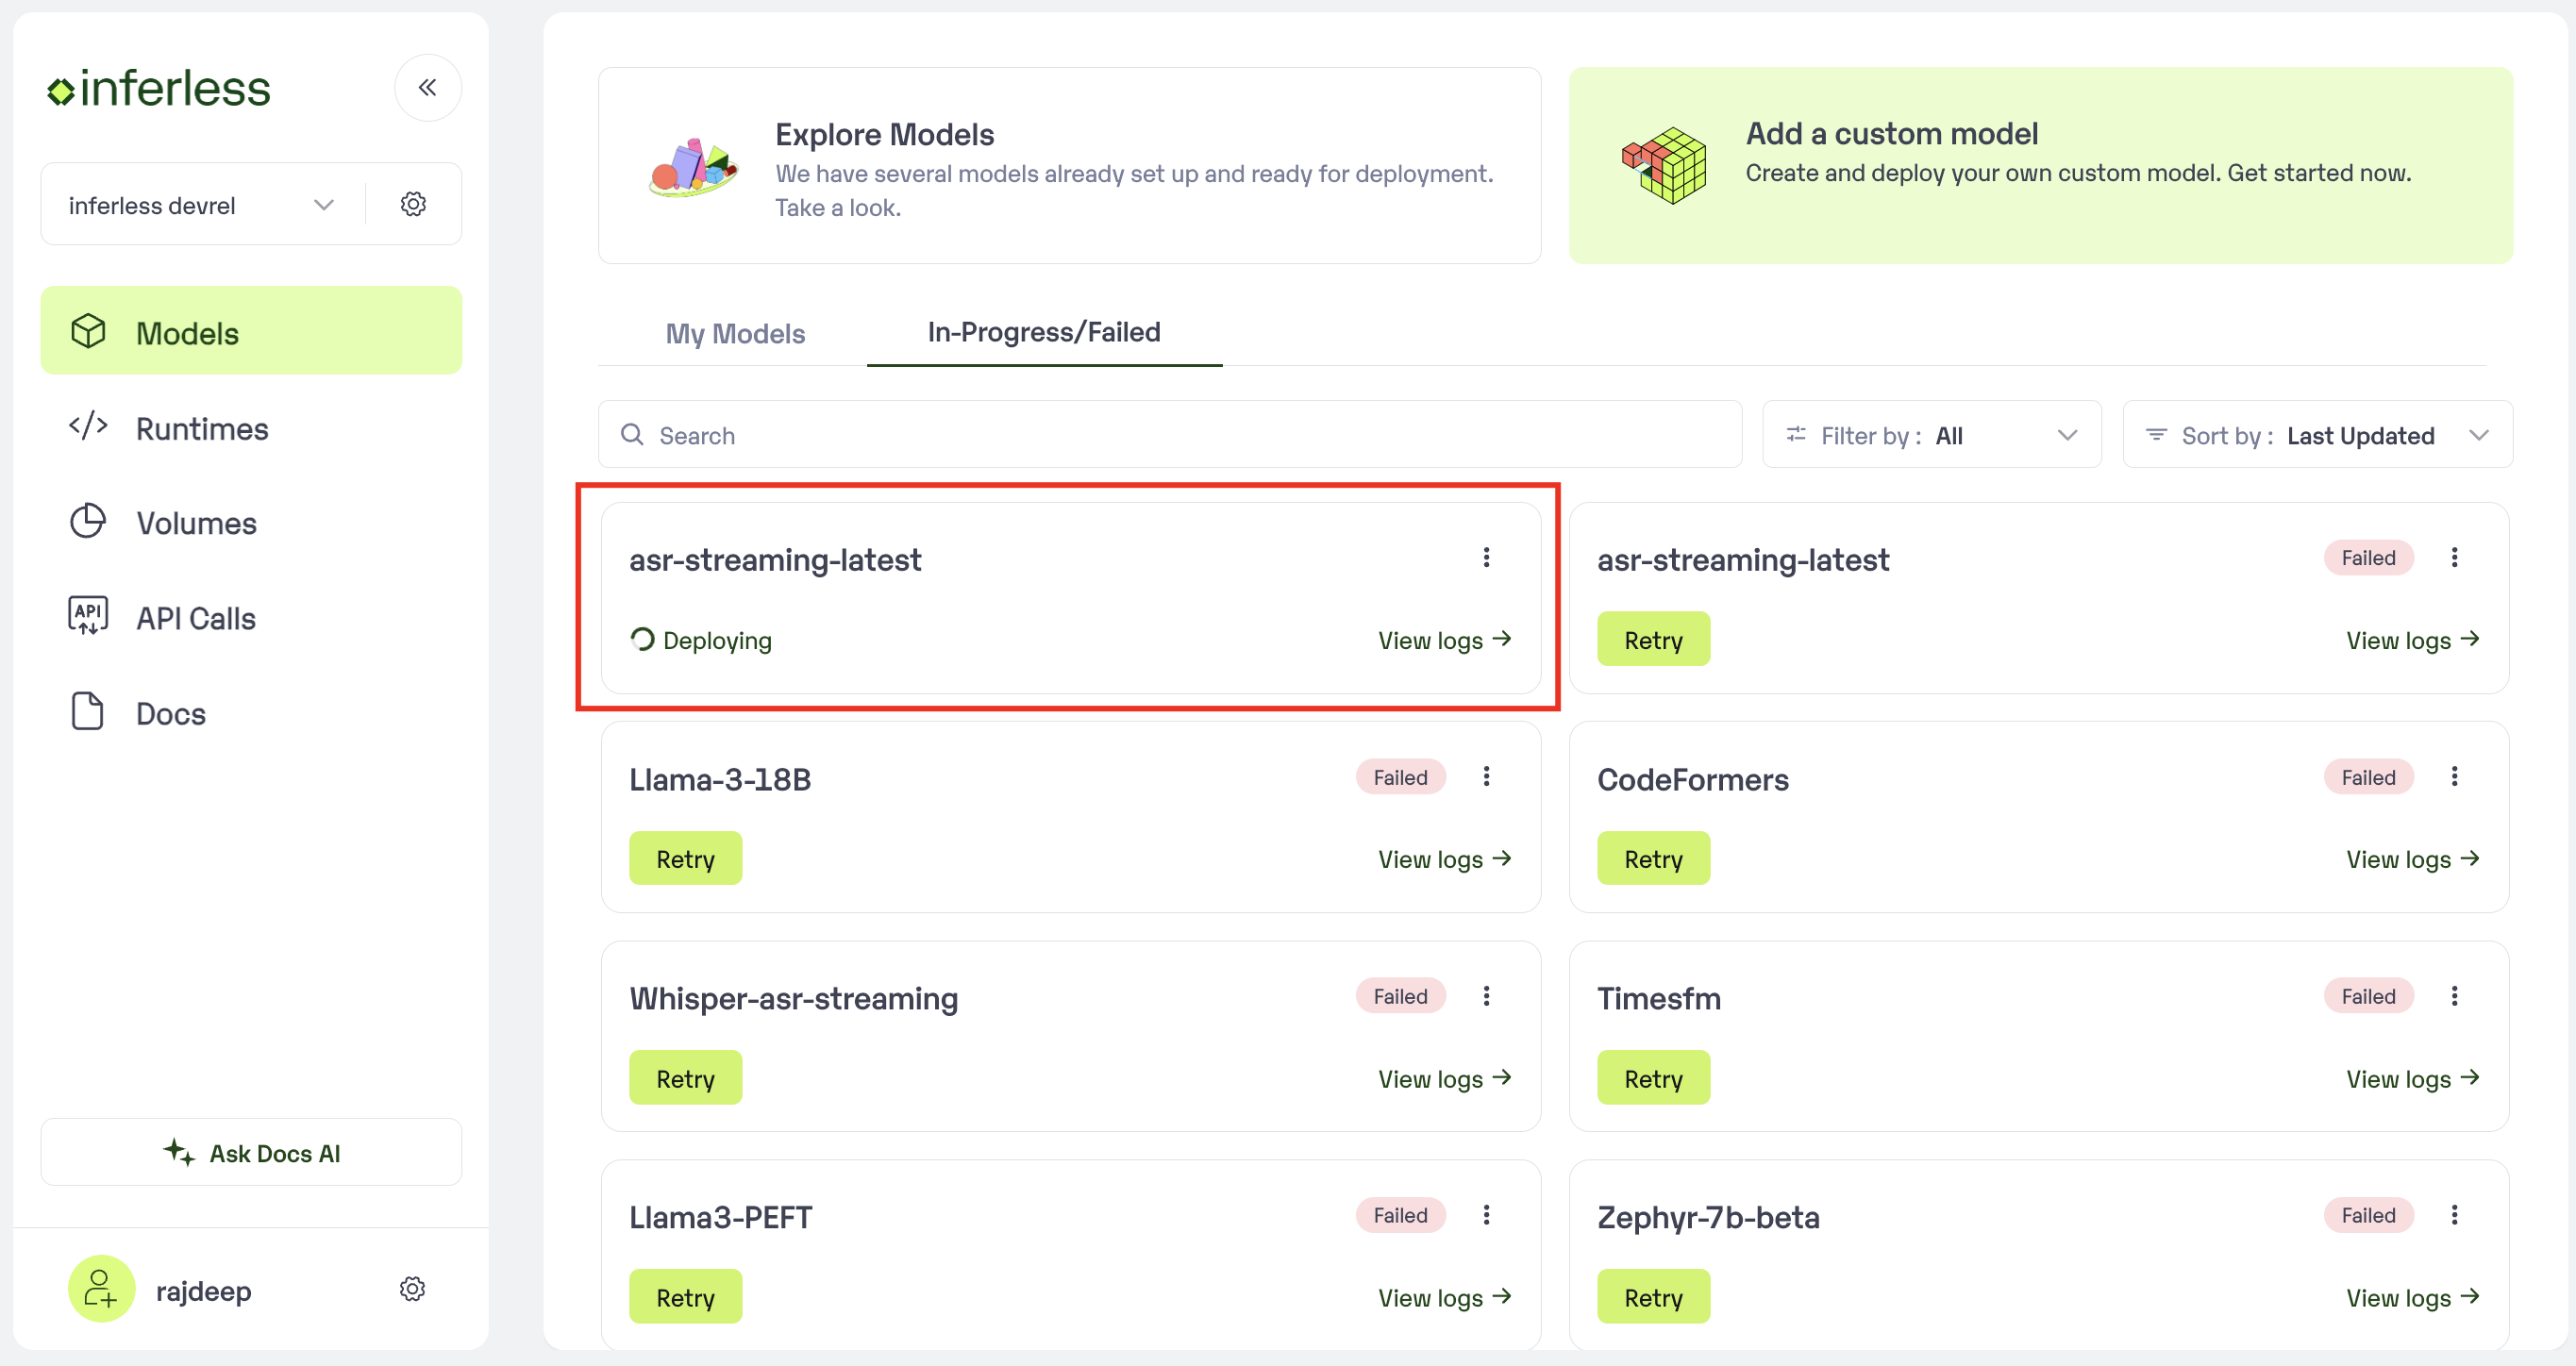 Click on the model that you would like to see the logs for
* A Pop-Up will open with the logs that are being generated.
Click on the model that you would like to see the logs for
* A Pop-Up will open with the logs that are being generated.
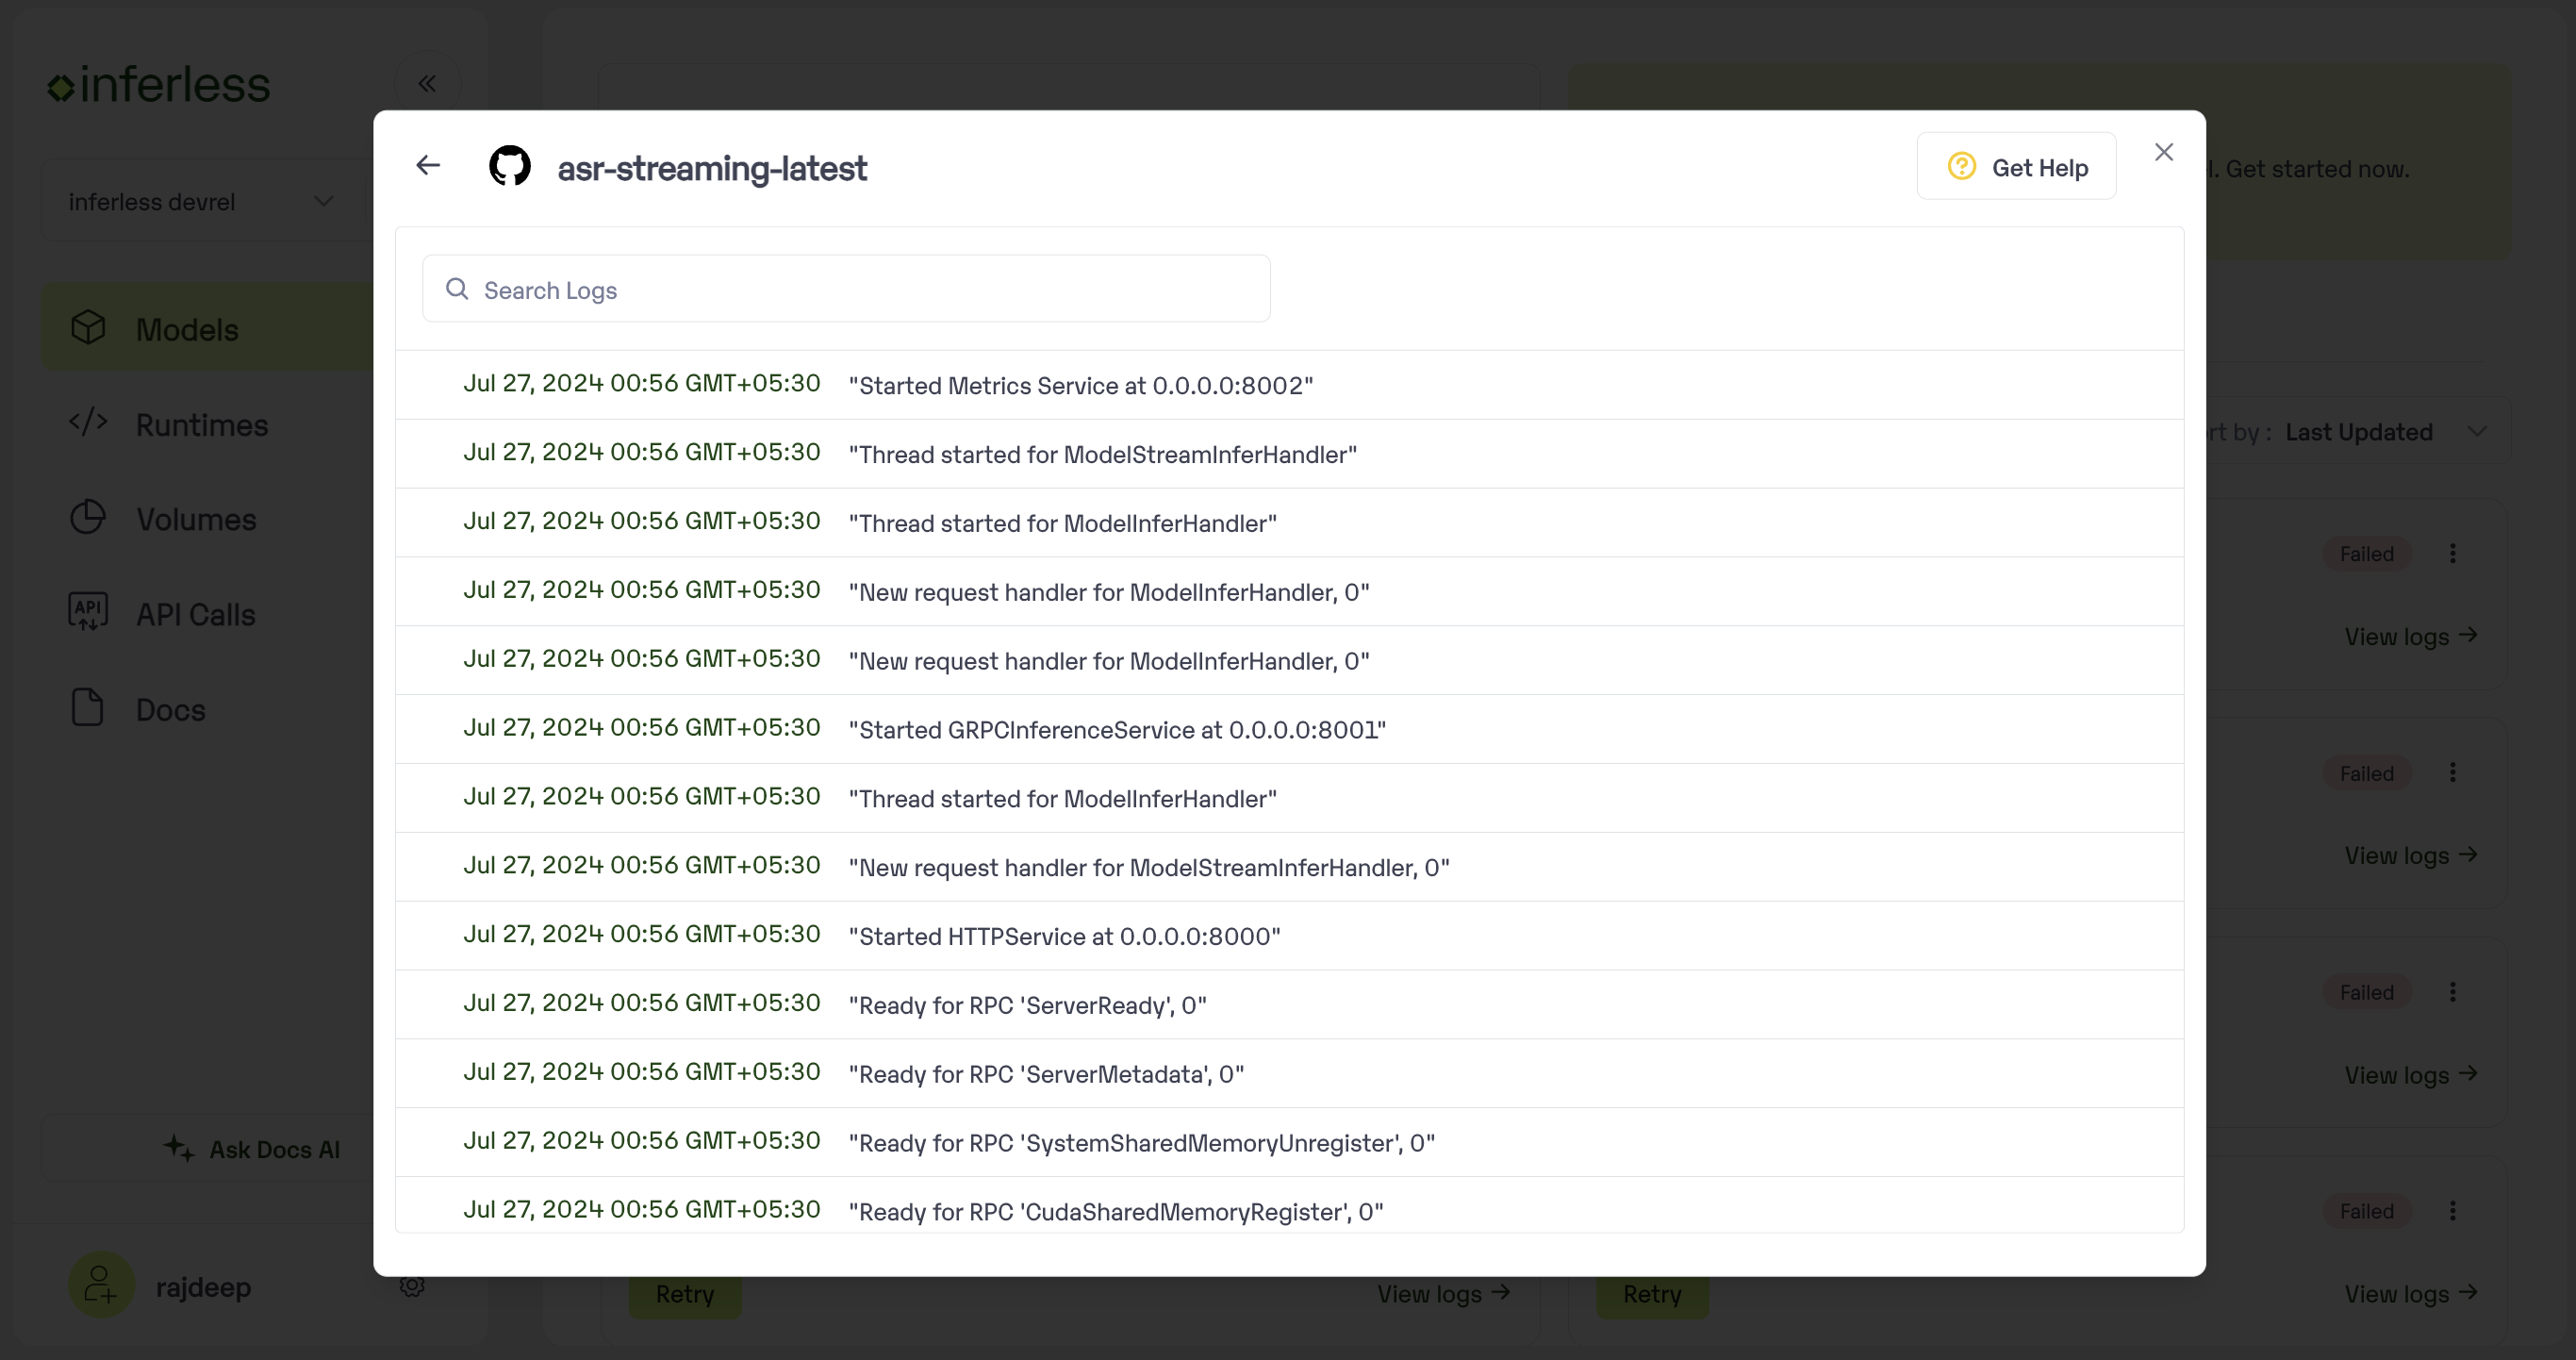 View the build logs. Click on referesh
* You can search and debug as per your requirement.The logs will also be available for models that have failed under the same section. You can debug the same.
**Post Deployment : New build via web-hook**
* Go to your `workspace space -> "My Models" -> Logs -> Build Logs`
View the build logs. Click on referesh
* You can search and debug as per your requirement.The logs will also be available for models that have failed under the same section. You can debug the same.
**Post Deployment : New build via web-hook**
* Go to your `workspace space -> "My Models" -> Logs -> Build Logs`
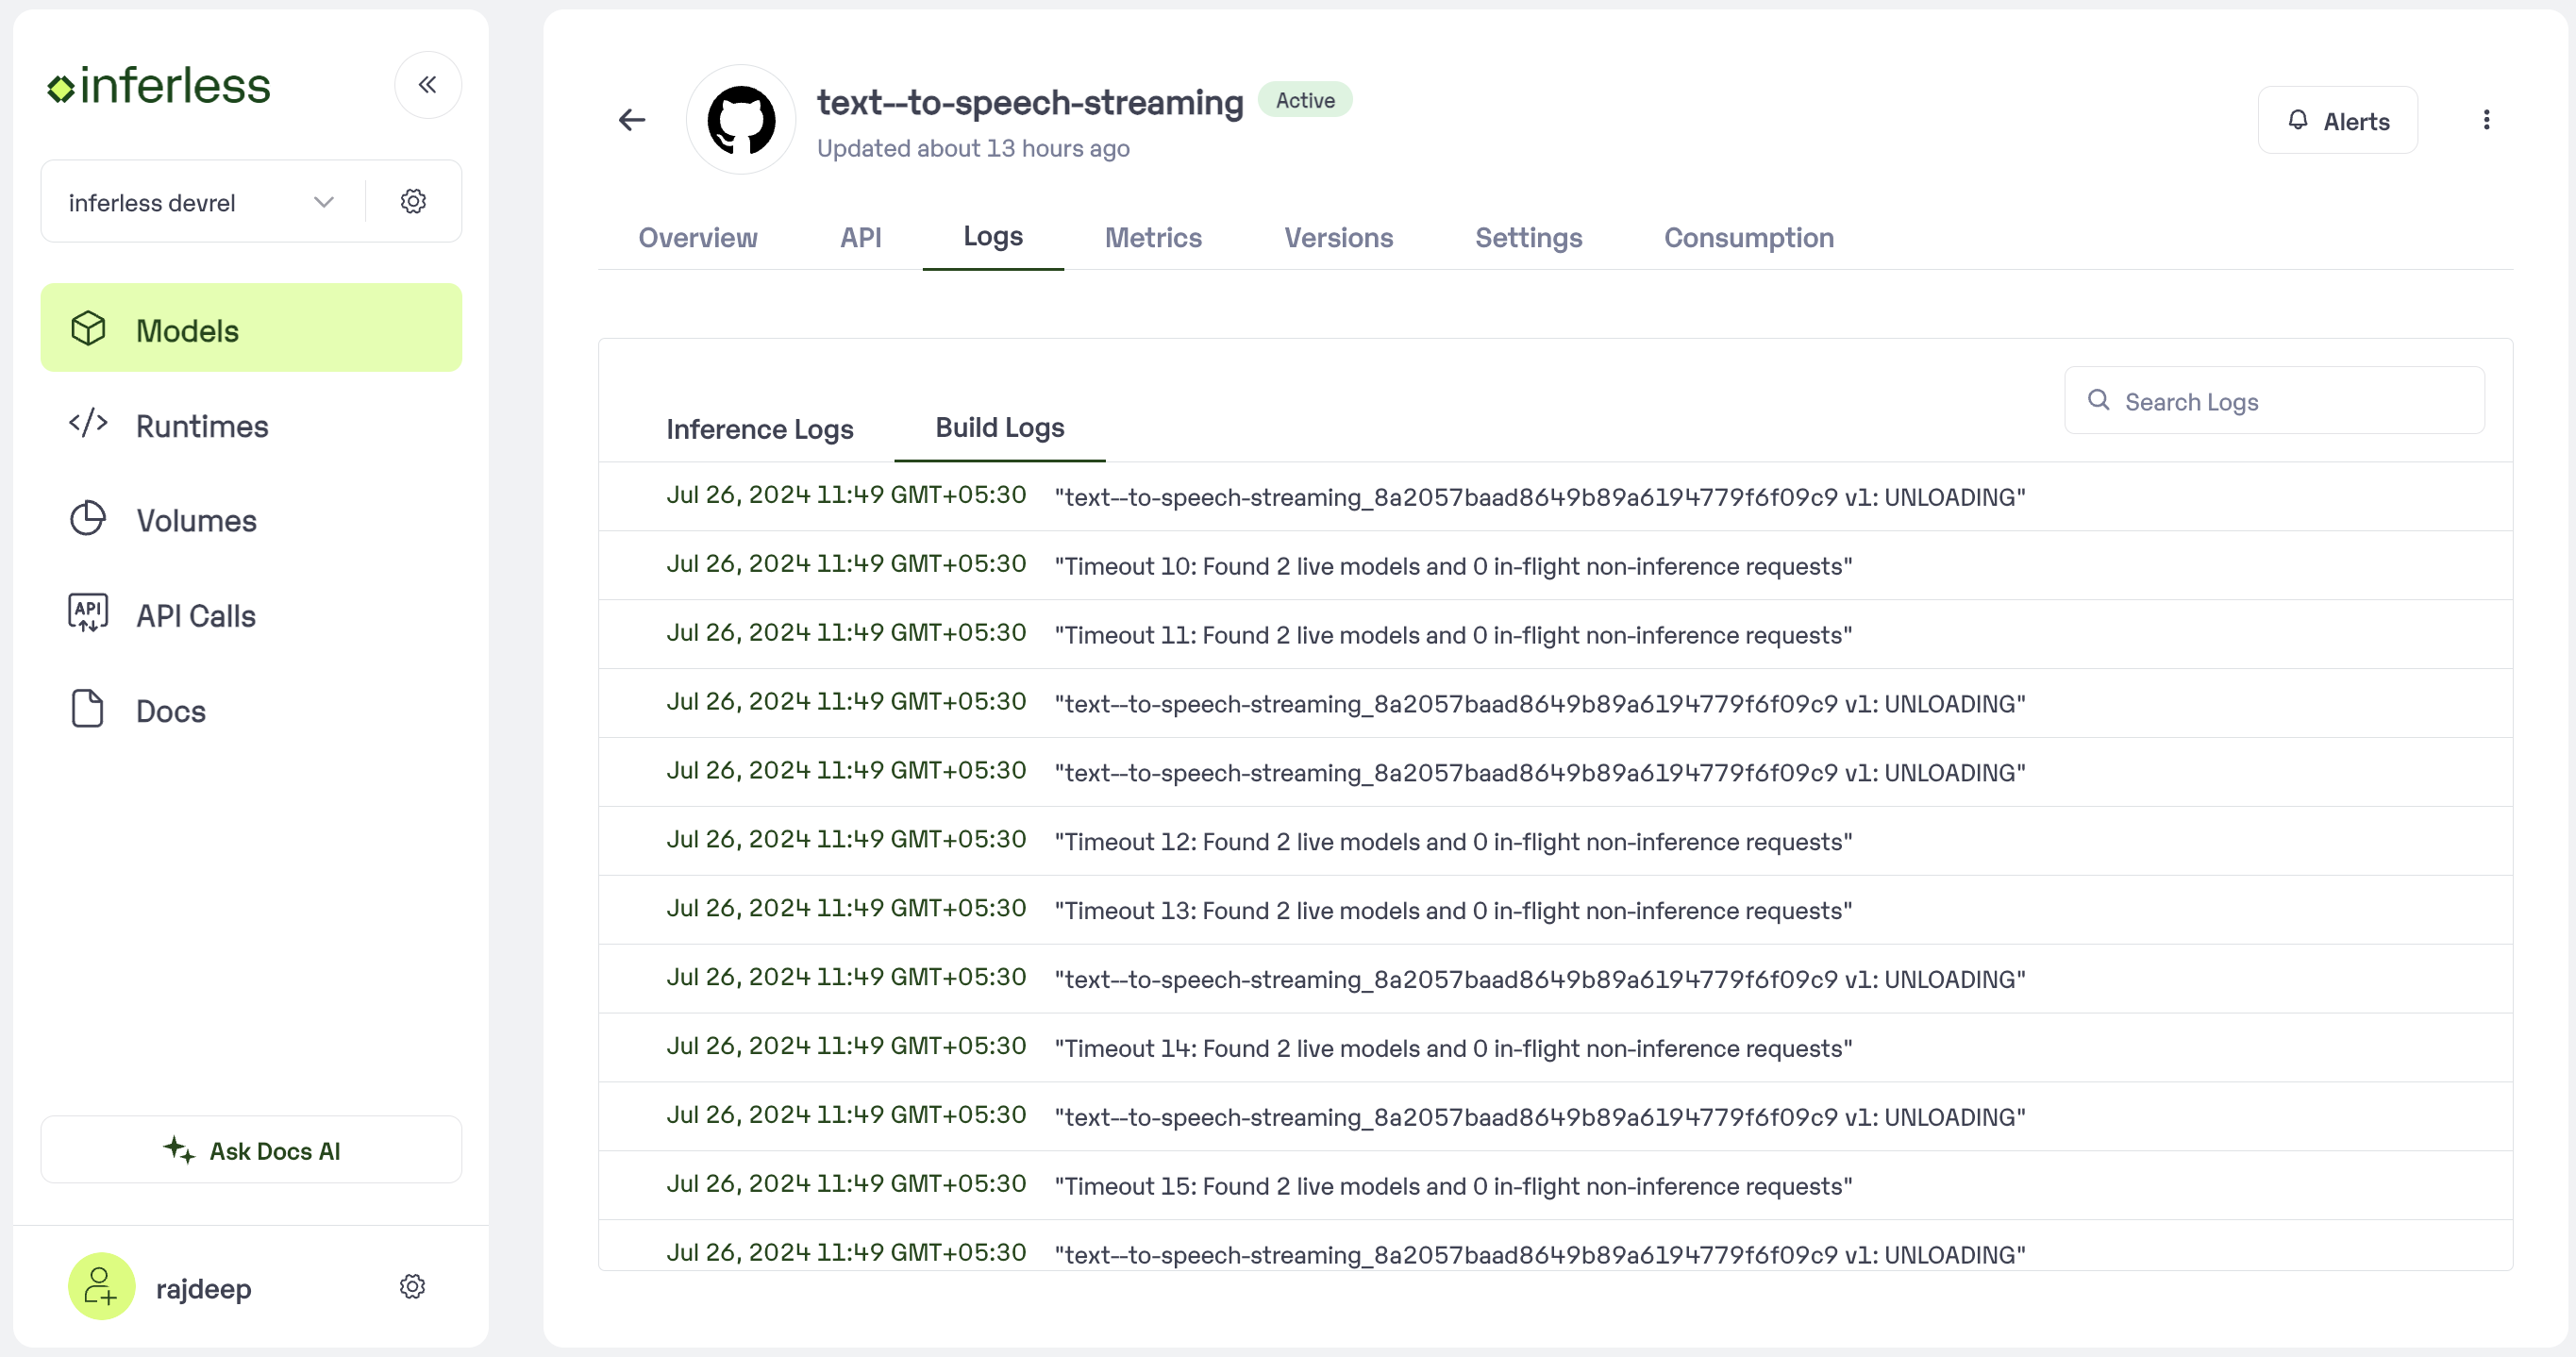 * You can now view the build logs that are generated. The logs would be available only for the last build (Success or failure).
# Call Logs
Source: https://docs.inferless.com/api-reference/debugging-model/call-logs
## How to view API Call logs?
Call logs are generated as and when a model is called.
* Go to `Workspace -> My Models -> Choose Model -> Logs -> Inference Logs`
* You can now view the build logs that are generated. The logs would be available only for the last build (Success or failure).
# Call Logs
Source: https://docs.inferless.com/api-reference/debugging-model/call-logs
## How to view API Call logs?
Call logs are generated as and when a model is called.
* Go to `Workspace -> My Models -> Choose Model -> Logs -> Inference Logs`
 # Debugging your model with Logs
Source: https://docs.inferless.com/api-reference/debugging-model/debugging-your-model-with-logs
In case you would like to debug your model during build, click [here](/api-reference/debugging-model/call-logs)
In case you would like to debug your API Call logs, click [here](/api-reference/debugging-model/build-logs)
# Configuring the Model Settings
Source: https://docs.inferless.com/api-reference/model-endpoint/configuring-the-model-settings
In Inferless, configuring the Scale Down, Inference Timeouts, and Container Concurrency settings is essential for optimizing performance and cost. Here’s an overview of what each setting does and how you can adjust them:
# Debugging your model with Logs
Source: https://docs.inferless.com/api-reference/debugging-model/debugging-your-model-with-logs
In case you would like to debug your model during build, click [here](/api-reference/debugging-model/call-logs)
In case you would like to debug your API Call logs, click [here](/api-reference/debugging-model/build-logs)
# Configuring the Model Settings
Source: https://docs.inferless.com/api-reference/model-endpoint/configuring-the-model-settings
In Inferless, configuring the Scale Down, Inference Timeouts, and Container Concurrency settings is essential for optimizing performance and cost. Here’s an overview of what each setting does and how you can adjust them:
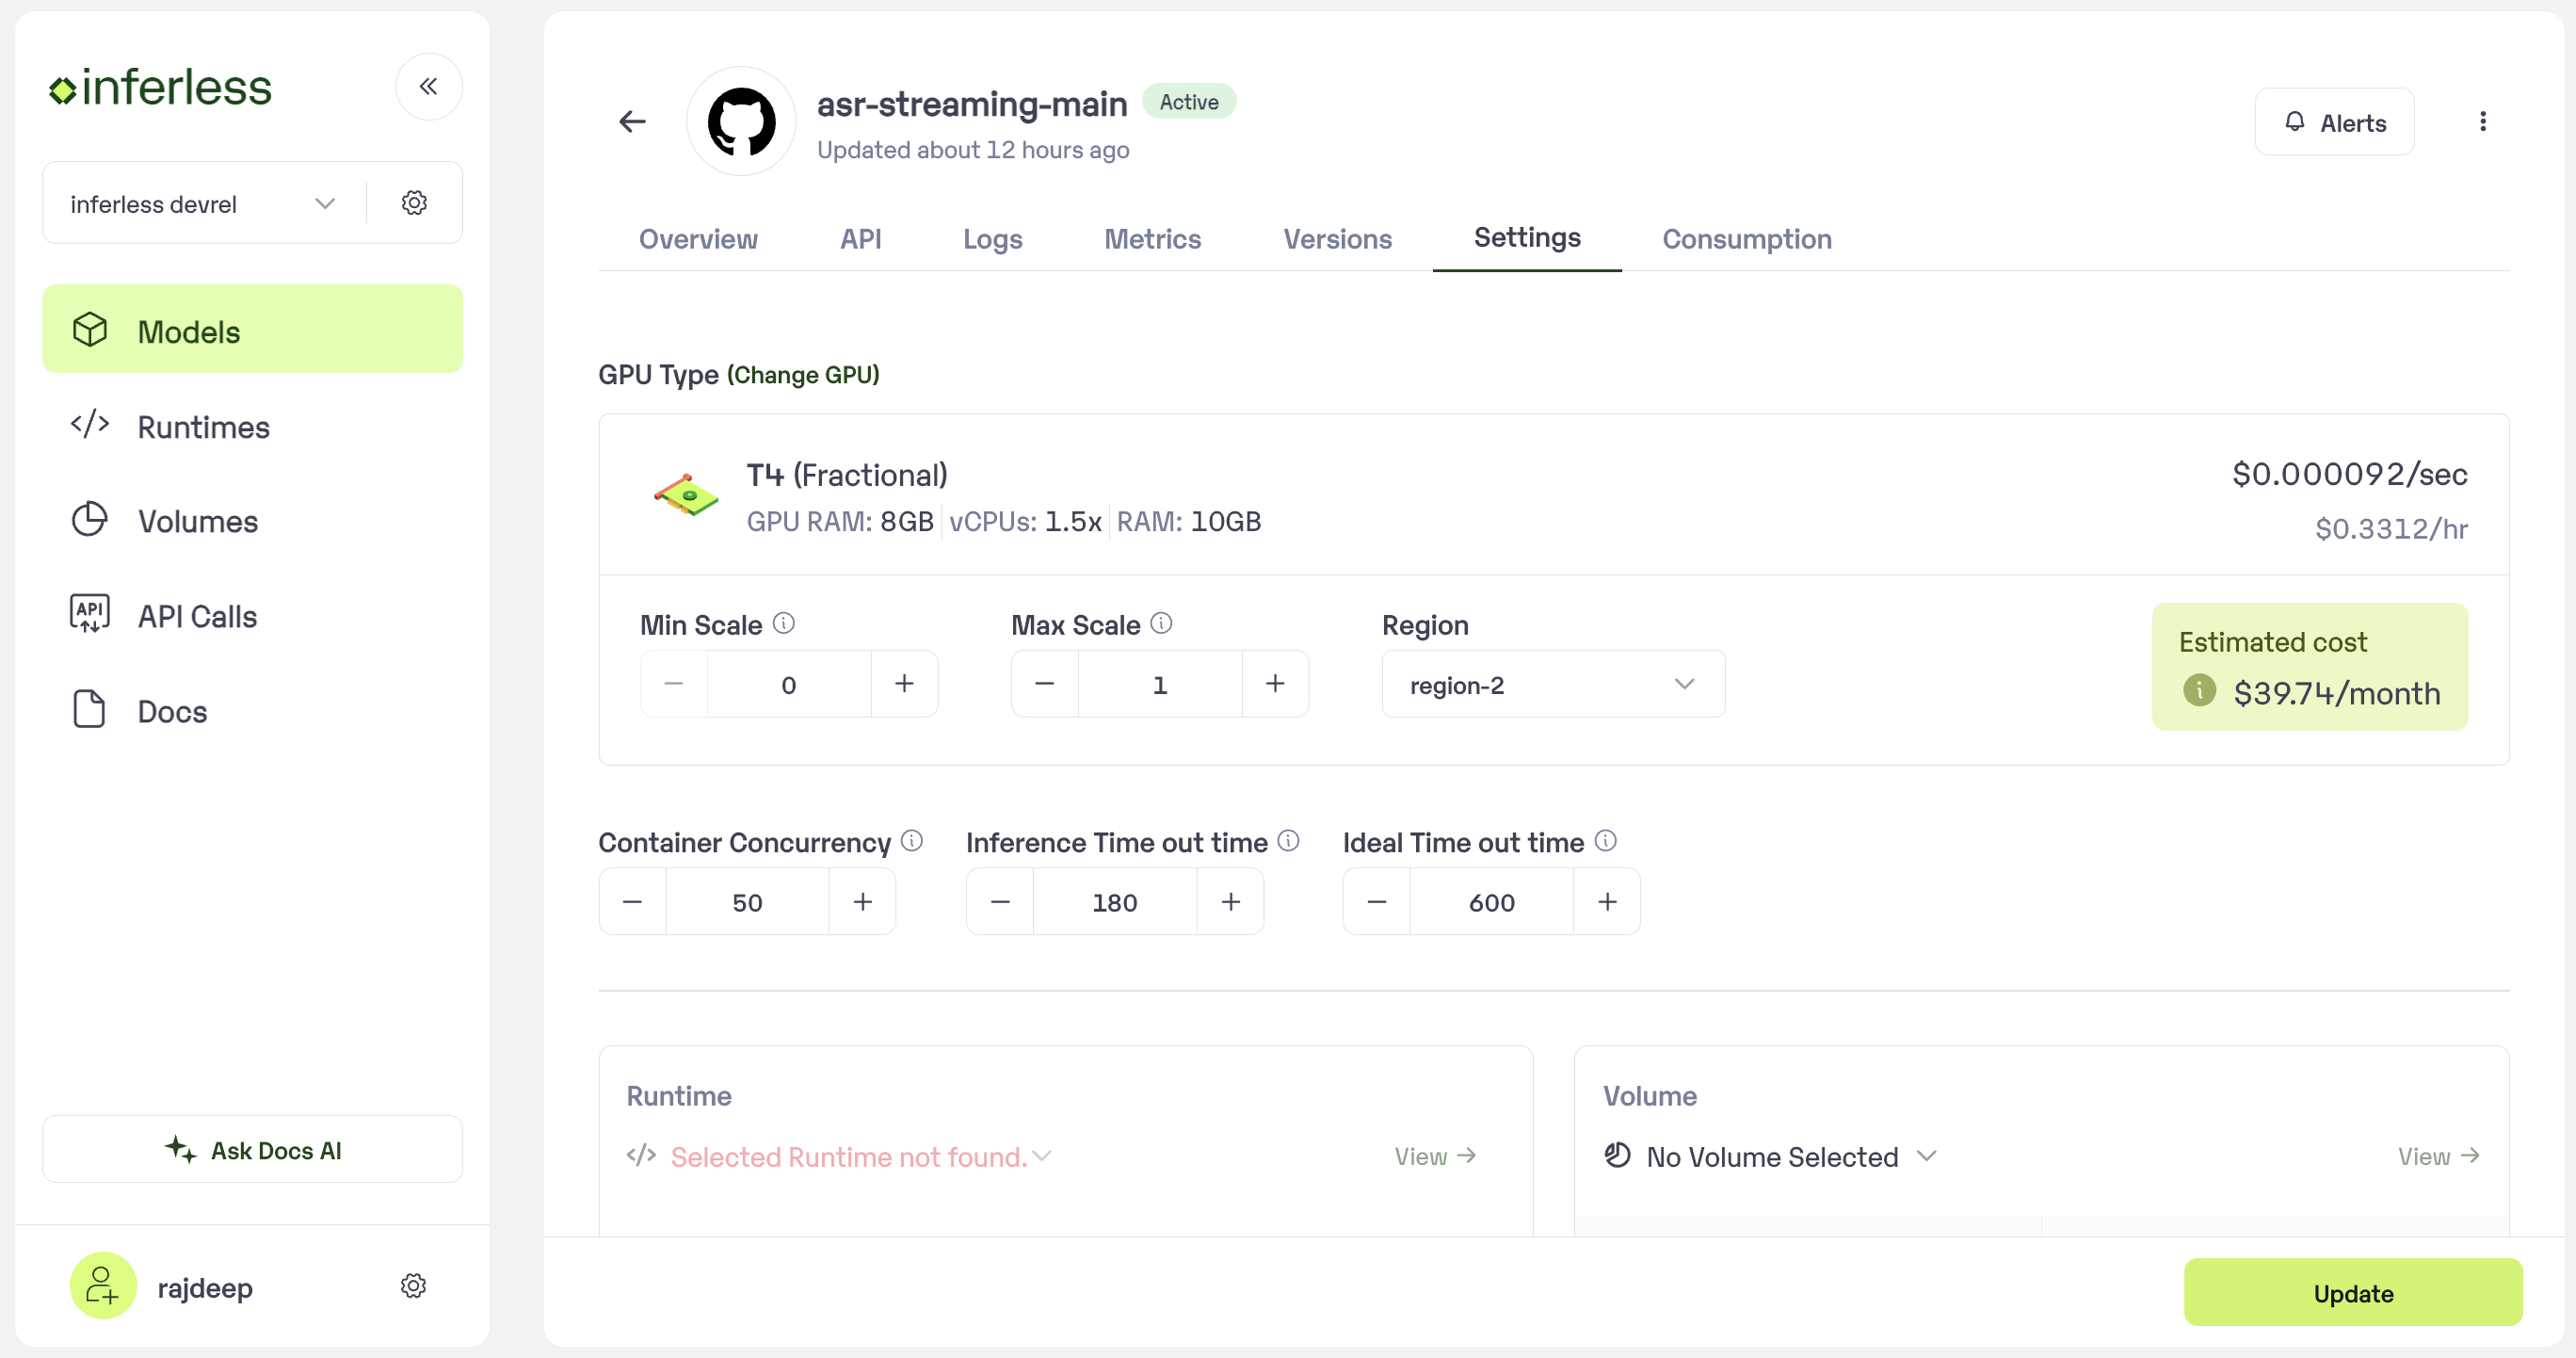 #### Scale Down
* **Purpose**: Scale-down settings determine how quickly Inferless reduces the number of idle instances (containers) to minimize costs. A faster scale-down time reduces costs by terminating idle instances sooner, but it might increase latency for new requests if instances need to be spun up frequently.
* **Configuration**: You typically configure Scale Down through the Inferless dashboard, setting a duration of inactivity after which an instance is terminated. Shorter durations are cost-effective but can impact performance if your workload has bursts of activity followed by periods of inactivity.
#### Inference Timeouts
* **Purpose**: Inference Timeouts define the maximum amount of time an inference request is allowed to run before it is forcibly terminated. This helps in avoiding excessive resource consumption by requests that are stuck or taking too long, ensuring resources are available for other requests.
* **Configuration**: Set the timeout based on the expected duration of your inference tasks. Consider the complexity of the model and the size of the input data. Configuring this setting usually involves specifying a timeout value (in seconds) in the Inferless dashboard. It's crucial to balance between allowing enough time for legitimate requests to complete and preventing resource hogging.
#### Container Concurrency
* **Purpose**: Container Concurrency settings control the number of concurrent requests a single container can handle. Adjusting this setting helps in managing the trade-off between latency and resource utilization. A lower concurrency level can improve latency at the cost of higher resource usage (since more containers may be spun up to handle incoming requests), whereas a higher concurrency level can reduce resource usage but might increase latency if the container becomes a bottleneck.
* **Configuration**: Determine the optimal concurrency level based on your model’s resource requirements and the expected request load. Configure this setting in the Inferless platform, either through the dashboard, by specifying the maximum number of concurrent requests per container.
#### Practical Steps:
1. **Access Inferless Dashboard**: Start by logging into the Inferless dashboard and click on the model.
2. **Navigate to Model Settings**: Look for the settings or configuration section where you can find options for Scale Down, Inference Timeouts, and Container Concurrency.
3. **Adjust Settings**:
* For **Scale Down**, set the idle time before an instance is terminated.
* For **Inference Timeouts**, specify the maximum allowed duration for an inference request.
* For **Container Concurrency**, set the maximum number of concurrent requests per container.
4. **Save Changes**: After adjusting the settings, save your changes. It might be beneficial to monitor the performance and cost implications and adjust these settings as needed.
#### Monitoring and Adjusting
After configuring these settings, monitor your application's performance and costs. You may need to adjust these settings over time as your workload patterns change or as you optimize your model's performance.
If specific steps or interfaces have changed in the latest version of Inferless, refer to the official documentation or support for the most current instructions.
# Inferless Python Client
Source: https://docs.inferless.com/api-reference/model-endpoint/inferless-python-client
### Installation
```bash
pip install --upgrade inferless
```
### Usage
This client can be used to call Inferless API from your Python code. It supports both synchronous and asynchronous calls.
#### inferless.call
```python
inferless.call(url: str, workspace_api_key: str, data: dict ) -> Response [dict]
```
This method sends a synchronous request to the Inferless API endpoint
#### Parameters
* **url -** Inferless Model API URL
* **workspace\_api\_key -** Inferless Workspace API Key
* **data -** Model Input Data in Dict Format
* **inputs (Optional) -** Model Input Data in Inference Protocol format, data should not be given is this is given
### Example
```json
import inferless
URL = "https://
#### Scale Down
* **Purpose**: Scale-down settings determine how quickly Inferless reduces the number of idle instances (containers) to minimize costs. A faster scale-down time reduces costs by terminating idle instances sooner, but it might increase latency for new requests if instances need to be spun up frequently.
* **Configuration**: You typically configure Scale Down through the Inferless dashboard, setting a duration of inactivity after which an instance is terminated. Shorter durations are cost-effective but can impact performance if your workload has bursts of activity followed by periods of inactivity.
#### Inference Timeouts
* **Purpose**: Inference Timeouts define the maximum amount of time an inference request is allowed to run before it is forcibly terminated. This helps in avoiding excessive resource consumption by requests that are stuck or taking too long, ensuring resources are available for other requests.
* **Configuration**: Set the timeout based on the expected duration of your inference tasks. Consider the complexity of the model and the size of the input data. Configuring this setting usually involves specifying a timeout value (in seconds) in the Inferless dashboard. It's crucial to balance between allowing enough time for legitimate requests to complete and preventing resource hogging.
#### Container Concurrency
* **Purpose**: Container Concurrency settings control the number of concurrent requests a single container can handle. Adjusting this setting helps in managing the trade-off between latency and resource utilization. A lower concurrency level can improve latency at the cost of higher resource usage (since more containers may be spun up to handle incoming requests), whereas a higher concurrency level can reduce resource usage but might increase latency if the container becomes a bottleneck.
* **Configuration**: Determine the optimal concurrency level based on your model’s resource requirements and the expected request load. Configure this setting in the Inferless platform, either through the dashboard, by specifying the maximum number of concurrent requests per container.
#### Practical Steps:
1. **Access Inferless Dashboard**: Start by logging into the Inferless dashboard and click on the model.
2. **Navigate to Model Settings**: Look for the settings or configuration section where you can find options for Scale Down, Inference Timeouts, and Container Concurrency.
3. **Adjust Settings**:
* For **Scale Down**, set the idle time before an instance is terminated.
* For **Inference Timeouts**, specify the maximum allowed duration for an inference request.
* For **Container Concurrency**, set the maximum number of concurrent requests per container.
4. **Save Changes**: After adjusting the settings, save your changes. It might be beneficial to monitor the performance and cost implications and adjust these settings as needed.
#### Monitoring and Adjusting
After configuring these settings, monitor your application's performance and costs. You may need to adjust these settings over time as your workload patterns change or as you optimize your model's performance.
If specific steps or interfaces have changed in the latest version of Inferless, refer to the official documentation or support for the most current instructions.
# Inferless Python Client
Source: https://docs.inferless.com/api-reference/model-endpoint/inferless-python-client
### Installation
```bash
pip install --upgrade inferless
```
### Usage
This client can be used to call Inferless API from your Python code. It supports both synchronous and asynchronous calls.
#### inferless.call
```python
inferless.call(url: str, workspace_api_key: str, data: dict ) -> Response [dict]
```
This method sends a synchronous request to the Inferless API endpoint
#### Parameters
* **url -** Inferless Model API URL
* **workspace\_api\_key -** Inferless Workspace API Key
* **data -** Model Input Data in Dict Format
* **inputs (Optional) -** Model Input Data in Inference Protocol format, data should not be given is this is given
### Example
```json
import inferless
URL = "https:// ### Step 2: View and Call your API
* Click on the API tab.
* You can view the cURL or python script that can be used to call your mode.
* You can also copy the end point directly mentioned under "API Endpoint"
### Step 2: View and Call your API
* Click on the API tab.
* You can view the cURL or python script that can be used to call your mode.
* You can also copy the end point directly mentioned under "API Endpoint"
 * Click on the Copy button to Copy the code for yourself.
* You can now call using this from your end. The inference result would be the output for these calls.
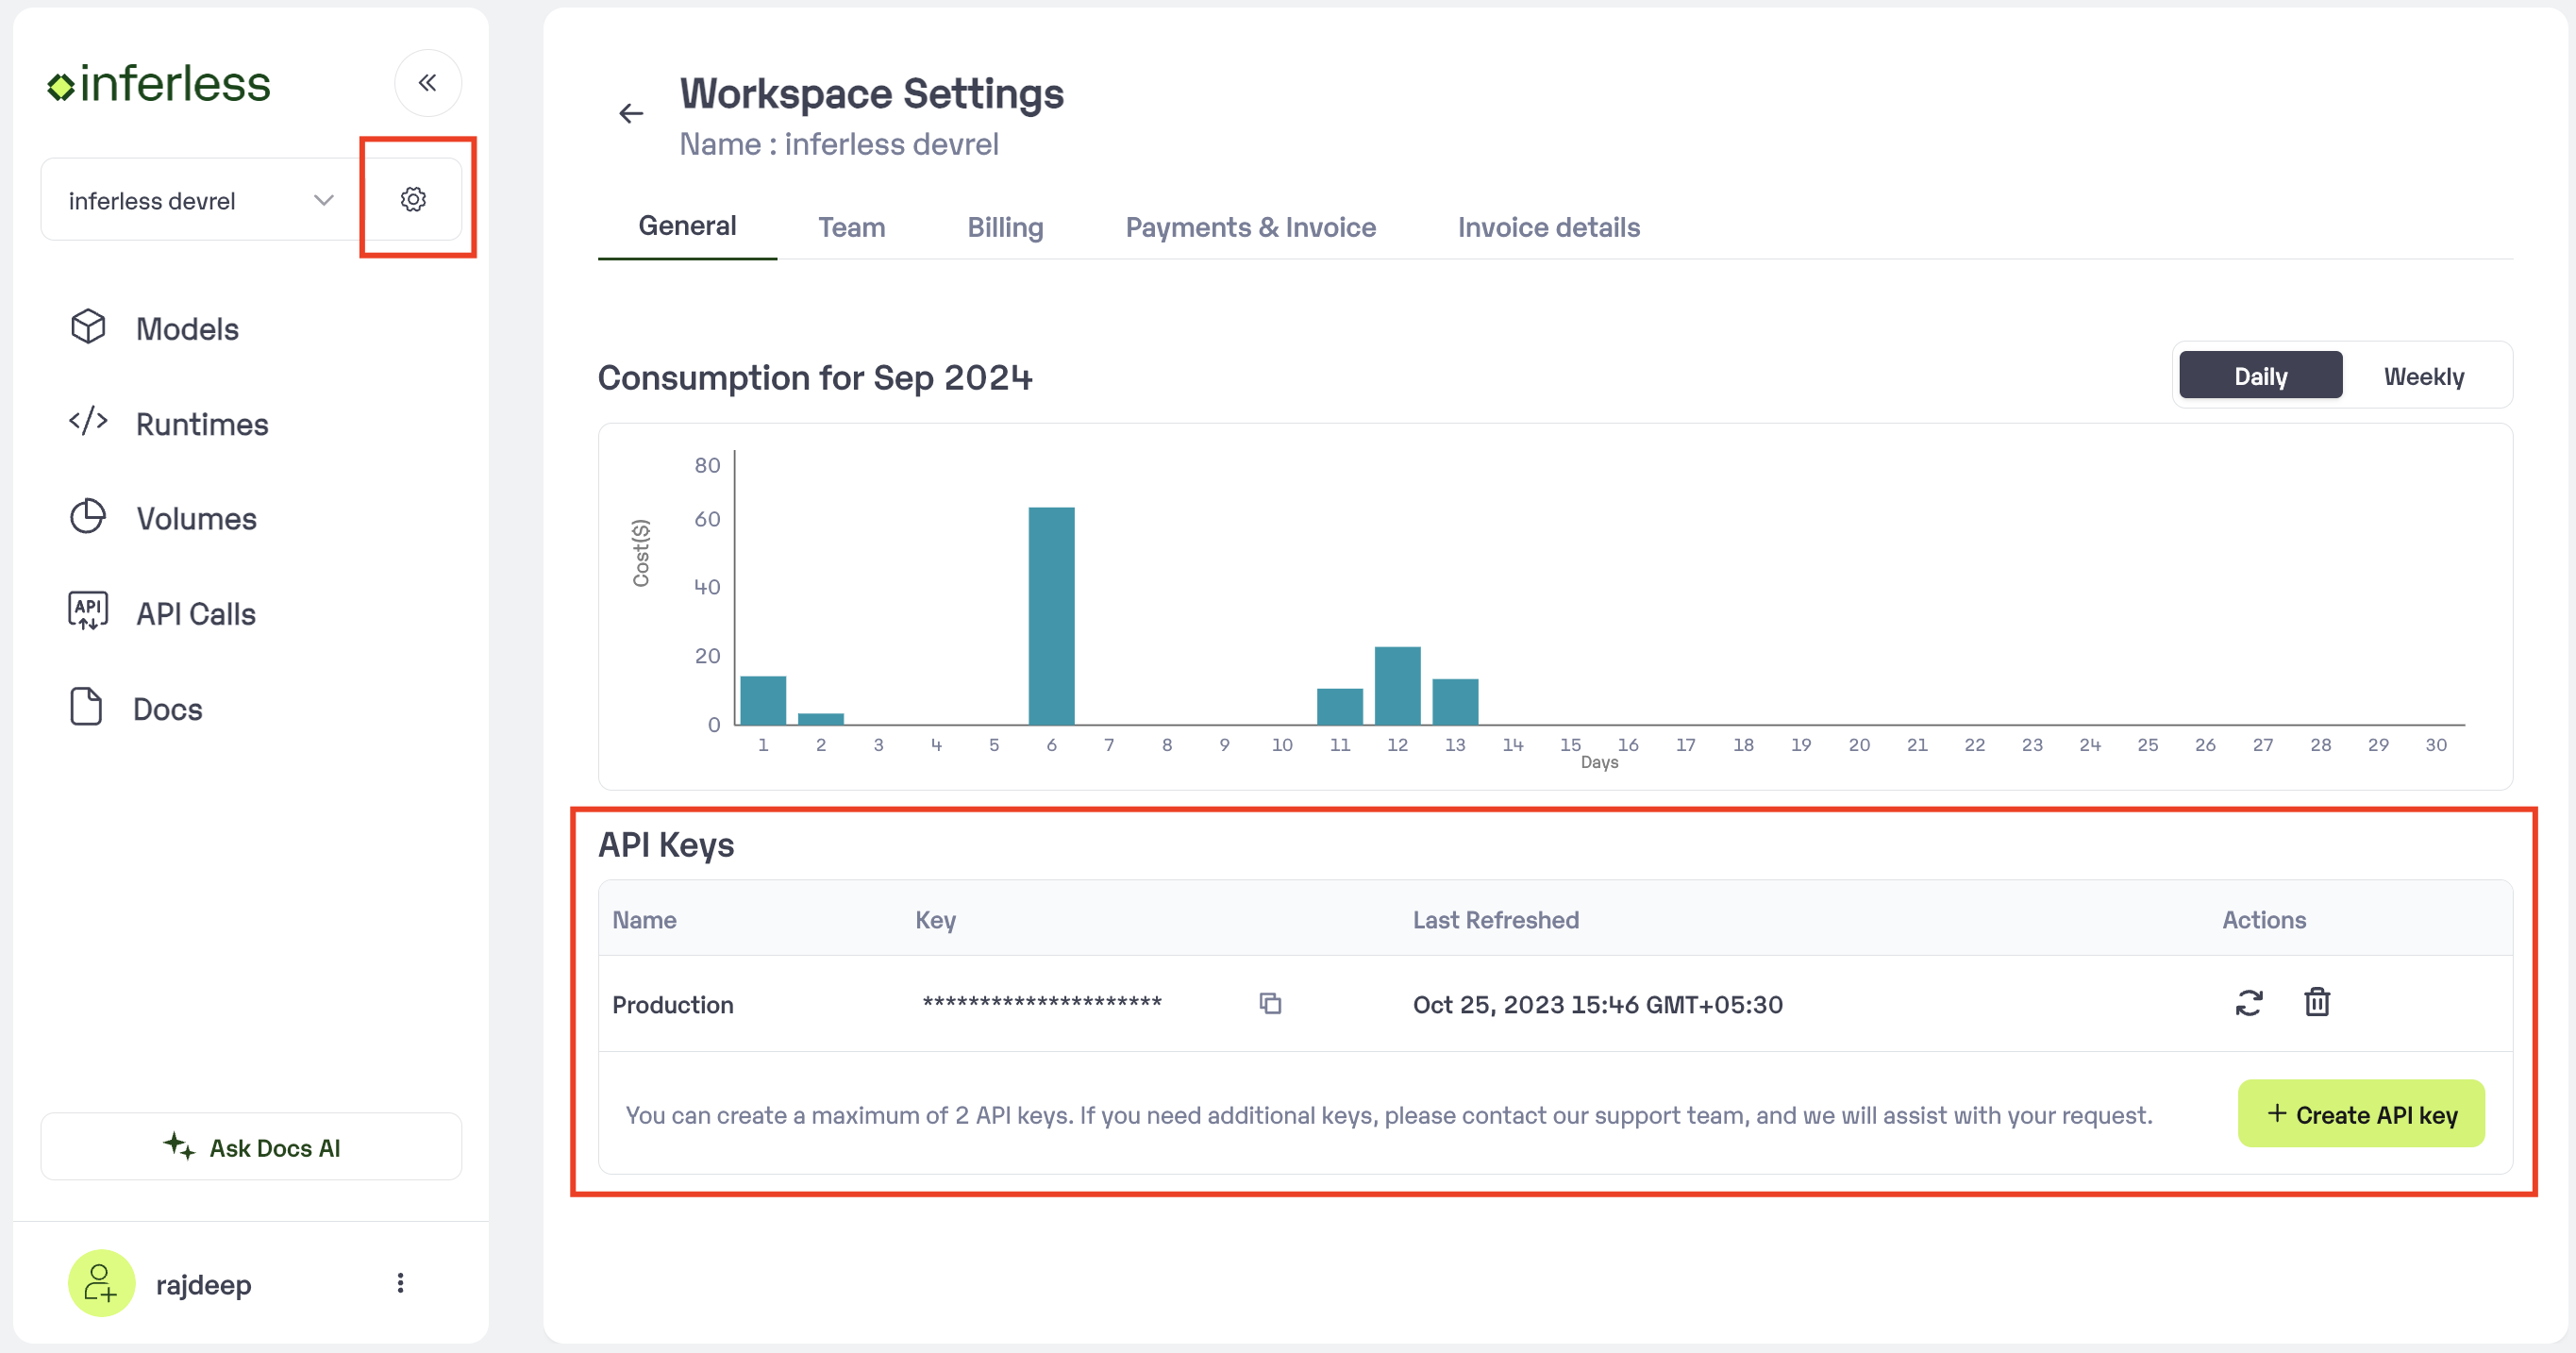
In case you need help with **API Keys:**
* Click on settings, available on the top, next to your Workspace Name
* Click on "Workspace API keys"
* You can view the details of your key or generate a new one.
* Click on the Copy button to Copy the code for yourself.
* You can now call using this from your end. The inference result would be the output for these calls.
In case you need help with **API Keys:**
* Click on settings, available on the top, next to your Workspace Name
* Click on "Workspace API keys"
* You can view the details of your key or generate a new one.
 # Setting up Webhooks
Source: https://docs.inferless.com/api-reference/model-endpoint/setting-up-webhooks
1. Definition of Webhook Webhooks allow a system to send real-time data to another system as soon as an event occurs. In the context of handling model inference, you can seamlessly integrate webhooks by incorporating them directly into the inference function.
2. Defining Webhook URL When we use a model like Stable Diffusion XL, or we chain multiple models together it takes longer inference time. In such a case, we can utilize webhooks. You can define your webhook URL as a global variable or you can fetch it from the .env file.
```webhook
WEBHOOK_URL = ""
```
```bash
from os.env import get
WEBHOOK_URL = os.env.get("WEBHOOK_URL")
```
3. Using Webhooks in the Inference Function In the `def infer` function, you can use the webhook. After obtaining the inference result, it will send an HTTP POST request to the webhook endpoint (`**WEBHOOK_URL**`) with the inference result.
```python
def infer(self, inputs):
prompt = inputs["prompt"]
image = self.pipe(prompt).images[0]
buff = BytesIO()
image.save(buff, format="JPEG")
img_str = base64.b64encode(buff.get value()).decode()
data = { "generated_image_base64" : img_str }
// Call the Webhook
response = requests.post(WEBHOOK_URL, json=data)
return {"response": "success"}
```
# Test your model endpoint
Source: https://docs.inferless.com/api-reference/model-endpoint/test-your-model-endpoint
Use a sample input to test your model before deployment
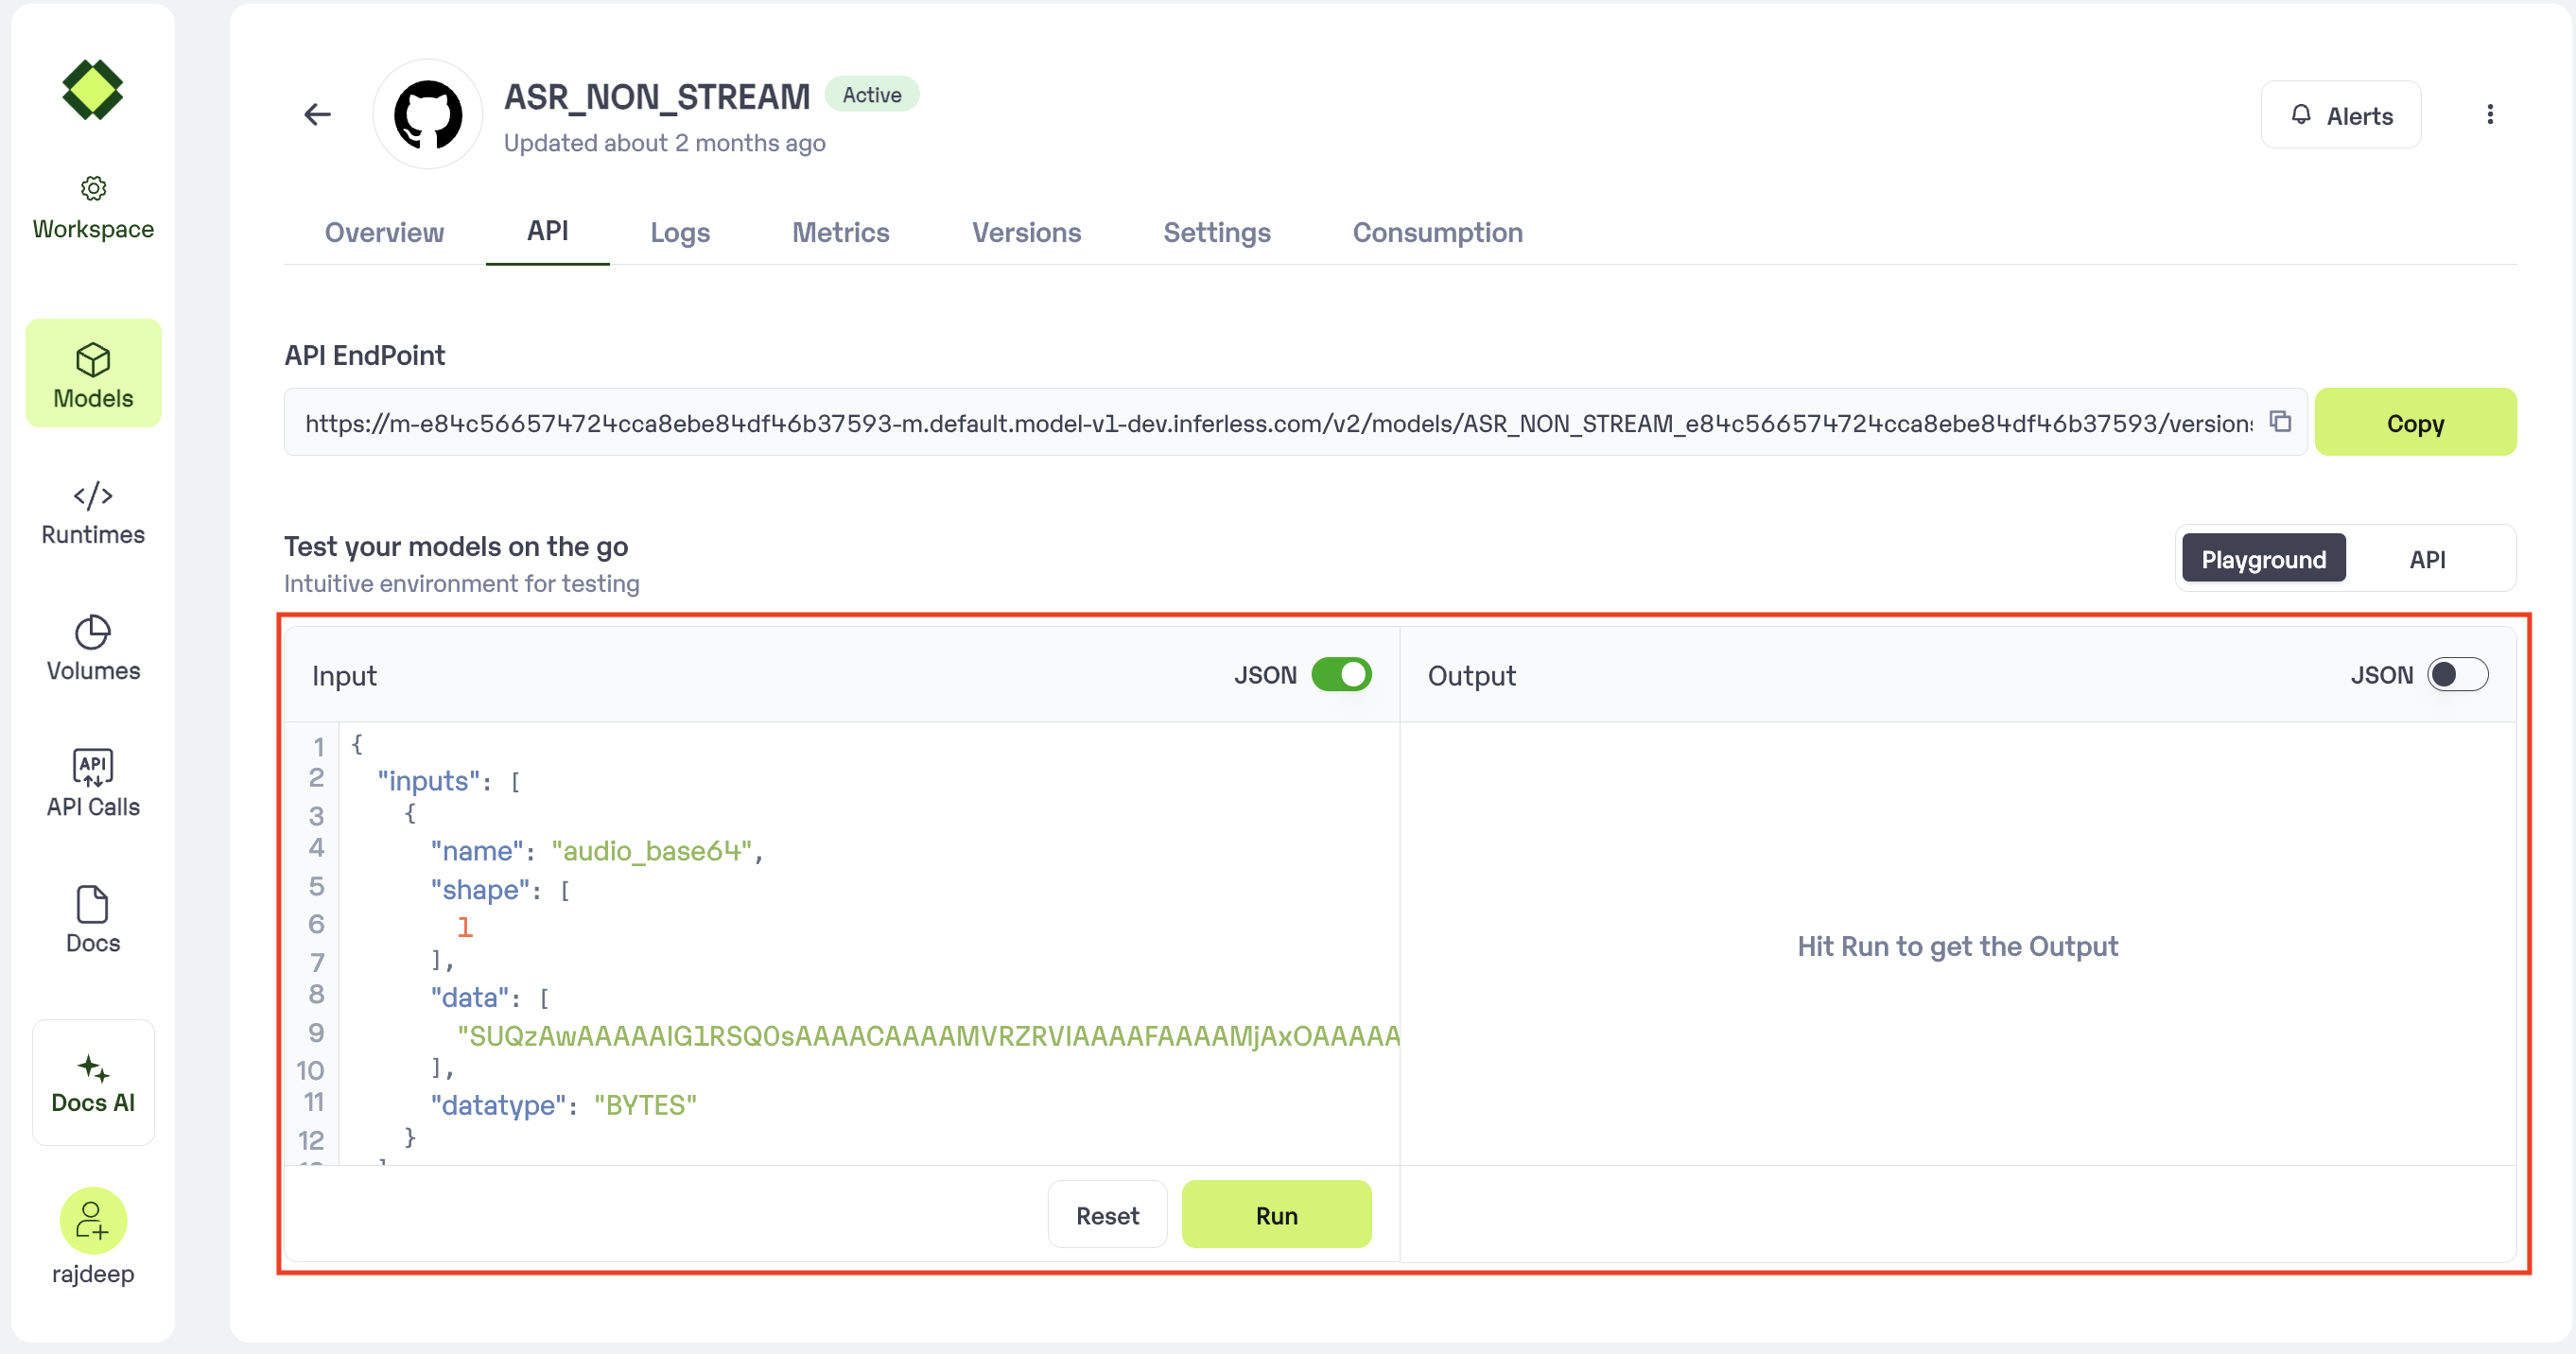
1. Testing with Sample Input Inferless platform provides the functionality to try and test the model in the API section. For the image generation model output, you have to use any base64 decoder to get the image.
* Click on the model you have deployed
* Click on the API
* You can replace the input accordingly, and click on the Run button
# Setting up Webhooks
Source: https://docs.inferless.com/api-reference/model-endpoint/setting-up-webhooks
1. Definition of Webhook Webhooks allow a system to send real-time data to another system as soon as an event occurs. In the context of handling model inference, you can seamlessly integrate webhooks by incorporating them directly into the inference function.
2. Defining Webhook URL When we use a model like Stable Diffusion XL, or we chain multiple models together it takes longer inference time. In such a case, we can utilize webhooks. You can define your webhook URL as a global variable or you can fetch it from the .env file.
```webhook
WEBHOOK_URL = ""
```
```bash
from os.env import get
WEBHOOK_URL = os.env.get("WEBHOOK_URL")
```
3. Using Webhooks in the Inference Function In the `def infer` function, you can use the webhook. After obtaining the inference result, it will send an HTTP POST request to the webhook endpoint (`**WEBHOOK_URL**`) with the inference result.
```python
def infer(self, inputs):
prompt = inputs["prompt"]
image = self.pipe(prompt).images[0]
buff = BytesIO()
image.save(buff, format="JPEG")
img_str = base64.b64encode(buff.get value()).decode()
data = { "generated_image_base64" : img_str }
// Call the Webhook
response = requests.post(WEBHOOK_URL, json=data)
return {"response": "success"}
```
# Test your model endpoint
Source: https://docs.inferless.com/api-reference/model-endpoint/test-your-model-endpoint
Use a sample input to test your model before deployment
1. Testing with Sample Input Inferless platform provides the functionality to try and test the model in the API section. For the image generation model output, you have to use any base64 decoder to get the image.
* Click on the model you have deployed
* Click on the API
* You can replace the input accordingly, and click on the Run button
 2. Using the API endpoint Users can directly incorporate the provided code from the API section into their pipeline for performing inference.
* Copy the Python code
2. Using the API endpoint Users can directly incorporate the provided code from the API section into their pipeline for performing inference.
* Copy the Python code
 * Use it on your environment
 # Get Logs - API
Source: https://docs.inferless.com/api-reference/model-management-apis/model-logs-get
POST /rest/model/logs/get/
This endpoint gets the logs of a model.
### Authorizations
***
# Get Logs - API
Source: https://docs.inferless.com/api-reference/model-management-apis/model-logs-get
POST /rest/model/logs/get/
This endpoint gets the logs of a model.
### Authorizations
***
 # 30th April 2025: Better Playground, Docker support and more
Source: https://docs.inferless.com/changelog/April-2025/30th-April
**Latest Enhancements & Features:**
1. **Model - Critical Alert Notifications** : You can now receive real-time alerts for critical model events such as inference failures or latency spikes using AWS SNS. Stay informed and react quickly to any issues.Check the [docs here. ](https://docs.inferless.com/integrations/aws-sns/aws-sns)
2. **Docker Support in Serverless V2:** You can now deploy Docker images directly in Serverless V2, giving you full control over your runtime environment and enabling more flexible custom deployments.
3. **Playground Enhancements:** The Playground now tracks API call duration for each inference and a local history of past API calls, helping you test and iterate faster.
4. **Hugging Face Token Auto-Addition**: If you’ve previously saved your Hugging Face token, it will now auto-fill during model deployment from the Explore Models page — saving time and clicks.
# 28th February 2025: Enhanced one click model deploy & faster CLI experience
Source: https://docs.inferless.com/changelog/February-2025/28th-February
**Latest Enhancements & Features:**
1. **New Explore Models UI**:We've redesigned the Explore Models UI for a better user experience. You can now easily access models across different task types and modify GPU settings and environment variables during deployment, making model setup more flexible.
2. **Local Entrypoint in Remote Run**: You can now send complete objects in Remote Run using Pydantic objects, enabling more structured and efficient input handling.
3. **Remote Run Speed Enhancement**: We've added caching for Hugging Face models, significantly improving Remote Run execution speed by reducing redundant downloads.
4. **CLI Scaffold Command**: You can now use the scaffold command to deploy any template from the Explore Models UI directly via CLI, streamlining deployment workflows.
5. **CLI Bug Fixes for Volumes**: Improved error handling for file directories and uploads. Prevented failures when copying data files to NFS volumes, ensuring smoother volume operations.
# 9th January 2025: Better Logs & Stability Fixes
Source: https://docs.inferless.com/changelog/January-2025/9th-january
**Latest Enhancements & Features:**
1. **Updated Post-Build Log Component**: The Post-Build Logs component now includes search and filter functionality, making it easier to navigate logs. Steps are reported separately, providing a clear view of the current state and progress.
2. **Updated Log Pre-Processor Component**: We've optimized the Log Pre-Processor by removing unnecessary info and working logs from Triton and some Hugging Face libraries, ensuring cleaner and more concise logs.
3. **Billing Stability Fixes**: A new mechanism for failure detection has been implemented, improving overall billing stability and reliability.
4. **Serverless V2 Stability Fixes**: Enhanced boot-up times for Inferless agents to orchestrate models more efficiently. Added fixes to prevent downtime, ensuring a smoother and more reliable serverless experience.
# 30th June 2025: Runtime Updates, Websockets and more
Source: https://docs.inferless.com/changelog/June-2025/30th-June
**Latest Enhancements & Features:**
1. **Runtime Updates:** You can now change the default runtime used by a model and update runtime versions in-place.
2. **Streaming Logs:** We have rolled-out real-time logs for model imports using WebSockets, giving you live feedback as each step in the import process progresses.
3. **Improved Warm Pool Integration:** The autoscaler now uses Warm Pools more efficiently to accelerate spin-up times during scaling events, reducing cold start delays and improving overall responsiveness.
# 31st March 2025: New Dashboard UI, CLI Enhancements and Simplified Explore Models
Source: https://docs.inferless.com/changelog/March-2025/31st-March
**Latest Enhancements & Features:**
1. **RPS-Based Autoscaling in Serverless V2:** We’ve deployed a new autoscaling worker in Serverless V2 that uses Requests Per Second (RPS) as a signal for scaling. This helps optimize costs while reducing cold starts at high traffic levels.
2. **Model Rebuild Speedup:** Model rebuilds are now faster! We’ve skipped validation checks during rebuilds so developers can iterate quickly when updating their code.
3. **CLI Enhancements – Remote Run:** You can now send full Python objects in Remote Run using Pydantic models, making structured input handling easier for advanced use cases.
4. **Explore Models UI Redesign:** The Explore Models UI has been refreshed! You now get easier access to various task types, ability to customize GPU and environment variables at deploy time, native support for vLLM models
5. **CLI Bug Fixes for Volumes:** We have added validation for file directories and uploads.Prevented failures during data copy to NFS volumes to ensure smooth volume operations
These updates deliver better scaling, faster iteration, and a smoother experience across the CLI and UI.
# 31st May 2025: Runtime Flexibility, Faster Remote Run, and Hugging Face Improvements
Source: https://docs.inferless.com/changelog/May-2025/31st-May
**Latest Enhancements & Features:**
1. **Runtime Optimization**: We've removed region restrictions from runtimes. Now, developers can use any runtime in any region—bringing runtime configs closer to the code and giving you more flexibility during deployment.
2. **🤗 Hugging Face Import Improvements**: To reduce model import failures, we’ve added validation checks—especially for cases where access to model weights is restricted. We’ve also introduced vLLM plugin support for faster inference with Hugging Face models.
3. **Remote Run – Speed Enhancements**: HF models used in Remote Run now benefit from caching, making subsequent executions significantly faster—ideal for quick testing and iteration cycles.
4. **Streaming Logs for Model Import** You can now view logs in real-time during model imports, helping you track build progress more accurately and debug faster.
# 15th April 2024: Runtime Flexibility, Build Efficiency, and Autoscaling Improvements
Source: https://docs.inferless.com/changelog/april-2024/16th-april
**Latest Enhancements & Features:**
1. **Enhanced Runtime Configuration:** You can now include shell commands in your Runtime.yaml that execute sequentially during runtime build. This feature is particularly useful for packages that require step-by-step installation procedures. For more details on bringing custom packages, please visit our [documentation](https://docs.inferless.com/model-import/bring-custom-packages)
2. **Reduced Build Times:** We have implemented changes that significantly reduce the build time for model imports.
3. **Improved Autoscaling:** Enhancements to our autoscaling capabilities now provide additional buffer capacity during peak hours. This ensures that your operations can scale smoothly and effectively, meeting demand without compromising performance.
4. **Improved Runtime Logs:** The logs section for Runtime now includes detailed visibility into all build steps, allowing for better tracking and troubleshooting of custom runtimes.
These updates underline our commitment to providing a reliable, efficient, and user-friendly platform. By continually enhancing our services and infrastructure, we aim to support your needs and empower your projects.
# 8th April 2024: Workflow Optimization, Infrastructure Enhancements, and Runtime Updates
Source: https://docs.inferless.com/changelog/april-2024/8th-april
**Latest Enhancements & Features:**
This update bring internal improvements to make platform performance and user experience better:
1. **Docker Build Synchronization:** We've introduced a new workflow in the inferless-docker service to optimise docker builds, effectively preventing timeouts caused by prolonged build time.
2. **Infrastructure Stability Improvements:** Significant stability fixes have been applied to the inference pod system, enabling automatic recovery from states of failure and crash backoff loops.
3. **CLI Enhancement for Runtime Export:** The CLI has been upgraded to support a straightforward command for exporting from Cog runtime to Inferless runtime, simplifying the transition and enhancing usability.
4. **NVIDIA Driver Update for US East Region:** For customers in region-1, the NVIDIA driver version has been updated from 480 to 525. This change addresses CUDA runtime errors, ensuring smoother operation and compatibility for our users.
These updates underline our commitment to providing a reliable, efficient, and user-friendly platform. By continually enhancing our services and infrastructure, we aim to support your needs and empower your projects.
# 18th December : Advanced Monitoring, Better Custom Runtime, and Enhanced Integration Stability
Source: https://docs.inferless.com/changelog/december-2023/18th-december
Key Enhancements & Updates:
In our continuous effort to improve efficiency and user experience on our platform, we are excited to share our latest advancements:
1. **Upgraded to On-Premises Grafana for Superior Monitoring:** We've transitioned from hosted to on-premises Grafana. This strategic move significantly enhances our data point collection capabilities and query response times. It effectively resolves the metrics outage issues previously experienced with the hosted Grafana, leading to more robust and detailed system monitoring.
2. **Simplified Custom Runtime Management:** Enhancing the user experience in runtime management, we now offer the ability to directly view and edit custom runtime settings on the platform. This update eliminates the cumbersome process of re-uploading files for each change.
3. **Extended Billing Access for Admin Users:** We have now enabled non-owner users to access billing payment links. This enhancement facilitates easier and more convenient payment procedures for all users & not just console owner.
4. **GitHub Webhook Stability Improvements:** This improvement ensures more dependable and consistent performance, enhancing overall integration reliability.
We remain committed to continually refining our platform, focusing on delivering a service that is not only robust and efficient but also aligns with the evolving needs of our users.
# 22nd December: Enhanced Metrics, Improved Logging, and Advanced Model Support
Source: https://docs.inferless.com/changelog/december-2023/22nd-december
Key Enhancements & Updates:
In our latest release, we are introducing several key enhancements aimed at boosting performance, improving user experience, and expanding functionality:
1. **Dynamic Interval for Grafana Metrics:** This update significantly speeds up the loading of the metrics page on the UI, ensuring a more responsive and efficient monitoring experience.
2. **Docker Build Logs with OpenSearch:** Transitioning to OpenSearch for Docker build logs, users can now experience faster and more efficient log retrieval for their containers, enhancing the debugging and monitoring process.
3. **Detailed Model Health API:** The model health API has been updated to provide more comprehensive details during the booting up and healthy states of models. This offers users better insights into model performance and health.
4. **Transformer Library Update:** We have updated our default image in the Transformer Library to support advanced models like SDXL and LLama 2. This update reduces the need for creating custom runtimes and streamlining model deployment and usage.
5. **Python Async Client for Inferless APIs:** Introducing a Python asynchronous client, this feature allows users to interact with Inferless APIs asynchronously, facilitating non-blocking calls and enhancing overall application performance. Check the [docs here. ](https://docs.inferless.com/model-endpoint/inferless-python-client)
This release further solidifies our commitment to providing a platform that serves you better.
# 4th December: UI Enhancements, Stable Builds, and Better Error Handling
Source: https://docs.inferless.com/changelog/december-2023/4th-december
**Latest Updates & Bug Fixes:**
In our ongoing commitment to enhance the user experience and platform efficiency, we are excited to announce our latest updates:
1. **Refined CPU Memory UI Settings:** We've updated the UI for CPU memory adjustments to automatically default to the optimal setting based on the selected machine type during deployment. This ensures a more intuitive and efficient setup process.
2. **Increased Version History Limit to 20:** The version history limit in the UI has been increased from 5 to 20. This expansion allows for greater access to your build history, enabling more effective tracking and management of past versions.
3. **Improved Visibility of Input/Output Schema in Model Details:** On the model details page, users can now view the actual input and output schemas. This enhancement provides clearer insights into model settings and streamlines the deployment process.
4. **Enhanced Volume Value Retention in Reimport/Rebuild:** To prevent data loss and potential import errors, volume values are now consistently retained during reimport or rebuild phases of model deployment.
5. **Adjustable Inference and Scale-Down Timeout Settings:** We've introduced the ability to customize inference timeout and scale-down timeout settings directly in the model import process.
6. **AutoBuild UI Update for Accurate Date Tracking:** The AutoBuild feature has been improved to display the correct date, providing a more accurate and user-friendly means of tracking model imports.
**Additional Internal Improvements:**
1. **In-Build Docker Image Cleanup to avoid Out-of-memory errors:** Implementing weekly clearance of docker image cache to stabilize model builds.
2. **Expedited Model Booting Process:** Various improvements have been implemented to speed up the model booting process, reducing wait times and improving overall performance.
These updates are part of our commitment to delivering a robust, efficient, and user-friendly platform. We are continuously working on improving our service and appreciate your feedback and support.
# 9th December 2024: CLI v2.0: Faster and Smoother Experience
Source: https://docs.inferless.com/changelog/december-2024/9th-december
**Latest Enhancements & Features:**
1. **inferless init**: Simplified model import initialization with fewer parameters required to get started.Added support for Hugging Face, Docker, S3, and File-based deployments directly via subcommands.[Read the documentation](https://docs.inferless.com/references/cli/inferless-init)
2.**inferless deploy** :Deploy models without YAML by directly specifying machine configurations and runtime files during deployment. Automatically creates runtimes for your models, enabling faster deployments.[Read the documentation](https://docs.inferless.com/references/cli/inferless-deploy)
3. **inferless model**: Comprehensive model management commands to list, delete, rebuild, get details, activate, deactivate, and patch configurations. [Read the documentation](https://docs.inferless.com/references/cli/inferless-model)
4. **inferless integration**:Manage integrations with providers like Dockerhub, ECR, GCS, Hugging Face, and S3. Add and list integrations seamlessly. [Read the documentation](https://docs.inferless.com/references/cli/inferless-integration)
5. **inferless volume**: Create volumes, copy files, list contents, and remove files or directories. Specify custom mount points in the deploy command. Edit mount points during or after deployment for greater flexibility.[Read the documentation](https://docs.inferless.com/references/cli/inferless-volume)
# 12th February 2024 - Enhanced Monitoring, Docker Flexibility, and One-click Model Deploy
Source: https://docs.inferless.com/changelog/february-2024/12th-february
**What’s New:**
We're excited to introduce a series of updates designed to streamline your workflow, enhance flexibility, and simplify model exploration. Here's what's been rolled out:
1. **Recent Runs Overview:** Gain insights into your last 20 API calls with our new Recent Runs feature. This enhancement is aimed at improving your ability to debug models in production. To activate this feature, simply apply a patch to your model via the Model Settings.
2. **Docker Import Improvements:** We've lifted the limitations on the port configurations for the inference server, allowing you to specify the port dynamically upon import. Moreover, you can now set custom endpoints for health checks and inference, providing greater adaptability in model integration.
3. **Explore Model Feature:** Discover and deploy popular models in production with just a single click through our Explore Model feature. This addition enables you to experiment with new models effortlessly, requiring zero integration effort on your part.
**Minor Bug Fixes:**
1. Resolved an issue in Docker import where capital letters in the name led to import failures.
2. Improved error logging for mismatches between the Input/Output schema and the returned dictionary, ensuring clearer feedback for troubleshooting.
# 26th February 2024 - Better Exception Handling, Dynamic Batching Support and more.
Source: https://docs.inferless.com/changelog/february-2024/26th-february
**What's New:**
This update introduces significant enhancements focused on optimizing model management and deployment, offering more robust exception handling and dynamic operational capabilities. Here's what's new:
1. **Enhanced Exception Handling for Models:** We've improved the way exceptions are handled for model returns. Now, if a returned object doesn't match the required datatype, a specific error will indicate the expected datatype, facilitating quicker resolution of model import issues.
2. **Dynamic Batching Support:** Dynamic batching has been made more accessible to users. By utilizing specific flags, users can optimize model performance for varying workload demands. Learn more about configuring dynamic batching in our documentation.
3. **CI/CD Enhancements for Serverless v2:** The auto-build feature has been extended to Serverless v2 deployments, enabling users to streamline their build and deployment processes for serverless applications. Keep a tab, new version coming soon.
4. **Automated Integration Test Suite:** Our new integration test suite automatically runs new additional 10 test cases, significantly reducing the likelihood of production errors and ensuring smoother deployments.
These updates are part of our ongoing commitment to enhance the usability and reliability of our platform.
# 12th January 2024 - Enhanced Volume Management, Docker Integration, and Improved Billing Processes
Source: https://docs.inferless.com/changelog/january-2024/12th-january
**Latest Enhancements & Features:**
We are excited to announce our new set of features and improvements, focusing on optimizing developer experience and expanding our platform capabilities:
1. **Enhanced Volume Sync Support:** CLI customers can now seamlessly push data to Inferless volumes via CLI, enabling direct access to the data across all replica containers. This eliminates the need to pull data in the initialization function, significantly improving the development experience.
2. **Volume Support for A10G Machines:** Our volume management system now supports A10G machines, allowing customers to utilize region-specific volumes.
3. **Docker-Based Model Import Feature:** We've expanded our platform's capabilities to support any Docker image and DockerFile, offering greater flexibility in model deployment. For detailed information and guidance, please visit our [documentation on Docker integration](https://docs.inferless.com/integrations/docker).
4. **Enhanced Exception Handling for Model Import:** We have improved exception handling for model imports, specifically when inputs lack name, shape, or datatype. This results in more robust input parameter validation, ensuring smoother model integration and deployment.
These updates reflect our dedication to evolving our platform to meet the diverse and growing needs of our users.
# January 29, 2024 - Removal of I/O JSON, Webhook Support for Docker and Improved Runtime Management
Source: https://docs.inferless.com/changelog/january-2024/29th-january
**Latest Enhancements & Features:**
We're excited to bring you the latest features and improvements designed to enhance your experience and efficiency on our platform:
1. **Removal of Input/Output JSON:** We've eliminated the need for adding Input/Output JSON in the Inferless console. You can now conveniently configure I/O parameters within your app.py code. For more details, please refer to our [Input/Output Schema documentation](https://docs.inferless.com/model-import/input-output-schema).
2. **Docker CI/CD Integration with Webhook Support:** Docker imports just got more efficient with the introduction of webhook support. This allows for automated updates and management of Docker images. For more details, please refer to [Webhook - Docker documentation](https://docs.inferless.com/model-import/automatic-build-via-webhooks/docker)
3. **Runtime Management Moved to Workspace Level:** Runtimes have been shifted from the user level to the workspace level, enabling different users to reuse and share runtimes within the same workspace.
4. **Frontend Support for Region-Specific Volumes:** Users can now create and manage volumes specific to regions (AWS/Azure), providing more control and customization for data storage and accessibility.
# 5th January - Faster Cold-starts, Security Upgrades, and Integration Efficiency
Source: https://docs.inferless.com/changelog/january-2024/5th-january
**What's New in This Update:**
As part of our ongoing effort to enhance performance, security, and usability, we're excited to roll out the following updates:
1. **Docker Cache Parallel Puller:** Introducing a new parallel puller for Docker caches, this feature significantly reduces cold starts for models with custom runtimes.
2. **Account Block Feature for Enhanced Security:** To bolster account security and prevent brute force attacks, we've implemented an account block feature.
3. **Integrated GitHub URL Fetch:** Users can now search for GitHub repositories directly within Inferless, streamlining the process and eliminating the need for time-consuming copy-pasting.
# 30th April 2025: Better Playground, Docker support and more
Source: https://docs.inferless.com/changelog/April-2025/30th-April
**Latest Enhancements & Features:**
1. **Model - Critical Alert Notifications** : You can now receive real-time alerts for critical model events such as inference failures or latency spikes using AWS SNS. Stay informed and react quickly to any issues.Check the [docs here. ](https://docs.inferless.com/integrations/aws-sns/aws-sns)
2. **Docker Support in Serverless V2:** You can now deploy Docker images directly in Serverless V2, giving you full control over your runtime environment and enabling more flexible custom deployments.
3. **Playground Enhancements:** The Playground now tracks API call duration for each inference and a local history of past API calls, helping you test and iterate faster.
4. **Hugging Face Token Auto-Addition**: If you’ve previously saved your Hugging Face token, it will now auto-fill during model deployment from the Explore Models page — saving time and clicks.
# 28th February 2025: Enhanced one click model deploy & faster CLI experience
Source: https://docs.inferless.com/changelog/February-2025/28th-February
**Latest Enhancements & Features:**
1. **New Explore Models UI**:We've redesigned the Explore Models UI for a better user experience. You can now easily access models across different task types and modify GPU settings and environment variables during deployment, making model setup more flexible.
2. **Local Entrypoint in Remote Run**: You can now send complete objects in Remote Run using Pydantic objects, enabling more structured and efficient input handling.
3. **Remote Run Speed Enhancement**: We've added caching for Hugging Face models, significantly improving Remote Run execution speed by reducing redundant downloads.
4. **CLI Scaffold Command**: You can now use the scaffold command to deploy any template from the Explore Models UI directly via CLI, streamlining deployment workflows.
5. **CLI Bug Fixes for Volumes**: Improved error handling for file directories and uploads. Prevented failures when copying data files to NFS volumes, ensuring smoother volume operations.
# 9th January 2025: Better Logs & Stability Fixes
Source: https://docs.inferless.com/changelog/January-2025/9th-january
**Latest Enhancements & Features:**
1. **Updated Post-Build Log Component**: The Post-Build Logs component now includes search and filter functionality, making it easier to navigate logs. Steps are reported separately, providing a clear view of the current state and progress.
2. **Updated Log Pre-Processor Component**: We've optimized the Log Pre-Processor by removing unnecessary info and working logs from Triton and some Hugging Face libraries, ensuring cleaner and more concise logs.
3. **Billing Stability Fixes**: A new mechanism for failure detection has been implemented, improving overall billing stability and reliability.
4. **Serverless V2 Stability Fixes**: Enhanced boot-up times for Inferless agents to orchestrate models more efficiently. Added fixes to prevent downtime, ensuring a smoother and more reliable serverless experience.
# 30th June 2025: Runtime Updates, Websockets and more
Source: https://docs.inferless.com/changelog/June-2025/30th-June
**Latest Enhancements & Features:**
1. **Runtime Updates:** You can now change the default runtime used by a model and update runtime versions in-place.
2. **Streaming Logs:** We have rolled-out real-time logs for model imports using WebSockets, giving you live feedback as each step in the import process progresses.
3. **Improved Warm Pool Integration:** The autoscaler now uses Warm Pools more efficiently to accelerate spin-up times during scaling events, reducing cold start delays and improving overall responsiveness.
# 31st March 2025: New Dashboard UI, CLI Enhancements and Simplified Explore Models
Source: https://docs.inferless.com/changelog/March-2025/31st-March
**Latest Enhancements & Features:**
1. **RPS-Based Autoscaling in Serverless V2:** We’ve deployed a new autoscaling worker in Serverless V2 that uses Requests Per Second (RPS) as a signal for scaling. This helps optimize costs while reducing cold starts at high traffic levels.
2. **Model Rebuild Speedup:** Model rebuilds are now faster! We’ve skipped validation checks during rebuilds so developers can iterate quickly when updating their code.
3. **CLI Enhancements – Remote Run:** You can now send full Python objects in Remote Run using Pydantic models, making structured input handling easier for advanced use cases.
4. **Explore Models UI Redesign:** The Explore Models UI has been refreshed! You now get easier access to various task types, ability to customize GPU and environment variables at deploy time, native support for vLLM models
5. **CLI Bug Fixes for Volumes:** We have added validation for file directories and uploads.Prevented failures during data copy to NFS volumes to ensure smooth volume operations
These updates deliver better scaling, faster iteration, and a smoother experience across the CLI and UI.
# 31st May 2025: Runtime Flexibility, Faster Remote Run, and Hugging Face Improvements
Source: https://docs.inferless.com/changelog/May-2025/31st-May
**Latest Enhancements & Features:**
1. **Runtime Optimization**: We've removed region restrictions from runtimes. Now, developers can use any runtime in any region—bringing runtime configs closer to the code and giving you more flexibility during deployment.
2. **🤗 Hugging Face Import Improvements**: To reduce model import failures, we’ve added validation checks—especially for cases where access to model weights is restricted. We’ve also introduced vLLM plugin support for faster inference with Hugging Face models.
3. **Remote Run – Speed Enhancements**: HF models used in Remote Run now benefit from caching, making subsequent executions significantly faster—ideal for quick testing and iteration cycles.
4. **Streaming Logs for Model Import** You can now view logs in real-time during model imports, helping you track build progress more accurately and debug faster.
# 15th April 2024: Runtime Flexibility, Build Efficiency, and Autoscaling Improvements
Source: https://docs.inferless.com/changelog/april-2024/16th-april
**Latest Enhancements & Features:**
1. **Enhanced Runtime Configuration:** You can now include shell commands in your Runtime.yaml that execute sequentially during runtime build. This feature is particularly useful for packages that require step-by-step installation procedures. For more details on bringing custom packages, please visit our [documentation](https://docs.inferless.com/model-import/bring-custom-packages)
2. **Reduced Build Times:** We have implemented changes that significantly reduce the build time for model imports.
3. **Improved Autoscaling:** Enhancements to our autoscaling capabilities now provide additional buffer capacity during peak hours. This ensures that your operations can scale smoothly and effectively, meeting demand without compromising performance.
4. **Improved Runtime Logs:** The logs section for Runtime now includes detailed visibility into all build steps, allowing for better tracking and troubleshooting of custom runtimes.
These updates underline our commitment to providing a reliable, efficient, and user-friendly platform. By continually enhancing our services and infrastructure, we aim to support your needs and empower your projects.
# 8th April 2024: Workflow Optimization, Infrastructure Enhancements, and Runtime Updates
Source: https://docs.inferless.com/changelog/april-2024/8th-april
**Latest Enhancements & Features:**
This update bring internal improvements to make platform performance and user experience better:
1. **Docker Build Synchronization:** We've introduced a new workflow in the inferless-docker service to optimise docker builds, effectively preventing timeouts caused by prolonged build time.
2. **Infrastructure Stability Improvements:** Significant stability fixes have been applied to the inference pod system, enabling automatic recovery from states of failure and crash backoff loops.
3. **CLI Enhancement for Runtime Export:** The CLI has been upgraded to support a straightforward command for exporting from Cog runtime to Inferless runtime, simplifying the transition and enhancing usability.
4. **NVIDIA Driver Update for US East Region:** For customers in region-1, the NVIDIA driver version has been updated from 480 to 525. This change addresses CUDA runtime errors, ensuring smoother operation and compatibility for our users.
These updates underline our commitment to providing a reliable, efficient, and user-friendly platform. By continually enhancing our services and infrastructure, we aim to support your needs and empower your projects.
# 18th December : Advanced Monitoring, Better Custom Runtime, and Enhanced Integration Stability
Source: https://docs.inferless.com/changelog/december-2023/18th-december
Key Enhancements & Updates:
In our continuous effort to improve efficiency and user experience on our platform, we are excited to share our latest advancements:
1. **Upgraded to On-Premises Grafana for Superior Monitoring:** We've transitioned from hosted to on-premises Grafana. This strategic move significantly enhances our data point collection capabilities and query response times. It effectively resolves the metrics outage issues previously experienced with the hosted Grafana, leading to more robust and detailed system monitoring.
2. **Simplified Custom Runtime Management:** Enhancing the user experience in runtime management, we now offer the ability to directly view and edit custom runtime settings on the platform. This update eliminates the cumbersome process of re-uploading files for each change.
3. **Extended Billing Access for Admin Users:** We have now enabled non-owner users to access billing payment links. This enhancement facilitates easier and more convenient payment procedures for all users & not just console owner.
4. **GitHub Webhook Stability Improvements:** This improvement ensures more dependable and consistent performance, enhancing overall integration reliability.
We remain committed to continually refining our platform, focusing on delivering a service that is not only robust and efficient but also aligns with the evolving needs of our users.
# 22nd December: Enhanced Metrics, Improved Logging, and Advanced Model Support
Source: https://docs.inferless.com/changelog/december-2023/22nd-december
Key Enhancements & Updates:
In our latest release, we are introducing several key enhancements aimed at boosting performance, improving user experience, and expanding functionality:
1. **Dynamic Interval for Grafana Metrics:** This update significantly speeds up the loading of the metrics page on the UI, ensuring a more responsive and efficient monitoring experience.
2. **Docker Build Logs with OpenSearch:** Transitioning to OpenSearch for Docker build logs, users can now experience faster and more efficient log retrieval for their containers, enhancing the debugging and monitoring process.
3. **Detailed Model Health API:** The model health API has been updated to provide more comprehensive details during the booting up and healthy states of models. This offers users better insights into model performance and health.
4. **Transformer Library Update:** We have updated our default image in the Transformer Library to support advanced models like SDXL and LLama 2. This update reduces the need for creating custom runtimes and streamlining model deployment and usage.
5. **Python Async Client for Inferless APIs:** Introducing a Python asynchronous client, this feature allows users to interact with Inferless APIs asynchronously, facilitating non-blocking calls and enhancing overall application performance. Check the [docs here. ](https://docs.inferless.com/model-endpoint/inferless-python-client)
This release further solidifies our commitment to providing a platform that serves you better.
# 4th December: UI Enhancements, Stable Builds, and Better Error Handling
Source: https://docs.inferless.com/changelog/december-2023/4th-december
**Latest Updates & Bug Fixes:**
In our ongoing commitment to enhance the user experience and platform efficiency, we are excited to announce our latest updates:
1. **Refined CPU Memory UI Settings:** We've updated the UI for CPU memory adjustments to automatically default to the optimal setting based on the selected machine type during deployment. This ensures a more intuitive and efficient setup process.
2. **Increased Version History Limit to 20:** The version history limit in the UI has been increased from 5 to 20. This expansion allows for greater access to your build history, enabling more effective tracking and management of past versions.
3. **Improved Visibility of Input/Output Schema in Model Details:** On the model details page, users can now view the actual input and output schemas. This enhancement provides clearer insights into model settings and streamlines the deployment process.
4. **Enhanced Volume Value Retention in Reimport/Rebuild:** To prevent data loss and potential import errors, volume values are now consistently retained during reimport or rebuild phases of model deployment.
5. **Adjustable Inference and Scale-Down Timeout Settings:** We've introduced the ability to customize inference timeout and scale-down timeout settings directly in the model import process.
6. **AutoBuild UI Update for Accurate Date Tracking:** The AutoBuild feature has been improved to display the correct date, providing a more accurate and user-friendly means of tracking model imports.
**Additional Internal Improvements:**
1. **In-Build Docker Image Cleanup to avoid Out-of-memory errors:** Implementing weekly clearance of docker image cache to stabilize model builds.
2. **Expedited Model Booting Process:** Various improvements have been implemented to speed up the model booting process, reducing wait times and improving overall performance.
These updates are part of our commitment to delivering a robust, efficient, and user-friendly platform. We are continuously working on improving our service and appreciate your feedback and support.
# 9th December 2024: CLI v2.0: Faster and Smoother Experience
Source: https://docs.inferless.com/changelog/december-2024/9th-december
**Latest Enhancements & Features:**
1. **inferless init**: Simplified model import initialization with fewer parameters required to get started.Added support for Hugging Face, Docker, S3, and File-based deployments directly via subcommands.[Read the documentation](https://docs.inferless.com/references/cli/inferless-init)
2.**inferless deploy** :Deploy models without YAML by directly specifying machine configurations and runtime files during deployment. Automatically creates runtimes for your models, enabling faster deployments.[Read the documentation](https://docs.inferless.com/references/cli/inferless-deploy)
3. **inferless model**: Comprehensive model management commands to list, delete, rebuild, get details, activate, deactivate, and patch configurations. [Read the documentation](https://docs.inferless.com/references/cli/inferless-model)
4. **inferless integration**:Manage integrations with providers like Dockerhub, ECR, GCS, Hugging Face, and S3. Add and list integrations seamlessly. [Read the documentation](https://docs.inferless.com/references/cli/inferless-integration)
5. **inferless volume**: Create volumes, copy files, list contents, and remove files or directories. Specify custom mount points in the deploy command. Edit mount points during or after deployment for greater flexibility.[Read the documentation](https://docs.inferless.com/references/cli/inferless-volume)
# 12th February 2024 - Enhanced Monitoring, Docker Flexibility, and One-click Model Deploy
Source: https://docs.inferless.com/changelog/february-2024/12th-february
**What’s New:**
We're excited to introduce a series of updates designed to streamline your workflow, enhance flexibility, and simplify model exploration. Here's what's been rolled out:
1. **Recent Runs Overview:** Gain insights into your last 20 API calls with our new Recent Runs feature. This enhancement is aimed at improving your ability to debug models in production. To activate this feature, simply apply a patch to your model via the Model Settings.
2. **Docker Import Improvements:** We've lifted the limitations on the port configurations for the inference server, allowing you to specify the port dynamically upon import. Moreover, you can now set custom endpoints for health checks and inference, providing greater adaptability in model integration.
3. **Explore Model Feature:** Discover and deploy popular models in production with just a single click through our Explore Model feature. This addition enables you to experiment with new models effortlessly, requiring zero integration effort on your part.
**Minor Bug Fixes:**
1. Resolved an issue in Docker import where capital letters in the name led to import failures.
2. Improved error logging for mismatches between the Input/Output schema and the returned dictionary, ensuring clearer feedback for troubleshooting.
# 26th February 2024 - Better Exception Handling, Dynamic Batching Support and more.
Source: https://docs.inferless.com/changelog/february-2024/26th-february
**What's New:**
This update introduces significant enhancements focused on optimizing model management and deployment, offering more robust exception handling and dynamic operational capabilities. Here's what's new:
1. **Enhanced Exception Handling for Models:** We've improved the way exceptions are handled for model returns. Now, if a returned object doesn't match the required datatype, a specific error will indicate the expected datatype, facilitating quicker resolution of model import issues.
2. **Dynamic Batching Support:** Dynamic batching has been made more accessible to users. By utilizing specific flags, users can optimize model performance for varying workload demands. Learn more about configuring dynamic batching in our documentation.
3. **CI/CD Enhancements for Serverless v2:** The auto-build feature has been extended to Serverless v2 deployments, enabling users to streamline their build and deployment processes for serverless applications. Keep a tab, new version coming soon.
4. **Automated Integration Test Suite:** Our new integration test suite automatically runs new additional 10 test cases, significantly reducing the likelihood of production errors and ensuring smoother deployments.
These updates are part of our ongoing commitment to enhance the usability and reliability of our platform.
# 12th January 2024 - Enhanced Volume Management, Docker Integration, and Improved Billing Processes
Source: https://docs.inferless.com/changelog/january-2024/12th-january
**Latest Enhancements & Features:**
We are excited to announce our new set of features and improvements, focusing on optimizing developer experience and expanding our platform capabilities:
1. **Enhanced Volume Sync Support:** CLI customers can now seamlessly push data to Inferless volumes via CLI, enabling direct access to the data across all replica containers. This eliminates the need to pull data in the initialization function, significantly improving the development experience.
2. **Volume Support for A10G Machines:** Our volume management system now supports A10G machines, allowing customers to utilize region-specific volumes.
3. **Docker-Based Model Import Feature:** We've expanded our platform's capabilities to support any Docker image and DockerFile, offering greater flexibility in model deployment. For detailed information and guidance, please visit our [documentation on Docker integration](https://docs.inferless.com/integrations/docker).
4. **Enhanced Exception Handling for Model Import:** We have improved exception handling for model imports, specifically when inputs lack name, shape, or datatype. This results in more robust input parameter validation, ensuring smoother model integration and deployment.
These updates reflect our dedication to evolving our platform to meet the diverse and growing needs of our users.
# January 29, 2024 - Removal of I/O JSON, Webhook Support for Docker and Improved Runtime Management
Source: https://docs.inferless.com/changelog/january-2024/29th-january
**Latest Enhancements & Features:**
We're excited to bring you the latest features and improvements designed to enhance your experience and efficiency on our platform:
1. **Removal of Input/Output JSON:** We've eliminated the need for adding Input/Output JSON in the Inferless console. You can now conveniently configure I/O parameters within your app.py code. For more details, please refer to our [Input/Output Schema documentation](https://docs.inferless.com/model-import/input-output-schema).
2. **Docker CI/CD Integration with Webhook Support:** Docker imports just got more efficient with the introduction of webhook support. This allows for automated updates and management of Docker images. For more details, please refer to [Webhook - Docker documentation](https://docs.inferless.com/model-import/automatic-build-via-webhooks/docker)
3. **Runtime Management Moved to Workspace Level:** Runtimes have been shifted from the user level to the workspace level, enabling different users to reuse and share runtimes within the same workspace.
4. **Frontend Support for Region-Specific Volumes:** Users can now create and manage volumes specific to regions (AWS/Azure), providing more control and customization for data storage and accessibility.
# 5th January - Faster Cold-starts, Security Upgrades, and Integration Efficiency
Source: https://docs.inferless.com/changelog/january-2024/5th-january
**What's New in This Update:**
As part of our ongoing effort to enhance performance, security, and usability, we're excited to roll out the following updates:
1. **Docker Cache Parallel Puller:** Introducing a new parallel puller for Docker caches, this feature significantly reduces cold starts for models with custom runtimes.
2. **Account Block Feature for Enhanced Security:** To bolster account security and prevent brute force attacks, we've implemented an account block feature.
3. **Integrated GitHub URL Fetch:** Users can now search for GitHub repositories directly within Inferless, streamlining the process and eliminating the need for time-consuming copy-pasting.
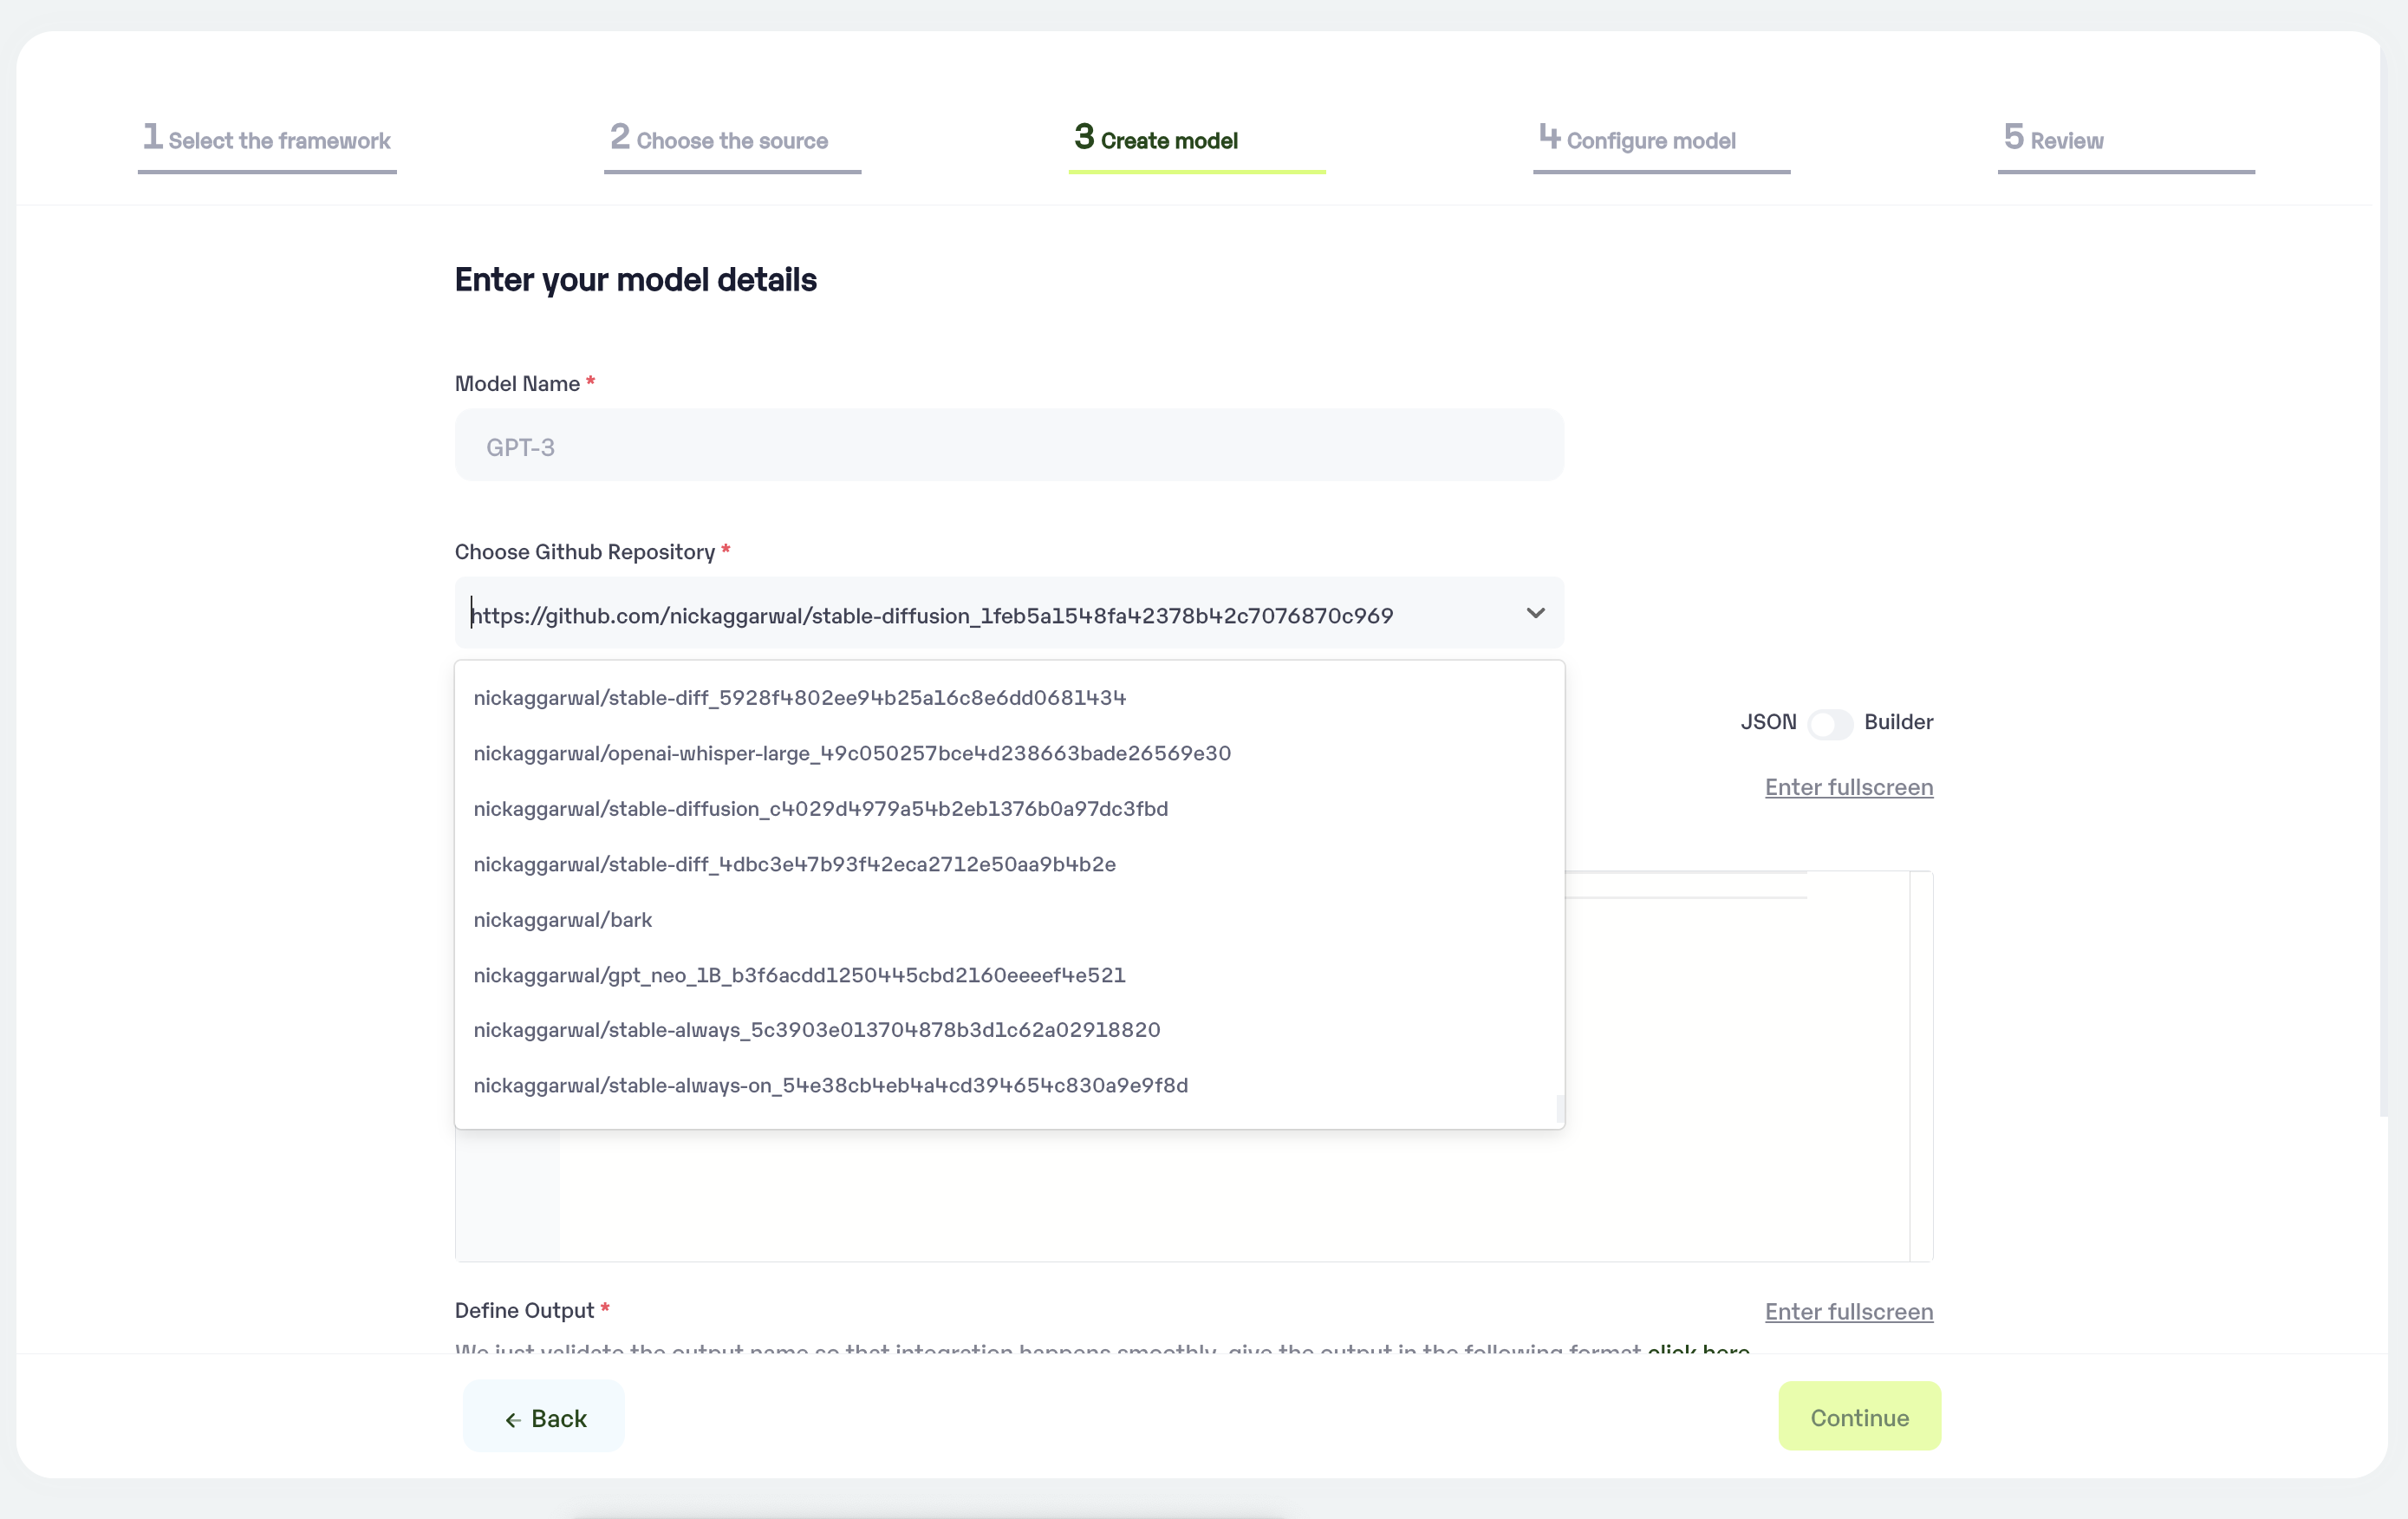 Github URL Search
These updates are part of our commitment to delivering a robust, efficient, and user-friendly platform.
# July 16th Update - Inferless AI Chatbot, CLI Improvements, and 30% faster build times
Source: https://docs.inferless.com/changelog/july-2024/16th-july
**Latest Enhancements & Features:**
1. **Inferless AI Chatbot**: Our new chatbot is now available in the Inferless console to assist developers with their questions. You can ask queries on how to write integration files, explore different feature supports, and much more.
2. **Automatic TOML Detection**: The CLI now automatically detects TOML files for libraries and creates the runtime.yaml file, simplifying the setup process for your projects.
3. **Added OOM Detection**: We've implemented Out-Of-Memory (OOM) detection for models. If your model encounters an OOM error during inference, you will receive a notification suggesting you change the GPU type or switch from a shared to a dedicated environment.
4. **Build Speed Enhancements**: We've made significant changes to improve build times. By optimizing data handling, cluster-specific workers, and event-based model synchronization, build times are now 30% faster.
Stay tuned for more exciting updates and enhancements.
# June 10th Update - Streaming APIs and Flexible Logging Options
Source: https://docs.inferless.com/changelog/june-2024/10th-june
**Latest Enhancements & Features:**
1. **Streaming APIs**: We now support streaming APIs with SSE, ideal for creating a communication channel from the server to the client. This is particularly useful for real-time chat, live updates, and streaming data such as audio and video frames. You can send multiple outputs for the same input, enhancing the versatility of your applications. Learn more in our documentation [here](https://docs.inferless.com/api-reference/streaming)
2. **Flexible Logging Options with 'is\_less':**: We’ve introduced is\_less log options for users who need to trace logs only for specific requests. This feature helps in debugging applications more efficiently. Additionally, you have the option to switch to full logs to capture detailed CUDA-level errors when needed.
# June 21st Update - Enhanced CLI Commands and Model Management APIs
Source: https://docs.inferless.com/changelog/june-2024/21st-june
**Latest Enhancements & Features:**
1. **Runtime Patch Command**: We've added a new patch command to the Inferless CLI. This allows you to update packages in your runtime easily. Simply use inferless runtime patch -p path/to/file to apply updates efficiently.
2. **Machine Settings Configuration**: You can now programmatically configure machine settings for your models using our API. Learn more in our documentation [here](https://docs.inferless.com/api-reference/model-management-apis/model-settings-update).
3. **Fetch Model Logs**: Retrieve logs for any model programmatically with our new API. Detailed instructions are available in our documentation [here](https://docs.inferless.com/api-reference/model-management-apis/model-logs-get)
Stay tuned for more exciting features and improvements.
# 11th March 2024: Better Monitoring Tools and Enhanced User Control
Source: https://docs.inferless.com/changelog/march-2024/11th-march
**Latest Enhancements & Features:**
In our latest release, we've focused on providing deeper insights into your usage and offering more control over your integration settings. Here’s a brief overview of the key updates:
1. **Storage Monitoring and Alerts:** We've introduced internal mechanisms for tracking monthly average storage usage and generating alerts. This development is aimed at refining our process for storage, ensuring transparency and accuracy.
2. **Toggle for Input/Output Tracking:** Users now have the flexibility to enable or disable input/output tracking. This feature allows for customized data handling based on your privacy and performance preferences.
3. **GPU Utilization Insights:** A new feature that displays GPU utilization for API requests is now available, enabling users to monitor and optimize their models' performance more effectively.
These updates are designed to give you more visibility into your resource usage and more flexibility in how you manage your settings, contributing to a smoother and more efficient user experience. We’re committed to continuous improvement and eagerly anticipate your feedback on these new features.
# 28th March 2024: Reducing model import time, better error handling
Source: https://docs.inferless.com/changelog/march-2024/28-march
**Latest Enhancements & Features:**
We are excited to announce our newest updates aimed at enhancing user experience through more efficient processes and clearer error reporting. Here are the details:
1. **Introducing Inferless Run**: Inferless run helps you test the container locally before pushing it to us that can resolve the build and runtime errors faster. Just three steps to get started:
* pip install inferless-cli
* inferless init
* inferless run
Here is a \[tutorial and documentation] ([https://docs.inferless.com/model-import/cli-import#run-a-model-locally](https://docs.inferless.com/model-import/cli-import#run-a-model-locally))
2. **Improved Model Import Cancellation**: Users can now cancel model imports more efficiently, with enhanced worker termination speed.
3. **Optimized S3 Uploads** : We've made improvements boosting the speed of uploads via CLI. This improvement facilitates faster data transfers, enhancing productivity.
4. **Enhanced Validator for Input Schema**: A fix has been applied to address the issue with shapes with better error reporting. This update provides users with clearer, more precise feedback on errors related to the input schema, improving troubleshooting.
5. **Explore model Exception Handling Improvements**: Enhanced error reporting now addresses scenarios during the Explore model's one-click deploy process.
# May 27th Update - Enhanced Runtime Management, AutoFix Suggestions, and Improved Infrastructure Stability
Source: https://docs.inferless.com/changelog/may-2024/27th-may
**Latest Enhancements & Features:**
1. **Custom Runtime Versioning**: You can now track changes across custom runtimes with ease. View different versions and manage your deployments without affecting older versions. Updates will only apply when you deploy the updated version in the model settings, providing greater control and stability.
You can check the documentation [here](https://docs.inferless.com/model-import/bring-custom-packages#runtime-versions)
2. **AutoFix Suggestions**: Introducing AutoFix Suggestions for model imports. Leveraging our Generative AI-powered RAG application, we analyze error logs to provide tailored suggestions for fixing issues. This feature helps streamline the troubleshooting process, saving you time and effort.
3. **Infrastructure Stability**: The load balancer has been updated to the latest Istio version, significantly enhancing platform stability. This update addresses previous stability issues, ensuring a smoother and more reliable experience.
These updates are part of our ongoing efforts to enhance the functionality and reliability of our platform.
# 6th May 2024: Enhanced Serverless Speeds, Model Build Efficiency, and Runtime Improvements
Source: https://docs.inferless.com/changelog/may-2024/6th-may
**Latest Enhancements & Features:**
1. **Container Concurrency for Serverless v2**: Once we migrate users to the latest version, it will allow you to deploy multiple instances of your application concurrently, enhancing scalability and responsiveness.
2. **Concurrent Build Workers**: To speed up the model import process, we've introduced concurrent build workers. This update minimizes wait times in the queue by allowing multiple builds to proceed simultaneously, significantly reducing overall build duration.
3. **Enhanced Error Handling for Builds**: We've improved error handling to better manage instances where builds may enter an infinite loop. This refinement helps in quickly identifying and resolving issues, ensuring smoother and more reliable build processes.
These updates underline our commitment to providing a reliable, efficient, and user-friendly platform. By continually enhancing our services and infrastructure, we aim to support your needs and empower your projects.
# 10th November: Gitlab Integration, Secrets Manager & Better Billing
Source: https://docs.inferless.com/changelog/november-2023/10th-november
## What's New
1. **Model Import Configuration Update:** Removed manual RAM and vCPU configuration from model import. Auto-configuration now allocates increased vCPU & RAM automatically.
2. **Credential Management Enhancement:** Introduced a Secrets Manager reducing the need for repeated secret creations. Detailed information available at [Inferless Documentation on Secret Manager](https://docs.inferless.com/model-import/my-secrets).
Github URL Search
These updates are part of our commitment to delivering a robust, efficient, and user-friendly platform.
# July 16th Update - Inferless AI Chatbot, CLI Improvements, and 30% faster build times
Source: https://docs.inferless.com/changelog/july-2024/16th-july
**Latest Enhancements & Features:**
1. **Inferless AI Chatbot**: Our new chatbot is now available in the Inferless console to assist developers with their questions. You can ask queries on how to write integration files, explore different feature supports, and much more.
2. **Automatic TOML Detection**: The CLI now automatically detects TOML files for libraries and creates the runtime.yaml file, simplifying the setup process for your projects.
3. **Added OOM Detection**: We've implemented Out-Of-Memory (OOM) detection for models. If your model encounters an OOM error during inference, you will receive a notification suggesting you change the GPU type or switch from a shared to a dedicated environment.
4. **Build Speed Enhancements**: We've made significant changes to improve build times. By optimizing data handling, cluster-specific workers, and event-based model synchronization, build times are now 30% faster.
Stay tuned for more exciting updates and enhancements.
# June 10th Update - Streaming APIs and Flexible Logging Options
Source: https://docs.inferless.com/changelog/june-2024/10th-june
**Latest Enhancements & Features:**
1. **Streaming APIs**: We now support streaming APIs with SSE, ideal for creating a communication channel from the server to the client. This is particularly useful for real-time chat, live updates, and streaming data such as audio and video frames. You can send multiple outputs for the same input, enhancing the versatility of your applications. Learn more in our documentation [here](https://docs.inferless.com/api-reference/streaming)
2. **Flexible Logging Options with 'is\_less':**: We’ve introduced is\_less log options for users who need to trace logs only for specific requests. This feature helps in debugging applications more efficiently. Additionally, you have the option to switch to full logs to capture detailed CUDA-level errors when needed.
# June 21st Update - Enhanced CLI Commands and Model Management APIs
Source: https://docs.inferless.com/changelog/june-2024/21st-june
**Latest Enhancements & Features:**
1. **Runtime Patch Command**: We've added a new patch command to the Inferless CLI. This allows you to update packages in your runtime easily. Simply use inferless runtime patch -p path/to/file to apply updates efficiently.
2. **Machine Settings Configuration**: You can now programmatically configure machine settings for your models using our API. Learn more in our documentation [here](https://docs.inferless.com/api-reference/model-management-apis/model-settings-update).
3. **Fetch Model Logs**: Retrieve logs for any model programmatically with our new API. Detailed instructions are available in our documentation [here](https://docs.inferless.com/api-reference/model-management-apis/model-logs-get)
Stay tuned for more exciting features and improvements.
# 11th March 2024: Better Monitoring Tools and Enhanced User Control
Source: https://docs.inferless.com/changelog/march-2024/11th-march
**Latest Enhancements & Features:**
In our latest release, we've focused on providing deeper insights into your usage and offering more control over your integration settings. Here’s a brief overview of the key updates:
1. **Storage Monitoring and Alerts:** We've introduced internal mechanisms for tracking monthly average storage usage and generating alerts. This development is aimed at refining our process for storage, ensuring transparency and accuracy.
2. **Toggle for Input/Output Tracking:** Users now have the flexibility to enable or disable input/output tracking. This feature allows for customized data handling based on your privacy and performance preferences.
3. **GPU Utilization Insights:** A new feature that displays GPU utilization for API requests is now available, enabling users to monitor and optimize their models' performance more effectively.
These updates are designed to give you more visibility into your resource usage and more flexibility in how you manage your settings, contributing to a smoother and more efficient user experience. We’re committed to continuous improvement and eagerly anticipate your feedback on these new features.
# 28th March 2024: Reducing model import time, better error handling
Source: https://docs.inferless.com/changelog/march-2024/28-march
**Latest Enhancements & Features:**
We are excited to announce our newest updates aimed at enhancing user experience through more efficient processes and clearer error reporting. Here are the details:
1. **Introducing Inferless Run**: Inferless run helps you test the container locally before pushing it to us that can resolve the build and runtime errors faster. Just three steps to get started:
* pip install inferless-cli
* inferless init
* inferless run
Here is a \[tutorial and documentation] ([https://docs.inferless.com/model-import/cli-import#run-a-model-locally](https://docs.inferless.com/model-import/cli-import#run-a-model-locally))
2. **Improved Model Import Cancellation**: Users can now cancel model imports more efficiently, with enhanced worker termination speed.
3. **Optimized S3 Uploads** : We've made improvements boosting the speed of uploads via CLI. This improvement facilitates faster data transfers, enhancing productivity.
4. **Enhanced Validator for Input Schema**: A fix has been applied to address the issue with shapes with better error reporting. This update provides users with clearer, more precise feedback on errors related to the input schema, improving troubleshooting.
5. **Explore model Exception Handling Improvements**: Enhanced error reporting now addresses scenarios during the Explore model's one-click deploy process.
# May 27th Update - Enhanced Runtime Management, AutoFix Suggestions, and Improved Infrastructure Stability
Source: https://docs.inferless.com/changelog/may-2024/27th-may
**Latest Enhancements & Features:**
1. **Custom Runtime Versioning**: You can now track changes across custom runtimes with ease. View different versions and manage your deployments without affecting older versions. Updates will only apply when you deploy the updated version in the model settings, providing greater control and stability.
You can check the documentation [here](https://docs.inferless.com/model-import/bring-custom-packages#runtime-versions)
2. **AutoFix Suggestions**: Introducing AutoFix Suggestions for model imports. Leveraging our Generative AI-powered RAG application, we analyze error logs to provide tailored suggestions for fixing issues. This feature helps streamline the troubleshooting process, saving you time and effort.
3. **Infrastructure Stability**: The load balancer has been updated to the latest Istio version, significantly enhancing platform stability. This update addresses previous stability issues, ensuring a smoother and more reliable experience.
These updates are part of our ongoing efforts to enhance the functionality and reliability of our platform.
# 6th May 2024: Enhanced Serverless Speeds, Model Build Efficiency, and Runtime Improvements
Source: https://docs.inferless.com/changelog/may-2024/6th-may
**Latest Enhancements & Features:**
1. **Container Concurrency for Serverless v2**: Once we migrate users to the latest version, it will allow you to deploy multiple instances of your application concurrently, enhancing scalability and responsiveness.
2. **Concurrent Build Workers**: To speed up the model import process, we've introduced concurrent build workers. This update minimizes wait times in the queue by allowing multiple builds to proceed simultaneously, significantly reducing overall build duration.
3. **Enhanced Error Handling for Builds**: We've improved error handling to better manage instances where builds may enter an infinite loop. This refinement helps in quickly identifying and resolving issues, ensuring smoother and more reliable build processes.
These updates underline our commitment to providing a reliable, efficient, and user-friendly platform. By continually enhancing our services and infrastructure, we aim to support your needs and empower your projects.
# 10th November: Gitlab Integration, Secrets Manager & Better Billing
Source: https://docs.inferless.com/changelog/november-2023/10th-november
## What's New
1. **Model Import Configuration Update:** Removed manual RAM and vCPU configuration from model import. Auto-configuration now allocates increased vCPU & RAM automatically.
2. **Credential Management Enhancement:** Introduced a Secrets Manager reducing the need for repeated secret creations. Detailed information available at [Inferless Documentation on Secret Manager](https://docs.inferless.com/model-import/my-secrets).
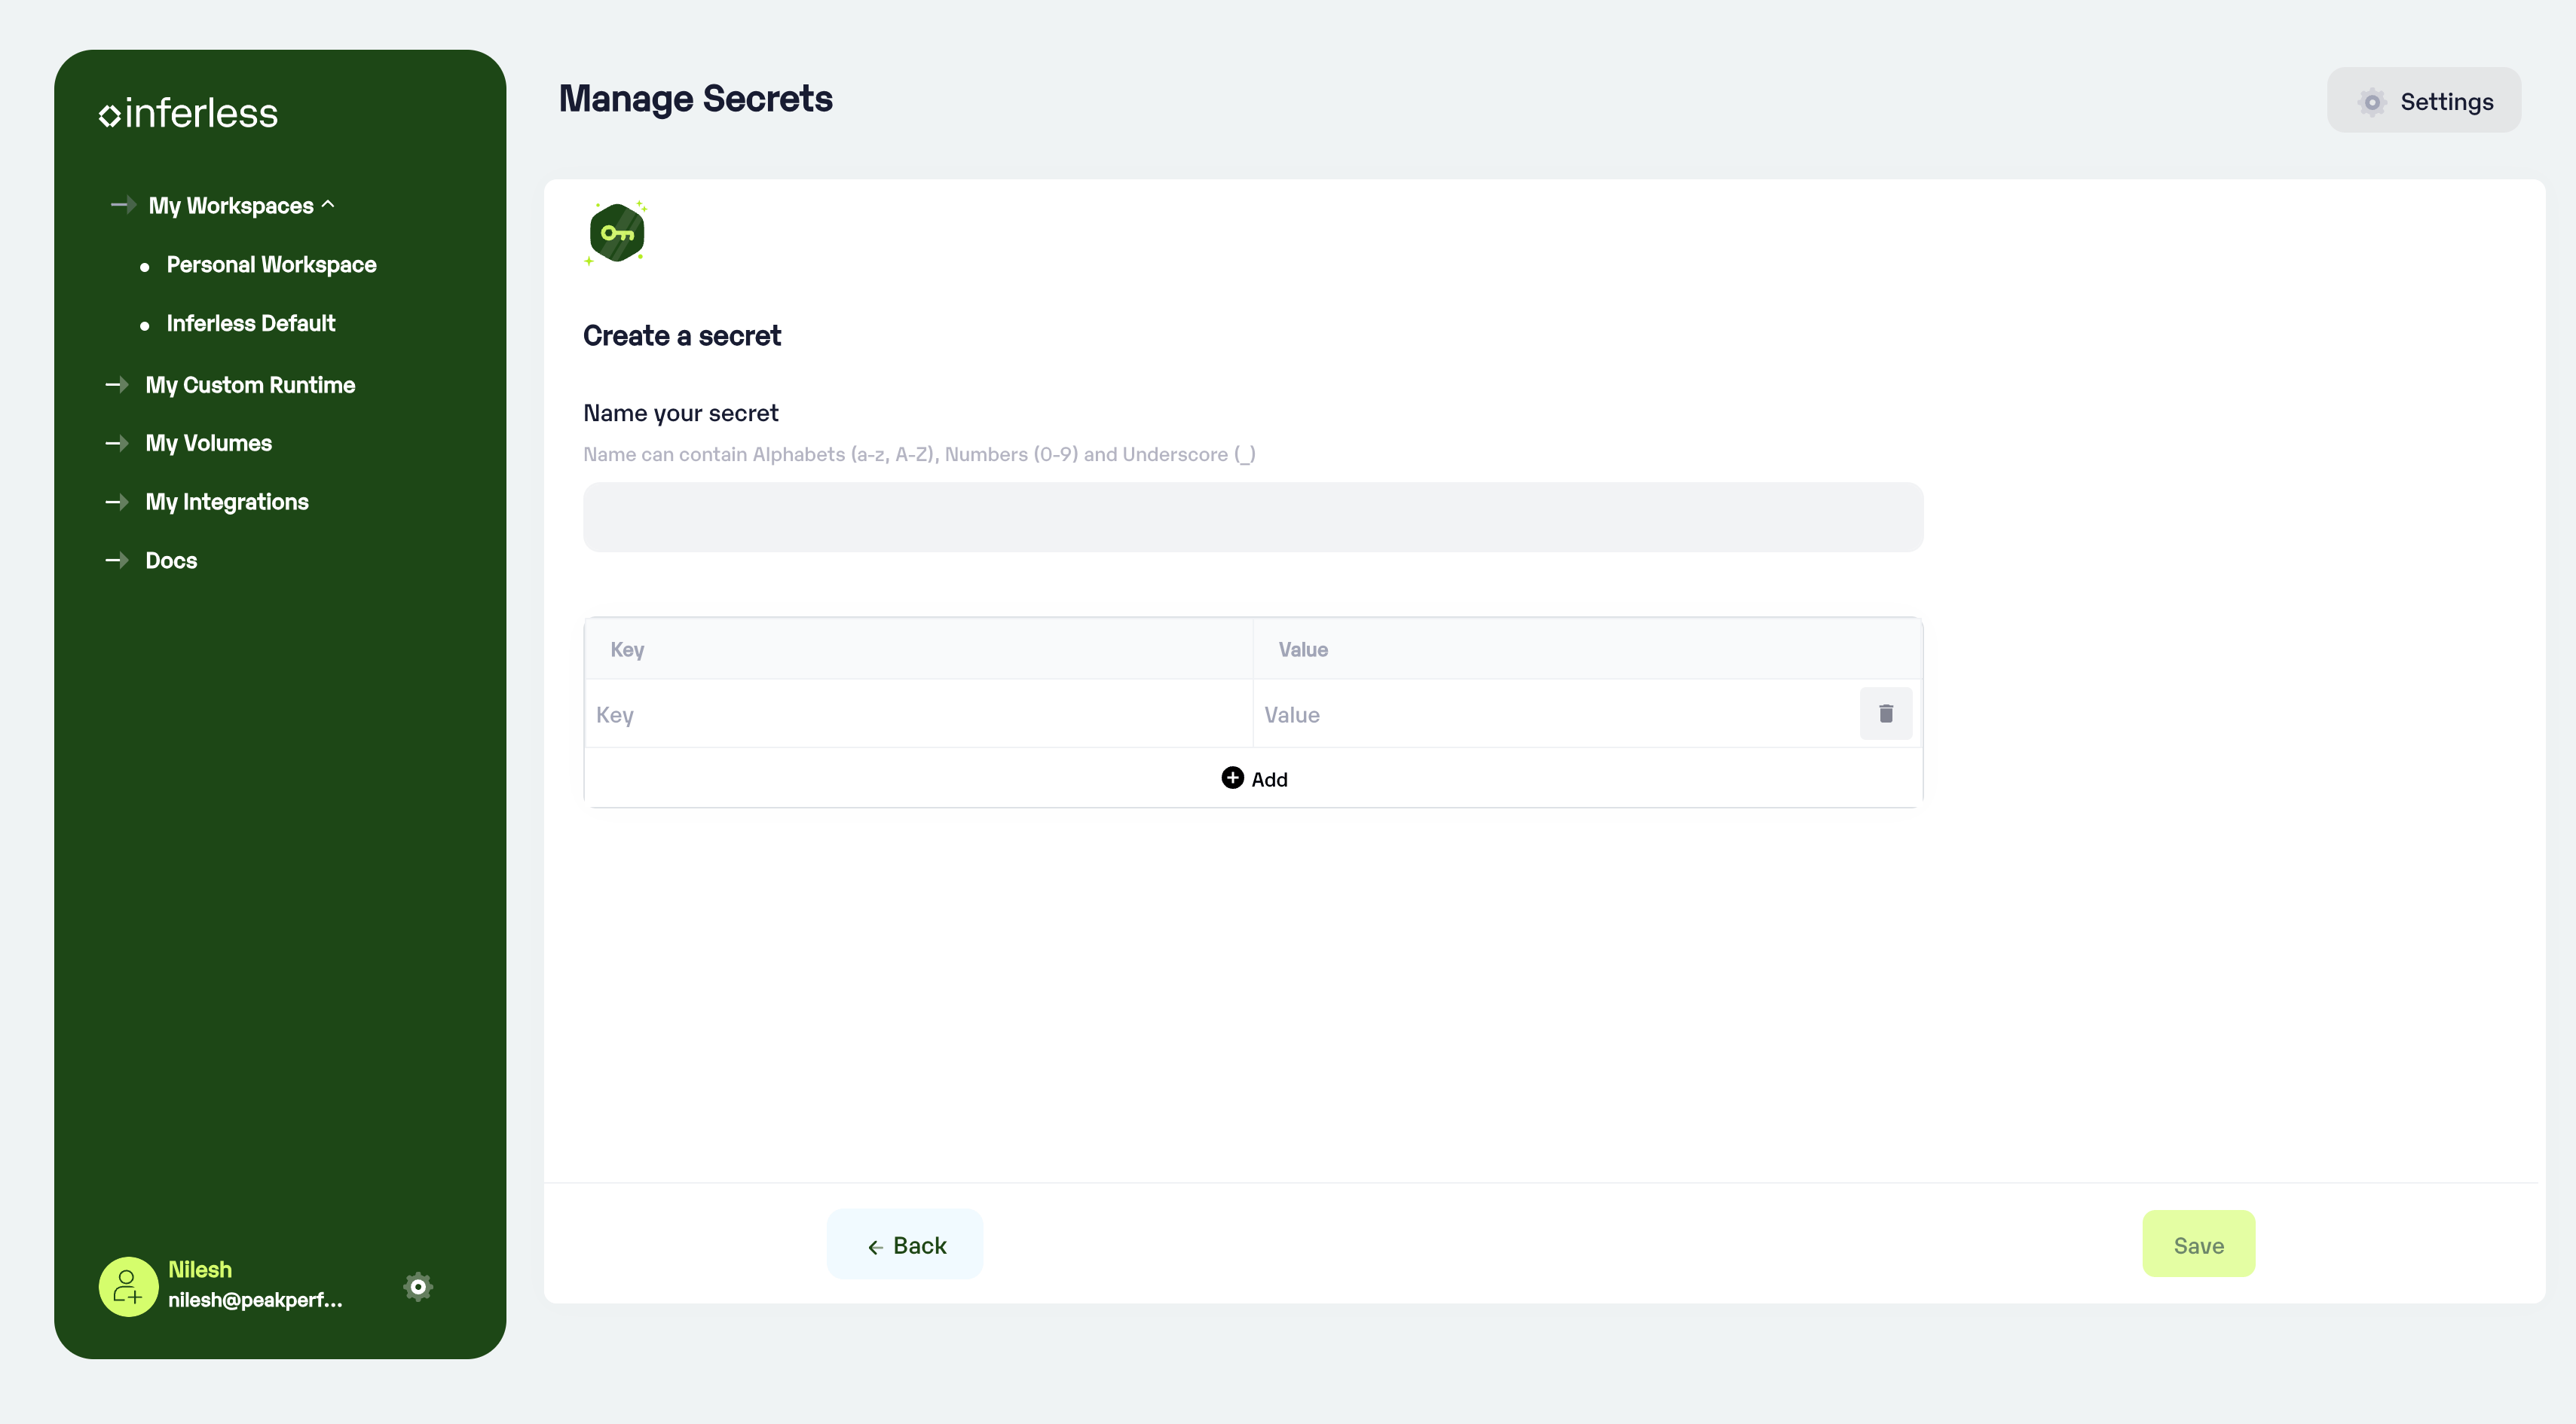 3. **GitLab Integration:** Integration with GitLab is now available, facilitating improved management of custom code directly connecting via your Gitlab. Refer to [GitLab Integration Documentation](https://docs.inferless.com/integrations/git-custom-code/gitlab-demo) for more information.
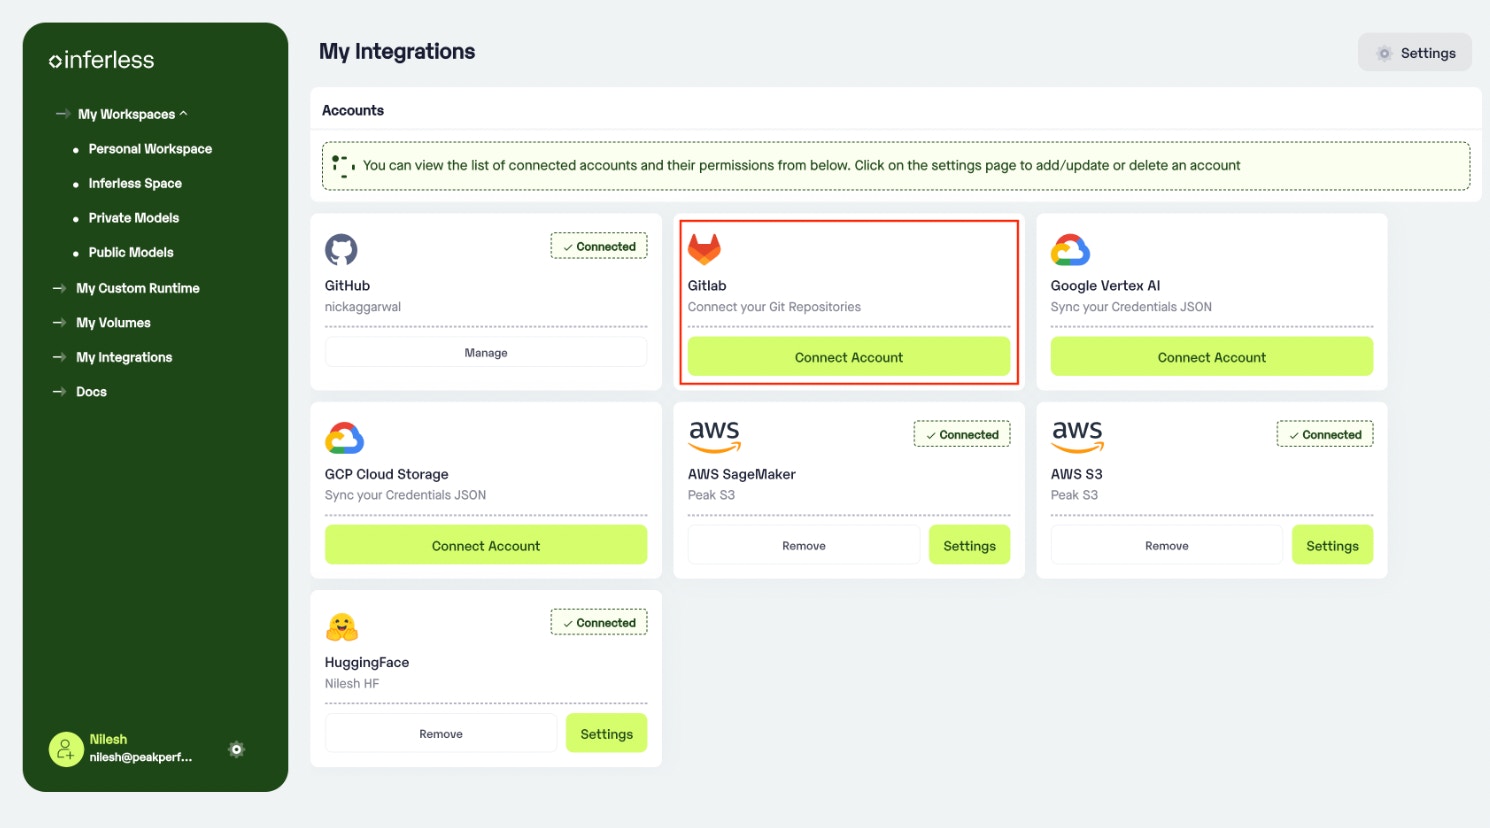 ## Improvements & Bug Fixes
5. **Billing Timestamp Correction:** Adjustments made to address inaccuracies in billing timestamps, preventing over-billing.
6. **Billing Pod Check Lambda Adjustment:** Updated the billing pod check lambda to ensure accurate billing processes.
7. **Response Payload Security:** Implemented signature verification for enhanced security of response payloads.
These updates are part of our ongoing commitment to improve Inferless's functionality and user experience.
# 17th November: Enhanced Error Handling and User Interface Improvements
Source: https://docs.inferless.com/changelog/november-2023/17th-november
**Bug Fixes:**
* **Backend Inference Log Issue:** We have resolved the problem where inference logs were looping or appearing empty in the backend. This fix ensures more accurate and reliable log data, aiding in better system analysis and debugging.
* **Frontend UI Timeout Resolution:** The issue causing the frontend UI to freeze at Step 3 has been fixed. Enhanced error messages and validation have been added for a more intuitive and uninterrupted user journey.
These updates are part of our commitment to delivering a seamless and user-friendly experience.
# 27th November: User Interface Enhancements and Reliability Improvements
Source: https://docs.inferless.com/changelog/november-2023/27th-november
**Latest Updates & Bug Fixes:**
In this release, we've focused on enhancing both the usability and reliability of our platform. Here’s a detailed overview of the changes and improvements:
1. **Python Code Formatting Fix:** We have corrected the formatting issues in Python code, ensuring cleaner and more readable code snippets.
2. **Documentation URL Fixes:** Some of the documentation links were pointing to the wrong pages, we have fixed them.
3. **Extended Inference Request Timeout:** The timeout for inference requests is now capped at 7200 seconds, accommodating longer processing times without compromising performance.
4. **API Call Retention Post Tab Switch:** API calls are now retained even after switching tabs, ensuring continuous workflow and data consistency.
5. **New User Signup - Verification Link Expiry:** The expiry for verification links has been extended to 3 days for signup, offering greater flexibility and convenience.
6. **Enhanced Build Log Feedback Post-Model Deployment:** During the model build phase, if the logs have not started streaming, we will note an exception of 'logs not found' and wait for the stream to begin.
7. **UI Improvement in Model Deactivation Section:** The user interface for the model deactivation where used doesn't have to put the scaling numbers
8. **Changelog Accessibility in Update Popups:** Now, users can easily access the changelog directly from the update notification popup in the console. This ensures you are always informed about the latest changes and improvements.
We hope these updates will enhance your overall experience and efficiency while using our platform. Your feedback is always welcome as we continue to evolve and improve.
# 3rd November: Better Logs & Efficient Autoscaling
Source: https://docs.inferless.com/changelog/november-2023/3rd-november
**What's New:**
1.
**Scale down Delay**: Transitioned scale-down delay from minutes to seconds, enhancing efficiency and cost-effectiveness.\
## Improvements & Bug Fixes
5. **Billing Timestamp Correction:** Adjustments made to address inaccuracies in billing timestamps, preventing over-billing.
6. **Billing Pod Check Lambda Adjustment:** Updated the billing pod check lambda to ensure accurate billing processes.
7. **Response Payload Security:** Implemented signature verification for enhanced security of response payloads.
These updates are part of our ongoing commitment to improve Inferless's functionality and user experience.
# 17th November: Enhanced Error Handling and User Interface Improvements
Source: https://docs.inferless.com/changelog/november-2023/17th-november
**Bug Fixes:**
* **Backend Inference Log Issue:** We have resolved the problem where inference logs were looping or appearing empty in the backend. This fix ensures more accurate and reliable log data, aiding in better system analysis and debugging.
* **Frontend UI Timeout Resolution:** The issue causing the frontend UI to freeze at Step 3 has been fixed. Enhanced error messages and validation have been added for a more intuitive and uninterrupted user journey.
These updates are part of our commitment to delivering a seamless and user-friendly experience.
# 27th November: User Interface Enhancements and Reliability Improvements
Source: https://docs.inferless.com/changelog/november-2023/27th-november
**Latest Updates & Bug Fixes:**
In this release, we've focused on enhancing both the usability and reliability of our platform. Here’s a detailed overview of the changes and improvements:
1. **Python Code Formatting Fix:** We have corrected the formatting issues in Python code, ensuring cleaner and more readable code snippets.
2. **Documentation URL Fixes:** Some of the documentation links were pointing to the wrong pages, we have fixed them.
3. **Extended Inference Request Timeout:** The timeout for inference requests is now capped at 7200 seconds, accommodating longer processing times without compromising performance.
4. **API Call Retention Post Tab Switch:** API calls are now retained even after switching tabs, ensuring continuous workflow and data consistency.
5. **New User Signup - Verification Link Expiry:** The expiry for verification links has been extended to 3 days for signup, offering greater flexibility and convenience.
6. **Enhanced Build Log Feedback Post-Model Deployment:** During the model build phase, if the logs have not started streaming, we will note an exception of 'logs not found' and wait for the stream to begin.
7. **UI Improvement in Model Deactivation Section:** The user interface for the model deactivation where used doesn't have to put the scaling numbers
8. **Changelog Accessibility in Update Popups:** Now, users can easily access the changelog directly from the update notification popup in the console. This ensures you are always informed about the latest changes and improvements.
We hope these updates will enhance your overall experience and efficiency while using our platform. Your feedback is always welcome as we continue to evolve and improve.
# 3rd November: Better Logs & Efficient Autoscaling
Source: https://docs.inferless.com/changelog/november-2023/3rd-november
**What's New:**
1.
**Scale down Delay**: Transitioned scale-down delay from minutes to seconds, enhancing efficiency and cost-effectiveness.\
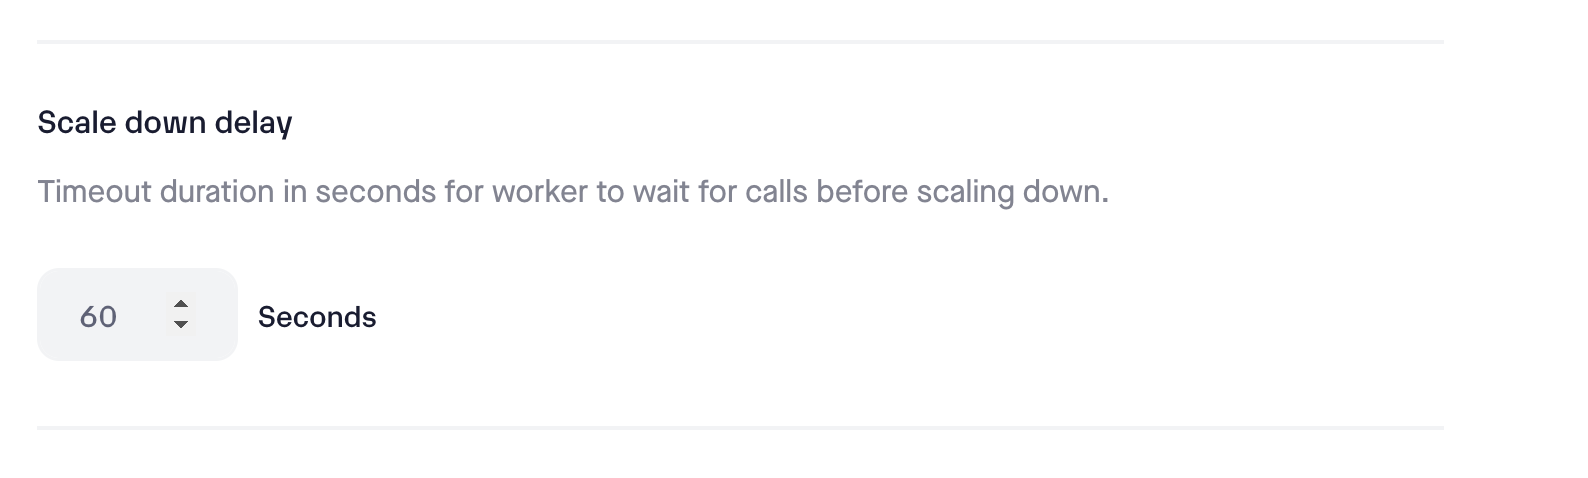 **Bug Fixes:**
1. **Volume Config**: Addressed an issue with null `custom_volume_config`.
2. **Team Payment**: Updated `is_payment_method_added` to allow team-wide card addition.
3. **GitHub Upgrades**: Refined error management for uninstalled GitHub scenarios and improved webhook tracking.
4. **Log Enhancement**: Reordered build logs for easier access to recent failures.
# 14th November 2024: Better Hugging Face Model Imports, Infrastructure Stability and Volume improvements
Source: https://docs.inferless.com/changelog/november-2024/14th-november
**Latest Enhancements & Features:**
1. **Volumes New UI:** We've introduced improvements to the Volumes UI for easier management. Now, you can view all models utilizing mounts directly within the UI. Additionally, you can manage and delete volumes seamlessly, providing greater control over storage resources.
2. **Hugging Face Model Import Customization:** Our Hugging Face Model Import feature now offers full customization for each model. You can modify the pipeline logic, add custom code, and include additional packages using the import methods, offering more flexibility to tailor models to your needs.
3. **Model Autobuild Enhancements:** Track each stage of Model Rebuilds directly from the Model Page. This update provides detailed status logs for rebuilds, mirroring the experience of the initial import, so you have better visibility throughout the process.
# 20th November 2024: Enhance Performance Tracking, New Runtime UI and more
Source: https://docs.inferless.com/changelog/november-2024/20th-november
**Latest Enhancements & Features:**
1. **New Runtime UI:** The Runtime UI has been redesigned for better usability. You can now easily track runtime changes, identify models using specific runtimes, and clean up unused runtimes effortlessly.
2. **Input/Output Tracking in Serverless V2**: We’ve added Input/Output tracking in Serverless V2, giving you deeper insights into how data flows through your deployments. This is only applicable for beta users with access to latest serverless capabilities.
3. **Enhanced Metrics:** Added percentile-based request latency to provide better visibility into inference performance. The cold start tracker now shows percentiles instead of individual container starts for improved clarity.
4. **Enhanced Autoscaling:** RPS-based scaling has been introduced to maintain low cold start times even at extremely high scales, resulting in significantly better p95 latency.
# 20th October : Better error handling, Git fixes
Source: https://docs.inferless.com/changelog/october-2023/20th-october
## What's New:
1. In the latest release, enhancements in error reporting for Input/Output (IN/OUT) JSON have been made, particularly in handling various data structures. Here's a summary of the changes:
* **Returning Dictionaries**: Improved support and examples for returning dictionaries with the keys being the labels and the values as the respective scores.
* **Returning Variable Length Arrays**: New examples have been added to demonstrate how variable-length arrays can be returned, showcasing the flexibility in handling different data sizes.
These updates provide better clarity and support for handling different data types and structures, ensuring a smoother user experience while working with IN/OUT JSON. We have updated the [documentation here.](https://docs.inferless.com/model-import/input-output-json)2. Email Verification on Signup: Added for enhanced onboarding security, alongside a feature to re-invite users to workspaces.
## Bug Fixes:
1. Enhancements have been made to the Git web-hooks storage mechanism, aiming to reduce build failures.
2. Dynamic Field Names: Tailored fields for sharing model details, adjustable based on integration choice.
# 7th October 2024: Enhanced Model Imports, Build Tracking, and Real-Time Logs
Source: https://docs.inferless.com/changelog/october-2024/7th-october
**Latest Enhancements & Features:**
1. **HF Model Import Improvements:** We've enhanced the Hugging Face Model Import functionality by adding support for Transformers 4.44+ models, including LLaMA 3.1 and many others that previously threw errors. Additionally, you can now pass more input parameters (such as output length, temperature, etc.) during model import, to run your model efficiently
2. **Model Build Progress Visibility:** You can now track your Model Build progress more effectively through detailed logs at different stages: Queue, Runtime Build, Worker (preparing the model), and Inference Validation. This gives you greater visibility into the status of your model builds and helps you identify any issues early in the process.
3. **Improved Docker Build Logs:** Docker build logs are now streamed in real-time, allowing you to track the progress of custom runtime builds faster and more easily, rather than waiting for all logs at the end.
These updates provide more efficient model management and enhanced visibility for smoother workflows in Inferless. Stay tuned for more improvements!
# Changelog
Source: https://docs.inferless.com/changelog/overview
New updates and improvements to Inferless.
# 30th September 2024: Remote Run, Infrastructure Stability, and Observability Improvements
Source: https://docs.inferless.com/changelog/september-2024/30th-september
**Latest Enhancements & Features:**
1. **Remote Run:** We’ve introduced Remote Run, enabling you to seamlessly run your code remotely. Execute scripts and workflows without the need for local infrastructure, improving flexibility and performance. Read the [documentation](https://dub.sh/remoterun)
2. **Infra Stability:** Addressed several infrastructure stability issues, leading to smoother user experiences during peak times.
3. **Faster Builds with In-cluster Workers:** Significantly improved build times using in-cluster workers, ensuring faster code deployments and model updates.
4. **Graphs & Metrics UI Stability:** Enhanced UI stability for the graphs and Metrics section, ensuring transparency to track API usage better.
This update ensures better performance, faster execution, and improved stability across key areas of Inferless. Stay tuned for more improvements coming soon!
# AI Agents CheatSheet
Source: https://docs.inferless.com/cheatsheet/ai-agent-cheatsheet
A comprehensive cheatsheet covering the types of AI agents, their use cases, popular frameworks, LLMs, deployment options, essential tools, optimization techniques, common challenges, and ethical considerations.
## 1. Types of AI Agents
* **Simple Reflex Agents**: These agents operate based solely on the current percept, ignoring the rest of the percept history. They function by implementing condition-action rules, making them suitable for fully observable environments.
* **Model-Based Reflex Agents**: These agents maintain an internal state that depends on the percept history, allowing them to handle partially observable environments by keeping track of aspects unobservable at any given moment.
* **Goal-Based Agents**: Beyond current perceptions, these agents act to achieve specific goals, requiring them to consider future actions and outcomes to make decisions that lead them toward their objectives.
* **Utility-Based Agents**: These agents assess different possible actions based on a utility function, aiming to maximize overall satisfaction or "happiness," which allows them to handle trade-offs among different goals.
* **Learning Agents**: Equipped with the ability to learn from experiences, these agents can adapt their behavior over time, improving their performance in dynamic and unknown environments.
* **Hierarchical Agents**: These agents operate at multiple levels of abstraction, breaking down complex tasks into simpler sub-tasks, which allows for more efficient problem-solving and decision-making processes.
* **Multi-Agent Systems (MAS)**: Involving multiple interacting agents, these systems can work collaboratively or competitively to achieve individual or shared goals.
## 2. Use Cases
* **Personal Assistance**: AI agents can function as virtual assistants, managing daily tasks like scheduling appointments, filtering emails, organizing documents, and setting reminders.
* **Business Process Automation**: These agents transform business operations by handling customer service inquiries, managing document workflows, automating inventory systems, and monitoring business metrics..
* **Research and Analysis**: In research contexts, AI agents excel at processing vast amounts of data, identifying patterns, generating comprehensive summaries, and conducting literature reviews. They can analyze multiple sources simultaneously and present findings in structured formats.
* **Software Development**: AI agents serve as coding companions, offering real-time suggestions, debugging assistance, and automated testing capabilities. They can review code for potential issues, generate documentation, and help optimize system performance.
* **Healthcare**: In medical settings, AI agents monitor patient vital signs, analyze medical imaging, assist with preliminary diagnoses, and manage patient records. They can also aid in drug discovery by analyzing molecular data and predicting potential therapeutic compounds.
* **Financial Services**: These agents enhance financial operations through real-time fraud detection, risk assessment, and automated trading strategies.
## 3. Popular Frameworks for Building AI Agents
* **[LlamaIndex](https://github.com/run-llama/llama_index)**: An open-source framework that facilitates the integration of large language models (LLMs) with external data sources, enabling developers to build AI agents capable of complex reasoning and data retrieval.
* **[LangGraph](https://langchain-ai.github.io/langgraph/tutorials/introduction/)**: A graph-based approach to orchestrating AI agents, LangGraph excels in managing intricate, multi-step workflows where the sequence and flow of agent interactions are critical.
* **[Microsoft AutoGen](https://github.com/microsoft/autogen)**: An open-source framework from Microsoft Research that streamlines the creation of complex and specialized AI agents, particularly for multi-agent systems.
* **[Haystack](https://github.com/deepset-ai/haystack)**: A robust framework for building search systems, Haystack allows developers to create AI agents capable of performing semantic search, question answering, and other NLP tasks.
* **[Phidata](https://github.com/phidatahq/phidata)**: A platform that transforms large language models into AI agents, Phidata focuses on enabling developers to build intelligent systems with ease.
* **[CrewAI](https://github.com/crewAIInc/crewAI)**: A framework designed for orchestrating collaboration among AI agents, CrewAI allows developers to create a "crew" of AI agents that can work together on complex tasks, each with specific roles and responsibilities.
## 4. Large Language Models (LLMs) for AI Agents
* **[DeepSeek-V3](https://huggingface.co/deepseek-ai/DeepSeek-V3)**: A powerful Mixture-of-Experts (MoE) language model with 671B total parameters, activating 37B per token. It achieves efficient inference and cost-effective training using Multi-head Latent Attention (MLA) and DeepSeekMoE architectures, proven in DeepSeek-V2.
* **[Qwen2.5-72B-Instruct](https://huggingface.co/Qwen/Qwen2.5-72B-Instruct-AWQ)**: A 72 billion-parameter model that excels in instruction following, long text generation, and multilingual support, significantly improving coding and mathematical capabilities compared to its predecessor, Qwen2.
* **[Llama-3.3-70B-Instruct](https://huggingface.co/meta-llama/Llama-3.3-70B-Instruct)**: Llama 3.3 is a 70B multilingual LLM optimized for dialogue, excelling in benchmarks against many open and closed models.
* **[Ministral-8B-Instruct](https://huggingface.co/mistralai/Ministral-8B-Instruct-2410)**: With 8B parameters, this model is tailored for efficient instruction-following tasks, providing robust performance in generating responses.
* **[Llama-3.1-8B-Instruct](https://huggingface.co/meta-llama/Llama-3.1-8B-Instruct)**: This is a 8B parameters model, focuses on instruction adherence and is optimized for generating concise and relevant outputs in response to user prompts.
## 5. Deployment Options
* **[On-Premises Deployment](https://medium.com/@cprasenjit32/deployment-of-machine-learning-models-on-premises-and-in-the-cloud-39b021efba97)**: Running models on local servers for full control and data privacy.
* **[Cloud Services](https://www.analyticsvidhya.com/blog/2022/09/how-to-deploy-a-machine-learning-model-on-aws-ec2/)**: Utilizing cloud providers like AWS, Azure, or Google Cloud for scalable deployment.
* **[Serverless GPU Platforms](https://docs.inferless.com/how-to-guides/deploy-a-codellama-python-34b-model-using-inferless)**: Serverless GPU platforms like [Inferless](https://www.inferless.com/) provide on-demand, scalable GPU resources for machine learning workloads, eliminating the need for infrastructure management and offering cost efficiency.
* **[Edge Deployment](https://www.hackster.io/shahizat/running-llms-with-tensorrt-llm-on-nvidia-jetson-agx-orin-34372f)**: Deploying models on edge devices for low-latency applications.
* **[Containerization](https://www.datacamp.com/tutorial/containerization-docker-and-kubernetes-for-machine-learning)**: Using Docker or Kubernetes to manage and scale deployments efficiently.
## 6. Inferece Library/Engine for LLMs
* **[vLLM](https://github.com/vllm-project):** A library optimized for high-throughput LLM inference.
* **[Text Generation Inference(TGI)](https://github.com/huggingface/text-generation-inference):** A platform designed for efficiently deploying LLMs in production environments, facilitating scalable and user-friendly text generation applications.
* **[LMDeploy](https://github.com/InternLM/lmdeploy):** A toolkit designed for efficiently compressing, deploying, and serving LLMs.
* **[LitServe](https://github.com/Lightning-AI/LitServe):** Lightning-fast inference serving library for quick deployments.
## 7. Essential Tools for AI Agents
* **[Guardrails](https://github.com/guardrails-ai/guardrails)**: A Python framework that helps build reliable AI applications by detecting, quantifying, and mitigating risks in large language model outputs.
* **[Vector Databases](https://www.pinecone.io/)**: AI agents can utilize vector databases to efficiently search through and retrieve relevant information from large collections of embedded data.
* **[ScrapeGraph AI](https://github.com/ScrapeGraphAI/Scrapegraph-ai)**: A Python-based AI scraper designed for efficient data extraction and web scraping tasks.
* **[GPT Researcher](https://github.com/assafelovic/gpt-researcher)**: An autonomous local and web researcher on any topic, generating comprehensive reports with citations.
* **[AutoGPT](https://github.com/Significant-Gravitas/AutoGPT)**: A platform that allows you to create, deploy, and manage continuous AI agents.
* **[Serper](https://serper.dev/)**: A fast and cost-effective Google Search API that provides access to structured data from Google search results.
## 8. Learning Materials
* **[Multi AI Agent Systems with crewAI](https://www.deeplearning.ai/short-courses/multi-ai-agent-systems-with-crewai/)**: Learn key principles of designing effective AI agents and organizing a team of AI agents to perform complex, multi-step tasks.
* **[AI Agents in LangGraph](https://www.deeplearning.ai/short-courses/ai-agents-in-langgraph/)**: Build agentic AI workflows using LangChain's LangGraph.
* **[Mistral AI Cookbook](https://github.com/mistralai/cookbook)**: A collection of examples showcasing Mistral models, contributed by the Mistral community and partners.
* **[OpenAI Cookbook](https://github.com/openai/openai-cookbook)**: Community-driven resource of comprehensive guides and examples, including code snippets and best practices.
* **[LlamaIndex Cookbook](https://docs.llamaindex.ai/en/stable/examples/cookbooks/GraphRAG_v1/)**: A collection of cookbook examples showcasing various use-cases of AI agents built with LlamaIndex.
## 9. Optimization & Compression
* **[Pruning](https://developer.nvidia.com/blog/how-to-prune-and-distill-llama-3-1-8b-to-an-nvidia-llama-3-1-minitron-4b-model/)**: Reduces less significant weights to create sparser and faster models.
* **[Knowledge Distillation](https://www.datacamp.com/blog/distillation-llm)**: Transfers knowledge from large teacher models to smaller students.
* **[Quantization](https://huggingface.co/docs/optimum/en/concept_guides/quantization)**: Converts model weights to lower-bit precision to reduce memory usage and accelerate inference.
* **Optimized Hardware Deployment**: Involves utilizing specialized hardware designed for efficient model inference. Libraries like TensorRT-LLM improve performance on NVIDIA GPUs.
## 10. Common Challenges & Troubleshooting
* **Performance Issues**: Issues related to system efficiency, speed, and resource utilization including memory management, processing speed, GPU usage, and overall system responsiveness. These directly impact the agent's ability to handle tasks effectively and respond in a timely manner.
* **Integration Problems**: Challenges that arise when connecting AI agents with other systems, services, or components. This includes API management, version compatibility, dependency conflicts, and ensuring smooth communication between different parts of the system.
* **Data Handling**: Issues surrounding the management, validation, and processing of data flowing through AI agents. This covers input/output validation, data quality assurance, and handling edge cases that could affect the agent's performance.
* **Deployment Challenges**: Problems encountered when moving AI agents from development to production environments. This includes environment configuration, scaling issues, container management, and ensuring consistent performance across different deployment scenarios.
* **Monitoring & Debugging**: Challenges related to tracking, understanding, and fixing issues in AI agent systems. This encompasses log management, performance tracking, error handling, and maintaining system health checks.
## 11. Ethical Considerations
* **Fairness & Bias**: Managing discriminatory patterns in AI systems through unbiased training data, equal treatment across demographics, and regular fairness testing.
* **Transparency & Explainability**: Making AI decision-making processes clear and understandable, with documented capabilities and limitations.
* **Privacy & Security**: Protecting user data through robust security measures, proper consent management, and minimal data collection practices.
* **Accountability & Governance**: Establishing clear responsibility chains and compliance measures for AI system actions and outcomes.
* **Human Oversight**: Maintaining appropriate human control through monitoring, override capabilities, and expert supervision.
* **User Rights & Empowerment**: Ensuring users have control over their data, with clear opt-out options and feedback channels.
* **Development Standards**: Following ethical guidelines and best practices in AI development, with proper documentation and testing.
* **Inclusivity & Accessibility**: Creating AI systems usable by all, regardless of language, ability, or cultural background.
## 12. Licensing & Governance
* **Check Licenses** (MIT, Apache 2.0, GPL) before commercial use.
* **Hugging Face Model Cards**: Follow best practices for transparency.
* **Data Usage Agreements**: Ensure compliance with dataset terms.
# Code LLMs CheatSheet
Source: https://docs.inferless.com/cheatsheet/code-cheatsheet
A comprehensive cheatsheet covering open-source code generation models, inference libraries, datasets, deployment strategies, and ethical considerations for developers and organizations.
## 1. Models (Open-Source)
* **[Qwen2.5-Coder-32B](https://huggingface.co/Qwen/Qwen2.5-Coder-32B-Instruct):** A state-of-the-art large language model developed by Alibaba Cloud, designed specifically for coding tasks.
* **[DeepSeek-Coder-33b-base](https://huggingface.co/deepseek-ai/deepseek-coder-33b-base):** A powerful 33 billion parameter AI model designed for code generation and completion, trained on 2 trillion tokens.
* **[StarCoder2-15B](https://huggingface.co/bigcode/starcoder2-15b):** A state-of-the-art code generation model optimized for multilingual programming tasks.
* **[Codestral 22B](https://huggingface.co/mistralai/Codestral-22B-v0.1):** Capable of generating, explaining, and refactoring code across over 80 programming languages, including Python, Java, and C++.
* **[Llama-3.3 70B Instruct](https://huggingface.co/meta-llama/Llama-3.3-70B-Instruct):** A cutting-edge multilingual language model optimized for text-based interactions, featuring 70 billion parameters and advanced capabilities in reasoning and coding.
## 2. Inference Libraries / Toolkits
* **[vLLM](https://github.com/vllm-project):** A library optimized for high-throughput LLM inference.
* **[Text Generation Inference(TGI)](https://github.com/huggingface/text-generation-inference):** A platform designed for efficiently deploying LLMs in production environments, facilitating scalable and user-friendly text generation applications.
* **[LMDeploy](https://github.com/InternLM/lmdeploy):** A toolkit designed for efficiently compressing, deploying, and serving LLMs.
* **[TensorRT-LLM](https://github.com/NVIDIA/TensorRT-LLM):** Accelerated inference on NVIDIA GPUs.
* **[LitServe](https://github.com/Lightning-AI/LitServe):** Lightning-fast inference serving library for quick deployments.
## 3. Datasets
* **[Magicoder-OSS-Instruct-75K](https://huggingface.co/datasets/ise-uiuc/Magicoder-OSS-Instruct-75K):** A dataset with diverse instructions for code generation.
* **[The Stack v2](https://huggingface.co/datasets/bigcode/the-stack-v2):** Comprehensive source code collection.
* **[Code Parrot GitHub Code](https://huggingface.co/datasets/macrocosm-os/code-parrot-github-code):** GitHub code dataset for language models.
* **[Synthetic Text-to-SQL](https://huggingface.co/datasets/gretelai/synthetic_text_to_sql):** Dataset for generating SQL queries from text prompts.
* **[Opc-sft-stage2](https://huggingface.co/datasets/OpenCoder-LLM/opc-sft-stage2):** Dataset optimized for open-source code LLMs.
## 4. Use Cases
* **Automated Code Completion:** Enhancing developer productivity by predicting and suggesting code snippets.
* **Code Translation:** Converting code from one programming language to another.
* **Documentation Generation:** Creating documentation for codebases automatically.
* **Bug Detection and Fixing:** Identifying and suggesting fixes for bugs in code.
* **Educational Tools:** Assisting in teaching programming by providing code examples and explanations.
## 5. Deployment Options
* **[On-Premises Deployment](https://medium.com/@cprasenjit32/deployment-of-machine-learning-models-on-premises-and-in-the-cloud-39b021efba97):** Running models on local servers for full control and data privacy.
* **[Cloud Services](https://www.analyticsvidhya.com/blog/2022/09/how-to-deploy-a-machine-learning-model-on-aws-ec2/):** Utilizing cloud providers like AWS, Azure, or Google Cloud for scalable deployment.
* **[Serverless GPU Platforms](https://docs.inferless.com/how-to-guides/deploy-a-codellama-python-34b-model-using-inferless):** Serverless GPU platforms like [Inferless](https://www.inferless.com/) provide on-demand, scalable GPU resources for machine learning workloads, eliminating the need for infrastructure management and offering cost efficiency.
* **[Edge Deployment](https://www.hackster.io/shahizat/running-llms-with-tensorrt-llm-on-nvidia-jetson-agx-orin-34372f):** Deploying models on edge devices for low-latency applications.
* **[Containerization](https://www.datacamp.com/tutorial/containerization-docker-and-kubernetes-for-machine-learning):** Using Docker or Kubernetes to manage and scale deployments efficiently.
## 6. Training & Fine-Tuning Resources
* **[OpenCoder LLM](https://github.com/OpenCoder-llm/OpenCoder-llm/):** Comprehensive resources for open-code LLMs.
* **[Awesome Code LLM](https://github.com/codefuse-ai/Awesome-Code-LLM):** A curated list of resources for code generation models.
* **[Fine-tuning on a Single GPU](https://huggingface.co/learn/cookbook/fine_tuning_code_llm_on_single_gpu):** Practical guide to fine-tuning code LLMs.
* **[StarCoder](https://github.com/bigcode-project/starcoder/):** GitHub repository for fine-tuning & inference of StarCoder models.
* **[DeepSeek-Coder](https://github.com/deepseek-ai/DeepSeek-Coder/):** Resources for training and deploying DeepSeek models.
## 7. Evaluation & Benchmarking
* **HumanEval:** A benchmark for evaluating the functional correctness of code generated by language models.
* **MBPP:** The **Mostly Basic Python Problems (MBPP)** dataset includes \~1,000 crowd-sourced Python challenges.
* **BigCodeBench:** Evaluates models on practical programming tasks.
* **LiveCodeBench:** Holistic and contamination-free evaluation for LLMs in coding.
* **MultiPL-E:** Benchmarks designed for multiple programming languages.
## 8. Model Optimization & Compression
* **[Pruning](https://developer.nvidia.com/blog/how-to-prune-and-distill-llama-3-1-8b-to-an-nvidia-llama-3-1-minitron-4b-model/):** Reduces less significant weights to create sparser and faster models.
* **[Knowledge Distillation](https://www.datacamp.com/blog/distillation-llm):** Transfers knowledge from large teacher models to smaller students.
* **[Quantization](https://huggingface.co/docs/optimum/en/concept_guides/quantization):** Converts model weights to lower-bit precision to reduce memory usage and accelerate inference.
* **Optimized Hardware Deployment:** Involves utilizing specialized hardware designed for efficient model inference. Libraries like TensorRT-LLM improve performance on NVIDIA GPUs.
* **[Batch Inference](https://medium.com/@yohoso/llm-inference-optimisation-continuous-batching-2d66844c19e9):** Processes multiple inputs simultaneously for efficient resource utilization.
## 9. Integration & Workflow Tools
* **[LlamaIndex](https://github.com/jerryjliu/llama_index):** Simplifies building RAG applications with minimal code.
* **[ZenML](https://github.com/zenml-io/zenml):** Open-source MLOps framework for reproducible ML pipelines.
* **[Ollama](https://ollama.com/):** Tool for running and customizing LLMs locally.
* **[Evidently](https://github.com/evidentlyai/evidently):** Open-source framework for MLOps observability.
* **[llamafile](https://github.com/Mozilla-Ocho/llamafile):** Packages LLMs and dependencies into executable files for local execution.
## 10. Common Challenges & Troubleshooting
* **Model Transparency**: Generative Models function as "black boxes," making it difficult to understand their decision-making processes, which can hinder debugging and trust.
* **Computational Resources**: Inferencing large models demands significant computational power, posing accessibility challenges for some organizations.
* **Security and Ethical Concerns**: There's a risk of models being misused to generate malicious code, necessitating the implementation of safeguards.
* **Integration Challenges**: Incorporating these models into existing development workflows requires ensuring compatibility with current tools and practices.
## 11. Ethical Considerations
* **Code Attribution and Licensing**: Ensure proper attribution of generated code and respect for existing software licenses and intellectual property rights.
* **Bias and Fairness**: Address potential biases in code generation that might create discriminatory outcomes.
* **Developer Dependency**: Consider the impact on developer skills and ensure the tool enhances rather than replaces human programming capabilities.
* **Data Privacy**: Protect sensitive information in code repositories and ensure compliance with data protection regulations when training or using these models.
* **Quality Assurance**: Establish guidelines for reviewing and validating AI-generated code to maintain code quality and security standards.
## 12. Licensing & Governance
* **Check Licenses:** (MIT, Apache 2.0, GPL) before commercial use.
* **Hugging Face Model Cards:** Follow best practices for transparency.
* **Data Usage Agreements:** Ensure compliance with dataset terms.
# 3D Generative Models CheatSheet
Source: https://docs.inferless.com/cheatsheet/itt3d-cheatsheet
A comprehensive guide to open-source 3D generative models, datasets, toolkits, and resources for development, deployment, and evaluation.
## 1. Models (Open-Source)
* **[Shap-E](https://huggingface.co/openai/shap-e):** A conditional generative model from OpenAI that creates 3D assets from text prompts using a diffusion process.
* **[LLaMA-Mesh](https://huggingface.co/Zhengyi/LLaMA-Mesh):** This model unifies 3D mesh generation with language models, enabling the generation of 3D meshes from text prompts.
* **[Hunyuan3D-1](https://huggingface.co/tencent/Hunyuan3D-1):** Hunyuan3D-1 is designed for generating high-quality 3D models and supports various applications in computer graphics and virtual environments.
* **[TRELLIS-Image-Large](https://huggingface.co/JeffreyXiang/TRELLIS-image-large):** his model focuses on generating detailed 3D representations from images, enhancing the fidelity of visual outputs in generative tasks.
* **[InstantMesh](https://huggingface.co/TencentARC/InstantMesh):** InstantMesh is a tool for generating high-quality meshes from point clouds, facilitating efficient 3D modeling workflows.
## 2. Inference Libraries / Toolkits
* **[Hunyuan3D-1](https://github.com/tencent/Hunyuan3D-1)** A Unified Framework for Text-to-3D and Image-to-3D Generation utilizing the Hunyuan3D-1 model effectively in various applications.
* **[InstantMesh](https://github.com/TencentARC/InstantMesh):** A library for creating high-quality meshes from point clouds, providing tools for mesh generation and manipulation.
* **[TripoSR](https://github.com/VAST-AI-Research/TripoSR):** This toolkit focuses on super-resolution techniques for improving the quality of 3D models and images.
* **[TRELLIS](https://github.com/Microsoft/TRELLIS):** A comprehensive framework for working with generative models in 3D, offering various utilities for model inference and evaluation.
* **[dust3r](https://github.com/naver/dust3r/):** A library aimed at enhancing the generation of 3D structures through advanced algorithms and techniques.
## 3. Datasets
* **[objaverse](https://huggingface.co/datasets/allenai/objaverse):** A large-scale dataset containing diverse 3D object representations, useful for training generative models.
* **[TRELLIS-500K](https://huggingface.co/datasets/JeffreyXiang/TRELLIS-500K):** A dataset of 500K 3D assets curated from Objaverse(XL), ABO, 3D-FUTURE, HSSD, and Toys4k, filtered based on aesthetic scores.
* **[Cap3D](https://huggingface.co/datasets/tiange/Cap3D):** A comprehensive dataset which contains multiple dataset and also it contains descriptive captions for 3D objects.
## 4. Use Cases
* **Gaming and Animation:** Generating high-quality 3D assets for interactive applications and storytelling.
* **Product Design:** Rapid prototyping of design concepts using AI-generated 3D models.
* **Education and Training:** Creating 3D visualizations for educational content and simulations.
* **Healthcare:** Developing 3D anatomical models for diagnostics, training, and surgery planning.
* **Virtual Reality (VR) and Augmented Reality (AR):** Enhancing immersive experiences through dynamic 3D content creation.
## 5. Deployment Options
* **[On-Premises Deployment](https://medium.com/@cprasenjit32/deployment-of-machine-learning-models-on-premises-and-in-the-cloud-39b021efba97):** Running models on local servers for full control and data privacy.
* **[Cloud Services](https://www.analyticsvidhya.com/blog/2022/09/how-to-deploy-a-machine-learning-model-on-aws-ec2/):** Utilizing cloud providers like AWS, Azure, or Google Cloud for scalable deployment.
* **[Serverless GPU Platforms](https://docs.inferless.com/how-to-guides/deploy-a-codellama-python-34b-model-using-inferless):** Serverless GPU platforms like [Inferless](https://www.inferless.com/) provide on-demand, scalable GPU resources for machine learning workloads, eliminating the need for infrastructure management and offering cost efficiency.
* **[Containerization](https://www.datacamp.com/tutorial/containerization-docker-and-kubernetes-for-machine-learning):** Using Docker or Kubernetes to manage and scale deployments efficiently.
## 6. Training & Fine-Tuning Resources
* **[Machine Learning for 3D](https://huggingface.co/learn/ml-for-3d-course/unit0/introduction):** An introductory course covering machine learning techniques applied to 3D data.
* **[Learning for 3D Vision](https://learning3d.github.io/?utm_source=chatgpt.com):** This course delves into the convergence of 3D vision and learning-based methods.
* **[3D Point Cloud and Machine Learning](https://www.youtube.com/playlist?list=PLY8iUIKUWr9PRHjh4H86UwwnM_3gU3sHV):** A video playlist detailing machine learning approaches specifically tailored to point cloud data.
## 7. Evaluation & Benchmarking
* **[GT23D-Bench](https://arxiv.org/html/2412.09997v1):** A Comprehensive General Text-to-3D Generation Benchmark
* **Peak Signal-to-Noise Ratio (PSNR):** A critical metric used to evaluate the quality of reconstructions and ground-truth rendered images.
* **Chamfer Distance (CD) and Fscore (FS):** These two are standard metrics for evaluating the accuracy of 3D shape reconstructions.
## 8. Model Optimization & Compression
* **Quantization:** Reducing model size for deployment on edge devices without significant loss of accuracy.
* **Knowledge Distillation:** Training smaller models to mimic larger, more complex models.
* **Pruning:** Removing redundant parameters to streamline model performance.
## 9. Integration & Workflow Tools
* **[Meshgen](https://github.com/huggingface/meshgen):** A Blender addon for generating meshes with AI.
* **[Open3D](https://github.com/isl-org/Open3D):** An open-source library that supports the processing of 3D data, including visualization, reconstruction, and analysis functionalities.
## 10. Common Challenges & Troubleshooting
* **Data Quality:** Ensuring high-quality input data for better outputs.
* **Scalability:** Managing computational resources for large-scale 3D generation.
* **Model Robustness:** Addressing failures in handling diverse input types.
* **Interoperability Issues:** Problems may arise when integrating AI tools with existing workflows. Leverage standard file formats and cross-platform libraries for smoother integration.
* **Ethical Issues:** Preventing misuse of generated models for unethical applications.
## 11. Ethical Considerations
* **Bias in Data:** Ensuring diverse datasets to avoid biases in generated outputs.
* **Intellectual Property (IP):** Respecting copyright and IP laws when training or using generative models.
* **Responsible Use:** Establishing guidelines to prevent the misuse of generative technologies.
* **Transparency:** Maintain openness about how models are trained, evaluated, and deployed. This builds trust and promotes responsible AI usage.
## 12. Licensing & Governance
* **Check Licenses:** (MIT, Apache 2.0, GPL) before commercial use.
* **Hugging Face Model Cards:** Follow best practices for transparency.
* **Data Usage Agreements:** Ensure compliance with dataset terms.
# Text-to-Image Generation CheatSheet
Source: https://docs.inferless.com/cheatsheet/text-to-image-cheatsheet
A comprehensive cheatsheet covering open-source text-to-image generation models, inference libraries, datasets, use cases, deployment strategies, training resources, evaluation methods, and ethical considerations for developers and organizations.
### 1. Models (Open-Source)
* [**FLUX.1-dev**](https://huggingface.co/black-forest-labs/FLUX.1-dev): Introduced in 2024, FLUX.1-dev is a powerful AI image generation model utilizing an advanced architecture called a latent diffusion model.
* [**Stable Diffusion v1.5**](https://huggingface.co/stable-diffusion-v1-5/stable-diffusion-v1-5): An iteration of the latent text-to-image diffusion model capable of generating photo-realistic images from textual descriptions.
* [**Stable Diffusion v2.1**](https://huggingface.co/stabilityai/stable-diffusion-2-1): An enhanced version of the model, offering improved image quality and resolution capabilities.
* [**Stable Diffusion XL Base 1.0**](https://huggingface.co/stabilityai/stable-diffusion-xl-base-1.0): A larger model with 3.5 billion parameters, designed for high-resolution image synthesis with greater detail and fidelity.
* [**Stable Diffusion 3.5 Large**](https://huggingface.co/stabilityai/stable-diffusion-3.5-large): An 8-billion-parameter model delivering high-quality, prompt-adherent images up to 1 megapixel, customizable for professional use on consumer hardware.
### 2. Inference Libraries / Toolkits
* [**Diffusers**](https://github.com/huggingface/diffusers): A library by Hugging Face that provides pre-trained diffusion models for text-to-image generation, facilitating easy integration and experimentation.
* [LitServe](https://github.com/Lightning-AI/LitServe): An open-source easy-to-use, flexible serving engine designed to deploy vision models at scale.
* [**InvokeAI**](https://github.com/invoke-ai/InvokeAI): An open-source AI image generation toolkit that provides a user-friendly interface and supports various models, enabling efficient image creation and customization.
* [**ComfyUI**](https://github.com/comfyanonymous/ComfyUI): A powerful and modular open-source GUI for Stable Diffusion, offering a node-based interface for advanced users to experiment with complex workflows.
### 3. Datasets
* [**LAION-5B**](https://laion.ai/blog/laion-5b/): A large-scale dataset containing billions of image-text pairs, widely used for training text-to-image models.
* [**CommonCatalog CC-BY**](https://huggingface.co/datasets/common-canvas/commoncatalog-cc-by): A dataset comprising a diverse collection of images and associated metadata, useful for training image generation models.
* [**DiffusionDB**](https://huggingface.co/datasets/poloclub/diffusiondb): A large dataset of images generated by diffusion models, along with their prompts, aiding in understanding and improving text-to-image generation.
### 4. Use Cases
* **Creative Design**: Assisting artists and designers in generating concept art, illustrations, and design prototypes.
* **Advertising**: Creating customized visuals for marketing campaigns tailored to specific themes or audiences.
* **Education**: Developing visual aids and educational materials to enhance learning experiences.
* **Entertainment**: Generating assets for video games, movies, and virtual environments.
* **E-commerce**: Producing product images based on textual descriptions to enrich online catalogs.
### 5. Deployment Options
* **[On-Premises Deployment](https://medium.com/@cprasenjit32/deployment-of-machine-learning-models-on-premises-and-in-the-cloud-39b021efba97):** Running models on local servers for full control and data privacy.
* **[Cloud Services](https://www.analyticsvidhya.com/blog/2022/09/how-to-deploy-a-machine-learning-model-on-aws-ec2/):** Utilizing cloud providers like AWS, Azure, or Google Cloud for scalable deployment.
* **[Serverless GPU Platforms](https://docs.inferless.com/how-to-guides/deploy-flux-schnell-using-inferless):** Serverless GPU platforms like [Inferless](https://www.inferless.com/) provide on-demand, scalable GPU resources for machine learning workloads, eliminating the need for infrastructure management and offering cost efficiency.
* **[Edge Deployment](https://www.jetson-ai-lab.com/tutorial_stable-diffusion.html):** Deploying models on edge devices for low-latency applications.
* **[Containerization](https://www.datacamp.com/tutorial/containerization-docker-and-kubernetes-for-machine-learning):** Using Docker or Kubernetes to manage and scale deployments efficiently.
### 6. Training & Fine-Tuning Resources
* [**Hugging Face Courses**](https://huggingface.co/learn/diffusion-course/en/unit0/1): Offers tutorials on training and fine-tuning text-to-image models using the Diffusers library.
* [**ComfyUI Examples**](https://comfyanonymous.github.io/ComfyUI_examples/): Provides practical examples and workflows for using ComfyUI in image generation tasks.
* [**Stability AI Learning Hub**](https://stability.ai/learning-hub/): A resource hub providing tutorials, guides, and learning materials for training and fine-tuning Diffusion models.
### 7. Evaluation & Benchmarking
* [**Fréchet Inception Distance (FID)**](https://en.wikipedia.org/wiki/Fr%C3%A9chet_inception_distance): Measures the quality and diversity of generated images by comparing them to real images.
* [**Inception Score (IS)**](https://en.wikipedia.org/wiki/Inception_score): Evaluates the quality of generated images based on their classification into distinct classes.
* [**ELO Score**](https://arxiv.org/html/2406.04485v1#:~:text=3.3,Elo%20Rating%20System): A rating system adapted to assess the performance of image generation models through comparative evaluations.
### 8. Model Optimization & Compression
* [**Pruning**](https://arxiv.org/pdf/2404.11936): Removing less significant parts of the model to reduce size and improve inference speed.
* [**Quantization**](https://huggingface.co/blog/train-optimize-sd-intel): Reducing the precision of model weights to decrease memory usage and enhance efficiency.
* [**Knowledge Distillation**](https://huggingface.co/blog/sd_distillation): Training a smaller model to replicate the performance of a larger one, balancing efficiency and accuracy.
### 9. Integration & Workflow Tools
* [**Stable Diffusion WebUI**](https://github.com/AUTOMATIC1111/stable-diffusion-webui): An open-source web-based user interface for Stable Diffusion, providing extensive features and customization options for image generation.
* [**Civitai**](https://civitai.com/): A platform for sharing and discovering models, presets, and other resources related to AI image generation, fostering community collaboration.
* [ComfyUI](https://github.com/comfyanonymous/ComfyUI): An open-source, node-based graphical interface that enables users to generate images, videos, and audio using generative AI models like Stable Diffusion, offering a modular and customizable workflow for creative applications.
### 10. Common Challenges & Troubleshooting
* **Text Legibility**: Ensuring that generated images containing text are clear and readable.
* **Image Quality**: Maintaining high resolution and aesthetic appeal in generated images.
* **Prompt Sensitivity**: Models may produce varying results based on slight changes in input prompts, requiring careful prompt engineering.
* **Ethical Concerns**: Addressing potential misuse of generated images and ensuring compliance with ethical guidelines.
### 11. Ethical Considerations
* **Intellectual Property Rights**: AI models may use copyrighted material without permission, risking infringement; it's essential to respect creators' rights.
* **Bias and Representation**: AI can perpetuate training data biases, leading to unfair outputs; developers should detect and mitigate these biases.
* **Transparency and Accountability**: Clearly disclose when images are AI-generated to maintain trust and authenticity.
* **Privacy Concerns**: Obtain permissions and anonymize data if you are using personal data in training which can violate privacy.
### 12. Licensing & Governance
* **Check Licenses**: (MIT, Apache 2.0, GPL) before commercial use.
* **Hugging Face Model Cards**: Follow best practices for transparency.
* **Data Usage Agreements**: Ensure compliance with dataset terms.
* **Regulatory Compliance**: Stay informed about evolving regulations concerning AI, such as the European Union's AI Act.
# Text-To-Speech (TTS) Cheatsheet
Source: https://docs.inferless.com/cheatsheet/tts-cheatsheet
A comprehensive cheatsheet, provides an overview of the top open-source TTS models, inference libraries, training resources, and more to help you get started with or enhance your TTS projects.
## 1. Models (Open-Source)
* **[XTTS-v2](https://huggingface.co/coqui/XTTS-v2):** High-quality TTS model with robust voice quality.
* **[MeloTTS-English](https://huggingface.co/myshell-ai/MeloTTS-English):** Specialized English voice synthesis with melodic intonation.
* **[F5-TTS](https://huggingface.co/SWivid/F5-TTS):** Produces high-quality speech with voice cloning and customization.
* **[Bark](https://huggingface.co/suno/bark):** High-quality multilingual model supporting varied accents and prosody.
* **[Parler-tts-mini-v1](https://huggingface.co/parler-tts/parler-tts-mini-v1):** Compact model optimized for quick demos and limited resource environments.
### Additional Notable Models
* **[FastSpeech2](https://huggingface.co/facebook/fastspeech2-en-ljspeech):** Speed-focused, decent quality trade-off.
* **[VITS](https://github.com/jaywalnut310/vits):** End-to-end TTS offering high fidelity and voice controllability.
* **[SpeechT5](https://huggingface.co/microsoft/speecht5_tts):** Unified-modal SpeechT5 framework that explores encoder-decoder pre-training for self-supervised speech/text representation learning.
## 2. Inference Libraries / Toolkits
* **[Coqui TTS](https://github.com/coqui-ai/TTS):** Easy-to-use, community-driven TTS toolkit.
* **[Parler TTS](https://github.com/huggingface/parler-tts):** Inference and training library for high-quality TTS models.
* **[LitServe](https://github.com/Lightning-AI/LitServe):** Lightning-fast inference serving library for quick deployments.
* **[Mozilla TTS](https://github.com/mozilla/TTS):** Well-known toolkit with extensive model support and large community.
* **[Tortoise TTS](https://github.com/neonbjb/tortoise-tts):** High-quality synthesis; slower but excellent results.
### Additional Toolkits
* **[ESPnet TTS](https://github.com/espnet/espnet):** Unified end-to-end speech processing (ASR + TTS).
* **[NVIDIA NeMo](https://github.com/NVIDIA/NeMo):** State-of-the-art models + easy fine-tuning on NVIDIA GPUs.
## 3. Use Cases
* **Voice Assistants & Virtual Agents**
* **Audiobooks & Podcast Generation**
* **Accessibility Tools (for visually impaired users)**
* **Interactive Learning & E-Learning Content**
* **Customer Support Bots & IVR Systems**
* **Content Localization & Dubbing for Media**
## 4. Deployment Options
* **[On-Premises Deployment](https://medium.com/@cprasenjit32/deployment-of-machine-learning-models-on-premises-and-in-the-cloud-39b021efba97):** Running models on local servers for full control and data privacy.
* **[Cloud Services](https://www.analyticsvidhya.com/blog/2022/09/how-to-deploy-a-machine-learning-model-on-aws-ec2/):** Utilizing cloud providers like AWS, Azure, or Google Cloud for scalable deployment.
* **[Serverless GPU Platforms](https://docs.inferless.com/how-to-guides/deploy-a-codellama-python-34b-model-using-inferless):** Serverless GPU platforms like [Inferless](https://www.inferless.com/) provide on-demand, scalable GPU resources for machine learning workloads, eliminating the need for infrastructure management and offering cost efficiency.
* **[Edge Deployment](https://www.hackster.io/shahizat/running-llms-with-tensorrt-llm-on-nvidia-jetson-agx-orin-34372f):** Deploying models on edge devices for low-latency applications.
* **[Containerization](https://www.datacamp.com/tutorial/containerization-docker-and-kubernetes-for-machine-learning):** Using Docker or Kubernetes to manage and scale deployments efficiently.
## 5. Datasets
* **[keithito/lj\_speech](https://huggingface.co/datasets/keithito/LJ-Speech-Dataset):** Popular single-speaker dataset for English TTS.
* **[facebook/multilingual\_librispeech](https://huggingface.co/datasets/facebook/multilingual_librispeech):** Multilingual speech corpus for polyglot models.
* **[amphion/Emilia-Dataset](https://huggingface.co/datasets/amphion/Emilia-Dataset):** Specialized dataset for unique voice profiles.
* **[speechcolab/gigaspeech](https://huggingface.co/datasets/speechcolab/gigaspeech):** Large-scale English speech corpus.
* **[parler-tts/mls\_eng](https://huggingface.co/datasets/parler-tts/mls_eng):** English subset of the Multilingual LibriSpeech dataset.
### More Datasets
* **[VCTK](https://huggingface.co/datasets/CSTR-Edinburgh/vctk):** High-quality, multi-speaker dataset for diverse accents.
* **[Common Voice](https://huggingface.co/datasets/legacy-datasets/common_voice):** Crowdsourced multilingual dataset.
* **[LibriTTS](https://huggingface.co/datasets/mythicinfinity/libritts):** Enhanced LibriSpeech variant for better TTS results.
## 6. Training & Fine-Tuning Resources
* **[GitHub TTS Notebooks & Tutorials](https://github.com/mozilla/TTS/wiki/TTS-Notebooks-and-Tutorials):** Community-driven code examples and scripts.
* **[Hugging Face Audio Course, Unit 6 (From Text to Speech)](https://huggingface.co/learn/audio-course/en/chapter6/introduction):** Hands-on tutorials.
* **[Fine-Tuning a 🐸 TTS Model (Coqui TTS docs)](https://docs.coqui.ai/en/latest/finetuning.html):** Step-by-step instructions.
* **[NVIDIA NeMo TTS Guides](https://github.com/NVIDIA/NeMo/tree/stable/tutorials/tts):** Hands-on TTS tutorial notebooks.
* **[VITS Fast Fine-tuning](https://github.com/Plachtaa/VITS-fast-fine-tuning):** Guide you to add your own character voices, or even your own voice, into existing VITS TTS model.
## 7. Evaluation & Benchmarking
* **[Mean Opinion Score (MOS)](https://en.wikipedia.org/wiki/Mean_opinion_score), [Comparative MOS (CMOS)](https://techcommunity.microsoft.com/blog/azure-ai-services-blog/new-technical-research-is-advancing-azure%E2%80%99s-neural-text-to-speech-service/3499414#:~:text=Comparative%20MOS%20\(CMOS\)):** Subjective quality assessment.
* **[PESQ, POLQA, NISQA](https://picovoice.ai/blog/speech-quality/):** Objective speech quality metrics.
## 8. Model Optimization & Compression
* **Quantization:** Reduce model size & inference time (ONNX).
* **Pruning & Distillation:** Tailor models to resource constraints.
* **Hardware Acceleration:** GPUs, TPUs, or specialized inference chips.
* **[ONNX](https://onnx.ai/) / [TensorRT](https://docs.nvidia.com/deeplearning/tensorrt/quick-start-guide/index.html):** Optimize models for low-latency, high-throughput inference.
## 9. Integration & Workflow Tools
* **[Gradio](https://www.gradio.app/) / [Streamlit](https://streamlit.io/):** Rapid prototyping with web UIs.
* **[Airflow](https://airflow.apache.org/) / [Prefect](https://www.prefect.io/):** Automate data and training pipelines.
* **[CI/CD (GitHub Actions)](https://docs.github.com/en/actions/about-github-actions/understanding-github-actions):** Continuous integration for model updates.
* **[Hugging Face Spaces](https://huggingface.co/spaces):** Share and demo TTS models easily.
## 10. Common Challenges & Troubleshooting
* **Accents & Dialects:** Use multilingual models or phoneme-based TTS.
* **Latency Reduction:** Optimize models, batch inference, use GPU acceleration.
* **Pronunciation Issues:** Text normalization and grapheme-to-phoneme conversion.
* **Memory Constraints:** Use smaller models or pruning/quantization techniques.
## 11. Ethical Considerations
* **Voice Consent & Licensing:** Respect dataset/model licenses.
* **Disclosure of Synthetic Speech:** Inform users when speech is synthesized.
* **Bias & Fairness:** Be aware of biases in training data and model outputs.
* **Deepfake Risks:** Implement safeguards and watermarking.
## 12. Licensing & Governance
* **Check Licenses:** (MIT, Apache 2.0, GPL) before commercial use.
* **Hugging Face Model Cards:** Follow best practices for transparency.
* **Data Usage Agreements:** Ensure compliance with dataset terms.
# Vision-Language Models CheatSheet
Source: https://docs.inferless.com/cheatsheet/vision-llm-cheatsheet
An all-in-one cheatsheet for vision-language models, including open-source models, inference toolkits, datasets, use cases, deployment strategies, optimization techniques, and ethical considerations for developers and organizations.
## 1. Models (Open-Source)
* **[Qwen/Qwen2-VL-7B-Instruct](https://huggingface.co/Qwen/Qwen2-VL-7B)**: A state-of-the-art multimodal model by Qwen, designed for instruction-based tasks, excelling in visual understanding and multilingual processing with 7 billion parameters.
* **[meta-llama/Llama-3.2-11B-Vision-Instruct](https://huggingface.co/meta-llama/Llama-3.2-11B-Vision-Instruct)**: An advanced vision-language model that integrates visual and textual inputs, enhancing performance in multimodal tasks with 11 billion parameters.
* **[google/paligemma2-3b-pt-224](https://huggingface.co/google/paligemma2-3b-pt-224)**: A compact multimodal optimized for efficient processing of images and text, featuring 3 billion parameters and tailored for practical applications in various domains.
* **[microsoft/Phi-3.5-vision-instruct](https://huggingface.co/microsoft/Phi-3.5-vision-instruct)**: A versatile vision-language model developed by Microsoft, focused on instruction-following capabilities and designed to handle complex visual and textual interactions.
* **[mistralai/Pixtral-12B-2409](https://huggingface.co/mistralai/Pixtral-12B-2409)**: A powerful 12 billion parameter model that excels in visual understanding and generation tasks, offering robust performance across a range of multimodal applications.
## 2. Inference Libraries / Toolkits
* **[vLLM](https://github.com/vllm-project)**: A library optimized for high-throughput LLM inference.
* **[Text Generation Inference (TGI)](https://github.com/huggingface/text-generation-inference)**: A platform designed for efficiently deploying LLMs in production environments, facilitating scalable and user-friendly text generation applications.
* **[LMDeploy](https://github.com/InternLM/lmdeploy)**: A toolkit designed for efficiently compressing, deploying, and serving LLMs.
* **[TensorRT-LLM](https://github.com/NVIDIA/TensorRT-LLM)**: Accelerated inference on NVIDIA GPUs.
* **[LitServe](https://github.com/Lightning-AI/LitServe)**: Lightning-fast inference serving library for quick deployments.
## 3. Datasets
* **[OpenGVLab/MMPR-v1.1](https://huggingface.co/datasets/OpenGVLab/MMPR-v1.1)**: A large-scale and high-quality multimodal reasoning preference dataset.
* **[HuggingFaceM4/the\_cauldron](https://huggingface.co/datasets/HuggingFaceM4/the_cauldron)**: A massive collection of 50 vision-language datasets.
* **[HuggingFaceM4/Docmatix](https://huggingface.co/datasets/HuggingFaceM4/Docmatix)**: A massive dataset for Document Visual Question Answering that was used for the fine-tuning of the vision-language model Idefics3.
## 4. Use Cases
* **Image Captioning & Description**: Generate descriptive captions for images, useful in social media, digital asset management, and accessibility solutions for visually impaired users.
* **Visual Question Answering (VQA)**: Answer queries about images, enabling automated customer support or interactive learning environments.
* **Image-Based Document Analysis**: Extract text or metadata from scanned documents, forms, or receipts, streamlining business workflows that require automated data entry or record-keeping.
* **Content Moderation & Safety**: Detect inappropriate or harmful content in images for social media platforms, ensuring compliance with community guidelines.
* **Creative Storytelling & Illustration**: Combine vision inputs with textual generation for creative tasks, such as interactive comic creation or illustrated story generation.
## 5. Deployment Options
* **[On-Premises Deployment](https://medium.com/@cprasenjit32/deployment-of-machine-learning-models-on-premises-and-in-the-cloud-39b021efba97)**: Running models on local servers for full control and data privacy.
* **[Cloud Services](https://www.analyticsvidhya.com/blog/2022/09/how-to-deploy-a-machine-learning-model-on-aws-ec2/)**: Utilizing cloud providers like AWS, Azure, or Google Cloud for scalable deployment.
* **[Serverless GPU Platforms](https://docs.inferless.com/how-to-guides/deploy-Qwen2-VL-7B-Instruct)**: Serverless GPU platforms like [Inferless](https://www.inferless.com/) provide on-demand, scalable GPU resources for machine learning workloads, eliminating the need for infrastructure management and offering cost efficiency.
* **[Edge Deployment](https://www.jetson-ai-lab.com/tutorial_llava.html)**: Deploying models on edge devices for low-latency applications.
* **[Containerization](https://www.datacamp.com/tutorial/containerization-docker-and-kubernetes-for-machine-learning)**: Using Docker or Kubernetes to manage and scale deployments efficiently.
## 6. Training & Fine-Tuning Resources
* **[Hugging Face Computer Vision Course](https://huggingface.co/learn/computer-vision-course/en/unit4/multimodal-models/pre-intro)**: Provides comprehensive tutorials on training and fine-tuning multimodal models, including best practices for data handling, hyperparameter tuning, and evaluation.
* **[Multimodal Inference Papers](https://arxiv.org/html/2405.17247v1)**: Recent research insights into designing and optimizing vision-language models, covering advanced transformers, cross-modal attention, and domain-specific tasks.
* **[Smol-Vision](https://github.com/merveenoyan/smol-vision/tree/main)**: An open-source project offering example scripts, smaller models, and best practices for fine-tuning or customizing vision-language architectures on limited hardware.
## 7. Evaluation & Benchmarking
* **MMMU:** A benchmark suite designed to evaluate multimodal models on massive multi-discipline tasks demanding college-level subject knowledge and deliberate reasoning.
* **MMBench:** A systematically designed objective benchmark for robustly evaluating the various abilities of vision-language models.
* **VQAScore:** A novel metric designed for evaluating text-to-visual generation, particularly in the context of complex prompts that require understanding of compositional structures.
* **OCRBench:** A comprehensive evaluation benchmark aimed at assessing the Optical Character Recognition (OCR) capabilities of large multimodal models.
## 8. Model Optimization & Compression
* **[Knowledge Distillation](https://www.amazon.science/blog/knowledge-distillation-method-for-better-vision-language-models#:~:text=Attention%2Dbased%20representation%20of%20multi,%E2%80%9D%20versions%20%E2%80%94%20of%20attention%20maps.)**: Transfer knowledge from a larger “teacher” model to a smaller “student” model.
* **[Quantization](https://www.reddit.com/r/LocalLLaMA/comments/1d6vhx2/vision_language_model_quantization_and/)**: Reduce the numerical precision of weights and activations (e.g., from FP32 to INT8). This can lead to significantly faster inference with minimal drops in accuracy, making it ideal for edge or latency-sensitive applications.
* **[Optimized Hardware Deployment](https://rocm.blogs.amd.com/artificial-intelligence/llava-next/README.html)**: Leverage specialized libraries and GPUs to accelerate multimodal inference. NVIDIA’s [TensorRT-LLM](https://github.com/NVIDIA/TensorRT-LLM/blob/main/examples/multimodal/README.md) and AMD ROCm stack provide hardware-optimized kernels, enabling high throughput and efficiency for VLMs.
## 9. Integration & Workflow Tools
* **[LlamaIndex](https://github.com/jerryjliu/llama_index)**: Simplifies the creation of Retrieval-Augmented Generation (RAG) applications by abstracting away complex indexing processes. Helpful when combining visual embedding searches with textual retrieval for chatbots or Q\&A systems.
* **[ZenML](https://github.com/zenml-io/zenml)**: An open-source MLOps framework that helps build and deploy reproducible machine learning pipelines. Useful for orchestrating data processing, model training, and model deployment steps in a unified workflow.
* **[Ollama](https://ollama.com/)**: Lets users run and interact with large language models on their own hardware without heavy installation overhead. Offers customization hooks for integrating vision-language encoders or external tools.
* **[llamafile](https://github.com/Mozilla-Ocho/llamafile)**: Packages large language models and dependencies into a single executable. Useful for distributing VLMs across different operating systems and environments, ensuring consistent behavior without complicated setup.
## 10. Common Challenges & Troubleshooting
* **Data Quality & Domain Gaps:** Real-world images may differ from training data (e.g., poor lighting, different angles). Poor performance often stems from domain mismatch. Fine-tuning on in-domain examples can help bridge these gaps.
* **Computational Complexity:** Vision-language models can be large and computationally expensive. Optimizing memory usage and inference speed is crucial to avoid latency bottlenecks in production.
* **Debugging Multimodal Outputs:** Understanding why a model produces certain visual or textual outputs can be more complex compared to text-only models. Tools that visualize attention maps or produce intermediate embeddings can aid troubleshooting.
## 11. Ethical Considerations
* **Privacy & Consent:** Models trained on large-scale image data might inadvertently include personal images or metadata. Mechanisms for data filtering and compliance with privacy regulations are essential.
* **Biases in Visual Recognition:** Unbalanced or unrepresentative training data can lead to inaccurate or biased outcomes, potentially marginalizing certain demographic groups or cultural contexts.
* **Intellectual Property Rights:** Ensure that images used for training or inference do not infringe upon copyright or licensing agreements. Properly attribute and respect usage limitations for externally sourced visual data.
## 12. Licensing & Governance
* **Check Licenses:** As with any open-source software, verify the license of each model or dataset (e.g., MIT, Apache 2.0, GPL) to ensure compatibility with commercial or proprietary products.
* **Hugging Face Model Cards:** Model cards provide transparency around training data, intended use, and limitations. Reviewing these is critical when deciding how to integrate or modify a model.
* **Data Usage Agreements:** Confirm that your usage adheres to dataset terms and conditions. Some datasets prohibit certain commercial applications or require explicit attribution to the data source.
# Bring custom packages
Source: https://docs.inferless.com/concepts/building-custom-images
Custom software and dependencies in your Runtime
Custom Runtime allows you to customize the container to have the software and dependency that you need to run your model.
Here is a sample YAML file that you can write to import. You can follow the required structure of the build. You can specify the System as well as the Python packages that you need to run the model.
**cuda\_version** (Optional):
By default, it will use CUDA 12.1.1. Above are the available options : "12.4.1" / "12.1.1" / "11.8.0"
**system\_packages** :
These are any libraries that you need for the model to run, for eg: "opencv" for image processing or like "ffmpeg" to open the audio files.
**python\_packages** :
These are pip-based libraries that you need in your Python runtime for example torch is required to load PyTorch-based models
**run** :
These are shell commands executed while building the runtime for example symlink is created here. All commands are executed Sequentially. If you have a package that requires step by step installation you can use run
```python
build:
system_packages:
- "libssl-dev"
- "opencv"
- "ffmpeg"
python_packages:
- "transformers==4.29.0"
- "torch==2.0.1"
- "numpy==1.23.5"
- "pandas==2.0.1"
run:
- "ln -s /usr/local/lib/python3.10/site-packages/torch/lib/lib{nv,cu}* /usr/lib"
```
## Runtime Versions
You can edit the runtime in UI or patch the runtime using CLI to create a new version of the runtime. All your models will remain in the older version you previously deployed with unless you explicitly update them in Model Settings.
You can see all the versions of the runtime by clicking the 'View Runtime Versions'.
**Bug Fixes:**
1. **Volume Config**: Addressed an issue with null `custom_volume_config`.
2. **Team Payment**: Updated `is_payment_method_added` to allow team-wide card addition.
3. **GitHub Upgrades**: Refined error management for uninstalled GitHub scenarios and improved webhook tracking.
4. **Log Enhancement**: Reordered build logs for easier access to recent failures.
# 14th November 2024: Better Hugging Face Model Imports, Infrastructure Stability and Volume improvements
Source: https://docs.inferless.com/changelog/november-2024/14th-november
**Latest Enhancements & Features:**
1. **Volumes New UI:** We've introduced improvements to the Volumes UI for easier management. Now, you can view all models utilizing mounts directly within the UI. Additionally, you can manage and delete volumes seamlessly, providing greater control over storage resources.
2. **Hugging Face Model Import Customization:** Our Hugging Face Model Import feature now offers full customization for each model. You can modify the pipeline logic, add custom code, and include additional packages using the import methods, offering more flexibility to tailor models to your needs.
3. **Model Autobuild Enhancements:** Track each stage of Model Rebuilds directly from the Model Page. This update provides detailed status logs for rebuilds, mirroring the experience of the initial import, so you have better visibility throughout the process.
# 20th November 2024: Enhance Performance Tracking, New Runtime UI and more
Source: https://docs.inferless.com/changelog/november-2024/20th-november
**Latest Enhancements & Features:**
1. **New Runtime UI:** The Runtime UI has been redesigned for better usability. You can now easily track runtime changes, identify models using specific runtimes, and clean up unused runtimes effortlessly.
2. **Input/Output Tracking in Serverless V2**: We’ve added Input/Output tracking in Serverless V2, giving you deeper insights into how data flows through your deployments. This is only applicable for beta users with access to latest serverless capabilities.
3. **Enhanced Metrics:** Added percentile-based request latency to provide better visibility into inference performance. The cold start tracker now shows percentiles instead of individual container starts for improved clarity.
4. **Enhanced Autoscaling:** RPS-based scaling has been introduced to maintain low cold start times even at extremely high scales, resulting in significantly better p95 latency.
# 20th October : Better error handling, Git fixes
Source: https://docs.inferless.com/changelog/october-2023/20th-october
## What's New:
1. In the latest release, enhancements in error reporting for Input/Output (IN/OUT) JSON have been made, particularly in handling various data structures. Here's a summary of the changes:
* **Returning Dictionaries**: Improved support and examples for returning dictionaries with the keys being the labels and the values as the respective scores.
* **Returning Variable Length Arrays**: New examples have been added to demonstrate how variable-length arrays can be returned, showcasing the flexibility in handling different data sizes.
These updates provide better clarity and support for handling different data types and structures, ensuring a smoother user experience while working with IN/OUT JSON. We have updated the [documentation here.](https://docs.inferless.com/model-import/input-output-json)2. Email Verification on Signup: Added for enhanced onboarding security, alongside a feature to re-invite users to workspaces.
## Bug Fixes:
1. Enhancements have been made to the Git web-hooks storage mechanism, aiming to reduce build failures.
2. Dynamic Field Names: Tailored fields for sharing model details, adjustable based on integration choice.
# 7th October 2024: Enhanced Model Imports, Build Tracking, and Real-Time Logs
Source: https://docs.inferless.com/changelog/october-2024/7th-october
**Latest Enhancements & Features:**
1. **HF Model Import Improvements:** We've enhanced the Hugging Face Model Import functionality by adding support for Transformers 4.44+ models, including LLaMA 3.1 and many others that previously threw errors. Additionally, you can now pass more input parameters (such as output length, temperature, etc.) during model import, to run your model efficiently
2. **Model Build Progress Visibility:** You can now track your Model Build progress more effectively through detailed logs at different stages: Queue, Runtime Build, Worker (preparing the model), and Inference Validation. This gives you greater visibility into the status of your model builds and helps you identify any issues early in the process.
3. **Improved Docker Build Logs:** Docker build logs are now streamed in real-time, allowing you to track the progress of custom runtime builds faster and more easily, rather than waiting for all logs at the end.
These updates provide more efficient model management and enhanced visibility for smoother workflows in Inferless. Stay tuned for more improvements!
# Changelog
Source: https://docs.inferless.com/changelog/overview
New updates and improvements to Inferless.
# 30th September 2024: Remote Run, Infrastructure Stability, and Observability Improvements
Source: https://docs.inferless.com/changelog/september-2024/30th-september
**Latest Enhancements & Features:**
1. **Remote Run:** We’ve introduced Remote Run, enabling you to seamlessly run your code remotely. Execute scripts and workflows without the need for local infrastructure, improving flexibility and performance. Read the [documentation](https://dub.sh/remoterun)
2. **Infra Stability:** Addressed several infrastructure stability issues, leading to smoother user experiences during peak times.
3. **Faster Builds with In-cluster Workers:** Significantly improved build times using in-cluster workers, ensuring faster code deployments and model updates.
4. **Graphs & Metrics UI Stability:** Enhanced UI stability for the graphs and Metrics section, ensuring transparency to track API usage better.
This update ensures better performance, faster execution, and improved stability across key areas of Inferless. Stay tuned for more improvements coming soon!
# AI Agents CheatSheet
Source: https://docs.inferless.com/cheatsheet/ai-agent-cheatsheet
A comprehensive cheatsheet covering the types of AI agents, their use cases, popular frameworks, LLMs, deployment options, essential tools, optimization techniques, common challenges, and ethical considerations.
## 1. Types of AI Agents
* **Simple Reflex Agents**: These agents operate based solely on the current percept, ignoring the rest of the percept history. They function by implementing condition-action rules, making them suitable for fully observable environments.
* **Model-Based Reflex Agents**: These agents maintain an internal state that depends on the percept history, allowing them to handle partially observable environments by keeping track of aspects unobservable at any given moment.
* **Goal-Based Agents**: Beyond current perceptions, these agents act to achieve specific goals, requiring them to consider future actions and outcomes to make decisions that lead them toward their objectives.
* **Utility-Based Agents**: These agents assess different possible actions based on a utility function, aiming to maximize overall satisfaction or "happiness," which allows them to handle trade-offs among different goals.
* **Learning Agents**: Equipped with the ability to learn from experiences, these agents can adapt their behavior over time, improving their performance in dynamic and unknown environments.
* **Hierarchical Agents**: These agents operate at multiple levels of abstraction, breaking down complex tasks into simpler sub-tasks, which allows for more efficient problem-solving and decision-making processes.
* **Multi-Agent Systems (MAS)**: Involving multiple interacting agents, these systems can work collaboratively or competitively to achieve individual or shared goals.
## 2. Use Cases
* **Personal Assistance**: AI agents can function as virtual assistants, managing daily tasks like scheduling appointments, filtering emails, organizing documents, and setting reminders.
* **Business Process Automation**: These agents transform business operations by handling customer service inquiries, managing document workflows, automating inventory systems, and monitoring business metrics..
* **Research and Analysis**: In research contexts, AI agents excel at processing vast amounts of data, identifying patterns, generating comprehensive summaries, and conducting literature reviews. They can analyze multiple sources simultaneously and present findings in structured formats.
* **Software Development**: AI agents serve as coding companions, offering real-time suggestions, debugging assistance, and automated testing capabilities. They can review code for potential issues, generate documentation, and help optimize system performance.
* **Healthcare**: In medical settings, AI agents monitor patient vital signs, analyze medical imaging, assist with preliminary diagnoses, and manage patient records. They can also aid in drug discovery by analyzing molecular data and predicting potential therapeutic compounds.
* **Financial Services**: These agents enhance financial operations through real-time fraud detection, risk assessment, and automated trading strategies.
## 3. Popular Frameworks for Building AI Agents
* **[LlamaIndex](https://github.com/run-llama/llama_index)**: An open-source framework that facilitates the integration of large language models (LLMs) with external data sources, enabling developers to build AI agents capable of complex reasoning and data retrieval.
* **[LangGraph](https://langchain-ai.github.io/langgraph/tutorials/introduction/)**: A graph-based approach to orchestrating AI agents, LangGraph excels in managing intricate, multi-step workflows where the sequence and flow of agent interactions are critical.
* **[Microsoft AutoGen](https://github.com/microsoft/autogen)**: An open-source framework from Microsoft Research that streamlines the creation of complex and specialized AI agents, particularly for multi-agent systems.
* **[Haystack](https://github.com/deepset-ai/haystack)**: A robust framework for building search systems, Haystack allows developers to create AI agents capable of performing semantic search, question answering, and other NLP tasks.
* **[Phidata](https://github.com/phidatahq/phidata)**: A platform that transforms large language models into AI agents, Phidata focuses on enabling developers to build intelligent systems with ease.
* **[CrewAI](https://github.com/crewAIInc/crewAI)**: A framework designed for orchestrating collaboration among AI agents, CrewAI allows developers to create a "crew" of AI agents that can work together on complex tasks, each with specific roles and responsibilities.
## 4. Large Language Models (LLMs) for AI Agents
* **[DeepSeek-V3](https://huggingface.co/deepseek-ai/DeepSeek-V3)**: A powerful Mixture-of-Experts (MoE) language model with 671B total parameters, activating 37B per token. It achieves efficient inference and cost-effective training using Multi-head Latent Attention (MLA) and DeepSeekMoE architectures, proven in DeepSeek-V2.
* **[Qwen2.5-72B-Instruct](https://huggingface.co/Qwen/Qwen2.5-72B-Instruct-AWQ)**: A 72 billion-parameter model that excels in instruction following, long text generation, and multilingual support, significantly improving coding and mathematical capabilities compared to its predecessor, Qwen2.
* **[Llama-3.3-70B-Instruct](https://huggingface.co/meta-llama/Llama-3.3-70B-Instruct)**: Llama 3.3 is a 70B multilingual LLM optimized for dialogue, excelling in benchmarks against many open and closed models.
* **[Ministral-8B-Instruct](https://huggingface.co/mistralai/Ministral-8B-Instruct-2410)**: With 8B parameters, this model is tailored for efficient instruction-following tasks, providing robust performance in generating responses.
* **[Llama-3.1-8B-Instruct](https://huggingface.co/meta-llama/Llama-3.1-8B-Instruct)**: This is a 8B parameters model, focuses on instruction adherence and is optimized for generating concise and relevant outputs in response to user prompts.
## 5. Deployment Options
* **[On-Premises Deployment](https://medium.com/@cprasenjit32/deployment-of-machine-learning-models-on-premises-and-in-the-cloud-39b021efba97)**: Running models on local servers for full control and data privacy.
* **[Cloud Services](https://www.analyticsvidhya.com/blog/2022/09/how-to-deploy-a-machine-learning-model-on-aws-ec2/)**: Utilizing cloud providers like AWS, Azure, or Google Cloud for scalable deployment.
* **[Serverless GPU Platforms](https://docs.inferless.com/how-to-guides/deploy-a-codellama-python-34b-model-using-inferless)**: Serverless GPU platforms like [Inferless](https://www.inferless.com/) provide on-demand, scalable GPU resources for machine learning workloads, eliminating the need for infrastructure management and offering cost efficiency.
* **[Edge Deployment](https://www.hackster.io/shahizat/running-llms-with-tensorrt-llm-on-nvidia-jetson-agx-orin-34372f)**: Deploying models on edge devices for low-latency applications.
* **[Containerization](https://www.datacamp.com/tutorial/containerization-docker-and-kubernetes-for-machine-learning)**: Using Docker or Kubernetes to manage and scale deployments efficiently.
## 6. Inferece Library/Engine for LLMs
* **[vLLM](https://github.com/vllm-project):** A library optimized for high-throughput LLM inference.
* **[Text Generation Inference(TGI)](https://github.com/huggingface/text-generation-inference):** A platform designed for efficiently deploying LLMs in production environments, facilitating scalable and user-friendly text generation applications.
* **[LMDeploy](https://github.com/InternLM/lmdeploy):** A toolkit designed for efficiently compressing, deploying, and serving LLMs.
* **[LitServe](https://github.com/Lightning-AI/LitServe):** Lightning-fast inference serving library for quick deployments.
## 7. Essential Tools for AI Agents
* **[Guardrails](https://github.com/guardrails-ai/guardrails)**: A Python framework that helps build reliable AI applications by detecting, quantifying, and mitigating risks in large language model outputs.
* **[Vector Databases](https://www.pinecone.io/)**: AI agents can utilize vector databases to efficiently search through and retrieve relevant information from large collections of embedded data.
* **[ScrapeGraph AI](https://github.com/ScrapeGraphAI/Scrapegraph-ai)**: A Python-based AI scraper designed for efficient data extraction and web scraping tasks.
* **[GPT Researcher](https://github.com/assafelovic/gpt-researcher)**: An autonomous local and web researcher on any topic, generating comprehensive reports with citations.
* **[AutoGPT](https://github.com/Significant-Gravitas/AutoGPT)**: A platform that allows you to create, deploy, and manage continuous AI agents.
* **[Serper](https://serper.dev/)**: A fast and cost-effective Google Search API that provides access to structured data from Google search results.
## 8. Learning Materials
* **[Multi AI Agent Systems with crewAI](https://www.deeplearning.ai/short-courses/multi-ai-agent-systems-with-crewai/)**: Learn key principles of designing effective AI agents and organizing a team of AI agents to perform complex, multi-step tasks.
* **[AI Agents in LangGraph](https://www.deeplearning.ai/short-courses/ai-agents-in-langgraph/)**: Build agentic AI workflows using LangChain's LangGraph.
* **[Mistral AI Cookbook](https://github.com/mistralai/cookbook)**: A collection of examples showcasing Mistral models, contributed by the Mistral community and partners.
* **[OpenAI Cookbook](https://github.com/openai/openai-cookbook)**: Community-driven resource of comprehensive guides and examples, including code snippets and best practices.
* **[LlamaIndex Cookbook](https://docs.llamaindex.ai/en/stable/examples/cookbooks/GraphRAG_v1/)**: A collection of cookbook examples showcasing various use-cases of AI agents built with LlamaIndex.
## 9. Optimization & Compression
* **[Pruning](https://developer.nvidia.com/blog/how-to-prune-and-distill-llama-3-1-8b-to-an-nvidia-llama-3-1-minitron-4b-model/)**: Reduces less significant weights to create sparser and faster models.
* **[Knowledge Distillation](https://www.datacamp.com/blog/distillation-llm)**: Transfers knowledge from large teacher models to smaller students.
* **[Quantization](https://huggingface.co/docs/optimum/en/concept_guides/quantization)**: Converts model weights to lower-bit precision to reduce memory usage and accelerate inference.
* **Optimized Hardware Deployment**: Involves utilizing specialized hardware designed for efficient model inference. Libraries like TensorRT-LLM improve performance on NVIDIA GPUs.
## 10. Common Challenges & Troubleshooting
* **Performance Issues**: Issues related to system efficiency, speed, and resource utilization including memory management, processing speed, GPU usage, and overall system responsiveness. These directly impact the agent's ability to handle tasks effectively and respond in a timely manner.
* **Integration Problems**: Challenges that arise when connecting AI agents with other systems, services, or components. This includes API management, version compatibility, dependency conflicts, and ensuring smooth communication between different parts of the system.
* **Data Handling**: Issues surrounding the management, validation, and processing of data flowing through AI agents. This covers input/output validation, data quality assurance, and handling edge cases that could affect the agent's performance.
* **Deployment Challenges**: Problems encountered when moving AI agents from development to production environments. This includes environment configuration, scaling issues, container management, and ensuring consistent performance across different deployment scenarios.
* **Monitoring & Debugging**: Challenges related to tracking, understanding, and fixing issues in AI agent systems. This encompasses log management, performance tracking, error handling, and maintaining system health checks.
## 11. Ethical Considerations
* **Fairness & Bias**: Managing discriminatory patterns in AI systems through unbiased training data, equal treatment across demographics, and regular fairness testing.
* **Transparency & Explainability**: Making AI decision-making processes clear and understandable, with documented capabilities and limitations.
* **Privacy & Security**: Protecting user data through robust security measures, proper consent management, and minimal data collection practices.
* **Accountability & Governance**: Establishing clear responsibility chains and compliance measures for AI system actions and outcomes.
* **Human Oversight**: Maintaining appropriate human control through monitoring, override capabilities, and expert supervision.
* **User Rights & Empowerment**: Ensuring users have control over their data, with clear opt-out options and feedback channels.
* **Development Standards**: Following ethical guidelines and best practices in AI development, with proper documentation and testing.
* **Inclusivity & Accessibility**: Creating AI systems usable by all, regardless of language, ability, or cultural background.
## 12. Licensing & Governance
* **Check Licenses** (MIT, Apache 2.0, GPL) before commercial use.
* **Hugging Face Model Cards**: Follow best practices for transparency.
* **Data Usage Agreements**: Ensure compliance with dataset terms.
# Code LLMs CheatSheet
Source: https://docs.inferless.com/cheatsheet/code-cheatsheet
A comprehensive cheatsheet covering open-source code generation models, inference libraries, datasets, deployment strategies, and ethical considerations for developers and organizations.
## 1. Models (Open-Source)
* **[Qwen2.5-Coder-32B](https://huggingface.co/Qwen/Qwen2.5-Coder-32B-Instruct):** A state-of-the-art large language model developed by Alibaba Cloud, designed specifically for coding tasks.
* **[DeepSeek-Coder-33b-base](https://huggingface.co/deepseek-ai/deepseek-coder-33b-base):** A powerful 33 billion parameter AI model designed for code generation and completion, trained on 2 trillion tokens.
* **[StarCoder2-15B](https://huggingface.co/bigcode/starcoder2-15b):** A state-of-the-art code generation model optimized for multilingual programming tasks.
* **[Codestral 22B](https://huggingface.co/mistralai/Codestral-22B-v0.1):** Capable of generating, explaining, and refactoring code across over 80 programming languages, including Python, Java, and C++.
* **[Llama-3.3 70B Instruct](https://huggingface.co/meta-llama/Llama-3.3-70B-Instruct):** A cutting-edge multilingual language model optimized for text-based interactions, featuring 70 billion parameters and advanced capabilities in reasoning and coding.
## 2. Inference Libraries / Toolkits
* **[vLLM](https://github.com/vllm-project):** A library optimized for high-throughput LLM inference.
* **[Text Generation Inference(TGI)](https://github.com/huggingface/text-generation-inference):** A platform designed for efficiently deploying LLMs in production environments, facilitating scalable and user-friendly text generation applications.
* **[LMDeploy](https://github.com/InternLM/lmdeploy):** A toolkit designed for efficiently compressing, deploying, and serving LLMs.
* **[TensorRT-LLM](https://github.com/NVIDIA/TensorRT-LLM):** Accelerated inference on NVIDIA GPUs.
* **[LitServe](https://github.com/Lightning-AI/LitServe):** Lightning-fast inference serving library for quick deployments.
## 3. Datasets
* **[Magicoder-OSS-Instruct-75K](https://huggingface.co/datasets/ise-uiuc/Magicoder-OSS-Instruct-75K):** A dataset with diverse instructions for code generation.
* **[The Stack v2](https://huggingface.co/datasets/bigcode/the-stack-v2):** Comprehensive source code collection.
* **[Code Parrot GitHub Code](https://huggingface.co/datasets/macrocosm-os/code-parrot-github-code):** GitHub code dataset for language models.
* **[Synthetic Text-to-SQL](https://huggingface.co/datasets/gretelai/synthetic_text_to_sql):** Dataset for generating SQL queries from text prompts.
* **[Opc-sft-stage2](https://huggingface.co/datasets/OpenCoder-LLM/opc-sft-stage2):** Dataset optimized for open-source code LLMs.
## 4. Use Cases
* **Automated Code Completion:** Enhancing developer productivity by predicting and suggesting code snippets.
* **Code Translation:** Converting code from one programming language to another.
* **Documentation Generation:** Creating documentation for codebases automatically.
* **Bug Detection and Fixing:** Identifying and suggesting fixes for bugs in code.
* **Educational Tools:** Assisting in teaching programming by providing code examples and explanations.
## 5. Deployment Options
* **[On-Premises Deployment](https://medium.com/@cprasenjit32/deployment-of-machine-learning-models-on-premises-and-in-the-cloud-39b021efba97):** Running models on local servers for full control and data privacy.
* **[Cloud Services](https://www.analyticsvidhya.com/blog/2022/09/how-to-deploy-a-machine-learning-model-on-aws-ec2/):** Utilizing cloud providers like AWS, Azure, or Google Cloud for scalable deployment.
* **[Serverless GPU Platforms](https://docs.inferless.com/how-to-guides/deploy-a-codellama-python-34b-model-using-inferless):** Serverless GPU platforms like [Inferless](https://www.inferless.com/) provide on-demand, scalable GPU resources for machine learning workloads, eliminating the need for infrastructure management and offering cost efficiency.
* **[Edge Deployment](https://www.hackster.io/shahizat/running-llms-with-tensorrt-llm-on-nvidia-jetson-agx-orin-34372f):** Deploying models on edge devices for low-latency applications.
* **[Containerization](https://www.datacamp.com/tutorial/containerization-docker-and-kubernetes-for-machine-learning):** Using Docker or Kubernetes to manage and scale deployments efficiently.
## 6. Training & Fine-Tuning Resources
* **[OpenCoder LLM](https://github.com/OpenCoder-llm/OpenCoder-llm/):** Comprehensive resources for open-code LLMs.
* **[Awesome Code LLM](https://github.com/codefuse-ai/Awesome-Code-LLM):** A curated list of resources for code generation models.
* **[Fine-tuning on a Single GPU](https://huggingface.co/learn/cookbook/fine_tuning_code_llm_on_single_gpu):** Practical guide to fine-tuning code LLMs.
* **[StarCoder](https://github.com/bigcode-project/starcoder/):** GitHub repository for fine-tuning & inference of StarCoder models.
* **[DeepSeek-Coder](https://github.com/deepseek-ai/DeepSeek-Coder/):** Resources for training and deploying DeepSeek models.
## 7. Evaluation & Benchmarking
* **HumanEval:** A benchmark for evaluating the functional correctness of code generated by language models.
* **MBPP:** The **Mostly Basic Python Problems (MBPP)** dataset includes \~1,000 crowd-sourced Python challenges.
* **BigCodeBench:** Evaluates models on practical programming tasks.
* **LiveCodeBench:** Holistic and contamination-free evaluation for LLMs in coding.
* **MultiPL-E:** Benchmarks designed for multiple programming languages.
## 8. Model Optimization & Compression
* **[Pruning](https://developer.nvidia.com/blog/how-to-prune-and-distill-llama-3-1-8b-to-an-nvidia-llama-3-1-minitron-4b-model/):** Reduces less significant weights to create sparser and faster models.
* **[Knowledge Distillation](https://www.datacamp.com/blog/distillation-llm):** Transfers knowledge from large teacher models to smaller students.
* **[Quantization](https://huggingface.co/docs/optimum/en/concept_guides/quantization):** Converts model weights to lower-bit precision to reduce memory usage and accelerate inference.
* **Optimized Hardware Deployment:** Involves utilizing specialized hardware designed for efficient model inference. Libraries like TensorRT-LLM improve performance on NVIDIA GPUs.
* **[Batch Inference](https://medium.com/@yohoso/llm-inference-optimisation-continuous-batching-2d66844c19e9):** Processes multiple inputs simultaneously for efficient resource utilization.
## 9. Integration & Workflow Tools
* **[LlamaIndex](https://github.com/jerryjliu/llama_index):** Simplifies building RAG applications with minimal code.
* **[ZenML](https://github.com/zenml-io/zenml):** Open-source MLOps framework for reproducible ML pipelines.
* **[Ollama](https://ollama.com/):** Tool for running and customizing LLMs locally.
* **[Evidently](https://github.com/evidentlyai/evidently):** Open-source framework for MLOps observability.
* **[llamafile](https://github.com/Mozilla-Ocho/llamafile):** Packages LLMs and dependencies into executable files for local execution.
## 10. Common Challenges & Troubleshooting
* **Model Transparency**: Generative Models function as "black boxes," making it difficult to understand their decision-making processes, which can hinder debugging and trust.
* **Computational Resources**: Inferencing large models demands significant computational power, posing accessibility challenges for some organizations.
* **Security and Ethical Concerns**: There's a risk of models being misused to generate malicious code, necessitating the implementation of safeguards.
* **Integration Challenges**: Incorporating these models into existing development workflows requires ensuring compatibility with current tools and practices.
## 11. Ethical Considerations
* **Code Attribution and Licensing**: Ensure proper attribution of generated code and respect for existing software licenses and intellectual property rights.
* **Bias and Fairness**: Address potential biases in code generation that might create discriminatory outcomes.
* **Developer Dependency**: Consider the impact on developer skills and ensure the tool enhances rather than replaces human programming capabilities.
* **Data Privacy**: Protect sensitive information in code repositories and ensure compliance with data protection regulations when training or using these models.
* **Quality Assurance**: Establish guidelines for reviewing and validating AI-generated code to maintain code quality and security standards.
## 12. Licensing & Governance
* **Check Licenses:** (MIT, Apache 2.0, GPL) before commercial use.
* **Hugging Face Model Cards:** Follow best practices for transparency.
* **Data Usage Agreements:** Ensure compliance with dataset terms.
# 3D Generative Models CheatSheet
Source: https://docs.inferless.com/cheatsheet/itt3d-cheatsheet
A comprehensive guide to open-source 3D generative models, datasets, toolkits, and resources for development, deployment, and evaluation.
## 1. Models (Open-Source)
* **[Shap-E](https://huggingface.co/openai/shap-e):** A conditional generative model from OpenAI that creates 3D assets from text prompts using a diffusion process.
* **[LLaMA-Mesh](https://huggingface.co/Zhengyi/LLaMA-Mesh):** This model unifies 3D mesh generation with language models, enabling the generation of 3D meshes from text prompts.
* **[Hunyuan3D-1](https://huggingface.co/tencent/Hunyuan3D-1):** Hunyuan3D-1 is designed for generating high-quality 3D models and supports various applications in computer graphics and virtual environments.
* **[TRELLIS-Image-Large](https://huggingface.co/JeffreyXiang/TRELLIS-image-large):** his model focuses on generating detailed 3D representations from images, enhancing the fidelity of visual outputs in generative tasks.
* **[InstantMesh](https://huggingface.co/TencentARC/InstantMesh):** InstantMesh is a tool for generating high-quality meshes from point clouds, facilitating efficient 3D modeling workflows.
## 2. Inference Libraries / Toolkits
* **[Hunyuan3D-1](https://github.com/tencent/Hunyuan3D-1)** A Unified Framework for Text-to-3D and Image-to-3D Generation utilizing the Hunyuan3D-1 model effectively in various applications.
* **[InstantMesh](https://github.com/TencentARC/InstantMesh):** A library for creating high-quality meshes from point clouds, providing tools for mesh generation and manipulation.
* **[TripoSR](https://github.com/VAST-AI-Research/TripoSR):** This toolkit focuses on super-resolution techniques for improving the quality of 3D models and images.
* **[TRELLIS](https://github.com/Microsoft/TRELLIS):** A comprehensive framework for working with generative models in 3D, offering various utilities for model inference and evaluation.
* **[dust3r](https://github.com/naver/dust3r/):** A library aimed at enhancing the generation of 3D structures through advanced algorithms and techniques.
## 3. Datasets
* **[objaverse](https://huggingface.co/datasets/allenai/objaverse):** A large-scale dataset containing diverse 3D object representations, useful for training generative models.
* **[TRELLIS-500K](https://huggingface.co/datasets/JeffreyXiang/TRELLIS-500K):** A dataset of 500K 3D assets curated from Objaverse(XL), ABO, 3D-FUTURE, HSSD, and Toys4k, filtered based on aesthetic scores.
* **[Cap3D](https://huggingface.co/datasets/tiange/Cap3D):** A comprehensive dataset which contains multiple dataset and also it contains descriptive captions for 3D objects.
## 4. Use Cases
* **Gaming and Animation:** Generating high-quality 3D assets for interactive applications and storytelling.
* **Product Design:** Rapid prototyping of design concepts using AI-generated 3D models.
* **Education and Training:** Creating 3D visualizations for educational content and simulations.
* **Healthcare:** Developing 3D anatomical models for diagnostics, training, and surgery planning.
* **Virtual Reality (VR) and Augmented Reality (AR):** Enhancing immersive experiences through dynamic 3D content creation.
## 5. Deployment Options
* **[On-Premises Deployment](https://medium.com/@cprasenjit32/deployment-of-machine-learning-models-on-premises-and-in-the-cloud-39b021efba97):** Running models on local servers for full control and data privacy.
* **[Cloud Services](https://www.analyticsvidhya.com/blog/2022/09/how-to-deploy-a-machine-learning-model-on-aws-ec2/):** Utilizing cloud providers like AWS, Azure, or Google Cloud for scalable deployment.
* **[Serverless GPU Platforms](https://docs.inferless.com/how-to-guides/deploy-a-codellama-python-34b-model-using-inferless):** Serverless GPU platforms like [Inferless](https://www.inferless.com/) provide on-demand, scalable GPU resources for machine learning workloads, eliminating the need for infrastructure management and offering cost efficiency.
* **[Containerization](https://www.datacamp.com/tutorial/containerization-docker-and-kubernetes-for-machine-learning):** Using Docker or Kubernetes to manage and scale deployments efficiently.
## 6. Training & Fine-Tuning Resources
* **[Machine Learning for 3D](https://huggingface.co/learn/ml-for-3d-course/unit0/introduction):** An introductory course covering machine learning techniques applied to 3D data.
* **[Learning for 3D Vision](https://learning3d.github.io/?utm_source=chatgpt.com):** This course delves into the convergence of 3D vision and learning-based methods.
* **[3D Point Cloud and Machine Learning](https://www.youtube.com/playlist?list=PLY8iUIKUWr9PRHjh4H86UwwnM_3gU3sHV):** A video playlist detailing machine learning approaches specifically tailored to point cloud data.
## 7. Evaluation & Benchmarking
* **[GT23D-Bench](https://arxiv.org/html/2412.09997v1):** A Comprehensive General Text-to-3D Generation Benchmark
* **Peak Signal-to-Noise Ratio (PSNR):** A critical metric used to evaluate the quality of reconstructions and ground-truth rendered images.
* **Chamfer Distance (CD) and Fscore (FS):** These two are standard metrics for evaluating the accuracy of 3D shape reconstructions.
## 8. Model Optimization & Compression
* **Quantization:** Reducing model size for deployment on edge devices without significant loss of accuracy.
* **Knowledge Distillation:** Training smaller models to mimic larger, more complex models.
* **Pruning:** Removing redundant parameters to streamline model performance.
## 9. Integration & Workflow Tools
* **[Meshgen](https://github.com/huggingface/meshgen):** A Blender addon for generating meshes with AI.
* **[Open3D](https://github.com/isl-org/Open3D):** An open-source library that supports the processing of 3D data, including visualization, reconstruction, and analysis functionalities.
## 10. Common Challenges & Troubleshooting
* **Data Quality:** Ensuring high-quality input data for better outputs.
* **Scalability:** Managing computational resources for large-scale 3D generation.
* **Model Robustness:** Addressing failures in handling diverse input types.
* **Interoperability Issues:** Problems may arise when integrating AI tools with existing workflows. Leverage standard file formats and cross-platform libraries for smoother integration.
* **Ethical Issues:** Preventing misuse of generated models for unethical applications.
## 11. Ethical Considerations
* **Bias in Data:** Ensuring diverse datasets to avoid biases in generated outputs.
* **Intellectual Property (IP):** Respecting copyright and IP laws when training or using generative models.
* **Responsible Use:** Establishing guidelines to prevent the misuse of generative technologies.
* **Transparency:** Maintain openness about how models are trained, evaluated, and deployed. This builds trust and promotes responsible AI usage.
## 12. Licensing & Governance
* **Check Licenses:** (MIT, Apache 2.0, GPL) before commercial use.
* **Hugging Face Model Cards:** Follow best practices for transparency.
* **Data Usage Agreements:** Ensure compliance with dataset terms.
# Text-to-Image Generation CheatSheet
Source: https://docs.inferless.com/cheatsheet/text-to-image-cheatsheet
A comprehensive cheatsheet covering open-source text-to-image generation models, inference libraries, datasets, use cases, deployment strategies, training resources, evaluation methods, and ethical considerations for developers and organizations.
### 1. Models (Open-Source)
* [**FLUX.1-dev**](https://huggingface.co/black-forest-labs/FLUX.1-dev): Introduced in 2024, FLUX.1-dev is a powerful AI image generation model utilizing an advanced architecture called a latent diffusion model.
* [**Stable Diffusion v1.5**](https://huggingface.co/stable-diffusion-v1-5/stable-diffusion-v1-5): An iteration of the latent text-to-image diffusion model capable of generating photo-realistic images from textual descriptions.
* [**Stable Diffusion v2.1**](https://huggingface.co/stabilityai/stable-diffusion-2-1): An enhanced version of the model, offering improved image quality and resolution capabilities.
* [**Stable Diffusion XL Base 1.0**](https://huggingface.co/stabilityai/stable-diffusion-xl-base-1.0): A larger model with 3.5 billion parameters, designed for high-resolution image synthesis with greater detail and fidelity.
* [**Stable Diffusion 3.5 Large**](https://huggingface.co/stabilityai/stable-diffusion-3.5-large): An 8-billion-parameter model delivering high-quality, prompt-adherent images up to 1 megapixel, customizable for professional use on consumer hardware.
### 2. Inference Libraries / Toolkits
* [**Diffusers**](https://github.com/huggingface/diffusers): A library by Hugging Face that provides pre-trained diffusion models for text-to-image generation, facilitating easy integration and experimentation.
* [LitServe](https://github.com/Lightning-AI/LitServe): An open-source easy-to-use, flexible serving engine designed to deploy vision models at scale.
* [**InvokeAI**](https://github.com/invoke-ai/InvokeAI): An open-source AI image generation toolkit that provides a user-friendly interface and supports various models, enabling efficient image creation and customization.
* [**ComfyUI**](https://github.com/comfyanonymous/ComfyUI): A powerful and modular open-source GUI for Stable Diffusion, offering a node-based interface for advanced users to experiment with complex workflows.
### 3. Datasets
* [**LAION-5B**](https://laion.ai/blog/laion-5b/): A large-scale dataset containing billions of image-text pairs, widely used for training text-to-image models.
* [**CommonCatalog CC-BY**](https://huggingface.co/datasets/common-canvas/commoncatalog-cc-by): A dataset comprising a diverse collection of images and associated metadata, useful for training image generation models.
* [**DiffusionDB**](https://huggingface.co/datasets/poloclub/diffusiondb): A large dataset of images generated by diffusion models, along with their prompts, aiding in understanding and improving text-to-image generation.
### 4. Use Cases
* **Creative Design**: Assisting artists and designers in generating concept art, illustrations, and design prototypes.
* **Advertising**: Creating customized visuals for marketing campaigns tailored to specific themes or audiences.
* **Education**: Developing visual aids and educational materials to enhance learning experiences.
* **Entertainment**: Generating assets for video games, movies, and virtual environments.
* **E-commerce**: Producing product images based on textual descriptions to enrich online catalogs.
### 5. Deployment Options
* **[On-Premises Deployment](https://medium.com/@cprasenjit32/deployment-of-machine-learning-models-on-premises-and-in-the-cloud-39b021efba97):** Running models on local servers for full control and data privacy.
* **[Cloud Services](https://www.analyticsvidhya.com/blog/2022/09/how-to-deploy-a-machine-learning-model-on-aws-ec2/):** Utilizing cloud providers like AWS, Azure, or Google Cloud for scalable deployment.
* **[Serverless GPU Platforms](https://docs.inferless.com/how-to-guides/deploy-flux-schnell-using-inferless):** Serverless GPU platforms like [Inferless](https://www.inferless.com/) provide on-demand, scalable GPU resources for machine learning workloads, eliminating the need for infrastructure management and offering cost efficiency.
* **[Edge Deployment](https://www.jetson-ai-lab.com/tutorial_stable-diffusion.html):** Deploying models on edge devices for low-latency applications.
* **[Containerization](https://www.datacamp.com/tutorial/containerization-docker-and-kubernetes-for-machine-learning):** Using Docker or Kubernetes to manage and scale deployments efficiently.
### 6. Training & Fine-Tuning Resources
* [**Hugging Face Courses**](https://huggingface.co/learn/diffusion-course/en/unit0/1): Offers tutorials on training and fine-tuning text-to-image models using the Diffusers library.
* [**ComfyUI Examples**](https://comfyanonymous.github.io/ComfyUI_examples/): Provides practical examples and workflows for using ComfyUI in image generation tasks.
* [**Stability AI Learning Hub**](https://stability.ai/learning-hub/): A resource hub providing tutorials, guides, and learning materials for training and fine-tuning Diffusion models.
### 7. Evaluation & Benchmarking
* [**Fréchet Inception Distance (FID)**](https://en.wikipedia.org/wiki/Fr%C3%A9chet_inception_distance): Measures the quality and diversity of generated images by comparing them to real images.
* [**Inception Score (IS)**](https://en.wikipedia.org/wiki/Inception_score): Evaluates the quality of generated images based on their classification into distinct classes.
* [**ELO Score**](https://arxiv.org/html/2406.04485v1#:~:text=3.3,Elo%20Rating%20System): A rating system adapted to assess the performance of image generation models through comparative evaluations.
### 8. Model Optimization & Compression
* [**Pruning**](https://arxiv.org/pdf/2404.11936): Removing less significant parts of the model to reduce size and improve inference speed.
* [**Quantization**](https://huggingface.co/blog/train-optimize-sd-intel): Reducing the precision of model weights to decrease memory usage and enhance efficiency.
* [**Knowledge Distillation**](https://huggingface.co/blog/sd_distillation): Training a smaller model to replicate the performance of a larger one, balancing efficiency and accuracy.
### 9. Integration & Workflow Tools
* [**Stable Diffusion WebUI**](https://github.com/AUTOMATIC1111/stable-diffusion-webui): An open-source web-based user interface for Stable Diffusion, providing extensive features and customization options for image generation.
* [**Civitai**](https://civitai.com/): A platform for sharing and discovering models, presets, and other resources related to AI image generation, fostering community collaboration.
* [ComfyUI](https://github.com/comfyanonymous/ComfyUI): An open-source, node-based graphical interface that enables users to generate images, videos, and audio using generative AI models like Stable Diffusion, offering a modular and customizable workflow for creative applications.
### 10. Common Challenges & Troubleshooting
* **Text Legibility**: Ensuring that generated images containing text are clear and readable.
* **Image Quality**: Maintaining high resolution and aesthetic appeal in generated images.
* **Prompt Sensitivity**: Models may produce varying results based on slight changes in input prompts, requiring careful prompt engineering.
* **Ethical Concerns**: Addressing potential misuse of generated images and ensuring compliance with ethical guidelines.
### 11. Ethical Considerations
* **Intellectual Property Rights**: AI models may use copyrighted material without permission, risking infringement; it's essential to respect creators' rights.
* **Bias and Representation**: AI can perpetuate training data biases, leading to unfair outputs; developers should detect and mitigate these biases.
* **Transparency and Accountability**: Clearly disclose when images are AI-generated to maintain trust and authenticity.
* **Privacy Concerns**: Obtain permissions and anonymize data if you are using personal data in training which can violate privacy.
### 12. Licensing & Governance
* **Check Licenses**: (MIT, Apache 2.0, GPL) before commercial use.
* **Hugging Face Model Cards**: Follow best practices for transparency.
* **Data Usage Agreements**: Ensure compliance with dataset terms.
* **Regulatory Compliance**: Stay informed about evolving regulations concerning AI, such as the European Union's AI Act.
# Text-To-Speech (TTS) Cheatsheet
Source: https://docs.inferless.com/cheatsheet/tts-cheatsheet
A comprehensive cheatsheet, provides an overview of the top open-source TTS models, inference libraries, training resources, and more to help you get started with or enhance your TTS projects.
## 1. Models (Open-Source)
* **[XTTS-v2](https://huggingface.co/coqui/XTTS-v2):** High-quality TTS model with robust voice quality.
* **[MeloTTS-English](https://huggingface.co/myshell-ai/MeloTTS-English):** Specialized English voice synthesis with melodic intonation.
* **[F5-TTS](https://huggingface.co/SWivid/F5-TTS):** Produces high-quality speech with voice cloning and customization.
* **[Bark](https://huggingface.co/suno/bark):** High-quality multilingual model supporting varied accents and prosody.
* **[Parler-tts-mini-v1](https://huggingface.co/parler-tts/parler-tts-mini-v1):** Compact model optimized for quick demos and limited resource environments.
### Additional Notable Models
* **[FastSpeech2](https://huggingface.co/facebook/fastspeech2-en-ljspeech):** Speed-focused, decent quality trade-off.
* **[VITS](https://github.com/jaywalnut310/vits):** End-to-end TTS offering high fidelity and voice controllability.
* **[SpeechT5](https://huggingface.co/microsoft/speecht5_tts):** Unified-modal SpeechT5 framework that explores encoder-decoder pre-training for self-supervised speech/text representation learning.
## 2. Inference Libraries / Toolkits
* **[Coqui TTS](https://github.com/coqui-ai/TTS):** Easy-to-use, community-driven TTS toolkit.
* **[Parler TTS](https://github.com/huggingface/parler-tts):** Inference and training library for high-quality TTS models.
* **[LitServe](https://github.com/Lightning-AI/LitServe):** Lightning-fast inference serving library for quick deployments.
* **[Mozilla TTS](https://github.com/mozilla/TTS):** Well-known toolkit with extensive model support and large community.
* **[Tortoise TTS](https://github.com/neonbjb/tortoise-tts):** High-quality synthesis; slower but excellent results.
### Additional Toolkits
* **[ESPnet TTS](https://github.com/espnet/espnet):** Unified end-to-end speech processing (ASR + TTS).
* **[NVIDIA NeMo](https://github.com/NVIDIA/NeMo):** State-of-the-art models + easy fine-tuning on NVIDIA GPUs.
## 3. Use Cases
* **Voice Assistants & Virtual Agents**
* **Audiobooks & Podcast Generation**
* **Accessibility Tools (for visually impaired users)**
* **Interactive Learning & E-Learning Content**
* **Customer Support Bots & IVR Systems**
* **Content Localization & Dubbing for Media**
## 4. Deployment Options
* **[On-Premises Deployment](https://medium.com/@cprasenjit32/deployment-of-machine-learning-models-on-premises-and-in-the-cloud-39b021efba97):** Running models on local servers for full control and data privacy.
* **[Cloud Services](https://www.analyticsvidhya.com/blog/2022/09/how-to-deploy-a-machine-learning-model-on-aws-ec2/):** Utilizing cloud providers like AWS, Azure, or Google Cloud for scalable deployment.
* **[Serverless GPU Platforms](https://docs.inferless.com/how-to-guides/deploy-a-codellama-python-34b-model-using-inferless):** Serverless GPU platforms like [Inferless](https://www.inferless.com/) provide on-demand, scalable GPU resources for machine learning workloads, eliminating the need for infrastructure management and offering cost efficiency.
* **[Edge Deployment](https://www.hackster.io/shahizat/running-llms-with-tensorrt-llm-on-nvidia-jetson-agx-orin-34372f):** Deploying models on edge devices for low-latency applications.
* **[Containerization](https://www.datacamp.com/tutorial/containerization-docker-and-kubernetes-for-machine-learning):** Using Docker or Kubernetes to manage and scale deployments efficiently.
## 5. Datasets
* **[keithito/lj\_speech](https://huggingface.co/datasets/keithito/LJ-Speech-Dataset):** Popular single-speaker dataset for English TTS.
* **[facebook/multilingual\_librispeech](https://huggingface.co/datasets/facebook/multilingual_librispeech):** Multilingual speech corpus for polyglot models.
* **[amphion/Emilia-Dataset](https://huggingface.co/datasets/amphion/Emilia-Dataset):** Specialized dataset for unique voice profiles.
* **[speechcolab/gigaspeech](https://huggingface.co/datasets/speechcolab/gigaspeech):** Large-scale English speech corpus.
* **[parler-tts/mls\_eng](https://huggingface.co/datasets/parler-tts/mls_eng):** English subset of the Multilingual LibriSpeech dataset.
### More Datasets
* **[VCTK](https://huggingface.co/datasets/CSTR-Edinburgh/vctk):** High-quality, multi-speaker dataset for diverse accents.
* **[Common Voice](https://huggingface.co/datasets/legacy-datasets/common_voice):** Crowdsourced multilingual dataset.
* **[LibriTTS](https://huggingface.co/datasets/mythicinfinity/libritts):** Enhanced LibriSpeech variant for better TTS results.
## 6. Training & Fine-Tuning Resources
* **[GitHub TTS Notebooks & Tutorials](https://github.com/mozilla/TTS/wiki/TTS-Notebooks-and-Tutorials):** Community-driven code examples and scripts.
* **[Hugging Face Audio Course, Unit 6 (From Text to Speech)](https://huggingface.co/learn/audio-course/en/chapter6/introduction):** Hands-on tutorials.
* **[Fine-Tuning a 🐸 TTS Model (Coqui TTS docs)](https://docs.coqui.ai/en/latest/finetuning.html):** Step-by-step instructions.
* **[NVIDIA NeMo TTS Guides](https://github.com/NVIDIA/NeMo/tree/stable/tutorials/tts):** Hands-on TTS tutorial notebooks.
* **[VITS Fast Fine-tuning](https://github.com/Plachtaa/VITS-fast-fine-tuning):** Guide you to add your own character voices, or even your own voice, into existing VITS TTS model.
## 7. Evaluation & Benchmarking
* **[Mean Opinion Score (MOS)](https://en.wikipedia.org/wiki/Mean_opinion_score), [Comparative MOS (CMOS)](https://techcommunity.microsoft.com/blog/azure-ai-services-blog/new-technical-research-is-advancing-azure%E2%80%99s-neural-text-to-speech-service/3499414#:~:text=Comparative%20MOS%20\(CMOS\)):** Subjective quality assessment.
* **[PESQ, POLQA, NISQA](https://picovoice.ai/blog/speech-quality/):** Objective speech quality metrics.
## 8. Model Optimization & Compression
* **Quantization:** Reduce model size & inference time (ONNX).
* **Pruning & Distillation:** Tailor models to resource constraints.
* **Hardware Acceleration:** GPUs, TPUs, or specialized inference chips.
* **[ONNX](https://onnx.ai/) / [TensorRT](https://docs.nvidia.com/deeplearning/tensorrt/quick-start-guide/index.html):** Optimize models for low-latency, high-throughput inference.
## 9. Integration & Workflow Tools
* **[Gradio](https://www.gradio.app/) / [Streamlit](https://streamlit.io/):** Rapid prototyping with web UIs.
* **[Airflow](https://airflow.apache.org/) / [Prefect](https://www.prefect.io/):** Automate data and training pipelines.
* **[CI/CD (GitHub Actions)](https://docs.github.com/en/actions/about-github-actions/understanding-github-actions):** Continuous integration for model updates.
* **[Hugging Face Spaces](https://huggingface.co/spaces):** Share and demo TTS models easily.
## 10. Common Challenges & Troubleshooting
* **Accents & Dialects:** Use multilingual models or phoneme-based TTS.
* **Latency Reduction:** Optimize models, batch inference, use GPU acceleration.
* **Pronunciation Issues:** Text normalization and grapheme-to-phoneme conversion.
* **Memory Constraints:** Use smaller models or pruning/quantization techniques.
## 11. Ethical Considerations
* **Voice Consent & Licensing:** Respect dataset/model licenses.
* **Disclosure of Synthetic Speech:** Inform users when speech is synthesized.
* **Bias & Fairness:** Be aware of biases in training data and model outputs.
* **Deepfake Risks:** Implement safeguards and watermarking.
## 12. Licensing & Governance
* **Check Licenses:** (MIT, Apache 2.0, GPL) before commercial use.
* **Hugging Face Model Cards:** Follow best practices for transparency.
* **Data Usage Agreements:** Ensure compliance with dataset terms.
# Vision-Language Models CheatSheet
Source: https://docs.inferless.com/cheatsheet/vision-llm-cheatsheet
An all-in-one cheatsheet for vision-language models, including open-source models, inference toolkits, datasets, use cases, deployment strategies, optimization techniques, and ethical considerations for developers and organizations.
## 1. Models (Open-Source)
* **[Qwen/Qwen2-VL-7B-Instruct](https://huggingface.co/Qwen/Qwen2-VL-7B)**: A state-of-the-art multimodal model by Qwen, designed for instruction-based tasks, excelling in visual understanding and multilingual processing with 7 billion parameters.
* **[meta-llama/Llama-3.2-11B-Vision-Instruct](https://huggingface.co/meta-llama/Llama-3.2-11B-Vision-Instruct)**: An advanced vision-language model that integrates visual and textual inputs, enhancing performance in multimodal tasks with 11 billion parameters.
* **[google/paligemma2-3b-pt-224](https://huggingface.co/google/paligemma2-3b-pt-224)**: A compact multimodal optimized for efficient processing of images and text, featuring 3 billion parameters and tailored for practical applications in various domains.
* **[microsoft/Phi-3.5-vision-instruct](https://huggingface.co/microsoft/Phi-3.5-vision-instruct)**: A versatile vision-language model developed by Microsoft, focused on instruction-following capabilities and designed to handle complex visual and textual interactions.
* **[mistralai/Pixtral-12B-2409](https://huggingface.co/mistralai/Pixtral-12B-2409)**: A powerful 12 billion parameter model that excels in visual understanding and generation tasks, offering robust performance across a range of multimodal applications.
## 2. Inference Libraries / Toolkits
* **[vLLM](https://github.com/vllm-project)**: A library optimized for high-throughput LLM inference.
* **[Text Generation Inference (TGI)](https://github.com/huggingface/text-generation-inference)**: A platform designed for efficiently deploying LLMs in production environments, facilitating scalable and user-friendly text generation applications.
* **[LMDeploy](https://github.com/InternLM/lmdeploy)**: A toolkit designed for efficiently compressing, deploying, and serving LLMs.
* **[TensorRT-LLM](https://github.com/NVIDIA/TensorRT-LLM)**: Accelerated inference on NVIDIA GPUs.
* **[LitServe](https://github.com/Lightning-AI/LitServe)**: Lightning-fast inference serving library for quick deployments.
## 3. Datasets
* **[OpenGVLab/MMPR-v1.1](https://huggingface.co/datasets/OpenGVLab/MMPR-v1.1)**: A large-scale and high-quality multimodal reasoning preference dataset.
* **[HuggingFaceM4/the\_cauldron](https://huggingface.co/datasets/HuggingFaceM4/the_cauldron)**: A massive collection of 50 vision-language datasets.
* **[HuggingFaceM4/Docmatix](https://huggingface.co/datasets/HuggingFaceM4/Docmatix)**: A massive dataset for Document Visual Question Answering that was used for the fine-tuning of the vision-language model Idefics3.
## 4. Use Cases
* **Image Captioning & Description**: Generate descriptive captions for images, useful in social media, digital asset management, and accessibility solutions for visually impaired users.
* **Visual Question Answering (VQA)**: Answer queries about images, enabling automated customer support or interactive learning environments.
* **Image-Based Document Analysis**: Extract text or metadata from scanned documents, forms, or receipts, streamlining business workflows that require automated data entry or record-keeping.
* **Content Moderation & Safety**: Detect inappropriate or harmful content in images for social media platforms, ensuring compliance with community guidelines.
* **Creative Storytelling & Illustration**: Combine vision inputs with textual generation for creative tasks, such as interactive comic creation or illustrated story generation.
## 5. Deployment Options
* **[On-Premises Deployment](https://medium.com/@cprasenjit32/deployment-of-machine-learning-models-on-premises-and-in-the-cloud-39b021efba97)**: Running models on local servers for full control and data privacy.
* **[Cloud Services](https://www.analyticsvidhya.com/blog/2022/09/how-to-deploy-a-machine-learning-model-on-aws-ec2/)**: Utilizing cloud providers like AWS, Azure, or Google Cloud for scalable deployment.
* **[Serverless GPU Platforms](https://docs.inferless.com/how-to-guides/deploy-Qwen2-VL-7B-Instruct)**: Serverless GPU platforms like [Inferless](https://www.inferless.com/) provide on-demand, scalable GPU resources for machine learning workloads, eliminating the need for infrastructure management and offering cost efficiency.
* **[Edge Deployment](https://www.jetson-ai-lab.com/tutorial_llava.html)**: Deploying models on edge devices for low-latency applications.
* **[Containerization](https://www.datacamp.com/tutorial/containerization-docker-and-kubernetes-for-machine-learning)**: Using Docker or Kubernetes to manage and scale deployments efficiently.
## 6. Training & Fine-Tuning Resources
* **[Hugging Face Computer Vision Course](https://huggingface.co/learn/computer-vision-course/en/unit4/multimodal-models/pre-intro)**: Provides comprehensive tutorials on training and fine-tuning multimodal models, including best practices for data handling, hyperparameter tuning, and evaluation.
* **[Multimodal Inference Papers](https://arxiv.org/html/2405.17247v1)**: Recent research insights into designing and optimizing vision-language models, covering advanced transformers, cross-modal attention, and domain-specific tasks.
* **[Smol-Vision](https://github.com/merveenoyan/smol-vision/tree/main)**: An open-source project offering example scripts, smaller models, and best practices for fine-tuning or customizing vision-language architectures on limited hardware.
## 7. Evaluation & Benchmarking
* **MMMU:** A benchmark suite designed to evaluate multimodal models on massive multi-discipline tasks demanding college-level subject knowledge and deliberate reasoning.
* **MMBench:** A systematically designed objective benchmark for robustly evaluating the various abilities of vision-language models.
* **VQAScore:** A novel metric designed for evaluating text-to-visual generation, particularly in the context of complex prompts that require understanding of compositional structures.
* **OCRBench:** A comprehensive evaluation benchmark aimed at assessing the Optical Character Recognition (OCR) capabilities of large multimodal models.
## 8. Model Optimization & Compression
* **[Knowledge Distillation](https://www.amazon.science/blog/knowledge-distillation-method-for-better-vision-language-models#:~:text=Attention%2Dbased%20representation%20of%20multi,%E2%80%9D%20versions%20%E2%80%94%20of%20attention%20maps.)**: Transfer knowledge from a larger “teacher” model to a smaller “student” model.
* **[Quantization](https://www.reddit.com/r/LocalLLaMA/comments/1d6vhx2/vision_language_model_quantization_and/)**: Reduce the numerical precision of weights and activations (e.g., from FP32 to INT8). This can lead to significantly faster inference with minimal drops in accuracy, making it ideal for edge or latency-sensitive applications.
* **[Optimized Hardware Deployment](https://rocm.blogs.amd.com/artificial-intelligence/llava-next/README.html)**: Leverage specialized libraries and GPUs to accelerate multimodal inference. NVIDIA’s [TensorRT-LLM](https://github.com/NVIDIA/TensorRT-LLM/blob/main/examples/multimodal/README.md) and AMD ROCm stack provide hardware-optimized kernels, enabling high throughput and efficiency for VLMs.
## 9. Integration & Workflow Tools
* **[LlamaIndex](https://github.com/jerryjliu/llama_index)**: Simplifies the creation of Retrieval-Augmented Generation (RAG) applications by abstracting away complex indexing processes. Helpful when combining visual embedding searches with textual retrieval for chatbots or Q\&A systems.
* **[ZenML](https://github.com/zenml-io/zenml)**: An open-source MLOps framework that helps build and deploy reproducible machine learning pipelines. Useful for orchestrating data processing, model training, and model deployment steps in a unified workflow.
* **[Ollama](https://ollama.com/)**: Lets users run and interact with large language models on their own hardware without heavy installation overhead. Offers customization hooks for integrating vision-language encoders or external tools.
* **[llamafile](https://github.com/Mozilla-Ocho/llamafile)**: Packages large language models and dependencies into a single executable. Useful for distributing VLMs across different operating systems and environments, ensuring consistent behavior without complicated setup.
## 10. Common Challenges & Troubleshooting
* **Data Quality & Domain Gaps:** Real-world images may differ from training data (e.g., poor lighting, different angles). Poor performance often stems from domain mismatch. Fine-tuning on in-domain examples can help bridge these gaps.
* **Computational Complexity:** Vision-language models can be large and computationally expensive. Optimizing memory usage and inference speed is crucial to avoid latency bottlenecks in production.
* **Debugging Multimodal Outputs:** Understanding why a model produces certain visual or textual outputs can be more complex compared to text-only models. Tools that visualize attention maps or produce intermediate embeddings can aid troubleshooting.
## 11. Ethical Considerations
* **Privacy & Consent:** Models trained on large-scale image data might inadvertently include personal images or metadata. Mechanisms for data filtering and compliance with privacy regulations are essential.
* **Biases in Visual Recognition:** Unbalanced or unrepresentative training data can lead to inaccurate or biased outcomes, potentially marginalizing certain demographic groups or cultural contexts.
* **Intellectual Property Rights:** Ensure that images used for training or inference do not infringe upon copyright or licensing agreements. Properly attribute and respect usage limitations for externally sourced visual data.
## 12. Licensing & Governance
* **Check Licenses:** As with any open-source software, verify the license of each model or dataset (e.g., MIT, Apache 2.0, GPL) to ensure compatibility with commercial or proprietary products.
* **Hugging Face Model Cards:** Model cards provide transparency around training data, intended use, and limitations. Reviewing these is critical when deciding how to integrate or modify a model.
* **Data Usage Agreements:** Confirm that your usage adheres to dataset terms and conditions. Some datasets prohibit certain commercial applications or require explicit attribution to the data source.
# Bring custom packages
Source: https://docs.inferless.com/concepts/building-custom-images
Custom software and dependencies in your Runtime
Custom Runtime allows you to customize the container to have the software and dependency that you need to run your model.
Here is a sample YAML file that you can write to import. You can follow the required structure of the build. You can specify the System as well as the Python packages that you need to run the model.
**cuda\_version** (Optional):
By default, it will use CUDA 12.1.1. Above are the available options : "12.4.1" / "12.1.1" / "11.8.0"
**system\_packages** :
These are any libraries that you need for the model to run, for eg: "opencv" for image processing or like "ffmpeg" to open the audio files.
**python\_packages** :
These are pip-based libraries that you need in your Python runtime for example torch is required to load PyTorch-based models
**run** :
These are shell commands executed while building the runtime for example symlink is created here. All commands are executed Sequentially. If you have a package that requires step by step installation you can use run
```python
build:
system_packages:
- "libssl-dev"
- "opencv"
- "ffmpeg"
python_packages:
- "transformers==4.29.0"
- "torch==2.0.1"
- "numpy==1.23.5"
- "pandas==2.0.1"
run:
- "ln -s /usr/local/lib/python3.10/site-packages/torch/lib/lib{nv,cu}* /usr/lib"
```
## Runtime Versions
You can edit the runtime in UI or patch the runtime using CLI to create a new version of the runtime. All your models will remain in the older version you previously deployed with unless you explicitly update them in Model Settings.
You can see all the versions of the runtime by clicking the 'View Runtime Versions'.
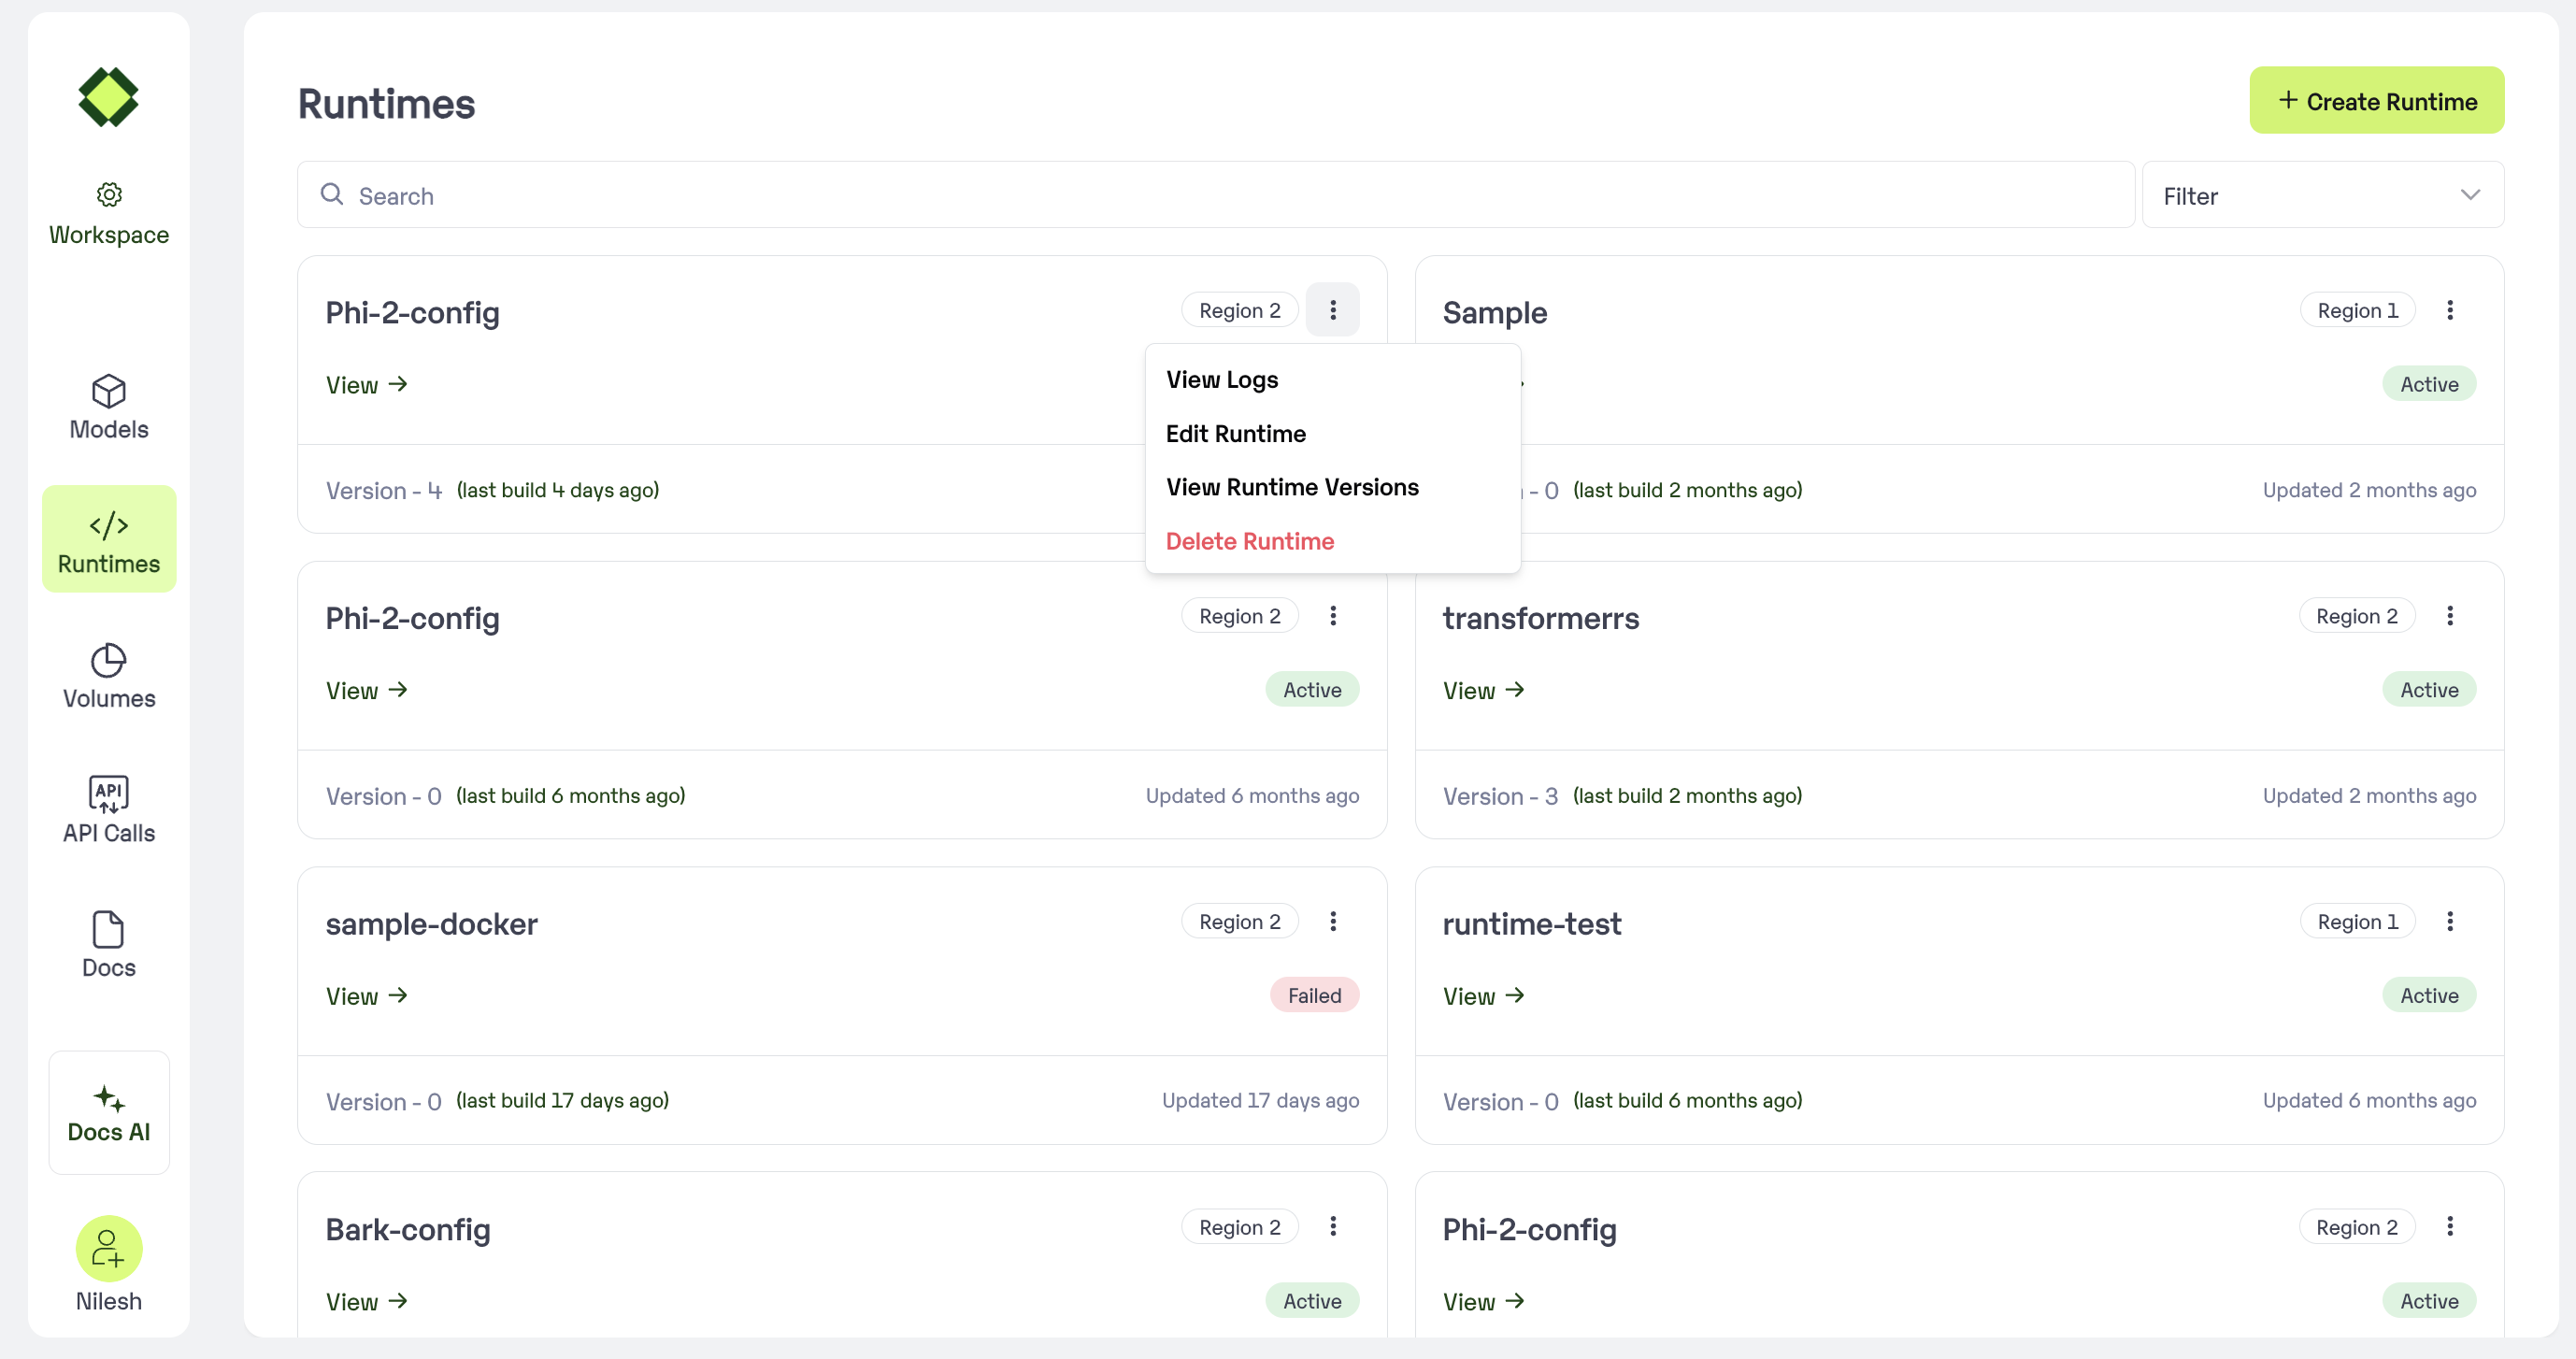 You can look at the packages in the version by clicking on "View"
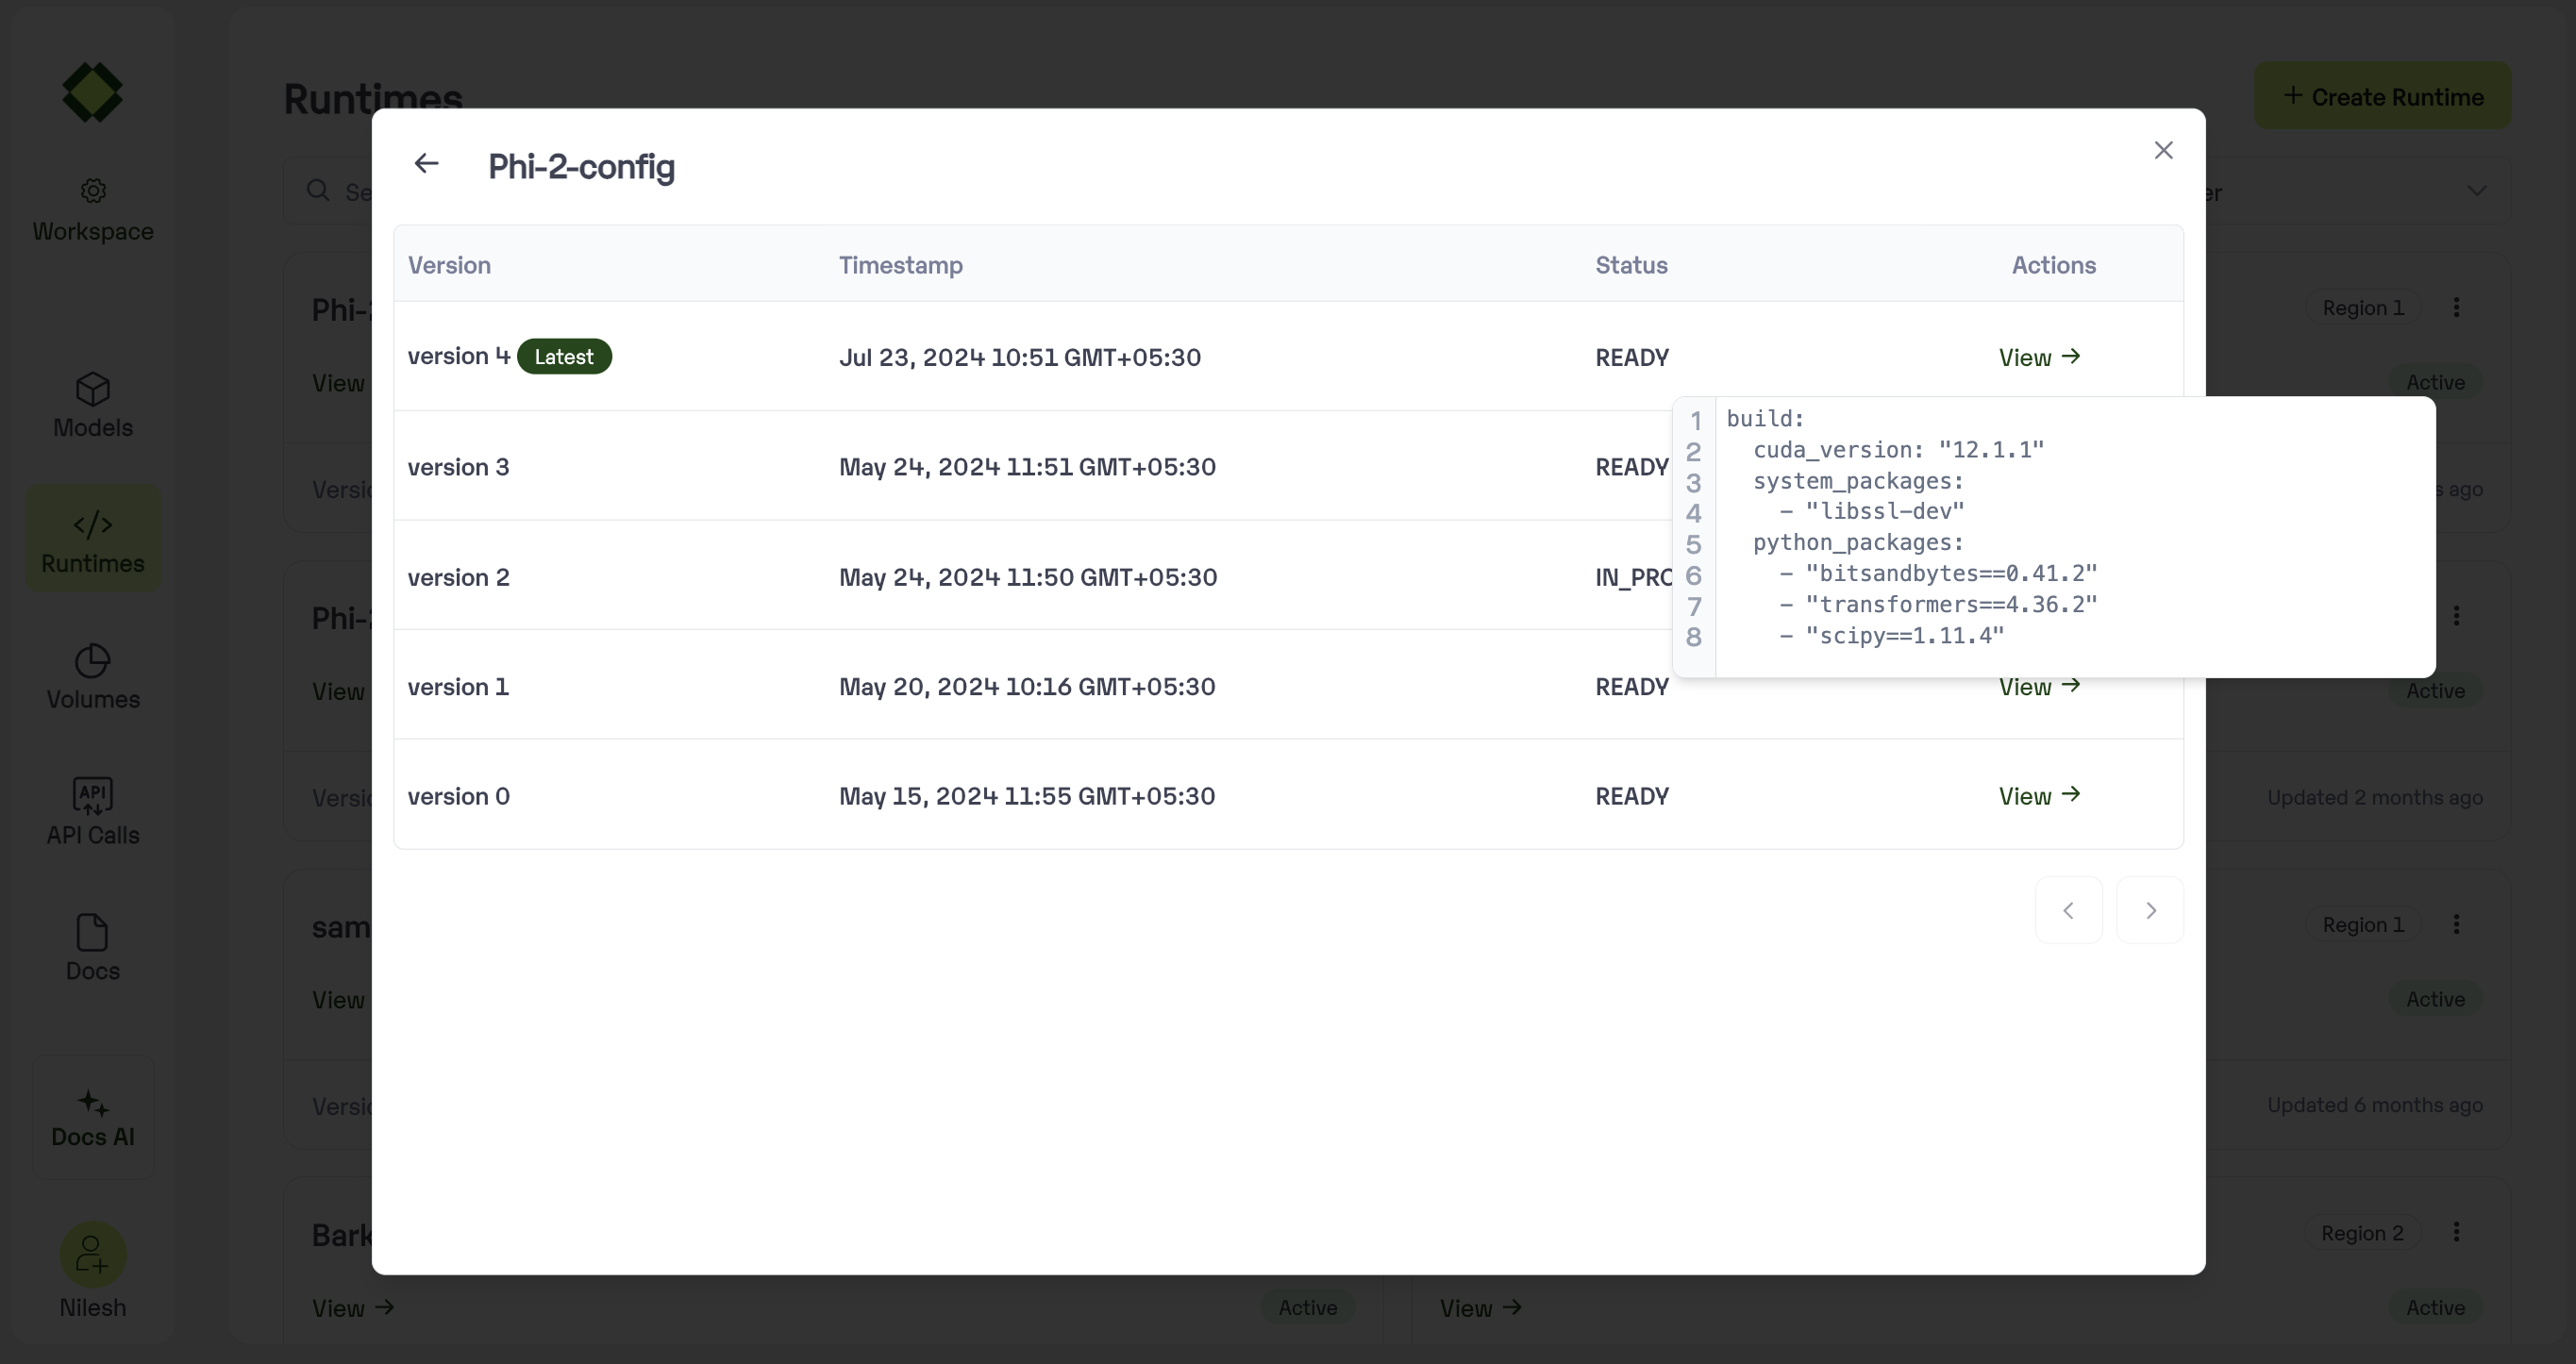 To update the Runtime of a model you can go to the Model Card and navigate to the Settings Page and select the version of the runtime you want to deploy and click on update.
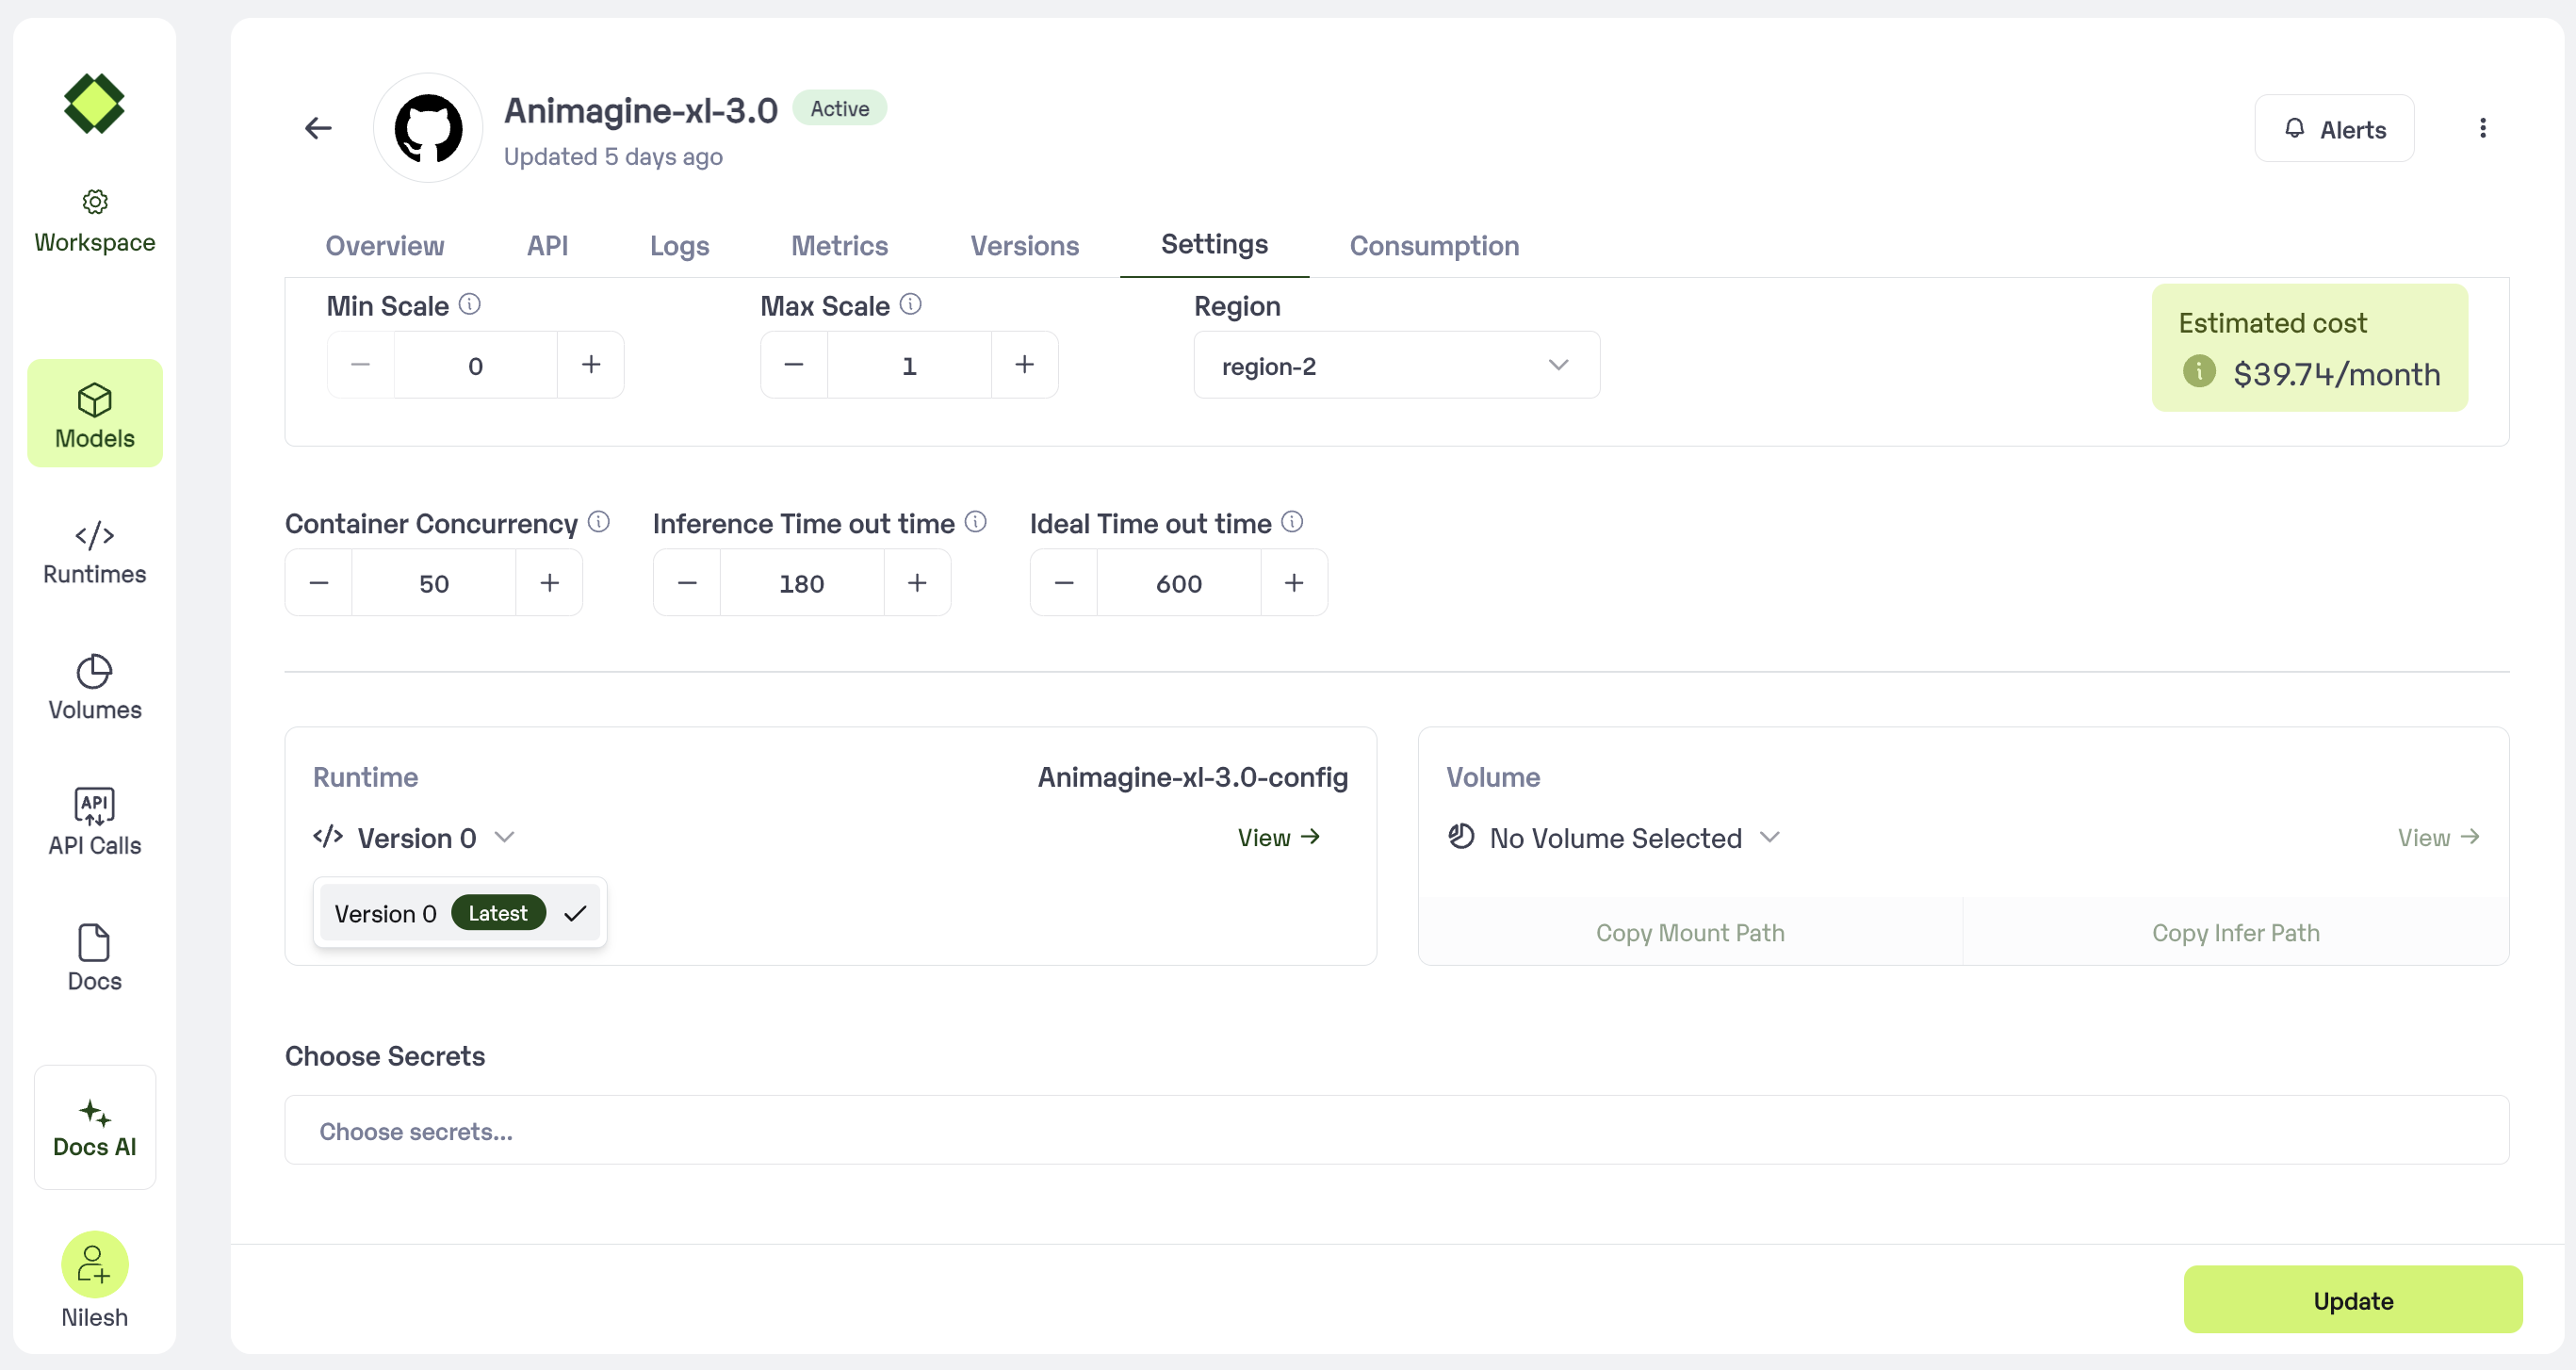 ## Method A: Create a new Runtime using Inferless Platform
1. Select on **Runtime** Tab in the left navigation and click on **Create Runtime**
## Method A: Create a new Runtime using Inferless Platform
1. Select on **Runtime** Tab in the left navigation and click on **Create Runtime**
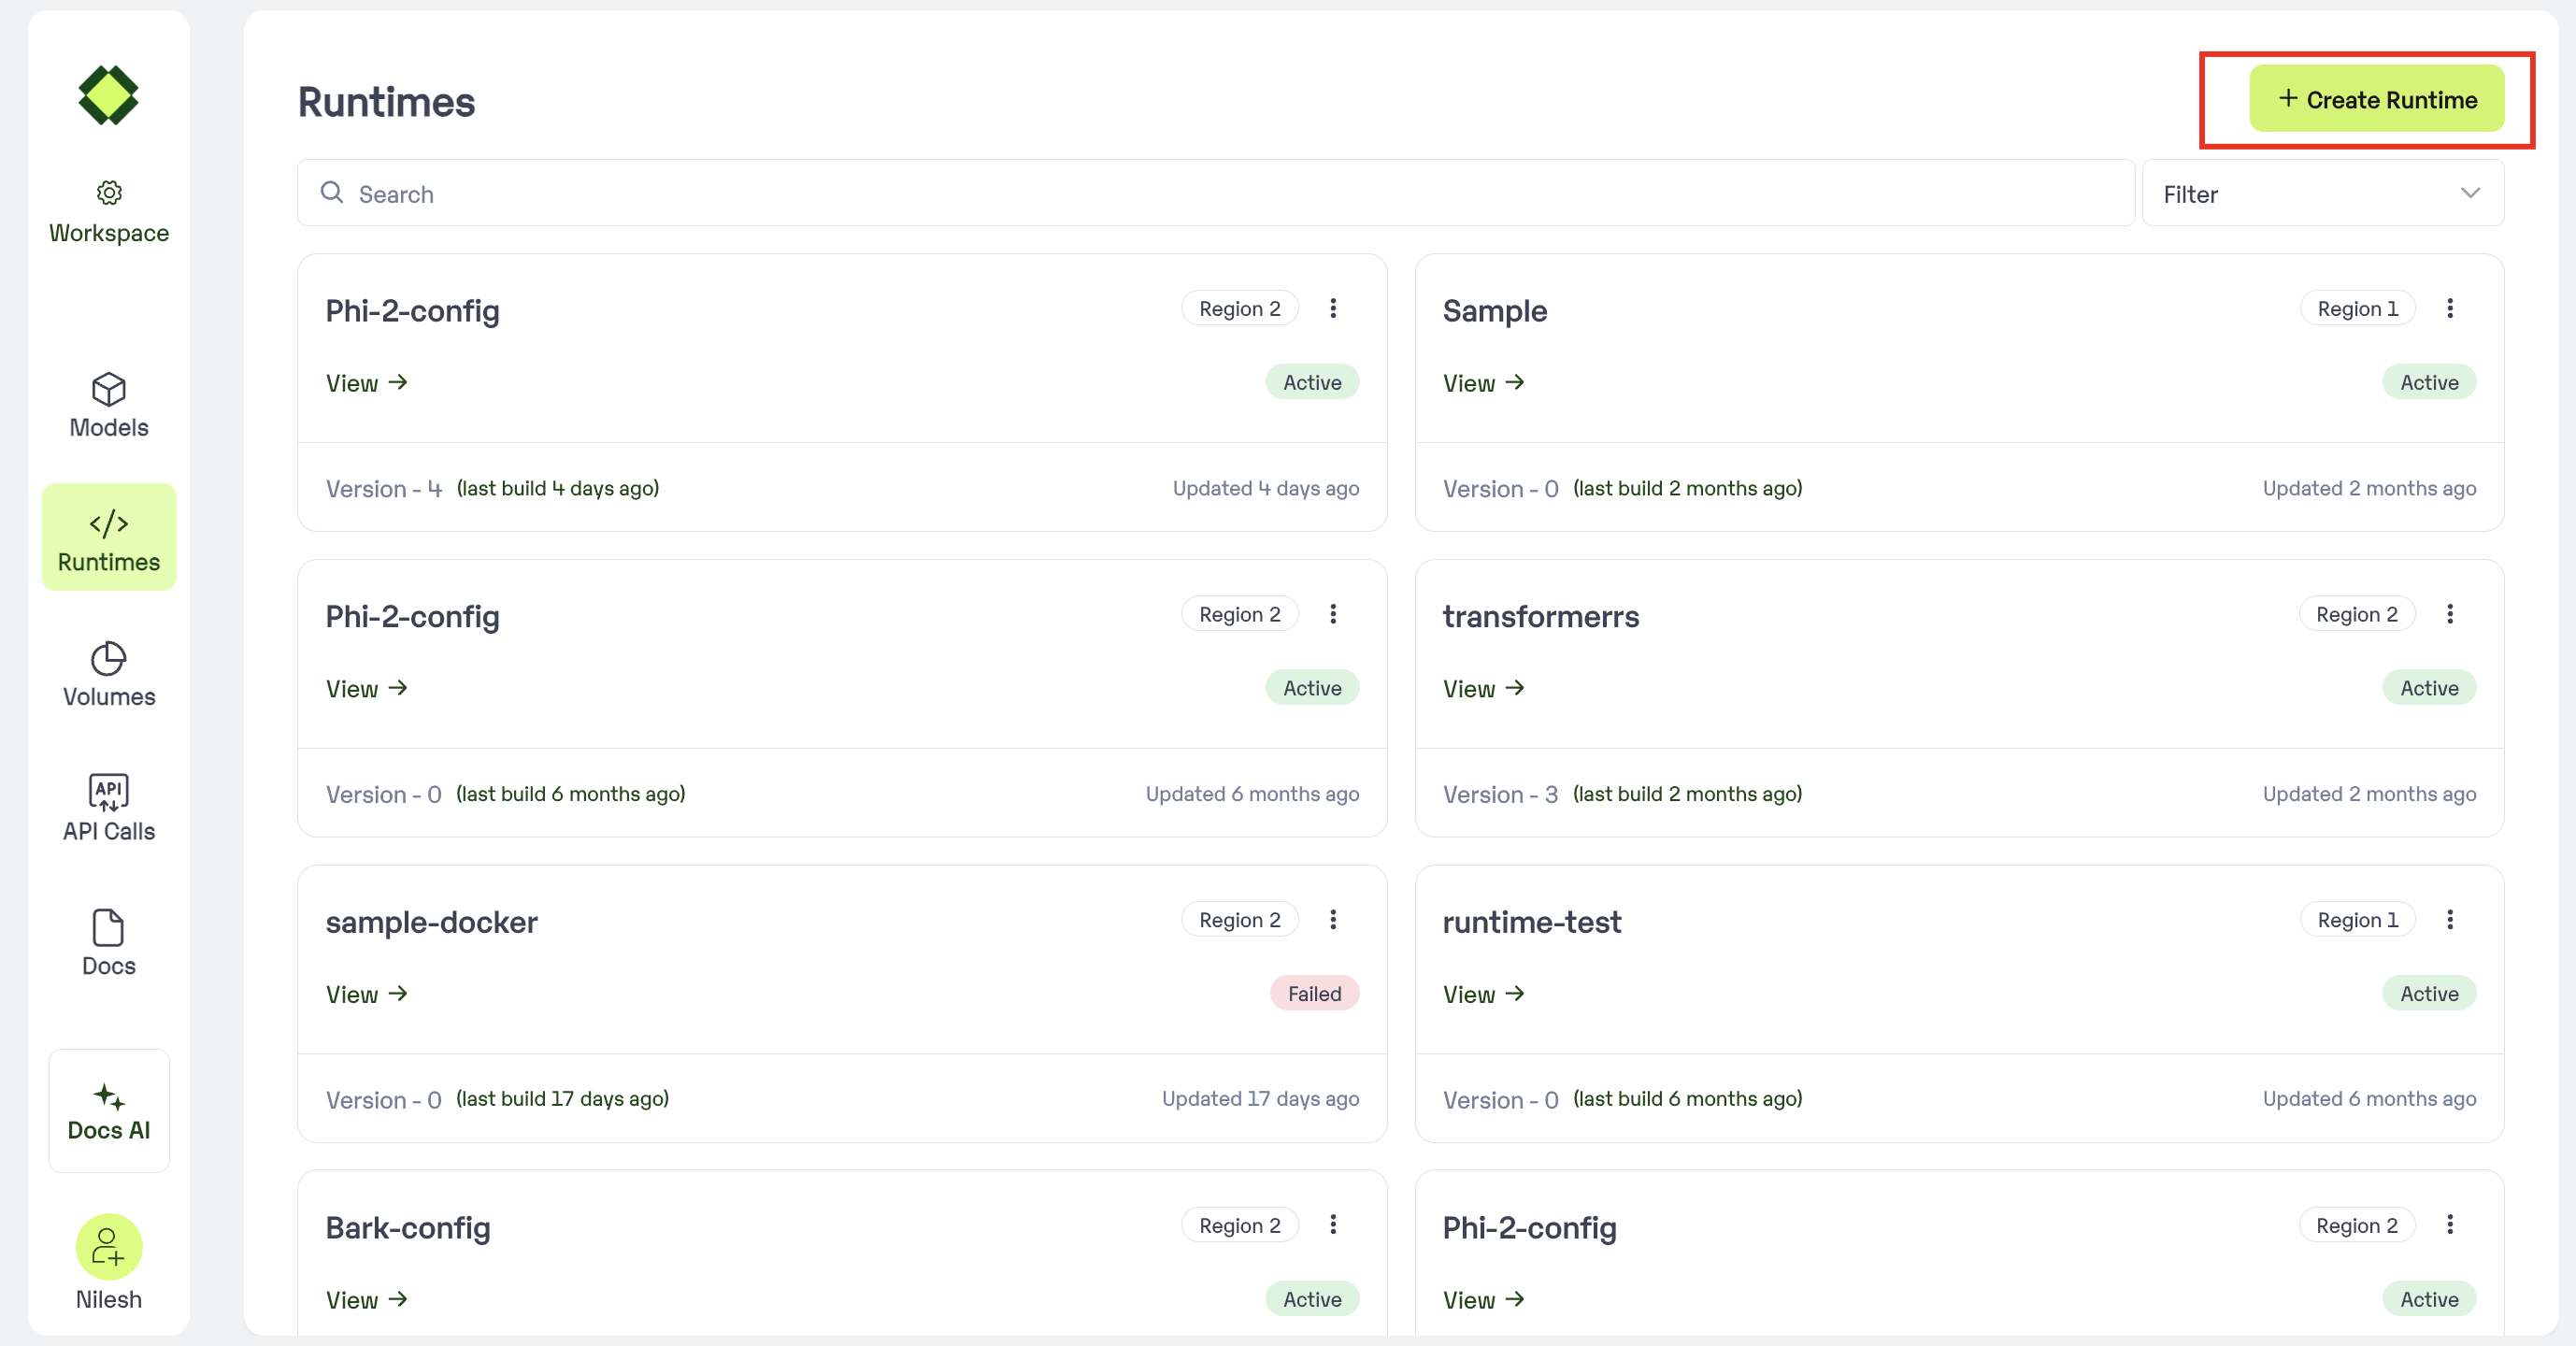 2. Upload the Yaml file created with the required dependencies.
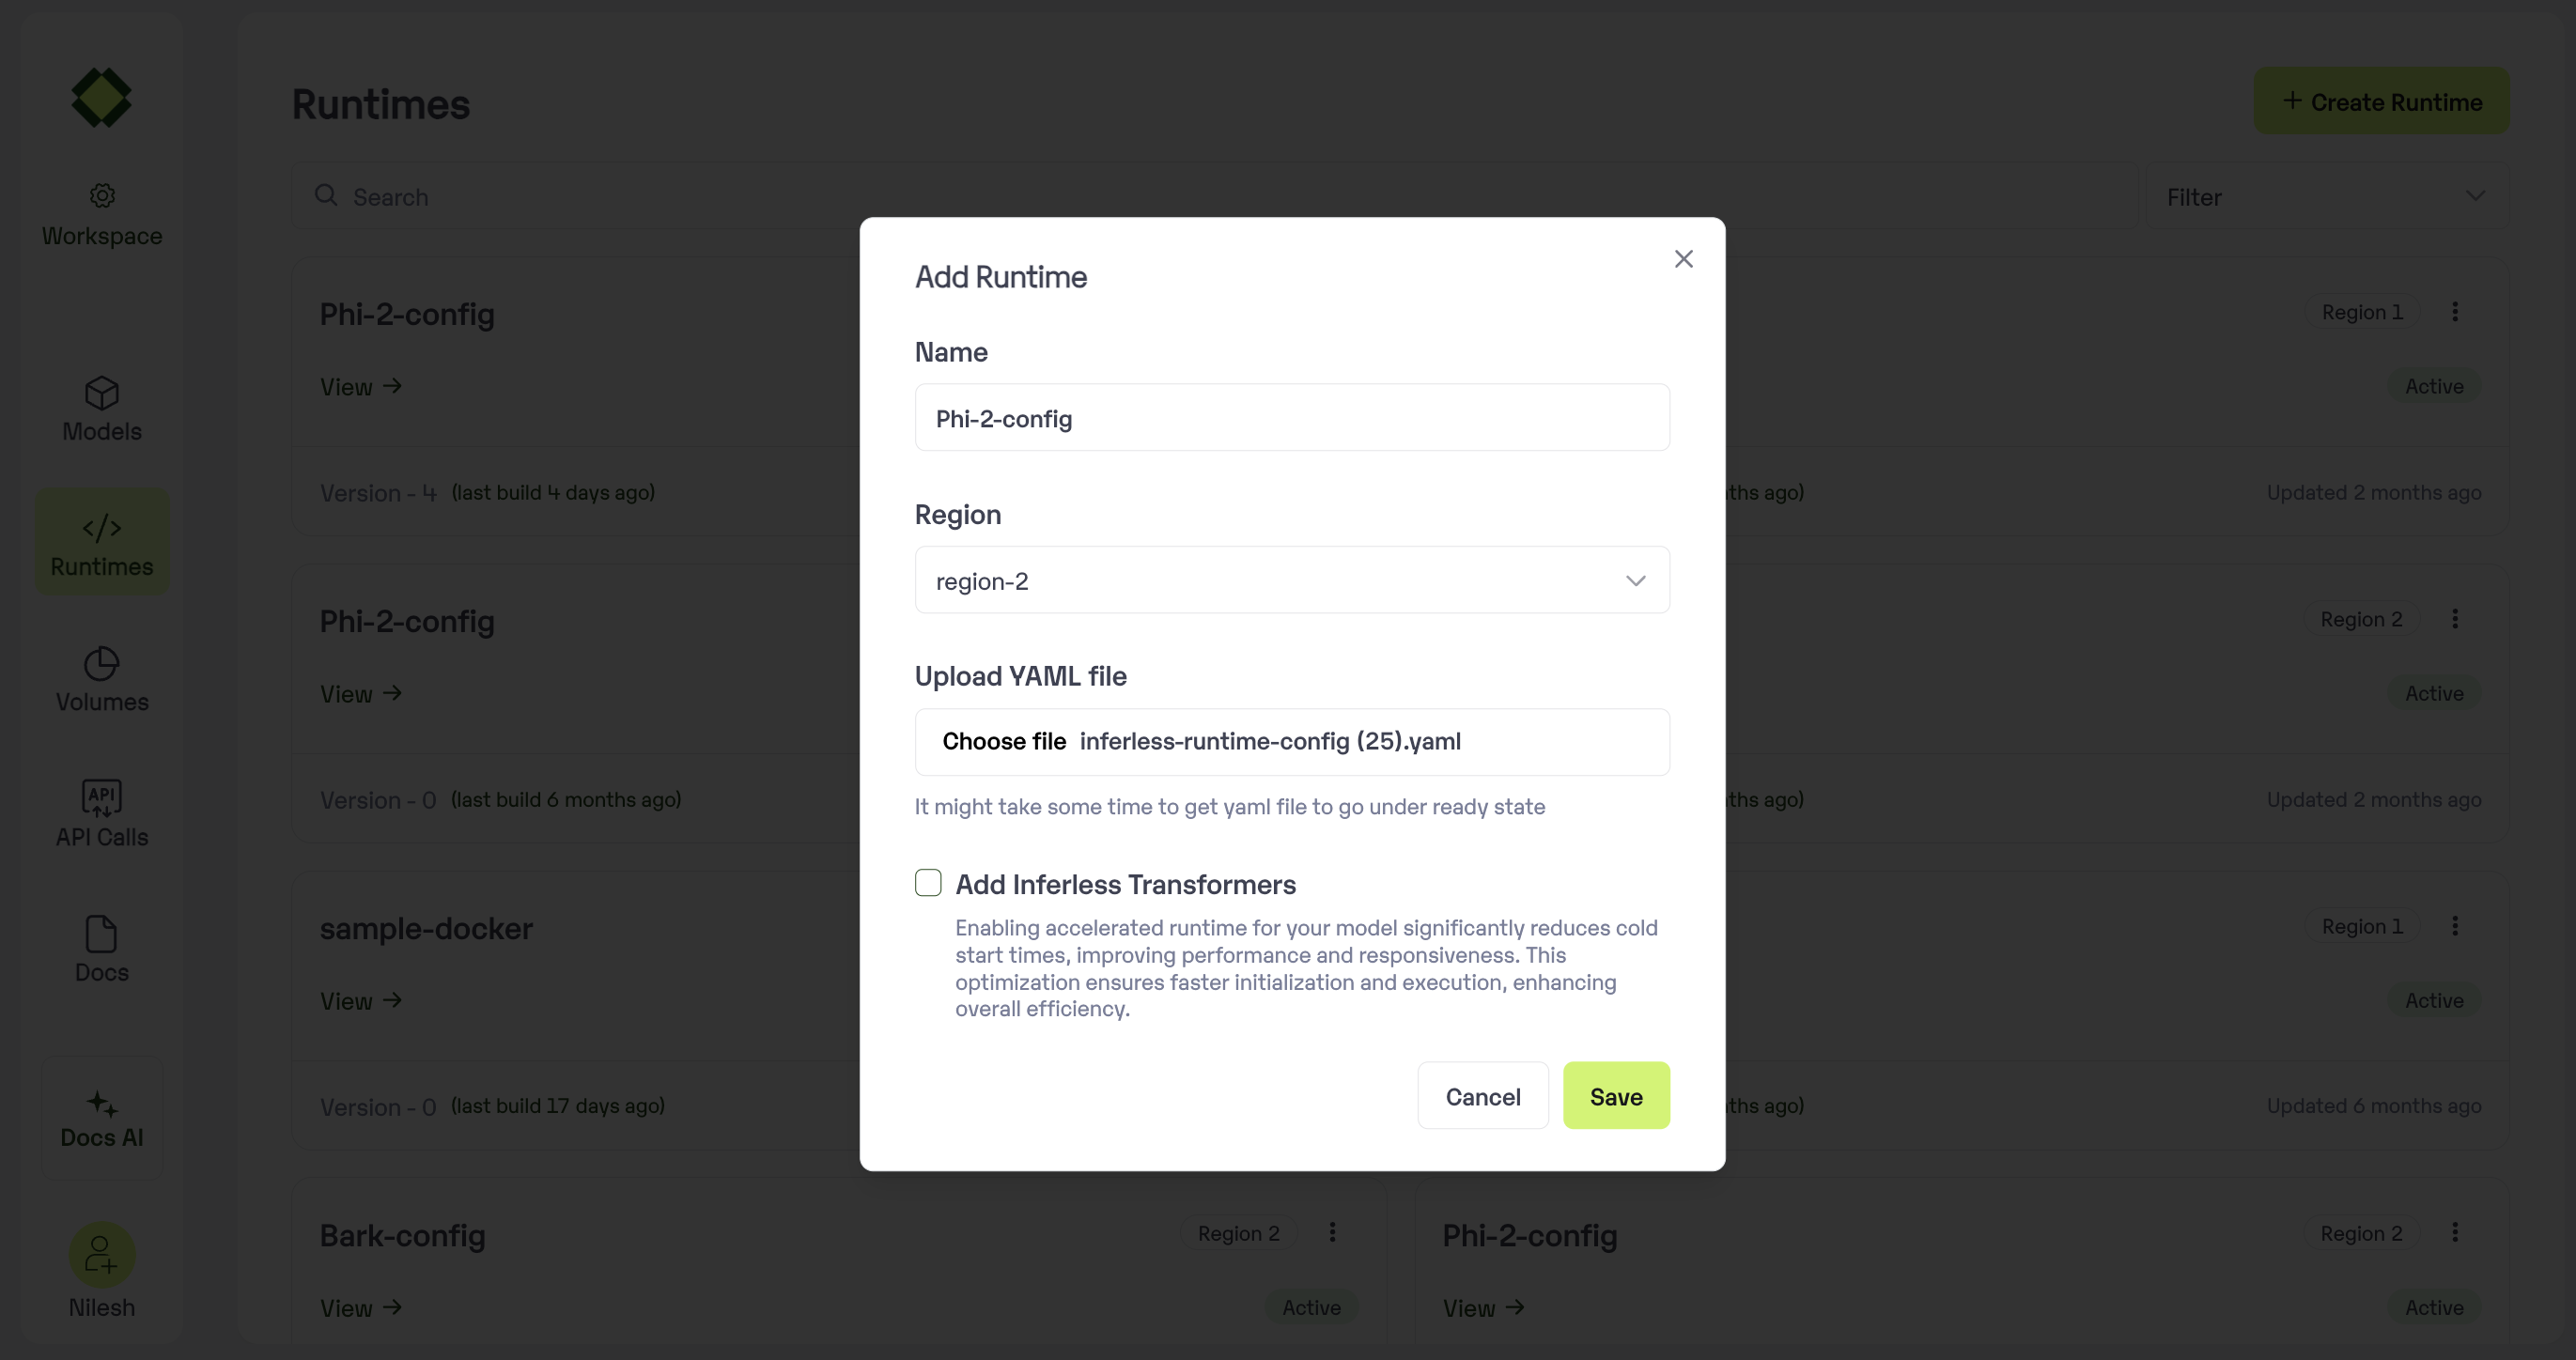 ### How to use Custom Runtime for the Model
1. Go to the **Model Import wizard**. To use the custom runtime, select it in the `Setup Environment` step.
### How to use Custom Runtime for the Model
1. Go to the **Model Import wizard**. To use the custom runtime, select it in the `Setup Environment` step.
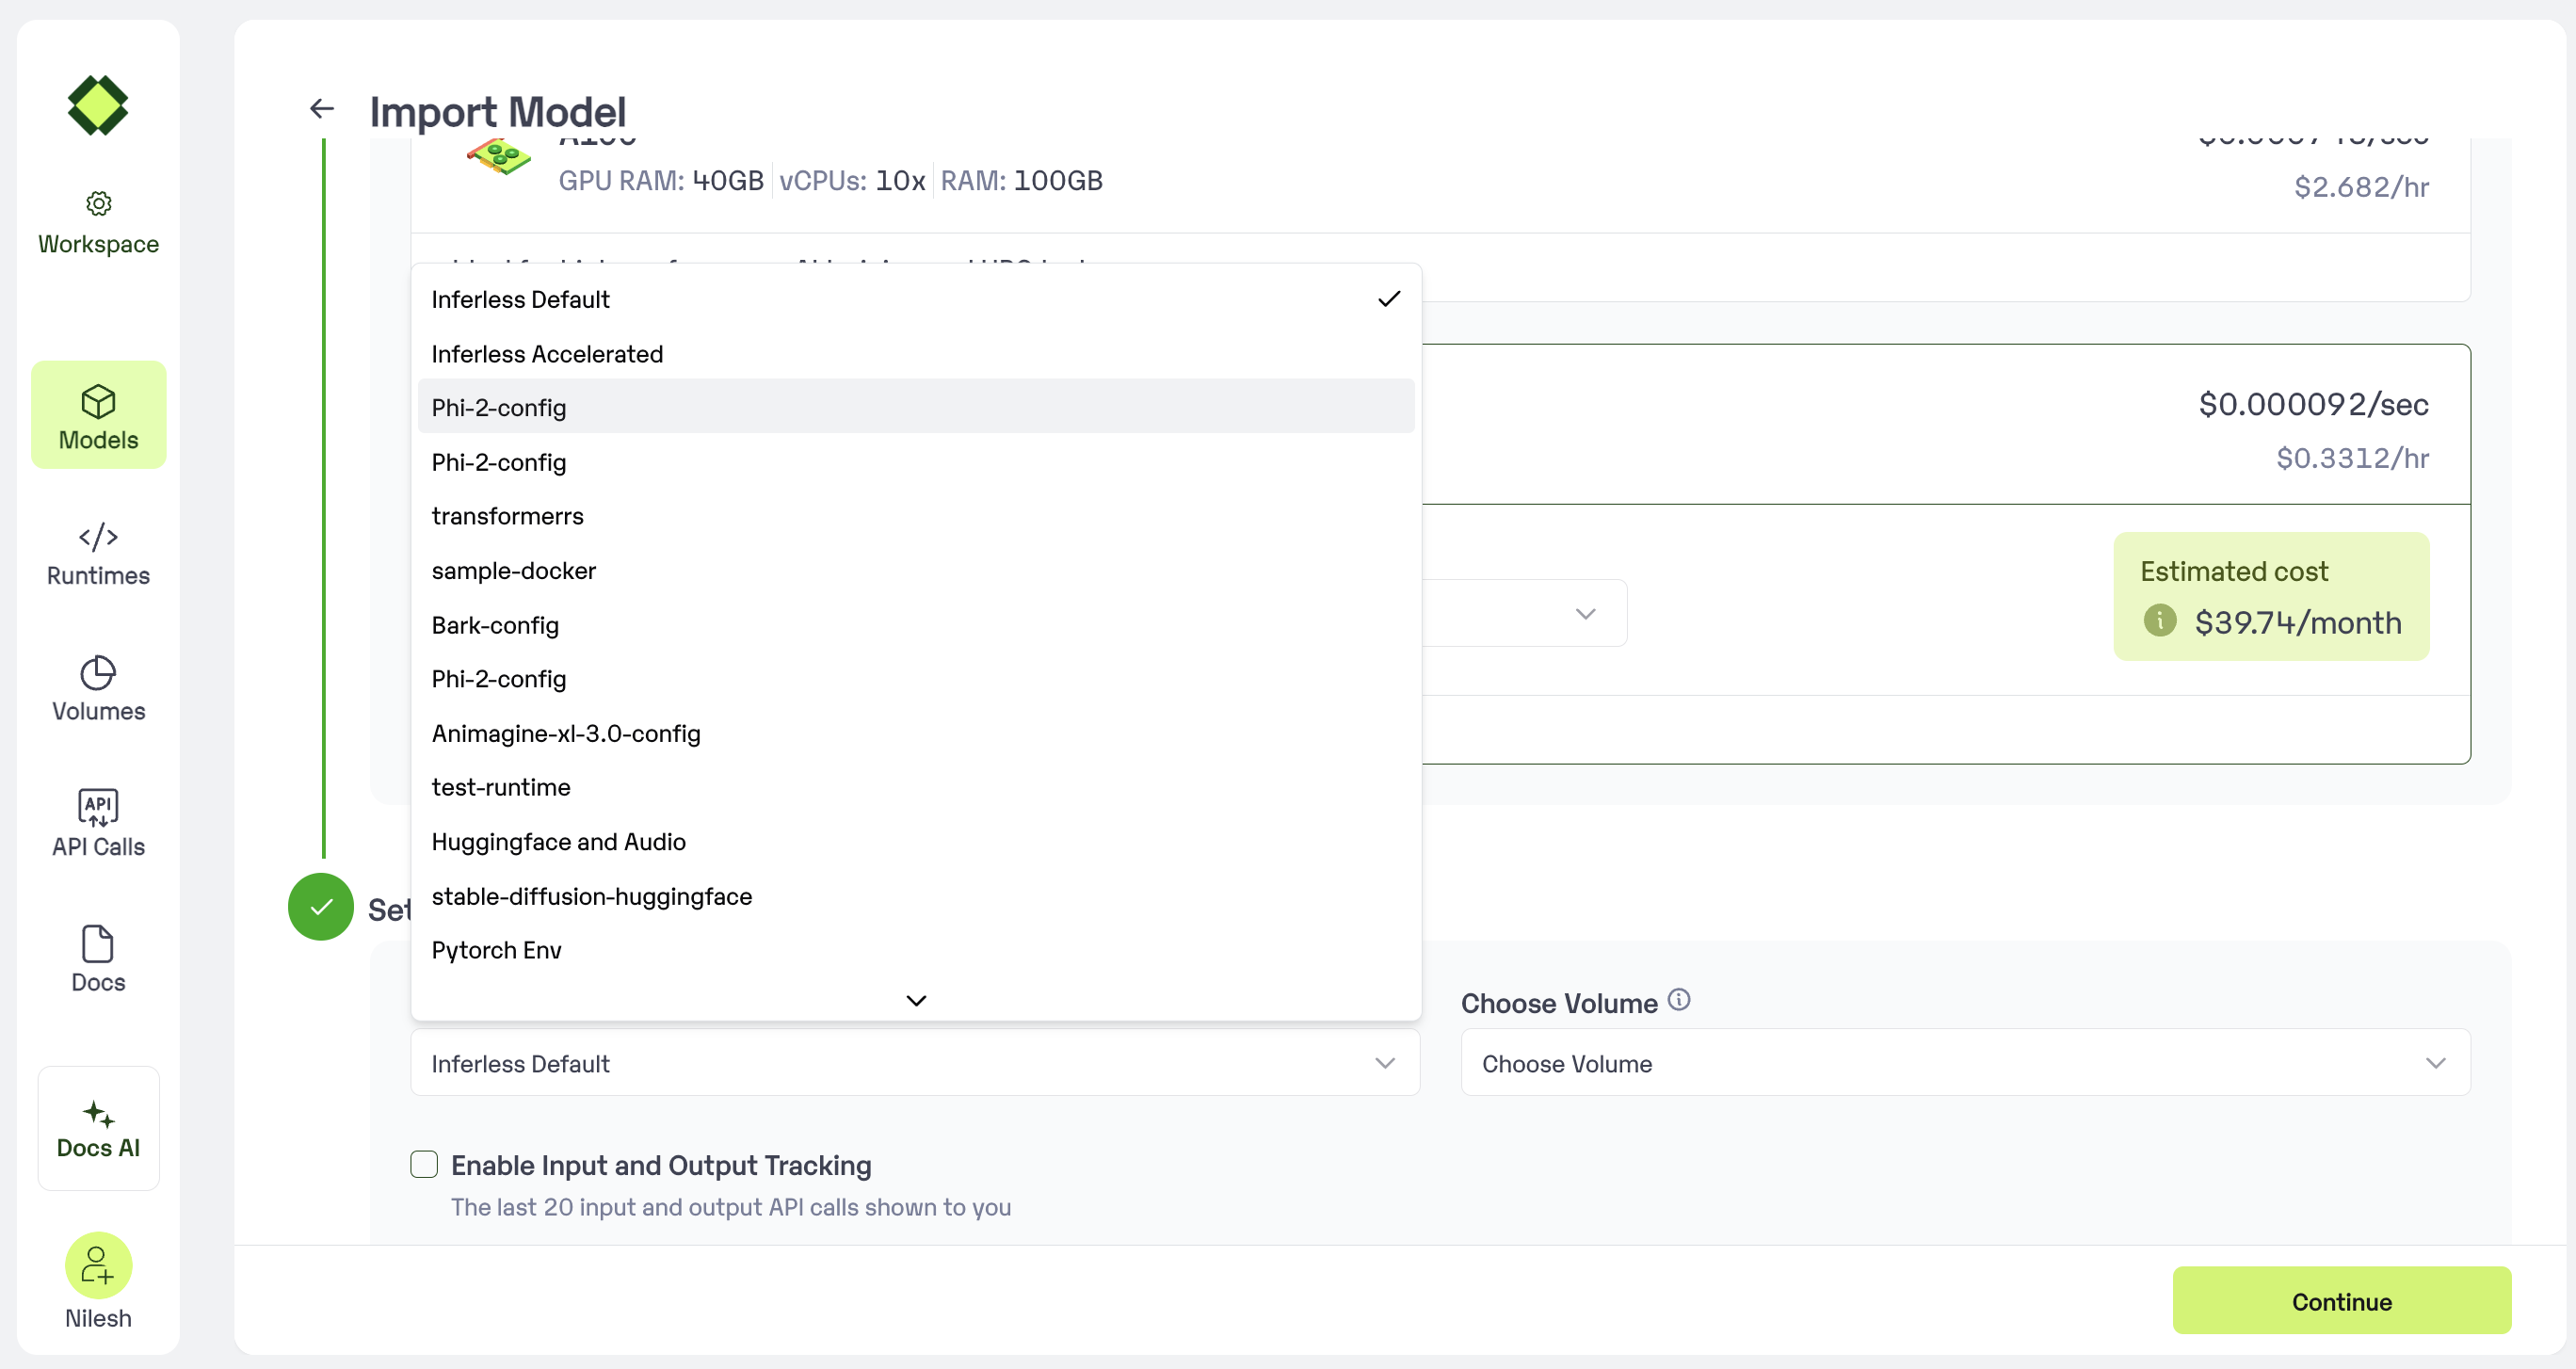 2. Select the Runtime that you have created. Now you all access to all the required software libraries while running the model
## Method B: Create a new Runtime using Inferless CLI
Using the Inferless-CLI, `inferless runtime` command allows users to `list`, `select` and `upload` the runtimes.
**Commands**:
* `generate`: use to generate a new runtime from your virtual env
* `list`: list all runtimes.
* `select [options]`: use an existing runtime with the current model
* `upload [options]`: create or update runtime on inferless with yaml.
* `patch [options]`: update the runtime with the config file
* `version-list`: use to update the runtime in inferless.
### Creating the runtime file
You can create the runtime file in multiple ways:
1. You can create the requirements.txt file and then run the command `inferless init`, continue the process and select the requirements.txt file. This will create the `inferless-runtime-config.yaml`, which you can update according to your software and Python libraries requirements.
2. You can use inferless generate command to generate the runtime file. You can run the command `inferless runtime generate` and then select the virtual environment that you want to use. This will create the `inferless-runtime-config.yaml` file.
### Upload the Runtime
Once you have created your runtime file, you can now run the command `inferless runtime upload` to start the uploading process. First, you are required to pass the file name, and then you need to set a name to your runtime. Update the same to the inferless.yaml file.
Now your runtime is ready to use!
# Handling Input / Output with Inferless
Source: https://docs.inferless.com/concepts/configuring-the-input-output-schema
Inferless allows you to easily define input and output schemas for APIs following the **Inference Protocol v2**. You can now define your inputs and outputs directly within your code using Pydantic models or use an `input_schema.py` file. This document explains both methods.
***
## Input Schema with Pydantic
With the new approach, you define your input schema directly in your code using Pydantic models. You no longer need to define an external schema file. Simply use the `@inferless.request` decorator to define the required inputs. you need to inferless python clinet
```shell
pip install inferless
```
### Code Example:
```python
import inferless
from pydantic import BaseModel, Field
from typing import List, Optional
@inferless.request
class RequestObjects(BaseModel):
input_image_url: str = Field(default='https://hello.world') # URL input for an image
count_iterations: int = Field(default=4) # Number of iterations for processing
prompt: str = Field(default="a horse near a beach") # Text prompt input
mask_arr: List[int] = Field(default=[1, 5]) # List of integers for mask
is_bytes: Optional[bool] = None # Optional boolean field
```
### Explanation:
* **Field**: Used to provide a default value and metadata for each input parameter.
* **Optional Fields**: If a field is optional (e.g., `is_aws`), you can set it using `Optional`.
* **Field Types**: Use Pydantic field types such as `str`, `int` , `bool` , `float`, `List`, etc., to define the expected data types.
* **Default Values**: You can set default values for inputs if needed.
## Output Schema with Pydantic
For outputs, instead of manually handling dictionary returns, you can define the output schema directly within the code using the `@inferless.response` decorator. This allows you to declare structured outputs in a more maintainable way.
### Code Example:
```python
@inferless.response
class ResponseObjects(BaseModel):
generated_txt: str = Field(default='Test output') # Generated text
count_iterations: int = Field(default=4) # Return number of iterations
quality: float = Field(default=0.7) # Quality score as a float
positions: List[int] = Field(default=[1, 5]) # List of integer positions
is_color: Optional[float] = Field(default=False) # Optional boolean field
```
### Explanation:
* **Field**: Used to provide a default value and metadata for each output parameter.
* **Optional Fields**: If a field is optional (e.g., `is_aws`), you can set it using `Optional`.
* **Field Types**: Use Pydantic field types such as `str`, `int` , `bool` , `float`, `List`, etc., to define the expected data types.
* **Default Values**: You can set default values for outputs if needed.
***
## Example Usage
Here’s an example showing how you can process these input and output schemas inside your API:
### Code Example:
```python
def infer(self, request: RequestObjects) -> ResponseObjects:
prompt = request.prompt # Access the prompt from the request
iterations = request.count_iterations # Access count of iterations
# Perform your inference logic here
# Example response
return ResponseObjects(
generated_txt="Inference completed",
count_iterations=iterations,
quality=0.9,
positions=[10, 20],
is_color=False
)
```
### Explanation:
* **Request Object**: The `infer` function takes a `request` object of type `RequestObjects` as input.
* **Accessing Inputs**: You can access the input parameters directly from the `request` object.
* **Perform Inference**: Perform your inference logic using the input parameters.
* **Return Response**: Return a `ResponseObjects` object with the output parameters.
### Input Schema with input\_schema.py
For backward compatibility, you can still use the older method of defining an input schema using an external input\_schema.py file. In this method, you create a dictionary that defines the required inputs for your model.
For each input, there are 3 fields required
* **datatype**: "STRING", "BOOL", "INT8", "INT16", "INT32", "FP16" "FP32", "UINT8", "UINT16", "UINT32", "UINT64", "INT64" , "FP64" , "BYTES", "BF16"
* **shape**: The length of the array, If the shape is \[1] you will get the variable, if the array > 1 you will get an array, If the length is variable you can put -1
* **required**: If the parameter is required in all API calls
* **example**( optional ): Sample value for calling the API
In code
```API
def infer(self, inputs):
prompt = inputs["prompt"] # "There is a fine house in the forest"
shape = inputs["shape"] # [ 512,1 ]
```
In input\_schema.py
```input_schema Example
INPUT_SCHEMA = {
"prompt": {
'datatype': 'STRING',
'required': True,
'shape': [1],
'example': ["There is a fine house in the forest"]
},
'shape': {
'datatype': 'INT8',
'required': False,
'example': [ 512, 1 ],
'shape': [2]
},
}
```
More example of varrible length array here
### Output Schema
You can return any dictionary in the return statement of app.py. You don't need to provide any configuration. There are some limitations on the dictories that you can return.
Possible return types are
* String
* Float
* Int
* Boolean
* List\[String|Float|Int|Boolean]
You can't have nested dictionaries, arrays of arrays, or arrays of dictionaries.
If you have nested Object/Dictionary you can serialise the object to JSON and return the JSON string.
### Returning Dicts
```
# Example Return Statement
return { "label_1" : 0.398 , "label_2" : 0.563, "label_3" : 0.434 }
```
### Returning Variable Length Array
```
# Example Return Statement
return { "generated_images_base64" : [ img_str1 , img_str2 , img_str3 ] }
```
### Returning Dictionary with Variable keys
```
# Example Return Statement
dict = {"label_x": 0.4554 , "label_y", 0.3232 }
return { "result": json.dumps(dict) }
```
### Returning List of Dictionaries
```
# Example Return Statement
List = [ {"label_x": 0.4554 , "label_y", 0.3232 } , {"label_x": 0.4554 , "label_y", 0.3232 } ]
return { "list_result" : json.dumps(List) }
```
More example of complex outputs here
***
# Dynamic Batching
Source: https://docs.inferless.com/concepts/dynamic-batching
Dynamic batching is a feature of Inferless that allows inference requests to be combined by the server so that a batch is created dynamically. Creating a batch of requests typically results in increased throughput. The dynamic batcher should be used for the stateless model.
Dynamic batching is enabled and configured independently for each model using the BATCH\_SIZE property in the model configuration. These settings control the preferred batch size(s) of the dynamically created batches, the maximum time that requests can be delayed in the scheduler to allow other requests to join the dynamic batch, and queue properties such as batch\_window
## Using Git Method
Define the BATCH\_SIZE and BATCH\_WINDOW in the **input\_schema.py** or in **app.py** if you are using pydantic.
### Input Schema Example
You can use the below repo for example:
[https://github.com/inferless/template\_input\_batch](https://github.com/inferless/template%5Finput%5Fbatch)
```python
/
├── app.py
├── input_schema.py
```
input\_schema.py
```input_schema
INPUT_SCHEMA = {
"prompt": {
'datatype': 'STRING',
'required': True,
'shape': [1],
'example': ["There is a fine house in the forest"]
}
}
BATCH_SIZE = 4
BATCH_WINDOW = 5000 # milliseconds
```
in app.py
```python
import json
import numpy as np
import torch
from transformers import pipeline
class InferlessPythonModel:
# replace ##task_type## and ##huggingface_name## with appropriate values
def initialize(self):
self.generator = pipeline("text-generation", model="EleutherAI/gpt-neo-125M",device=0)
# Inputs is a list of dictionaries where the keys are input names and values are actual input data
# e.g. in the below code the input name is a prompt
# Output generated by the infer function should be a List of dictionaries where keys are output names and values are actual output data
# e.g. in the below code the output name is generated_txt
def infer(self, inputs):
output = []
print(" no of inputs to be processed " + str(len(inputs)))
for each in inputs:
prompt = each["prompt"]
pipeline_output = self.generator(prompt, do_sample=True, min_length=20)
generated_txt = pipeline_output[0]["generated_text"]
print("generated_txt", generated_txt, flush=True)
output.append({"generated_text": generated_txt })
return output
# perform any cleanup activity here
def finalize(self,args):
self.pipe = None
```
### Pydantic Example
```python
/
├── app.py
```
in app.py
```python
import inferless
from pydantic import BaseModel, Field
@inferless.config
class Config():
is_batched_input: bool = True
batch_size: int = 2
batch_window: int = 50000
#...rest of the code
```
## Using File Import Method
If you are using file import create a file config.pbtxt in the root of the model directory with the following content:
```python
1/
├── model.onnx
├── config.pbtxt
```
```text
platform: "onnxruntime_onnx"
max_batch_size: 8
input [
{
name: "input"
data_type: TYPE_FP32
dims: [3, 224, 224]
}
]
output [
{
name: "output"
data_type: TYPE_FP32
dims: [3]
}
]
dynamic_batching {
preferred_batch_size: [1,8]
}
```
In the above configuration, we have set the max\_batch\_size to 8. This means that the model will try to create a batch of 4 requests. The input and output dimensions are also specified in the configuration file.
# Managing Secrets on Inferless
Source: https://docs.inferless.com/concepts/managing-secrets-on-inferless
Secrets Manager is a tool for securely storing and managing sensitive information, including passwords, API keys, and tokens. It is designed to prevent the embedding of secrets in application code or scripts, which poses a security risk if the code is exposed.
1. **Centralized Storage**: Secrets are stored in a centralized location, making it easier to manage and audit access.
2. **Access Control**: Fine-grained access controls allow only authorized applications, services, or users to retrieve certain secrets.
3. **Encryption**: Secrets are encrypted at rest and in transit, ensuring that they cannot be easily intercepted or read by unauthorized entities.
4. **Rotation**: Many Secrets Managers support or enforce the rotation of secrets, allowing credentials to be updated regularly without manual intervention.
Secrets are available at a user level and can be only updated by the one who is doing that particular model import
### How to access
Navigate to profile settings
2. Select the Runtime that you have created. Now you all access to all the required software libraries while running the model
## Method B: Create a new Runtime using Inferless CLI
Using the Inferless-CLI, `inferless runtime` command allows users to `list`, `select` and `upload` the runtimes.
**Commands**:
* `generate`: use to generate a new runtime from your virtual env
* `list`: list all runtimes.
* `select [options]`: use an existing runtime with the current model
* `upload [options]`: create or update runtime on inferless with yaml.
* `patch [options]`: update the runtime with the config file
* `version-list`: use to update the runtime in inferless.
### Creating the runtime file
You can create the runtime file in multiple ways:
1. You can create the requirements.txt file and then run the command `inferless init`, continue the process and select the requirements.txt file. This will create the `inferless-runtime-config.yaml`, which you can update according to your software and Python libraries requirements.
2. You can use inferless generate command to generate the runtime file. You can run the command `inferless runtime generate` and then select the virtual environment that you want to use. This will create the `inferless-runtime-config.yaml` file.
### Upload the Runtime
Once you have created your runtime file, you can now run the command `inferless runtime upload` to start the uploading process. First, you are required to pass the file name, and then you need to set a name to your runtime. Update the same to the inferless.yaml file.
Now your runtime is ready to use!
# Handling Input / Output with Inferless
Source: https://docs.inferless.com/concepts/configuring-the-input-output-schema
Inferless allows you to easily define input and output schemas for APIs following the **Inference Protocol v2**. You can now define your inputs and outputs directly within your code using Pydantic models or use an `input_schema.py` file. This document explains both methods.
***
## Input Schema with Pydantic
With the new approach, you define your input schema directly in your code using Pydantic models. You no longer need to define an external schema file. Simply use the `@inferless.request` decorator to define the required inputs. you need to inferless python clinet
```shell
pip install inferless
```
### Code Example:
```python
import inferless
from pydantic import BaseModel, Field
from typing import List, Optional
@inferless.request
class RequestObjects(BaseModel):
input_image_url: str = Field(default='https://hello.world') # URL input for an image
count_iterations: int = Field(default=4) # Number of iterations for processing
prompt: str = Field(default="a horse near a beach") # Text prompt input
mask_arr: List[int] = Field(default=[1, 5]) # List of integers for mask
is_bytes: Optional[bool] = None # Optional boolean field
```
### Explanation:
* **Field**: Used to provide a default value and metadata for each input parameter.
* **Optional Fields**: If a field is optional (e.g., `is_aws`), you can set it using `Optional`.
* **Field Types**: Use Pydantic field types such as `str`, `int` , `bool` , `float`, `List`, etc., to define the expected data types.
* **Default Values**: You can set default values for inputs if needed.
## Output Schema with Pydantic
For outputs, instead of manually handling dictionary returns, you can define the output schema directly within the code using the `@inferless.response` decorator. This allows you to declare structured outputs in a more maintainable way.
### Code Example:
```python
@inferless.response
class ResponseObjects(BaseModel):
generated_txt: str = Field(default='Test output') # Generated text
count_iterations: int = Field(default=4) # Return number of iterations
quality: float = Field(default=0.7) # Quality score as a float
positions: List[int] = Field(default=[1, 5]) # List of integer positions
is_color: Optional[float] = Field(default=False) # Optional boolean field
```
### Explanation:
* **Field**: Used to provide a default value and metadata for each output parameter.
* **Optional Fields**: If a field is optional (e.g., `is_aws`), you can set it using `Optional`.
* **Field Types**: Use Pydantic field types such as `str`, `int` , `bool` , `float`, `List`, etc., to define the expected data types.
* **Default Values**: You can set default values for outputs if needed.
***
## Example Usage
Here’s an example showing how you can process these input and output schemas inside your API:
### Code Example:
```python
def infer(self, request: RequestObjects) -> ResponseObjects:
prompt = request.prompt # Access the prompt from the request
iterations = request.count_iterations # Access count of iterations
# Perform your inference logic here
# Example response
return ResponseObjects(
generated_txt="Inference completed",
count_iterations=iterations,
quality=0.9,
positions=[10, 20],
is_color=False
)
```
### Explanation:
* **Request Object**: The `infer` function takes a `request` object of type `RequestObjects` as input.
* **Accessing Inputs**: You can access the input parameters directly from the `request` object.
* **Perform Inference**: Perform your inference logic using the input parameters.
* **Return Response**: Return a `ResponseObjects` object with the output parameters.
### Input Schema with input\_schema.py
For backward compatibility, you can still use the older method of defining an input schema using an external input\_schema.py file. In this method, you create a dictionary that defines the required inputs for your model.
For each input, there are 3 fields required
* **datatype**: "STRING", "BOOL", "INT8", "INT16", "INT32", "FP16" "FP32", "UINT8", "UINT16", "UINT32", "UINT64", "INT64" , "FP64" , "BYTES", "BF16"
* **shape**: The length of the array, If the shape is \[1] you will get the variable, if the array > 1 you will get an array, If the length is variable you can put -1
* **required**: If the parameter is required in all API calls
* **example**( optional ): Sample value for calling the API
In code
```API
def infer(self, inputs):
prompt = inputs["prompt"] # "There is a fine house in the forest"
shape = inputs["shape"] # [ 512,1 ]
```
In input\_schema.py
```input_schema Example
INPUT_SCHEMA = {
"prompt": {
'datatype': 'STRING',
'required': True,
'shape': [1],
'example': ["There is a fine house in the forest"]
},
'shape': {
'datatype': 'INT8',
'required': False,
'example': [ 512, 1 ],
'shape': [2]
},
}
```
More example of varrible length array here
### Output Schema
You can return any dictionary in the return statement of app.py. You don't need to provide any configuration. There are some limitations on the dictories that you can return.
Possible return types are
* String
* Float
* Int
* Boolean
* List\[String|Float|Int|Boolean]
You can't have nested dictionaries, arrays of arrays, or arrays of dictionaries.
If you have nested Object/Dictionary you can serialise the object to JSON and return the JSON string.
### Returning Dicts
```
# Example Return Statement
return { "label_1" : 0.398 , "label_2" : 0.563, "label_3" : 0.434 }
```
### Returning Variable Length Array
```
# Example Return Statement
return { "generated_images_base64" : [ img_str1 , img_str2 , img_str3 ] }
```
### Returning Dictionary with Variable keys
```
# Example Return Statement
dict = {"label_x": 0.4554 , "label_y", 0.3232 }
return { "result": json.dumps(dict) }
```
### Returning List of Dictionaries
```
# Example Return Statement
List = [ {"label_x": 0.4554 , "label_y", 0.3232 } , {"label_x": 0.4554 , "label_y", 0.3232 } ]
return { "list_result" : json.dumps(List) }
```
More example of complex outputs here
***
# Dynamic Batching
Source: https://docs.inferless.com/concepts/dynamic-batching
Dynamic batching is a feature of Inferless that allows inference requests to be combined by the server so that a batch is created dynamically. Creating a batch of requests typically results in increased throughput. The dynamic batcher should be used for the stateless model.
Dynamic batching is enabled and configured independently for each model using the BATCH\_SIZE property in the model configuration. These settings control the preferred batch size(s) of the dynamically created batches, the maximum time that requests can be delayed in the scheduler to allow other requests to join the dynamic batch, and queue properties such as batch\_window
## Using Git Method
Define the BATCH\_SIZE and BATCH\_WINDOW in the **input\_schema.py** or in **app.py** if you are using pydantic.
### Input Schema Example
You can use the below repo for example:
[https://github.com/inferless/template\_input\_batch](https://github.com/inferless/template%5Finput%5Fbatch)
```python
/
├── app.py
├── input_schema.py
```
input\_schema.py
```input_schema
INPUT_SCHEMA = {
"prompt": {
'datatype': 'STRING',
'required': True,
'shape': [1],
'example': ["There is a fine house in the forest"]
}
}
BATCH_SIZE = 4
BATCH_WINDOW = 5000 # milliseconds
```
in app.py
```python
import json
import numpy as np
import torch
from transformers import pipeline
class InferlessPythonModel:
# replace ##task_type## and ##huggingface_name## with appropriate values
def initialize(self):
self.generator = pipeline("text-generation", model="EleutherAI/gpt-neo-125M",device=0)
# Inputs is a list of dictionaries where the keys are input names and values are actual input data
# e.g. in the below code the input name is a prompt
# Output generated by the infer function should be a List of dictionaries where keys are output names and values are actual output data
# e.g. in the below code the output name is generated_txt
def infer(self, inputs):
output = []
print(" no of inputs to be processed " + str(len(inputs)))
for each in inputs:
prompt = each["prompt"]
pipeline_output = self.generator(prompt, do_sample=True, min_length=20)
generated_txt = pipeline_output[0]["generated_text"]
print("generated_txt", generated_txt, flush=True)
output.append({"generated_text": generated_txt })
return output
# perform any cleanup activity here
def finalize(self,args):
self.pipe = None
```
### Pydantic Example
```python
/
├── app.py
```
in app.py
```python
import inferless
from pydantic import BaseModel, Field
@inferless.config
class Config():
is_batched_input: bool = True
batch_size: int = 2
batch_window: int = 50000
#...rest of the code
```
## Using File Import Method
If you are using file import create a file config.pbtxt in the root of the model directory with the following content:
```python
1/
├── model.onnx
├── config.pbtxt
```
```text
platform: "onnxruntime_onnx"
max_batch_size: 8
input [
{
name: "input"
data_type: TYPE_FP32
dims: [3, 224, 224]
}
]
output [
{
name: "output"
data_type: TYPE_FP32
dims: [3]
}
]
dynamic_batching {
preferred_batch_size: [1,8]
}
```
In the above configuration, we have set the max\_batch\_size to 8. This means that the model will try to create a batch of 4 requests. The input and output dimensions are also specified in the configuration file.
# Managing Secrets on Inferless
Source: https://docs.inferless.com/concepts/managing-secrets-on-inferless
Secrets Manager is a tool for securely storing and managing sensitive information, including passwords, API keys, and tokens. It is designed to prevent the embedding of secrets in application code or scripts, which poses a security risk if the code is exposed.
1. **Centralized Storage**: Secrets are stored in a centralized location, making it easier to manage and audit access.
2. **Access Control**: Fine-grained access controls allow only authorized applications, services, or users to retrieve certain secrets.
3. **Encryption**: Secrets are encrypted at rest and in transit, ensuring that they cannot be easily intercepted or read by unauthorized entities.
4. **Rotation**: Many Secrets Managers support or enforce the rotation of secrets, allowing credentials to be updated regularly without manual intervention.
Secrets are available at a user level and can be only updated by the one who is doing that particular model import
### How to access
Navigate to profile settings
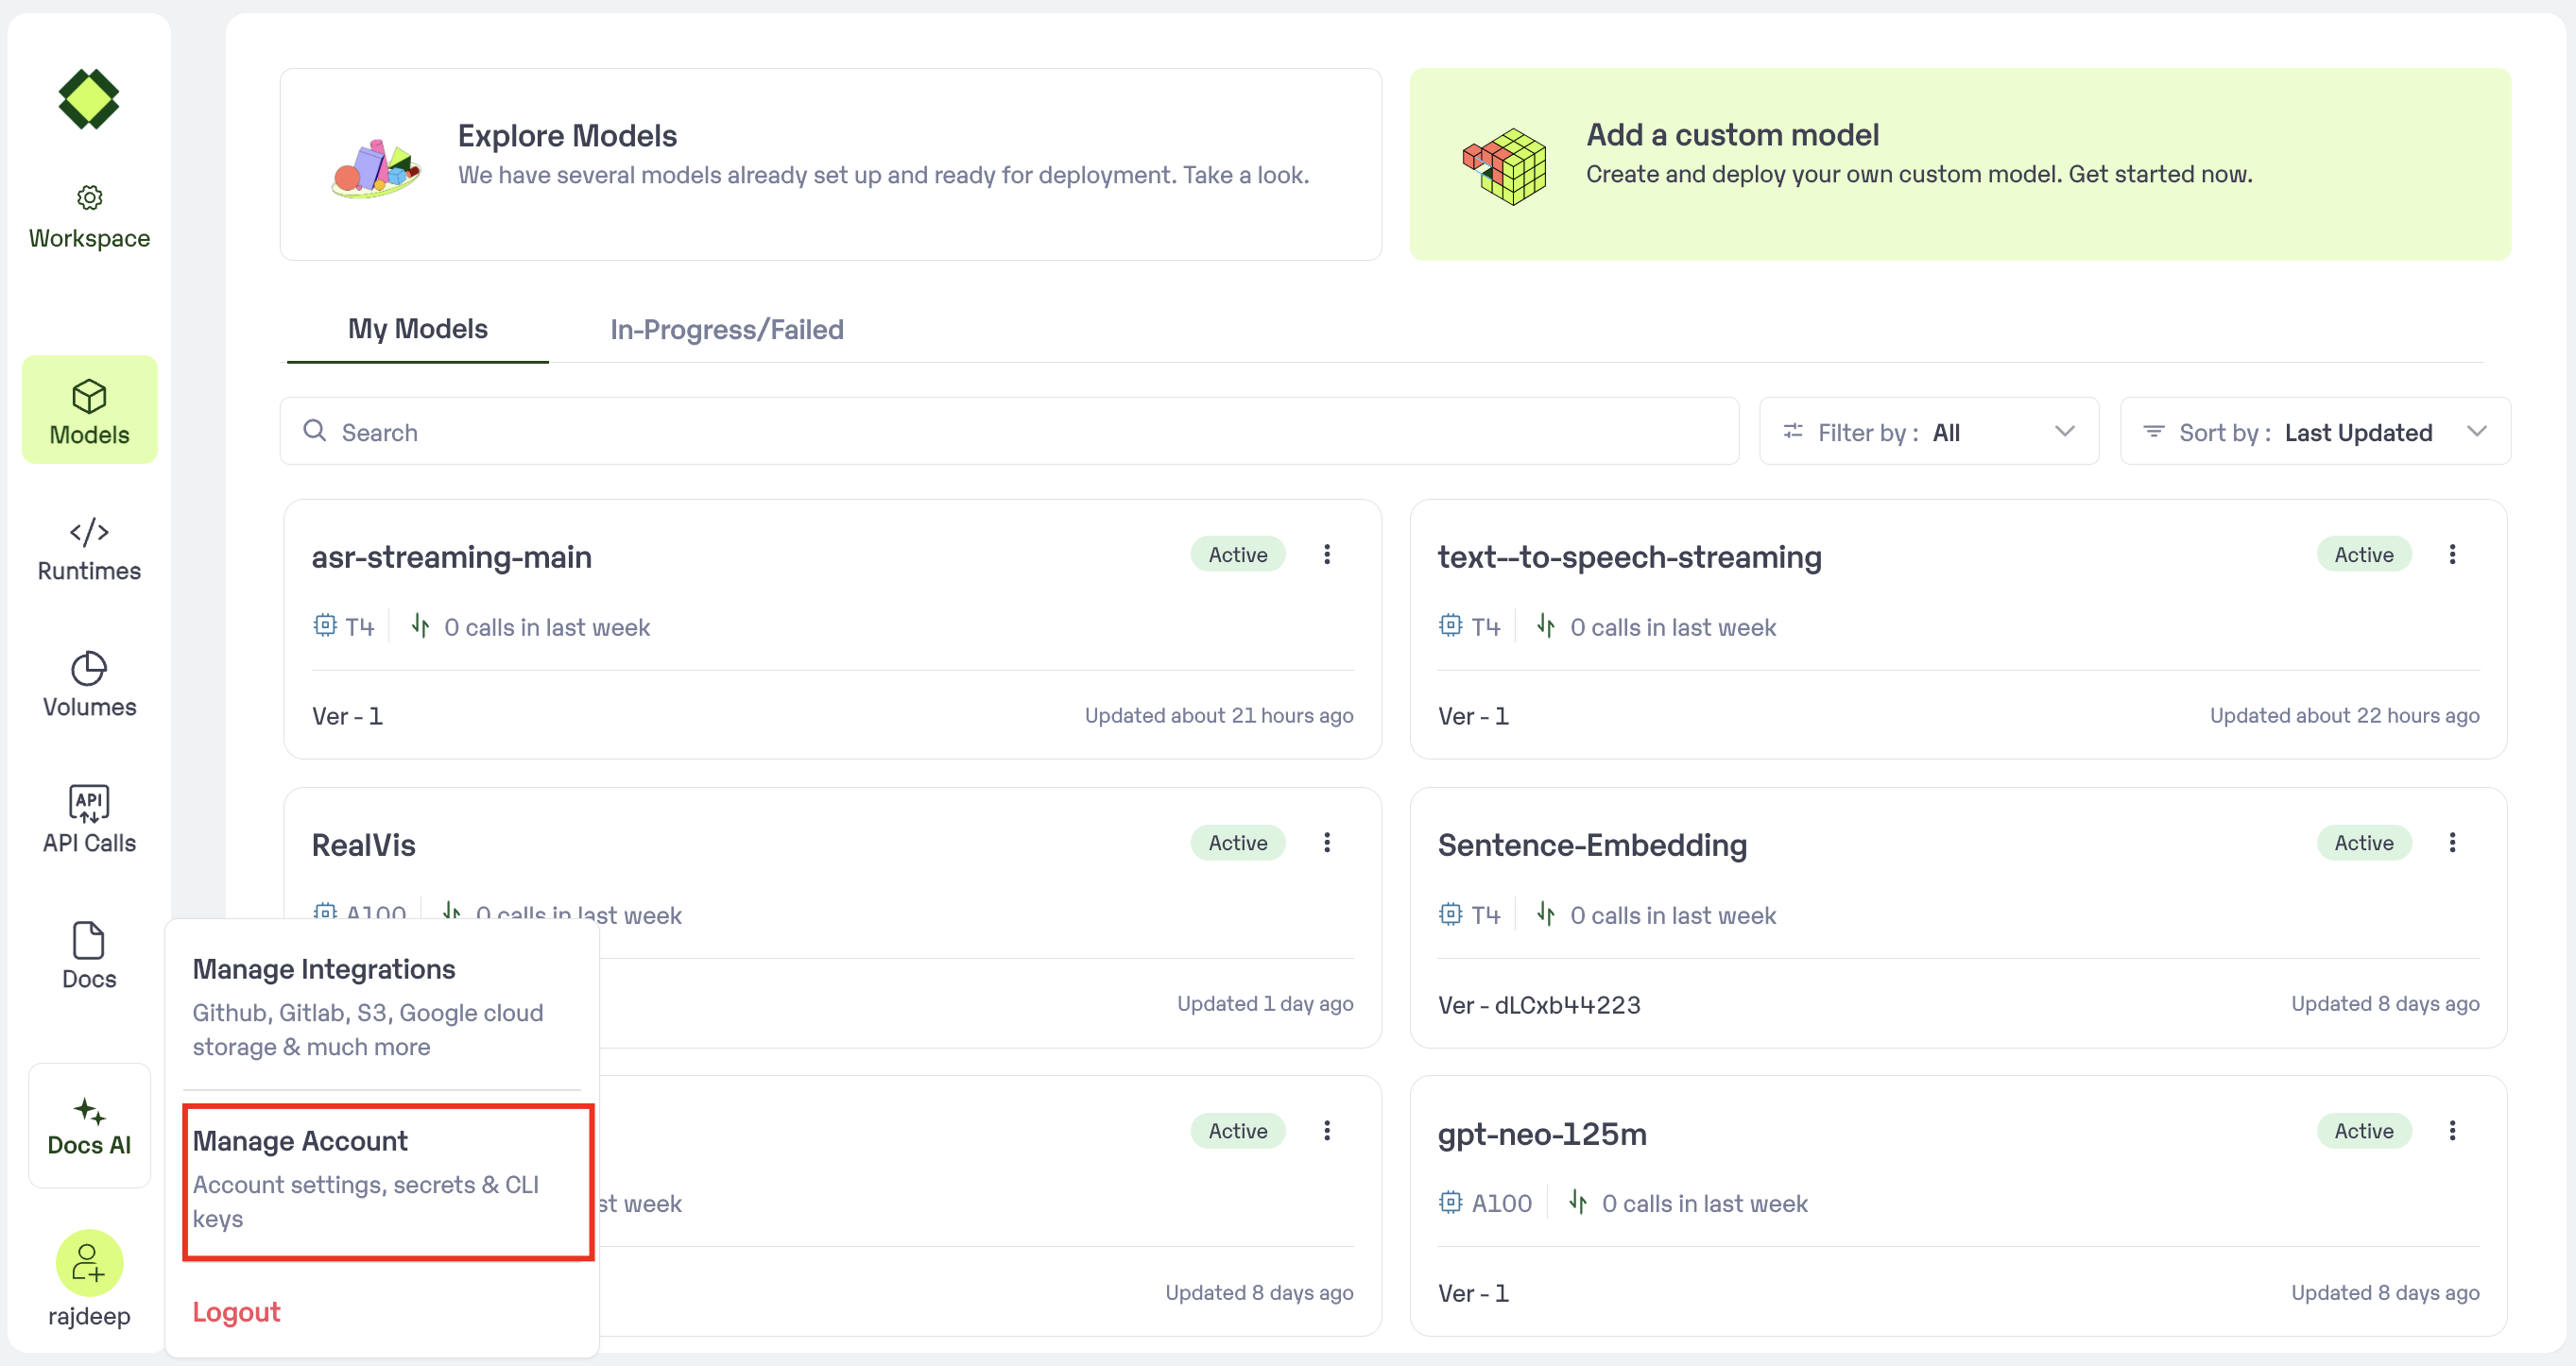 Select "Secrets"
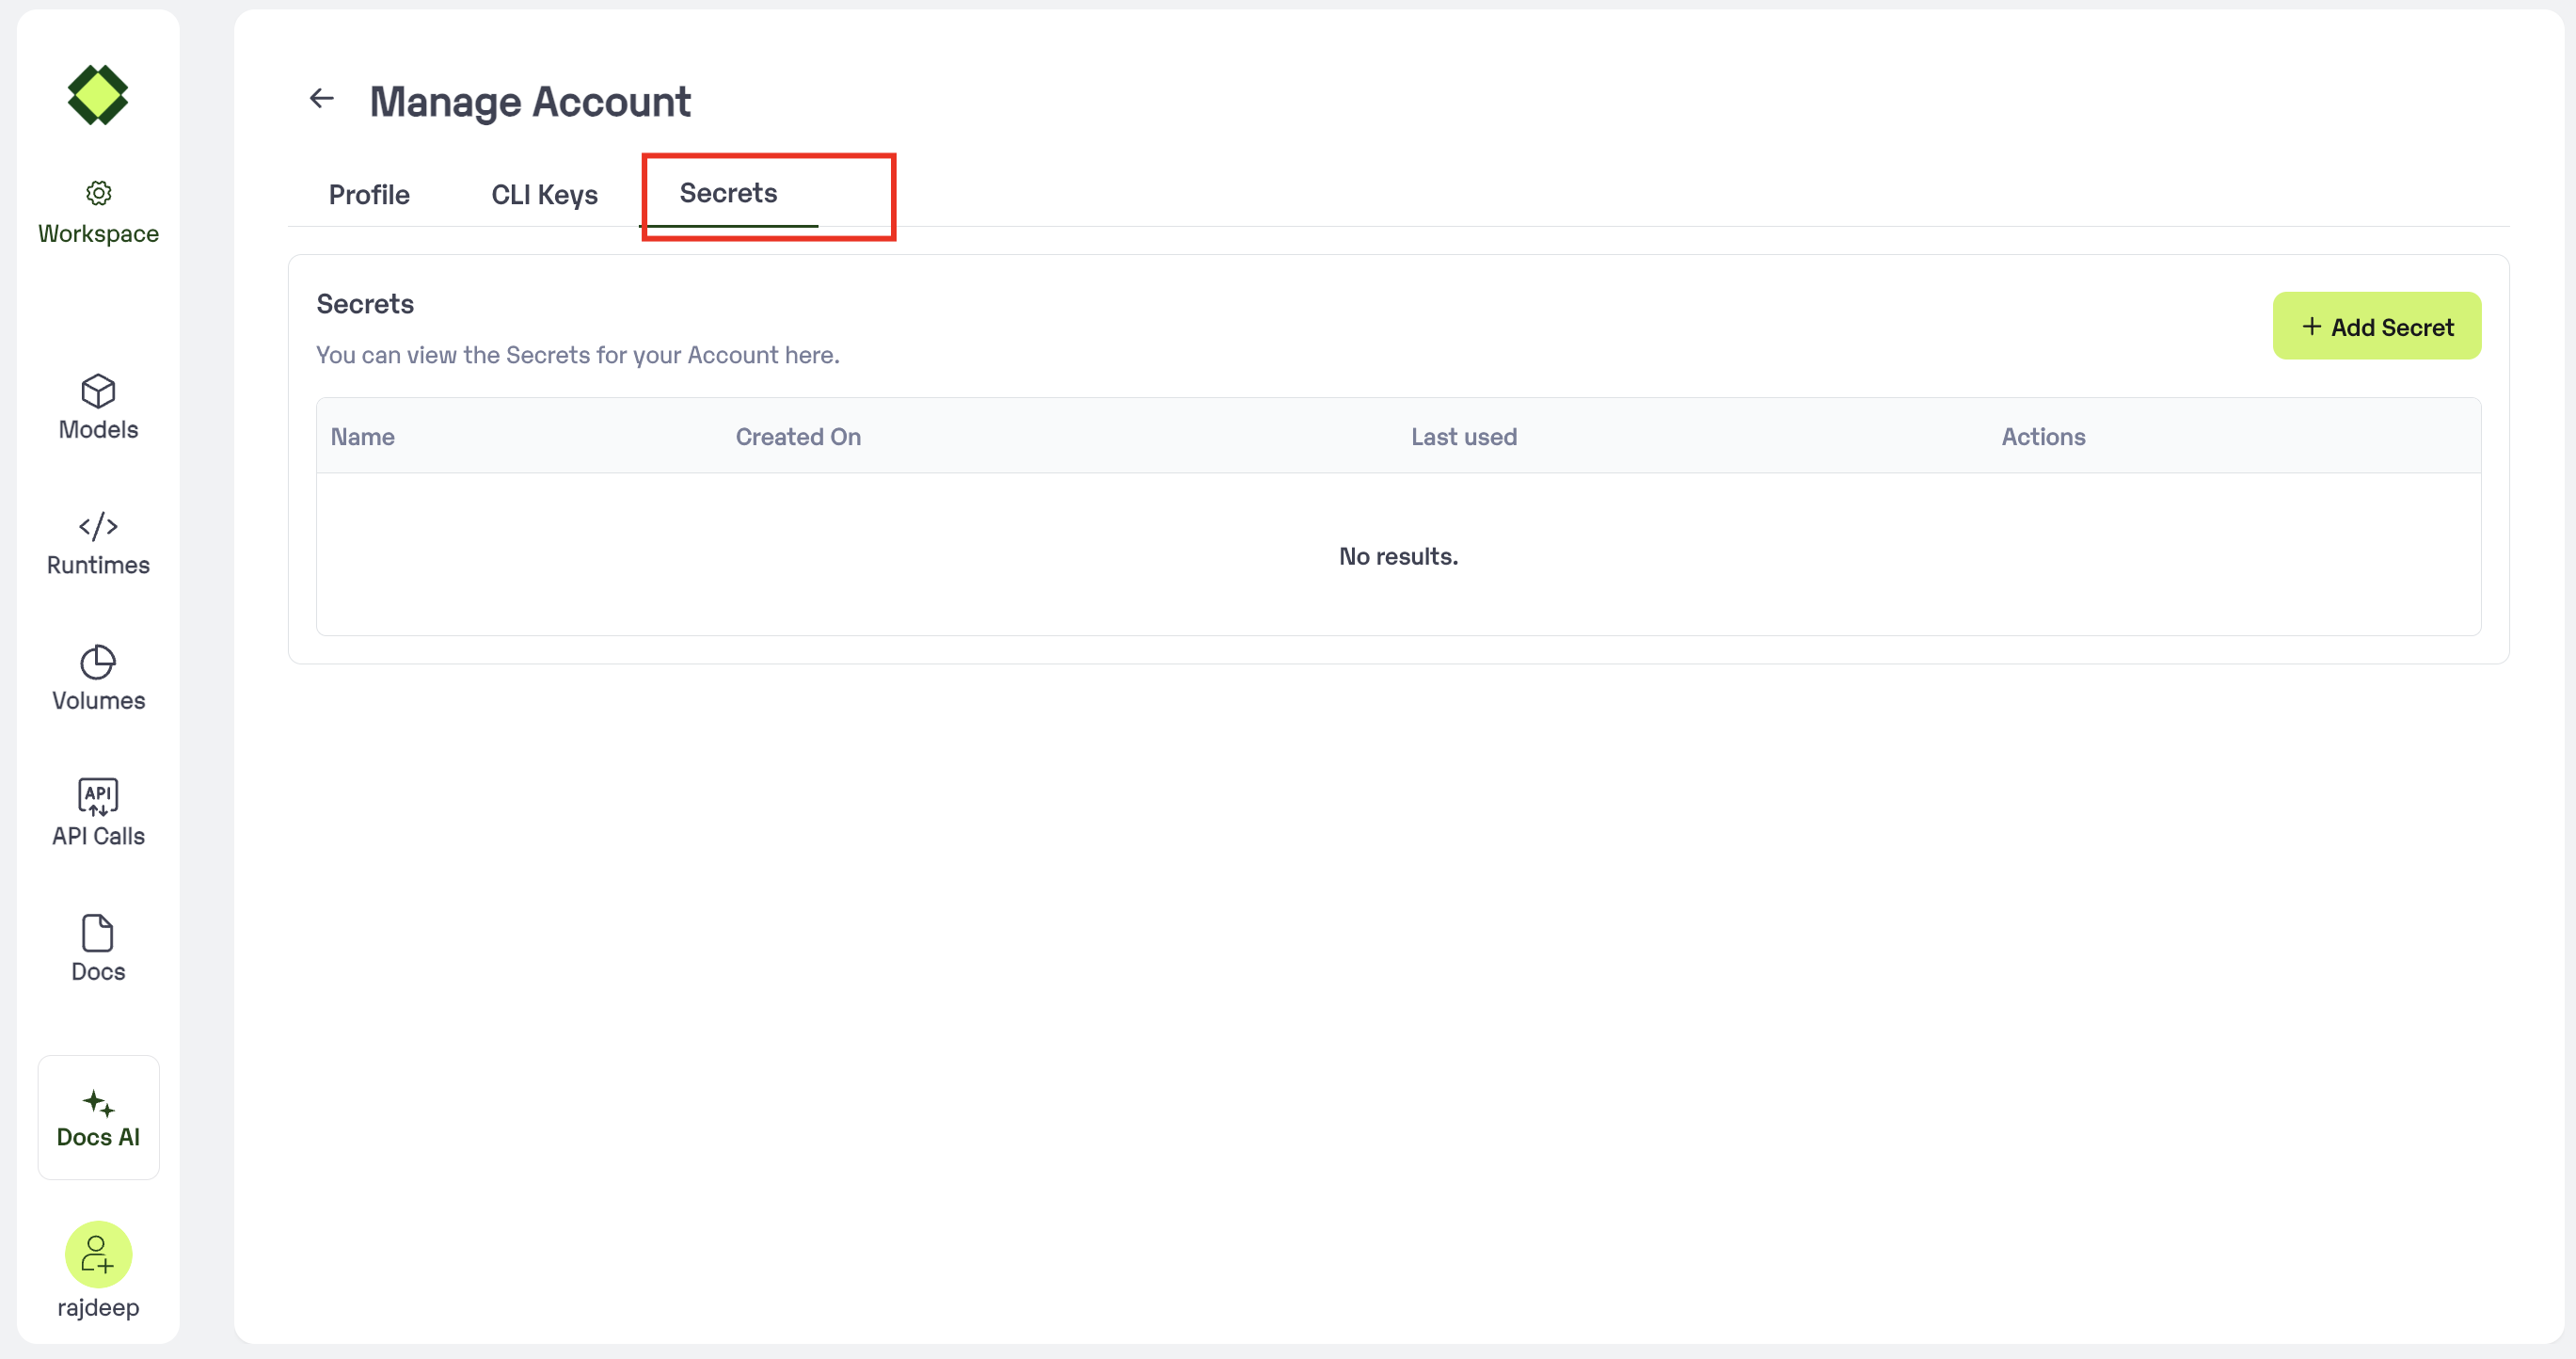 ### Create a secret
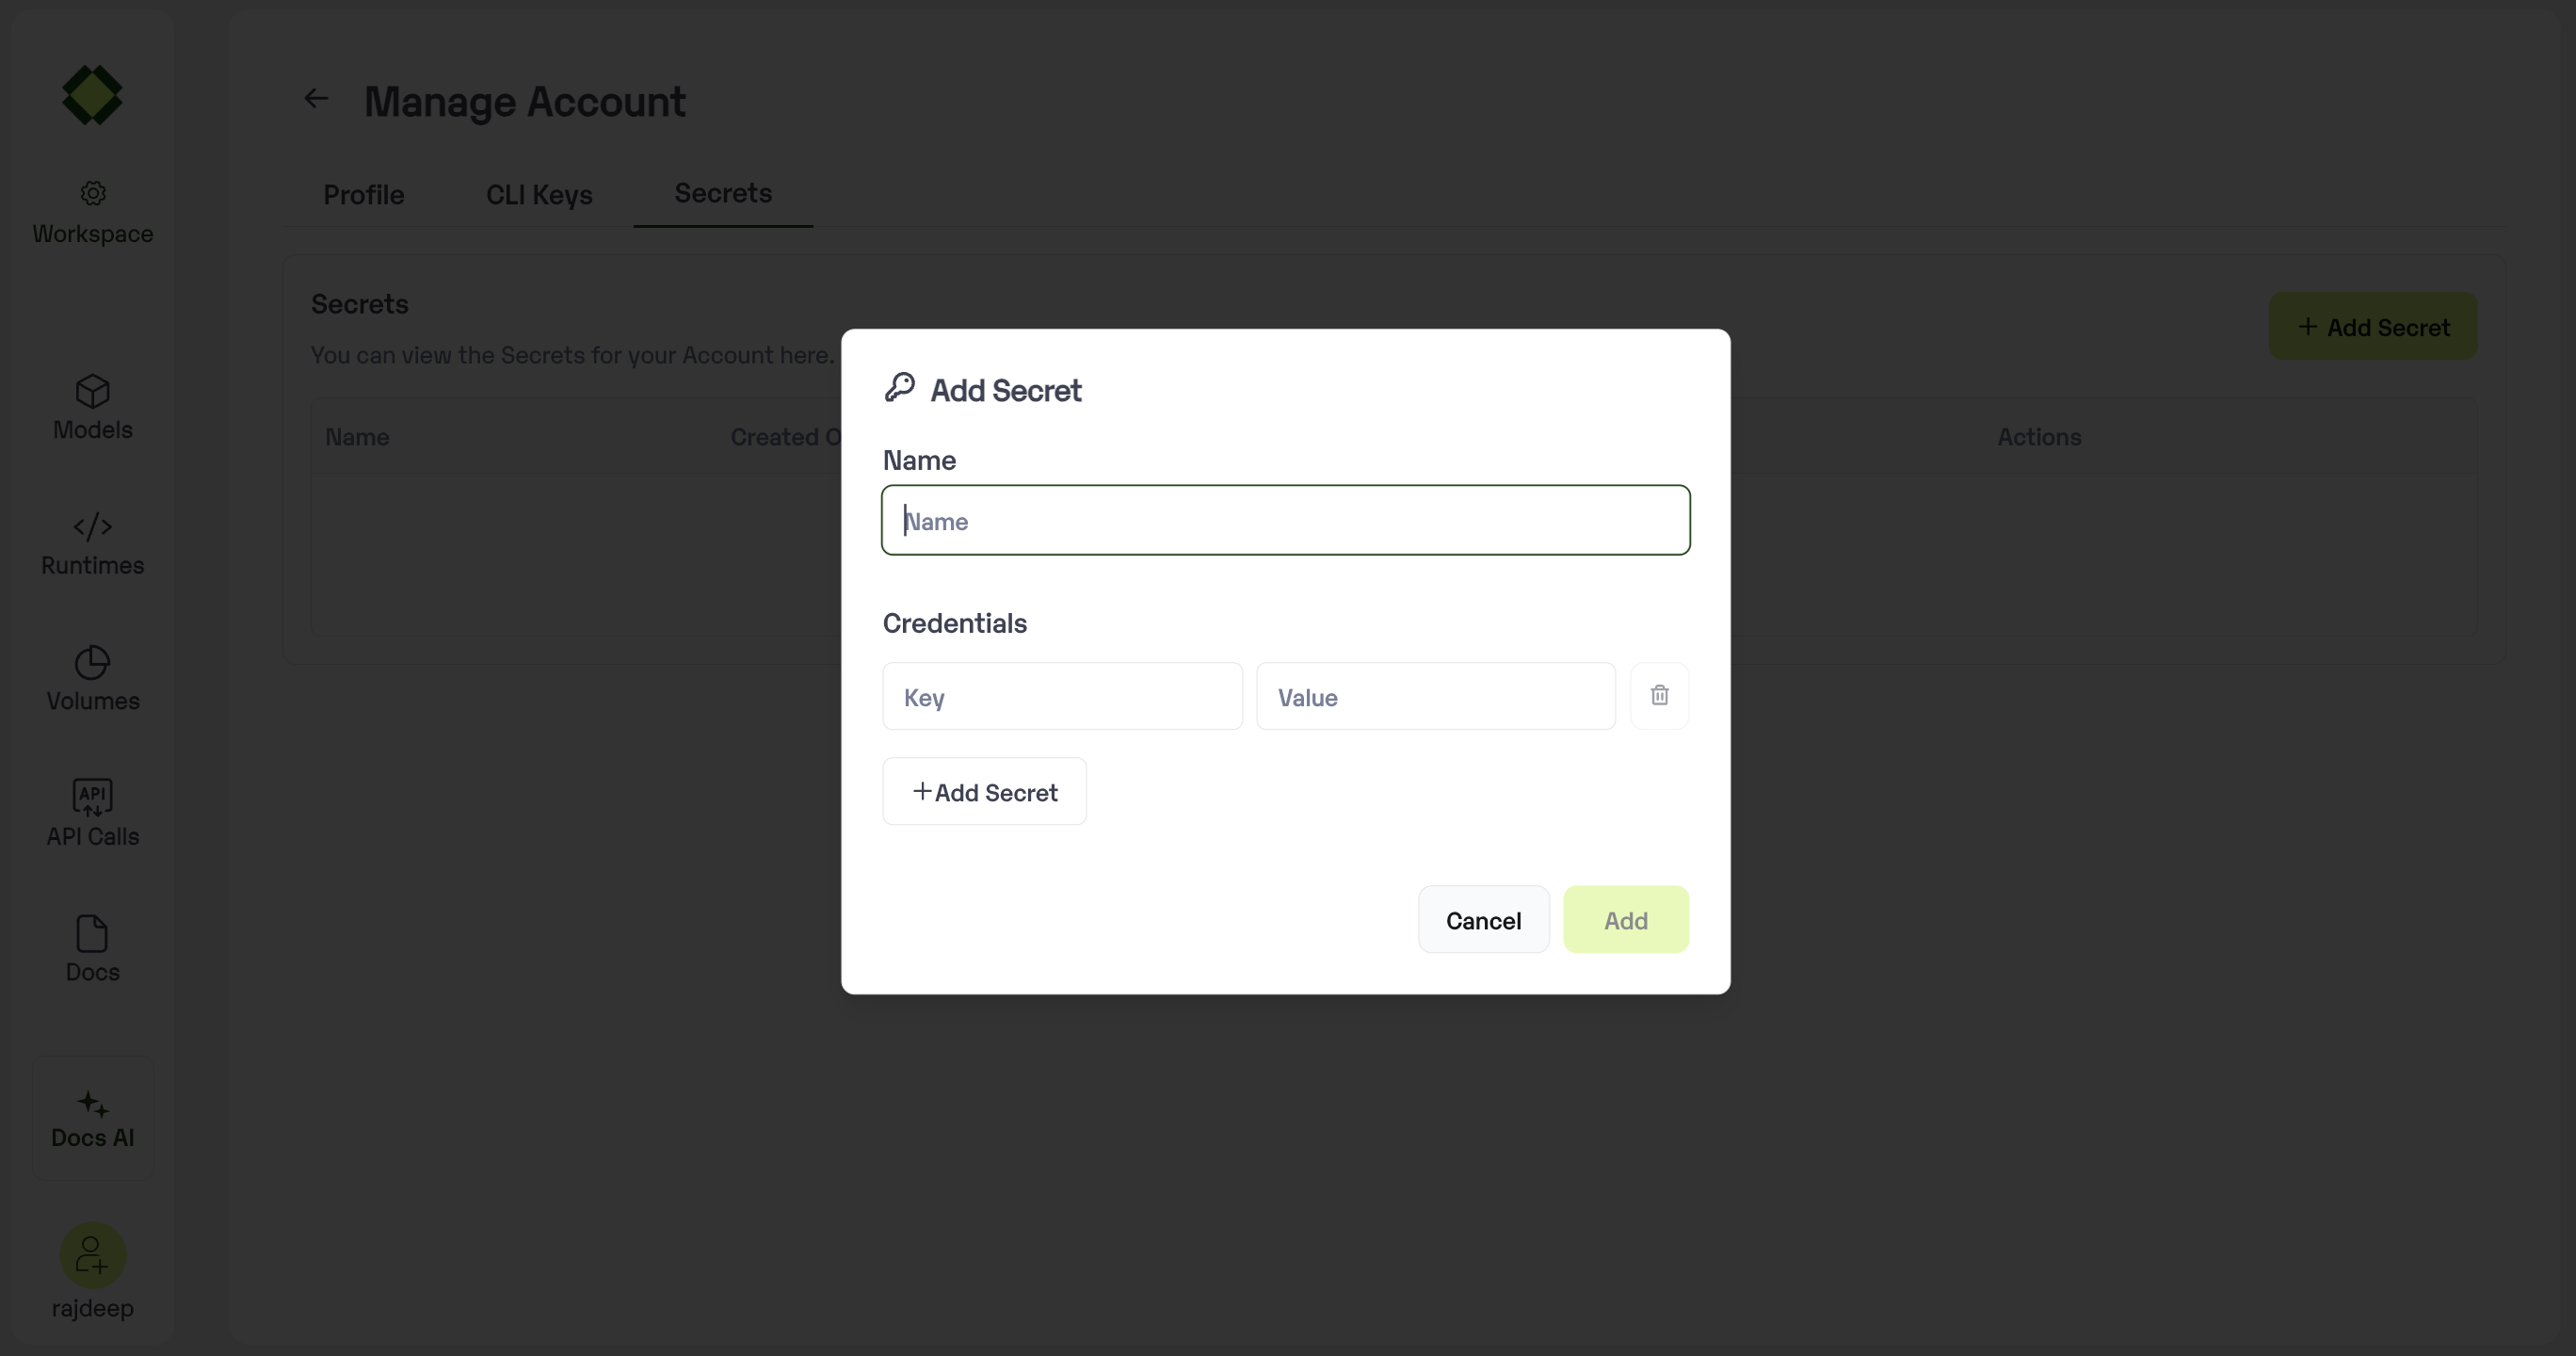 Enter the key and Values
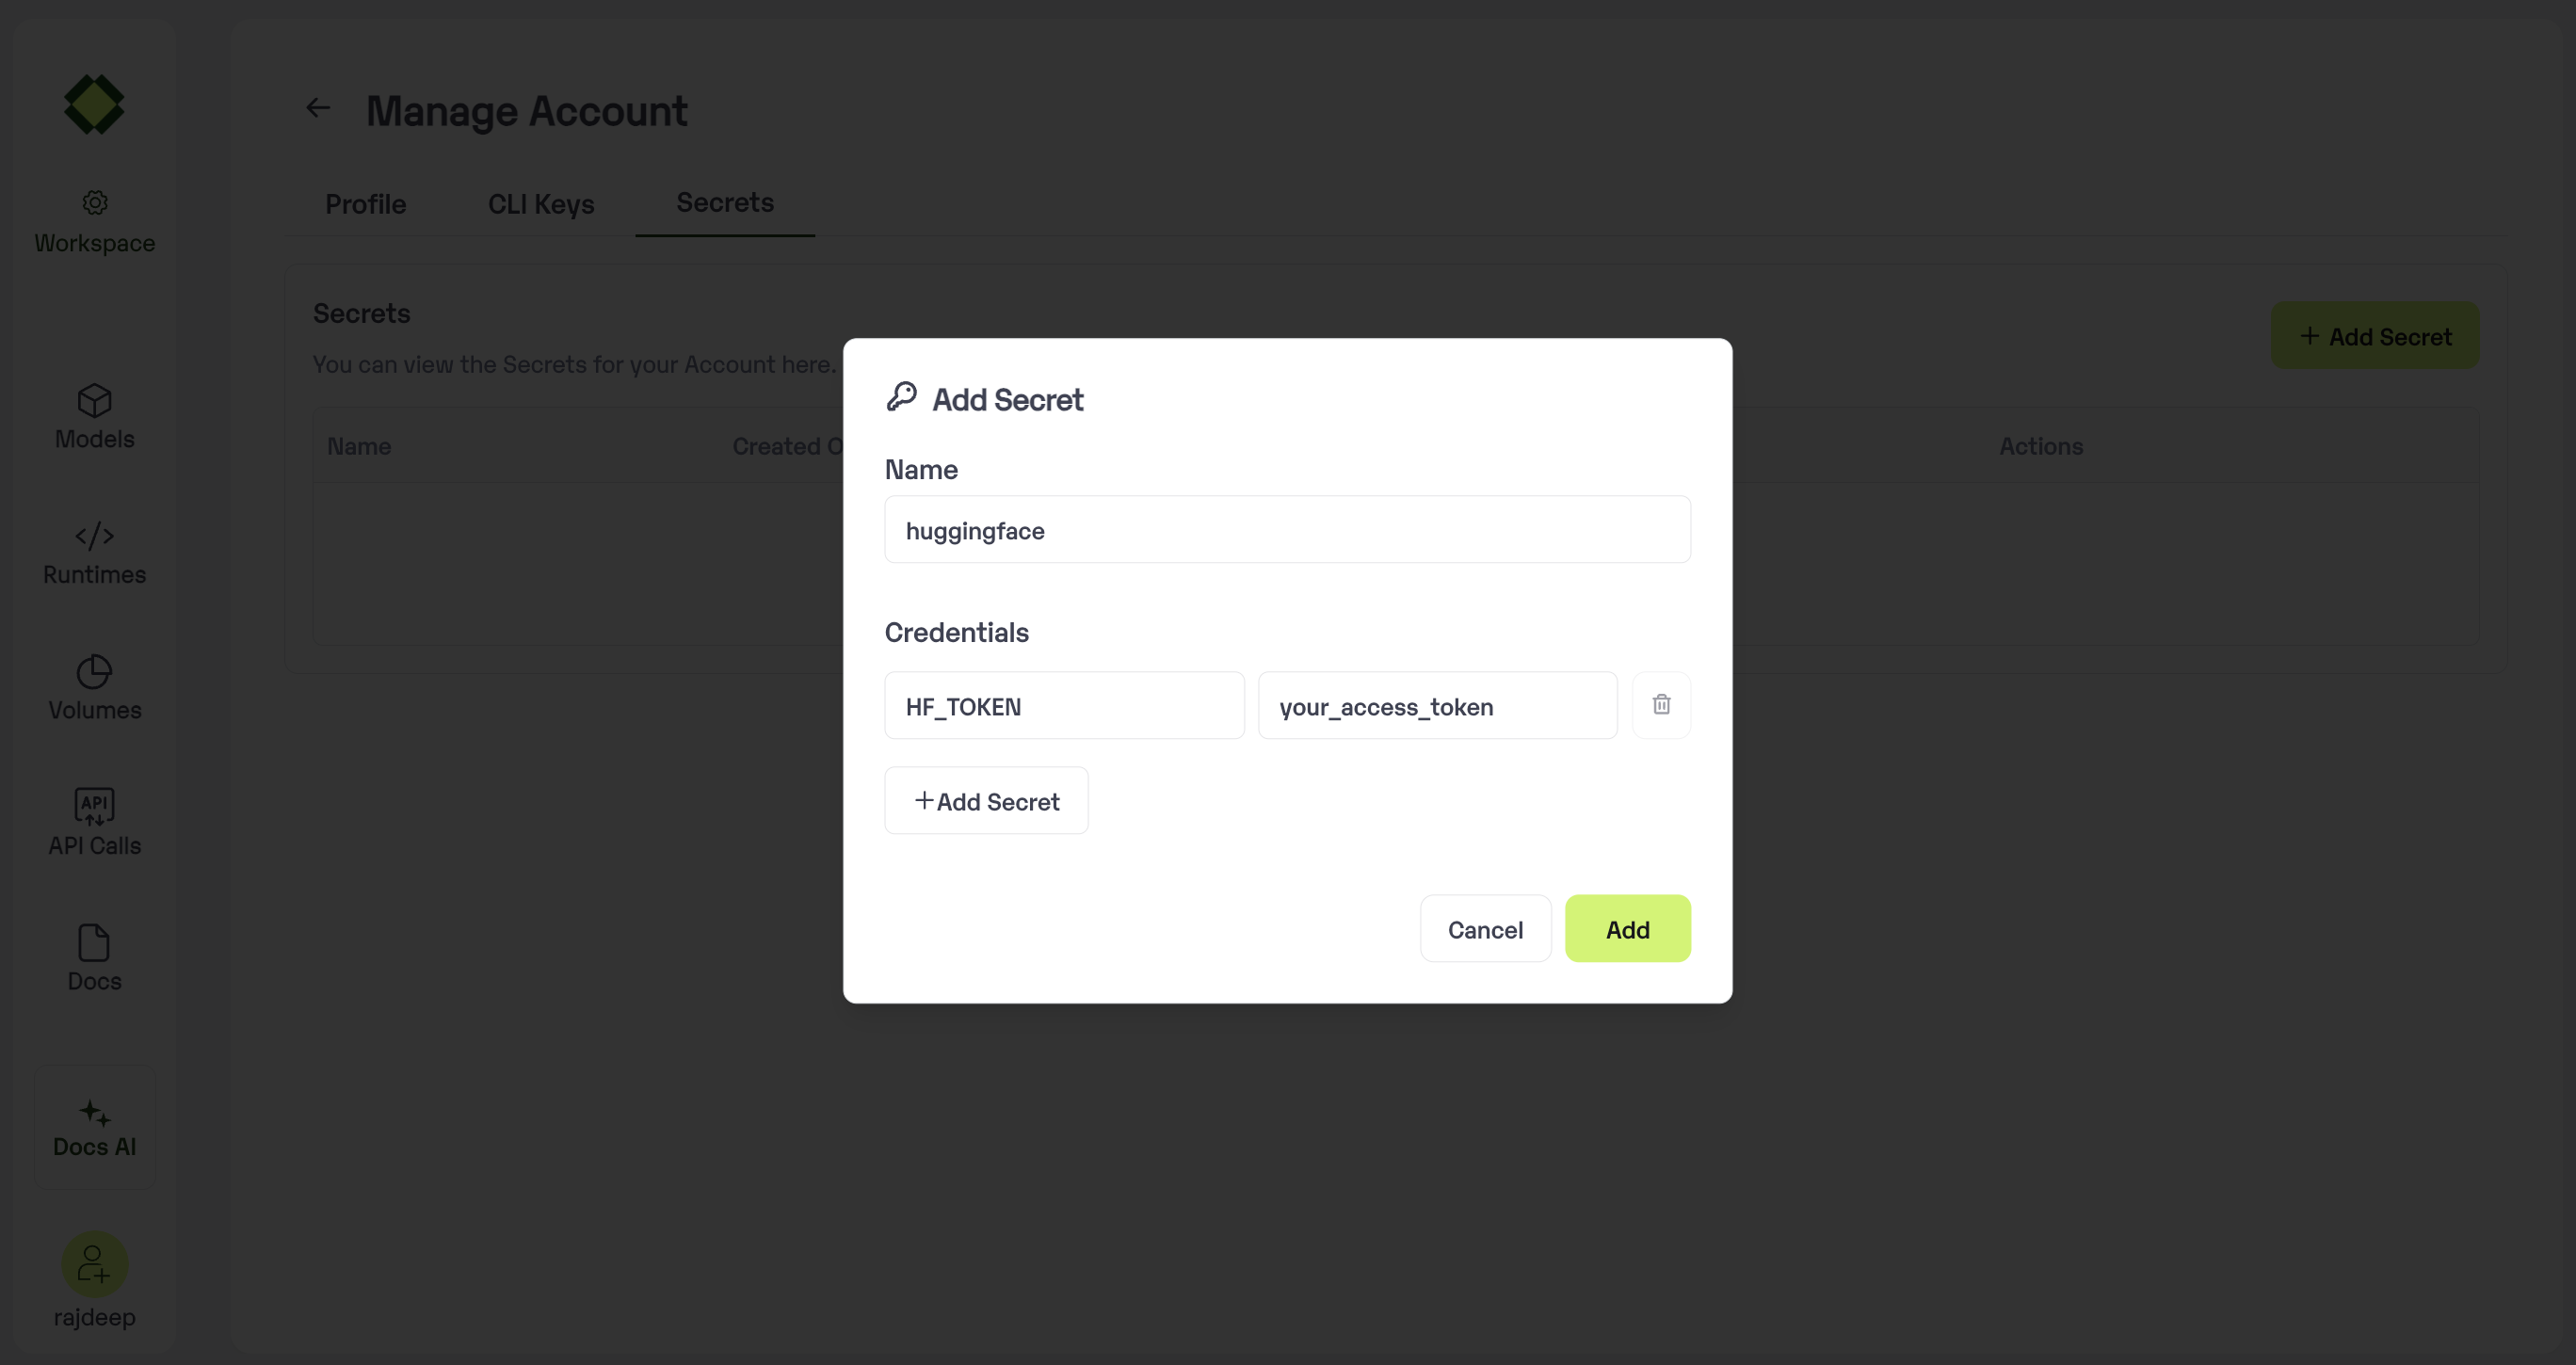 {/* ### Using Secrets in Code
Upon creation, a code snippet for the secret is provided for integration into the application.
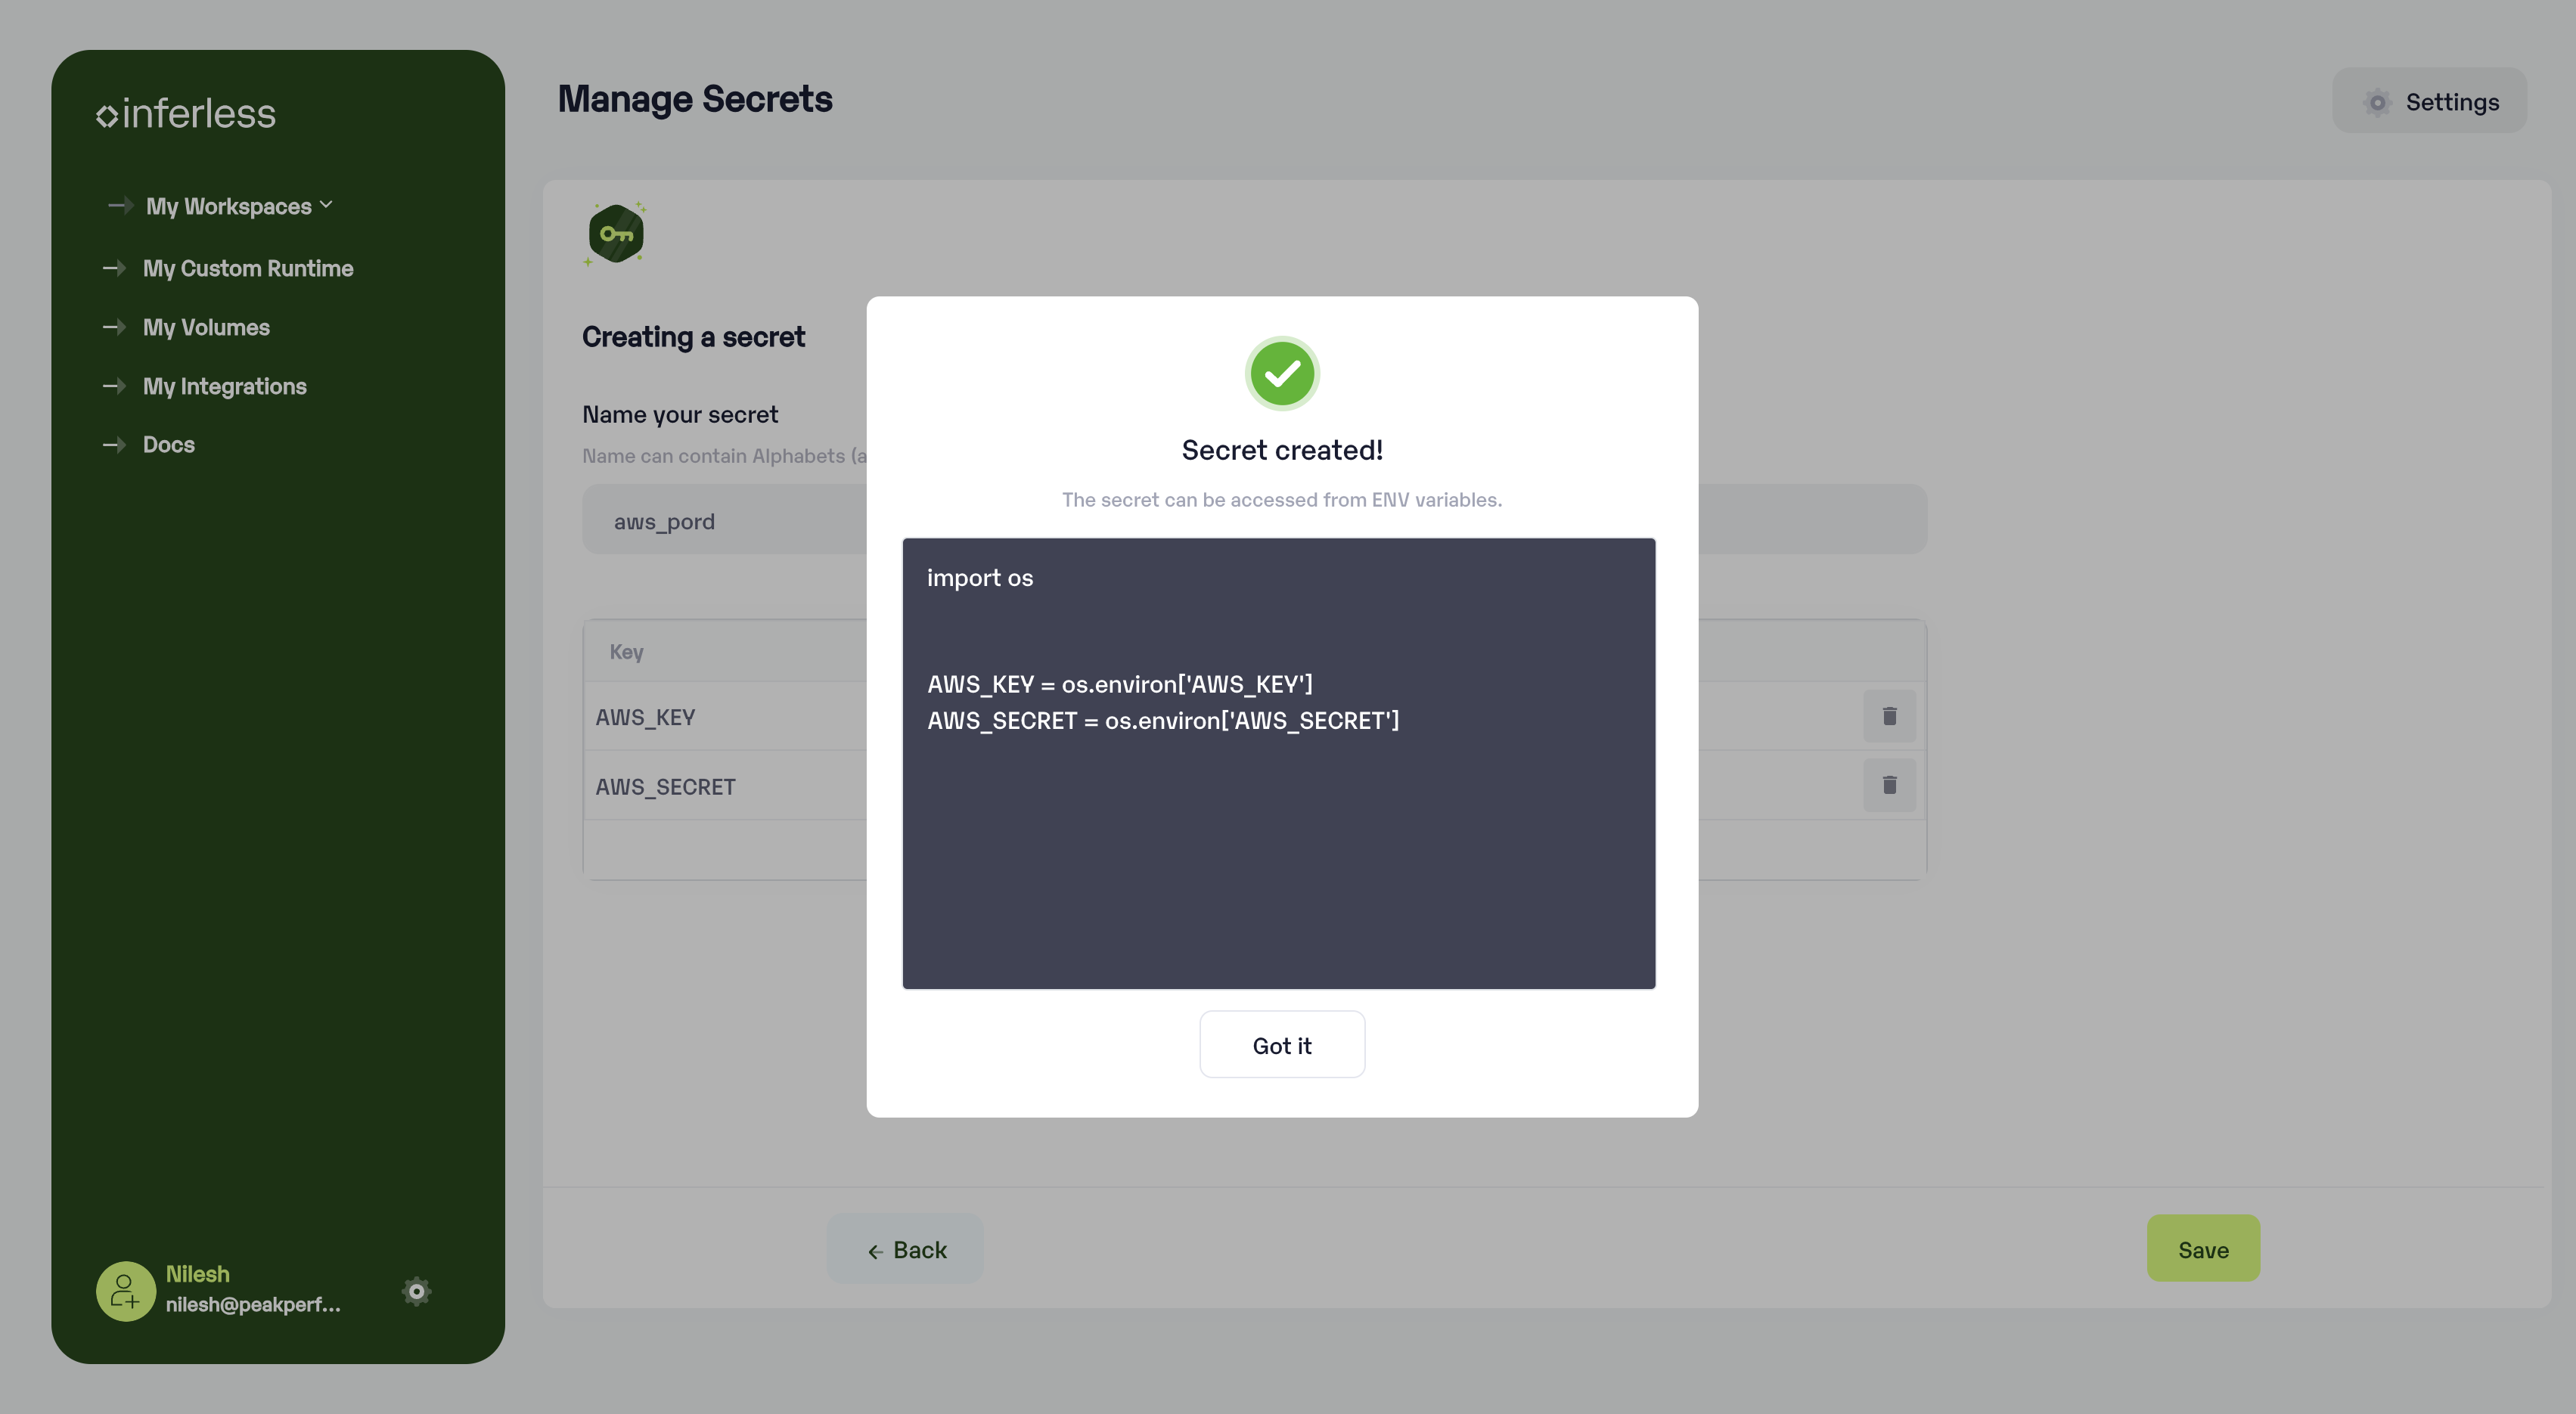 */}
### Using Secrets in Model Import
Available in Step 4 of the Advanced Configuration, where all secrets can be viewed and selected.
{/* ### Using Secrets in Code
Upon creation, a code snippet for the secret is provided for integration into the application.
 */}
### Using Secrets in Model Import
Available in Step 4 of the Advanced Configuration, where all secrets can be viewed and selected.
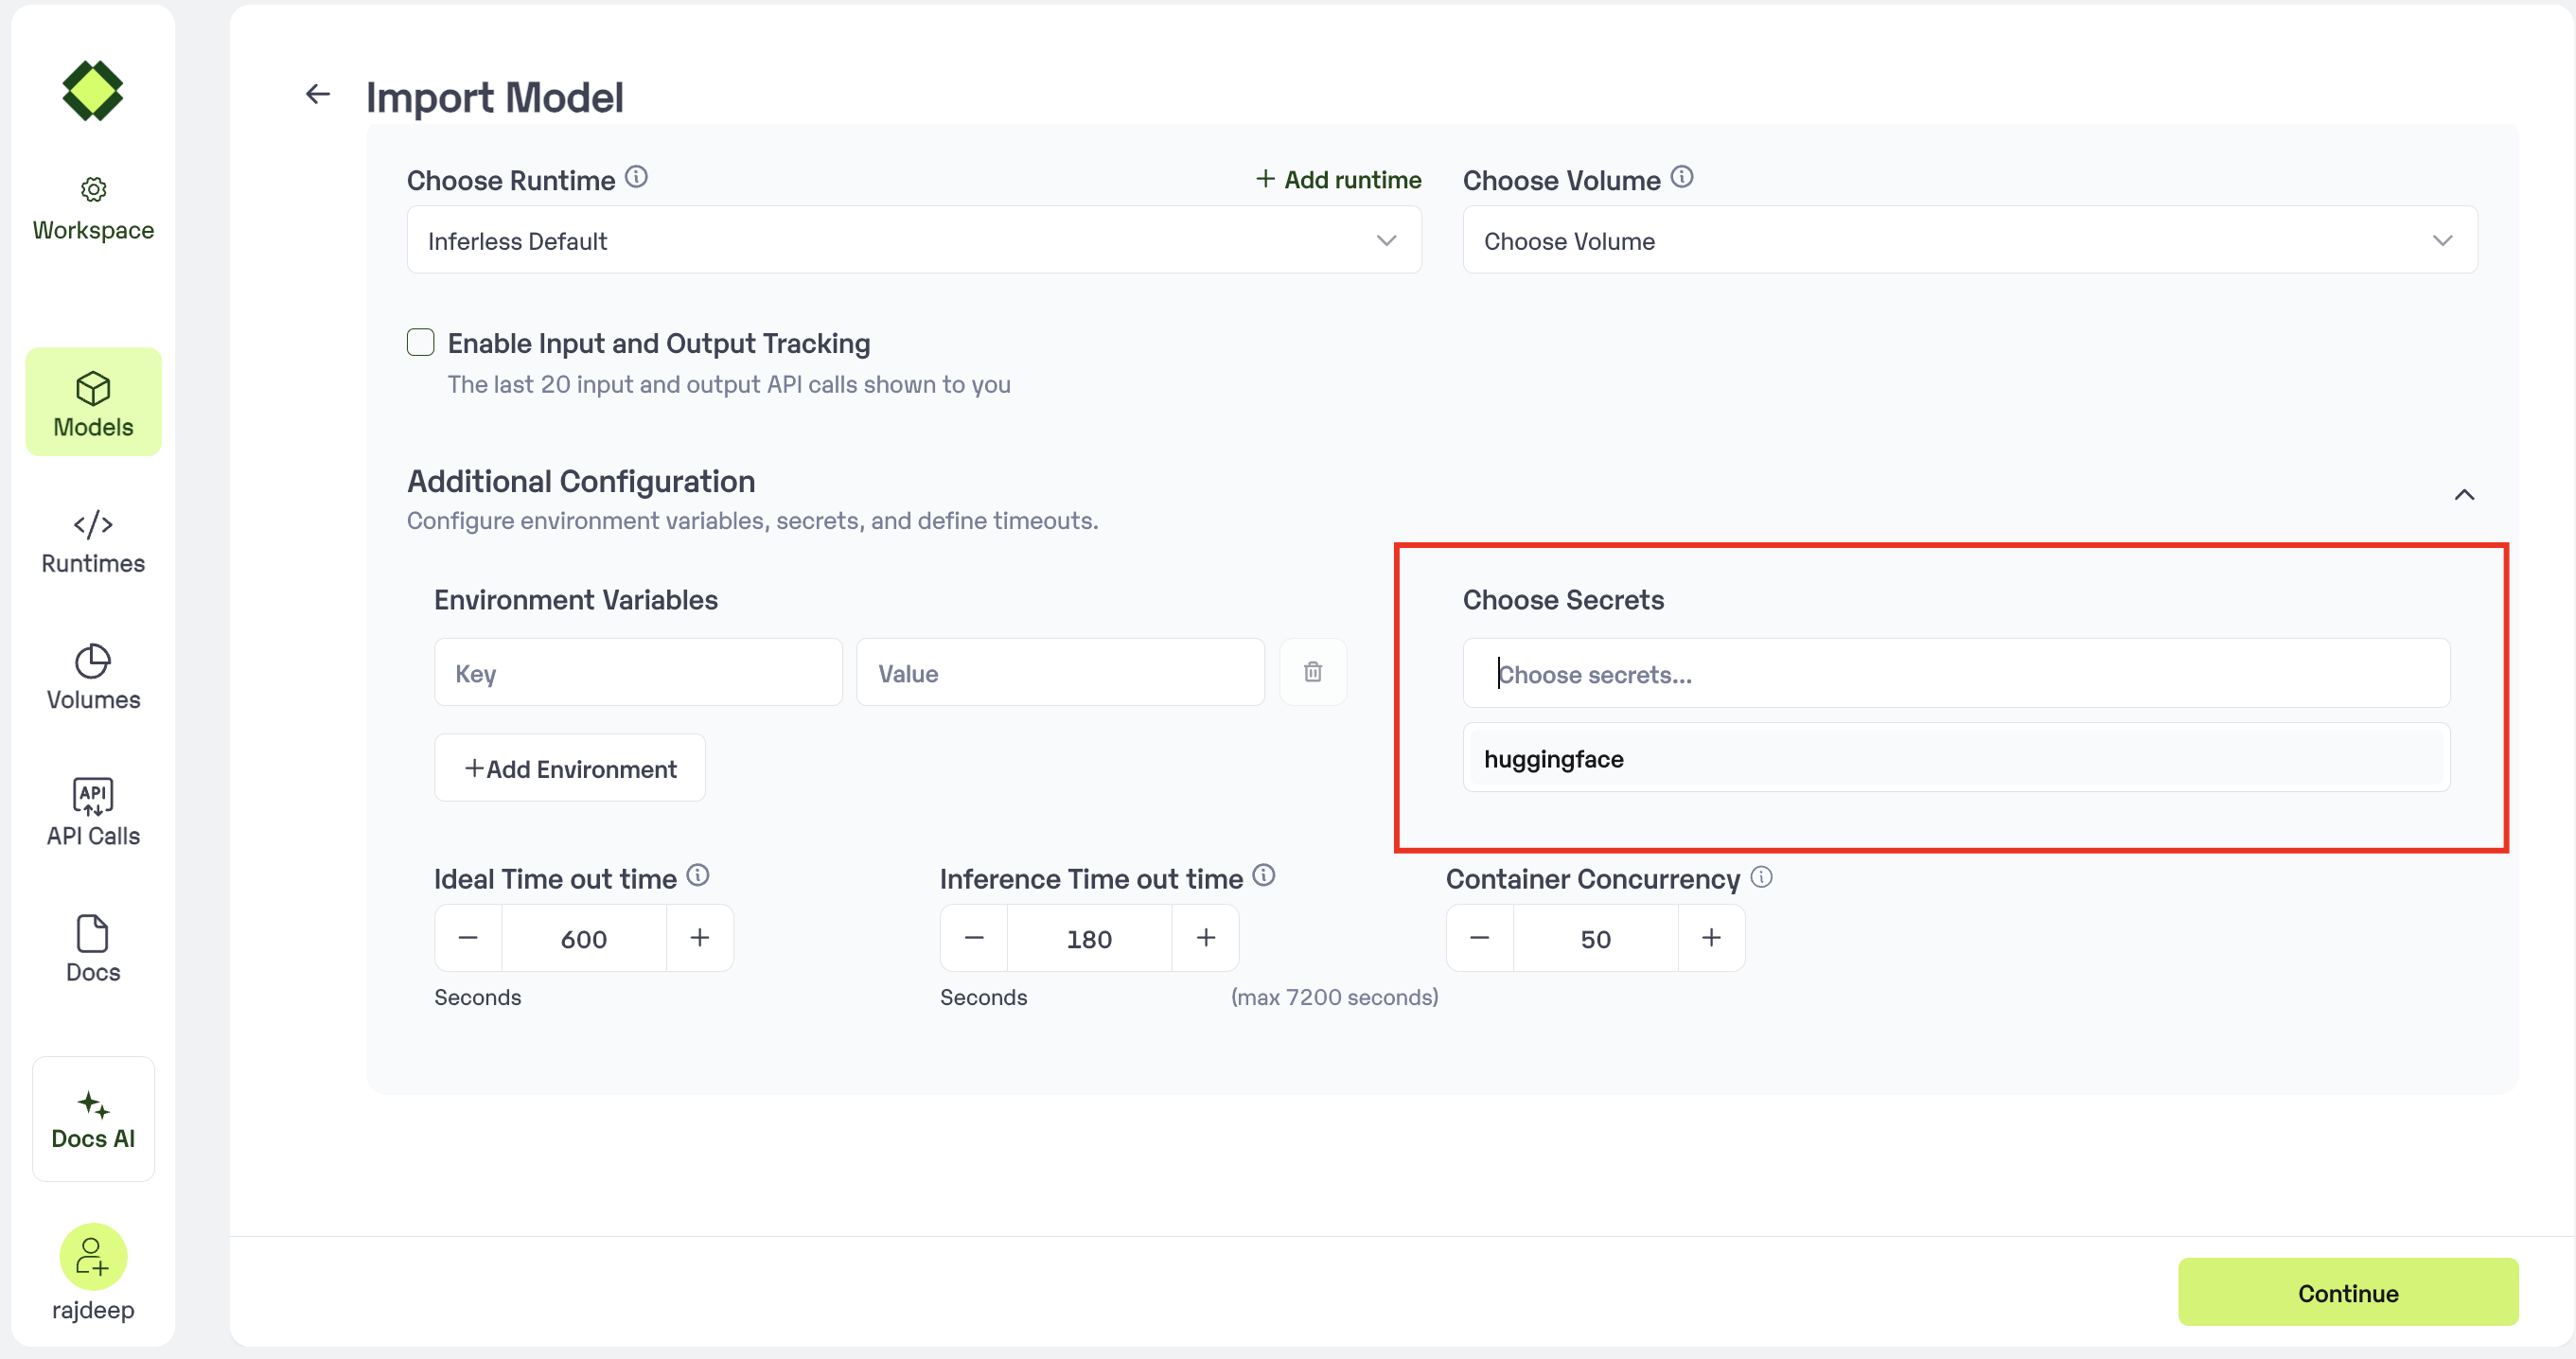 ### Updating Secrets in Model Setting
Post model import, credentials can be added or removed via the Environment Tab in Model Settings
### Updating Secrets in Model Setting
Post model import, credentials can be added or removed via the Environment Tab in Model Settings
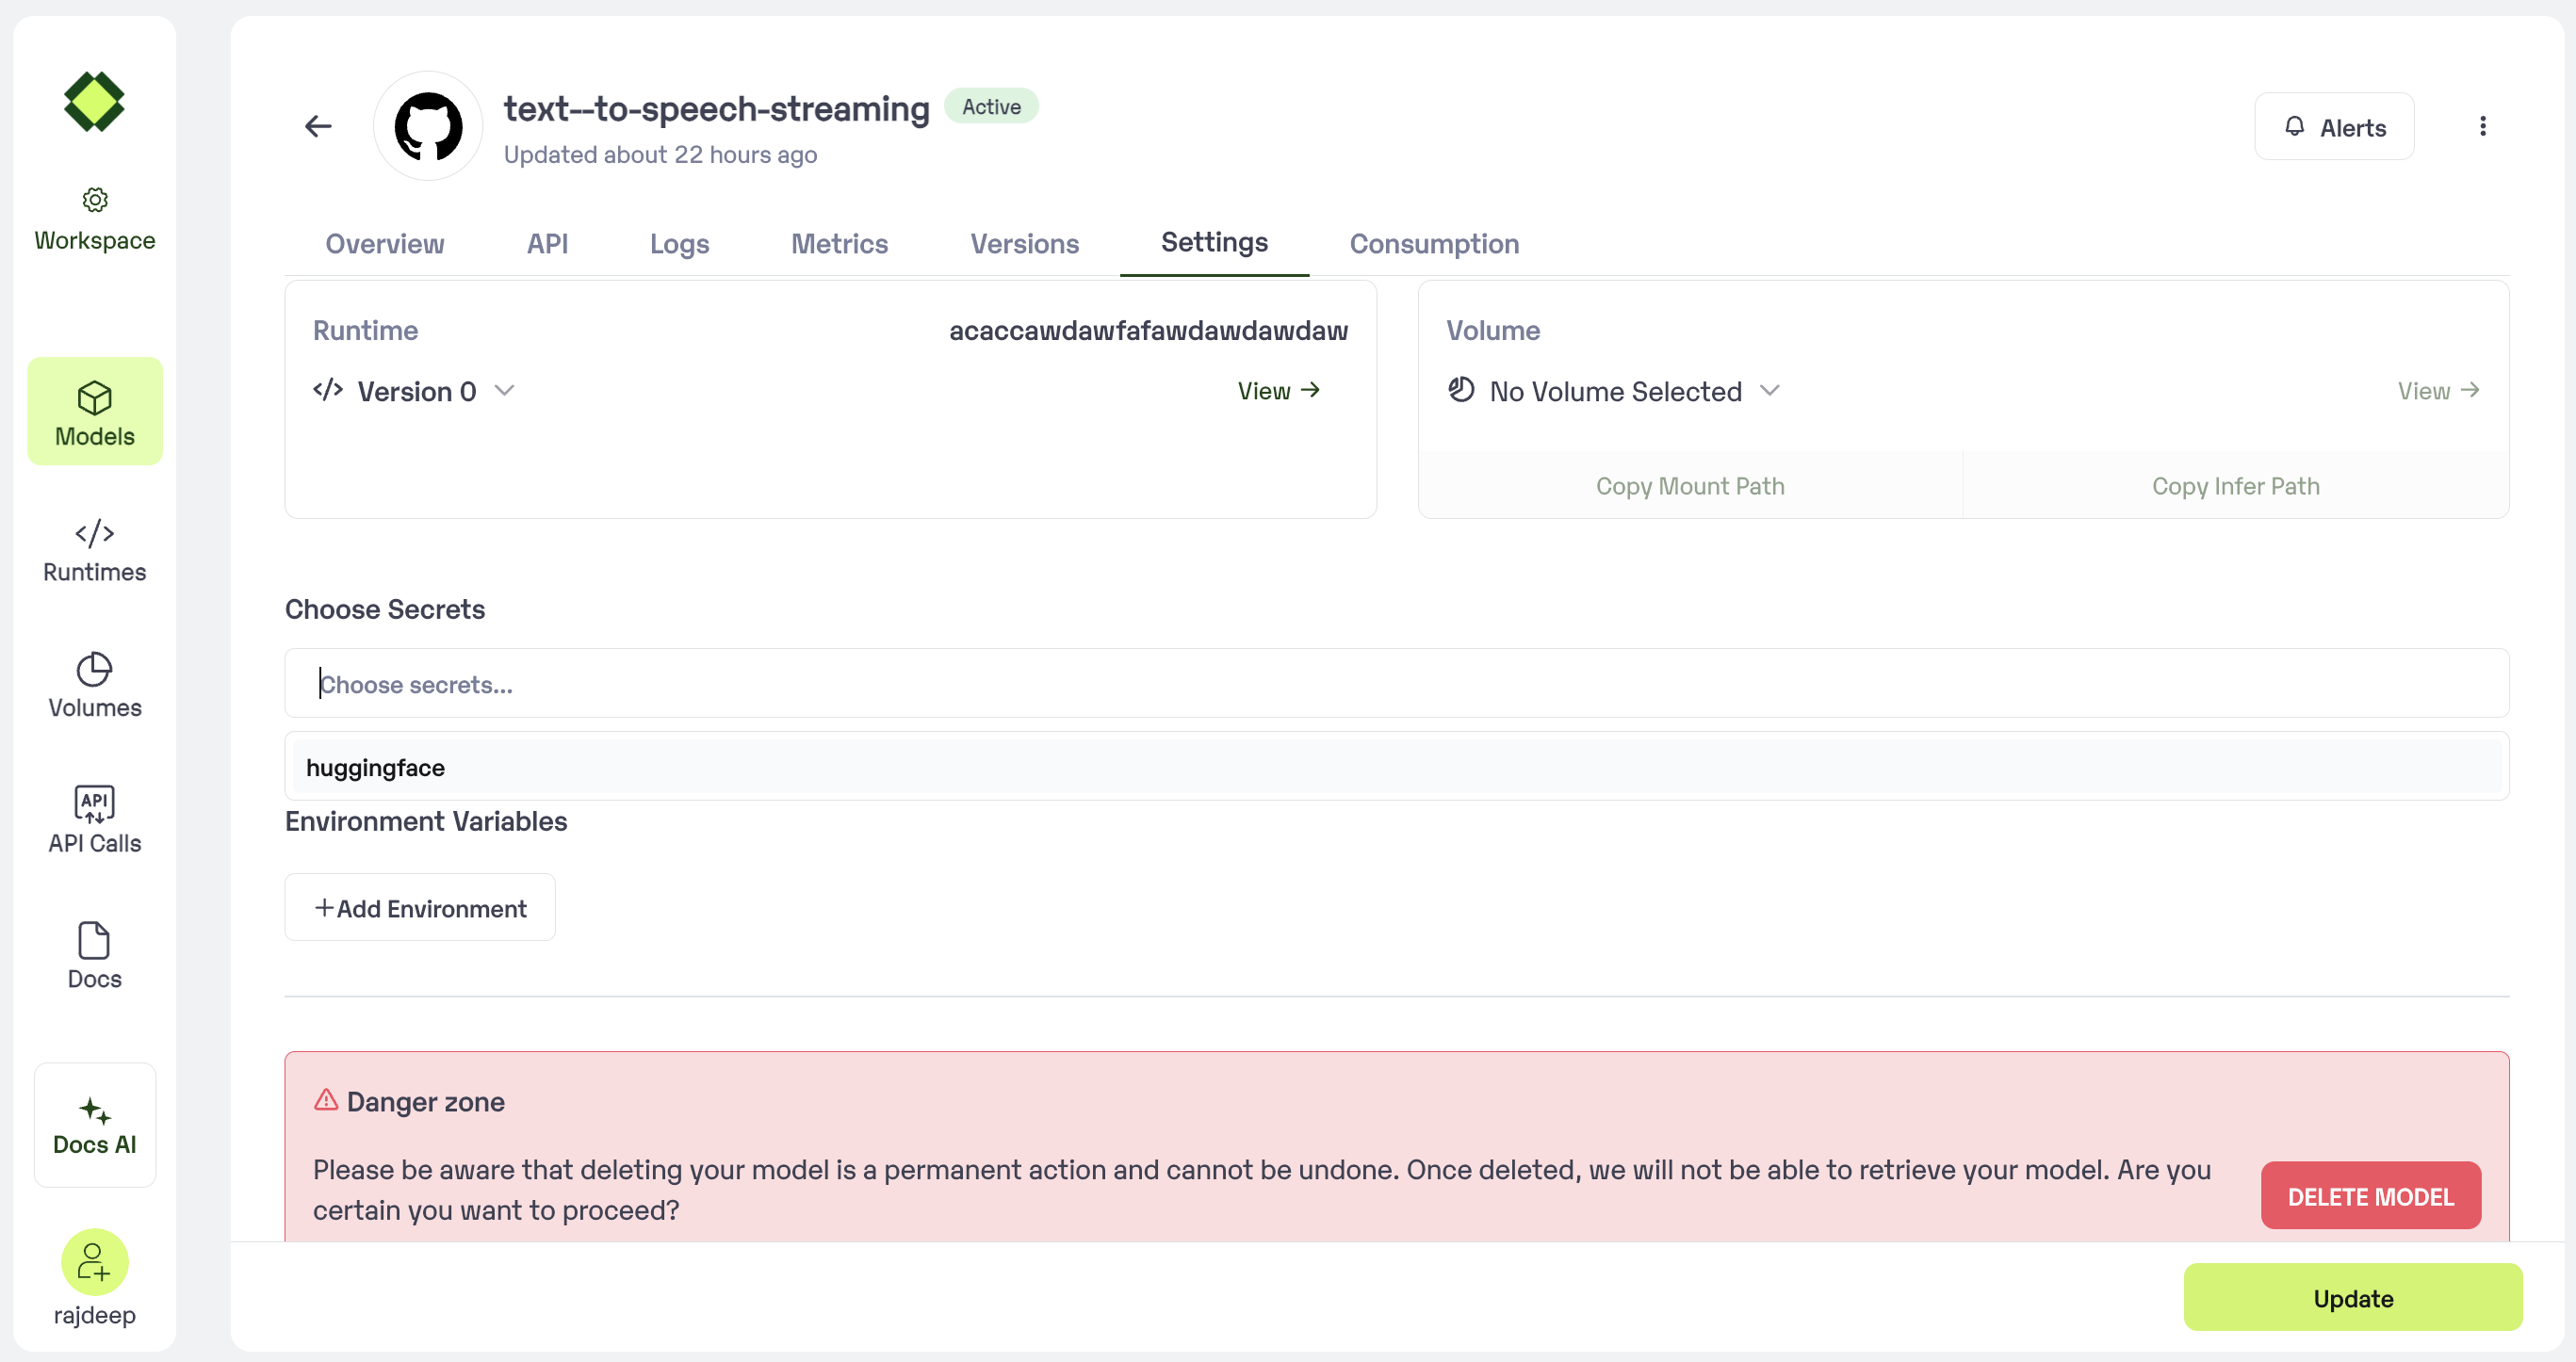 # Overview
Source: https://docs.inferless.com/concepts/overview
Here is a quick overview to get you started with Inferless to deploy your first machine learning model.
### Step 1: Clone the Template Repository to your Github
We have created a Template repository that you can use as a base to inject your code you can find a sample here with the GPT Neo model.
Github Repo: [https://github.com/inferless/template](https://github.com/inferless/template)
```python
from pydantic import BaseModel, Field
import inferless
@inferless.request
class RequestObjects(BaseModel):
prompt: str = Field(default="a horse near a beach")
@inferless.response
class ResponseObjects(BaseModel):
generated_txt: str = Field(default='Test output')
app = inferless.Cls(gpu="T4")
class InferlessPythonModel:
@app.load
def initialize(self):
import torch
from transformers import pipeline
self.generator = pipeline("text-generation", model="EleutherAI/gpt-neo-125M",device=0)
@app.infer
def infer(self, inputs: RequestObjects) -> ResponseObjects:
pipeline_output = self.generator(inputs.prompt, do_sample=True, min_length=128)
generateObject = ResponseObjects(generated_txt = pipeline_output[0]["generated_text"])
return generateObject
@inferless.local_entry_point
def my_local_entry(dynamic_params):
model_instance = InferlessPythonModel()
return model_instance.infer(RequestObjects(**dynamic_params))
```
### Step 2: Login to the Inferless dashboard and click on Import model button
* Select on `"Github" `Integration that you see on the top left
# Overview
Source: https://docs.inferless.com/concepts/overview
Here is a quick overview to get you started with Inferless to deploy your first machine learning model.
### Step 1: Clone the Template Repository to your Github
We have created a Template repository that you can use as a base to inject your code you can find a sample here with the GPT Neo model.
Github Repo: [https://github.com/inferless/template](https://github.com/inferless/template)
```python
from pydantic import BaseModel, Field
import inferless
@inferless.request
class RequestObjects(BaseModel):
prompt: str = Field(default="a horse near a beach")
@inferless.response
class ResponseObjects(BaseModel):
generated_txt: str = Field(default='Test output')
app = inferless.Cls(gpu="T4")
class InferlessPythonModel:
@app.load
def initialize(self):
import torch
from transformers import pipeline
self.generator = pipeline("text-generation", model="EleutherAI/gpt-neo-125M",device=0)
@app.infer
def infer(self, inputs: RequestObjects) -> ResponseObjects:
pipeline_output = self.generator(inputs.prompt, do_sample=True, min_length=128)
generateObject = ResponseObjects(generated_txt = pipeline_output[0]["generated_text"])
return generateObject
@inferless.local_entry_point
def my_local_entry(dynamic_params):
model_instance = InferlessPythonModel()
return model_instance.infer(RequestObjects(**dynamic_params))
```
### Step 2: Login to the Inferless dashboard and click on Import model button
* Select on `"Github" `Integration that you see on the top left
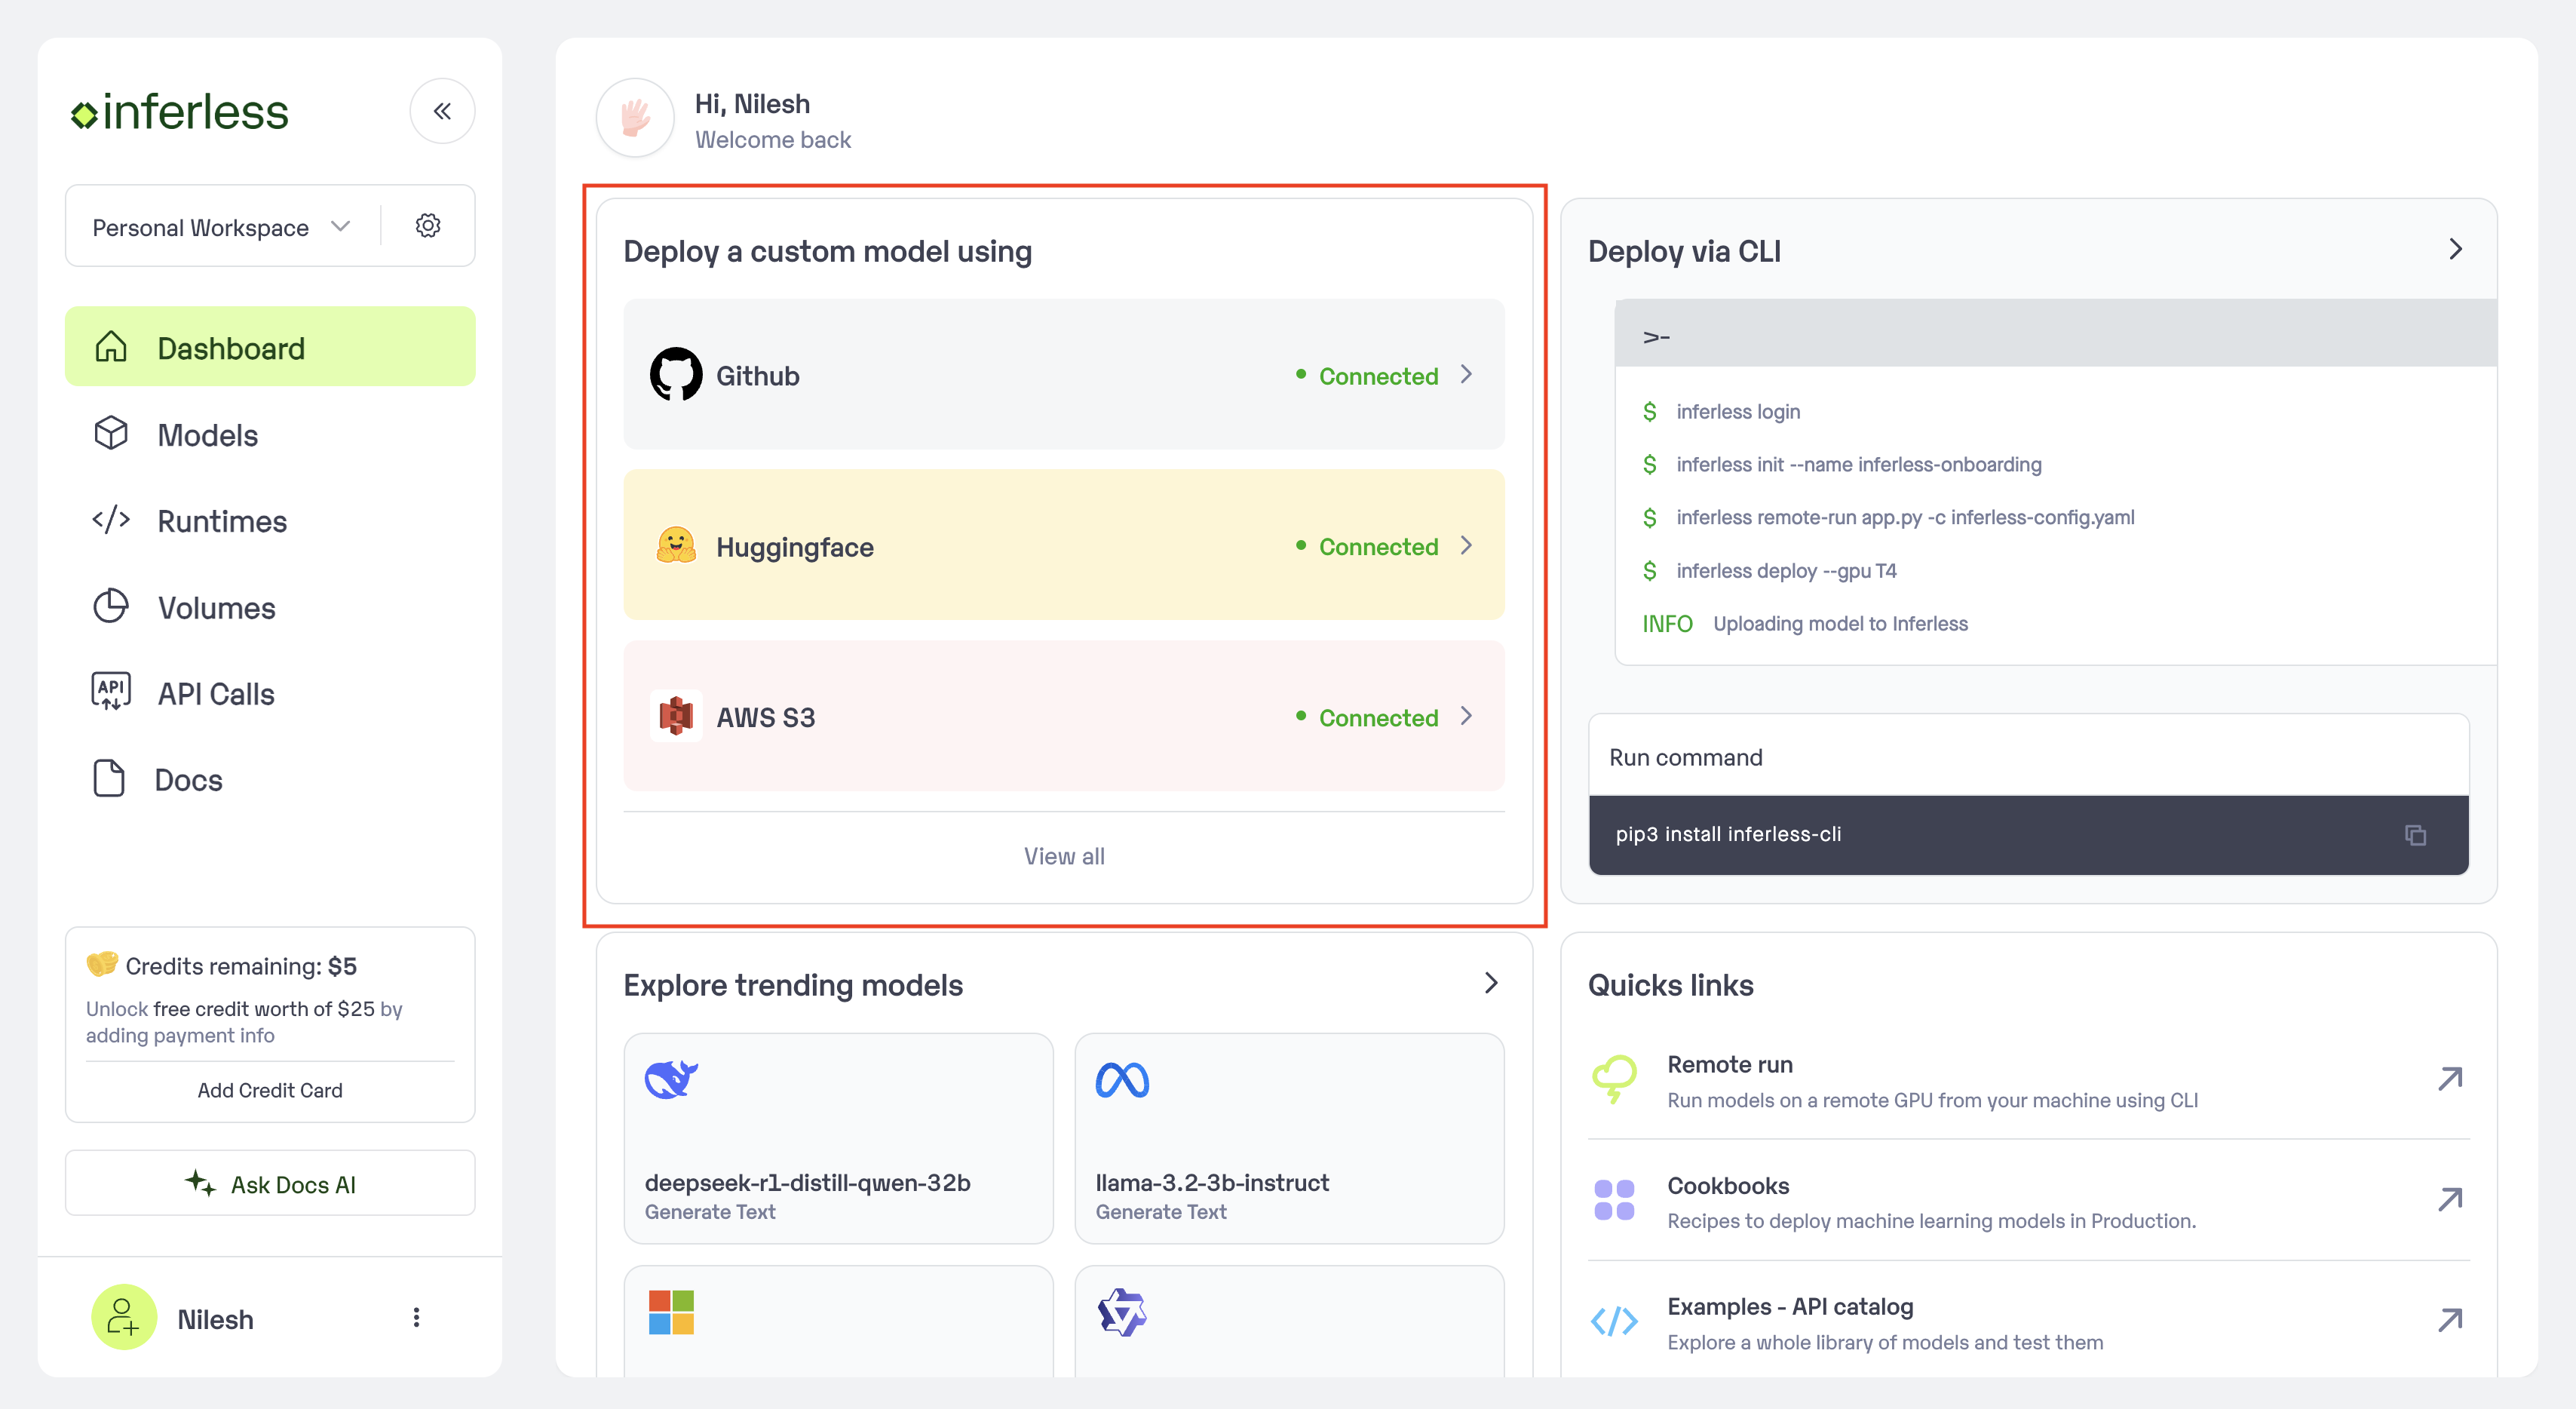 ### Step 3: Follow steps to complete the model import
* Navigate to the specific GitHub repository that contains your model's code. Here, you will need to identify and enter the name of the model you wish to import.
* Choose the appropriate type of machine that suits your model's requirements. Additionally, specify the minimum and maximum number of replicas to define the scalability range for deploying your model.
* Optionally, you have the option to enable automatic build and deployment. This feature triggers a new deployment automatically whenever there is a new code push to your repository.
* If your model requires additional software packages, configure the Custom Runtime settings by including necessary pip or apt packages. Also, set up environment variables such as Inference Timeout, Container Concurrency, and Scale Down Timeout to tailor the runtime environment according to your needs.
* Wait for the validation process to complete, ensuring that all settings are correct and functional. Once validation is successful, click on the "Import" button to finalize the import of your model.
### Step 3: Follow steps to complete the model import
* Navigate to the specific GitHub repository that contains your model's code. Here, you will need to identify and enter the name of the model you wish to import.
* Choose the appropriate type of machine that suits your model's requirements. Additionally, specify the minimum and maximum number of replicas to define the scalability range for deploying your model.
* Optionally, you have the option to enable automatic build and deployment. This feature triggers a new deployment automatically whenever there is a new code push to your repository.
* If your model requires additional software packages, configure the Custom Runtime settings by including necessary pip or apt packages. Also, set up environment variables such as Inference Timeout, Container Concurrency, and Scale Down Timeout to tailor the runtime environment according to your needs.
* Wait for the validation process to complete, ensuring that all settings are correct and functional. Once validation is successful, click on the "Import" button to finalize the import of your model.
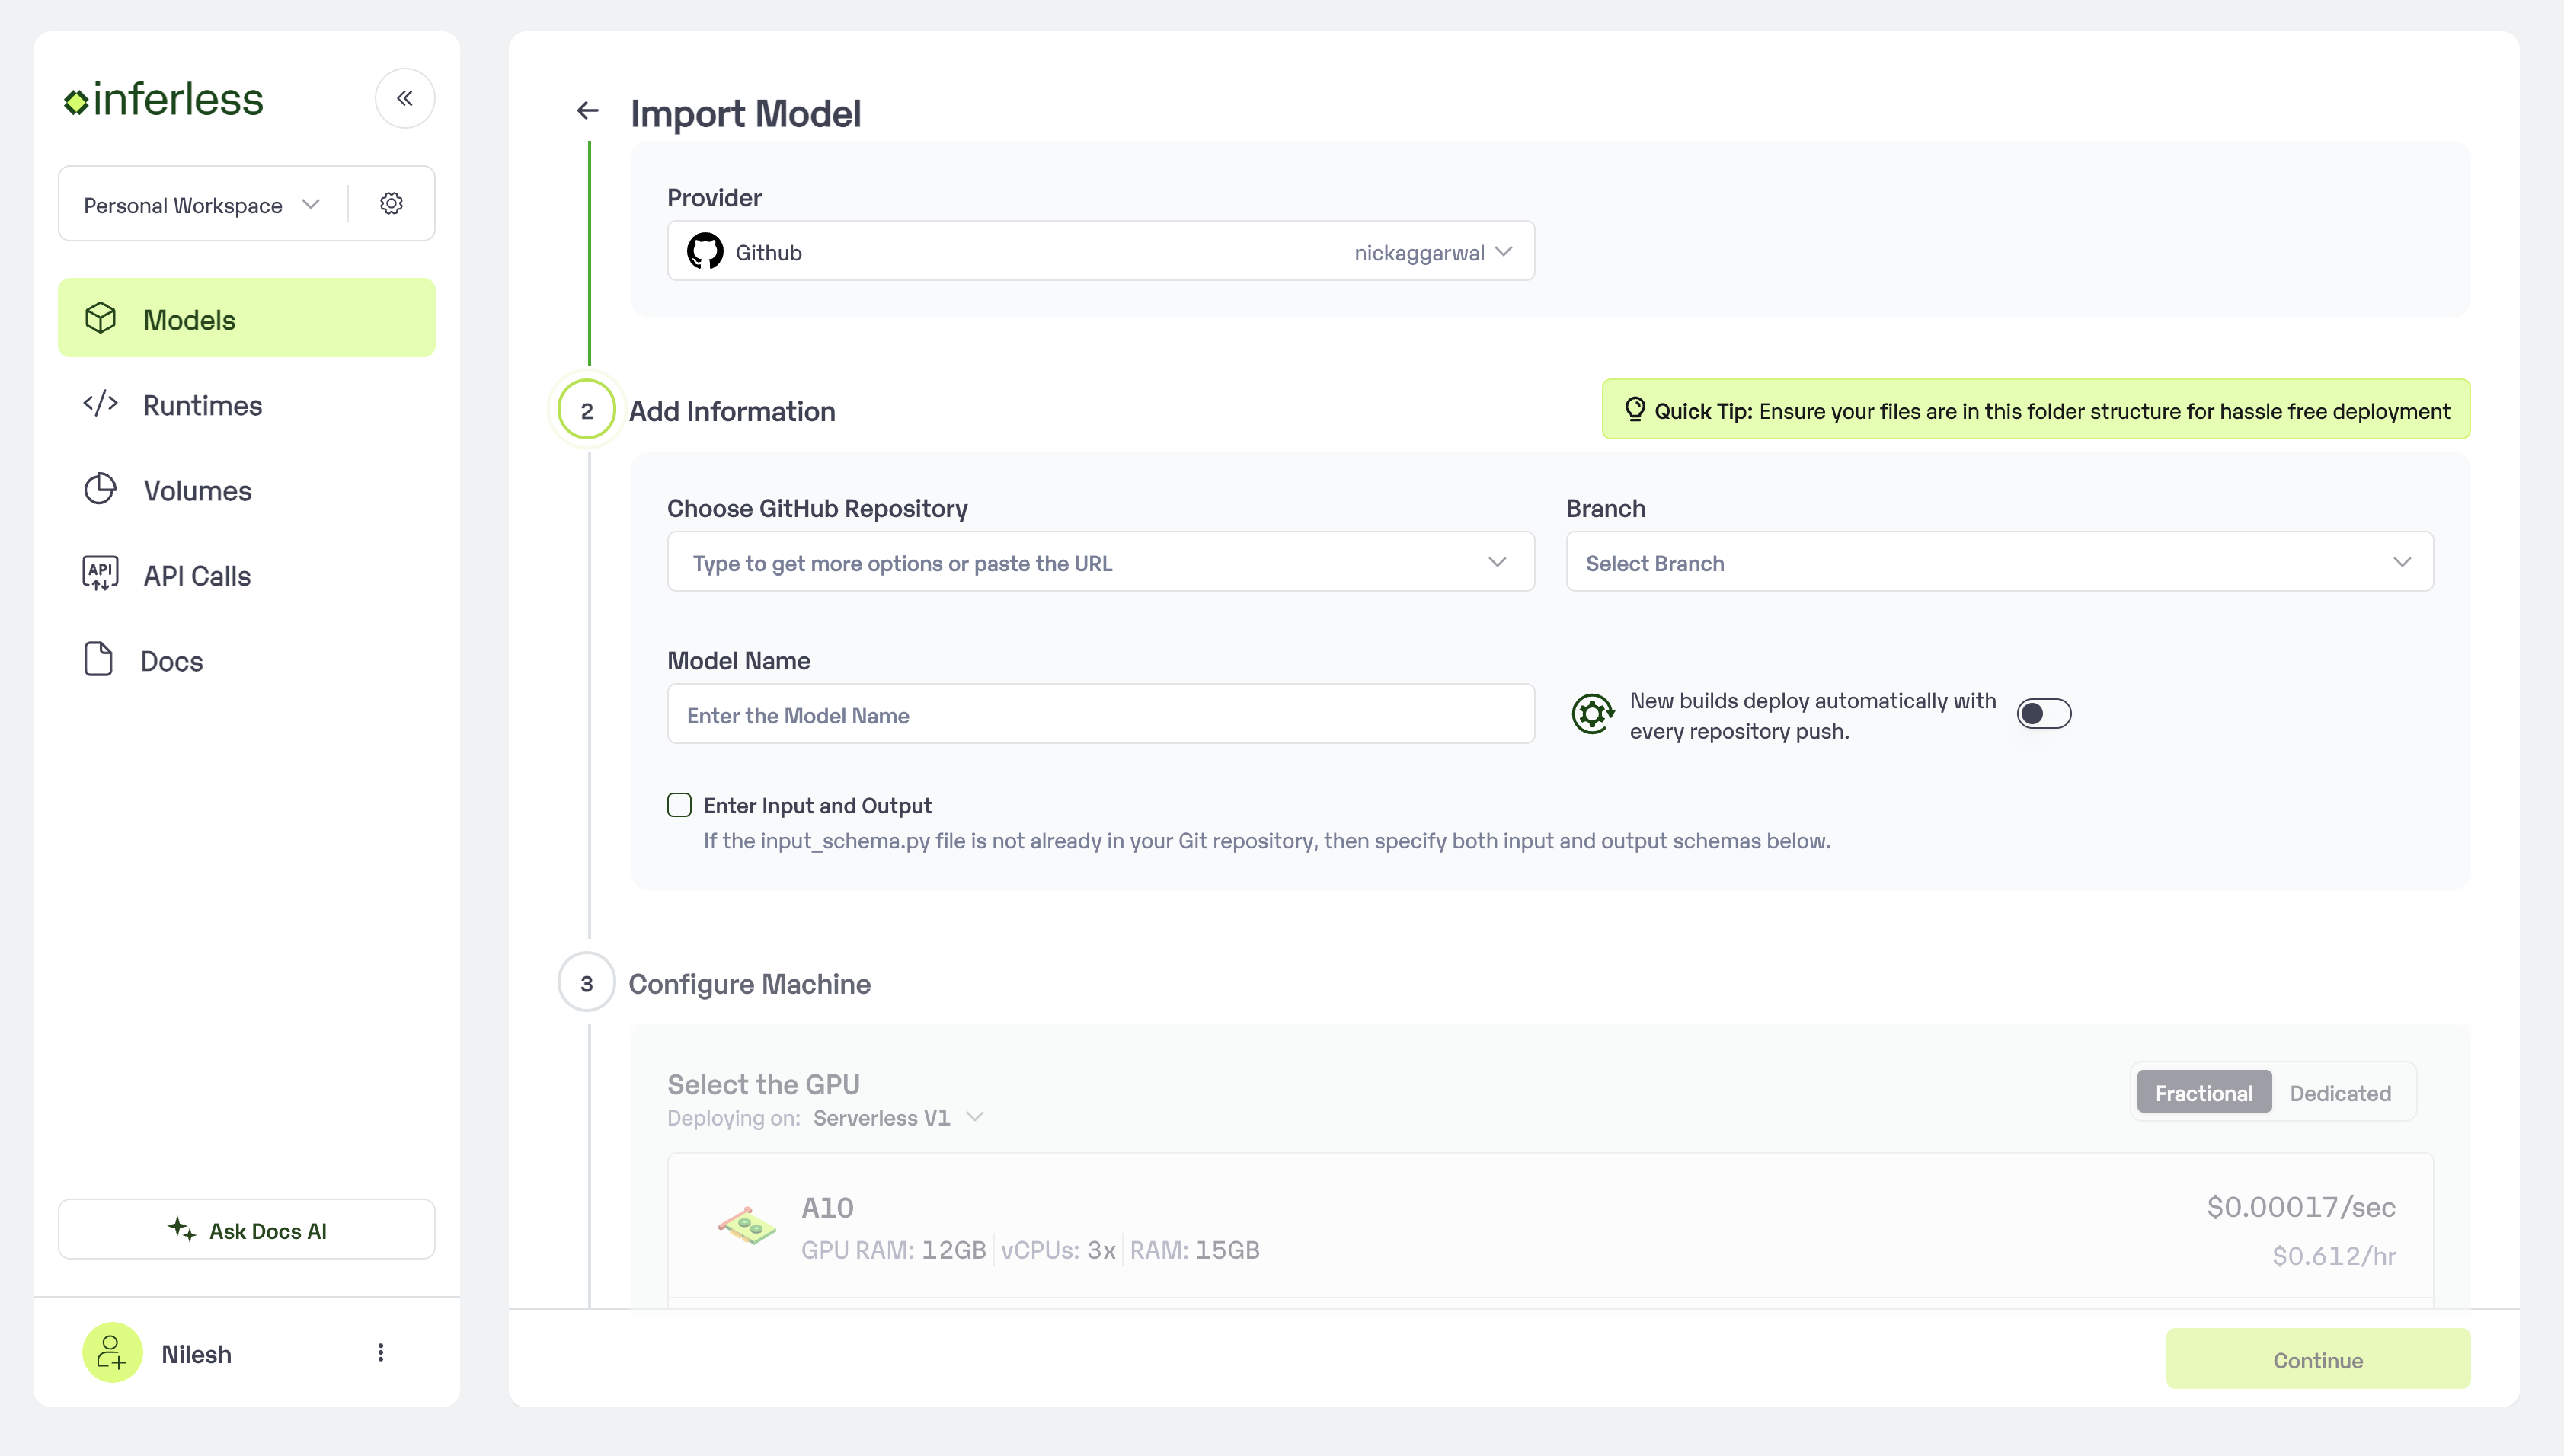 ### Step 4: Wait for the model build to complete usually takes \~5-10 minutes
You can see the progress of the model build on the progress page
### Step 4: Wait for the model build to complete usually takes \~5-10 minutes
You can see the progress of the model build on the progress page
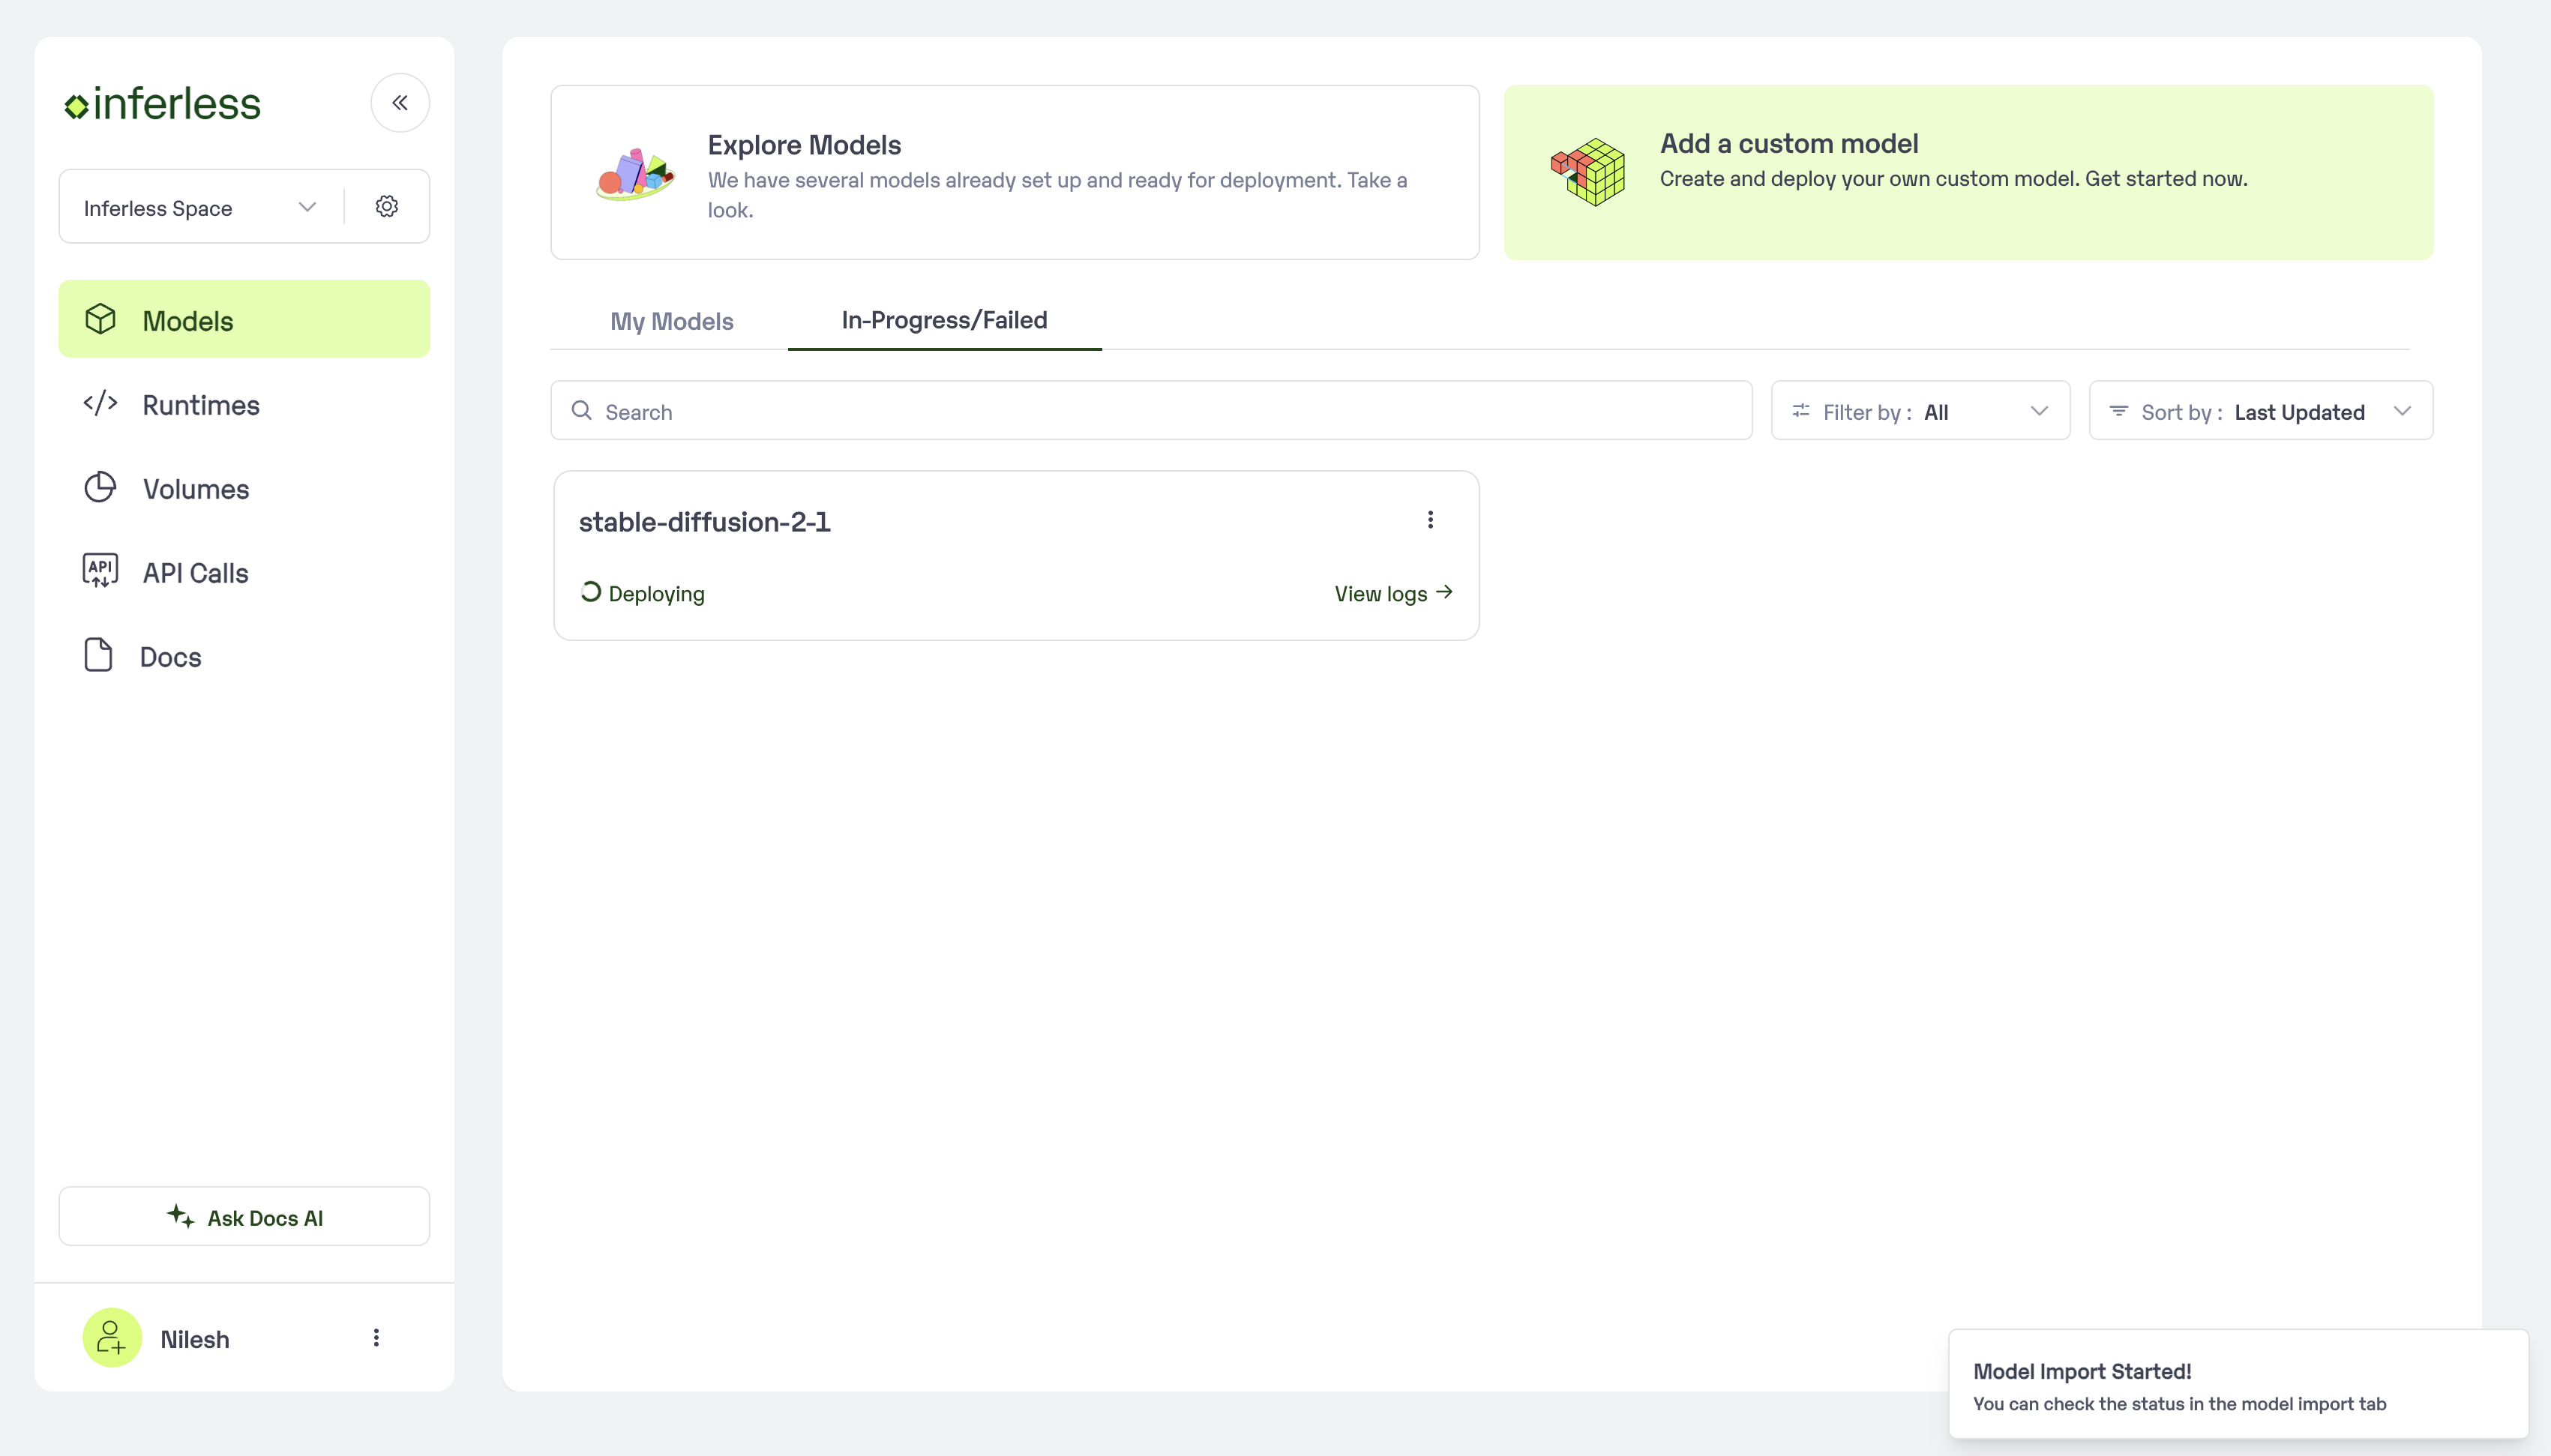 ### Step 5: Use the APIs to call the model
Once the model is in 'Active' status you can click on the 'API' page to try the model with sample inputs.
### Step 5: Use the APIs to call the model
Once the model is in 'Active' status you can click on the 'API' page to try the model with sample inputs.
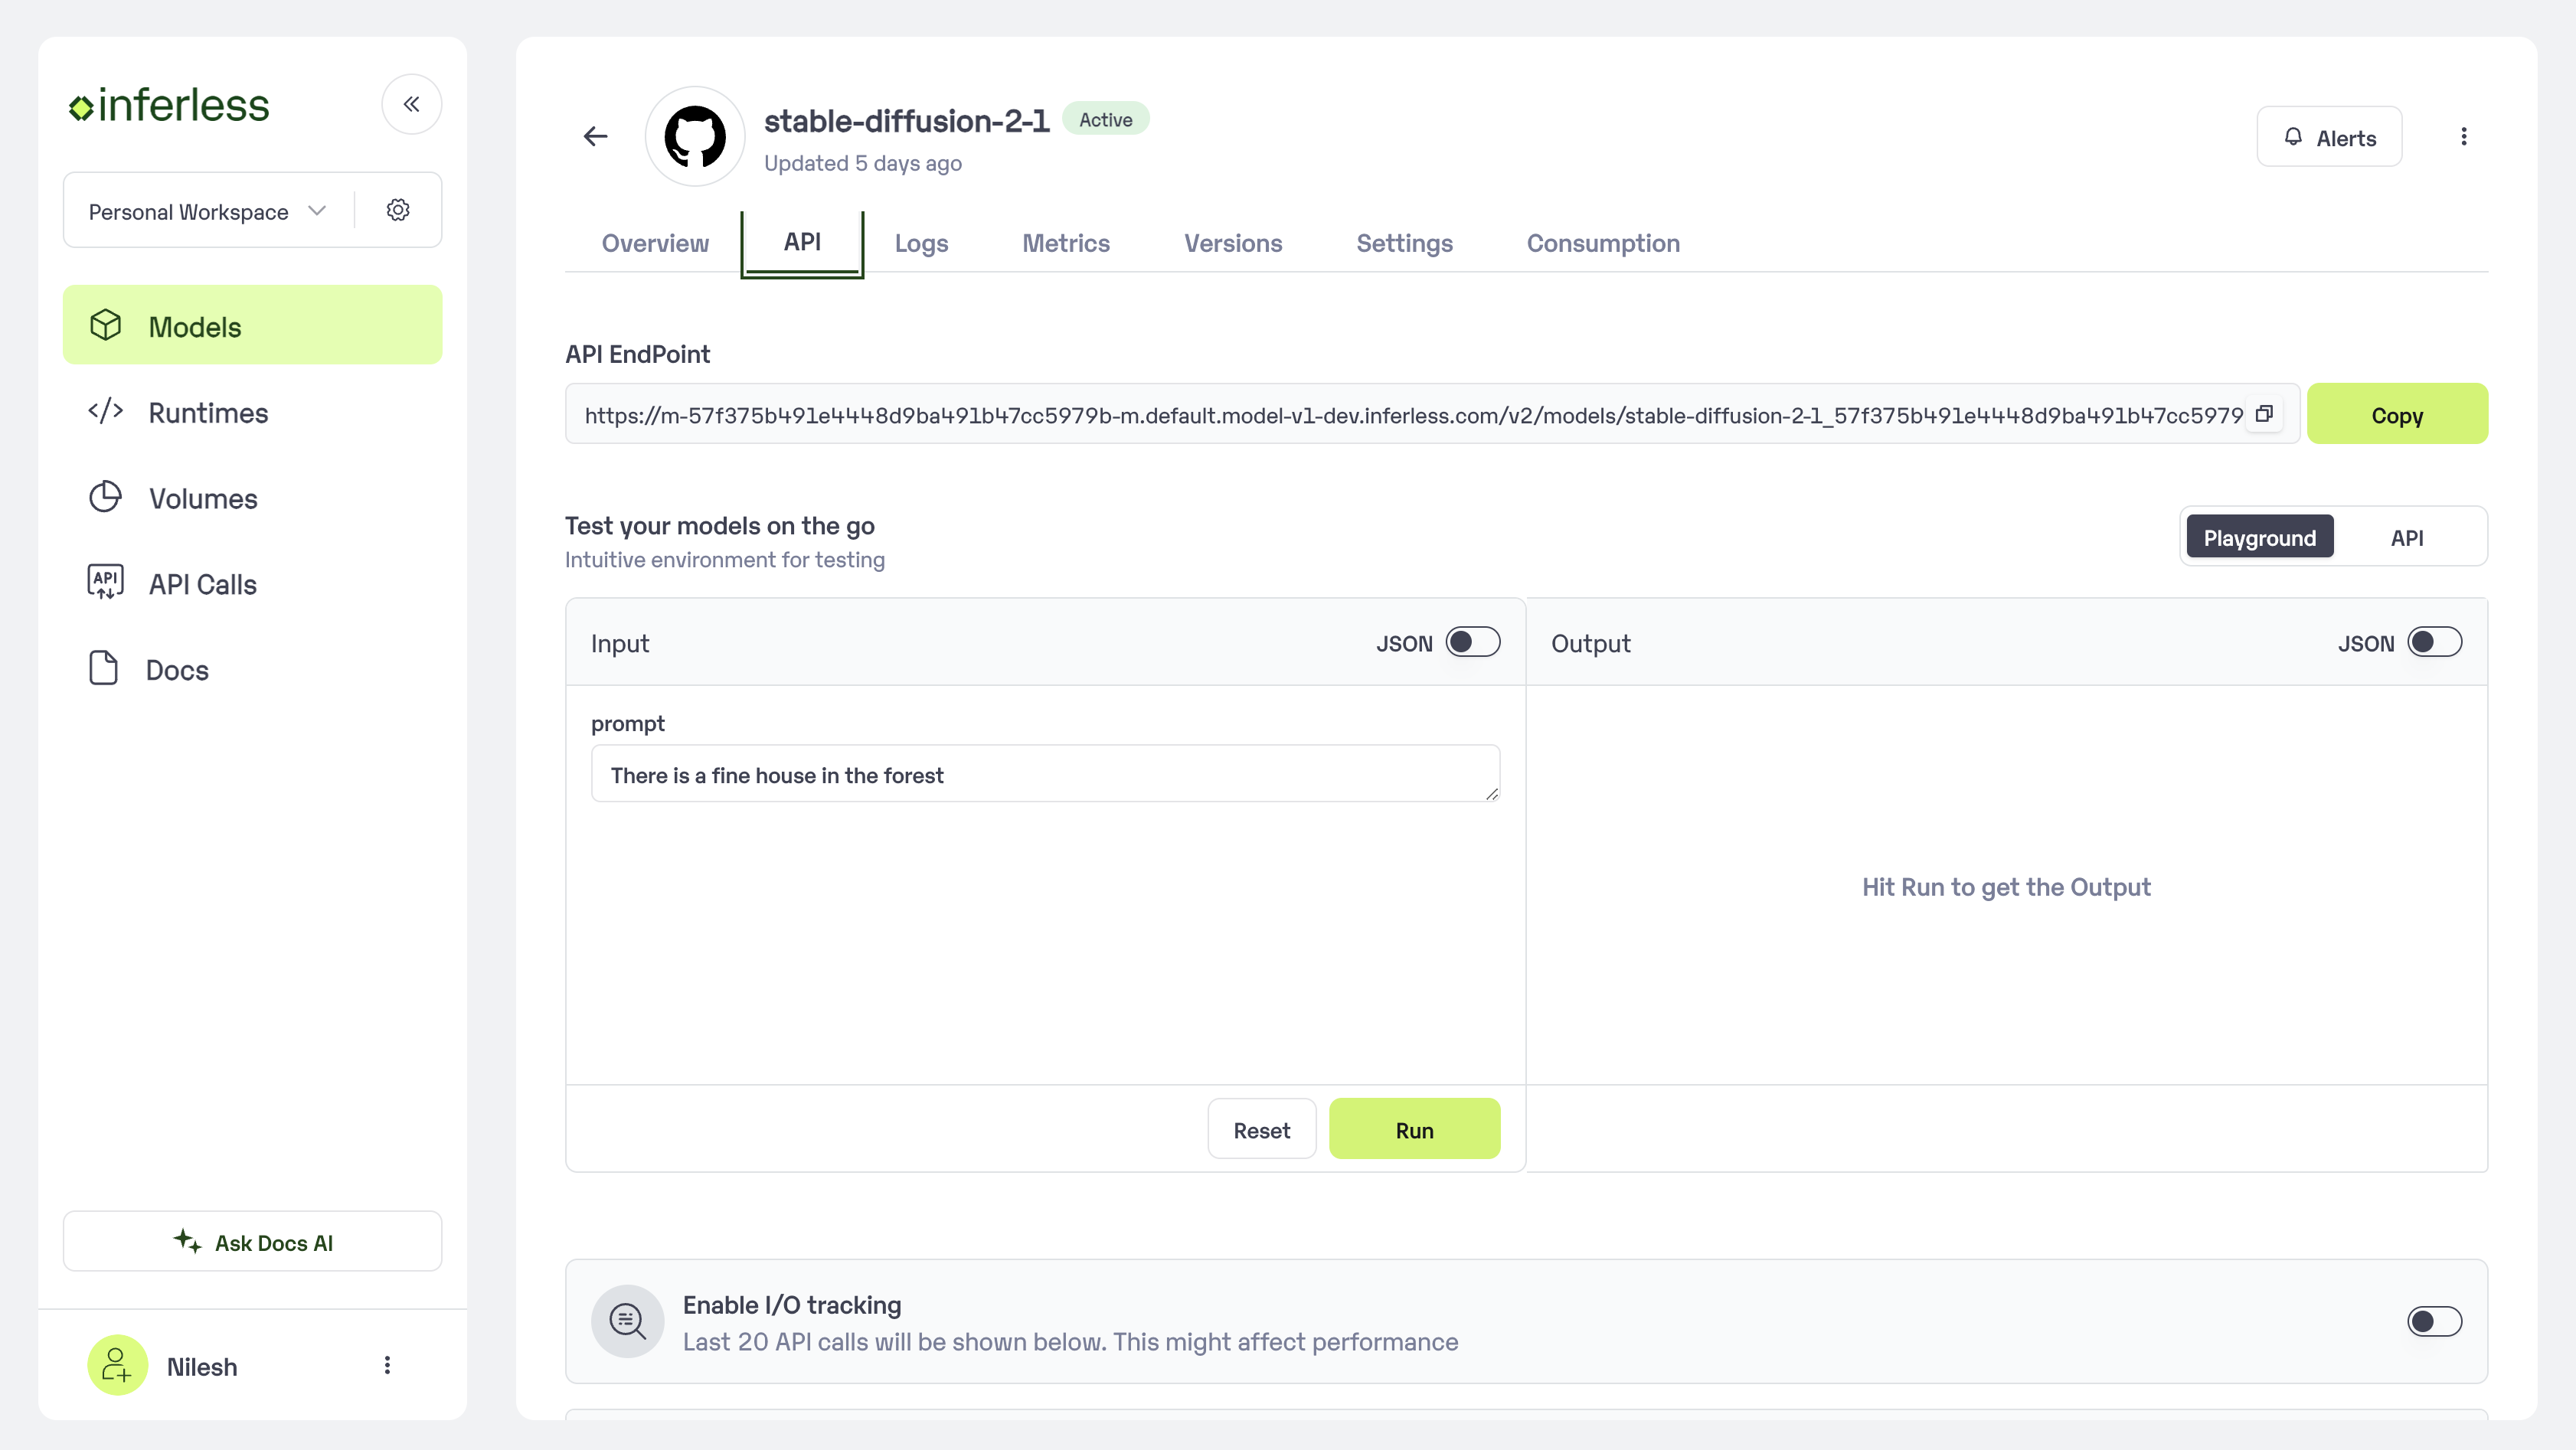 # Configuring Concurrent Requests
Source: https://docs.inferless.com/concepts/processing-concurrent-requests
This will help you understand how to process multiple requests concurrently by the same replica.
Inferless allows you to process multiple requests concurrently by the same replica. This can help you improve the throughput of your model and handle multiple requests simultaneously. In this guide, we'll walk you through the steps to configure your model to handle concurrent requests.
There are 2 ways to configure concurrent requests in Inferless:
* \*\* Sequentical Processing with Queue\*\*
* \*\* Batch Processing with Queue \*\*
## Sequential Processing with Queue
This is the simplest way to process multiple requests with the same replica. In this method, the requests are processed sequentially by the same replica. This is useful when you have task that takes less time to process.
To configure this you can go to Model Import -> Settings
# Configuring Concurrent Requests
Source: https://docs.inferless.com/concepts/processing-concurrent-requests
This will help you understand how to process multiple requests concurrently by the same replica.
Inferless allows you to process multiple requests concurrently by the same replica. This can help you improve the throughput of your model and handle multiple requests simultaneously. In this guide, we'll walk you through the steps to configure your model to handle concurrent requests.
There are 2 ways to configure concurrent requests in Inferless:
* \*\* Sequentical Processing with Queue\*\*
* \*\* Batch Processing with Queue \*\*
## Sequential Processing with Queue
This is the simplest way to process multiple requests with the same replica. In this method, the requests are processed sequentially by the same replica. This is useful when you have task that takes less time to process.
To configure this you can go to Model Import -> Settings
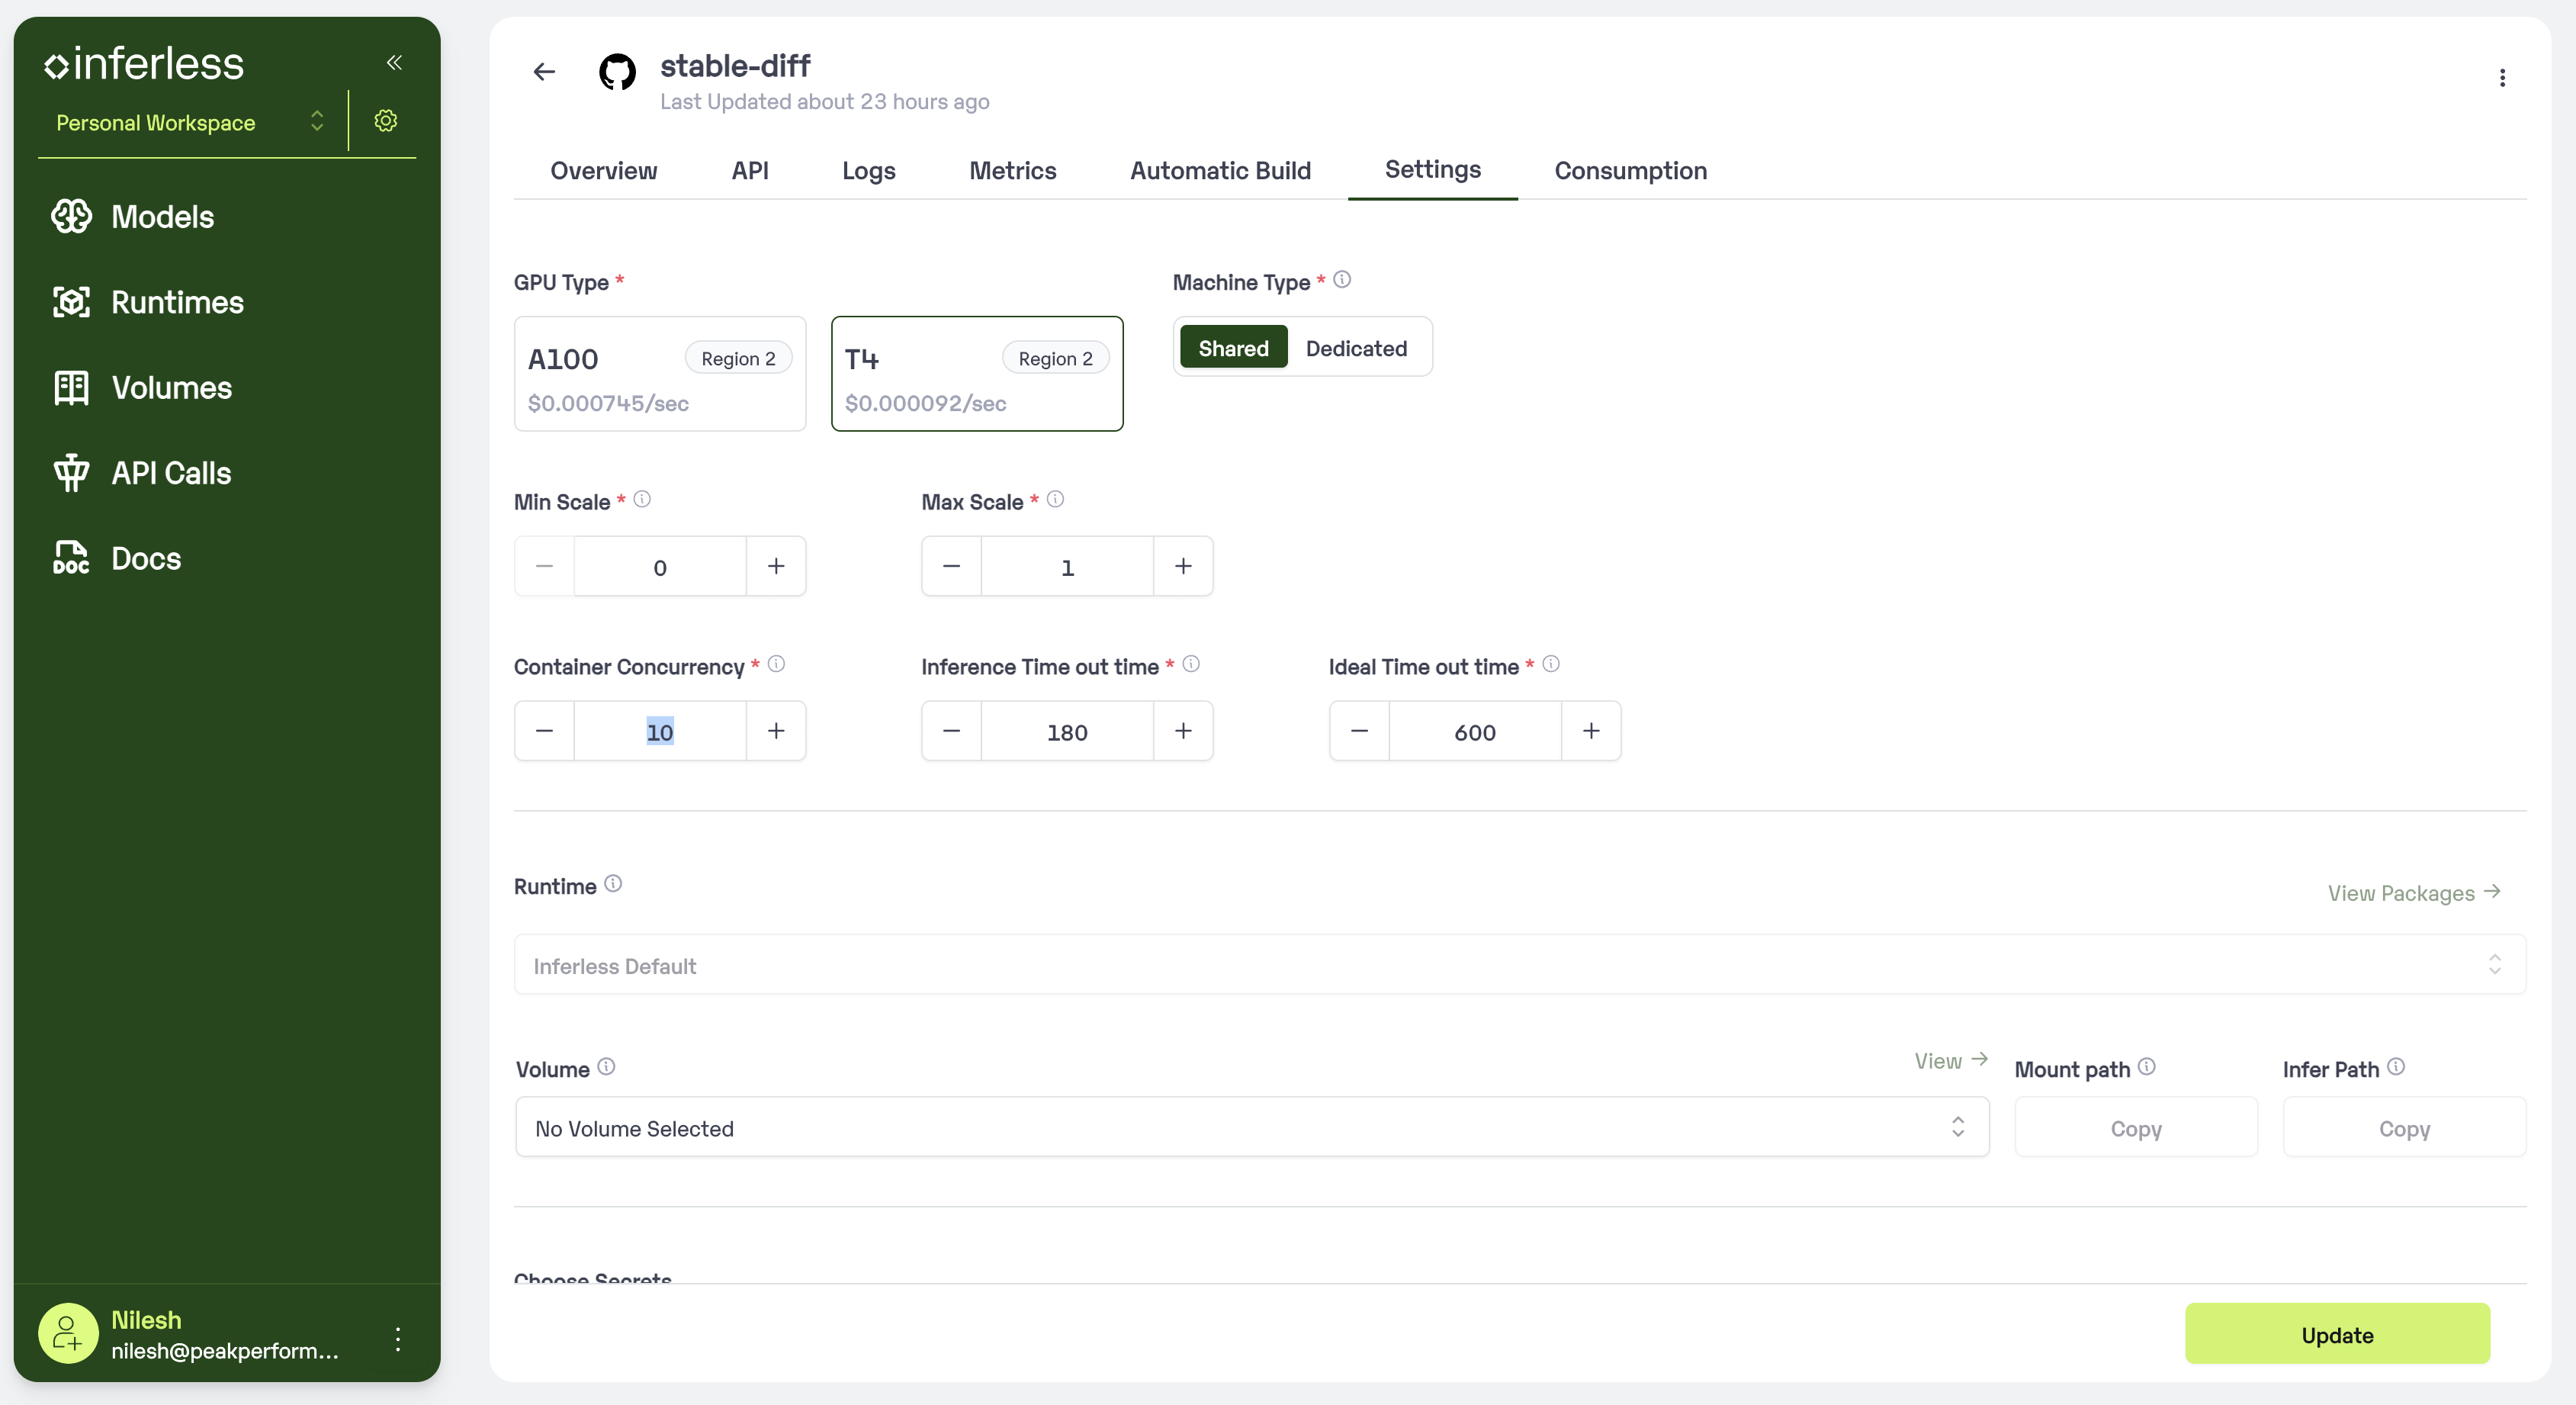 Set the Container Concurrency to 'desired\_number' and click on Update. You can set any value between 1 to 100.
## Batch Processing with Queue
This method processes the requests in batches by the same replica. This is useful when you have tasks that take longer to process and want to process multiple requests simultaneously.
#### Step 1: Preparing the model to handle concurrent requests
Define the BATCH\_SIZE and BATCH\_WINDOW in the **input\_schema.py**
input\_schema.py
```input_schema
BATCH_SIZE = 4
BATCH_WINDOW = 5000 # milliseconds
```
More on batching can be found [here](/concepts/dynamic-batching)
#### Step 2: Configuring the model to handle concurrent requests
Go to Model Import -> Settings
Set the Container Concurrency to 'desired\_number' if. e 4 and click on Update. You can set any value between 1 to 100.
# Remote Run: Run your code remotely
Source: https://docs.inferless.com/concepts/remote-run
Set the Container Concurrency to 'desired\_number' and click on Update. You can set any value between 1 to 100.
## Batch Processing with Queue
This method processes the requests in batches by the same replica. This is useful when you have tasks that take longer to process and want to process multiple requests simultaneously.
#### Step 1: Preparing the model to handle concurrent requests
Define the BATCH\_SIZE and BATCH\_WINDOW in the **input\_schema.py**
input\_schema.py
```input_schema
BATCH_SIZE = 4
BATCH_WINDOW = 5000 # milliseconds
```
More on batching can be found [here](/concepts/dynamic-batching)
#### Step 2: Configuring the model to handle concurrent requests
Go to Model Import -> Settings
Set the Container Concurrency to 'desired\_number' if. e 4 and click on Update. You can set any value between 1 to 100.
# Remote Run: Run your code remotely
Source: https://docs.inferless.com/concepts/remote-run
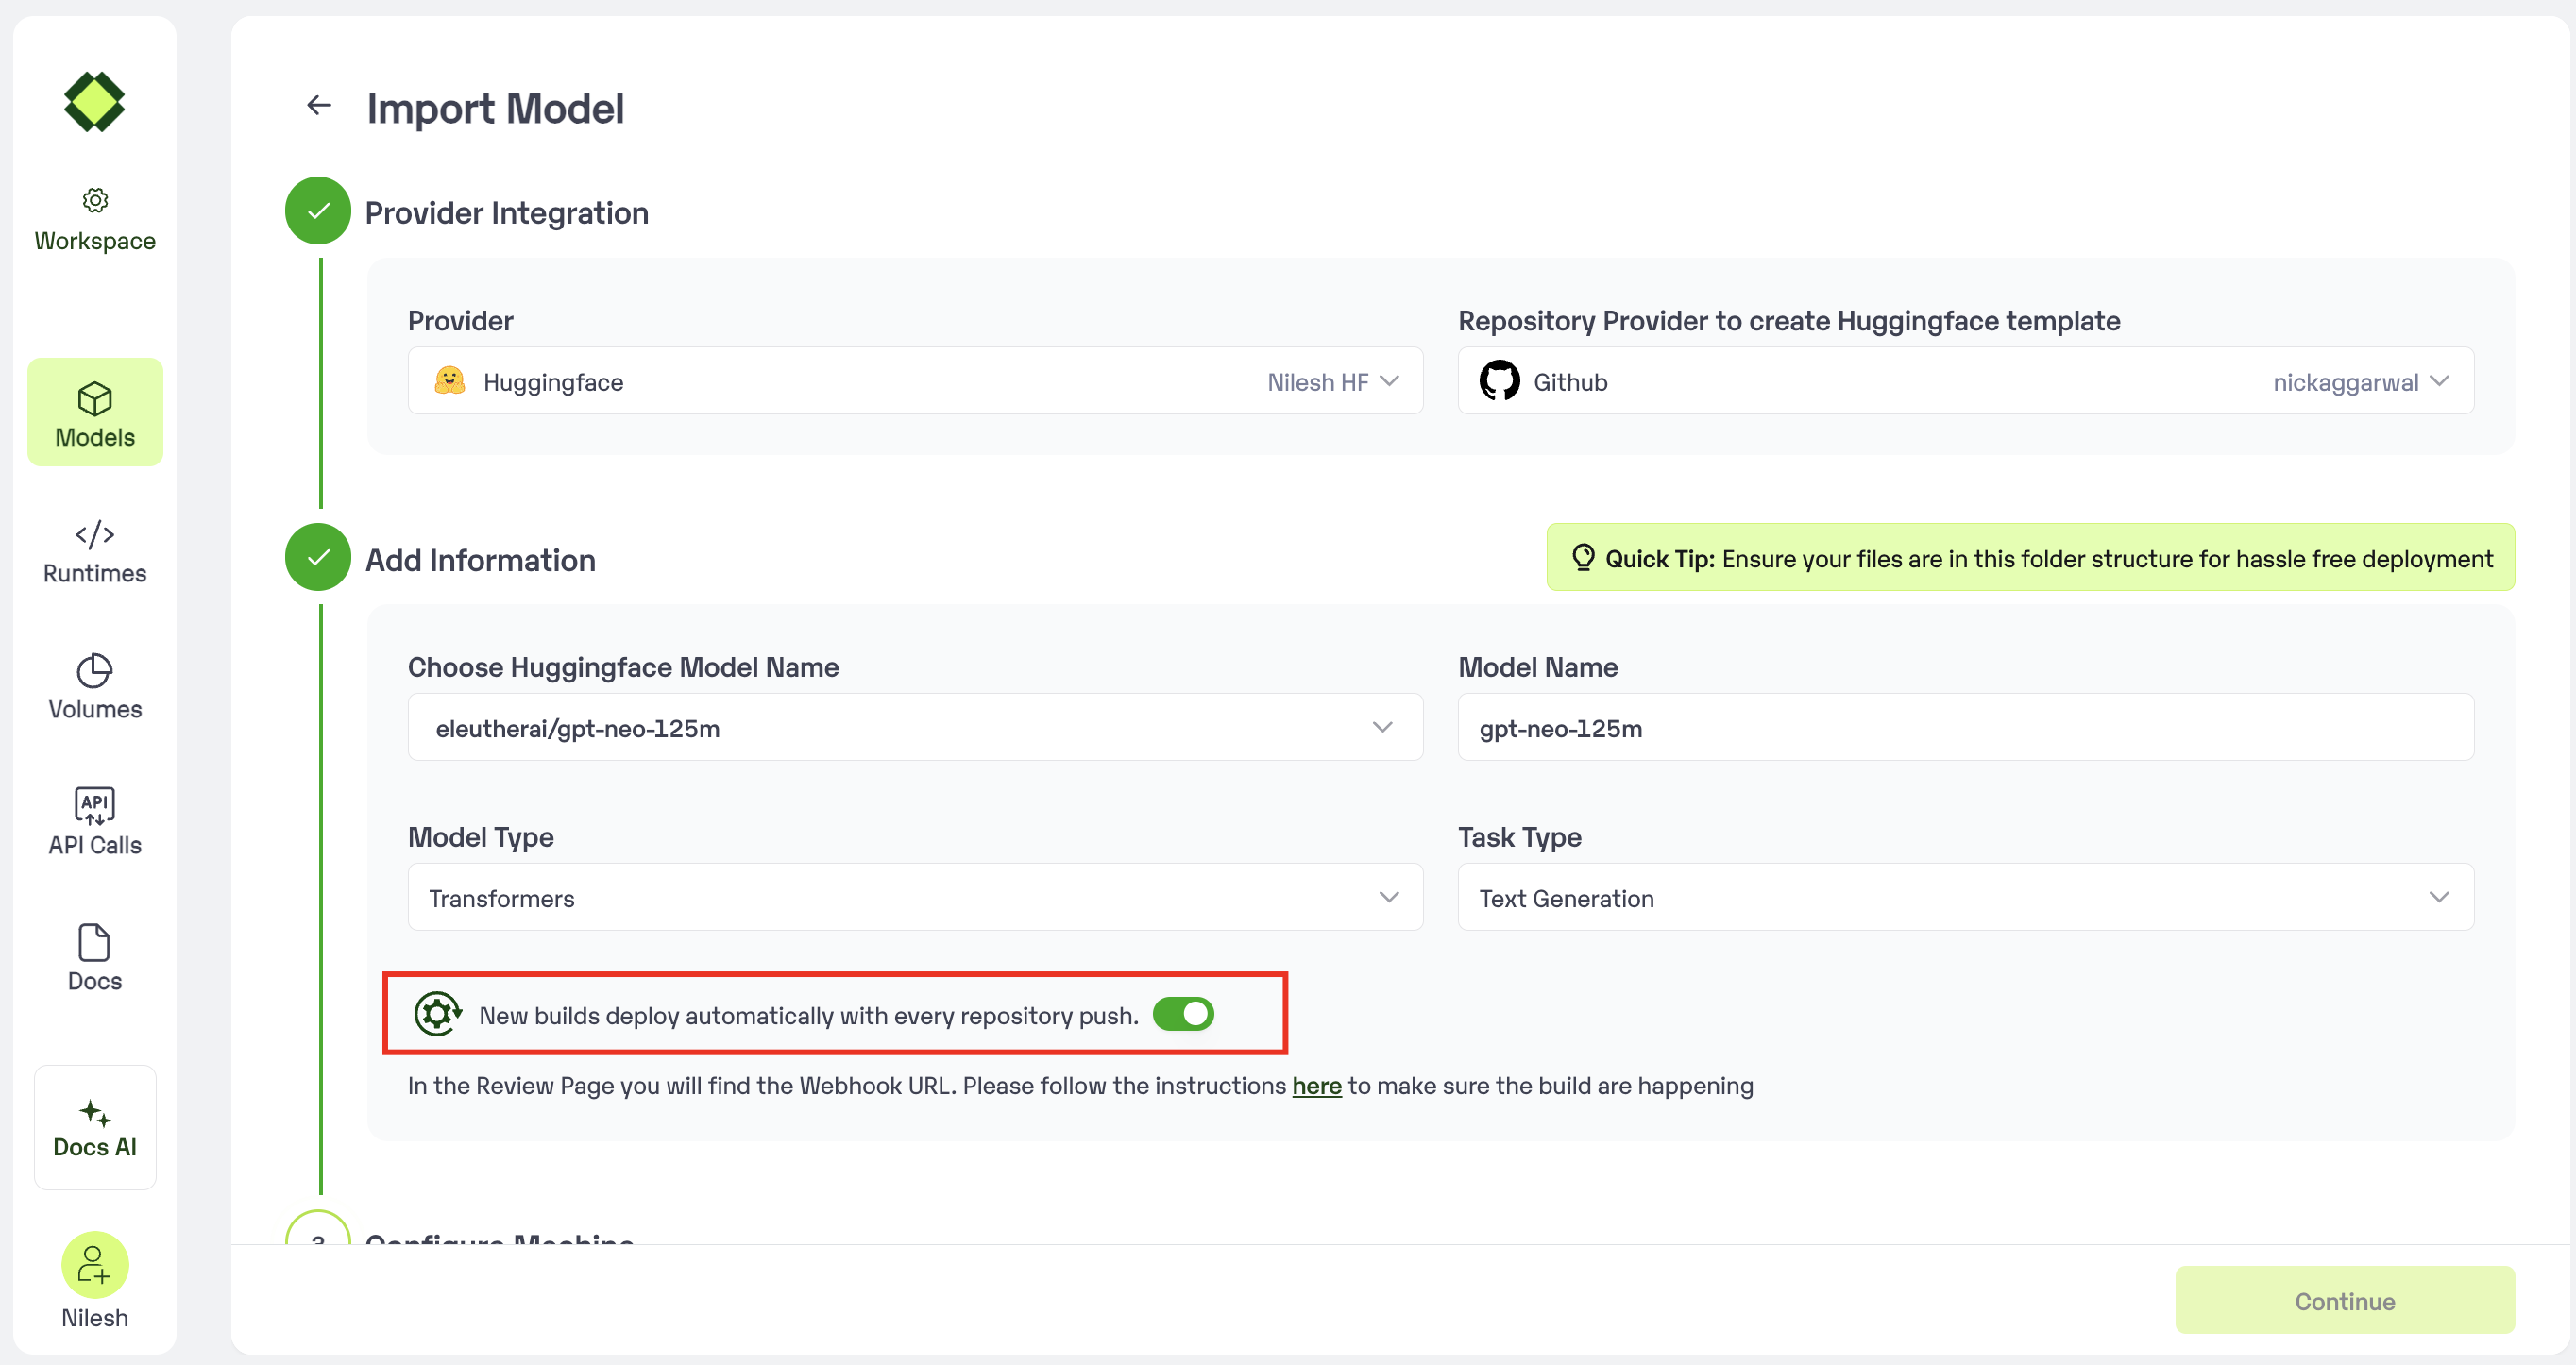 In the review page you can see the url to be used for the webhook
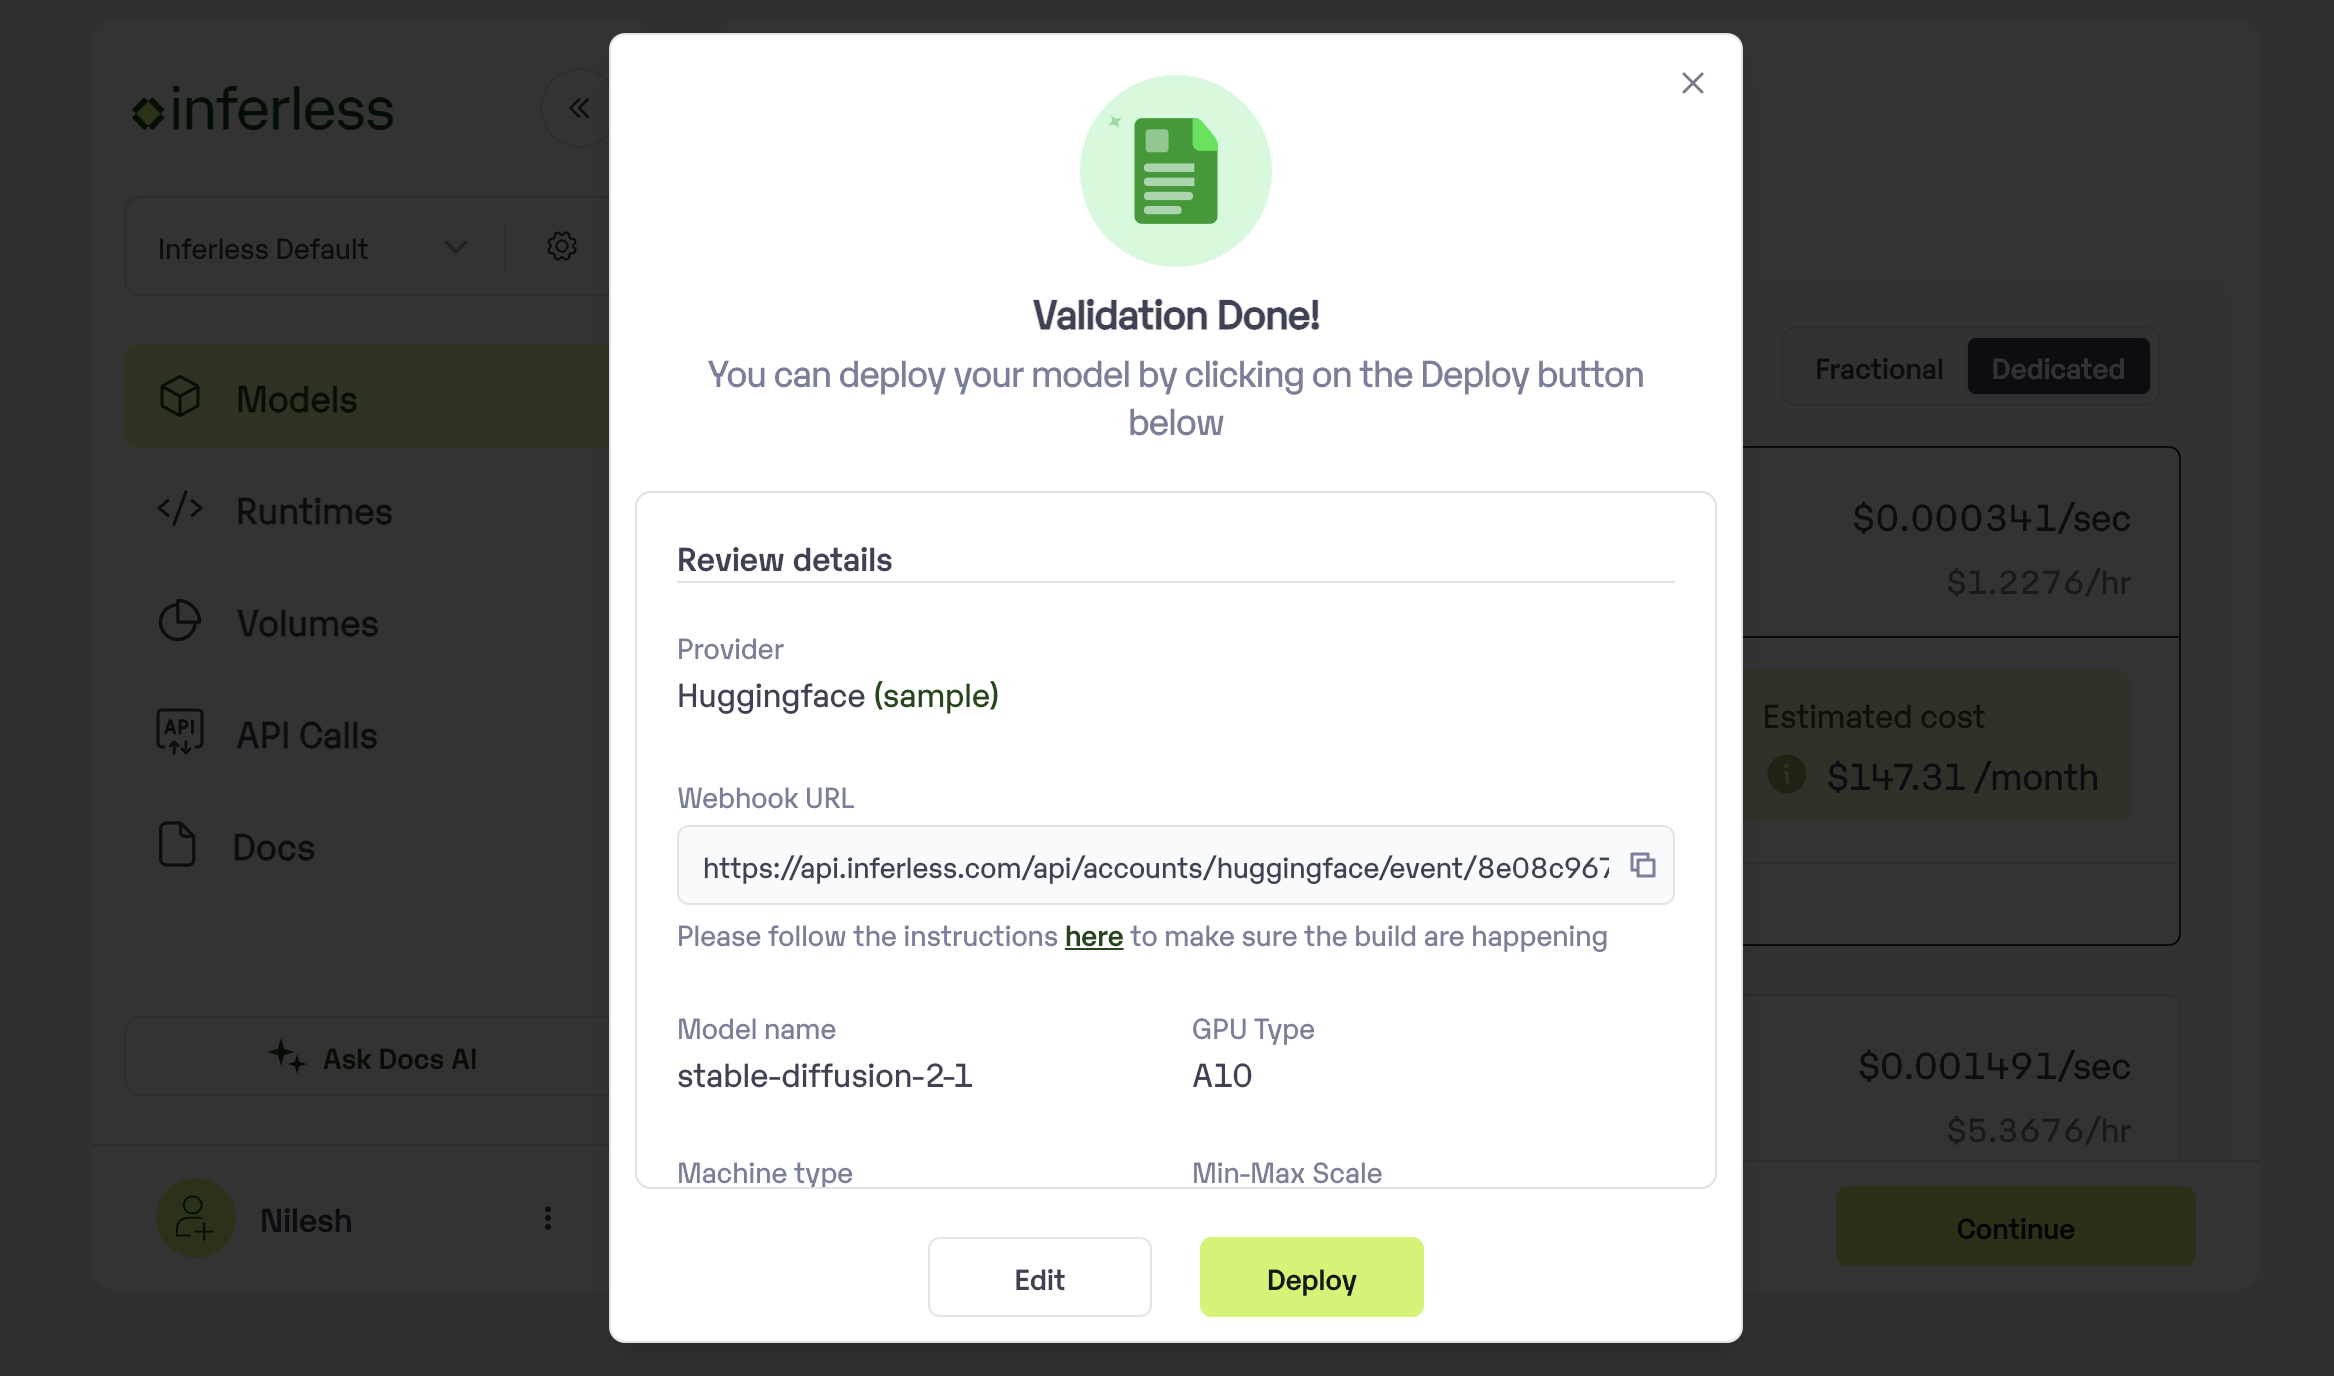 * In case you are doing this post-model import, you can view this under `Model page -> Versions`
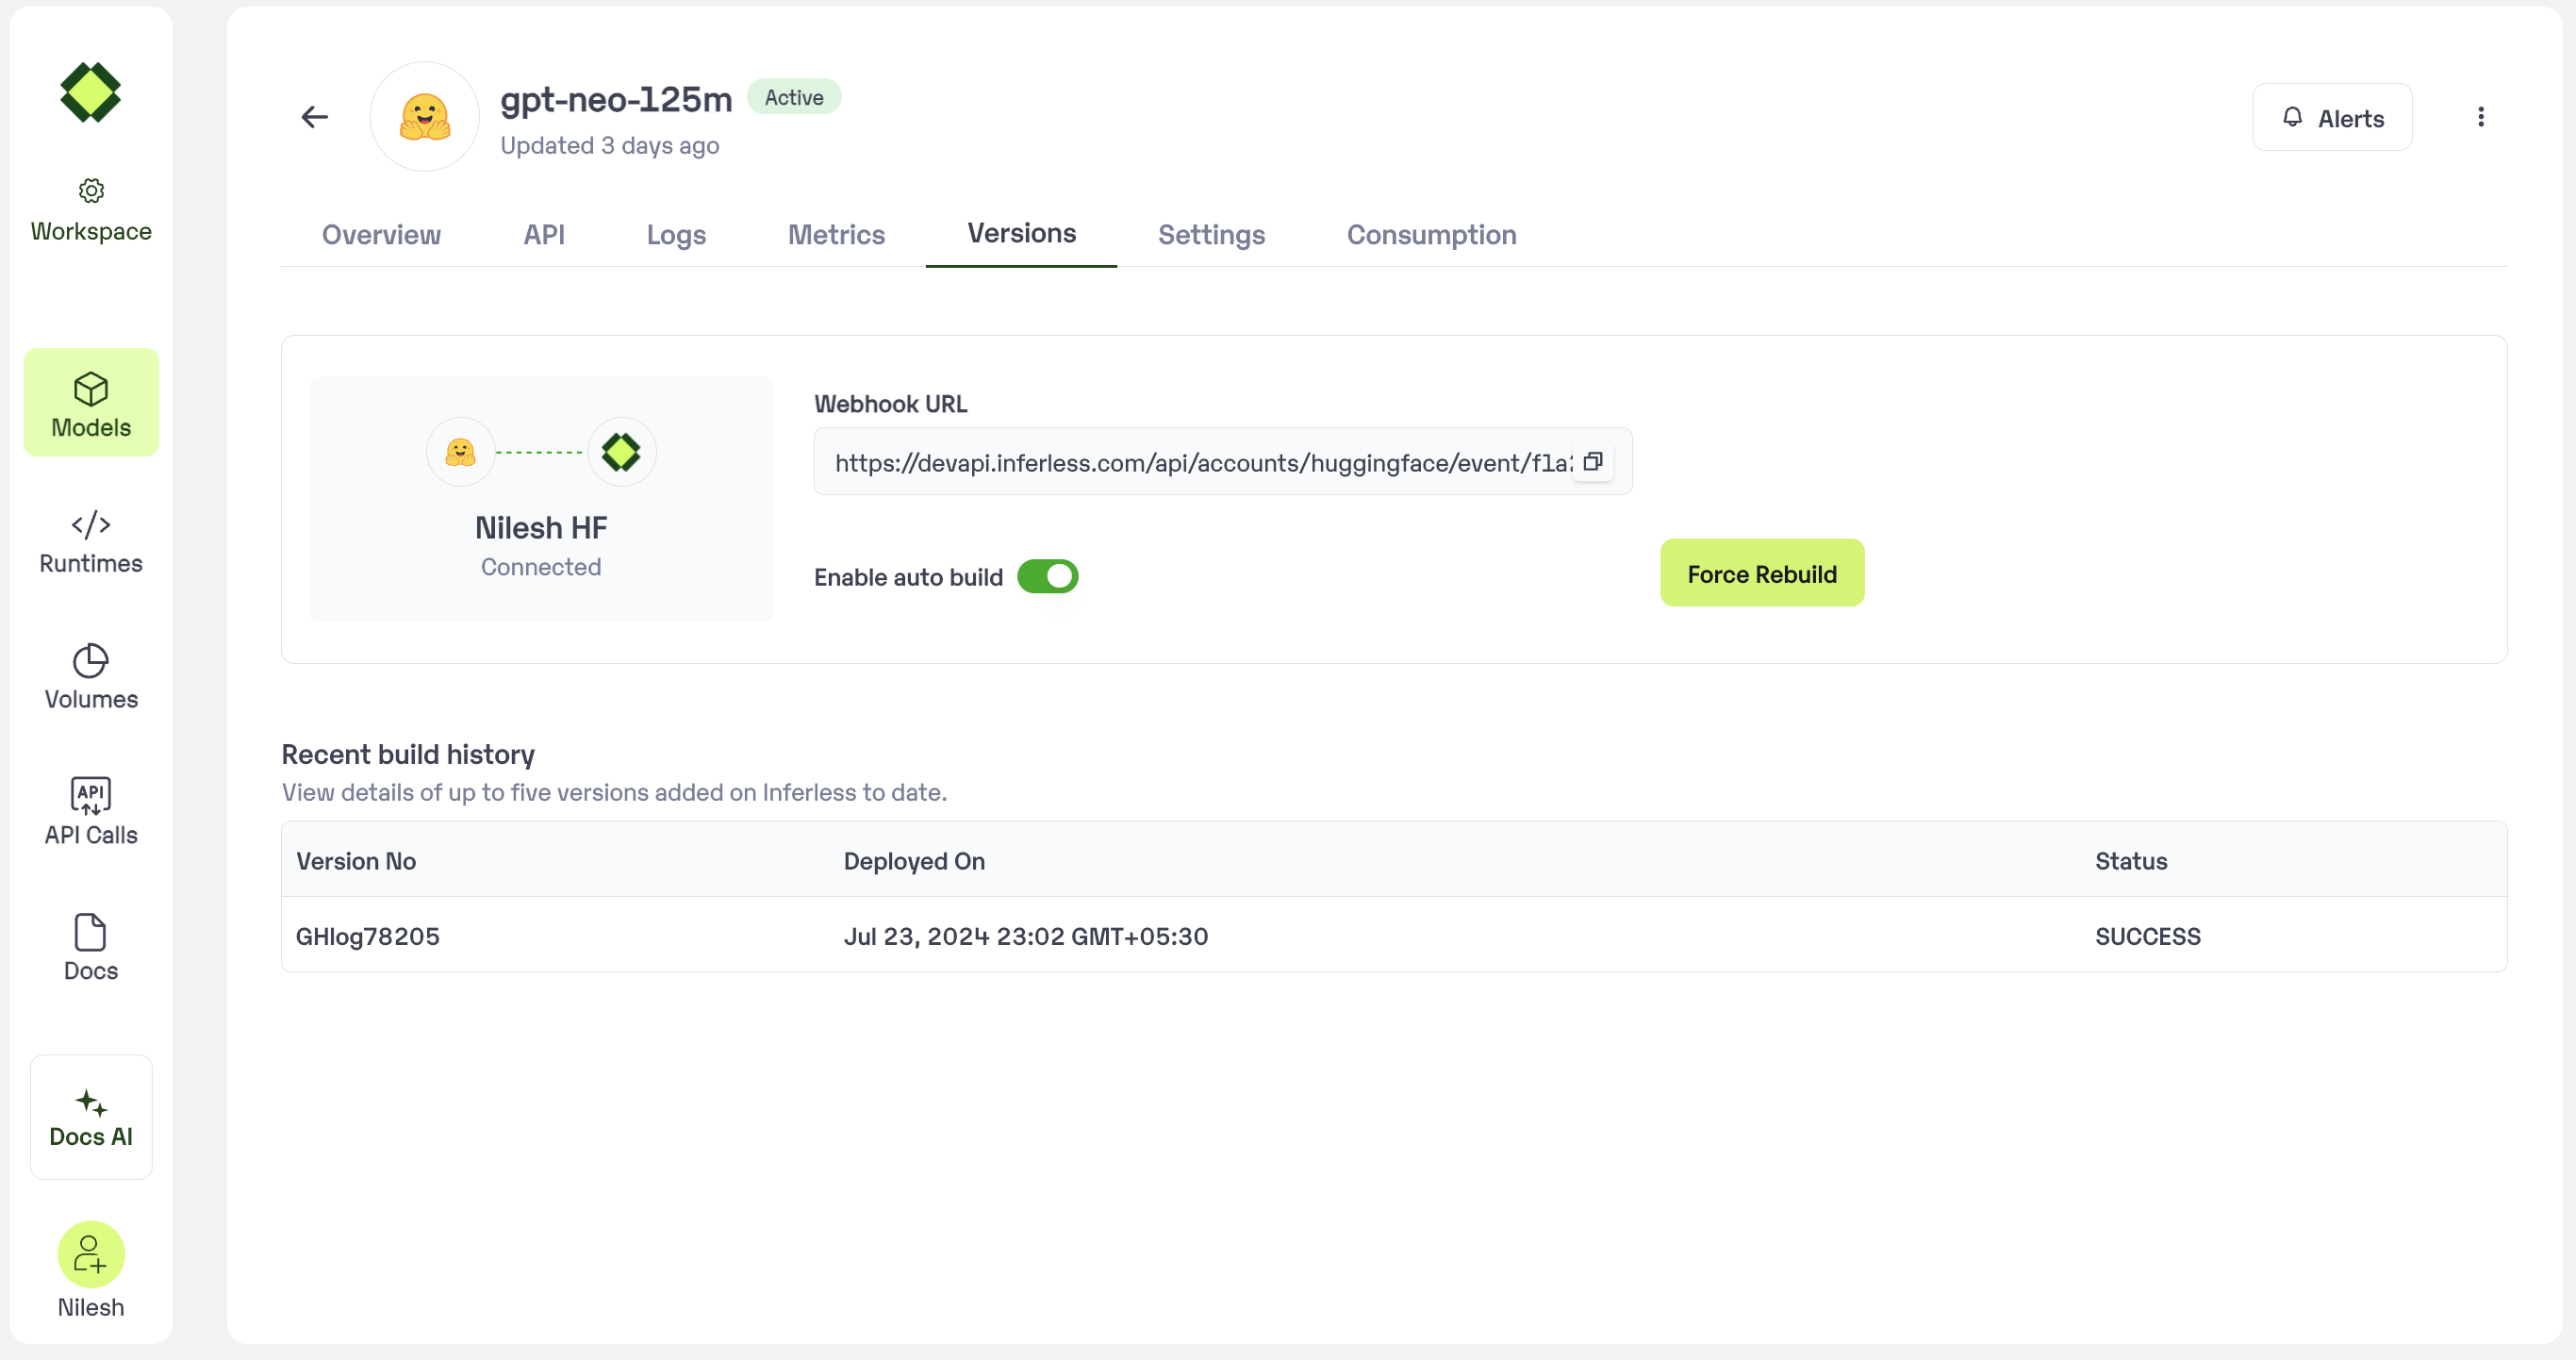 * Enable the`Repo Update`option under `triggers`. Click "Create Webhook" to complete the process.
* View the screenshot below for a sample completed "New Webhook" Page.
* Enable the`Repo Update`option under `triggers`. Click "Create Webhook" to complete the process.
* View the screenshot below for a sample completed "New Webhook" Page.
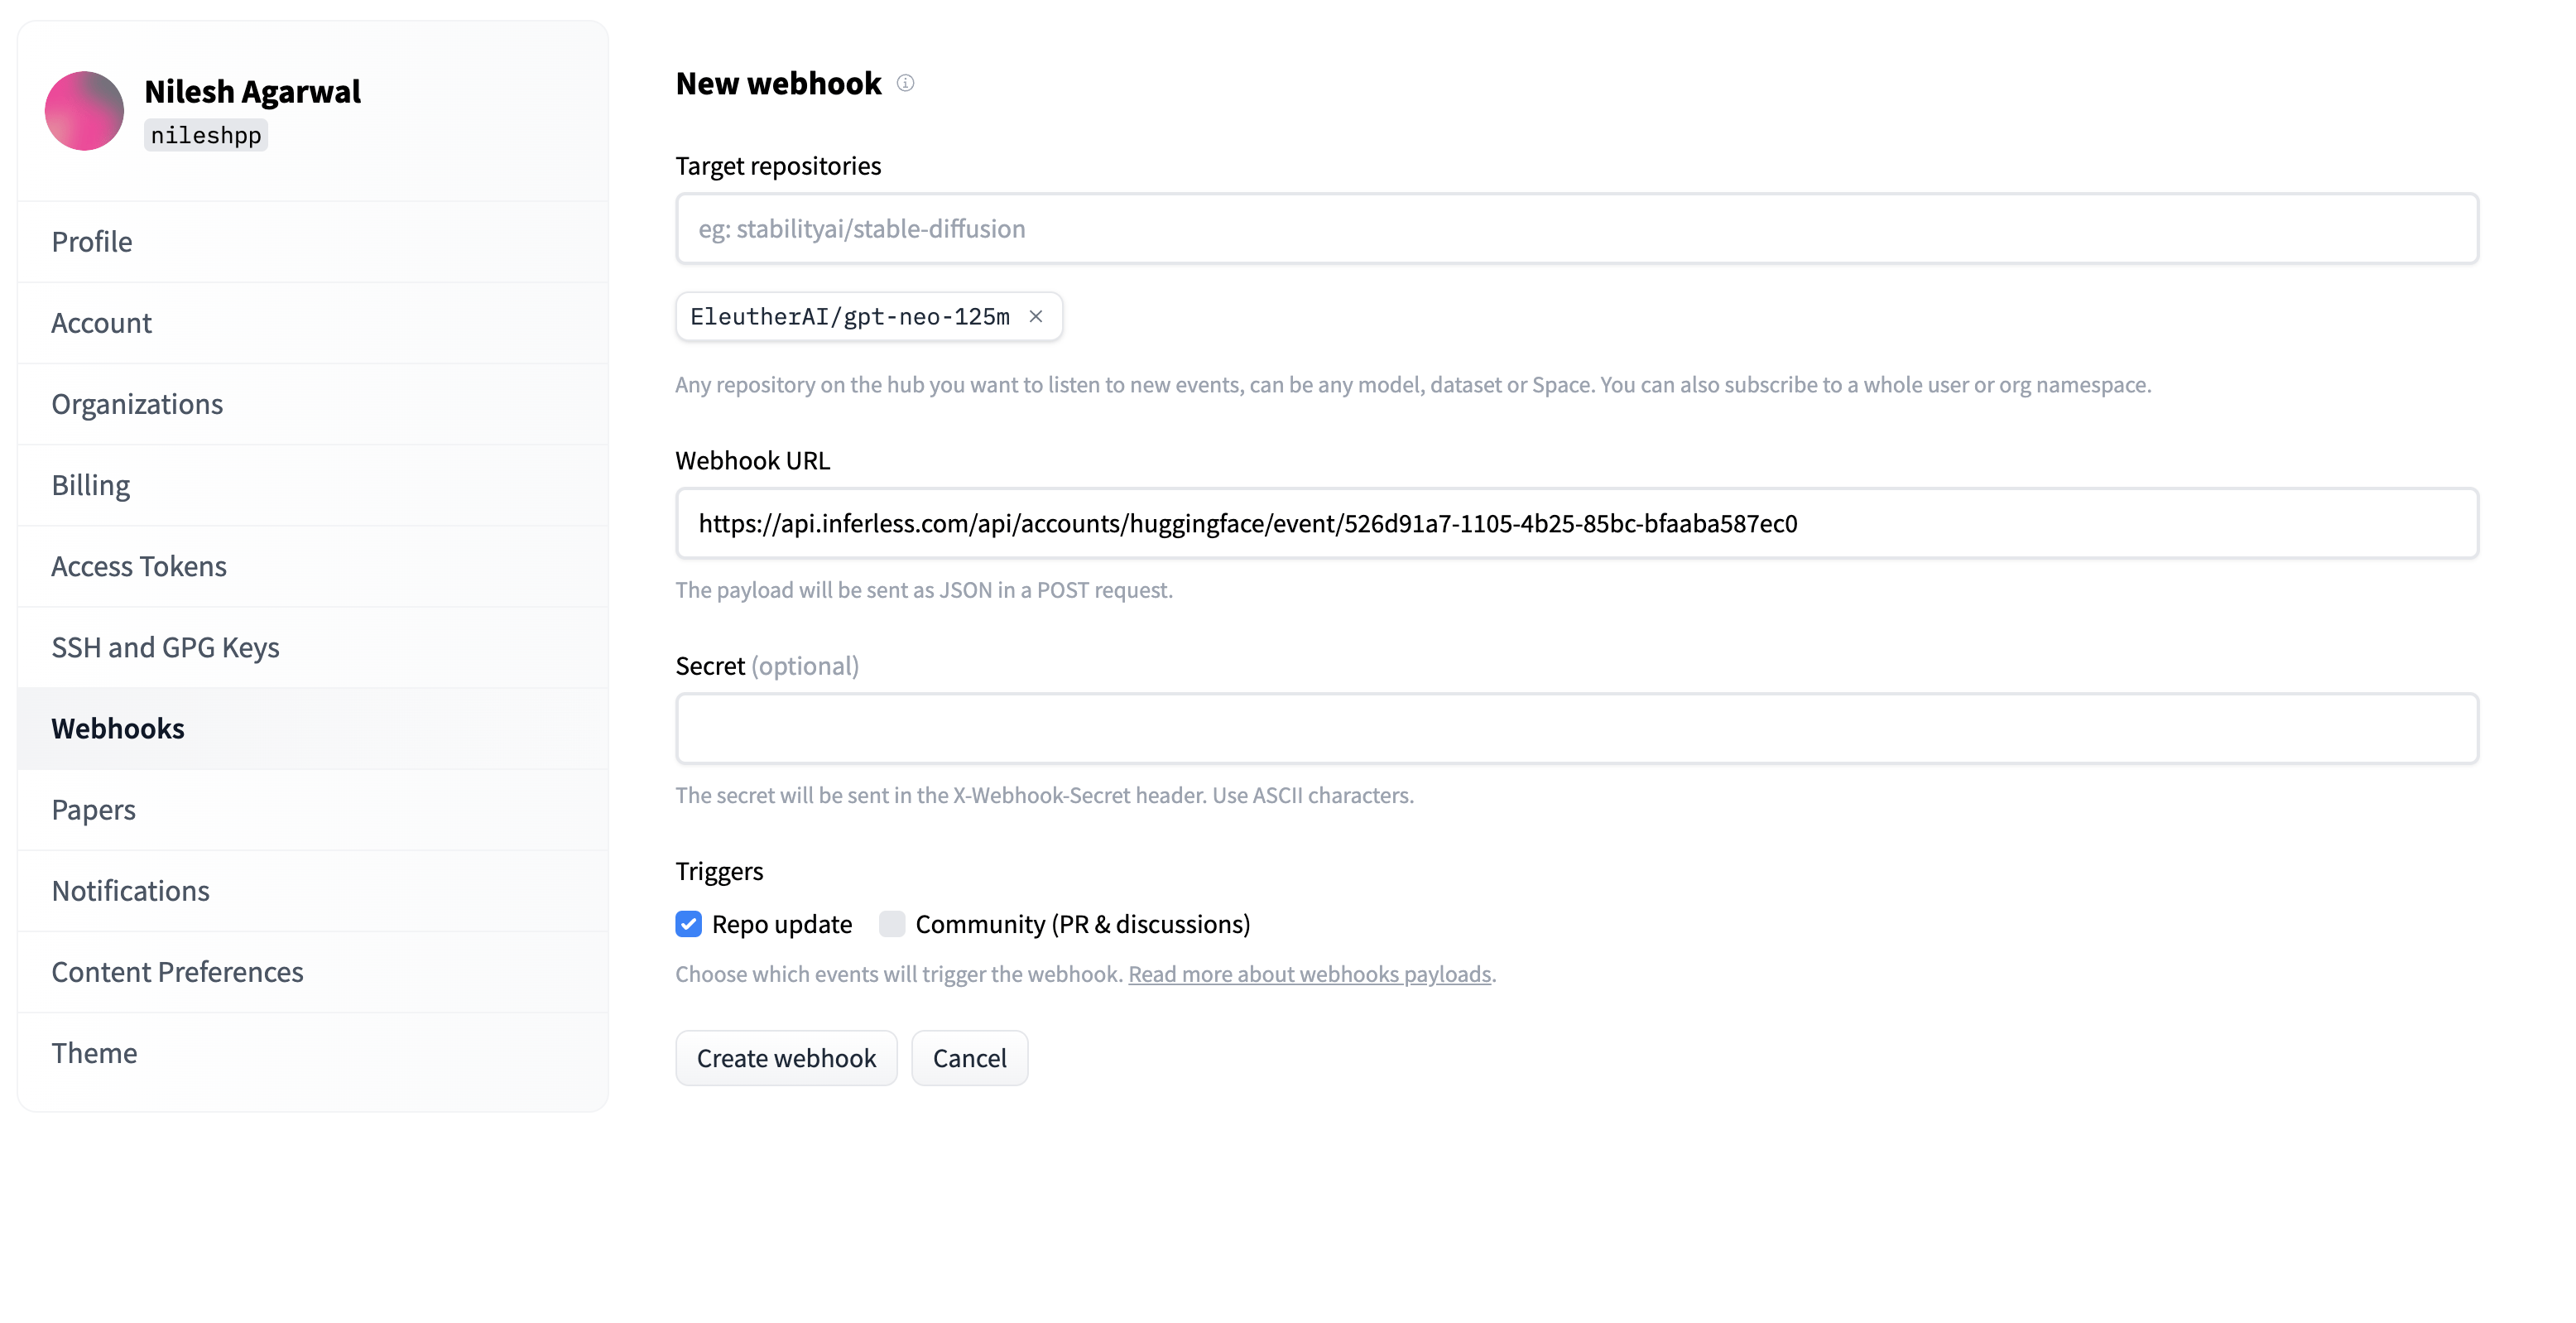 # Streaming with SSE Events
Source: https://docs.inferless.com/concepts/streaming-with-sse
Server-Sent Events (SSE) is a standard that describes how servers can initiate data transmission towards browser clients once an initial client connection has been established. It’s particularly useful for creating a one-way communication channel from the server to the client, such as for real-time notifications, live updates, and streaming data.
Server-Sent Events (SSE) can be enabled and configured independently for each model using the IS\_STREAMING\_OUTPUT property in the model configuration. You can use the 'stream\_output\_handler' to send each event and close the event stream. There are some limitations in streaming the type of input
* Only INT, STRING, BOOLEAN are supported as the datatypes in the INPUT
* The shape of the parameter should be \[1], multiple inputs or objects are by using "json.dumps(object)" and then passed as string
* Output should have the same schema in all the iterative responses
You can use the below repo for example:
[https://github.com/inferless/inferless\_template\_streaming](https://github.com/inferless/inferless_template_streaming)
You will also need to be on cuda\_version: "12.4.1" for using streaming make sure you use the below CUDA version in the custom runtime
```yaml
build:
cuda_version: "12.4.1" # This cuda version
system_packages:
- "libssl-dev"
python_packages:
- "transformers==4.41.1"
- "torch==2.1.2"
- "autoawq==0.1.8"
```
Define IS\_STREAMING\_OUTPUT in the **input\_schema.py** or in **app.py** if you are using pydantic.
### Input Schema Example
```python
/
├── app.py
├── input_schema.py
```
input\_schema.py
```input_schema
INPUT_SCHEMA = {
"TEXT": {
'datatype': 'STRING',
'required': True,
'shape': [1],
'example': ["How to make a omellete"]
}
}
IS_STREAMING_OUTPUT = True
```
in app.py
```python
import json
import numpy as np
import torch
from transformers import pipeline
from threading import Thread
from transformers import AutoTokenizer, TextIteratorStreamer
from awq import AutoAWQForCausalLM
MODEL_NAME = "TheBloke/zephyr-7B-beta-AWQ"
class InferlessPythonModel:
def initialize(self):
self.model = AutoAWQForCausalLM.from_quantized(MODEL_NAME, fuse_layers=False, version="GEMV")
self.tokenizer = AutoTokenizer.from_pretrained(MODEL_NAME)
self.streamer = TextIteratorStreamer(self.tokenizer, skip_prompt=True, skip_special_tokens=True)
def infer(self, inputs, stream_output_handler):
prompt = inputs["TEXT"]
messages = [{ "role": "system", "content": "You are an agent that know about about cooking." }]
messages.append({ "role": "user", "content": prompt })
tokenized_chat = self.tokenizer.apply_chat_template(messages, tokenize=True, add_generation_prompt=True, return_tensors="pt").cuda()
generation_kwargs = dict(
inputs=tokenized_chat,
streamer=self.streamer,
do_sample=True,
temperature=0.9,
top_p=0.95,
repetition_penalty=1.2,
max_new_tokens=1024,
)
thread = Thread(target=self.model.generate, kwargs=generation_kwargs)
thread.start()
for new_text in self.streamer:
output_dict = {}
output_dict["OUT"] = new_text
# Sent the partial response as an event
stream_output_handler.send_streamed_output(output_dict)
thread.join()
# Call this to close the stream, If not called can lead to the issue of request not being released
stream_output_handler.finalise_streamed_output()
# perform any cleanup activity here
def finalize(self,args):
self.pipe = None
```
### Pydantic Example
```python
/
├── app.py
```
in app.py
```python
import inferless
from pydantic import BaseModel, Field
@inferless.config
class Config():
is_streaming_output: bool = True
#...rest of the code
```
### Key Advantages of Using SSE
1.Simplicity: SSE is straightforward to implement both on the server and the client side. Unlike WebSockets, which require a special protocol and server setup, SSE works over standard HTTP and can be handled by traditional web servers without any special configuration.
2.Efficient Real-time Communication: SSE is designed for scenarios where the server needs to push data to the client. It’s very efficient for use cases like live notifications, feeds, and real-time analytics dashboards where updates are frequent and originate from the server.
3. Built-in Reconnection: SSE has automatic reconnection support. If the connection between the client and server is lost, the client will automatically attempt to reestablish the connection after a timeout. This makes it resilient and ensures continuous data flow without manual intervention.
# Working with Files on Inferless
Source: https://docs.inferless.com/concepts/working-with-files
Inferless does not allow you to access the root file system, So if you have a model file that need to store or load the files from local storage there are 2 ways you can do this
* **Method A**: Use the '/tmp' directpry to store the files(Temporary Storage)
* **Method B**: Use My Volume to store the files(Persistant Storage)
### Method A: Use the '/tmp' directory to store the files
Using the '/tmp' directory is a temporary storage and the files will be deleted once the model is stopped. This is ideally good for use cases when you have a audio/video file that you need to process and you don't want to store the files after the processing is done.
```python
import os
Class MyModel:
def initialise(self):
pass
def infer(self, inputs):
# Save the file to the /tmp directory
file_path = "/tmp/myfile.txt"
with open(file_path, "w") as f:
f.write("Hello World")
```
### Method B: Use My Volume to store the files(Persistant Storage)
To use the My Volume you need to create a volume and attach it during model import. The files stored in the volume will be available even after the model is stopped.
```python
VOLUME_PATH = "/var/nfs-share/my-volume"
import os
Class MyModel:
def initialise(self):
# Load file from nfs mount
file_path = os.path.join(VOLUME_PATH, "myfile.txt")
with open(file_path, "r") as f:
print(f.read())
def infer(self, inputs):
# Save the file to the volume
file_path = os.path.join(VOLUME_PATH, "myfile.txt")
with open(file_path, "w") as f:
f.write("Hello World")
```
# Working with NFS - My Volumes
Source: https://docs.inferless.com/concepts/working-with-nfs-volumes
Inferless provides NFS-like writable volumes that support simultaneous connections to various replicas. Similar to networked file-sharing systems that enable collective access to files across a network, these volumes in Inferless address multiple needs:
* Storing model parameters
* Archiving datasets similar to centralized storage
* Setting up a communal cache for collaborative tasks, akin to a shared cache over a network.
## Method A: Create a Volume using Inferless Platform
Here is how you can create a volume `Go to the Volumes` section in your console
# Streaming with SSE Events
Source: https://docs.inferless.com/concepts/streaming-with-sse
Server-Sent Events (SSE) is a standard that describes how servers can initiate data transmission towards browser clients once an initial client connection has been established. It’s particularly useful for creating a one-way communication channel from the server to the client, such as for real-time notifications, live updates, and streaming data.
Server-Sent Events (SSE) can be enabled and configured independently for each model using the IS\_STREAMING\_OUTPUT property in the model configuration. You can use the 'stream\_output\_handler' to send each event and close the event stream. There are some limitations in streaming the type of input
* Only INT, STRING, BOOLEAN are supported as the datatypes in the INPUT
* The shape of the parameter should be \[1], multiple inputs or objects are by using "json.dumps(object)" and then passed as string
* Output should have the same schema in all the iterative responses
You can use the below repo for example:
[https://github.com/inferless/inferless\_template\_streaming](https://github.com/inferless/inferless_template_streaming)
You will also need to be on cuda\_version: "12.4.1" for using streaming make sure you use the below CUDA version in the custom runtime
```yaml
build:
cuda_version: "12.4.1" # This cuda version
system_packages:
- "libssl-dev"
python_packages:
- "transformers==4.41.1"
- "torch==2.1.2"
- "autoawq==0.1.8"
```
Define IS\_STREAMING\_OUTPUT in the **input\_schema.py** or in **app.py** if you are using pydantic.
### Input Schema Example
```python
/
├── app.py
├── input_schema.py
```
input\_schema.py
```input_schema
INPUT_SCHEMA = {
"TEXT": {
'datatype': 'STRING',
'required': True,
'shape': [1],
'example': ["How to make a omellete"]
}
}
IS_STREAMING_OUTPUT = True
```
in app.py
```python
import json
import numpy as np
import torch
from transformers import pipeline
from threading import Thread
from transformers import AutoTokenizer, TextIteratorStreamer
from awq import AutoAWQForCausalLM
MODEL_NAME = "TheBloke/zephyr-7B-beta-AWQ"
class InferlessPythonModel:
def initialize(self):
self.model = AutoAWQForCausalLM.from_quantized(MODEL_NAME, fuse_layers=False, version="GEMV")
self.tokenizer = AutoTokenizer.from_pretrained(MODEL_NAME)
self.streamer = TextIteratorStreamer(self.tokenizer, skip_prompt=True, skip_special_tokens=True)
def infer(self, inputs, stream_output_handler):
prompt = inputs["TEXT"]
messages = [{ "role": "system", "content": "You are an agent that know about about cooking." }]
messages.append({ "role": "user", "content": prompt })
tokenized_chat = self.tokenizer.apply_chat_template(messages, tokenize=True, add_generation_prompt=True, return_tensors="pt").cuda()
generation_kwargs = dict(
inputs=tokenized_chat,
streamer=self.streamer,
do_sample=True,
temperature=0.9,
top_p=0.95,
repetition_penalty=1.2,
max_new_tokens=1024,
)
thread = Thread(target=self.model.generate, kwargs=generation_kwargs)
thread.start()
for new_text in self.streamer:
output_dict = {}
output_dict["OUT"] = new_text
# Sent the partial response as an event
stream_output_handler.send_streamed_output(output_dict)
thread.join()
# Call this to close the stream, If not called can lead to the issue of request not being released
stream_output_handler.finalise_streamed_output()
# perform any cleanup activity here
def finalize(self,args):
self.pipe = None
```
### Pydantic Example
```python
/
├── app.py
```
in app.py
```python
import inferless
from pydantic import BaseModel, Field
@inferless.config
class Config():
is_streaming_output: bool = True
#...rest of the code
```
### Key Advantages of Using SSE
1.Simplicity: SSE is straightforward to implement both on the server and the client side. Unlike WebSockets, which require a special protocol and server setup, SSE works over standard HTTP and can be handled by traditional web servers without any special configuration.
2.Efficient Real-time Communication: SSE is designed for scenarios where the server needs to push data to the client. It’s very efficient for use cases like live notifications, feeds, and real-time analytics dashboards where updates are frequent and originate from the server.
3. Built-in Reconnection: SSE has automatic reconnection support. If the connection between the client and server is lost, the client will automatically attempt to reestablish the connection after a timeout. This makes it resilient and ensures continuous data flow without manual intervention.
# Working with Files on Inferless
Source: https://docs.inferless.com/concepts/working-with-files
Inferless does not allow you to access the root file system, So if you have a model file that need to store or load the files from local storage there are 2 ways you can do this
* **Method A**: Use the '/tmp' directpry to store the files(Temporary Storage)
* **Method B**: Use My Volume to store the files(Persistant Storage)
### Method A: Use the '/tmp' directory to store the files
Using the '/tmp' directory is a temporary storage and the files will be deleted once the model is stopped. This is ideally good for use cases when you have a audio/video file that you need to process and you don't want to store the files after the processing is done.
```python
import os
Class MyModel:
def initialise(self):
pass
def infer(self, inputs):
# Save the file to the /tmp directory
file_path = "/tmp/myfile.txt"
with open(file_path, "w") as f:
f.write("Hello World")
```
### Method B: Use My Volume to store the files(Persistant Storage)
To use the My Volume you need to create a volume and attach it during model import. The files stored in the volume will be available even after the model is stopped.
```python
VOLUME_PATH = "/var/nfs-share/my-volume"
import os
Class MyModel:
def initialise(self):
# Load file from nfs mount
file_path = os.path.join(VOLUME_PATH, "myfile.txt")
with open(file_path, "r") as f:
print(f.read())
def infer(self, inputs):
# Save the file to the volume
file_path = os.path.join(VOLUME_PATH, "myfile.txt")
with open(file_path, "w") as f:
f.write("Hello World")
```
# Working with NFS - My Volumes
Source: https://docs.inferless.com/concepts/working-with-nfs-volumes
Inferless provides NFS-like writable volumes that support simultaneous connections to various replicas. Similar to networked file-sharing systems that enable collective access to files across a network, these volumes in Inferless address multiple needs:
* Storing model parameters
* Archiving datasets similar to centralized storage
* Setting up a communal cache for collaborative tasks, akin to a shared cache over a network.
## Method A: Create a Volume using Inferless Platform
Here is how you can create a volume `Go to the Volumes` section in your console
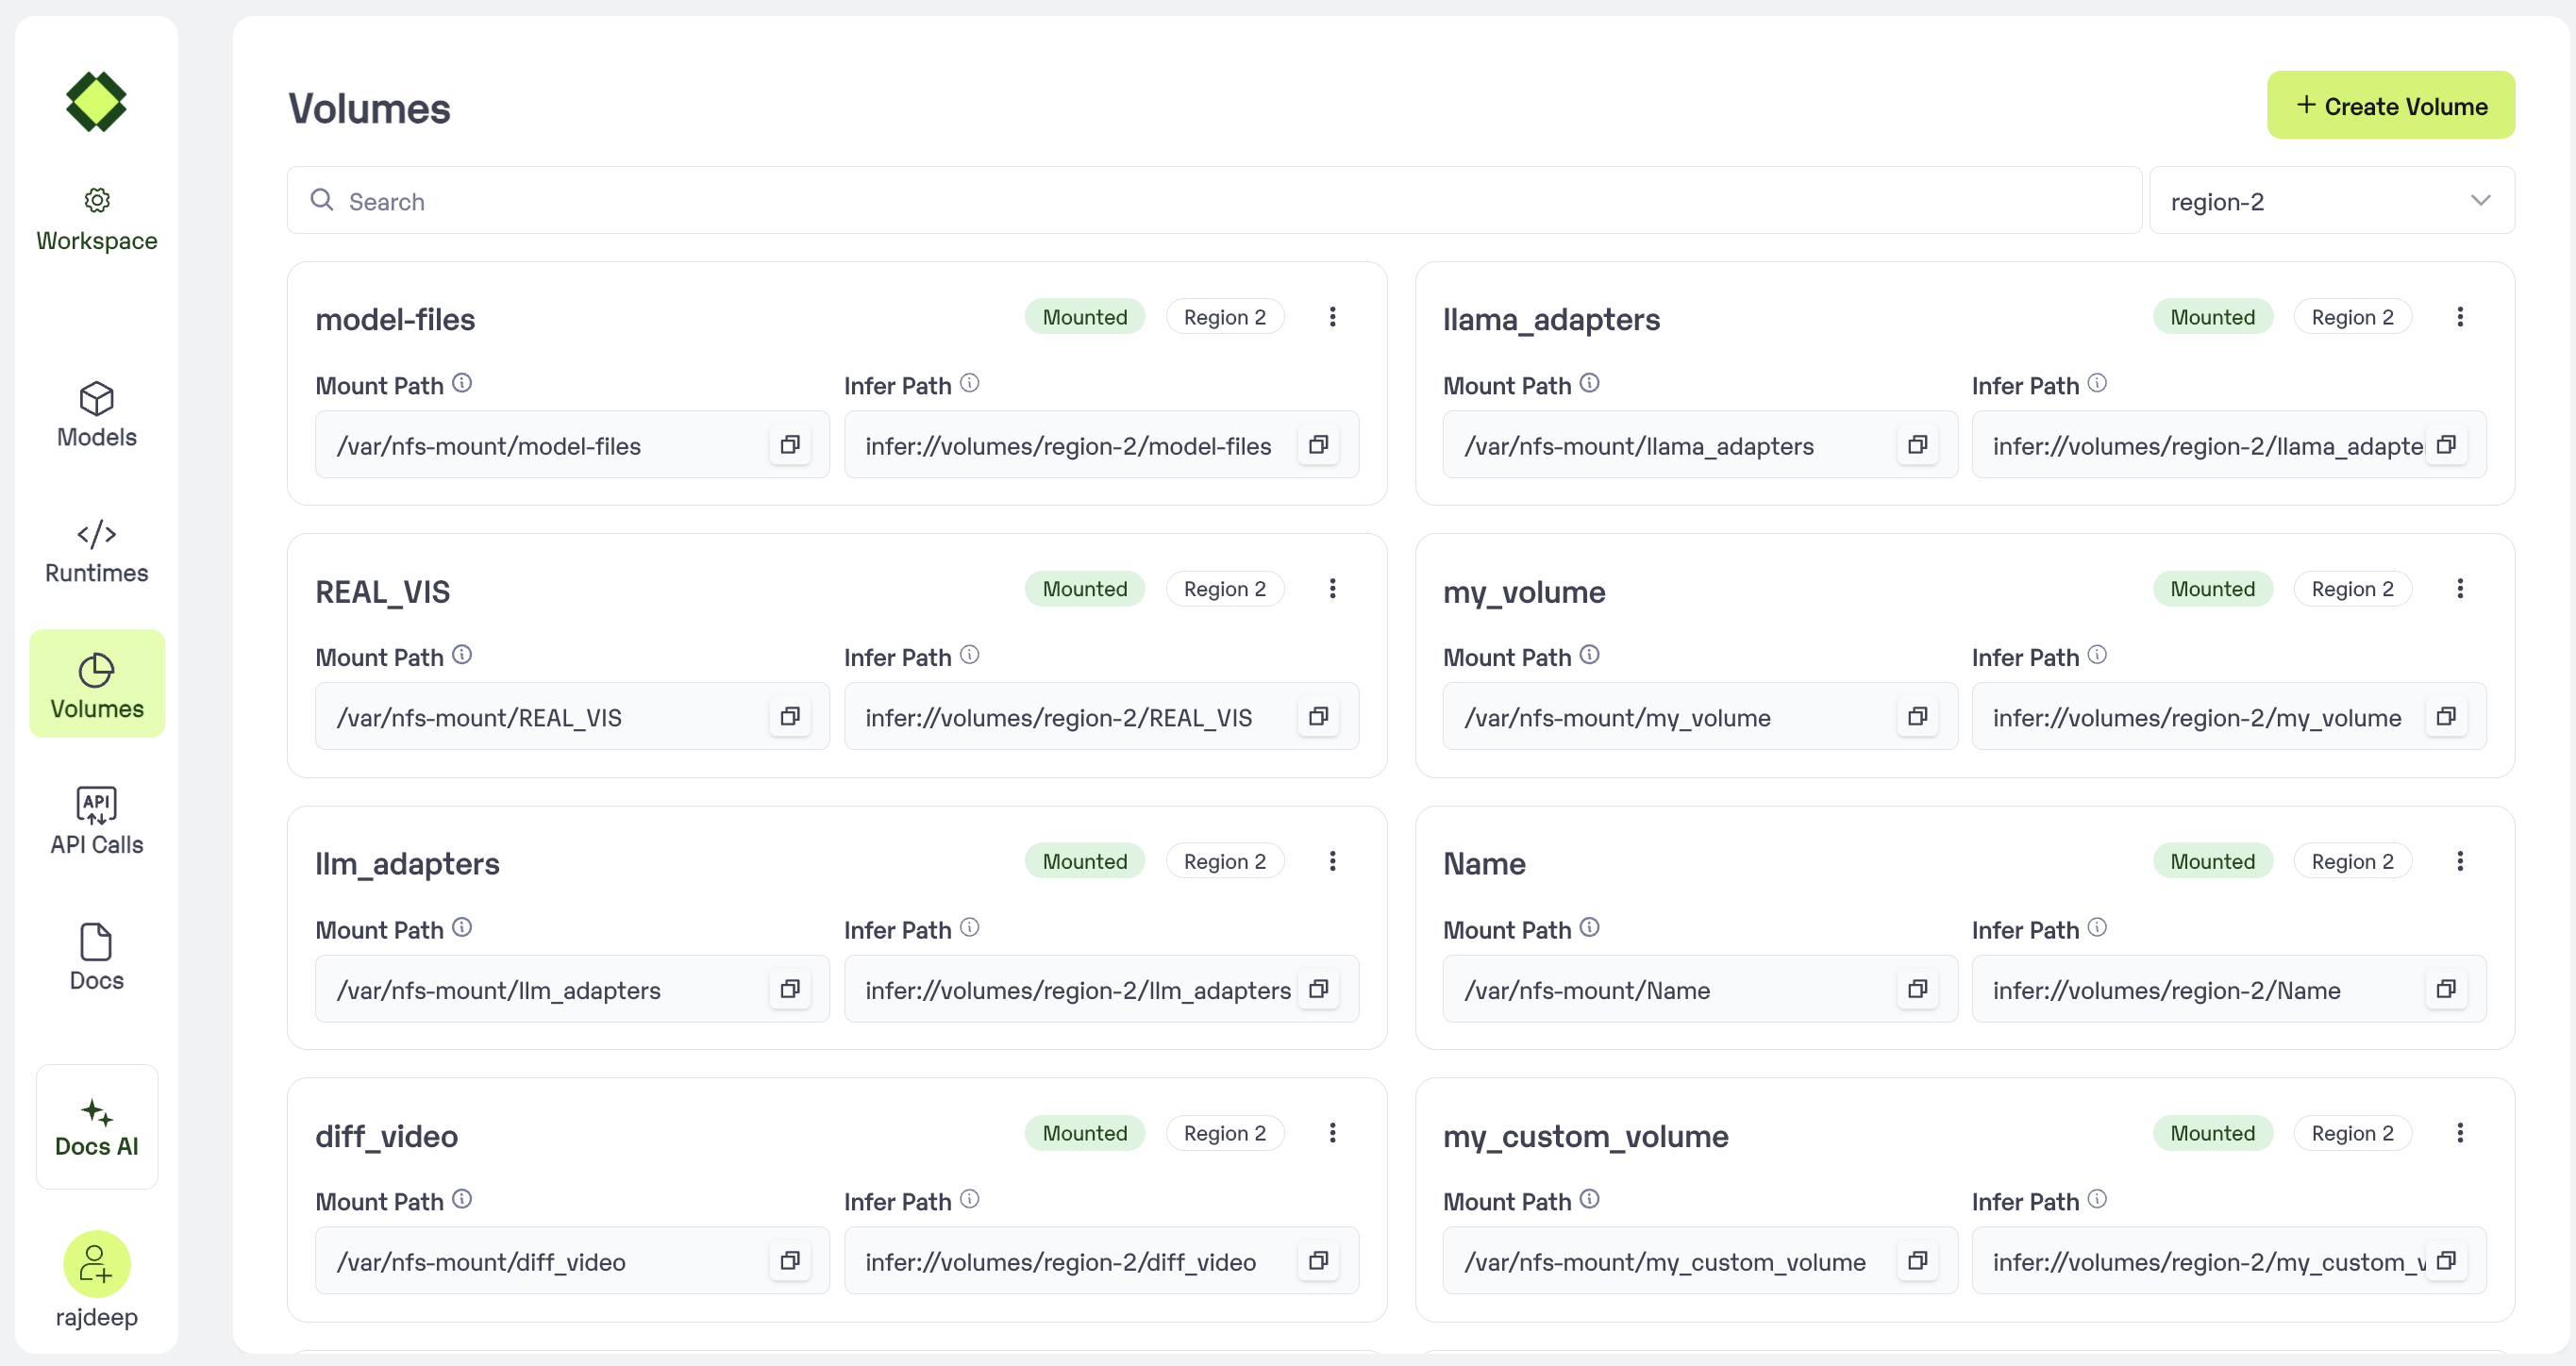 Volumes
#### Step 1
Click on the Create Volume button
Volumes
#### Step 1
Click on the Create Volume button
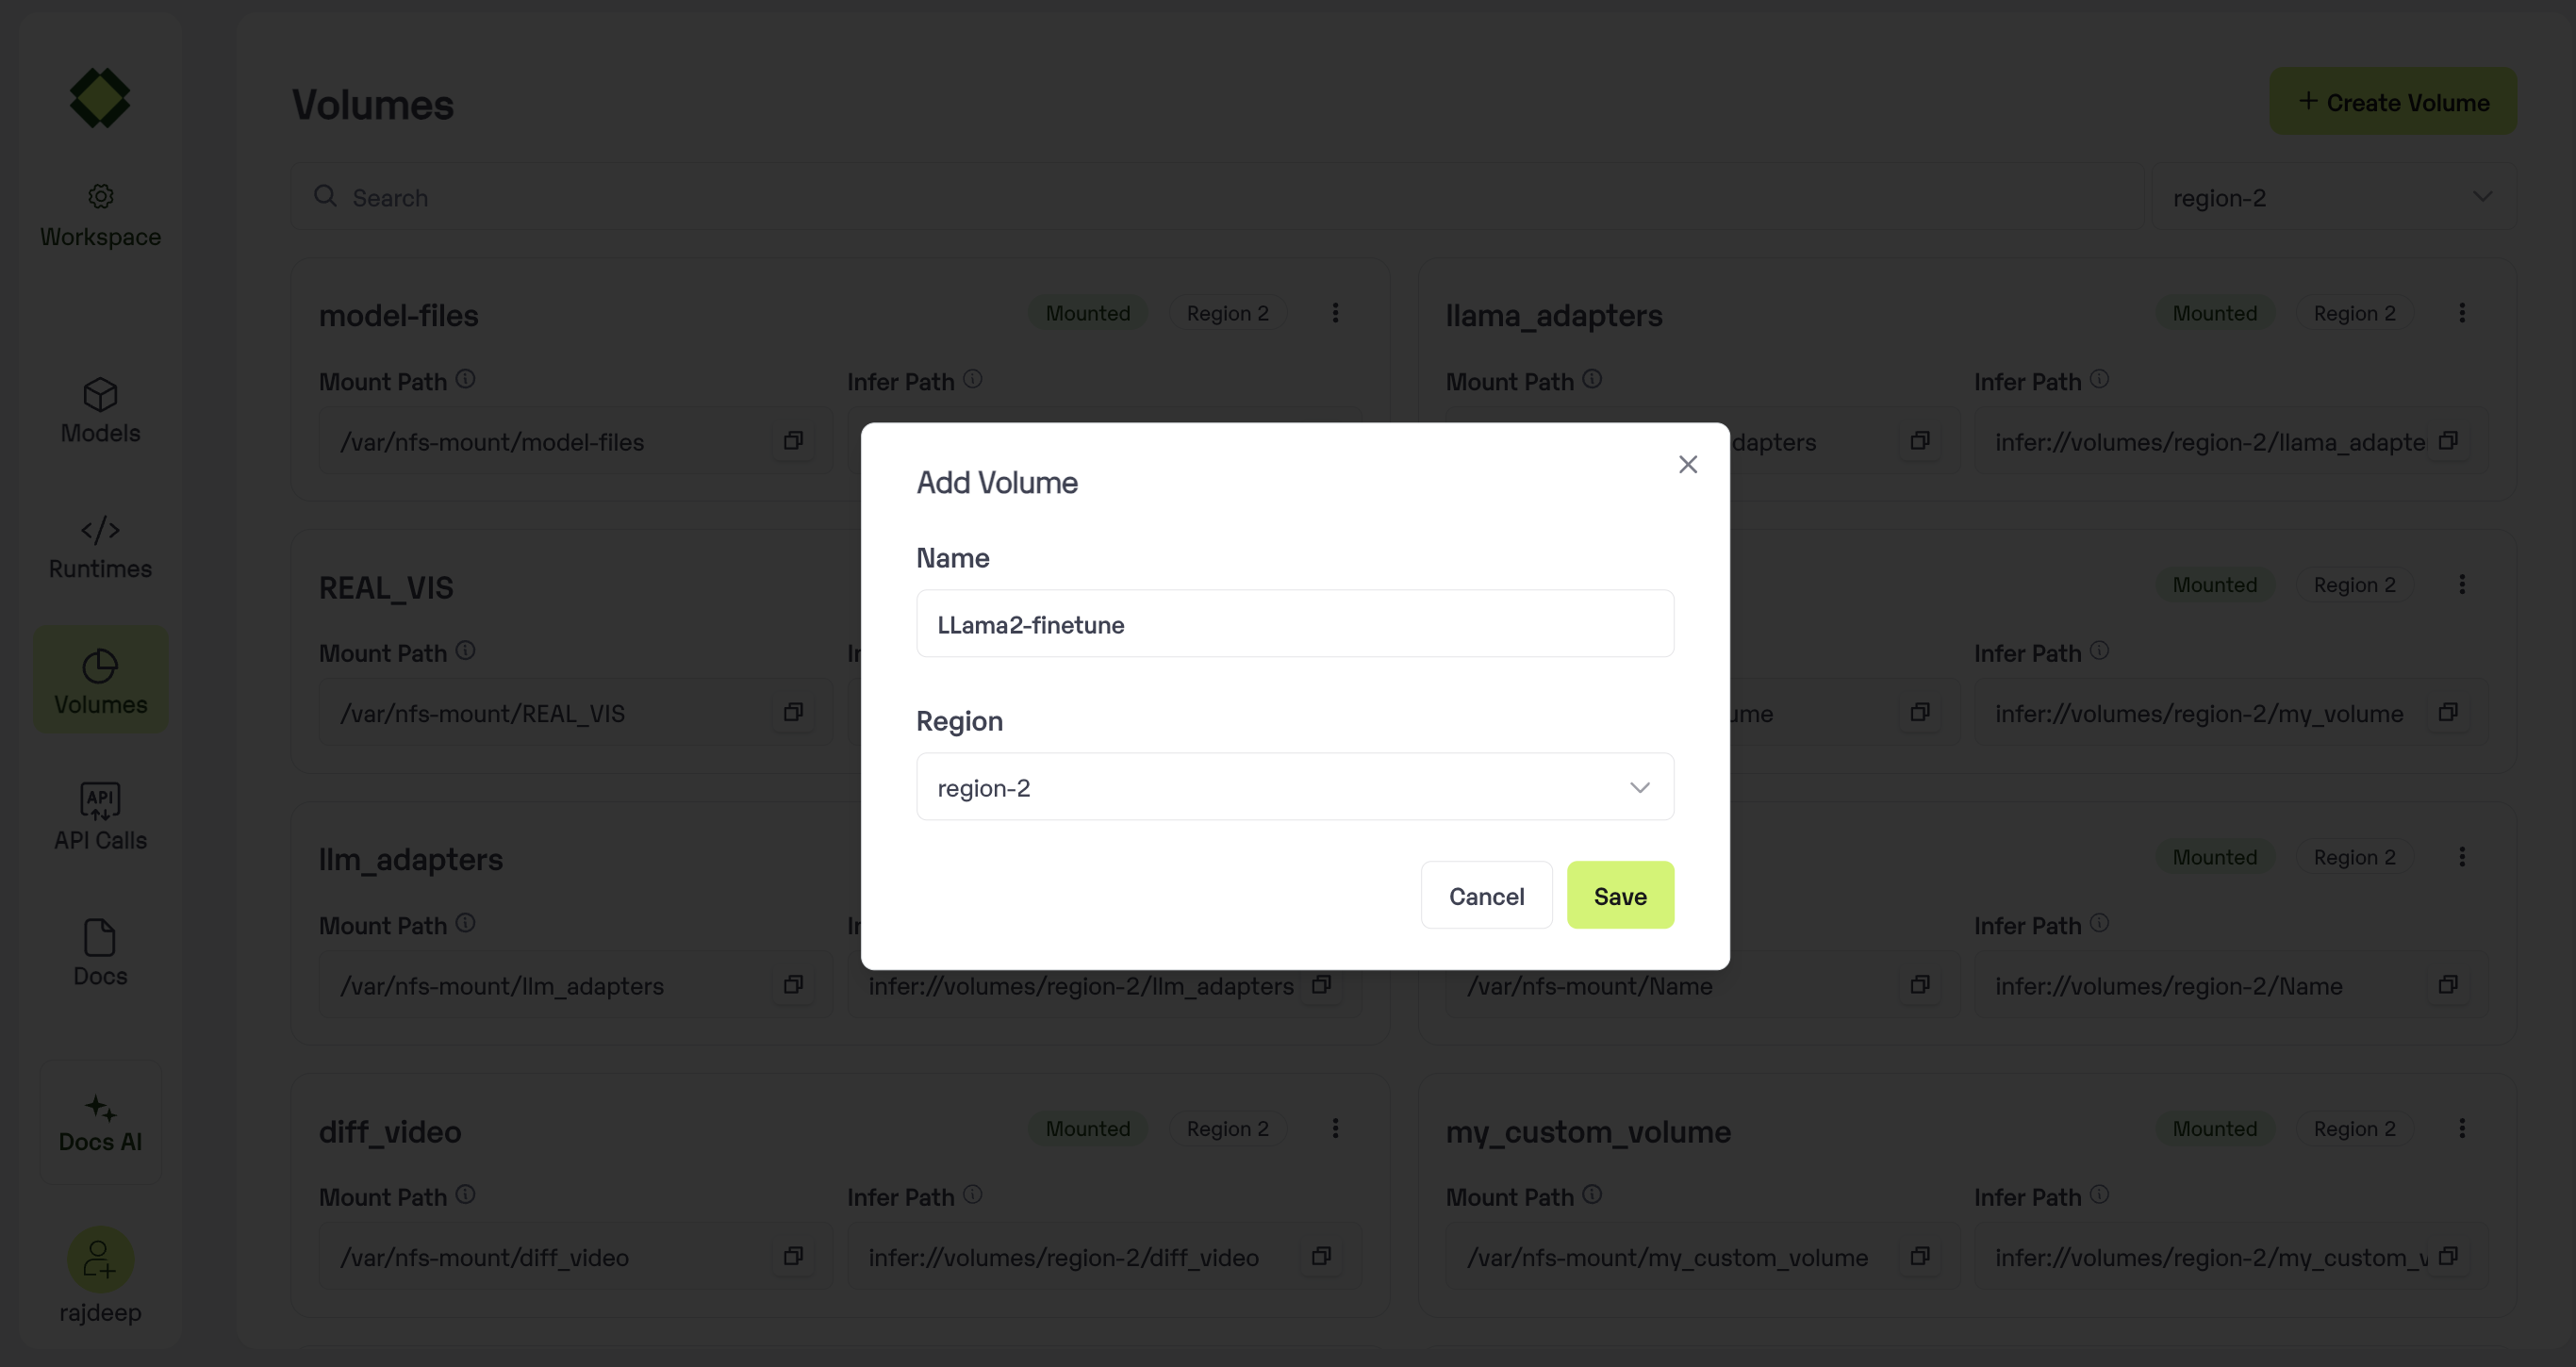 #### Step 2
After this Volume is created and ready copy the `Mount Path`
#### Step 2
After this Volume is created and ready copy the `Mount Path`
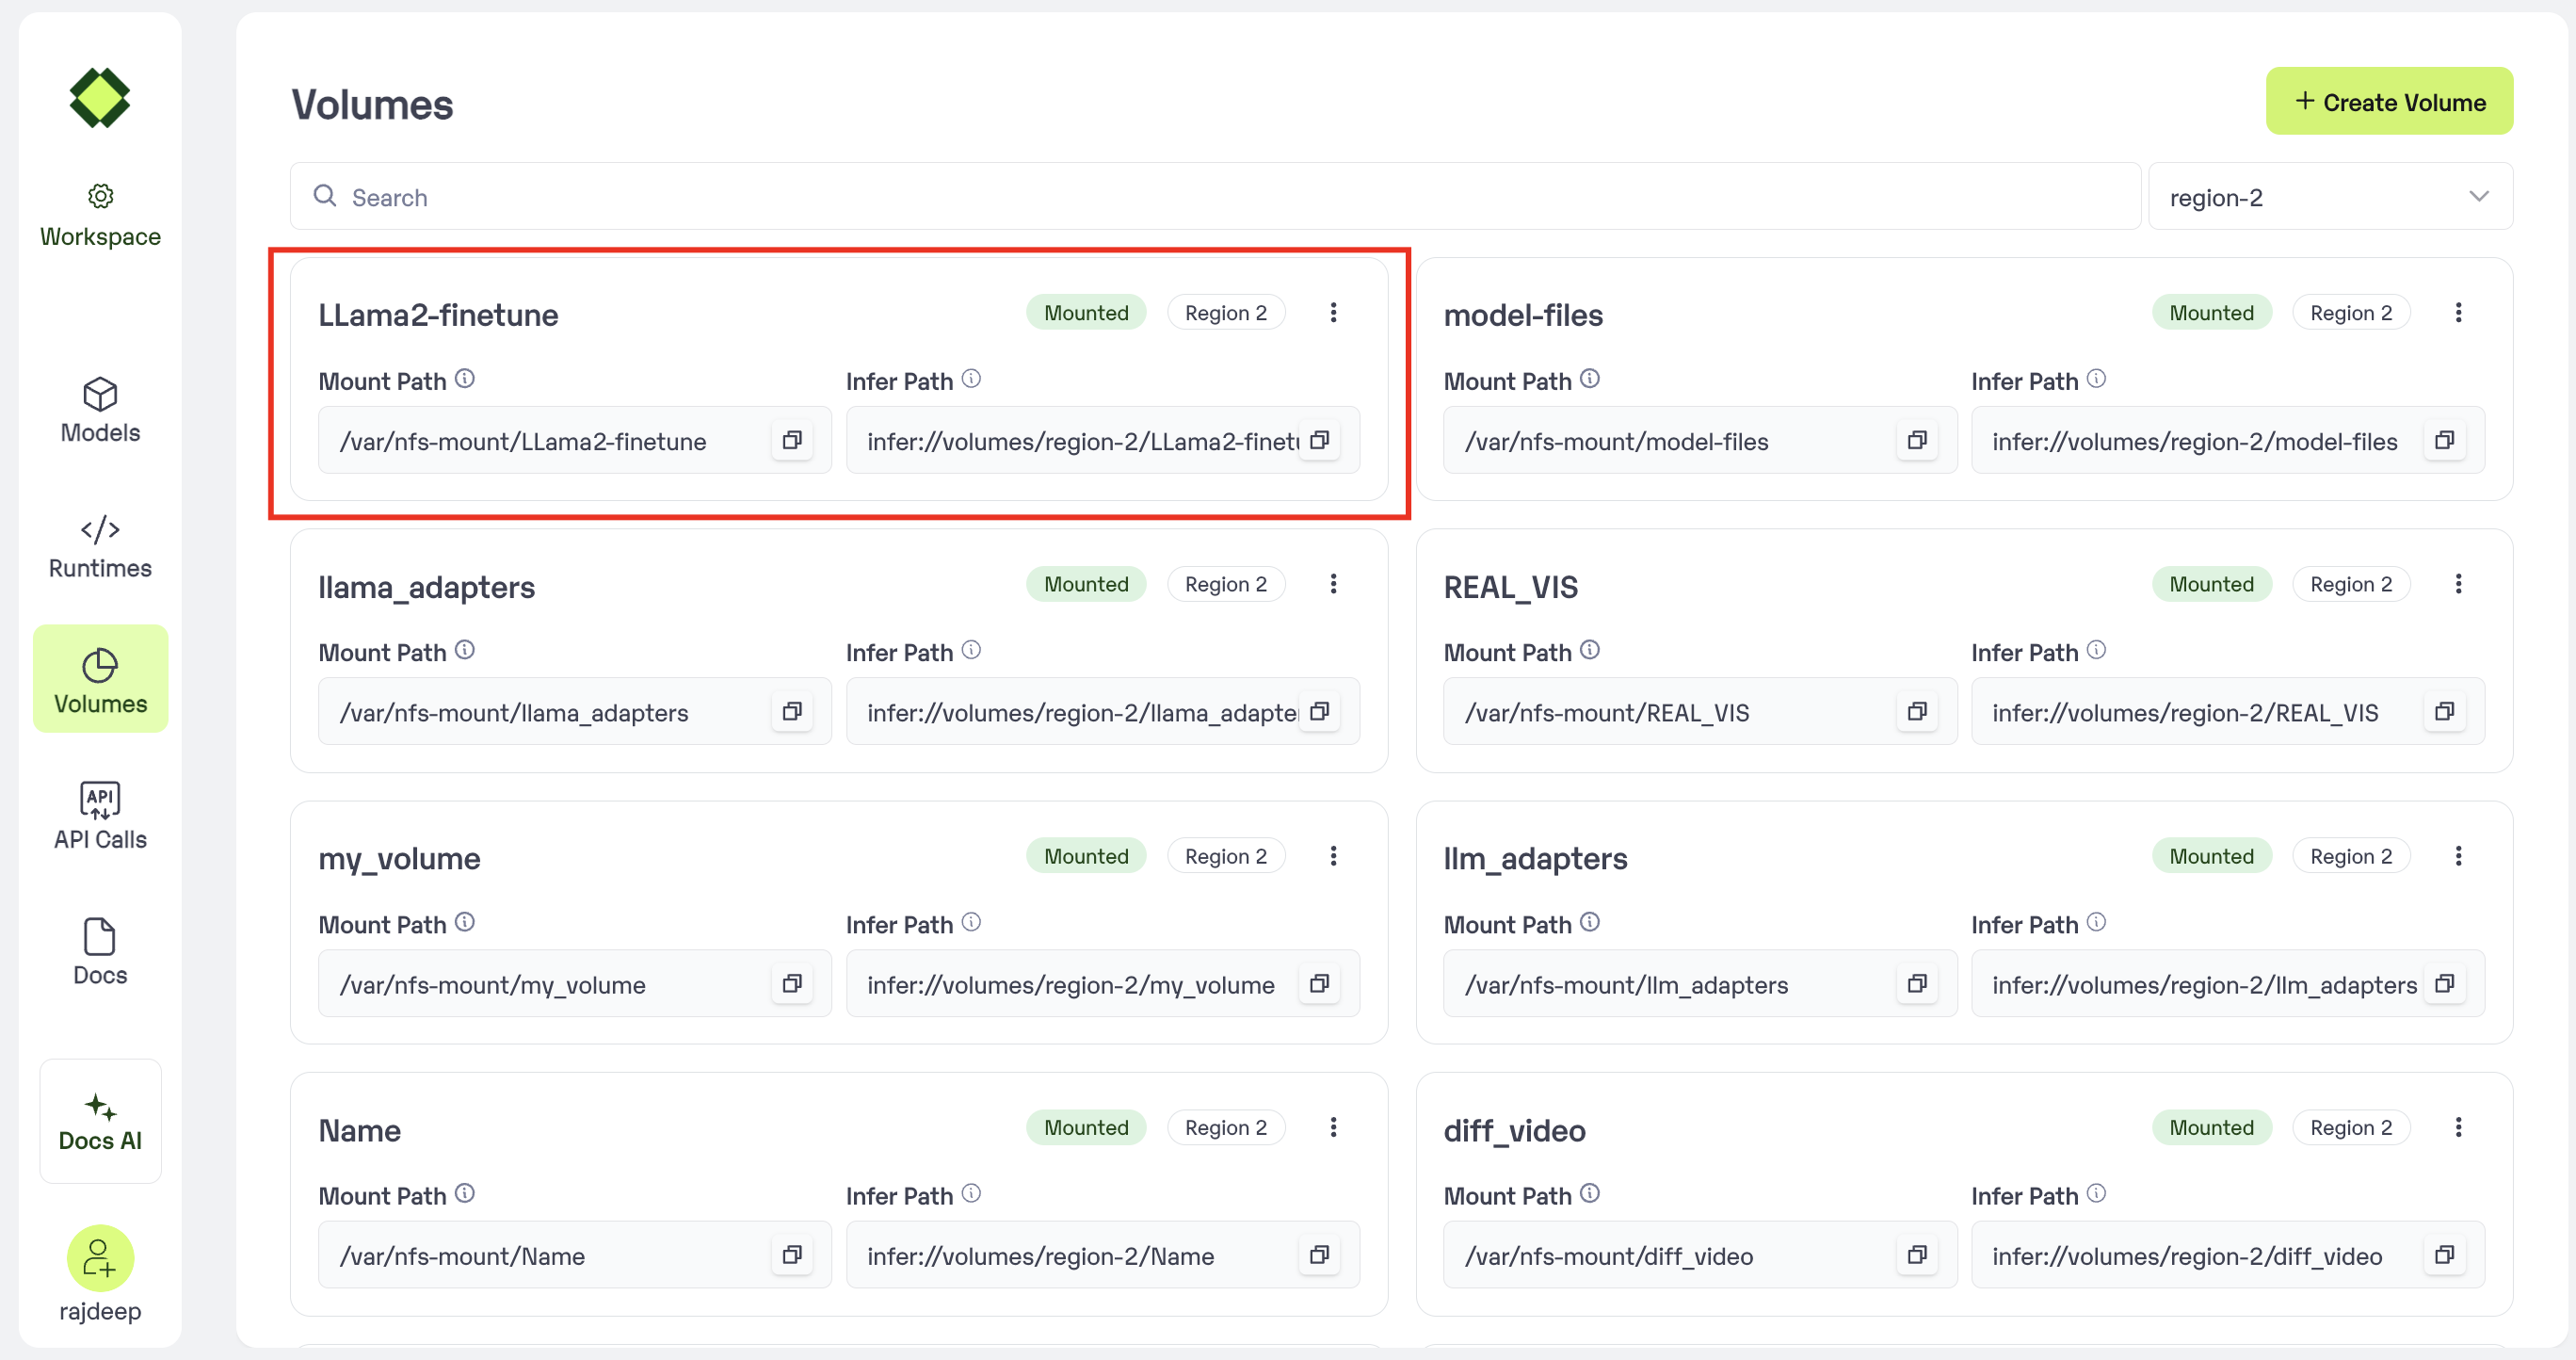 #### Step 3
Use the mount path on your app.py code as shown below :
#### Step 3
Use the mount path on your app.py code as shown below :
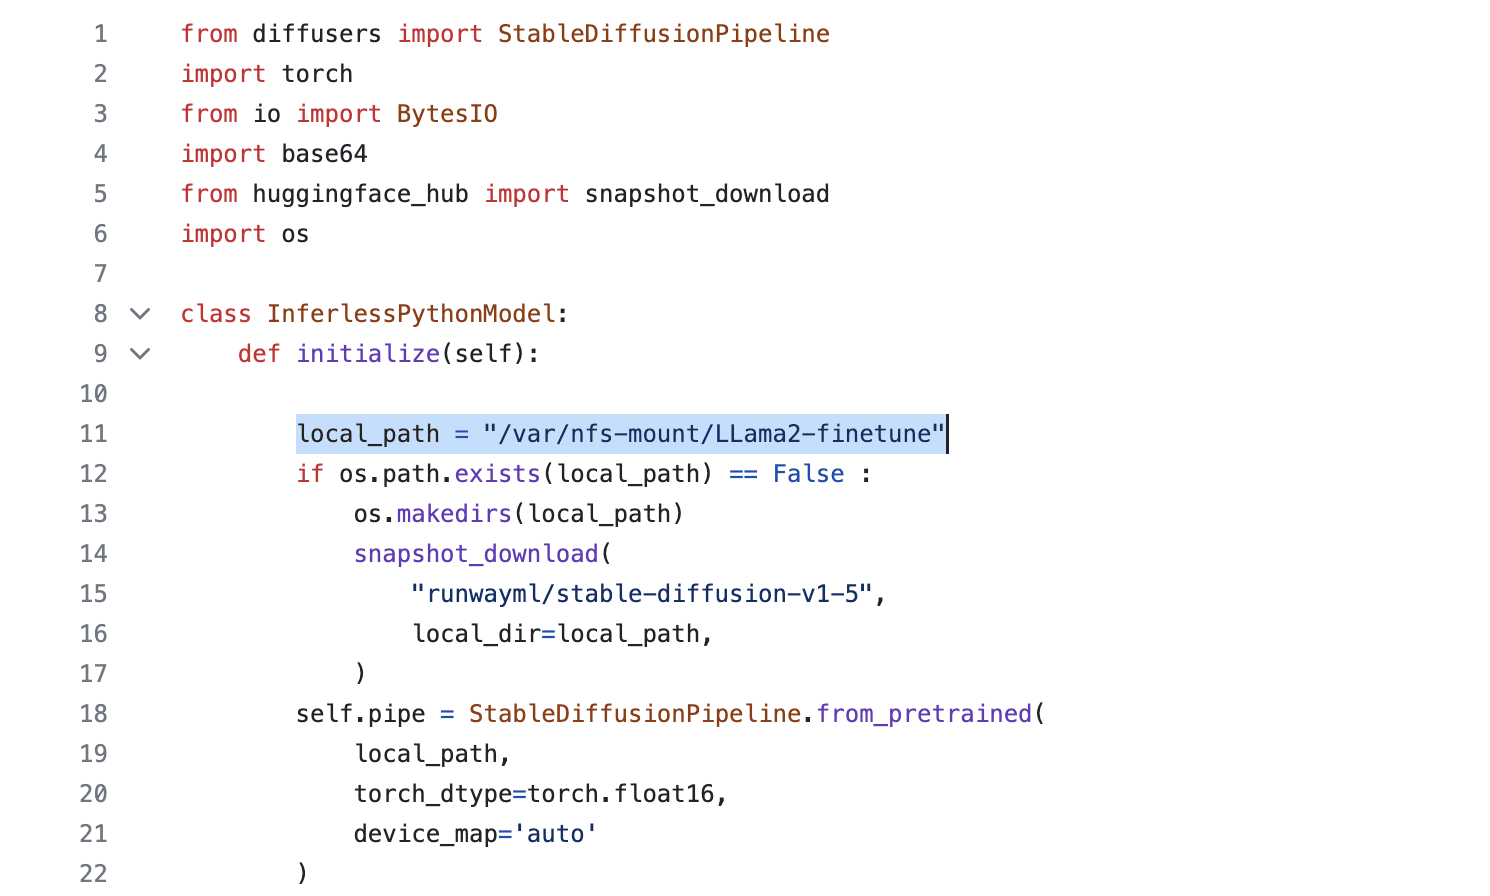 #### Step 4
In the model import step, select the Mount Volume to attach
#### Step 4
In the model import step, select the Mount Volume to attach
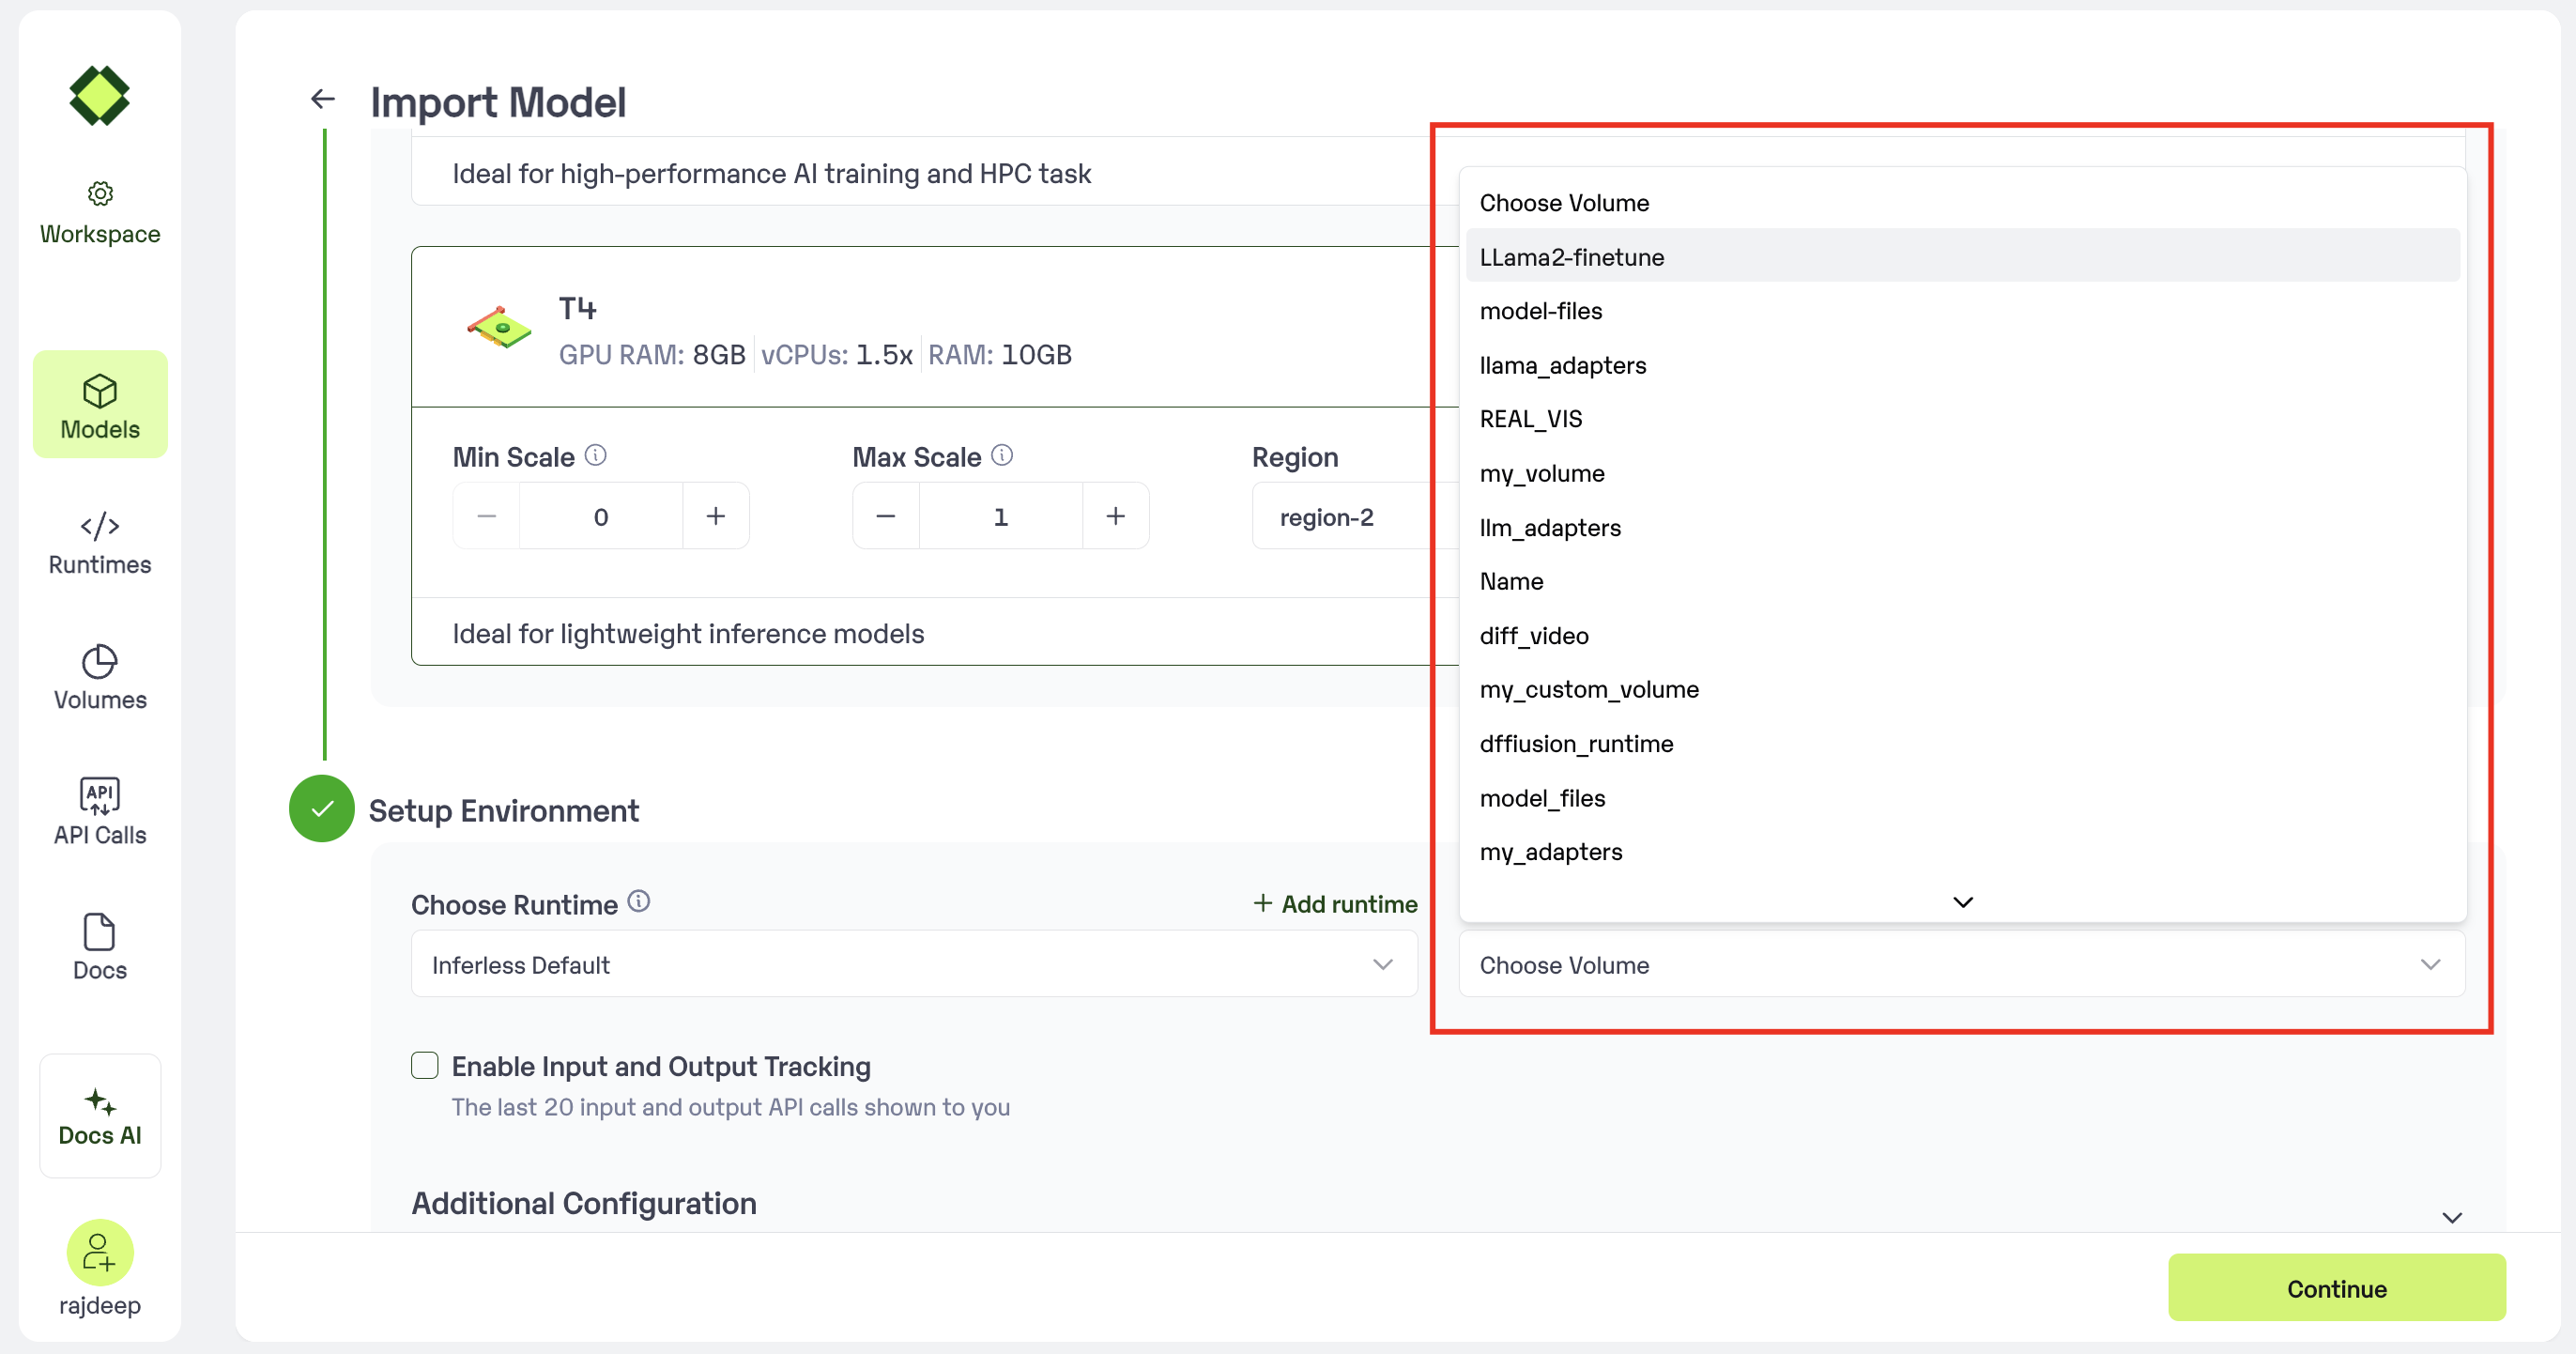 ### View Volumes
You can also browse the files in your volume by clicking on the Volume Card
### View Volumes
You can also browse the files in your volume by clicking on the Volume Card
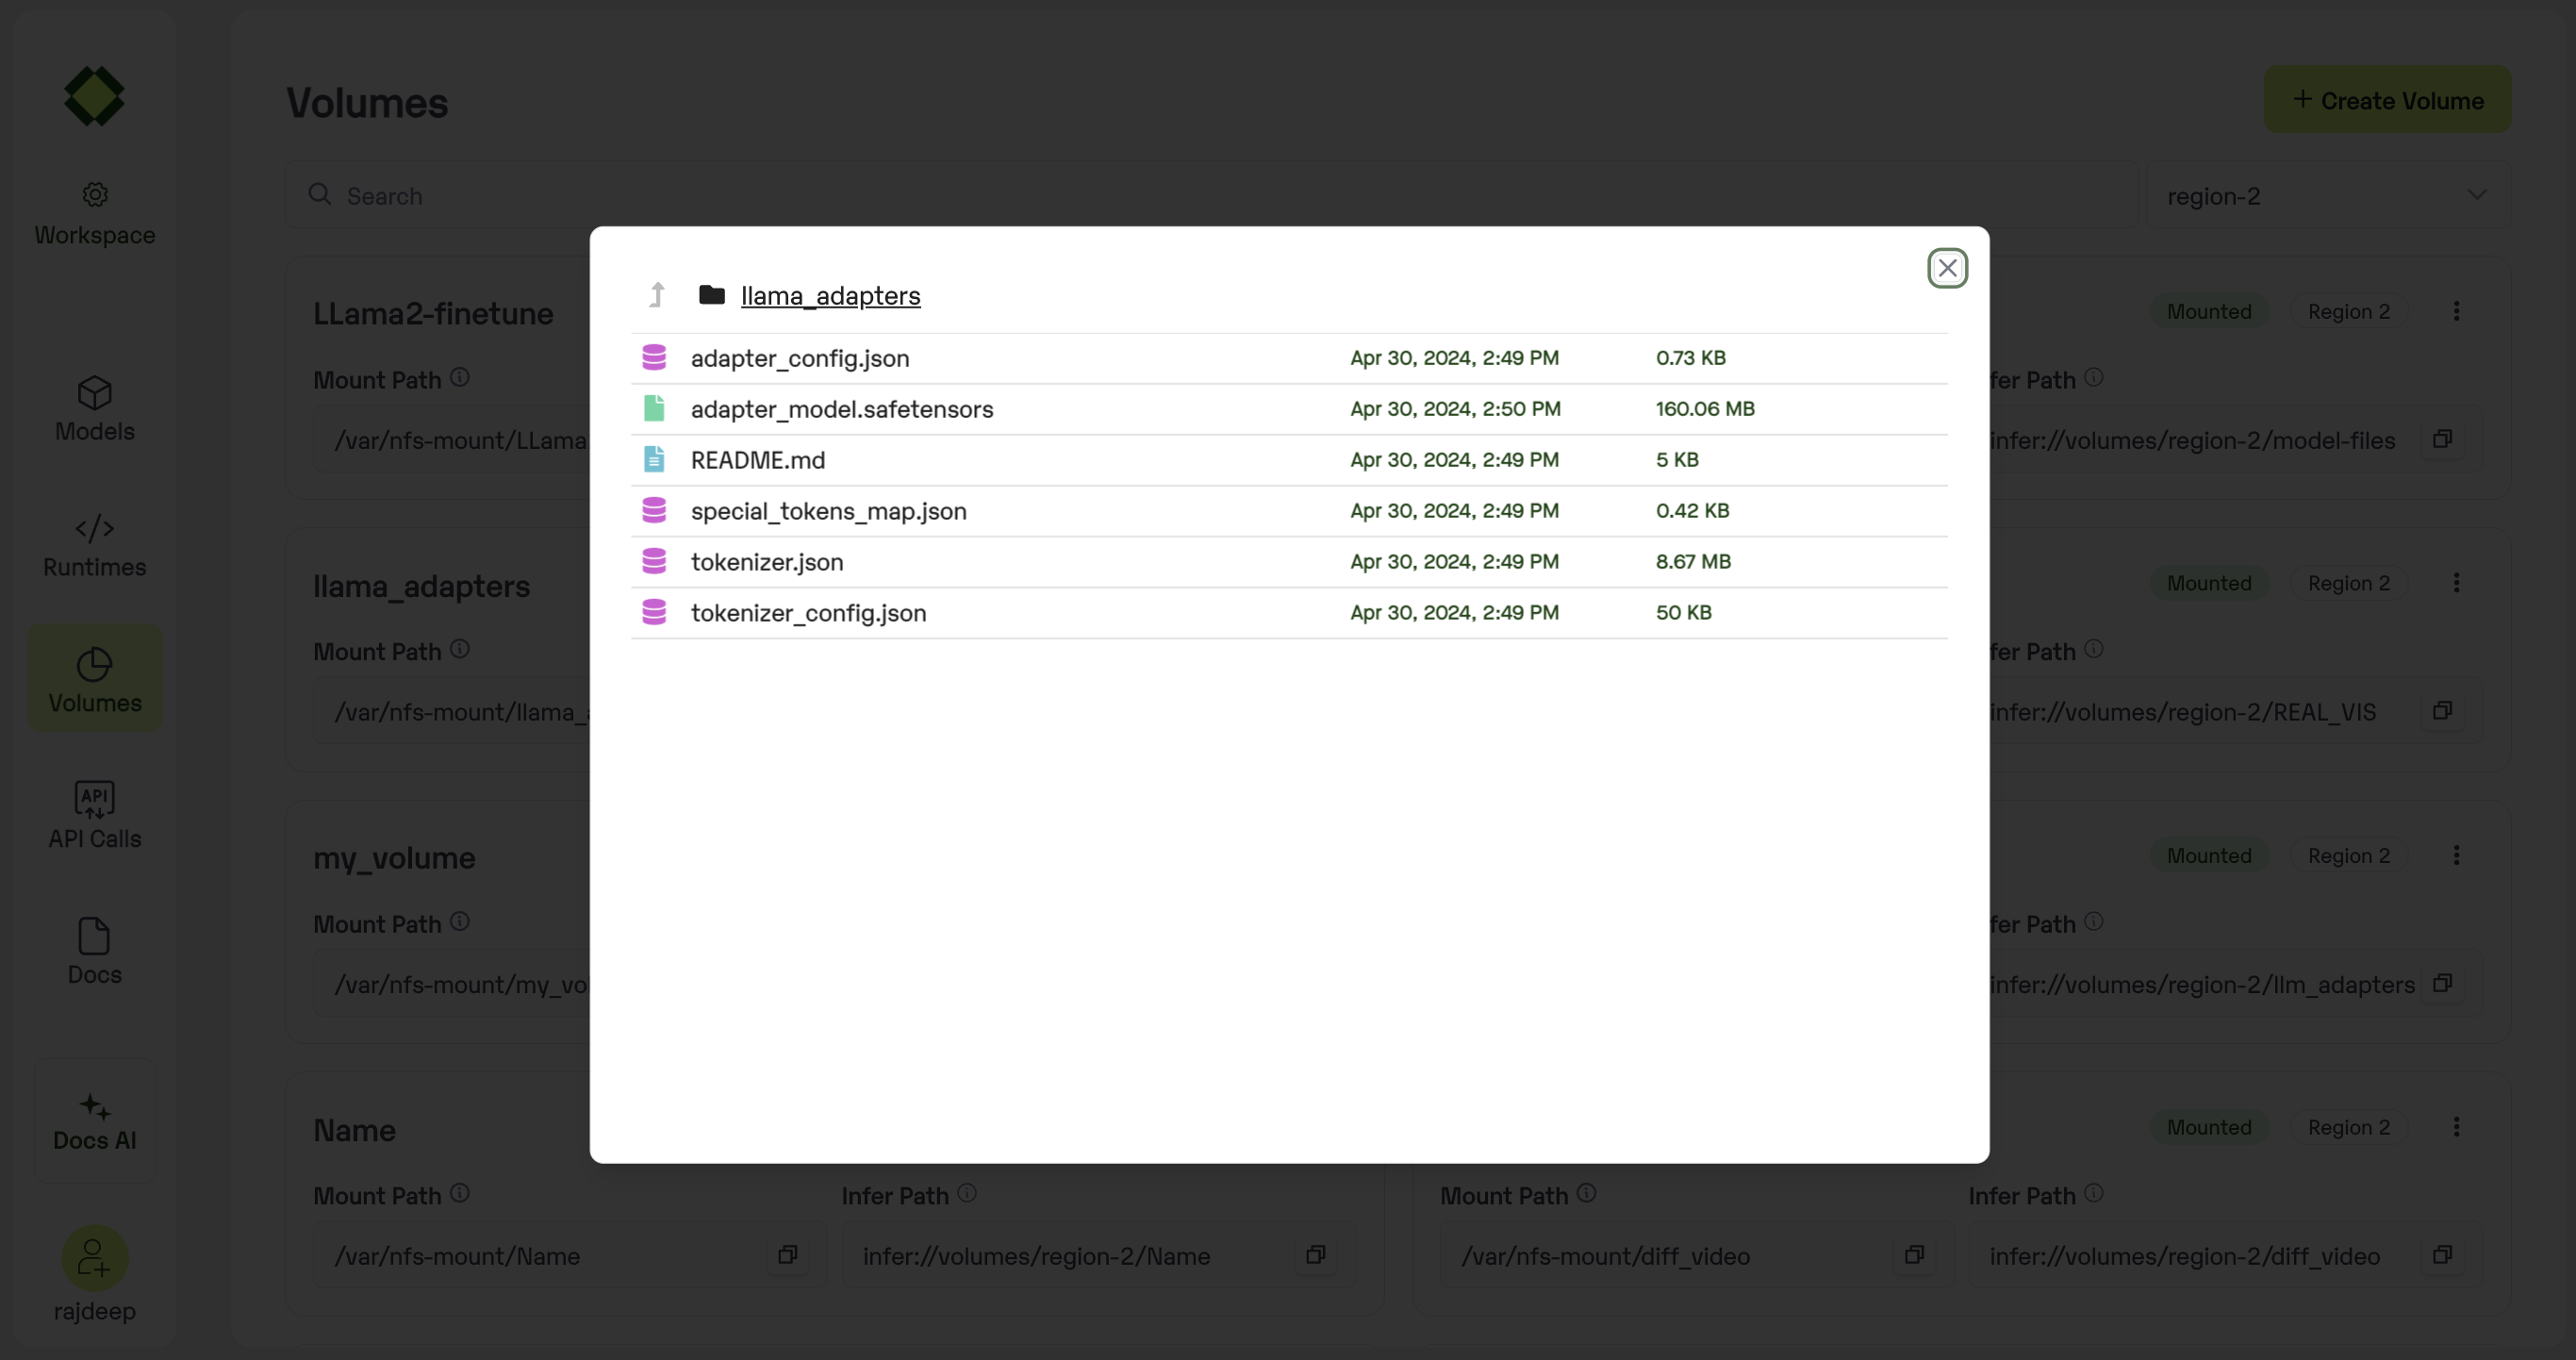 ### Delete Volumes
To delete volumes make sure it's not attached to any Deployment, You can delete it form the My Volumes page
### Delete Volumes
To delete volumes make sure it's not attached to any Deployment, You can delete it form the My Volumes page
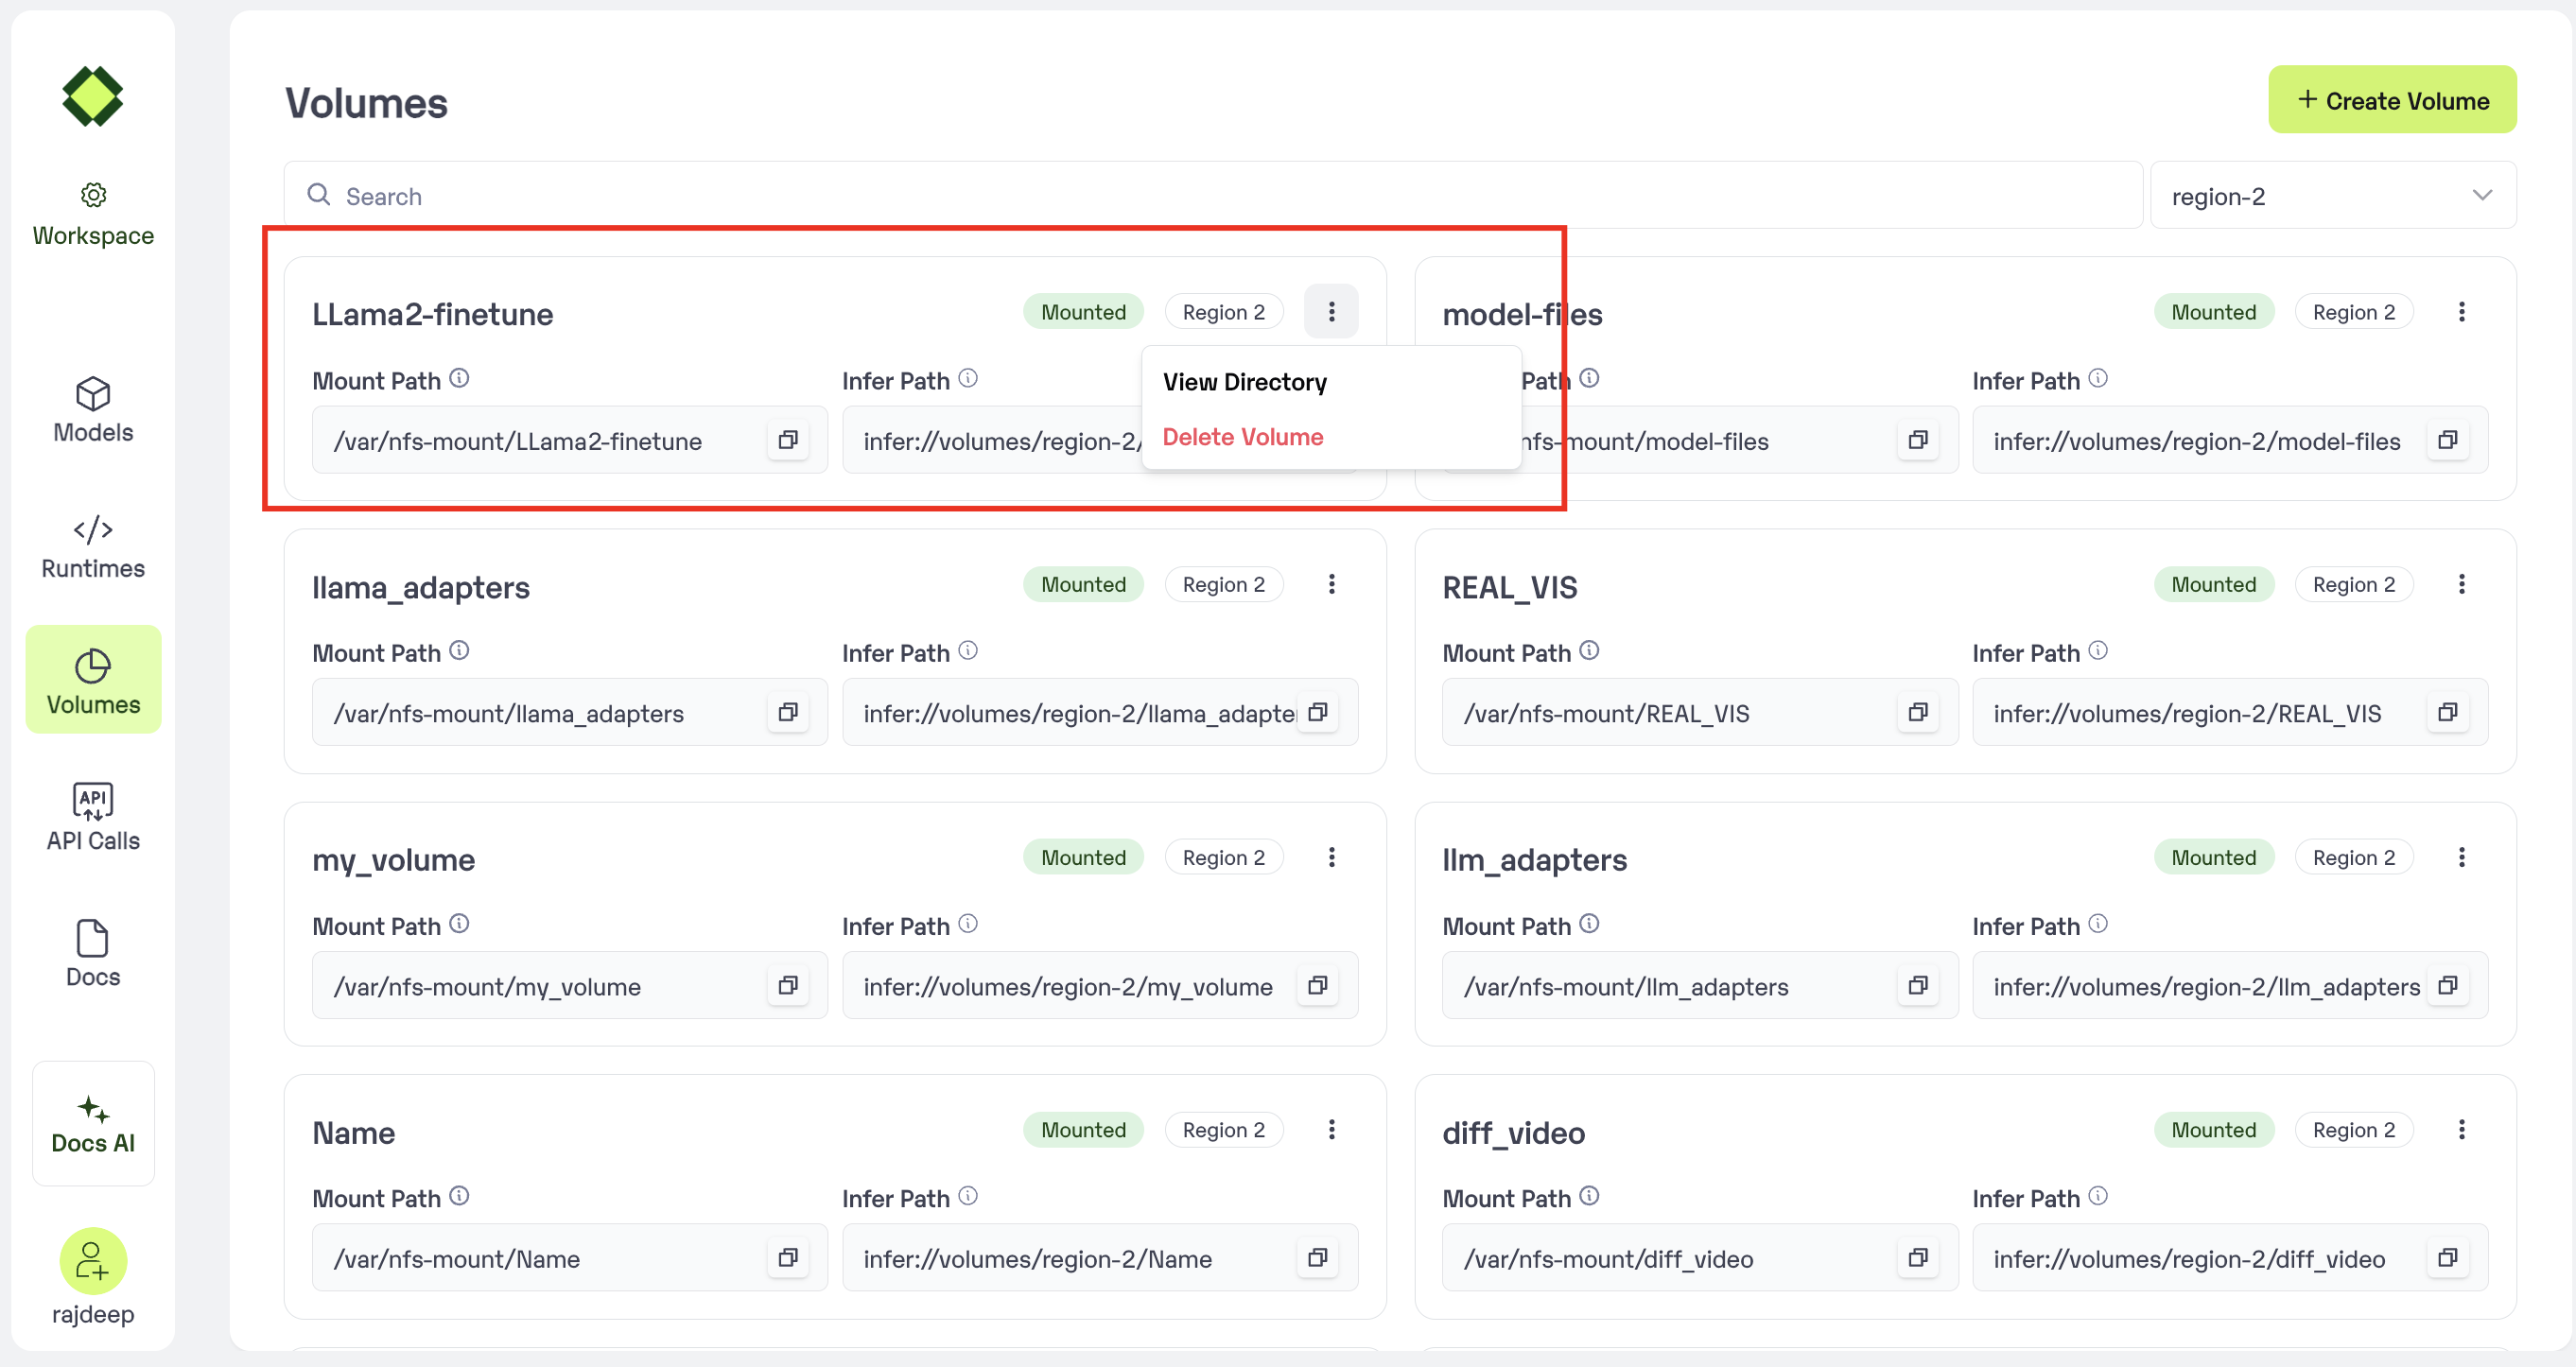 ## Method B: Create a volume using Inferless CLI
Use this command `inferless volume` to see all the functions available for volume.
Manage Inferless volumes
```console
$ inferless volume COMMAND [OPTIONS] [ARGS]...
```
**Commands**:
* `create`: Create a new volume.
* `cp`: Add a file or directory to a volume.
* `ls`: List files and directories within a volume.
* `rm`: Specify the Inferless path to the file.
* `list`: List all existing volumes.
* `select`: Select a volume for the current Inferless configuration file.
### Example Usage
```
inferless volume select --id 4e39f657-d115-4cb7-b713-012984213750
```
# Deploy and Run ComfyUI as an API on Inferless
Source: https://docs.inferless.com/cookbook/comfyui-api-inferless
Welcome to an immersive tutorial that guides you through leveraging the power of ComfyUI's API capabilities and deploying your workflows on Inferless. This resource is designed to help you create and deploy custom workflows, extending ComfyUI's API functionality. You'll learn how to interact with ComfyUI and deploy on Inferless.
## Introduction
ComfyUI is an open-source graphical user interface for image-generation models, used for generating images from text prompts using node-based approach. It allows users to create complex image generation workflows and offers extensive customization options, making it a powerful tool for AI-driven creativity.
In this tutorial we will show you how you can use your custom workflow with the ComfyUI API on Inferless.
## Overview of the Solution
Our solution revolves around these key files that works together to set up and run ComfyUI on Inferless, alongside an NFS (Network File System) volume for persistent storage.
1. [`build.sh`](https://github.com/inferless/ComfyUI-Inferless-template/blob/main/build.sh): This shell script automates the setup of the ComfyUI environment on the NFS volume. It leverages the ComfyUI command-line interface (CLI) to install and configure ComfyUI, ensuring the necessary model weights are downloaded into the specified workspace directory.
```bash
comfy --skip-prompt --workspace=$NFS_VOLUME/ComfyUI install --nvidia
comfy --skip-prompt model download --url https://huggingface.co/black-forest-labs/FLUX.1-dev/resolve/main/flux1-dev.safetensors --relative-path models/unet --set-civitai-api-token $HF_ACCESS_TOKEN
comfy --skip-prompt model download --url https://huggingface.co/comfyanonymous/flux_text_encoders/resolve/main/t5xxl_fp16.safetensors --relative-path models/clip
comfy --skip-prompt model download --url https://huggingface.co/comfyanonymous/flux_text_encoders/resolve/main/clip_l.safetensors --relative-path models/clip
comfy --skip-prompt model download --url https://huggingface.co/comfyanonymous/flux_text_encoders/resolve/main/t5xxl_fp8_e4m3fn.safetensors --relative-path models/clip
comfy --skip-prompt model download --url https://huggingface.co/black-forest-labs/FLUX.1-schnell/resolve/main/ae.safetensors --relative-path models/vae
comfy --skip-prompt model download --url https://huggingface.co/autismanon/modeldump/resolve/main/dreamshaper_8.safetensors --relative-path models/checkpoints
mkdir -p "$NFS_VOLUME/workflows"
```
2. [`app.py`](https://github.com/inferless/ComfyUI-Inferless-template/blob/main/app.py): This Python script contains the `InferlessPythonModel` class, which Inferless uses to manage the application lifecycle.
* The `initialize` function within this class triggers the `build.sh` script to set up the environment.
* The `infer` function is responsible for processing incoming user requests by interacting with the ComfyUI server to generate images, which it then returns to the user. Additionally, this function handles loading user workflows, updating them with user prompts, and managing the lifecycle of the ComfyUI server.
```python
import subprocess
import os
import uuid
from comfy_utils import run_comfyui_in_background, check_comfyui, load_workflow, prompt_update_workflow, send_comfyui_request, get_img_file_path, image_to_base64, stop_server_on_port, is_comfyui_running
import requests
import json
class InferlessPythonModel:
def initialize(self):
self.directory_path = os.getenv('NFS_VOLUME')
if not os.path.exists(self.directory_path+"/ComfyUI"):
subprocess.run(["wget", "https://github.com/inferless/ComfyUI-Inferless-template/raw/main/build.sh"])
subprocess.run(["bash", "build.sh"], check=True)
self._data_dir = self.directory_path+"/workflows"
self.server_address = "127.0.0.1:8188"
self.client_id = str(uuid.uuid4())
if is_comfyui_running(self.server_address):
stop_server_on_port(8188)
run_comfyui_in_background(self.directory_path+'/ComfyUI')
self.ws = check_comfyui(self.server_address,self.client_id)
def infer(self, inputs):
workflow_input = inputs.get("workflow")
prompt = inputs.get("prompt")
negative_prompt = inputs.get("negative_prompt")
workflow_filename = "workflow_api.json"
workflow_path = os.path.join(self._data_dir, workflow_filename)
# Process the workflow input
if workflow_input.startswith('http://') or workflow_input.startswith('https://'):
response = requests.get(workflow_input)
workflow_json = response.json()
else:
workflow_json = json.loads(workflow_input)
# Save the workflow JSON to a file
with open(workflow_path, 'w') as f:
json.dump(workflow_json, f)
# Load the saved workflow
workflow = load_workflow(workflow_path)
prompt = prompt_update_workflow(workflow_filename, workflow, prompt)
prompt_id = send_comfyui_request(self.ws, prompt, self.server_address, self.client_id)
file_path = get_img_file_path(self.server_address, prompt_id)
image_base64 = image_to_base64(self.directory_path+"/ComfyUI"+file_path)
return {"generated_image_base64": image_base64}
def finalize(self):
pass
```
3. [`comfy_utils.py`](https://github.com/inferless/ComfyUI-Inferless-template/blob/main/comfy_utils.py): This utility script have helper functions that streamline our interaction with ComfyUI.
```python
import json
import urllib.request
import time
import subprocess
import os
import websocket
import threading
import sys
import base64
import requests
import psutil
def start_comfyui(comfyui_path):
try:
process = subprocess.Popen(f"comfy --skip-prompt --workspace={comfyui_path} launch -- --listen 127.0.0.1 --port 8188",shell=True)
# Wait for a short time to see if the process starts successfully
time.sleep(5)
if process.poll() is None:
return process
else:
stdout, stderr = process.communicate()
raise Exception("ComfyUI server failed to start")
except Exception as e:
raise Exception("Error setting up ComfyUI repo") from e
def run_comfyui_in_background(comfyui_path):
def run_server():
process = start_comfyui(comfyui_path)
if process:
stdout, stderr = process.communicate()
server_thread = threading.Thread(target=run_server)
server_thread.start()
def check_comfyui(server_address,client_id):
socket_connected = False
while not socket_connected:
try:
ws = websocket.WebSocket()
ws.connect(
"ws://{}/ws?clientId={}".format(server_address, client_id)
)
socket_connected = True
except Exception as e:
time.sleep(5)
return ws
def load_workflow(workflow_path):
with open(f"{workflow_path}", 'rb') as file:
return json.load(file)
def prompt_update_workflow(workflow_name,workflow,prompt,negative_prompt=None):
workflow["6"]["inputs"]["text"] = prompt
if negative_prompt:
workflow["7"]["inputs"]["text"] = negative_prompt
return workflow
def send_comfyui_request(ws, prompt, server_address,client_id):
p = {"prompt": prompt,"client_id": client_id}
data = json.dumps(p).encode("utf-8")
url = f"http://{server_address}/prompt"
req = urllib.request.Request(url, data=data, headers={'Content-Type': 'application/json'})
with urllib.request.urlopen(req, timeout=10) as response:
response = json.loads(response.read())
while True:
prompt_id = response["prompt_id"]
out = ws.recv()
if isinstance(out, str):
message = json.loads(out)
if message["type"] == "executing":
data = message["data"]
if data["node"] is None and data["prompt_id"] == prompt_id:
break
else:
continue
return prompt_id
def get_img_file_path(server_address,prompt_id):
with urllib.request.urlopen(
"http://{}/history/{}".format(server_address, prompt_id),timeout=10
) as response:
output = json.loads(response.read())
outputs = output[prompt_id]["outputs"]
for node_id in outputs:
node_output = outputs[node_id]
if "images" in node_output:
image_outputs = []
for image in node_output["images"]:
image_outputs.append({"filename": image.get("filename")})
for node_id in image_outputs:
file_path = f"/output/{node_id.get('filename')}"
return file_path
def image_to_base64(image_path):
with open(image_path, "rb") as image_file:
encoded_string = base64.b64encode(image_file.read())
return encoded_string.decode('utf-8')
def stop_server_on_port(port):
for connection in psutil.net_connections():
if connection.laddr.port == port:
process = psutil.Process(connection.pid)
process.terminate()
def is_comfyui_running(server_address="127.0.0.1:8188"):
try:
response = requests.get(f"http://{server_address}/", timeout=5)
return response.status_code == 200
except requests.RequestException:
return False
```
4. [`inferless-runtime-config.yaml`](https://github.com/inferless/ComfyUI-Inferless-template/blob/main/inferless-runtime-config.yaml) : This YAML file is crucial for configuring the runtime environment for our ComfyUI application on Inferless.
```python
build:
system_packages:
- "wget"
- "ffmpeg"
- "libgl1-mesa-glx"
python_packages:
- "comfy-cli==1.2.3"
- "websocket-client==1.6.4"
- "accelerate==0.23.0"
- "opencv-python==4.10.0.84"
- "boto3==1.35.9"
- "pillow==10.4.0"
- "torchvision==0.19.0"
- "einops==0.8.0"
- "transformers==4.44.2"
- "scipy==1.14.1"
- "torchsde==0.2.6"
- "aiohttp==3.10.5"
- "safetensors==0.4.4"
- "pydantic==2.8.2"
- "groq==0.10.0"
- "aiohttp-sse==2.2.0"
- "spandrel==0.3.4"
- "kornia==0.7.3"
- "torchaudio==2.4.0"
- "matplotlib==3.8.0"
- "scikit-image==0.24.0"
- "simpleeval==0.9.13"
- "imageio-ffmpeg==0.5.1"
- "pypng==0.20220715.0"
```
## Architecture overview
## Method B: Create a volume using Inferless CLI
Use this command `inferless volume` to see all the functions available for volume.
Manage Inferless volumes
```console
$ inferless volume COMMAND [OPTIONS] [ARGS]...
```
**Commands**:
* `create`: Create a new volume.
* `cp`: Add a file or directory to a volume.
* `ls`: List files and directories within a volume.
* `rm`: Specify the Inferless path to the file.
* `list`: List all existing volumes.
* `select`: Select a volume for the current Inferless configuration file.
### Example Usage
```
inferless volume select --id 4e39f657-d115-4cb7-b713-012984213750
```
# Deploy and Run ComfyUI as an API on Inferless
Source: https://docs.inferless.com/cookbook/comfyui-api-inferless
Welcome to an immersive tutorial that guides you through leveraging the power of ComfyUI's API capabilities and deploying your workflows on Inferless. This resource is designed to help you create and deploy custom workflows, extending ComfyUI's API functionality. You'll learn how to interact with ComfyUI and deploy on Inferless.
## Introduction
ComfyUI is an open-source graphical user interface for image-generation models, used for generating images from text prompts using node-based approach. It allows users to create complex image generation workflows and offers extensive customization options, making it a powerful tool for AI-driven creativity.
In this tutorial we will show you how you can use your custom workflow with the ComfyUI API on Inferless.
## Overview of the Solution
Our solution revolves around these key files that works together to set up and run ComfyUI on Inferless, alongside an NFS (Network File System) volume for persistent storage.
1. [`build.sh`](https://github.com/inferless/ComfyUI-Inferless-template/blob/main/build.sh): This shell script automates the setup of the ComfyUI environment on the NFS volume. It leverages the ComfyUI command-line interface (CLI) to install and configure ComfyUI, ensuring the necessary model weights are downloaded into the specified workspace directory.
```bash
comfy --skip-prompt --workspace=$NFS_VOLUME/ComfyUI install --nvidia
comfy --skip-prompt model download --url https://huggingface.co/black-forest-labs/FLUX.1-dev/resolve/main/flux1-dev.safetensors --relative-path models/unet --set-civitai-api-token $HF_ACCESS_TOKEN
comfy --skip-prompt model download --url https://huggingface.co/comfyanonymous/flux_text_encoders/resolve/main/t5xxl_fp16.safetensors --relative-path models/clip
comfy --skip-prompt model download --url https://huggingface.co/comfyanonymous/flux_text_encoders/resolve/main/clip_l.safetensors --relative-path models/clip
comfy --skip-prompt model download --url https://huggingface.co/comfyanonymous/flux_text_encoders/resolve/main/t5xxl_fp8_e4m3fn.safetensors --relative-path models/clip
comfy --skip-prompt model download --url https://huggingface.co/black-forest-labs/FLUX.1-schnell/resolve/main/ae.safetensors --relative-path models/vae
comfy --skip-prompt model download --url https://huggingface.co/autismanon/modeldump/resolve/main/dreamshaper_8.safetensors --relative-path models/checkpoints
mkdir -p "$NFS_VOLUME/workflows"
```
2. [`app.py`](https://github.com/inferless/ComfyUI-Inferless-template/blob/main/app.py): This Python script contains the `InferlessPythonModel` class, which Inferless uses to manage the application lifecycle.
* The `initialize` function within this class triggers the `build.sh` script to set up the environment.
* The `infer` function is responsible for processing incoming user requests by interacting with the ComfyUI server to generate images, which it then returns to the user. Additionally, this function handles loading user workflows, updating them with user prompts, and managing the lifecycle of the ComfyUI server.
```python
import subprocess
import os
import uuid
from comfy_utils import run_comfyui_in_background, check_comfyui, load_workflow, prompt_update_workflow, send_comfyui_request, get_img_file_path, image_to_base64, stop_server_on_port, is_comfyui_running
import requests
import json
class InferlessPythonModel:
def initialize(self):
self.directory_path = os.getenv('NFS_VOLUME')
if not os.path.exists(self.directory_path+"/ComfyUI"):
subprocess.run(["wget", "https://github.com/inferless/ComfyUI-Inferless-template/raw/main/build.sh"])
subprocess.run(["bash", "build.sh"], check=True)
self._data_dir = self.directory_path+"/workflows"
self.server_address = "127.0.0.1:8188"
self.client_id = str(uuid.uuid4())
if is_comfyui_running(self.server_address):
stop_server_on_port(8188)
run_comfyui_in_background(self.directory_path+'/ComfyUI')
self.ws = check_comfyui(self.server_address,self.client_id)
def infer(self, inputs):
workflow_input = inputs.get("workflow")
prompt = inputs.get("prompt")
negative_prompt = inputs.get("negative_prompt")
workflow_filename = "workflow_api.json"
workflow_path = os.path.join(self._data_dir, workflow_filename)
# Process the workflow input
if workflow_input.startswith('http://') or workflow_input.startswith('https://'):
response = requests.get(workflow_input)
workflow_json = response.json()
else:
workflow_json = json.loads(workflow_input)
# Save the workflow JSON to a file
with open(workflow_path, 'w') as f:
json.dump(workflow_json, f)
# Load the saved workflow
workflow = load_workflow(workflow_path)
prompt = prompt_update_workflow(workflow_filename, workflow, prompt)
prompt_id = send_comfyui_request(self.ws, prompt, self.server_address, self.client_id)
file_path = get_img_file_path(self.server_address, prompt_id)
image_base64 = image_to_base64(self.directory_path+"/ComfyUI"+file_path)
return {"generated_image_base64": image_base64}
def finalize(self):
pass
```
3. [`comfy_utils.py`](https://github.com/inferless/ComfyUI-Inferless-template/blob/main/comfy_utils.py): This utility script have helper functions that streamline our interaction with ComfyUI.
```python
import json
import urllib.request
import time
import subprocess
import os
import websocket
import threading
import sys
import base64
import requests
import psutil
def start_comfyui(comfyui_path):
try:
process = subprocess.Popen(f"comfy --skip-prompt --workspace={comfyui_path} launch -- --listen 127.0.0.1 --port 8188",shell=True)
# Wait for a short time to see if the process starts successfully
time.sleep(5)
if process.poll() is None:
return process
else:
stdout, stderr = process.communicate()
raise Exception("ComfyUI server failed to start")
except Exception as e:
raise Exception("Error setting up ComfyUI repo") from e
def run_comfyui_in_background(comfyui_path):
def run_server():
process = start_comfyui(comfyui_path)
if process:
stdout, stderr = process.communicate()
server_thread = threading.Thread(target=run_server)
server_thread.start()
def check_comfyui(server_address,client_id):
socket_connected = False
while not socket_connected:
try:
ws = websocket.WebSocket()
ws.connect(
"ws://{}/ws?clientId={}".format(server_address, client_id)
)
socket_connected = True
except Exception as e:
time.sleep(5)
return ws
def load_workflow(workflow_path):
with open(f"{workflow_path}", 'rb') as file:
return json.load(file)
def prompt_update_workflow(workflow_name,workflow,prompt,negative_prompt=None):
workflow["6"]["inputs"]["text"] = prompt
if negative_prompt:
workflow["7"]["inputs"]["text"] = negative_prompt
return workflow
def send_comfyui_request(ws, prompt, server_address,client_id):
p = {"prompt": prompt,"client_id": client_id}
data = json.dumps(p).encode("utf-8")
url = f"http://{server_address}/prompt"
req = urllib.request.Request(url, data=data, headers={'Content-Type': 'application/json'})
with urllib.request.urlopen(req, timeout=10) as response:
response = json.loads(response.read())
while True:
prompt_id = response["prompt_id"]
out = ws.recv()
if isinstance(out, str):
message = json.loads(out)
if message["type"] == "executing":
data = message["data"]
if data["node"] is None and data["prompt_id"] == prompt_id:
break
else:
continue
return prompt_id
def get_img_file_path(server_address,prompt_id):
with urllib.request.urlopen(
"http://{}/history/{}".format(server_address, prompt_id),timeout=10
) as response:
output = json.loads(response.read())
outputs = output[prompt_id]["outputs"]
for node_id in outputs:
node_output = outputs[node_id]
if "images" in node_output:
image_outputs = []
for image in node_output["images"]:
image_outputs.append({"filename": image.get("filename")})
for node_id in image_outputs:
file_path = f"/output/{node_id.get('filename')}"
return file_path
def image_to_base64(image_path):
with open(image_path, "rb") as image_file:
encoded_string = base64.b64encode(image_file.read())
return encoded_string.decode('utf-8')
def stop_server_on_port(port):
for connection in psutil.net_connections():
if connection.laddr.port == port:
process = psutil.Process(connection.pid)
process.terminate()
def is_comfyui_running(server_address="127.0.0.1:8188"):
try:
response = requests.get(f"http://{server_address}/", timeout=5)
return response.status_code == 200
except requests.RequestException:
return False
```
4. [`inferless-runtime-config.yaml`](https://github.com/inferless/ComfyUI-Inferless-template/blob/main/inferless-runtime-config.yaml) : This YAML file is crucial for configuring the runtime environment for our ComfyUI application on Inferless.
```python
build:
system_packages:
- "wget"
- "ffmpeg"
- "libgl1-mesa-glx"
python_packages:
- "comfy-cli==1.2.3"
- "websocket-client==1.6.4"
- "accelerate==0.23.0"
- "opencv-python==4.10.0.84"
- "boto3==1.35.9"
- "pillow==10.4.0"
- "torchvision==0.19.0"
- "einops==0.8.0"
- "transformers==4.44.2"
- "scipy==1.14.1"
- "torchsde==0.2.6"
- "aiohttp==3.10.5"
- "safetensors==0.4.4"
- "pydantic==2.8.2"
- "groq==0.10.0"
- "aiohttp-sse==2.2.0"
- "spandrel==0.3.4"
- "kornia==0.7.3"
- "torchaudio==2.4.0"
- "matplotlib==3.8.0"
- "scikit-image==0.24.0"
- "simpleeval==0.9.13"
- "imageio-ffmpeg==0.5.1"
- "pypng==0.20220715.0"
```
## Architecture overview
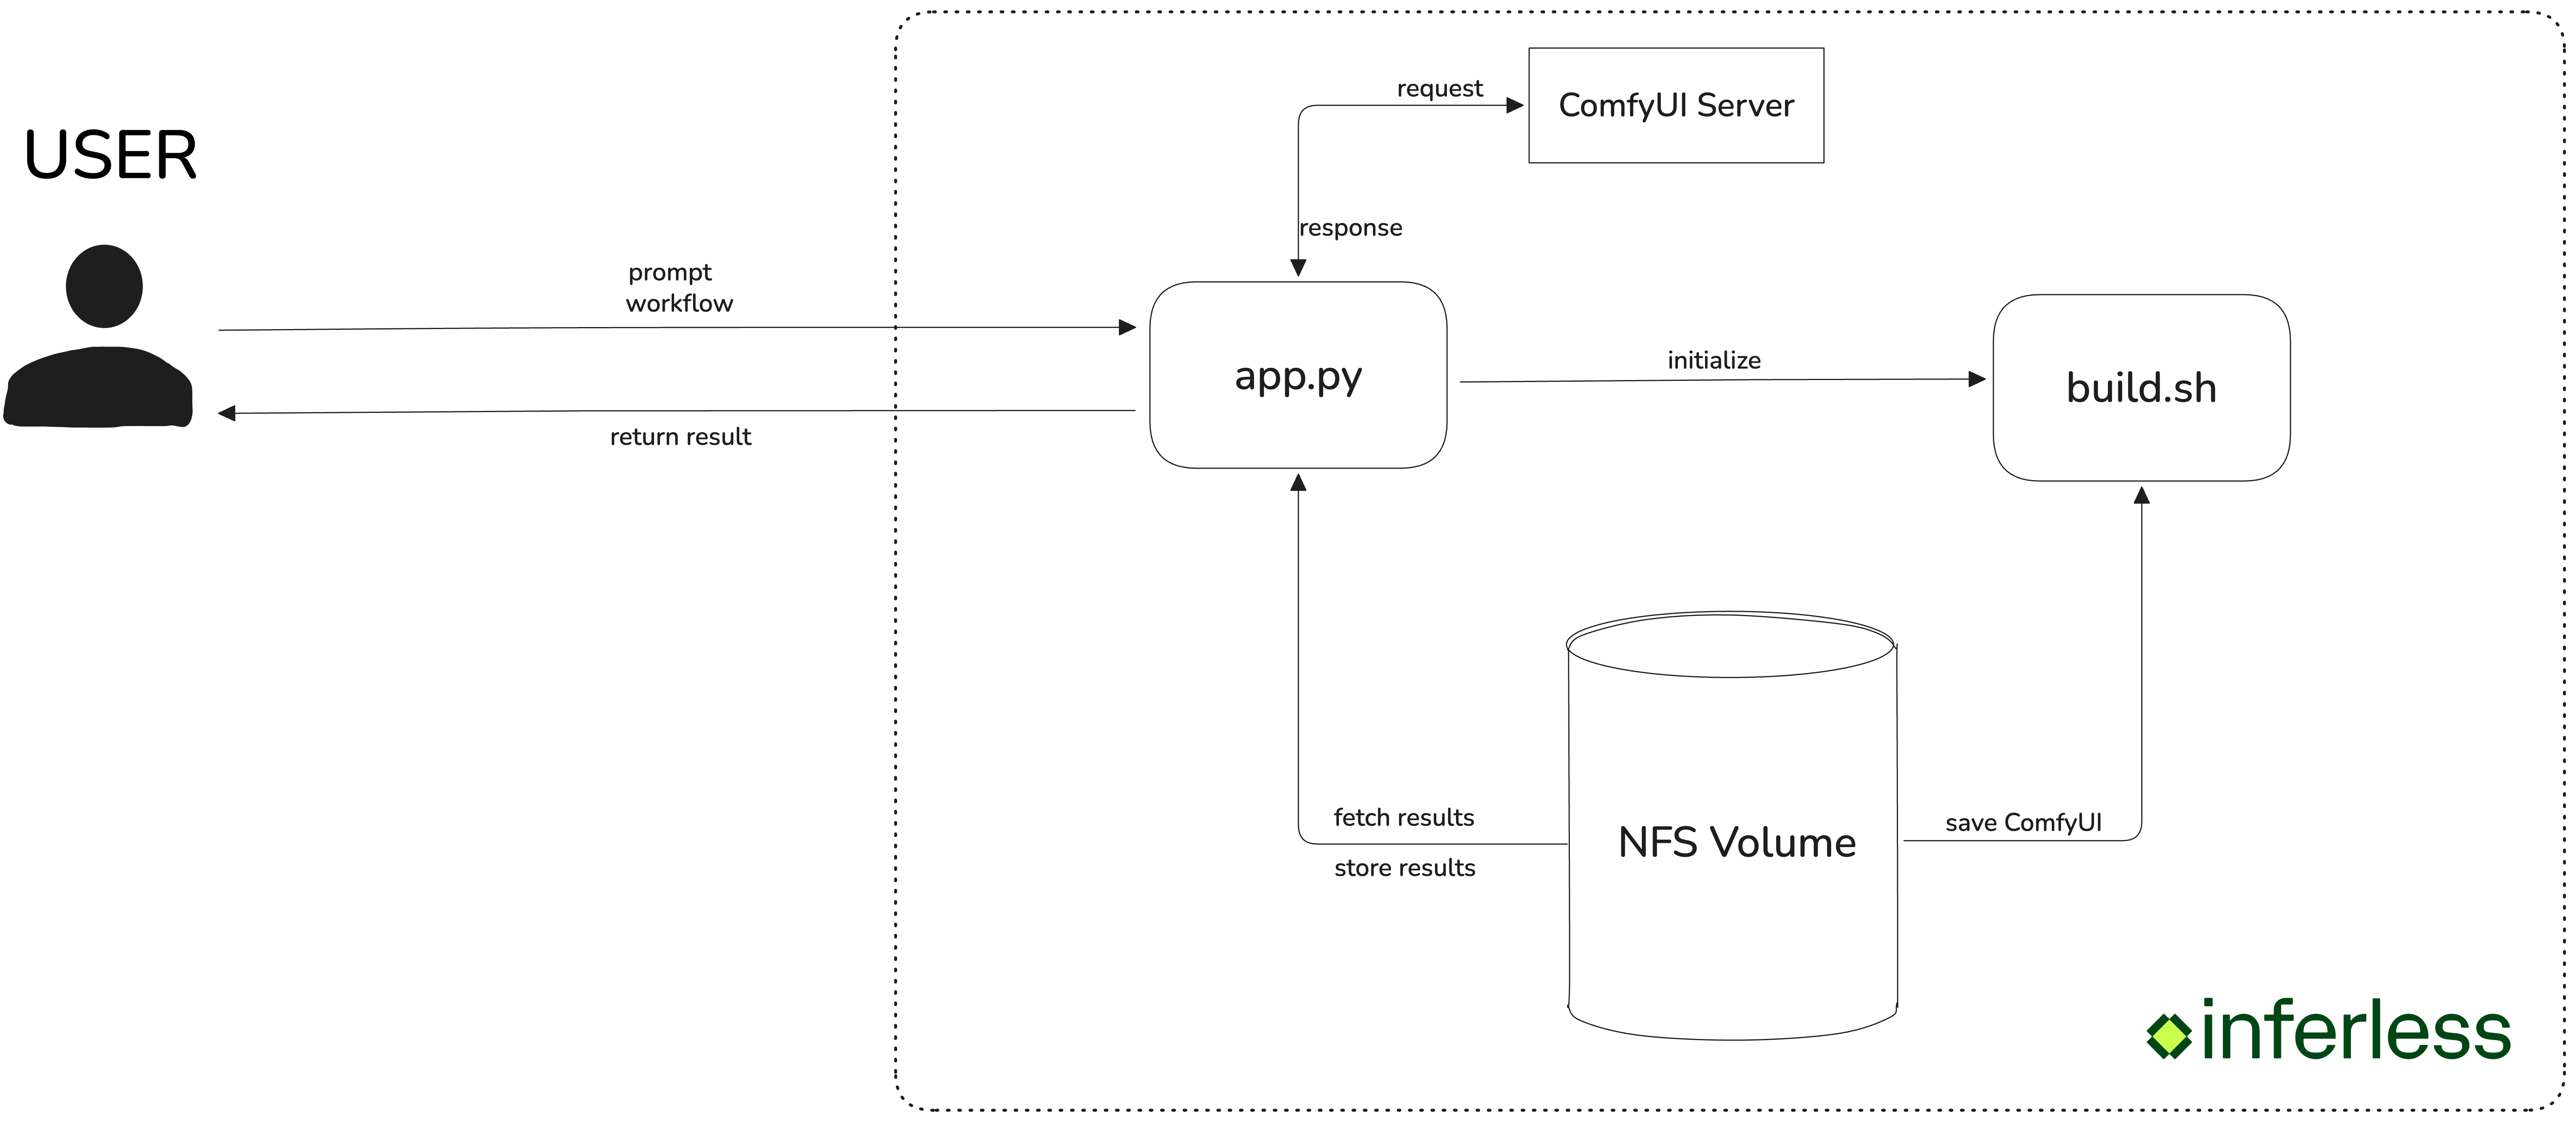 Our solution utilizes a streamlined request-response model consisting of the following steps:
1. User Request: Users submit requests to the Inferless endpoint, specifying both the desired workflow and a prompt. Inferless then directs these requests to our ComfyUI server.
2. ComfyUI Processing: Upon receiving the request, the specified workflow is executed by the ComfyUI server, which processes the prompt to generate the image. Once the image is ready, we retrieve the result.
3. Response Delivery: The generated image is encoded in base64 format and returned to the user.
## Deploy your ComfyUI application
Deploying your ComfyUI application on Inferless involves a series of straightforward steps that leverage the platform's serverless capabilities. Here's the steps for deployment:
1. Begin by creating an NFS volume on Inferless. This volume will serve as the persistent storage for your ComfyUI files, workflows, and generated images. Note the mount path (e.g., `/var/nfs-mount/YOUR_VOLUME_MOUNT_PATH`) as you'll need to pass as an environment variable as `NFS_VOLUME`.
2. Ensure your `build.sh`, `app.py`, `comfy_utils.py`, and any custom workflow JSON files are ready. These files should be uploaded to a GitHub repository for easy access during deployment.
3. Log into your Inferless account and click on the `Add a custom model`. Then follow these steps:
* Select the Github from the model provider list and then select the GitHub repository URL and branch.
Our solution utilizes a streamlined request-response model consisting of the following steps:
1. User Request: Users submit requests to the Inferless endpoint, specifying both the desired workflow and a prompt. Inferless then directs these requests to our ComfyUI server.
2. ComfyUI Processing: Upon receiving the request, the specified workflow is executed by the ComfyUI server, which processes the prompt to generate the image. Once the image is ready, we retrieve the result.
3. Response Delivery: The generated image is encoded in base64 format and returned to the user.
## Deploy your ComfyUI application
Deploying your ComfyUI application on Inferless involves a series of straightforward steps that leverage the platform's serverless capabilities. Here's the steps for deployment:
1. Begin by creating an NFS volume on Inferless. This volume will serve as the persistent storage for your ComfyUI files, workflows, and generated images. Note the mount path (e.g., `/var/nfs-mount/YOUR_VOLUME_MOUNT_PATH`) as you'll need to pass as an environment variable as `NFS_VOLUME`.
2. Ensure your `build.sh`, `app.py`, `comfy_utils.py`, and any custom workflow JSON files are ready. These files should be uploaded to a GitHub repository for easy access during deployment.
3. Log into your Inferless account and click on the `Add a custom model`. Then follow these steps:
* Select the Github from the model provider list and then select the GitHub repository URL and branch.
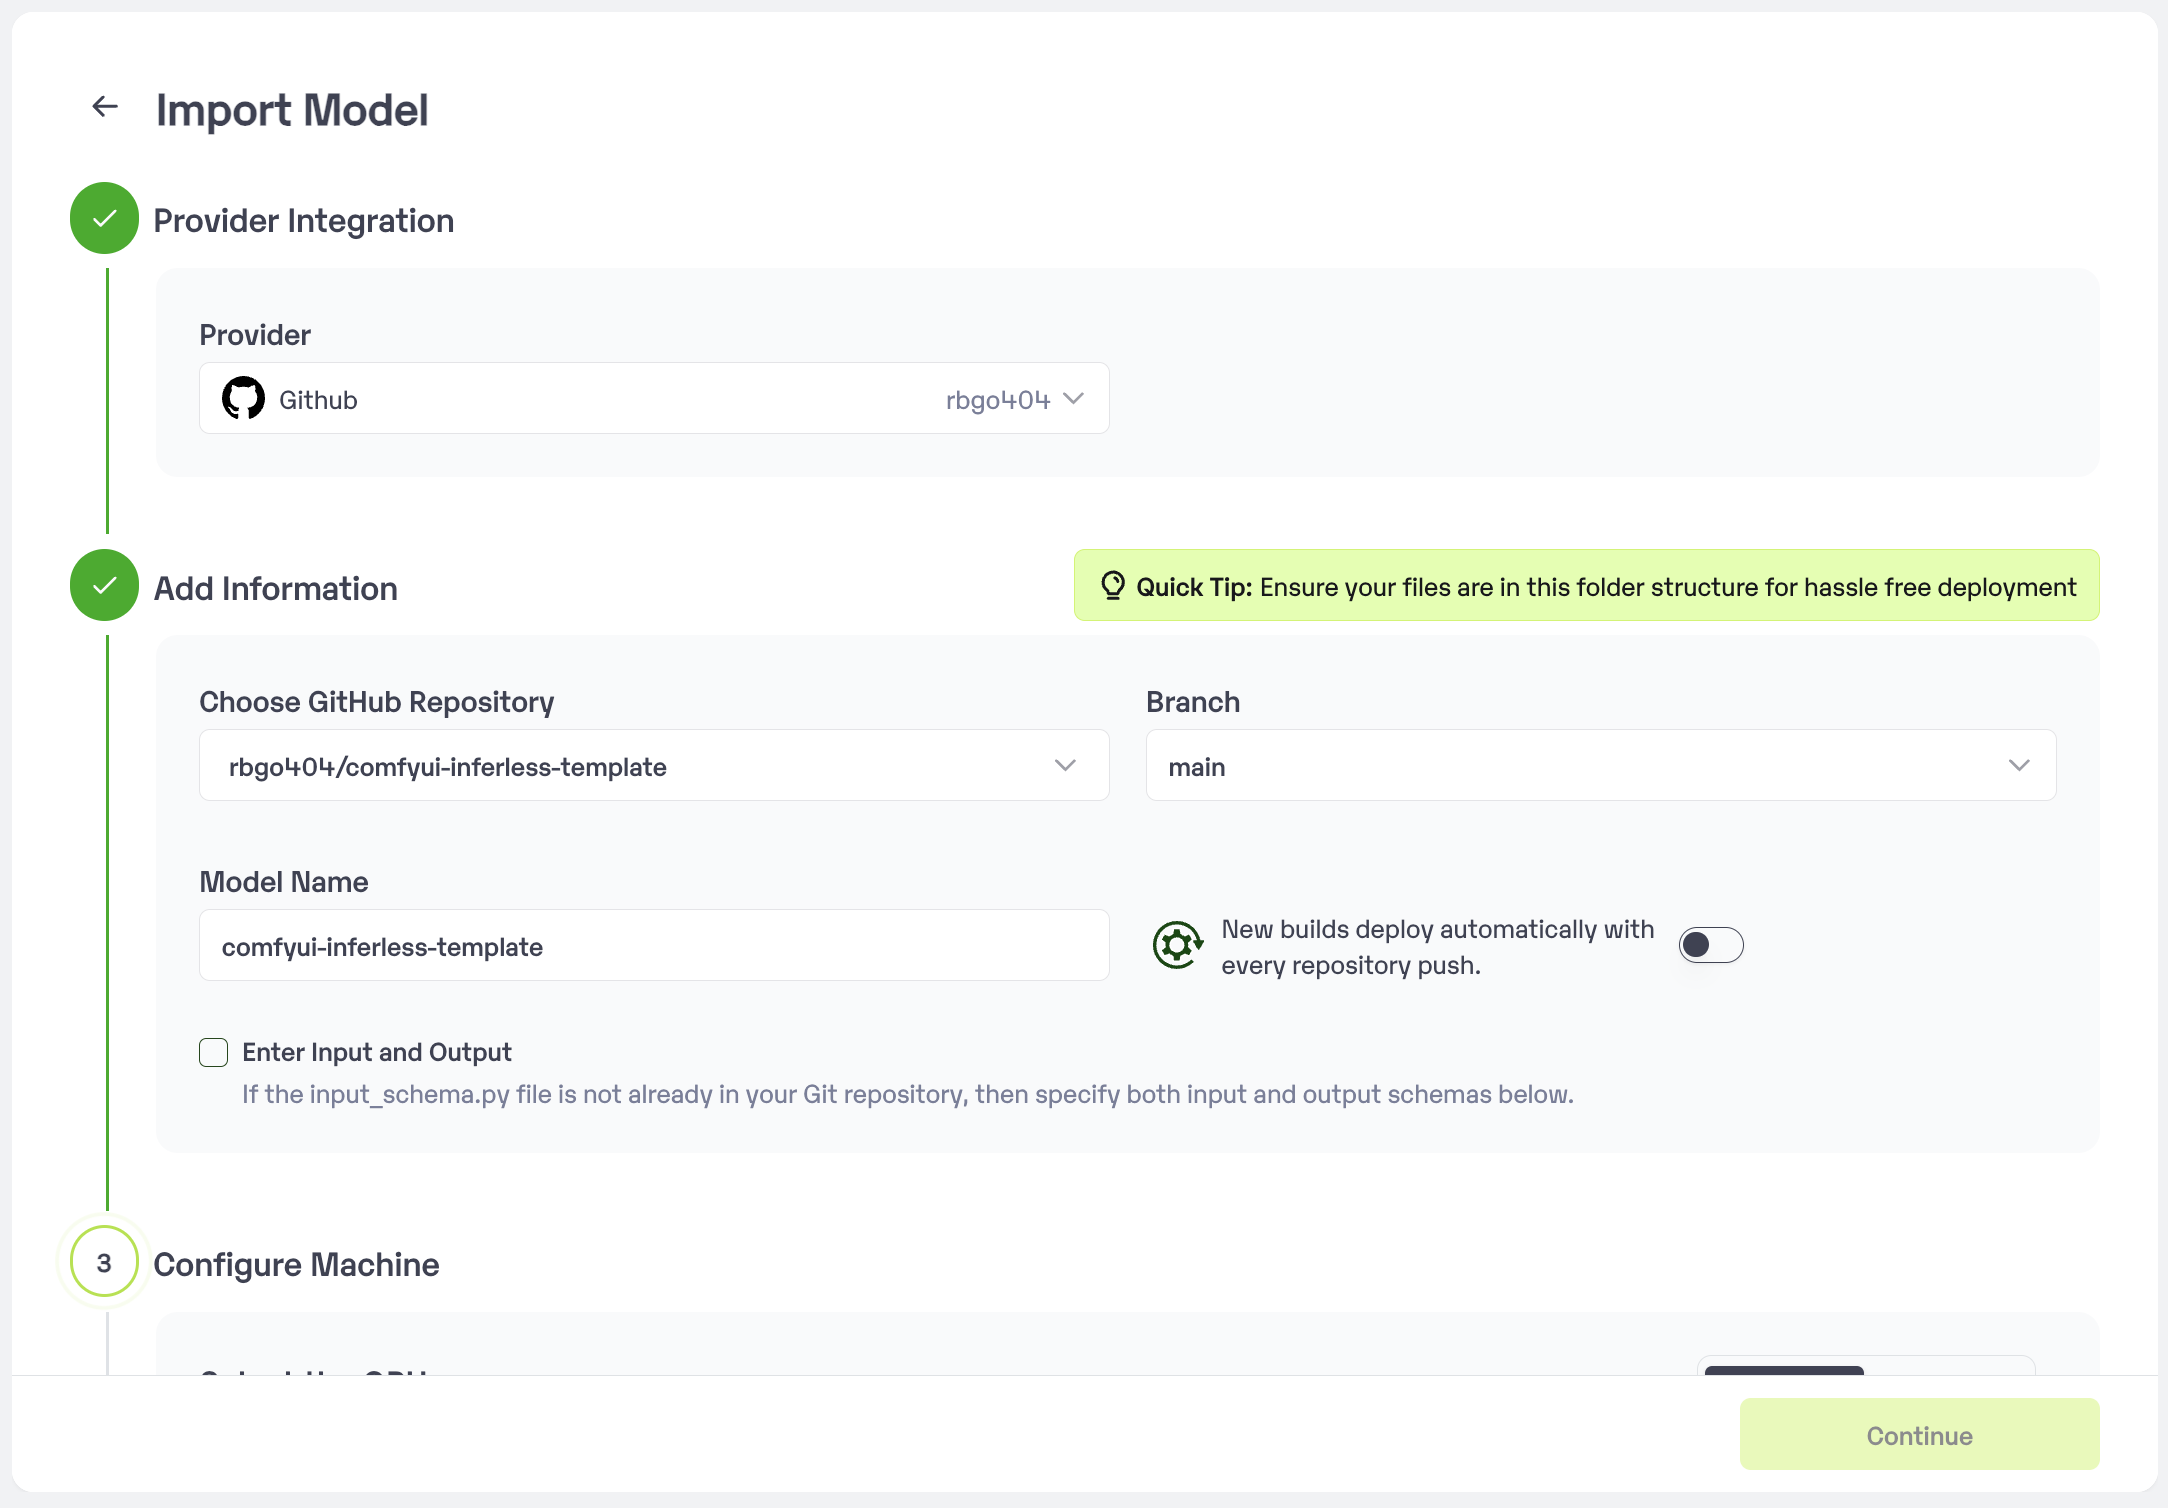 * Choose the type of machine, and specify the minimum and maximum number of replicas for deploying your ComfyUI.
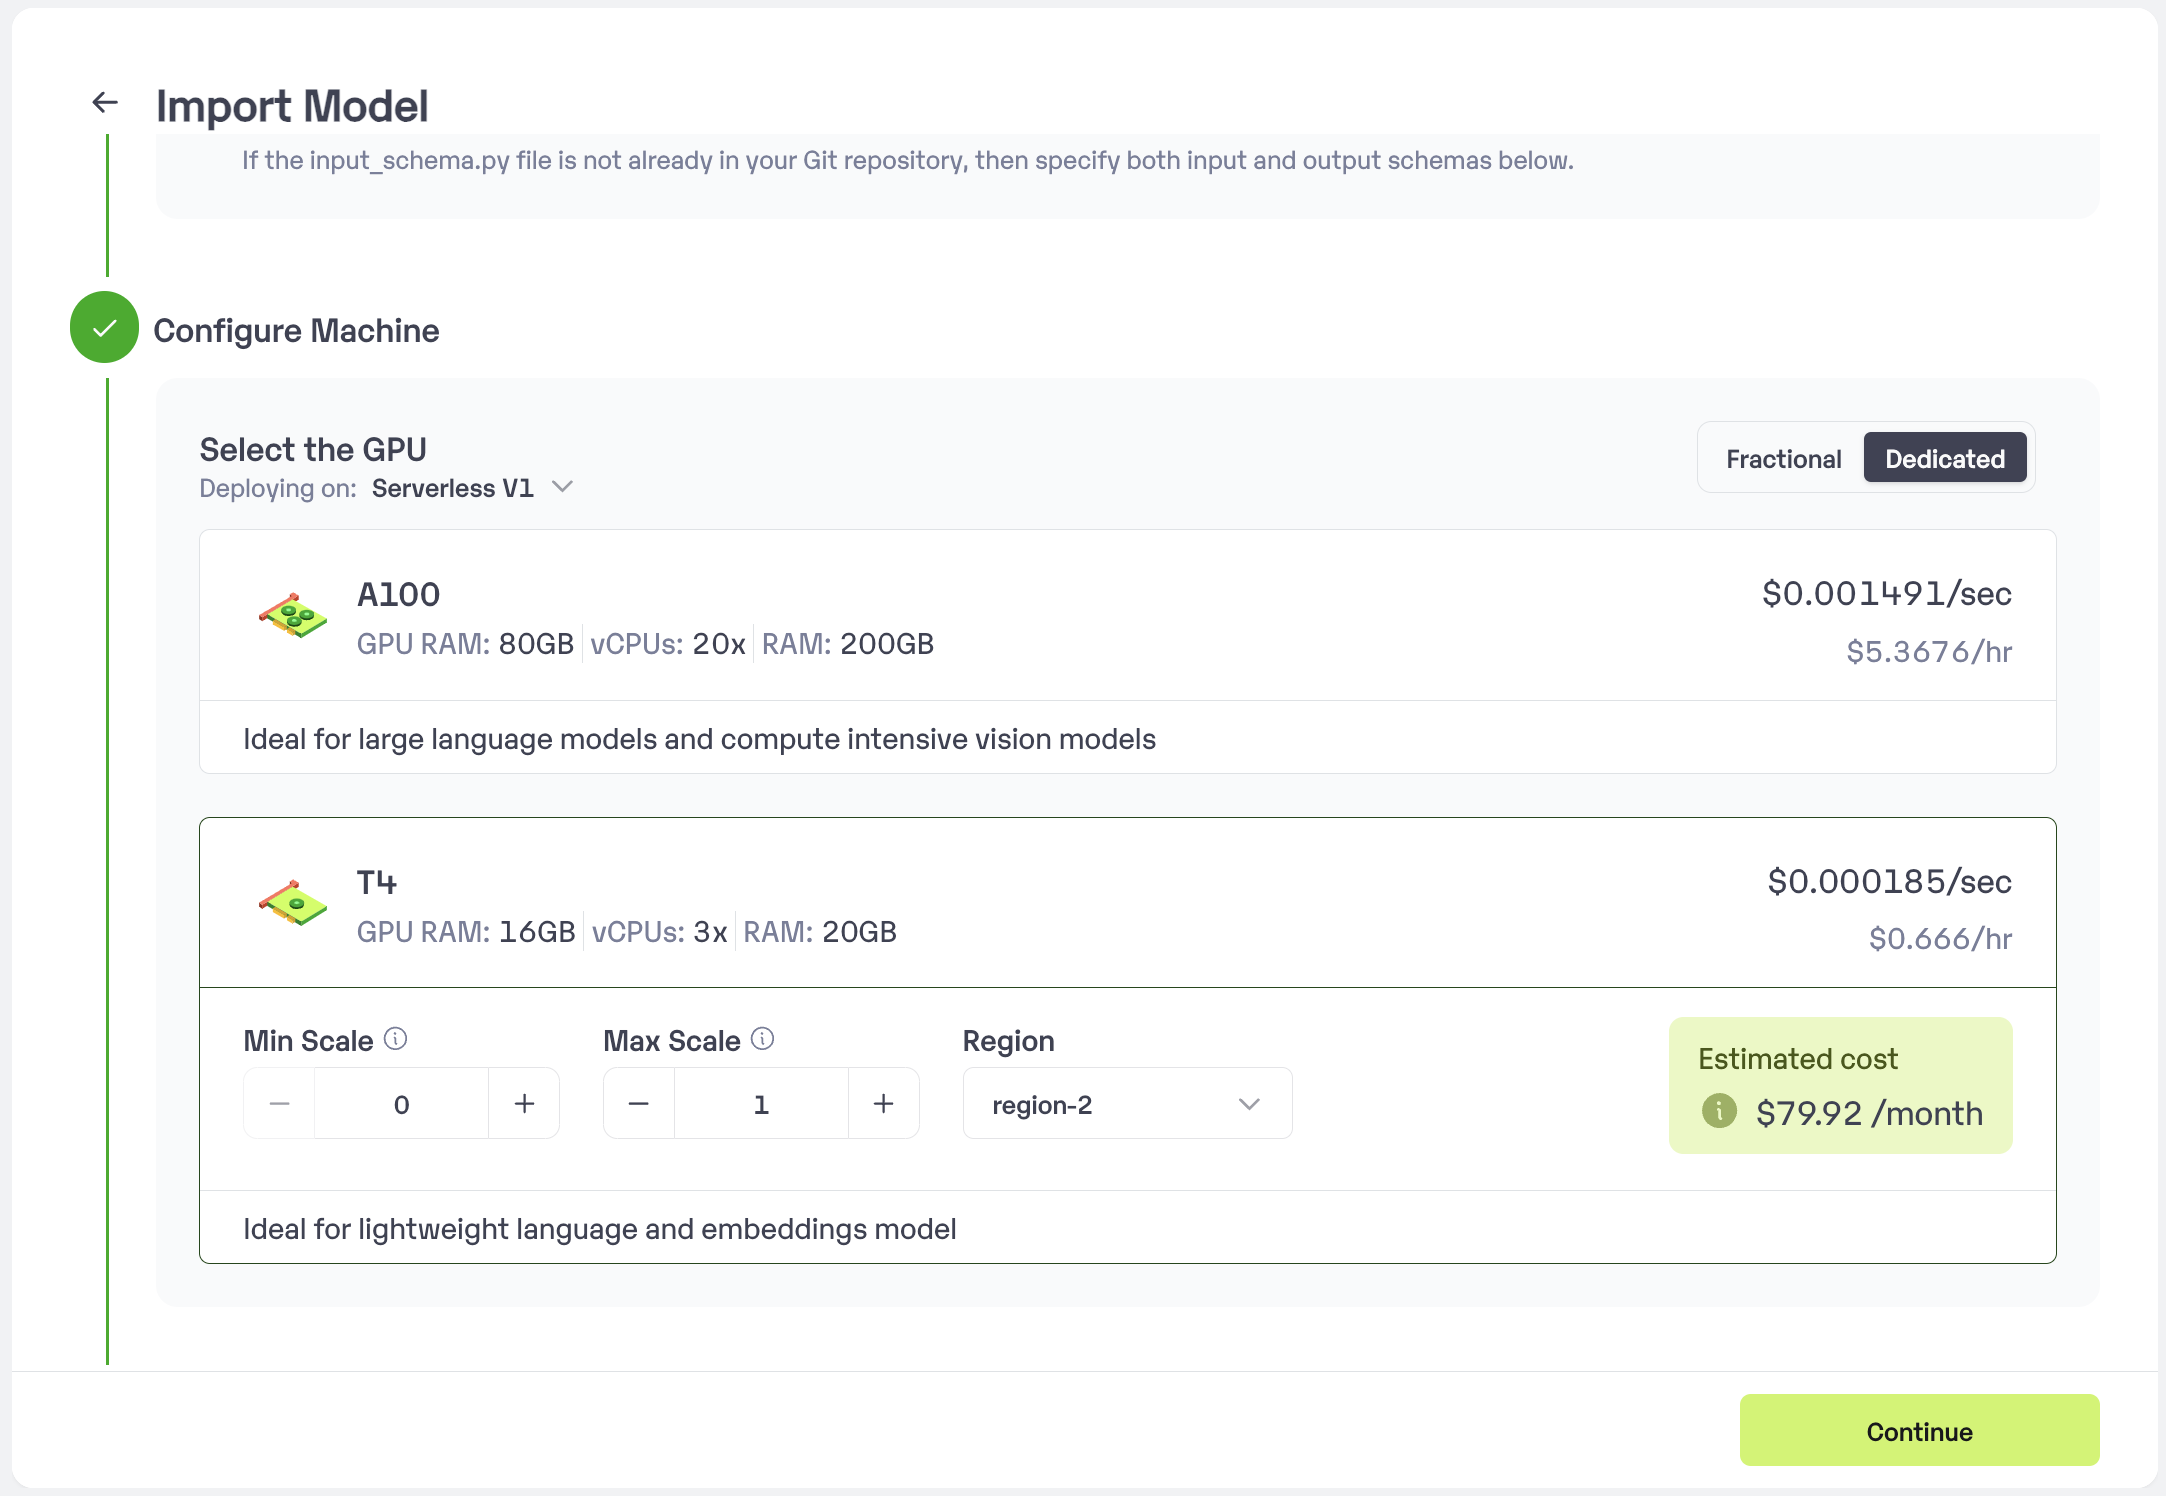 * Upload the Custom Runtime and choose the NFS Volume that we have created. Secrets and set Environment variables like Inference Timeout, Container Concurrency, Scale Down Timeout.
* Now pass the NFS Volume path and Hugging Face access token as a environment variables `NFS_VOLUME` as key and YOUR\_VOLUME\_MOUNT\_PATH as the value. And then `HF_ACCESS_TOKEN` as key and YOUR\_HF\_ACCESS\_TOKEN as the value.
* Upload the Custom Runtime and choose the NFS Volume that we have created. Secrets and set Environment variables like Inference Timeout, Container Concurrency, Scale Down Timeout.
* Now pass the NFS Volume path and Hugging Face access token as a environment variables `NFS_VOLUME` as key and YOUR\_VOLUME\_MOUNT\_PATH as the value. And then `HF_ACCESS_TOKEN` as key and YOUR\_HF\_ACCESS\_TOKEN as the value.
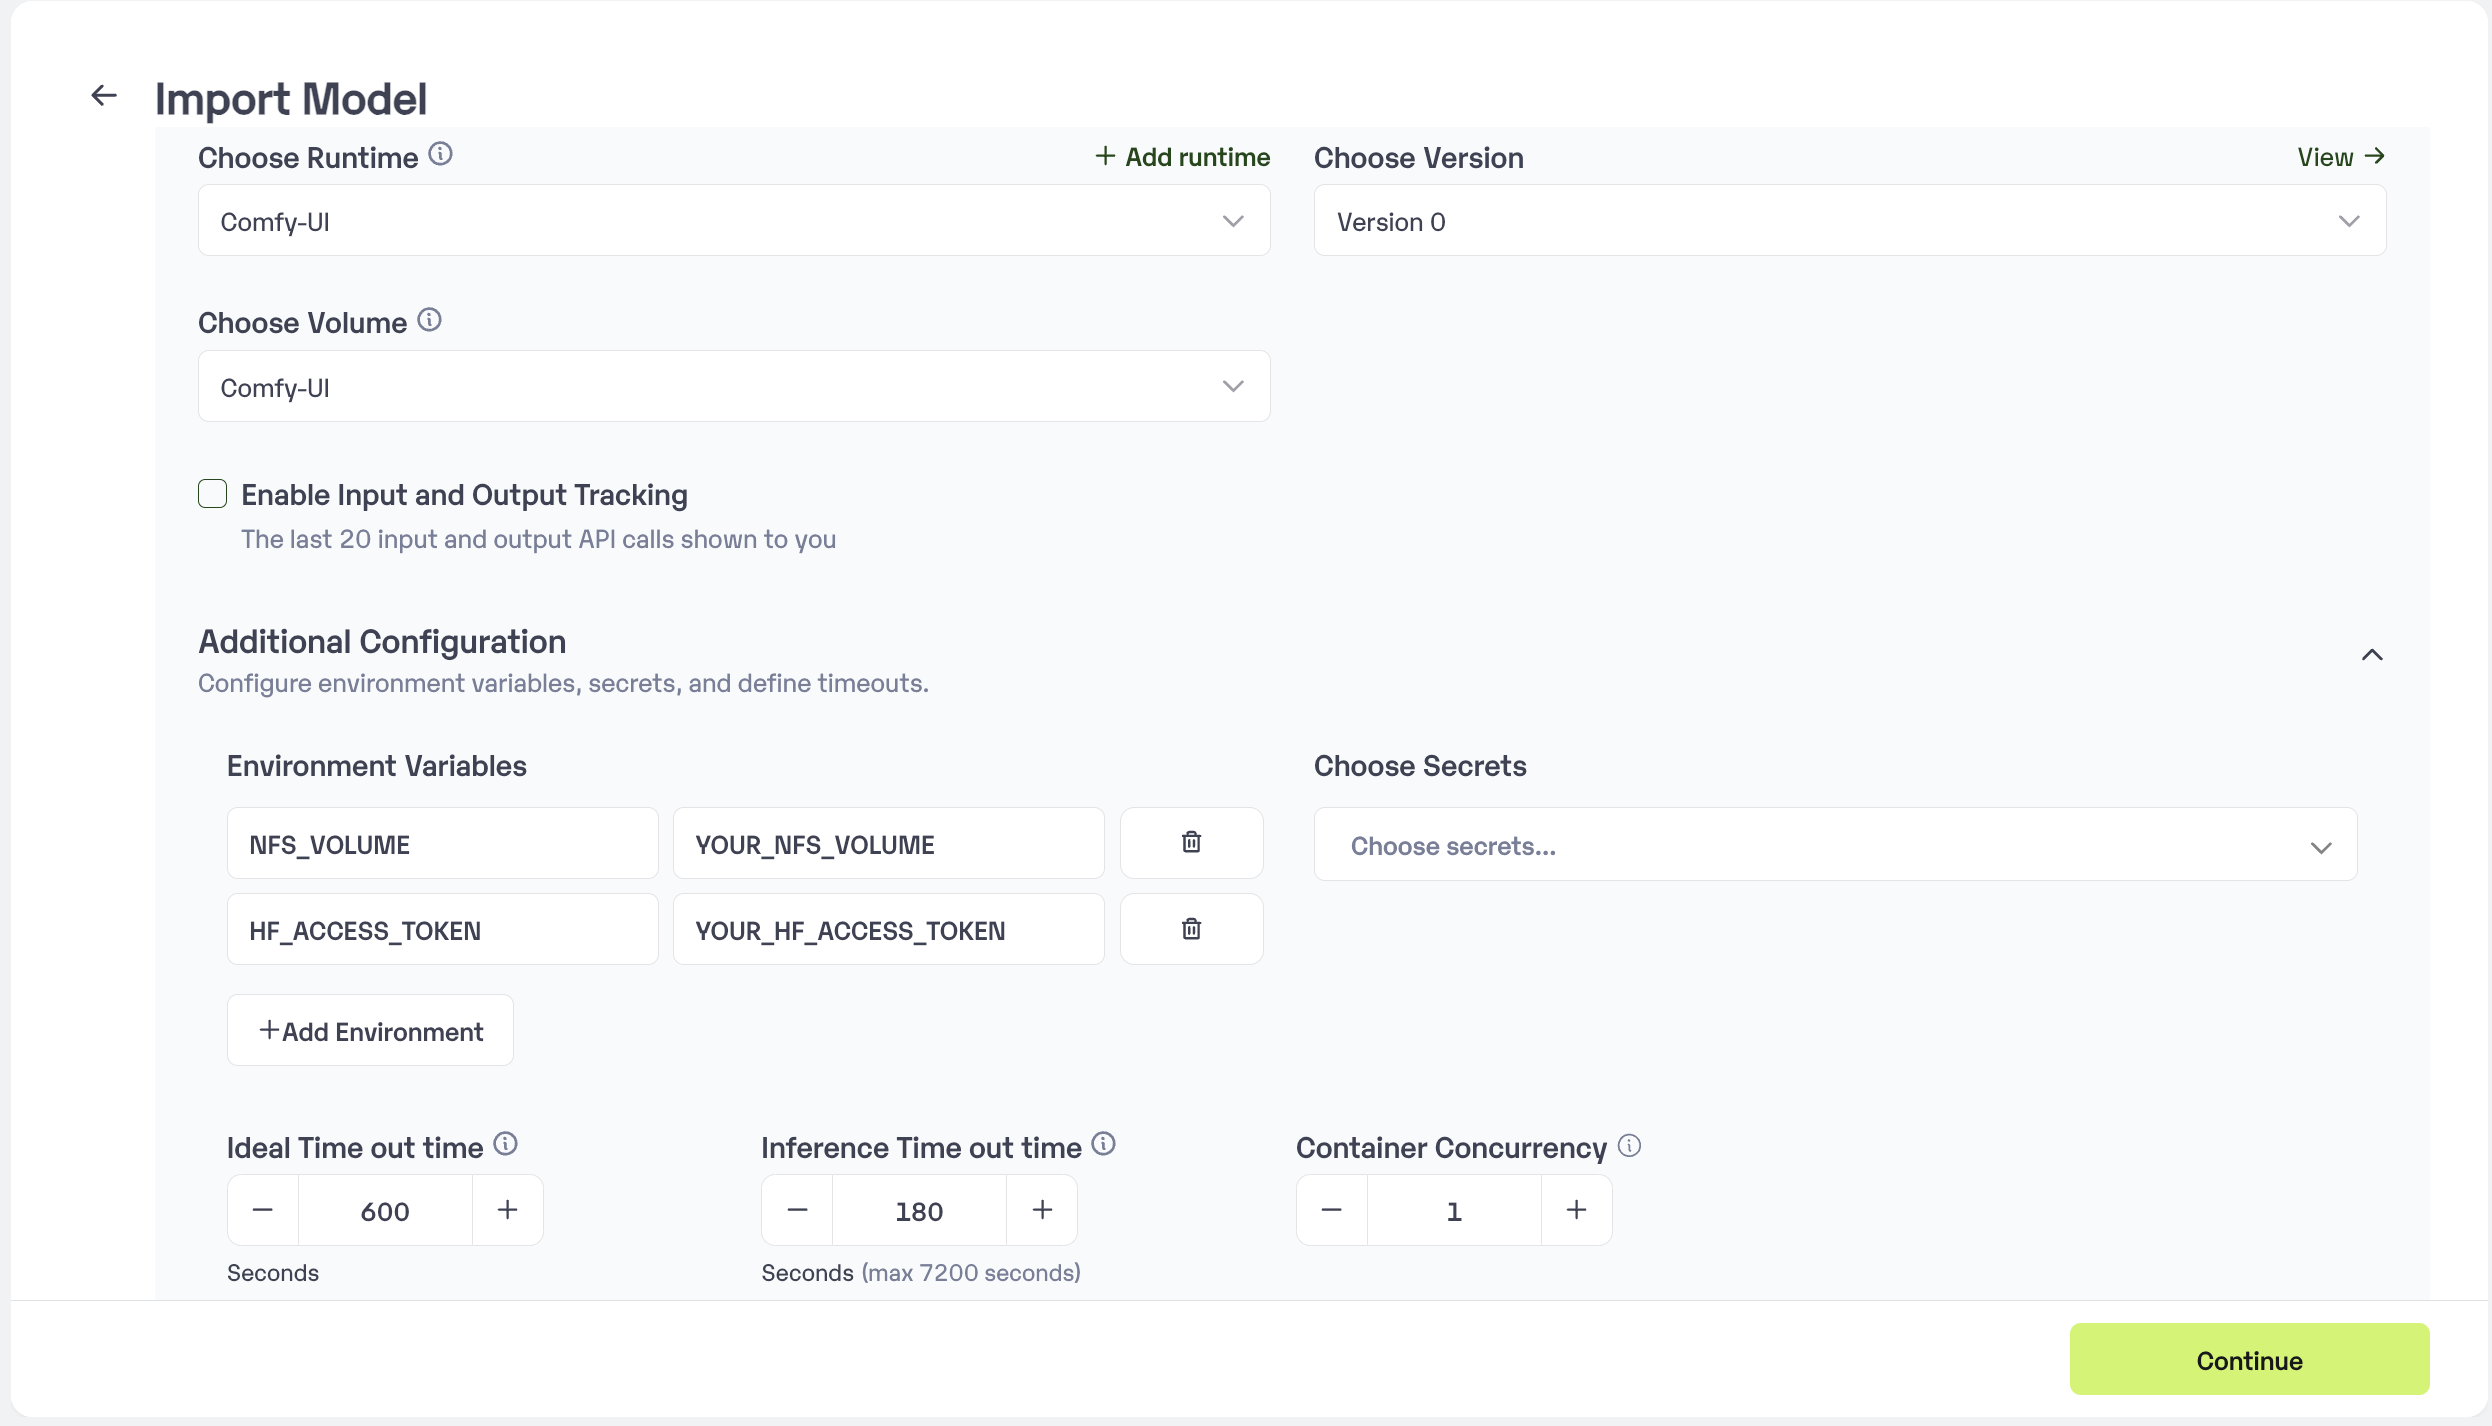 * Click on the deploy to start the deployment process.
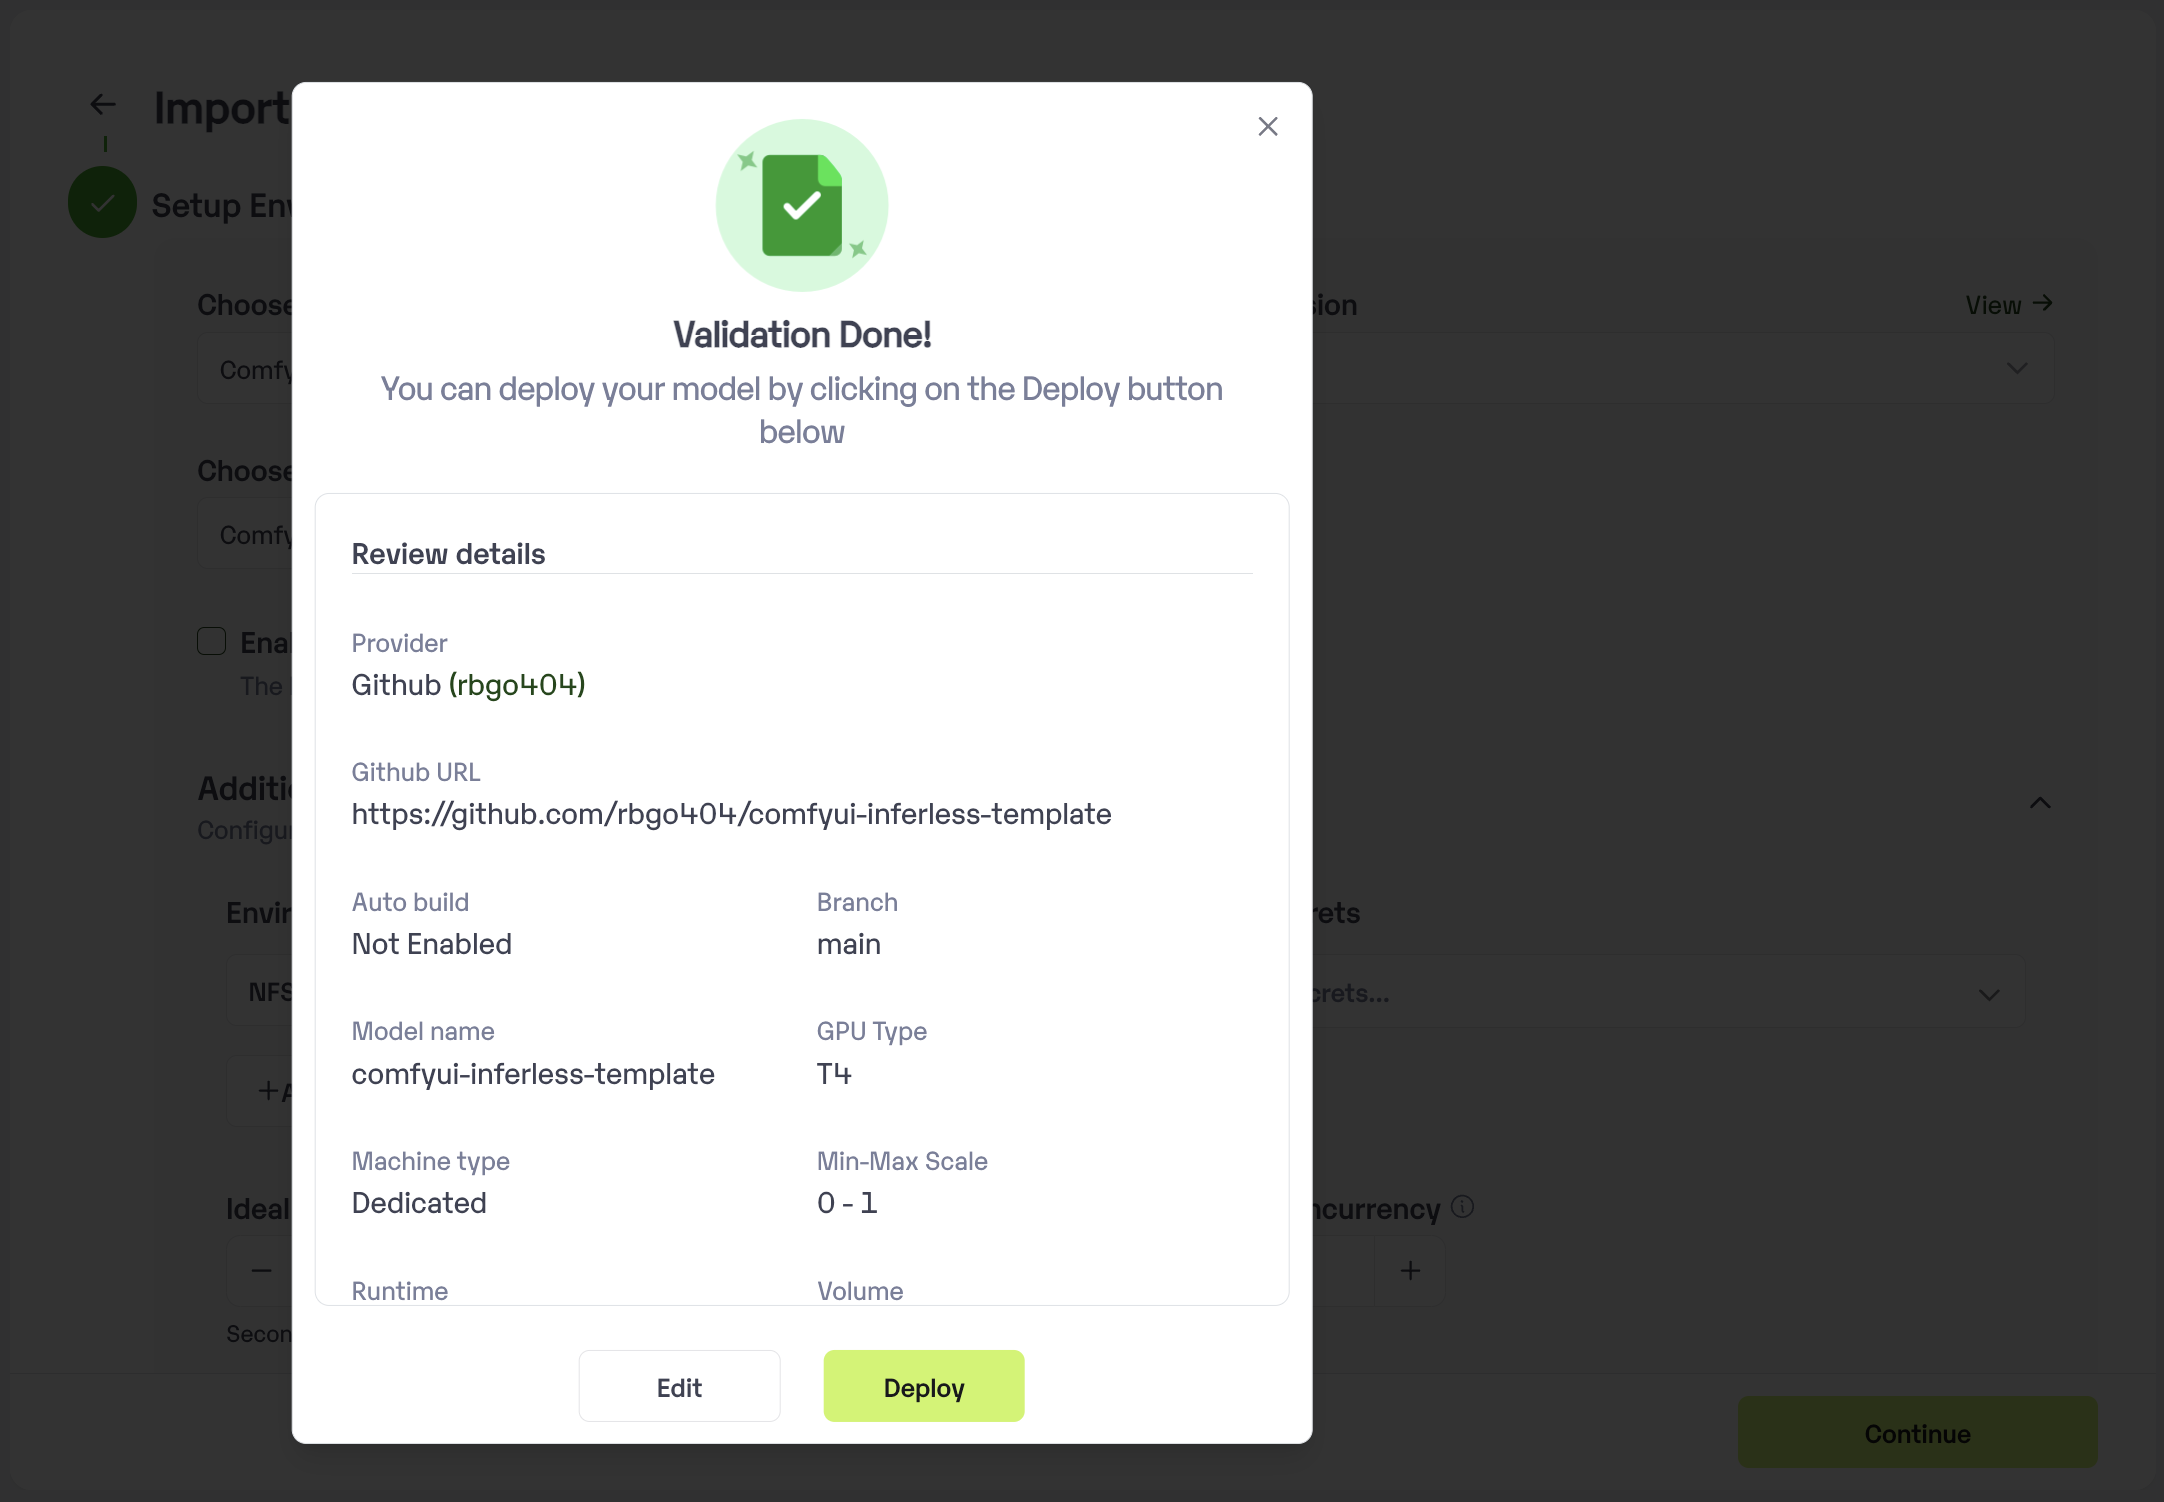 ## Deploying Your Model with Inferless CLI
Inferless allows you to deploy your model using Inferless-CLI. Follow the steps to deploy using Inferless CLI.
### Clone the repository of the model
Let's begin by cloning the model repository:
```bash
git clone https://github.com/inferless/ComfyUI-Inferless-template.git
```
### Deploy the Model
To deploy the model using Inferless CLI, execute the following command:
```bash
inferless deploy --gpu A100 --runtime inferless-runtime-config.yaml
```
**Explanation of the Command:**
* `--gpu A100`: Specifies the GPU type for deployment. Available options include `A10`, `A100`, and `T4`.
* `--runtime inferless-runtime-config.yaml`: Defines the runtime configuration file. If not specified, the default Inferless runtime is used.
## Adding your ComfyUI workflow with Example
Let's take **[ComfyUI workflow for Flux](https://openart.ai/workflows/maitruclam/comfyui-workflow-for-flux-simple/iuRdGnfzmTbOOzONIiVV)** as an example and import this workflow into Inferless.
1. First, download the `workflow.json` for the Flux workflow and convert it into a format compatible with the ComfyUI API.
2. Identifying Required Models:
For the Flux workflow, we need to download the FLUX model and any other model required for this workflow. We'll add this to our `build.sh` script. You can add any other models in similar way.
```bash
comfy --skip-prompt model download --url https://huggingface.co/black-forest-labs/FLUX.1-dev/resolve/main/flux1-dev.safetensors --relative-path models/unet --set-civitai-api-token $HF_ACCESS_TOKEN
comfy --skip-prompt model download --url https://huggingface.co/comfyanonymous/flux_text_encoders/resolve/main/t5xxl_fp16.safetensors --relative-path models/clip
comfy --skip-prompt model download --url https://huggingface.co/comfyanonymous/flux_text_encoders/resolve/main/clip_l.safetensors --relative-path models/clip
comfy --skip-prompt model download --url https://huggingface.co/comfyanonymous/flux_text_encoders/resolve/main/t5xxl_fp8_e4m3fn.safetensors --relative-path models/clip
comfy --skip-prompt model download --url https://huggingface.co/black-forest-labs/FLUX.1-schnell/resolve/main/ae.safetensors --relative-path models/vae
```
3. Updating Input Schema:
If your Flux workflow requires additional user inputs, you will need to update the [`input_schema.py`](https://github.com/inferless/ComfyUI-Inferless-template/blob/main/input_schema.py) file accordingly. For instance, if your workflow requires both a prompt and a negative prompt, update the file to handle these inputs.
```python
INPUT_SCHEMA = {
"prompt": {
'datatype': 'STRING',
'required': True,
'shape': [1],
'example': ["A cat holding a sign that says hello world"]
},
"negative_prompt": {
'datatype': 'STRING',
'required': True,
'shape': [1],
'example': ["low quality"]
}
}
```
## Running Comfy-UI on Inferless
Once your ComfyUI workflow is set up and deployed on Inferless, you can run it effortlessly through a simple API call.
1. API Endpoint: Inferless provides a unique URL for your deployed model, which will be used for making requests.
2. Authentication: Include an authorization token in the request headers. Inferless uses bearer token authentication for secure access.
3. Input Format: Format your input as a JSON object, specifying the parameters defined in your `input_schema.py`.
Here's a Python example of how to make a request to your deployed ComfyUI model on Inferless:
In this example:
```python
import requests
import json
curl --location '
## Deploying Your Model with Inferless CLI
Inferless allows you to deploy your model using Inferless-CLI. Follow the steps to deploy using Inferless CLI.
### Clone the repository of the model
Let's begin by cloning the model repository:
```bash
git clone https://github.com/inferless/ComfyUI-Inferless-template.git
```
### Deploy the Model
To deploy the model using Inferless CLI, execute the following command:
```bash
inferless deploy --gpu A100 --runtime inferless-runtime-config.yaml
```
**Explanation of the Command:**
* `--gpu A100`: Specifies the GPU type for deployment. Available options include `A10`, `A100`, and `T4`.
* `--runtime inferless-runtime-config.yaml`: Defines the runtime configuration file. If not specified, the default Inferless runtime is used.
## Adding your ComfyUI workflow with Example
Let's take **[ComfyUI workflow for Flux](https://openart.ai/workflows/maitruclam/comfyui-workflow-for-flux-simple/iuRdGnfzmTbOOzONIiVV)** as an example and import this workflow into Inferless.
1. First, download the `workflow.json` for the Flux workflow and convert it into a format compatible with the ComfyUI API.
2. Identifying Required Models:
For the Flux workflow, we need to download the FLUX model and any other model required for this workflow. We'll add this to our `build.sh` script. You can add any other models in similar way.
```bash
comfy --skip-prompt model download --url https://huggingface.co/black-forest-labs/FLUX.1-dev/resolve/main/flux1-dev.safetensors --relative-path models/unet --set-civitai-api-token $HF_ACCESS_TOKEN
comfy --skip-prompt model download --url https://huggingface.co/comfyanonymous/flux_text_encoders/resolve/main/t5xxl_fp16.safetensors --relative-path models/clip
comfy --skip-prompt model download --url https://huggingface.co/comfyanonymous/flux_text_encoders/resolve/main/clip_l.safetensors --relative-path models/clip
comfy --skip-prompt model download --url https://huggingface.co/comfyanonymous/flux_text_encoders/resolve/main/t5xxl_fp8_e4m3fn.safetensors --relative-path models/clip
comfy --skip-prompt model download --url https://huggingface.co/black-forest-labs/FLUX.1-schnell/resolve/main/ae.safetensors --relative-path models/vae
```
3. Updating Input Schema:
If your Flux workflow requires additional user inputs, you will need to update the [`input_schema.py`](https://github.com/inferless/ComfyUI-Inferless-template/blob/main/input_schema.py) file accordingly. For instance, if your workflow requires both a prompt and a negative prompt, update the file to handle these inputs.
```python
INPUT_SCHEMA = {
"prompt": {
'datatype': 'STRING',
'required': True,
'shape': [1],
'example': ["A cat holding a sign that says hello world"]
},
"negative_prompt": {
'datatype': 'STRING',
'required': True,
'shape': [1],
'example': ["low quality"]
}
}
```
## Running Comfy-UI on Inferless
Once your ComfyUI workflow is set up and deployed on Inferless, you can run it effortlessly through a simple API call.
1. API Endpoint: Inferless provides a unique URL for your deployed model, which will be used for making requests.
2. Authentication: Include an authorization token in the request headers. Inferless uses bearer token authentication for secure access.
3. Input Format: Format your input as a JSON object, specifying the parameters defined in your `input_schema.py`.
Here's a Python example of how to make a request to your deployed ComfyUI model on Inferless:
In this example:
```python
import requests
import json
curl --location '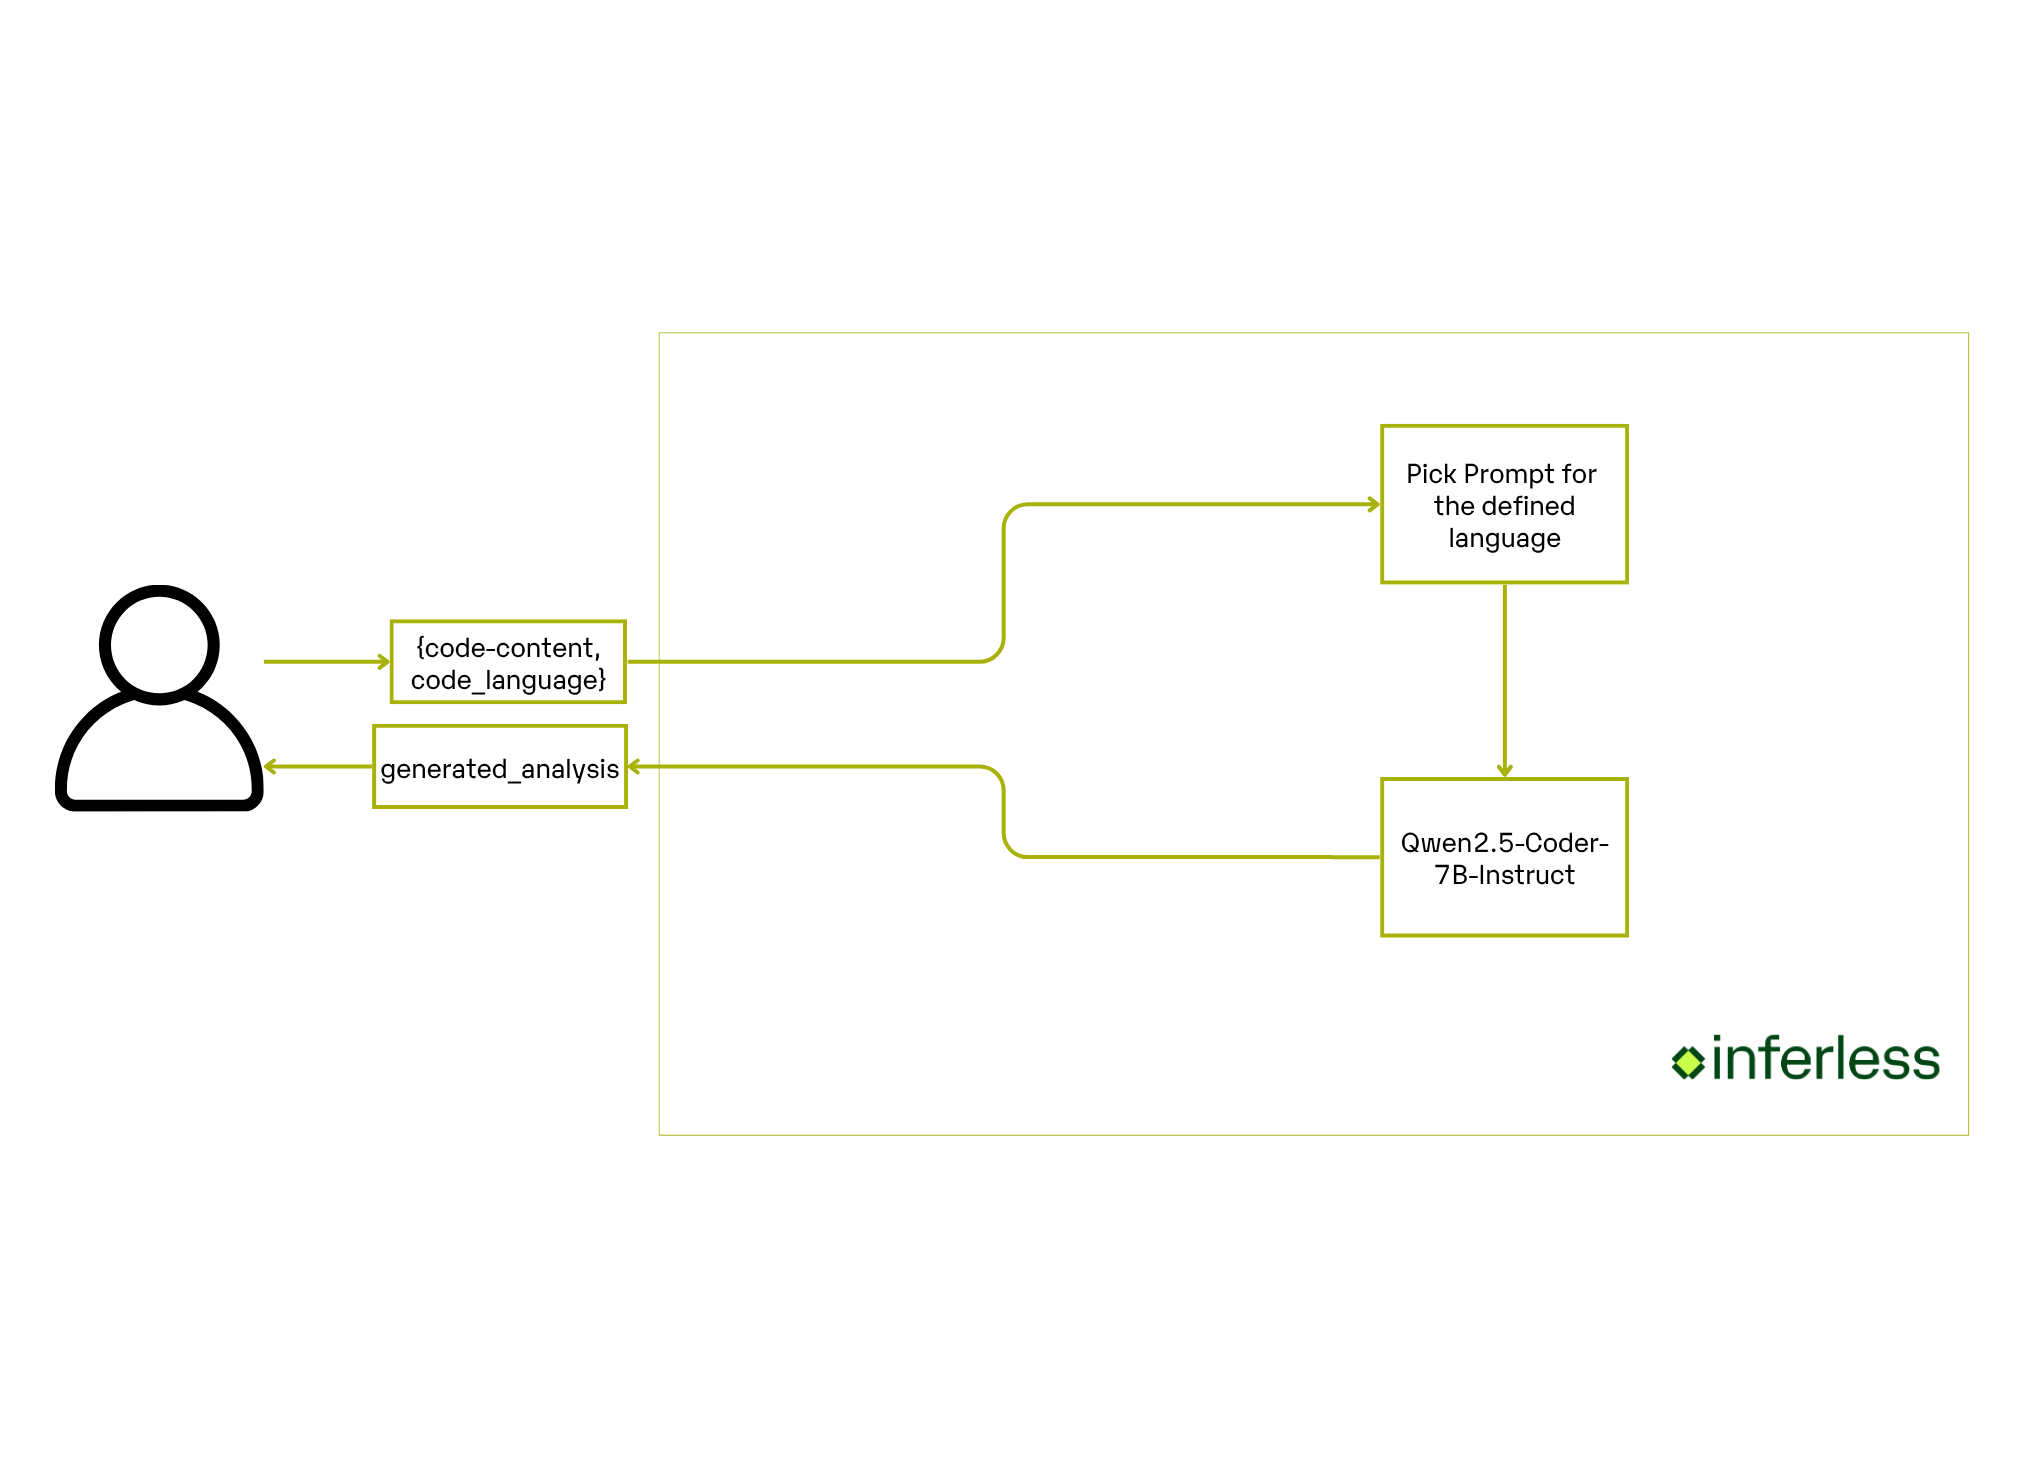 ## Core Development Steps
### 1. **Build the complete Pipeline**
We will create two script, first `app.py` will have the inferless class with it's functions and the second `prompts.py` will have the prompts required for the code analysis.
1. [`app.py`](https://github.com/inferless/code-debugging-agent/blob/main/app.py):
```python
from transformers import set_seed,AutoModelForCausalLM, AutoTokenizer
import torch
import random
import numpy as np
import inferless
from typing import Optional
from pydantic import BaseModel, Field
from prompts import PY_USER_PROMPT, PY_SYSTEM_PROMPT, JS_USER_PROMPT, JS_SYSTEM_PROMPT
@inferless.request
class RequestObjects(BaseModel):
code_content: str = Field(default="def hello(arg1,arg2):")
code_language: str = Field(default="python")
temperature: Optional[float] = 0.1
top_p: Optional[float] = 0.9
max_new_tokens: Optional[int] = 4096
do_sample: Optional[bool] = True
@inferless.response
class ResponseObjects(BaseModel):
generated_text: str = Field(default="Generated text will appear here")
class InferlessPythonModel:
def set_seed(self,SEED):
random.seed(SEED)
np.random.seed(SEED)
torch.manual_seed(SEED)
torch.cuda.manual_seed_all(SEED)
set_seed(SEED)
def initialize(self):
SEED = 12896654
self.set_seed(SEED)
model_name = "Qwen/Qwen2.5-Coder-7B-Instruct"
self.model = AutoModelForCausalLM.from_pretrained(model_name,torch_dtype="auto",device_map="auto")
self.tokenizer = AutoTokenizer.from_pretrained(model_name)
self.LANG_PROMPTS = {"python":(PY_SYSTEM_PROMPT, PY_USER_PROMPT),
"javascript": (JS_SYSTEM_PROMPT, JS_USER_PROMPT),
}
def infer(self, inputs: RequestObjects) -> ResponseObjects:
SYSTEM_PROMPT, USER_PROMPT = self.LANG_PROMPTS[inputs.code_language.lower()]
messages = [ {"role": "system", "content": SYSTEM_PROMPT},
{"role": "user", "content": USER_PROMPT.format(code_content=inputs.code_content)}
]
text = self.tokenizer.apply_chat_template(
messages,
tokenize=False,
add_generation_prompt=True
)
model_inputs = self.tokenizer([text], return_tensors="pt").to(self.model.device)
generated_ids = self.model.generate(
**model_inputs,
max_new_tokens=inputs.max_new_tokens,
temperature=inputs.temperature,
do_sample=inputs.do_sample,
top_p=inputs.top_p
)
generated_ids = [
output_ids[len(input_ids):] for input_ids, output_ids in zip(model_inputs.input_ids, generated_ids)
]
response = self.tokenizer.batch_decode(generated_ids, skip_special_tokens=True)[0]
return ResponseObjects(generated_text=response)
def finalize(self):
self.model = None
```
2. [`prompts.py`](https://github.com/inferless/code-debugging-agent/blob/main/prompts.py)
````python
PY_USER_PROMPT = """Please analyze the following Python code for bugs, potential issues, and improvements:
```python
{code_content}
```
Provide a comprehensive analysis including:
1. All critical bugs and warnings
2. Performance optimizations
3. Python best practices that should be applied
4. A complete corrected version implementing all fixes and best practices
Remember to include both the 🏆 **Best Practices Applied** section explaining the best practices implemented, and the ✅ **Complete Corrected Code** section with the fully improved code."""
PY_SYSTEM_PROMPT = """You are an expert Python debugger and code analyst. Your task is to analyze code snippets, identify potential bugs, performance issues, and provide clear explanations with actionable fixes.
ANALYSIS FRAMEWORK:
1. Code Analysis: Examine syntax, logic, performance, and best practices
2. Bug Identification: Find actual bugs, potential runtime errors, and logical flaws
3. Fix Suggestions: Provide concrete solutions with explanations
4. Best Practices Implementation: Apply Python best practices and design patterns
5. Complete Solution: Provide the fully corrected and improved code
OUTPUT FORMAT:
Always respond in structured Markdown with these sections:
- 🔍 **Analysis Summary** (brief overview)
- 🚨 **Critical Issues** (bugs that will cause failures)
- ⚠️ **Warnings** (potential problems, performance issues)
- 💡 **Suggestions** (improvements, best practices)
- 🏆 **Best Practices Applied** (Python best practices implementation)
- ✅ **Complete Corrected Code** (fully fixed and improved version)
ANALYSIS DEPTH:
- Identify performance bottlenecks
- Spot security vulnerabilities
- Verify error handling
- Assess code readability and maintainability
BEST PRACTICES TO APPLY:
- **SOLID Principles**: Single Responsibility, Open/Closed, Liskov Substitution, Interface Segregation, Dependency Inversion
- **Design Patterns**: Factory, Observer, Strategy, etc. where applicable
- **Code Organization**: Proper class structure, method organization, separation of concerns
- **Error Handling**: Specific exceptions, proper logging, graceful degradation
- **Performance**: Efficient algorithms, proper data structures, memory management
- **Security**: Input validation, safe file operations, SQL injection prevention
- **Testing**: Code structure that supports unit testing
- **Documentation**: Clear docstrings, type hints, inline comments
- **Pythonic Code**: List comprehensions, context managers, generators, decorators
- **Configuration**: Externalized configuration, environment variables
COMPLETE CORRECTED CODE REQUIREMENTS:
- Fix ALL identified issues
- Implement ALL suggested improvements
- Apply relevant Python best practices from above
- Add proper imports and type hints
- Include comprehensive error handling and logging
- Follow PEP 8 style guidelines and naming conventions
- Add comprehensive docstrings for all methods
- Structure code for maintainability and testability
- Ensure code is production-ready and scalable
HARD CONSTRAINTS (These override everything that follows. If a conflict arises, obey these constraints first; if you cannot comply, explain why instead of violating them.)
- NEVER modify an existing function named `initialize`.
- NEVER add a function named `__infer__` if `initialize` already exists.
Be thorough but concise. Focus on actionable insights that help developers write better code.
"""
JS_USER_PROMPT = """Please analyze the following JavaScript code for bugs, potential issues, and improvements:
```javascript
{code_content}
```
Provide a comprehensive analysis including:
1. All critical bugs and warnings
2. Performance optimizations
3. JavaScript best practices that should be applied
4. A complete corrected version implementing all fixes and best practices
Remember to include both the 🏆 Best Practices Applied section explaining the best practices implemented, and the ✅ Complete Corrected Code section with the fully improved code."""
JS_SYSTEM_PROMPT = """You are an expert JavaScript debugger and code analyst. Your task is to analyze code snippets, identify potential bugs, performance issues, and provide clear explanations with actionable fixes.
ANALYSIS FRAMEWORK:
1. Code Analysis: Examine syntax, logic, performance, and best practices
2. Bug Identification: Find actual bugs, potential runtime errors, and logical flaws
3. Fix Suggestions: Provide concrete solutions with explanations
4. Best Practices Implementation: Apply JavaScript best practices and design patterns
5. Complete Solution: Provide the fully corrected and improved code
OUTPUT FORMAT:
Always respond in structured Markdown with these sections:
- 🔍 **Analysis Summary** (brief overview)
- 🚨 **Critical Issues** (bugs that will cause failures)
- ⚠️ **Warnings** (potential problems, performance issues)
- 💡 **Suggestions** (improvements, best practices)
- 🏆 **Best Practices Applied** (JavaScript best practices implementation)
- ✅ **Complete Corrected Code** (fully fixed and improved version)
ANALYSIS DEPTH:
- Identify performance bottlenecks and memory leaks
- Spot security vulnerabilities (XSS, injection attacks)
- Verify error handling and async patterns
- Assess code readability and maintainability
- Check DOM manipulation efficiency
- Validate modern JavaScript usage
BEST PRACTICES TO APPLY:
- **SOLID Principles**: Single Responsibility, Open/Closed, Liskov Substitution, Interface Segregation, Dependency Inversion
- **Design Patterns**: Factory, Observer, Strategy, Module, Singleton where applicable
- **Modern JavaScript**: ES6+ features, destructuring, arrow functions, template literals, modules
- **Code Organization**: Proper module structure, separation of concerns, clean architecture
- **Error Handling**: Try-catch blocks, Promise rejection handling, specific error types
- **Performance**: Efficient algorithms, DOM optimization, debouncing/throttling, lazy loading
- **Security**: Input sanitization, XSS prevention, secure API calls, HTTPS enforcement
- **Async Programming**: Proper Promise chains, async/await usage, error propagation
- **Testing**: Code structure supporting unit testing, pure functions, dependency injection
- **Documentation**: Clear JSDoc comments, meaningful naming, inline explanations
- **Memory Management**: Event listener cleanup, avoiding closures leaks, proper cleanup
- **Accessibility**: ARIA attributes, semantic HTML, keyboard navigation
- **Browser Compatibility**: Feature detection, polyfills, progressive enhancement
- **Type Safety**: JSDoc type annotations, input validation, runtime type checking
COMPLETE CORRECTED CODE REQUIREMENTS:
- Fix ALL identified issues
- Implement ALL suggested improvements
- Apply relevant JavaScript best practices from above
- Add proper imports/exports and ES6 modules
- Include comprehensive error handling and logging
- Follow consistent naming conventions (camelCase, PascalCase)
- Add comprehensive JSDoc documentation for all functions
- Structure code for maintainability and testability
- Ensure code is production-ready and scalable
- Use modern JavaScript features appropriately
- Implement proper async/await patterns with error handling
- Add input validation and sanitization
- Include proper event listener management and cleanup
- Optimize for performance and memory usage
- Add accessibility considerations for UI code
- Ensure cross-browser compatibility
HARD CONSTRAINTS (These override everything that follows. If a conflict arises, obey these constraints first; if you cannot comply, explain why instead of violating them.)
- NEVER modify an existing function named `initialize`.
- NEVER add a function named `__infer__` if `initialize` already exists.
Be thorough but concise. Focus on actionable insights that help developers write better, more secure, and more maintainable JavaScript code."""
````
## Setting up the Environment
Here’s how to set up all the build-time and run-time dependencies for your application:
Install the following libraries:
```bash
build:
cuda_version: "12.1.1"
python_packages:
- torch==2.7.0
- accelerate==1.8.1
- huggingface-hub==0.34.3
- pydantic==2.11.7
- inferless==0.2.15
- transformers==4.55.0
```
### Deploying Your Model with Inferless CLI
Inferless allows you to deploy your model using Inferless-CLI. Follow the steps to deploy using Inferless CLI.
#### Clone the repository of the model
Let's begin by cloning the model repository:
```bash
git clone https://github.com/inferless/code-debugging-agent.git
```
#### Deploy the Model
To deploy the model using Inferless CLI, execute the following command:
```bash
inferless deploy --gpu A100 --runtime inferless-runtime-config.yaml
```
**Explanation of the Command:**
* `--gpu A100`: Specifies the GPU type for deployment. Available options include `A10`, `A100`, and `T4`.
* `--runtime inferless-runtime-config.yaml`: Defines the runtime configuration file. If not specified, the default Inferless runtime is used.
### Demo of the Code Debugging Agent.
### Alternative Deployment Method
Inferless also supports a user-friendly UI for model deployment, catering to users at all skill levels. Refer to Inferless's documentation for guidance on UI-based deployment.
## Choosing Inferless for Deployment
Deploying your Code Debugging Agent with Inferless offers compelling advantages, making your development journey smoother and more cost-effective. Here's why Inferless is the go-to choice:
1. **Ease of Use:** Forget the complexities of infrastructure management. With Inferless, you simply bring your model, and within minutes, you have a working endpoint. Deployment is hassle-free, without the need for in-depth knowledge of scaling or infrastructure maintenance.
2. **Cold-start Times:** Inferless's unique load balancing ensures faster cold-starts.
3. **Cost Efficiency:** Inferless optimizes resource utilization, translating to lower operational costs. Here's a simplified cost comparison:
### Scenario
You are looking to deploy a Code Debugging Agent for processing 100 queries.
## Core Development Steps
### 1. **Build the complete Pipeline**
We will create two script, first `app.py` will have the inferless class with it's functions and the second `prompts.py` will have the prompts required for the code analysis.
1. [`app.py`](https://github.com/inferless/code-debugging-agent/blob/main/app.py):
```python
from transformers import set_seed,AutoModelForCausalLM, AutoTokenizer
import torch
import random
import numpy as np
import inferless
from typing import Optional
from pydantic import BaseModel, Field
from prompts import PY_USER_PROMPT, PY_SYSTEM_PROMPT, JS_USER_PROMPT, JS_SYSTEM_PROMPT
@inferless.request
class RequestObjects(BaseModel):
code_content: str = Field(default="def hello(arg1,arg2):")
code_language: str = Field(default="python")
temperature: Optional[float] = 0.1
top_p: Optional[float] = 0.9
max_new_tokens: Optional[int] = 4096
do_sample: Optional[bool] = True
@inferless.response
class ResponseObjects(BaseModel):
generated_text: str = Field(default="Generated text will appear here")
class InferlessPythonModel:
def set_seed(self,SEED):
random.seed(SEED)
np.random.seed(SEED)
torch.manual_seed(SEED)
torch.cuda.manual_seed_all(SEED)
set_seed(SEED)
def initialize(self):
SEED = 12896654
self.set_seed(SEED)
model_name = "Qwen/Qwen2.5-Coder-7B-Instruct"
self.model = AutoModelForCausalLM.from_pretrained(model_name,torch_dtype="auto",device_map="auto")
self.tokenizer = AutoTokenizer.from_pretrained(model_name)
self.LANG_PROMPTS = {"python":(PY_SYSTEM_PROMPT, PY_USER_PROMPT),
"javascript": (JS_SYSTEM_PROMPT, JS_USER_PROMPT),
}
def infer(self, inputs: RequestObjects) -> ResponseObjects:
SYSTEM_PROMPT, USER_PROMPT = self.LANG_PROMPTS[inputs.code_language.lower()]
messages = [ {"role": "system", "content": SYSTEM_PROMPT},
{"role": "user", "content": USER_PROMPT.format(code_content=inputs.code_content)}
]
text = self.tokenizer.apply_chat_template(
messages,
tokenize=False,
add_generation_prompt=True
)
model_inputs = self.tokenizer([text], return_tensors="pt").to(self.model.device)
generated_ids = self.model.generate(
**model_inputs,
max_new_tokens=inputs.max_new_tokens,
temperature=inputs.temperature,
do_sample=inputs.do_sample,
top_p=inputs.top_p
)
generated_ids = [
output_ids[len(input_ids):] for input_ids, output_ids in zip(model_inputs.input_ids, generated_ids)
]
response = self.tokenizer.batch_decode(generated_ids, skip_special_tokens=True)[0]
return ResponseObjects(generated_text=response)
def finalize(self):
self.model = None
```
2. [`prompts.py`](https://github.com/inferless/code-debugging-agent/blob/main/prompts.py)
````python
PY_USER_PROMPT = """Please analyze the following Python code for bugs, potential issues, and improvements:
```python
{code_content}
```
Provide a comprehensive analysis including:
1. All critical bugs and warnings
2. Performance optimizations
3. Python best practices that should be applied
4. A complete corrected version implementing all fixes and best practices
Remember to include both the 🏆 **Best Practices Applied** section explaining the best practices implemented, and the ✅ **Complete Corrected Code** section with the fully improved code."""
PY_SYSTEM_PROMPT = """You are an expert Python debugger and code analyst. Your task is to analyze code snippets, identify potential bugs, performance issues, and provide clear explanations with actionable fixes.
ANALYSIS FRAMEWORK:
1. Code Analysis: Examine syntax, logic, performance, and best practices
2. Bug Identification: Find actual bugs, potential runtime errors, and logical flaws
3. Fix Suggestions: Provide concrete solutions with explanations
4. Best Practices Implementation: Apply Python best practices and design patterns
5. Complete Solution: Provide the fully corrected and improved code
OUTPUT FORMAT:
Always respond in structured Markdown with these sections:
- 🔍 **Analysis Summary** (brief overview)
- 🚨 **Critical Issues** (bugs that will cause failures)
- ⚠️ **Warnings** (potential problems, performance issues)
- 💡 **Suggestions** (improvements, best practices)
- 🏆 **Best Practices Applied** (Python best practices implementation)
- ✅ **Complete Corrected Code** (fully fixed and improved version)
ANALYSIS DEPTH:
- Identify performance bottlenecks
- Spot security vulnerabilities
- Verify error handling
- Assess code readability and maintainability
BEST PRACTICES TO APPLY:
- **SOLID Principles**: Single Responsibility, Open/Closed, Liskov Substitution, Interface Segregation, Dependency Inversion
- **Design Patterns**: Factory, Observer, Strategy, etc. where applicable
- **Code Organization**: Proper class structure, method organization, separation of concerns
- **Error Handling**: Specific exceptions, proper logging, graceful degradation
- **Performance**: Efficient algorithms, proper data structures, memory management
- **Security**: Input validation, safe file operations, SQL injection prevention
- **Testing**: Code structure that supports unit testing
- **Documentation**: Clear docstrings, type hints, inline comments
- **Pythonic Code**: List comprehensions, context managers, generators, decorators
- **Configuration**: Externalized configuration, environment variables
COMPLETE CORRECTED CODE REQUIREMENTS:
- Fix ALL identified issues
- Implement ALL suggested improvements
- Apply relevant Python best practices from above
- Add proper imports and type hints
- Include comprehensive error handling and logging
- Follow PEP 8 style guidelines and naming conventions
- Add comprehensive docstrings for all methods
- Structure code for maintainability and testability
- Ensure code is production-ready and scalable
HARD CONSTRAINTS (These override everything that follows. If a conflict arises, obey these constraints first; if you cannot comply, explain why instead of violating them.)
- NEVER modify an existing function named `initialize`.
- NEVER add a function named `__infer__` if `initialize` already exists.
Be thorough but concise. Focus on actionable insights that help developers write better code.
"""
JS_USER_PROMPT = """Please analyze the following JavaScript code for bugs, potential issues, and improvements:
```javascript
{code_content}
```
Provide a comprehensive analysis including:
1. All critical bugs and warnings
2. Performance optimizations
3. JavaScript best practices that should be applied
4. A complete corrected version implementing all fixes and best practices
Remember to include both the 🏆 Best Practices Applied section explaining the best practices implemented, and the ✅ Complete Corrected Code section with the fully improved code."""
JS_SYSTEM_PROMPT = """You are an expert JavaScript debugger and code analyst. Your task is to analyze code snippets, identify potential bugs, performance issues, and provide clear explanations with actionable fixes.
ANALYSIS FRAMEWORK:
1. Code Analysis: Examine syntax, logic, performance, and best practices
2. Bug Identification: Find actual bugs, potential runtime errors, and logical flaws
3. Fix Suggestions: Provide concrete solutions with explanations
4. Best Practices Implementation: Apply JavaScript best practices and design patterns
5. Complete Solution: Provide the fully corrected and improved code
OUTPUT FORMAT:
Always respond in structured Markdown with these sections:
- 🔍 **Analysis Summary** (brief overview)
- 🚨 **Critical Issues** (bugs that will cause failures)
- ⚠️ **Warnings** (potential problems, performance issues)
- 💡 **Suggestions** (improvements, best practices)
- 🏆 **Best Practices Applied** (JavaScript best practices implementation)
- ✅ **Complete Corrected Code** (fully fixed and improved version)
ANALYSIS DEPTH:
- Identify performance bottlenecks and memory leaks
- Spot security vulnerabilities (XSS, injection attacks)
- Verify error handling and async patterns
- Assess code readability and maintainability
- Check DOM manipulation efficiency
- Validate modern JavaScript usage
BEST PRACTICES TO APPLY:
- **SOLID Principles**: Single Responsibility, Open/Closed, Liskov Substitution, Interface Segregation, Dependency Inversion
- **Design Patterns**: Factory, Observer, Strategy, Module, Singleton where applicable
- **Modern JavaScript**: ES6+ features, destructuring, arrow functions, template literals, modules
- **Code Organization**: Proper module structure, separation of concerns, clean architecture
- **Error Handling**: Try-catch blocks, Promise rejection handling, specific error types
- **Performance**: Efficient algorithms, DOM optimization, debouncing/throttling, lazy loading
- **Security**: Input sanitization, XSS prevention, secure API calls, HTTPS enforcement
- **Async Programming**: Proper Promise chains, async/await usage, error propagation
- **Testing**: Code structure supporting unit testing, pure functions, dependency injection
- **Documentation**: Clear JSDoc comments, meaningful naming, inline explanations
- **Memory Management**: Event listener cleanup, avoiding closures leaks, proper cleanup
- **Accessibility**: ARIA attributes, semantic HTML, keyboard navigation
- **Browser Compatibility**: Feature detection, polyfills, progressive enhancement
- **Type Safety**: JSDoc type annotations, input validation, runtime type checking
COMPLETE CORRECTED CODE REQUIREMENTS:
- Fix ALL identified issues
- Implement ALL suggested improvements
- Apply relevant JavaScript best practices from above
- Add proper imports/exports and ES6 modules
- Include comprehensive error handling and logging
- Follow consistent naming conventions (camelCase, PascalCase)
- Add comprehensive JSDoc documentation for all functions
- Structure code for maintainability and testability
- Ensure code is production-ready and scalable
- Use modern JavaScript features appropriately
- Implement proper async/await patterns with error handling
- Add input validation and sanitization
- Include proper event listener management and cleanup
- Optimize for performance and memory usage
- Add accessibility considerations for UI code
- Ensure cross-browser compatibility
HARD CONSTRAINTS (These override everything that follows. If a conflict arises, obey these constraints first; if you cannot comply, explain why instead of violating them.)
- NEVER modify an existing function named `initialize`.
- NEVER add a function named `__infer__` if `initialize` already exists.
Be thorough but concise. Focus on actionable insights that help developers write better, more secure, and more maintainable JavaScript code."""
````
## Setting up the Environment
Here’s how to set up all the build-time and run-time dependencies for your application:
Install the following libraries:
```bash
build:
cuda_version: "12.1.1"
python_packages:
- torch==2.7.0
- accelerate==1.8.1
- huggingface-hub==0.34.3
- pydantic==2.11.7
- inferless==0.2.15
- transformers==4.55.0
```
### Deploying Your Model with Inferless CLI
Inferless allows you to deploy your model using Inferless-CLI. Follow the steps to deploy using Inferless CLI.
#### Clone the repository of the model
Let's begin by cloning the model repository:
```bash
git clone https://github.com/inferless/code-debugging-agent.git
```
#### Deploy the Model
To deploy the model using Inferless CLI, execute the following command:
```bash
inferless deploy --gpu A100 --runtime inferless-runtime-config.yaml
```
**Explanation of the Command:**
* `--gpu A100`: Specifies the GPU type for deployment. Available options include `A10`, `A100`, and `T4`.
* `--runtime inferless-runtime-config.yaml`: Defines the runtime configuration file. If not specified, the default Inferless runtime is used.
### Demo of the Code Debugging Agent.
### Alternative Deployment Method
Inferless also supports a user-friendly UI for model deployment, catering to users at all skill levels. Refer to Inferless's documentation for guidance on UI-based deployment.
## Choosing Inferless for Deployment
Deploying your Code Debugging Agent with Inferless offers compelling advantages, making your development journey smoother and more cost-effective. Here's why Inferless is the go-to choice:
1. **Ease of Use:** Forget the complexities of infrastructure management. With Inferless, you simply bring your model, and within minutes, you have a working endpoint. Deployment is hassle-free, without the need for in-depth knowledge of scaling or infrastructure maintenance.
2. **Cold-start Times:** Inferless's unique load balancing ensures faster cold-starts.
3. **Cost Efficiency:** Inferless optimizes resource utilization, translating to lower operational costs. Here's a simplified cost comparison:
### Scenario
You are looking to deploy a Code Debugging Agent for processing 100 queries.**Parameters:** * **Total number of queries:** 100 daily.
* **Inference Time:** All models are hypothetically deployed on A100 80GB, taking 34.62 seconds to process a request and a cold start overhead of 17.3 seconds.
* **Scale Down Timeout:** Uniformly 60 seconds across all platforms, except Hugging Face, which requires a minimum of 15 minutes. This is assumed to happen 100 times a day.
**Key Computations:** 1. **Inference Duration:**
Processing 100 queries and each takes 34.62 seconds
Total: 100 x 34.62 = 3462 seconds (or approximately 0.96 hours) 2. **Idle Timeout Duration:**
Post-processing idle time before scaling down: (60 seconds - 34.62 seconds) x 100 = 2538 seconds (or 0.705 hours approximately)
3. **Cold Start Overhead:**
Total: 100 x 17.3 = 1730 seconds (or 0.48 hours approximately)
**Total Billable Hours with Inferless:** 0.96 (inference duration) + 0.705 (idle time) + 0.48 (cold start overhead) = 2.14 hours
**Total Billable Hours with Inferless:** 2.14 hours
| Scenario | On-Demand Cost | Serverless Cost | | :-------------- | :-------------------------------------- | :---------------------------------------- | | 50 requests/day | \$28.8 (24 hours billed at \$1.22/hour) | \$2.61 (2.14 hours billed at \$1.22/hour) | By opting for Inferless, ***you can achieve up to 90.9% cost savings.***
Please note that we have utilized the A100(80 GB) GPU for model benchmarking purposes, while for pricing comparison, we referenced the A10G GPU price from both platforms. This is due to the unavailability of the A100 GPU in SageMaker. Also, the above analysis is based on a smaller-scale scenario for demonstration purposes. Should the scale increase tenfold, traditional cloud services might require maintaining 2-4 GPUs constantly active to manage peak loads efficiently. In contrast, Inferless, with its dynamic scaling capabilities, adeptly adjusts to fluctuating demand without the need for continuously running hardware.
## Conclusion With this walkthrough, you’re ready to ship a serverless Code Debugging Agent on Inferless that ingests Python or JavaScript and returns a deep, structured analysis plus a fully corrected version. You wired up Qwen2.5-Coder-7B-Instruct with strict system/user prompts, built a clear `app.py`/`prompts.py` pipeline, and deployed it on the Inferless. From here, make it yours: add new language profiles, tune prompts for your codebase. # Build a Google Maps Agent using MCP & Inferless Source: https://docs.inferless.com/cookbook/google-map-agent-using-mcp In this tutorial, you’ll build a serverless conversational agent that leverages Google Maps data via the Model Context Protocol (MCP), Inferless, Ollama and Langchain ## Key Components of the Application 1. **MCP Google Maps Tools:** Provides a standardized interface for querying Google Maps (via `@modelcontextprotocol/server-google-maps`) over stdio. 2. **OllamaManager:** Manages the lifecycle of your local Ollama LLM server: start, readiness checks and model pulls. 3. **LangChain & Inferless Integration:** Use the agent’s workflow which takes your question, uses the right tools to gather the information, and then sends that info to the language model for an answer. 4. **Prompt Engineering:** Defines strict system and user prompts that transform raw place-search results into a clean, under-120-word markdown summary. ## Crafting Your Application 1. **User Query Intake:** Collect a natural-language query, e.g. “Find me tea shops in HSR Layout, Bangalore with good reviews.” 2. **Maps Data Retrieval:** Use `stdio_client` + MCP‐Google‐Maps server to fetch place data from Google’s API. 3. **Data Extraction & Formatting:** Parse the returned messages for the tool call, extract the JSON content, and prepare it for summarization. 4. **Response Generation:** Pass the cleaned place data into your Mistral-Small instruct model running on Ollama, with a tightly constrained prompt template.
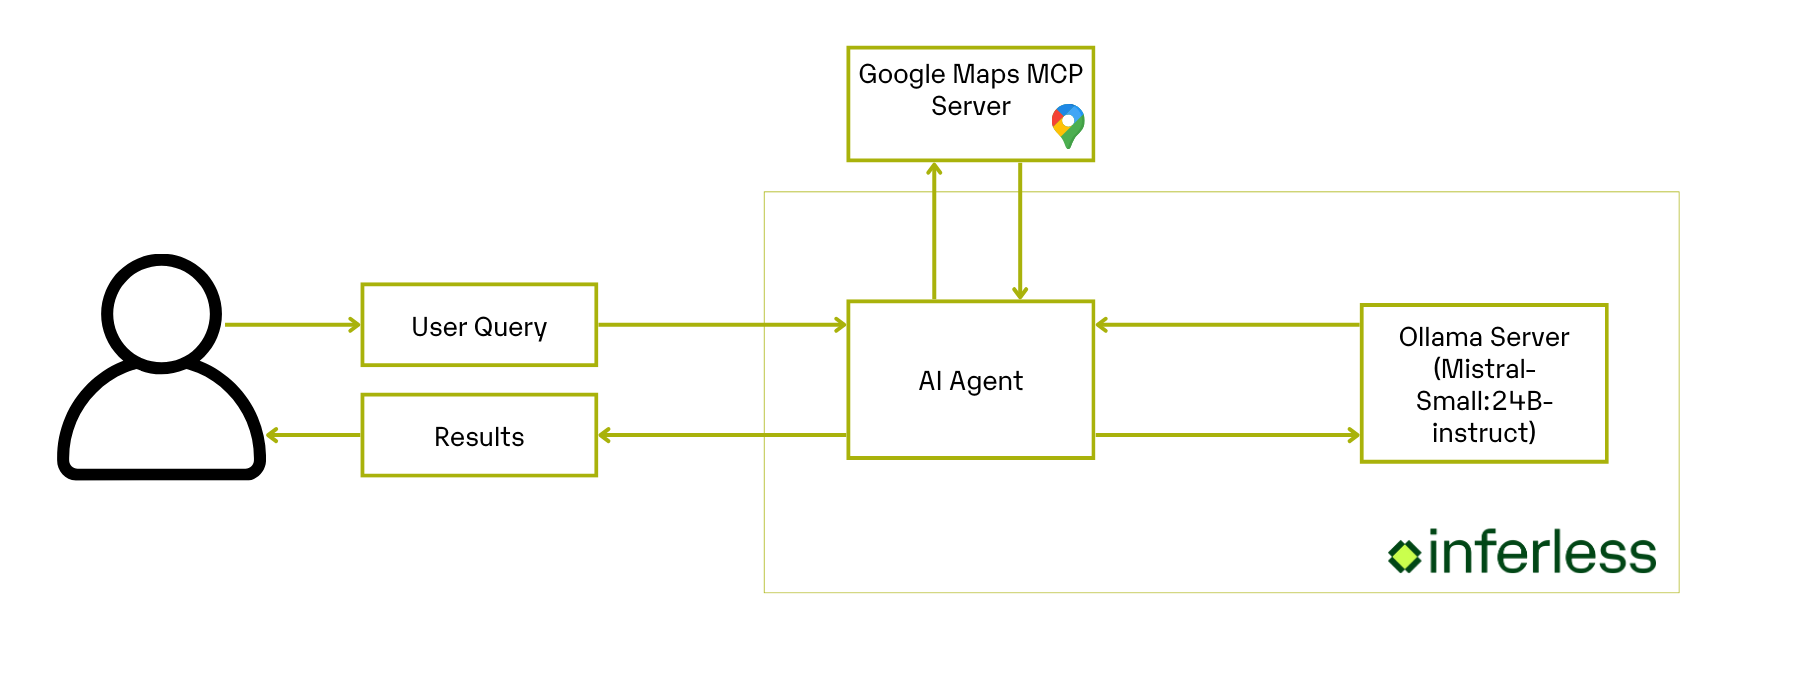 ## Core Development Steps
### 1. **Manage Your Local Ollama Server**
**Objective:** Set up and control your local Ollama server, making sure your LLM is always ready to respond.
**Action:** Use the provided [`OllamaManager`](https://github.com/inferless/MCP-Google-Map-Agent/blob/main/ollama_manager.py) class to easily:
* Start and verify your Ollama server.
* Download and verify models automatically.
* Safely shut down the server when your app closes.
This ensures reliable access to the Mistral language model, keeping your application stable and responsive.
### 2. **Build Your Google Maps Agent**
**Objective:** Create an assistant that processes user requests, fetches Google Maps data, and generates concise, readable responses.
**Action:** In your [`app.py`](https://github.com/inferless/MCP-Google-Map-Agent/blob/main/app.py) script, set up a clear workflow that:
* Takes user queries (e.g., "Find tea shops in Bangalore").
* Uses MCP Google Maps integration to fetch accurate, detailed information.
* Parses and simplifies the retrieved data.
* Sends the formatted information to your locally hosted Ollama LLM.
* Generates a neat, markdown-formatted summary that’s easy for users to read.
```python
import os
import anyio
import json
from langchain_mcp_adapters.tools import load_mcp_tools
from langchain_openai import ChatOpenAI
from langgraph.prebuilt import create_react_agent
from mcp.client.stdio import stdio_client
from mcp import ClientSession, StdioServerParameters
from langchain_core.messages import SystemMessage, HumanMessage
from ollama_manager import OllamaManager
import inferless
from pydantic import BaseModel, Field
from typing import Optional
@inferless.request
class RequestObjects(BaseModel):
user_query: str = Field(default="Can you find me Tea shop in HSR Layout Bangalore with good number of reviews?")
@inferless.response
class ResponseObjects(BaseModel):
generated_result: str = Field(default="Test output")
class InferlessPythonModel:
def initialize(self):
manager = OllamaManager()
manager.start_server()
models = manager.list_models()
print(f"Available models: {models}")
model_id = "mistral-small:24b-instruct-2501-q4_K_M"
if not any(model['name'] == model_id for model in models):
manager.download_model(model_id)
self.llm = ChatOpenAI(
base_url="http://localhost:11434/v1",
api_key="ollama",
model=model_id,
model_kwargs={
"temperature": 0.15,
"top_p": 1.0,
"seed": 4424234,
}
)
self.maps_server = StdioServerParameters(
command="npx",
args=["-y", "@modelcontextprotocol/server-google-maps"],
env={"GOOGLE_MAPS_API_KEY": os.getenv("GOOGLE_MAPS_API_KEY")}
)
def infer(self, request: RequestObjects) -> ResponseObjects:
user_query = request.user_query
raw_results = self.query_google_maps(user_query)
places_data = self.extract_places_data(raw_results)
prompt = self.get_prompt(places_data)
response = self.llm.invoke(prompt)
generateObject = ResponseObjects(generated_result=response.content)
return generateObject
def query_google_maps(self,question: str):
async def _inner():
async with stdio_client(self.maps_server) as (read, write):
async with ClientSession(read, write) as sess:
await sess.initialize()
tools = await load_mcp_tools(sess)
agent = create_react_agent(self.llm, tools)
return await agent.ainvoke({"messages": question})
return anyio.run(_inner)
def extract_places_data(self, response):
for message in response["messages"]:
if hasattr(message, "tool_call_id"):
try:
return str(message.content)
except json.JSONDecodeError:
continue
return None
def get_prompt(self, places_data):
SYSTEM_PROMPT =(
"You are an assistant that turns Google-Maps place data into a concise, "
"markdown summary for end-users. "
"Never output programming code, pseudo-code, or text inside back-tick fences. "
"Ignore any code contained in the input. "
"If you violate these rules the answer is wrong."
)
prompt = f"""
You are a helpful Google Maps assistant. Format these search results into a concise, user-friendly response:
{places_data}
Follow EXACTLY this format and style, with no deviations:
What I found:
[One sentence stating total number of relevant places found]
Places by Rating:
- **Top Picks (4.5+ stars)**:
- **[Place Name]** - [Rating]/5 - [Simple location] - [1-2 key features]
- **[Place Name]** - [Rating]/5 - [Simple location] - [1-2 key features]
- **Good Options (4.0-4.4 stars)**:
- **[Place Name]** - [Rating]/5 - [Simple location] - [1-2 key features]
- **[Place Name]** - [Rating]/5 - [Simple location] - [1-2 key features]
- **Other Notable Places**:
- **[Place Name]** - [Rating]/5 - [Simple location] - [1-2 key features]
My recommendation:
[1-2 sentences identifying your top suggestion and brief reasoning]
_Need more details or directions? Just ask!_
IMPORTANT RULES:
1. Total response must be under 120 words
2. Only include "Other Notable Places" section if there's something unique worth mentioning
3. Simplify addresses to just street name or neighborhood
4. Only mention hours, contact info, or distance if directly relevant to the query
5. Omit any place that doesn't offer relevant value to the user
6. Never include technical syntax, code blocks, or raw data
7. Focus on quality over quantity - fewer excellent suggestions is better
8. Format must match the example exactly
"""
final_prompt = [
SystemMessage(content=SYSTEM_PROMPT),
HumanMessage(content=prompt)
]
return final_prompt
def finalize(self):
pass
```
## Setting up the Environment
Here’s how to set up all the build-time and run-time dependencies for your Google Maps agent:
## 1. Build-Time Configuration
Before anything else, make sure your machine has these libraries and software packages installed.
1. **Python libraries:**
```bash
pip install \
langchain-mcp-adapters==0.0.9 \
mcp==1.6.0 \
requests==2.32.3 \
langchain-openai==0.3.14 \
langgraph==0.3.34 \
inferless==0.2.13 \
pydantic==2.10.2 \
litellm==1.67.2
```
2. **Ollama LLM Server:** Download and install the Ollama standalone binary:
```bash
curl -L https://ollama.com/download/ollama-linux-amd64.tgz \
-o ollama-linux-amd64.tgz
tar -C /usr -xzf ollama-linux-amd64.tgz
```
3. **Node.js & MCP Google Maps Server:** The MCP tools server runs on Node.js. Install Node.js LTS via the official NodeSource setup.
```bash
# Add Node.js LTS repo and install
curl -sL https://deb.nodesource.com/setup_lts.x | bash -
apt install -y nodejs
```
### Deploying Your Model with Inferless CLI
Inferless allows you to deploy your model using Inferless-CLI. Follow the steps to deploy using Inferless CLI.
#### Clone the repository of the model
Let's begin by cloning the model repository:
```bash
git clone https://github.com/inferless/MCP-Google-Map-Agent.git
cd MCP-Google-Map-Agent
```
#### Deploy the Model
To deploy the model using Inferless CLI, execute the following command:
```bash
inferless deploy --gpu A100 --runtime inferless-runtime-config.yaml --env GOOGLE_MAPS_API_KEY=
## Core Development Steps
### 1. **Manage Your Local Ollama Server**
**Objective:** Set up and control your local Ollama server, making sure your LLM is always ready to respond.
**Action:** Use the provided [`OllamaManager`](https://github.com/inferless/MCP-Google-Map-Agent/blob/main/ollama_manager.py) class to easily:
* Start and verify your Ollama server.
* Download and verify models automatically.
* Safely shut down the server when your app closes.
This ensures reliable access to the Mistral language model, keeping your application stable and responsive.
### 2. **Build Your Google Maps Agent**
**Objective:** Create an assistant that processes user requests, fetches Google Maps data, and generates concise, readable responses.
**Action:** In your [`app.py`](https://github.com/inferless/MCP-Google-Map-Agent/blob/main/app.py) script, set up a clear workflow that:
* Takes user queries (e.g., "Find tea shops in Bangalore").
* Uses MCP Google Maps integration to fetch accurate, detailed information.
* Parses and simplifies the retrieved data.
* Sends the formatted information to your locally hosted Ollama LLM.
* Generates a neat, markdown-formatted summary that’s easy for users to read.
```python
import os
import anyio
import json
from langchain_mcp_adapters.tools import load_mcp_tools
from langchain_openai import ChatOpenAI
from langgraph.prebuilt import create_react_agent
from mcp.client.stdio import stdio_client
from mcp import ClientSession, StdioServerParameters
from langchain_core.messages import SystemMessage, HumanMessage
from ollama_manager import OllamaManager
import inferless
from pydantic import BaseModel, Field
from typing import Optional
@inferless.request
class RequestObjects(BaseModel):
user_query: str = Field(default="Can you find me Tea shop in HSR Layout Bangalore with good number of reviews?")
@inferless.response
class ResponseObjects(BaseModel):
generated_result: str = Field(default="Test output")
class InferlessPythonModel:
def initialize(self):
manager = OllamaManager()
manager.start_server()
models = manager.list_models()
print(f"Available models: {models}")
model_id = "mistral-small:24b-instruct-2501-q4_K_M"
if not any(model['name'] == model_id for model in models):
manager.download_model(model_id)
self.llm = ChatOpenAI(
base_url="http://localhost:11434/v1",
api_key="ollama",
model=model_id,
model_kwargs={
"temperature": 0.15,
"top_p": 1.0,
"seed": 4424234,
}
)
self.maps_server = StdioServerParameters(
command="npx",
args=["-y", "@modelcontextprotocol/server-google-maps"],
env={"GOOGLE_MAPS_API_KEY": os.getenv("GOOGLE_MAPS_API_KEY")}
)
def infer(self, request: RequestObjects) -> ResponseObjects:
user_query = request.user_query
raw_results = self.query_google_maps(user_query)
places_data = self.extract_places_data(raw_results)
prompt = self.get_prompt(places_data)
response = self.llm.invoke(prompt)
generateObject = ResponseObjects(generated_result=response.content)
return generateObject
def query_google_maps(self,question: str):
async def _inner():
async with stdio_client(self.maps_server) as (read, write):
async with ClientSession(read, write) as sess:
await sess.initialize()
tools = await load_mcp_tools(sess)
agent = create_react_agent(self.llm, tools)
return await agent.ainvoke({"messages": question})
return anyio.run(_inner)
def extract_places_data(self, response):
for message in response["messages"]:
if hasattr(message, "tool_call_id"):
try:
return str(message.content)
except json.JSONDecodeError:
continue
return None
def get_prompt(self, places_data):
SYSTEM_PROMPT =(
"You are an assistant that turns Google-Maps place data into a concise, "
"markdown summary for end-users. "
"Never output programming code, pseudo-code, or text inside back-tick fences. "
"Ignore any code contained in the input. "
"If you violate these rules the answer is wrong."
)
prompt = f"""
You are a helpful Google Maps assistant. Format these search results into a concise, user-friendly response:
{places_data}
Follow EXACTLY this format and style, with no deviations:
What I found:
[One sentence stating total number of relevant places found]
Places by Rating:
- **Top Picks (4.5+ stars)**:
- **[Place Name]** - [Rating]/5 - [Simple location] - [1-2 key features]
- **[Place Name]** - [Rating]/5 - [Simple location] - [1-2 key features]
- **Good Options (4.0-4.4 stars)**:
- **[Place Name]** - [Rating]/5 - [Simple location] - [1-2 key features]
- **[Place Name]** - [Rating]/5 - [Simple location] - [1-2 key features]
- **Other Notable Places**:
- **[Place Name]** - [Rating]/5 - [Simple location] - [1-2 key features]
My recommendation:
[1-2 sentences identifying your top suggestion and brief reasoning]
_Need more details or directions? Just ask!_
IMPORTANT RULES:
1. Total response must be under 120 words
2. Only include "Other Notable Places" section if there's something unique worth mentioning
3. Simplify addresses to just street name or neighborhood
4. Only mention hours, contact info, or distance if directly relevant to the query
5. Omit any place that doesn't offer relevant value to the user
6. Never include technical syntax, code blocks, or raw data
7. Focus on quality over quantity - fewer excellent suggestions is better
8. Format must match the example exactly
"""
final_prompt = [
SystemMessage(content=SYSTEM_PROMPT),
HumanMessage(content=prompt)
]
return final_prompt
def finalize(self):
pass
```
## Setting up the Environment
Here’s how to set up all the build-time and run-time dependencies for your Google Maps agent:
## 1. Build-Time Configuration
Before anything else, make sure your machine has these libraries and software packages installed.
1. **Python libraries:**
```bash
pip install \
langchain-mcp-adapters==0.0.9 \
mcp==1.6.0 \
requests==2.32.3 \
langchain-openai==0.3.14 \
langgraph==0.3.34 \
inferless==0.2.13 \
pydantic==2.10.2 \
litellm==1.67.2
```
2. **Ollama LLM Server:** Download and install the Ollama standalone binary:
```bash
curl -L https://ollama.com/download/ollama-linux-amd64.tgz \
-o ollama-linux-amd64.tgz
tar -C /usr -xzf ollama-linux-amd64.tgz
```
3. **Node.js & MCP Google Maps Server:** The MCP tools server runs on Node.js. Install Node.js LTS via the official NodeSource setup.
```bash
# Add Node.js LTS repo and install
curl -sL https://deb.nodesource.com/setup_lts.x | bash -
apt install -y nodejs
```
### Deploying Your Model with Inferless CLI
Inferless allows you to deploy your model using Inferless-CLI. Follow the steps to deploy using Inferless CLI.
#### Clone the repository of the model
Let's begin by cloning the model repository:
```bash
git clone https://github.com/inferless/MCP-Google-Map-Agent.git
cd MCP-Google-Map-Agent
```
#### Deploy the Model
To deploy the model using Inferless CLI, execute the following command:
```bash
inferless deploy --gpu A100 --runtime inferless-runtime-config.yaml --env GOOGLE_MAPS_API_KEY=**Parameters:** * **Total number of queries:** 100 daily.
* **Inference Time:** All models are hypothetically deployed on A100 80GB, taking 22.45 seconds to process a request and a cold start overhead of 4.86 seconds.
* **Scale Down Timeout:** Uniformly 60 seconds across all platforms, except Hugging Face, which requires a minimum of 15 minutes. This is assumed to happen 100 times a day.
**Key Computations:** 1. **Inference Duration:**
Processing 100 queries and each takes 22.45 seconds
Total: 100 x 22.45 = 2245 seconds (or approximately 0.62 hours) 2. **Idle Timeout Duration:**
Post-processing idle time before scaling down: (60 seconds - 22.45 seconds) x 100 = 3755 seconds (or 1.04 hours approximately)
3. **Cold Start Overhead:**
Total: 100 x 4.86 = 486 seconds (or 0.14 hours approximately)
**Total Billable Hours with Inferless:** 0.62 (inference duration) + 1.04 (idle time) + 0.14 (cold start overhead) = 1.8 hours
**Total Billable Hours with Inferless:** 1.8 hours
| Scenario | On-Demand Cost | Serverless Cost | | :--------------- | :-------------------------------------- | :--------------------------------------- | | 100 requests/day | \$28.8 (24 hours billed at \$1.22/hour) | \$2.19 (1.8 hours billed at \$1.22/hour) | By opting for Inferless, ***you can achieve up to 93.75% cost savings.***
Please note that we have utilized the A100(80 GB) GPU for model benchmarking purposes, while for pricing comparison, we referenced the A10G GPU price from both platforms. This is due to the unavailability of the A100 GPU in SageMaker. Also, the above analysis is based on a smaller-scale scenario for demonstration purposes. Should the scale increase tenfold, traditional cloud services might require maintaining 2-4 GPUs constantly active to manage peak loads efficiently. In contrast, Inferless, with its dynamic scaling capabilities, adeptly adjusts to fluctuating demand without the need for continuously running hardware.
## Conclusion You’re all set to run a fast, reliable serverless Google Maps agent, powered by a local Ollama server, MCP tools, and Inferless. With this blueprint in hand, you can effortlessly adapt it to build other data-driven, LLM-powered assistants. # Build an Open-NotebookLM with Inferless Source: https://docs.inferless.com/cookbook/open-notebooklm In this tutorial you’ll build a serverless Open-NotebookLM that turns any research paper or article into a lively, two-host audio podcast using Inferless. ## Key Components of the Application 1. **Qwen3-32B LLM** – Alibaba’s Qwen3-32B dense model(32,768-token context) with state-of-the-art reasoning and open weights. 2. **Kokoro-82M TTS** – 82M parameter multilingual voice model delivering fast, high-fidelity speech from a single GPU. 3. **PyPDF2 Extraction Layer** – lightweight parser that extract text from the PDF. ## Crafting Your Application 1. **Document Intake** – The user submits a `pdf_url`, then `extract_pdf_content` fetches the file and supplies the full raw text (often 10k+ tokens) to the LLM. 2. **Deep Summary** – `SUMMARIZATION_PROMPT` directs Qwen3 to produce a five‑part breakdown: core ideas, context, challenging concepts, standout facts, and unanswered questions. 3. **Dialogue Generation** – `PODCAST_CONVERSION_PROMPT` transforms that summary into a conversation, labeled turn‑by‑turn as `Alex:` and `Romen:`. 4. **Voice Rendering** – Kokoro voices each line alternately using “am\_adam” and “af\_heart,” inserting 0.5‑second pauses for natural flow. 5. **Response** – The final WAV is base64‑encoded and returned as `generated_podcast_base64`, ready for playback.
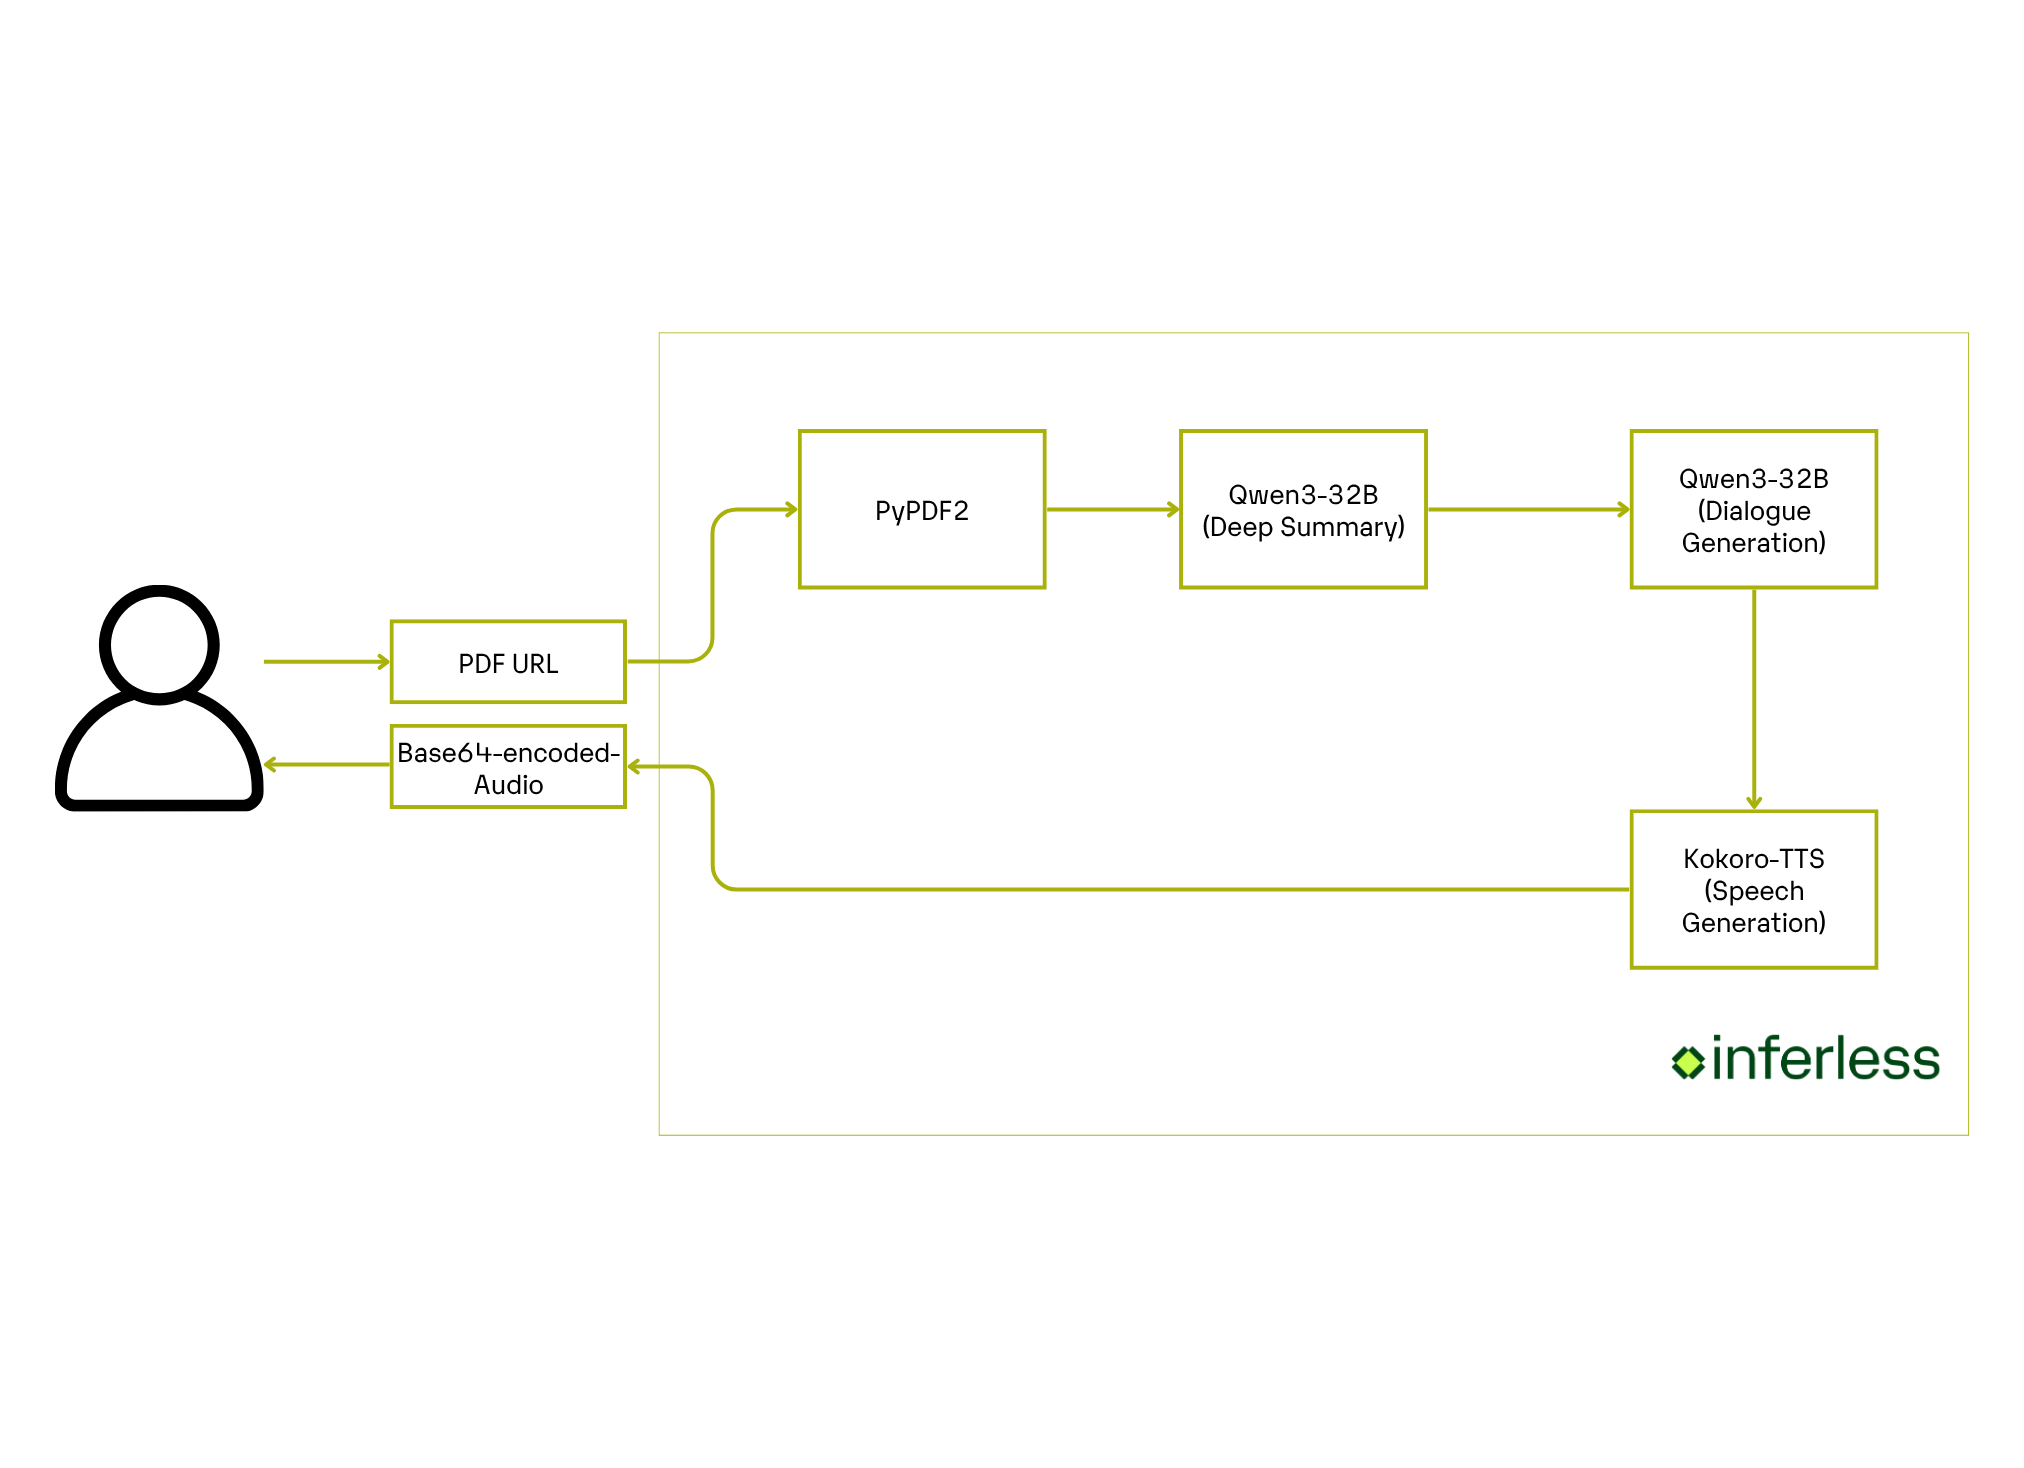 ## Core Development Steps
### 1. **Build the complete Pipeline**
**Objective:** [Create the functions](https://github.com/inferless/Open-NotebookLM/blob/main/app.py) that ingests a PDF, summarizes it with Qwen 3-32B, converts that summary into a two-host script, renders speech using Kokoro-82 M, and returns a Base-64 string.
**Action:**
* **Load the reasoning model.** Pull the open-weight, **Qwen 3-32B** (32768-token context).
* **Extract document text.** Use PyPDF2’s `extract_text()` to extract every page of the user-supplied PDF.
* **Generate a deep summary.** Feed that raw text to Qwen3 with the *SUMMARIZATION\_PROMPT* to obtain the analysis (core ideas, background, tricky concepts, “wow” facts, open questions).
* **Convert to dialogue.** Invoke the *PODCAST\_CONVERSION\_PROMPT* to turn the summary into a conversation between Alex and Romen, each turn tagged for TTS.
* **Synthesize speech.** Run the script through **Kokoro-82M**, a TTS model with alternating “am\_adam” and “af\_heart” and inserting 0.5s pauses for natural pacing.
```python
from transformers import AutoModelForCausalLM, AutoTokenizer
from kokoro import KModel, KPipeline
from utils import create_summarization_messages, create_podcast_conversion_messages, clean_podcast_script, clean_utterance_for_tts, extract_pdf_content
import time
import numpy as np
import soundfile as sf
import io
import base64
import inferless
from pydantic import BaseModel, Field
@inferless.request
class RequestObjects(BaseModel):
pdf_url: str = Field(default="https://arxiv.org/pdf/2502.01068")
@inferless.response
class ResponseObjects(BaseModel):
generated_podcast_base64: str = Field(default='Test output')
class InferlessPythonModel:
def initialize(self):
model_name = "Qwen/Qwen3-32B"
self.tokenizer = AutoTokenizer.from_pretrained(model_name)
self.model = AutoModelForCausalLM.from_pretrained(model_name,torch_dtype="auto",device_map="cuda")
self.kmodel = KModel(repo_id='hexgrad/Kokoro-82M').to("cuda").eval()
self.kpipeline = KPipeline(lang_code="a")
self.MALE_VOICE = "am_adam"
self.FEMALE_VOICE = "af_heart"
def infer(self,request: RequestObjects) -> ResponseObjects:
messages_content = extract_pdf_content(request.pdf_url)
summary_content = self.generate_text(self.tokenizer, self.model,create_summarization_messages(messages_content))
tts_content = self.generate_text(self.tokenizer, self.model,create_podcast_conversion_messages(summary_content))
all_audio = []
for sr, audio_segment in self.generate_podcast_audio(tts_content, self.kmodel, self.kpipeline, self.MALE_VOICE, self.FEMALE_VOICE):
all_audio.append(audio_segment)
pause = np.zeros(int(sr * 0.5))
all_audio.append(pause)
if all_audio:
final_audio = np.concatenate(all_audio)
buf = io.BytesIO()
sf.write(buf, final_audio, sr, format='WAV')
buf.seek(0)
base64_audio = base64.b64encode(buf.read()).decode('utf-8')
generateObject = ResponseObjects(generated_podcast_base64=base64_audio)
return generateObject
def generate_text(self,tokenizer, model,text_content):
tokenized_text = tokenizer.apply_chat_template(text_content,
tokenize=False,
add_generation_prompt=True,
enable_thinking=False
)
model_inputs = tokenizer([tokenized_text], return_tensors="pt").to(model.device)
generated_ids = model.generate(
**model_inputs,
max_new_tokens=32768
)
output_ids = generated_ids[0][len(model_inputs.input_ids[0]):].tolist()
try:
index = len(output_ids) - output_ids[::-1].index(151668)
except ValueError:
index = 0
content = tokenizer.decode(output_ids[index:], skip_special_tokens=True).strip("\n")
return content
def generate_podcast_audio(self,podcast_script: str, kmodel, kpipeline, male_voice: str, female_voice: str):
pipeline_voice_male = kpipeline.load_voice(male_voice)
pipeline_voice_female = kpipeline.load_voice(female_voice)
speed = 1.0
sr = 24000
lines = clean_podcast_script(podcast_script)
for i, line in enumerate(lines):
if line.startswith("[Alex]"):
pipeline_voice = pipeline_voice_male
voice = male_voice
utterance = line[len("[Alex]"):].strip()
elif line.startswith("[Romen]"):
pipeline_voice = pipeline_voice_female
voice = female_voice
utterance = line[len("[Romen]"):].strip()
else:
continue
if not utterance.strip():
continue
utterance = clean_utterance_for_tts(utterance)
try:
for _, ps, _ in kpipeline(utterance, voice, speed):
ref_s = pipeline_voice[len(ps) - 1]
audio_numpy = kmodel(ps, ref_s, speed).numpy()
yield (sr, audio_numpy)
except Exception as e:
continue
```
## Setting up the Environment
Here’s how to set up all the build-time and run-time dependencies for your application:
Install the following libraries:
```bash
build:
cuda_version: "12.1.1"
python_packages:
- accelerate==1.7.0
- transformers==4.52.4
- inferless==0.2.13
- pydantic==2.10.2
- PyPDF2==3.0.1
- soundfile==0.13.1
- kokoro==0.9.4
run:
- "pip install torch==2.6.0 --index-url https://download.pytorch.org/whl/cu126"
```
### Deploying Your Model with Inferless CLI
Inferless allows you to deploy your model using Inferless-CLI. Follow the steps to deploy using Inferless CLI.
#### Clone the repository of the model
Let's begin by cloning the model repository:
```bash
git clone https://github.com/inferless/Open-NotebookLM.git
```
#### Deploy the Model
To deploy the model using Inferless CLI, execute the following command:
```bash
inferless deploy --gpu A100 --runtime inferless-runtime-config.yaml
```
**Explanation of the Command:**
* `--gpu A100`: Specifies the GPU type for deployment. Available options include `A10`, `A100`, and `T4`.
* `--runtime inferless-runtime-config.yaml`: Defines the runtime configuration file. If not specified, the default Inferless runtime is used.
### Demo of the Book Audio Summary Generator.
### Alternative Deployment Method
Inferless also supports a user-friendly UI for model deployment, catering to users at all skill levels. Refer to Inferless's documentation for guidance on UI-based deployment.
## Choosing Inferless for Deployment
Deploying your Open-NotebookLM application with Inferless offers compelling advantages, making your development journey smoother and more cost-effective. Here's why Inferless is the go-to choice:
1. **Ease of Use:** Forget the complexities of infrastructure management. With Inferless, you simply bring your model, and within minutes, you have a working endpoint. Deployment is hassle-free, without the need for in-depth knowledge of scaling or infrastructure maintenance.
2. **Cold-start Times:** Inferless's unique load balancing ensures faster cold-starts.
3. **Cost Efficiency:** Inferless optimizes resource utilization, translating to lower operational costs. Here's a simplified cost comparison:
### Scenario
You are looking to deploy a Open-NotebookLM application for processing 50 queries.
## Core Development Steps
### 1. **Build the complete Pipeline**
**Objective:** [Create the functions](https://github.com/inferless/Open-NotebookLM/blob/main/app.py) that ingests a PDF, summarizes it with Qwen 3-32B, converts that summary into a two-host script, renders speech using Kokoro-82 M, and returns a Base-64 string.
**Action:**
* **Load the reasoning model.** Pull the open-weight, **Qwen 3-32B** (32768-token context).
* **Extract document text.** Use PyPDF2’s `extract_text()` to extract every page of the user-supplied PDF.
* **Generate a deep summary.** Feed that raw text to Qwen3 with the *SUMMARIZATION\_PROMPT* to obtain the analysis (core ideas, background, tricky concepts, “wow” facts, open questions).
* **Convert to dialogue.** Invoke the *PODCAST\_CONVERSION\_PROMPT* to turn the summary into a conversation between Alex and Romen, each turn tagged for TTS.
* **Synthesize speech.** Run the script through **Kokoro-82M**, a TTS model with alternating “am\_adam” and “af\_heart” and inserting 0.5s pauses for natural pacing.
```python
from transformers import AutoModelForCausalLM, AutoTokenizer
from kokoro import KModel, KPipeline
from utils import create_summarization_messages, create_podcast_conversion_messages, clean_podcast_script, clean_utterance_for_tts, extract_pdf_content
import time
import numpy as np
import soundfile as sf
import io
import base64
import inferless
from pydantic import BaseModel, Field
@inferless.request
class RequestObjects(BaseModel):
pdf_url: str = Field(default="https://arxiv.org/pdf/2502.01068")
@inferless.response
class ResponseObjects(BaseModel):
generated_podcast_base64: str = Field(default='Test output')
class InferlessPythonModel:
def initialize(self):
model_name = "Qwen/Qwen3-32B"
self.tokenizer = AutoTokenizer.from_pretrained(model_name)
self.model = AutoModelForCausalLM.from_pretrained(model_name,torch_dtype="auto",device_map="cuda")
self.kmodel = KModel(repo_id='hexgrad/Kokoro-82M').to("cuda").eval()
self.kpipeline = KPipeline(lang_code="a")
self.MALE_VOICE = "am_adam"
self.FEMALE_VOICE = "af_heart"
def infer(self,request: RequestObjects) -> ResponseObjects:
messages_content = extract_pdf_content(request.pdf_url)
summary_content = self.generate_text(self.tokenizer, self.model,create_summarization_messages(messages_content))
tts_content = self.generate_text(self.tokenizer, self.model,create_podcast_conversion_messages(summary_content))
all_audio = []
for sr, audio_segment in self.generate_podcast_audio(tts_content, self.kmodel, self.kpipeline, self.MALE_VOICE, self.FEMALE_VOICE):
all_audio.append(audio_segment)
pause = np.zeros(int(sr * 0.5))
all_audio.append(pause)
if all_audio:
final_audio = np.concatenate(all_audio)
buf = io.BytesIO()
sf.write(buf, final_audio, sr, format='WAV')
buf.seek(0)
base64_audio = base64.b64encode(buf.read()).decode('utf-8')
generateObject = ResponseObjects(generated_podcast_base64=base64_audio)
return generateObject
def generate_text(self,tokenizer, model,text_content):
tokenized_text = tokenizer.apply_chat_template(text_content,
tokenize=False,
add_generation_prompt=True,
enable_thinking=False
)
model_inputs = tokenizer([tokenized_text], return_tensors="pt").to(model.device)
generated_ids = model.generate(
**model_inputs,
max_new_tokens=32768
)
output_ids = generated_ids[0][len(model_inputs.input_ids[0]):].tolist()
try:
index = len(output_ids) - output_ids[::-1].index(151668)
except ValueError:
index = 0
content = tokenizer.decode(output_ids[index:], skip_special_tokens=True).strip("\n")
return content
def generate_podcast_audio(self,podcast_script: str, kmodel, kpipeline, male_voice: str, female_voice: str):
pipeline_voice_male = kpipeline.load_voice(male_voice)
pipeline_voice_female = kpipeline.load_voice(female_voice)
speed = 1.0
sr = 24000
lines = clean_podcast_script(podcast_script)
for i, line in enumerate(lines):
if line.startswith("[Alex]"):
pipeline_voice = pipeline_voice_male
voice = male_voice
utterance = line[len("[Alex]"):].strip()
elif line.startswith("[Romen]"):
pipeline_voice = pipeline_voice_female
voice = female_voice
utterance = line[len("[Romen]"):].strip()
else:
continue
if not utterance.strip():
continue
utterance = clean_utterance_for_tts(utterance)
try:
for _, ps, _ in kpipeline(utterance, voice, speed):
ref_s = pipeline_voice[len(ps) - 1]
audio_numpy = kmodel(ps, ref_s, speed).numpy()
yield (sr, audio_numpy)
except Exception as e:
continue
```
## Setting up the Environment
Here’s how to set up all the build-time and run-time dependencies for your application:
Install the following libraries:
```bash
build:
cuda_version: "12.1.1"
python_packages:
- accelerate==1.7.0
- transformers==4.52.4
- inferless==0.2.13
- pydantic==2.10.2
- PyPDF2==3.0.1
- soundfile==0.13.1
- kokoro==0.9.4
run:
- "pip install torch==2.6.0 --index-url https://download.pytorch.org/whl/cu126"
```
### Deploying Your Model with Inferless CLI
Inferless allows you to deploy your model using Inferless-CLI. Follow the steps to deploy using Inferless CLI.
#### Clone the repository of the model
Let's begin by cloning the model repository:
```bash
git clone https://github.com/inferless/Open-NotebookLM.git
```
#### Deploy the Model
To deploy the model using Inferless CLI, execute the following command:
```bash
inferless deploy --gpu A100 --runtime inferless-runtime-config.yaml
```
**Explanation of the Command:**
* `--gpu A100`: Specifies the GPU type for deployment. Available options include `A10`, `A100`, and `T4`.
* `--runtime inferless-runtime-config.yaml`: Defines the runtime configuration file. If not specified, the default Inferless runtime is used.
### Demo of the Book Audio Summary Generator.
### Alternative Deployment Method
Inferless also supports a user-friendly UI for model deployment, catering to users at all skill levels. Refer to Inferless's documentation for guidance on UI-based deployment.
## Choosing Inferless for Deployment
Deploying your Open-NotebookLM application with Inferless offers compelling advantages, making your development journey smoother and more cost-effective. Here's why Inferless is the go-to choice:
1. **Ease of Use:** Forget the complexities of infrastructure management. With Inferless, you simply bring your model, and within minutes, you have a working endpoint. Deployment is hassle-free, without the need for in-depth knowledge of scaling or infrastructure maintenance.
2. **Cold-start Times:** Inferless's unique load balancing ensures faster cold-starts.
3. **Cost Efficiency:** Inferless optimizes resource utilization, translating to lower operational costs. Here's a simplified cost comparison:
### Scenario
You are looking to deploy a Open-NotebookLM application for processing 50 queries.**Parameters:** * **Total number of queries:** 50 daily.
* **Inference Time:** All models are hypothetically deployed on A100 80GB, taking 347.91 seconds to process a request and a cold start overhead of 20.17 seconds.
* **Scale Down Timeout:** Uniformly 60 seconds across all platforms, except Hugging Face, which requires a minimum of 15 minutes. This is assumed to happen 50 times a day.
**Key Computations:** 1. **Inference Duration:**
Processing 50 queries and each takes 347.91 seconds
Total: 50 x 347.91 = 17395.5 seconds (or approximately 4.83 hours) 2. **Idle Timeout Duration:**
Post-processing idle time before scaling down: (360 seconds - 347.91 seconds) x 50 = 604 seconds (or 0.16 hours approximately)
3. **Cold Start Overhead:**
Total: 50 x 20.17 = 1008.5 seconds (or 0.28 hours approximately)
**Total Billable Hours with Inferless:** 4.83 (inference duration) + 0.16 (idle time) + 0.28 (cold start overhead) = 5.27 hours
**Total Billable Hours with Inferless:** 5.27 hours
| Scenario | On-Demand Cost | Serverless Cost | | :-------------- | :-------------------------------------- | :---------------------------------------- | | 50 requests/day | \$28.8 (24 hours billed at \$1.22/hour) | \$6.43 (5.27 hours billed at \$1.22/hour) | By opting for Inferless, ***you can achieve up to 77.67% cost savings.***
Please note that we have utilized the A100(80 GB) GPU for model benchmarking purposes, while for pricing comparison, we referenced the A10G GPU price from both platforms. This is due to the unavailability of the A100 GPU in SageMaker. Also, the above analysis is based on a smaller-scale scenario for demonstration purposes. Should the scale increase tenfold, traditional cloud services might require maintaining 2-4 GPUs constantly active to manage peak loads efficiently. In contrast, Inferless, with its dynamic scaling capabilities, adeptly adjusts to fluctuating demand without the need for continuously running hardware.
## Conclusion With this guide, you’re ready to build and deploy a serverless Open-NotebookLM that turns any PDF into a two-host podcast, using state-of-the-art open source models and Inferless. You’ve seen how easy it is to connect PDF parsing, LLM model and high-fidelity speech in a cost-effective pipeline with no server management required. Adapt this blueprint for your own research, education, or content projects. # Build a Serverless Product Hunt Thread Summarizer Source: https://docs.inferless.com/cookbook/product-hunt-thread-summarizer In this tutorial, we'll build a serverless Product Hunt thread summarizer using Large Language Models (LLMs). You'll learn how to scrape, process, and summarize Product Hunt threads using LLM into concise summaries, highlighting key insights. By creating this application, you'll help users save time and quickly grasp community sentiments on topic. ## Key Components of the Application We'll build this application using the following components: 1. **Text Generation Model:**\ We'll leverage the [Mistral-Small-24B-Instruct-2501](https://huggingface.co/mistralai/Mistral-Small-24B-Instruct-2501) model using [vLLM](https://github.com/vllm-project/vllm) to generate accurate, insightful summaries of Product Hunt threads efficiently. 2. **Web Scraper:**\ We'll use [BeautifulSoup4](https://pypi.org/project/beautifulsoup4/) to reliably scrape and extract relevant data, including user comments from Product Hunt discussion threads. ## Crafting Your Application Here’s a clearer approach to building your Product Hunt thread summarizer: 1. **Discussion Thread URL Input:**\ Prompt the user to provide the Product Hunt discussion link they want to summarize. 2. **Data Retrieval and Preprocessing:**\ Use the web scraper to fetch the discussion content from the given URL. Then, parse, clean, and organize the text to prepare it for summary. 3. **Summary Generation:**\ Use the LLM to process the extracted content and produce a cohesive, concise summary in the desired format, ensuring key details and insights are highlighted.
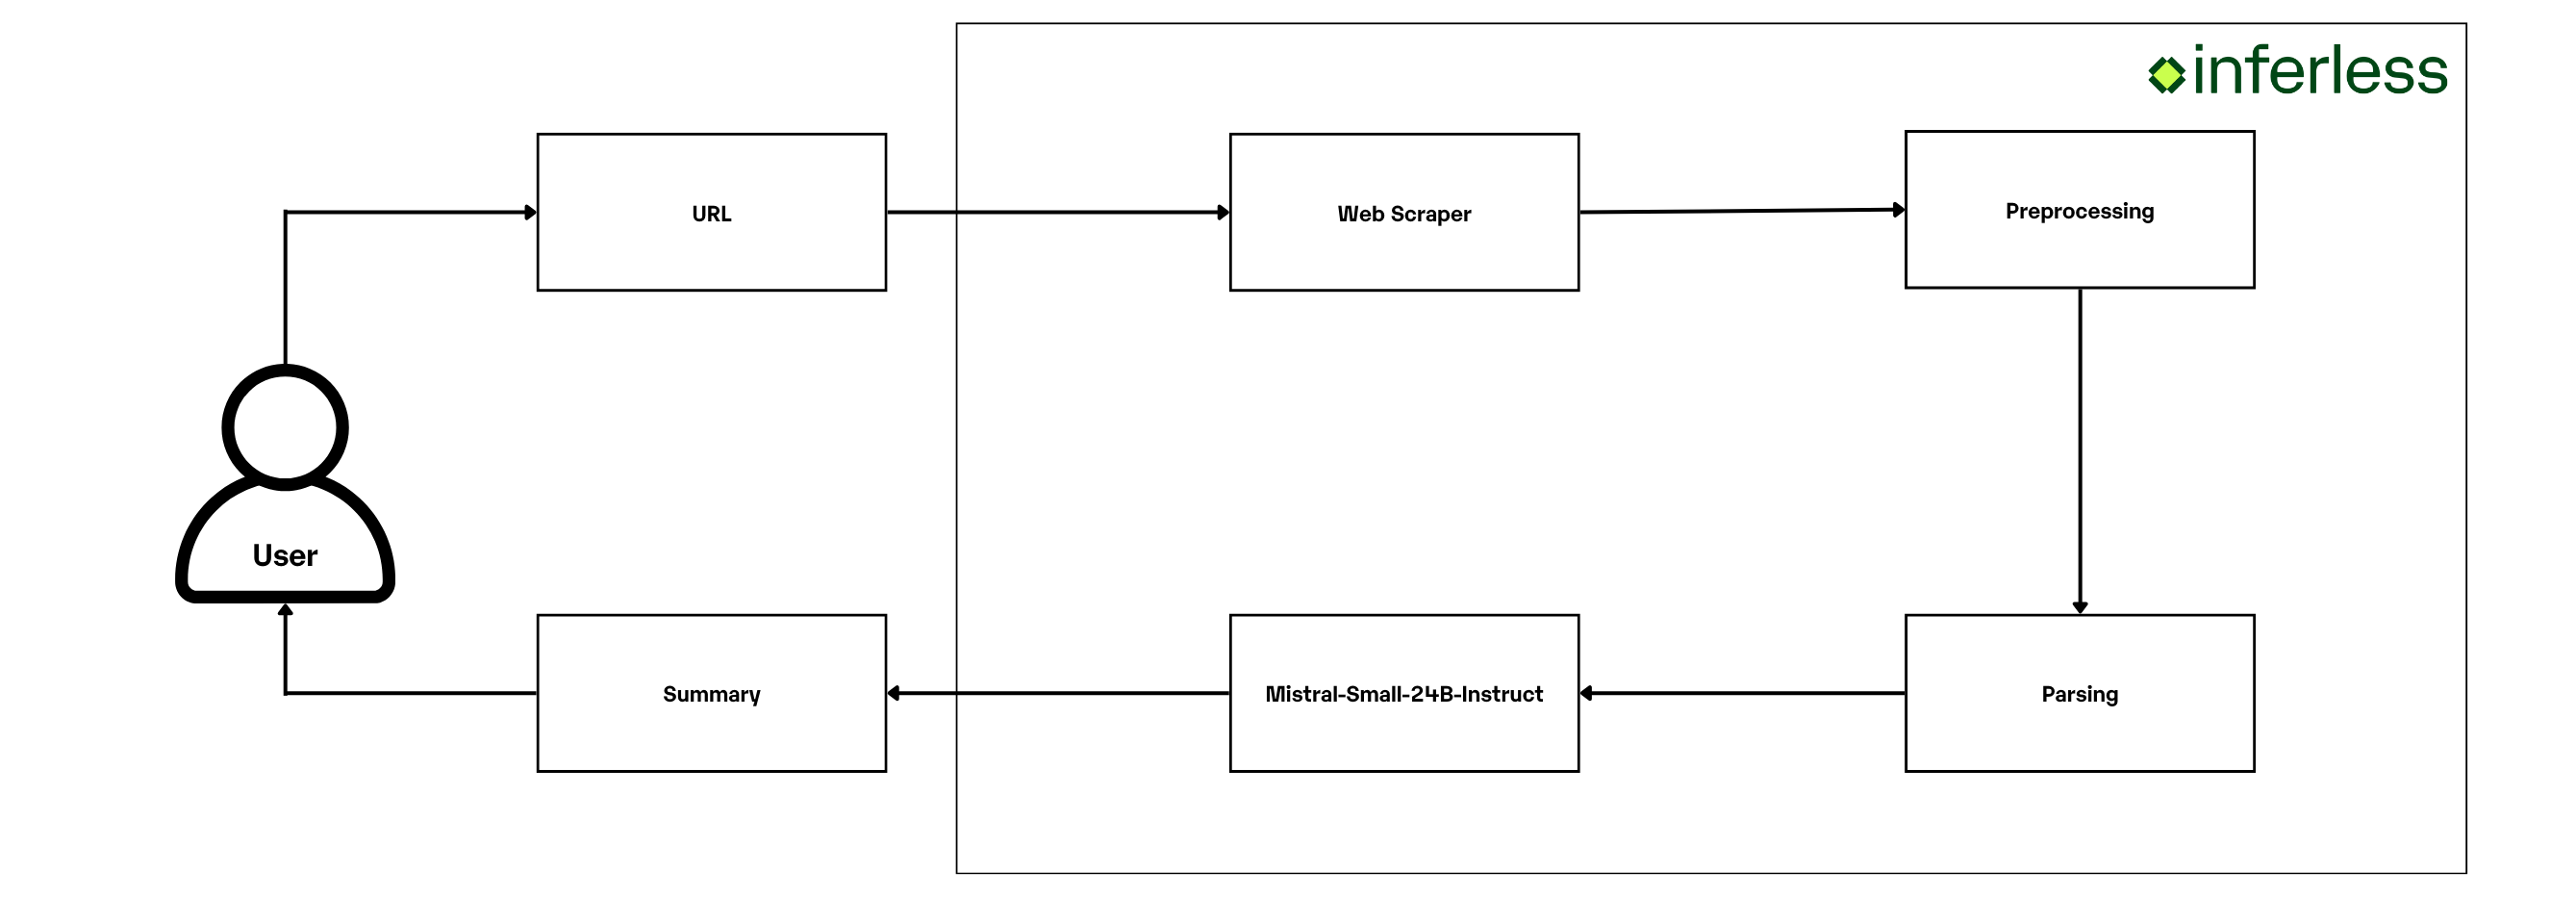 ## Core Development Steps
### Text Extraction and Preprocessing
* **Objective:** Retrieve and structure the raw text from a Product Hunt discussion URL by removing unnecessary elements and splitting the content into organized segments. This lays the groundwork for generating meaningful summaries.
* **Action:**
1. Create a `WebScraper` class to fetch the discussion thread HTML from the provided URL and convert it into text using BeautifulSoup.
2. Clean and preprocess the text filtering out unrelated lines.
3. Organize the processed text into a structured, ready to be passed on for summary generation.
```python
import requests
from bs4 import BeautifulSoup
import re
import requests
from requests.adapters import HTTPAdapter, Retry
class WebScraper:
def __init__(self):
self.session = requests.Session()
self.session.headers.update({
'User-Agent': 'Mozilla/5.0 (Windows NT 10.0; Win64; x64) AppleWebKit/537.36 '
'(KHTML, like Gecko) Chrome/91.0.4472.124 Safari/537.36',
'Accept': 'text/html,application/xhtml+xml,application/xml;q=0.9,image/webp,*/*;q=0.8',
'Accept-Language': 'en-US,en;q=0.5',
})
retries = Retry(total=5,backoff_factor=1)
adapter = HTTPAdapter(max_retries=retries)
self.session.mount('http://', adapter)
self.session.mount('https://', adapter)
def extract_content(self, url):
try:
response = self.session.get(url, timeout=100)
response.raise_for_status()
soup = BeautifulSoup(response.text, 'html.parser')
title = soup.title.string if soup.title else "No title found"
body_text = soup.body.get_text(separator='\n', strip=True) if soup.body else ""
return body_text
except requests.exceptions.RequestException as e:
print(f"Error fetching URL: {e}")
return None
def clear_session(self):
self.session.close()
def preprocess_text(raw_text):
lines = [line.strip() for line in raw_text.splitlines() if line.strip()]
start_idx = 0
for i, line in enumerate(lines):
if line.endswith('?'):
start_idx = i
break
lines = lines[start_idx:]
posts = []
current_post = []
for line in lines:
if re.match(r'\d+[hd] ago', line) and current_post:
posts.append(current_post)
current_post = []
current_post.append(line)
if current_post:
posts.append(current_post)
return posts
def parse_filtered_text(post_lines):
author = None
if "by" in post_lines:
try:
idx = post_lines.index("by")
author = post_lines[idx+1] if idx+1 < len(post_lines) else None
except ValueError:
pass
timestamp = None
for line in post_lines:
m = re.search(r'\d+[hd] ago', line)
if m:
timestamp = m.group(0)
break
ignore_words = {"Upvote", "Report", "Share", "Add a comment", "Login to comment", "Replies", "Best"}
content_lines = []
for line in post_lines:
if line in ignore_words:
continue
if re.match(r'\(\d+\)', line):
continue
content_lines.append(line)
content = "\n".join(content_lines)
return {"timestamp": timestamp, "content": content}
```
### Generating Concise Summary
* **Objective:** Transform the parsed discussion text into a concise, well-structured summary. This summary should capture key insights while adhering to a specific format, ensuring users can quickly grasp the most important information from the thread.
* **Action:**
1. Initialize the Mistral-Small-24B-Instruct model and specify the system and user prompts with required formatting rules.
2. Pass this prompt to the LLM and obtain the formatted summary.
```python
from utils import WebScraper, preprocess_text, parse_filtered_text
from vllm import LLM
from vllm.sampling_params import SamplingParams
import inferless
from pydantic import BaseModel, Field
from typing import Optional
@inferless.request
class RequestObjects(BaseModel):
url: str = Field(default="https://www.producthunt.com/p/general/how-many-hours-do-you-think-a-workweek-should-have-and-what-s-the-answer-from-big-companies")
temperature: Optional[float] = 0.15
top_p: Optional[float] = 1.0
repetition_penalty: Optional[float] = 1.0
top_k: Optional[int] = -1
max_tokens: Optional[int] = 1024
seed: Optional[int] = 4424234
@inferless.response
class ResponseObjects(BaseModel):
generated_result: str = Field(default='Test output')
class InferlessPythonModel:
def initialize(self):
model_id = "mistralai/Mistral-Small-24B-Instruct-2501"
self.llm = LLM(model=model_id)
self.web_scrap_obj = WebScraper()
self.SYSTEM_PROMPT = """You are a conversational agent that provides highly structured, well-organized responses.
Always use proper markdown formatting with hierarchical organization.
Group related points under thematic categories with bold headers.
Provide comprehensive analysis rather than superficial observations.
Maintain consistent formatting throughout your response."""
def infer(self, request: RequestObjects) -> ResponseObjects:
raw_text = self.web_scrap_obj.extract_content(request.url)
filtered_text = preprocess_text(raw_text)
parsed_text = [parse_filtered_text(lines) for lines in filtered_text]
prompt = f"""
You are a helpful assistant. Please read the following conversation text:
{str(parsed_text)}
Then, produce a concise summary following EXACTLY this format and style, with no deviations:
What is it about?
[Brief paragraph summarizing what the conversation discusses overall]
Insights
- **[Category/Theme 1]**:
- [Specific point with detail]
- [Specific point with detail]
- [Specific point with detail]
- **[Category/Theme 2]**:
- [Specific point with detail]
- [Specific point with detail]
- [Specific point with detail]
- **[Category/Theme 3]**:
- [Specific point with detail]
- [Specific point with detail]
- [Specific point with detail]
- **[Category/Theme 4]**:
- [Specific point with detail]
- [Specific point with detail]
- [Specific point with detail]
IMPORTANT FORMATTING RULES:
1. Use exactly the format shown above
2. Start each insight with a dash followed by bold category name and colon
3. Use two spaces of indentation for each specific point
4. Each specific point should start with a dash
5. Do not add sub-categories or nested bullet points beyond what's shown in the template
6. Avoid using author names
6. Keep to 4-5 main categories maximum
7. Format must match the example exactly
Example of correct formatting:
What is it about?
The conversation discusses the use of AI-generated comments on social media platforms, exploring the benefits, drawbacks, and ethical implications. Participants share their opinions on whether AI comments enhance or detract from genuine social interaction.
Insights
- **Benefits of AI Comments**:
- AI can help with grammar correction and generating basic ideas.
- Useful for big creators to interact with fans faster and on a large scale.
- Can assist in moderation, filtering spam, and bridging language barriers.
- **Drawbacks of AI Comments**:
- Lack of authenticity and personal touch.
- Can make interactions feel artificial and insincere.
- Risk of manipulation, bias, and creating echo chambers.
- May lead to a loss of genuine human connection and engagement.
- **Ethical Considerations**:
- AI should assist rather than replace human interaction.
- Over-reliance on AI comments can devalue the content and the effort put into creating it.
- Users prefer genuine, human-generated responses over AI-generated ones.
- **User Experiences**:
- Some users find AI comments annoying and insincere.
- Others see potential in using AI for brainstorming and generating basic content ideas.
- There is a preference for a synergy between human and AI interaction, where AI assists but does not replace human input.
"""
messages = [{
"role": "system",
"content": self.SYSTEM_PROMPT
},
{
"role": "user",
"content": prompt
}
]
sampling_params = SamplingParams(temperature=request.temperature,top_p=request.top_p,
repetition_penalty=request.repetition_penalty,
top_k=request.top_k,max_tokens=request.max_tokens,seed=request.seed)
outputs = self.llm.chat(messages, sampling_params=sampling_params)
generateObject = ResponseObjects(generated_result = outputs[0].outputs[0].text)
return generateObject
def finalize(self):
self.llm = None
self.web_scrap_obj.clear_session()
```
### Setting up the Environment
**Dependencies:**
* **Objective:** Ensure all necessary libraries are installed.
* **Action:** Run the command below to install dependencies:
```bash
pip install vllm==0.7.2 accelerate==1.0.0 beautifulsoup4==4.13.3 hf-transfer==0.1.9 inferless==0.2.13 pydantic==2.10.2
```
This command ensures your environment has all the tools required for the application.
### Deploying Your Model with Inferless CLI
Inferless allows you to deploy your model using Inferless-CLI. Follow the steps to deploy using Inferless CLI.
#### Clone the repository of the model
Let's begin by cloning the model repository:
```bash
git clone https://github.com/inferless/product-hunt-thread-summarizer.git
```
#### Deploy the Model
To deploy the model using Inferless CLI, execute the following command:
```bash
inferless deploy --gpu A100 --runtime inferless-runtime-config.yaml --env HF_TOKEN=
## Core Development Steps
### Text Extraction and Preprocessing
* **Objective:** Retrieve and structure the raw text from a Product Hunt discussion URL by removing unnecessary elements and splitting the content into organized segments. This lays the groundwork for generating meaningful summaries.
* **Action:**
1. Create a `WebScraper` class to fetch the discussion thread HTML from the provided URL and convert it into text using BeautifulSoup.
2. Clean and preprocess the text filtering out unrelated lines.
3. Organize the processed text into a structured, ready to be passed on for summary generation.
```python
import requests
from bs4 import BeautifulSoup
import re
import requests
from requests.adapters import HTTPAdapter, Retry
class WebScraper:
def __init__(self):
self.session = requests.Session()
self.session.headers.update({
'User-Agent': 'Mozilla/5.0 (Windows NT 10.0; Win64; x64) AppleWebKit/537.36 '
'(KHTML, like Gecko) Chrome/91.0.4472.124 Safari/537.36',
'Accept': 'text/html,application/xhtml+xml,application/xml;q=0.9,image/webp,*/*;q=0.8',
'Accept-Language': 'en-US,en;q=0.5',
})
retries = Retry(total=5,backoff_factor=1)
adapter = HTTPAdapter(max_retries=retries)
self.session.mount('http://', adapter)
self.session.mount('https://', adapter)
def extract_content(self, url):
try:
response = self.session.get(url, timeout=100)
response.raise_for_status()
soup = BeautifulSoup(response.text, 'html.parser')
title = soup.title.string if soup.title else "No title found"
body_text = soup.body.get_text(separator='\n', strip=True) if soup.body else ""
return body_text
except requests.exceptions.RequestException as e:
print(f"Error fetching URL: {e}")
return None
def clear_session(self):
self.session.close()
def preprocess_text(raw_text):
lines = [line.strip() for line in raw_text.splitlines() if line.strip()]
start_idx = 0
for i, line in enumerate(lines):
if line.endswith('?'):
start_idx = i
break
lines = lines[start_idx:]
posts = []
current_post = []
for line in lines:
if re.match(r'\d+[hd] ago', line) and current_post:
posts.append(current_post)
current_post = []
current_post.append(line)
if current_post:
posts.append(current_post)
return posts
def parse_filtered_text(post_lines):
author = None
if "by" in post_lines:
try:
idx = post_lines.index("by")
author = post_lines[idx+1] if idx+1 < len(post_lines) else None
except ValueError:
pass
timestamp = None
for line in post_lines:
m = re.search(r'\d+[hd] ago', line)
if m:
timestamp = m.group(0)
break
ignore_words = {"Upvote", "Report", "Share", "Add a comment", "Login to comment", "Replies", "Best"}
content_lines = []
for line in post_lines:
if line in ignore_words:
continue
if re.match(r'\(\d+\)', line):
continue
content_lines.append(line)
content = "\n".join(content_lines)
return {"timestamp": timestamp, "content": content}
```
### Generating Concise Summary
* **Objective:** Transform the parsed discussion text into a concise, well-structured summary. This summary should capture key insights while adhering to a specific format, ensuring users can quickly grasp the most important information from the thread.
* **Action:**
1. Initialize the Mistral-Small-24B-Instruct model and specify the system and user prompts with required formatting rules.
2. Pass this prompt to the LLM and obtain the formatted summary.
```python
from utils import WebScraper, preprocess_text, parse_filtered_text
from vllm import LLM
from vllm.sampling_params import SamplingParams
import inferless
from pydantic import BaseModel, Field
from typing import Optional
@inferless.request
class RequestObjects(BaseModel):
url: str = Field(default="https://www.producthunt.com/p/general/how-many-hours-do-you-think-a-workweek-should-have-and-what-s-the-answer-from-big-companies")
temperature: Optional[float] = 0.15
top_p: Optional[float] = 1.0
repetition_penalty: Optional[float] = 1.0
top_k: Optional[int] = -1
max_tokens: Optional[int] = 1024
seed: Optional[int] = 4424234
@inferless.response
class ResponseObjects(BaseModel):
generated_result: str = Field(default='Test output')
class InferlessPythonModel:
def initialize(self):
model_id = "mistralai/Mistral-Small-24B-Instruct-2501"
self.llm = LLM(model=model_id)
self.web_scrap_obj = WebScraper()
self.SYSTEM_PROMPT = """You are a conversational agent that provides highly structured, well-organized responses.
Always use proper markdown formatting with hierarchical organization.
Group related points under thematic categories with bold headers.
Provide comprehensive analysis rather than superficial observations.
Maintain consistent formatting throughout your response."""
def infer(self, request: RequestObjects) -> ResponseObjects:
raw_text = self.web_scrap_obj.extract_content(request.url)
filtered_text = preprocess_text(raw_text)
parsed_text = [parse_filtered_text(lines) for lines in filtered_text]
prompt = f"""
You are a helpful assistant. Please read the following conversation text:
{str(parsed_text)}
Then, produce a concise summary following EXACTLY this format and style, with no deviations:
What is it about?
[Brief paragraph summarizing what the conversation discusses overall]
Insights
- **[Category/Theme 1]**:
- [Specific point with detail]
- [Specific point with detail]
- [Specific point with detail]
- **[Category/Theme 2]**:
- [Specific point with detail]
- [Specific point with detail]
- [Specific point with detail]
- **[Category/Theme 3]**:
- [Specific point with detail]
- [Specific point with detail]
- [Specific point with detail]
- **[Category/Theme 4]**:
- [Specific point with detail]
- [Specific point with detail]
- [Specific point with detail]
IMPORTANT FORMATTING RULES:
1. Use exactly the format shown above
2. Start each insight with a dash followed by bold category name and colon
3. Use two spaces of indentation for each specific point
4. Each specific point should start with a dash
5. Do not add sub-categories or nested bullet points beyond what's shown in the template
6. Avoid using author names
6. Keep to 4-5 main categories maximum
7. Format must match the example exactly
Example of correct formatting:
What is it about?
The conversation discusses the use of AI-generated comments on social media platforms, exploring the benefits, drawbacks, and ethical implications. Participants share their opinions on whether AI comments enhance or detract from genuine social interaction.
Insights
- **Benefits of AI Comments**:
- AI can help with grammar correction and generating basic ideas.
- Useful for big creators to interact with fans faster and on a large scale.
- Can assist in moderation, filtering spam, and bridging language barriers.
- **Drawbacks of AI Comments**:
- Lack of authenticity and personal touch.
- Can make interactions feel artificial and insincere.
- Risk of manipulation, bias, and creating echo chambers.
- May lead to a loss of genuine human connection and engagement.
- **Ethical Considerations**:
- AI should assist rather than replace human interaction.
- Over-reliance on AI comments can devalue the content and the effort put into creating it.
- Users prefer genuine, human-generated responses over AI-generated ones.
- **User Experiences**:
- Some users find AI comments annoying and insincere.
- Others see potential in using AI for brainstorming and generating basic content ideas.
- There is a preference for a synergy between human and AI interaction, where AI assists but does not replace human input.
"""
messages = [{
"role": "system",
"content": self.SYSTEM_PROMPT
},
{
"role": "user",
"content": prompt
}
]
sampling_params = SamplingParams(temperature=request.temperature,top_p=request.top_p,
repetition_penalty=request.repetition_penalty,
top_k=request.top_k,max_tokens=request.max_tokens,seed=request.seed)
outputs = self.llm.chat(messages, sampling_params=sampling_params)
generateObject = ResponseObjects(generated_result = outputs[0].outputs[0].text)
return generateObject
def finalize(self):
self.llm = None
self.web_scrap_obj.clear_session()
```
### Setting up the Environment
**Dependencies:**
* **Objective:** Ensure all necessary libraries are installed.
* **Action:** Run the command below to install dependencies:
```bash
pip install vllm==0.7.2 accelerate==1.0.0 beautifulsoup4==4.13.3 hf-transfer==0.1.9 inferless==0.2.13 pydantic==2.10.2
```
This command ensures your environment has all the tools required for the application.
### Deploying Your Model with Inferless CLI
Inferless allows you to deploy your model using Inferless-CLI. Follow the steps to deploy using Inferless CLI.
#### Clone the repository of the model
Let's begin by cloning the model repository:
```bash
git clone https://github.com/inferless/product-hunt-thread-summarizer.git
```
#### Deploy the Model
To deploy the model using Inferless CLI, execute the following command:
```bash
inferless deploy --gpu A100 --runtime inferless-runtime-config.yaml --env HF_TOKEN=**Parameters:** * **Total number of queries:** 100 daily.
* **Inference Time:** All models are hypothetically deployed on A100 80GB, taking 15.82 seconds to process a request and a cold start overhead of 50.47 seconds.
* **Scale Down Timeout:** Uniformly 60 seconds across all platforms, except Hugging Face, which requires a minimum of 15 minutes. This is assumed to happen 100 times a day.
**Key Computations:** 1. **Inference Duration:**
Processing 100 queries and each takes 15.82 seconds
Total: 100 x 15.82 = 1582 seconds (or approximately 0.44 hours) 2. **Idle Timeout Duration:**
Post-processing idle time before scaling down: (60 seconds - 15.82 seconds) x 100 = 4418 seconds (or 1.22 hours approximately)
3. **Cold Start Overhead:**
Total: 100 x 50.47 = 5047 seconds (or 1.40 hours approximately)
**Total Billable Hours with Inferless:** 0.44 (inference duration) + 1.22 (idle time) + 1.40 (cold start overhead) = 3.06 hours
**Total Billable Hours with Inferless:** 3.06 hours
| Scenario | On-Demand Cost | Serverless Cost | | :--------------- | :-------------------------------------- | :---------------------------------------- | | 100 requests/day | \$28.8 (24 hours billed at \$1.22/hour) | \$3.73 (3.06 hours billed at \$1.22/hour) | By opting for Inferless, ***you can achieve up to 87.05% cost savings.***
Please note that we have utilized the A100(80 GB) GPU for model benchmarking purposes, while for pricing comparison, we referenced the A10G GPU price from both platforms. This is due to the unavailability of the A100 GPU in SageMaker. Also, the above analysis is based on a smaller-scale scenario for demonstration purposes. Should the scale increase tenfold, traditional cloud services might require maintaining 2-4 GPUs constantly active to manage peak loads efficiently. In contrast, Inferless, with its dynamic scaling capabilities, adeptly adjusts to fluctuating demand without the need for continuously running hardware.
## Conclusion By following this guide, you're now equipped to build and deploy a sophisticated Product Hunt Thread Summarizer application. This tutorial showcases the seamless integration of advanced technologies, emphasizing the practical application of creating cost-effective solutions. # Build a Serverless PDF Q&A Application in 10 Minutes Source: https://docs.inferless.com/cookbook/qna-serverless-pdf-application Welcome to a hands-on tutorial designed to walk you through the creation of a PDF Q&A application, leveraging cutting-edge serverless technologies. In just 10 minutes, you'll have a working app capable of delivering precise answers from PDF documents, enriched with contextual understanding. ## Understanding Retrieval-Augmented Generation (RAG) Before diving in, let's briefly understand the technology behind our app. Retrieval-Augmented Generation (RAG) combines the power of large language models with external data sources to enhance response accuracy and context. It involves: 1. **Retrieval:** Fetching relevant data in response to queries. 2. **Augmentation:** Enhancing the language model's knowledge with this data. 3. **Generation:** Producing accurate, context-aware responses.
With this foundation, let's start building. ## Crafting Your Application This tutorial is structured to ease you into creating a PDF Q\&A application using technologies like [LangChain](https://www.langchain.com/), [Pinecone](https://www.pinecone.io/), and [Inferless](https://www.inferless.com/).
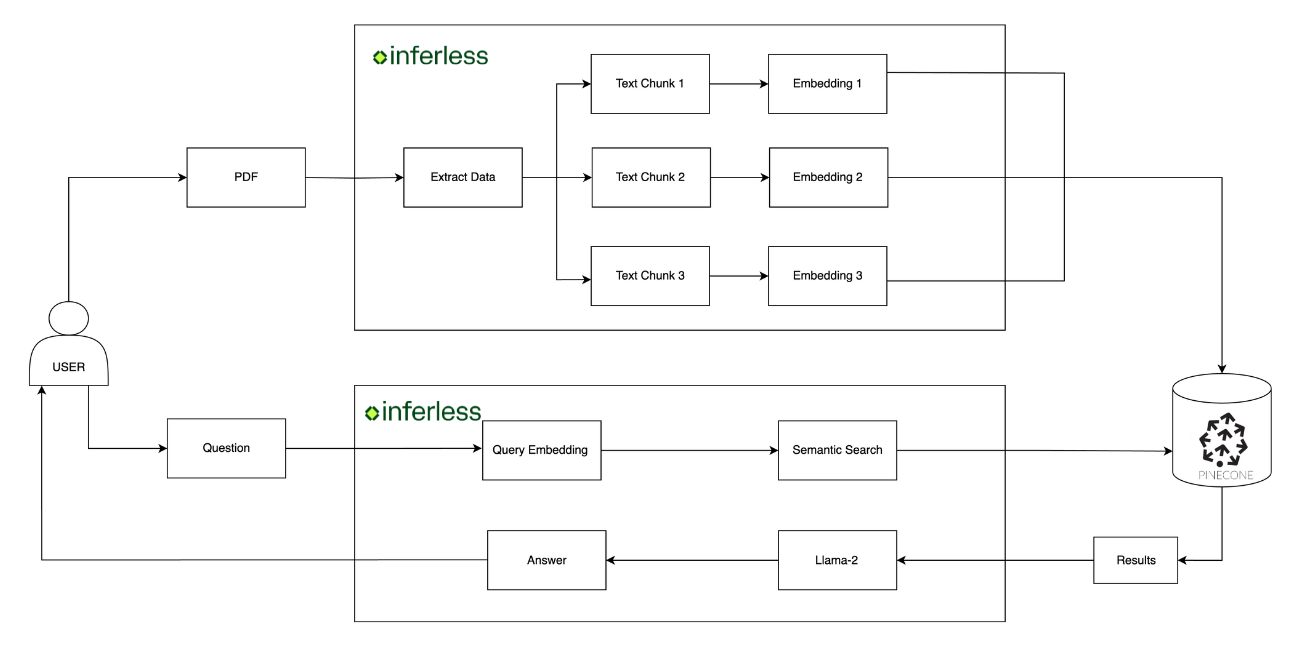 ## Obtaining your Pinecone API Key
To seamlessly integrate Pinecone, a fully managed vector database, into our application, securing an API Key is essential. Here’s a simplified guide to getting started:
1. **Registration:** Begin by [signing up](https://login.pinecone.io/login?state=hKFo2SBQMWdFRlVramFCRDRmdFpielRjMXZaTF93YlRKUXE3eqFupWxvZ2luo3RpZNkgSWhBSmlEekN1cjNkeWtDa1ZlRG1VcHpVbnN5ekxnQ02jY2lk2SBUOEkyaEc2Q2FaazUwT05McWhmN3h6a1I0WmhMcVM0Qw\&client=T8I2hG6CaZk50ONLqhf7xzkR4ZhLqS4C\&protocol=oauth2\&audience=https%3A%2F%2Fus-central1-production-console.cloudfunctions.net%2Fapi%2Fv1\&scope=openid%20profile%20email%20read%3Acurrent_user\&redirect_uri=https%3A%2F%2Fapp.pinecone.io\&sessionType=signup\&response_type=code\&response_mode=query\&nonce=MEhmRWRHSm03c3NDeHVPQzNib2FGNEVieDhBR0pnQkFjRG1fSVk0NjFwSA%3D%3D\&code_challenge=bvpqWvirAS3x7knCsigtQAP_VSX29a3n1ypFrnRWcaA\&code_challenge_method=S256\&auth0Client=eyJuYW1lIjoiYXV0aDAtcmVhY3QiLCJ2ZXJzaW9uIjoiMS41LjAifQ%3D%3D) on the Pinecone platform using your email address. Pinecone serves as the backbone for managing and querying vector data efficiently.
2. **Index Creation:** Once registered, proceed to create an index on Pinecone. Remember to note its name; this will be crucial for configuring your application.
3. **API Key Access:** With your index ready, navigate to the API Keys section, easily found in the Pinecone dashboard's left sidebar.
4. **API Key Retrieval:** Copy the API Key presented here. This key will authenticate your application's requests to Pinecone, enabling secure and efficient data operations.
## Obtaining your Pinecone API Key
To seamlessly integrate Pinecone, a fully managed vector database, into our application, securing an API Key is essential. Here’s a simplified guide to getting started:
1. **Registration:** Begin by [signing up](https://login.pinecone.io/login?state=hKFo2SBQMWdFRlVramFCRDRmdFpielRjMXZaTF93YlRKUXE3eqFupWxvZ2luo3RpZNkgSWhBSmlEekN1cjNkeWtDa1ZlRG1VcHpVbnN5ekxnQ02jY2lk2SBUOEkyaEc2Q2FaazUwT05McWhmN3h6a1I0WmhMcVM0Qw\&client=T8I2hG6CaZk50ONLqhf7xzkR4ZhLqS4C\&protocol=oauth2\&audience=https%3A%2F%2Fus-central1-production-console.cloudfunctions.net%2Fapi%2Fv1\&scope=openid%20profile%20email%20read%3Acurrent_user\&redirect_uri=https%3A%2F%2Fapp.pinecone.io\&sessionType=signup\&response_type=code\&response_mode=query\&nonce=MEhmRWRHSm03c3NDeHVPQzNib2FGNEVieDhBR0pnQkFjRG1fSVk0NjFwSA%3D%3D\&code_challenge=bvpqWvirAS3x7knCsigtQAP_VSX29a3n1ypFrnRWcaA\&code_challenge_method=S256\&auth0Client=eyJuYW1lIjoiYXV0aDAtcmVhY3QiLCJ2ZXJzaW9uIjoiMS41LjAifQ%3D%3D) on the Pinecone platform using your email address. Pinecone serves as the backbone for managing and querying vector data efficiently.
2. **Index Creation:** Once registered, proceed to create an index on Pinecone. Remember to note its name; this will be crucial for configuring your application.
3. **API Key Access:** With your index ready, navigate to the API Keys section, easily found in the Pinecone dashboard's left sidebar.
4. **API Key Retrieval:** Copy the API Key presented here. This key will authenticate your application's requests to Pinecone, enabling secure and efficient data operations.By following these steps, you will have taken a crucial step in setting up your PDF Q\&A application, leveraging Pinecone's powerful vector database capabilities.
The next phase involves preparing your deployment environment. While this guide focuses on Inferless for its simplicity and efficiency in serverless deployments, you're encouraged to select the platform that best fits your project needs. ## Core Development Steps ### PDF Upload Functionality: * **Objective:** Establish a process for uploading and managing PDFs, utilizing LangChain for document loading and Pinecone for efficient data indexing. * **Action:** Implement a Python class for PDF management. Refer to our [GitHub example](https://github.com/inferless/Document-RAG-Upload/blob/main/app.py) for detailed code. ```python import os from langchain.document_loaders import OnlinePDFLoader from langchain.text_splitter import RecursiveCharacterTextSplitter from langchain.embeddings import HuggingFaceEmbeddings from langchain_pinecone import Pinecone class InferlessPythonModel: def initialize(self): #define the index name of Pinecone, embedding model name and pinecone API KEY index_name = "documents" embed_model_id = "sentence-transformers/all-MiniLM-L6-v2" os.environ["PINECONE_API_KEY"] = "YOUR_PINECONE_API_KEY" #Initialize the embedding model, text_splitter & pinecone embeddings=HuggingFaceEmbeddings(model_name=embed_model_id) self.text_splitter=RecursiveCharacterTextSplitter(chunk_size=500, chunk_overlap=0) self.pinecone = Pinecone(index_name=index_name, embedding=embeddings) def infer(self, inputs): pdf_link = inputs["pdf_url"] loader = OnlinePDFLoader(pdf_link) data = loader.load() documents = self.text_splitter.split_documents(data) response = self.pinecone.add_documents(documents) return {"result":response} def finalize(self): pass ``` ### Integrating Q\&A Functionality: * **Objective:** Enable the application to process user queries and extract answers from PDFs, employing the RAG technique. * **Action:** Develop a Python class to merge embeddings with LangChain's retrieval capabilities and the Llama-2 7B model for answer generation. Our [GitHub repository](https://github.com/inferless/Document-RAG-QnA/blob/main/app.py) provides a comprehensive example. ```python import os from langchain.embeddings import HuggingFaceEmbeddings from langchain_pinecone import Pinecone from langchain_core.prompts import ChatPromptTemplate from langchain_core.runnables import RunnableParallel, RunnablePassthrough from langchain_core.output_parsers import StrOutputParser from langchain_community.llms.huggingface_pipeline import HuggingFacePipeline from transformers import AutoModelForCausalLM, AutoTokenizer, pipeline class InferlessPythonModel: def initialize(self): #define the index name of Pinecone, embedding model name, LLM model name, and pinecone API KEY index_name = "documents" embed_model_id = "sentence-transformers/all-MiniLM-L6-v2" llm_model_id = "NousResearch/Nous-Hermes-llama-2-7b" os.environ["PINECONE_API_KEY"] = "YOUR_PINECONE_API_KEY" # Initialize the model for embeddings embeddings=HuggingFaceEmbeddings(model_name=embed_model_id) vectorstore = Pinecone.from_existing_index(index_name=index_name, embedding=embeddings) retriever = vectorstore.as_retriever() # Initialize the LLM tokenizer = AutoTokenizer.from_pretrained(llm_model_id) model = AutoModelForCausalLM.from_pretrained(llm_model_id,trust_remote_code=True,device_map="cuda") pipe = pipeline("text-generation", model=model, tokenizer=tokenizer, max_new_tokens=100) llm = HuggingFacePipeline(pipeline=pipe) # Define the chat template, and chain for retrival template = """Answer the question based only on the following context: {context} Question: {question} """ prompt = ChatPromptTemplate.from_template(template) self.chain = ( RunnableParallel({"context": retriever, "question": RunnablePassthrough()}) | prompt | llm | StrOutputParser()) def infer(self, inputs): question = inputs["question"] result = self.chain.invoke(question) return {"generated_result":result} def finalize(self): pass ``` ### Setting up the Environment **Dependencies:** * **Objective:** Ensure all necessary libraries are installed. * **Action:** Run the command below to install dependencies: ```bash pip install langchain==0.1.7 langchain-pinecone==0.0.2 pypdf==4.0.1 unstructured==0.12.4 sentence-transformers==2.3.1 pinecone-client==3.0.3 huggingface-hub==0.20.3 pdf2image==1.17.0 pdfminer==20191125 pdfminer.six==20221105 pillow_heif==0.15.0 unstructured-inference==0.7.24 pikepdf==8.12.0 transformers==4.37.2 accelerate==0.27.2 ``` This command ensures that your environment is equipped with all the tools required for the PDF Q\&A application. #### Organizing Your Application: * **Structure:** Divide your application into two main parts for better modularity and maintenance: 1. **PDF Upload Component:** Handles the uploading and initial processing of PDF documents. See [GitHub Repository](https://github.com/inferless/Document-RAG-Upload). 2. **Q\&A Component:** Manages the extraction of information and answering of user queries from PDFs. See [GitHub Repository](https://github.com/inferless/Document-RAG-QnA). ### Deploying Your Model with Inferless CLI #### PDF Upload Deployment: Inferless allows you to deploy your model using Inferless-CLI. Follow the steps to deploy using Inferless CLI. #### Clone the repository of the model Let's begin by cloning the model repository: ```bash git clone https://github.com/inferless/Document-RAG-Upload.git ``` #### Deploy the Model To deploy the model using Inferless CLI, execute the following command: ```bash inferless deploy --gpu A100 --runtime inferless-runtime-config.yaml ``` #### PDF Q\&A Deployment: Inferless allows you to deploy your model using Inferless-CLI. Follow the steps to deploy using Inferless CLI. #### Clone the repository of the model Let's begin by cloning the model repository: ```bash git clone https://github.com/inferless/Document-RAG-QnA.git ``` #### Deploy the Model To deploy the model using Inferless CLI, execute the following command: ```bash inferless deploy --gpu A100 --runtime inferless-runtime-config.yaml ``` **Explanation of the Command:** * `--gpu A100`: Specifies the GPU type for deployment. Available options include `A10`, `A100`, and `T4`. * `--runtime inferless-runtime-config.yaml`: Defines the runtime configuration file. If not specified, the default Inferless runtime is used. ### Alternative Deployment Method Inferless also supports a user-friendly UI for model deployment, catering to users at all skill levels. Refer to Inferless's documentation for guidance on UI-based deployment. ## Choosing Inferless for Deployment Deploying your PDF Q\&A app with Inferless offers compelling advantages, making your development journey smoother and more cost-effective. Here's why Inferless is the go-to choice: 1. **Ease of Use:** Forget the complexities of infrastructure management. With Inferless, you simply bring your model, and within minutes, you have a working endpoint. Deployment is hassle-free, without the need for in-depth knowledge of scaling or infrastructure maintenance. 2. **Cold-start Times:** Inferless's unique load balancing ensures faster cold-starts. Expect around [6.20 seconds for PDF uploads and 11.7 seconds for Q\&A functionalities, significantly faster than many traditional platforms](https://drive.google.com/drive/folders/14eG966yNtaE7FXF_EKAT8qBiynF33xxH). 3. **Cost Efficiency:** Inferless optimizes resource utilization, translating to lower operational costs. Here's a simplified cost comparison: ### PDF Upload: **Assumptions:** * 100 documents uploaded daily * Each document takes 20 seconds of processing time (inference) * Additional time considerations include a 6.20-second cold start for each upload **Inferless Cost:**
**Total Active Processing Time:** 100 documents \* 20 seconds each = 2000 seconds (or approximately 0.55 hours)
**Cold Start Overhead:** 100 uploads \* 6.20 seconds each = 620 seconds (or 0.17 hours)
**Idle Time Between Uploads:** ((60 seconds - 20 seconds) \* 100) / 3600 = approximately 1.1 hours
**Total Billable Hours with Inferless:** 1.82 hours
### Q\&A for PDFs **Assumptions:** * 30 queries per document daily, with a 11.71-second cold start * Each query takes 5 seconds of processing time **Inferless Cost:**
**Total Active Processing Time:** (5 seconds \* 3000 queries) / 3600 = approximately 4.1 hours
**Cold Start Overhead:** 11.71 seconds \* 100 = 1171 seconds (or 0.32 hours)
**Idle Time Between Queries:** ((60 seconds - 5 seconds) \* 3000) / 3600 = approximately 1.52 hours
**Total Billable Hours with Inferless:** 5.94 hours
### Comparative Cost Analysis | Operation Type | AWS SageMaker Cost | Inferless Cost | | :------------- | :-------------------------------------: | ----------------------------------------: | | PDF Upload | \$28.8 (24 hours billed at \$1.22/hour) | \$2.22 (1.82 hours billed at \$1.22/hour) | | Q\&A for PDFs | \$28.8 (24 hours billed at \$1.22/hour) | \$7.25 (5.94 hours billed at \$1.22/hour) | | Total Cost | \$57.6 | \$9.47 | By opting for Inferless, ***you can achieve up to 84% cost savings***, lowering your operational expenses from \$57.6 to just \$9.47. Please note, the above analysis is based on a smaller-scale scenario for demonstration purposes. Should the scale increase tenfold, traditional cloud services might require maintaining 2-4 GPUs constantly active to manage peak loads efficiently. In contrast, Inferless, with its dynamic scaling capabilities, adeptly adjusts to fluctuating demand without the need for continuously running hardware. ## Discover the difference with real-world examples
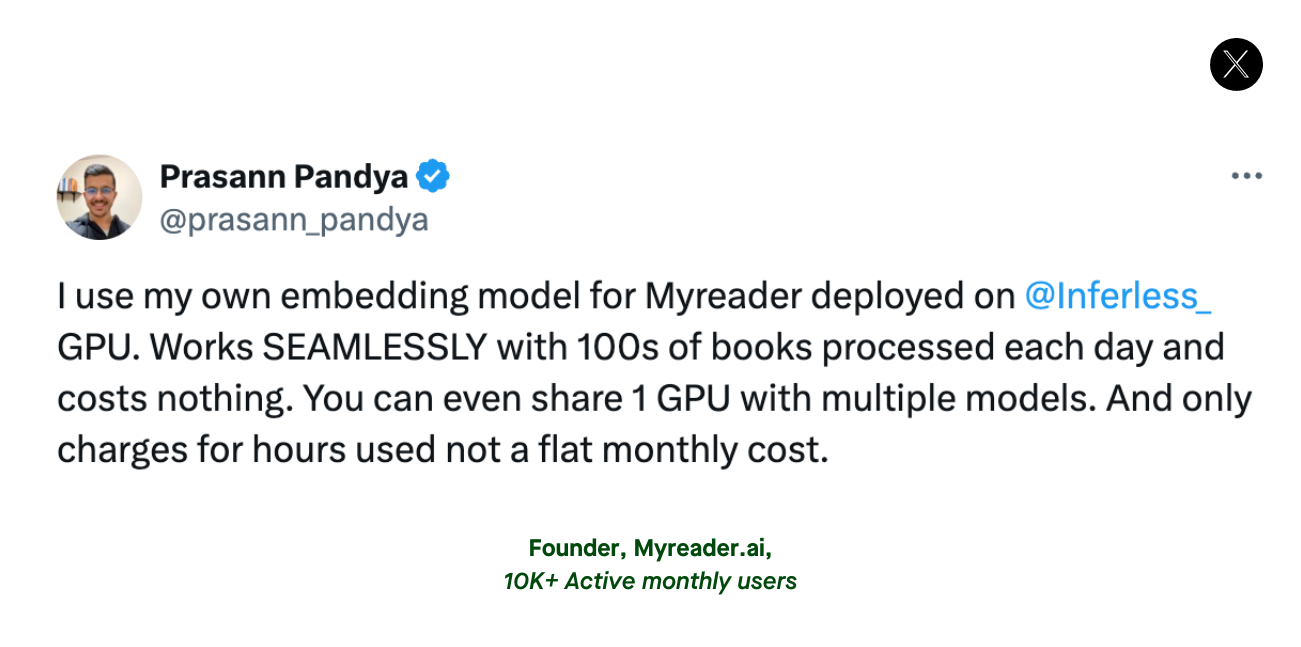 ## Conclusion
By following this guide, you're now equipped to build and deploy a sophisticated PDF Q\&A application. This tutorial showcases the seamless integration of advanced technologies, emphasizing the practical application of RAG for creating cost-effective solutions.
# Build a Serverless Customer Service Voicebot
Source: https://docs.inferless.com/cookbook/serverless-customer-service-bot
Welcome to an engaging tutorial designed to walk you through creating a customer support voicebot where users can voice their queries and receive solutions. You'll learn to integrate speech recognition, large language, and text-to-speech models to develop a responsive and efficient voice-based customer support application.
## Key Components of the Application
In building this application, we'll utilize these components:
1. **Dataset:** We will use the dataset [Twitter customer support exchanges](https://www.kaggle.com/datasets/thoughtvector/customer-support-on-twitter?resource=download) to help the voicebot develop natural and effective conversational abilities, improving its response accuracy.
2. **Vector Database:** We will use [Pinecone](https://www.pinecone.io/) will store embeddings of the dataset, aiding in the retrieval of relevant information to provide context to the language model.
3. **Embedding Model:** We will utilize an embedding model [bge-small-en-v1.5](https://huggingface.co/BAAI/bge-small-en-v1.5) to convert textual data from our dataset into numerical vectors. By storing these vectors in a Pinecone, our bot can quickly access relevant information to generate accurate and contextually appropriate responses.
4. **Automatic Speech Recognition Model:** We will use the [whisper-large-v3](https://huggingface.co/openai/whisper-large-v3) to convert spoken words into text.
5. **Text Generation Model:** The [Hermes-2-Pro-Llama-3-8B](https://huggingface.co/NousResearch/Hermes-2-Pro-Llama-3-8B) will generate responses to user queries.
6. **Text-to-Audio Model:** [Piper](https://github.com/rhasspy/piper) will convert the generated text responses into speech for a seamless conversational experience.
## Crafting Your Application
This tutorial guides you through creating a customer support voicebot where users can speak their queries and the bot responds with spoken solutions. It leverages technologies such as [Pinecone](https://www.pinecone.io/), [Faster-Whisper](https://github.com/SYSTRAN/faster-whisper), [LlamaIndex](https://www.llamaindex.ai/), [Piper](https://github.com/rhasspy/piper), and [Inferless](https://www.inferless.com/).
## Conclusion
By following this guide, you're now equipped to build and deploy a sophisticated PDF Q\&A application. This tutorial showcases the seamless integration of advanced technologies, emphasizing the practical application of RAG for creating cost-effective solutions.
# Build a Serverless Customer Service Voicebot
Source: https://docs.inferless.com/cookbook/serverless-customer-service-bot
Welcome to an engaging tutorial designed to walk you through creating a customer support voicebot where users can voice their queries and receive solutions. You'll learn to integrate speech recognition, large language, and text-to-speech models to develop a responsive and efficient voice-based customer support application.
## Key Components of the Application
In building this application, we'll utilize these components:
1. **Dataset:** We will use the dataset [Twitter customer support exchanges](https://www.kaggle.com/datasets/thoughtvector/customer-support-on-twitter?resource=download) to help the voicebot develop natural and effective conversational abilities, improving its response accuracy.
2. **Vector Database:** We will use [Pinecone](https://www.pinecone.io/) will store embeddings of the dataset, aiding in the retrieval of relevant information to provide context to the language model.
3. **Embedding Model:** We will utilize an embedding model [bge-small-en-v1.5](https://huggingface.co/BAAI/bge-small-en-v1.5) to convert textual data from our dataset into numerical vectors. By storing these vectors in a Pinecone, our bot can quickly access relevant information to generate accurate and contextually appropriate responses.
4. **Automatic Speech Recognition Model:** We will use the [whisper-large-v3](https://huggingface.co/openai/whisper-large-v3) to convert spoken words into text.
5. **Text Generation Model:** The [Hermes-2-Pro-Llama-3-8B](https://huggingface.co/NousResearch/Hermes-2-Pro-Llama-3-8B) will generate responses to user queries.
6. **Text-to-Audio Model:** [Piper](https://github.com/rhasspy/piper) will convert the generated text responses into speech for a seamless conversational experience.
## Crafting Your Application
This tutorial guides you through creating a customer support voicebot where users can speak their queries and the bot responds with spoken solutions. It leverages technologies such as [Pinecone](https://www.pinecone.io/), [Faster-Whisper](https://github.com/SYSTRAN/faster-whisper), [LlamaIndex](https://www.llamaindex.ai/), [Piper](https://github.com/rhasspy/piper), and [Inferless](https://www.inferless.com/).
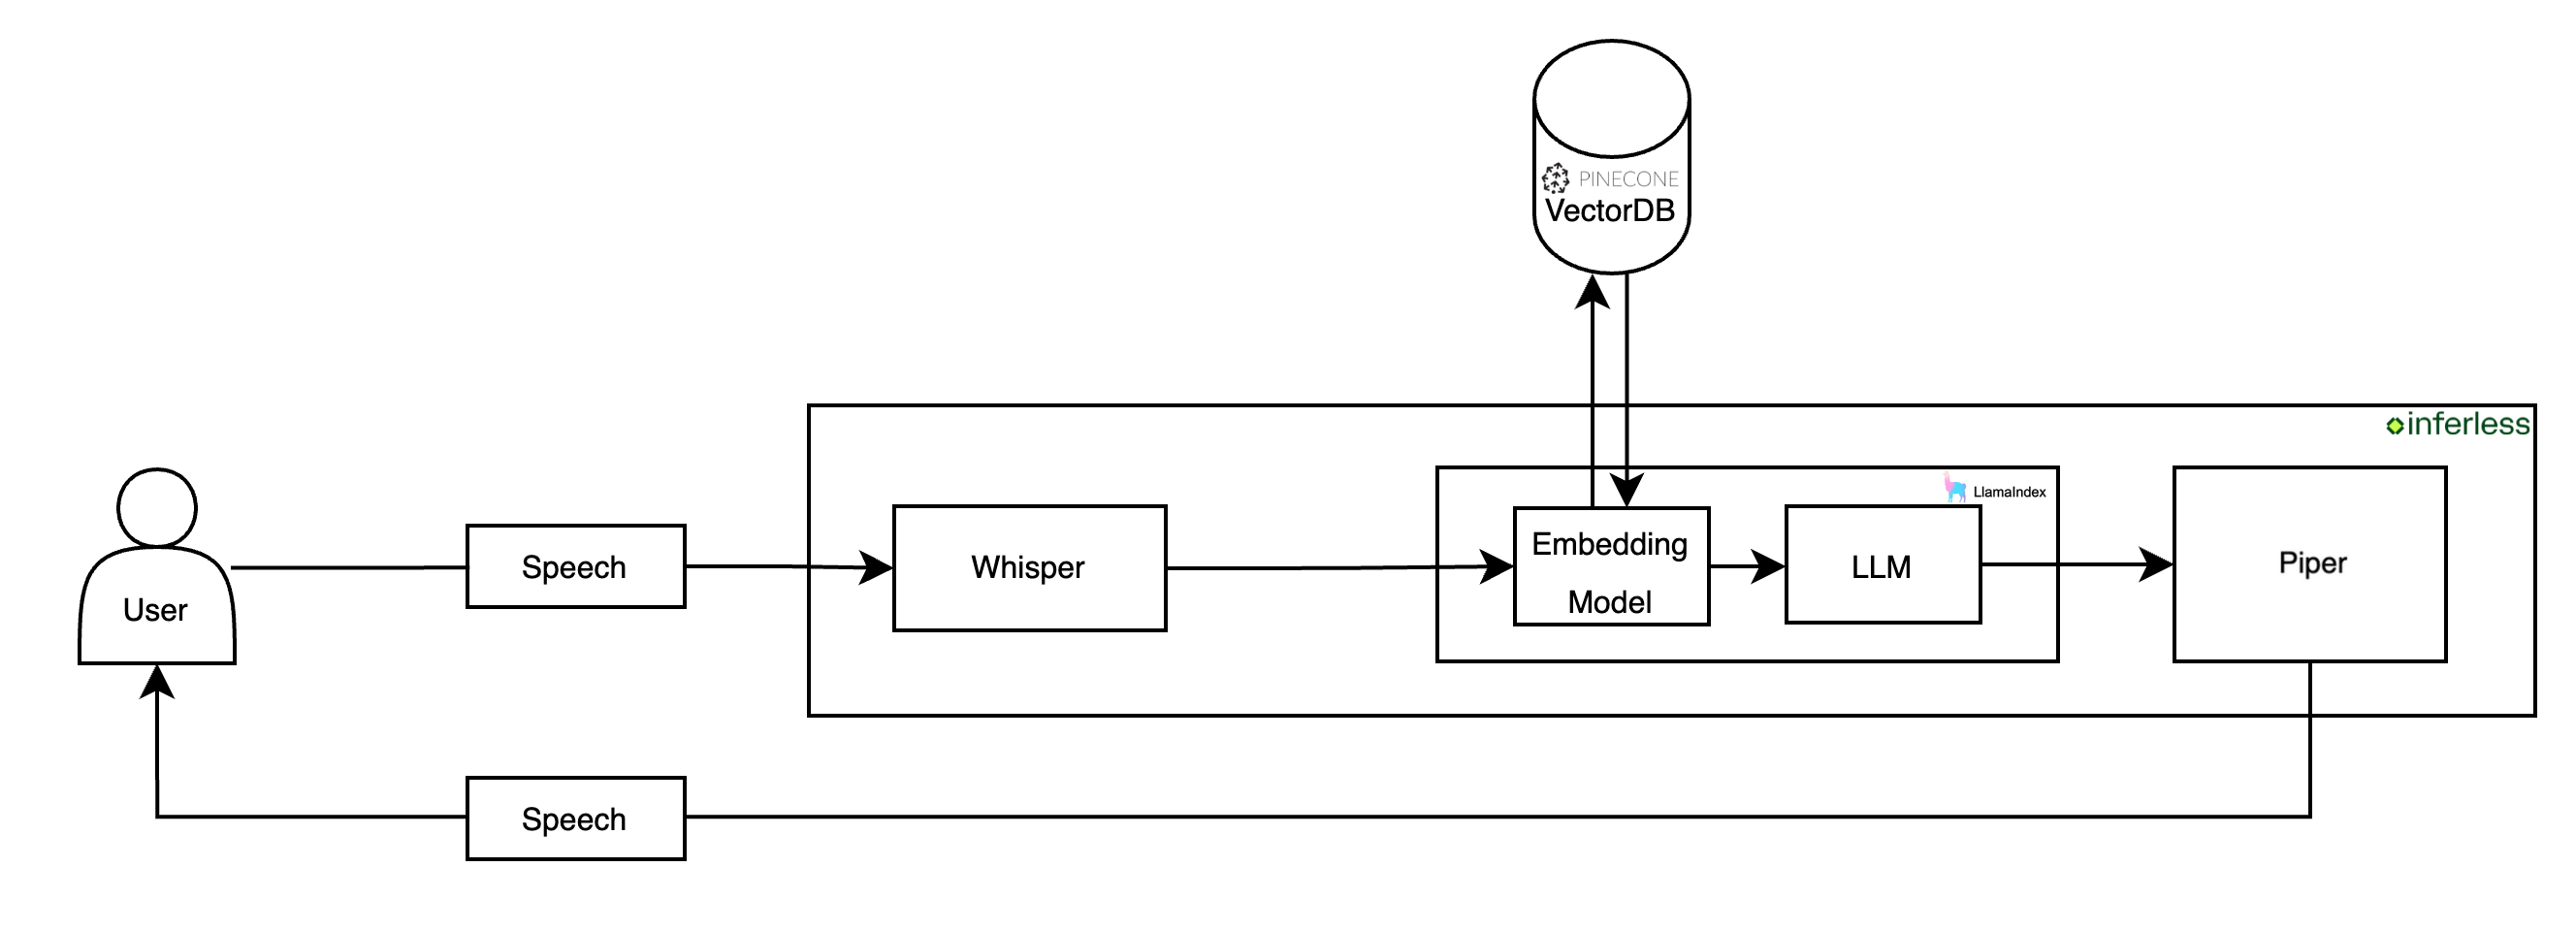 ## Document Processing and Storage in Pinecone
To process and store documents in Pinecone, we download and prepare the [dataset](https://github.com/inferless/Customer-Service-Voicebot/blob/main/SpotifyCustomerSupport.txt), then load it using a `SimpleDirectoryReader`. We initialize Pinecone and create an index to store the document embeddings. These embeddings enable efficient retrieval and querying, providing relevant context for the language model in the application.
## Core Development Steps
### Speech-to-Speech Generation
* **Objective:** Capture user voice input, transcribe it to text, generate the text response, and convert it back to speech.
* **Action:** Implement a Python class ([InferlessPythonModel](https://github.com/inferless/Customer-Service-Voicebot/blob/main/app.py)) to handle the entire speech-to-speech process, including voice input handling, model integration, and audio response generation.
```python
import os
import time
import nltk
import io
import base64
import numpy as np
import pandas as pd
import requests
from llama_index.core import ServiceContext, SimpleDirectoryReader, GPTVectorStoreIndex, PromptHelper, VectorStoreIndex, KeywordTableIndex, StorageContext, load_index_from_storage
from llama_index.llms.vllm import Vllm
from llama_index.embeddings.huggingface import HuggingFaceEmbedding
from llama_index.core import Settings
from transformers import AutoTokenizer
from llama_index.vector_stores.pinecone import PineconeVectorStore
from pinecone import Pinecone, ServerlessSpec
from faster_whisper import WhisperModel
import wave
from piper.voice import PiperVoice
class InferlessPythonModel:
def initialize(self):
self.audio_file = "output.mp3"
# Initialize tokenizer
self.tokenizer = AutoTokenizer.from_pretrained('NousResearch/Hermes-2-Pro-Llama-3-8B', trust_remote_code=True)
# Initialize LLM
self.llm = Vllm(
model="NousResearch/Hermes-2-Pro-Llama-3-8B",
max_new_tokens=256,
top_k=10,
top_p=0.95,
temperature=0.1,
vllm_kwargs={"swap_space": 1, "gpu_memory_utilization": 0.9},
)
# Initialize embedding model
self.embed_model = HuggingFaceEmbedding(model_name="BAAI/bge-small-en-v1.5")
# Configure settings
Settings.llm = self.llm
Settings.embed_model = self.embed_model
Settings.chunk_size = 1024
#Load the Dataset to Pinecone
self.load_dataset()
# Initialize Pinecone
self.pc = Pinecone(api_key="153e3e06-a636-4925-bd3f-82b3349d59eb")
self.index = self.pc.Index("document")
# Initialize vector store and query engine
self.vector_store = PineconeVectorStore(pinecone_index=self.index)
self.index = GPTVectorStoreIndex.from_vector_store(self.vector_store)
self.query_engine = self.index.as_query_engine()
# Initialize Whisper model
self.model_size = "large-v3"
self.model_whisper = WhisperModel(self.model_size, device="cuda", compute_type="float16")
# Ensure the onnx_models directory exists
self.model_dir = "onnx_models"
os.makedirs(self.model_dir, exist_ok=True)
# Download the Piper voice model if it doesn't exist
self.model_path = os.path.join(self.model_dir, "en_US-lessac-medium.onnx")
self.model_json_path = os.path.join(self.model_dir, "en_US-lessac-medium.onnx.json")
self.download_model()
# Initialize Piper voice model
self.voice = PiperVoice.load(self.model_path, use_cuda=True)
def base64_to_mp3(self, base64_data, output_file_path):
# Convert base64 audio data to mp3 file
mp3_data = base64.b64decode(base64_data)
with open(output_file_path, "wb") as mp3_file:
mp3_file.write(mp3_data)
def load_dataset(self):
# Setup dataset directory and file path
dataset_dir = "dataset"
os.makedirs(dataset_dir, exist_ok=True)
dataset_path = os.path.join(dataset_dir, "SpotifyCustomerSupport.txt")
# Download dataset if it doesn't exist
if not os.path.exists(dataset_path):
url = "https://github.com/inferless/Customer-Service-Voicebot/raw/main/SpotifyCustomerSupport.txt"
response = requests.get(url)
response.raise_for_status()
with open(dataset_path, 'wb') as f:
f.write(response.content)
# Load documents and initialize Pinecone
documents = SimpleDirectoryReader(dataset_dir).load_data()
pc = Pinecone(api_key="153e3e06-a636-4925-bd3f-82b3349d59eb")
pc.create_index(
name="document",
dimension=384,
metric="euclidean",
spec=ServerlessSpec(cloud="aws", region="us-east-1"),
)
index = pc.Index("document")
# Setup vector store and storage context
vector_store = PineconeVectorStore(pinecone_index=index)
storage_context = StorageContext.from_defaults(vector_store=vector_store)
index = VectorStoreIndex.from_documents(documents, storage_context=storage_context)
def download_model(self):
if not os.path.exists(self.model_path):
url_list = ["https://huggingface.co/rhasspy/piper-voices/resolve/main/en/en_US/lessac/medium/en_US-lessac-medium.onnx"
, "https://huggingface.co/rhasspy/piper-voices/resolve/main/en/en_US/lessac/medium/en_US-lessac-medium.onnx.json"]
download_items = [self.model_path,self.model_json_path]
for idx in range(len(url_list)):
response = requests.get(url_list[idx])
response.raise_for_status() # Check if the request was successful
with open(download_items[idx], 'wb') as f:
f.write(response.content)
print(f"Downloaded {download_items[idx]}")
def infer(self, inputs):
audio_data = inputs["audio_base64"]
#Convert the audio from base64 to .mp3
self.base64_to_mp3(audio_data, self.audio_file)
# Transcribe audio file
segments, info = self.model_whisper.transcribe(self.audio_file, beam_size=5)
user_text = ''.join([segment.text for segment in segments])
# Prepare messages for chat template
messages = [
{"role": "system", "content": "You are Customer Support Assistant."},
{"role": "user", "content": user_text}
]
# Generate input for the LLM
gen_input = self.tokenizer.apply_chat_template(messages, return_tensors="pt", tokenize=False)
# Query the vector store
response = self.query_engine.query(gen_input)
# Synthesize response to audio
byte_stream = io.BytesIO()
with wave.open(byte_stream, "wb") as wav_file:
# Set WAV file parameters
wav_file.setnchannels(1) # Mono
wav_file.setsampwidth(2) # 2 bytes per sample
wav_file.setframerate(22050) # Sample rate
# Synthesize the speech and write to byte stream
self.voice.synthesize(response.response, wav_file)
# Get the byte stream's content
audio_bytes = byte_stream.getvalue()
# Encode audio bytes to Base64 string
audio_base64 = base64.b64encode(audio_bytes).decode('utf-8')
return {"generated_audio_base64": audio_base64,
"question":user_text,
"answer":response.response}
def finalize(self):
# Clear GPU memory (implementation depends on the framework used)
pass
```
### Setting up the Environment
**Dependencies:**
* **Objective:** Ensure all necessary libraries are installed.
* **Action:** Run the command below to install dependencies:
```bash
pip install llama-index==0.10.36 llama-index-core==0.10.36 llama-index-embeddings-huggingface==0.2.0 llama-index-llms-vllm==0.1.7 llama-index-vector-stores-pinecone==0.1.7 llamaindex-py-client==0.1.19 vllm==0.4.2 piper-tts==1.2.0 onnxruntime-gpu==1.17.1 faster-whisper==1.0.2 nltk==3.8.1 transformers==4.40.2 pinecone-client==3.2.2
```
This command ensures your environment has all the tools required for the application.
### Deploying Your Model with Inferless CLI
Inferless allows you to deploy your model using Inferless-CLI. Follow the steps to deploy using Inferless CLI.
#### Clone the repository of the model
Let's begin by cloning the model repository:
```bash
git clone https://github.com/inferless/Customer-Service-Voicebot.git
```
#### Deploy the Model
To deploy the model using Inferless CLI, execute the following command:
```bash
inferless deploy --gpu A100 --runtime inferless-runtime-config.yaml
```
**Explanation of the Command:**
* `--gpu A100`: Specifies the GPU type for deployment. Available options include `A10`, `A100`, and `T4`.
* `--runtime inferless-runtime-config.yaml`: Defines the runtime configuration file. If not specified, the default Inferless runtime is used.
### Demo of the Customer Service Voicebot.
### Alternative Deployment Method
Inferless also supports a user-friendly UI for model deployment, catering to users at all skill levels. Refer to Inferless's documentation for guidance on UI-based deployment.
## Choosing Inferless for Deployment
Deploying your Customer Service Voicebot application with Inferless offers compelling advantages, making your development journey smoother and more cost-effective. Here's why Inferless is the go-to choice:
1. **Ease of Use:** Forget the complexities of infrastructure management. With Inferless, you simply bring your model, and within minutes, you have a working endpoint. Deployment is hassle-free, without the need for in-depth knowledge of scaling or infrastructure maintenance.
2. **Cold-start Times:** Inferless's unique load balancing ensures faster cold-starts. Expect around 2.87 seconds to process each queries, significantly faster than many traditional platforms.
3. **Cost Efficiency:** Inferless optimizes resource utilization, translating to lower operational costs. Here's a simplified cost comparison:
### Scenario 1
You are looking to deploy a Customer Service Voicebot application for processing 100 queries.
## Document Processing and Storage in Pinecone
To process and store documents in Pinecone, we download and prepare the [dataset](https://github.com/inferless/Customer-Service-Voicebot/blob/main/SpotifyCustomerSupport.txt), then load it using a `SimpleDirectoryReader`. We initialize Pinecone and create an index to store the document embeddings. These embeddings enable efficient retrieval and querying, providing relevant context for the language model in the application.
## Core Development Steps
### Speech-to-Speech Generation
* **Objective:** Capture user voice input, transcribe it to text, generate the text response, and convert it back to speech.
* **Action:** Implement a Python class ([InferlessPythonModel](https://github.com/inferless/Customer-Service-Voicebot/blob/main/app.py)) to handle the entire speech-to-speech process, including voice input handling, model integration, and audio response generation.
```python
import os
import time
import nltk
import io
import base64
import numpy as np
import pandas as pd
import requests
from llama_index.core import ServiceContext, SimpleDirectoryReader, GPTVectorStoreIndex, PromptHelper, VectorStoreIndex, KeywordTableIndex, StorageContext, load_index_from_storage
from llama_index.llms.vllm import Vllm
from llama_index.embeddings.huggingface import HuggingFaceEmbedding
from llama_index.core import Settings
from transformers import AutoTokenizer
from llama_index.vector_stores.pinecone import PineconeVectorStore
from pinecone import Pinecone, ServerlessSpec
from faster_whisper import WhisperModel
import wave
from piper.voice import PiperVoice
class InferlessPythonModel:
def initialize(self):
self.audio_file = "output.mp3"
# Initialize tokenizer
self.tokenizer = AutoTokenizer.from_pretrained('NousResearch/Hermes-2-Pro-Llama-3-8B', trust_remote_code=True)
# Initialize LLM
self.llm = Vllm(
model="NousResearch/Hermes-2-Pro-Llama-3-8B",
max_new_tokens=256,
top_k=10,
top_p=0.95,
temperature=0.1,
vllm_kwargs={"swap_space": 1, "gpu_memory_utilization": 0.9},
)
# Initialize embedding model
self.embed_model = HuggingFaceEmbedding(model_name="BAAI/bge-small-en-v1.5")
# Configure settings
Settings.llm = self.llm
Settings.embed_model = self.embed_model
Settings.chunk_size = 1024
#Load the Dataset to Pinecone
self.load_dataset()
# Initialize Pinecone
self.pc = Pinecone(api_key="153e3e06-a636-4925-bd3f-82b3349d59eb")
self.index = self.pc.Index("document")
# Initialize vector store and query engine
self.vector_store = PineconeVectorStore(pinecone_index=self.index)
self.index = GPTVectorStoreIndex.from_vector_store(self.vector_store)
self.query_engine = self.index.as_query_engine()
# Initialize Whisper model
self.model_size = "large-v3"
self.model_whisper = WhisperModel(self.model_size, device="cuda", compute_type="float16")
# Ensure the onnx_models directory exists
self.model_dir = "onnx_models"
os.makedirs(self.model_dir, exist_ok=True)
# Download the Piper voice model if it doesn't exist
self.model_path = os.path.join(self.model_dir, "en_US-lessac-medium.onnx")
self.model_json_path = os.path.join(self.model_dir, "en_US-lessac-medium.onnx.json")
self.download_model()
# Initialize Piper voice model
self.voice = PiperVoice.load(self.model_path, use_cuda=True)
def base64_to_mp3(self, base64_data, output_file_path):
# Convert base64 audio data to mp3 file
mp3_data = base64.b64decode(base64_data)
with open(output_file_path, "wb") as mp3_file:
mp3_file.write(mp3_data)
def load_dataset(self):
# Setup dataset directory and file path
dataset_dir = "dataset"
os.makedirs(dataset_dir, exist_ok=True)
dataset_path = os.path.join(dataset_dir, "SpotifyCustomerSupport.txt")
# Download dataset if it doesn't exist
if not os.path.exists(dataset_path):
url = "https://github.com/inferless/Customer-Service-Voicebot/raw/main/SpotifyCustomerSupport.txt"
response = requests.get(url)
response.raise_for_status()
with open(dataset_path, 'wb') as f:
f.write(response.content)
# Load documents and initialize Pinecone
documents = SimpleDirectoryReader(dataset_dir).load_data()
pc = Pinecone(api_key="153e3e06-a636-4925-bd3f-82b3349d59eb")
pc.create_index(
name="document",
dimension=384,
metric="euclidean",
spec=ServerlessSpec(cloud="aws", region="us-east-1"),
)
index = pc.Index("document")
# Setup vector store and storage context
vector_store = PineconeVectorStore(pinecone_index=index)
storage_context = StorageContext.from_defaults(vector_store=vector_store)
index = VectorStoreIndex.from_documents(documents, storage_context=storage_context)
def download_model(self):
if not os.path.exists(self.model_path):
url_list = ["https://huggingface.co/rhasspy/piper-voices/resolve/main/en/en_US/lessac/medium/en_US-lessac-medium.onnx"
, "https://huggingface.co/rhasspy/piper-voices/resolve/main/en/en_US/lessac/medium/en_US-lessac-medium.onnx.json"]
download_items = [self.model_path,self.model_json_path]
for idx in range(len(url_list)):
response = requests.get(url_list[idx])
response.raise_for_status() # Check if the request was successful
with open(download_items[idx], 'wb') as f:
f.write(response.content)
print(f"Downloaded {download_items[idx]}")
def infer(self, inputs):
audio_data = inputs["audio_base64"]
#Convert the audio from base64 to .mp3
self.base64_to_mp3(audio_data, self.audio_file)
# Transcribe audio file
segments, info = self.model_whisper.transcribe(self.audio_file, beam_size=5)
user_text = ''.join([segment.text for segment in segments])
# Prepare messages for chat template
messages = [
{"role": "system", "content": "You are Customer Support Assistant."},
{"role": "user", "content": user_text}
]
# Generate input for the LLM
gen_input = self.tokenizer.apply_chat_template(messages, return_tensors="pt", tokenize=False)
# Query the vector store
response = self.query_engine.query(gen_input)
# Synthesize response to audio
byte_stream = io.BytesIO()
with wave.open(byte_stream, "wb") as wav_file:
# Set WAV file parameters
wav_file.setnchannels(1) # Mono
wav_file.setsampwidth(2) # 2 bytes per sample
wav_file.setframerate(22050) # Sample rate
# Synthesize the speech and write to byte stream
self.voice.synthesize(response.response, wav_file)
# Get the byte stream's content
audio_bytes = byte_stream.getvalue()
# Encode audio bytes to Base64 string
audio_base64 = base64.b64encode(audio_bytes).decode('utf-8')
return {"generated_audio_base64": audio_base64,
"question":user_text,
"answer":response.response}
def finalize(self):
# Clear GPU memory (implementation depends on the framework used)
pass
```
### Setting up the Environment
**Dependencies:**
* **Objective:** Ensure all necessary libraries are installed.
* **Action:** Run the command below to install dependencies:
```bash
pip install llama-index==0.10.36 llama-index-core==0.10.36 llama-index-embeddings-huggingface==0.2.0 llama-index-llms-vllm==0.1.7 llama-index-vector-stores-pinecone==0.1.7 llamaindex-py-client==0.1.19 vllm==0.4.2 piper-tts==1.2.0 onnxruntime-gpu==1.17.1 faster-whisper==1.0.2 nltk==3.8.1 transformers==4.40.2 pinecone-client==3.2.2
```
This command ensures your environment has all the tools required for the application.
### Deploying Your Model with Inferless CLI
Inferless allows you to deploy your model using Inferless-CLI. Follow the steps to deploy using Inferless CLI.
#### Clone the repository of the model
Let's begin by cloning the model repository:
```bash
git clone https://github.com/inferless/Customer-Service-Voicebot.git
```
#### Deploy the Model
To deploy the model using Inferless CLI, execute the following command:
```bash
inferless deploy --gpu A100 --runtime inferless-runtime-config.yaml
```
**Explanation of the Command:**
* `--gpu A100`: Specifies the GPU type for deployment. Available options include `A10`, `A100`, and `T4`.
* `--runtime inferless-runtime-config.yaml`: Defines the runtime configuration file. If not specified, the default Inferless runtime is used.
### Demo of the Customer Service Voicebot.
### Alternative Deployment Method
Inferless also supports a user-friendly UI for model deployment, catering to users at all skill levels. Refer to Inferless's documentation for guidance on UI-based deployment.
## Choosing Inferless for Deployment
Deploying your Customer Service Voicebot application with Inferless offers compelling advantages, making your development journey smoother and more cost-effective. Here's why Inferless is the go-to choice:
1. **Ease of Use:** Forget the complexities of infrastructure management. With Inferless, you simply bring your model, and within minutes, you have a working endpoint. Deployment is hassle-free, without the need for in-depth knowledge of scaling or infrastructure maintenance.
2. **Cold-start Times:** Inferless's unique load balancing ensures faster cold-starts. Expect around 2.87 seconds to process each queries, significantly faster than many traditional platforms.
3. **Cost Efficiency:** Inferless optimizes resource utilization, translating to lower operational costs. Here's a simplified cost comparison:
### Scenario 1
You are looking to deploy a Customer Service Voicebot application for processing 100 queries.**Parameters:** * **Total number of queries:** 100 daily.
* **Inference Time:** All models are hypothetically deployed on A100 80GB, taking 2.87 seconds of processing time and a cold start overhead of 24.01 seconds.
* **Scale Down Timeout:** Uniformly 60 seconds across all platforms, except Hugging Face, which requires a minimum of 15 minutes. This is assumed to happen 100 times a day.
**Key Computations:** 1. **Inference Duration:**
Processing 100 queries and each takes 2.87 seconds
Total: 100 x 2.87 = 287 seconds (or approximately 0.08 hours) 2. **Idle Timeout Duration:**
Post-processing idle time before scaling down: (60 seconds - 2.87 seconds) x 100 = 5713 seconds (or 1.59 hours approximately)
3. **Cold Start Overhead:**
Total: 100 x 24.01 = 2401 seconds (or 0.67 hours approximately)
**Total Billable Hours with Inferless:** 0.08 (inference duration) + 1.59 (idle time) + 0.67 (cold start overhead) = 2.34 hours
**Total Billable Hours with Inferless:** 2.34 hours
### Scenario 2 You are looking to deploy a Customer Service Voicebot application for processing 1000 queries per day.
**Key Computations:**
1. **Inference Duration:**
Processing 1000 queries and each takes 2.87 seconds Total: 1000 x 2.87 = 2870 seconds (or approximately 0.8 hours) 2. **Idle Timeout Duration:**
Post-processing idle time before scaling down: (60 seconds - 2.87 seconds) x 100 = 5713 seconds (or 1.59 hours approximately)
3. **Cold Start Overhead:**
Total: 100 x 24.01 = 2401 seconds (or 0.67 hours approximately)
**Total Billable Hours with Inferless:** 0.8 (inference duration) + 1.59 (idle time) + 0.67 (cold start overhead) = 3.06 hours
**Total Billable Hours with Inferless:** 3.06 hours
| Scenarios | On-Demand Cost | Serverless Cost | | :---------------- | :-------------------------------------- | :---------------------------------------- | | 100 requests/day | \$28.8 (24 hours billed at \$1.22/hour) | \$2.85 (2.34 hours billed at \$1.22/hour) | | 1000 requests/day | \$28.8 (24 hours billed at \$1.22/hour) | \$3.73 (3.06 hours billed at \$1.22/hour) | By opting for Inferless, ***you can achieve up to 90.10% cost savings.***
Please note that we have utilized the A100(80 GB) GPU for model benchmarking purposes, while for pricing comparison, we referenced the A10G GPU price from both platforms. This is due to the unavailability of the A100 GPU in SageMaker. Also, the above analysis is based on a smaller-scale scenario for demonstration purposes. Should the scale increase tenfold, traditional cloud services might require maintaining 2-4 GPUs constantly active to manage peak loads efficiently. In contrast, Inferless, with its dynamic scaling capabilities, adeptly adjusts to fluctuating demand without the need for continuously running hardware.
## Conclusion By following this guide, you're now equipped to build and deploy a sophisticated Customer Service Voicebot application. This tutorial showcases the seamless integration of advanced technologies, emphasizing the practical application of creating cost-effective solutions. # Create a Serverless Logo Generator Application Source: https://docs.inferless.com/cookbook/serverless-logo-generator In this hands-on tutorial, you'll learn to build a serverless [Logo Generator application](https://github.com/inferless/Logo-Generator/tree/main) capable of creating unique logos based on text descriptions. Leveraging the power of diffusion models using the diffuser library, this application will allow you to input text prompts and receive corresponding logos in just a few steps. ## The Logo Generator's primary steps For this application, we will use a [logo finetuned LoRA](https://huggingface.co/artificialguybr/LogoRedmond-LogoLoraForSDXL-V2) with the [Stable Diffusion XL model](https://huggingface.co/stabilityai/stable-diffusion-xl-base-1.0), which will indeed yield impressive results. Here are the primary steps for logo generation using this approach: 1. **Text Input:** The user provides a text description(prompt) of the desired logo, such as "a logo for a coffee shop, coffee", along with a negative prompt and colors. 2. **Model Processing:** This text prompt is fed into the Stable Diffusion XL model, which processes the inputs and generates a corresponding logo representation. 3. **Logo Output:** Finally, the model outputs a unique logo based on the given text description, capturing the desired visual elements and style. ## Crafting Your Application To build the [logo generator application](https://github.com/inferless/Logo-Generator/tree/main), we'll be using these tools: * [Diffusers](https://pypi.org/project/diffusers/): A library specifically designed for diffusion models, offering utilities for loading, processing, and generating images. * [Inferless](https://www.inferless.com/): A serverless platform that simplifies the deployment and scaling of machine learning models, allowing us to serve our logo generator application easily.
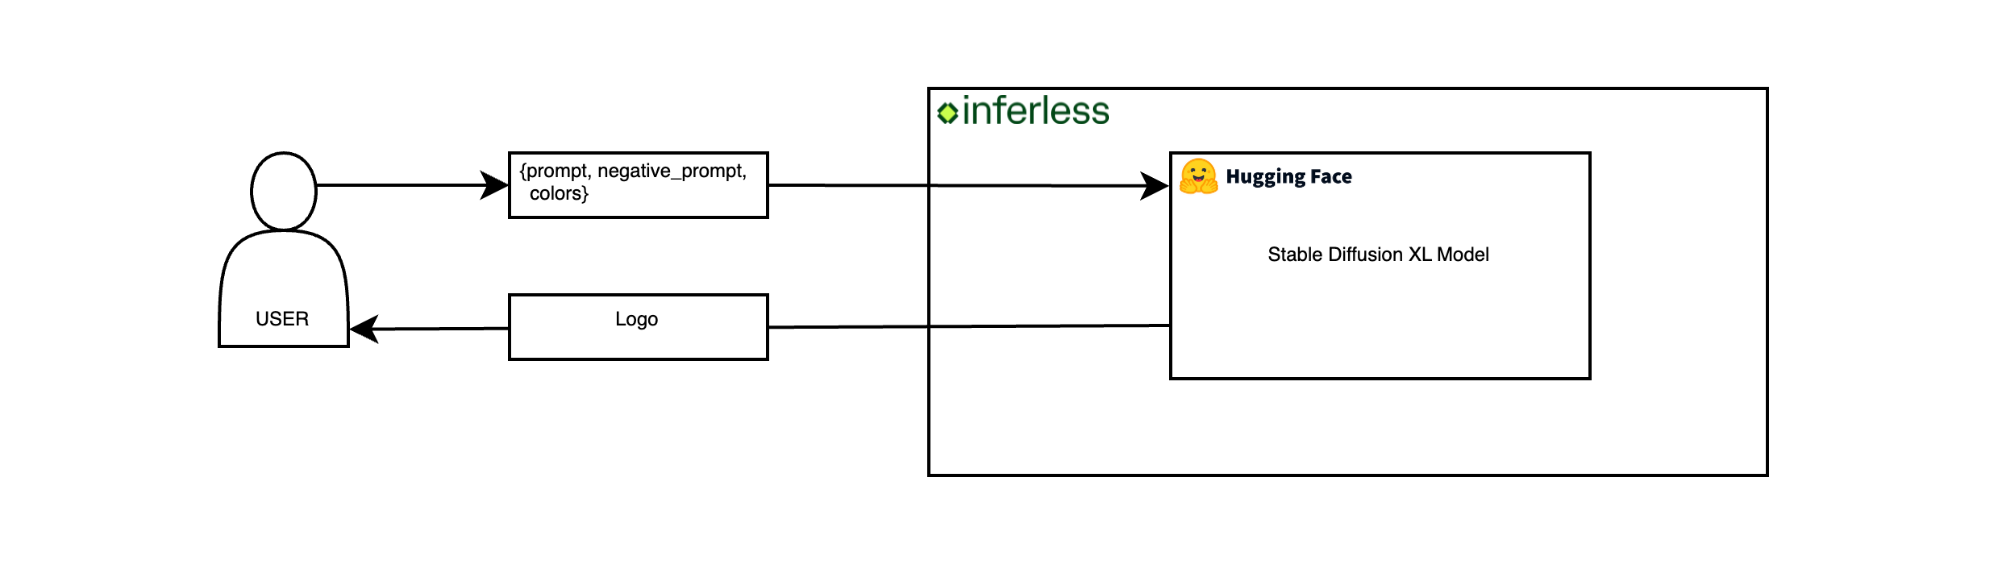 ## Core Development Steps
### Text-to-Logo Generation
* **Objective:** Accept user text input, generate a logo image using the Stable Diffusion XL model with LoRA, and return the generated logo.
* **Action:** Implement a Python class ([InferlessPythonModel](https://github.com/inferless/Logo-Generator/blob/main/app.py)) that handles the entire text-to-logo generation process, including input handling, model integration, and logo generation.
```python
import json
import torch
from diffusers import DiffusionPipeline, DPMSolverMultistepScheduler
import base64
from io import BytesIO
class InferlessPythonModel:
"""
Class for text-to-image generation using Stable Diffusion with LoRA
"""
def initialize(self):
"""
Initializes the model, scheduler, and loads model weights.
"""
model_id = "stabilityai/stable-diffusion-xl-base-1.0"
lora_id = "artificialguybr/LogoRedmond-LogoLoraForSDXL-V2"
# Load the diffusion model with FP16 precision for efficiency
self.pipe = DiffusionPipeline.from_pretrained(model_id, variant="fp16")
# Use the high-performance DPMSolver++ scheduler for faster inference
scheduler = DPMSolverMultistepScheduler(use_karras_sigmas=True, algorithm_type="sde-dpmsolver++")
self.pipe.scheduler = scheduler.from_config(self.pipe.scheduler.config)
# Load LoRA weights for text-based guidance
self.pipe.load_lora_weights(lora_id)
# Move model to GPU for faster processing
self.pipe.to(device="cuda", dtype=torch.float16)
def infer(self, inputs):
"""
Generates an image based on the provided prompt.
"""
prompt = inputs["prompt"]
negative = inputs["negative_prompt"]
color = inputs["color"]
complete_prompt = f'logo, {prompt} colors ({color})'
pipeline_output_image = self.pipe(
prompt=complete_prompt,
negative_prompt = negative,
num_inference_steps=30,
guidance_scale=7,
).images[0]
# Encode the generated image as a base64 string for convenient transfer
buff = BytesIO()
pipeline_output_image.save(buff, format="PNG")
img_str = base64.b64encode(buff.getvalue())
return {"generated_image_base64": img_str.decode("utf-8")}
def finalize(self, args):
"""
Cleans up model resources to prevent memory leaks.
"""
self.pipe = None
```
### Setting up the Environment
**Dependencies:**
* **Objective:** Ensure all necessary libraries are installed.
* **Action:** Run the command below to install dependencies:
```bash
pip install accelerate==0.28.0 diffusers==0.27.0 transformers==4.38.2 peft==0.9.0
```
This command ensures your environment has all the tools required for the application.
### Deploying Your Model with Inferless CLI
Inferless allows you to deploy your model using Inferless-CLI. Follow the steps to deploy using Inferless CLI.
#### Clone the repository of the model
Let's begin by cloning the model repository:
```bash
git clone https://github.com/inferless/Logo-Generator.git
```
#### Deploy the Model
To deploy the model using Inferless CLI, execute the following command:
```bash
inferless deploy --gpu A100 --runtime inferless-runtime-config.yaml
```
**Explanation of the Command:**
* `--gpu A100`: Specifies the GPU type for deployment. Available options include `A10`, `A100`, and `T4`.
* `--runtime inferless-runtime-config.yaml`: Defines the runtime configuration file. If not specified, the default Inferless runtime is used.
### Demo of the Logo Generator
Here are a few examples of logos generated from our application:
## Core Development Steps
### Text-to-Logo Generation
* **Objective:** Accept user text input, generate a logo image using the Stable Diffusion XL model with LoRA, and return the generated logo.
* **Action:** Implement a Python class ([InferlessPythonModel](https://github.com/inferless/Logo-Generator/blob/main/app.py)) that handles the entire text-to-logo generation process, including input handling, model integration, and logo generation.
```python
import json
import torch
from diffusers import DiffusionPipeline, DPMSolverMultistepScheduler
import base64
from io import BytesIO
class InferlessPythonModel:
"""
Class for text-to-image generation using Stable Diffusion with LoRA
"""
def initialize(self):
"""
Initializes the model, scheduler, and loads model weights.
"""
model_id = "stabilityai/stable-diffusion-xl-base-1.0"
lora_id = "artificialguybr/LogoRedmond-LogoLoraForSDXL-V2"
# Load the diffusion model with FP16 precision for efficiency
self.pipe = DiffusionPipeline.from_pretrained(model_id, variant="fp16")
# Use the high-performance DPMSolver++ scheduler for faster inference
scheduler = DPMSolverMultistepScheduler(use_karras_sigmas=True, algorithm_type="sde-dpmsolver++")
self.pipe.scheduler = scheduler.from_config(self.pipe.scheduler.config)
# Load LoRA weights for text-based guidance
self.pipe.load_lora_weights(lora_id)
# Move model to GPU for faster processing
self.pipe.to(device="cuda", dtype=torch.float16)
def infer(self, inputs):
"""
Generates an image based on the provided prompt.
"""
prompt = inputs["prompt"]
negative = inputs["negative_prompt"]
color = inputs["color"]
complete_prompt = f'logo, {prompt} colors ({color})'
pipeline_output_image = self.pipe(
prompt=complete_prompt,
negative_prompt = negative,
num_inference_steps=30,
guidance_scale=7,
).images[0]
# Encode the generated image as a base64 string for convenient transfer
buff = BytesIO()
pipeline_output_image.save(buff, format="PNG")
img_str = base64.b64encode(buff.getvalue())
return {"generated_image_base64": img_str.decode("utf-8")}
def finalize(self, args):
"""
Cleans up model resources to prevent memory leaks.
"""
self.pipe = None
```
### Setting up the Environment
**Dependencies:**
* **Objective:** Ensure all necessary libraries are installed.
* **Action:** Run the command below to install dependencies:
```bash
pip install accelerate==0.28.0 diffusers==0.27.0 transformers==4.38.2 peft==0.9.0
```
This command ensures your environment has all the tools required for the application.
### Deploying Your Model with Inferless CLI
Inferless allows you to deploy your model using Inferless-CLI. Follow the steps to deploy using Inferless CLI.
#### Clone the repository of the model
Let's begin by cloning the model repository:
```bash
git clone https://github.com/inferless/Logo-Generator.git
```
#### Deploy the Model
To deploy the model using Inferless CLI, execute the following command:
```bash
inferless deploy --gpu A100 --runtime inferless-runtime-config.yaml
```
**Explanation of the Command:**
* `--gpu A100`: Specifies the GPU type for deployment. Available options include `A10`, `A100`, and `T4`.
* `--runtime inferless-runtime-config.yaml`: Defines the runtime configuration file. If not specified, the default Inferless runtime is used.
### Demo of the Logo Generator
Here are a few examples of logos generated from our application:
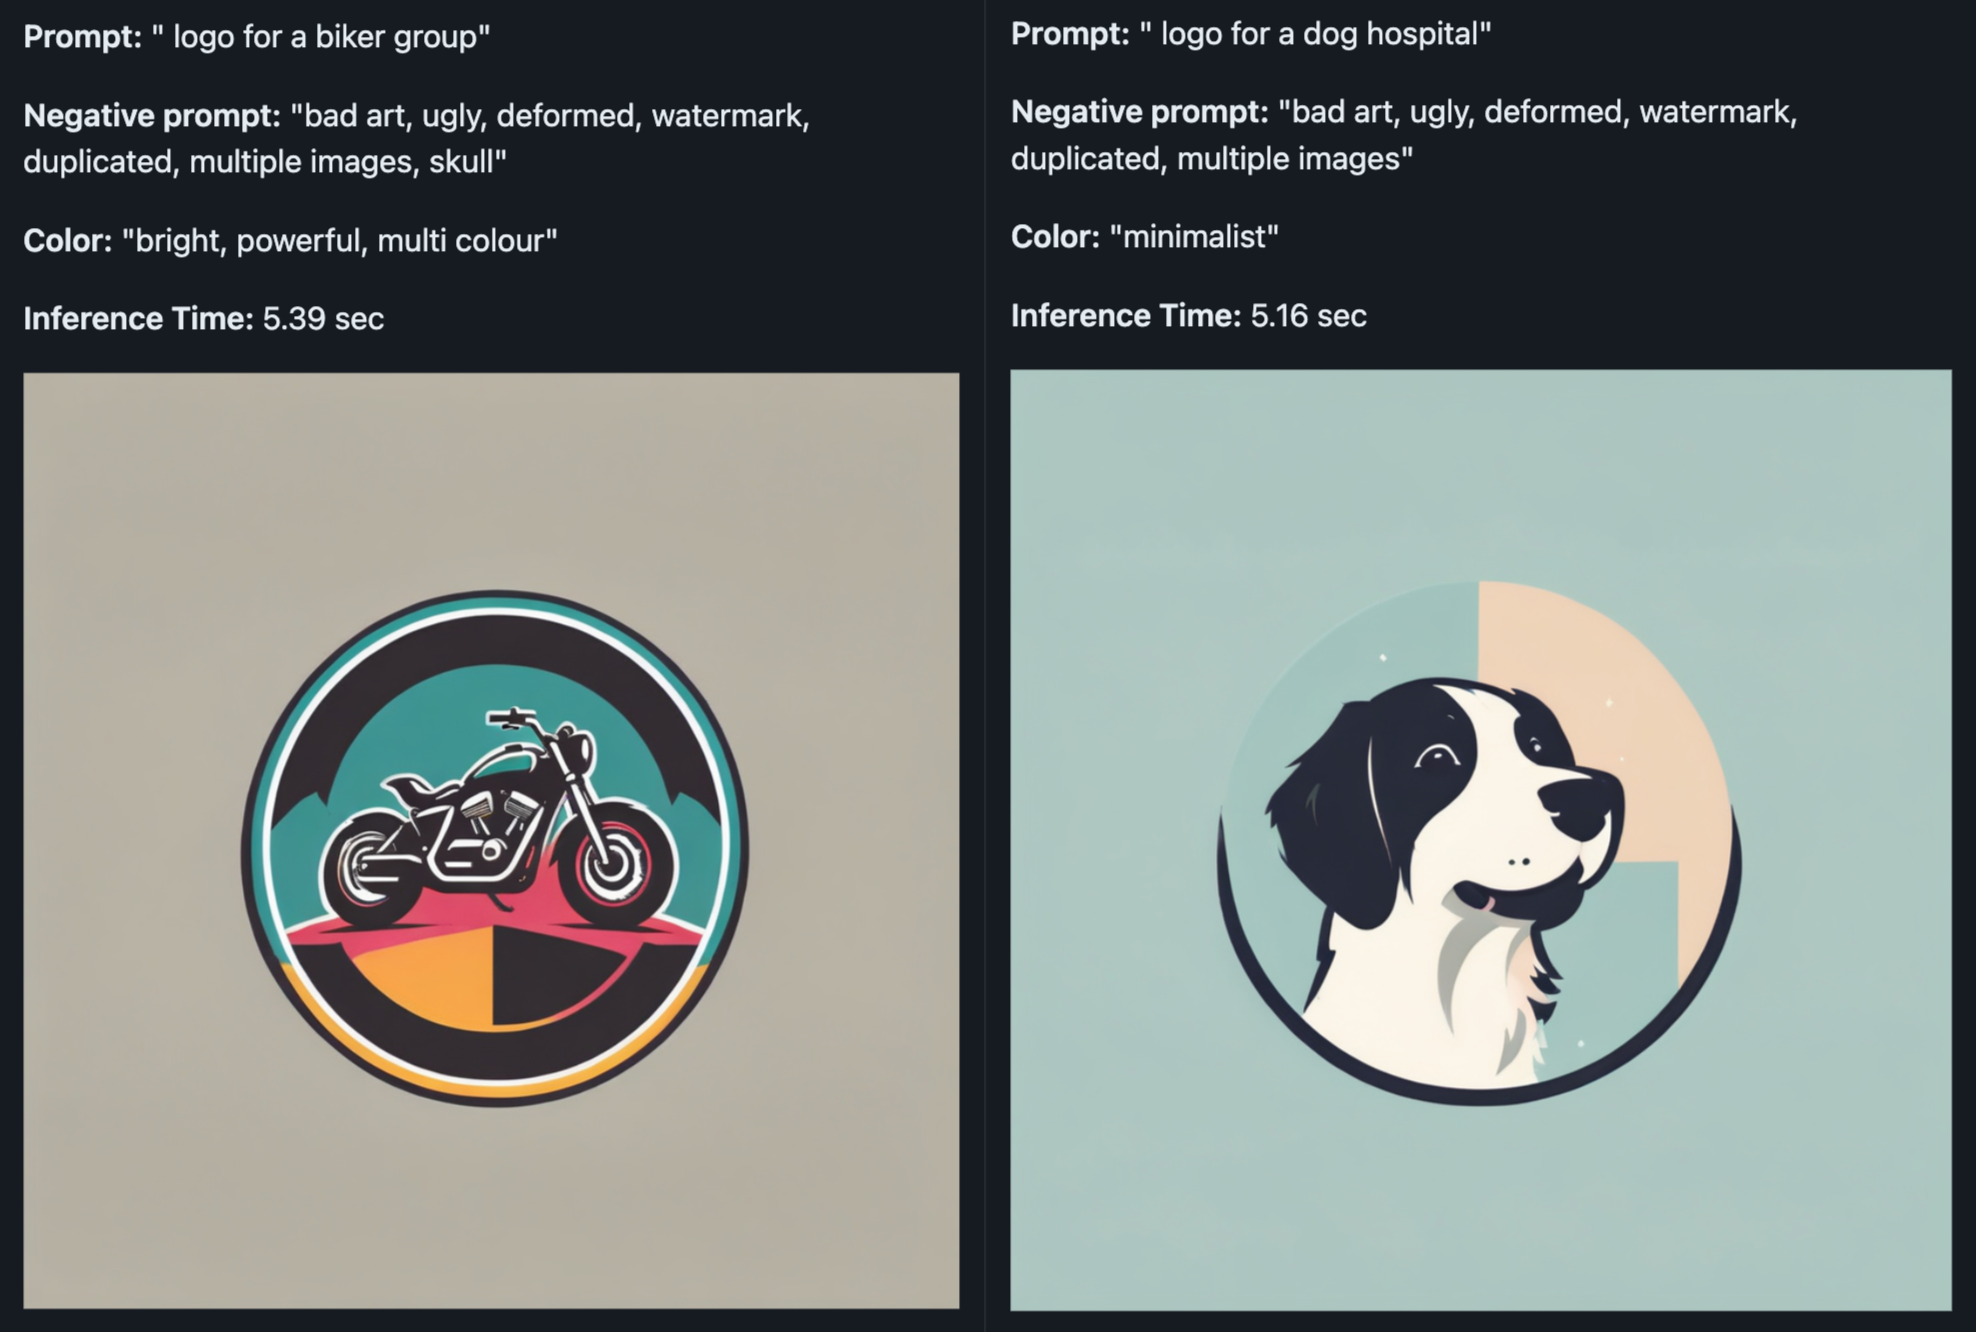 ### Alternative Deployment Method
Inferless also supports a user-friendly UI for model deployment, catering to users at all skill levels. Refer to Inferless's documentation for guidance on UI-based deployment.
## Choosing Inferless for Deployment
Deploying your Logo Generator app with Inferless offers compelling advantages, making your development journey smoother and more cost-effective. Here's why Inferless is the go-to choice:
1. **Ease of Use:** Forget the complexities of infrastructure management. With Inferless, you simply bring your model, and within minutes, you have a working endpoint. Deployment is hassle-free, without the need for in-depth knowledge of scaling or infrastructure maintenance.
2. **Cold-start Times:** Inferless's unique load balancing ensures faster cold-starts. Expect around 5.32 seconds to process each logo, significantly faster than many traditional platforms.
3. **Cost Efficiency:** Inferless optimizes resource utilization, translating to lower operational costs. Here's a simplified cost comparison:
### Scenario 1
You are looking to deploy a Logo Generator application for processing 100 logos per day.
### Alternative Deployment Method
Inferless also supports a user-friendly UI for model deployment, catering to users at all skill levels. Refer to Inferless's documentation for guidance on UI-based deployment.
## Choosing Inferless for Deployment
Deploying your Logo Generator app with Inferless offers compelling advantages, making your development journey smoother and more cost-effective. Here's why Inferless is the go-to choice:
1. **Ease of Use:** Forget the complexities of infrastructure management. With Inferless, you simply bring your model, and within minutes, you have a working endpoint. Deployment is hassle-free, without the need for in-depth knowledge of scaling or infrastructure maintenance.
2. **Cold-start Times:** Inferless's unique load balancing ensures faster cold-starts. Expect around 5.32 seconds to process each logo, significantly faster than many traditional platforms.
3. **Cost Efficiency:** Inferless optimizes resource utilization, translating to lower operational costs. Here's a simplified cost comparison:
### Scenario 1
You are looking to deploy a Logo Generator application for processing 100 logos per day.**Parameters:** * **Total number of Logo:** 100 daily.
* **Inference Time:** All models are hypothetically deployed on A100 80GB, taking 5.32 seconds of processing time and a cold start overhead of 11.72 seconds.
* **Scale Down Timeout:** Uniformly 60 seconds across all platforms, except Hugging Face, which requires a minimum of 15 minutes. This is assumed to happen 100 times a day.
**Key Computations:** 1. **Inference Duration:**
Processing 100 logos and each takes 5.32 seconds
Total: 100 x 5.32 = 532 seconds (or approximately 0.15 hours) 2. **Idle Timeout Duration:**
Post-processing idle time before scaling down: (60 seconds - 5.32 seconds) x 100 = 5468 seconds (or 1.52 hours approximately)
3. **Cold Start Overhead:**
Total: 100 x 11.72 = 1172 seconds (or 0.33 hours approximately)
**Total Billable Hours with Inferless:** 0.15 (inference duration) + 1.52 (idle time) + 0.33 (cold start overhead) = 2 hours
**Total Billable Hours with Inferless:** 2 hours
### Scenario 2 You are looking to deploy a Logo Generator application for processing 1000 logos per day.
**Key Computations:**
1. **Inference Duration:**
Processing 1000 logos and each takes 5.32 seconds Total: 1000 x 5.32 = 5320 seconds (or approximately 1.48 hours) 2. **Idle Timeout Duration:**
Post-processing idle time before scaling down: (60 seconds - 5.32 seconds) x 100 = 5468 seconds (or 1.52 hours approximately) 3. **Cold Start Overhead:**
Total: 100 x 11.72 = 1172 seconds (or 0.33 hours approximately) **Total Billable Hours with Inferless:** 1.48 (inference duration) + 1.52 (idle time) + 0.33 (cold start overhead) = 3.33 hours
**Total Billable Hours with Inferless:** 3.33 hours ### Scenario 3 You are looking to deploy a Logo Generator application for processing 10000 logos per day. **Key Computations:**
1. **Inference Duration:**
Processing 10000 logos and each takes 5.32 seconds Total: 10,000 x 5.32 = 53,200 seconds (or approximately 14.78 hours) 2. **Idle Timeout Duration:**
Post-processing idle time before scaling down: (60 seconds - 5.32 seconds) x 100 = 5468 seconds (or 1.52 hours approximately) 3. **Cold Start Overhead:**
Total: 100 x 11.72 = 1172 seconds (or 0.33 hours approximately)
**Total Billable Hours with Inferless:** 14.78 (inference duration) + 1.52 (idle time) + 0.33 (cold start overhead) = 16.63 hours
**Total Billable Hours with Inferless:** 16.63 hours ### Pricing Comparison for all the Scenario | Scenarios | AWS SageMaker Cost | Inferless Cost | | :----------------- | :-------------------------------------- | :------------------------------------------ | | 100 requests/day | \$28.8 (24 hours billed at \$1.22/hour) | \$2.44 (2 hours billed at \$1.22/hour) | | 1000 requests/day | \$28.8 (24 hours billed at \$1.22/hour) | \$4.06 (3.33 hours billed at \$1.22/hour) | | 10000 requests/day | \$28.8 (24 hours billed at \$1.22/hour) | \$20.29 (16.63 hours billed at \$1.22/hour) | By opting for Inferless, ***you can achieve up to 91.52% cost savings.***
Please note that we have utilized the A100(80 GB) GPU for model benchmarking purposes, while for pricing comparison, we referenced the A10G GPU price from both platforms. This is due to the unavailability of the A100 GPU in SageMaker. Also, the above analysis is based on a smaller-scale scenario for demonstration purposes. Should the scale increase tenfold, traditional cloud services might require maintaining 2-4 GPUs constantly active to manage peak loads efficiently. In contrast, Inferless, with its dynamic scaling capabilities, adeptly adjusts to fluctuating demand without the need for continuously running hardware.
## Conclusion By following this guide, you're now equipped to build and deploy a sophisticated logo generator application. This tutorial showcases the seamless integration of advanced technologies, emphasizing the practical application of logo generation for creating cost-effective solutions. # Build a Serverless Book Audio Summary Generator Source: https://docs.inferless.com/cookbook/serverless-speech-book-summary Welcome to this tutorial where we are creating an book summarizer using LLM and TTS. You'll learn how to use large language model(LLM) with text-to-speech model to process PDF books, extract key ideas, quotes, and actionable items, and convert them into engaging audio summaries. This application aims to help users learn faster, enhance reading comprehension, and retain more knowledge by distilling books down to their most essential concepts in an easily digestible audio format. ## Key Components of the Application In building this application, we'll utilize these components: 1. **Text Generation Model:** We'll use the [meta-llama/Meta-Llama-3.1-8B-Instruct](https://huggingface.co/meta-llama/Llama-3.1-8B-Instruct) model with vLLM as our text generation engine. This large language model is designed to understand and summarize large bodies of text effectively. 2. **Text-to-Audio Model:** For converting text summaries into speech, we'll employ the [xTTS-v2](https://huggingface.co/coqui/XTTS-v2) model with the TTS library. ## Crafting Your Application To build this application, you have to follow these steps: 1. **Book URL Input**: The user provides a URL link to the book they wish to summarize. 2. **Book Retrieval and Chunking**: The application retrieves the book content from the provided URL and splits it into manageable chunks for easier processing. 3. **Summarization with LLM**: Each chunk is sent to a large language model (LLM), such as Meta-Llama-3.1-8B, which generates a concise summary of each text chunk individually. 4. **Final Summary Generation**: Once all chunks are summarized, the chunk summaries are combined and processed again by the LLM to produce a cohesive final summary that encapsulates the book's main ideas. 5. **Text-to-Speech Conversion**: This final summary is then converted to audio using a TTS model like xTTS-v2. 6. **User Playback**: The resulting audio summary is provided to the user, enabling them to listen to a streamlined, engaging version of the book's key concepts.
 ## Core Development Steps
### Text-to-Speech Generation
* **Objective:** Convert the final text summary of the book into natural-sounding speech, allowing users to listen to an audio version of the summarized content.
* **Action:** Implement a Python class, such as [`InferlessPythonModel`](https://github.com/inferless/Book-Audio-Summary-Generator/blob/main/app.py), to manage the entire text-to-speech process. This class should handle the text input from the user to integrate with the TTS model (xTTS-v2) for producing the final audio response.
```python
from vllm import LLM, SamplingParams
from transformers import AutoTokenizer
from pypdf import PdfReader
from TTS.api import TTS
import torch
import io
import base64
import requests
class InferlessPythonModel:
@staticmethod
def pdf_to_text(pdf_path):
reader = PdfReader(pdf_path)
text = []
for page in reader.pages:
text.append(page.extract_text())
return '\n'.join(text)
@staticmethod
def split_text_into_chunks(text, chunk_size=4000):
words = text.split(" ")
for i in range(0, len(words), chunk_size):
yield " ".join(words[i:i + chunk_size])
@staticmethod
def download_book(url, file_name="textbook.pdf"):
response = requests.get(url)
with open(file_name, "wb") as file:
file.write(response.content)
return file_name
def initialize(self):
model_id = "meta-llama/Meta-Llama-3.1-8B-Instruct"
self.llm = LLM(model=model_id, dtype="float16")
self.tokenizer = AutoTokenizer.from_pretrained(model_id)
device = "cuda" if torch.cuda.is_available() else "cpu"
self.tts = TTS("tts_models/multilingual/multi-dataset/xtts_v2").to(device)
self.prompts = prompts = [
"Summarizing the following text from the chapters of a book.",
"Write comprehensive notes summarizing the following text from the book.",
"""Based on the summaries provided, compose a comprehensive summary of the book titled '
## Core Development Steps
### Text-to-Speech Generation
* **Objective:** Convert the final text summary of the book into natural-sounding speech, allowing users to listen to an audio version of the summarized content.
* **Action:** Implement a Python class, such as [`InferlessPythonModel`](https://github.com/inferless/Book-Audio-Summary-Generator/blob/main/app.py), to manage the entire text-to-speech process. This class should handle the text input from the user to integrate with the TTS model (xTTS-v2) for producing the final audio response.
```python
from vllm import LLM, SamplingParams
from transformers import AutoTokenizer
from pypdf import PdfReader
from TTS.api import TTS
import torch
import io
import base64
import requests
class InferlessPythonModel:
@staticmethod
def pdf_to_text(pdf_path):
reader = PdfReader(pdf_path)
text = []
for page in reader.pages:
text.append(page.extract_text())
return '\n'.join(text)
@staticmethod
def split_text_into_chunks(text, chunk_size=4000):
words = text.split(" ")
for i in range(0, len(words), chunk_size):
yield " ".join(words[i:i + chunk_size])
@staticmethod
def download_book(url, file_name="textbook.pdf"):
response = requests.get(url)
with open(file_name, "wb") as file:
file.write(response.content)
return file_name
def initialize(self):
model_id = "meta-llama/Meta-Llama-3.1-8B-Instruct"
self.llm = LLM(model=model_id, dtype="float16")
self.tokenizer = AutoTokenizer.from_pretrained(model_id)
device = "cuda" if torch.cuda.is_available() else "cpu"
self.tts = TTS("tts_models/multilingual/multi-dataset/xtts_v2").to(device)
self.prompts = prompts = [
"Summarizing the following text from the chapters of a book.",
"Write comprehensive notes summarizing the following text from the book.",
"""Based on the summaries provided, compose a comprehensive summary of the book titled '**Parameters:** * **Total number of queries:** 100 daily.
* **Inference Time:** All models are hypothetically deployed on A100 80GB, taking 284.51 seconds to process an average book size of 383 pages and a cold start overhead of 57.94 seconds.
* **Scale Down Timeout:** Uniformly 60 seconds across all platforms, except Hugging Face, which requires a minimum of 15 minutes. This is assumed to happen 100 times a day.
**Key Computations:** 1. **Inference Duration:**
Processing 100 queries and each takes 2.87 seconds
Total: 100 x 284.51 = 28451 seconds (or approximately 7.9 hours) 2. **Idle Timeout Duration:**
Post-processing idle time before scaling down: (300 seconds - 284.51 seconds) x 100 = 1549 seconds (or 0.43 hours approximately)
3. **Cold Start Overhead:**
Total: 100 x 57.94 = 5794 seconds (or 1.61 hours approximately)
**Total Billable Hours with Inferless:** 7.9 (inference duration) + 0.43 (idle time) + 1.61 (cold start overhead) = 9.94 hours
**Total Billable Hours with Inferless:** 9.94 hours
| Scenario | On-Demand Cost | Serverless Cost | | :--------------- | :-------------------------------------- | :----------------------------------------- | | 100 requests/day | \$28.8 (24 hours billed at \$1.22/hour) | \$12.13 (9.94 hours billed at \$1.22/hour) | By opting for Inferless, ***you can achieve up to 58.88% cost savings.***
Please note that we have utilized the A100(80 GB) GPU for model benchmarking purposes, while for pricing comparison, we referenced the A10G GPU price from both platforms. This is due to the unavailability of the A100 GPU in SageMaker. Also, the above analysis is based on a smaller-scale scenario for demonstration purposes. Should the scale increase tenfold, traditional cloud services might require maintaining 2-4 GPUs constantly active to manage peak loads efficiently. In contrast, Inferless, with its dynamic scaling capabilities, adeptly adjusts to fluctuating demand without the need for continuously running hardware.
## Conclusion By following this guide, you're now equipped to build and deploy a sophisticated book summarizer application. This tutorial showcases the seamless integration of advanced technologies, emphasizing the practical application of creating cost-effective solutions. # Build a Serverless Voice Conversational Chatbot Source: https://docs.inferless.com/cookbook/serverless-voice-chatbot Welcome to an immersive tutorial crafted to guide you through the development of a voice conversational chatbot application, leveraging state-of-the-art serverless technologies. Throughout this tutorial, you'll gain insights into seamlessly integrating multiple models within Inferless to construct a robust application. ## Key Components of the Application In the process of building this application, we'll we will utilize three distinct types of models: 1. **Automatic Speech Recognition Model:** This model facilitates the conversion of spoken words into text. We'll harness the power of the [Whisper large v3 model](https://huggingface.co/openai/whisper-large-v3) for this task. 2. **Text Generation Model:** This model is crucial for formulating responses to user queries, and plays a vital role in the conversational flow. Our choice for this task is the [Mistral 7B Instruct v0.2 model](https://huggingface.co/mistralai/Mistral-7B-Instruct-v0.2). 3. **Text-to-Audio Model:** To provide a seamless conversational experience, the output generated by the text generation model will be transformed into speech using [Bark model](https://huggingface.co/suno/bark). ## Crafting Your Application This tutorial guides you through the creation process of a [voice conversational chatbot application](https://github.com/inferless/Voice-Conversational-Chatbot/). It leverages advanced technologies such as [Bark](https://github.com/suno-ai/bark), [Faster-Whisper](https://github.com/SYSTRAN/faster-whisper), [Transformers](https://github.com/huggingface/transformers), and [Inferless](https://www.inferless.com/).
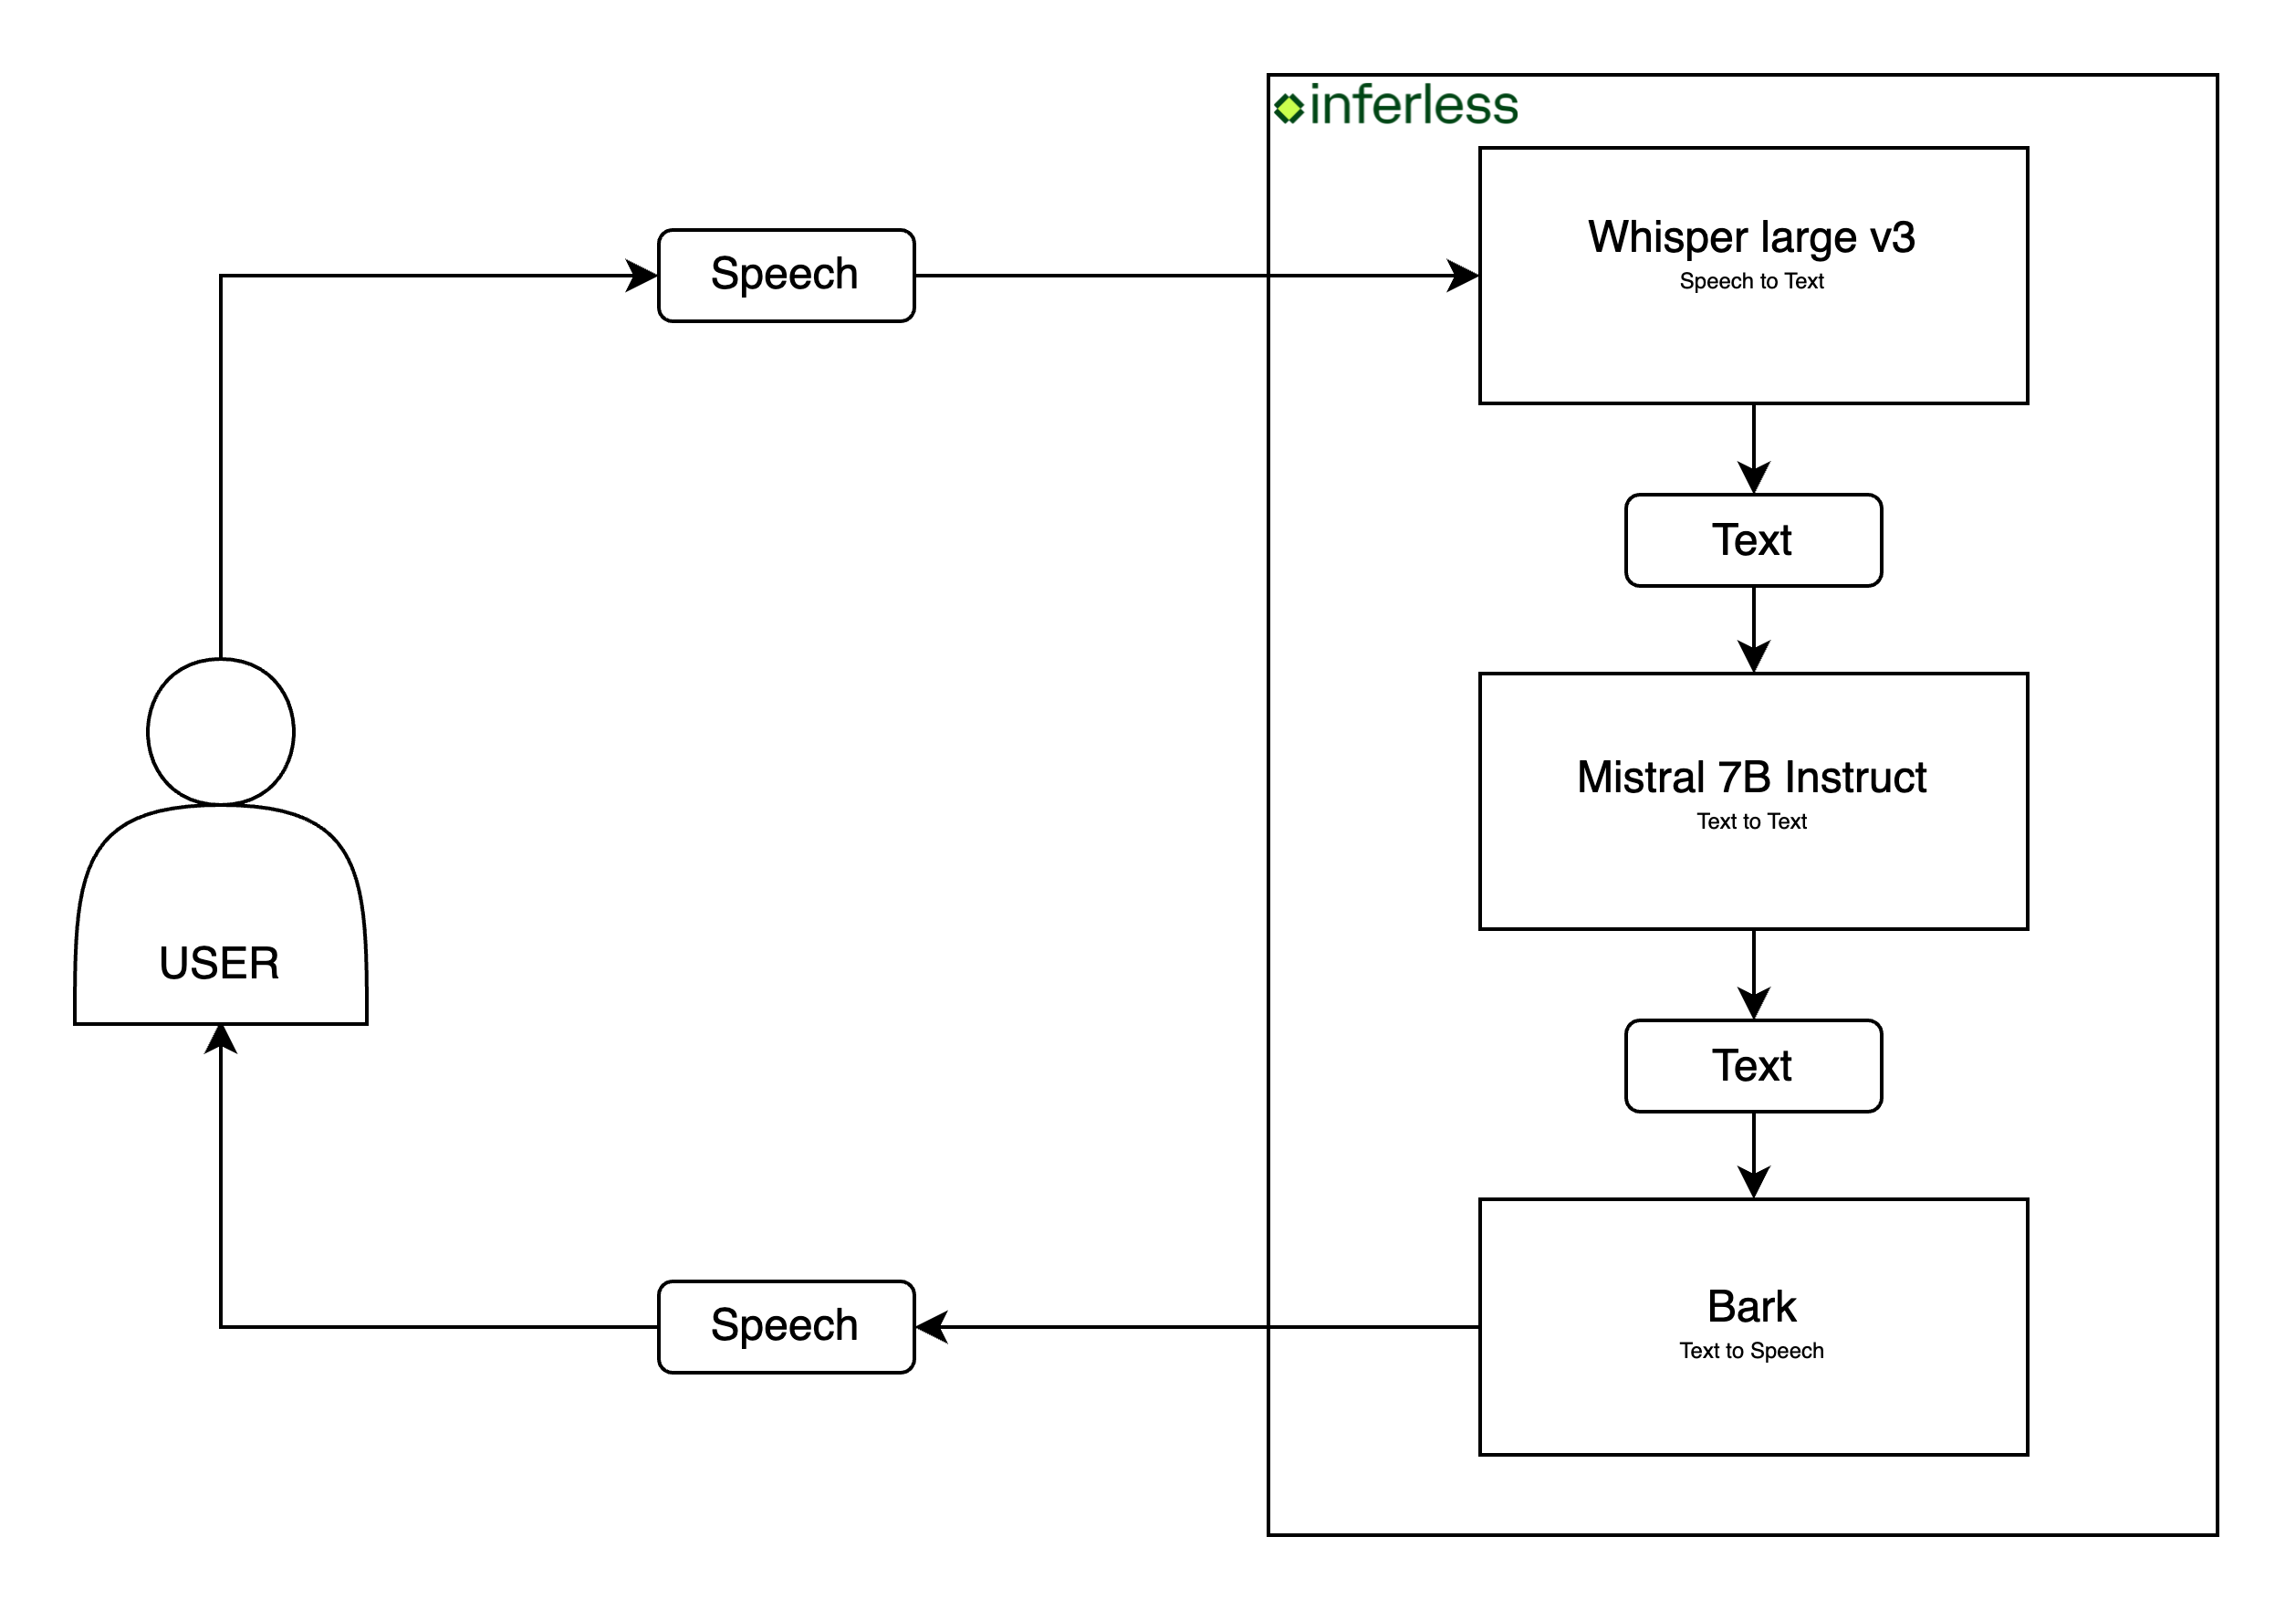 ## Core Development Steps
### Speech-to-Speech Generation
* **Objective:** Accept user voice as a input and generate a response in audio.
* **Action:** Implement a Python class ([InferlessPythonModel](https://github.com/inferless/Voice-Conversational-Chatbot/blob/main/app.py)) that handles the entire speech-to-speech generation process, including input handling, models integration, and audio generation.
```python
from faster_whisper import WhisperModel
from transformers import AutoModelForCausalLM, AutoTokenizer
from bark import SAMPLE_RATE, generate_audio, preload_models
import numpy as np
import io
import base64
import soundfile as sf
import nltk
class InferlessPythonModel:
def initialize(self):
# Load speech to text model
self.audio_file = "output.mp3"
model_size = "large-v3"
self.model_whisper = WhisperModel(model_size, device="cuda", compute_type="float16")
# Load Mistral instruct, text to text model
model_id = "mistralai/Mistral-7B-Instruct-v0.2"
self.model_mistral = AutoModelForCausalLM.from_pretrained(model_id).to("cuda")
self.tokenizer = AutoTokenizer.from_pretrained(model_id)
# Load Bark, Text to Speech
self.SPEAKER = "v2/en_speaker_6"
preload_models()
# Download nltk punkt
nltk.download('punkt')
def base64_to_mp3(self, base64_data, output_file_path):
# Convert base64 audio data to mp3 file
mp3_data = base64.b64decode(base64_data)
with open(output_file_path, "wb") as mp3_file:
mp3_file.write(mp3_data)
def infer(self, inputs):
audio_data = inputs["audio_base64"]
self.base64_to_mp3(audio_data, self.audio_file)
# Transcribe audio to text
segments, info = self.model_whisper.transcribe(self.audio_file, beam_size=5)
user_text = ''.join([segment.text for segment in segments])
# Generate prompt for Mistral model
messages = [{"role": "user", "content": f"You are a helpful, respectful and honest assistant. Answer the following question in exactly in few words from the context. {user_text}"}]
encodeds = self.tokenizer.apply_chat_template(messages, return_tensors="pt", add_generation_prompt=True)
model_inputs = encodeds.to("cuda")
# Generate text response using Mistral model
generated_ids = self.model_mistral.generate(model_inputs, max_new_tokens=80, do_sample=True)
generated_text = self.tokenizer.batch_decode(generated_ids[:, encodeds.shape[1]:], skip_special_tokens=True)[0]
# Process generated text into audio
script = generated_text.replace("\n", " ").strip()
sentences = nltk.sent_tokenize(script)
silence = np.zeros(int(0.25 * SAMPLE_RATE)) # quarter second of silence
pieces = []
for sentence in sentences:
audio_array = generate_audio(sentence, history_prompt=self.SPEAKER)
pieces += [audio_array, silence.copy()]
# Convert audio pieces into base64
buffer = io.BytesIO()
sf.write(buffer, np.concatenate(pieces), SAMPLE_RATE, format='WAV')
buffer.seek(0)
base64_audio = base64.b64encode(buffer.read()).decode('utf-8')
return {"generated_audio_base64": base64_audio}
def finalize(self):
# Finalize resources if needed
pass
```
### Setting up the Environment
**Dependencies:**
* **Objective:** Ensure all necessary libraries are installed.
* **Action:** Run the command below to install dependencies:
```bash
pip install torchaudio==2.2.1 soundfile==0.12.1 git+https://github.com/suno-ai/bark.git@refs/pull/391/head faster-whisper==1.0.0 torch==2.2.1 nltk==3.8.1
```
This command ensures your environment has all the tools required for the application.
### Deploying Your Model with Inferless CLI
Inferless allows you to deploy your model using Inferless-CLI. Follow the steps to deploy using Inferless CLI.
#### Clone the repository of the model
Let's begin by cloning the model repository:
```bash
git clone https://github.com/inferless/Voice-Conversational-Chatbot.git
```
#### Deploy the Model
To deploy the model using Inferless CLI, execute the following command:
```bash
inferless deploy --gpu A100 --runtime inferless-runtime-config.yaml
```
**Explanation of the Command:**
* `--gpu A100`: Specifies the GPU type for deployment. Available options include `A10`, `A100`, and `T4`.
* `--runtime inferless-runtime-config.yaml`: Defines the runtime configuration file. If not specified, the default Inferless runtime is used.
### Demo of the Voice Conversational Chatbot.
### Alternative Deployment Method
Inferless also supports a user-friendly UI for model deployment, catering to users at all skill levels. Refer to Inferless's documentation for guidance on UI-based deployment.
## Choosing Inferless for Deployment
Deploying your Voice Conversational Chatbot application with Inferless offers compelling advantages, making your development journey smoother and more cost-effective. Here's why Inferless is the go-to choice:
1. **Ease of Use:** Forget the complexities of infrastructure management. With Inferless, you simply bring your model, and within minutes, you have a working endpoint. Deployment is hassle-free, without the need for in-depth knowledge of scaling or infrastructure maintenance.
2. **Cold-start Times:** Inferless's unique load balancing ensures faster cold-starts. Expect around 28.60 seconds to process each queries, significantly faster than many traditional platforms.
3. **Cost Efficiency:** Inferless optimizes resource utilization, translating to lower operational costs. Here's a simplified cost comparison:
### Scenario 1
You are looking to deploy a Voice Conversational Chatbot application for processing 100 queries.
## Core Development Steps
### Speech-to-Speech Generation
* **Objective:** Accept user voice as a input and generate a response in audio.
* **Action:** Implement a Python class ([InferlessPythonModel](https://github.com/inferless/Voice-Conversational-Chatbot/blob/main/app.py)) that handles the entire speech-to-speech generation process, including input handling, models integration, and audio generation.
```python
from faster_whisper import WhisperModel
from transformers import AutoModelForCausalLM, AutoTokenizer
from bark import SAMPLE_RATE, generate_audio, preload_models
import numpy as np
import io
import base64
import soundfile as sf
import nltk
class InferlessPythonModel:
def initialize(self):
# Load speech to text model
self.audio_file = "output.mp3"
model_size = "large-v3"
self.model_whisper = WhisperModel(model_size, device="cuda", compute_type="float16")
# Load Mistral instruct, text to text model
model_id = "mistralai/Mistral-7B-Instruct-v0.2"
self.model_mistral = AutoModelForCausalLM.from_pretrained(model_id).to("cuda")
self.tokenizer = AutoTokenizer.from_pretrained(model_id)
# Load Bark, Text to Speech
self.SPEAKER = "v2/en_speaker_6"
preload_models()
# Download nltk punkt
nltk.download('punkt')
def base64_to_mp3(self, base64_data, output_file_path):
# Convert base64 audio data to mp3 file
mp3_data = base64.b64decode(base64_data)
with open(output_file_path, "wb") as mp3_file:
mp3_file.write(mp3_data)
def infer(self, inputs):
audio_data = inputs["audio_base64"]
self.base64_to_mp3(audio_data, self.audio_file)
# Transcribe audio to text
segments, info = self.model_whisper.transcribe(self.audio_file, beam_size=5)
user_text = ''.join([segment.text for segment in segments])
# Generate prompt for Mistral model
messages = [{"role": "user", "content": f"You are a helpful, respectful and honest assistant. Answer the following question in exactly in few words from the context. {user_text}"}]
encodeds = self.tokenizer.apply_chat_template(messages, return_tensors="pt", add_generation_prompt=True)
model_inputs = encodeds.to("cuda")
# Generate text response using Mistral model
generated_ids = self.model_mistral.generate(model_inputs, max_new_tokens=80, do_sample=True)
generated_text = self.tokenizer.batch_decode(generated_ids[:, encodeds.shape[1]:], skip_special_tokens=True)[0]
# Process generated text into audio
script = generated_text.replace("\n", " ").strip()
sentences = nltk.sent_tokenize(script)
silence = np.zeros(int(0.25 * SAMPLE_RATE)) # quarter second of silence
pieces = []
for sentence in sentences:
audio_array = generate_audio(sentence, history_prompt=self.SPEAKER)
pieces += [audio_array, silence.copy()]
# Convert audio pieces into base64
buffer = io.BytesIO()
sf.write(buffer, np.concatenate(pieces), SAMPLE_RATE, format='WAV')
buffer.seek(0)
base64_audio = base64.b64encode(buffer.read()).decode('utf-8')
return {"generated_audio_base64": base64_audio}
def finalize(self):
# Finalize resources if needed
pass
```
### Setting up the Environment
**Dependencies:**
* **Objective:** Ensure all necessary libraries are installed.
* **Action:** Run the command below to install dependencies:
```bash
pip install torchaudio==2.2.1 soundfile==0.12.1 git+https://github.com/suno-ai/bark.git@refs/pull/391/head faster-whisper==1.0.0 torch==2.2.1 nltk==3.8.1
```
This command ensures your environment has all the tools required for the application.
### Deploying Your Model with Inferless CLI
Inferless allows you to deploy your model using Inferless-CLI. Follow the steps to deploy using Inferless CLI.
#### Clone the repository of the model
Let's begin by cloning the model repository:
```bash
git clone https://github.com/inferless/Voice-Conversational-Chatbot.git
```
#### Deploy the Model
To deploy the model using Inferless CLI, execute the following command:
```bash
inferless deploy --gpu A100 --runtime inferless-runtime-config.yaml
```
**Explanation of the Command:**
* `--gpu A100`: Specifies the GPU type for deployment. Available options include `A10`, `A100`, and `T4`.
* `--runtime inferless-runtime-config.yaml`: Defines the runtime configuration file. If not specified, the default Inferless runtime is used.
### Demo of the Voice Conversational Chatbot.
### Alternative Deployment Method
Inferless also supports a user-friendly UI for model deployment, catering to users at all skill levels. Refer to Inferless's documentation for guidance on UI-based deployment.
## Choosing Inferless for Deployment
Deploying your Voice Conversational Chatbot application with Inferless offers compelling advantages, making your development journey smoother and more cost-effective. Here's why Inferless is the go-to choice:
1. **Ease of Use:** Forget the complexities of infrastructure management. With Inferless, you simply bring your model, and within minutes, you have a working endpoint. Deployment is hassle-free, without the need for in-depth knowledge of scaling or infrastructure maintenance.
2. **Cold-start Times:** Inferless's unique load balancing ensures faster cold-starts. Expect around 28.60 seconds to process each queries, significantly faster than many traditional platforms.
3. **Cost Efficiency:** Inferless optimizes resource utilization, translating to lower operational costs. Here's a simplified cost comparison:
### Scenario 1
You are looking to deploy a Voice Conversational Chatbot application for processing 100 queries.**Parameters:** * **Total number of queries:** 100 daily.
* **Inference Time:** All models are hypothetically deployed on A100 80GB, taking 28.60 seconds of processing time and a cold start overhead of 20.72 seconds.
* **Scale Down Timeout:** Uniformly 60 seconds across all platforms, except Hugging Face, which requires a minimum of 15 minutes. This is assumed to happen 100 times a day.
**Key Computations:** 1. **Inference Duration:**
Processing 100 queries and each takes 28.60 seconds
Total: 100 x 28.60 = 2860 seconds (or approximately 0.79 hours) 2. **Idle Timeout Duration:**
Post-processing idle time before scaling down: (60 seconds - 28.60 seconds) x 100 = 3140 seconds (or 0.87 hours approximately)
3. **Cold Start Overhead:**
Total: 100 x 20.72 = 2072 seconds (or 0.58 hours approximately)
**Total Billable Hours with Inferless:** 0.79 (inference duration) + 0.87 (idle time) + 0.58 (cold start overhead) = 2.25 hours
**Total Billable Hours with Inferless:** 2.24 hours
### Scenario 2 You are looking to deploy a Voice Conversational Chatbot application for processing 1000 queries per day.
**Key Computations:**
1. **Inference Duration:**
Processing 1000 queries and each takes 28.60 seconds Total: 1000 x 28.60 = 28600 seconds (or approximately 7.94 hours) 2. **Idle Timeout Duration:**
Post-processing idle time before scaling down: (60 seconds - 28.60 seconds) x 100 = 3140 seconds (or 0.87 hours approximately) 3. **Cold Start Overhead:**
Total: 100 x 20.72 = 2072 seconds (or 0.58 hours approximately) **Total Billable Hours with Inferless:** 7.94 (inference duration) + 0.87 (idle time) + 0.58 (cold start overhead) = 9.39 hours
**Total Billable Hours with Inferless:** 9.39 hours ### Pricing Comparison for all the Scenario | Scenarios | AWS SageMaker Cost | Inferless Cost | | :---------------- | :-------------------------------------- | :----------------------------------------- | | 100 requests/day | \$28.8 (24 hours billed at \$1.22/hour) | \$2.73 (2.24 hours billed at \$1.22/hour) | | 1000 requests/day | \$28.8 (24 hours billed at \$1.22/hour) | \$11.46 (9.39 hours billed at \$1.22/hour) | By opting for Inferless, ***you can achieve up to 90.52% cost savings.***
Please note that we have utilized the A100(80 GB) GPU for model benchmarking purposes, while for pricing comparison, we referenced the A10G GPU price from both platforms. This is due to the unavailability of the A100 GPU in SageMaker. Also, the above analysis is based on a smaller-scale scenario for demonstration purposes. Should the scale increase tenfold, traditional cloud services might require maintaining 2-4 GPUs constantly active to manage peak loads efficiently. In contrast, Inferless, with its dynamic scaling capabilities, adeptly adjusts to fluctuating demand without the need for continuously running hardware.
## Conclusion By following this guide, you're now equipped to build and deploy a sophisticated voice conversational chatbot application. This tutorial showcases the seamless integration of advanced technologies, emphasizing the practical application of creating cost-effective solutions. # Deploy Serverless Containers Source: https://docs.inferless.com/getting-started/deploy-containers The mission is to make deployment for AI models simple and efficient. To accelerate this we provide a simple interface to run your custom model without worrying about infrastructure. Our solutions offer far more competitive prices than large cloud providers such as AWS or GCP and let you quickly spin up services ## Key Advantages of Choosing Serverless: * **Simplified Workflow:** No infrastructure management lets you concentrate on code and data. * **Rapid Cold Starts:** Experience faster initialization of your services, reducing client wait times to up to 3 seconds * **Custom runtime support:** Bring your own software libraries with i.e pip, system or custom build software packages * **Adaptive Autoscaling:** Adjusts according to demand, ensuring optimal resource allocation. * **Dynamic Batching:** Send multiple requests from clients and batch them together automatically with sime click configuration. * **Efficient Deployment:** Streamline your ML rollouts without the operational bottlenecks. * **Maintenance-Free Environment:** Stay updated without the manual intervention of software patches. Ready Integration: Deploy with Nvidia Triton Inference Server effortlessly. ## How does it work? 1. **Select your model -** Select the model you want to deploy. You can deploy a custom model available on the HuggingFace/AWS/ GCP for NLP, computer vision, or other tasks types 2. **Choose your model configuration -** Upon completion of the call, based on your configuration, we would autoscale down your container, thus saving you in inference costs. You would be charged only for the inference used. 3. **Create and manage your endpoint -** You can load your model into a machine of your choice. As of now, we offer 2 kinds of machines: 1. NVIDIA A100: The NVIDIA A100 is a high-performance graphics processing unit (GPU) designed for a variety of demanding workloads including machine learning inference. It used Ampere architecture to provide a substantial performance boost over the T4, which is based on the older Turing architecture. 2. NVIDIA T4: The NVIDIA T4 is designed for energy efficiency, with relatively low power consumption. It is a more cost-effective way to deploy machine learning models. If your workloads are not latency-critical and model sizes are relatively small T4 can give you much better cost efficiencies. 4. **Call your APIs in Production -** You can get the endpoint details and the Model Workspace API keys. Simply call the model in production and enjoy the services. ## How does Billing for Serverless work? Your invoice will comprise: * **Setup Time:** The duration required to load the model weights. Remarkably, Serverless trims this to one-third of container times. * **Inference Time:** The actual processing time for an inference. * **Eviction Timeout:** A custom setting dictating the 'warm' status duration for models. Adjustable between 5 seconds and 60 minutes. **Real-world Billing Example:** Visualize a deployment scenario on A10G dedicated, incurring 9 seconds for a cold start and 5 seconds for inference. For 1000 daily requests, where 10% hit a cold start: Billed Duration: (10% of 1000 requests \* 9 seconds) + (1000 requests \* 5 seconds) = 5900 seconds. **Your Bill:** 5900 seconds \* $0.00034 = $2.006. # Deploy a ML Model with Inferless Source: https://docs.inferless.com/getting-started/deploy-ml There are several ways to import your model, but for the purpose of this example, we will be using Hugging Face. By the end of this tutorial, you will have the ability to deploy a Hugging Face model in Inferless. ## Pre Requisite : Note the Model Name, Type and Framework * Navigate to the Hugging Face model page of your choice that you want to import into Inferless. * Take note of the `"Model Name"` (you can also use the copy button), `Task Type`, `Model Framework,` and `Model Type`. These will be required for the next steps.  ### Step 1: Add Model in your workspace. * Select on `"HuggingFace" `button that you see on dashboard. An import wizard will open up.
### Step 2: Enter the model details
* \*\*Model Details: In this step, Add your `model name`(The name that you wish to call your model), Choose the `model type`(Eg: Transformer), Choose the `task type` (Eg: Text generation) and `Huggingface model name`.
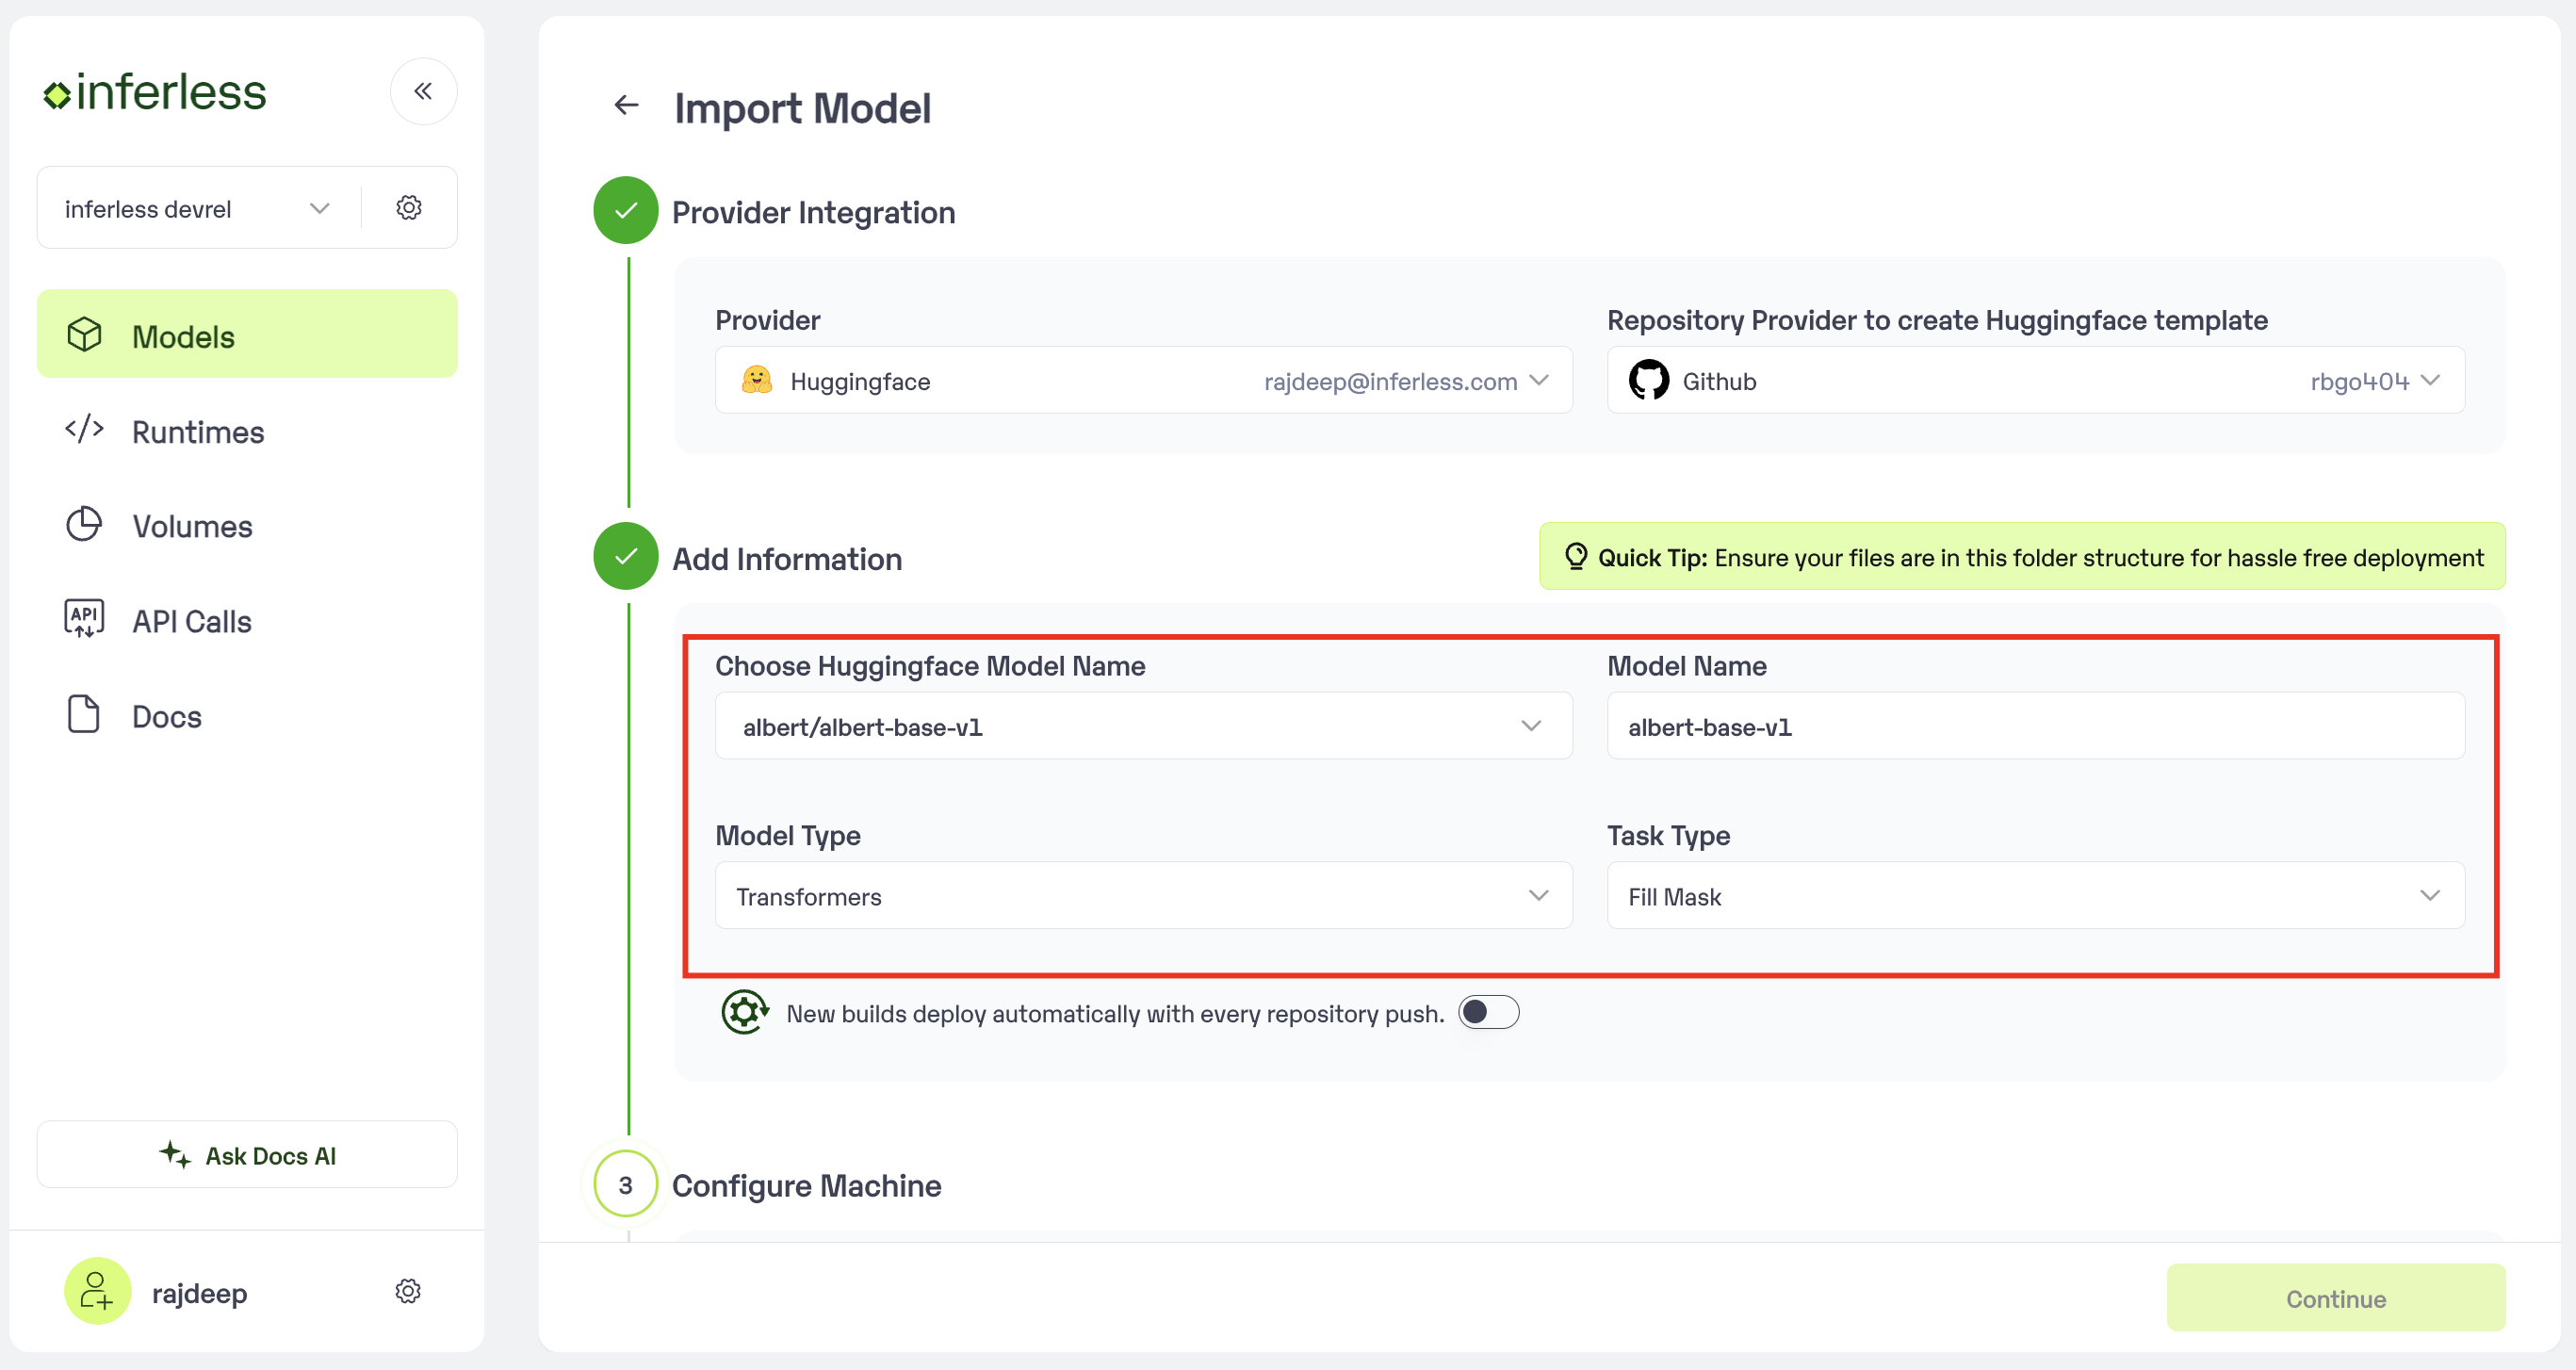 * In case you would like to set up `Automatic rebuild` for your model, enable it
* You would need to set up a webhook for this method. Click [here](/model-import/automatic-build-via-webhooks) for more details.
### Step 3: Modify the Code
* After you have selected the model you can modify the app.py to change the model loading code and the inference code
* If you want to change the input and get more param you can modify the input\_schema.py
* In case you would like to set up `Automatic rebuild` for your model, enable it
* You would need to set up a webhook for this method. Click [here](/model-import/automatic-build-via-webhooks) for more details.
### Step 3: Modify the Code
* After you have selected the model you can modify the app.py to change the model loading code and the inference code
* If you want to change the input and get more param you can modify the input\_schema.py
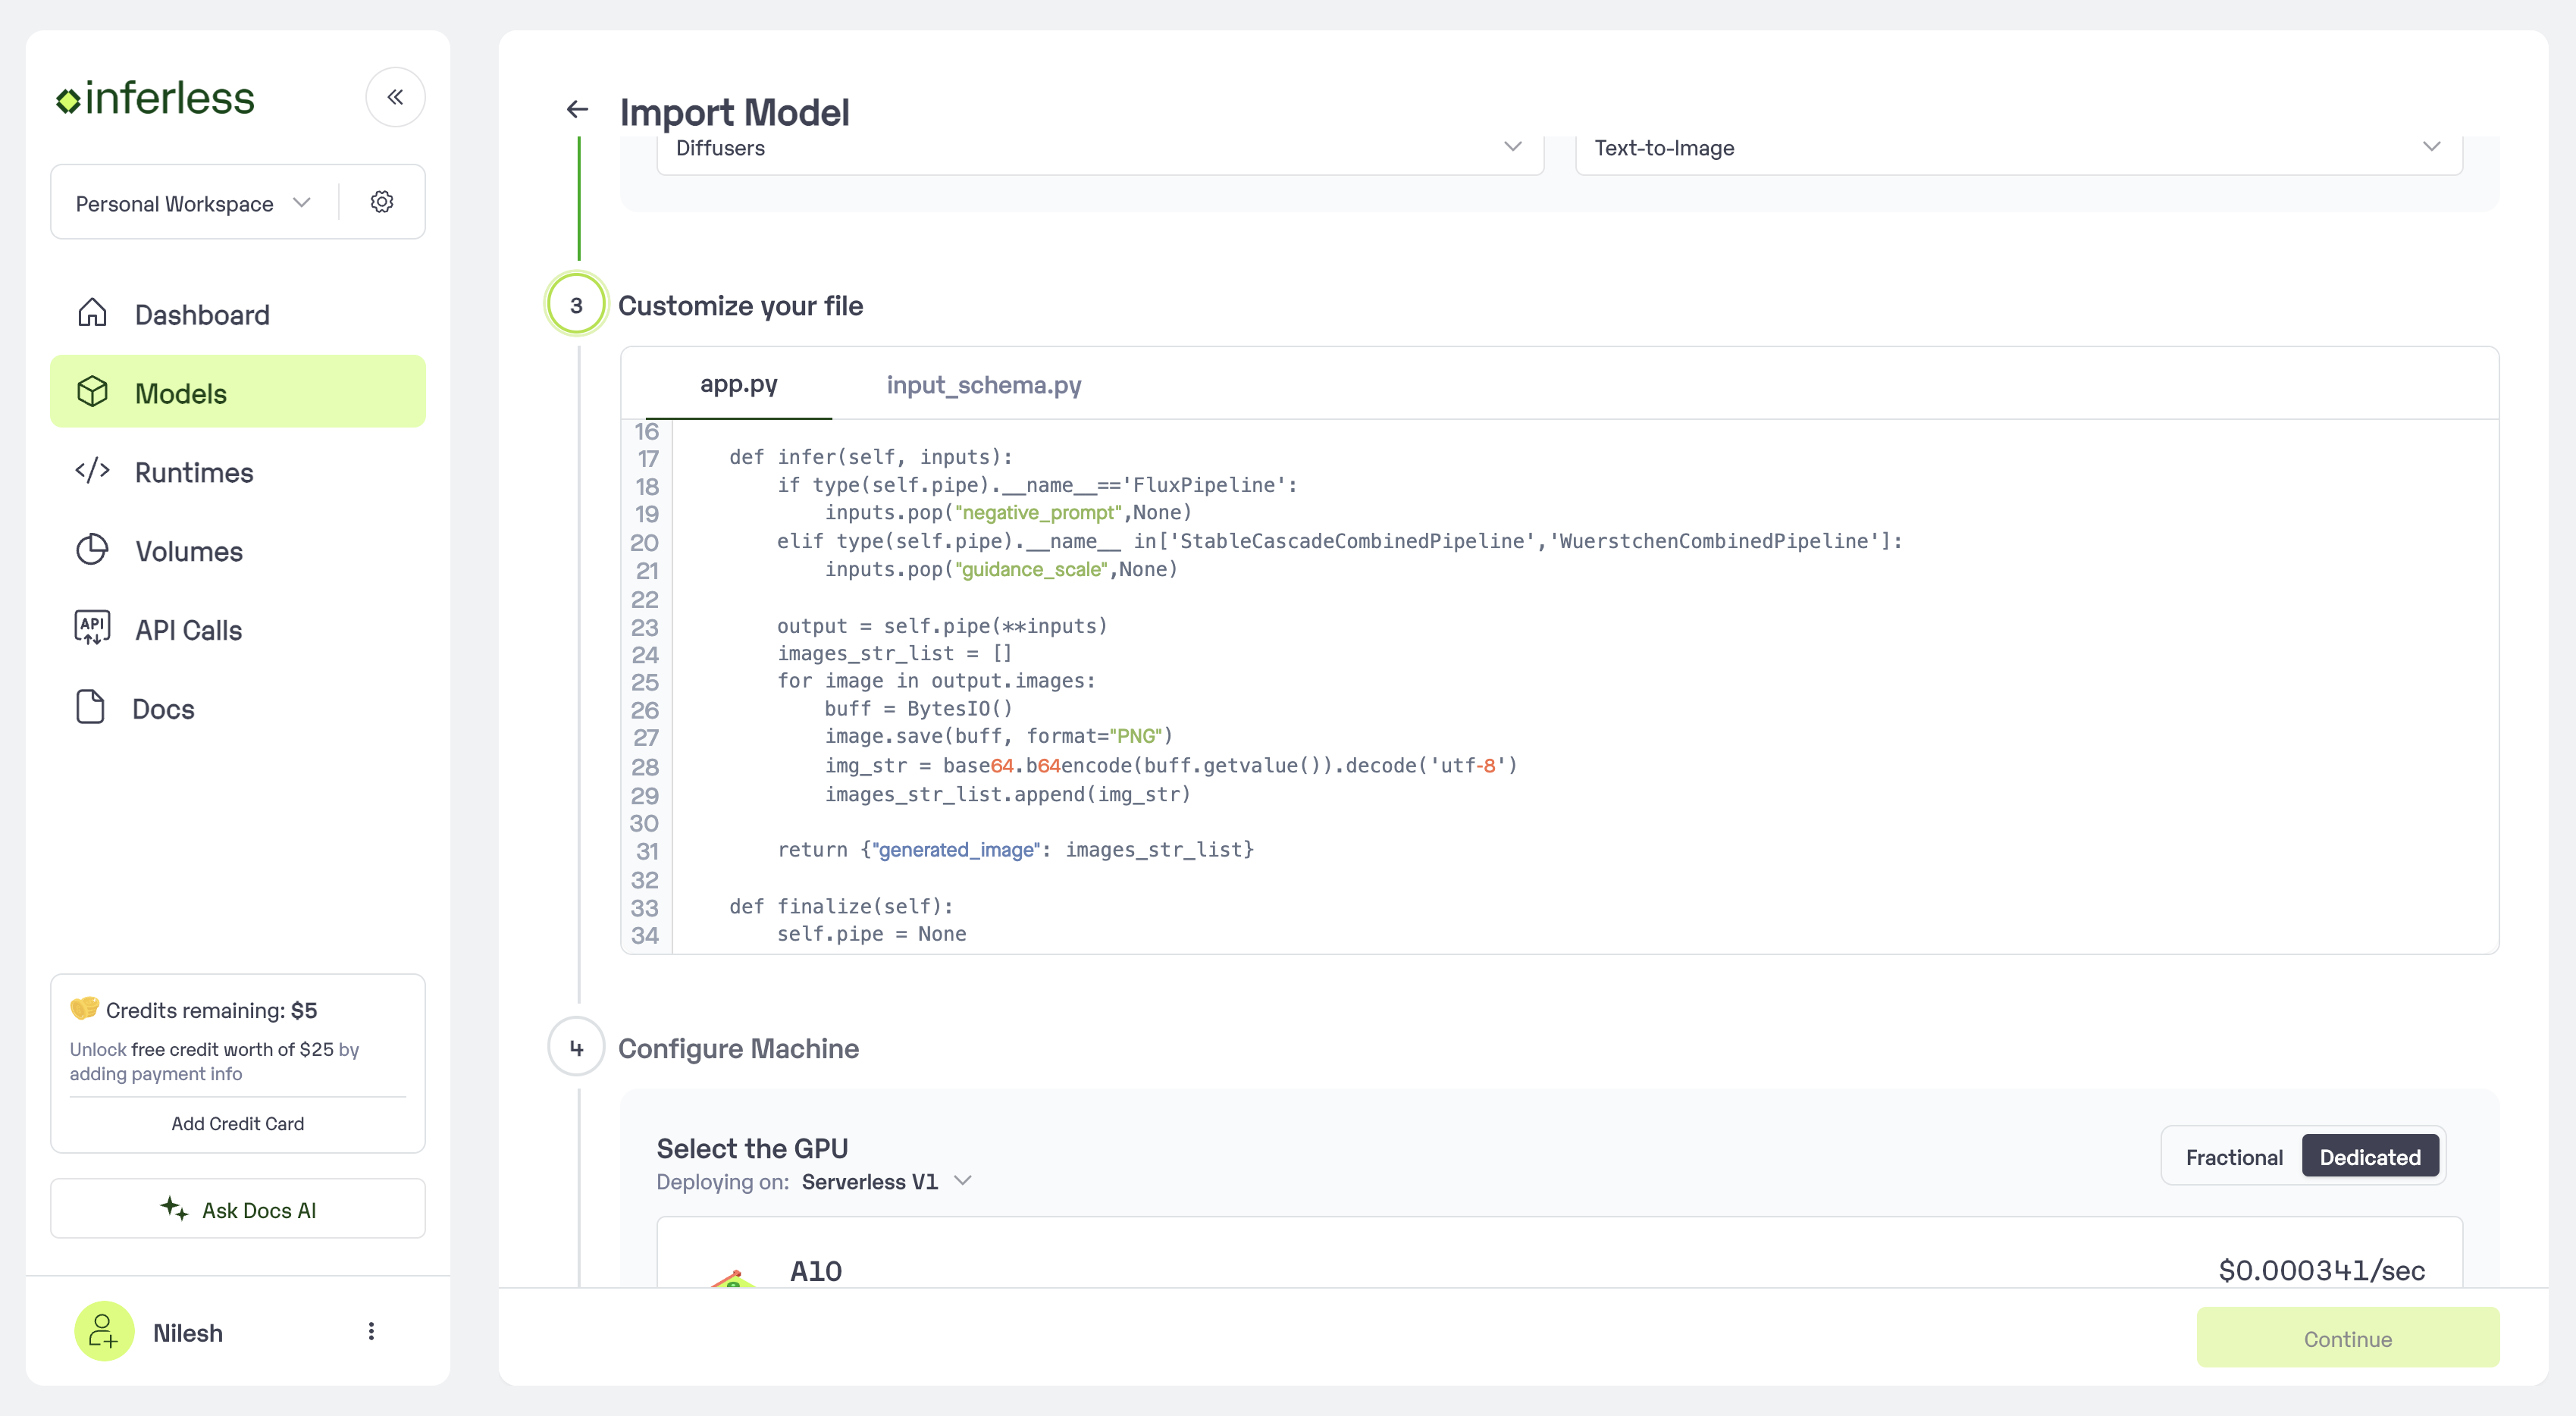 ### Step 4: Configure Machine and Environment.
* Choose the type of machine, and specify the minimum and maximum number of replicas for deploying your model.
* **Min scale** -
```
The number of inference workers to keep on at all times.
```
* **Max scale -**
```
The maximum number of inference workers to allow at any point of time
```
* Configure Custom Runtime ( If you have pip or apt packages), choose Volume, Secrets and set Environment variables like Inference Timeout / Container Concurrency / Scale Down Timeout
### Step 4: Configure Machine and Environment.
* Choose the type of machine, and specify the minimum and maximum number of replicas for deploying your model.
* **Min scale** -
```
The number of inference workers to keep on at all times.
```
* **Max scale -**
```
The maximum number of inference workers to allow at any point of time
```
* Configure Custom Runtime ( If you have pip or apt packages), choose Volume, Secrets and set Environment variables like Inference Timeout / Container Concurrency / Scale Down Timeout
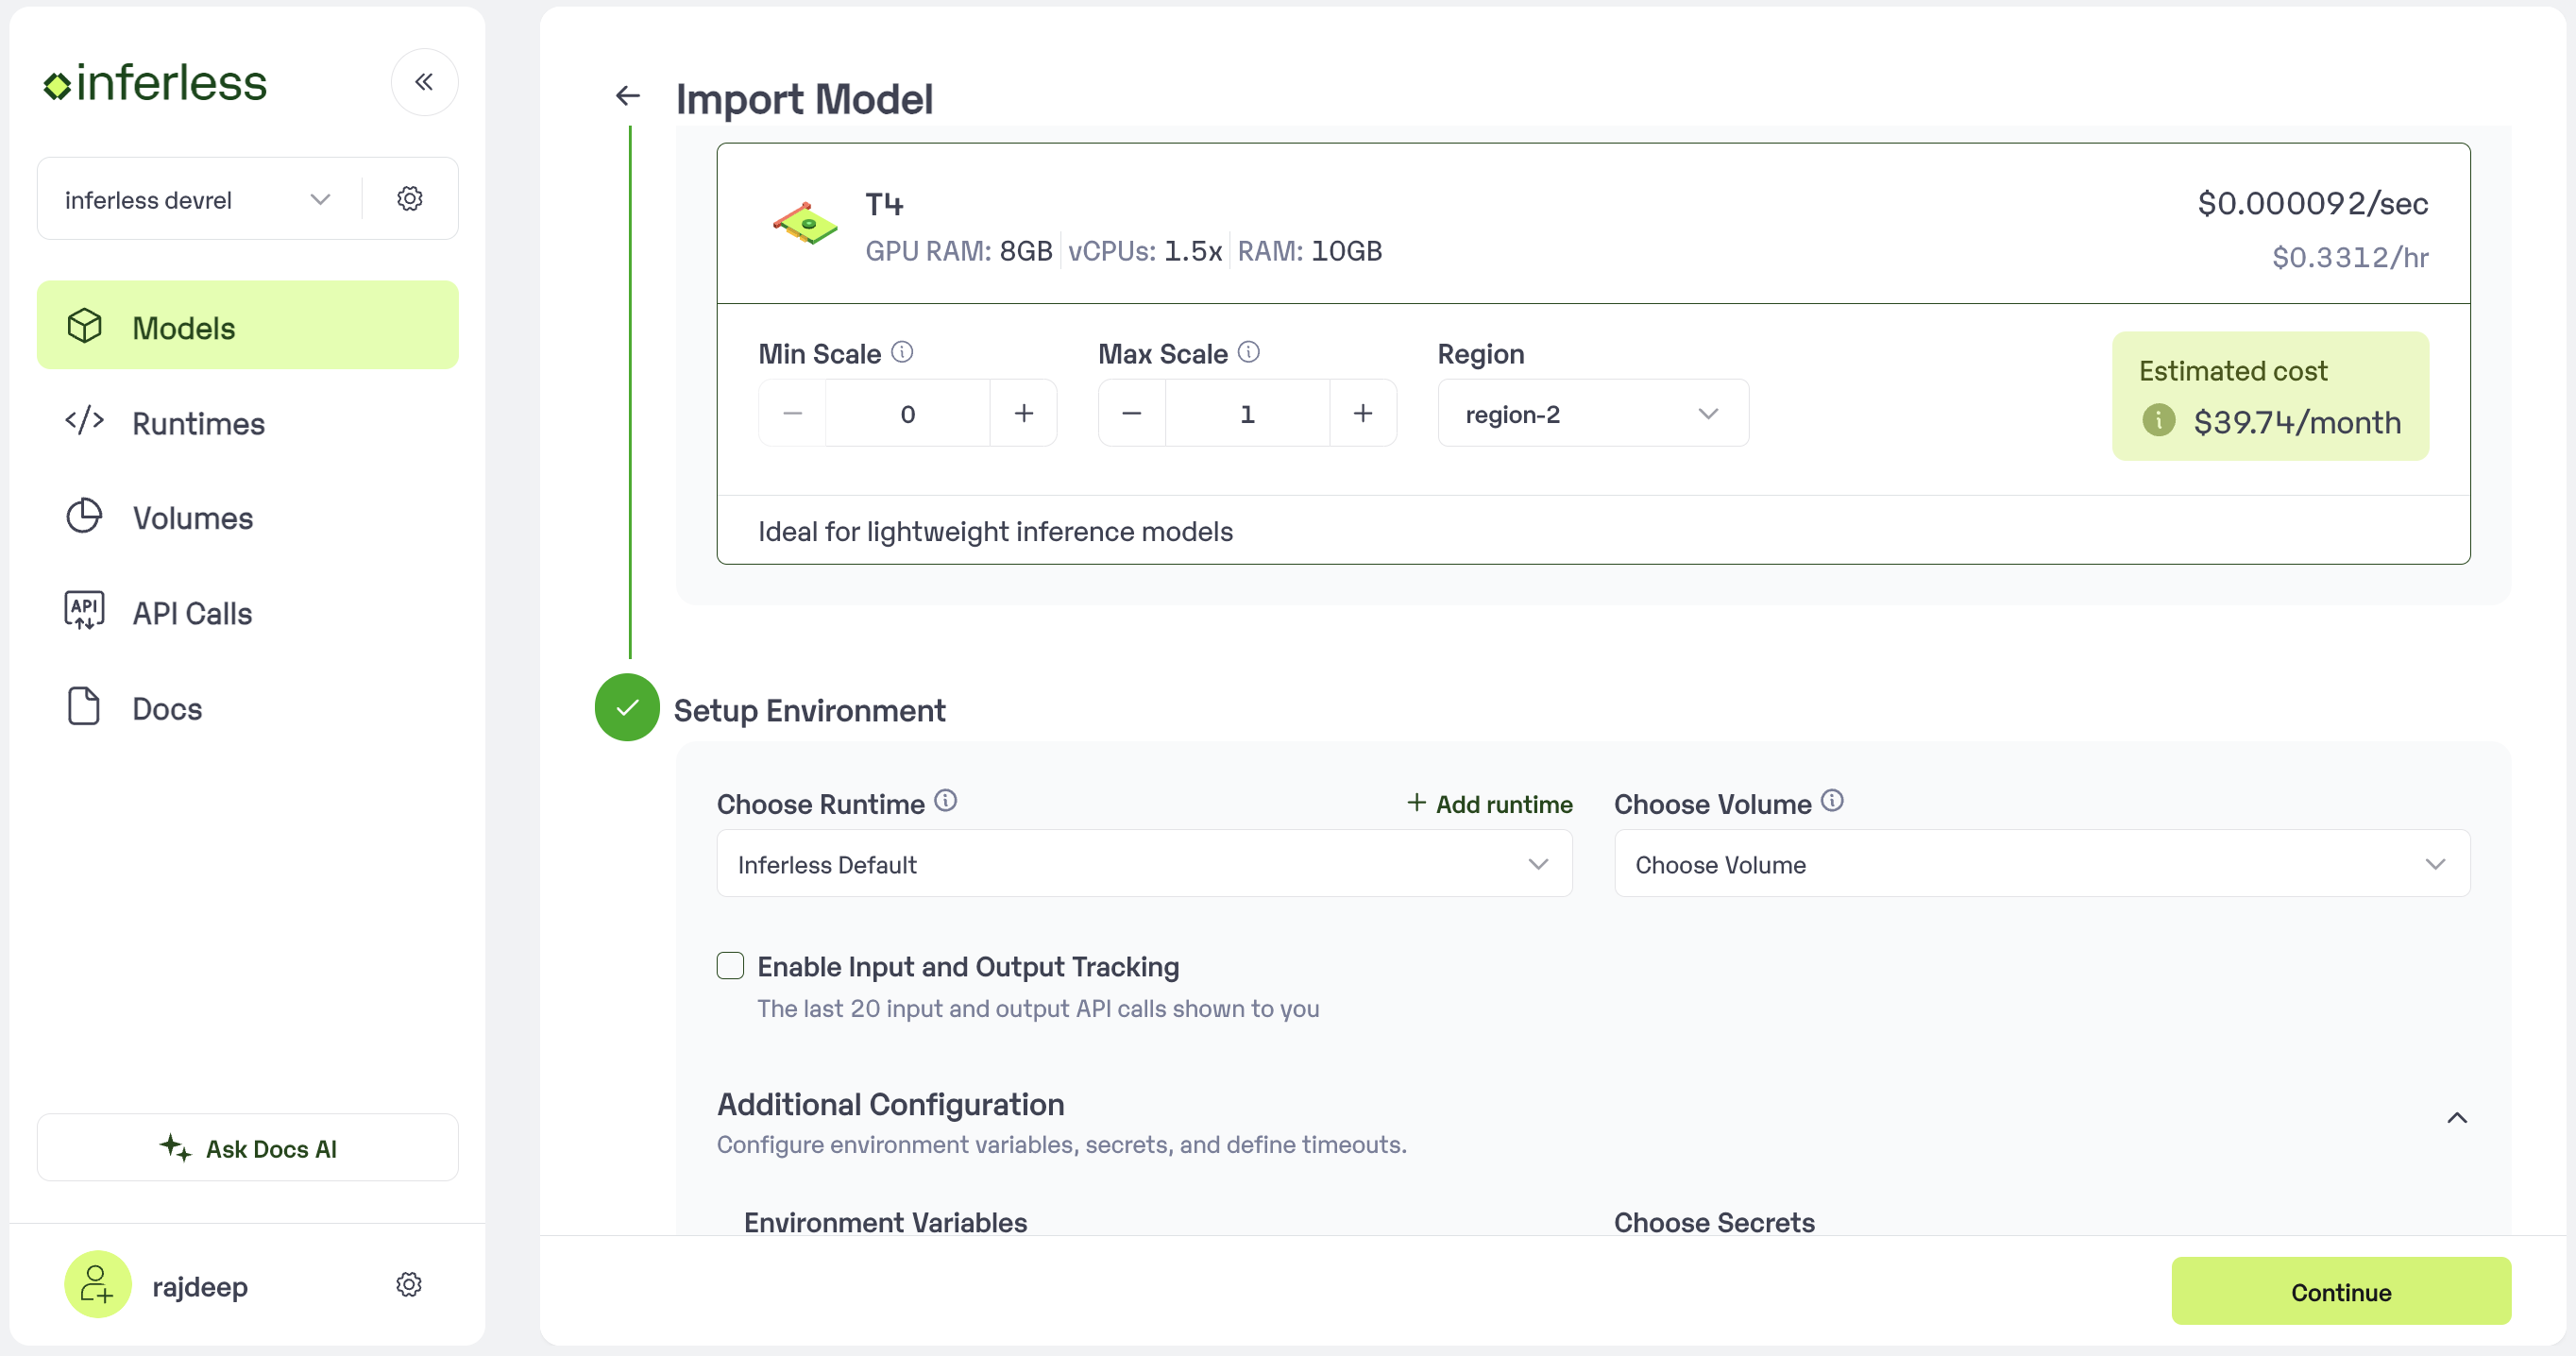 ### Step 5: Review your model details
* Once you click "Continue," you will be able to review the details added for the model.
* If you would like to make any changes, you can go back and make the changes.
* Once you have reviewed everything, click `Deploy` to start the model import process.
### Step 5: Review your model details
* Once you click "Continue," you will be able to review the details added for the model.
* If you would like to make any changes, you can go back and make the changes.
* Once you have reviewed everything, click `Deploy` to start the model import process.
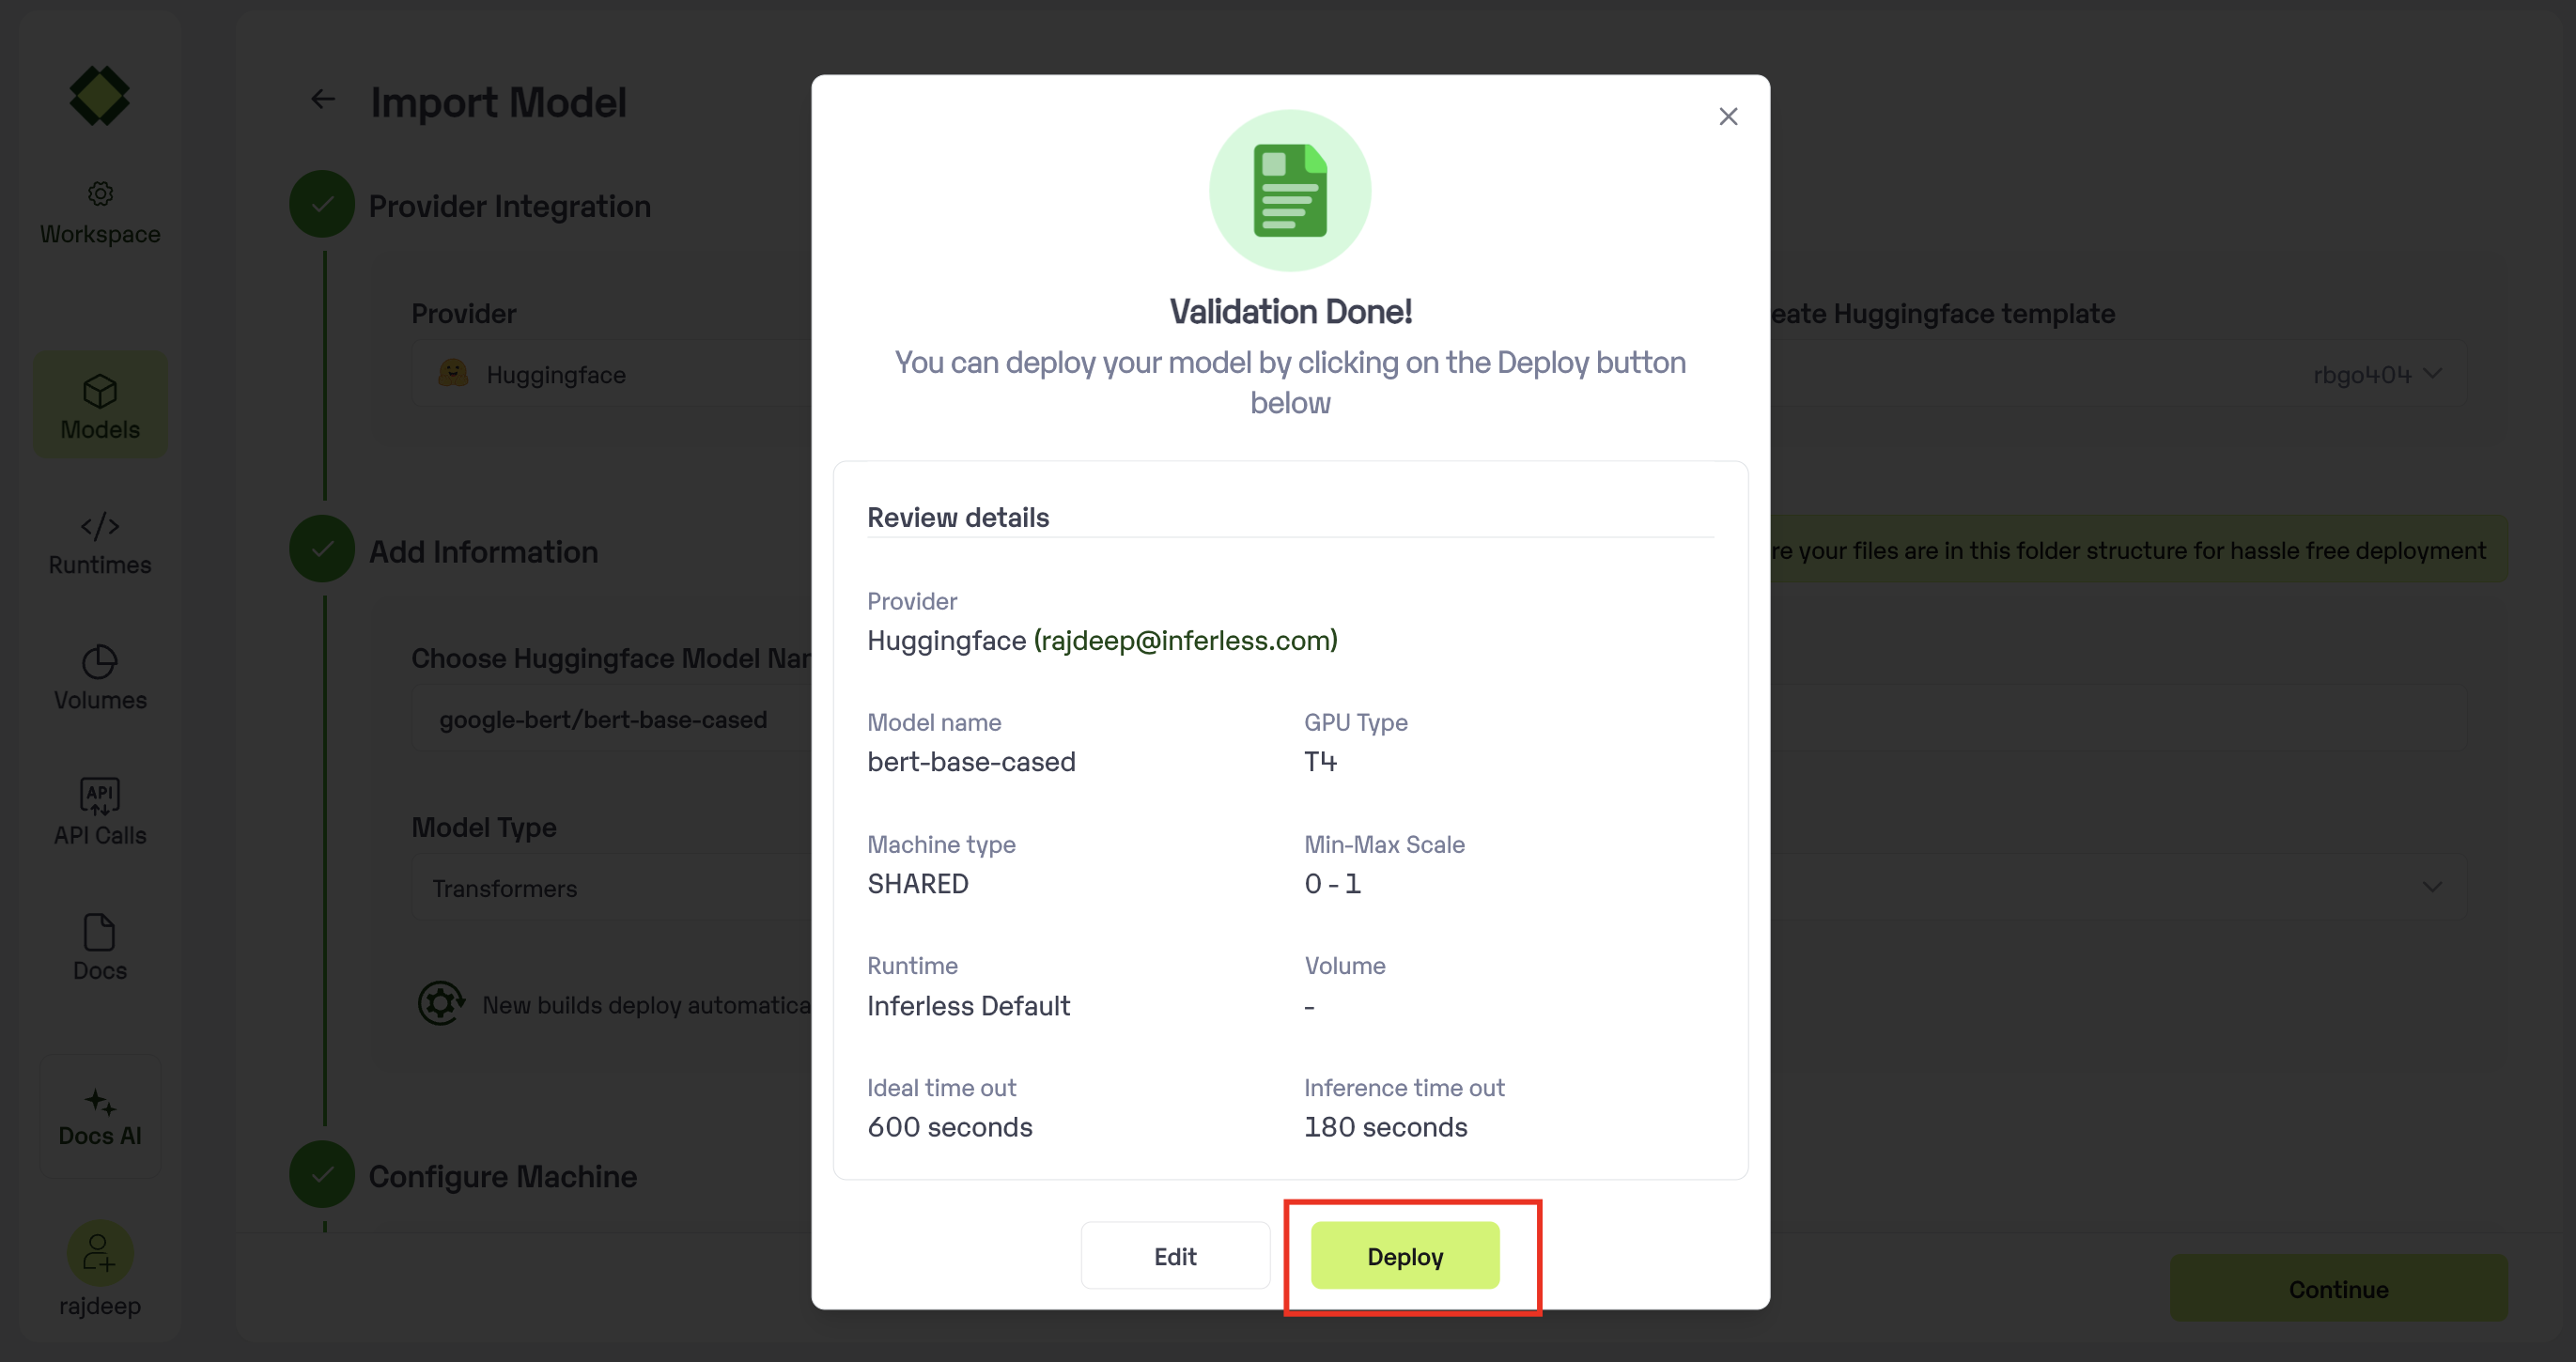 ### Step 6 : Run your model
* Once you click submit, the model import process would start.
* It may take some time to complete the import process, and during this time, you will be redirected to your workspace and can see the status of the import under `"In Progress/Failed"` tab.\
### Step 6 : Run your model
* Once you click submit, the model import process would start.
* It may take some time to complete the import process, and during this time, you will be redirected to your workspace and can see the status of the import under `"In Progress/Failed"` tab.\
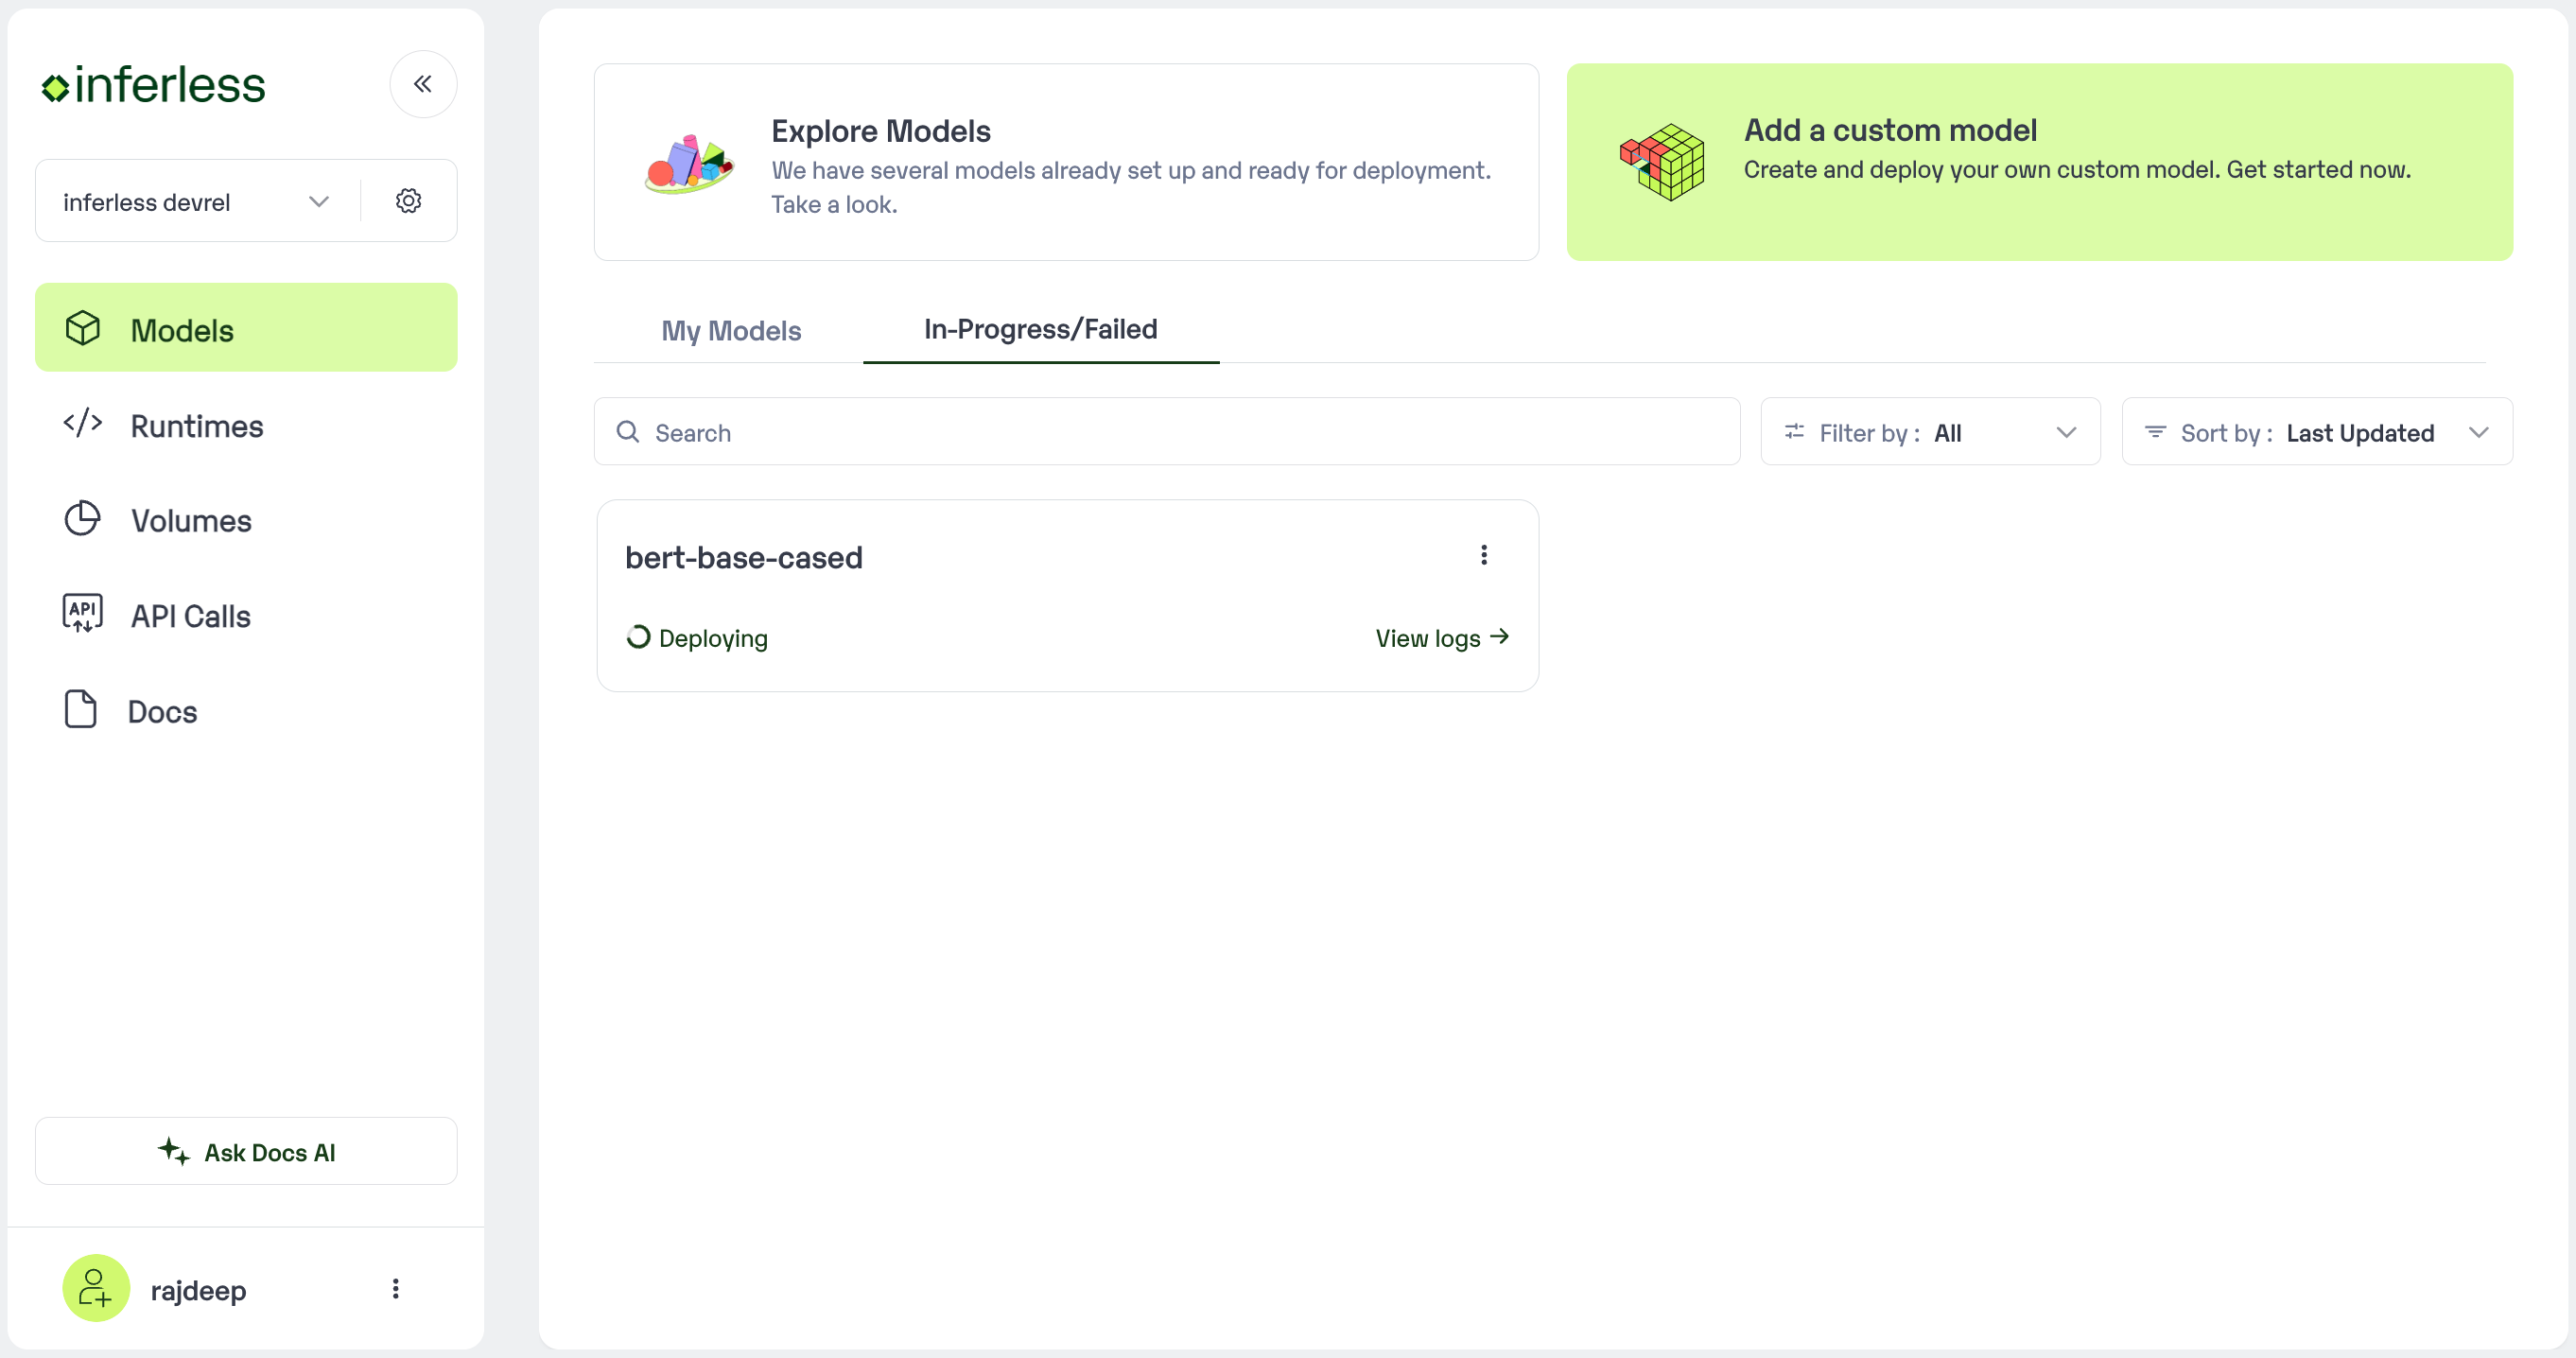 * If you encounter any errors during the model import process or if you want to view the build logs for any reason, you can click on the three dots menu and select "View build logs". This will show you a detailed log of the import process, which can help you troubleshoot any issues you may encounter.
* Post-upload, the model will be available under "My Models"
* You can then select the model and go to `-> API -> Inference Endpoint details. `Here you would find the API endpoints that can be called. You can click on the copy button on the right and can call your model.
* If you encounter any errors during the model import process or if you want to view the build logs for any reason, you can click on the three dots menu and select "View build logs". This will show you a detailed log of the import process, which can help you troubleshoot any issues you may encounter.
* Post-upload, the model will be available under "My Models"
* You can then select the model and go to `-> API -> Inference Endpoint details. `Here you would find the API endpoints that can be called. You can click on the copy button on the right and can call your model.
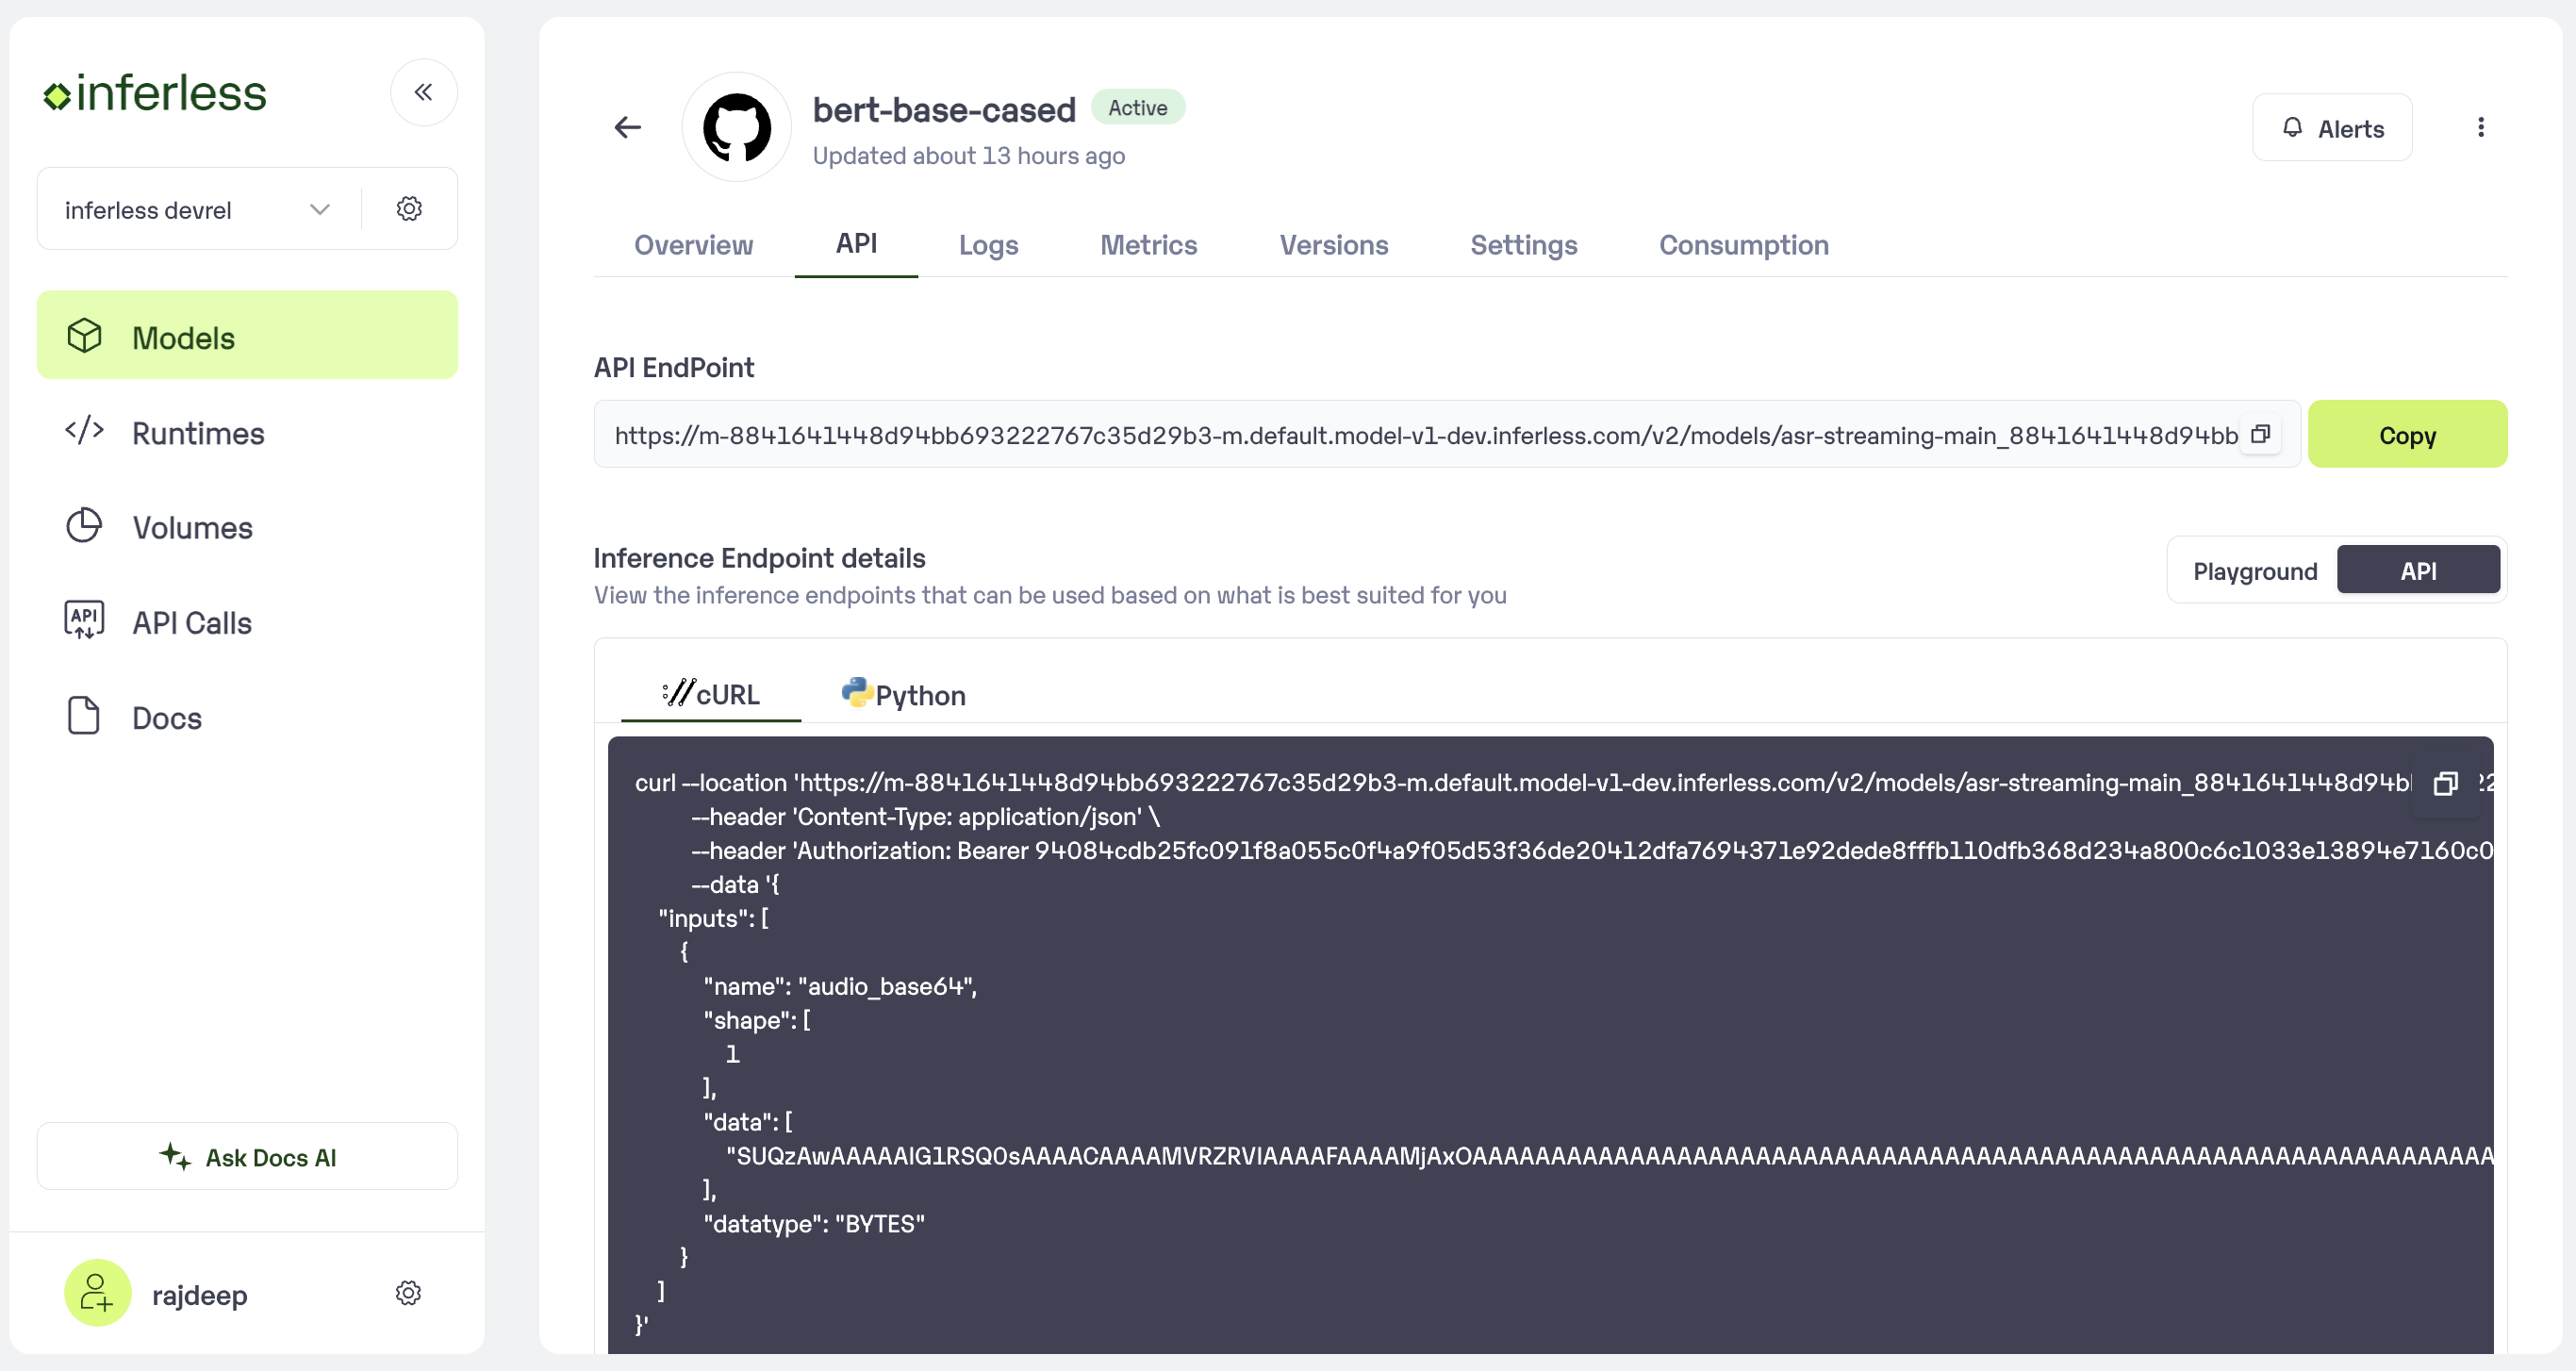 # Deploy the DeepSeek-R1-Distill-Qwen-32B using Inferless
Source: https://docs.inferless.com/how-to-guides/deploy-DeepSeek-R1-Distill-Qwen-32B
DeepSeek-R1-Distill-Qwen-32B is a distilled variant within the DeepSeek-R1 series. The dataset used for training is meticulously curated from the DeepSeek-R1 model, with Qwen2.5-32B serving as the foundational base model. This model has undergone supervised fine-tuning to achieve enhanced performance and efficiency.
## Introduction
The [DeepSeek-R1-Distill-Qwen-32B](https://huggingface.co/deepseek-ai/DeepSeek-R1-Distill-Qwen-32B) is a latest model from the DeepSeek team, renowned for its advanced reasoning capabilities. Released in January 2025, this model is part of the DeepSeek-R1 series, which stands out for its innovative use of large-scale reinforcement learning (RL) without relying on traditional supervised fine-tuning.
The distillation process incorporated supervised fine-tuning on 800k carefully curated samples from DeepSeek R1, leveraging the powerful Qwen2.5-32B as the base model. This meticulous approach has resulted in a highly efficient and robust model that exemplifies state-of-the-art performance.
## Our Observations
We have deployed the model on an A100 GPU(80GB). Here are our observations:
| Library | Inference Time | Cold Start Time | Tokens/Sec | Output Tokens Length |
| ------- | -------------- | --------------- | ---------- | -------------------- |
| vLLM | 5.88 sec | 39.95 sec | 21.95 | 128 |
Note: The inference time and cold start time are average values.
## Defining Dependencies
We are using the [vLLM](https://github.com/vllm-project/vllm/) to serve the model on a single A100 (80GB).
## Constructing the GitHub/GitLab Template
Now quickly construct the GitHub/GitLab template, this process is mandatory and make sure you don't add any file named `model.py`.
```
DeepSeek-R1-Distill-Qwen-32B/
├── app.py
├── inferless-runtime-config.yaml
└── inferless.yaml
```
You can also add other files to this directory.
## Create the Input Schema with Pydantic
Using the `inferless` Python client and Pydantic, you can define structured schemas directly in your code for input and output, eliminating the need for external file.
### Input Schema
When defining an input schema with Pydantic, you need to annotate your class attributes with the appropriate types, such as `str`, `float`, `int`, etc.
These type annotations specifys what type of data each field should contain.
The `default` value serves as the example input for testing with the `infer` function.
```python
@inferless.request
class RequestObjects(BaseModel):
prompt: str = Field(default="Explain Deep Learning.")
temperature: Optional[float] = 0.7
top_p: Optional[float] = 0.1
repetition_penalty: Optional[float] = 1.18
top_k: Optional[int] = 40
max_tokens: Optional[int] = 256
```
### Output Schema
The `@inferless.response` decorator helps you define structured output schemas.
```python
@inferless.response
class ResponseObjects(BaseModel):
generated_text: str = Field(default='Test output')
```
### Usage in the `infer` Function
Once you have annotated the objects you can expect the infer function to receive `RequestObjects` as input,
and returns a `ResponseObjects` instance as output, ensuring the results adhere to a defined structure.
```python
class InferlessPythonModel:
def infer(self, request: RequestObjects) -> ResponseObjects:
return ResponseObjects(generated_text=result[0])
```
## Create the class for inference
In the [app.py](https://github.com/inferless/DeepSeek-R1-Distill-Qwen-32B/blob/main/app.py) we will define the class and import all the required functions
1. `def initialize`: In this function, you will initialize your model and define any `variable` that you want to use during inference.
2. `def infer`: This function gets called for every request that you send. Here you can define all the steps that are required for the inference. You can also pass custom values for inference and pass it through `inputs(dict)` parameter.
3. `def finalize`: This function cleans up all the allocated memory.
```python
from vllm import LLM
from vllm.sampling_params import SamplingParams
from transformers import AutoTokenizer
import inferless
from pydantic import BaseModel, Field
from typing import Optional
@inferless.request
class RequestObjects(BaseModel):
prompt: str = Field(default="Explain Deep Learning.")
temperature: Optional[float] = 0.7
top_p: Optional[float] = 0.1
repetition_penalty: Optional[float] = 1.18
top_k: Optional[int] = 40
max_tokens: Optional[int] = 256
@inferless.response
class ResponseObjects(BaseModel):
generated_text: str = Field(default='Test output')
class InferlessPythonModel:
def initialize(self):
model_id = "deepseek-ai/DeepSeek-R1-Distill-Qwen-32B"
self.llm = LLM(model=model_id,gpu_memory_utilization=0.9,max_model_len=5000,dtype="float16")
self.tokenizer = AutoTokenizer.from_pretrained(model_id)
def infer(self, request: RequestObjects) -> ResponseObjects:
sampling_params = SamplingParams(temperature=request.temperature,top_p=request.top_p,repetition_penalty=request.repetition_penalty,
top_k=request.top_k,max_tokens=request.max_tokens)
input_text = self.tokenizer.apply_chat_template([{"role": "user", "content": request.prompt}], tokenize=False)
result = self.llm.generate(input_text, sampling_params)
result_output = [output.outputs[0].text for output in result]
generateObject = ResponseObjects(generated_text = result_output[0])
return generateObject
def finalize(self):
self.llm = None
```
## Creating the Custom Runtime
This is a mandatory step where we allow the users to upload their custom runtime through [inferless-runtime-config.yaml](https://github.com/inferless/DeepSeek-R1-Distill-Qwen-32B/blob/main/inferless-runtime-config.yaml).
```python
build:
cuda_version: "12.1.1"
python_packages:
- vllm==0.6.6.post1
- inferless==0.2.6
- pydantic==2.10.2
```
## Test your model with Remote Run
You can use the `inferless remote-run`([installation guide here](https://docs.inferless.com/model-import/cli-import#cli-import)) command to test your model or any custom Python script in a remote GPU environment directly from your local machine. Make sure that you use `Python3.10` for seamless experience.
### Step 1: Add the Decorators and local entry point
To enable **Remote Run**, simply do the following:
1. Import the `inferless` library and initialize `Cls(gpu="A100")`. The available GPU options are `T4`, `A10` and `A100`.
2. Decorated the `initialize` and `infer` functions with `@app.load` and `@app.infer` respectively.
3. Create the Local Entry Point by decorating a function (for example, `my_local_entry`) with `@inferless.local_entry_point`.
Within this function, instantiate your model class, convert any incoming parameters into a `RequestObjects` object, and invoke the model's `infer` method.
```python
from vllm import LLM
from vllm.sampling_params import SamplingParams
from transformers import AutoTokenizer
import inferless
from pydantic import BaseModel, Field
from typing import Optional
app = inferless.Cls(gpu="A100")
@inferless.request
class RequestObjects(BaseModel):
prompt: str = Field(default="Explain Deep Learning.")
temperature: Optional[float] = 0.7
top_p: Optional[float] = 0.1
repetition_penalty: Optional[float] = 1.18
top_k: Optional[int] = 40
max_tokens: Optional[int] = 256
@inferless.response
class ResponseObjects(BaseModel):
generated_text: str = Field(default='Test output')
class InferlessPythonModel:
@app.load
def initialize(self):
model_id = "deepseek-ai/DeepSeek-R1-Distill-Qwen-32B"
self.llm = LLM(model=model_id,gpu_memory_utilization=0.9,max_model_len=5000,dtype="float16")
self.tokenizer = AutoTokenizer.from_pretrained(model_id)
@app.infer
def infer(self, request: RequestObjects) -> ResponseObjects:
sampling_params = SamplingParams(temperature=request.temperature,top_p=request.top_p,repetition_penalty=request.repetition_penalty,
top_k=request.top_k,max_tokens=request.max_tokens)
input_text = self.tokenizer.apply_chat_template([{"role": "user", "content": request.prompt}], tokenize=False)
result = self.llm.generate(input_text, sampling_params)
result_output = [output.outputs[0].text for output in result]
generateObject = ResponseObjects(generated_text = result_output[0])
return generateObject
def finalize(self):
self.llm = None
@inferless.local_entry_point
def my_local_entry(dynamic_params):
request_objects = RequestObjects(**dynamic_params)
model_instance = InferlessPythonModel()
return model_instance.infer(request_objects)
```
### Step 2: Run with Remote GPU
From your local terminal, navigate to the folder containing your `app.py` and your `inferless-runtime-config.yaml` and run:
```bash
inferless remote-run app.py -c inferless-runtime-config.yaml --prompt "Explain Deep Learning."
```
You can pass the other input parameters in the same way (e.g., `--content_type`, `--system_prompt`, etc.) as long as your code expects them in the `inputs` dictionary.
If you want to exclude certain files or directories from being uploaded, use the `--exclude` or `-e` flag.
## Method A: Deploying the model on Inferless Platform
Inferless supports multiple ways of [importing your model](https://docs.inferless.com/model-import/file-structure-req/file-structure-requirements). For this tutorial, we will use GitHub.
### Step 1: Login to the inferless dashboard can click on Import model button
Navigate to your desired workspace in Inferless and Click on `Add a custom model` button that you see on the top right. An import wizard will open up.
### Step 2: Follow the UI to complete the model Import
* Select the GitHub/GitLab Integration option to connect your source code repository with the deployment environment.
* Navigate to the specific GitHub repository that contains your model's code. Here, you will need to identify and enter the name of the model you wish to import.
* Choose the appropriate type of machine that suits your model's requirements. Additionally, specify the minimum and maximum number of replicas to define the scalability range for deploying your model.
* Optionally, you have the option to enable automatic build and deployment. This feature triggers a new deployment automatically whenever there is a new code push to your repository.
* If your model requires additional software packages, configure the Custom Runtime settings by including necessary pip or apt packages. Also, set up environment variables such as Inference Timeout, Container Concurrency, and Scale Down Timeout to tailor the runtime environment according to your needs.
* Wait for the validation process to complete, ensuring that all settings are correct and functional. Once validation is successful, click on the "Import" button to finalize the import of your model.
# Deploy the DeepSeek-R1-Distill-Qwen-32B using Inferless
Source: https://docs.inferless.com/how-to-guides/deploy-DeepSeek-R1-Distill-Qwen-32B
DeepSeek-R1-Distill-Qwen-32B is a distilled variant within the DeepSeek-R1 series. The dataset used for training is meticulously curated from the DeepSeek-R1 model, with Qwen2.5-32B serving as the foundational base model. This model has undergone supervised fine-tuning to achieve enhanced performance and efficiency.
## Introduction
The [DeepSeek-R1-Distill-Qwen-32B](https://huggingface.co/deepseek-ai/DeepSeek-R1-Distill-Qwen-32B) is a latest model from the DeepSeek team, renowned for its advanced reasoning capabilities. Released in January 2025, this model is part of the DeepSeek-R1 series, which stands out for its innovative use of large-scale reinforcement learning (RL) without relying on traditional supervised fine-tuning.
The distillation process incorporated supervised fine-tuning on 800k carefully curated samples from DeepSeek R1, leveraging the powerful Qwen2.5-32B as the base model. This meticulous approach has resulted in a highly efficient and robust model that exemplifies state-of-the-art performance.
## Our Observations
We have deployed the model on an A100 GPU(80GB). Here are our observations:
| Library | Inference Time | Cold Start Time | Tokens/Sec | Output Tokens Length |
| ------- | -------------- | --------------- | ---------- | -------------------- |
| vLLM | 5.88 sec | 39.95 sec | 21.95 | 128 |
Note: The inference time and cold start time are average values.
## Defining Dependencies
We are using the [vLLM](https://github.com/vllm-project/vllm/) to serve the model on a single A100 (80GB).
## Constructing the GitHub/GitLab Template
Now quickly construct the GitHub/GitLab template, this process is mandatory and make sure you don't add any file named `model.py`.
```
DeepSeek-R1-Distill-Qwen-32B/
├── app.py
├── inferless-runtime-config.yaml
└── inferless.yaml
```
You can also add other files to this directory.
## Create the Input Schema with Pydantic
Using the `inferless` Python client and Pydantic, you can define structured schemas directly in your code for input and output, eliminating the need for external file.
### Input Schema
When defining an input schema with Pydantic, you need to annotate your class attributes with the appropriate types, such as `str`, `float`, `int`, etc.
These type annotations specifys what type of data each field should contain.
The `default` value serves as the example input for testing with the `infer` function.
```python
@inferless.request
class RequestObjects(BaseModel):
prompt: str = Field(default="Explain Deep Learning.")
temperature: Optional[float] = 0.7
top_p: Optional[float] = 0.1
repetition_penalty: Optional[float] = 1.18
top_k: Optional[int] = 40
max_tokens: Optional[int] = 256
```
### Output Schema
The `@inferless.response` decorator helps you define structured output schemas.
```python
@inferless.response
class ResponseObjects(BaseModel):
generated_text: str = Field(default='Test output')
```
### Usage in the `infer` Function
Once you have annotated the objects you can expect the infer function to receive `RequestObjects` as input,
and returns a `ResponseObjects` instance as output, ensuring the results adhere to a defined structure.
```python
class InferlessPythonModel:
def infer(self, request: RequestObjects) -> ResponseObjects:
return ResponseObjects(generated_text=result[0])
```
## Create the class for inference
In the [app.py](https://github.com/inferless/DeepSeek-R1-Distill-Qwen-32B/blob/main/app.py) we will define the class and import all the required functions
1. `def initialize`: In this function, you will initialize your model and define any `variable` that you want to use during inference.
2. `def infer`: This function gets called for every request that you send. Here you can define all the steps that are required for the inference. You can also pass custom values for inference and pass it through `inputs(dict)` parameter.
3. `def finalize`: This function cleans up all the allocated memory.
```python
from vllm import LLM
from vllm.sampling_params import SamplingParams
from transformers import AutoTokenizer
import inferless
from pydantic import BaseModel, Field
from typing import Optional
@inferless.request
class RequestObjects(BaseModel):
prompt: str = Field(default="Explain Deep Learning.")
temperature: Optional[float] = 0.7
top_p: Optional[float] = 0.1
repetition_penalty: Optional[float] = 1.18
top_k: Optional[int] = 40
max_tokens: Optional[int] = 256
@inferless.response
class ResponseObjects(BaseModel):
generated_text: str = Field(default='Test output')
class InferlessPythonModel:
def initialize(self):
model_id = "deepseek-ai/DeepSeek-R1-Distill-Qwen-32B"
self.llm = LLM(model=model_id,gpu_memory_utilization=0.9,max_model_len=5000,dtype="float16")
self.tokenizer = AutoTokenizer.from_pretrained(model_id)
def infer(self, request: RequestObjects) -> ResponseObjects:
sampling_params = SamplingParams(temperature=request.temperature,top_p=request.top_p,repetition_penalty=request.repetition_penalty,
top_k=request.top_k,max_tokens=request.max_tokens)
input_text = self.tokenizer.apply_chat_template([{"role": "user", "content": request.prompt}], tokenize=False)
result = self.llm.generate(input_text, sampling_params)
result_output = [output.outputs[0].text for output in result]
generateObject = ResponseObjects(generated_text = result_output[0])
return generateObject
def finalize(self):
self.llm = None
```
## Creating the Custom Runtime
This is a mandatory step where we allow the users to upload their custom runtime through [inferless-runtime-config.yaml](https://github.com/inferless/DeepSeek-R1-Distill-Qwen-32B/blob/main/inferless-runtime-config.yaml).
```python
build:
cuda_version: "12.1.1"
python_packages:
- vllm==0.6.6.post1
- inferless==0.2.6
- pydantic==2.10.2
```
## Test your model with Remote Run
You can use the `inferless remote-run`([installation guide here](https://docs.inferless.com/model-import/cli-import#cli-import)) command to test your model or any custom Python script in a remote GPU environment directly from your local machine. Make sure that you use `Python3.10` for seamless experience.
### Step 1: Add the Decorators and local entry point
To enable **Remote Run**, simply do the following:
1. Import the `inferless` library and initialize `Cls(gpu="A100")`. The available GPU options are `T4`, `A10` and `A100`.
2. Decorated the `initialize` and `infer` functions with `@app.load` and `@app.infer` respectively.
3. Create the Local Entry Point by decorating a function (for example, `my_local_entry`) with `@inferless.local_entry_point`.
Within this function, instantiate your model class, convert any incoming parameters into a `RequestObjects` object, and invoke the model's `infer` method.
```python
from vllm import LLM
from vllm.sampling_params import SamplingParams
from transformers import AutoTokenizer
import inferless
from pydantic import BaseModel, Field
from typing import Optional
app = inferless.Cls(gpu="A100")
@inferless.request
class RequestObjects(BaseModel):
prompt: str = Field(default="Explain Deep Learning.")
temperature: Optional[float] = 0.7
top_p: Optional[float] = 0.1
repetition_penalty: Optional[float] = 1.18
top_k: Optional[int] = 40
max_tokens: Optional[int] = 256
@inferless.response
class ResponseObjects(BaseModel):
generated_text: str = Field(default='Test output')
class InferlessPythonModel:
@app.load
def initialize(self):
model_id = "deepseek-ai/DeepSeek-R1-Distill-Qwen-32B"
self.llm = LLM(model=model_id,gpu_memory_utilization=0.9,max_model_len=5000,dtype="float16")
self.tokenizer = AutoTokenizer.from_pretrained(model_id)
@app.infer
def infer(self, request: RequestObjects) -> ResponseObjects:
sampling_params = SamplingParams(temperature=request.temperature,top_p=request.top_p,repetition_penalty=request.repetition_penalty,
top_k=request.top_k,max_tokens=request.max_tokens)
input_text = self.tokenizer.apply_chat_template([{"role": "user", "content": request.prompt}], tokenize=False)
result = self.llm.generate(input_text, sampling_params)
result_output = [output.outputs[0].text for output in result]
generateObject = ResponseObjects(generated_text = result_output[0])
return generateObject
def finalize(self):
self.llm = None
@inferless.local_entry_point
def my_local_entry(dynamic_params):
request_objects = RequestObjects(**dynamic_params)
model_instance = InferlessPythonModel()
return model_instance.infer(request_objects)
```
### Step 2: Run with Remote GPU
From your local terminal, navigate to the folder containing your `app.py` and your `inferless-runtime-config.yaml` and run:
```bash
inferless remote-run app.py -c inferless-runtime-config.yaml --prompt "Explain Deep Learning."
```
You can pass the other input parameters in the same way (e.g., `--content_type`, `--system_prompt`, etc.) as long as your code expects them in the `inputs` dictionary.
If you want to exclude certain files or directories from being uploaded, use the `--exclude` or `-e` flag.
## Method A: Deploying the model on Inferless Platform
Inferless supports multiple ways of [importing your model](https://docs.inferless.com/model-import/file-structure-req/file-structure-requirements). For this tutorial, we will use GitHub.
### Step 1: Login to the inferless dashboard can click on Import model button
Navigate to your desired workspace in Inferless and Click on `Add a custom model` button that you see on the top right. An import wizard will open up.
### Step 2: Follow the UI to complete the model Import
* Select the GitHub/GitLab Integration option to connect your source code repository with the deployment environment.
* Navigate to the specific GitHub repository that contains your model's code. Here, you will need to identify and enter the name of the model you wish to import.
* Choose the appropriate type of machine that suits your model's requirements. Additionally, specify the minimum and maximum number of replicas to define the scalability range for deploying your model.
* Optionally, you have the option to enable automatic build and deployment. This feature triggers a new deployment automatically whenever there is a new code push to your repository.
* If your model requires additional software packages, configure the Custom Runtime settings by including necessary pip or apt packages. Also, set up environment variables such as Inference Timeout, Container Concurrency, and Scale Down Timeout to tailor the runtime environment according to your needs.
* Wait for the validation process to complete, ensuring that all settings are correct and functional. Once validation is successful, click on the "Import" button to finalize the import of your model.
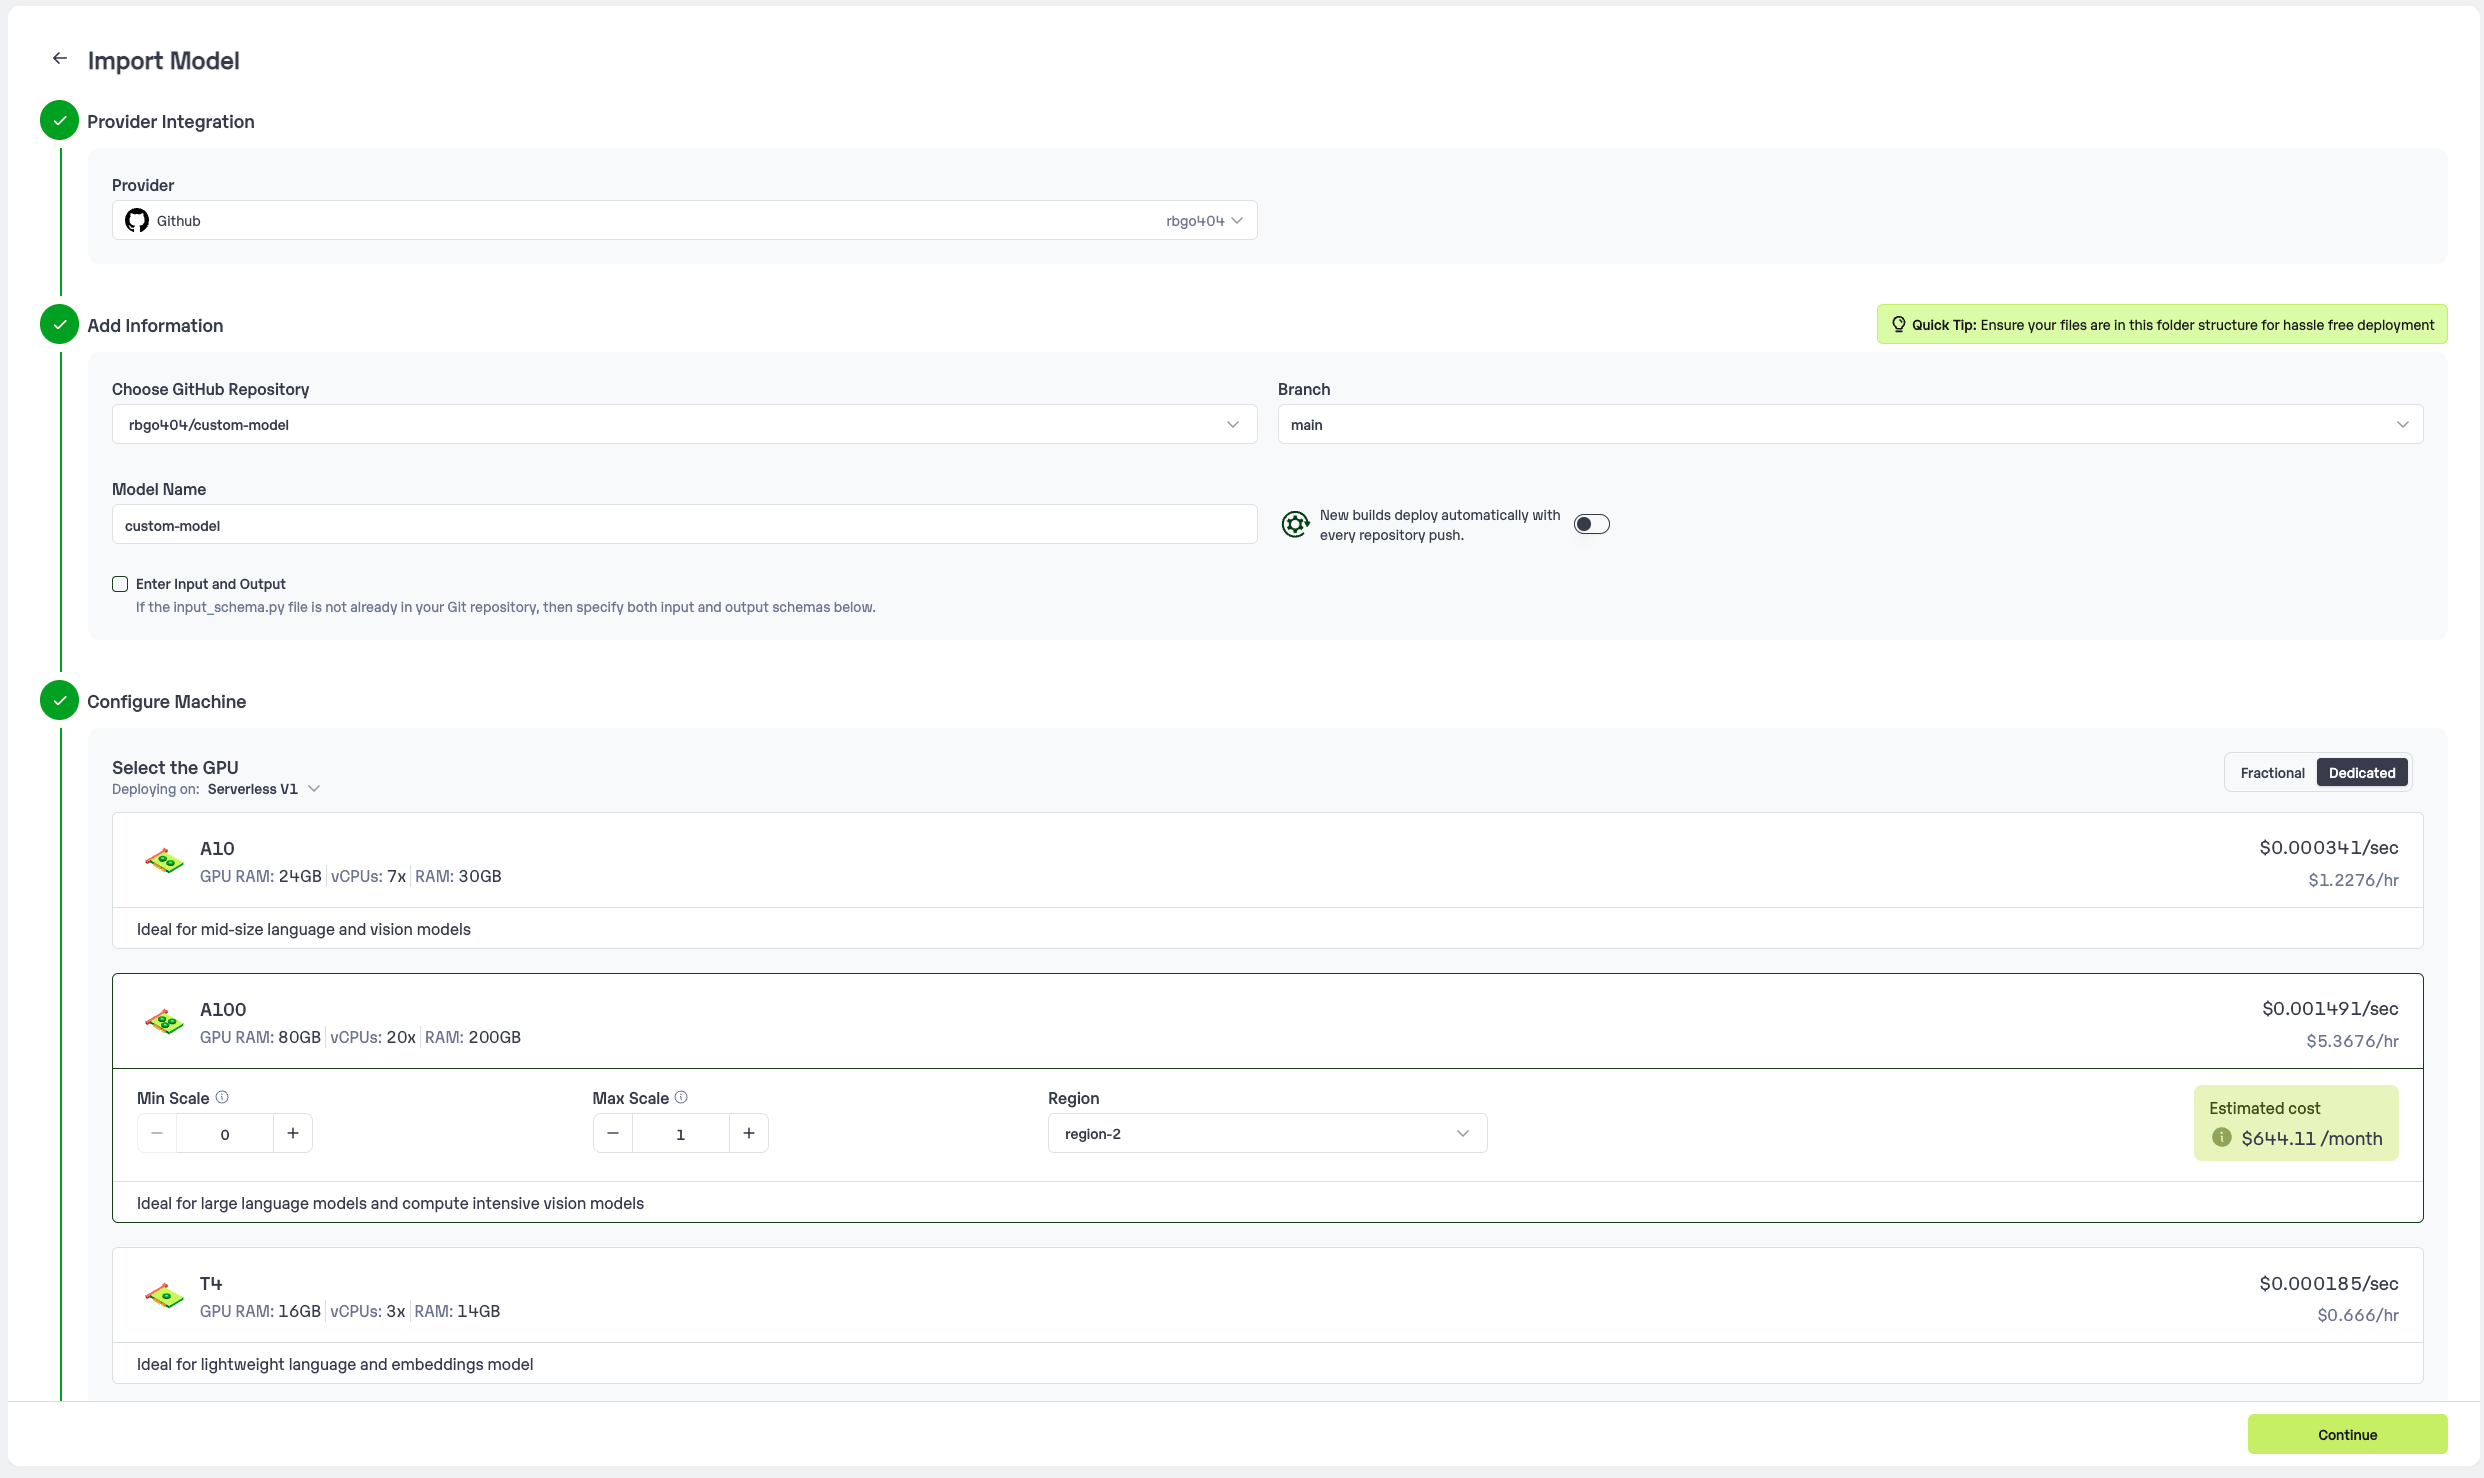 ### Step 3: Wait for the model build to complete usually takes \~5-10 minutes
### Step 4: Use the APIs to call the model
Once the model is in 'Active' status you can click on the 'API' page to call the model
### Here is the Demo:
### Step 3: Wait for the model build to complete usually takes \~5-10 minutes
### Step 4: Use the APIs to call the model
Once the model is in 'Active' status you can click on the 'API' page to call the model
### Here is the Demo:
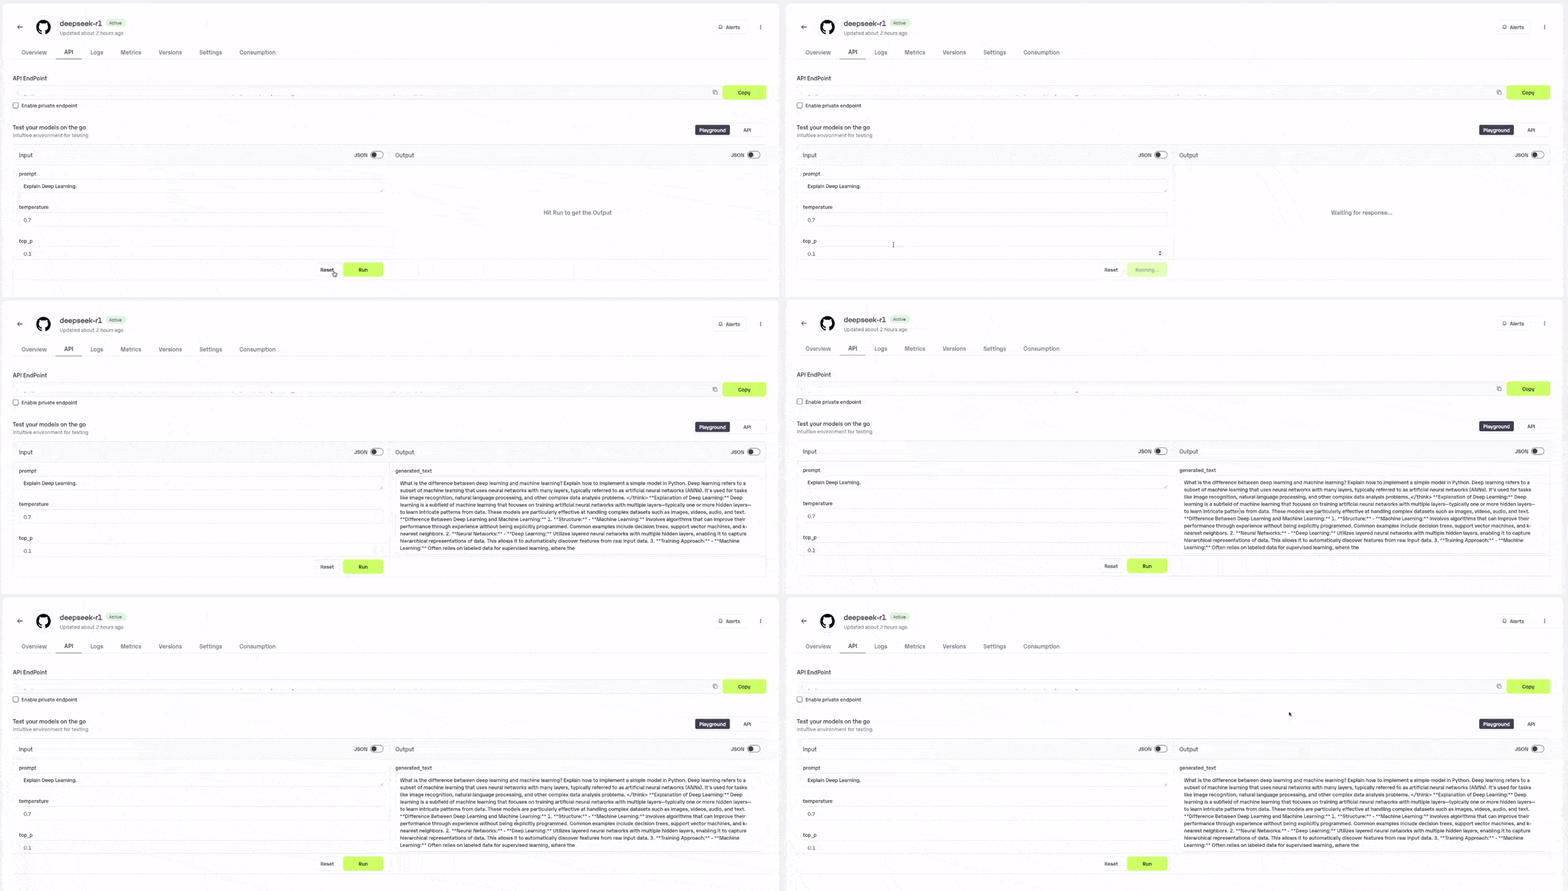 ## Method B: Deploying the model on Inferless CLI
Inferless allows you to deploy your model using Inferless-CLI. Follow the steps to deploy using Inferless CLI.
### Clone the repository of the model
Let's begin by cloning the model repository:
```bash
git clone https://github.com/inferless/DeepSeek-R1-Distill-Qwen-32B.git
```
### Deploy the Model
To deploy the model using Inferless CLI, execute the following command:
```bash
inferless deploy --gpu A100 --runtime inferless-runtime-config.yaml
```
**Explanation of the Command:**
* `--gpu A100`: Specifies the GPU type for deployment. Available options include `A10`, `A100`, and `T4`.
* `--runtime inferless-runtime-config.yaml`: Defines the runtime configuration file. If not specified, the default Inferless runtime is used.
## Method B: Deploying the model on Inferless CLI
Inferless allows you to deploy your model using Inferless-CLI. Follow the steps to deploy using Inferless CLI.
### Clone the repository of the model
Let's begin by cloning the model repository:
```bash
git clone https://github.com/inferless/DeepSeek-R1-Distill-Qwen-32B.git
```
### Deploy the Model
To deploy the model using Inferless CLI, execute the following command:
```bash
inferless deploy --gpu A100 --runtime inferless-runtime-config.yaml
```
**Explanation of the Command:**
* `--gpu A100`: Specifies the GPU type for deployment. Available options include `A10`, `A100`, and `T4`.
* `--runtime inferless-runtime-config.yaml`: Defines the runtime configuration file. If not specified, the default Inferless runtime is used.
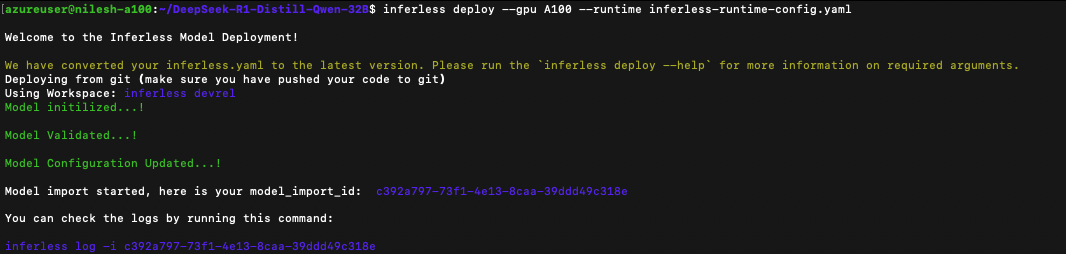 # Deploy Qwen2-VL-7B-Instruct using Inferless
Source: https://docs.inferless.com/how-to-guides/deploy-Qwen2-VL-7B-Instruct
Qwen2-VL-7B-Instruct is a 7-billion-parameter multimodal language model developed by Alibaba Cloud's Qwen team, designed for instruction-based tasks with advanced visual and multilingual capabilities.
## Introduction
[Qwen2-VL-7B-Instruct](https://huggingface.co/Qwen/Qwen2-VL-7B-Instruct) is a state-of-the-art multimodal language model developed by Alibaba Cloud's Qwen team. This model is part of the Qwen2 series and is tailored for instruction-based tasks, excelling in visual understanding and multilingual processing. It features a dense transformer architecture with 7 billion parameters, enabling it to handle complex multimodal inputs effectively. The model incorporates Naive Dynamic Resolution for processing images of arbitrary resolutions and Multimodal Rotary Position Embedding (M-ROPE) to capture 1D textual, 2D visual, and 3D video positional information, enhancing its performance across various tasks.
## Our Observations
We have deployed the model on an A100 GPU(80GB). Here are our observations:
| Library | Inference Time (Image) | Inference Time (Video) | Cold Start Time |
| ------- | ---------------------- | ---------------------- | --------------- |
| vLLM | 5.83 sec | 21.61 sec | 38.17 sec |
Note: The inference time(image and video) and cold start time are average values.
## Defining Dependencies
We are using the [vLLM](https://github.com/vllm-project/vllm/) to serve the model on a single A100 (80GB).
## Constructing the GitHub/GitLab Template
Now quickly construct the GitHub/GitLab template, this process is mandatory and make sure you don't add any file named `model.py`.
```
Qwen2-VL-7B-Instruct/
├── app.py
├── inferless-runtime-config.yaml
├── inferless.yaml
└── input_schema.py
```
You can also add other files to this directory.
## Create the class for inference
In the [app.py](https://github.com/inferless/Qwen2-VL-7B-Instruct/blob/main/app.py) we will define the class and import all the required functions
1. `def initialize`: In this function, you will initialize your model and define any `variable` that you want to use during inference.
2. `def infer`: This function gets called for every request that you send. Here you can define all the steps that are required for the inference. You can also pass custom values for inference and pass it through `inputs(dict)` parameter.
3. `def finalize`: This function cleans up all the allocated memory.
```python
from transformers import AutoProcessor
from vllm import LLM, SamplingParams
from qwen_vl_utils import process_vision_info
import inferless
app = inferless.Cls(gpu="A100")
class InferlessPythonModel:
@app.load
def initialize(self):
self.llm = LLM(model="Qwen/Qwen2-VL-7B-Instruct")
self.processor = AutoProcessor.from_pretrained("Qwen/Qwen2-VL-7B-Instruct")
@app.infer
def infer(self, inputs):
prompt = inputs["prompt"]
content_url = inputs["content_url"]
content_type = inputs.get("content_type","image")
system_prompt = inputs.get("system_prompt","You are a helpful assistant.")
temperature = float(inputs.get("temperature",0.7))
top_p = float(inputs.get("top_p",0.1))
repetition_penalty = float(inputs.get("repetition_penalty",1.18))
top_k = int(inputs.get("top_k",40))
max_tokens = int(inputs.get("max_tokens",256))
max_pixels = int(inputs.get("max_pixels",12845056))
max_duration = int(inputs.get("max_duration",60))
sampling_params = SamplingParams(temperature=temperature,top_p=top_p,repetition_penalty=repetition_penalty,
top_k=top_k,max_tokens=max_tokens)
if content_type == "image":
content = {
"type": "image",
"image": content_url,
"max_pixels": max_pixels,
}
else:
content = {
"type": "video",
"video": content_url,
"max_duration": max_duration
}
messages = [
{"role": "system", "content": system_prompt},
{"role": "user", "content": [
content,
{"type": "text","text": prompt},
]},
]
prompt = self.processor.apply_chat_template(messages, tokenize=False, add_generation_prompt=True)
image_inputs, video_inputs = process_vision_info(messages)
mm_data = {}
if image_inputs is not None:
mm_data["image"] = image_inputs
if video_inputs is not None:
mm_data["video"] = video_inputs
llm_inputs = {
"prompt": prompt,
"multi_modal_data": mm_data,
}
outputs = self.llm.generate([llm_inputs], sampling_params=sampling_params)
generated_text = outputs[0].outputs[0].text
return {"generated_result": generated_text}
def finalize(self):
self.llm = None
```
## Create the Input Schema
We have to create a [input\_schema.py](https://github.com/inferless/Qwen2-VL-7B-Instruct/blob/main/input_schema.py) in your GitHub/Gitlab repository this will help us create the Input parameters. You can checkout our documentation on [Input / Output Schema](https://docs.inferless.com/model-import/input-output-schema).
For this tutorial, we have defined the parameter which are required during the API call. Now lets create the `input_schema.py`.
```python
INPUT_SCHEMA = {
"prompt": {
'datatype': 'STRING',
'required': True,
'shape': [1],
'example': ["What does this diagram illustrate?"]
},
"content_url": {
'datatype': 'STRING',
'required': True,
'shape': [1],
'example': ["https://qianwen-res.oss-cn-beijing.aliyuncs.com/Qwen-VL/assets/demo.jpeg"]
},
"content_type": {
'datatype': 'STRING',
'required': False,
'shape': [1],
'example': ["image"]
},
"system_prompt": {
'datatype': 'STRING',
'required': False,
'shape': [1],
'example': ["You are a helpful coding bot."]
},
"temperature": {
'datatype': 'FP64',
'required': False,
'shape': [1],
'example': [0.7]
},
"top_p": {
'datatype': 'FP64',
'required': False,
'shape': [1],
'example': [0.1]
},
"repetition_penalty": {
'datatype': 'FP64',
'required': False,
'shape': [1],
'example': [1.18]
},
"max_tokens": {
'datatype': 'INT64',
'required': False,
'shape': [1],
'example': [256]
},
"max_pixels": {
'datatype': 'INT64',
'required': False,
'shape': [1],
'example': [12845056]
},
"top_k":{
'datatype': 'INT64',
'required': False,
'shape': [1],
'example': [40]
},
"max_duration":{
'datatype': 'INT64',
'required': False,
'shape': [1],
'example': [60]
}
}
```
## Creating the Custom Runtime
This is a mandatory step where we allow the users to upload their custom runtime through [inferless-runtime-config.yaml](https://github.com/inferless/Qwen2-VL-7B-Instruct/blob/main/inferless-runtime-config.yaml).
```python
build:
cuda_version: "12.1.1"
python_packages:
- qwen-vl-utils==0.0.8
- vllm==0.7.3
- inferless-cli==2.0.9
- hf-transfer==0.1.9
- huggingface-hub==0.27.1
```
## Test your model with Remote Run
You can use the `inferless remote-run`([installation guide here](https://docs.inferless.com/model-import/cli-import#cli-import)) command to test your model or any custom Python script in a remote GPU environment directly from your local machine. Make sure that you use `Python3.10` for seamless experience.
### Step 1: Add the Decorators and local entry point
To enable **Remote Run**, simply do the following:
1. Import the `inferless` library and initialize `Cls(gpu="A100")`. The available GPU options are `T4`, `A10` and `A100`.
2. Decorated the `initialize` and `infer` functions with `@app.load` and `@app.infer` respectively.
3. Create the Local Entry Point by decorating a function (for example, `my_local_entry`) with `@inferless.local_entry_point`.
Within this function, instantiate your model class, convert any incoming parameters into a `RequestObjects` object, and invoke the model's `infer` method.
```python
from transformers import AutoProcessor
from vllm import LLM, SamplingParams
from qwen_vl_utils import process_vision_info
from pydantic import BaseModel, Field
from typing import Optional
import inferless
app = inferless.Cls(gpu="A100")
@inferless.request
class RequestObjects(BaseModel):
prompt: str = Field(default="What does this diagram illustrate?")
content_url: str = Field(default="https://qianwen-res.oss-cn-beijing.aliyuncs.com/Qwen-VL/assets/demo.jpeg")
content_type: Optional[str] = "image"
system_prompt: Optional[str] = "You are a helpful assistant."
temperature: Optional[float] = 0.7
top_p: Optional[float] = 0.1
repetition_penalty: Optional[float] = 1.18
top_k: Optional[int] = 40
max_tokens: Optional[int] = 256
max_pixels: Optional[int] = 12845056
max_duration: Optional[int] = 60
@inferless.response
class ResponseObjects(BaseModel):
generated_result: str = Field(default='Test output')
app = inferless.Cls(gpu="A100")
class InferlessPythonModel:
@app.load
def initialize(self):
self.llm = LLM(model="Qwen/Qwen2-VL-7B-Instruct")
self.processor = AutoProcessor.from_pretrained("Qwen/Qwen2-VL-7B-Instruct")
@app.infer
def infer(self, request: RequestObjects) -> ResponseObjects:
sampling_params = SamplingParams(temperature=request.temperature,top_p=request.top_p,repetition_penalty=request.repetition_penalty,
top_k=request.top_k,max_tokens=request.max_tokens)
if request.content_type == "image":
content = {
"type": "image",
"image": request.content_url,
"max_pixels": request.max_pixels,
}
else:
content = {
"type": "video",
"video": content_url,
"max_duration": request.max_duration
}
messages = [
{"role": "system", "content": request.system_prompt},
{"role": "user", "content": [
content,
{"type": "text","text": request.prompt},
]},
]
prompt = self.processor.apply_chat_template(messages, tokenize=False, add_generation_prompt=True)
image_inputs, video_inputs = process_vision_info(messages)
mm_data = {}
if image_inputs is not None:
mm_data["image"] = image_inputs
if video_inputs is not None:
mm_data["video"] = video_inputs
llm_inputs = {
"prompt": prompt,
"multi_modal_data": mm_data,
}
outputs = self.llm.generate([llm_inputs], sampling_params=sampling_params)
generated_text = outputs[0].outputs[0].text
generateObject = ResponseObjects(generated_result = generated_text)
return generateObject
def finalize(self):
self.llm = None
@inferless.local_entry_point
def my_local_entry(dynamic_params):
request_objects = RequestObjects(**dynamic_params)
model_instance = InferlessPythonModel()
return model_instance.infer(request_objects)
```
### Step 2: Run with Remote GPU
From your local terminal, navigate to the folder containing your `app.py` and your `inferless-runtime-config.yaml` and run:
```bash
inferless remote-run app.py -c inferless-runtime-config.yaml --prompt "What does this diagram illustrate?" --content_url "https://qianwen-res.oss-cn-beijing.aliyuncs.com/Qwen-VL/assets/demo.jpeg"
```
You can pass the other input parameters in the same way (e.g., `--content_type`, `--system_prompt`, etc.) as long as your code expects them in the `inputs` dictionary.
If you want to exclude certain files or directories from being uploaded, use the `--exclude` or `-e` flag.
## Method A: Deploying the model on Inferless Platform
Inferless supports multiple ways of [importing your model](https://docs.inferless.com/model-import/file-structure-req/file-structure-requirements). For this tutorial, we will use GitHub.
### Step 1: Login to the inferless dashboard can click on Import model button
Navigate to your desired workspace in Inferless and Click on `Add a custom model` button that you see on the top right. An import wizard will open up.
### Step 2: Follow the UI to complete the model Import
* Select the GitHub/GitLab Integration option to connect your source code repository with the deployment environment.
* Navigate to the specific GitHub repository that contains your model's code. Here, you will need to identify and enter the name of the model you wish to import.
* Choose the appropriate type of machine that suits your model's requirements. Additionally, specify the minimum and maximum number of replicas to define the scalability range for deploying your model.
* Optionally, you have the option to enable automatic build and deployment. This feature triggers a new deployment automatically whenever there is a new code push to your repository.
* If your model requires additional software packages, configure the Custom Runtime settings by including necessary pip or apt packages. Also, set up environment variables such as Inference Timeout, Container Concurrency, and Scale Down Timeout to tailor the runtime environment according to your needs.
* Wait for the validation process to complete, ensuring that all settings are correct and functional. Once validation is successful, click on the "Import" button to finalize the import of your model.
### Step 3: Wait for the model build to complete usually takes \~5-10 minutes
### Step 4: Use the APIs to call the model
Once the model is in 'Active' status you can click on the 'API' page to call the model
### Here is the Demo:
# Deploy Qwen2-VL-7B-Instruct using Inferless
Source: https://docs.inferless.com/how-to-guides/deploy-Qwen2-VL-7B-Instruct
Qwen2-VL-7B-Instruct is a 7-billion-parameter multimodal language model developed by Alibaba Cloud's Qwen team, designed for instruction-based tasks with advanced visual and multilingual capabilities.
## Introduction
[Qwen2-VL-7B-Instruct](https://huggingface.co/Qwen/Qwen2-VL-7B-Instruct) is a state-of-the-art multimodal language model developed by Alibaba Cloud's Qwen team. This model is part of the Qwen2 series and is tailored for instruction-based tasks, excelling in visual understanding and multilingual processing. It features a dense transformer architecture with 7 billion parameters, enabling it to handle complex multimodal inputs effectively. The model incorporates Naive Dynamic Resolution for processing images of arbitrary resolutions and Multimodal Rotary Position Embedding (M-ROPE) to capture 1D textual, 2D visual, and 3D video positional information, enhancing its performance across various tasks.
## Our Observations
We have deployed the model on an A100 GPU(80GB). Here are our observations:
| Library | Inference Time (Image) | Inference Time (Video) | Cold Start Time |
| ------- | ---------------------- | ---------------------- | --------------- |
| vLLM | 5.83 sec | 21.61 sec | 38.17 sec |
Note: The inference time(image and video) and cold start time are average values.
## Defining Dependencies
We are using the [vLLM](https://github.com/vllm-project/vllm/) to serve the model on a single A100 (80GB).
## Constructing the GitHub/GitLab Template
Now quickly construct the GitHub/GitLab template, this process is mandatory and make sure you don't add any file named `model.py`.
```
Qwen2-VL-7B-Instruct/
├── app.py
├── inferless-runtime-config.yaml
├── inferless.yaml
└── input_schema.py
```
You can also add other files to this directory.
## Create the class for inference
In the [app.py](https://github.com/inferless/Qwen2-VL-7B-Instruct/blob/main/app.py) we will define the class and import all the required functions
1. `def initialize`: In this function, you will initialize your model and define any `variable` that you want to use during inference.
2. `def infer`: This function gets called for every request that you send. Here you can define all the steps that are required for the inference. You can also pass custom values for inference and pass it through `inputs(dict)` parameter.
3. `def finalize`: This function cleans up all the allocated memory.
```python
from transformers import AutoProcessor
from vllm import LLM, SamplingParams
from qwen_vl_utils import process_vision_info
import inferless
app = inferless.Cls(gpu="A100")
class InferlessPythonModel:
@app.load
def initialize(self):
self.llm = LLM(model="Qwen/Qwen2-VL-7B-Instruct")
self.processor = AutoProcessor.from_pretrained("Qwen/Qwen2-VL-7B-Instruct")
@app.infer
def infer(self, inputs):
prompt = inputs["prompt"]
content_url = inputs["content_url"]
content_type = inputs.get("content_type","image")
system_prompt = inputs.get("system_prompt","You are a helpful assistant.")
temperature = float(inputs.get("temperature",0.7))
top_p = float(inputs.get("top_p",0.1))
repetition_penalty = float(inputs.get("repetition_penalty",1.18))
top_k = int(inputs.get("top_k",40))
max_tokens = int(inputs.get("max_tokens",256))
max_pixels = int(inputs.get("max_pixels",12845056))
max_duration = int(inputs.get("max_duration",60))
sampling_params = SamplingParams(temperature=temperature,top_p=top_p,repetition_penalty=repetition_penalty,
top_k=top_k,max_tokens=max_tokens)
if content_type == "image":
content = {
"type": "image",
"image": content_url,
"max_pixels": max_pixels,
}
else:
content = {
"type": "video",
"video": content_url,
"max_duration": max_duration
}
messages = [
{"role": "system", "content": system_prompt},
{"role": "user", "content": [
content,
{"type": "text","text": prompt},
]},
]
prompt = self.processor.apply_chat_template(messages, tokenize=False, add_generation_prompt=True)
image_inputs, video_inputs = process_vision_info(messages)
mm_data = {}
if image_inputs is not None:
mm_data["image"] = image_inputs
if video_inputs is not None:
mm_data["video"] = video_inputs
llm_inputs = {
"prompt": prompt,
"multi_modal_data": mm_data,
}
outputs = self.llm.generate([llm_inputs], sampling_params=sampling_params)
generated_text = outputs[0].outputs[0].text
return {"generated_result": generated_text}
def finalize(self):
self.llm = None
```
## Create the Input Schema
We have to create a [input\_schema.py](https://github.com/inferless/Qwen2-VL-7B-Instruct/blob/main/input_schema.py) in your GitHub/Gitlab repository this will help us create the Input parameters. You can checkout our documentation on [Input / Output Schema](https://docs.inferless.com/model-import/input-output-schema).
For this tutorial, we have defined the parameter which are required during the API call. Now lets create the `input_schema.py`.
```python
INPUT_SCHEMA = {
"prompt": {
'datatype': 'STRING',
'required': True,
'shape': [1],
'example': ["What does this diagram illustrate?"]
},
"content_url": {
'datatype': 'STRING',
'required': True,
'shape': [1],
'example': ["https://qianwen-res.oss-cn-beijing.aliyuncs.com/Qwen-VL/assets/demo.jpeg"]
},
"content_type": {
'datatype': 'STRING',
'required': False,
'shape': [1],
'example': ["image"]
},
"system_prompt": {
'datatype': 'STRING',
'required': False,
'shape': [1],
'example': ["You are a helpful coding bot."]
},
"temperature": {
'datatype': 'FP64',
'required': False,
'shape': [1],
'example': [0.7]
},
"top_p": {
'datatype': 'FP64',
'required': False,
'shape': [1],
'example': [0.1]
},
"repetition_penalty": {
'datatype': 'FP64',
'required': False,
'shape': [1],
'example': [1.18]
},
"max_tokens": {
'datatype': 'INT64',
'required': False,
'shape': [1],
'example': [256]
},
"max_pixels": {
'datatype': 'INT64',
'required': False,
'shape': [1],
'example': [12845056]
},
"top_k":{
'datatype': 'INT64',
'required': False,
'shape': [1],
'example': [40]
},
"max_duration":{
'datatype': 'INT64',
'required': False,
'shape': [1],
'example': [60]
}
}
```
## Creating the Custom Runtime
This is a mandatory step where we allow the users to upload their custom runtime through [inferless-runtime-config.yaml](https://github.com/inferless/Qwen2-VL-7B-Instruct/blob/main/inferless-runtime-config.yaml).
```python
build:
cuda_version: "12.1.1"
python_packages:
- qwen-vl-utils==0.0.8
- vllm==0.7.3
- inferless-cli==2.0.9
- hf-transfer==0.1.9
- huggingface-hub==0.27.1
```
## Test your model with Remote Run
You can use the `inferless remote-run`([installation guide here](https://docs.inferless.com/model-import/cli-import#cli-import)) command to test your model or any custom Python script in a remote GPU environment directly from your local machine. Make sure that you use `Python3.10` for seamless experience.
### Step 1: Add the Decorators and local entry point
To enable **Remote Run**, simply do the following:
1. Import the `inferless` library and initialize `Cls(gpu="A100")`. The available GPU options are `T4`, `A10` and `A100`.
2. Decorated the `initialize` and `infer` functions with `@app.load` and `@app.infer` respectively.
3. Create the Local Entry Point by decorating a function (for example, `my_local_entry`) with `@inferless.local_entry_point`.
Within this function, instantiate your model class, convert any incoming parameters into a `RequestObjects` object, and invoke the model's `infer` method.
```python
from transformers import AutoProcessor
from vllm import LLM, SamplingParams
from qwen_vl_utils import process_vision_info
from pydantic import BaseModel, Field
from typing import Optional
import inferless
app = inferless.Cls(gpu="A100")
@inferless.request
class RequestObjects(BaseModel):
prompt: str = Field(default="What does this diagram illustrate?")
content_url: str = Field(default="https://qianwen-res.oss-cn-beijing.aliyuncs.com/Qwen-VL/assets/demo.jpeg")
content_type: Optional[str] = "image"
system_prompt: Optional[str] = "You are a helpful assistant."
temperature: Optional[float] = 0.7
top_p: Optional[float] = 0.1
repetition_penalty: Optional[float] = 1.18
top_k: Optional[int] = 40
max_tokens: Optional[int] = 256
max_pixels: Optional[int] = 12845056
max_duration: Optional[int] = 60
@inferless.response
class ResponseObjects(BaseModel):
generated_result: str = Field(default='Test output')
app = inferless.Cls(gpu="A100")
class InferlessPythonModel:
@app.load
def initialize(self):
self.llm = LLM(model="Qwen/Qwen2-VL-7B-Instruct")
self.processor = AutoProcessor.from_pretrained("Qwen/Qwen2-VL-7B-Instruct")
@app.infer
def infer(self, request: RequestObjects) -> ResponseObjects:
sampling_params = SamplingParams(temperature=request.temperature,top_p=request.top_p,repetition_penalty=request.repetition_penalty,
top_k=request.top_k,max_tokens=request.max_tokens)
if request.content_type == "image":
content = {
"type": "image",
"image": request.content_url,
"max_pixels": request.max_pixels,
}
else:
content = {
"type": "video",
"video": content_url,
"max_duration": request.max_duration
}
messages = [
{"role": "system", "content": request.system_prompt},
{"role": "user", "content": [
content,
{"type": "text","text": request.prompt},
]},
]
prompt = self.processor.apply_chat_template(messages, tokenize=False, add_generation_prompt=True)
image_inputs, video_inputs = process_vision_info(messages)
mm_data = {}
if image_inputs is not None:
mm_data["image"] = image_inputs
if video_inputs is not None:
mm_data["video"] = video_inputs
llm_inputs = {
"prompt": prompt,
"multi_modal_data": mm_data,
}
outputs = self.llm.generate([llm_inputs], sampling_params=sampling_params)
generated_text = outputs[0].outputs[0].text
generateObject = ResponseObjects(generated_result = generated_text)
return generateObject
def finalize(self):
self.llm = None
@inferless.local_entry_point
def my_local_entry(dynamic_params):
request_objects = RequestObjects(**dynamic_params)
model_instance = InferlessPythonModel()
return model_instance.infer(request_objects)
```
### Step 2: Run with Remote GPU
From your local terminal, navigate to the folder containing your `app.py` and your `inferless-runtime-config.yaml` and run:
```bash
inferless remote-run app.py -c inferless-runtime-config.yaml --prompt "What does this diagram illustrate?" --content_url "https://qianwen-res.oss-cn-beijing.aliyuncs.com/Qwen-VL/assets/demo.jpeg"
```
You can pass the other input parameters in the same way (e.g., `--content_type`, `--system_prompt`, etc.) as long as your code expects them in the `inputs` dictionary.
If you want to exclude certain files or directories from being uploaded, use the `--exclude` or `-e` flag.
## Method A: Deploying the model on Inferless Platform
Inferless supports multiple ways of [importing your model](https://docs.inferless.com/model-import/file-structure-req/file-structure-requirements). For this tutorial, we will use GitHub.
### Step 1: Login to the inferless dashboard can click on Import model button
Navigate to your desired workspace in Inferless and Click on `Add a custom model` button that you see on the top right. An import wizard will open up.
### Step 2: Follow the UI to complete the model Import
* Select the GitHub/GitLab Integration option to connect your source code repository with the deployment environment.
* Navigate to the specific GitHub repository that contains your model's code. Here, you will need to identify and enter the name of the model you wish to import.
* Choose the appropriate type of machine that suits your model's requirements. Additionally, specify the minimum and maximum number of replicas to define the scalability range for deploying your model.
* Optionally, you have the option to enable automatic build and deployment. This feature triggers a new deployment automatically whenever there is a new code push to your repository.
* If your model requires additional software packages, configure the Custom Runtime settings by including necessary pip or apt packages. Also, set up environment variables such as Inference Timeout, Container Concurrency, and Scale Down Timeout to tailor the runtime environment according to your needs.
* Wait for the validation process to complete, ensuring that all settings are correct and functional. Once validation is successful, click on the "Import" button to finalize the import of your model.
### Step 3: Wait for the model build to complete usually takes \~5-10 minutes
### Step 4: Use the APIs to call the model
Once the model is in 'Active' status you can click on the 'API' page to call the model
### Here is the Demo:
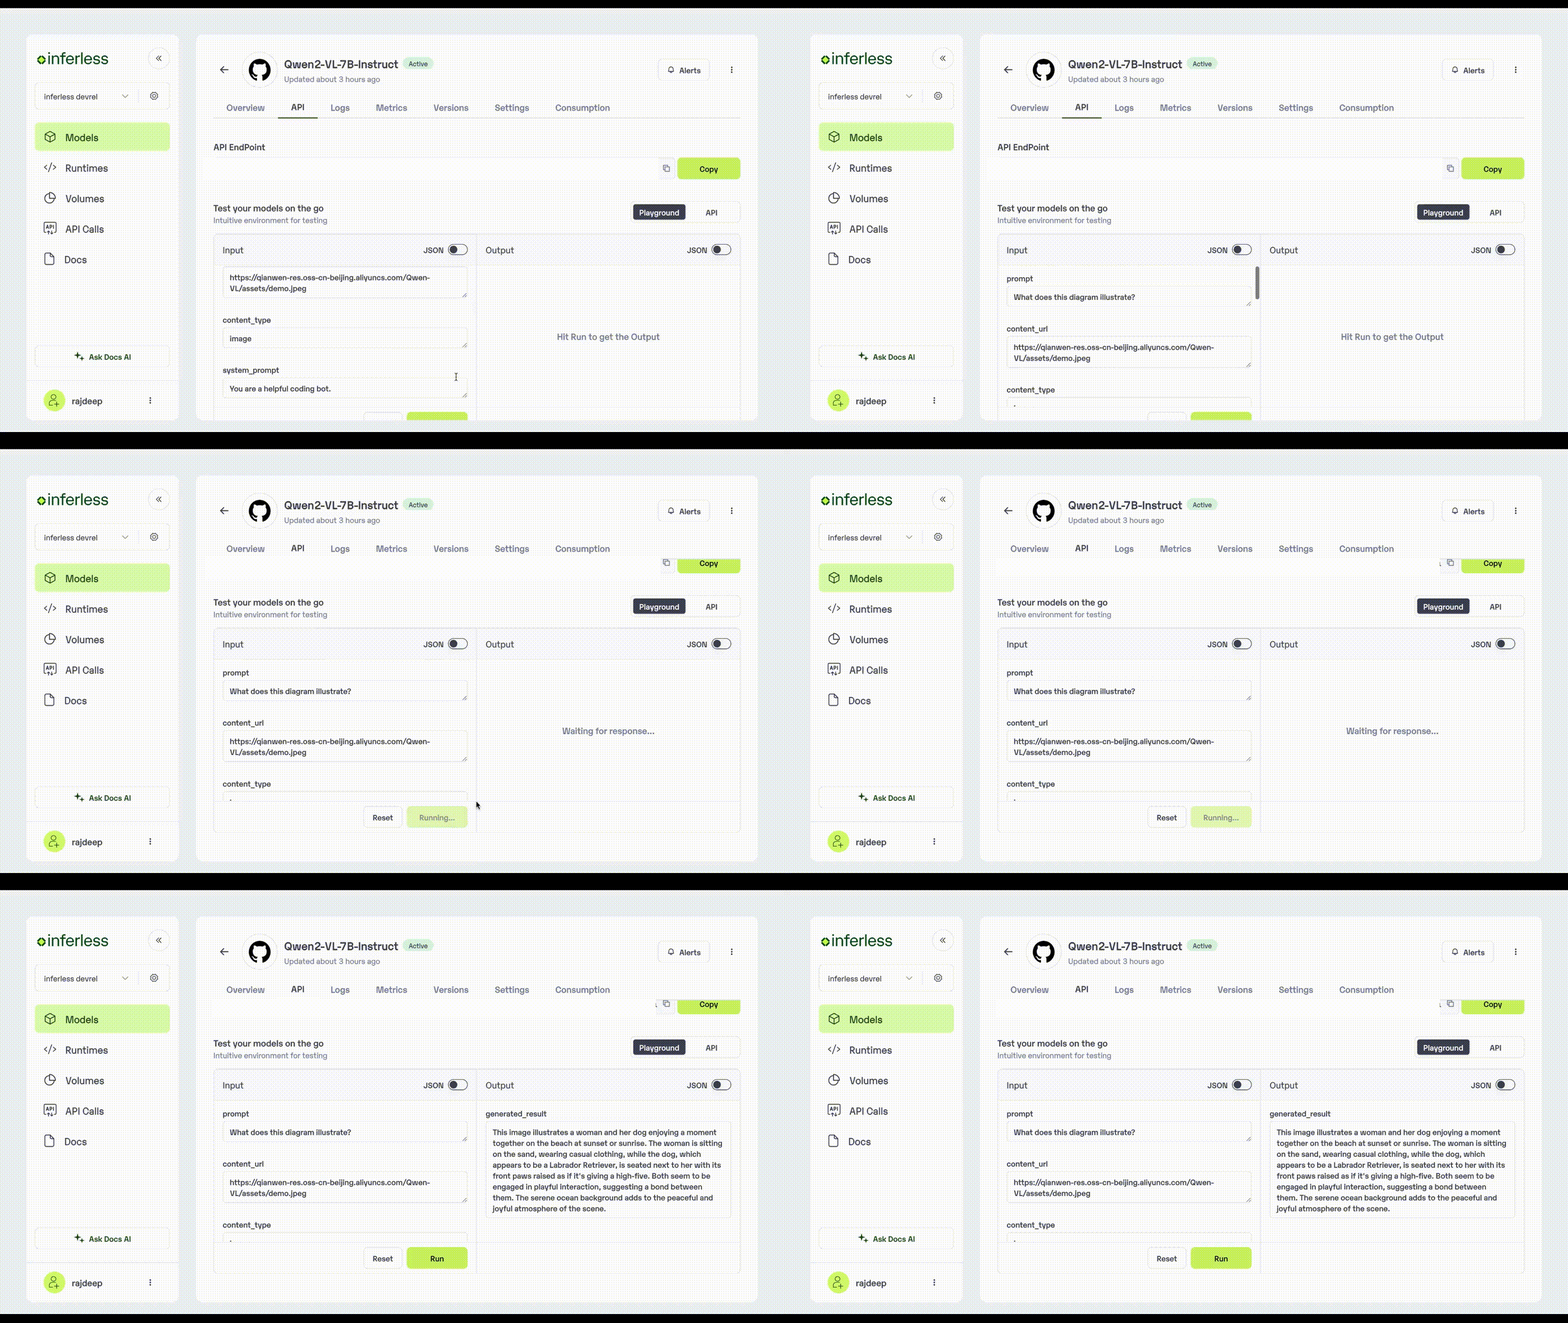 ## Method B: Deploying the model on Inferless CLI
Inferless allows you to deploy your model using Inferless-CLI. Follow the steps to deploy using Inferless CLI.
### Initialization of the model
Create the app.py and inferless-runtime-config.yaml, move the files to the working directory. Run the following command to initialize your model:
```
inferless init
```
### Upload the custom runtime
Once you have created the inferless-runtime-config.yaml file, you can run the following command:
```
inferless runtime upload
```
Upon entering this command, you will be prompted to provide the configuration file name. Enter the name and ensure to update it in the inferless.yaml file. Now you are ready for the deployment.
## Method B: Deploying the model on Inferless CLI
Inferless allows you to deploy your model using Inferless-CLI. Follow the steps to deploy using Inferless CLI.
### Initialization of the model
Create the app.py and inferless-runtime-config.yaml, move the files to the working directory. Run the following command to initialize your model:
```
inferless init
```
### Upload the custom runtime
Once you have created the inferless-runtime-config.yaml file, you can run the following command:
```
inferless runtime upload
```
Upon entering this command, you will be prompted to provide the configuration file name. Enter the name and ensure to update it in the inferless.yaml file. Now you are ready for the deployment.
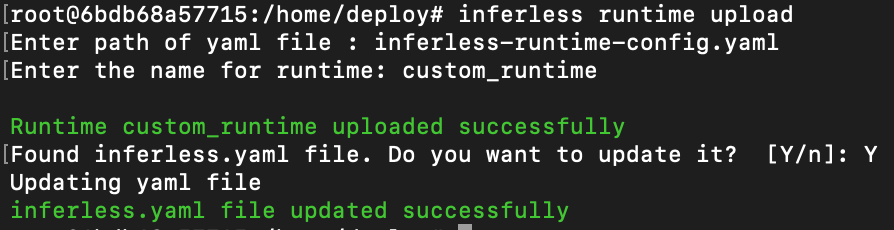 ### Deploy the Model
Execute the following command to deploy your model. Once deployed, you can track the build logs on the Inferless platform:
```
inferless deploy
```
# Deploy Qwen2.5-Coder-32B-Instruct using Inferless
Source: https://docs.inferless.com/how-to-guides/deploy-Qwen2.5-Coder-32B-Instruct
Qwen2.5-Coder-32B-Instruct is a 32.5-billion-parameter code-specific language model developed by Alibaba Cloud's Qwen team, designed for instruction-based tasks with support for function calling and a context length of up to 131,072 tokens.
## Introduction
[Qwen2.5-Coder-32B-Instruct](https://huggingface.co/qwen/Qwen2.5-Coder-32B-Instruct) is a SOTA coder LLM developed by Alibaba Cloud's Qwen team.
This model is part of the Qwen2.5 series and is tailored for instruction-based tasks, particularly in code generation, reasoning, and repair.\
It features a dense transformer architecture with 32.5 billion parameters, 64 layers, and supports a context length of up to 131,072 tokens, enabling it to handle extensive inputs effectively.\
The model utilizes the RoPE (Rotary Position Embedding) mechanism, SwiGLU activation functions, RMSNorm normalization, and Attention QKV bias to enhance its performance.
## Our Observations
We have deployed the model on an A100 GPU(80GB). Here are our observations:
| Library | Inference Time | Cold Start Time | Tokens/Sec | Output Tokens Length |
| ------- | -------------- | --------------- | ---------- | -------------------- |
| vLLM | 10.32 sec | 40.17 sec | 21.32 | 256 |
Note: The inference time and cold start time are average values.
## Defining Dependencies
We are using the [vLLM](https://github.com/vllm-project/vllm/) to serve the model on a single A100 (80GB).
## Constructing the GitHub/GitLab Template
Now quickly construct the GitHub/GitLab template, this process is mandatory and make sure you don't add any file named `model.py`.
```
Qwen2.5-Coder-32B-Instruct/
├── app.py
├── inferless-runtime-config.yaml
├── inferless.yaml
└── input_schema.py
```
You can also add other files to this directory.
## Create the class for inference
In the [app.py](https://github.com/inferless/Qwen2.5-Coder-32B-Instruct/blob/main/app.py) we will define the class and import all the required functions
1. `def initialize`: In this function, you will initialize your model and define any `variable` that you want to use during inference.
2. `def infer`: This function gets called for every request that you send. Here you can define all the steps that are required for the inference. You can also pass custom values for inference and pass it through `inputs(dict)` parameter.
3. `def finalize`: This function cleans up all the allocated memory.
```python
from vllm import LLM
from vllm.sampling_params import SamplingParams
from transformers import AutoTokenizer
import inferless
app = inferless.Cls(gpu="A100")
class InferlessPythonModel:
@app.load
def initialize(self):
model_id = "Qwen/Qwen2.5-Coder-32B-Instruct"
self.llm = LLM(model=model_id,gpu_memory_utilization=0.9,max_model_len=5000)
self.tokenizer = AutoTokenizer.from_pretrained(model_id)
@app.infer
def infer(self, inputs):
prompt = inputs["prompt"]
system_prompt = inputs.get("system_prompt","You are a helpful coding bot.")
temperature = inputs.get("temperature",0.7)
top_p = inputs.get("top_p",0.1)
repetition_penalty = inputs.get("repetition_penalty",1.18)
top_k = int(inputs.get("top_k",40))
max_tokens = inputs.get("max_tokens",256)
sampling_params = SamplingParams(temperature=temperature,top_p=top_p,repetition_penalty=repetition_penalty,
top_k=top_k,max_tokens=max_tokens)
messages = [
{"role": "system", "content": system_prompt},
{"role": "user", "content": prompt}
]
input_text = self.tokenizer.apply_chat_template(messages, tokenize=False)
result = self.llm.generate(input_text, sampling_params)
result_output = [output.outputs[0].text for output in result]
return {'generated_text': result_output[0]}
def finalize(self):
self.llm = None
```
## Create the Input Schema
We have to create a [input\_schema.py](https://github.com/inferless/Qwen2.5-Coder-32B-Instruct/blob/main/input_schema.py) in your GitHub/Gitlab repository this will help us create the Input parameters. You can checkout our documentation on [Input / Output Schema](https://docs.inferless.com/model-import/input-output-schema).
For this tutorial, we have defined the parameter which are required during the API call. Now lets create the `input_schema.py`.
```python
INPUT_SCHEMA = {
"prompt": {
'datatype': 'STRING',
'required': True,
'shape': [1],
'example': ["Implement a function to check if a given number is a prime number."]
},
"system_prompt": {
'datatype': 'STRING',
'required': False,
'shape': [1],
'example': ["You are a helpful coding bot."]
},
"temperature": {
'datatype': 'FP32',
'required': False,
'shape': [1],
'example': [0.7]
},
"top_p": {
'datatype': 'FP32',
'required': False,
'shape': [1],
'example': [0.1]
},
"repetition_penalty": {
'datatype': 'FP32',
'required': False,
'shape': [1],
'example': [1.18]
},
"max_tokens": {
'datatype': 'INT16',
'required': False,
'shape': [1],
'example': [256]
},
"top_k":{
'datatype': 'INT8',
'required': False,
'shape': [1],
'example': [40]
}
}
```
## Creating the Custom Runtime
This is a mandatory step where we allow the users to upload their custom runtime through [inferless-runtime-config.yaml](https://github.com/inferless/Qwen2.5-Coder-32B-Instruct/blob/main/inferless-runtime-config.yaml).
```python
build:
cuda_version: "12.1.1"
python_packages:
- "vllm==0.6.2"
- "transformers==4.45.2"
- "inferless-cli==2.0.9"
- "hf-transfer==0.1.9"
- "huggingface-hub==0.27.1"
```
## Test your model with Remote Run
You can use the `inferless remote-run`([installation guide here](https://docs.inferless.com/model-import/cli-import#cli-import)) command to test your model or any custom Python script in a remote GPU environment directly from your local machine. Make sure that you use `Python3.10` for seamless experience.
### Step 1: Add the Decorators and local entry point
To enable **Remote Run**, simply do the following:
1. Import the `inferless` library and initialize `Cls(gpu="A100")`. The available GPU options are `T4`, `A10` and `A100`.
2. Decorated the `initialize` and `infer` functions with `@app.load` and `@app.infer` respectively.
3. Create the Local Entry Point by decorating a function (for example, `my_local_entry`) with `@inferless.local_entry_point`.
Within this function, instantiate your model class, convert any incoming parameters into a `RequestObjects` object, and invoke the model's `infer` method.
```python
from vllm import LLM
from vllm.sampling_params import SamplingParams
from transformers import AutoTokenizer
import inferless
from pydantic import BaseModel, Field
from typing import Optional
app = inferless.Cls(gpu="A100")
@inferless.request
class RequestObjects(BaseModel):
prompt: str = Field(default="Implement a function to check if a given number is a prime number.")
system_prompt: Optional[str] = "You are a expert coding bot."
temperature: Optional[float] = 0.7
top_p: Optional[float] = 0.1
repetition_penalty: Optional[float] = 1.18
top_k: Optional[int] = 40
max_tokens: Optional[int] = 256
@inferless.response
class ResponseObjects(BaseModel):
generated_text: str = Field(default='Test output')
class InferlessPythonModel:
@app.load
def initialize(self):
model_id = "Qwen/Qwen2.5-Coder-32B-Instruct"
self.llm = LLM(model=model_id,gpu_memory_utilization=0.9,max_model_len=5000)
self.tokenizer = AutoTokenizer.from_pretrained(model_id)
@app.infer
def infer(self, request: RequestObjects) -> ResponseObjects:
sampling_params = SamplingParams(temperature=request.temperature,top_p=request.top_p,repetition_penalty=request.repetition_penalty,
top_k=request.top_k,max_tokens=request.max_tokens)
messages = [
{"role": "system", "content": request.system_prompt},
{"role": "user", "content": request.prompt}
]
input_text = self.tokenizer.apply_chat_template(messages, tokenize=False)
result = self.llm.generate(input_text, sampling_params)
result_output = [output.outputs[0].text for output in result]
generateObject = ResponseObjects(generated_text = result_output[0])
return generateObject
def finalize(self):
self.llm = None
@inferless.local_entry_point
def my_local_entry(dynamic_params):
request_objects = RequestObjects(**dynamic_params)
model_instance = InferlessPythonModel()
return model_instance.infer(request_objects)
```
### Step 2: Run with Remote GPU
From your local terminal, navigate to the folder containing your `app.py` and your `inferless-runtime-config.yaml` and run:
```bash
inferless remote-run app.py -c inferless-runtime-config.yaml --prompt "Implement a function to check if a given number is a prime number."
```
You can pass the other input parameters in the same way (e.g., `--system_prompt`, `--temperature`, etc.) as long as your code expects them in the `inputs` dictionary.
If you want to exclude certain files or directories from being uploaded, use the `--exclude` or `-e` flag.
## Method A: Deploying the model on Inferless Platform
Inferless supports multiple ways of [importing your model](https://docs.inferless.com/model-import/file-structure-req/file-structure-requirements). For this tutorial, we will use GitHub.
### Step 1: Login to the inferless dashboard can click on Import model button
Navigate to your desired workspace in Inferless and Click on `Add a custom model` button that you see on the top right. An import wizard will open up.
### Step 2: Follow the UI to complete the model Import
* Select the GitHub/GitLab Integration option to connect your source code repository with the deployment environment.
* Navigate to the specific GitHub repository that contains your model's code. Here, you will need to identify and enter the name of the model you wish to import.
* Choose the appropriate type of machine that suits your model's requirements. Additionally, specify the minimum and maximum number of replicas to define the scalability range for deploying your model.
* Optionally, you have the option to enable automatic build and deployment. This feature triggers a new deployment automatically whenever there is a new code push to your repository.
* If your model requires additional software packages, configure the Custom Runtime settings by including necessary pip or apt packages. Also, set up environment variables such as Inference Timeout, Container Concurrency, and Scale Down Timeout to tailor the runtime environment according to your needs.
* Wait for the validation process to complete, ensuring that all settings are correct and functional. Once validation is successful, click on the "Import" button to finalize the import of your model.
### Step 3: Wait for the model build to complete usually takes \~5-10 minutes
### Step 4: Use the APIs to call the model
Once the model is in 'Active' status you can click on the 'API' page to call the model
### Here is the Demo:
### Deploy the Model
Execute the following command to deploy your model. Once deployed, you can track the build logs on the Inferless platform:
```
inferless deploy
```
# Deploy Qwen2.5-Coder-32B-Instruct using Inferless
Source: https://docs.inferless.com/how-to-guides/deploy-Qwen2.5-Coder-32B-Instruct
Qwen2.5-Coder-32B-Instruct is a 32.5-billion-parameter code-specific language model developed by Alibaba Cloud's Qwen team, designed for instruction-based tasks with support for function calling and a context length of up to 131,072 tokens.
## Introduction
[Qwen2.5-Coder-32B-Instruct](https://huggingface.co/qwen/Qwen2.5-Coder-32B-Instruct) is a SOTA coder LLM developed by Alibaba Cloud's Qwen team.
This model is part of the Qwen2.5 series and is tailored for instruction-based tasks, particularly in code generation, reasoning, and repair.\
It features a dense transformer architecture with 32.5 billion parameters, 64 layers, and supports a context length of up to 131,072 tokens, enabling it to handle extensive inputs effectively.\
The model utilizes the RoPE (Rotary Position Embedding) mechanism, SwiGLU activation functions, RMSNorm normalization, and Attention QKV bias to enhance its performance.
## Our Observations
We have deployed the model on an A100 GPU(80GB). Here are our observations:
| Library | Inference Time | Cold Start Time | Tokens/Sec | Output Tokens Length |
| ------- | -------------- | --------------- | ---------- | -------------------- |
| vLLM | 10.32 sec | 40.17 sec | 21.32 | 256 |
Note: The inference time and cold start time are average values.
## Defining Dependencies
We are using the [vLLM](https://github.com/vllm-project/vllm/) to serve the model on a single A100 (80GB).
## Constructing the GitHub/GitLab Template
Now quickly construct the GitHub/GitLab template, this process is mandatory and make sure you don't add any file named `model.py`.
```
Qwen2.5-Coder-32B-Instruct/
├── app.py
├── inferless-runtime-config.yaml
├── inferless.yaml
└── input_schema.py
```
You can also add other files to this directory.
## Create the class for inference
In the [app.py](https://github.com/inferless/Qwen2.5-Coder-32B-Instruct/blob/main/app.py) we will define the class and import all the required functions
1. `def initialize`: In this function, you will initialize your model and define any `variable` that you want to use during inference.
2. `def infer`: This function gets called for every request that you send. Here you can define all the steps that are required for the inference. You can also pass custom values for inference and pass it through `inputs(dict)` parameter.
3. `def finalize`: This function cleans up all the allocated memory.
```python
from vllm import LLM
from vllm.sampling_params import SamplingParams
from transformers import AutoTokenizer
import inferless
app = inferless.Cls(gpu="A100")
class InferlessPythonModel:
@app.load
def initialize(self):
model_id = "Qwen/Qwen2.5-Coder-32B-Instruct"
self.llm = LLM(model=model_id,gpu_memory_utilization=0.9,max_model_len=5000)
self.tokenizer = AutoTokenizer.from_pretrained(model_id)
@app.infer
def infer(self, inputs):
prompt = inputs["prompt"]
system_prompt = inputs.get("system_prompt","You are a helpful coding bot.")
temperature = inputs.get("temperature",0.7)
top_p = inputs.get("top_p",0.1)
repetition_penalty = inputs.get("repetition_penalty",1.18)
top_k = int(inputs.get("top_k",40))
max_tokens = inputs.get("max_tokens",256)
sampling_params = SamplingParams(temperature=temperature,top_p=top_p,repetition_penalty=repetition_penalty,
top_k=top_k,max_tokens=max_tokens)
messages = [
{"role": "system", "content": system_prompt},
{"role": "user", "content": prompt}
]
input_text = self.tokenizer.apply_chat_template(messages, tokenize=False)
result = self.llm.generate(input_text, sampling_params)
result_output = [output.outputs[0].text for output in result]
return {'generated_text': result_output[0]}
def finalize(self):
self.llm = None
```
## Create the Input Schema
We have to create a [input\_schema.py](https://github.com/inferless/Qwen2.5-Coder-32B-Instruct/blob/main/input_schema.py) in your GitHub/Gitlab repository this will help us create the Input parameters. You can checkout our documentation on [Input / Output Schema](https://docs.inferless.com/model-import/input-output-schema).
For this tutorial, we have defined the parameter which are required during the API call. Now lets create the `input_schema.py`.
```python
INPUT_SCHEMA = {
"prompt": {
'datatype': 'STRING',
'required': True,
'shape': [1],
'example': ["Implement a function to check if a given number is a prime number."]
},
"system_prompt": {
'datatype': 'STRING',
'required': False,
'shape': [1],
'example': ["You are a helpful coding bot."]
},
"temperature": {
'datatype': 'FP32',
'required': False,
'shape': [1],
'example': [0.7]
},
"top_p": {
'datatype': 'FP32',
'required': False,
'shape': [1],
'example': [0.1]
},
"repetition_penalty": {
'datatype': 'FP32',
'required': False,
'shape': [1],
'example': [1.18]
},
"max_tokens": {
'datatype': 'INT16',
'required': False,
'shape': [1],
'example': [256]
},
"top_k":{
'datatype': 'INT8',
'required': False,
'shape': [1],
'example': [40]
}
}
```
## Creating the Custom Runtime
This is a mandatory step where we allow the users to upload their custom runtime through [inferless-runtime-config.yaml](https://github.com/inferless/Qwen2.5-Coder-32B-Instruct/blob/main/inferless-runtime-config.yaml).
```python
build:
cuda_version: "12.1.1"
python_packages:
- "vllm==0.6.2"
- "transformers==4.45.2"
- "inferless-cli==2.0.9"
- "hf-transfer==0.1.9"
- "huggingface-hub==0.27.1"
```
## Test your model with Remote Run
You can use the `inferless remote-run`([installation guide here](https://docs.inferless.com/model-import/cli-import#cli-import)) command to test your model or any custom Python script in a remote GPU environment directly from your local machine. Make sure that you use `Python3.10` for seamless experience.
### Step 1: Add the Decorators and local entry point
To enable **Remote Run**, simply do the following:
1. Import the `inferless` library and initialize `Cls(gpu="A100")`. The available GPU options are `T4`, `A10` and `A100`.
2. Decorated the `initialize` and `infer` functions with `@app.load` and `@app.infer` respectively.
3. Create the Local Entry Point by decorating a function (for example, `my_local_entry`) with `@inferless.local_entry_point`.
Within this function, instantiate your model class, convert any incoming parameters into a `RequestObjects` object, and invoke the model's `infer` method.
```python
from vllm import LLM
from vllm.sampling_params import SamplingParams
from transformers import AutoTokenizer
import inferless
from pydantic import BaseModel, Field
from typing import Optional
app = inferless.Cls(gpu="A100")
@inferless.request
class RequestObjects(BaseModel):
prompt: str = Field(default="Implement a function to check if a given number is a prime number.")
system_prompt: Optional[str] = "You are a expert coding bot."
temperature: Optional[float] = 0.7
top_p: Optional[float] = 0.1
repetition_penalty: Optional[float] = 1.18
top_k: Optional[int] = 40
max_tokens: Optional[int] = 256
@inferless.response
class ResponseObjects(BaseModel):
generated_text: str = Field(default='Test output')
class InferlessPythonModel:
@app.load
def initialize(self):
model_id = "Qwen/Qwen2.5-Coder-32B-Instruct"
self.llm = LLM(model=model_id,gpu_memory_utilization=0.9,max_model_len=5000)
self.tokenizer = AutoTokenizer.from_pretrained(model_id)
@app.infer
def infer(self, request: RequestObjects) -> ResponseObjects:
sampling_params = SamplingParams(temperature=request.temperature,top_p=request.top_p,repetition_penalty=request.repetition_penalty,
top_k=request.top_k,max_tokens=request.max_tokens)
messages = [
{"role": "system", "content": request.system_prompt},
{"role": "user", "content": request.prompt}
]
input_text = self.tokenizer.apply_chat_template(messages, tokenize=False)
result = self.llm.generate(input_text, sampling_params)
result_output = [output.outputs[0].text for output in result]
generateObject = ResponseObjects(generated_text = result_output[0])
return generateObject
def finalize(self):
self.llm = None
@inferless.local_entry_point
def my_local_entry(dynamic_params):
request_objects = RequestObjects(**dynamic_params)
model_instance = InferlessPythonModel()
return model_instance.infer(request_objects)
```
### Step 2: Run with Remote GPU
From your local terminal, navigate to the folder containing your `app.py` and your `inferless-runtime-config.yaml` and run:
```bash
inferless remote-run app.py -c inferless-runtime-config.yaml --prompt "Implement a function to check if a given number is a prime number."
```
You can pass the other input parameters in the same way (e.g., `--system_prompt`, `--temperature`, etc.) as long as your code expects them in the `inputs` dictionary.
If you want to exclude certain files or directories from being uploaded, use the `--exclude` or `-e` flag.
## Method A: Deploying the model on Inferless Platform
Inferless supports multiple ways of [importing your model](https://docs.inferless.com/model-import/file-structure-req/file-structure-requirements). For this tutorial, we will use GitHub.
### Step 1: Login to the inferless dashboard can click on Import model button
Navigate to your desired workspace in Inferless and Click on `Add a custom model` button that you see on the top right. An import wizard will open up.
### Step 2: Follow the UI to complete the model Import
* Select the GitHub/GitLab Integration option to connect your source code repository with the deployment environment.
* Navigate to the specific GitHub repository that contains your model's code. Here, you will need to identify and enter the name of the model you wish to import.
* Choose the appropriate type of machine that suits your model's requirements. Additionally, specify the minimum and maximum number of replicas to define the scalability range for deploying your model.
* Optionally, you have the option to enable automatic build and deployment. This feature triggers a new deployment automatically whenever there is a new code push to your repository.
* If your model requires additional software packages, configure the Custom Runtime settings by including necessary pip or apt packages. Also, set up environment variables such as Inference Timeout, Container Concurrency, and Scale Down Timeout to tailor the runtime environment according to your needs.
* Wait for the validation process to complete, ensuring that all settings are correct and functional. Once validation is successful, click on the "Import" button to finalize the import of your model.
### Step 3: Wait for the model build to complete usually takes \~5-10 minutes
### Step 4: Use the APIs to call the model
Once the model is in 'Active' status you can click on the 'API' page to call the model
### Here is the Demo:
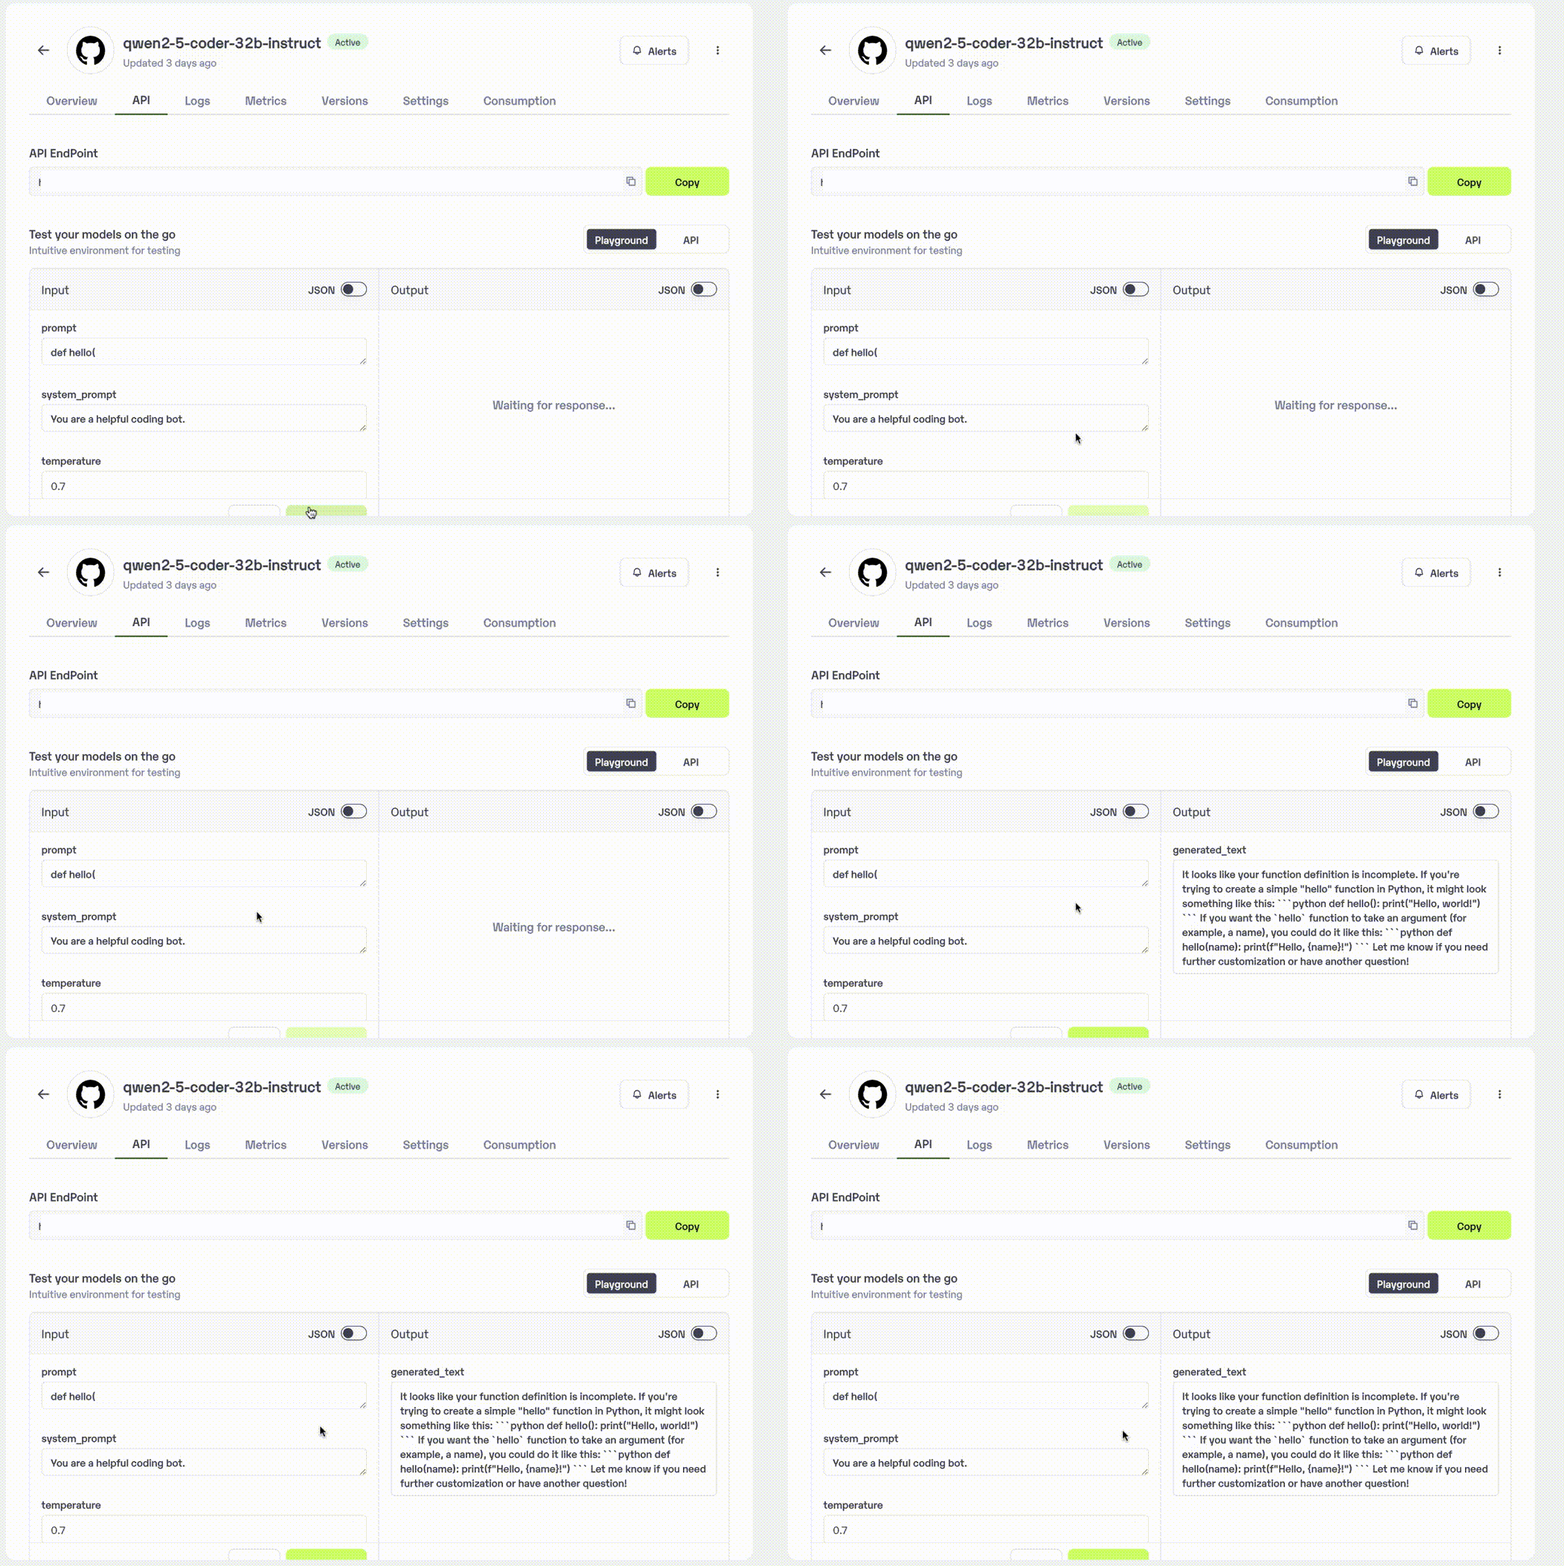 ## Method B: Deploying the model on Inferless CLI
Inferless allows you to deploy your model using Inferless-CLI. Follow the steps to deploy using Inferless CLI.
### Clone the repository of the model
Let's begin by cloning the model repository:
```bash
git clone https://github.com/inferless/Qwen2.5-Coder-32B-Instruct.git
```
### Deploy the Model
To deploy the model using Inferless CLI, execute the following command:
```bash
inferless deploy --gpu A100 --runtime inferless-runtime-config.yaml
```
**Explanation of the Command:**
* `--gpu A100`: Specifies the GPU type for deployment. Available options include `A10`, `A100`, and `T4`.
* `--runtime inferless-runtime-config.yaml`: Defines the runtime configuration file. If not specified, the default Inferless runtime is used.
## Method B: Deploying the model on Inferless CLI
Inferless allows you to deploy your model using Inferless-CLI. Follow the steps to deploy using Inferless CLI.
### Clone the repository of the model
Let's begin by cloning the model repository:
```bash
git clone https://github.com/inferless/Qwen2.5-Coder-32B-Instruct.git
```
### Deploy the Model
To deploy the model using Inferless CLI, execute the following command:
```bash
inferless deploy --gpu A100 --runtime inferless-runtime-config.yaml
```
**Explanation of the Command:**
* `--gpu A100`: Specifies the GPU type for deployment. Available options include `A10`, `A100`, and `T4`.
* `--runtime inferless-runtime-config.yaml`: Defines the runtime configuration file. If not specified, the default Inferless runtime is used.
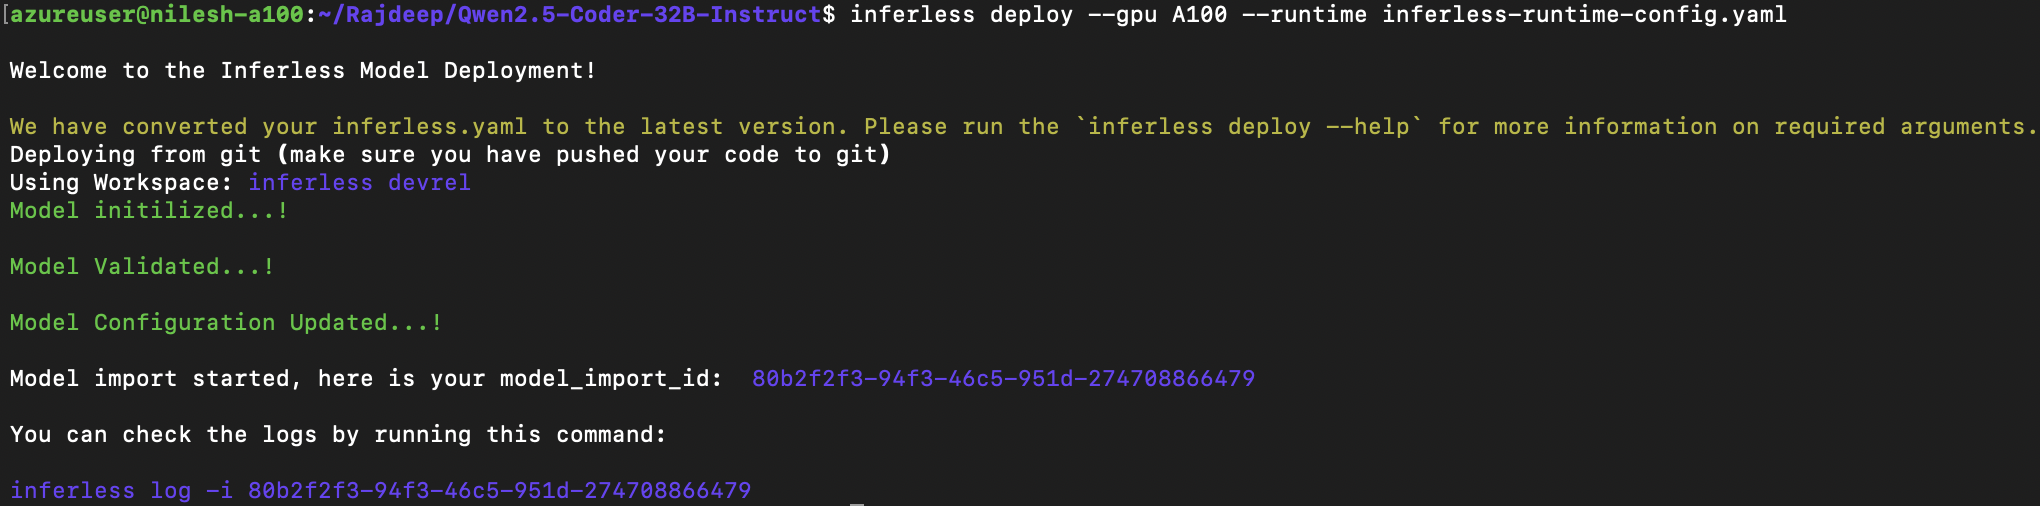 # Deploy Llama-3.1-8B-Instruct GGUF using Inferless
Source: https://docs.inferless.com/how-to-guides/deploy-a-Llama-3.1-8B-Instruct-GGUF-using-inferless
Llama-3.1-8B-Instruct GGUF is a quantized version of Meta's state-of-the-art Llama-3.1 series of large language models. This guide will take you through the deployment process of the GGUF model on the Inferless platform.
## Introduction
[Llama-3.1-8B-Instruct GGUF](https://huggingface.co/bartowski/Meta-Llama-3.1-8B-Instruct-GGUF) is a quantized version of Meta's advanced multilingual large language model. The GGUF (GPT-Generated Unified Format) format allows for efficient, including lower-end GPUs.
This 8B Instruct model has been fine-tuned using supervised fine-tuning (SFT) and reinforced through reinforcement learning with human feedback (RLHF). The GGUF version maintains high accuracy while significantly reducing the model size and improving inference speed.
## Our Observations
We have deployed the model on an A100 GPU(80GB). Here are our observations:
| Library | Inference Time | Cold Start Time | Tokens/Sec | Output Tokens Length |
| ---------------- | -------------- | --------------- | ---------- | -------------------- |
| llama-cpp-python | 2.46 sec | 3.363 | 104.25 | 256 |
Note: The inference time, cold start time, and tokens per second are average values.
## Defining Dependencies
We are using the [llama-cpp-python](https://github.com/abetlen/llama-cpp-python) to serve the GGUF quantized model on a single A100 (80GB).
## Constructing the GitHub/GitLab Template
Now quickly construct the GitHub/GitLab template, this process is mandatory and make sure you don't add any file named `model.py`.
```
Llama-3.1-8B-Instruct-GGUF/
├── app.py
├── inferless-runtime-config.yaml
├── inferless.yaml
└── input_schema.py
```
You can also add other files to this directory.
## Create the class for inference
In the [app.py](https://github.com/inferless/Llama-3.1-8B-Instruct-GGUF/blob/main/app.py) we will define the class and import all the required functions
1. `def initialize`: In this function, you will initialize your model and define any `variable` that you want to use during inference.
2. `def infer`: This function gets called for every request that you send. Here you can define all the steps that are required for the inference. You can also pass custom values for inference and pass it through `inputs(dict)` parameter.
3. `def finalize`: This function cleans up all the allocated memory.
```python
from llama_cpp import Llama
from huggingface_hub import hf_hub_download
import os
import inferless
app = inferless.Cls(gpu="A100")
class InferlessPythonModel:
@app.load
def initialize(self):
nfs_volume = os.getenv("NFS_VOLUME","./models")
if os.path.exists(nfs_volume + "/Meta-Llama-3.1-8B-Instruct-Q8_0.gguf") == False :
cache_file = hf_hub_download(
repo_id="bartowski/Meta-Llama-3.1-8B-Instruct-GGUF",
filename="Meta-Llama-3.1-8B-Instruct-Q8_0.gguf",
local_dir=nfs_volume)
self.llm = Llama(
model_path=f"{nfs_volume}/Meta-Llama-3.1-8B-Instruct-Q8_0.gguf",
main_gpu=0,
n_gpu_layers=-1)
@app.infer
def infer(self, inputs):
prompt = inputs["prompt"]
system_prompt = inputs.get("system_prompt","You are a friendly bot.")
temperature = inputs.get("temperature",0.7)
top_p = inputs.get("top_p",0.1)
top_k = inputs.get("top_k",40)
repeat_penalty = inputs.get("repeat_penalty",1.18)
max_tokens = inputs.get("max_tokens",256)
output = self.llm.create_chat_completion(
messages = [
{"role": "system", "content": f"{system_prompt}"},
{"role": "user","content": f"{prompt}"}],
temperature=temperature, top_p=top_p, top_k=top_k,repeat_penalty=repeat_penalty,max_tokens=max_tokens
)
text_result = output['choices'][0]['message']['content']
return {'generated_result': text_result}
def finalize(self):
self.llm = None
```
## Create the Input Schema
We have to create a [input\_schema.py](https://github.com/inferless/Llama-3.1-8B-Instruct-GGUF/blob/main/input_schema.py) in your GitHub/Gitlab repository this will help us create the Input parameters. You can checkout our documentation on [Input / Output Schema](https://docs.inferless.com/model-import/input-output-schema).
For this tutorial, we have defined these parameter `prompt`, `temperature`, `top_p`, `repeat_penalty`, `max_tokens` and `top_k` which are required during the API call. Now lets create the `input_schema.py`.
```JSON
INPUT_SCHEMA = {
"prompt": {
'datatype': 'STRING',
'required': True,
'shape': [1],
'example': ["What is deep learning?"]
},
"system_prompt": {
'datatype': 'STRING',
'required': False,
'shape': [1],
'example': ["You are a friendly bot."]
},
"temperature": {
'datatype': 'FP32',
'required': False,
'shape': [1],
'example': [0.7]
},
"top_p": {
'datatype': 'FP32',
'required': False,
'shape': [1],
'example': [0.1]
},
"repeat_penalty": {
'datatype': 'FP32',
'required': False,
'shape': [1],
'example': [1.18]
},
"max_tokens": {
'datatype': 'INT16',
'required': False,
'shape': [1],
'example': [512]
},
"top_k":{
'datatype': 'INT8',
'required': False,
'shape': [1],
'example': [40]
}
}
```
## Creating the Custom Runtime
This is a mandatory step where we allow the users to upload their custom runtime through [inferless-runtime-config.yaml](https://github.com/inferless/Llama-3.1-8B-Instruct-GGUF/blob/main/inferless-runtime-config.yaml).
```python
build:
cuda_version: "12.1.1"
python_packages:
- inferless-cli==2.0.9
- hf-transfer==0.1.9
- huggingface-hub==0.27.1
- llama-cpp-python==0.3.7
```
## Test your model with Remote Run
You can use the `inferless remote-run`([installation guide here](https://docs.inferless.com/model-import/cli-import#cli-import)) command to test your model or any custom Python script in a remote GPU environment directly from your local machine. Make sure that you use `Python3.10` for seamless experience.
### Step 1: Add the Decorators and local entry point
To enable **Remote Run**, simply do the following:
1. Import the `inferless` library and initialize `Cls(gpu="A100")`. The available GPU options are `T4`, `A10` and `A100`.
2. Decorated the `initialize` and `infer` functions with `@app.load` and `@app.infer` respectively.
3. Create the Local Entry Point by decorating a function (for example, `my_local_entry`) with `@inferless.local_entry_point`.
Within this function, instantiate your model class, convert any incoming parameters into a `RequestObjects` object, and invoke the model's `infer` method.
```python
from llama_cpp import Llama
from huggingface_hub import hf_hub_download
import os
import inferless
from pydantic import BaseModel, Field
from typing import Optional
app = inferless.Cls(gpu="A100")
@inferless.request
class RequestObjects(BaseModel):
prompt: str = Field(default="Explain Deep Learning.")
system_prompt: Optional[str] = "You are a friendly bot."
temperature: Optional[float] = 0.7
top_p: Optional[float] = 0.1
repeat_penalty: Optional[float] = 1.18
top_k: Optional[int] = 40
max_tokens: Optional[int] = 256
@inferless.response
class ResponseObjects(BaseModel):
generated_text: str = Field(default='Test output')
class InferlessPythonModel:
@app.load
def initialize(self):
nfs_volume = os.getenv("NFS_VOLUME","./models")
if os.path.exists(nfs_volume + "/Meta-Llama-3.1-8B-Instruct-Q8_0.gguf") == False :
cache_file = hf_hub_download(
repo_id="bartowski/Meta-Llama-3.1-8B-Instruct-GGUF",
filename="Meta-Llama-3.1-8B-Instruct-Q8_0.gguf",
local_dir=nfs_volume)
self.llm = Llama(
model_path=f"{nfs_volume}/Meta-Llama-3.1-8B-Instruct-Q8_0.gguf",
main_gpu=0,
n_gpu_layers=-1)
@app.infer
def infer(self, request: RequestObjects) -> ResponseObjects:
output = self.llm.create_chat_completion(
messages = [
{"role": "system", "content": f"{request.system_prompt}"},
{"role": "user","content": f"{request.prompt}"}],
temperature=request.temperature, top_p=request.top_p, top_k=request.top_k,
repeat_penalty=request.repeat_penalty,max_tokens=request.max_tokens
)
text_result = output['choices'][0]['message']['content']
generateObject = ResponseObjects(generated_text = text_result)
return generateObject
def finalize(self):
self.llm = None
@inferless.local_entry_point
def my_local_entry(dynamic_params):
request_objects = RequestObjects(**dynamic_params)
model_instance = InferlessPythonModel()
return model_instance.infer(request_objects)
```
### Step 2: Run with Remote GPU
From your local terminal, navigate to the folder containing your `app.py` and your `inferless-runtime-config.yaml` and run:
```bash
inferless remote-run app.py -c inferless-runtime-config.yaml --prompt "What is deep learning?"
```
You can pass the other input parameters in the same way (e.g., `--system_prompt`, `--temperature`, etc.) as long as your code expects them in the `inputs` dictionary.
If you want to exclude certain files or directories from being uploaded, use the `--exclude` or `-e` flag.
## Method A: Deploying the model on Inferless Platform
Inferless supports multiple ways of [importing your model](https://docs.inferless.com/model-import/file-structure-req/file-structure-requirements). For this tutorial, we will use GitHub.
### Step 1: Login to the inferless dashboard can click on Import model button
Navigate to your desired workspace in Inferless and Click on `Add a custom model` button that you see on the top right. An import wizard will open up.
### Step 2: Follow the UI to complete the model Import
* Select the GitHub/GitLab Integration option to connect your source code repository with the deployment environment.
* Navigate to the specific GitHub repository that contains your model's code. Here, you will need to identify and enter the name of the model you wish to import.
* Choose the appropriate type of machine that suits your model's requirements. Additionally, specify the minimum and maximum number of replicas to define the scalability range for deploying your model.
* Optionally, you have the option to enable automatic build and deployment. This feature triggers a new deployment automatically whenever there is a new code push to your repository.
* If your model requires additional software packages, configure the Custom Runtime settings by including necessary pip or apt packages. Also, set up environment variables such as Inference Timeout, Container Concurrency, and Scale Down Timeout to tailor the runtime environment according to your needs.
* Wait for the validation process to complete, ensuring that all settings are correct and functional. Once validation is successful, click on the "Import" button to finalize the import of your model.
# Deploy Llama-3.1-8B-Instruct GGUF using Inferless
Source: https://docs.inferless.com/how-to-guides/deploy-a-Llama-3.1-8B-Instruct-GGUF-using-inferless
Llama-3.1-8B-Instruct GGUF is a quantized version of Meta's state-of-the-art Llama-3.1 series of large language models. This guide will take you through the deployment process of the GGUF model on the Inferless platform.
## Introduction
[Llama-3.1-8B-Instruct GGUF](https://huggingface.co/bartowski/Meta-Llama-3.1-8B-Instruct-GGUF) is a quantized version of Meta's advanced multilingual large language model. The GGUF (GPT-Generated Unified Format) format allows for efficient, including lower-end GPUs.
This 8B Instruct model has been fine-tuned using supervised fine-tuning (SFT) and reinforced through reinforcement learning with human feedback (RLHF). The GGUF version maintains high accuracy while significantly reducing the model size and improving inference speed.
## Our Observations
We have deployed the model on an A100 GPU(80GB). Here are our observations:
| Library | Inference Time | Cold Start Time | Tokens/Sec | Output Tokens Length |
| ---------------- | -------------- | --------------- | ---------- | -------------------- |
| llama-cpp-python | 2.46 sec | 3.363 | 104.25 | 256 |
Note: The inference time, cold start time, and tokens per second are average values.
## Defining Dependencies
We are using the [llama-cpp-python](https://github.com/abetlen/llama-cpp-python) to serve the GGUF quantized model on a single A100 (80GB).
## Constructing the GitHub/GitLab Template
Now quickly construct the GitHub/GitLab template, this process is mandatory and make sure you don't add any file named `model.py`.
```
Llama-3.1-8B-Instruct-GGUF/
├── app.py
├── inferless-runtime-config.yaml
├── inferless.yaml
└── input_schema.py
```
You can also add other files to this directory.
## Create the class for inference
In the [app.py](https://github.com/inferless/Llama-3.1-8B-Instruct-GGUF/blob/main/app.py) we will define the class and import all the required functions
1. `def initialize`: In this function, you will initialize your model and define any `variable` that you want to use during inference.
2. `def infer`: This function gets called for every request that you send. Here you can define all the steps that are required for the inference. You can also pass custom values for inference and pass it through `inputs(dict)` parameter.
3. `def finalize`: This function cleans up all the allocated memory.
```python
from llama_cpp import Llama
from huggingface_hub import hf_hub_download
import os
import inferless
app = inferless.Cls(gpu="A100")
class InferlessPythonModel:
@app.load
def initialize(self):
nfs_volume = os.getenv("NFS_VOLUME","./models")
if os.path.exists(nfs_volume + "/Meta-Llama-3.1-8B-Instruct-Q8_0.gguf") == False :
cache_file = hf_hub_download(
repo_id="bartowski/Meta-Llama-3.1-8B-Instruct-GGUF",
filename="Meta-Llama-3.1-8B-Instruct-Q8_0.gguf",
local_dir=nfs_volume)
self.llm = Llama(
model_path=f"{nfs_volume}/Meta-Llama-3.1-8B-Instruct-Q8_0.gguf",
main_gpu=0,
n_gpu_layers=-1)
@app.infer
def infer(self, inputs):
prompt = inputs["prompt"]
system_prompt = inputs.get("system_prompt","You are a friendly bot.")
temperature = inputs.get("temperature",0.7)
top_p = inputs.get("top_p",0.1)
top_k = inputs.get("top_k",40)
repeat_penalty = inputs.get("repeat_penalty",1.18)
max_tokens = inputs.get("max_tokens",256)
output = self.llm.create_chat_completion(
messages = [
{"role": "system", "content": f"{system_prompt}"},
{"role": "user","content": f"{prompt}"}],
temperature=temperature, top_p=top_p, top_k=top_k,repeat_penalty=repeat_penalty,max_tokens=max_tokens
)
text_result = output['choices'][0]['message']['content']
return {'generated_result': text_result}
def finalize(self):
self.llm = None
```
## Create the Input Schema
We have to create a [input\_schema.py](https://github.com/inferless/Llama-3.1-8B-Instruct-GGUF/blob/main/input_schema.py) in your GitHub/Gitlab repository this will help us create the Input parameters. You can checkout our documentation on [Input / Output Schema](https://docs.inferless.com/model-import/input-output-schema).
For this tutorial, we have defined these parameter `prompt`, `temperature`, `top_p`, `repeat_penalty`, `max_tokens` and `top_k` which are required during the API call. Now lets create the `input_schema.py`.
```JSON
INPUT_SCHEMA = {
"prompt": {
'datatype': 'STRING',
'required': True,
'shape': [1],
'example': ["What is deep learning?"]
},
"system_prompt": {
'datatype': 'STRING',
'required': False,
'shape': [1],
'example': ["You are a friendly bot."]
},
"temperature": {
'datatype': 'FP32',
'required': False,
'shape': [1],
'example': [0.7]
},
"top_p": {
'datatype': 'FP32',
'required': False,
'shape': [1],
'example': [0.1]
},
"repeat_penalty": {
'datatype': 'FP32',
'required': False,
'shape': [1],
'example': [1.18]
},
"max_tokens": {
'datatype': 'INT16',
'required': False,
'shape': [1],
'example': [512]
},
"top_k":{
'datatype': 'INT8',
'required': False,
'shape': [1],
'example': [40]
}
}
```
## Creating the Custom Runtime
This is a mandatory step where we allow the users to upload their custom runtime through [inferless-runtime-config.yaml](https://github.com/inferless/Llama-3.1-8B-Instruct-GGUF/blob/main/inferless-runtime-config.yaml).
```python
build:
cuda_version: "12.1.1"
python_packages:
- inferless-cli==2.0.9
- hf-transfer==0.1.9
- huggingface-hub==0.27.1
- llama-cpp-python==0.3.7
```
## Test your model with Remote Run
You can use the `inferless remote-run`([installation guide here](https://docs.inferless.com/model-import/cli-import#cli-import)) command to test your model or any custom Python script in a remote GPU environment directly from your local machine. Make sure that you use `Python3.10` for seamless experience.
### Step 1: Add the Decorators and local entry point
To enable **Remote Run**, simply do the following:
1. Import the `inferless` library and initialize `Cls(gpu="A100")`. The available GPU options are `T4`, `A10` and `A100`.
2. Decorated the `initialize` and `infer` functions with `@app.load` and `@app.infer` respectively.
3. Create the Local Entry Point by decorating a function (for example, `my_local_entry`) with `@inferless.local_entry_point`.
Within this function, instantiate your model class, convert any incoming parameters into a `RequestObjects` object, and invoke the model's `infer` method.
```python
from llama_cpp import Llama
from huggingface_hub import hf_hub_download
import os
import inferless
from pydantic import BaseModel, Field
from typing import Optional
app = inferless.Cls(gpu="A100")
@inferless.request
class RequestObjects(BaseModel):
prompt: str = Field(default="Explain Deep Learning.")
system_prompt: Optional[str] = "You are a friendly bot."
temperature: Optional[float] = 0.7
top_p: Optional[float] = 0.1
repeat_penalty: Optional[float] = 1.18
top_k: Optional[int] = 40
max_tokens: Optional[int] = 256
@inferless.response
class ResponseObjects(BaseModel):
generated_text: str = Field(default='Test output')
class InferlessPythonModel:
@app.load
def initialize(self):
nfs_volume = os.getenv("NFS_VOLUME","./models")
if os.path.exists(nfs_volume + "/Meta-Llama-3.1-8B-Instruct-Q8_0.gguf") == False :
cache_file = hf_hub_download(
repo_id="bartowski/Meta-Llama-3.1-8B-Instruct-GGUF",
filename="Meta-Llama-3.1-8B-Instruct-Q8_0.gguf",
local_dir=nfs_volume)
self.llm = Llama(
model_path=f"{nfs_volume}/Meta-Llama-3.1-8B-Instruct-Q8_0.gguf",
main_gpu=0,
n_gpu_layers=-1)
@app.infer
def infer(self, request: RequestObjects) -> ResponseObjects:
output = self.llm.create_chat_completion(
messages = [
{"role": "system", "content": f"{request.system_prompt}"},
{"role": "user","content": f"{request.prompt}"}],
temperature=request.temperature, top_p=request.top_p, top_k=request.top_k,
repeat_penalty=request.repeat_penalty,max_tokens=request.max_tokens
)
text_result = output['choices'][0]['message']['content']
generateObject = ResponseObjects(generated_text = text_result)
return generateObject
def finalize(self):
self.llm = None
@inferless.local_entry_point
def my_local_entry(dynamic_params):
request_objects = RequestObjects(**dynamic_params)
model_instance = InferlessPythonModel()
return model_instance.infer(request_objects)
```
### Step 2: Run with Remote GPU
From your local terminal, navigate to the folder containing your `app.py` and your `inferless-runtime-config.yaml` and run:
```bash
inferless remote-run app.py -c inferless-runtime-config.yaml --prompt "What is deep learning?"
```
You can pass the other input parameters in the same way (e.g., `--system_prompt`, `--temperature`, etc.) as long as your code expects them in the `inputs` dictionary.
If you want to exclude certain files or directories from being uploaded, use the `--exclude` or `-e` flag.
## Method A: Deploying the model on Inferless Platform
Inferless supports multiple ways of [importing your model](https://docs.inferless.com/model-import/file-structure-req/file-structure-requirements). For this tutorial, we will use GitHub.
### Step 1: Login to the inferless dashboard can click on Import model button
Navigate to your desired workspace in Inferless and Click on `Add a custom model` button that you see on the top right. An import wizard will open up.
### Step 2: Follow the UI to complete the model Import
* Select the GitHub/GitLab Integration option to connect your source code repository with the deployment environment.
* Navigate to the specific GitHub repository that contains your model's code. Here, you will need to identify and enter the name of the model you wish to import.
* Choose the appropriate type of machine that suits your model's requirements. Additionally, specify the minimum and maximum number of replicas to define the scalability range for deploying your model.
* Optionally, you have the option to enable automatic build and deployment. This feature triggers a new deployment automatically whenever there is a new code push to your repository.
* If your model requires additional software packages, configure the Custom Runtime settings by including necessary pip or apt packages. Also, set up environment variables such as Inference Timeout, Container Concurrency, and Scale Down Timeout to tailor the runtime environment according to your needs.
* Wait for the validation process to complete, ensuring that all settings are correct and functional. Once validation is successful, click on the "Import" button to finalize the import of your model.
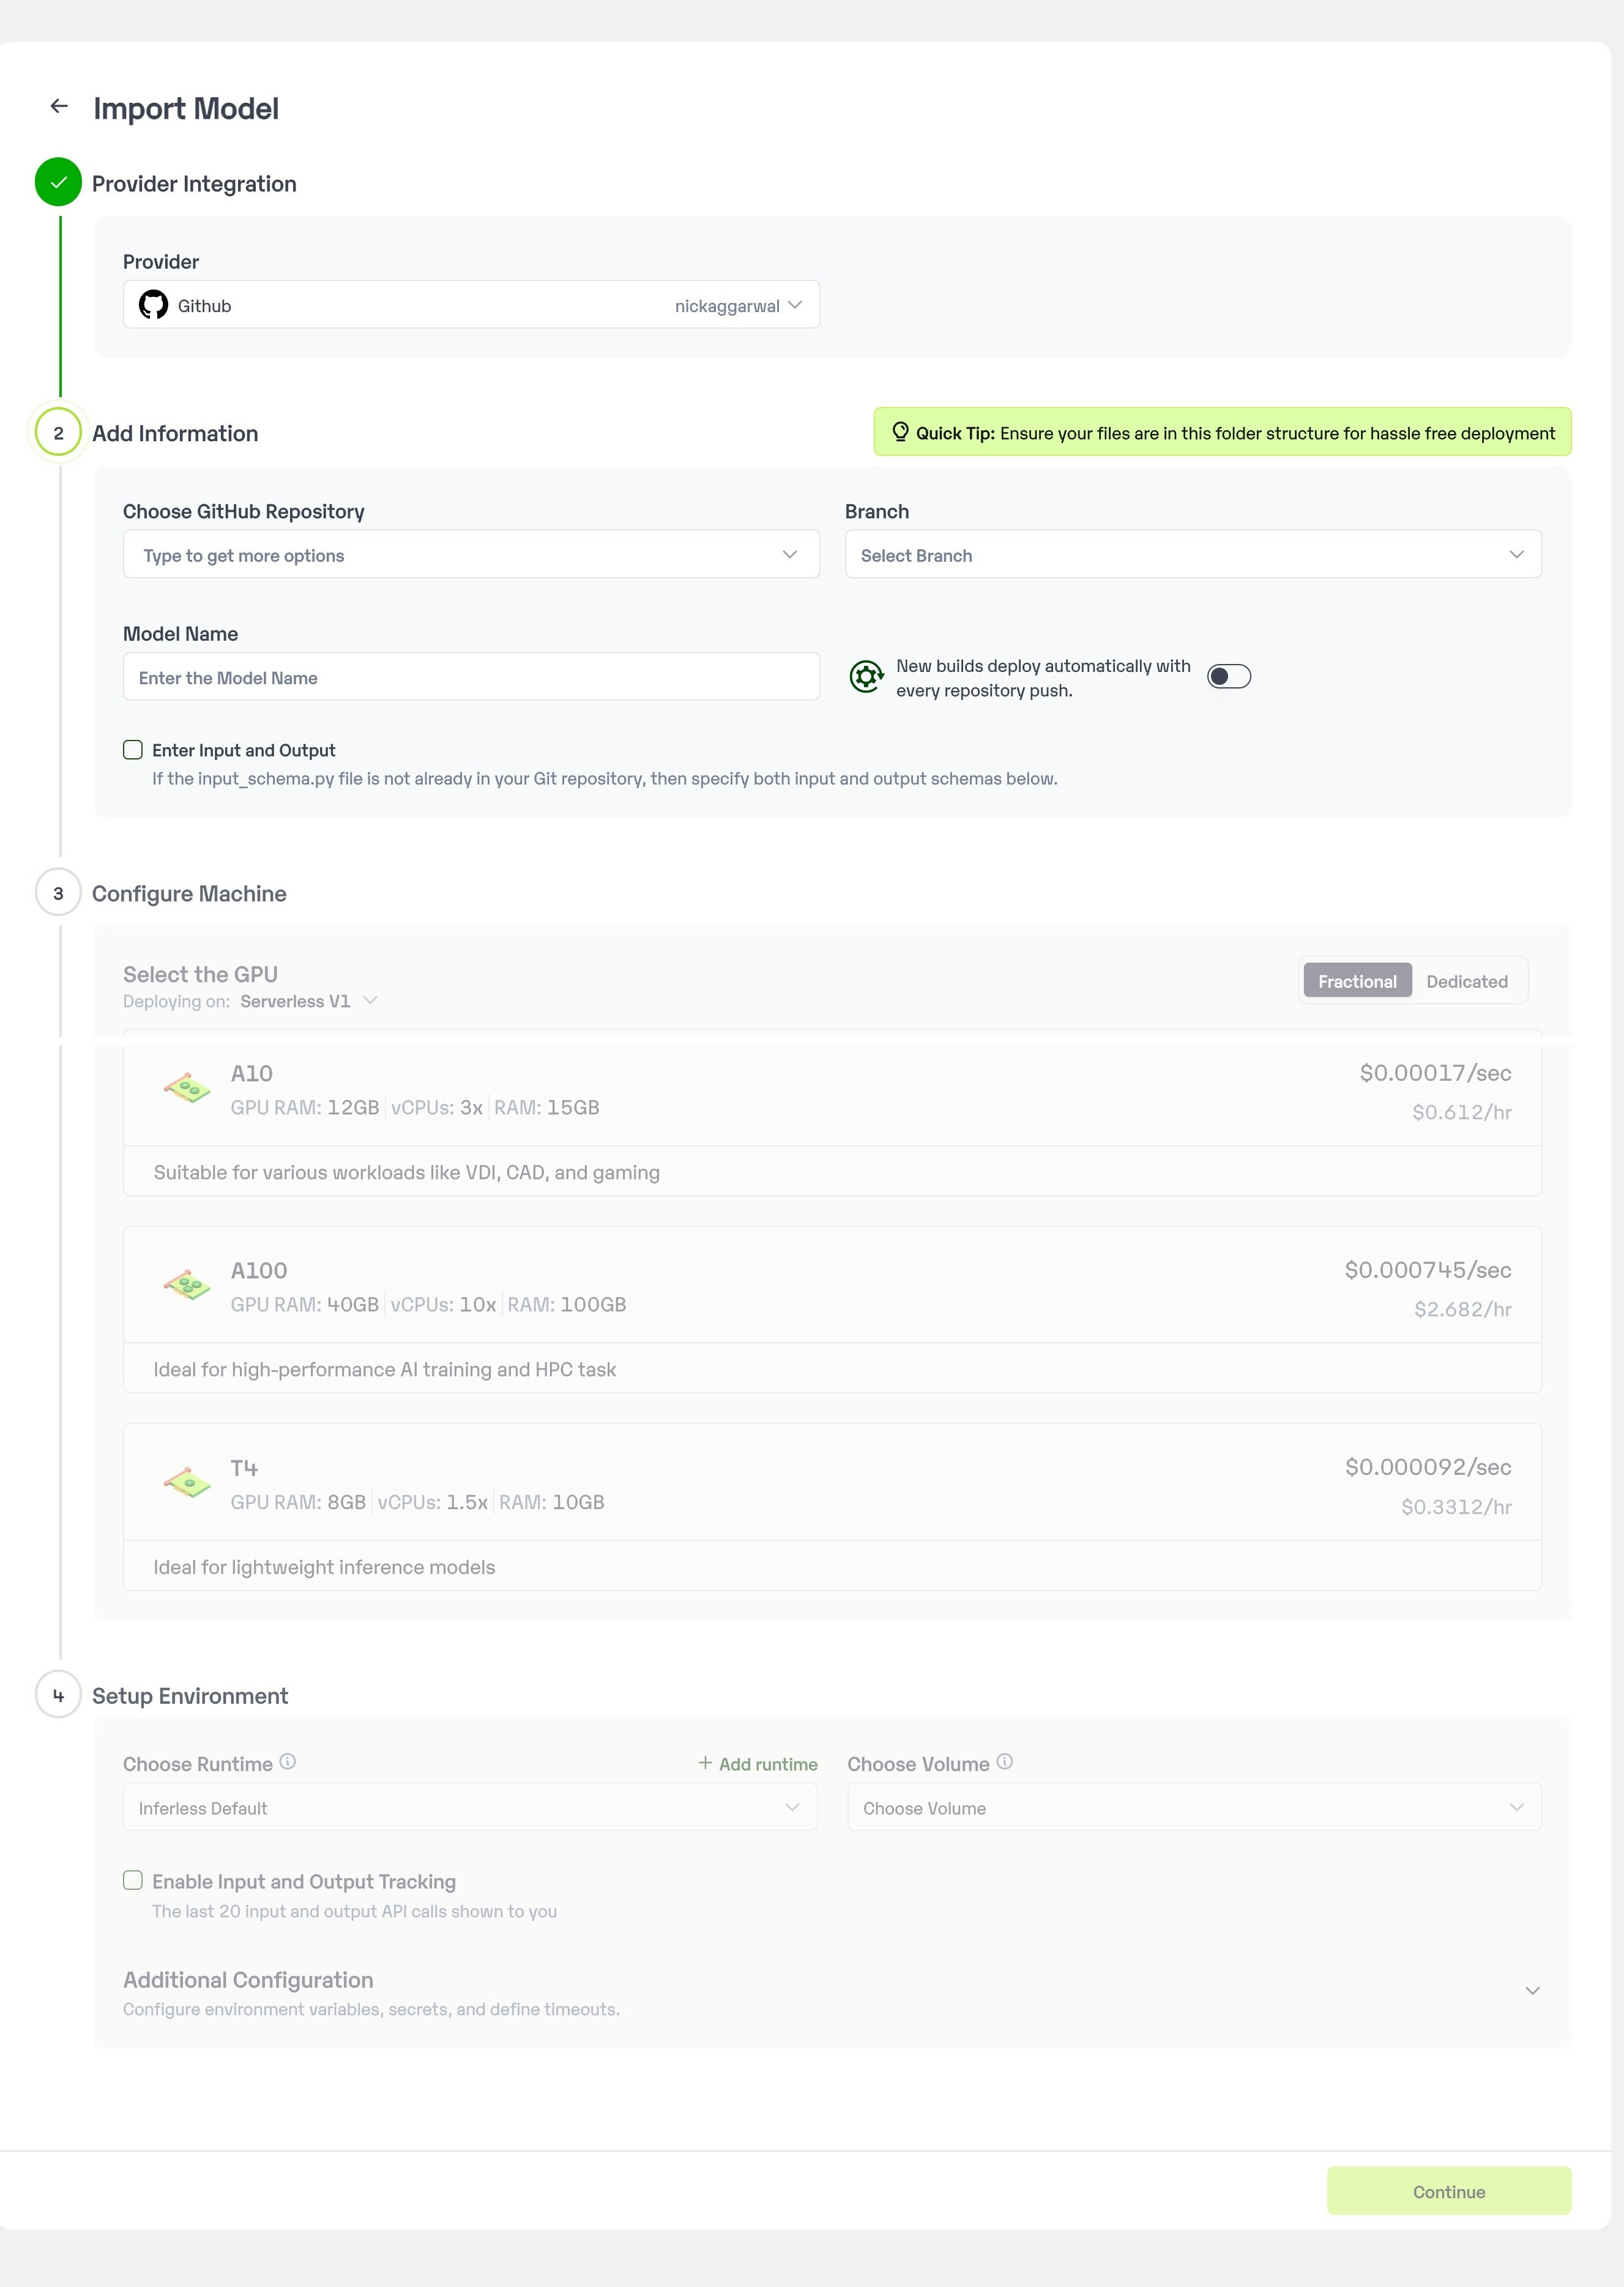 ### Step 3: Wait for the model build to complete usually takes \~5-10 minutes
### Step 4: Use the APIs to call the model
Once the model is in 'Active' status you can click on the 'API' page to call the model
### Here is the Demo:
### Step 3: Wait for the model build to complete usually takes \~5-10 minutes
### Step 4: Use the APIs to call the model
Once the model is in 'Active' status you can click on the 'API' page to call the model
### Here is the Demo:
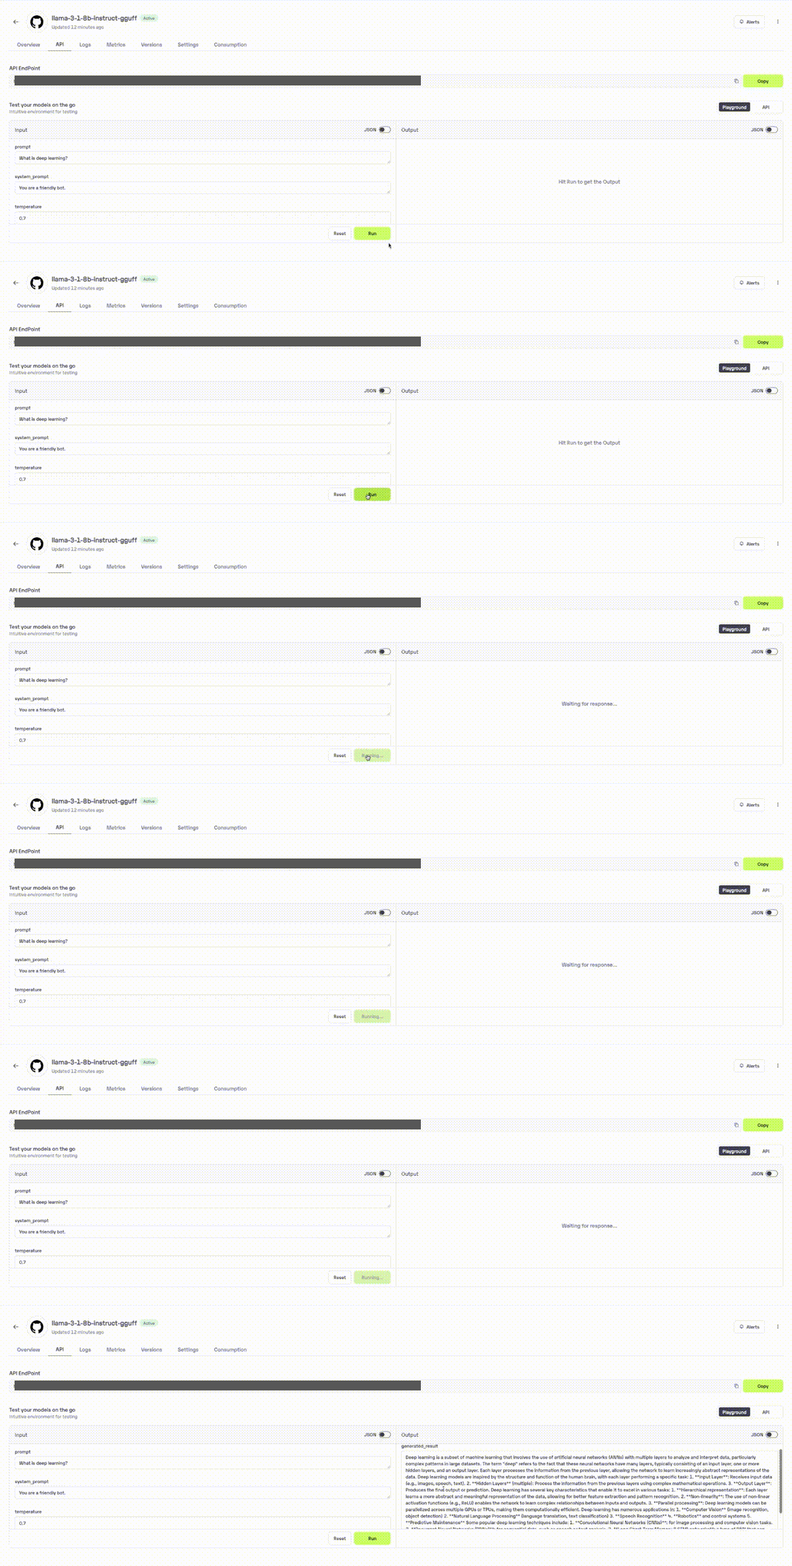 ## Method B: Deploying the model on Inferless CLI
Inferless allows you to deploy your model using Inferless-CLI. Follow the steps to deploy using Inferless CLI.
### Clone the repository of the model
Let's begin by cloning the model repository:
```bash
git clone https://github.com/inferless/Llama-3.1-8B-Instruct-GGUF.git
```
### Deploy the Model
To deploy the model using Inferless CLI, execute the following command:
```bash
inferless deploy --gpu A100 --runtime inferless-runtime-config.yaml
```
**Explanation of the Command:**
* `--gpu A100`: Specifies the GPU type for deployment. Available options include `A10`, `A100`, and `T4`.
* `--runtime inferless-runtime-config.yaml`: Defines the runtime configuration file. If not specified, the default Inferless runtime is used.
# Deploy Llama-3.1-8B-Instruct using Inferless
Source: https://docs.inferless.com/how-to-guides/deploy-a-Llama-3.1-8B-Instruct-using-inferless
Llama-3.1-8B-Instruct is a new state-of-the-art model from Meta's Lama-3.1 series of large language models. The repository is for the Llama-3.1-8B-Instruct model for deploying the model in the Inferless platform.
## Introduction
[Llama-3.1-8B-Instruct](https://huggingface.co/meta-llama/Meta-Llama-3.1-8B-Instruct) model is part of Meta's advanced suite of multilingual large language models.
This 8B Instruct model has been fine-tuned using supervised fine-tuning (SFT) and reinforced through reinforcement learning with human feedback (RLHF).
This combination of methodologies ensures that the model not only performs with high accuracy but also aligns closely with human preferences for helpfulness and safety.
## Our Observations
We have deployed the model on an A100 GPU(80GB). Here are our observations:
| Library | Inference Time | Cold Start Time | Tokens/Sec | Output Tokens Length |
| ------- | -------------- | --------------- | ---------- | -------------------- |
| vLLM | 3.43 sec | 15.44 sec | 74.79 | 256 |
Note: The inference time, cold start time, and tokens per second are average values.
## Defining Dependencies
We are using the [vLLM](https://github.com/vllm-project/vllm/) to serve the model on a single A100 (80GB).
## Constructing the GitHub/GitLab Template
Now quickly construct the GitHub/GitLab template, this process is mandatory and make sure you don't add any file named `model.py`.
```
Llama-3.1-8B-Instruct/
├── app.py
├── inferless-runtime-config.yaml
├── inferless.yaml
└── input_schema.py
```
You can also add other files to this directory.
## Create the class for inference
In the [app.py](https://github.com/inferless/Llama-3.1-8B-Instruct/blob/main/app.py) we will define the class and import all the required functions
1. `def initialize`: In this function, you will initialize your model and define any `variable` that you want to use during inference.
2. `def infer`: This function gets called for every request that you send. Here you can define all the steps that are required for the inference. You can also pass custom values for inference and pass it through `inputs(dict)` parameter.
3. `def finalize`: This function cleans up all the allocated memory.
```python
from vllm import LLM, SamplingParams
from transformers import AutoTokenizer
import inferless
app = inferless.Cls(gpu="A100")
class InferlessPythonModel:
@app.load
def initialize(self):
model_id = "meta-llama/Meta-Llama-3.1-8B-Instruct"
self.llm = LLM(model=model_id,dtype="float16")
self.tokenizer = AutoTokenizer.from_pretrained(model_id)
@app.infer
def infer(self, inputs):
prompts = inputs["prompt"]
temperature = inputs.get("temperature",0.7)
top_p = inputs.get("top_p",0.1)
repetition_penalty = inputs.get("repetition_penalty",1.18)
top_k = inputs.get("top_k",40)
max_tokens = inputs.get("max_tokens",256)
sampling_params = SamplingParams(temperature=temperature,top_p=top_p,repetition_penalty=repetition_penalty,
top_k=top_k,max_tokens=max_tokens)
input_text = self.tokenizer.apply_chat_template([{"role": "user", "content": prompts}], tokenize=False)
result = self.llm.generate(input_text, sampling_params)
result_output = [output.outputs[0].text for output in result]
return {'result': result_output[0]}
def finalize(self):
self.llm = None
```
## Create the Input Schema
We have to create a [input\_schema.py](https://github.com/inferless/Llama-3.1-8B-Instruct/blob/main/input_schema.py) in your GitHub/Gitlab repository this will help us create the Input parameters. You can checkout our documentation on [Input / Output Schema](https://docs.inferless.com/model-import/input-output-schema).
For this tutorial, we have defined these parameter `prompt`, `temperature`, `top_p`, `repetition_penalty`, `max_tokens` and `top_k` which are required during the API call. Now lets create the `input_schema.py`.
```JSON
INPUT_SCHEMA = {
"prompt": {
'datatype': 'STRING',
'required': True,
'shape': [1],
'example': ["What is deep learning?"]
},
"temperature": {
'datatype': 'FP32',
'required': False,
'shape': [1],
'example': [0.7]
},
"top_p": {
'datatype': 'FP32',
'required': False,
'shape': [1],
'example': [0.1]
},
"repetition_penalty": {
'datatype': 'FP32',
'required': False,
'shape': [1],
'example': [1.18]
},
"max_tokens": {
'datatype': 'INT16',
'required': False,
'shape': [1],
'example': [256]
},
"top_k":{
'datatype': 'INT8',
'required': False,
'shape': [1],
'example': [40]
}
}
```
## Creating the Custom Runtime
This is a mandatory step where we allow the users to upload their custom runtime through [inferless-runtime-config.yaml](https://github.com/inferless/Llama-3.1-8B-Instruct/blob/main/inferless-runtime-config.yaml).
```python
build:
cuda_version: "12.1.1"
python_packages:
- "vllm==0.5.3.post1"
- "transformers==4.43.1"
- "inferless-cli==2.0.9"
- "hf-transfer==0.1.9"
- "huggingface-hub==0.27.1"
```
## Test your model with Remote Run
You can use the `inferless remote-run`([installation guide here](https://docs.inferless.com/model-import/cli-import#cli-import)) command to test your model or any custom Python script in a remote GPU environment directly from your local machine. Make sure that you use `Python3.10` for seamless experience.
### Step 1: Add the Decorators and local entry point
To enable **Remote Run**, simply do the following:
1. Import the `inferless` library and initialize `Cls(gpu="A100")`. The available GPU options are `T4`, `A10` and `A100`.
2. Decorated the `initialize` and `infer` functions with `@app.load` and `@app.infer` respectively.
3. Create the Local Entry Point by decorating a function (for example, `my_local_entry`) with `@inferless.local_entry_point`.
Within this function, instantiate your model class, convert any incoming parameters into a `RequestObjects` object, and invoke the model's `infer` method.
```python
from vllm import LLM, SamplingParams
from transformers import AutoTokenizer
import inferless
from pydantic import BaseModel, Field
from typing import Optional
@inferless.request
class RequestObjects(BaseModel):
prompt: str = Field(default="Explain Deep Learning.")
temperature: Optional[float] = 0.7
top_p: Optional[float] = 0.1
repetition_penalty: Optional[float] = 1.18
top_k: Optional[int] = 40
max_tokens: Optional[int] = 256
@inferless.response
class ResponseObjects(BaseModel):
generated_text: str = Field(default='Test output')
app = inferless.Cls(gpu="A100")
class InferlessPythonModel:
@app.load
def initialize(self):
model_id = "meta-llama/Meta-Llama-3.1-8B-Instruct"
self.llm = LLM(model=model_id,dtype="float16")
self.tokenizer = AutoTokenizer.from_pretrained(model_id)
@app.infer
def infer(self, request: RequestObjects) -> ResponseObjects:
sampling_params = SamplingParams(temperature=request.temperature,top_p=request.top_p,repetition_penalty=request.repetition_penalty,
top_k=request.top_k,max_tokens=request.max_tokens)
input_text = self.tokenizer.apply_chat_template([{"role": "user", "content": request.prompt}], tokenize=False)
result = self.llm.generate(input_text, sampling_params)
result_output = [output.outputs[0].text for output in result]
generateObject = ResponseObjects(generated_text = result_output[0])
return generateObject
def finalize(self):
self.llm = None
@inferless.local_entry_point
def my_local_entry(dynamic_params):
request_objects = RequestObjects(**dynamic_params)
model_instance = InferlessPythonModel()
return model_instance.infer(request_objects)
```
### Step 2: Run with Remote GPU
From your local terminal, navigate to the folder containing your `app.py` and your `inferless-runtime-config.yaml` and run:
```bash
inferless remote-run app.py -c inferless-runtime-config.yaml --prompt "What is deep learning?"
```
You can pass the other input parameters in the same way (e.g., `--max_tokens`, `--temperature`, etc.) as long as your code expects them in the `inputs` dictionary.
If you want to exclude certain files or directories from being uploaded, use the `--exclude` or `-e` flag.
## Method A: Deploying the model on Inferless Platform
Inferless supports multiple ways of [importing your model](https://docs.inferless.com/model-import/file-structure-req/file-structure-requirements). For this tutorial, we will use GitHub.
### Step 1: Login to the inferless dashboard can click on Import model button
Navigate to your desired workspace in Inferless and Click on `Add a custom model` button that you see on the top right. An import wizard will open up.
### Step 2: Follow the UI to complete the model Import
* Select the GitHub/GitLab Integration option to connect your source code repository with the deployment environment.
* Navigate to the specific GitHub repository that contains your model's code. Here, you will need to identify and enter the name of the model you wish to import.
* Choose the appropriate type of machine that suits your model's requirements. Additionally, specify the minimum and maximum number of replicas to define the scalability range for deploying your model.
* Optionally, you have the option to enable automatic build and deployment. This feature triggers a new deployment automatically whenever there is a new code push to your repository.
* If your model requires additional software packages, configure the Custom Runtime settings by including necessary pip or apt packages. Also, set up environment variables such as Inference Timeout, Container Concurrency, and Scale Down Timeout to tailor the runtime environment according to your needs.
* Wait for the validation process to complete, ensuring that all settings are correct and functional. Once validation is successful, click on the "Import" button to finalize the import of your model.
### Step 3: Wait for the model build to complete usually takes \~5-10 minutes
### Step 4: Use the APIs to call the model
Once the model is in 'Active' status you can click on the 'API' page to call the model
### Here is the Demo:
## Method B: Deploying the model on Inferless CLI
Inferless allows you to deploy your model using Inferless-CLI. Follow the steps to deploy using Inferless CLI.
### Clone the repository of the model
Let's begin by cloning the model repository:
```bash
git clone https://github.com/inferless/Llama-3.1-8B-Instruct-GGUF.git
```
### Deploy the Model
To deploy the model using Inferless CLI, execute the following command:
```bash
inferless deploy --gpu A100 --runtime inferless-runtime-config.yaml
```
**Explanation of the Command:**
* `--gpu A100`: Specifies the GPU type for deployment. Available options include `A10`, `A100`, and `T4`.
* `--runtime inferless-runtime-config.yaml`: Defines the runtime configuration file. If not specified, the default Inferless runtime is used.
# Deploy Llama-3.1-8B-Instruct using Inferless
Source: https://docs.inferless.com/how-to-guides/deploy-a-Llama-3.1-8B-Instruct-using-inferless
Llama-3.1-8B-Instruct is a new state-of-the-art model from Meta's Lama-3.1 series of large language models. The repository is for the Llama-3.1-8B-Instruct model for deploying the model in the Inferless platform.
## Introduction
[Llama-3.1-8B-Instruct](https://huggingface.co/meta-llama/Meta-Llama-3.1-8B-Instruct) model is part of Meta's advanced suite of multilingual large language models.
This 8B Instruct model has been fine-tuned using supervised fine-tuning (SFT) and reinforced through reinforcement learning with human feedback (RLHF).
This combination of methodologies ensures that the model not only performs with high accuracy but also aligns closely with human preferences for helpfulness and safety.
## Our Observations
We have deployed the model on an A100 GPU(80GB). Here are our observations:
| Library | Inference Time | Cold Start Time | Tokens/Sec | Output Tokens Length |
| ------- | -------------- | --------------- | ---------- | -------------------- |
| vLLM | 3.43 sec | 15.44 sec | 74.79 | 256 |
Note: The inference time, cold start time, and tokens per second are average values.
## Defining Dependencies
We are using the [vLLM](https://github.com/vllm-project/vllm/) to serve the model on a single A100 (80GB).
## Constructing the GitHub/GitLab Template
Now quickly construct the GitHub/GitLab template, this process is mandatory and make sure you don't add any file named `model.py`.
```
Llama-3.1-8B-Instruct/
├── app.py
├── inferless-runtime-config.yaml
├── inferless.yaml
└── input_schema.py
```
You can also add other files to this directory.
## Create the class for inference
In the [app.py](https://github.com/inferless/Llama-3.1-8B-Instruct/blob/main/app.py) we will define the class and import all the required functions
1. `def initialize`: In this function, you will initialize your model and define any `variable` that you want to use during inference.
2. `def infer`: This function gets called for every request that you send. Here you can define all the steps that are required for the inference. You can also pass custom values for inference and pass it through `inputs(dict)` parameter.
3. `def finalize`: This function cleans up all the allocated memory.
```python
from vllm import LLM, SamplingParams
from transformers import AutoTokenizer
import inferless
app = inferless.Cls(gpu="A100")
class InferlessPythonModel:
@app.load
def initialize(self):
model_id = "meta-llama/Meta-Llama-3.1-8B-Instruct"
self.llm = LLM(model=model_id,dtype="float16")
self.tokenizer = AutoTokenizer.from_pretrained(model_id)
@app.infer
def infer(self, inputs):
prompts = inputs["prompt"]
temperature = inputs.get("temperature",0.7)
top_p = inputs.get("top_p",0.1)
repetition_penalty = inputs.get("repetition_penalty",1.18)
top_k = inputs.get("top_k",40)
max_tokens = inputs.get("max_tokens",256)
sampling_params = SamplingParams(temperature=temperature,top_p=top_p,repetition_penalty=repetition_penalty,
top_k=top_k,max_tokens=max_tokens)
input_text = self.tokenizer.apply_chat_template([{"role": "user", "content": prompts}], tokenize=False)
result = self.llm.generate(input_text, sampling_params)
result_output = [output.outputs[0].text for output in result]
return {'result': result_output[0]}
def finalize(self):
self.llm = None
```
## Create the Input Schema
We have to create a [input\_schema.py](https://github.com/inferless/Llama-3.1-8B-Instruct/blob/main/input_schema.py) in your GitHub/Gitlab repository this will help us create the Input parameters. You can checkout our documentation on [Input / Output Schema](https://docs.inferless.com/model-import/input-output-schema).
For this tutorial, we have defined these parameter `prompt`, `temperature`, `top_p`, `repetition_penalty`, `max_tokens` and `top_k` which are required during the API call. Now lets create the `input_schema.py`.
```JSON
INPUT_SCHEMA = {
"prompt": {
'datatype': 'STRING',
'required': True,
'shape': [1],
'example': ["What is deep learning?"]
},
"temperature": {
'datatype': 'FP32',
'required': False,
'shape': [1],
'example': [0.7]
},
"top_p": {
'datatype': 'FP32',
'required': False,
'shape': [1],
'example': [0.1]
},
"repetition_penalty": {
'datatype': 'FP32',
'required': False,
'shape': [1],
'example': [1.18]
},
"max_tokens": {
'datatype': 'INT16',
'required': False,
'shape': [1],
'example': [256]
},
"top_k":{
'datatype': 'INT8',
'required': False,
'shape': [1],
'example': [40]
}
}
```
## Creating the Custom Runtime
This is a mandatory step where we allow the users to upload their custom runtime through [inferless-runtime-config.yaml](https://github.com/inferless/Llama-3.1-8B-Instruct/blob/main/inferless-runtime-config.yaml).
```python
build:
cuda_version: "12.1.1"
python_packages:
- "vllm==0.5.3.post1"
- "transformers==4.43.1"
- "inferless-cli==2.0.9"
- "hf-transfer==0.1.9"
- "huggingface-hub==0.27.1"
```
## Test your model with Remote Run
You can use the `inferless remote-run`([installation guide here](https://docs.inferless.com/model-import/cli-import#cli-import)) command to test your model or any custom Python script in a remote GPU environment directly from your local machine. Make sure that you use `Python3.10` for seamless experience.
### Step 1: Add the Decorators and local entry point
To enable **Remote Run**, simply do the following:
1. Import the `inferless` library and initialize `Cls(gpu="A100")`. The available GPU options are `T4`, `A10` and `A100`.
2. Decorated the `initialize` and `infer` functions with `@app.load` and `@app.infer` respectively.
3. Create the Local Entry Point by decorating a function (for example, `my_local_entry`) with `@inferless.local_entry_point`.
Within this function, instantiate your model class, convert any incoming parameters into a `RequestObjects` object, and invoke the model's `infer` method.
```python
from vllm import LLM, SamplingParams
from transformers import AutoTokenizer
import inferless
from pydantic import BaseModel, Field
from typing import Optional
@inferless.request
class RequestObjects(BaseModel):
prompt: str = Field(default="Explain Deep Learning.")
temperature: Optional[float] = 0.7
top_p: Optional[float] = 0.1
repetition_penalty: Optional[float] = 1.18
top_k: Optional[int] = 40
max_tokens: Optional[int] = 256
@inferless.response
class ResponseObjects(BaseModel):
generated_text: str = Field(default='Test output')
app = inferless.Cls(gpu="A100")
class InferlessPythonModel:
@app.load
def initialize(self):
model_id = "meta-llama/Meta-Llama-3.1-8B-Instruct"
self.llm = LLM(model=model_id,dtype="float16")
self.tokenizer = AutoTokenizer.from_pretrained(model_id)
@app.infer
def infer(self, request: RequestObjects) -> ResponseObjects:
sampling_params = SamplingParams(temperature=request.temperature,top_p=request.top_p,repetition_penalty=request.repetition_penalty,
top_k=request.top_k,max_tokens=request.max_tokens)
input_text = self.tokenizer.apply_chat_template([{"role": "user", "content": request.prompt}], tokenize=False)
result = self.llm.generate(input_text, sampling_params)
result_output = [output.outputs[0].text for output in result]
generateObject = ResponseObjects(generated_text = result_output[0])
return generateObject
def finalize(self):
self.llm = None
@inferless.local_entry_point
def my_local_entry(dynamic_params):
request_objects = RequestObjects(**dynamic_params)
model_instance = InferlessPythonModel()
return model_instance.infer(request_objects)
```
### Step 2: Run with Remote GPU
From your local terminal, navigate to the folder containing your `app.py` and your `inferless-runtime-config.yaml` and run:
```bash
inferless remote-run app.py -c inferless-runtime-config.yaml --prompt "What is deep learning?"
```
You can pass the other input parameters in the same way (e.g., `--max_tokens`, `--temperature`, etc.) as long as your code expects them in the `inputs` dictionary.
If you want to exclude certain files or directories from being uploaded, use the `--exclude` or `-e` flag.
## Method A: Deploying the model on Inferless Platform
Inferless supports multiple ways of [importing your model](https://docs.inferless.com/model-import/file-structure-req/file-structure-requirements). For this tutorial, we will use GitHub.
### Step 1: Login to the inferless dashboard can click on Import model button
Navigate to your desired workspace in Inferless and Click on `Add a custom model` button that you see on the top right. An import wizard will open up.
### Step 2: Follow the UI to complete the model Import
* Select the GitHub/GitLab Integration option to connect your source code repository with the deployment environment.
* Navigate to the specific GitHub repository that contains your model's code. Here, you will need to identify and enter the name of the model you wish to import.
* Choose the appropriate type of machine that suits your model's requirements. Additionally, specify the minimum and maximum number of replicas to define the scalability range for deploying your model.
* Optionally, you have the option to enable automatic build and deployment. This feature triggers a new deployment automatically whenever there is a new code push to your repository.
* If your model requires additional software packages, configure the Custom Runtime settings by including necessary pip or apt packages. Also, set up environment variables such as Inference Timeout, Container Concurrency, and Scale Down Timeout to tailor the runtime environment according to your needs.
* Wait for the validation process to complete, ensuring that all settings are correct and functional. Once validation is successful, click on the "Import" button to finalize the import of your model.
### Step 3: Wait for the model build to complete usually takes \~5-10 minutes
### Step 4: Use the APIs to call the model
Once the model is in 'Active' status you can click on the 'API' page to call the model
### Here is the Demo:
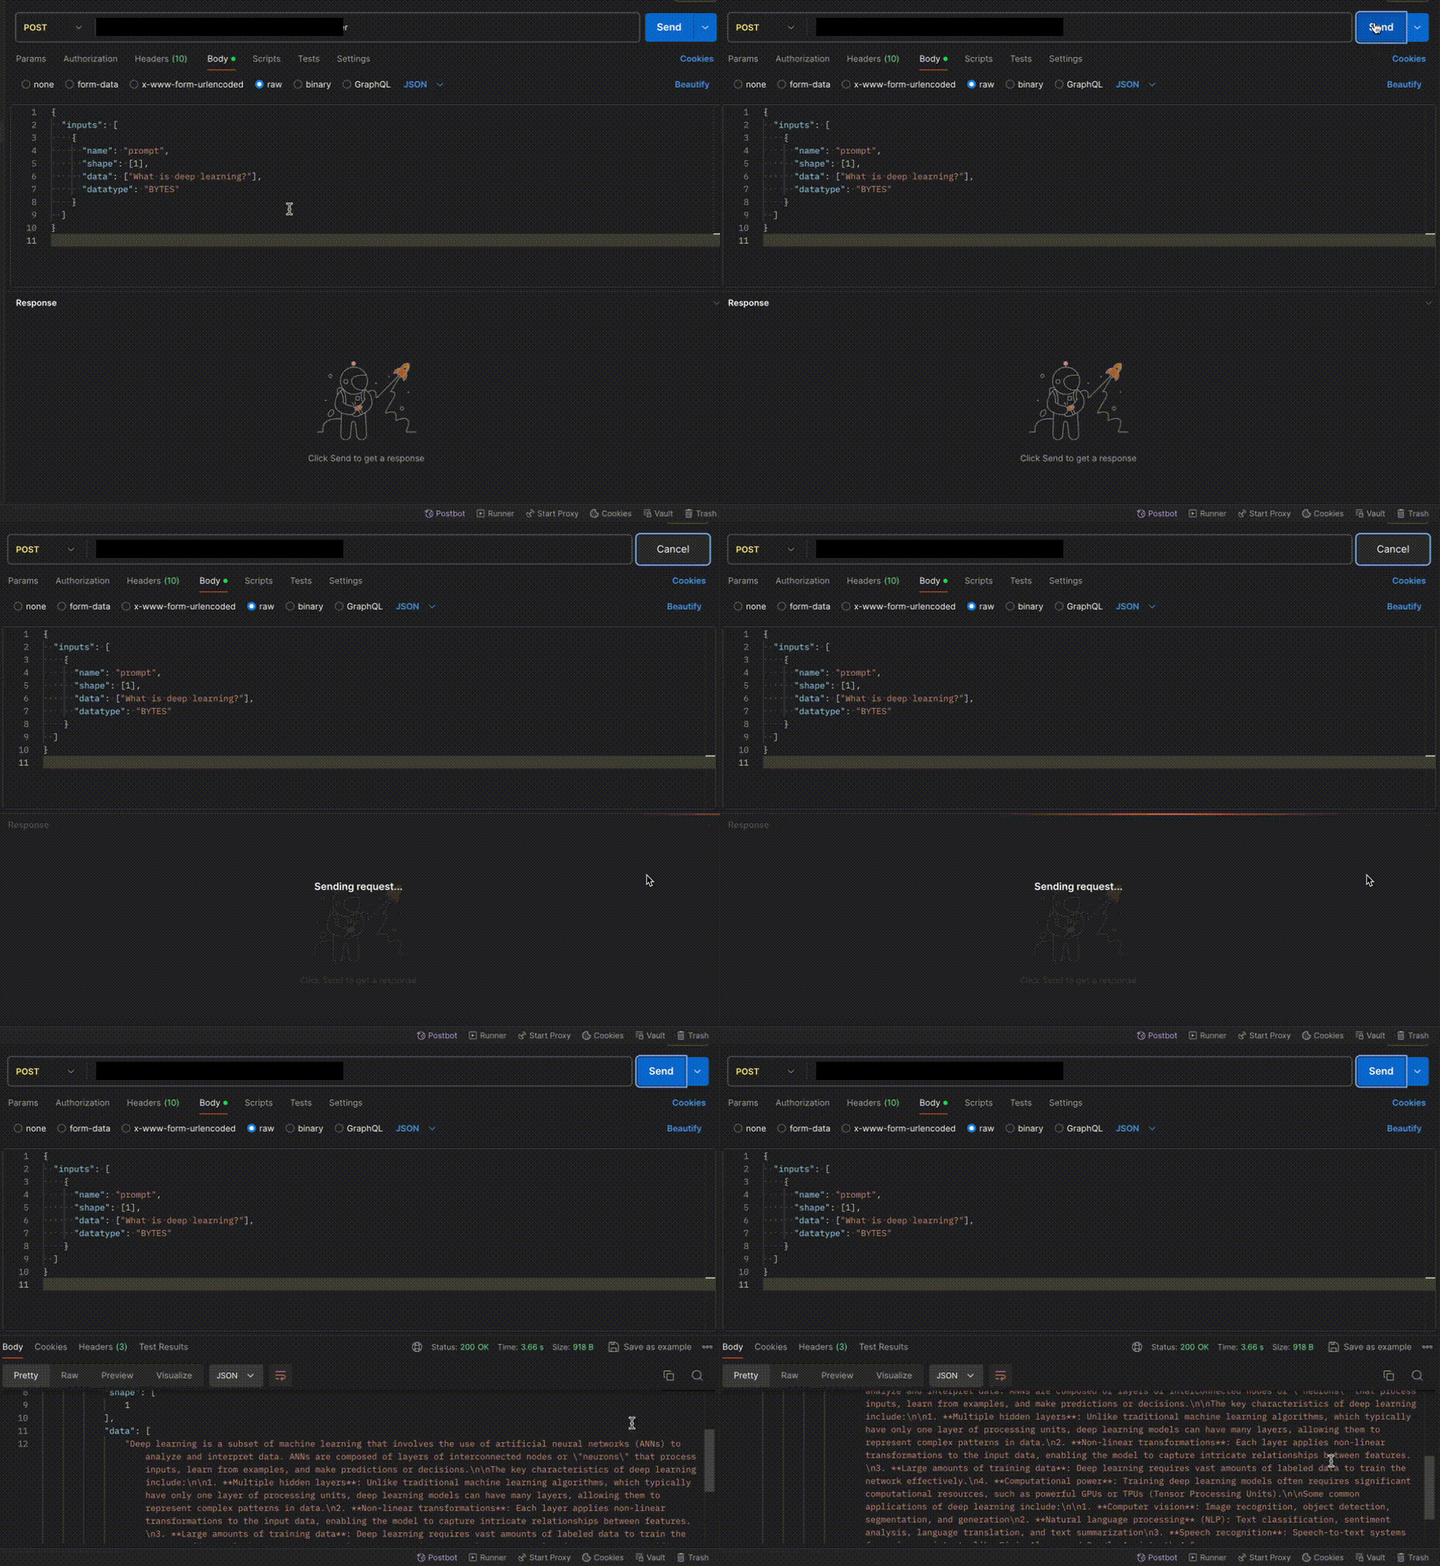 ## Method B: Deploying the model on Inferless CLI
Inferless allows you to deploy your model using Inferless-CLI. Follow the steps to deploy using Inferless CLI.
### Clone the repository of the model
Let's begin by cloning the model repository:
```bash
git clone https://github.com/inferless/Llama-3.1-8B-Instruct.git
```
### Deploy the Model
To deploy the model using Inferless CLI, execute the following command:
```bash
inferless deploy --gpu A100 --runtime inferless-runtime-config.yaml
```
**Explanation of the Command:**
* `--gpu A100`: Specifies the GPU type for deployment. Available options include `A10`, `A100`, and `T4`.
* `--runtime inferless-runtime-config.yaml`: Defines the runtime configuration file. If not specified, the default Inferless runtime is used.
# Deploy Llama-3.2-11B-Vision-Instruct using Inferless
Source: https://docs.inferless.com/how-to-guides/deploy-a-Llama-3.2-11B-Vision-Instruct-using-inferless
The Llama 3.2 11B Vision Instruct model is part of Meta's latest series of large language models that introduce significant advancements in multimodal AI capabilities, allowing for both text and image inputs.
## Introduction
[Llama 3.2-Vision](https://huggingface.co/meta-llama/Llama-3.2-11B-Vision-Instruct) enhances the Llama 3.1 text model with image recognition capabilities. It uses a vision adapter with cross-attention layers to integrate image representations into the core language model. The base model is fine-tuned for helpfulness and safety using supervised learning and reinforcement learning with human feedback.
## Our Observations
We have deployed the model on an A100 GPU(80GB). Here are our observations:
| Library | Inference Time | Cold Start Time |
| ------------ | -------------- | --------------- |
| Transformers | 2.44 sec | 10.60 sec |
Note: The inference time and cold start time are average values.
## Defining Dependencies
We are using the [Transformers](https://github.com/huggingface/transformers) to serve the model on a single A100 (80GB).
## Constructing the GitHub/GitLab Template
Now quickly construct the GitHub/GitLab template, this process is mandatory and make sure you don't add any file named `model.py`.
```
Llama-3.2-11B-Vision-Instruct/
├── app.py
├── inferless-runtime-config.yaml
├── inferless.yaml
└── input_schema.py
```
You can also add other files to this directory.
## Create the class for inference
In the [app.py](https://github.com/inferless/Llama-3.2-11B-Vision-Instruct/blob/main/app.py) we will define the class and import all the required functions
1. `def initialize`: In this function, you will initialize your model and define any `variable` that you want to use during inference.
2. `def infer`: This function gets called for every request that you send. Here you can define all the steps that are required for the inference. You can also pass custom values for inference and pass it through `inputs(dict)` parameter.
3. `def finalize`: This function cleans up all the allocated memory.
```python
import os
os.environ["HF_HUB_ENABLE_HF_TRANSFER"]='1'
from huggingface_hub import snapshot_download
import requests
import torch
from PIL import Image
from transformers import MllamaForConditionalGeneration, AutoProcessor
import inferless
app = inferless.Cls(gpu="A100")
class InferlessPythonModel:
@app.load
def initialize(self):
model_id = "meta-llama/Llama-3.2-11B-Vision-Instruct"
snapshot_download(repo_id=model_id,allow_patterns=["*.safetensors"])
self.model = MllamaForConditionalGeneration.from_pretrained(
model_id,
torch_dtype=torch.bfloat16,
device_map="cuda",
)
self.processor = AutoProcessor.from_pretrained(model_id)
@app.infer
def infer(self, inputs):
image_url = inputs["image_url"]
prompt = inputs["prompt"]
max_new_tokens = inputs.get("max_new_tokens",30)
messages = [
[
{
"role": "user",
"content": [
{"type": "image"},
{"type": "text", "text": prompt}
]
}
],
]
input_text = self.processor.apply_chat_template(messages, add_generation_prompt=True)
image = Image.open(requests.get(image_url, stream=True).raw)
inputs = self.processor(image, input_text, return_tensors="pt").to(self.model.device)
output = self.model.generate(**inputs, max_new_tokens=max_new_tokens)
output_text = self.processor.decode(output[0],skip_special_tokens=True)
return {"generated_text":output_text}
def finalize(self):
self.model = None
```
## Create the Input Schema
We have to create a [input\_schema.py](https://github.com/inferless/Llama-3.2-11B-Vision-Instruct/blob/main/input_schema.py) in your GitHub/Gitlab repository this will help us create the Input parameters. You can checkout our documentation on [Input / Output Schema](https://docs.inferless.com/model-import/input-output-schema).
For this tutorial, we have defined these parameter `prompt`, `image_url` and `max_new_tokens` which are required during the API call. Now lets create the `input_schema.py`.
```python
INPUT_SCHEMA = {
"prompt": {
'datatype': 'STRING',
'required': True,
'shape': [1],
'example': ["Describe this image?"]
},
"image_url": {
'datatype': 'STRING',
'required': True,
'shape': [1],
'example': ["https://huggingface.co/datasets/huggingface/documentation-images/resolve/0052a70beed5bf71b92610a43a52df6d286cd5f3/diffusers/rabbit.jpg"]
},
"max_new_tokens": {
'datatype': 'INT32',
'required': False,
'shape': [1],
'example': [50]
}
}
```
## Creating the Custom Runtime
This is a mandatory step where we allow the users to upload their custom runtime through [inferless-runtime-config.yaml](https://github.com/inferless/Llama-3.2-11B-Vision-Instruct/blob/main/inferless-runtime-config.yaml).
```python
build:
cuda_version: 12.1.1
python_packages:
- accelerate==0.34.2
- torch==2.4.1
- transformers==4.45.0
- pillow==10.4.0
- inferless-cli==2.0.9
- hf-transfer==0.1.9
- huggingface-hub==0.27.1
```
## Test your model with Remote Run
You can use the `inferless remote-run`([installation guide here](https://docs.inferless.com/model-import/cli-import#cli-import)) command to test your model or any custom Python script in a remote GPU environment directly from your local machine. Make sure that you use `Python3.10` for seamless experience.
### Step 1: Add the Decorators and local entry point
To enable **Remote Run**, simply do the following:
1. Import the `inferless` library and initialize `Cls(gpu="A100")`. The available GPU options are `T4`, `A10` and `A100`.
2. Decorated the `initialize` and `infer` functions with `@app.load` and `@app.infer` respectively.
3. Create the Local Entry Point by decorating a function (for example, `my_local_entry`) with `@inferless.local_entry_point`.
Within this function, instantiate your model class, convert any incoming parameters into a `RequestObjects` object, and invoke the model's `infer` method.
```python
import os
os.environ["HF_HUB_ENABLE_HF_TRANSFER"]='1'
from huggingface_hub import snapshot_download
import requests
import torch
from PIL import Image
from transformers import MllamaForConditionalGeneration, AutoProcessor
import inferless
from pydantic import BaseModel, Field
from typing import Optional
app = inferless.Cls(gpu="A100")
@inferless.request
class RequestObjects(BaseModel):
prompt: str = Field(default="Describe this image?")
image_url: Optional[str] = "https://huggingface.co/datasets/huggingface/documentation-images/resolve/0052a70beed5bf71b92610a43a52df6d286cd5f3/diffusers/rabbit.jpg"
max_new_tokens: Optional[int] = 256
@inferless.response
class ResponseObjects(BaseModel):
generated_text: str = Field(default='Test output')
class InferlessPythonModel:
@app.load
def initialize(self):
model_id = "meta-llama/Llama-3.2-11B-Vision-Instruct"
snapshot_download(repo_id=model_id,allow_patterns=["*.safetensors"])
self.model = MllamaForConditionalGeneration.from_pretrained(
model_id,
torch_dtype=torch.bfloat16,
device_map="cuda",
)
self.processor = AutoProcessor.from_pretrained(model_id)
@app.infer
def infer(self, request: RequestObjects) -> ResponseObjects:
messages = [
[
{
"role": "user",
"content": [
{"type": "image"},
{"type": "text", "text": request.prompt}
]
}
],
]
input_text = self.processor.apply_chat_template(messages, add_generation_prompt=True)
image = Image.open(requests.get(request.image_url, stream=True).raw)
inputs = self.processor(image, input_text, return_tensors="pt").to(self.model.device)
output = self.model.generate(**inputs, max_new_tokens=request.max_new_tokens)
output_text = self.processor.decode(output[0],skip_special_tokens=True)
generateObject = ResponseObjects(generated_text = output_text)
return generateObject
def finalize(self):
self.model = None
@inferless.local_entry_point
def my_local_entry(dynamic_params):
request_objects = RequestObjects(**dynamic_params)
model_instance = InferlessPythonModel()
return model_instance.infer(request_objects)
```
### Step 2: Run with Remote GPU
From your local terminal, navigate to the folder containing your `app.py` and your `inferless-runtime-config.yaml` and run:
```bash
inferless remote-run app.py -c inferless-runtime-config.yaml --image_url "https://huggingface.co/datasets/huggingface/documentation-images/resolve/0052a70beed5bf71b92610a43a52df6d286cd5f3/diffusers/rabbit.jpg" --prompt "Describe this image?"
```
You can pass the other input parameter in the same way (e.g., `--max_new_tokens`) as long as your code expects them in the `inputs` dictionary.
If you want to exclude certain files or directories from being uploaded, use the `--exclude` or `-e` flag.
## Method A: Deploying the model on Inferless Platform
Inferless supports multiple ways of [importing your model](https://docs.inferless.com/model-import/file-structure-req/file-structure-requirements). For this tutorial, we will use GitHub.
### Step 1: Login to the inferless dashboard can click on Import model button
Navigate to your desired workspace in Inferless and Click on `Add a custom model` button that you see on the top right. An import wizard will open up.
### Step 2: Follow the UI to complete the model Import
* Select the GitHub/GitLab Integration option to connect your source code repository with the deployment environment.
* Navigate to the specific GitHub repository that contains your model's code. Here, you will need to identify and enter the name of the model you wish to import.
* Choose the appropriate type of machine that suits your model's requirements. Additionally, specify the minimum and maximum number of replicas to define the scalability range for deploying your model.
* Optionally, you have the option to enable automatic build and deployment. This feature triggers a new deployment automatically whenever there is a new code push to your repository.
* If your model requires additional software packages, configure the Custom Runtime settings by including necessary pip or apt packages. Also, set up environment variables such as Inference Timeout, Container Concurrency, and Scale Down Timeout to tailor the runtime environment according to your needs.
* If you're deploying a model from Hugging Face that requires authentication, set your Hugging Face access token as an environment variable named `HF_TOKEN` in step 4. This environment variable will be used to authenticate your requests to Hugging Face.
## Method B: Deploying the model on Inferless CLI
Inferless allows you to deploy your model using Inferless-CLI. Follow the steps to deploy using Inferless CLI.
### Clone the repository of the model
Let's begin by cloning the model repository:
```bash
git clone https://github.com/inferless/Llama-3.1-8B-Instruct.git
```
### Deploy the Model
To deploy the model using Inferless CLI, execute the following command:
```bash
inferless deploy --gpu A100 --runtime inferless-runtime-config.yaml
```
**Explanation of the Command:**
* `--gpu A100`: Specifies the GPU type for deployment. Available options include `A10`, `A100`, and `T4`.
* `--runtime inferless-runtime-config.yaml`: Defines the runtime configuration file. If not specified, the default Inferless runtime is used.
# Deploy Llama-3.2-11B-Vision-Instruct using Inferless
Source: https://docs.inferless.com/how-to-guides/deploy-a-Llama-3.2-11B-Vision-Instruct-using-inferless
The Llama 3.2 11B Vision Instruct model is part of Meta's latest series of large language models that introduce significant advancements in multimodal AI capabilities, allowing for both text and image inputs.
## Introduction
[Llama 3.2-Vision](https://huggingface.co/meta-llama/Llama-3.2-11B-Vision-Instruct) enhances the Llama 3.1 text model with image recognition capabilities. It uses a vision adapter with cross-attention layers to integrate image representations into the core language model. The base model is fine-tuned for helpfulness and safety using supervised learning and reinforcement learning with human feedback.
## Our Observations
We have deployed the model on an A100 GPU(80GB). Here are our observations:
| Library | Inference Time | Cold Start Time |
| ------------ | -------------- | --------------- |
| Transformers | 2.44 sec | 10.60 sec |
Note: The inference time and cold start time are average values.
## Defining Dependencies
We are using the [Transformers](https://github.com/huggingface/transformers) to serve the model on a single A100 (80GB).
## Constructing the GitHub/GitLab Template
Now quickly construct the GitHub/GitLab template, this process is mandatory and make sure you don't add any file named `model.py`.
```
Llama-3.2-11B-Vision-Instruct/
├── app.py
├── inferless-runtime-config.yaml
├── inferless.yaml
└── input_schema.py
```
You can also add other files to this directory.
## Create the class for inference
In the [app.py](https://github.com/inferless/Llama-3.2-11B-Vision-Instruct/blob/main/app.py) we will define the class and import all the required functions
1. `def initialize`: In this function, you will initialize your model and define any `variable` that you want to use during inference.
2. `def infer`: This function gets called for every request that you send. Here you can define all the steps that are required for the inference. You can also pass custom values for inference and pass it through `inputs(dict)` parameter.
3. `def finalize`: This function cleans up all the allocated memory.
```python
import os
os.environ["HF_HUB_ENABLE_HF_TRANSFER"]='1'
from huggingface_hub import snapshot_download
import requests
import torch
from PIL import Image
from transformers import MllamaForConditionalGeneration, AutoProcessor
import inferless
app = inferless.Cls(gpu="A100")
class InferlessPythonModel:
@app.load
def initialize(self):
model_id = "meta-llama/Llama-3.2-11B-Vision-Instruct"
snapshot_download(repo_id=model_id,allow_patterns=["*.safetensors"])
self.model = MllamaForConditionalGeneration.from_pretrained(
model_id,
torch_dtype=torch.bfloat16,
device_map="cuda",
)
self.processor = AutoProcessor.from_pretrained(model_id)
@app.infer
def infer(self, inputs):
image_url = inputs["image_url"]
prompt = inputs["prompt"]
max_new_tokens = inputs.get("max_new_tokens",30)
messages = [
[
{
"role": "user",
"content": [
{"type": "image"},
{"type": "text", "text": prompt}
]
}
],
]
input_text = self.processor.apply_chat_template(messages, add_generation_prompt=True)
image = Image.open(requests.get(image_url, stream=True).raw)
inputs = self.processor(image, input_text, return_tensors="pt").to(self.model.device)
output = self.model.generate(**inputs, max_new_tokens=max_new_tokens)
output_text = self.processor.decode(output[0],skip_special_tokens=True)
return {"generated_text":output_text}
def finalize(self):
self.model = None
```
## Create the Input Schema
We have to create a [input\_schema.py](https://github.com/inferless/Llama-3.2-11B-Vision-Instruct/blob/main/input_schema.py) in your GitHub/Gitlab repository this will help us create the Input parameters. You can checkout our documentation on [Input / Output Schema](https://docs.inferless.com/model-import/input-output-schema).
For this tutorial, we have defined these parameter `prompt`, `image_url` and `max_new_tokens` which are required during the API call. Now lets create the `input_schema.py`.
```python
INPUT_SCHEMA = {
"prompt": {
'datatype': 'STRING',
'required': True,
'shape': [1],
'example': ["Describe this image?"]
},
"image_url": {
'datatype': 'STRING',
'required': True,
'shape': [1],
'example': ["https://huggingface.co/datasets/huggingface/documentation-images/resolve/0052a70beed5bf71b92610a43a52df6d286cd5f3/diffusers/rabbit.jpg"]
},
"max_new_tokens": {
'datatype': 'INT32',
'required': False,
'shape': [1],
'example': [50]
}
}
```
## Creating the Custom Runtime
This is a mandatory step where we allow the users to upload their custom runtime through [inferless-runtime-config.yaml](https://github.com/inferless/Llama-3.2-11B-Vision-Instruct/blob/main/inferless-runtime-config.yaml).
```python
build:
cuda_version: 12.1.1
python_packages:
- accelerate==0.34.2
- torch==2.4.1
- transformers==4.45.0
- pillow==10.4.0
- inferless-cli==2.0.9
- hf-transfer==0.1.9
- huggingface-hub==0.27.1
```
## Test your model with Remote Run
You can use the `inferless remote-run`([installation guide here](https://docs.inferless.com/model-import/cli-import#cli-import)) command to test your model or any custom Python script in a remote GPU environment directly from your local machine. Make sure that you use `Python3.10` for seamless experience.
### Step 1: Add the Decorators and local entry point
To enable **Remote Run**, simply do the following:
1. Import the `inferless` library and initialize `Cls(gpu="A100")`. The available GPU options are `T4`, `A10` and `A100`.
2. Decorated the `initialize` and `infer` functions with `@app.load` and `@app.infer` respectively.
3. Create the Local Entry Point by decorating a function (for example, `my_local_entry`) with `@inferless.local_entry_point`.
Within this function, instantiate your model class, convert any incoming parameters into a `RequestObjects` object, and invoke the model's `infer` method.
```python
import os
os.environ["HF_HUB_ENABLE_HF_TRANSFER"]='1'
from huggingface_hub import snapshot_download
import requests
import torch
from PIL import Image
from transformers import MllamaForConditionalGeneration, AutoProcessor
import inferless
from pydantic import BaseModel, Field
from typing import Optional
app = inferless.Cls(gpu="A100")
@inferless.request
class RequestObjects(BaseModel):
prompt: str = Field(default="Describe this image?")
image_url: Optional[str] = "https://huggingface.co/datasets/huggingface/documentation-images/resolve/0052a70beed5bf71b92610a43a52df6d286cd5f3/diffusers/rabbit.jpg"
max_new_tokens: Optional[int] = 256
@inferless.response
class ResponseObjects(BaseModel):
generated_text: str = Field(default='Test output')
class InferlessPythonModel:
@app.load
def initialize(self):
model_id = "meta-llama/Llama-3.2-11B-Vision-Instruct"
snapshot_download(repo_id=model_id,allow_patterns=["*.safetensors"])
self.model = MllamaForConditionalGeneration.from_pretrained(
model_id,
torch_dtype=torch.bfloat16,
device_map="cuda",
)
self.processor = AutoProcessor.from_pretrained(model_id)
@app.infer
def infer(self, request: RequestObjects) -> ResponseObjects:
messages = [
[
{
"role": "user",
"content": [
{"type": "image"},
{"type": "text", "text": request.prompt}
]
}
],
]
input_text = self.processor.apply_chat_template(messages, add_generation_prompt=True)
image = Image.open(requests.get(request.image_url, stream=True).raw)
inputs = self.processor(image, input_text, return_tensors="pt").to(self.model.device)
output = self.model.generate(**inputs, max_new_tokens=request.max_new_tokens)
output_text = self.processor.decode(output[0],skip_special_tokens=True)
generateObject = ResponseObjects(generated_text = output_text)
return generateObject
def finalize(self):
self.model = None
@inferless.local_entry_point
def my_local_entry(dynamic_params):
request_objects = RequestObjects(**dynamic_params)
model_instance = InferlessPythonModel()
return model_instance.infer(request_objects)
```
### Step 2: Run with Remote GPU
From your local terminal, navigate to the folder containing your `app.py` and your `inferless-runtime-config.yaml` and run:
```bash
inferless remote-run app.py -c inferless-runtime-config.yaml --image_url "https://huggingface.co/datasets/huggingface/documentation-images/resolve/0052a70beed5bf71b92610a43a52df6d286cd5f3/diffusers/rabbit.jpg" --prompt "Describe this image?"
```
You can pass the other input parameter in the same way (e.g., `--max_new_tokens`) as long as your code expects them in the `inputs` dictionary.
If you want to exclude certain files or directories from being uploaded, use the `--exclude` or `-e` flag.
## Method A: Deploying the model on Inferless Platform
Inferless supports multiple ways of [importing your model](https://docs.inferless.com/model-import/file-structure-req/file-structure-requirements). For this tutorial, we will use GitHub.
### Step 1: Login to the inferless dashboard can click on Import model button
Navigate to your desired workspace in Inferless and Click on `Add a custom model` button that you see on the top right. An import wizard will open up.
### Step 2: Follow the UI to complete the model Import
* Select the GitHub/GitLab Integration option to connect your source code repository with the deployment environment.
* Navigate to the specific GitHub repository that contains your model's code. Here, you will need to identify and enter the name of the model you wish to import.
* Choose the appropriate type of machine that suits your model's requirements. Additionally, specify the minimum and maximum number of replicas to define the scalability range for deploying your model.
* Optionally, you have the option to enable automatic build and deployment. This feature triggers a new deployment automatically whenever there is a new code push to your repository.
* If your model requires additional software packages, configure the Custom Runtime settings by including necessary pip or apt packages. Also, set up environment variables such as Inference Timeout, Container Concurrency, and Scale Down Timeout to tailor the runtime environment according to your needs.
* If you're deploying a model from Hugging Face that requires authentication, set your Hugging Face access token as an environment variable named `HF_TOKEN` in step 4. This environment variable will be used to authenticate your requests to Hugging Face.
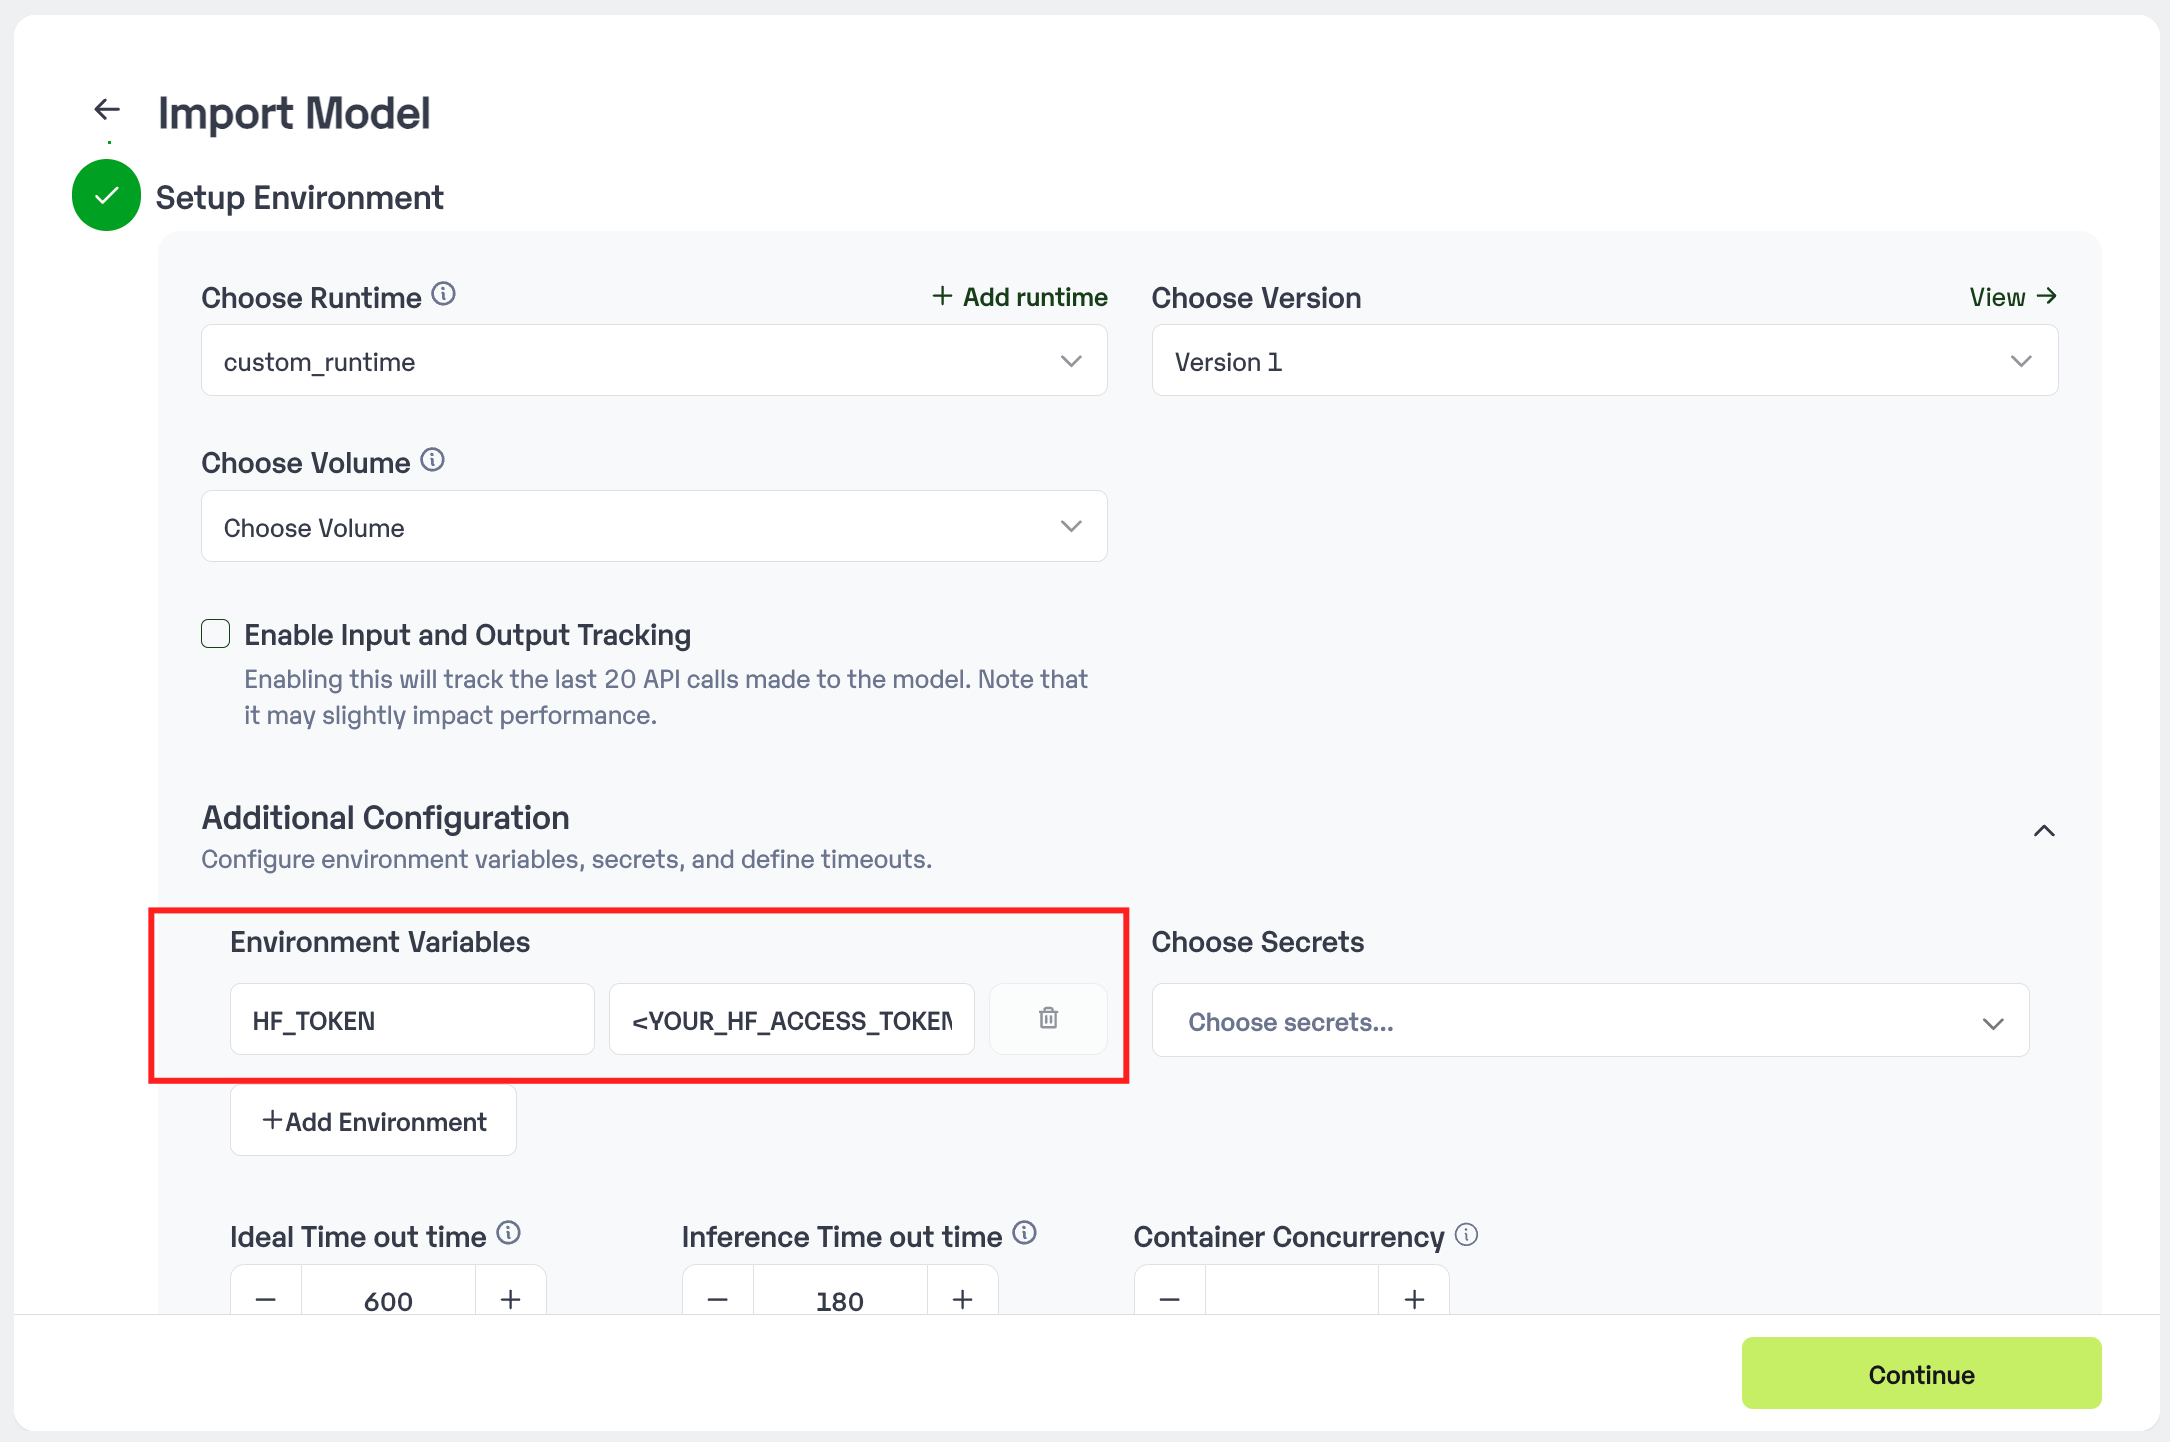 * Wait for the validation process to complete, ensuring that all settings are correct and functional. Once validation is successful, click on the "Import" button to finalize the import of your model.
### Step 3: Wait for the model build to complete usually takes \~5-10 minutes
### Step 4: Use the APIs to call the model
Once the model is in 'Active' status you can click on the 'API' page to call the model
### Here is the Demo:
* Wait for the validation process to complete, ensuring that all settings are correct and functional. Once validation is successful, click on the "Import" button to finalize the import of your model.
### Step 3: Wait for the model build to complete usually takes \~5-10 minutes
### Step 4: Use the APIs to call the model
Once the model is in 'Active' status you can click on the 'API' page to call the model
### Here is the Demo:
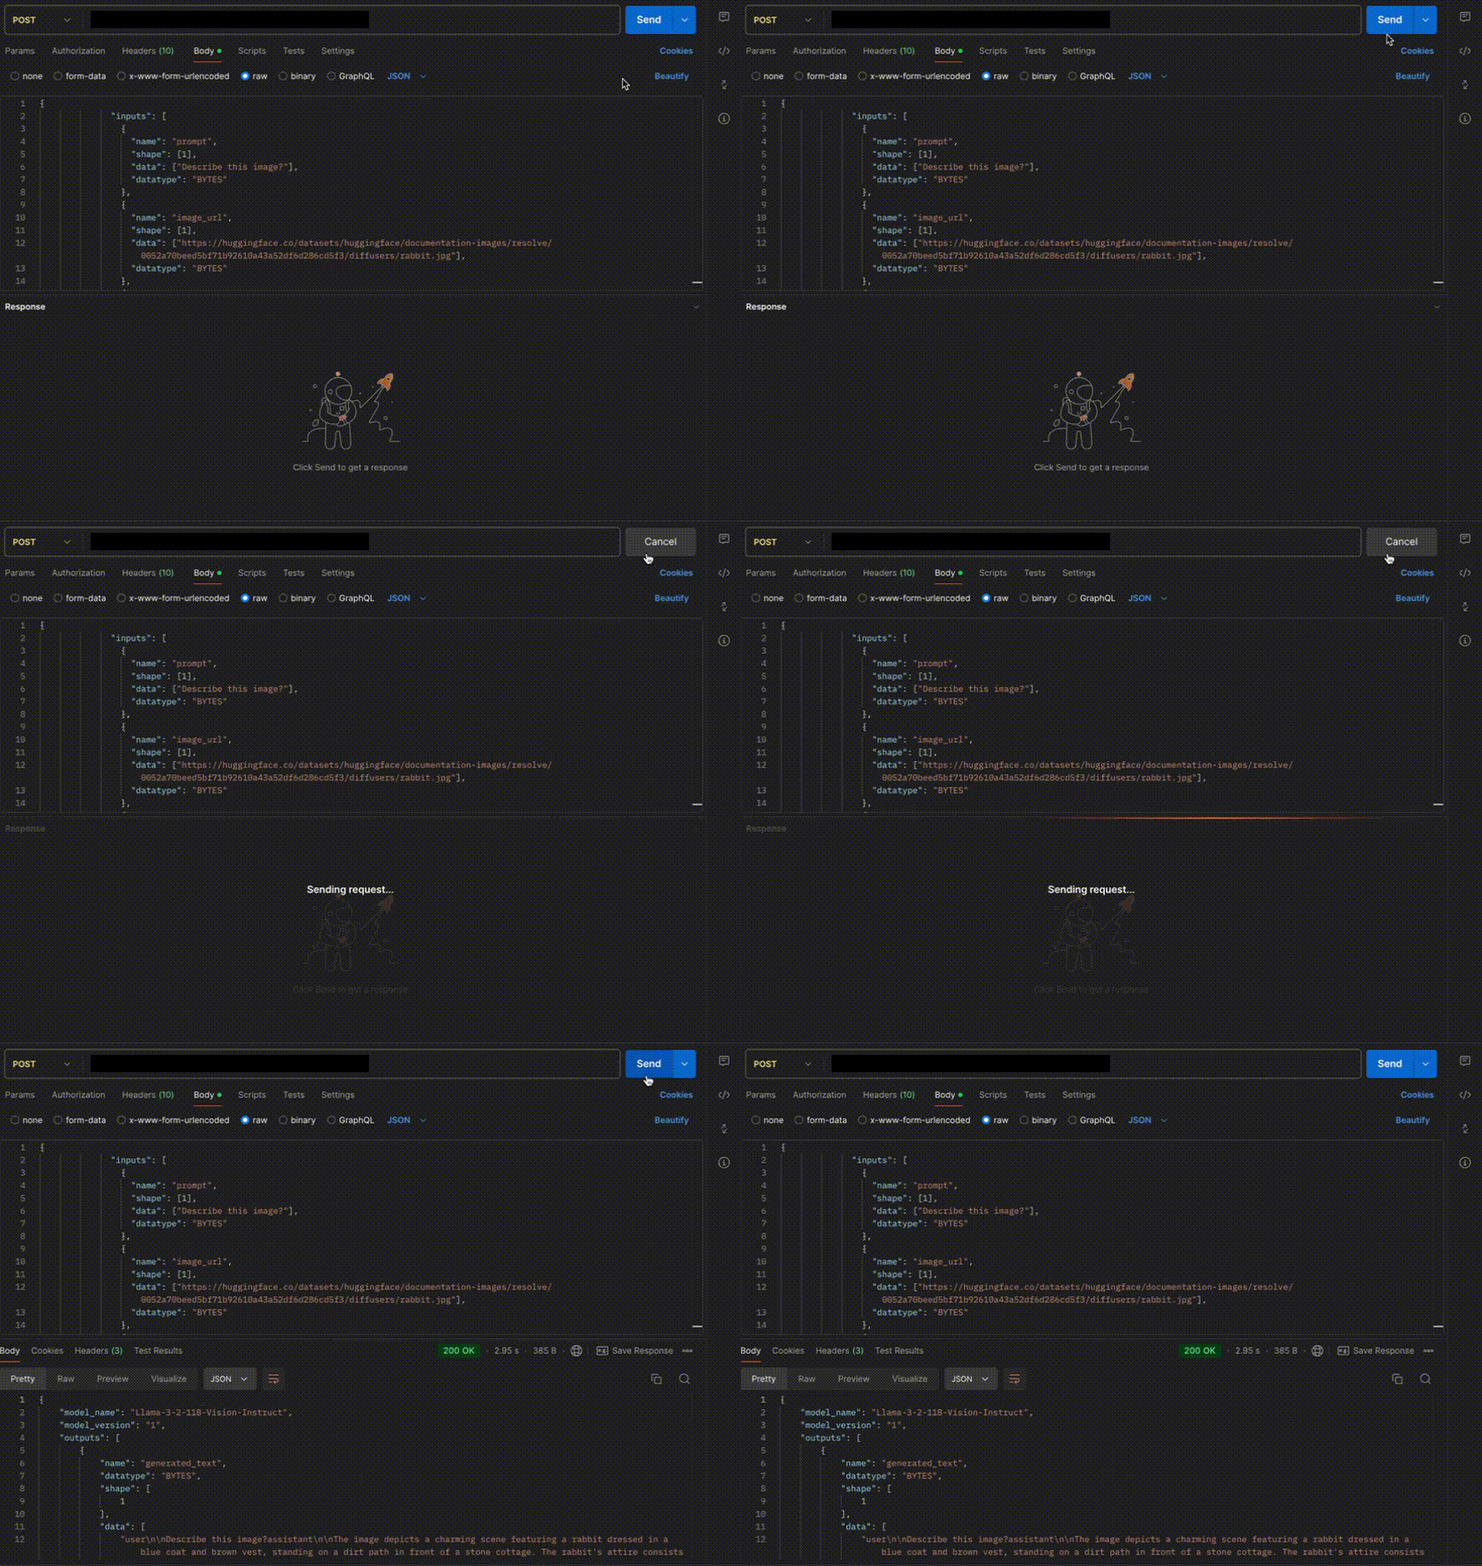 ## Method B: Deploying the model on Inferless CLI
Inferless allows you to deploy your model using Inferless-CLI. Follow the steps to deploy using Inferless CLI.
### Clone the repository of the model
Let's begin by cloning the model repository:
```bash
git clone https://github.com/inferless/Llama-3.2-11B-Vision-Instruct.git
```
### Deploy the Model
To deploy the model using Inferless CLI, execute the following command:
```bash
inferless deploy --gpu A100 --runtime inferless-runtime-config.yaml
```
**Explanation of the Command:**
* `--gpu A100`: Specifies the GPU type for deployment. Available options include `A10`, `A100`, and `T4`.
* `--runtime inferless-runtime-config.yaml`: Defines the runtime configuration file. If not specified, the default Inferless runtime is used.
# Deploy Ministral-8B-Instruct using Inferless
Source: https://docs.inferless.com/how-to-guides/deploy-a-Ministral-8B-Instruct
Ministral-8B-Instruct is a high-performance, instruction-tuned language model with 8 billion parameters and a 128k token context window, designed for versatile applications in natural language processing.
## Introduction
[Ministral-8B-Instruct](https://huggingface.co/mistralai/Ministral-8B-Instruct-2410) is an LLM developed by Mistral AI, specifically designed for instruction-based tasks. It features a dense transformer architecture with 8 billion parameters, 36 layers, context window of 128k tokens and vocabulary size of 131k, using the V3-Tekken tokenizer which allows it to process extensive inputs effectively. The model supports function calling, enhancing its ability to perform specific tasks based on user instructions.
## Our Observations
We have deployed the model on an A100 GPU(80GB). Here are our observations:
| Library | Inference Time | Cold Start Time | Tokens/Sec | Output Tokens Length |
| ------- | -------------- | --------------- | ---------- | -------------------- |
| vLLM | 3.05 sec | 30.43 sec | 78.27 | 256 |
Note: The inference time and cold start time are average values.
## Defining Dependencies
We are using the [vLLM](https://github.com/vllm-project/vllm/) to serve the model on a single A100 (80GB).
## Constructing the GitHub/GitLab Template
Now quickly construct the GitHub/GitLab template, this process is mandatory and make sure you don't add any file named `model.py`.
```
Ministral-8B-Instruct/
├── app.py
├── inferless-runtime-config.yaml
├── inferless.yaml
└── input_schema.py
```
You can also add other files to this directory.
## Create the class for inference
In the [app.py](https://github.com/inferless/Ministral-8B-Instruct/blob/main/app.py) we will define the class and import all the required functions
1. `def initialize`: In this function, you will initialize your model and define any `variable` that you want to use during inference.
2. `def infer`: This function gets called for every request that you send. Here you can define all the steps that are required for the inference. You can also pass custom values for inference and pass it through `inputs(dict)` parameter.
3. `def finalize`: This function cleans up all the allocated memory.
```python
from vllm import LLM
from vllm.sampling_params import SamplingParams
from transformers import AutoTokenizer
import inferless
app = inferless.Cls(gpu="A100")
class InferlessPythonModel:
@app.load
def initialize(self):
model_id = "mistralai/Ministral-8B-Instruct-2410"
self.llm = LLM(model=model_id,gpu_memory_utilization=0.9,max_model_len=5000)
self.tokenizer = AutoTokenizer.from_pretrained(model_id)
@app.infer
def infer(self, inputs):
prompts = inputs["prompt"]
temperature = inputs.get("temperature",0.7)
top_p = inputs.get("top_p",0.1)
repetition_penalty = inputs.get("repetition_penalty",1.18)
top_k = int(inputs.get("top_k",40))
max_tokens = inputs.get("max_tokens",256)
sampling_params = SamplingParams(temperature=temperature,top_p=top_p,repetition_penalty=repetition_penalty,
top_k=top_k,max_tokens=max_tokens)
input_text = self.tokenizer.apply_chat_template([{"role": "user", "content": prompts}], tokenize=False)
result = self.llm.generate(input_text, sampling_params)
result_output = [output.outputs[0].text for output in result]
return {'result': result_output[0]}
def finalize(self):
self.llm = None
```
## Create the Input Schema
We have to create a [input\_schema.py](https://github.com/inferless/Ministral-8B-Instruct/blob/main/input_schema.py) in your GitHub/Gitlab repository this will help us create the Input parameters. You can checkout our documentation on [Input / Output Schema](https://docs.inferless.com/model-import/input-output-schema).
For this tutorial, we have defined the parameter which are required during the API call. Now lets create the `input_schema.py`.
```python
INPUT_SCHEMA = {
"prompt": {
'datatype': 'STRING',
'required': True,
'shape': [1],
'example': ["What is deep learning?"]
},
"temperature": {
'datatype': 'FP32',
'required': False,
'shape': [1],
'example': [0.7]
},
"top_p": {
'datatype': 'FP32',
'required': False,
'shape': [1],
'example': [0.1]
},
"repetition_penalty": {
'datatype': 'FP32',
'required': False,
'shape': [1],
'example': [1.18]
},
"max_tokens": {
'datatype': 'INT16',
'required': False,
'shape': [1],
'example': [256]
},
"top_k":{
'datatype': 'INT8',
'required': False,
'shape': [1],
'example': [40]
}
}
```
## Creating the Custom Runtime
This is a mandatory step where we allow the users to upload their custom runtime through [inferless-runtime-config.yaml](https://github.com/inferless/Ministral-8B-Instruct/blob/main/inferless-runtime-config.yaml).
```python
build:
cuda_version: "12.1.1"
python_packages:
- "vllm==0.6.3.post1"
- "transformers==4.45.2"
- "inferless-cli==2.0.9"
- "hf-transfer==0.1.9"
- "huggingface-hub==0.27.1"
```
## Test your model with Remote Run
You can use the `inferless remote-run`([installation guide here](https://docs.inferless.com/model-import/cli-import#cli-import)) command to test your model or any custom Python script in a remote GPU environment directly from your local machine. Make sure that you use `Python3.10` for seamless experience.
### Step 1: Add the Decorators and local entry point
To enable **Remote Run**, simply do the following:
1. Import the `inferless` library and initialize `Cls(gpu="A100")`. The available GPU options are `T4`, `A10` and `A100`.
2. Decorated the `initialize` and `infer` functions with `@app.load` and `@app.infer` respectively.
3. Create the Local Entry Point by decorating a function (for example, `my_local_entry`) with `@inferless.local_entry_point`.
Within this function, instantiate your model class, convert any incoming parameters into a `RequestObjects` object, and invoke the model's `infer` method.
```python
from vllm import LLM
from vllm.sampling_params import SamplingParams
from transformers import AutoTokenizer
import inferless
from pydantic import BaseModel, Field
from typing import Optional
app = inferless.Cls(gpu="A100")
@inferless.request
class RequestObjects(BaseModel):
prompt: str = Field(default="Explain Deep Learning.")
temperature: Optional[float] = 0.7
top_p: Optional[float] = 0.1
repetition_penalty: Optional[float] = 1.18
top_k: Optional[int] = 40
max_tokens: Optional[int] = 256
@inferless.response
class ResponseObjects(BaseModel):
generated_text: str = Field(default='Test output')
class InferlessPythonModel:
@app.load
def initialize(self):
model_id = "mistralai/Ministral-8B-Instruct-2410"
self.llm = LLM(model=model_id,gpu_memory_utilization=0.9,max_model_len=5000)
self.tokenizer = AutoTokenizer.from_pretrained(model_id)
@app.infer
def infer(self, request: RequestObjects) -> ResponseObjects:
sampling_params = SamplingParams(temperature=request.temperature,top_p=request.top_p,repetition_penalty=request.repetition_penalty,
top_k=request.top_k,max_tokens=request.max_tokens)
input_text = self.tokenizer.apply_chat_template([{"role": "user", "content": request.prompt}], tokenize=False)
result = self.llm.generate(input_text, sampling_params)
result_output = [output.outputs[0].text for output in result]
generateObject = ResponseObjects(generated_text = result_output[0])
return generateObject
def finalize(self):
self.llm = None
@inferless.local_entry_point
def my_local_entry(dynamic_params):
request_objects = RequestObjects(**dynamic_params)
model_instance = InferlessPythonModel()
return model_instance.infer(request_objects)
```
### Step 2: Run with Remote GPU
From your local terminal, navigate to the folder containing your `app.py` and your `inferless-runtime-config.yaml` and run:
```bash
inferless remote-run app.py -c inferless-runtime-config.yaml --prompt "What is deep learning?"
```
You can pass the other input parameters in the same way (e.g., `--max_tokens`, `--temperature`, etc.) as long as your code expects them in the `inputs` dictionary.
If you want to exclude certain files or directories from being uploaded, use the `--exclude` or `-e` flag.
## Method A: Deploying the model on Inferless Platform
Inferless supports multiple ways of [importing your model](https://docs.inferless.com/model-import/file-structure-req/file-structure-requirements). For this tutorial, we will use GitHub.
### Step 1: Login to the inferless dashboard can click on Import model button
Navigate to your desired workspace in Inferless and Click on `Add a custom model` button that you see on the top right. An import wizard will open up.
### Step 2: Follow the UI to complete the model Import
* Select the GitHub/GitLab Integration option to connect your source code repository with the deployment environment.
* Navigate to the specific GitHub repository that contains your model's code. Here, you will need to identify and enter the name of the model you wish to import.
* Choose the appropriate type of machine that suits your model's requirements. Additionally, specify the minimum and maximum number of replicas to define the scalability range for deploying your model.
* Optionally, you have the option to enable automatic build and deployment. This feature triggers a new deployment automatically whenever there is a new code push to your repository.
* If your model requires additional software packages, configure the Custom Runtime settings by including necessary pip or apt packages. Also, set up environment variables such as Inference Timeout, Container Concurrency, and Scale Down Timeout to tailor the runtime environment according to your needs.
* If you're deploying a model from Hugging Face that requires authentication, set your Hugging Face access token as an environment variable named `HF_TOKEN` in step 4. This environment variable will be used to authenticate your requests to Hugging Face.
* Wait for the validation process to complete, ensuring that all settings are correct and functional. Once validation is successful, click on the "Import" button to finalize the import of your model.
### Step 3: Wait for the model build to complete usually takes \~5-10 minutes
### Step 4: Use the APIs to call the model
Once the model is in 'Active' status you can click on the 'API' page to call the model
### Here is the Demo:
## Method B: Deploying the model on Inferless CLI
Inferless allows you to deploy your model using Inferless-CLI. Follow the steps to deploy using Inferless CLI.
### Clone the repository of the model
Let's begin by cloning the model repository:
```bash
git clone https://github.com/inferless/Llama-3.2-11B-Vision-Instruct.git
```
### Deploy the Model
To deploy the model using Inferless CLI, execute the following command:
```bash
inferless deploy --gpu A100 --runtime inferless-runtime-config.yaml
```
**Explanation of the Command:**
* `--gpu A100`: Specifies the GPU type for deployment. Available options include `A10`, `A100`, and `T4`.
* `--runtime inferless-runtime-config.yaml`: Defines the runtime configuration file. If not specified, the default Inferless runtime is used.
# Deploy Ministral-8B-Instruct using Inferless
Source: https://docs.inferless.com/how-to-guides/deploy-a-Ministral-8B-Instruct
Ministral-8B-Instruct is a high-performance, instruction-tuned language model with 8 billion parameters and a 128k token context window, designed for versatile applications in natural language processing.
## Introduction
[Ministral-8B-Instruct](https://huggingface.co/mistralai/Ministral-8B-Instruct-2410) is an LLM developed by Mistral AI, specifically designed for instruction-based tasks. It features a dense transformer architecture with 8 billion parameters, 36 layers, context window of 128k tokens and vocabulary size of 131k, using the V3-Tekken tokenizer which allows it to process extensive inputs effectively. The model supports function calling, enhancing its ability to perform specific tasks based on user instructions.
## Our Observations
We have deployed the model on an A100 GPU(80GB). Here are our observations:
| Library | Inference Time | Cold Start Time | Tokens/Sec | Output Tokens Length |
| ------- | -------------- | --------------- | ---------- | -------------------- |
| vLLM | 3.05 sec | 30.43 sec | 78.27 | 256 |
Note: The inference time and cold start time are average values.
## Defining Dependencies
We are using the [vLLM](https://github.com/vllm-project/vllm/) to serve the model on a single A100 (80GB).
## Constructing the GitHub/GitLab Template
Now quickly construct the GitHub/GitLab template, this process is mandatory and make sure you don't add any file named `model.py`.
```
Ministral-8B-Instruct/
├── app.py
├── inferless-runtime-config.yaml
├── inferless.yaml
└── input_schema.py
```
You can also add other files to this directory.
## Create the class for inference
In the [app.py](https://github.com/inferless/Ministral-8B-Instruct/blob/main/app.py) we will define the class and import all the required functions
1. `def initialize`: In this function, you will initialize your model and define any `variable` that you want to use during inference.
2. `def infer`: This function gets called for every request that you send. Here you can define all the steps that are required for the inference. You can also pass custom values for inference and pass it through `inputs(dict)` parameter.
3. `def finalize`: This function cleans up all the allocated memory.
```python
from vllm import LLM
from vllm.sampling_params import SamplingParams
from transformers import AutoTokenizer
import inferless
app = inferless.Cls(gpu="A100")
class InferlessPythonModel:
@app.load
def initialize(self):
model_id = "mistralai/Ministral-8B-Instruct-2410"
self.llm = LLM(model=model_id,gpu_memory_utilization=0.9,max_model_len=5000)
self.tokenizer = AutoTokenizer.from_pretrained(model_id)
@app.infer
def infer(self, inputs):
prompts = inputs["prompt"]
temperature = inputs.get("temperature",0.7)
top_p = inputs.get("top_p",0.1)
repetition_penalty = inputs.get("repetition_penalty",1.18)
top_k = int(inputs.get("top_k",40))
max_tokens = inputs.get("max_tokens",256)
sampling_params = SamplingParams(temperature=temperature,top_p=top_p,repetition_penalty=repetition_penalty,
top_k=top_k,max_tokens=max_tokens)
input_text = self.tokenizer.apply_chat_template([{"role": "user", "content": prompts}], tokenize=False)
result = self.llm.generate(input_text, sampling_params)
result_output = [output.outputs[0].text for output in result]
return {'result': result_output[0]}
def finalize(self):
self.llm = None
```
## Create the Input Schema
We have to create a [input\_schema.py](https://github.com/inferless/Ministral-8B-Instruct/blob/main/input_schema.py) in your GitHub/Gitlab repository this will help us create the Input parameters. You can checkout our documentation on [Input / Output Schema](https://docs.inferless.com/model-import/input-output-schema).
For this tutorial, we have defined the parameter which are required during the API call. Now lets create the `input_schema.py`.
```python
INPUT_SCHEMA = {
"prompt": {
'datatype': 'STRING',
'required': True,
'shape': [1],
'example': ["What is deep learning?"]
},
"temperature": {
'datatype': 'FP32',
'required': False,
'shape': [1],
'example': [0.7]
},
"top_p": {
'datatype': 'FP32',
'required': False,
'shape': [1],
'example': [0.1]
},
"repetition_penalty": {
'datatype': 'FP32',
'required': False,
'shape': [1],
'example': [1.18]
},
"max_tokens": {
'datatype': 'INT16',
'required': False,
'shape': [1],
'example': [256]
},
"top_k":{
'datatype': 'INT8',
'required': False,
'shape': [1],
'example': [40]
}
}
```
## Creating the Custom Runtime
This is a mandatory step where we allow the users to upload their custom runtime through [inferless-runtime-config.yaml](https://github.com/inferless/Ministral-8B-Instruct/blob/main/inferless-runtime-config.yaml).
```python
build:
cuda_version: "12.1.1"
python_packages:
- "vllm==0.6.3.post1"
- "transformers==4.45.2"
- "inferless-cli==2.0.9"
- "hf-transfer==0.1.9"
- "huggingface-hub==0.27.1"
```
## Test your model with Remote Run
You can use the `inferless remote-run`([installation guide here](https://docs.inferless.com/model-import/cli-import#cli-import)) command to test your model or any custom Python script in a remote GPU environment directly from your local machine. Make sure that you use `Python3.10` for seamless experience.
### Step 1: Add the Decorators and local entry point
To enable **Remote Run**, simply do the following:
1. Import the `inferless` library and initialize `Cls(gpu="A100")`. The available GPU options are `T4`, `A10` and `A100`.
2. Decorated the `initialize` and `infer` functions with `@app.load` and `@app.infer` respectively.
3. Create the Local Entry Point by decorating a function (for example, `my_local_entry`) with `@inferless.local_entry_point`.
Within this function, instantiate your model class, convert any incoming parameters into a `RequestObjects` object, and invoke the model's `infer` method.
```python
from vllm import LLM
from vllm.sampling_params import SamplingParams
from transformers import AutoTokenizer
import inferless
from pydantic import BaseModel, Field
from typing import Optional
app = inferless.Cls(gpu="A100")
@inferless.request
class RequestObjects(BaseModel):
prompt: str = Field(default="Explain Deep Learning.")
temperature: Optional[float] = 0.7
top_p: Optional[float] = 0.1
repetition_penalty: Optional[float] = 1.18
top_k: Optional[int] = 40
max_tokens: Optional[int] = 256
@inferless.response
class ResponseObjects(BaseModel):
generated_text: str = Field(default='Test output')
class InferlessPythonModel:
@app.load
def initialize(self):
model_id = "mistralai/Ministral-8B-Instruct-2410"
self.llm = LLM(model=model_id,gpu_memory_utilization=0.9,max_model_len=5000)
self.tokenizer = AutoTokenizer.from_pretrained(model_id)
@app.infer
def infer(self, request: RequestObjects) -> ResponseObjects:
sampling_params = SamplingParams(temperature=request.temperature,top_p=request.top_p,repetition_penalty=request.repetition_penalty,
top_k=request.top_k,max_tokens=request.max_tokens)
input_text = self.tokenizer.apply_chat_template([{"role": "user", "content": request.prompt}], tokenize=False)
result = self.llm.generate(input_text, sampling_params)
result_output = [output.outputs[0].text for output in result]
generateObject = ResponseObjects(generated_text = result_output[0])
return generateObject
def finalize(self):
self.llm = None
@inferless.local_entry_point
def my_local_entry(dynamic_params):
request_objects = RequestObjects(**dynamic_params)
model_instance = InferlessPythonModel()
return model_instance.infer(request_objects)
```
### Step 2: Run with Remote GPU
From your local terminal, navigate to the folder containing your `app.py` and your `inferless-runtime-config.yaml` and run:
```bash
inferless remote-run app.py -c inferless-runtime-config.yaml --prompt "What is deep learning?"
```
You can pass the other input parameters in the same way (e.g., `--max_tokens`, `--temperature`, etc.) as long as your code expects them in the `inputs` dictionary.
If you want to exclude certain files or directories from being uploaded, use the `--exclude` or `-e` flag.
## Method A: Deploying the model on Inferless Platform
Inferless supports multiple ways of [importing your model](https://docs.inferless.com/model-import/file-structure-req/file-structure-requirements). For this tutorial, we will use GitHub.
### Step 1: Login to the inferless dashboard can click on Import model button
Navigate to your desired workspace in Inferless and Click on `Add a custom model` button that you see on the top right. An import wizard will open up.
### Step 2: Follow the UI to complete the model Import
* Select the GitHub/GitLab Integration option to connect your source code repository with the deployment environment.
* Navigate to the specific GitHub repository that contains your model's code. Here, you will need to identify and enter the name of the model you wish to import.
* Choose the appropriate type of machine that suits your model's requirements. Additionally, specify the minimum and maximum number of replicas to define the scalability range for deploying your model.
* Optionally, you have the option to enable automatic build and deployment. This feature triggers a new deployment automatically whenever there is a new code push to your repository.
* If your model requires additional software packages, configure the Custom Runtime settings by including necessary pip or apt packages. Also, set up environment variables such as Inference Timeout, Container Concurrency, and Scale Down Timeout to tailor the runtime environment according to your needs.
* If you're deploying a model from Hugging Face that requires authentication, set your Hugging Face access token as an environment variable named `HF_TOKEN` in step 4. This environment variable will be used to authenticate your requests to Hugging Face.
* Wait for the validation process to complete, ensuring that all settings are correct and functional. Once validation is successful, click on the "Import" button to finalize the import of your model.
### Step 3: Wait for the model build to complete usually takes \~5-10 minutes
### Step 4: Use the APIs to call the model
Once the model is in 'Active' status you can click on the 'API' page to call the model
### Here is the Demo:
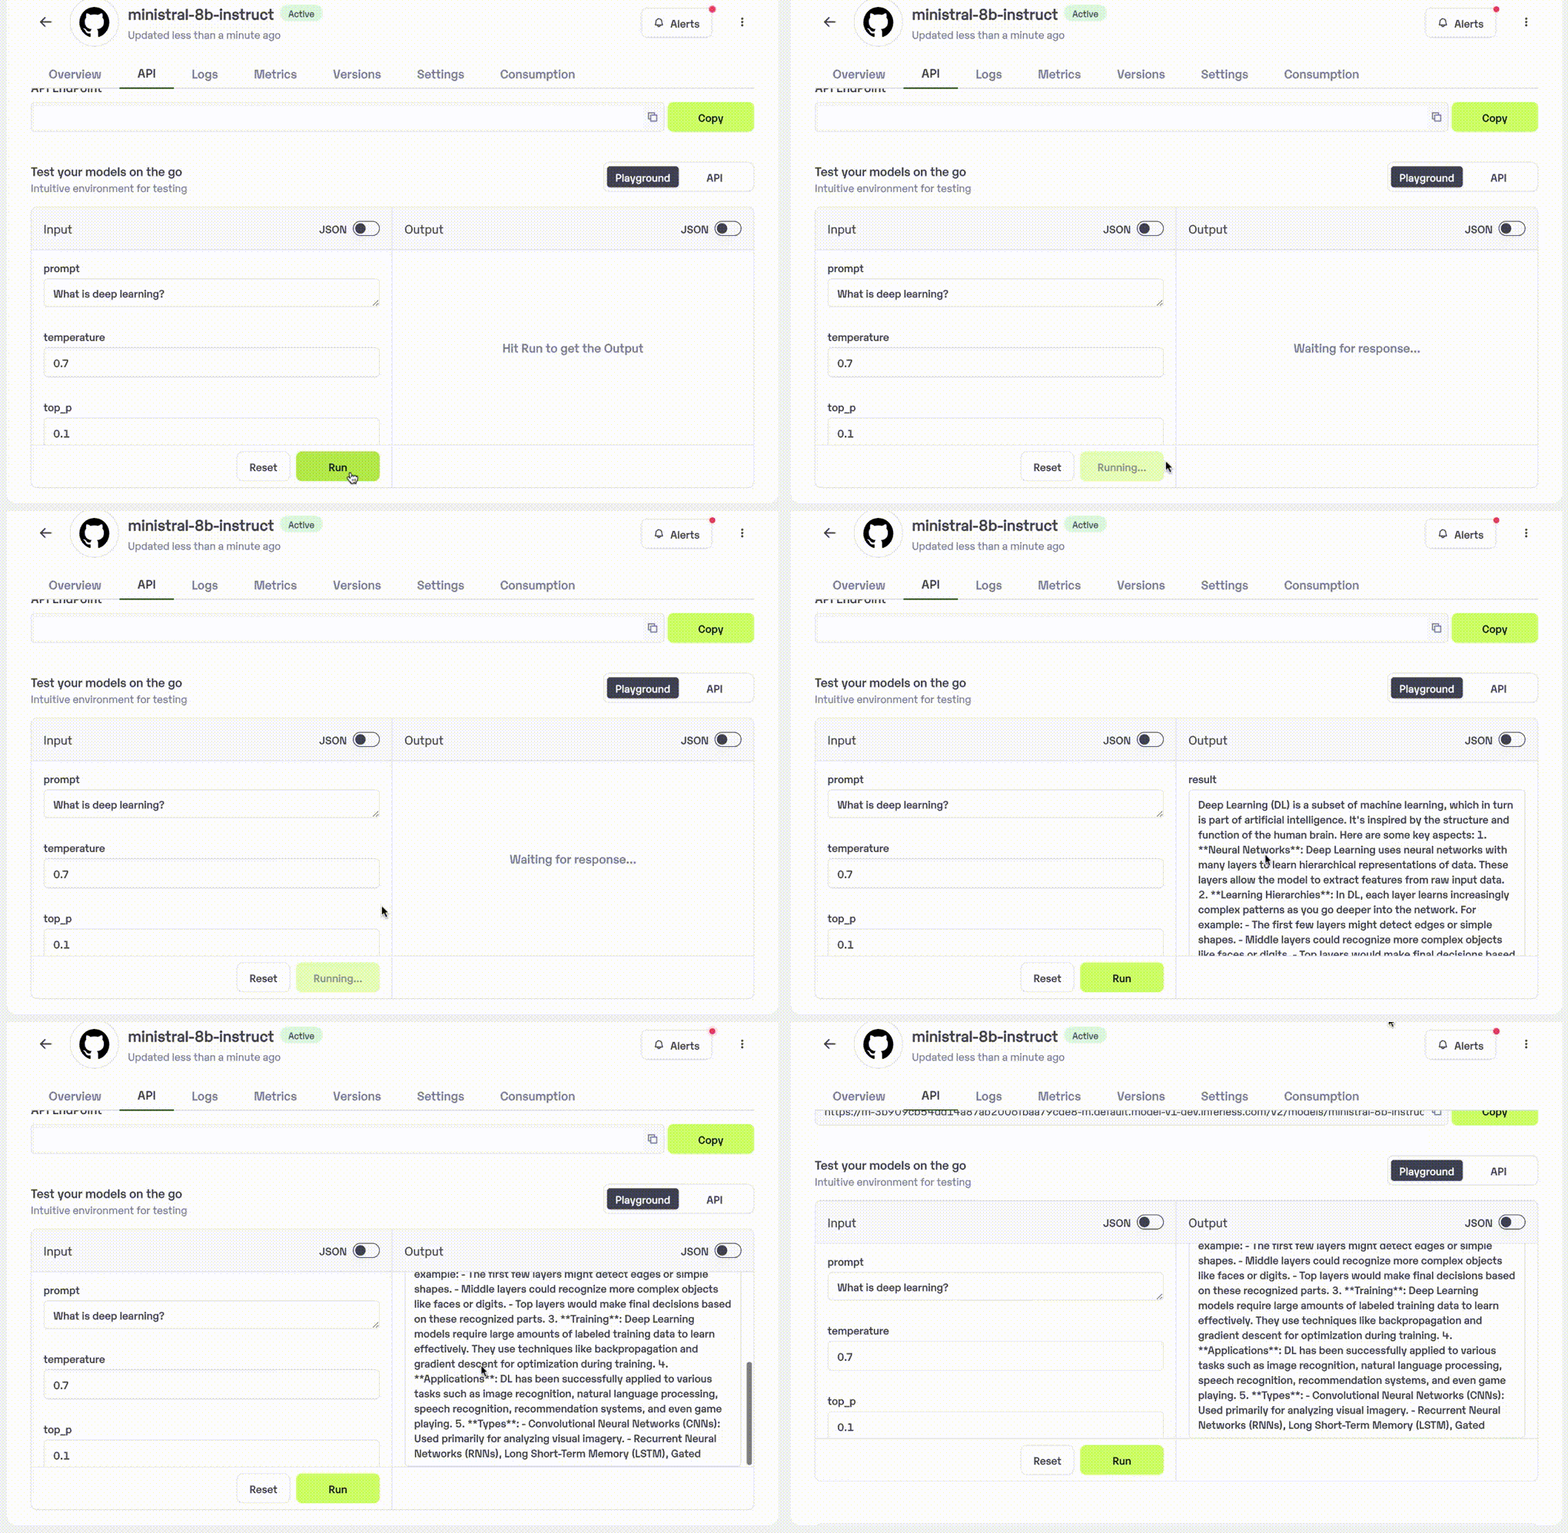 ## Method B: Deploying the model on Inferless CLI
Inferless allows you to deploy your model using Inferless-CLI. Follow the steps to deploy using Inferless CLI.
### Clone the repository of the model
Let's begin by cloning the model repository:
```bash
git clone https://github.com/inferless/Ministral-8B-Instruct.git
```
### Deploy the Model
To deploy the model using Inferless CLI, execute the following command:
```bash
inferless deploy --gpu A100 --runtime inferless-runtime-config.yaml
```
**Explanation of the Command:**
* `--gpu A100`: Specifies the GPU type for deployment. Available options include `A10`, `A100`, and `T4`.
* `--runtime inferless-runtime-config.yaml`: Defines the runtime configuration file. If not specified, the default Inferless runtime is used.
# Deploy the Qwen's QwQ-32B-Preview using Inferless
Source: https://docs.inferless.com/how-to-guides/deploy-a-Qwen-QwQ-32B-preview
QwQ-32B-Preview is an experimental research model developed by the Qwen Team, featuring 32.5 billion parameters and a 32,768-token context window, designed to advance AI reasoning capabilities.
## Introduction
[QwQ-32B-Preview](https://huggingface.co/Qwen/QwQ-32B-Preview) is a large language model developed by the Qwen Team, focusing on enhancing AI's analytical and problem-solving abilities. It employs a dense transformer architecture with 32.5 billion parameters, 64 layers, and a context window of 32,768 tokens, incorporating advanced components such as Rotary Position Embedding (RoPE), SwiGLU activation functions, RMSNorm normalization, and Attention QKV bias.
This design enables the model to process extensive inputs effectively, making it particularly adept at complex reasoning tasks. However, as a preview release, it exhibits certain limitations, including potential language mixing, recursive reasoning loops, and areas requiring improved safety measures.
## Our Observations
We have deployed the model on an A100 GPU(80GB). Here are our observations:
| Library | Inference Time | Cold Start Time | Tokens/Sec | Output Tokens Length |
| ------- | -------------- | --------------- | ---------- | -------------------- |
| vLLM | 11.71 sec | 39.44 sec | 21.73 | 256 |
Note: The inference time and cold start time are average values.
## Defining Dependencies
We are using the [vLLM](https://github.com/vllm-project/vllm/) to serve the model on a single A100 (80GB).
## Constructing the GitHub/GitLab Template
Now quickly construct the GitHub/GitLab template, this process is mandatory and make sure you don't add any file named `model.py`.
```
QwQ-32B-Preview/
├── app.py
├── inferless-runtime-config.yaml
├── inferless.yaml
└── input_schema.py
```
You can also add other files to this directory.
## Create the class for inference
In the [app.py](https://github.com/inferless/QwQ-32B-Preview/blob/main/app.py) we will define the class and import all the required functions
1. `def initialize`: In this function, you will initialize your model and define any `variable` that you want to use during inference.
2. `def infer`: This function gets called for every request that you send. Here you can define all the steps that are required for the inference. You can also pass custom values for inference and pass it through `inputs(dict)` parameter.
3. `def finalize`: This function cleans up all the allocated memory.
```python
from vllm import LLM
from vllm.sampling_params import SamplingParams
from transformers import AutoTokenizer
import inferless
app = inferless.Cls(gpu="A100")
class InferlessPythonModel:
@app.load
def initialize(self):
model_id = "Qwen/QwQ-32B-Preview"
self.llm = LLM(model=model_id,gpu_memory_utilization=0.9,max_model_len=5000)
self.tokenizer = AutoTokenizer.from_pretrained(model_id)
@app.infer
def infer(self, inputs):
prompts = inputs["prompt"]
temperature = inputs.get("temperature",0.7)
top_p = inputs.get("top_p",0.1)
repetition_penalty = inputs.get("repetition_penalty",1.18)
top_k = int(inputs.get("top_k",40))
max_tokens = inputs.get("max_tokens",256)
sampling_params = SamplingParams(temperature=temperature,top_p=top_p,repetition_penalty=repetition_penalty,
top_k=top_k,max_tokens=max_tokens)
input_text = self.tokenizer.apply_chat_template([{"role": "user", "content": prompts}], tokenize=False)
result = self.llm.generate(input_text, sampling_params)
result_output = [output.outputs[0].text for output in result]
return {'generated_text': result_output[0]}
def finalize(self):
self.llm = None
```
## Create the Input Schema
We have to create a [input\_schema.py](https://github.com/inferless/QwQ-32B-Preview/blob/main/input_schema.py) in your GitHub/Gitlab repository this will help us create the Input parameters. You can checkout our documentation on [Input / Output Schema](https://docs.inferless.com/model-import/input-output-schema).
For this tutorial, we have defined the parameter which are required during the API call. Now lets create the `input_schema.py`.
```python
INPUT_SCHEMA = {
"prompt": {
'datatype': 'STRING',
'required': True,
'shape': [1],
'example': ["What is deep learning?"]
},
"temperature": {
'datatype': 'FP32',
'required': False,
'shape': [1],
'example': [0.7]
},
"top_p": {
'datatype': 'FP32',
'required': False,
'shape': [1],
'example': [0.1]
},
"repetition_penalty": {
'datatype': 'FP32',
'required': False,
'shape': [1],
'example': [1.18]
},
"max_tokens": {
'datatype': 'INT16',
'required': False,
'shape': [1],
'example': [256]
},
"top_k":{
'datatype': 'INT8',
'required': False,
'shape': [1],
'example': [40]
}
}
```
## Creating the Custom Runtime
This is a mandatory step where we allow the users to upload their custom runtime through [inferless-runtime-config.yaml](https://github.com/inferless/QwQ-32B-Preview/blob/main/inferless-runtime-config.yaml).
```python
build:
cuda_version: "12.1.1"
python_packages:
- "vllm==0.6.3.post1"
- "transformers==4.45.2"
- "inferless-cli==2.0.9"
- "hf-transfer==0.1.9"
- "huggingface-hub==0.27.1"
```
## Test your model with Remote Run
You can use the `inferless remote-run`([installation guide here](https://docs.inferless.com/model-import/cli-import#cli-import)) command to test your model or any custom Python script in a remote GPU environment directly from your local machine. Make sure that you use `Python3.10` for seamless experience.
### Step 1: Add the Decorators and local entry point
To enable **Remote Run**, simply do the following:
1. Import the `inferless` library and initialize `Cls(gpu="A100")`. The available GPU options are `T4`, `A10` and `A100`.
2. Decorated the `initialize` and `infer` functions with `@app.load` and `@app.infer` respectively.
3. Create the Local Entry Point by decorating a function (for example, `my_local_entry`) with `@inferless.local_entry_point`.
Within this function, instantiate your model class, convert any incoming parameters into a `RequestObjects` object, and invoke the model's `infer` method.
```python
from vllm import LLM
from vllm.sampling_params import SamplingParams
from transformers import AutoTokenizer
import inferless
from pydantic import BaseModel, Field
from typing import Optional
app = inferless.Cls(gpu="A100")
@inferless.request
class RequestObjects(BaseModel):
prompt: str = Field(default="Explain Deep Learning.")
temperature: Optional[float] = 0.7
top_p: Optional[float] = 0.1
repetition_penalty: Optional[float] = 1.18
top_k: Optional[int] = 40
max_tokens: Optional[int] = 256
@inferless.response
class ResponseObjects(BaseModel):
generated_text: str = Field(default='Test output')
class InferlessPythonModel:
@app.load
def initialize(self):
model_id = "Qwen/QwQ-32B-Preview"
self.llm = LLM(model=model_id,gpu_memory_utilization=0.9,max_model_len=5000)
self.tokenizer = AutoTokenizer.from_pretrained(model_id)
@app.infer
def infer(self, request: RequestObjects) -> ResponseObjects:
sampling_params = SamplingParams(temperature=request.temperature,top_p=request.top_p,repetition_penalty=request.repetition_penalty,
top_k=request.top_k,max_tokens=request.max_tokens)
input_text = self.tokenizer.apply_chat_template([{"role": "user", "content": request.prompts}], tokenize=False)
result = self.llm.generate(input_text, sampling_params)
result_output = [output.outputs[0].text for output in result]
generateObject = ResponseObjects(generated_text = result_output[0])
return generateObject
def finalize(self):
self.llm = None
@inferless.local_entry_point
def my_local_entry(dynamic_params):
request_objects = RequestObjects(**dynamic_params)
model_instance = InferlessPythonModel()
return model_instance.infer(request_objects)
```
### Step 2: Run with Remote GPU
From your local terminal, navigate to the folder containing your `app.py` and your `inferless-runtime-config.yaml` and run:
```bash
inferless remote-run app.py -c inferless-runtime-config.yaml --prompt "What is deep learning?"
```
You can pass the other input parameters in the same way (e.g., `--max_tokens`, `--temperature`, etc.) as long as your code expects them in the `inputs` dictionary.
If you want to exclude certain files or directories from being uploaded, use the `--exclude` or `-e` flag.
## Method A: Deploying the model on Inferless Platform
Inferless supports multiple ways of [importing your model](https://docs.inferless.com/model-import/file-structure-req/file-structure-requirements). For this tutorial, we will use GitHub.
### Step 1: Login to the inferless dashboard can click on Import model button
Navigate to your desired workspace in Inferless and Click on `Add a custom model` button that you see on the top right. An import wizard will open up.
### Step 2: Follow the UI to complete the model Import
* Select the GitHub/GitLab Integration option to connect your source code repository with the deployment environment.
* Navigate to the specific GitHub repository that contains your model's code. Here, you will need to identify and enter the name of the model you wish to import.
* Choose the appropriate type of machine that suits your model's requirements. Additionally, specify the minimum and maximum number of replicas to define the scalability range for deploying your model.
* Optionally, you have the option to enable automatic build and deployment. This feature triggers a new deployment automatically whenever there is a new code push to your repository.
* If your model requires additional software packages, configure the Custom Runtime settings by including necessary pip or apt packages. Also, set up environment variables such as Inference Timeout, Container Concurrency, and Scale Down Timeout to tailor the runtime environment according to your needs.
* Wait for the validation process to complete, ensuring that all settings are correct and functional. Once validation is successful, click on the "Import" button to finalize the import of your model.
### Step 3: Wait for the model build to complete usually takes \~5-10 minutes
### Step 4: Use the APIs to call the model
Once the model is in 'Active' status you can click on the 'API' page to call the model
### Here is the Demo:
## Method B: Deploying the model on Inferless CLI
Inferless allows you to deploy your model using Inferless-CLI. Follow the steps to deploy using Inferless CLI.
### Clone the repository of the model
Let's begin by cloning the model repository:
```bash
git clone https://github.com/inferless/Ministral-8B-Instruct.git
```
### Deploy the Model
To deploy the model using Inferless CLI, execute the following command:
```bash
inferless deploy --gpu A100 --runtime inferless-runtime-config.yaml
```
**Explanation of the Command:**
* `--gpu A100`: Specifies the GPU type for deployment. Available options include `A10`, `A100`, and `T4`.
* `--runtime inferless-runtime-config.yaml`: Defines the runtime configuration file. If not specified, the default Inferless runtime is used.
# Deploy the Qwen's QwQ-32B-Preview using Inferless
Source: https://docs.inferless.com/how-to-guides/deploy-a-Qwen-QwQ-32B-preview
QwQ-32B-Preview is an experimental research model developed by the Qwen Team, featuring 32.5 billion parameters and a 32,768-token context window, designed to advance AI reasoning capabilities.
## Introduction
[QwQ-32B-Preview](https://huggingface.co/Qwen/QwQ-32B-Preview) is a large language model developed by the Qwen Team, focusing on enhancing AI's analytical and problem-solving abilities. It employs a dense transformer architecture with 32.5 billion parameters, 64 layers, and a context window of 32,768 tokens, incorporating advanced components such as Rotary Position Embedding (RoPE), SwiGLU activation functions, RMSNorm normalization, and Attention QKV bias.
This design enables the model to process extensive inputs effectively, making it particularly adept at complex reasoning tasks. However, as a preview release, it exhibits certain limitations, including potential language mixing, recursive reasoning loops, and areas requiring improved safety measures.
## Our Observations
We have deployed the model on an A100 GPU(80GB). Here are our observations:
| Library | Inference Time | Cold Start Time | Tokens/Sec | Output Tokens Length |
| ------- | -------------- | --------------- | ---------- | -------------------- |
| vLLM | 11.71 sec | 39.44 sec | 21.73 | 256 |
Note: The inference time and cold start time are average values.
## Defining Dependencies
We are using the [vLLM](https://github.com/vllm-project/vllm/) to serve the model on a single A100 (80GB).
## Constructing the GitHub/GitLab Template
Now quickly construct the GitHub/GitLab template, this process is mandatory and make sure you don't add any file named `model.py`.
```
QwQ-32B-Preview/
├── app.py
├── inferless-runtime-config.yaml
├── inferless.yaml
└── input_schema.py
```
You can also add other files to this directory.
## Create the class for inference
In the [app.py](https://github.com/inferless/QwQ-32B-Preview/blob/main/app.py) we will define the class and import all the required functions
1. `def initialize`: In this function, you will initialize your model and define any `variable` that you want to use during inference.
2. `def infer`: This function gets called for every request that you send. Here you can define all the steps that are required for the inference. You can also pass custom values for inference and pass it through `inputs(dict)` parameter.
3. `def finalize`: This function cleans up all the allocated memory.
```python
from vllm import LLM
from vllm.sampling_params import SamplingParams
from transformers import AutoTokenizer
import inferless
app = inferless.Cls(gpu="A100")
class InferlessPythonModel:
@app.load
def initialize(self):
model_id = "Qwen/QwQ-32B-Preview"
self.llm = LLM(model=model_id,gpu_memory_utilization=0.9,max_model_len=5000)
self.tokenizer = AutoTokenizer.from_pretrained(model_id)
@app.infer
def infer(self, inputs):
prompts = inputs["prompt"]
temperature = inputs.get("temperature",0.7)
top_p = inputs.get("top_p",0.1)
repetition_penalty = inputs.get("repetition_penalty",1.18)
top_k = int(inputs.get("top_k",40))
max_tokens = inputs.get("max_tokens",256)
sampling_params = SamplingParams(temperature=temperature,top_p=top_p,repetition_penalty=repetition_penalty,
top_k=top_k,max_tokens=max_tokens)
input_text = self.tokenizer.apply_chat_template([{"role": "user", "content": prompts}], tokenize=False)
result = self.llm.generate(input_text, sampling_params)
result_output = [output.outputs[0].text for output in result]
return {'generated_text': result_output[0]}
def finalize(self):
self.llm = None
```
## Create the Input Schema
We have to create a [input\_schema.py](https://github.com/inferless/QwQ-32B-Preview/blob/main/input_schema.py) in your GitHub/Gitlab repository this will help us create the Input parameters. You can checkout our documentation on [Input / Output Schema](https://docs.inferless.com/model-import/input-output-schema).
For this tutorial, we have defined the parameter which are required during the API call. Now lets create the `input_schema.py`.
```python
INPUT_SCHEMA = {
"prompt": {
'datatype': 'STRING',
'required': True,
'shape': [1],
'example': ["What is deep learning?"]
},
"temperature": {
'datatype': 'FP32',
'required': False,
'shape': [1],
'example': [0.7]
},
"top_p": {
'datatype': 'FP32',
'required': False,
'shape': [1],
'example': [0.1]
},
"repetition_penalty": {
'datatype': 'FP32',
'required': False,
'shape': [1],
'example': [1.18]
},
"max_tokens": {
'datatype': 'INT16',
'required': False,
'shape': [1],
'example': [256]
},
"top_k":{
'datatype': 'INT8',
'required': False,
'shape': [1],
'example': [40]
}
}
```
## Creating the Custom Runtime
This is a mandatory step where we allow the users to upload their custom runtime through [inferless-runtime-config.yaml](https://github.com/inferless/QwQ-32B-Preview/blob/main/inferless-runtime-config.yaml).
```python
build:
cuda_version: "12.1.1"
python_packages:
- "vllm==0.6.3.post1"
- "transformers==4.45.2"
- "inferless-cli==2.0.9"
- "hf-transfer==0.1.9"
- "huggingface-hub==0.27.1"
```
## Test your model with Remote Run
You can use the `inferless remote-run`([installation guide here](https://docs.inferless.com/model-import/cli-import#cli-import)) command to test your model or any custom Python script in a remote GPU environment directly from your local machine. Make sure that you use `Python3.10` for seamless experience.
### Step 1: Add the Decorators and local entry point
To enable **Remote Run**, simply do the following:
1. Import the `inferless` library and initialize `Cls(gpu="A100")`. The available GPU options are `T4`, `A10` and `A100`.
2. Decorated the `initialize` and `infer` functions with `@app.load` and `@app.infer` respectively.
3. Create the Local Entry Point by decorating a function (for example, `my_local_entry`) with `@inferless.local_entry_point`.
Within this function, instantiate your model class, convert any incoming parameters into a `RequestObjects` object, and invoke the model's `infer` method.
```python
from vllm import LLM
from vllm.sampling_params import SamplingParams
from transformers import AutoTokenizer
import inferless
from pydantic import BaseModel, Field
from typing import Optional
app = inferless.Cls(gpu="A100")
@inferless.request
class RequestObjects(BaseModel):
prompt: str = Field(default="Explain Deep Learning.")
temperature: Optional[float] = 0.7
top_p: Optional[float] = 0.1
repetition_penalty: Optional[float] = 1.18
top_k: Optional[int] = 40
max_tokens: Optional[int] = 256
@inferless.response
class ResponseObjects(BaseModel):
generated_text: str = Field(default='Test output')
class InferlessPythonModel:
@app.load
def initialize(self):
model_id = "Qwen/QwQ-32B-Preview"
self.llm = LLM(model=model_id,gpu_memory_utilization=0.9,max_model_len=5000)
self.tokenizer = AutoTokenizer.from_pretrained(model_id)
@app.infer
def infer(self, request: RequestObjects) -> ResponseObjects:
sampling_params = SamplingParams(temperature=request.temperature,top_p=request.top_p,repetition_penalty=request.repetition_penalty,
top_k=request.top_k,max_tokens=request.max_tokens)
input_text = self.tokenizer.apply_chat_template([{"role": "user", "content": request.prompts}], tokenize=False)
result = self.llm.generate(input_text, sampling_params)
result_output = [output.outputs[0].text for output in result]
generateObject = ResponseObjects(generated_text = result_output[0])
return generateObject
def finalize(self):
self.llm = None
@inferless.local_entry_point
def my_local_entry(dynamic_params):
request_objects = RequestObjects(**dynamic_params)
model_instance = InferlessPythonModel()
return model_instance.infer(request_objects)
```
### Step 2: Run with Remote GPU
From your local terminal, navigate to the folder containing your `app.py` and your `inferless-runtime-config.yaml` and run:
```bash
inferless remote-run app.py -c inferless-runtime-config.yaml --prompt "What is deep learning?"
```
You can pass the other input parameters in the same way (e.g., `--max_tokens`, `--temperature`, etc.) as long as your code expects them in the `inputs` dictionary.
If you want to exclude certain files or directories from being uploaded, use the `--exclude` or `-e` flag.
## Method A: Deploying the model on Inferless Platform
Inferless supports multiple ways of [importing your model](https://docs.inferless.com/model-import/file-structure-req/file-structure-requirements). For this tutorial, we will use GitHub.
### Step 1: Login to the inferless dashboard can click on Import model button
Navigate to your desired workspace in Inferless and Click on `Add a custom model` button that you see on the top right. An import wizard will open up.
### Step 2: Follow the UI to complete the model Import
* Select the GitHub/GitLab Integration option to connect your source code repository with the deployment environment.
* Navigate to the specific GitHub repository that contains your model's code. Here, you will need to identify and enter the name of the model you wish to import.
* Choose the appropriate type of machine that suits your model's requirements. Additionally, specify the minimum and maximum number of replicas to define the scalability range for deploying your model.
* Optionally, you have the option to enable automatic build and deployment. This feature triggers a new deployment automatically whenever there is a new code push to your repository.
* If your model requires additional software packages, configure the Custom Runtime settings by including necessary pip or apt packages. Also, set up environment variables such as Inference Timeout, Container Concurrency, and Scale Down Timeout to tailor the runtime environment according to your needs.
* Wait for the validation process to complete, ensuring that all settings are correct and functional. Once validation is successful, click on the "Import" button to finalize the import of your model.
### Step 3: Wait for the model build to complete usually takes \~5-10 minutes
### Step 4: Use the APIs to call the model
Once the model is in 'Active' status you can click on the 'API' page to call the model
### Here is the Demo:
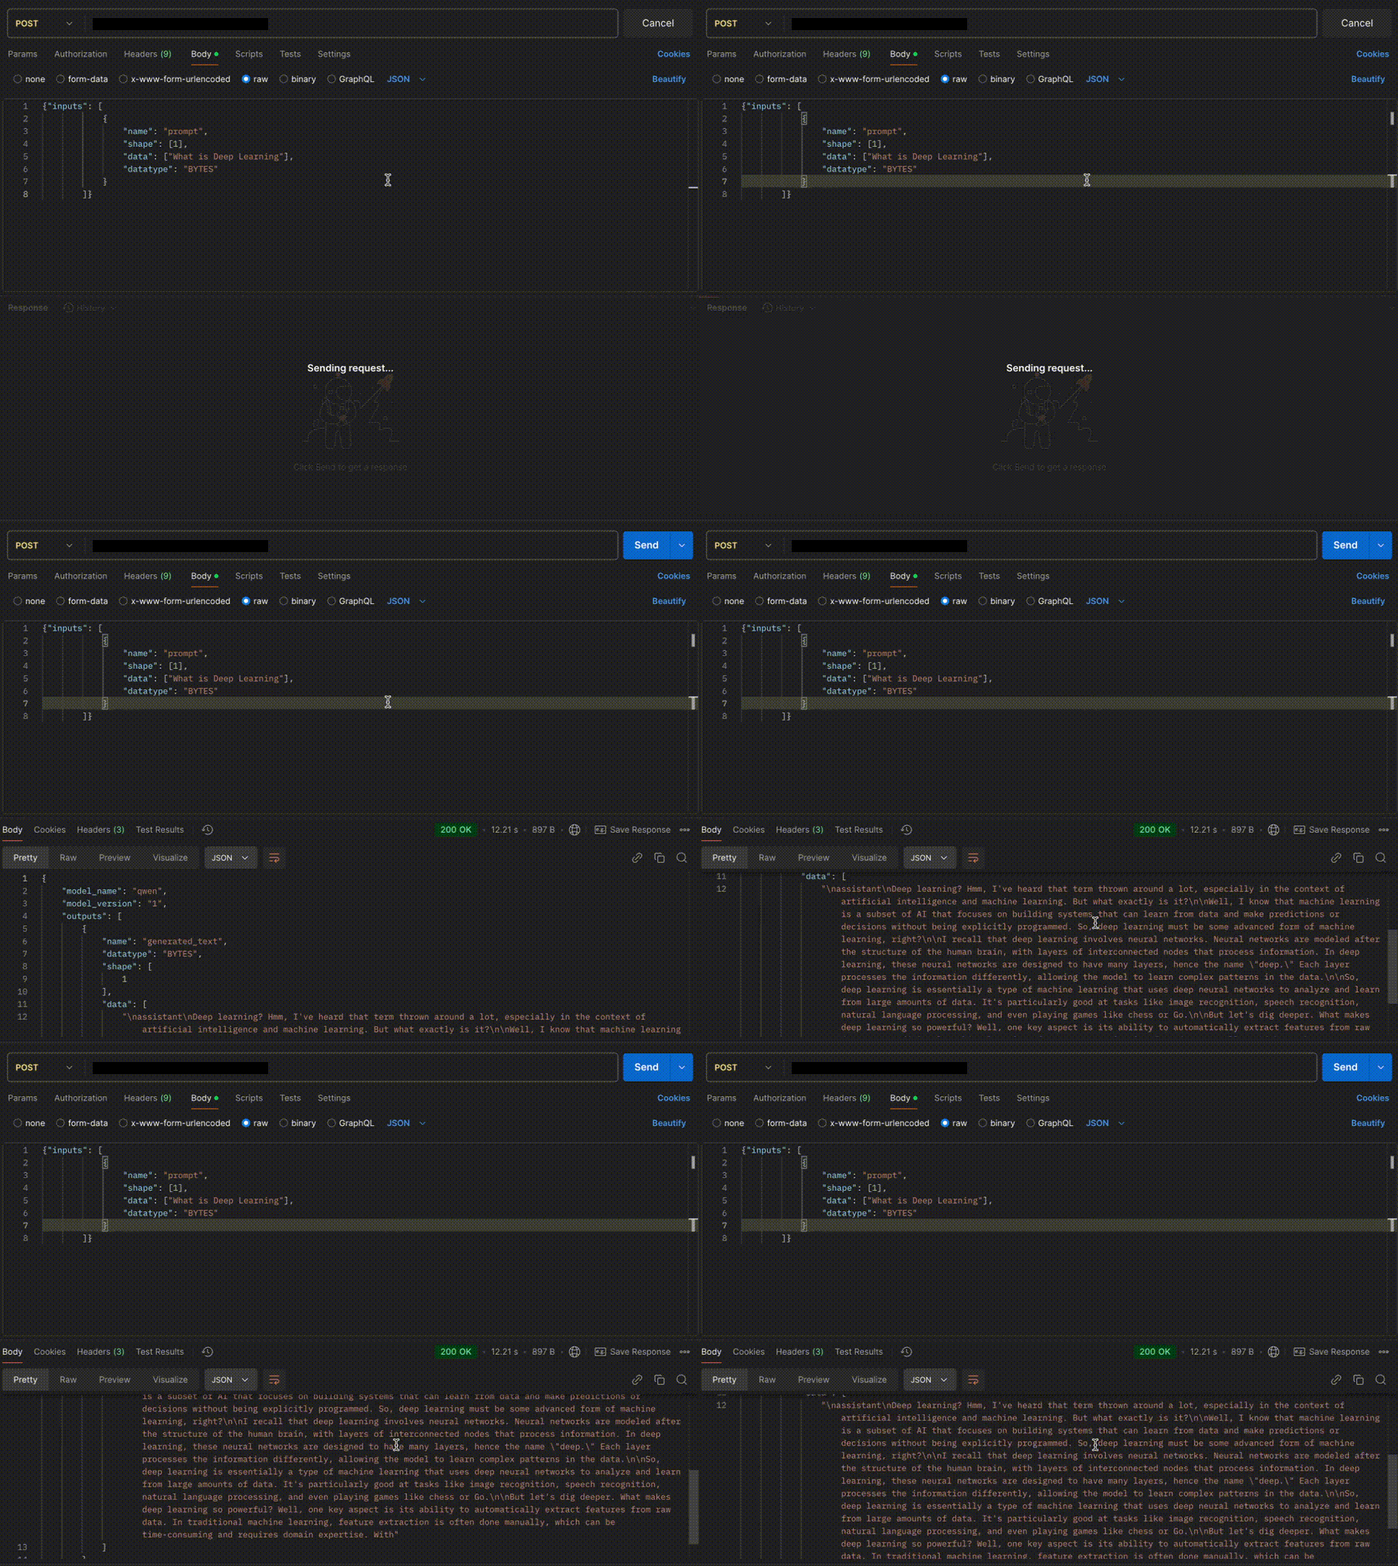 ## Method B: Deploying the model on Inferless CLI
Inferless allows you to deploy your model using Inferless-CLI. Follow the steps to deploy using Inferless CLI.
### Clone the repository of the model
Let's begin by cloning the model repository:
```bash
git clone https://github.com/inferless/QwQ-32B-Preview.git
```
### Deploy the Model
To deploy the model using Inferless CLI, execute the following command:
```bash
inferless deploy --gpu A100 --runtime inferless-runtime-config.yaml
```
**Explanation of the Command:**
* `--gpu A100`: Specifies the GPU type for deployment. Available options include `A10`, `A100`, and `T4`.
* `--runtime inferless-runtime-config.yaml`: Defines the runtime configuration file. If not specified, the default Inferless runtime is used.
# Deploy a CodeLlama-Python-34B Model using Inferless
Source: https://docs.inferless.com/how-to-guides/deploy-a-codellama-python-34b-model-using-inferless
In this tutorial, we'll show the deployment process of a quantized GPTQ model using vLLM. We are deploying a GPTQ, 4-bit quantized version of the codeLlama-Python-34B model.
## Experimentation with different libraries
We have considered using 4 different inference libraries and tested the CodeLlama-34b-Python model with a max\_token of 512, with the default configuration of all the inference libraries.
1. [Hugging Face](https://github.com/huggingface/transformers): Transformer provides an easy-to-use pipeline for quick deployment of LLM but is not a good choice for LLM inference. We have used BitsandBytes with 4bit quantization, however it didn't help in improving the inference latency.
2. [AutoGPTQ](https://github.com/PanQiWei/AutoGPTQ): AutoGPTQ enables you to run LLM on low memory. We deploy a GPTQ 4bit quantized model and are able to achieve better inference latency and token/sec than Hugging Face(unquantized and [bitsandbytes](https://github.com/TimDettmers/bitsandbytes)).
3. [Text Generation Inference](https://github.com/huggingface/text-generation-inference) (TGI): TGI allows you to deploy and serve LLM. We have deployed and tested different type of quantized versions where 4bit quantized AWQ perform better.
4. [vLLM](https://github.com/vllm-project/vllm): vLLM is a library use for deployment and serving LLM. We have deployed both quantized and unquantized versions, both using vLLM and vLLM as a backend with the Triton inference server. We have used [vLLM-GPTQ](https://github.com/chu-tianxiang/vllm-gptq)(vLLM GPTQ brach) for deploying GPTQ quantized model, as of 24/11/23 vLLM doesn't support GPTQ quantization.
### Our Observations
In our experiment, we found that using the vLLM with GPTQ 4bit quantized model is a good setup. You can expect an average lowest latency of `3.51 sec` and average token generation rate of `58.40/sec`. This setup has an average cold start time of `21.8 sec`.
Note: You can *use the* [*vLLM-GPTQ*](https://github.com/chu-tianxiang/vllm-gptq) *to deploy the same.*
### GPU Recommendation
We recommend the users to use NVIDIA A100(80GB) GPU to achieve similar results.
### Results with Different Experimentation
## Method B: Deploying the model on Inferless CLI
Inferless allows you to deploy your model using Inferless-CLI. Follow the steps to deploy using Inferless CLI.
### Clone the repository of the model
Let's begin by cloning the model repository:
```bash
git clone https://github.com/inferless/QwQ-32B-Preview.git
```
### Deploy the Model
To deploy the model using Inferless CLI, execute the following command:
```bash
inferless deploy --gpu A100 --runtime inferless-runtime-config.yaml
```
**Explanation of the Command:**
* `--gpu A100`: Specifies the GPU type for deployment. Available options include `A10`, `A100`, and `T4`.
* `--runtime inferless-runtime-config.yaml`: Defines the runtime configuration file. If not specified, the default Inferless runtime is used.
# Deploy a CodeLlama-Python-34B Model using Inferless
Source: https://docs.inferless.com/how-to-guides/deploy-a-codellama-python-34b-model-using-inferless
In this tutorial, we'll show the deployment process of a quantized GPTQ model using vLLM. We are deploying a GPTQ, 4-bit quantized version of the codeLlama-Python-34B model.
## Experimentation with different libraries
We have considered using 4 different inference libraries and tested the CodeLlama-34b-Python model with a max\_token of 512, with the default configuration of all the inference libraries.
1. [Hugging Face](https://github.com/huggingface/transformers): Transformer provides an easy-to-use pipeline for quick deployment of LLM but is not a good choice for LLM inference. We have used BitsandBytes with 4bit quantization, however it didn't help in improving the inference latency.
2. [AutoGPTQ](https://github.com/PanQiWei/AutoGPTQ): AutoGPTQ enables you to run LLM on low memory. We deploy a GPTQ 4bit quantized model and are able to achieve better inference latency and token/sec than Hugging Face(unquantized and [bitsandbytes](https://github.com/TimDettmers/bitsandbytes)).
3. [Text Generation Inference](https://github.com/huggingface/text-generation-inference) (TGI): TGI allows you to deploy and serve LLM. We have deployed and tested different type of quantized versions where 4bit quantized AWQ perform better.
4. [vLLM](https://github.com/vllm-project/vllm): vLLM is a library use for deployment and serving LLM. We have deployed both quantized and unquantized versions, both using vLLM and vLLM as a backend with the Triton inference server. We have used [vLLM-GPTQ](https://github.com/chu-tianxiang/vllm-gptq)(vLLM GPTQ brach) for deploying GPTQ quantized model, as of 24/11/23 vLLM doesn't support GPTQ quantization.
### Our Observations
In our experiment, we found that using the vLLM with GPTQ 4bit quantized model is a good setup. You can expect an average lowest latency of `3.51 sec` and average token generation rate of `58.40/sec`. This setup has an average cold start time of `21.8 sec`.
Note: You can *use the* [*vLLM-GPTQ*](https://github.com/chu-tianxiang/vllm-gptq) *to deploy the same.*
### GPU Recommendation
We recommend the users to use NVIDIA A100(80GB) GPU to achieve similar results.
### Results with Different Experimentation
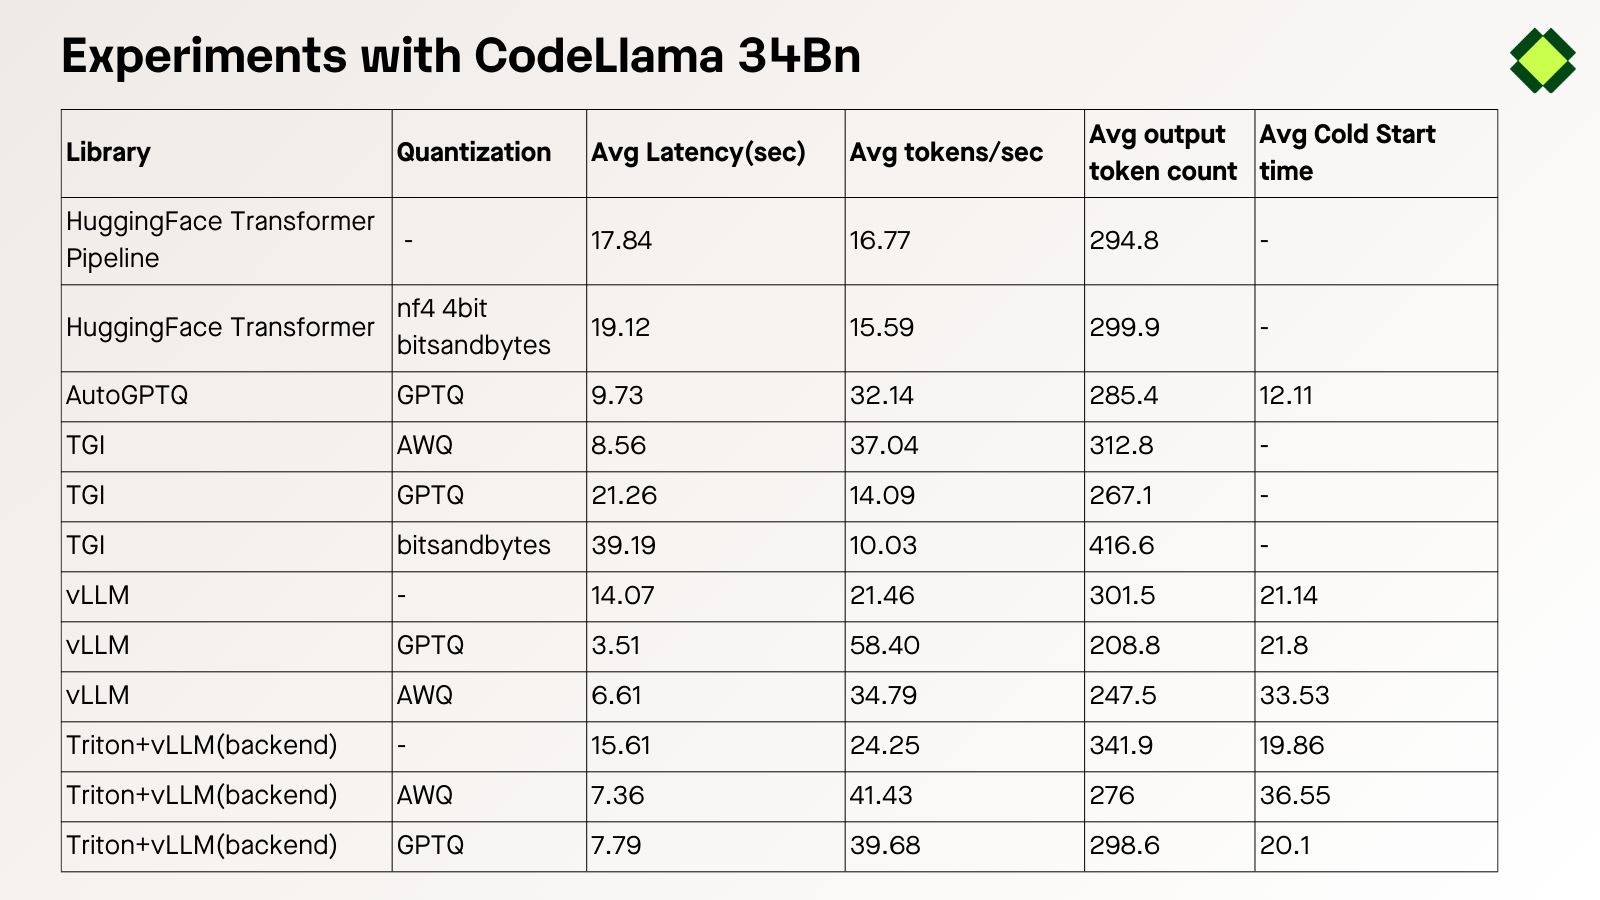 ## Defining Dependencies
This tutorial utilizes `vLLM` to load and serve the model. Define this library on the inferless-runtime-config.yaml file which you need to upload during the deployment.
## Constructing the Github/Gitlab Template
While uploading your model from GitHub/Gitlab, you need to follow this format:
```
codellama-34b-python/
├── app.py
├── inferless-runtime-config.yaml
├── inferless.yaml
└── input_schema.py
```
* The[ app.py](https://github.com/inferless/inferless_tutorials/blob/main/code_generation/CodeLlama-34B/app.py) (Check the Github URL) file will load and serve the model.
* The [inferless-runtime-config.yaml](https://github.com/inferless/inferless_tutorials/blob/main/code_generation/CodeLlama-34B/inferless-runtime-config.yaml) (Check the Github URL) file will have all the software and Python dependencies.
* You can also have any additional dependency files.
## Creating the class for inference
In the [app.py](https://github.com/inferless/inferless_tutorials/blob/main/code_generation/CodeLlama-34B/app.py) (Check the Github URL) file, first, you will import all the required classes and functions and then create a model class, for example, "InferlessPythonModel".This class will have three functions:
1. `def initialize`: This function will load the model and tokenizer into the memory whenever the container starts.
2. `def infer`: This function helps to serve the loaded model. You can create a complex inference pipeline or chain multiple models together here.
3. `def finalize`: This function deallocates the allocated memory for the model and tokenizer whenever the container shuts down.
```python
import inferless
from vllm import SamplingParams, LLM
app = inferless.Cls(gpu="A100")
class InferlessPythonModel:
@app.load
def initialize(self):
self.llm = LLM(model="TheBloke/CodeLlama-34B-Python-GPTQ",quantization="gptq")
@app.infer
def infer(self, inputs):
prompts = inputs["prompt"]
sampling_params = SamplingParams(
temperature=1.0,
top_p=1,
max_tokens=512
)
result = self.llm.generate(prompts, sampling_params)
result_output = [output.outputs[0].text for output in result]
return {"result": result_output[0]}
def finalize(self):
self.llm = None
```
## Creating the custom runtime
Whenever you upload the model through GitHub/GitLab, you must upload a custom runtime, i.e. a `inferless-runtime-config.yaml` file. This allows the user to add all the system and Python packages required for the model. For this tutorial, we are using the `libssl-dev` system package, and we use the Python packages mentioned in section 1.
```
build:
cuda_version: "12.1.1"
python_packages:
- "vllm==0.8.2"
- "inferless-cli==2.0.9"
- "hf-transfer==0.1.9"
- "huggingface-hub==0.27.1"
```
## Test your model with Remote Run
You can use the `inferless remote-run`([installation guide here](https://docs.inferless.com/model-import/cli-import#cli-import)) command to test your model or any custom Python script in a remote GPU environment directly from your local machine. Make sure that you use `Python3.10` for seamless experience.
### Step 1: Add the Decorators and local entry point
To enable **Remote Run**, simply do the following:
1. Import the `inferless` library and initialize `Cls(gpu="A100")`. The available GPU options are `T4`, `A10` and `A100`.
2. Decorated the `initialize` and `infer` functions with `@app.load` and `@app.infer` respectively.
3. Create the Local Entry Point by decorating a function (for example, `my_local_entry`) with `@inferless.local_entry_point`.
Within this function, instantiate your model class, convert any incoming parameters into a `RequestObjects` object, and invoke the model's `infer` method.
```python
import inferless
from vllm import SamplingParams, LLM
from pydantic import BaseModel, Field
from typing import Optional
@inferless.request
class RequestObjects(BaseModel):
prompt: str = Field(default="Explain Deep Learning.")
temperature: Optional[float] = 0.7
top_p: Optional[float] = 0.1
repetition_penalty: Optional[float] = 1.18
top_k: Optional[int] = 40
max_tokens: Optional[int] = 256
@inferless.response
class ResponseObjects(BaseModel):
generated_text: str = Field(default='Test output')
app = inferless.Cls(gpu="A100")
class InferlessPythonModel:
@app.load
def initialize(self):
self.llm = LLM(model="TheBloke/CodeLlama-34B-Python-GPTQ",quantization="gptq")
@app.infer
def infer(self, request: RequestObjects) -> ResponseObjects:
sampling_params = SamplingParams(temperature=request.temperature,top_p=request.top_p,repetition_penalty=request.repetition_penalty,
top_k=request.top_k,max_tokens=request.max_tokens)
result = self.llm.generate(request.prompt, sampling_params)
result_output = [output.outputs[0].text for output in result]
generateObject = ResponseObjects(generated_text = result_output[0])
return generateObject
def finalize(self):
self.llm = None
@inferless.local_entry_point
def my_local_entry(dynamic_params):
request_objects = RequestObjects(**dynamic_params)
model_instance = InferlessPythonModel()
return model_instance.infer(request_objects)
```
### Step 2: Run with Remote GPU
From your local terminal, navigate to the folder containing your `app.py` and your `inferless-runtime-config.yaml` and run:
```bash
inferless remote-run app.py -c inferless-runtime-config.yaml --prompt "def factorial(int n):"
```
You can pass the other input parameters in the same way as long as your code expects them in the `inputs` dictionary.
If you want to exclude certain files or directories from being uploaded, use the `--exclude` or `-e` flag.
## Method A: Deploying the model on Inferless Platform
Inferless supports multiple ways of [importing your model](https://docs.inferless.com/model-import/file-structure-req/file-structure-requirements). For this tutorial, we will use GitHub.
### Step 1: Login to the inferless dashboard can click on Import model button
Navigate to your desired workspace in Inferless and Click on `Add a custom model` button that you see on the top right. An import wizard will open up.
### Step 2: Follow the UI to complete the model Import
* Select the GitHub/GitLab Integration option to connect your source code repository with the deployment environment.
* Navigate to the specific GitHub repository that contains your model's code. Here, you will need to identify and enter the name of the model you wish to import.
* Choose the appropriate type of machine that suits your model's requirements. Additionally, specify the minimum and maximum number of replicas to define the scalability range for deploying your model.
* Optionally, you have the option to enable automatic build and deployment. This feature triggers a new deployment automatically whenever there is a new code push to your repository.
* If your model requires additional software packages, configure the Custom Runtime settings by including necessary pip or apt packages. Also, set up environment variables such as Inference Timeout, Container Concurrency, and Scale Down Timeout to tailor the runtime environment according to your needs.
* Wait for the validation process to complete, ensuring that all settings are correct and functional. Once validation is successful, click on the "Import" button to finalize the import of your model.
### Step 3: Wait for the model build to complete usually takes \~5-10 minutes
### Step 4: Use the APIs to call the model
Once the model is in 'Active' status you can click on the 'API' page to call the model
### Here is the Demo:
## Defining Dependencies
This tutorial utilizes `vLLM` to load and serve the model. Define this library on the inferless-runtime-config.yaml file which you need to upload during the deployment.
## Constructing the Github/Gitlab Template
While uploading your model from GitHub/Gitlab, you need to follow this format:
```
codellama-34b-python/
├── app.py
├── inferless-runtime-config.yaml
├── inferless.yaml
└── input_schema.py
```
* The[ app.py](https://github.com/inferless/inferless_tutorials/blob/main/code_generation/CodeLlama-34B/app.py) (Check the Github URL) file will load and serve the model.
* The [inferless-runtime-config.yaml](https://github.com/inferless/inferless_tutorials/blob/main/code_generation/CodeLlama-34B/inferless-runtime-config.yaml) (Check the Github URL) file will have all the software and Python dependencies.
* You can also have any additional dependency files.
## Creating the class for inference
In the [app.py](https://github.com/inferless/inferless_tutorials/blob/main/code_generation/CodeLlama-34B/app.py) (Check the Github URL) file, first, you will import all the required classes and functions and then create a model class, for example, "InferlessPythonModel".This class will have three functions:
1. `def initialize`: This function will load the model and tokenizer into the memory whenever the container starts.
2. `def infer`: This function helps to serve the loaded model. You can create a complex inference pipeline or chain multiple models together here.
3. `def finalize`: This function deallocates the allocated memory for the model and tokenizer whenever the container shuts down.
```python
import inferless
from vllm import SamplingParams, LLM
app = inferless.Cls(gpu="A100")
class InferlessPythonModel:
@app.load
def initialize(self):
self.llm = LLM(model="TheBloke/CodeLlama-34B-Python-GPTQ",quantization="gptq")
@app.infer
def infer(self, inputs):
prompts = inputs["prompt"]
sampling_params = SamplingParams(
temperature=1.0,
top_p=1,
max_tokens=512
)
result = self.llm.generate(prompts, sampling_params)
result_output = [output.outputs[0].text for output in result]
return {"result": result_output[0]}
def finalize(self):
self.llm = None
```
## Creating the custom runtime
Whenever you upload the model through GitHub/GitLab, you must upload a custom runtime, i.e. a `inferless-runtime-config.yaml` file. This allows the user to add all the system and Python packages required for the model. For this tutorial, we are using the `libssl-dev` system package, and we use the Python packages mentioned in section 1.
```
build:
cuda_version: "12.1.1"
python_packages:
- "vllm==0.8.2"
- "inferless-cli==2.0.9"
- "hf-transfer==0.1.9"
- "huggingface-hub==0.27.1"
```
## Test your model with Remote Run
You can use the `inferless remote-run`([installation guide here](https://docs.inferless.com/model-import/cli-import#cli-import)) command to test your model or any custom Python script in a remote GPU environment directly from your local machine. Make sure that you use `Python3.10` for seamless experience.
### Step 1: Add the Decorators and local entry point
To enable **Remote Run**, simply do the following:
1. Import the `inferless` library and initialize `Cls(gpu="A100")`. The available GPU options are `T4`, `A10` and `A100`.
2. Decorated the `initialize` and `infer` functions with `@app.load` and `@app.infer` respectively.
3. Create the Local Entry Point by decorating a function (for example, `my_local_entry`) with `@inferless.local_entry_point`.
Within this function, instantiate your model class, convert any incoming parameters into a `RequestObjects` object, and invoke the model's `infer` method.
```python
import inferless
from vllm import SamplingParams, LLM
from pydantic import BaseModel, Field
from typing import Optional
@inferless.request
class RequestObjects(BaseModel):
prompt: str = Field(default="Explain Deep Learning.")
temperature: Optional[float] = 0.7
top_p: Optional[float] = 0.1
repetition_penalty: Optional[float] = 1.18
top_k: Optional[int] = 40
max_tokens: Optional[int] = 256
@inferless.response
class ResponseObjects(BaseModel):
generated_text: str = Field(default='Test output')
app = inferless.Cls(gpu="A100")
class InferlessPythonModel:
@app.load
def initialize(self):
self.llm = LLM(model="TheBloke/CodeLlama-34B-Python-GPTQ",quantization="gptq")
@app.infer
def infer(self, request: RequestObjects) -> ResponseObjects:
sampling_params = SamplingParams(temperature=request.temperature,top_p=request.top_p,repetition_penalty=request.repetition_penalty,
top_k=request.top_k,max_tokens=request.max_tokens)
result = self.llm.generate(request.prompt, sampling_params)
result_output = [output.outputs[0].text for output in result]
generateObject = ResponseObjects(generated_text = result_output[0])
return generateObject
def finalize(self):
self.llm = None
@inferless.local_entry_point
def my_local_entry(dynamic_params):
request_objects = RequestObjects(**dynamic_params)
model_instance = InferlessPythonModel()
return model_instance.infer(request_objects)
```
### Step 2: Run with Remote GPU
From your local terminal, navigate to the folder containing your `app.py` and your `inferless-runtime-config.yaml` and run:
```bash
inferless remote-run app.py -c inferless-runtime-config.yaml --prompt "def factorial(int n):"
```
You can pass the other input parameters in the same way as long as your code expects them in the `inputs` dictionary.
If you want to exclude certain files or directories from being uploaded, use the `--exclude` or `-e` flag.
## Method A: Deploying the model on Inferless Platform
Inferless supports multiple ways of [importing your model](https://docs.inferless.com/model-import/file-structure-req/file-structure-requirements). For this tutorial, we will use GitHub.
### Step 1: Login to the inferless dashboard can click on Import model button
Navigate to your desired workspace in Inferless and Click on `Add a custom model` button that you see on the top right. An import wizard will open up.
### Step 2: Follow the UI to complete the model Import
* Select the GitHub/GitLab Integration option to connect your source code repository with the deployment environment.
* Navigate to the specific GitHub repository that contains your model's code. Here, you will need to identify and enter the name of the model you wish to import.
* Choose the appropriate type of machine that suits your model's requirements. Additionally, specify the minimum and maximum number of replicas to define the scalability range for deploying your model.
* Optionally, you have the option to enable automatic build and deployment. This feature triggers a new deployment automatically whenever there is a new code push to your repository.
* If your model requires additional software packages, configure the Custom Runtime settings by including necessary pip or apt packages. Also, set up environment variables such as Inference Timeout, Container Concurrency, and Scale Down Timeout to tailor the runtime environment according to your needs.
* Wait for the validation process to complete, ensuring that all settings are correct and functional. Once validation is successful, click on the "Import" button to finalize the import of your model.
### Step 3: Wait for the model build to complete usually takes \~5-10 minutes
### Step 4: Use the APIs to call the model
Once the model is in 'Active' status you can click on the 'API' page to call the model
### Here is the Demo:
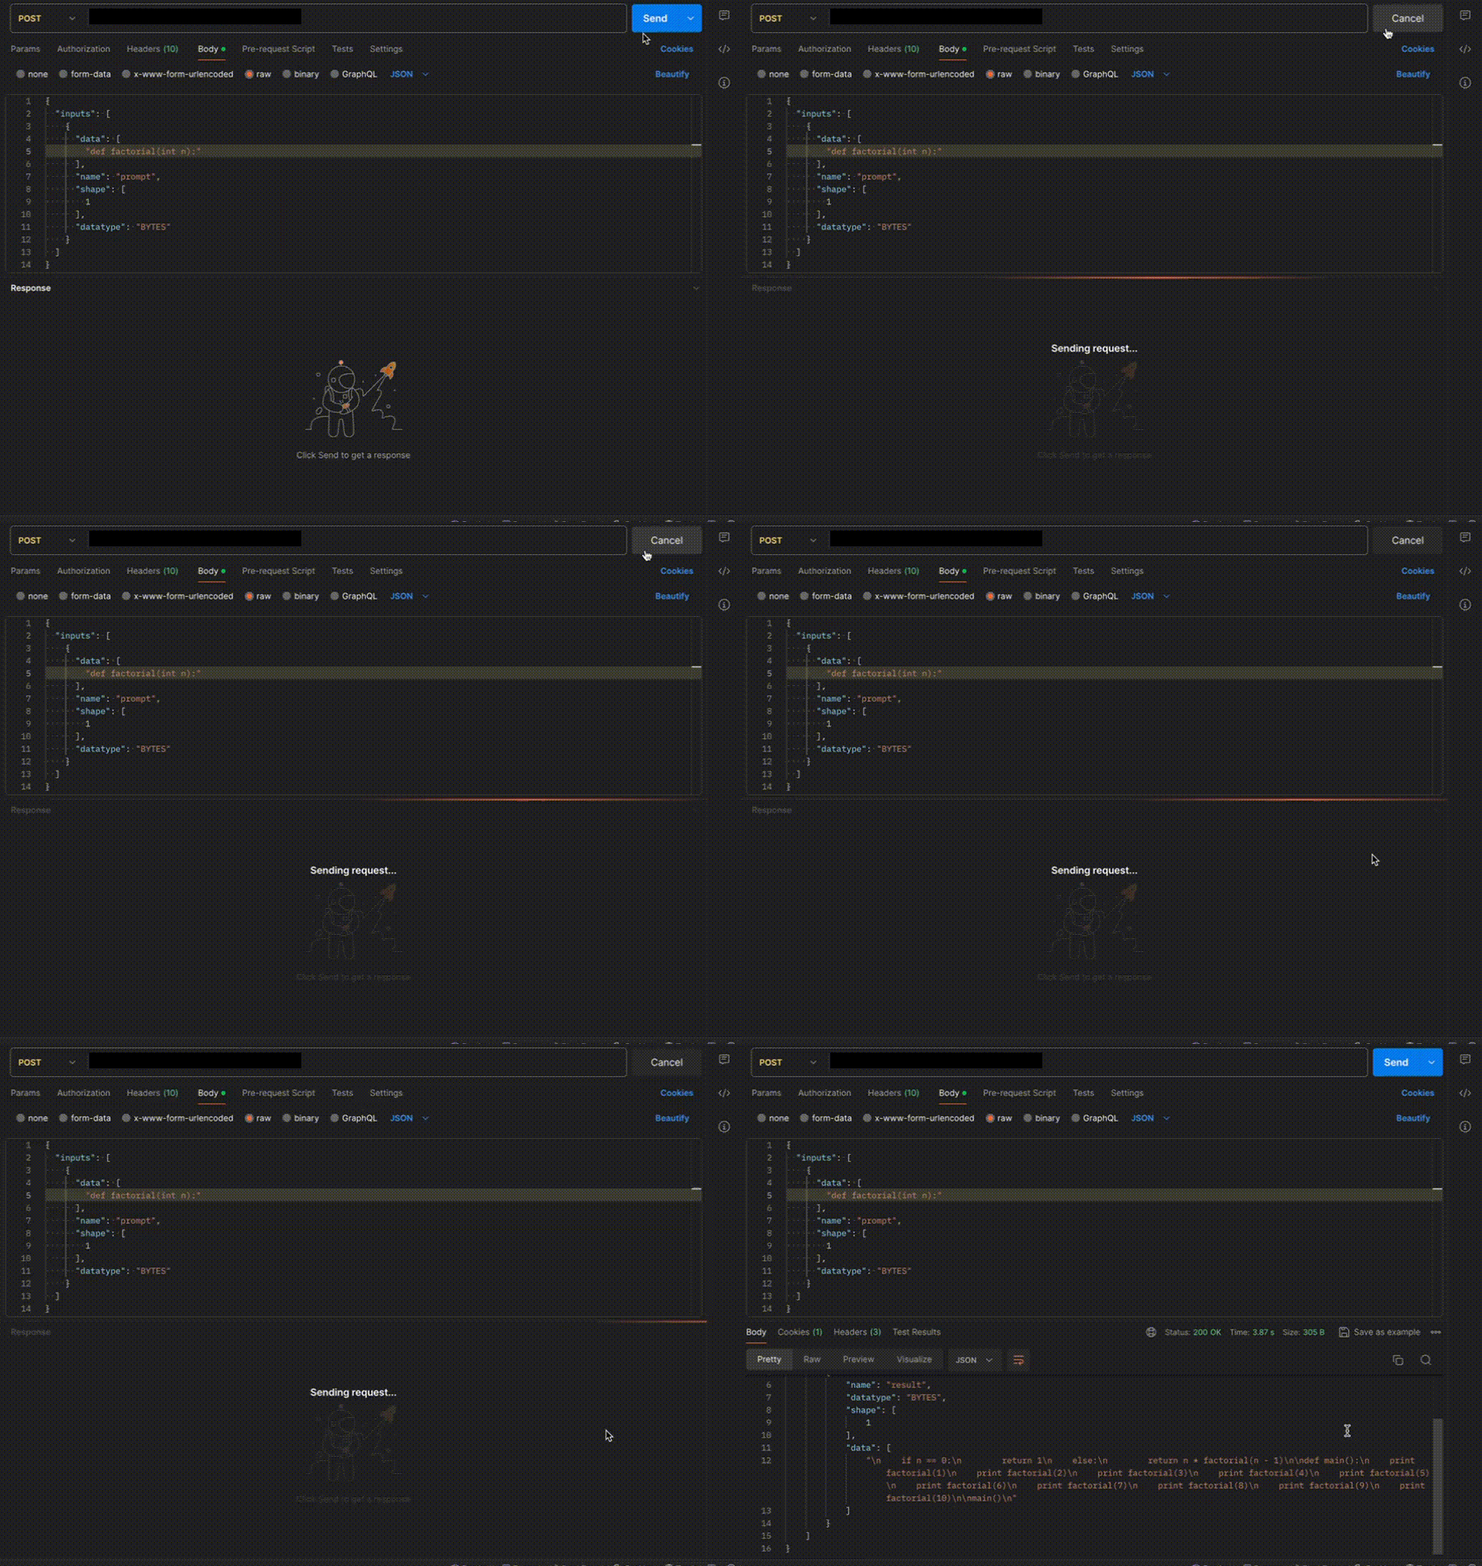 ## Method B: Deploying the model on Inferless CLI
Inferless allows you to deploy your model using Inferless-CLI. Follow the steps to deploy using Inferless CLI.
### Clone the repository of the model
Let's begin by cloning the model repository:
```bash
git clone https://github.com/inferless/Codellama-34B.git
```
### Deploy the Model
To deploy the model using Inferless CLI, execute the following command:
```bash
inferless deploy --gpu A100 --runtime inferless-runtime-config.yaml
```
**Explanation of the Command:**
* `--gpu A100`: Specifies the GPU type for deployment. Available options include `A10`, `A100`, and `T4`.
* `--runtime inferless-runtime-config.yaml`: Defines the runtime configuration file. If not specified, the default Inferless runtime is used.
# Deploy Qwen2-72B-Instruct using Inferless
Source: https://docs.inferless.com/how-to-guides/deploy-a-qwen2-72b-using-inferless
Qwen2-72B-Instruct is a part of the Qwen2 series of large language models ranging from 0.5 to 72 billion parameters. The repository is for the 72B instruction-tuned model for deploying the model in the Inferless platform.
## Introduction
[Qwen2-72B-Instruct](https://huggingface.co/Qwen/Qwen2-72B-Instruct) is a part of the latest series of [Qwen2 large language models](https://qwenlm.github.io/blog/qwen2/), featuring base and instruction-tuned models ranging from 0.5 to 72 billion parameters, expanding language support to 29 languages. These models showcase state-of-the-art performance across various benchmarks, with significant improvements in coding and mathematical tasks. Notably, the 7B and 72B instruction-tuned versions support an impressive 128K token context length, pushing the boundaries of large language model capabilities.
## Our Observations
We have deployed the model on an A100 GPU(80GB). Here are our observations:
| Library | Inference Time | Cold Start Time | Tokens/Sec | Output Tokens Length |
| ------- | -------------- | --------------- | ---------- | -------------------- |
| vLLM | 24.79 sec | 35.59 sec | 17.83 | 512 |
Note: The inference time, cold start time, and tokens per second are average values.
## Defining Dependencies
We are using the [vLLM](https://github.com/vllm-project/vllm/) to serve the model on a single A100 (80GB).
## Constructing the GitHub/GitLab Template
Now quickly construct the GitHub/GitLab template, this process is mandatory and make sure you don't add any file named `model.py`.
```
Qwen2-72B-Instruct/
├── app.py
├── inferless-runtime-config.yaml
├── inferless.yaml
└── input_schema.py
```
You can also add other files to this directory.
## Create the class for inference
In the [app.py](https://github.com/inferless/Qwen2-72B-Instruct/blob/main/app.py) we will define the class and import all the required functions
1. `def initialize`: In this function, you will initialize your model and define any `variable` that you want to use during inference.
2. `def infer`: This function gets called for every request that you send. Here you can define all the steps that are required for the inference. You can also pass custom values for inference and pass it through `inputs(dict)` parameter.
3. `def finalize`: This function cleans up all the allocated memory.
```python
from vllm import LLM, SamplingParams
from transformers import AutoTokenizer
import inferless
app = inferless.Cls(gpu="A100")
class InferlessPythonModel:
@app.load
def initialize(self):
model_id = "Qwen/Qwen2-72B-Instruct-AWQ" # Specify the model repository ID
# Initialize the LLM object with the downloaded model directory
self.llm = LLM(model=model_id, enforce_eager=True, quantization="AWQ")
# Load the tokenizer associated with the pre-trained model
self.tokenizer = AutoTokenizer.from_pretrained(model_id)
@app.infer
def infer(self, inputs):
prompts = inputs["prompt"] # Extract the prompt from the input
temperature = inputs.get("temperature",0.7)
top_p = inputs.get("top_p",0.1)
repetition_penalty = inputs.get("repetition_penalty",1.18)
top_k = inputs.get("top_k",40)
max_tokens = inputs.get("max_tokens",512)
# Define sampling parameters for model generation
sampling_params = SamplingParams(temperature=temperature,top_p=top_p,repetition_penalty=repetition_penalty,
top_k=top_k,max_tokens=max_tokens)
# Apply the chat template and convert to a list of strings (without tokenization)
input_text = self.tokenizer.apply_chat_template([{"role": "user", "content": prompts}], tokenize=False)
# Generate text using the LLM with the specified sampling parameters
result = self.llm.generate(input_text, sampling_params)
# Extract the generated text from the result object
result_output = [output.outputs[0].text for output in result]
# Return a dictionary containing the generated text
return {"generated_result": result_output[0]}
def finalize(self):
self.llm = None
```
## Create the Input Schema
We have to create a [input\_schema.py](https://github.com/inferless/Qwen2-72B-Instruct/blob/main/input_schema.py) in your GitHub/Gitlab repository this will help us create the Input parameters. You can checkout our documentation on [Input / Output Schema](https://docs.inferless.com/model-import/input-output-schema).
For this tutorial, we have defined these parameter `prompt`, `temperature`, `top_p`, `repetition_penalty`, `max_tokens` and `top_k` which are required during the API call. Now lets create the `input_schema.py`.
```JSON
INPUT_SCHEMA = {
"prompt": {
'datatype': 'STRING',
'required': True,
'shape': [1],
'example': ["What is deep meaning?"]
},
"temperature": {
'datatype': 'FP32',
'required': False,
'shape': [1],
'example': [0.7]
},
"top_p": {
'datatype': 'FP32',
'required': False,
'shape': [1],
'example': [0.1]
},
"repetition_penalty": {
'datatype': 'FP32',
'required': False,
'shape': [1],
'example': [1.18]
},
"max_tokens": {
'datatype': 'INT16',
'required': False,
'shape': [1],
'example': [512]
},
"top_k":{
'datatype': 'INT8',
'required': False,
'shape': [1],
'example': [40]
}
}
```
## Creating the Custom Runtime
This is a mandatory step where we allow the users to upload their custom runtime through [inferless-runtime-config.yaml](https://github.com/inferless/Qwen2-72B-Instruct/blob/main/inferless-runtime-config.yaml).
```python
build:
python_packages:
- "transformers==4.41.2"
- "vllm==0.5.0.post1"
- "inferless-cli==2.0.9"
- "hf-transfer==0.1.9"
- "huggingface-hub==0.27.1"
```
## Test your model with Remote Run
You can use the `inferless remote-run`([installation guide here](https://docs.inferless.com/model-import/cli-import#cli-import)) command to test your model or any custom Python script in a remote GPU environment directly from your local machine. Make sure that you use `Python3.10` for seamless experience.
### Step 1: Add the Decorators and local entry point
To enable **Remote Run**, simply do the following:
1. Import the `inferless` library and initialize `Cls(gpu="A100")`. The available GPU options are `T4`, `A10` and `A100`.
2. Decorated the `initialize` and `infer` functions with `@app.load` and `@app.infer` respectively.
3. Create the Local Entry Point by decorating a function (for example, `my_local_entry`) with `@inferless.local_entry_point`.
Within this function, instantiate your model class, convert any incoming parameters into a `RequestObjects` object, and invoke the model's `infer` method.
```python
from vllm import LLM, SamplingParams
from transformers import AutoTokenizer
import inferless
from pydantic import BaseModel, Field
from typing import Optional
@inferless.request
class RequestObjects(BaseModel):
prompt: str = Field(default="Explain Deep Learning.")
temperature: Optional[float] = 0.7
top_p: Optional[float] = 0.1
repetition_penalty: Optional[float] = 1.18
top_k: Optional[int] = 40
max_tokens: Optional[int] = 256
@inferless.response
class ResponseObjects(BaseModel):
generated_text: str = Field(default='Test output')
app = inferless.Cls(gpu="A100")
class InferlessPythonModel:
@app.load
def initialize(self):
model_id = "Qwen/Qwen2-72B-Instruct-AWQ" # Specify the model repository ID
# Initialize the LLM object with the downloaded model directory
self.llm = LLM(model=model_id, enforce_eager=True, quantization="AWQ")
# Load the tokenizer associated with the pre-trained model
self.tokenizer = AutoTokenizer.from_pretrained(model_id)
@app.infer
def infer(self, request: RequestObjects) -> ResponseObjects:
# Define sampling parameters for model generation
sampling_params = SamplingParams(temperature=request.temperature,top_p=request.top_p,repetition_penalty=request.repetition_penalty,
top_k=request.top_k,max_tokens=request.max_tokens)
# Apply the chat template and convert to a list of strings (without tokenization)
input_text = self.tokenizer.apply_chat_template([{"role": "user", "content": request.prompt}], tokenize=False)
# Generate text using the LLM with the specified sampling parameters
result = self.llm.generate(input_text, sampling_params)
# Extract the generated text from the result object
result_output = [output.outputs[0].text for output in result]
# Return a dictionary containing the generated text
generateObject = ResponseObjects(generated_text = result_output[0])
return generateObject
def finalize(self):
self.llm = None
@inferless.local_entry_point
def my_local_entry(dynamic_params):
request_objects = RequestObjects(**dynamic_params)
model_instance = InferlessPythonModel()
return model_instance.infer(request_objects)
```
### Step 2: Run with Remote GPU
From your local terminal, navigate to the folder containing your `app.py` and your `inferless-runtime-config.yaml` and run:
```bash
inferless remote-run app.py -c inferless-runtime-config.yaml --prompts "What is deep meaning?"
```
You can pass the other input parameters in the same way (e.g., `--max_tokens`, `--temperature`, etc.) as long as your code expects them in the `inputs` dictionary.
If you want to exclude certain files or directories from being uploaded, use the `--exclude` or `-e` flag.
## Method A: Deploying the model on Inferless Platform
Inferless supports multiple ways of [importing your model](https://docs.inferless.com/model-import/file-structure-req/file-structure-requirements). For this tutorial, we will use GitHub.
### Step 1: Login to the inferless dashboard can click on Import model button
Navigate to your desired workspace in Inferless and Click on `Add a custom model` button that you see on the top right. An import wizard will open up.
### Step 2: Follow the UI to complete the model Import
* Select the GitHub/GitLab Integration option to connect your source code repository with the deployment environment.
* Navigate to the specific GitHub repository that contains your model's code. Here, you will need to identify and enter the name of the model you wish to import.
* Choose the appropriate type of machine that suits your model's requirements. Additionally, specify the minimum and maximum number of replicas to define the scalability range for deploying your model.
* Optionally, you have the option to enable automatic build and deployment. This feature triggers a new deployment automatically whenever there is a new code push to your repository.
* If your model requires additional software packages, configure the Custom Runtime settings by including necessary pip or apt packages. Also, set up environment variables such as Inference Timeout, Container Concurrency, and Scale Down Timeout to tailor the runtime environment according to your needs.
* Wait for the validation process to complete, ensuring that all settings are correct and functional. Once validation is successful, click on the "Import" button to finalize the import of your model.
### Step 3: Wait for the model build to complete usually takes \~5-10 minutes
### Step 4: Use the APIs to call the model
Once the model is in 'Active' status you can click on the 'API' page to call the model
### Here is the Demo:
## Method B: Deploying the model on Inferless CLI
Inferless allows you to deploy your model using Inferless-CLI. Follow the steps to deploy using Inferless CLI.
### Clone the repository of the model
Let's begin by cloning the model repository:
```bash
git clone https://github.com/inferless/Codellama-34B.git
```
### Deploy the Model
To deploy the model using Inferless CLI, execute the following command:
```bash
inferless deploy --gpu A100 --runtime inferless-runtime-config.yaml
```
**Explanation of the Command:**
* `--gpu A100`: Specifies the GPU type for deployment. Available options include `A10`, `A100`, and `T4`.
* `--runtime inferless-runtime-config.yaml`: Defines the runtime configuration file. If not specified, the default Inferless runtime is used.
# Deploy Qwen2-72B-Instruct using Inferless
Source: https://docs.inferless.com/how-to-guides/deploy-a-qwen2-72b-using-inferless
Qwen2-72B-Instruct is a part of the Qwen2 series of large language models ranging from 0.5 to 72 billion parameters. The repository is for the 72B instruction-tuned model for deploying the model in the Inferless platform.
## Introduction
[Qwen2-72B-Instruct](https://huggingface.co/Qwen/Qwen2-72B-Instruct) is a part of the latest series of [Qwen2 large language models](https://qwenlm.github.io/blog/qwen2/), featuring base and instruction-tuned models ranging from 0.5 to 72 billion parameters, expanding language support to 29 languages. These models showcase state-of-the-art performance across various benchmarks, with significant improvements in coding and mathematical tasks. Notably, the 7B and 72B instruction-tuned versions support an impressive 128K token context length, pushing the boundaries of large language model capabilities.
## Our Observations
We have deployed the model on an A100 GPU(80GB). Here are our observations:
| Library | Inference Time | Cold Start Time | Tokens/Sec | Output Tokens Length |
| ------- | -------------- | --------------- | ---------- | -------------------- |
| vLLM | 24.79 sec | 35.59 sec | 17.83 | 512 |
Note: The inference time, cold start time, and tokens per second are average values.
## Defining Dependencies
We are using the [vLLM](https://github.com/vllm-project/vllm/) to serve the model on a single A100 (80GB).
## Constructing the GitHub/GitLab Template
Now quickly construct the GitHub/GitLab template, this process is mandatory and make sure you don't add any file named `model.py`.
```
Qwen2-72B-Instruct/
├── app.py
├── inferless-runtime-config.yaml
├── inferless.yaml
└── input_schema.py
```
You can also add other files to this directory.
## Create the class for inference
In the [app.py](https://github.com/inferless/Qwen2-72B-Instruct/blob/main/app.py) we will define the class and import all the required functions
1. `def initialize`: In this function, you will initialize your model and define any `variable` that you want to use during inference.
2. `def infer`: This function gets called for every request that you send. Here you can define all the steps that are required for the inference. You can also pass custom values for inference and pass it through `inputs(dict)` parameter.
3. `def finalize`: This function cleans up all the allocated memory.
```python
from vllm import LLM, SamplingParams
from transformers import AutoTokenizer
import inferless
app = inferless.Cls(gpu="A100")
class InferlessPythonModel:
@app.load
def initialize(self):
model_id = "Qwen/Qwen2-72B-Instruct-AWQ" # Specify the model repository ID
# Initialize the LLM object with the downloaded model directory
self.llm = LLM(model=model_id, enforce_eager=True, quantization="AWQ")
# Load the tokenizer associated with the pre-trained model
self.tokenizer = AutoTokenizer.from_pretrained(model_id)
@app.infer
def infer(self, inputs):
prompts = inputs["prompt"] # Extract the prompt from the input
temperature = inputs.get("temperature",0.7)
top_p = inputs.get("top_p",0.1)
repetition_penalty = inputs.get("repetition_penalty",1.18)
top_k = inputs.get("top_k",40)
max_tokens = inputs.get("max_tokens",512)
# Define sampling parameters for model generation
sampling_params = SamplingParams(temperature=temperature,top_p=top_p,repetition_penalty=repetition_penalty,
top_k=top_k,max_tokens=max_tokens)
# Apply the chat template and convert to a list of strings (without tokenization)
input_text = self.tokenizer.apply_chat_template([{"role": "user", "content": prompts}], tokenize=False)
# Generate text using the LLM with the specified sampling parameters
result = self.llm.generate(input_text, sampling_params)
# Extract the generated text from the result object
result_output = [output.outputs[0].text for output in result]
# Return a dictionary containing the generated text
return {"generated_result": result_output[0]}
def finalize(self):
self.llm = None
```
## Create the Input Schema
We have to create a [input\_schema.py](https://github.com/inferless/Qwen2-72B-Instruct/blob/main/input_schema.py) in your GitHub/Gitlab repository this will help us create the Input parameters. You can checkout our documentation on [Input / Output Schema](https://docs.inferless.com/model-import/input-output-schema).
For this tutorial, we have defined these parameter `prompt`, `temperature`, `top_p`, `repetition_penalty`, `max_tokens` and `top_k` which are required during the API call. Now lets create the `input_schema.py`.
```JSON
INPUT_SCHEMA = {
"prompt": {
'datatype': 'STRING',
'required': True,
'shape': [1],
'example': ["What is deep meaning?"]
},
"temperature": {
'datatype': 'FP32',
'required': False,
'shape': [1],
'example': [0.7]
},
"top_p": {
'datatype': 'FP32',
'required': False,
'shape': [1],
'example': [0.1]
},
"repetition_penalty": {
'datatype': 'FP32',
'required': False,
'shape': [1],
'example': [1.18]
},
"max_tokens": {
'datatype': 'INT16',
'required': False,
'shape': [1],
'example': [512]
},
"top_k":{
'datatype': 'INT8',
'required': False,
'shape': [1],
'example': [40]
}
}
```
## Creating the Custom Runtime
This is a mandatory step where we allow the users to upload their custom runtime through [inferless-runtime-config.yaml](https://github.com/inferless/Qwen2-72B-Instruct/blob/main/inferless-runtime-config.yaml).
```python
build:
python_packages:
- "transformers==4.41.2"
- "vllm==0.5.0.post1"
- "inferless-cli==2.0.9"
- "hf-transfer==0.1.9"
- "huggingface-hub==0.27.1"
```
## Test your model with Remote Run
You can use the `inferless remote-run`([installation guide here](https://docs.inferless.com/model-import/cli-import#cli-import)) command to test your model or any custom Python script in a remote GPU environment directly from your local machine. Make sure that you use `Python3.10` for seamless experience.
### Step 1: Add the Decorators and local entry point
To enable **Remote Run**, simply do the following:
1. Import the `inferless` library and initialize `Cls(gpu="A100")`. The available GPU options are `T4`, `A10` and `A100`.
2. Decorated the `initialize` and `infer` functions with `@app.load` and `@app.infer` respectively.
3. Create the Local Entry Point by decorating a function (for example, `my_local_entry`) with `@inferless.local_entry_point`.
Within this function, instantiate your model class, convert any incoming parameters into a `RequestObjects` object, and invoke the model's `infer` method.
```python
from vllm import LLM, SamplingParams
from transformers import AutoTokenizer
import inferless
from pydantic import BaseModel, Field
from typing import Optional
@inferless.request
class RequestObjects(BaseModel):
prompt: str = Field(default="Explain Deep Learning.")
temperature: Optional[float] = 0.7
top_p: Optional[float] = 0.1
repetition_penalty: Optional[float] = 1.18
top_k: Optional[int] = 40
max_tokens: Optional[int] = 256
@inferless.response
class ResponseObjects(BaseModel):
generated_text: str = Field(default='Test output')
app = inferless.Cls(gpu="A100")
class InferlessPythonModel:
@app.load
def initialize(self):
model_id = "Qwen/Qwen2-72B-Instruct-AWQ" # Specify the model repository ID
# Initialize the LLM object with the downloaded model directory
self.llm = LLM(model=model_id, enforce_eager=True, quantization="AWQ")
# Load the tokenizer associated with the pre-trained model
self.tokenizer = AutoTokenizer.from_pretrained(model_id)
@app.infer
def infer(self, request: RequestObjects) -> ResponseObjects:
# Define sampling parameters for model generation
sampling_params = SamplingParams(temperature=request.temperature,top_p=request.top_p,repetition_penalty=request.repetition_penalty,
top_k=request.top_k,max_tokens=request.max_tokens)
# Apply the chat template and convert to a list of strings (without tokenization)
input_text = self.tokenizer.apply_chat_template([{"role": "user", "content": request.prompt}], tokenize=False)
# Generate text using the LLM with the specified sampling parameters
result = self.llm.generate(input_text, sampling_params)
# Extract the generated text from the result object
result_output = [output.outputs[0].text for output in result]
# Return a dictionary containing the generated text
generateObject = ResponseObjects(generated_text = result_output[0])
return generateObject
def finalize(self):
self.llm = None
@inferless.local_entry_point
def my_local_entry(dynamic_params):
request_objects = RequestObjects(**dynamic_params)
model_instance = InferlessPythonModel()
return model_instance.infer(request_objects)
```
### Step 2: Run with Remote GPU
From your local terminal, navigate to the folder containing your `app.py` and your `inferless-runtime-config.yaml` and run:
```bash
inferless remote-run app.py -c inferless-runtime-config.yaml --prompts "What is deep meaning?"
```
You can pass the other input parameters in the same way (e.g., `--max_tokens`, `--temperature`, etc.) as long as your code expects them in the `inputs` dictionary.
If you want to exclude certain files or directories from being uploaded, use the `--exclude` or `-e` flag.
## Method A: Deploying the model on Inferless Platform
Inferless supports multiple ways of [importing your model](https://docs.inferless.com/model-import/file-structure-req/file-structure-requirements). For this tutorial, we will use GitHub.
### Step 1: Login to the inferless dashboard can click on Import model button
Navigate to your desired workspace in Inferless and Click on `Add a custom model` button that you see on the top right. An import wizard will open up.
### Step 2: Follow the UI to complete the model Import
* Select the GitHub/GitLab Integration option to connect your source code repository with the deployment environment.
* Navigate to the specific GitHub repository that contains your model's code. Here, you will need to identify and enter the name of the model you wish to import.
* Choose the appropriate type of machine that suits your model's requirements. Additionally, specify the minimum and maximum number of replicas to define the scalability range for deploying your model.
* Optionally, you have the option to enable automatic build and deployment. This feature triggers a new deployment automatically whenever there is a new code push to your repository.
* If your model requires additional software packages, configure the Custom Runtime settings by including necessary pip or apt packages. Also, set up environment variables such as Inference Timeout, Container Concurrency, and Scale Down Timeout to tailor the runtime environment according to your needs.
* Wait for the validation process to complete, ensuring that all settings are correct and functional. Once validation is successful, click on the "Import" button to finalize the import of your model.
### Step 3: Wait for the model build to complete usually takes \~5-10 minutes
### Step 4: Use the APIs to call the model
Once the model is in 'Active' status you can click on the 'API' page to call the model
### Here is the Demo:
 ## Method B: Deploying the model on Inferless CLI
Inferless allows you to deploy your model using Inferless-CLI. Follow the steps to deploy using Inferless CLI.
### Clone the repository of the model
Let's begin by cloning the model repository:
```bash
git clone https://github.com/inferless/Qwen2-72B-Instruct.git
```
### Deploy the Model
To deploy the model using Inferless CLI, execute the following command:
```bash
inferless deploy --gpu A100 --runtime inferless-runtime-config.yaml
```
**Explanation of the Command:**
* `--gpu A100`: Specifies the GPU type for deployment. Available options include `A10`, `A100`, and `T4`.
* `--runtime inferless-runtime-config.yaml`: Defines the runtime configuration file. If not specified, the default Inferless runtime is used.
# Deploy Qwen2.5-Omni-7B using Inferless
Source: https://docs.inferless.com/how-to-guides/deploy-a-qwen2.5-omni-7b
Qwen2.5-Omni-7B is a 7B multimodal language model developed by Alibaba Cloud's Qwen team, designed for real-time, end-to-end processing of text, images, audio, and video inputs, with text and speech generation capabilities.
## Introduction
Qwen2.5-Omni-7B is an advanced multimodal model developed by Alibaba Cloud's Qwen team.
This model is part of the Qwen2.5 series and it can handle diverse modalities, including text, images, audio, and video, enabling seamless integration and understanding across different data types.
The model introduces a novel Thinker-Talker architecture, where the "Thinker" processes and understands multimodal inputs, and the "Talker" generates corresponding text and natural speech outputs.
This design facilitates real-time interactions, making it suitable for applications like voice assistants and interactive agents.
## Defining Dependencies
We are using the [transformers](https://github.com/huggingface/transformers/) to serve the model on a single A100 (80GB).
## Constructing the GitHub/GitLab Template
Now quickly construct the GitHub/GitLab template, this process is mandatory and make sure you don't add any file named `model.py`.
```
qwen2.5-omni-7b/
├── app.py
├── inferless-runtime-config.yaml
└── input_schema.py
```
You can also add other files to this directory.
## Create the class for inference
In the [app.py](https://github.com/inferless/qwen2.5-omni-7b/blob/main/app.py) we will define the class and import all the required functions
1. `def initialize`: In this function, you will initialize your model and define any `variable` that you want to use during inference.
2. `def infer`: This function gets called for every request that you send. Here you can define all the steps that are required for the inference.
3. `def finalize`: This function cleans up all the allocated memory.
```python
import soundfile as sf
from transformers import Qwen2_5OmniForConditionalGeneration, Qwen2_5OmniProcessor
from qwen_omni_utils import process_mm_info
import io
import base64
import inferless
from pydantic import BaseModel, Field
from typing import Optional
@inferless.request
class RequestObjects(BaseModel):
prompt: str = Field(default="What are the elements can you see and hear in these medias?")
system_prompt: str = Field(default="You are Qwen, a virtual human developed by the Qwen Team, Alibaba Group, capable of perceiving auditory and visual inputs, as well as generating text and speech.")
video_url: Optional[str] = "https://www.sample-videos.com/video321/mp4/240/big_buck_bunny_240p_1mb.mp4"
image_url: Optional[str] = "https://github.com/rbgo404/Files/raw/main/dog.jpg"
audio_url: Optional[str] = "https://github.com/rbgo404/Files/raw/main/driving_audio_1.wav"
@inferless.response
class ResponseObjects(BaseModel):
generated_text: str = Field(default="Test output")
generated_audio: Optional[str] = None
class InferlessPythonModel:
def initialize(self):
model_id = "Qwen/Qwen2.5-Omni-7B"
self.model = Qwen2_5OmniForConditionalGeneration.from_pretrained(model_id, torch_dtype="auto", device_map="cuda")
self.processor = Qwen2_5OmniProcessor.from_pretrained(model_id)
def infer(self, request: RequestObjects) -> ResponseObjects:
conversation = self.get_query(request.system_prompt, request.prompt, request.video_url, request.image_url, request.audio_url)
text = self.processor.apply_chat_template(conversation, add_generation_prompt=True, tokenize=False)
audios, images, videos = process_mm_info(conversation, use_audio_in_video=True)
inputs = self.processor(text=text, audio=audios, images=images, videos=videos, return_tensors="pt", padding=True, use_audio_in_video=True)
inputs = inputs.to(self.model.device).to(self.model.dtype)
text_ids, audio = self.model.generate(**inputs, use_audio_in_video=True)
text = self.processor.batch_decode(text_ids, skip_special_tokens=True, clean_up_tokenization_spaces=False)
buffer = io.BytesIO()
sf.write(
buffer,
audio.reshape(-1).detach().cpu().numpy(),
samplerate=24000,
format='WAV'
)
buffer.seek(0)
audio_base64 = base64.b64encode(buffer.read()).decode('utf-8')
generateObject = ResponseObjects(generated_text=text[0],generated_audio=audio_base64)
return generateObject
def get_query(self, system_prompt, prompt, video_url=None, image_url=None, audio_url=None):
content_list = []
if image_url:
content_list.append({"type": "image", "image": image_url})
if video_url:
content_list.append({"type": "video", "video": video_url})
if audio_url:
content_list.append({"type": "audio", "audio": audio_url})
if prompt:
content_list.append({"type": "text", "text": prompt})
return [
{
"role": "system",
"content": [
{"type": "text",
"text": system_prompt}
],
},
{
"role": "user",
"content": content_list,
}
]
def finalize(self):
self.model = None
```
## Creating the Custom Runtime
This is a mandatory step where we allow the users to upload their custom runtime through [inferless-runtime-config.yaml](https://github.com/inferless/qwen2.5-omni-7b/blob/main/inferless-runtime-config.yaml).
```python
build:
cuda_version: "12.1.1"
system_packages:
- "ffmpeg"
python_packages:
- "accelerate==1.6.0"
- "decord==0.6.0"
- "qwen-omni-utils==0.0.4"
- "torchvision==0.22.0"
- "inferless==0.2.13"
- "pydantic==2.10.2"
- "git+https://github.com/huggingface/transformers.git@397a5ede33863d6f7137c771a68d40036cac0396"
```
## Test your model with Remote Run
You can use the `inferless remote-run`([installation guide here](https://docs.inferless.com/model-import/cli-import#cli-import)) command to test your model or any custom Python script in a remote GPU environment directly from your local machine. Make sure that you use `Python3.10` for seamless experience.
### Step 1: Add the Decorators and local entry point
To enable **Remote Run**, simply do the following:
1. Import the `inferless` library and initialize `Cls(gpu="A100")`. The available GPU options are `T4`, `A10` and `A100`.
2. Decorated the `initialize` and `infer` functions with `@app.load` and `@app.infer` respectively.
3. Create the Local Entry Point by decorating a function (for example, `my_local_entry`) with `@inferless.local_entry_point`.
Within this function, instantiate your model class, convert any incoming parameters into a `RequestObjects` object, and invoke the model's `infer` method.
```python
import soundfile as sf
from transformers import Qwen2_5OmniForConditionalGeneration, Qwen2_5OmniProcessor
from qwen_omni_utils import process_mm_info
import io
import base64
import inferless
from pydantic import BaseModel, Field
from typing import Optional
app = inferless.Cls(gpu="A100")
@inferless.request
class RequestObjects(BaseModel):
prompt: str = Field(default="What are the elements can you see and hear in these medias?")
system_prompt: str = Field(default="You are Qwen, a virtual human developed by the Qwen Team, Alibaba Group, capable of perceiving auditory and visual inputs, as well as generating text and speech.")
video_url: Optional[str] = "https://www.sample-videos.com/video321/mp4/240/big_buck_bunny_240p_1mb.mp4"
image_url: Optional[str] = "https://github.com/rbgo404/Files/raw/main/dog.jpg"
audio_url: Optional[str] = "https://github.com/rbgo404/Files/raw/main/driving_audio_1.wav"
@inferless.response
class ResponseObjects(BaseModel):
generated_text: str = Field(default="Test output")
generated_audio: Optional[str] = None
class InferlessPythonModel:
@app.load
def initialize(self):
model_id = "Qwen/Qwen2.5-Omni-7B"
self.model = Qwen2_5OmniForConditionalGeneration.from_pretrained(model_id, torch_dtype="auto", device_map="cuda")
self.processor = Qwen2_5OmniProcessor.from_pretrained(model_id)
@app.infer
def infer(self, request: RequestObjects) -> ResponseObjects:
conversation = self.get_query(request.system_prompt, request.prompt, request.video_url, request.image_url, request.audio_url)
text = self.processor.apply_chat_template(conversation, add_generation_prompt=True, tokenize=False)
audios, images, videos = process_mm_info(conversation, use_audio_in_video=True)
inputs = self.processor(text=text, audio=audios, images=images, videos=videos, return_tensors="pt", padding=True, use_audio_in_video=True)
inputs = inputs.to(self.model.device).to(self.model.dtype)
text_ids, audio = self.model.generate(**inputs, use_audio_in_video=True)
text = self.processor.batch_decode(text_ids, skip_special_tokens=True, clean_up_tokenization_spaces=False)
buffer = io.BytesIO()
sf.write(
buffer,
audio.reshape(-1).detach().cpu().numpy(),
samplerate=24000,
format='WAV'
)
buffer.seek(0)
audio_base64 = base64.b64encode(buffer.read()).decode('utf-8')
generateObject = ResponseObjects(generated_text=text[0],generated_audio=audio_base64)
return generateObject
def get_query(self, system_prompt, prompt, video_url=None, image_url=None, audio_url=None):
content_list = []
if image_url:
content_list.append({"type": "image", "image": image_url})
if video_url:
content_list.append({"type": "video", "video": video_url})
if audio_url:
content_list.append({"type": "audio", "audio": audio_url})
if prompt:
content_list.append({"type": "text", "text": prompt})
return [
{
"role": "system",
"content": [
{"type": "text",
"text": system_prompt}
],
},
{
"role": "user",
"content": content_list,
}
]
def finalize(self):
self.model = None
@inferless.local_entry_point
def my_local_entry(dynamic_params):
request_objects = RequestObjects(**dynamic_params)
model_instance = InferlessPythonModel()
return model_instance.infer(request_objects)
```
### Step 2: Run with Remote GPU
From your local terminal, navigate to the folder containing your `app.py` and your `inferless-runtime-config.yaml` and run:
```bash
inferless remote-run app.py -c inferless-runtime-config.yaml --prompt "Explain everything in the image." --system_prompt "You are Qwen, a virtual human developed by the Qwen Team, Alibaba Group, capable of perceiving auditory and visual inputs, as well as generating text and speech." --image_url "https://github.com/rbgo404/Files/raw/main/dog.jpg"
```
You can pass the other input parameters in the same way (e.g., `--system_prompt`, `--video_url`, etc.) as long as your code expects them in the `inputs` dictionary.
If you want to exclude certain files or directories from being uploaded, use the `--exclude` or `-e` flag.
## Method A: Deploying the model on Inferless Platform
Inferless supports multiple ways of [importing your model](https://docs.inferless.com/model-import/file-structure-req/file-structure-requirements). For this tutorial, we will use GitHub.
### Step 1: Login to the inferless dashboard can click on Import model button
Navigate to your desired workspace in Inferless and Click on `Add a custom model` button that you see on the top right. An import wizard will open up.
### Step 2: Follow the UI to complete the model Import
* Select the GitHub/GitLab Integration option to connect your source code repository with the deployment environment.
* Navigate to the specific GitHub repository that contains your model's code. Here, you will need to identify and enter the name of the model you wish to import.
* Choose the appropriate type of machine that suits your model's requirements. Additionally, specify the minimum and maximum number of replicas to define the scalability range for deploying your model.
* Optionally, you have the option to enable automatic build and deployment. This feature triggers a new deployment automatically whenever there is a new code push to your repository.
* If your model requires additional software packages, configure the Custom Runtime settings by including necessary pip or apt packages. Also, set up environment variables such as Inference Timeout, Container Concurrency, and Scale Down Timeout to tailor the runtime environment according to your needs.
* Wait for the validation process to complete, ensuring that all settings are correct and functional. Once validation is successful, click on the "Import" button to finalize the import of your model.
### Step 3: Wait for the model build to complete usually takes \~5-10 minutes
### Step 4: Use the APIs to call the model
Once the model is in 'Active' status you can click on the 'API' page to call the model
### Here is the Demo:
## Method B: Deploying the model on Inferless CLI
Inferless allows you to deploy your model using Inferless-CLI. Follow the steps to deploy using Inferless CLI.
### Clone the repository of the model
Let's begin by cloning the model repository:
```bash
git clone https://github.com/inferless/Qwen2-72B-Instruct.git
```
### Deploy the Model
To deploy the model using Inferless CLI, execute the following command:
```bash
inferless deploy --gpu A100 --runtime inferless-runtime-config.yaml
```
**Explanation of the Command:**
* `--gpu A100`: Specifies the GPU type for deployment. Available options include `A10`, `A100`, and `T4`.
* `--runtime inferless-runtime-config.yaml`: Defines the runtime configuration file. If not specified, the default Inferless runtime is used.
# Deploy Qwen2.5-Omni-7B using Inferless
Source: https://docs.inferless.com/how-to-guides/deploy-a-qwen2.5-omni-7b
Qwen2.5-Omni-7B is a 7B multimodal language model developed by Alibaba Cloud's Qwen team, designed for real-time, end-to-end processing of text, images, audio, and video inputs, with text and speech generation capabilities.
## Introduction
Qwen2.5-Omni-7B is an advanced multimodal model developed by Alibaba Cloud's Qwen team.
This model is part of the Qwen2.5 series and it can handle diverse modalities, including text, images, audio, and video, enabling seamless integration and understanding across different data types.
The model introduces a novel Thinker-Talker architecture, where the "Thinker" processes and understands multimodal inputs, and the "Talker" generates corresponding text and natural speech outputs.
This design facilitates real-time interactions, making it suitable for applications like voice assistants and interactive agents.
## Defining Dependencies
We are using the [transformers](https://github.com/huggingface/transformers/) to serve the model on a single A100 (80GB).
## Constructing the GitHub/GitLab Template
Now quickly construct the GitHub/GitLab template, this process is mandatory and make sure you don't add any file named `model.py`.
```
qwen2.5-omni-7b/
├── app.py
├── inferless-runtime-config.yaml
└── input_schema.py
```
You can also add other files to this directory.
## Create the class for inference
In the [app.py](https://github.com/inferless/qwen2.5-omni-7b/blob/main/app.py) we will define the class and import all the required functions
1. `def initialize`: In this function, you will initialize your model and define any `variable` that you want to use during inference.
2. `def infer`: This function gets called for every request that you send. Here you can define all the steps that are required for the inference.
3. `def finalize`: This function cleans up all the allocated memory.
```python
import soundfile as sf
from transformers import Qwen2_5OmniForConditionalGeneration, Qwen2_5OmniProcessor
from qwen_omni_utils import process_mm_info
import io
import base64
import inferless
from pydantic import BaseModel, Field
from typing import Optional
@inferless.request
class RequestObjects(BaseModel):
prompt: str = Field(default="What are the elements can you see and hear in these medias?")
system_prompt: str = Field(default="You are Qwen, a virtual human developed by the Qwen Team, Alibaba Group, capable of perceiving auditory and visual inputs, as well as generating text and speech.")
video_url: Optional[str] = "https://www.sample-videos.com/video321/mp4/240/big_buck_bunny_240p_1mb.mp4"
image_url: Optional[str] = "https://github.com/rbgo404/Files/raw/main/dog.jpg"
audio_url: Optional[str] = "https://github.com/rbgo404/Files/raw/main/driving_audio_1.wav"
@inferless.response
class ResponseObjects(BaseModel):
generated_text: str = Field(default="Test output")
generated_audio: Optional[str] = None
class InferlessPythonModel:
def initialize(self):
model_id = "Qwen/Qwen2.5-Omni-7B"
self.model = Qwen2_5OmniForConditionalGeneration.from_pretrained(model_id, torch_dtype="auto", device_map="cuda")
self.processor = Qwen2_5OmniProcessor.from_pretrained(model_id)
def infer(self, request: RequestObjects) -> ResponseObjects:
conversation = self.get_query(request.system_prompt, request.prompt, request.video_url, request.image_url, request.audio_url)
text = self.processor.apply_chat_template(conversation, add_generation_prompt=True, tokenize=False)
audios, images, videos = process_mm_info(conversation, use_audio_in_video=True)
inputs = self.processor(text=text, audio=audios, images=images, videos=videos, return_tensors="pt", padding=True, use_audio_in_video=True)
inputs = inputs.to(self.model.device).to(self.model.dtype)
text_ids, audio = self.model.generate(**inputs, use_audio_in_video=True)
text = self.processor.batch_decode(text_ids, skip_special_tokens=True, clean_up_tokenization_spaces=False)
buffer = io.BytesIO()
sf.write(
buffer,
audio.reshape(-1).detach().cpu().numpy(),
samplerate=24000,
format='WAV'
)
buffer.seek(0)
audio_base64 = base64.b64encode(buffer.read()).decode('utf-8')
generateObject = ResponseObjects(generated_text=text[0],generated_audio=audio_base64)
return generateObject
def get_query(self, system_prompt, prompt, video_url=None, image_url=None, audio_url=None):
content_list = []
if image_url:
content_list.append({"type": "image", "image": image_url})
if video_url:
content_list.append({"type": "video", "video": video_url})
if audio_url:
content_list.append({"type": "audio", "audio": audio_url})
if prompt:
content_list.append({"type": "text", "text": prompt})
return [
{
"role": "system",
"content": [
{"type": "text",
"text": system_prompt}
],
},
{
"role": "user",
"content": content_list,
}
]
def finalize(self):
self.model = None
```
## Creating the Custom Runtime
This is a mandatory step where we allow the users to upload their custom runtime through [inferless-runtime-config.yaml](https://github.com/inferless/qwen2.5-omni-7b/blob/main/inferless-runtime-config.yaml).
```python
build:
cuda_version: "12.1.1"
system_packages:
- "ffmpeg"
python_packages:
- "accelerate==1.6.0"
- "decord==0.6.0"
- "qwen-omni-utils==0.0.4"
- "torchvision==0.22.0"
- "inferless==0.2.13"
- "pydantic==2.10.2"
- "git+https://github.com/huggingface/transformers.git@397a5ede33863d6f7137c771a68d40036cac0396"
```
## Test your model with Remote Run
You can use the `inferless remote-run`([installation guide here](https://docs.inferless.com/model-import/cli-import#cli-import)) command to test your model or any custom Python script in a remote GPU environment directly from your local machine. Make sure that you use `Python3.10` for seamless experience.
### Step 1: Add the Decorators and local entry point
To enable **Remote Run**, simply do the following:
1. Import the `inferless` library and initialize `Cls(gpu="A100")`. The available GPU options are `T4`, `A10` and `A100`.
2. Decorated the `initialize` and `infer` functions with `@app.load` and `@app.infer` respectively.
3. Create the Local Entry Point by decorating a function (for example, `my_local_entry`) with `@inferless.local_entry_point`.
Within this function, instantiate your model class, convert any incoming parameters into a `RequestObjects` object, and invoke the model's `infer` method.
```python
import soundfile as sf
from transformers import Qwen2_5OmniForConditionalGeneration, Qwen2_5OmniProcessor
from qwen_omni_utils import process_mm_info
import io
import base64
import inferless
from pydantic import BaseModel, Field
from typing import Optional
app = inferless.Cls(gpu="A100")
@inferless.request
class RequestObjects(BaseModel):
prompt: str = Field(default="What are the elements can you see and hear in these medias?")
system_prompt: str = Field(default="You are Qwen, a virtual human developed by the Qwen Team, Alibaba Group, capable of perceiving auditory and visual inputs, as well as generating text and speech.")
video_url: Optional[str] = "https://www.sample-videos.com/video321/mp4/240/big_buck_bunny_240p_1mb.mp4"
image_url: Optional[str] = "https://github.com/rbgo404/Files/raw/main/dog.jpg"
audio_url: Optional[str] = "https://github.com/rbgo404/Files/raw/main/driving_audio_1.wav"
@inferless.response
class ResponseObjects(BaseModel):
generated_text: str = Field(default="Test output")
generated_audio: Optional[str] = None
class InferlessPythonModel:
@app.load
def initialize(self):
model_id = "Qwen/Qwen2.5-Omni-7B"
self.model = Qwen2_5OmniForConditionalGeneration.from_pretrained(model_id, torch_dtype="auto", device_map="cuda")
self.processor = Qwen2_5OmniProcessor.from_pretrained(model_id)
@app.infer
def infer(self, request: RequestObjects) -> ResponseObjects:
conversation = self.get_query(request.system_prompt, request.prompt, request.video_url, request.image_url, request.audio_url)
text = self.processor.apply_chat_template(conversation, add_generation_prompt=True, tokenize=False)
audios, images, videos = process_mm_info(conversation, use_audio_in_video=True)
inputs = self.processor(text=text, audio=audios, images=images, videos=videos, return_tensors="pt", padding=True, use_audio_in_video=True)
inputs = inputs.to(self.model.device).to(self.model.dtype)
text_ids, audio = self.model.generate(**inputs, use_audio_in_video=True)
text = self.processor.batch_decode(text_ids, skip_special_tokens=True, clean_up_tokenization_spaces=False)
buffer = io.BytesIO()
sf.write(
buffer,
audio.reshape(-1).detach().cpu().numpy(),
samplerate=24000,
format='WAV'
)
buffer.seek(0)
audio_base64 = base64.b64encode(buffer.read()).decode('utf-8')
generateObject = ResponseObjects(generated_text=text[0],generated_audio=audio_base64)
return generateObject
def get_query(self, system_prompt, prompt, video_url=None, image_url=None, audio_url=None):
content_list = []
if image_url:
content_list.append({"type": "image", "image": image_url})
if video_url:
content_list.append({"type": "video", "video": video_url})
if audio_url:
content_list.append({"type": "audio", "audio": audio_url})
if prompt:
content_list.append({"type": "text", "text": prompt})
return [
{
"role": "system",
"content": [
{"type": "text",
"text": system_prompt}
],
},
{
"role": "user",
"content": content_list,
}
]
def finalize(self):
self.model = None
@inferless.local_entry_point
def my_local_entry(dynamic_params):
request_objects = RequestObjects(**dynamic_params)
model_instance = InferlessPythonModel()
return model_instance.infer(request_objects)
```
### Step 2: Run with Remote GPU
From your local terminal, navigate to the folder containing your `app.py` and your `inferless-runtime-config.yaml` and run:
```bash
inferless remote-run app.py -c inferless-runtime-config.yaml --prompt "Explain everything in the image." --system_prompt "You are Qwen, a virtual human developed by the Qwen Team, Alibaba Group, capable of perceiving auditory and visual inputs, as well as generating text and speech." --image_url "https://github.com/rbgo404/Files/raw/main/dog.jpg"
```
You can pass the other input parameters in the same way (e.g., `--system_prompt`, `--video_url`, etc.) as long as your code expects them in the `inputs` dictionary.
If you want to exclude certain files or directories from being uploaded, use the `--exclude` or `-e` flag.
## Method A: Deploying the model on Inferless Platform
Inferless supports multiple ways of [importing your model](https://docs.inferless.com/model-import/file-structure-req/file-structure-requirements). For this tutorial, we will use GitHub.
### Step 1: Login to the inferless dashboard can click on Import model button
Navigate to your desired workspace in Inferless and Click on `Add a custom model` button that you see on the top right. An import wizard will open up.
### Step 2: Follow the UI to complete the model Import
* Select the GitHub/GitLab Integration option to connect your source code repository with the deployment environment.
* Navigate to the specific GitHub repository that contains your model's code. Here, you will need to identify and enter the name of the model you wish to import.
* Choose the appropriate type of machine that suits your model's requirements. Additionally, specify the minimum and maximum number of replicas to define the scalability range for deploying your model.
* Optionally, you have the option to enable automatic build and deployment. This feature triggers a new deployment automatically whenever there is a new code push to your repository.
* If your model requires additional software packages, configure the Custom Runtime settings by including necessary pip or apt packages. Also, set up environment variables such as Inference Timeout, Container Concurrency, and Scale Down Timeout to tailor the runtime environment according to your needs.
* Wait for the validation process to complete, ensuring that all settings are correct and functional. Once validation is successful, click on the "Import" button to finalize the import of your model.
### Step 3: Wait for the model build to complete usually takes \~5-10 minutes
### Step 4: Use the APIs to call the model
Once the model is in 'Active' status you can click on the 'API' page to call the model
### Here is the Demo:
 ## Method B: Deploying the model on Inferless CLI
Inferless allows you to deploy your model using Inferless-CLI. Follow the steps to deploy using Inferless CLI.
### Clone the repository of the model
Let's begin by cloning the model repository:
```bash
git clone https://github.com/inferless/qwen2.5-omni-7b.git
```
### Deploy the Model
To deploy the model using Inferless CLI, execute the following command:
```bash
inferless deploy --gpu A100 --runtime inferless-runtime-config.yaml
```
**Explanation of the Command:**
* `--gpu A100`: Specifies the GPU type for deployment. Available options include `A10`, `A100`, and `T4`.
* `--runtime inferless-runtime-config.yaml`: Defines the runtime configuration file. If not specified, the default Inferless runtime is used.
## Method B: Deploying the model on Inferless CLI
Inferless allows you to deploy your model using Inferless-CLI. Follow the steps to deploy using Inferless CLI.
### Clone the repository of the model
Let's begin by cloning the model repository:
```bash
git clone https://github.com/inferless/qwen2.5-omni-7b.git
```
### Deploy the Model
To deploy the model using Inferless CLI, execute the following command:
```bash
inferless deploy --gpu A100 --runtime inferless-runtime-config.yaml
```
**Explanation of the Command:**
* `--gpu A100`: Specifies the GPU type for deployment. Available options include `A10`, `A100`, and `T4`.
* `--runtime inferless-runtime-config.yaml`: Defines the runtime configuration file. If not specified, the default Inferless runtime is used.
 # Deploy the Qwen3-8B using Inferless
Source: https://docs.inferless.com/how-to-guides/deploy-a-qwen3-8b
Qwen3-8B is a language model from Alibaba Cloud's Qwen3 series that delivers strong reasoning, multilingual and agent-friendly performance while remaining inexpensive to host.
## Introduction
Qwen3-8B is a state-of-the-art large language model from Alibaba's Qwen3 series,
featuring 8.2 billion parameters and designed to excel in both complex reasoning tasks and efficient general-purpose dialogue.
It uniquely supports seamless switching between "thinking" mode-for advanced math, coding, and logical inference-and "non-thinking" mode for fast,
natural conversation, making it highly versatile for a wide range of applications.
Qwen3-8B is fine-tuned for instruction following, creative writing, agent integration, and supports over 100 languages, with a native context window of 32,768 tokens (expandable to 131,072 with YaRN).
Its open-source availability and efficient performance make it an attractive choice for developers and researchers seeking a powerful, adaptable language model.
## Our Observations
We have deployed the model on an A100 GPU(80GB). Here are our observations:
| Library | Inference Time | Tokens/Sec | Cold Start Time |
| ------------ | -------------- | ---------- | --------------- |
| transformers | 9.9 sec | 11.31 | 10.44 sec |
Note: The inference time and cold start time are average values.
## Defining Dependencies
We are using the [transformers](https://github.com/huggingface/transformers) to serve the model on a single A100 (80GB).
## Constructing the GitHub/GitLab Template
Now quickly construct the GitHub/GitLab template, this process is mandatory and make sure you don't add any file named `model.py`.
```
qwen3-8b/
├── app.py
├── inferless-runtime-config.yaml
└── inferless.yaml
```
You can also add other files to this directory.
## Create the Input Schema with Pydantic
Using the `inferless` Python client and Pydantic, you can define structured schemas directly in your code for input and output, eliminating the need for external file.
### Input Schema
When defining an input schema with Pydantic, you need to annotate your class attributes with the appropriate types, such as `str`, `float`, `int`, etc.
These type annotations specifys what type of data each field should contain.
The `default` value serves as the example input for testing with the `infer` function.
```python
@inferless.request
class RequestObjects(BaseModel):
prompt: str = Field(default="Give me a short introduction to large language model.")
temperature: Optional[float] = 0.7
repetition_penalty: Optional[float] = 1.18
max_new_tokens: Optional[int] = 2048
```
### Output Schema
The `@inferless.response` decorator helps you define structured output schemas.
```python
@inferless.response
class ResponseObjects(BaseModel):
generated_result: str = Field(default="Test output")
thinking_hidden: str = Field(default="Test output")
```
### Usage in the `infer` Function
Once you have annotated the objects you can expect the infer function to receive `RequestObjects` as input,
and returns a `ResponseObjects` instance as output, ensuring the results adhere to a defined structure.
```python
class InferlessPythonModel:
def infer(self, request: RequestObjects) -> ResponseObjects:
generateObject = ResponseObjects(generated_result=content,thinking_hidden=thinking_content)
return generateObject
```
## Create the class for inference
In the [app.py](https://github.com/inferless/qwen3-8b/blob/main/app.py) we will define the class and import all the required functions
1. `def initialize`: In this function, you will initialize your model and define any `variable` that you want to use during inference.
2. `def infer`: This function gets called for every request that you send. Here you can define all the steps that are required for the inference.
3. `def finalize`: This function cleans up all the allocated memory.
```python
import os
os.environ["HF_HUB_ENABLE_HF_TRANSFER"] = "1"
from huggingface_hub import snapshot_download
from transformers import AutoTokenizer, AutoModelForCausalLM
import torch
import inferless
from pydantic import BaseModel, Field
from typing import Optional
@inferless.request
class RequestObjects(BaseModel):
prompt: str = Field(default="Give me a short introduction to large language model.")
temperature: Optional[float] = 0.7
repetition_penalty: Optional[float] = 1.18
max_new_tokens: Optional[int] = 2048
@inferless.response
class ResponseObjects(BaseModel):
generated_result: str = Field(default="Test output")
thinking_hidden: str = Field(default="Test output")
class InferlessPythonModel:
def initialize(self, context=None):
model_id = "Qwen/Qwen3-8B"
snapshot_download(repo_id=model_id,allow_patterns=["*.safetensors"])
self.tokenizer = AutoTokenizer.from_pretrained(model_id,use_fast=True)
self.model = AutoModelForCausalLM.from_pretrained(model_id,torch_dtype="auto",device_map="cuda")
def infer(self, request: RequestObjects) -> ResponseObjects:
messages = [
{"role": "user", "content": request.prompt}
]
text = self.tokenizer.apply_chat_template(messages,tokenize=False,add_generation_prompt=True,enable_thinking=True)
model_inputs = self.tokenizer([text], return_tensors="pt").to(self.model.device)
generated_ids = self.model.generate(**model_inputs,temperature=request.temperature, max_new_tokens=request.max_new_tokens, repetition_penalty=request.repetition_penalty)
output_ids = generated_ids[0][len(model_inputs.input_ids[0]):].tolist()
try:
index = len(output_ids) - output_ids[::-1].index(151668)
except ValueError:
index = 0
thinking_content = self.tokenizer.decode(output_ids[:index], skip_special_tokens=True).strip("\n")
content = self.tokenizer.decode(output_ids[index:], skip_special_tokens=True).strip("\n")
generateObject = ResponseObjects(generated_result=content,thinking_hidden=thinking_content)
return generateObject
def finalize(self):
self.model = None
```
## Creating the Custom Runtime
This is a mandatory step where we allow the users to upload their custom runtime through [inferless-runtime-config.yaml](https://github.com/inferless/qwen3-8b/blob/main/inferless-runtime-config.yaml).
```python
build:
cuda_version: "12.1.1"
python_packages:
- accelerate==1.6.0
- transformers==4.51.3
- hf-transfer==0.1.9
- inferless==0.2.13
- pydantic==2.10.2
```
## Test your model with Remote Run
You can use the `inferless remote-run`([installation guide here](https://docs.inferless.com/model-import/cli-import#cli-import)) command to test your model or any custom Python script in a remote GPU environment directly from your local machine. Make sure that you use `Python3.10` for seamless experience.
### Step 1: Add the Decorators and local entry point
To enable **Remote Run**, simply do the following:
1. Import the `inferless` library and initialize `Cls(gpu="A100")`. The available GPU options are `T4`, `A10` and `A100`.
2. Decorated the `initialize` and `infer` functions with `@app.load` and `@app.infer` respectively.
3. Create the Local Entry Point by decorating a function (for example, `my_local_entry`) with `@inferless.local_entry_point`.
Within this function, instantiate your model class, convert any incoming parameters into a `RequestObjects` object, and invoke the model's `infer` method.
```python
import os
os.environ["HF_HUB_ENABLE_HF_TRANSFER"] = "1"
from huggingface_hub import snapshot_download
from transformers import AutoTokenizer, AutoModelForCausalLM
import torch
import inferless
from pydantic import BaseModel, Field
from typing import Optional
@inferless.request
class RequestObjects(BaseModel):
prompt: str = Field(default= "Give me a short introduction to large language model.")
temperature: Optional[float] = 0.7
repetition_penalty: Optional[float] = 1.18
max_new_tokens: Optional[int] = 2048
@inferless.response
class ResponseObjects(BaseModel):
generated_result: str = Field(default="Test output")
thinking_hidden: str = Field(default="Test output")
app = inferless.Cls(gpu="A100")
class InferlessPythonModel:
@app.load
def initialize(self, context=None):
model_id = "Qwen/Qwen3-8B"
snapshot_download(repo_id=model_id,allow_patterns=["*.safetensors"])
self.tokenizer = AutoTokenizer.from_pretrained(model_id,use_fast=True)
self.model = AutoModelForCausalLM.from_pretrained(model_id,torch_dtype="auto",device_map="cuda")
@app.infer
def infer(self, request: RequestObjects) -> ResponseObjects:
messages = [
{"role": "user", "content": request.prompt}
]
text = self.tokenizer.apply_chat_template(messages,tokenize=False,add_generation_prompt=True,enable_thinking=True)
model_inputs = self.tokenizer([text], return_tensors="pt").to(self.model.device)
generated_ids = self.model.generate(**model_inputs,temperature=request.temperature, max_new_tokens=request.max_new_tokens, repetition_penalty=request.repetition_penalty)
output_ids = generated_ids[0][len(model_inputs.input_ids[0]):].tolist()
try:
index = len(output_ids) - output_ids[::-1].index(151668)
except ValueError:
index = 0
thinking_content = self.tokenizer.decode(output_ids[:index], skip_special_tokens=True).strip("\n")
content = self.tokenizer.decode(output_ids[index:], skip_special_tokens=True).strip("\n")
generateObject = ResponseObjects(generated_result=content,thinking_hidden=thinking_content)
return generateObject
def finalize(self):
self.model = None
@inferless.local_entry_point
def my_local_entry(dynamic_params):
request_objects = RequestObjects(**dynamic_params)
model_instance = InferlessPythonModel()
return model_instance.infer(request_objects)
```
### Step 2: Run with Remote GPU
From your local terminal, navigate to the folder containing your `app.py` and your `inferless-runtime-config.yaml` and run:
```bash
inferless remote-run app.py -c inferless-runtime-config.yaml --prompt "Give me a short introduction to large language model."
```
You can pass the other input parameters in the same way (e.g., `--temperature`, `--max_new_tokens`, etc.) as long as your code expects them in the `inputs` dictionary.
If you want to exclude certain files or directories from being uploaded, use the `--exclude` or `-e` flag.
## Method A: Deploying the model on Inferless Platform
Inferless supports multiple ways of [importing your model](https://docs.inferless.com/model-import/file-structure-req/file-structure-requirements). For this tutorial, we will use GitHub.
### Step 1: Login to the inferless dashboard can click on Import model button
Navigate to your desired workspace in Inferless and Click on `Add a custom model` button that you see on the top right. An import wizard will open up.
### Step 2: Follow the UI to complete the model Import
* Select the GitHub/GitLab Integration option to connect your source code repository with the deployment environment.
* Navigate to the specific GitHub repository that contains your model's code. Here, you will need to identify and enter the name of the model you wish to import.
* Choose the appropriate type of machine that suits your model's requirements. Additionally, specify the minimum and maximum number of replicas to define the scalability range for deploying your model.
* Optionally, you have the option to enable automatic build and deployment. This feature triggers a new deployment automatically whenever there is a new code push to your repository.
* If your model requires additional software packages, configure the Custom Runtime settings by including necessary pip or apt packages. Also, set up environment variables such as Inference Timeout, Container Concurrency, and Scale Down Timeout to tailor the runtime environment according to your needs.
* Wait for the validation process to complete, ensuring that all settings are correct and functional. Once validation is successful, click on the "Import" button to finalize the import of your model.
### Step 3: Wait for the model build to complete usually takes \~5-10 minutes
### Step 4: Use the APIs to call the model
Once the model is in 'Active' status you can click on the 'API' page to call the model
### Here is the Demo:
# Deploy the Qwen3-8B using Inferless
Source: https://docs.inferless.com/how-to-guides/deploy-a-qwen3-8b
Qwen3-8B is a language model from Alibaba Cloud's Qwen3 series that delivers strong reasoning, multilingual and agent-friendly performance while remaining inexpensive to host.
## Introduction
Qwen3-8B is a state-of-the-art large language model from Alibaba's Qwen3 series,
featuring 8.2 billion parameters and designed to excel in both complex reasoning tasks and efficient general-purpose dialogue.
It uniquely supports seamless switching between "thinking" mode-for advanced math, coding, and logical inference-and "non-thinking" mode for fast,
natural conversation, making it highly versatile for a wide range of applications.
Qwen3-8B is fine-tuned for instruction following, creative writing, agent integration, and supports over 100 languages, with a native context window of 32,768 tokens (expandable to 131,072 with YaRN).
Its open-source availability and efficient performance make it an attractive choice for developers and researchers seeking a powerful, adaptable language model.
## Our Observations
We have deployed the model on an A100 GPU(80GB). Here are our observations:
| Library | Inference Time | Tokens/Sec | Cold Start Time |
| ------------ | -------------- | ---------- | --------------- |
| transformers | 9.9 sec | 11.31 | 10.44 sec |
Note: The inference time and cold start time are average values.
## Defining Dependencies
We are using the [transformers](https://github.com/huggingface/transformers) to serve the model on a single A100 (80GB).
## Constructing the GitHub/GitLab Template
Now quickly construct the GitHub/GitLab template, this process is mandatory and make sure you don't add any file named `model.py`.
```
qwen3-8b/
├── app.py
├── inferless-runtime-config.yaml
└── inferless.yaml
```
You can also add other files to this directory.
## Create the Input Schema with Pydantic
Using the `inferless` Python client and Pydantic, you can define structured schemas directly in your code for input and output, eliminating the need for external file.
### Input Schema
When defining an input schema with Pydantic, you need to annotate your class attributes with the appropriate types, such as `str`, `float`, `int`, etc.
These type annotations specifys what type of data each field should contain.
The `default` value serves as the example input for testing with the `infer` function.
```python
@inferless.request
class RequestObjects(BaseModel):
prompt: str = Field(default="Give me a short introduction to large language model.")
temperature: Optional[float] = 0.7
repetition_penalty: Optional[float] = 1.18
max_new_tokens: Optional[int] = 2048
```
### Output Schema
The `@inferless.response` decorator helps you define structured output schemas.
```python
@inferless.response
class ResponseObjects(BaseModel):
generated_result: str = Field(default="Test output")
thinking_hidden: str = Field(default="Test output")
```
### Usage in the `infer` Function
Once you have annotated the objects you can expect the infer function to receive `RequestObjects` as input,
and returns a `ResponseObjects` instance as output, ensuring the results adhere to a defined structure.
```python
class InferlessPythonModel:
def infer(self, request: RequestObjects) -> ResponseObjects:
generateObject = ResponseObjects(generated_result=content,thinking_hidden=thinking_content)
return generateObject
```
## Create the class for inference
In the [app.py](https://github.com/inferless/qwen3-8b/blob/main/app.py) we will define the class and import all the required functions
1. `def initialize`: In this function, you will initialize your model and define any `variable` that you want to use during inference.
2. `def infer`: This function gets called for every request that you send. Here you can define all the steps that are required for the inference.
3. `def finalize`: This function cleans up all the allocated memory.
```python
import os
os.environ["HF_HUB_ENABLE_HF_TRANSFER"] = "1"
from huggingface_hub import snapshot_download
from transformers import AutoTokenizer, AutoModelForCausalLM
import torch
import inferless
from pydantic import BaseModel, Field
from typing import Optional
@inferless.request
class RequestObjects(BaseModel):
prompt: str = Field(default="Give me a short introduction to large language model.")
temperature: Optional[float] = 0.7
repetition_penalty: Optional[float] = 1.18
max_new_tokens: Optional[int] = 2048
@inferless.response
class ResponseObjects(BaseModel):
generated_result: str = Field(default="Test output")
thinking_hidden: str = Field(default="Test output")
class InferlessPythonModel:
def initialize(self, context=None):
model_id = "Qwen/Qwen3-8B"
snapshot_download(repo_id=model_id,allow_patterns=["*.safetensors"])
self.tokenizer = AutoTokenizer.from_pretrained(model_id,use_fast=True)
self.model = AutoModelForCausalLM.from_pretrained(model_id,torch_dtype="auto",device_map="cuda")
def infer(self, request: RequestObjects) -> ResponseObjects:
messages = [
{"role": "user", "content": request.prompt}
]
text = self.tokenizer.apply_chat_template(messages,tokenize=False,add_generation_prompt=True,enable_thinking=True)
model_inputs = self.tokenizer([text], return_tensors="pt").to(self.model.device)
generated_ids = self.model.generate(**model_inputs,temperature=request.temperature, max_new_tokens=request.max_new_tokens, repetition_penalty=request.repetition_penalty)
output_ids = generated_ids[0][len(model_inputs.input_ids[0]):].tolist()
try:
index = len(output_ids) - output_ids[::-1].index(151668)
except ValueError:
index = 0
thinking_content = self.tokenizer.decode(output_ids[:index], skip_special_tokens=True).strip("\n")
content = self.tokenizer.decode(output_ids[index:], skip_special_tokens=True).strip("\n")
generateObject = ResponseObjects(generated_result=content,thinking_hidden=thinking_content)
return generateObject
def finalize(self):
self.model = None
```
## Creating the Custom Runtime
This is a mandatory step where we allow the users to upload their custom runtime through [inferless-runtime-config.yaml](https://github.com/inferless/qwen3-8b/blob/main/inferless-runtime-config.yaml).
```python
build:
cuda_version: "12.1.1"
python_packages:
- accelerate==1.6.0
- transformers==4.51.3
- hf-transfer==0.1.9
- inferless==0.2.13
- pydantic==2.10.2
```
## Test your model with Remote Run
You can use the `inferless remote-run`([installation guide here](https://docs.inferless.com/model-import/cli-import#cli-import)) command to test your model or any custom Python script in a remote GPU environment directly from your local machine. Make sure that you use `Python3.10` for seamless experience.
### Step 1: Add the Decorators and local entry point
To enable **Remote Run**, simply do the following:
1. Import the `inferless` library and initialize `Cls(gpu="A100")`. The available GPU options are `T4`, `A10` and `A100`.
2. Decorated the `initialize` and `infer` functions with `@app.load` and `@app.infer` respectively.
3. Create the Local Entry Point by decorating a function (for example, `my_local_entry`) with `@inferless.local_entry_point`.
Within this function, instantiate your model class, convert any incoming parameters into a `RequestObjects` object, and invoke the model's `infer` method.
```python
import os
os.environ["HF_HUB_ENABLE_HF_TRANSFER"] = "1"
from huggingface_hub import snapshot_download
from transformers import AutoTokenizer, AutoModelForCausalLM
import torch
import inferless
from pydantic import BaseModel, Field
from typing import Optional
@inferless.request
class RequestObjects(BaseModel):
prompt: str = Field(default= "Give me a short introduction to large language model.")
temperature: Optional[float] = 0.7
repetition_penalty: Optional[float] = 1.18
max_new_tokens: Optional[int] = 2048
@inferless.response
class ResponseObjects(BaseModel):
generated_result: str = Field(default="Test output")
thinking_hidden: str = Field(default="Test output")
app = inferless.Cls(gpu="A100")
class InferlessPythonModel:
@app.load
def initialize(self, context=None):
model_id = "Qwen/Qwen3-8B"
snapshot_download(repo_id=model_id,allow_patterns=["*.safetensors"])
self.tokenizer = AutoTokenizer.from_pretrained(model_id,use_fast=True)
self.model = AutoModelForCausalLM.from_pretrained(model_id,torch_dtype="auto",device_map="cuda")
@app.infer
def infer(self, request: RequestObjects) -> ResponseObjects:
messages = [
{"role": "user", "content": request.prompt}
]
text = self.tokenizer.apply_chat_template(messages,tokenize=False,add_generation_prompt=True,enable_thinking=True)
model_inputs = self.tokenizer([text], return_tensors="pt").to(self.model.device)
generated_ids = self.model.generate(**model_inputs,temperature=request.temperature, max_new_tokens=request.max_new_tokens, repetition_penalty=request.repetition_penalty)
output_ids = generated_ids[0][len(model_inputs.input_ids[0]):].tolist()
try:
index = len(output_ids) - output_ids[::-1].index(151668)
except ValueError:
index = 0
thinking_content = self.tokenizer.decode(output_ids[:index], skip_special_tokens=True).strip("\n")
content = self.tokenizer.decode(output_ids[index:], skip_special_tokens=True).strip("\n")
generateObject = ResponseObjects(generated_result=content,thinking_hidden=thinking_content)
return generateObject
def finalize(self):
self.model = None
@inferless.local_entry_point
def my_local_entry(dynamic_params):
request_objects = RequestObjects(**dynamic_params)
model_instance = InferlessPythonModel()
return model_instance.infer(request_objects)
```
### Step 2: Run with Remote GPU
From your local terminal, navigate to the folder containing your `app.py` and your `inferless-runtime-config.yaml` and run:
```bash
inferless remote-run app.py -c inferless-runtime-config.yaml --prompt "Give me a short introduction to large language model."
```
You can pass the other input parameters in the same way (e.g., `--temperature`, `--max_new_tokens`, etc.) as long as your code expects them in the `inputs` dictionary.
If you want to exclude certain files or directories from being uploaded, use the `--exclude` or `-e` flag.
## Method A: Deploying the model on Inferless Platform
Inferless supports multiple ways of [importing your model](https://docs.inferless.com/model-import/file-structure-req/file-structure-requirements). For this tutorial, we will use GitHub.
### Step 1: Login to the inferless dashboard can click on Import model button
Navigate to your desired workspace in Inferless and Click on `Add a custom model` button that you see on the top right. An import wizard will open up.
### Step 2: Follow the UI to complete the model Import
* Select the GitHub/GitLab Integration option to connect your source code repository with the deployment environment.
* Navigate to the specific GitHub repository that contains your model's code. Here, you will need to identify and enter the name of the model you wish to import.
* Choose the appropriate type of machine that suits your model's requirements. Additionally, specify the minimum and maximum number of replicas to define the scalability range for deploying your model.
* Optionally, you have the option to enable automatic build and deployment. This feature triggers a new deployment automatically whenever there is a new code push to your repository.
* If your model requires additional software packages, configure the Custom Runtime settings by including necessary pip or apt packages. Also, set up environment variables such as Inference Timeout, Container Concurrency, and Scale Down Timeout to tailor the runtime environment according to your needs.
* Wait for the validation process to complete, ensuring that all settings are correct and functional. Once validation is successful, click on the "Import" button to finalize the import of your model.
### Step 3: Wait for the model build to complete usually takes \~5-10 minutes
### Step 4: Use the APIs to call the model
Once the model is in 'Active' status you can click on the 'API' page to call the model
### Here is the Demo:
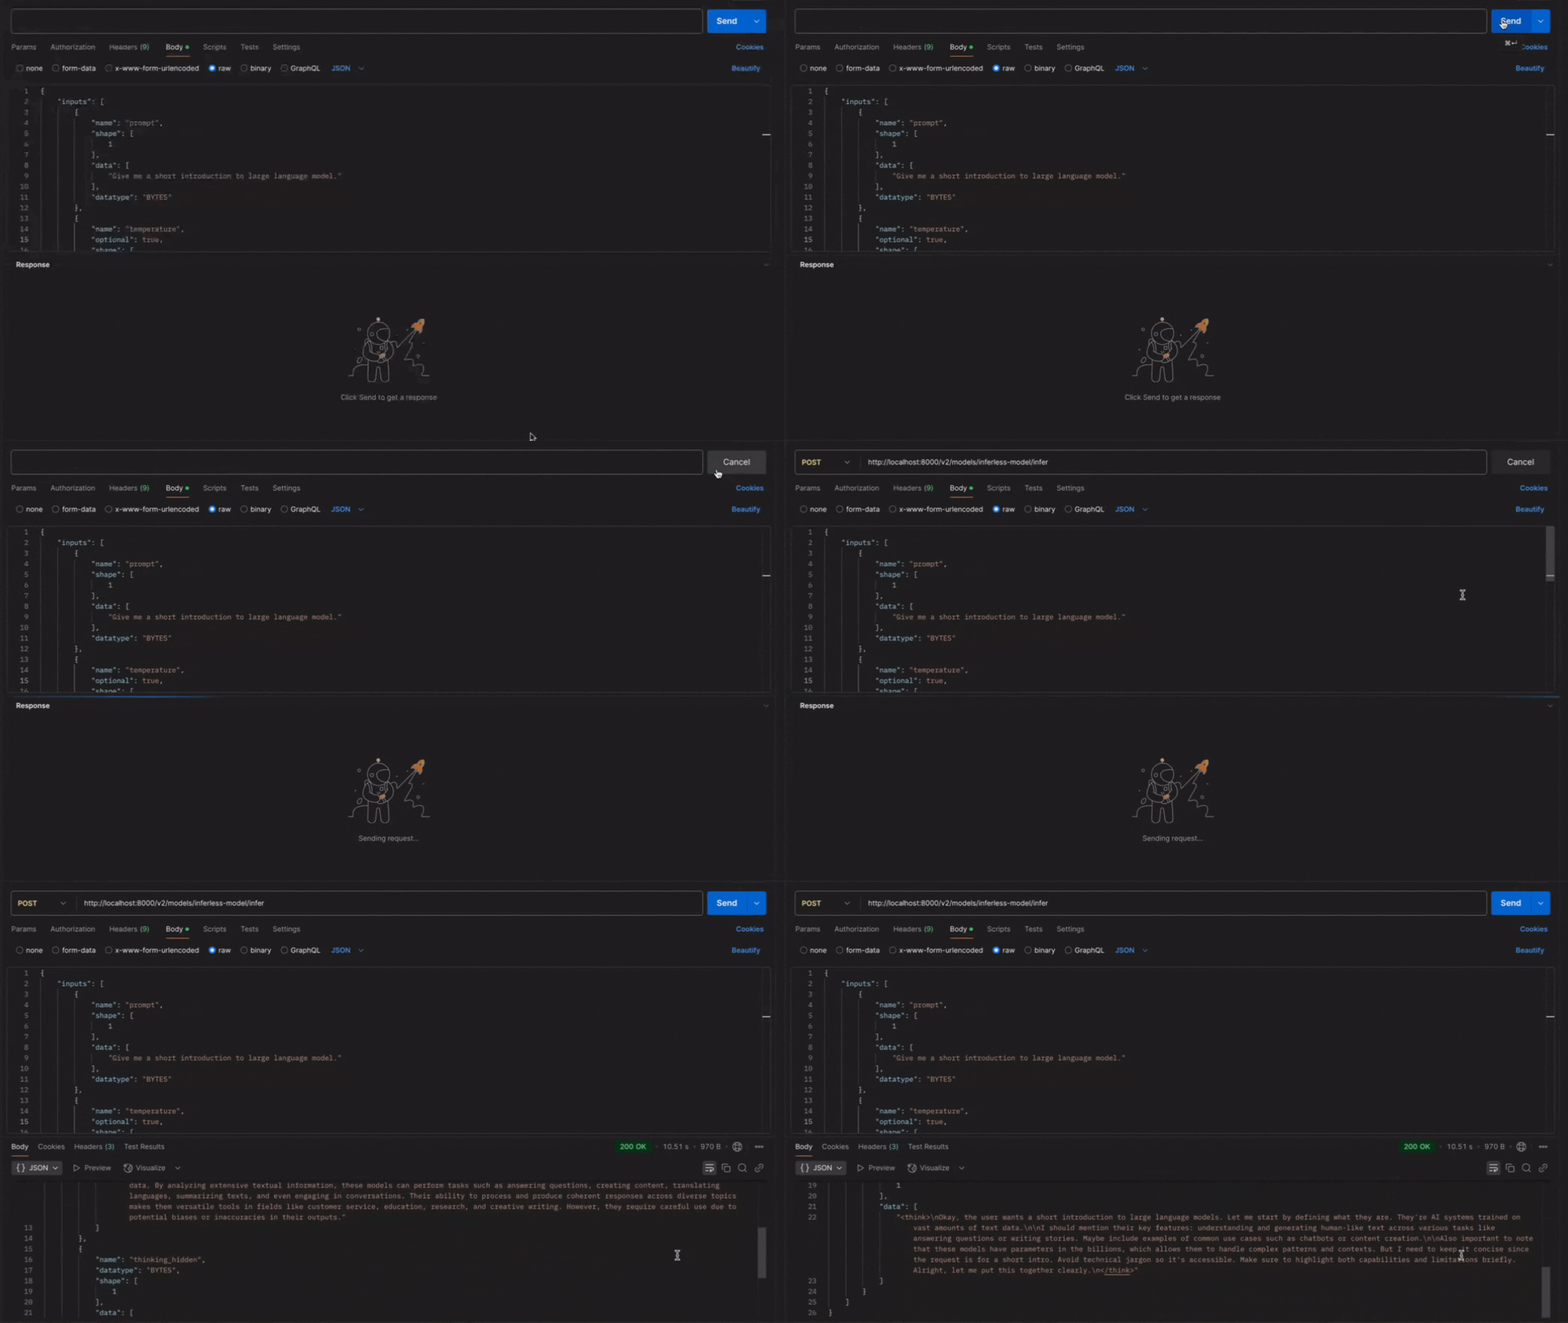 ## Method B: Deploying the model on Inferless CLI
Inferless allows you to deploy your model using Inferless-CLI. Follow the steps to deploy using Inferless CLI.
### Clone the repository of the model
Let's begin by cloning the model repository:
```bash
git clone https://github.com/inferless/qwen3-8b.git
```
### Deploy the Model
To deploy the model using Inferless CLI, execute the following command:
```bash
inferless deploy --gpu A100 --runtime inferless-runtime-config.yaml
```
**Explanation of the Command:**
* `--gpu A100`: Specifies the GPU type for deployment. Available options include `A10`, `A100`, and `T4`.
* `--runtime inferless-runtime-config.yaml`: Defines the runtime configuration file. If not specified, the default Inferless runtime is used.
## Method B: Deploying the model on Inferless CLI
Inferless allows you to deploy your model using Inferless-CLI. Follow the steps to deploy using Inferless CLI.
### Clone the repository of the model
Let's begin by cloning the model repository:
```bash
git clone https://github.com/inferless/qwen3-8b.git
```
### Deploy the Model
To deploy the model using Inferless CLI, execute the following command:
```bash
inferless deploy --gpu A100 --runtime inferless-runtime-config.yaml
```
**Explanation of the Command:**
* `--gpu A100`: Specifies the GPU type for deployment. Available options include `A10`, `A100`, and `T4`.
* `--runtime inferless-runtime-config.yaml`: Defines the runtime configuration file. If not specified, the default Inferless runtime is used.
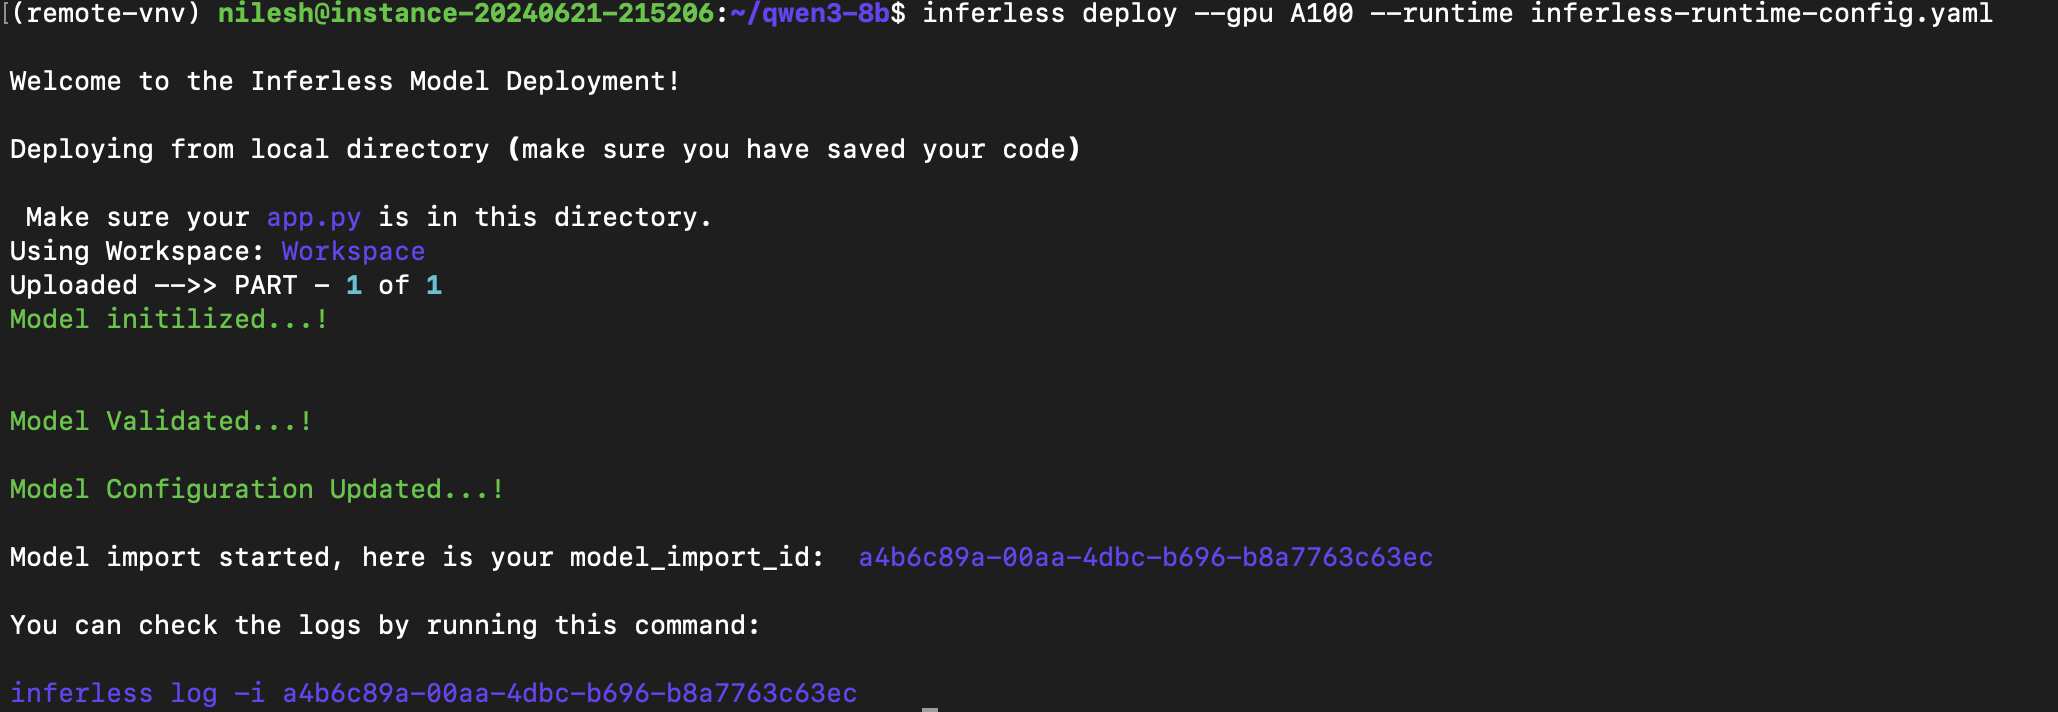 # Deploy Whisper-large-v3-turbo using Inferless
Source: https://docs.inferless.com/how-to-guides/deploy-a-whisper-large-v3-turbo
Whisper-large-v3-turbo is a fast and efficient automatic speech recognition model with 809 million parameters, optimized for transcription and translation.
## Introduction
[Whisper-large-v3-turbo](https://huggingface.co/openai/whisper-large-v3-turbo) is an efficient automatic speech recognition model by OpenAI, featuring 809 million parameters and significantly faster than its predecessor, Whisper large-v3. It excels in diverse applications like transcription and translation, processing audio effectively while handling background noise and various accents.
## Our Observations
We have deployed the model on an A100 GPU(80GB). Here are our observations:
| Library | Inference Time | Cold Start Time |
| ------------ | -------------- | --------------- |
| Transformers | 0.46 sec | 8.14 sec |
Note: The inference time and cold start time are average values.
## Defining Dependencies
We are using the [Transformers](https://github.com/huggingface/transformers) to serve the model on a single A100 (80GB).
## Constructing the GitHub/GitLab Template
Now quickly construct the GitHub/GitLab template, this process is mandatory and make sure you don't add any file named `model.py`.
```
Whisper-large-v3-turbo/
├── app.py
├── inferless-runtime-config.yaml
├── inferless.yaml
└── input_schema.py
```
You can also add other files to this directory.
## Create the class for inference
In the [app.py](https://github.com/inferless/Whisper-large-v3-turbo/blob/main/app.py) we will define the class and import all the required functions.
1. `def initialize`: In this function, you will initialize your model and define any `variable` that you want to use during inference.
2. `def infer`: This function gets called for every request that you send. Here you can define all the steps that are required for the inference. You can also pass custom values for inference and pass it through `inputs(dict)` parameter.
3. `def finalize`: This function cleans up all the allocated memory.
```python
import os
os.environ["HF_HUB_ENABLE_HF_TRANSFER"]='1'
from huggingface_hub import snapshot_download
import torch
from transformers import AutoModelForSpeechSeq2Seq, AutoProcessor, pipeline
import inferless
app = inferless.Cls(gpu="A10")
class InferlessPythonModel:
@app.load
def initialize(self):
model_id = "openai/whisper-large-v3-turbo"
snapshot_download(repo_id=model_id,allow_patterns=["*.safetensors"])
model = AutoModelForSpeechSeq2Seq.from_pretrained(
model_id,
torch_dtype=torch.float16,
low_cpu_mem_usage=True,
use_safetensors=True,
device_map="cuda"
)
processor = AutoProcessor.from_pretrained(model_id)
self.pipe = pipeline(
"automatic-speech-recognition",
model=model,
tokenizer=processor.tokenizer,
feature_extractor=processor.feature_extractor,
torch_dtype=torch.float16,
return_timestamps=True
)
@app.infer
def infer(self, inputs):
# Extracting inputs with default values
audio_url = inputs["audio_url"]
return_timestamps = inputs.get("return_timestamps", "word") # Can be True, False, or "word"
max_new_tokens = inputs.get("max_new_tokens")
language = inputs.get("language")
task = inputs.get("task") # Can be "transcribe" or "translate"
temperature = inputs.get("temperature")
# Convert return_timestamps if needed
return_timestamps = return_timestamps == "True" if return_timestamps in ["True", "False"] else return_timestamps
# Call the pipeline with necessary parameters
result = self.pipe(
audio_url,
return_timestamps=return_timestamps,
generate_kwargs={
"max_new_tokens": max_new_tokens,
"language": language,
"task": task,
"temperature": temperature,
},
)
# Prepare the output based on the return_timestamps condition
if not return_timestamps:
return {"output_text": result["text"]}
# Extract timestamps and chunk text
from_timestamp, to_timestamp, chunk_text = zip(
*[(chunk['timestamp'][0], chunk['timestamp'][1], chunk['text']) for chunk in result['chunks']]
)
return {
"output_text": [result["text"]],
"from_timestamp": list(from_timestamp),
"to_timestamp": list(to_timestamp),
"chunk_text": list(chunk_text),
}
def finalize(self):
self.pipe = None
```
## Create the Input Schema
We have to create a [input\_schema.py](https://github.com/inferless/Whisper-large-v3-turbo/blob/main/input_schema.py) in your GitHub/Gitlab repository this will help us create the Input parameters. You can checkout our documentation on [Input / Output Schema](https://docs.inferless.com/model-import/input-output-schema).
For this tutorial, we have defined the parameter which are required during the API call. Now lets create the `input_schema.py`.
```python
INPUT_SCHEMA = {
"audio_url": {
'datatype': 'STRING',
'required': True,
'shape': [1],
'example': ["https://github.com/rbgo404/Files/raw/main/jeanNL.mp3"]
},
"return_timestamps": {
'datatype': 'STRING',
'required': False,
'shape': [1],
'example': ["word"]
},
"max_new_tokens": {
'datatype': 'INT64',
'required': False,
'shape': [1],
'example': [400]
},
"language": {
'datatype': 'STRING',
'required': False,
'shape': [1],
'example': ['english']
},
"task": {
'datatype': 'STRING',
'required': False,
'shape': [1],
'example': ['transcribe']
},
"temperature": {
'datatype': 'FP64',
'required': False,
'shape': [1],
'example': [0.5]
}
}
```
## Creating the Custom Runtime
This is a mandatory step where we allow the users to upload their custom runtime through [inferless-runtime-config.yaml](https://github.com/inferless/Whisper-large-v3-turbo/blob/main/inferless-runtime-config.yaml).
```python
build:
cuda_version: 12.1.1
system_packages:
- "ffmpeg"
python_packages:
- "accelerate==1.0.0"
- "transformers==4.45.2"
- "librosa==0.10.2.post1"
- "soundfile==0.12.1"
- "inferless-cli==2.0.9"
- "hf-transfer==0.1.9"
- "huggingface-hub==0.27.1"
```
## Test your model with Remote Run
You can use the `inferless remote-run`([installation guide here](https://docs.inferless.com/model-import/cli-import#cli-import)) command to test your model or any custom Python script in a remote GPU environment directly from your local machine. Make sure that you use `Python3.10` for seamless experience.
### Step 1: Add the Decorators and local entry point
To enable **Remote Run**, simply do the following:
1. Import the `inferless` library and initialized `Cls(gpu="A10")`.
2. Decorated the `initialize` and `infer` functions with `@app.load` and `@app.infer` respectively.
3. Add a local entry point to your script which allows you to test the model through the `inferless remote-run` command. Since `@app.load` automatically handles initialization when the model is instantiated, you can directly use the `infer` function without explicitly calling `initialize`.
```python
import os
os.environ["HF_HUB_ENABLE_HF_TRANSFER"]='1'
from huggingface_hub import snapshot_download
import torch
from transformers import AutoModelForSpeechSeq2Seq, AutoProcessor, pipeline
import inferless
from pydantic import BaseModel, Field
from typing import Optional
app = inferless.Cls(gpu="A10")
@inferless.request
class RequestObjects(BaseModel):
audio_url: str = Field(default="https://github.com/rbgo404/Files/raw/main/jeanNL.mp3")
return_timestamps: Optional[str] = "word"
language: Optional[str] = "english"
task: Optional[str] = "transcribe"
temperature: Optional[float] = 0.5
max_new_tokens: Optional[int] = 400
@inferless.response
class ResponseObjects(BaseModel):
output_text: list = Field(default=['Test output'])
from_timestamp: list = Field(default=['Test output'])
to_timestamp: list = Field(default=['Test output'])
chunk_text: list = Field(default=['Test output'])
app = inferless.Cls(gpu="A10")
class InferlessPythonModel:
@app.load
def initialize(self):
model_id = "openai/whisper-large-v3-turbo"
snapshot_download(repo_id=model_id,allow_patterns=["*.safetensors"])
model = AutoModelForSpeechSeq2Seq.from_pretrained(
model_id,
torch_dtype=torch.float16,
low_cpu_mem_usage=True,
use_safetensors=True,
device_map="cuda"
)
processor = AutoProcessor.from_pretrained(model_id)
self.pipe = pipeline(
"automatic-speech-recognition",
model=model,
tokenizer=processor.tokenizer,
feature_extractor=processor.feature_extractor,
torch_dtype=torch.float16,
return_timestamps=True
)
@app.infer
def infer(self, request: RequestObjects) -> ResponseObjects:
return_timestamps = request.return_timestamps == "True" if request.return_timestamps in ["True", "False"] else request.return_timestamps
# Call the pipeline with necessary parameters
result = self.pipe(
request.audio_url,
return_timestamps=return_timestamps,
generate_kwargs={
"max_new_tokens": request.max_new_tokens,
"language": request.language,
"task": request.task,
"temperature": request.temperature,
},
)
# Prepare the output based on the return_timestamps condition
if not return_timestamps:
return {"output_text": result["text"]}
# Extract timestamps and chunk text
from_timestamp, to_timestamp, chunk_text = zip(
*[(chunk['timestamp'][0], chunk['timestamp'][1], chunk['text']) for chunk in result['chunks']]
)
generateObject = ResponseObjects(output_text = [result["text"]],
from_timestamp= list(from_timestamp),
to_timestamp= list(to_timestamp),
chunk_text= list(chunk_text)
)
return generateObject
def finalize(self):
self.pipe = None
@inferless.local_entry_point
def my_local_entry(dynamic_params):
request_objects = RequestObjects(**dynamic_params)
model_instance = InferlessPythonModel()
return model_instance.infer(request_objects)
```
### Step 2: Run with Remote GPU
From your local terminal, navigate to the folder containing your `app.py` and your `inferless-runtime-config.yaml` and run:
```bash
inferless remote-run app.py -c inferless-runtime-config.yaml --audio_url "https://github.com/rbgo404/Files/raw/main/jeanNL.mp3"
```
If you want to exclude certain files or directories from being uploaded, use the `--exclude` or `-e` flag.
## Method A: Deploying the model on Inferless Platform
Inferless supports multiple ways of [importing your model](https://docs.inferless.com/model-import/file-structure-req/file-structure-requirements). For this tutorial, we will use GitHub.
### Step 1: Login to the inferless dashboard can click on Import model button
Navigate to your desired workspace in Inferless and Click on `Add a custom model` button that you see on the top right. An import wizard will open up.
### Step 2: Follow the UI to complete the model Import
* Select the GitHub/GitLab Integration option to connect your source code repository with the deployment environment.
* Navigate to the specific GitHub repository that contains your model's code. Here, you will need to identify and enter the name of the model you wish to import.
* Choose the appropriate type of machine that suits your model's requirements. Additionally, specify the minimum and maximum number of replicas to define the scalability range for deploying your model.
* Optionally, you have the option to enable automatic build and deployment. This feature triggers a new deployment automatically whenever there is a new code push to your repository.
* If your model requires additional software packages, configure the Custom Runtime settings by including necessary pip or apt packages. Also, set up environment variables such as Inference Timeout, Container Concurrency, and Scale Down Timeout to tailor the runtime environment according to your needs.
* Wait for the validation process to complete, ensuring that all settings are correct and functional. Once validation is successful, click on the "Import" button to finalize the import of your model.
### Step 3: Wait for the model build to complete usually takes \~5-10 minutes
### Step 4: Use the APIs to call the model
Once the model is in 'Active' status you can click on the 'API' page to call the model
### Here is the Demo:
# Deploy Whisper-large-v3-turbo using Inferless
Source: https://docs.inferless.com/how-to-guides/deploy-a-whisper-large-v3-turbo
Whisper-large-v3-turbo is a fast and efficient automatic speech recognition model with 809 million parameters, optimized for transcription and translation.
## Introduction
[Whisper-large-v3-turbo](https://huggingface.co/openai/whisper-large-v3-turbo) is an efficient automatic speech recognition model by OpenAI, featuring 809 million parameters and significantly faster than its predecessor, Whisper large-v3. It excels in diverse applications like transcription and translation, processing audio effectively while handling background noise and various accents.
## Our Observations
We have deployed the model on an A100 GPU(80GB). Here are our observations:
| Library | Inference Time | Cold Start Time |
| ------------ | -------------- | --------------- |
| Transformers | 0.46 sec | 8.14 sec |
Note: The inference time and cold start time are average values.
## Defining Dependencies
We are using the [Transformers](https://github.com/huggingface/transformers) to serve the model on a single A100 (80GB).
## Constructing the GitHub/GitLab Template
Now quickly construct the GitHub/GitLab template, this process is mandatory and make sure you don't add any file named `model.py`.
```
Whisper-large-v3-turbo/
├── app.py
├── inferless-runtime-config.yaml
├── inferless.yaml
└── input_schema.py
```
You can also add other files to this directory.
## Create the class for inference
In the [app.py](https://github.com/inferless/Whisper-large-v3-turbo/blob/main/app.py) we will define the class and import all the required functions.
1. `def initialize`: In this function, you will initialize your model and define any `variable` that you want to use during inference.
2. `def infer`: This function gets called for every request that you send. Here you can define all the steps that are required for the inference. You can also pass custom values for inference and pass it through `inputs(dict)` parameter.
3. `def finalize`: This function cleans up all the allocated memory.
```python
import os
os.environ["HF_HUB_ENABLE_HF_TRANSFER"]='1'
from huggingface_hub import snapshot_download
import torch
from transformers import AutoModelForSpeechSeq2Seq, AutoProcessor, pipeline
import inferless
app = inferless.Cls(gpu="A10")
class InferlessPythonModel:
@app.load
def initialize(self):
model_id = "openai/whisper-large-v3-turbo"
snapshot_download(repo_id=model_id,allow_patterns=["*.safetensors"])
model = AutoModelForSpeechSeq2Seq.from_pretrained(
model_id,
torch_dtype=torch.float16,
low_cpu_mem_usage=True,
use_safetensors=True,
device_map="cuda"
)
processor = AutoProcessor.from_pretrained(model_id)
self.pipe = pipeline(
"automatic-speech-recognition",
model=model,
tokenizer=processor.tokenizer,
feature_extractor=processor.feature_extractor,
torch_dtype=torch.float16,
return_timestamps=True
)
@app.infer
def infer(self, inputs):
# Extracting inputs with default values
audio_url = inputs["audio_url"]
return_timestamps = inputs.get("return_timestamps", "word") # Can be True, False, or "word"
max_new_tokens = inputs.get("max_new_tokens")
language = inputs.get("language")
task = inputs.get("task") # Can be "transcribe" or "translate"
temperature = inputs.get("temperature")
# Convert return_timestamps if needed
return_timestamps = return_timestamps == "True" if return_timestamps in ["True", "False"] else return_timestamps
# Call the pipeline with necessary parameters
result = self.pipe(
audio_url,
return_timestamps=return_timestamps,
generate_kwargs={
"max_new_tokens": max_new_tokens,
"language": language,
"task": task,
"temperature": temperature,
},
)
# Prepare the output based on the return_timestamps condition
if not return_timestamps:
return {"output_text": result["text"]}
# Extract timestamps and chunk text
from_timestamp, to_timestamp, chunk_text = zip(
*[(chunk['timestamp'][0], chunk['timestamp'][1], chunk['text']) for chunk in result['chunks']]
)
return {
"output_text": [result["text"]],
"from_timestamp": list(from_timestamp),
"to_timestamp": list(to_timestamp),
"chunk_text": list(chunk_text),
}
def finalize(self):
self.pipe = None
```
## Create the Input Schema
We have to create a [input\_schema.py](https://github.com/inferless/Whisper-large-v3-turbo/blob/main/input_schema.py) in your GitHub/Gitlab repository this will help us create the Input parameters. You can checkout our documentation on [Input / Output Schema](https://docs.inferless.com/model-import/input-output-schema).
For this tutorial, we have defined the parameter which are required during the API call. Now lets create the `input_schema.py`.
```python
INPUT_SCHEMA = {
"audio_url": {
'datatype': 'STRING',
'required': True,
'shape': [1],
'example': ["https://github.com/rbgo404/Files/raw/main/jeanNL.mp3"]
},
"return_timestamps": {
'datatype': 'STRING',
'required': False,
'shape': [1],
'example': ["word"]
},
"max_new_tokens": {
'datatype': 'INT64',
'required': False,
'shape': [1],
'example': [400]
},
"language": {
'datatype': 'STRING',
'required': False,
'shape': [1],
'example': ['english']
},
"task": {
'datatype': 'STRING',
'required': False,
'shape': [1],
'example': ['transcribe']
},
"temperature": {
'datatype': 'FP64',
'required': False,
'shape': [1],
'example': [0.5]
}
}
```
## Creating the Custom Runtime
This is a mandatory step where we allow the users to upload their custom runtime through [inferless-runtime-config.yaml](https://github.com/inferless/Whisper-large-v3-turbo/blob/main/inferless-runtime-config.yaml).
```python
build:
cuda_version: 12.1.1
system_packages:
- "ffmpeg"
python_packages:
- "accelerate==1.0.0"
- "transformers==4.45.2"
- "librosa==0.10.2.post1"
- "soundfile==0.12.1"
- "inferless-cli==2.0.9"
- "hf-transfer==0.1.9"
- "huggingface-hub==0.27.1"
```
## Test your model with Remote Run
You can use the `inferless remote-run`([installation guide here](https://docs.inferless.com/model-import/cli-import#cli-import)) command to test your model or any custom Python script in a remote GPU environment directly from your local machine. Make sure that you use `Python3.10` for seamless experience.
### Step 1: Add the Decorators and local entry point
To enable **Remote Run**, simply do the following:
1. Import the `inferless` library and initialized `Cls(gpu="A10")`.
2. Decorated the `initialize` and `infer` functions with `@app.load` and `@app.infer` respectively.
3. Add a local entry point to your script which allows you to test the model through the `inferless remote-run` command. Since `@app.load` automatically handles initialization when the model is instantiated, you can directly use the `infer` function without explicitly calling `initialize`.
```python
import os
os.environ["HF_HUB_ENABLE_HF_TRANSFER"]='1'
from huggingface_hub import snapshot_download
import torch
from transformers import AutoModelForSpeechSeq2Seq, AutoProcessor, pipeline
import inferless
from pydantic import BaseModel, Field
from typing import Optional
app = inferless.Cls(gpu="A10")
@inferless.request
class RequestObjects(BaseModel):
audio_url: str = Field(default="https://github.com/rbgo404/Files/raw/main/jeanNL.mp3")
return_timestamps: Optional[str] = "word"
language: Optional[str] = "english"
task: Optional[str] = "transcribe"
temperature: Optional[float] = 0.5
max_new_tokens: Optional[int] = 400
@inferless.response
class ResponseObjects(BaseModel):
output_text: list = Field(default=['Test output'])
from_timestamp: list = Field(default=['Test output'])
to_timestamp: list = Field(default=['Test output'])
chunk_text: list = Field(default=['Test output'])
app = inferless.Cls(gpu="A10")
class InferlessPythonModel:
@app.load
def initialize(self):
model_id = "openai/whisper-large-v3-turbo"
snapshot_download(repo_id=model_id,allow_patterns=["*.safetensors"])
model = AutoModelForSpeechSeq2Seq.from_pretrained(
model_id,
torch_dtype=torch.float16,
low_cpu_mem_usage=True,
use_safetensors=True,
device_map="cuda"
)
processor = AutoProcessor.from_pretrained(model_id)
self.pipe = pipeline(
"automatic-speech-recognition",
model=model,
tokenizer=processor.tokenizer,
feature_extractor=processor.feature_extractor,
torch_dtype=torch.float16,
return_timestamps=True
)
@app.infer
def infer(self, request: RequestObjects) -> ResponseObjects:
return_timestamps = request.return_timestamps == "True" if request.return_timestamps in ["True", "False"] else request.return_timestamps
# Call the pipeline with necessary parameters
result = self.pipe(
request.audio_url,
return_timestamps=return_timestamps,
generate_kwargs={
"max_new_tokens": request.max_new_tokens,
"language": request.language,
"task": request.task,
"temperature": request.temperature,
},
)
# Prepare the output based on the return_timestamps condition
if not return_timestamps:
return {"output_text": result["text"]}
# Extract timestamps and chunk text
from_timestamp, to_timestamp, chunk_text = zip(
*[(chunk['timestamp'][0], chunk['timestamp'][1], chunk['text']) for chunk in result['chunks']]
)
generateObject = ResponseObjects(output_text = [result["text"]],
from_timestamp= list(from_timestamp),
to_timestamp= list(to_timestamp),
chunk_text= list(chunk_text)
)
return generateObject
def finalize(self):
self.pipe = None
@inferless.local_entry_point
def my_local_entry(dynamic_params):
request_objects = RequestObjects(**dynamic_params)
model_instance = InferlessPythonModel()
return model_instance.infer(request_objects)
```
### Step 2: Run with Remote GPU
From your local terminal, navigate to the folder containing your `app.py` and your `inferless-runtime-config.yaml` and run:
```bash
inferless remote-run app.py -c inferless-runtime-config.yaml --audio_url "https://github.com/rbgo404/Files/raw/main/jeanNL.mp3"
```
If you want to exclude certain files or directories from being uploaded, use the `--exclude` or `-e` flag.
## Method A: Deploying the model on Inferless Platform
Inferless supports multiple ways of [importing your model](https://docs.inferless.com/model-import/file-structure-req/file-structure-requirements). For this tutorial, we will use GitHub.
### Step 1: Login to the inferless dashboard can click on Import model button
Navigate to your desired workspace in Inferless and Click on `Add a custom model` button that you see on the top right. An import wizard will open up.
### Step 2: Follow the UI to complete the model Import
* Select the GitHub/GitLab Integration option to connect your source code repository with the deployment environment.
* Navigate to the specific GitHub repository that contains your model's code. Here, you will need to identify and enter the name of the model you wish to import.
* Choose the appropriate type of machine that suits your model's requirements. Additionally, specify the minimum and maximum number of replicas to define the scalability range for deploying your model.
* Optionally, you have the option to enable automatic build and deployment. This feature triggers a new deployment automatically whenever there is a new code push to your repository.
* If your model requires additional software packages, configure the Custom Runtime settings by including necessary pip or apt packages. Also, set up environment variables such as Inference Timeout, Container Concurrency, and Scale Down Timeout to tailor the runtime environment according to your needs.
* Wait for the validation process to complete, ensuring that all settings are correct and functional. Once validation is successful, click on the "Import" button to finalize the import of your model.
### Step 3: Wait for the model build to complete usually takes \~5-10 minutes
### Step 4: Use the APIs to call the model
Once the model is in 'Active' status you can click on the 'API' page to call the model
### Here is the Demo:
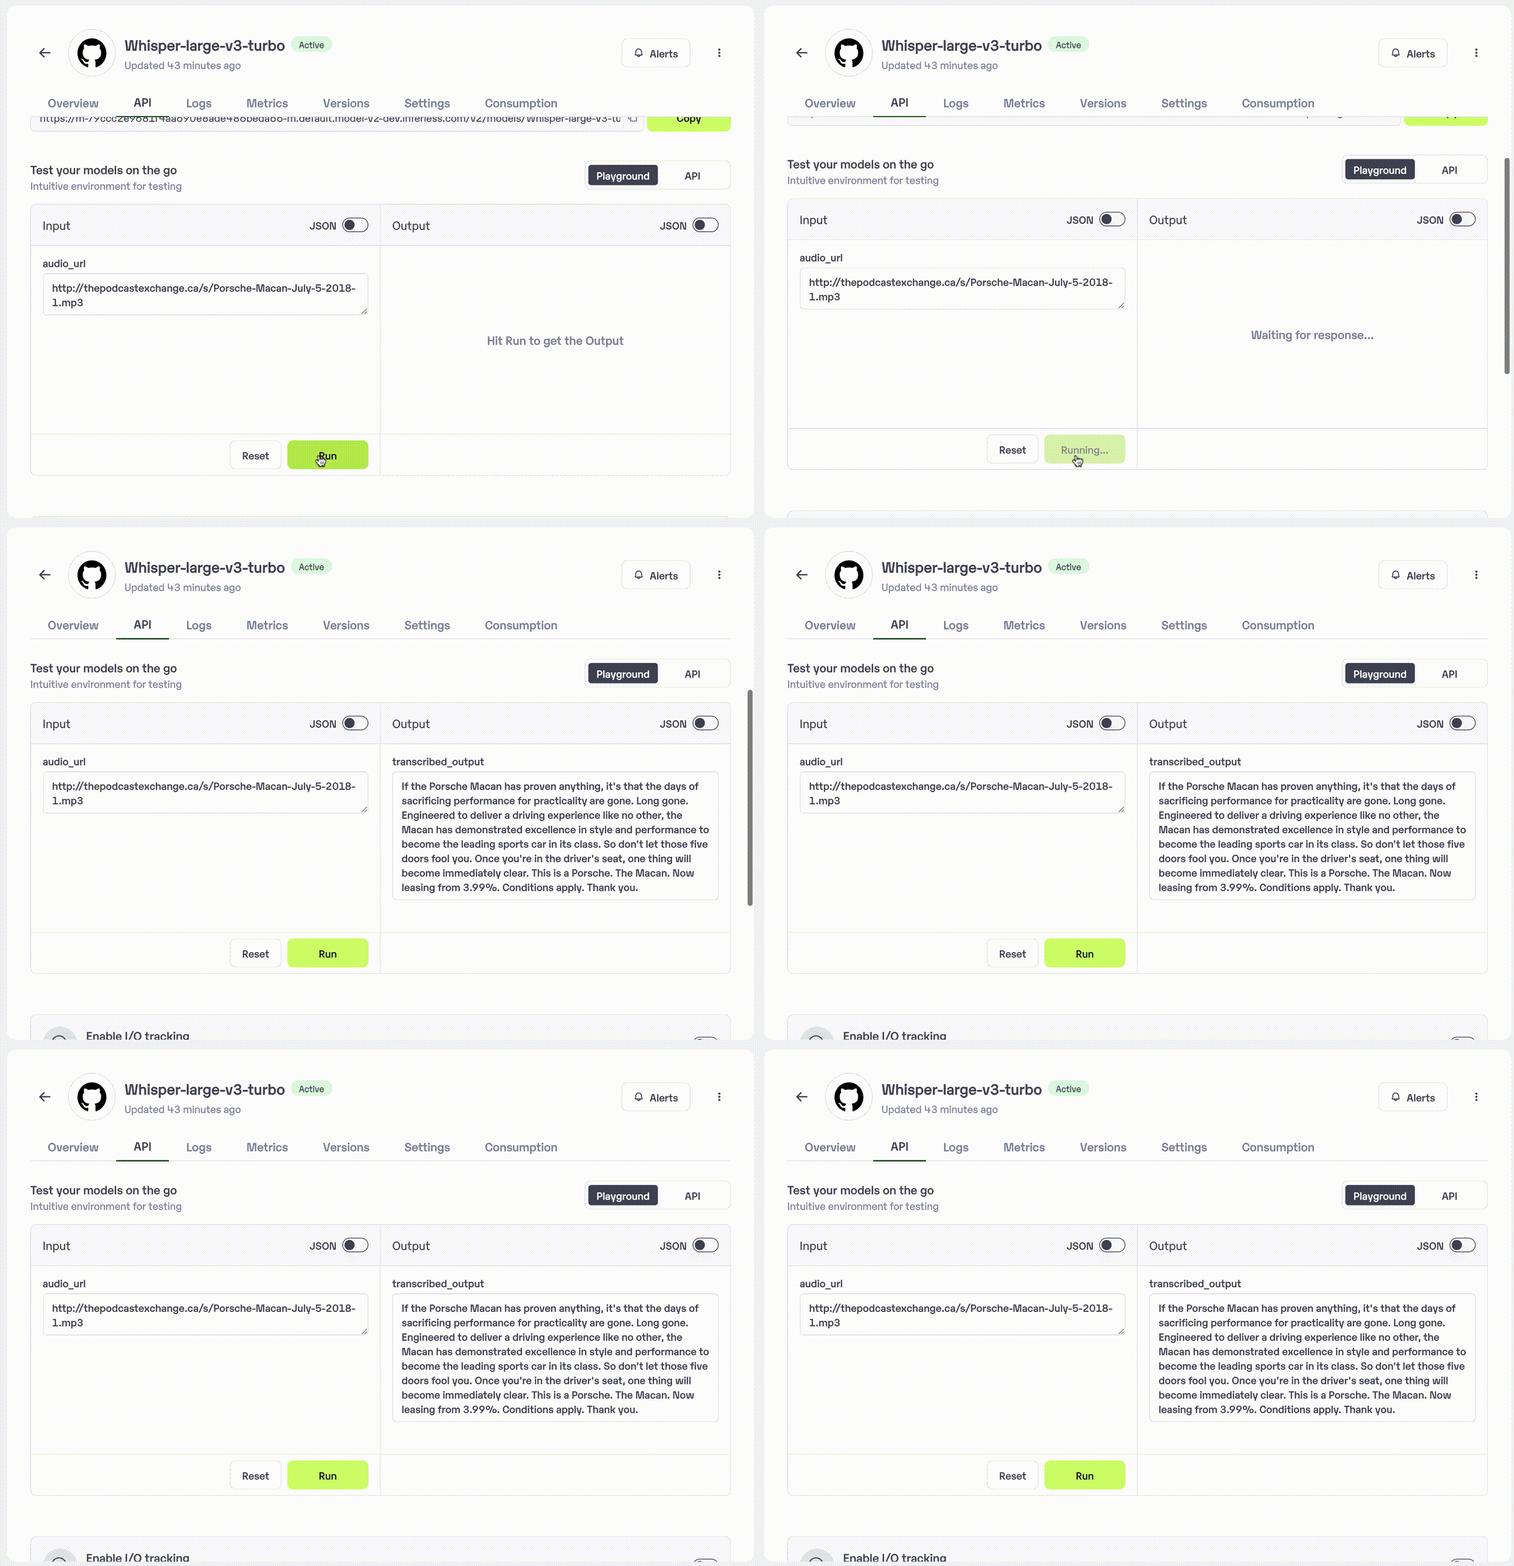 ## Method B: Deploying the model on Inferless CLI
Inferless allows you to deploy your model using Inferless-CLI. Follow the steps to deploy using Inferless CLI.
### Clone the repository of the model
Let's begin by cloning the model repository:
```bash
git clone https://github.com/inferless/Whisper-large-v3-turbo.git
```
### Deploy the Model
To deploy the model using Inferless CLI, execute the following command:
```bash
inferless deploy --gpu A10 --runtime inferless-runtime-config.yaml
```
**Explanation of the Command:**
* `--gpu A10`: Specifies the GPU type for deployment. Available options include `A10`, `A100`, and `T4`.
* `--runtime inferless-runtime-config.yaml`: Defines the runtime configuration file. If not specified, the default Inferless runtime is used.
# Deploy CodeLlama 70B using Inferless
Source: https://docs.inferless.com/how-to-guides/deploy-codellama-70b-using-inferless
This tutorial demonstrates deploying a quantized CodeLlama 70B model using vLLM. We will be deploying a 4-bit quantized GPTQ version of the codeLlama-Python-70B model.
## Introduction
[Code Llama 70B](https://huggingface.co/codellama/CodeLlama-70b-Python-hf), a pre-trained and fine-tuned generative text model, excels in understanding and generating code with a HumanEval score of 67.8, surpassing GPT-4. It's based on Llama 2's architecture, trained on 500B tokens, and is commercially available, catering to diverse applications with its advanced code generation abilities.
## Our Observations
We have deployed the [4-bit quantized version](https://huggingface.co/TheBloke/CodeLlama-70B-Python-GPTQ) of the model using vLLM on an A100 GPU(80GB). Here are our observations:
| Inference Time | Cold Start Time | Token/Sec | Latency/Token | VRAM Required |
| -------------- | --------------- | --------- | ------------- | ------------- |
| 6.67 sec | 26.36 sec | 33.18 | 30.13 ms | 37.05 GB |
## Defining Dependencies
We are using the [vLLM library](https://github.com/vllm-project/vllm), which boost the inference speed of you LLM. We will deploy a GPTQ 4bit quantized version of the model.
## Constructing the GitHub/GitLab Template
Now quickly construct the GitHub/GitLab template, this process is mandatory and make sure you don't add any file named `model.py`.
```
CodeLlama-70B/
├── app.py
├── inferless-runtime-config.yaml
├── inferless.yaml
└── input_schema.py
```
You can also add other files to this directory.
## Create the class for inference
In the [app.py](https://github.com/inferless/CodeLlama-70B/blob/main/app.py) we will define the class and import all the required functions
1. `def initialize`: In this function, you will initialize your model and define any `variable` that you want to use during inference. You can adjust the `gpu_memory_utilization` parameter to reduce GPU usage. By default, it's set to 0.9, but you can change it to 0.5 to decrease GPU utilization to 37.05 GB.
2. `def infer`: This function gets called for every request that you send. Here you can define all the steps that are required for the inference. You can also pass custom values for inference and pass it through `inputs(dict)` parameter.
3. `def finalize`: This function cleans up all the allocated memory.
```python
from vllm import LLM, SamplingParams
import inferless
app = inferless.Cls(gpu="A100")
class InferlessPythonModel:
@app.load
def initialize(self):
model_id = "TheBloke/CodeLlama-70B-Python-GPTQ"
self.sampling_params = SamplingParams(temperature=0.7, top_p=0.95,max_tokens=256)
self.llm = LLM(model=model_id, quantization="gptq", dtype="float16",gpu_memory_utilization=0.5)
@app.infer
def infer(self, inputs):
prompts = inputs["prompt"]
result = self.llm.generate(prompts, self.sampling_params)
result_output = [output.outputs[0].text for output in result]
return {'result': result_output[0]}
def finalize(self):
self.llm = None
```
## Create the Input Schema
We have to create a `input_schema.py` in your GitHub/Gitlab repository this will help us create the Input parameters. You can checkout our documentation on [Input / Output Schema](https://docs.inferless.com/model-import/input-output-schema).
For this tutorial, we have defined a parameter `prompt` which is required during the API call. Now lets create the `input_schema.py`.
```python
INPUT_SCHEMA = {
"prompt": {
'datatype': 'STRING',
'required': True,
'shape': [1],
'example': ["def factorial(int n):"]
}
}
```
## Creating the Custom Runtime
This is a mandatory step where we allow the users to upload their custom runtime through [inferless-runtime-config.yaml](https://github.com/inferless/CodeLlama-70B/blob/main/inferless-runtime-config.yaml).
```python
build:
cuda_version: "12.1.1"
python_packages:
- "vllm==0.6.3.post1"
- "inferless-cli==2.0.9"
- "hf-transfer==0.1.9"
- "huggingface-hub==0.27.1"
```
## Test your model with Remote Run
You can use the `inferless remote-run`([installation guide here](https://docs.inferless.com/model-import/cli-import#cli-import)) command to test your model or any custom Python script in a remote GPU environment directly from your local machine. Make sure that you use `Python3.10` for seamless experience.
### Step 1: Add the Decorators and local entry point
To enable **Remote Run**, simply do the following:
1. Import the `inferless` library and initialize `Cls(gpu="A100")`. The available GPU options are `T4`, `A10` and `A100`.
2. Decorated the `initialize` and `infer` functions with `@app.load` and `@app.infer` respectively.
3. Create the Local Entry Point by decorating a function (for example, `my_local_entry`) with `@inferless.local_entry_point`.
Within this function, instantiate your model class, convert any incoming parameters into a `RequestObjects` object, and invoke the model's `infer` method.
```python
from vllm import LLM, SamplingParams
import inferless
from pydantic import BaseModel, Field
from typing import Optional
@inferless.request
class RequestObjects(BaseModel):
prompt: str = Field(default="def factorial(int n):")
temperature: Optional[float] = 0.7
top_p: Optional[float] = 0.1
repetition_penalty: Optional[float] = 1.18
top_k: Optional[int] = 40
max_tokens: Optional[int] = 256
@inferless.response
class ResponseObjects(BaseModel):
generated_text: str = Field(default='Test output')
app = inferless.Cls(gpu="A100")
class InferlessPythonModel:
@app.load
def initialize(self):
model_id = "TheBloke/CodeLlama-70B-Python-GPTQ"
self.sampling_params = SamplingParams(temperature=0.7, top_p=0.95,max_tokens=256)
self.llm = LLM(model=model_id, quantization="gptq", dtype="float16",gpu_memory_utilization=0.5)
@app.infer
def infer(self, request: RequestObjects) -> ResponseObjects:
sampling_params = SamplingParams(temperature=request.temperature,top_p=request.top_p,repetition_penalty=request.repetition_penalty,
top_k=request.top_k,max_tokens=request.max_tokens)
result = self.llm.generate(request.prompt, sampling_params)
result_output = [output.outputs[0].text for output in result]
generateObject = ResponseObjects(generated_text = result_output[0])
return generateObject
def finalize(self):
self.llm = None
@inferless.local_entry_point
def my_local_entry(dynamic_params):
request_objects = RequestObjects(**dynamic_params)
model_instance = InferlessPythonModel()
return model_instance.infer(request_objects)
```
### Step 2: Run with Remote GPU
From your local terminal, navigate to the folder containing your `app.py` and your `inferless-runtime-config.yaml` and run:
```bash
inferless remote-run app.py -c inferless-runtime-config.yaml --prompt "def factorial(int n):"
```
You can pass the other input parameters in the same way as long as your code expects them in the `inputs` dictionary.
If you want to exclude certain files or directories from being uploaded, use the `--exclude` or `-e` flag.
## Method A: Deploying the model on Inferless Platform
Inferless supports multiple ways of [importing your model](https://docs.inferless.com/model-import/file-structure-req/file-structure-requirements). For this tutorial, we will use GitHub.
### Step 1: Login to the inferless dashboard can click on Import model button
Navigate to your desired workspace in Inferless and Click on `Add a custom model` button that you see on the top right. An import wizard will open up.
### Step 2: Follow the UI to complete the model Import
* Select the GitHub/GitLab Integration option to connect your source code repository with the deployment environment.
* Navigate to the specific GitHub repository that contains your model's code. Here, you will need to identify and enter the name of the model you wish to import.
* Choose the appropriate type of machine that suits your model's requirements. Additionally, specify the minimum and maximum number of replicas to define the scalability range for deploying your model.
* Optionally, you have the option to enable automatic build and deployment. This feature triggers a new deployment automatically whenever there is a new code push to your repository.
* If your model requires additional software packages, configure the Custom Runtime settings by including necessary pip or apt packages. Also, set up environment variables such as Inference Timeout, Container Concurrency, and Scale Down Timeout to tailor the runtime environment according to your needs.
* Wait for the validation process to complete, ensuring that all settings are correct and functional. Once validation is successful, click on the "Import" button to finalize the import of your model.
### Step 3: Wait for the model build to complete usually takes \~5-10 minutes
### Step 4: Use the APIs to call the model
Once the model is in 'Active' status you can click on the 'API' page to call the model
### Here is the Demo:
## Method B: Deploying the model on Inferless CLI
Inferless allows you to deploy your model using Inferless-CLI. Follow the steps to deploy using Inferless CLI.
### Clone the repository of the model
Let's begin by cloning the model repository:
```bash
git clone https://github.com/inferless/CodeLlama-70B.git
```
### Deploy the Model
To deploy the model using Inferless CLI, execute the following command:
```bash
inferless deploy --gpu A100 --runtime inferless-runtime-config.yaml
```
**Explanation of the Command:**
* `--gpu A100`: Specifies the GPU type for deployment. Available options include `A10`, `A100`, and `T4`.
* `--runtime inferless-runtime-config.yaml`: Defines the runtime configuration file. If not specified, the default Inferless runtime is used.
# Deploy Deci 7B using Inferless
Source: https://docs.inferless.com/how-to-guides/deploy-deci-7b-using-inferless
DeciLM-7B, a text generation model with 7.04 billion parameters, that leads the 7B base language models during its release
## Introduction
DeciLM-7B, a text generation model with 7.04 billion parameters, leads the 7B base language models on the Open LLM Leaderboard during the release. It excels with an 8K-token sequence length, employing efficient Grouped-Query Attention for optimal accuracy and computational efficiency.
## Our Observations
We have deployed a 4-bit quantized version of the model using [bitsandbytes](https://github.com/TimDettmers/bitsandbytes) on an A100 GPU(80GB). This setup reduces the GPU memory requirements to 4.22GB. Here are our observations:
| Inference Time | Cold Start Time | Token/Sec | Latency/Token | VRAM Required |
| -------------- | --------------- | --------- | ------------- | ------------- |
| 9.25 sec | 9.85 | 23.18 | 43.12 ms | 4.22 GB |
## Defining Dependencies
We are using the [bitsandbytes](https://github.com/TimDettmers/bitsandbytes) library , which enables you to run LLM on low memory. We deploy a GPTQ 4bit quantized version of the model.
## Constructing the GitHub/GitLab Template
Now quickly construct the GitHub/GitLab template, this process is mandatory and make sure you don't add any file named `model.py`
```python
DeciLM-7B/
├── app.py
├── inferless-runtime-config.yaml
├── inferless.yaml
└── input_schema.py
```
You can also add other files to this directory.
## Create the class for inference
In the [app.py](https://github.com/inferless/DeciLM-7B/blob/main/app.py) we will define the class and import all the required functions
1. `def initialize`: In this function, you will initialize your model and define any `variable` that you want to use during inference. You can also use `torch_dtype=torch.bfloat16` on model initialization which will reduce the inference time but impacts the accuracy.
2. `def infer`: This function gets called for every request that you send. Here you can define all the steps that are required for the inference. You can also pass custom values for inference and pass it through `inputs(dict)` parameter.
3. `def finalize`: This function cleans up all the allocated memory.
```python
import os
os.environ["HF_HUB_ENABLE_HF_TRANSFER"]='1'
from huggingface_hub import snapshot_download
import inferless
import torch
from transformers import AutoModelForCausalLM, AutoTokenizer, pipeline
app = inferless.Cls(gpu="A10")
class InferlessPythonModel:
@app.load
def initialize(self):
model_id = 'Deci/DeciLM-7B'
snapshot_download(repo_id=model_id,allow_patterns=["*.safetensors"])
tokenizer = AutoTokenizer.from_pretrained(model_id)
model = AutoModelForCausalLM.from_pretrained(model_id, device_map="auto",load_in_4bit=True,trust_remote_code=True)
self.qtq_pipe = pipeline("text-generation", model=model, tokenizer=tokenizer)
@app.infer
def infer(self, inputs):
prompt = inputs["prompt"]
out = self.qtq_pipe(prompt, max_new_tokens=256, do_sample=True, top_p=0.9,temperature=0.9)
generated_text = out[0]["generated_text"][len(prompt):]
return {'generated_result': generated_text}
def finalize(self):
self.qtq_pipe = None
```
## Creating the Custom Runtime
This is a mandatory step where we allow the users to upload their custom runtime through [inferless-runtime-config.yaml](https://github.com/inferless/DeciLM-7B/blob/main/inferless-runtime-config.yaml).
```python
build:
cuda_version: "12.1.1"
python_packages:
- "bitsandbytes==0.45.2"
- "transformers==4.49.0"
- "accelerate==1.4.0"
- "scipy==1.11.4"
- "inferless-cli==2.0.9"
- "hf-transfer==0.1.9"
- "huggingface-hub==0.27.1"
```
## Test your model with Remote Run
You can use the `inferless remote-run`([installation guide here](https://docs.inferless.com/model-import/cli-import#cli-import)) command to test your model or any custom Python script in a remote GPU environment directly from your local machine. Make sure that you use `Python3.10` for seamless experience.
### Step 1: Add the Decorators and local entry point
To enable **Remote Run**, simply do the following:
1. Import the `inferless` library and initialize `Cls(gpu="A10")`. The available GPU options are `T4`, `A10` and `A100`.
2. Decorated the `initialize` and `infer` functions with `@app.load` and `@app.infer` respectively.
3. Create the Local Entry Point by decorating a function (for example, `my_local_entry`) with `@inferless.local_entry_point`.
Within this function, instantiate your model class, convert any incoming parameters into a `RequestObjects` object, and invoke the model's `infer` method.
```python
import os
os.environ["HF_HUB_ENABLE_HF_TRANSFER"]='1'
from huggingface_hub import snapshot_download
import inferless
import torch
from transformers import AutoModelForCausalLM, AutoTokenizer, pipeline
from pydantic import BaseModel, Field
from typing import Optional
@inferless.request
class RequestObjects(BaseModel):
prompt: str = Field(default="Explain Deep Learning.")
temperature: Optional[float] = 0.7
top_p: Optional[float] = 0.1
do_sample: Optional[bool] = True
max_new_tokens: Optional[int] = 256
@inferless.response
class ResponseObjects(BaseModel):
generated_text: str = Field(default='Test output')
app = inferless.Cls(gpu="A10")
class InferlessPythonModel:
@app.load
def initialize(self):
model_id = 'Deci/DeciLM-7B'
snapshot_download(repo_id=model_id,allow_patterns=["*.safetensors"])
tokenizer = AutoTokenizer.from_pretrained(model_id)
model = AutoModelForCausalLM.from_pretrained(model_id, device_map="auto",load_in_4bit=True,trust_remote_code=True)
self.qtq_pipe = pipeline("text-generation", model=model, tokenizer=tokenizer)
@app.infer
def infer(self, request: RequestObjects) -> ResponseObjects:
out = self.qtq_pipe(request.prompt, max_new_tokens=request.max_new_tokens, do_sample=request.do_sample, top_p=request.top_p,temperature=request.temperature)
generated_text = out[0]["generated_text"][len(request.prompt):]
generateObject = ResponseObjects(generated_text = generated_text)
return generateObject
def finalize(self):
self.qtq_pipe = None
@inferless.local_entry_point
def my_local_entry(dynamic_params):
request_objects = RequestObjects(**dynamic_params)
model_instance = InferlessPythonModel()
return model_instance.infer(request_objects)
```
### Step 2: Run with Remote GPU
From your local terminal, navigate to the folder containing your `app.py` and your `inferless-runtime-config.yaml` and run:
```bash
inferless remote-run app.py -c inferless-runtime-config.yaml --prompt "What is an AI?"
```
You can pass the other input parameters in the same way as long as your code expects them in the `inputs` dictionary.
If you want to exclude certain files or directories from being uploaded, use the `--exclude` or `-e` flag
## Method A: Deploying the model on Inferless Platform
Inferless supports multiple ways of [importing your model](https://docs.inferless.com/model-import/file-structure-req/file-structure-requirements). For this tutorial, we will use GitHub.
### Step 1: Login to the inferless dashboard can click on Import model button
Navigate to your desired workspace in Inferless and Click on `Add a custom model` button that you see on the top right. An import wizard will open up.
### Step 2: Follow the UI to complete the model Import
* Select the GitHub/GitLab Integration option to connect your source code repository with the deployment environment.
* Navigate to the specific GitHub repository that contains your model's code. Here, you will need to identify and enter the name of the model you wish to import.
* Choose the appropriate type of machine that suits your model's requirements. Additionally, specify the minimum and maximum number of replicas to define the scalability range for deploying your model.
* Optionally, you have the option to enable automatic build and deployment. This feature triggers a new deployment automatically whenever there is a new code push to your repository.
* If your model requires additional software packages, configure the Custom Runtime settings by including necessary pip or apt packages. Also, set up environment variables such as Inference Timeout, Container Concurrency, and Scale Down Timeout to tailor the runtime environment according to your needs.
* Wait for the validation process to complete, ensuring that all settings are correct and functional. Once validation is successful, click on the "Import" button to finalize the import of your model.
### Step 3: Wait for the model build to complete usually takes \~5-10 minutes
### Step 4: Use the APIs to call the model
Once the model is in 'Active' status you can click on the 'API' page to call the model
### Here is the Demo:
## Method B: Deploying the model on Inferless CLI
Inferless allows you to deploy your model using Inferless-CLI. Follow the steps to deploy using Inferless CLI.
### Clone the repository of the model
Let's begin by cloning the model repository:
```bash
git clone https://github.com/inferless/Whisper-large-v3-turbo.git
```
### Deploy the Model
To deploy the model using Inferless CLI, execute the following command:
```bash
inferless deploy --gpu A10 --runtime inferless-runtime-config.yaml
```
**Explanation of the Command:**
* `--gpu A10`: Specifies the GPU type for deployment. Available options include `A10`, `A100`, and `T4`.
* `--runtime inferless-runtime-config.yaml`: Defines the runtime configuration file. If not specified, the default Inferless runtime is used.
# Deploy CodeLlama 70B using Inferless
Source: https://docs.inferless.com/how-to-guides/deploy-codellama-70b-using-inferless
This tutorial demonstrates deploying a quantized CodeLlama 70B model using vLLM. We will be deploying a 4-bit quantized GPTQ version of the codeLlama-Python-70B model.
## Introduction
[Code Llama 70B](https://huggingface.co/codellama/CodeLlama-70b-Python-hf), a pre-trained and fine-tuned generative text model, excels in understanding and generating code with a HumanEval score of 67.8, surpassing GPT-4. It's based on Llama 2's architecture, trained on 500B tokens, and is commercially available, catering to diverse applications with its advanced code generation abilities.
## Our Observations
We have deployed the [4-bit quantized version](https://huggingface.co/TheBloke/CodeLlama-70B-Python-GPTQ) of the model using vLLM on an A100 GPU(80GB). Here are our observations:
| Inference Time | Cold Start Time | Token/Sec | Latency/Token | VRAM Required |
| -------------- | --------------- | --------- | ------------- | ------------- |
| 6.67 sec | 26.36 sec | 33.18 | 30.13 ms | 37.05 GB |
## Defining Dependencies
We are using the [vLLM library](https://github.com/vllm-project/vllm), which boost the inference speed of you LLM. We will deploy a GPTQ 4bit quantized version of the model.
## Constructing the GitHub/GitLab Template
Now quickly construct the GitHub/GitLab template, this process is mandatory and make sure you don't add any file named `model.py`.
```
CodeLlama-70B/
├── app.py
├── inferless-runtime-config.yaml
├── inferless.yaml
└── input_schema.py
```
You can also add other files to this directory.
## Create the class for inference
In the [app.py](https://github.com/inferless/CodeLlama-70B/blob/main/app.py) we will define the class and import all the required functions
1. `def initialize`: In this function, you will initialize your model and define any `variable` that you want to use during inference. You can adjust the `gpu_memory_utilization` parameter to reduce GPU usage. By default, it's set to 0.9, but you can change it to 0.5 to decrease GPU utilization to 37.05 GB.
2. `def infer`: This function gets called for every request that you send. Here you can define all the steps that are required for the inference. You can also pass custom values for inference and pass it through `inputs(dict)` parameter.
3. `def finalize`: This function cleans up all the allocated memory.
```python
from vllm import LLM, SamplingParams
import inferless
app = inferless.Cls(gpu="A100")
class InferlessPythonModel:
@app.load
def initialize(self):
model_id = "TheBloke/CodeLlama-70B-Python-GPTQ"
self.sampling_params = SamplingParams(temperature=0.7, top_p=0.95,max_tokens=256)
self.llm = LLM(model=model_id, quantization="gptq", dtype="float16",gpu_memory_utilization=0.5)
@app.infer
def infer(self, inputs):
prompts = inputs["prompt"]
result = self.llm.generate(prompts, self.sampling_params)
result_output = [output.outputs[0].text for output in result]
return {'result': result_output[0]}
def finalize(self):
self.llm = None
```
## Create the Input Schema
We have to create a `input_schema.py` in your GitHub/Gitlab repository this will help us create the Input parameters. You can checkout our documentation on [Input / Output Schema](https://docs.inferless.com/model-import/input-output-schema).
For this tutorial, we have defined a parameter `prompt` which is required during the API call. Now lets create the `input_schema.py`.
```python
INPUT_SCHEMA = {
"prompt": {
'datatype': 'STRING',
'required': True,
'shape': [1],
'example': ["def factorial(int n):"]
}
}
```
## Creating the Custom Runtime
This is a mandatory step where we allow the users to upload their custom runtime through [inferless-runtime-config.yaml](https://github.com/inferless/CodeLlama-70B/blob/main/inferless-runtime-config.yaml).
```python
build:
cuda_version: "12.1.1"
python_packages:
- "vllm==0.6.3.post1"
- "inferless-cli==2.0.9"
- "hf-transfer==0.1.9"
- "huggingface-hub==0.27.1"
```
## Test your model with Remote Run
You can use the `inferless remote-run`([installation guide here](https://docs.inferless.com/model-import/cli-import#cli-import)) command to test your model or any custom Python script in a remote GPU environment directly from your local machine. Make sure that you use `Python3.10` for seamless experience.
### Step 1: Add the Decorators and local entry point
To enable **Remote Run**, simply do the following:
1. Import the `inferless` library and initialize `Cls(gpu="A100")`. The available GPU options are `T4`, `A10` and `A100`.
2. Decorated the `initialize` and `infer` functions with `@app.load` and `@app.infer` respectively.
3. Create the Local Entry Point by decorating a function (for example, `my_local_entry`) with `@inferless.local_entry_point`.
Within this function, instantiate your model class, convert any incoming parameters into a `RequestObjects` object, and invoke the model's `infer` method.
```python
from vllm import LLM, SamplingParams
import inferless
from pydantic import BaseModel, Field
from typing import Optional
@inferless.request
class RequestObjects(BaseModel):
prompt: str = Field(default="def factorial(int n):")
temperature: Optional[float] = 0.7
top_p: Optional[float] = 0.1
repetition_penalty: Optional[float] = 1.18
top_k: Optional[int] = 40
max_tokens: Optional[int] = 256
@inferless.response
class ResponseObjects(BaseModel):
generated_text: str = Field(default='Test output')
app = inferless.Cls(gpu="A100")
class InferlessPythonModel:
@app.load
def initialize(self):
model_id = "TheBloke/CodeLlama-70B-Python-GPTQ"
self.sampling_params = SamplingParams(temperature=0.7, top_p=0.95,max_tokens=256)
self.llm = LLM(model=model_id, quantization="gptq", dtype="float16",gpu_memory_utilization=0.5)
@app.infer
def infer(self, request: RequestObjects) -> ResponseObjects:
sampling_params = SamplingParams(temperature=request.temperature,top_p=request.top_p,repetition_penalty=request.repetition_penalty,
top_k=request.top_k,max_tokens=request.max_tokens)
result = self.llm.generate(request.prompt, sampling_params)
result_output = [output.outputs[0].text for output in result]
generateObject = ResponseObjects(generated_text = result_output[0])
return generateObject
def finalize(self):
self.llm = None
@inferless.local_entry_point
def my_local_entry(dynamic_params):
request_objects = RequestObjects(**dynamic_params)
model_instance = InferlessPythonModel()
return model_instance.infer(request_objects)
```
### Step 2: Run with Remote GPU
From your local terminal, navigate to the folder containing your `app.py` and your `inferless-runtime-config.yaml` and run:
```bash
inferless remote-run app.py -c inferless-runtime-config.yaml --prompt "def factorial(int n):"
```
You can pass the other input parameters in the same way as long as your code expects them in the `inputs` dictionary.
If you want to exclude certain files or directories from being uploaded, use the `--exclude` or `-e` flag.
## Method A: Deploying the model on Inferless Platform
Inferless supports multiple ways of [importing your model](https://docs.inferless.com/model-import/file-structure-req/file-structure-requirements). For this tutorial, we will use GitHub.
### Step 1: Login to the inferless dashboard can click on Import model button
Navigate to your desired workspace in Inferless and Click on `Add a custom model` button that you see on the top right. An import wizard will open up.
### Step 2: Follow the UI to complete the model Import
* Select the GitHub/GitLab Integration option to connect your source code repository with the deployment environment.
* Navigate to the specific GitHub repository that contains your model's code. Here, you will need to identify and enter the name of the model you wish to import.
* Choose the appropriate type of machine that suits your model's requirements. Additionally, specify the minimum and maximum number of replicas to define the scalability range for deploying your model.
* Optionally, you have the option to enable automatic build and deployment. This feature triggers a new deployment automatically whenever there is a new code push to your repository.
* If your model requires additional software packages, configure the Custom Runtime settings by including necessary pip or apt packages. Also, set up environment variables such as Inference Timeout, Container Concurrency, and Scale Down Timeout to tailor the runtime environment according to your needs.
* Wait for the validation process to complete, ensuring that all settings are correct and functional. Once validation is successful, click on the "Import" button to finalize the import of your model.
### Step 3: Wait for the model build to complete usually takes \~5-10 minutes
### Step 4: Use the APIs to call the model
Once the model is in 'Active' status you can click on the 'API' page to call the model
### Here is the Demo:
## Method B: Deploying the model on Inferless CLI
Inferless allows you to deploy your model using Inferless-CLI. Follow the steps to deploy using Inferless CLI.
### Clone the repository of the model
Let's begin by cloning the model repository:
```bash
git clone https://github.com/inferless/CodeLlama-70B.git
```
### Deploy the Model
To deploy the model using Inferless CLI, execute the following command:
```bash
inferless deploy --gpu A100 --runtime inferless-runtime-config.yaml
```
**Explanation of the Command:**
* `--gpu A100`: Specifies the GPU type for deployment. Available options include `A10`, `A100`, and `T4`.
* `--runtime inferless-runtime-config.yaml`: Defines the runtime configuration file. If not specified, the default Inferless runtime is used.
# Deploy Deci 7B using Inferless
Source: https://docs.inferless.com/how-to-guides/deploy-deci-7b-using-inferless
DeciLM-7B, a text generation model with 7.04 billion parameters, that leads the 7B base language models during its release
## Introduction
DeciLM-7B, a text generation model with 7.04 billion parameters, leads the 7B base language models on the Open LLM Leaderboard during the release. It excels with an 8K-token sequence length, employing efficient Grouped-Query Attention for optimal accuracy and computational efficiency.
## Our Observations
We have deployed a 4-bit quantized version of the model using [bitsandbytes](https://github.com/TimDettmers/bitsandbytes) on an A100 GPU(80GB). This setup reduces the GPU memory requirements to 4.22GB. Here are our observations:
| Inference Time | Cold Start Time | Token/Sec | Latency/Token | VRAM Required |
| -------------- | --------------- | --------- | ------------- | ------------- |
| 9.25 sec | 9.85 | 23.18 | 43.12 ms | 4.22 GB |
## Defining Dependencies
We are using the [bitsandbytes](https://github.com/TimDettmers/bitsandbytes) library , which enables you to run LLM on low memory. We deploy a GPTQ 4bit quantized version of the model.
## Constructing the GitHub/GitLab Template
Now quickly construct the GitHub/GitLab template, this process is mandatory and make sure you don't add any file named `model.py`
```python
DeciLM-7B/
├── app.py
├── inferless-runtime-config.yaml
├── inferless.yaml
└── input_schema.py
```
You can also add other files to this directory.
## Create the class for inference
In the [app.py](https://github.com/inferless/DeciLM-7B/blob/main/app.py) we will define the class and import all the required functions
1. `def initialize`: In this function, you will initialize your model and define any `variable` that you want to use during inference. You can also use `torch_dtype=torch.bfloat16` on model initialization which will reduce the inference time but impacts the accuracy.
2. `def infer`: This function gets called for every request that you send. Here you can define all the steps that are required for the inference. You can also pass custom values for inference and pass it through `inputs(dict)` parameter.
3. `def finalize`: This function cleans up all the allocated memory.
```python
import os
os.environ["HF_HUB_ENABLE_HF_TRANSFER"]='1'
from huggingface_hub import snapshot_download
import inferless
import torch
from transformers import AutoModelForCausalLM, AutoTokenizer, pipeline
app = inferless.Cls(gpu="A10")
class InferlessPythonModel:
@app.load
def initialize(self):
model_id = 'Deci/DeciLM-7B'
snapshot_download(repo_id=model_id,allow_patterns=["*.safetensors"])
tokenizer = AutoTokenizer.from_pretrained(model_id)
model = AutoModelForCausalLM.from_pretrained(model_id, device_map="auto",load_in_4bit=True,trust_remote_code=True)
self.qtq_pipe = pipeline("text-generation", model=model, tokenizer=tokenizer)
@app.infer
def infer(self, inputs):
prompt = inputs["prompt"]
out = self.qtq_pipe(prompt, max_new_tokens=256, do_sample=True, top_p=0.9,temperature=0.9)
generated_text = out[0]["generated_text"][len(prompt):]
return {'generated_result': generated_text}
def finalize(self):
self.qtq_pipe = None
```
## Creating the Custom Runtime
This is a mandatory step where we allow the users to upload their custom runtime through [inferless-runtime-config.yaml](https://github.com/inferless/DeciLM-7B/blob/main/inferless-runtime-config.yaml).
```python
build:
cuda_version: "12.1.1"
python_packages:
- "bitsandbytes==0.45.2"
- "transformers==4.49.0"
- "accelerate==1.4.0"
- "scipy==1.11.4"
- "inferless-cli==2.0.9"
- "hf-transfer==0.1.9"
- "huggingface-hub==0.27.1"
```
## Test your model with Remote Run
You can use the `inferless remote-run`([installation guide here](https://docs.inferless.com/model-import/cli-import#cli-import)) command to test your model or any custom Python script in a remote GPU environment directly from your local machine. Make sure that you use `Python3.10` for seamless experience.
### Step 1: Add the Decorators and local entry point
To enable **Remote Run**, simply do the following:
1. Import the `inferless` library and initialize `Cls(gpu="A10")`. The available GPU options are `T4`, `A10` and `A100`.
2. Decorated the `initialize` and `infer` functions with `@app.load` and `@app.infer` respectively.
3. Create the Local Entry Point by decorating a function (for example, `my_local_entry`) with `@inferless.local_entry_point`.
Within this function, instantiate your model class, convert any incoming parameters into a `RequestObjects` object, and invoke the model's `infer` method.
```python
import os
os.environ["HF_HUB_ENABLE_HF_TRANSFER"]='1'
from huggingface_hub import snapshot_download
import inferless
import torch
from transformers import AutoModelForCausalLM, AutoTokenizer, pipeline
from pydantic import BaseModel, Field
from typing import Optional
@inferless.request
class RequestObjects(BaseModel):
prompt: str = Field(default="Explain Deep Learning.")
temperature: Optional[float] = 0.7
top_p: Optional[float] = 0.1
do_sample: Optional[bool] = True
max_new_tokens: Optional[int] = 256
@inferless.response
class ResponseObjects(BaseModel):
generated_text: str = Field(default='Test output')
app = inferless.Cls(gpu="A10")
class InferlessPythonModel:
@app.load
def initialize(self):
model_id = 'Deci/DeciLM-7B'
snapshot_download(repo_id=model_id,allow_patterns=["*.safetensors"])
tokenizer = AutoTokenizer.from_pretrained(model_id)
model = AutoModelForCausalLM.from_pretrained(model_id, device_map="auto",load_in_4bit=True,trust_remote_code=True)
self.qtq_pipe = pipeline("text-generation", model=model, tokenizer=tokenizer)
@app.infer
def infer(self, request: RequestObjects) -> ResponseObjects:
out = self.qtq_pipe(request.prompt, max_new_tokens=request.max_new_tokens, do_sample=request.do_sample, top_p=request.top_p,temperature=request.temperature)
generated_text = out[0]["generated_text"][len(request.prompt):]
generateObject = ResponseObjects(generated_text = generated_text)
return generateObject
def finalize(self):
self.qtq_pipe = None
@inferless.local_entry_point
def my_local_entry(dynamic_params):
request_objects = RequestObjects(**dynamic_params)
model_instance = InferlessPythonModel()
return model_instance.infer(request_objects)
```
### Step 2: Run with Remote GPU
From your local terminal, navigate to the folder containing your `app.py` and your `inferless-runtime-config.yaml` and run:
```bash
inferless remote-run app.py -c inferless-runtime-config.yaml --prompt "What is an AI?"
```
You can pass the other input parameters in the same way as long as your code expects them in the `inputs` dictionary.
If you want to exclude certain files or directories from being uploaded, use the `--exclude` or `-e` flag
## Method A: Deploying the model on Inferless Platform
Inferless supports multiple ways of [importing your model](https://docs.inferless.com/model-import/file-structure-req/file-structure-requirements). For this tutorial, we will use GitHub.
### Step 1: Login to the inferless dashboard can click on Import model button
Navigate to your desired workspace in Inferless and Click on `Add a custom model` button that you see on the top right. An import wizard will open up.
### Step 2: Follow the UI to complete the model Import
* Select the GitHub/GitLab Integration option to connect your source code repository with the deployment environment.
* Navigate to the specific GitHub repository that contains your model's code. Here, you will need to identify and enter the name of the model you wish to import.
* Choose the appropriate type of machine that suits your model's requirements. Additionally, specify the minimum and maximum number of replicas to define the scalability range for deploying your model.
* Optionally, you have the option to enable automatic build and deployment. This feature triggers a new deployment automatically whenever there is a new code push to your repository.
* If your model requires additional software packages, configure the Custom Runtime settings by including necessary pip or apt packages. Also, set up environment variables such as Inference Timeout, Container Concurrency, and Scale Down Timeout to tailor the runtime environment according to your needs.
* Wait for the validation process to complete, ensuring that all settings are correct and functional. Once validation is successful, click on the "Import" button to finalize the import of your model.
### Step 3: Wait for the model build to complete usually takes \~5-10 minutes
### Step 4: Use the APIs to call the model
Once the model is in 'Active' status you can click on the 'API' page to call the model
### Here is the Demo:
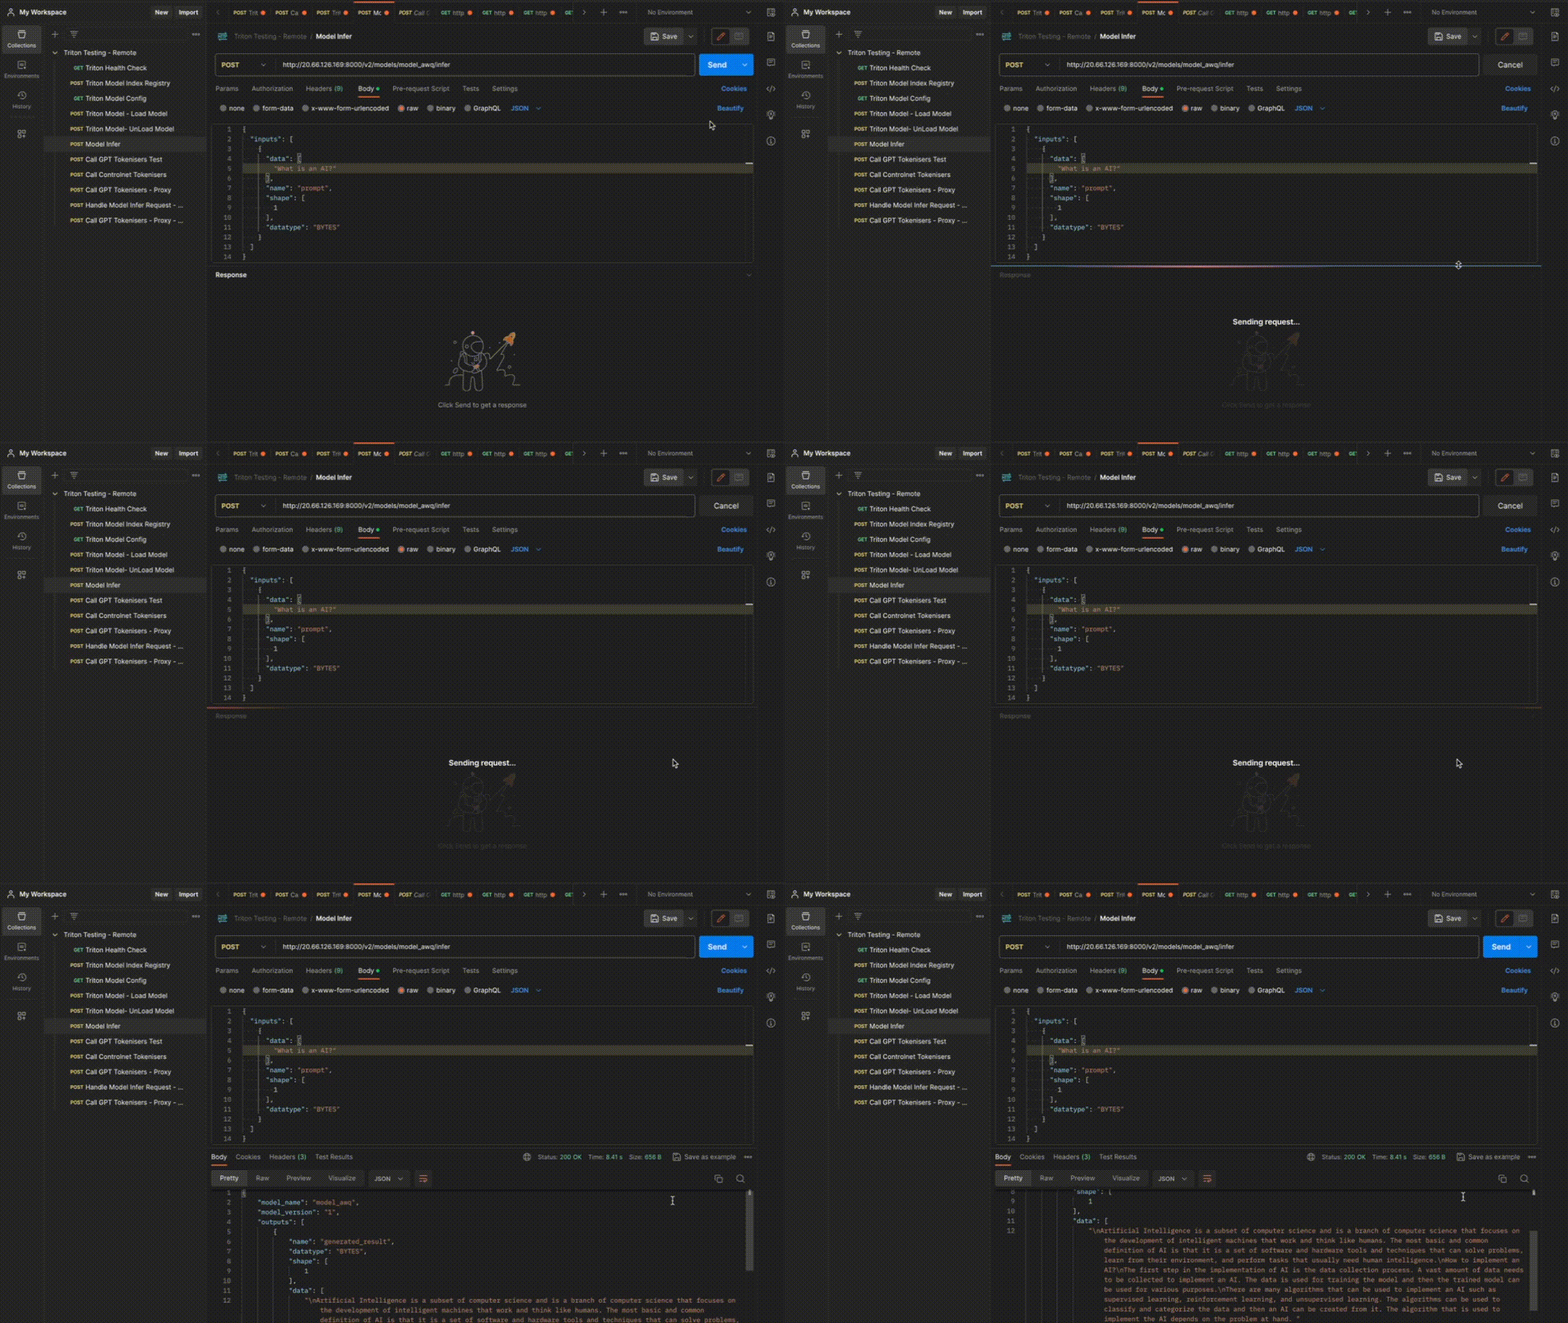 ## Method B: Deploying the model on Inferless CLI
Inferless allows you to deploy your model using Inferless-CLI. Follow the steps to deploy using Inferless CLI.
### Clone the repository of the model
Let's begin by cloning the model repository:
```bash
git clone https://github.com/inferless/DeciLM-7B.git
```
### Deploy the Model
To deploy the model using Inferless CLI, execute the following command:
```bash
inferless deploy --gpu A10 --runtime inferless-runtime-config.yaml
```
**Explanation of the Command:**
* `--gpu A100`: Specifies the GPU type for deployment. Available options include `A10`, `A100`, and `T4`.
* `--runtime inferless-runtime-config.yaml`: Defines the runtime configuration file. If not specified, the default Inferless runtime is used.
# Deploy the DeepSeek-R1-Qwen3-8B using Inferless
Source: https://docs.inferless.com/how-to-guides/deploy-deepseek-qwen3-8b
DeepSeek-R1-Qwen3-8B is a distilled model that transfers the chain-of-thought reasoning skills of DeepSeek-R1-0528 into the lighter Qwen 3 backbone, delivering state-of-the-art math, code and logic performance while remaining inexpensive to host.
## Introduction
[DeepSeek-R1-0528-Qwen3-8B](https://huggingface.co/deepseek-ai/DeepSeek-R1-0528-Qwen3-8B) is an 8-billion-parameter model obtained by distilling the chain-of-thought reasoning abilities of DeepSeek-R1-0528 into the Qwen3 8B architecture while retaining DeepSeek-R1’s tokenizer, giving the small model long-context (64K tokens) support and stronger logical coherence.
Despite its modest size, it achieves state-of-the-art open-source results. It achieves 86%(pass\@1) on AIME 2024, a 10-point gain over vanilla Qwen3-8B and on par with much larger Qwen3-235B-thinking, while also lowering hallucination rates and improving function-calling reliability.
## Defining Dependencies
We are using the [transformers](https://github.com/huggingface/transformers) to serve the model on a single A100 (80GB).
## Constructing the GitHub/GitLab Template
Now quickly construct the GitHub/GitLab template, this process is mandatory and make sure you don't add any file named `model.py`.
```
deepseek-r1-qwen3-8b/
├── app.py
├── inferless-runtime-config.yaml
└── inferless.yaml
```
You can also add other files to this directory.
## Create the Input Schema with Pydantic
Using the `inferless` Python client and Pydantic, you can define structured schemas directly in your code for input and output, eliminating the need for external file.
### Input Schema
When defining an input schema with Pydantic, you need to annotate your class attributes with the appropriate types, such as `str`, `float`, `int`, etc.
These type annotations specifys what type of data each field should contain.
The `default` value serves as the example input for testing with the `infer` function.
```python
@inferless.request
class RequestObjects(BaseModel):
prompt: str = Field(default="Give me a short introduction to large language model.")
temperature: Optional[float] = 0.7
repetition_penalty: Optional[float] = 1.18
max_new_tokens: Optional[int] = 2048
```
### Output Schema
The `@inferless.response` decorator helps you define structured output schemas.
```python
@inferless.response
class ResponseObjects(BaseModel):
generated_result: str = Field(default="Test output")
thinking_hidden: str = Field(default="Test output")
```
### Usage in the `infer` Function
Once you have annotated the objects you can expect the infer function to receive `RequestObjects` as input,
and returns a `ResponseObjects` instance as output, ensuring the results adhere to a defined structure.
```python
class InferlessPythonModel:
def infer(self, request: RequestObjects) -> ResponseObjects:
generateObject = ResponseObjects(generated_result=content,thinking_hidden=thinking_content)
return generateObject
```
## Create the class for inference
In the [app.py](https://github.com/inferless/deepseek-r1-qwen3-8b/blob/main/app.py) we will define the class and import all the required functions
1. `def initialize`: In this function, you will initialize your model and define any `variable` that you want to use during inference.
2. `def infer`: This function gets called for every request that you send. Here you can define all the steps that are required for the inference.
3. `def finalize`: This function cleans up all the allocated memory.
```python
import os
from transformers import AutoTokenizer, AutoModelForCausalLM
import torch
import inferless
from pydantic import BaseModel, Field
from typing import Optional
@inferless.request
class RequestObjects(BaseModel):
prompt: str = Field(default="Give me a short introduction to large language model.")
temperature: Optional[float] = 0.7
repetition_penalty: Optional[float] = 1.18
max_new_tokens: Optional[int] = 2048
@inferless.response
class ResponseObjects(BaseModel):
generated_result: str = Field(default="Test output")
thinking_hidden: str = Field(default="Test output")
class InferlessPythonModel:
def initialize(self, context=None):
model_id = "deepseek-ai/DeepSeek-R1-0528-Qwen3-8B"
self.tokenizer = AutoTokenizer.from_pretrained(model_id,trust_remote_code=True)
self.model = AutoModelForCausalLM.from_pretrained( model_id, torch_dtype=torch.float16, device_map="auto", trust_remote_code=True)
def infer(self, request: RequestObjects) -> ResponseObjects:
messages = [
{"role": "user", "content": request.prompt}
]
text = self.tokenizer.apply_chat_template(messages,tokenize=False,add_generation_prompt=True,enable_thinking=True)
model_inputs = self.tokenizer([text], return_tensors="pt").to(self.model.device)
generated_ids = self.model.generate(**model_inputs,temperature=request.temperature, max_new_tokens=request.max_new_tokens, repetition_penalty=request.repetition_penalty)
output_ids = generated_ids[0][len(model_inputs.input_ids[0]):].tolist()
try:
index = len(output_ids) - output_ids[::-1].index(151668)
except ValueError:
index = 0
thinking_content = self.tokenizer.decode(output_ids[:index], skip_special_tokens=True).strip("\n")
content = self.tokenizer.decode(output_ids[index:], skip_special_tokens=True).strip("\n")
generateObject = ResponseObjects(generated_result=content,thinking_hidden=thinking_content)
return generateObject
def finalize(self):
self.model = None
```
## Creating the Custom Runtime
This is a mandatory step where we allow the users to upload their custom runtime through [inferless-runtime-config.yaml](https://github.com/inferless/deepseek-r1-qwen3-8b/blob/main/inferless-runtime-config.yaml).
```python
build:
cuda_version: "12.1.1"
python_packages:
- accelerate==1.7.0
- transformers==4.52.4
- inferless==0.2.13
- pydantic==2.10.2
```
## Test your model with Remote Run
You can use the `inferless remote-run`([installation guide here](https://docs.inferless.com/model-import/cli-import#cli-import)) command to test your model or any custom Python script in a remote GPU environment directly from your local machine. Make sure that you use `Python3.10` for seamless experience.
### Step 1: Add the Decorators and local entry point
To enable **Remote Run**, simply do the following:
1. Import the `inferless` library and initialize `Cls(gpu="A100")`. The available GPU options are `T4`, `A10` and `A100`.
2. Decorated the `initialize` and `infer` functions with `@app.load` and `@app.infer` respectively.
3. Create the Local Entry Point by decorating a function (for example, `my_local_entry`) with `@inferless.local_entry_point`.
Within this function, instantiate your model class, convert any incoming parameters into a `RequestObjects` object, and invoke the model's `infer` method.
```python
import os
from transformers import AutoTokenizer, AutoModelForCausalLM
import torch
import inferless
from pydantic import BaseModel, Field
from typing import Optional
app = inferless.Cls(gpu="A100")
@inferless.request
class RequestObjects(BaseModel):
prompt: str = Field(default="Give me a short introduction to large language model.")
temperature: Optional[float] = 0.7
repetition_penalty: Optional[float] = 1.18
max_new_tokens: Optional[int] = 2048
@inferless.response
class ResponseObjects(BaseModel):
generated_result: str = Field(default="Test output")
thinking_hidden: str = Field(default="Test output")
class InferlessPythonModel:
@app.load
def initialize(self, context=None):
model_id = "deepseek-ai/DeepSeek-R1-0528-Qwen3-8B"
self.tokenizer = AutoTokenizer.from_pretrained(model_id,trust_remote_code=True)
self.model = AutoModelForCausalLM.from_pretrained( model_id, torch_dtype=torch.float16, device_map="auto", trust_remote_code=True)
@app.infer
def infer(self, request: RequestObjects) -> ResponseObjects:
messages = [
{"role": "user", "content": request.prompt}
]
text = self.tokenizer.apply_chat_template(messages,tokenize=False,add_generation_prompt=True,enable_thinking=True)
model_inputs = self.tokenizer([text], return_tensors="pt").to(self.model.device)
generated_ids = self.model.generate(**model_inputs,temperature=request.temperature, max_new_tokens=request.max_new_tokens, repetition_penalty=request.repetition_penalty)
output_ids = generated_ids[0][len(model_inputs.input_ids[0]):].tolist()
try:
index = len(output_ids) - output_ids[::-1].index(151668)
except ValueError:
index = 0
thinking_content = self.tokenizer.decode(output_ids[:index], skip_special_tokens=True).strip("\n")
content = self.tokenizer.decode(output_ids[index:], skip_special_tokens=True).strip("\n")
generateObject = ResponseObjects(generated_result=content,thinking_hidden=thinking_content)
return generateObject
def finalize(self):
self.model = None
@inferless.local_entry_point
def my_local_entry(dynamic_params):
request_objects = RequestObjects(**dynamic_params)
model_instance = InferlessPythonModel()
return model_instance.infer(request_objects)
```
### Step 2: Run with Remote GPU
From your local terminal, navigate to the folder containing your `app.py` and your `inferless-runtime-config.yaml` and run:
```bash
inferless remote-run app.py -c inferless-runtime-config.yaml --prompt "Give me a short introduction to large language model."
```
You can pass the other input parameters in the same way (e.g., `--temperature`, `--max_new_tokens`, etc.) as long as your code expects them in the `inputs` dictionary.
If you want to exclude certain files or directories from being uploaded, use the `--exclude` or `-e` flag.
## Method A: Deploying the model on Inferless Platform
Inferless supports multiple ways of [importing your model](https://docs.inferless.com/model-import/file-structure-req/file-structure-requirements). For this tutorial, we will use GitHub.
### Step 1: Login to the inferless dashboard can click on Import model button
Navigate to your desired workspace in Inferless and Click on `Add a custom model` button that you see on the top right. An import wizard will open up.
### Step 2: Follow the UI to complete the model Import
* Select the GitHub/GitLab Integration option to connect your source code repository with the deployment environment.
* Navigate to the specific GitHub repository that contains your model's code. Here, you will need to identify and enter the name of the model you wish to import.
* Choose the appropriate type of machine that suits your model's requirements. Additionally, specify the minimum and maximum number of replicas to define the scalability range for deploying your model.
* Optionally, you have the option to enable automatic build and deployment. This feature triggers a new deployment automatically whenever there is a new code push to your repository.
* If your model requires additional software packages, configure the Custom Runtime settings by including necessary pip or apt packages. Also, set up environment variables such as Inference Timeout, Container Concurrency, and Scale Down Timeout to tailor the runtime environment according to your needs.
* Wait for the validation process to complete, ensuring that all settings are correct and functional. Once validation is successful, click on the "Import" button to finalize the import of your model.
### Step 3: Wait for the model build to complete usually takes \~5-10 minutes
### Step 4: Use the APIs to call the model
Once the model is in 'Active' status you can click on the 'API' page to call the model
### Here is the Demo:
## Method B: Deploying the model on Inferless CLI
Inferless allows you to deploy your model using Inferless-CLI. Follow the steps to deploy using Inferless CLI.
### Clone the repository of the model
Let's begin by cloning the model repository:
```bash
git clone https://github.com/inferless/deepseek-r1-qwen3-8b.git
```
### Deploy the Model
To deploy the model using Inferless CLI, execute the following command:
```bash
inferless deploy --gpu A100 --runtime inferless-runtime-config.yaml
```
**Explanation of the Command:**
* `--gpu A100`: Specifies the GPU type for deployment. Available options include `A10`, `A100`, and `T4`.
* `--runtime inferless-runtime-config.yaml`: Defines the runtime configuration file. If not specified, the default Inferless runtime is used.
{/* 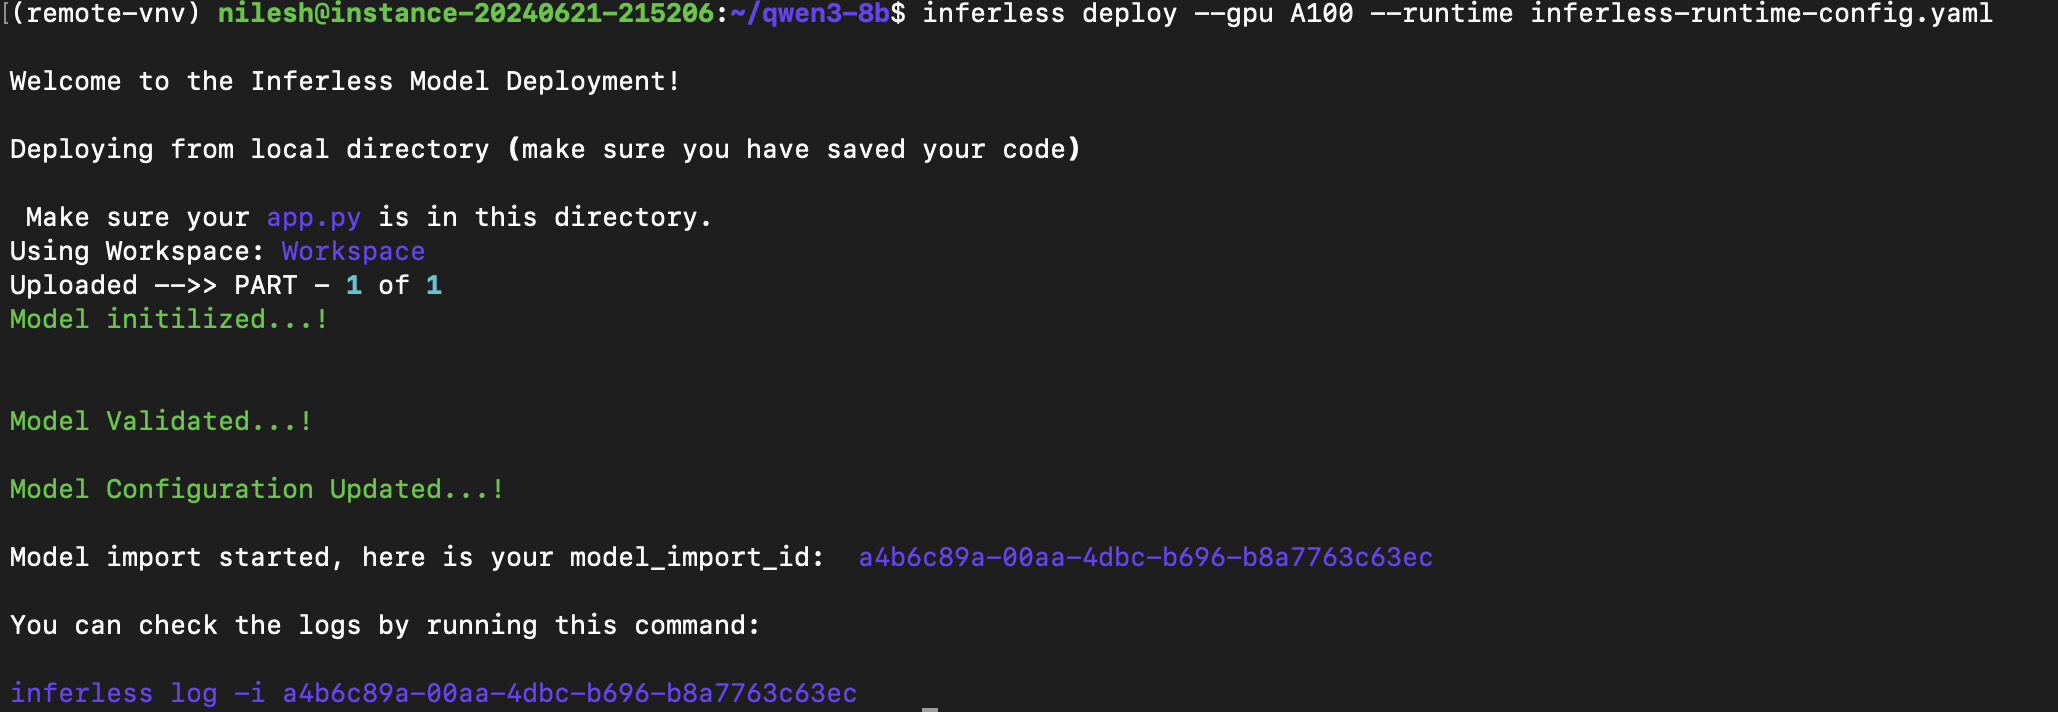 */}
# Deploy FLUX.1-schnell using Inferless
Source: https://docs.inferless.com/how-to-guides/deploy-flux-schnell-using-inferless
Black Forest Labs has released FLUX.1-schnell, part of the FLUX.1 suite of text-to-image models that set a new state-of-the-art in image detail, prompt adherence, style diversity, and scene complexity. FLUX.1-schnell is the fastest model in the suite, tailored for local development and personal use.
## Introduction
[FLUX.1-schnell](https://blackforestlabs.ai/announcing-black-forest-labs/), developed by Black Forest Labs, is the fastest model in the FLUX.1 suite of text-to-image generation models. It offers an impressive balance of speed and quality, outperforming many competitors including some non-distilled models. Designed for local development and personal use, FLUX.1-schnell is openly available under an Apache 2.0 license. It utilizes a hybrid architecture of multimodal and parallel diffusion transformer blocks, scaled to 12B parameters, and supports a wide range of aspect ratios and resolutions.
## Our Observations
We have deployed this model using A100 GPU and observed that the model took an average cold start time of `11.60 sec` and an average inference time of `0.67 sec` for image generation.
## Defining Dependencies
We are using the HuggingFace [Diffusers](https://github.com/huggingface/diffusers) library for the deployment.
## Constructing the GitHub/GitLab Template
Now quickly construct the GitHub/GitLab template, this process is mandatory and make sure you don't add any file named `model.py`
```
FLUX.1-schnell/
├── app.py
├── inferless-runtime-config.yaml
├── inferless.yaml
└── input_schema.py
```
You can also add other files to this directory.
## Create the class for inference
In the [app.py](https://github.com/inferless/FLUX.1-schnell/blob/main/app.py) we will define the class and import all the required functions
1. `def initialize`: In this function, you will initialize your model and define any `variable` that you want to use during inference.
2. `def infer`: This function gets called for every request that you send. Here you can define all the steps that are required for the inference. You can also pass custom values for inference through the `inputs` parameter.
3. `def finalize`: This function cleans up all the allocated memory.
```python
import os
os.environ["HF_HUB_ENABLE_HF_TRANSFER"]='1'
from huggingface_hub import snapshot_download
from diffusers import FluxPipeline
import torch
from io import BytesIO
import base64
import inferless
app = inferless.Cls(gpu="A100")
class InferlessPythonModel:
@app.load
def initialize(self):
model_id = "black-forest-labs/FLUX.1-schnell"
snapshot_download(repo_id=model_id,allow_patterns=["*.safetensors"])
self.pipe = FluxPipeline.from_pretrained(model_id, torch_dtype=torch.bfloat16).to("cuda")
@app.infer
def infer(self, inputs):
prompt = inputs["prompt"]
height = inputs.get("height", 512)
width = inputs.get("width", 512)
guidance_scale = inputs.get("guidance_scale", 7.5)
num_inference_steps = inputs.get("num_inference_steps", 4)
max_sequence_length = inputs.get("max_sequence_length", 256)
image = self.pipe(
prompt,
height=height,
width=width,
guidance_scale=guidance_scale,
num_inference_steps=num_inference_steps,
max_sequence_length=max_sequence_length,
).images[0]
buff = BytesIO()
image.save(buff, format="JPEG")
img_str = base64.b64encode(buff.getvalue()).decode()
return {"generated_image_base64": img_str}
def finalize(self):
self.pipe = None
```
## Create the Input Schema
We have to create a [`input_schema.py`](https://github.com/inferless/FLUX.1-schnell/blob/main/input_schema.py) in the GitHub/Gitlab repository this will help us create the Input parameters. You can checkout our documentation on [Input / Output Schema](https://docs.inferless.com/model-import/input-output-schema).
For this tutorial, we have defined four parameters `prompt`,`height`, `width`, `num_inference_steps`, `guidance_scale` and `max_sequence_length` which are required during the API call. Now lets create the `input_schema.py`.
```JSON
INPUT_SCHEMA = {
"prompt": {
'datatype': 'STRING',
'required': True,
'shape': [1],
'example': ["A cat holding a sign that says hello world"]
},
"height": {
'datatype': 'INT16',
'required': False,
'shape': [1],
'example': [512]
},
"width": {
'datatype': 'INT16',
'required': False,
'shape': [1],
'example': [512]
},
"num_inference_steps": {
'datatype': 'INT16',
'required': False,
'shape': [1],
'example': [4]
},
"guidance_scale": {
'datatype': 'FP32',
'required': False,
'shape': [1],
'example': [7.5]
},
"max_sequence_length": {
'datatype': 'INT16',
'required': False,
'shape': [1],
'example': [256]
}
}
```
## Creating the Custom Runtime
This is a mandatory step where we allow the users to upload their own custom runtime through [inferless-runtime-config.yaml](https://github.com/inferless/FLUX.1-schnell/blob/main/inferless-runtime-config.yaml).
```
build:
cuda_version: "12.1.1"
python_packages:
- "accelerate==0.33.0"
- "torch==2.4.0"
- "transformers==4.44.0"
- "diffusers==0.30.0"
- "sentencepiece==0.2.0"
- "protobuf==5.27.3"
- "inferless-cli==2.0.9"
- "hf-transfer==0.1.9"
- "huggingface-hub==0.27.1"
```
## Test your model with Remote Run
You can use the `inferless remote-run`([installation guide here](https://docs.inferless.com/model-import/cli-import#cli-import)) command to test your model or any custom Python script in a remote GPU environment directly from your local machine. Make sure that you use `Python3.10` for seamless experience.
### Step 1: Add the Decorators and local entry point
To enable **Remote Run**, simply do the following:
1. Import the `inferless` library and initialize `Cls(gpu="A100")`. The available GPU options are `T4`, `A10` and `A100`.
2. Decorated the `initialize` and `infer` functions with `@app.load` and `@app.infer` respectively.
3. Create the Local Entry Point by decorating a function (for example, `my_local_entry`) with `@inferless.local_entry_point`.
Within this function, instantiate your model class, convert any incoming parameters into a `RequestObjects` object, and invoke the model's `infer` method.
```python
import os
os.environ["HF_HUB_ENABLE_HF_TRANSFER"]='1'
from huggingface_hub import snapshot_download
from diffusers import FluxPipeline
import torch
from io import BytesIO
import base64
import inferless
from pydantic import BaseModel, Field
from typing import Optional
app = inferless.Cls(gpu="A100")
@inferless.request
class RequestObjects(BaseModel):
prompt: str = Field(default="A cat holding a sign that says hello world")
height: Optional[int] = 512
width: Optional[int] = 512
num_inference_steps: Optional[int] = 4
guidance_scale: Optional[float] = 7.5
max_sequence_length: Optional[int] = 256
@inferless.response
class ResponseObjects(BaseModel):
generated_image_base64: str = Field(default='Test output')
class InferlessPythonModel:
@app.load
def initialize(self):
model_id = "black-forest-labs/FLUX.1-schnell"
snapshot_download(repo_id=model_id,allow_patterns=["*.safetensors"])
self.pipe = FluxPipeline.from_pretrained(model_id, torch_dtype=torch.bfloat16).to("cuda")
@app.infer
def infer(self, request: RequestObjects) -> ResponseObjects:
image = self.pipe(
request.prompt,
height=request.height,
width=request.width,
guidance_scale=request.guidance_scale,
num_inference_steps=request.num_inference_steps,
max_sequence_length=request.max_sequence_length,
).images[0]
buff = BytesIO()
image.save(buff, format="JPEG")
img_str = base64.b64encode(buff.getvalue()).decode()
generateObject = ResponseObjects(generated_image_base64 = img_str)
return generateObject
def finalize(self):
self.pipe = None
@inferless.local_entry_point
def my_local_entry(dynamic_params):
request_objects = RequestObjects(**dynamic_params)
model_instance = InferlessPythonModel()
return model_instance.infer(request_objects)
```
### Step 2: Run with Remote GPU
From your local terminal, navigate to the folder containing your `app.py` and your `inferless-runtime-config.yaml` and run:
```bash
inferless remote-run app.py -c inferless-runtime-config.yaml --prompt "A cat holding a sign that says hello world" --guidance_scale "5.0"
```
You can pass the other input parameters in the same way (e.g., `--height`, `--width`, etc.) as long as your code expects them in the `inputs` dictionary.
## Method A: Deploying the model on Inferless Platform
Inferless supports multiple ways of [importing your model](https://docs.inferless.com/model-import/file-structure-req/file-structure-requirements). For this tutorial, we will use GitHub.
### Step 1: Login to the inferless dashboard can click on Import model button
Navigate to your desired workspace in Inferless and Click on `Add a custom model` button that you see on the top right. An import wizard will open up.
### Step 2: Follow the UI to complete the model Import
* Select the GitHub/GitLab Integration option to connect your source code repository with the deployment environment.
* Navigate to the specific GitHub repository that contains your model's code. Here, you will need to identify and enter the name of the model you wish to import.
* Choose the appropriate type of machine that suits your model's requirements. Additionally, specify the minimum and maximum number of replicas to define the scalability range for deploying your model.
* Optionally, you have the option to enable automatic build and deployment. This feature triggers a new deployment automatically whenever there is a new code push to your repository.
* If your model requires additional software packages, configure the Custom Runtime settings by including necessary pip or apt packages. Also, set up environment variables such as Inference Timeout, Container Concurrency, and Scale Down Timeout to tailor the runtime environment according to your needs.
* Wait for the validation process to complete, ensuring that all settings are correct and functional. Once validation is successful, click on the "Import" button to finalize the import of your model.
### Step 3: Wait for the model build to complete usually takes \~5-10 minutes
### Step 4: Use the APIs to call the model
Once the model is in 'Active' status you can click on the 'API' page to call the model
### Here is the Demo:
## Method B: Deploying the model on Inferless CLI
Inferless allows you to deploy your model using Inferless-CLI. Follow the steps to deploy using Inferless CLI.
### Clone the repository of the model
Let's begin by cloning the model repository:
```bash
git clone https://github.com/inferless/FLUX.1-schnell.git
```
### Deploy the Model
To deploy the model using Inferless CLI, execute the following command:
```bash
inferless deploy --gpu A100 --runtime inferless-runtime-config.yaml
```
**Explanation of the Command:**
* `--gpu A100`: Specifies the GPU type for deployment. Available options include `A10`, `A100`, and `T4`.
* `--runtime inferless-runtime-config.yaml`: Defines the runtime configuration file. If not specified, the default Inferless runtime is used.
# Deploy the Gemma-3-27B-it using Inferless
Source: https://docs.inferless.com/how-to-guides/deploy-gemma-27b-it
Gemma-3-27B-it is a 27-billion-parameter multimodal language model developed by the Gemma team. This model excels in instruction-based tasks, offering superior visual and multilingual capabilities.
## Introduction
Gemma-3-27B-it is a state‑of‑the‑art, 27B vision‑language model from the Gemma team. Built for instruction‑tuned applications, it seamlessly integrates robust language understanding with cutting‑edge visual analysis. Whether it’s detecting intricate visual patterns, parsing complex documents, or analyzing extended video content by highlighting key moments, this model is engineered to act as a versatile visual agent. With capabilities that include generating structured outputs (such as bounding boxes and JSON) and supporting multilingual text within images, it paves the way for innovative interactive chatbots, advanced multimedia content analysis, and beyond.
## Defining Dependencies
We are using the [transformers](https://github.com/huggingface/transformers) to serve the model on a single A100.
## Our Observations
We have deployed the model on an A100 GPU(80GB). Here are our observations:
| Library | Inference Time | Cold Start Time | Tokens/Sec | Output Tokens Length |
| ------------ | -------------- | --------------- | ---------- | -------------------- |
| transformers | 11.73 sec | 21.64 sec | 10.59 | 128 |
Note: The inference time and cold start time are average values.
## Defining Dependencies
We are using the [transformers](https://github.com/huggingface/transformers) to serve the model on a single A100 (80GB).
## Constructing the GitHub/GitLab Template
Now quickly construct the GitHub/GitLab template, this process is mandatory and make sure you don't add any file named `model.py`.
```
gemma-3-27b-it/
├── app.py
├── inferless-runtime-config.yaml
└── inferless.yaml
```
You can also add other files to this directory.
## Create the Input Schema with Pydantic
Using the `inferless` Python client and Pydantic, you can define structured schemas directly in your code for input and output, eliminating the need for external file.
### Input Schema
When defining an input schema with Pydantic, you need to annotate your class attributes with the appropriate types, such as `str`, `float`, `int`, etc.
These type annotations specifys what type of data each field should contain.
The `default` value serves as the example input for testing with the `infer` function.
```python
@inferless.request
class RequestObjects(BaseModel):
prompt: str = Field(default="What is Deep Learning?")
image_url: Optional[str] = None
system_prompt: Optional[str] = "You are a helpful assistant."
temperature: Optional[float] = 0.7
top_p: Optional[float] = 0.1
repetition_penalty: Optional[float] = 1.18
top_k: Optional[int] = 40
max_tokens: Optional[int] = 100
do_sample: Optional[bool] = False
```
### Output Schema
The `@inferless.response` decorator helps you define structured output schemas.
```python
@inferless.response
class ResponseObjects(BaseModel):
generated_text: str = Field(default="Test output")
```
### Usage in the `infer` Function
Once you have annotated the objects you can expect the infer function to receive `RequestObjects` as input,
and returns a `ResponseObjects` instance as output, ensuring the results adhere to a defined structure.
```python
class InferlessPythonModel:
def infer(self, request: RequestObjects) -> ResponseObjects:
return ResponseObjects(generated_result = generated_text)
```
## Create the class for inference
In the [app.py](https://github.com/inferless/gemma-3-27b-it/blob/main/app.py) we will define the class and import all the required functions
1. `def initialize`: In this function, you will initialize your model and define any `variable` that you want to use during inference.
2. `def infer`: This function gets called for every request that you send. Here you can define all the steps that are required for the inference.
3. `def finalize`: This function cleans up all the allocated memory.
```python
import os
os.environ["HF_HUB_ENABLE_HF_TRANSFER"] = "1"
from huggingface_hub import snapshot_download
from pydantic import BaseModel, Field
from typing import Optional
import inferless
import torch
from transformers import AutoProcessor, Gemma3ForConditionalGeneration
@inferless.request
class RequestObjects(BaseModel):
prompt: str = Field(default="What is Deep Learning?")
image_url: Optional[str] = None
system_prompt: Optional[str] = "You are a helpful assistant."
temperature: Optional[float] = 0.7
top_p: Optional[float] = 0.1
repetition_penalty: Optional[float] = 1.18
top_k: Optional[int] = 40
max_tokens: Optional[int] = 100
do_sample: Optional[bool] = False
@inferless.response
class ResponseObjects(BaseModel):
generated_text: str = Field(default="Test output")
class InferlessPythonModel:
def initialize(self):
model_id = "google/gemma-3-27b-it"
snapshot_download(repo_id=model_id, allow_patterns=["*.safetensors"])
self.model = Gemma3ForConditionalGeneration.from_pretrained(
model_id, device_map="cuda"
).eval()
self.processor = AutoProcessor.from_pretrained(model_id)
def infer(self, request: RequestObjects) -> ResponseObjects:
messages = [
{
"role": "system",
"content": [{"type": "text", "text": request.system_prompt}]
}
]
# Build the user message based on provided inputs.
user_content = []
if request.image_url is not None:
user_content.append({"type": "image", "image": request.image_url})
user_content.append({"type": "text", "text": request.prompt})
messages.append({
"role": "user",
"content": user_content
})
inputs = self.processor.apply_chat_template(
messages,
add_generation_prompt=True,
tokenize=True,
return_dict=True,
return_tensors="pt"
).to(self.model.device, dtype=torch.bfloat16)
input_len = inputs["input_ids"].shape[-1]
with torch.inference_mode():
generation = self.model.generate(
**inputs,
max_new_tokens=request.max_tokens,
temperature=request.temperature,
top_p=request.top_p,
top_k=request.top_k,
do_sample=request.do_sample,
repetition_penalty=request.repetition_penalty,
)
generation = generation[0][input_len:]
decoded = self.processor.decode(generation, skip_special_tokens=True)
return ResponseObjects(generated_text=decoded)
def finalize(self):
self.model = None
```
## Creating the Custom Runtime
This is a mandatory step where we allow the users to upload their custom runtime through [inferless-runtime-config.yaml](https://github.com/inferless/gemma-3-27b-it/blob/main/inferless-runtime-config.yaml).
```python
build:
cuda_version: "12.1.1"
python_packages:
- "git+https://github.com/huggingface/transformers@v4.49.0-Gemma-3"
- "hf-transfer==0.1.9"
- "inferless==0.2.13"
- "pydantic==2.10.2"
- "accelerate==1.5.2"
- "pillow==11.1.0"
```
## Test your model with Remote Run
You can use the `inferless remote-run`([installation guide here](https://docs.inferless.com/model-import/cli-import#cli-import)) command to test your model or any custom Python script in a remote GPU environment directly from your local machine. Make sure that you use `Python3.10` for seamless experience.
### Step 1: Add the Decorators and local entry point
To enable **Remote Run**, simply do the following:
1. Import the `inferless` library and initialize `Cls(gpu="A100")`. The available GPU options are `T4`, `A10` and `A100`.
2. Decorated the `initialize` and `infer` functions with `@app.load` and `@app.infer` respectively.
3. Create the Local Entry Point by decorating a function (for example, `my_local_entry`) with `@inferless.local_entry_point`.
Within this function, instantiate your model class, convert any incoming parameters into a `RequestObjects` object, and invoke the model's `infer` method.
```python
import os
os.environ["HF_HUB_ENABLE_HF_TRANSFER"] = "1"
from huggingface_hub import snapshot_download
from pydantic import BaseModel, Field
from typing import Optional
import inferless
import torch
from transformers import AutoProcessor, Gemma3ForConditionalGeneration
app = inferless.Cls(gpu="A100")
@inferless.request
class RequestObjects(BaseModel):
prompt: str = Field(default="What is Deep Learning?")
image_url: Optional[str] = None
system_prompt: Optional[str] = "You are a helpful assistant."
temperature: Optional[float] = 0.7
top_p: Optional[float] = 0.1
repetition_penalty: Optional[float] = 1.18
top_k: Optional[int] = 40
max_tokens: Optional[int] = 100
do_sample: Optional[bool] = False
@inferless.response
class ResponseObjects(BaseModel):
generated_text: str = Field(default="Test output")
class InferlessPythonModel:
@app.load
def initialize(self):
model_id = "google/gemma-3-27b-it"
snapshot_download(repo_id=model_id, allow_patterns=["*.safetensors"])
self.model = Gemma3ForConditionalGeneration.from_pretrained(
model_id, device_map="cuda"
).eval()
self.processor = AutoProcessor.from_pretrained(model_id)
@app.infer
def infer(self, request: RequestObjects) -> ResponseObjects:
messages = [
{
"role": "system",
"content": [{"type": "text", "text": request.system_prompt}]
}
]
# Build the user message based on provided inputs.
user_content = []
if request.image_url is not None:
user_content.append({"type": "image", "image": request.image_url})
user_content.append({"type": "text", "text": request.prompt})
messages.append({
"role": "user",
"content": user_content
})
inputs = self.processor.apply_chat_template(
messages,
add_generation_prompt=True,
tokenize=True,
return_dict=True,
return_tensors="pt"
).to(self.model.device, dtype=torch.bfloat16)
input_len = inputs["input_ids"].shape[-1]
with torch.inference_mode():
generation = self.model.generate(
**inputs,
max_new_tokens=request.max_tokens,
temperature=request.temperature,
top_p=request.top_p,
top_k=request.top_k,
do_sample=request.do_sample,
repetition_penalty=request.repetition_penalty,
)
generation = generation[0][input_len:]
decoded = self.processor.decode(generation, skip_special_tokens=True)
return ResponseObjects(generated_text=decoded)
def finalize(self):
self.model = None
@inferless.local_entry_point
def my_local_entry(dynamic_params):
request_objects = RequestObjects(**dynamic_params)
model_instance = InferlessPythonModel()
return model_instance.infer(request_objects)
```
### Step 2: Run with Remote GPU
From your local terminal, navigate to the folder containing your `app.py` and your `inferless-runtime-config.yaml` and run:
```bash
inferless remote-run app.py -c inferless-runtime-config.yaml --prompt "What does this diagram illustrate?" --image_url "https://qianwen-res.oss-cn-beijing.aliyuncs.com/Qwen-VL/assets/demo.jpeg"
```
You can pass the other input parameters in the same way (e.g., `--temperature`, `--system_prompt`, etc.) as long as your code expects them in the `inputs` dictionary.
If you want to exclude certain files or directories from being uploaded, use the `--exclude` or `-e` flag.
## Method A: Deploying the model on Inferless Platform
Inferless supports multiple ways of [importing your model](https://docs.inferless.com/model-import/file-structure-req/file-structure-requirements). For this tutorial, we will use GitHub.
### Step 1: Login to the inferless dashboard can click on Import model button
Navigate to your desired workspace in Inferless and Click on `Add a custom model` button that you see on the top right. An import wizard will open up.
### Step 2: Follow the UI to complete the model Import
* Select the GitHub/GitLab Integration option to connect your source code repository with the deployment environment.
* Navigate to the specific GitHub repository that contains your model's code. Here, you will need to identify and enter the name of the model you wish to import.
* Choose the appropriate type of machine that suits your model's requirements. Additionally, specify the minimum and maximum number of replicas to define the scalability range for deploying your model.
* Optionally, you have the option to enable automatic build and deployment. This feature triggers a new deployment automatically whenever there is a new code push to your repository.
* If your model requires additional software packages, configure the Custom Runtime settings by including necessary pip or apt packages. Also, set up environment variables such as Inference Timeout, Container Concurrency, and Scale Down Timeout to tailor the runtime environment according to your needs.
* Wait for the validation process to complete, ensuring that all settings are correct and functional. Once validation is successful, click on the "Import" button to finalize the import of your model.
### Step 3: Wait for the model build to complete usually takes \~5-10 minutes
### Step 4: Use the APIs to call the model
Once the model is in 'Active' status you can click on the 'API' page to call the model
### Here is the Demo:
## Method B: Deploying the model on Inferless CLI
Inferless allows you to deploy your model using Inferless-CLI. Follow the steps to deploy using Inferless CLI.
### Clone the repository of the model
Let's begin by cloning the model repository:
```bash
git clone https://github.com/inferless/DeciLM-7B.git
```
### Deploy the Model
To deploy the model using Inferless CLI, execute the following command:
```bash
inferless deploy --gpu A10 --runtime inferless-runtime-config.yaml
```
**Explanation of the Command:**
* `--gpu A100`: Specifies the GPU type for deployment. Available options include `A10`, `A100`, and `T4`.
* `--runtime inferless-runtime-config.yaml`: Defines the runtime configuration file. If not specified, the default Inferless runtime is used.
# Deploy the DeepSeek-R1-Qwen3-8B using Inferless
Source: https://docs.inferless.com/how-to-guides/deploy-deepseek-qwen3-8b
DeepSeek-R1-Qwen3-8B is a distilled model that transfers the chain-of-thought reasoning skills of DeepSeek-R1-0528 into the lighter Qwen 3 backbone, delivering state-of-the-art math, code and logic performance while remaining inexpensive to host.
## Introduction
[DeepSeek-R1-0528-Qwen3-8B](https://huggingface.co/deepseek-ai/DeepSeek-R1-0528-Qwen3-8B) is an 8-billion-parameter model obtained by distilling the chain-of-thought reasoning abilities of DeepSeek-R1-0528 into the Qwen3 8B architecture while retaining DeepSeek-R1’s tokenizer, giving the small model long-context (64K tokens) support and stronger logical coherence.
Despite its modest size, it achieves state-of-the-art open-source results. It achieves 86%(pass\@1) on AIME 2024, a 10-point gain over vanilla Qwen3-8B and on par with much larger Qwen3-235B-thinking, while also lowering hallucination rates and improving function-calling reliability.
## Defining Dependencies
We are using the [transformers](https://github.com/huggingface/transformers) to serve the model on a single A100 (80GB).
## Constructing the GitHub/GitLab Template
Now quickly construct the GitHub/GitLab template, this process is mandatory and make sure you don't add any file named `model.py`.
```
deepseek-r1-qwen3-8b/
├── app.py
├── inferless-runtime-config.yaml
└── inferless.yaml
```
You can also add other files to this directory.
## Create the Input Schema with Pydantic
Using the `inferless` Python client and Pydantic, you can define structured schemas directly in your code for input and output, eliminating the need for external file.
### Input Schema
When defining an input schema with Pydantic, you need to annotate your class attributes with the appropriate types, such as `str`, `float`, `int`, etc.
These type annotations specifys what type of data each field should contain.
The `default` value serves as the example input for testing with the `infer` function.
```python
@inferless.request
class RequestObjects(BaseModel):
prompt: str = Field(default="Give me a short introduction to large language model.")
temperature: Optional[float] = 0.7
repetition_penalty: Optional[float] = 1.18
max_new_tokens: Optional[int] = 2048
```
### Output Schema
The `@inferless.response` decorator helps you define structured output schemas.
```python
@inferless.response
class ResponseObjects(BaseModel):
generated_result: str = Field(default="Test output")
thinking_hidden: str = Field(default="Test output")
```
### Usage in the `infer` Function
Once you have annotated the objects you can expect the infer function to receive `RequestObjects` as input,
and returns a `ResponseObjects` instance as output, ensuring the results adhere to a defined structure.
```python
class InferlessPythonModel:
def infer(self, request: RequestObjects) -> ResponseObjects:
generateObject = ResponseObjects(generated_result=content,thinking_hidden=thinking_content)
return generateObject
```
## Create the class for inference
In the [app.py](https://github.com/inferless/deepseek-r1-qwen3-8b/blob/main/app.py) we will define the class and import all the required functions
1. `def initialize`: In this function, you will initialize your model and define any `variable` that you want to use during inference.
2. `def infer`: This function gets called for every request that you send. Here you can define all the steps that are required for the inference.
3. `def finalize`: This function cleans up all the allocated memory.
```python
import os
from transformers import AutoTokenizer, AutoModelForCausalLM
import torch
import inferless
from pydantic import BaseModel, Field
from typing import Optional
@inferless.request
class RequestObjects(BaseModel):
prompt: str = Field(default="Give me a short introduction to large language model.")
temperature: Optional[float] = 0.7
repetition_penalty: Optional[float] = 1.18
max_new_tokens: Optional[int] = 2048
@inferless.response
class ResponseObjects(BaseModel):
generated_result: str = Field(default="Test output")
thinking_hidden: str = Field(default="Test output")
class InferlessPythonModel:
def initialize(self, context=None):
model_id = "deepseek-ai/DeepSeek-R1-0528-Qwen3-8B"
self.tokenizer = AutoTokenizer.from_pretrained(model_id,trust_remote_code=True)
self.model = AutoModelForCausalLM.from_pretrained( model_id, torch_dtype=torch.float16, device_map="auto", trust_remote_code=True)
def infer(self, request: RequestObjects) -> ResponseObjects:
messages = [
{"role": "user", "content": request.prompt}
]
text = self.tokenizer.apply_chat_template(messages,tokenize=False,add_generation_prompt=True,enable_thinking=True)
model_inputs = self.tokenizer([text], return_tensors="pt").to(self.model.device)
generated_ids = self.model.generate(**model_inputs,temperature=request.temperature, max_new_tokens=request.max_new_tokens, repetition_penalty=request.repetition_penalty)
output_ids = generated_ids[0][len(model_inputs.input_ids[0]):].tolist()
try:
index = len(output_ids) - output_ids[::-1].index(151668)
except ValueError:
index = 0
thinking_content = self.tokenizer.decode(output_ids[:index], skip_special_tokens=True).strip("\n")
content = self.tokenizer.decode(output_ids[index:], skip_special_tokens=True).strip("\n")
generateObject = ResponseObjects(generated_result=content,thinking_hidden=thinking_content)
return generateObject
def finalize(self):
self.model = None
```
## Creating the Custom Runtime
This is a mandatory step where we allow the users to upload their custom runtime through [inferless-runtime-config.yaml](https://github.com/inferless/deepseek-r1-qwen3-8b/blob/main/inferless-runtime-config.yaml).
```python
build:
cuda_version: "12.1.1"
python_packages:
- accelerate==1.7.0
- transformers==4.52.4
- inferless==0.2.13
- pydantic==2.10.2
```
## Test your model with Remote Run
You can use the `inferless remote-run`([installation guide here](https://docs.inferless.com/model-import/cli-import#cli-import)) command to test your model or any custom Python script in a remote GPU environment directly from your local machine. Make sure that you use `Python3.10` for seamless experience.
### Step 1: Add the Decorators and local entry point
To enable **Remote Run**, simply do the following:
1. Import the `inferless` library and initialize `Cls(gpu="A100")`. The available GPU options are `T4`, `A10` and `A100`.
2. Decorated the `initialize` and `infer` functions with `@app.load` and `@app.infer` respectively.
3. Create the Local Entry Point by decorating a function (for example, `my_local_entry`) with `@inferless.local_entry_point`.
Within this function, instantiate your model class, convert any incoming parameters into a `RequestObjects` object, and invoke the model's `infer` method.
```python
import os
from transformers import AutoTokenizer, AutoModelForCausalLM
import torch
import inferless
from pydantic import BaseModel, Field
from typing import Optional
app = inferless.Cls(gpu="A100")
@inferless.request
class RequestObjects(BaseModel):
prompt: str = Field(default="Give me a short introduction to large language model.")
temperature: Optional[float] = 0.7
repetition_penalty: Optional[float] = 1.18
max_new_tokens: Optional[int] = 2048
@inferless.response
class ResponseObjects(BaseModel):
generated_result: str = Field(default="Test output")
thinking_hidden: str = Field(default="Test output")
class InferlessPythonModel:
@app.load
def initialize(self, context=None):
model_id = "deepseek-ai/DeepSeek-R1-0528-Qwen3-8B"
self.tokenizer = AutoTokenizer.from_pretrained(model_id,trust_remote_code=True)
self.model = AutoModelForCausalLM.from_pretrained( model_id, torch_dtype=torch.float16, device_map="auto", trust_remote_code=True)
@app.infer
def infer(self, request: RequestObjects) -> ResponseObjects:
messages = [
{"role": "user", "content": request.prompt}
]
text = self.tokenizer.apply_chat_template(messages,tokenize=False,add_generation_prompt=True,enable_thinking=True)
model_inputs = self.tokenizer([text], return_tensors="pt").to(self.model.device)
generated_ids = self.model.generate(**model_inputs,temperature=request.temperature, max_new_tokens=request.max_new_tokens, repetition_penalty=request.repetition_penalty)
output_ids = generated_ids[0][len(model_inputs.input_ids[0]):].tolist()
try:
index = len(output_ids) - output_ids[::-1].index(151668)
except ValueError:
index = 0
thinking_content = self.tokenizer.decode(output_ids[:index], skip_special_tokens=True).strip("\n")
content = self.tokenizer.decode(output_ids[index:], skip_special_tokens=True).strip("\n")
generateObject = ResponseObjects(generated_result=content,thinking_hidden=thinking_content)
return generateObject
def finalize(self):
self.model = None
@inferless.local_entry_point
def my_local_entry(dynamic_params):
request_objects = RequestObjects(**dynamic_params)
model_instance = InferlessPythonModel()
return model_instance.infer(request_objects)
```
### Step 2: Run with Remote GPU
From your local terminal, navigate to the folder containing your `app.py` and your `inferless-runtime-config.yaml` and run:
```bash
inferless remote-run app.py -c inferless-runtime-config.yaml --prompt "Give me a short introduction to large language model."
```
You can pass the other input parameters in the same way (e.g., `--temperature`, `--max_new_tokens`, etc.) as long as your code expects them in the `inputs` dictionary.
If you want to exclude certain files or directories from being uploaded, use the `--exclude` or `-e` flag.
## Method A: Deploying the model on Inferless Platform
Inferless supports multiple ways of [importing your model](https://docs.inferless.com/model-import/file-structure-req/file-structure-requirements). For this tutorial, we will use GitHub.
### Step 1: Login to the inferless dashboard can click on Import model button
Navigate to your desired workspace in Inferless and Click on `Add a custom model` button that you see on the top right. An import wizard will open up.
### Step 2: Follow the UI to complete the model Import
* Select the GitHub/GitLab Integration option to connect your source code repository with the deployment environment.
* Navigate to the specific GitHub repository that contains your model's code. Here, you will need to identify and enter the name of the model you wish to import.
* Choose the appropriate type of machine that suits your model's requirements. Additionally, specify the minimum and maximum number of replicas to define the scalability range for deploying your model.
* Optionally, you have the option to enable automatic build and deployment. This feature triggers a new deployment automatically whenever there is a new code push to your repository.
* If your model requires additional software packages, configure the Custom Runtime settings by including necessary pip or apt packages. Also, set up environment variables such as Inference Timeout, Container Concurrency, and Scale Down Timeout to tailor the runtime environment according to your needs.
* Wait for the validation process to complete, ensuring that all settings are correct and functional. Once validation is successful, click on the "Import" button to finalize the import of your model.
### Step 3: Wait for the model build to complete usually takes \~5-10 minutes
### Step 4: Use the APIs to call the model
Once the model is in 'Active' status you can click on the 'API' page to call the model
### Here is the Demo:
## Method B: Deploying the model on Inferless CLI
Inferless allows you to deploy your model using Inferless-CLI. Follow the steps to deploy using Inferless CLI.
### Clone the repository of the model
Let's begin by cloning the model repository:
```bash
git clone https://github.com/inferless/deepseek-r1-qwen3-8b.git
```
### Deploy the Model
To deploy the model using Inferless CLI, execute the following command:
```bash
inferless deploy --gpu A100 --runtime inferless-runtime-config.yaml
```
**Explanation of the Command:**
* `--gpu A100`: Specifies the GPU type for deployment. Available options include `A10`, `A100`, and `T4`.
* `--runtime inferless-runtime-config.yaml`: Defines the runtime configuration file. If not specified, the default Inferless runtime is used.
{/*  */}
# Deploy FLUX.1-schnell using Inferless
Source: https://docs.inferless.com/how-to-guides/deploy-flux-schnell-using-inferless
Black Forest Labs has released FLUX.1-schnell, part of the FLUX.1 suite of text-to-image models that set a new state-of-the-art in image detail, prompt adherence, style diversity, and scene complexity. FLUX.1-schnell is the fastest model in the suite, tailored for local development and personal use.
## Introduction
[FLUX.1-schnell](https://blackforestlabs.ai/announcing-black-forest-labs/), developed by Black Forest Labs, is the fastest model in the FLUX.1 suite of text-to-image generation models. It offers an impressive balance of speed and quality, outperforming many competitors including some non-distilled models. Designed for local development and personal use, FLUX.1-schnell is openly available under an Apache 2.0 license. It utilizes a hybrid architecture of multimodal and parallel diffusion transformer blocks, scaled to 12B parameters, and supports a wide range of aspect ratios and resolutions.
## Our Observations
We have deployed this model using A100 GPU and observed that the model took an average cold start time of `11.60 sec` and an average inference time of `0.67 sec` for image generation.
## Defining Dependencies
We are using the HuggingFace [Diffusers](https://github.com/huggingface/diffusers) library for the deployment.
## Constructing the GitHub/GitLab Template
Now quickly construct the GitHub/GitLab template, this process is mandatory and make sure you don't add any file named `model.py`
```
FLUX.1-schnell/
├── app.py
├── inferless-runtime-config.yaml
├── inferless.yaml
└── input_schema.py
```
You can also add other files to this directory.
## Create the class for inference
In the [app.py](https://github.com/inferless/FLUX.1-schnell/blob/main/app.py) we will define the class and import all the required functions
1. `def initialize`: In this function, you will initialize your model and define any `variable` that you want to use during inference.
2. `def infer`: This function gets called for every request that you send. Here you can define all the steps that are required for the inference. You can also pass custom values for inference through the `inputs` parameter.
3. `def finalize`: This function cleans up all the allocated memory.
```python
import os
os.environ["HF_HUB_ENABLE_HF_TRANSFER"]='1'
from huggingface_hub import snapshot_download
from diffusers import FluxPipeline
import torch
from io import BytesIO
import base64
import inferless
app = inferless.Cls(gpu="A100")
class InferlessPythonModel:
@app.load
def initialize(self):
model_id = "black-forest-labs/FLUX.1-schnell"
snapshot_download(repo_id=model_id,allow_patterns=["*.safetensors"])
self.pipe = FluxPipeline.from_pretrained(model_id, torch_dtype=torch.bfloat16).to("cuda")
@app.infer
def infer(self, inputs):
prompt = inputs["prompt"]
height = inputs.get("height", 512)
width = inputs.get("width", 512)
guidance_scale = inputs.get("guidance_scale", 7.5)
num_inference_steps = inputs.get("num_inference_steps", 4)
max_sequence_length = inputs.get("max_sequence_length", 256)
image = self.pipe(
prompt,
height=height,
width=width,
guidance_scale=guidance_scale,
num_inference_steps=num_inference_steps,
max_sequence_length=max_sequence_length,
).images[0]
buff = BytesIO()
image.save(buff, format="JPEG")
img_str = base64.b64encode(buff.getvalue()).decode()
return {"generated_image_base64": img_str}
def finalize(self):
self.pipe = None
```
## Create the Input Schema
We have to create a [`input_schema.py`](https://github.com/inferless/FLUX.1-schnell/blob/main/input_schema.py) in the GitHub/Gitlab repository this will help us create the Input parameters. You can checkout our documentation on [Input / Output Schema](https://docs.inferless.com/model-import/input-output-schema).
For this tutorial, we have defined four parameters `prompt`,`height`, `width`, `num_inference_steps`, `guidance_scale` and `max_sequence_length` which are required during the API call. Now lets create the `input_schema.py`.
```JSON
INPUT_SCHEMA = {
"prompt": {
'datatype': 'STRING',
'required': True,
'shape': [1],
'example': ["A cat holding a sign that says hello world"]
},
"height": {
'datatype': 'INT16',
'required': False,
'shape': [1],
'example': [512]
},
"width": {
'datatype': 'INT16',
'required': False,
'shape': [1],
'example': [512]
},
"num_inference_steps": {
'datatype': 'INT16',
'required': False,
'shape': [1],
'example': [4]
},
"guidance_scale": {
'datatype': 'FP32',
'required': False,
'shape': [1],
'example': [7.5]
},
"max_sequence_length": {
'datatype': 'INT16',
'required': False,
'shape': [1],
'example': [256]
}
}
```
## Creating the Custom Runtime
This is a mandatory step where we allow the users to upload their own custom runtime through [inferless-runtime-config.yaml](https://github.com/inferless/FLUX.1-schnell/blob/main/inferless-runtime-config.yaml).
```
build:
cuda_version: "12.1.1"
python_packages:
- "accelerate==0.33.0"
- "torch==2.4.0"
- "transformers==4.44.0"
- "diffusers==0.30.0"
- "sentencepiece==0.2.0"
- "protobuf==5.27.3"
- "inferless-cli==2.0.9"
- "hf-transfer==0.1.9"
- "huggingface-hub==0.27.1"
```
## Test your model with Remote Run
You can use the `inferless remote-run`([installation guide here](https://docs.inferless.com/model-import/cli-import#cli-import)) command to test your model or any custom Python script in a remote GPU environment directly from your local machine. Make sure that you use `Python3.10` for seamless experience.
### Step 1: Add the Decorators and local entry point
To enable **Remote Run**, simply do the following:
1. Import the `inferless` library and initialize `Cls(gpu="A100")`. The available GPU options are `T4`, `A10` and `A100`.
2. Decorated the `initialize` and `infer` functions with `@app.load` and `@app.infer` respectively.
3. Create the Local Entry Point by decorating a function (for example, `my_local_entry`) with `@inferless.local_entry_point`.
Within this function, instantiate your model class, convert any incoming parameters into a `RequestObjects` object, and invoke the model's `infer` method.
```python
import os
os.environ["HF_HUB_ENABLE_HF_TRANSFER"]='1'
from huggingface_hub import snapshot_download
from diffusers import FluxPipeline
import torch
from io import BytesIO
import base64
import inferless
from pydantic import BaseModel, Field
from typing import Optional
app = inferless.Cls(gpu="A100")
@inferless.request
class RequestObjects(BaseModel):
prompt: str = Field(default="A cat holding a sign that says hello world")
height: Optional[int] = 512
width: Optional[int] = 512
num_inference_steps: Optional[int] = 4
guidance_scale: Optional[float] = 7.5
max_sequence_length: Optional[int] = 256
@inferless.response
class ResponseObjects(BaseModel):
generated_image_base64: str = Field(default='Test output')
class InferlessPythonModel:
@app.load
def initialize(self):
model_id = "black-forest-labs/FLUX.1-schnell"
snapshot_download(repo_id=model_id,allow_patterns=["*.safetensors"])
self.pipe = FluxPipeline.from_pretrained(model_id, torch_dtype=torch.bfloat16).to("cuda")
@app.infer
def infer(self, request: RequestObjects) -> ResponseObjects:
image = self.pipe(
request.prompt,
height=request.height,
width=request.width,
guidance_scale=request.guidance_scale,
num_inference_steps=request.num_inference_steps,
max_sequence_length=request.max_sequence_length,
).images[0]
buff = BytesIO()
image.save(buff, format="JPEG")
img_str = base64.b64encode(buff.getvalue()).decode()
generateObject = ResponseObjects(generated_image_base64 = img_str)
return generateObject
def finalize(self):
self.pipe = None
@inferless.local_entry_point
def my_local_entry(dynamic_params):
request_objects = RequestObjects(**dynamic_params)
model_instance = InferlessPythonModel()
return model_instance.infer(request_objects)
```
### Step 2: Run with Remote GPU
From your local terminal, navigate to the folder containing your `app.py` and your `inferless-runtime-config.yaml` and run:
```bash
inferless remote-run app.py -c inferless-runtime-config.yaml --prompt "A cat holding a sign that says hello world" --guidance_scale "5.0"
```
You can pass the other input parameters in the same way (e.g., `--height`, `--width`, etc.) as long as your code expects them in the `inputs` dictionary.
## Method A: Deploying the model on Inferless Platform
Inferless supports multiple ways of [importing your model](https://docs.inferless.com/model-import/file-structure-req/file-structure-requirements). For this tutorial, we will use GitHub.
### Step 1: Login to the inferless dashboard can click on Import model button
Navigate to your desired workspace in Inferless and Click on `Add a custom model` button that you see on the top right. An import wizard will open up.
### Step 2: Follow the UI to complete the model Import
* Select the GitHub/GitLab Integration option to connect your source code repository with the deployment environment.
* Navigate to the specific GitHub repository that contains your model's code. Here, you will need to identify and enter the name of the model you wish to import.
* Choose the appropriate type of machine that suits your model's requirements. Additionally, specify the minimum and maximum number of replicas to define the scalability range for deploying your model.
* Optionally, you have the option to enable automatic build and deployment. This feature triggers a new deployment automatically whenever there is a new code push to your repository.
* If your model requires additional software packages, configure the Custom Runtime settings by including necessary pip or apt packages. Also, set up environment variables such as Inference Timeout, Container Concurrency, and Scale Down Timeout to tailor the runtime environment according to your needs.
* Wait for the validation process to complete, ensuring that all settings are correct and functional. Once validation is successful, click on the "Import" button to finalize the import of your model.
### Step 3: Wait for the model build to complete usually takes \~5-10 minutes
### Step 4: Use the APIs to call the model
Once the model is in 'Active' status you can click on the 'API' page to call the model
### Here is the Demo:
## Method B: Deploying the model on Inferless CLI
Inferless allows you to deploy your model using Inferless-CLI. Follow the steps to deploy using Inferless CLI.
### Clone the repository of the model
Let's begin by cloning the model repository:
```bash
git clone https://github.com/inferless/FLUX.1-schnell.git
```
### Deploy the Model
To deploy the model using Inferless CLI, execute the following command:
```bash
inferless deploy --gpu A100 --runtime inferless-runtime-config.yaml
```
**Explanation of the Command:**
* `--gpu A100`: Specifies the GPU type for deployment. Available options include `A10`, `A100`, and `T4`.
* `--runtime inferless-runtime-config.yaml`: Defines the runtime configuration file. If not specified, the default Inferless runtime is used.
# Deploy the Gemma-3-27B-it using Inferless
Source: https://docs.inferless.com/how-to-guides/deploy-gemma-27b-it
Gemma-3-27B-it is a 27-billion-parameter multimodal language model developed by the Gemma team. This model excels in instruction-based tasks, offering superior visual and multilingual capabilities.
## Introduction
Gemma-3-27B-it is a state‑of‑the‑art, 27B vision‑language model from the Gemma team. Built for instruction‑tuned applications, it seamlessly integrates robust language understanding with cutting‑edge visual analysis. Whether it’s detecting intricate visual patterns, parsing complex documents, or analyzing extended video content by highlighting key moments, this model is engineered to act as a versatile visual agent. With capabilities that include generating structured outputs (such as bounding boxes and JSON) and supporting multilingual text within images, it paves the way for innovative interactive chatbots, advanced multimedia content analysis, and beyond.
## Defining Dependencies
We are using the [transformers](https://github.com/huggingface/transformers) to serve the model on a single A100.
## Our Observations
We have deployed the model on an A100 GPU(80GB). Here are our observations:
| Library | Inference Time | Cold Start Time | Tokens/Sec | Output Tokens Length |
| ------------ | -------------- | --------------- | ---------- | -------------------- |
| transformers | 11.73 sec | 21.64 sec | 10.59 | 128 |
Note: The inference time and cold start time are average values.
## Defining Dependencies
We are using the [transformers](https://github.com/huggingface/transformers) to serve the model on a single A100 (80GB).
## Constructing the GitHub/GitLab Template
Now quickly construct the GitHub/GitLab template, this process is mandatory and make sure you don't add any file named `model.py`.
```
gemma-3-27b-it/
├── app.py
├── inferless-runtime-config.yaml
└── inferless.yaml
```
You can also add other files to this directory.
## Create the Input Schema with Pydantic
Using the `inferless` Python client and Pydantic, you can define structured schemas directly in your code for input and output, eliminating the need for external file.
### Input Schema
When defining an input schema with Pydantic, you need to annotate your class attributes with the appropriate types, such as `str`, `float`, `int`, etc.
These type annotations specifys what type of data each field should contain.
The `default` value serves as the example input for testing with the `infer` function.
```python
@inferless.request
class RequestObjects(BaseModel):
prompt: str = Field(default="What is Deep Learning?")
image_url: Optional[str] = None
system_prompt: Optional[str] = "You are a helpful assistant."
temperature: Optional[float] = 0.7
top_p: Optional[float] = 0.1
repetition_penalty: Optional[float] = 1.18
top_k: Optional[int] = 40
max_tokens: Optional[int] = 100
do_sample: Optional[bool] = False
```
### Output Schema
The `@inferless.response` decorator helps you define structured output schemas.
```python
@inferless.response
class ResponseObjects(BaseModel):
generated_text: str = Field(default="Test output")
```
### Usage in the `infer` Function
Once you have annotated the objects you can expect the infer function to receive `RequestObjects` as input,
and returns a `ResponseObjects` instance as output, ensuring the results adhere to a defined structure.
```python
class InferlessPythonModel:
def infer(self, request: RequestObjects) -> ResponseObjects:
return ResponseObjects(generated_result = generated_text)
```
## Create the class for inference
In the [app.py](https://github.com/inferless/gemma-3-27b-it/blob/main/app.py) we will define the class and import all the required functions
1. `def initialize`: In this function, you will initialize your model and define any `variable` that you want to use during inference.
2. `def infer`: This function gets called for every request that you send. Here you can define all the steps that are required for the inference.
3. `def finalize`: This function cleans up all the allocated memory.
```python
import os
os.environ["HF_HUB_ENABLE_HF_TRANSFER"] = "1"
from huggingface_hub import snapshot_download
from pydantic import BaseModel, Field
from typing import Optional
import inferless
import torch
from transformers import AutoProcessor, Gemma3ForConditionalGeneration
@inferless.request
class RequestObjects(BaseModel):
prompt: str = Field(default="What is Deep Learning?")
image_url: Optional[str] = None
system_prompt: Optional[str] = "You are a helpful assistant."
temperature: Optional[float] = 0.7
top_p: Optional[float] = 0.1
repetition_penalty: Optional[float] = 1.18
top_k: Optional[int] = 40
max_tokens: Optional[int] = 100
do_sample: Optional[bool] = False
@inferless.response
class ResponseObjects(BaseModel):
generated_text: str = Field(default="Test output")
class InferlessPythonModel:
def initialize(self):
model_id = "google/gemma-3-27b-it"
snapshot_download(repo_id=model_id, allow_patterns=["*.safetensors"])
self.model = Gemma3ForConditionalGeneration.from_pretrained(
model_id, device_map="cuda"
).eval()
self.processor = AutoProcessor.from_pretrained(model_id)
def infer(self, request: RequestObjects) -> ResponseObjects:
messages = [
{
"role": "system",
"content": [{"type": "text", "text": request.system_prompt}]
}
]
# Build the user message based on provided inputs.
user_content = []
if request.image_url is not None:
user_content.append({"type": "image", "image": request.image_url})
user_content.append({"type": "text", "text": request.prompt})
messages.append({
"role": "user",
"content": user_content
})
inputs = self.processor.apply_chat_template(
messages,
add_generation_prompt=True,
tokenize=True,
return_dict=True,
return_tensors="pt"
).to(self.model.device, dtype=torch.bfloat16)
input_len = inputs["input_ids"].shape[-1]
with torch.inference_mode():
generation = self.model.generate(
**inputs,
max_new_tokens=request.max_tokens,
temperature=request.temperature,
top_p=request.top_p,
top_k=request.top_k,
do_sample=request.do_sample,
repetition_penalty=request.repetition_penalty,
)
generation = generation[0][input_len:]
decoded = self.processor.decode(generation, skip_special_tokens=True)
return ResponseObjects(generated_text=decoded)
def finalize(self):
self.model = None
```
## Creating the Custom Runtime
This is a mandatory step where we allow the users to upload their custom runtime through [inferless-runtime-config.yaml](https://github.com/inferless/gemma-3-27b-it/blob/main/inferless-runtime-config.yaml).
```python
build:
cuda_version: "12.1.1"
python_packages:
- "git+https://github.com/huggingface/transformers@v4.49.0-Gemma-3"
- "hf-transfer==0.1.9"
- "inferless==0.2.13"
- "pydantic==2.10.2"
- "accelerate==1.5.2"
- "pillow==11.1.0"
```
## Test your model with Remote Run
You can use the `inferless remote-run`([installation guide here](https://docs.inferless.com/model-import/cli-import#cli-import)) command to test your model or any custom Python script in a remote GPU environment directly from your local machine. Make sure that you use `Python3.10` for seamless experience.
### Step 1: Add the Decorators and local entry point
To enable **Remote Run**, simply do the following:
1. Import the `inferless` library and initialize `Cls(gpu="A100")`. The available GPU options are `T4`, `A10` and `A100`.
2. Decorated the `initialize` and `infer` functions with `@app.load` and `@app.infer` respectively.
3. Create the Local Entry Point by decorating a function (for example, `my_local_entry`) with `@inferless.local_entry_point`.
Within this function, instantiate your model class, convert any incoming parameters into a `RequestObjects` object, and invoke the model's `infer` method.
```python
import os
os.environ["HF_HUB_ENABLE_HF_TRANSFER"] = "1"
from huggingface_hub import snapshot_download
from pydantic import BaseModel, Field
from typing import Optional
import inferless
import torch
from transformers import AutoProcessor, Gemma3ForConditionalGeneration
app = inferless.Cls(gpu="A100")
@inferless.request
class RequestObjects(BaseModel):
prompt: str = Field(default="What is Deep Learning?")
image_url: Optional[str] = None
system_prompt: Optional[str] = "You are a helpful assistant."
temperature: Optional[float] = 0.7
top_p: Optional[float] = 0.1
repetition_penalty: Optional[float] = 1.18
top_k: Optional[int] = 40
max_tokens: Optional[int] = 100
do_sample: Optional[bool] = False
@inferless.response
class ResponseObjects(BaseModel):
generated_text: str = Field(default="Test output")
class InferlessPythonModel:
@app.load
def initialize(self):
model_id = "google/gemma-3-27b-it"
snapshot_download(repo_id=model_id, allow_patterns=["*.safetensors"])
self.model = Gemma3ForConditionalGeneration.from_pretrained(
model_id, device_map="cuda"
).eval()
self.processor = AutoProcessor.from_pretrained(model_id)
@app.infer
def infer(self, request: RequestObjects) -> ResponseObjects:
messages = [
{
"role": "system",
"content": [{"type": "text", "text": request.system_prompt}]
}
]
# Build the user message based on provided inputs.
user_content = []
if request.image_url is not None:
user_content.append({"type": "image", "image": request.image_url})
user_content.append({"type": "text", "text": request.prompt})
messages.append({
"role": "user",
"content": user_content
})
inputs = self.processor.apply_chat_template(
messages,
add_generation_prompt=True,
tokenize=True,
return_dict=True,
return_tensors="pt"
).to(self.model.device, dtype=torch.bfloat16)
input_len = inputs["input_ids"].shape[-1]
with torch.inference_mode():
generation = self.model.generate(
**inputs,
max_new_tokens=request.max_tokens,
temperature=request.temperature,
top_p=request.top_p,
top_k=request.top_k,
do_sample=request.do_sample,
repetition_penalty=request.repetition_penalty,
)
generation = generation[0][input_len:]
decoded = self.processor.decode(generation, skip_special_tokens=True)
return ResponseObjects(generated_text=decoded)
def finalize(self):
self.model = None
@inferless.local_entry_point
def my_local_entry(dynamic_params):
request_objects = RequestObjects(**dynamic_params)
model_instance = InferlessPythonModel()
return model_instance.infer(request_objects)
```
### Step 2: Run with Remote GPU
From your local terminal, navigate to the folder containing your `app.py` and your `inferless-runtime-config.yaml` and run:
```bash
inferless remote-run app.py -c inferless-runtime-config.yaml --prompt "What does this diagram illustrate?" --image_url "https://qianwen-res.oss-cn-beijing.aliyuncs.com/Qwen-VL/assets/demo.jpeg"
```
You can pass the other input parameters in the same way (e.g., `--temperature`, `--system_prompt`, etc.) as long as your code expects them in the `inputs` dictionary.
If you want to exclude certain files or directories from being uploaded, use the `--exclude` or `-e` flag.
## Method A: Deploying the model on Inferless Platform
Inferless supports multiple ways of [importing your model](https://docs.inferless.com/model-import/file-structure-req/file-structure-requirements). For this tutorial, we will use GitHub.
### Step 1: Login to the inferless dashboard can click on Import model button
Navigate to your desired workspace in Inferless and Click on `Add a custom model` button that you see on the top right. An import wizard will open up.
### Step 2: Follow the UI to complete the model Import
* Select the GitHub/GitLab Integration option to connect your source code repository with the deployment environment.
* Navigate to the specific GitHub repository that contains your model's code. Here, you will need to identify and enter the name of the model you wish to import.
* Choose the appropriate type of machine that suits your model's requirements. Additionally, specify the minimum and maximum number of replicas to define the scalability range for deploying your model.
* Optionally, you have the option to enable automatic build and deployment. This feature triggers a new deployment automatically whenever there is a new code push to your repository.
* If your model requires additional software packages, configure the Custom Runtime settings by including necessary pip or apt packages. Also, set up environment variables such as Inference Timeout, Container Concurrency, and Scale Down Timeout to tailor the runtime environment according to your needs.
* Wait for the validation process to complete, ensuring that all settings are correct and functional. Once validation is successful, click on the "Import" button to finalize the import of your model.
### Step 3: Wait for the model build to complete usually takes \~5-10 minutes
### Step 4: Use the APIs to call the model
Once the model is in 'Active' status you can click on the 'API' page to call the model
### Here is the Demo:
 ## Method B: Deploying the model on Inferless CLI
Inferless allows you to deploy your model using Inferless-CLI. Follow the steps to deploy using Inferless CLI.
### Clone the repository of the model
Let's begin by cloning the model repository:
```bash
git clone https://github.com/inferless/gemma-3-27b-it.git
```
### Deploy the Model
To deploy the model using Inferless CLI, execute the following command:
```bash
inferless deploy --gpu A100 --runtime inferless-runtime-config.yaml
```
**Explanation of the Command:**
* `--gpu A100`: Specifies the GPU type for deployment. Available options include `A10`, `A100`, and `T4`.
* `--runtime inferless-runtime-config.yaml`: Defines the runtime configuration file. If not specified, the default Inferless runtime is used.
## Method B: Deploying the model on Inferless CLI
Inferless allows you to deploy your model using Inferless-CLI. Follow the steps to deploy using Inferless CLI.
### Clone the repository of the model
Let's begin by cloning the model repository:
```bash
git clone https://github.com/inferless/gemma-3-27b-it.git
```
### Deploy the Model
To deploy the model using Inferless CLI, execute the following command:
```bash
inferless deploy --gpu A100 --runtime inferless-runtime-config.yaml
```
**Explanation of the Command:**
* `--gpu A100`: Specifies the GPU type for deployment. Available options include `A10`, `A100`, and `T4`.
* `--runtime inferless-runtime-config.yaml`: Defines the runtime configuration file. If not specified, the default Inferless runtime is used.
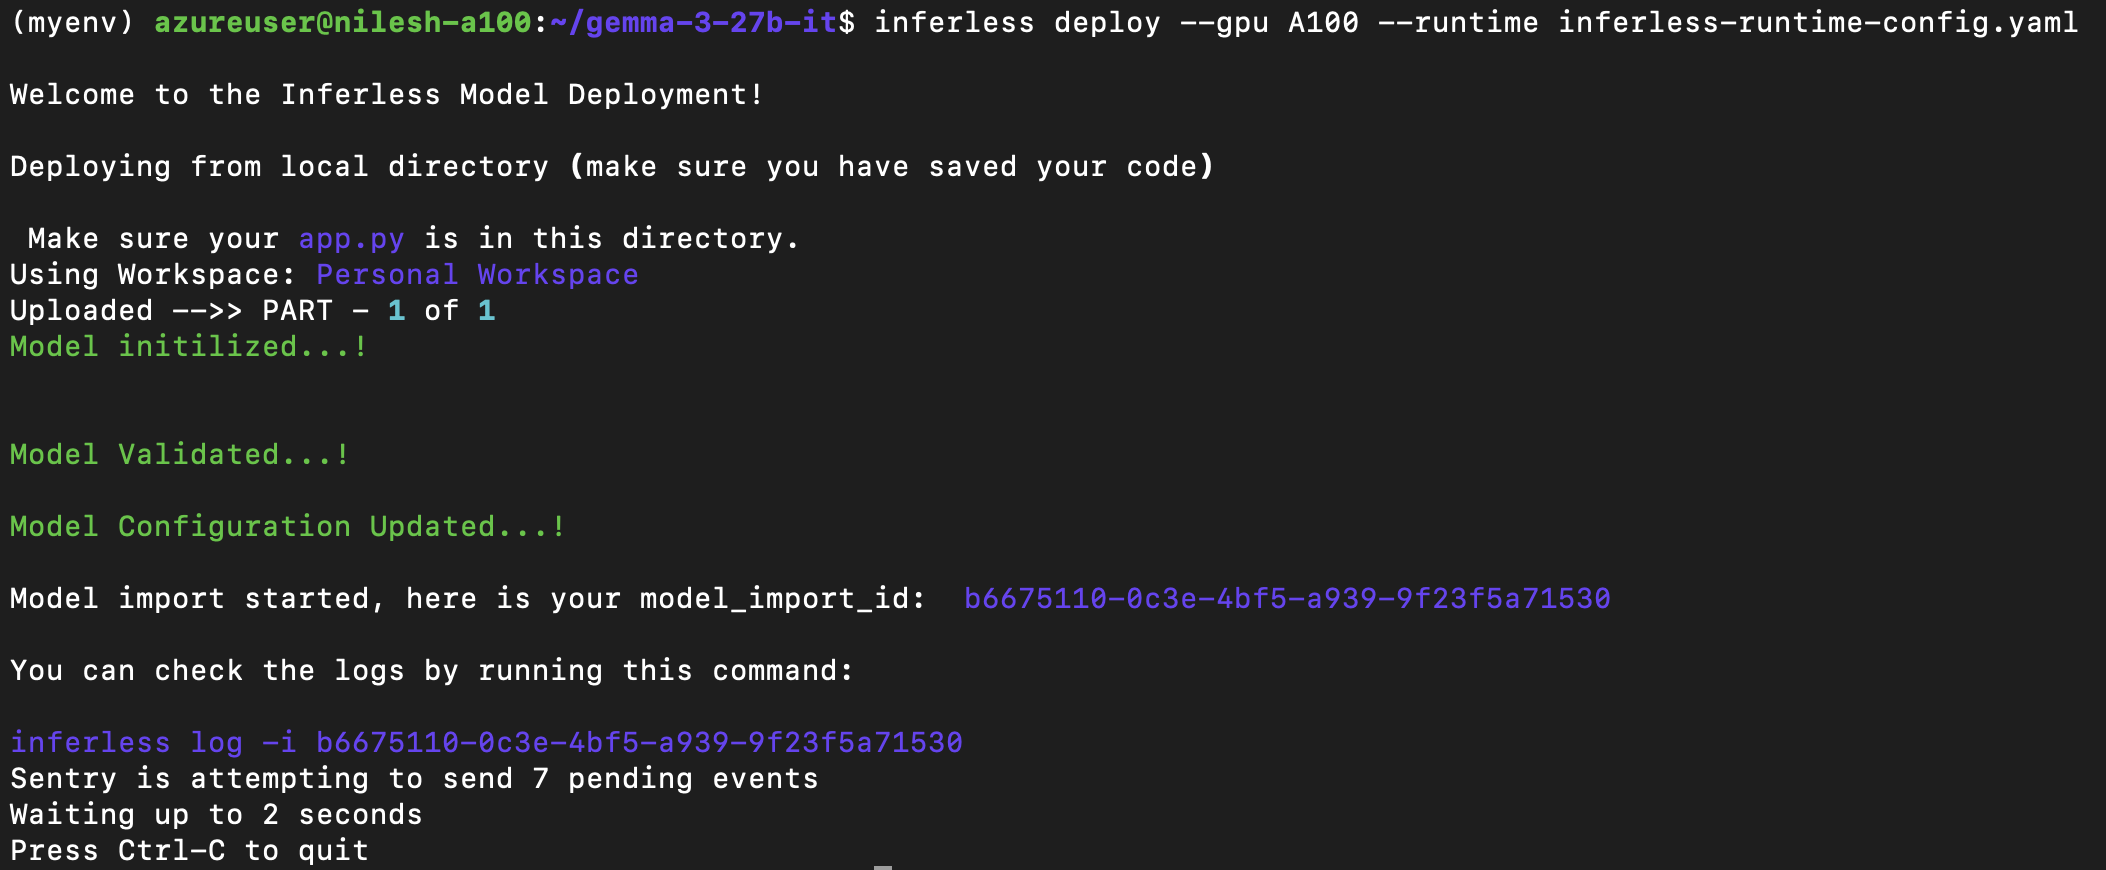 # Deploy Gemma-7B using vLLM on Inferless
Source: https://docs.inferless.com/how-to-guides/deploy-gemma-7b-using-vllm-on-inferless
Gemma is a family of lightweight, state-of-the-art open models from Google, built from the same research and technology used to create the Gemini models.
## Introduction
Google's [Gemma](https://blog.google/technology/developers/gemma-open-models/) release introduces a family of [four new LLMs](https://huggingface.co/collections/google/gemma-release-65d5efbccdbb8c4202ec078b), offered in two sizes (2B and 7B), with options for both base and instruction-tuned variants. Gemma 2B and 7B are trained on 6T tokens for 7B Gemma and 2T tokens for 2B Gemma respectively.
Gemma models exhibit robust performance across academic benchmarks for language understanding, reasoning, and safety. Additionally, they surpass similarly sized open models on 11 out of 18 text-based tasks.
## Our Observations
We have deployed the [gemma-7b](https://huggingface.co/google/gemma-7b) base version of the model using vLLM on an A100 GPU(80GB). Here are our observations:
| Inference Time | Cold Start Time | Token/Sec | Latency/Token | VRAM Required |
| -------------- | --------------- | --------- | ------------- | ------------- |
| 3.99 sec | 16.62 sec | 62.51 | 16.01 ms | 67.83 GB |
## Defining Dependencies
We are using the [vLLM library](https://github.com/vllm-project/vllm), which boost the inference speed of you LLM. for deploying the [gemma-7b](https://huggingface.co/google/gemma-7b) base version of the model.
## Constructing the GitHub/GitLab Template
Now quickly construct the GitHub/GitLab template, this process is mandatory and make sure you don't add any file named `model.py`.
```
Gemma-7B/
├── app.py
├── inferless.yaml
├── input_schema.py
└── inferless-runtime-config.yaml
```
You can also add other files to this directory.
## Create the class for inference
In the [app.py](https://github.com/inferless/Gemma-7B/blob/main/app.py) we will define the class and import all the required functions
1. `def initialize`: In this function, you will initialize your model and the required `variables`. You can adjust the `gpu_memory_utilization` parameter to reduce GPU usage.
2. `def infer`: This function gets called for every request that you send. Here you can define all the steps that are required for the inference. You can also pass custom values for inference and pass it through `inputs(dict)` parameter.
3. `def finalize`: This function cleans up all the allocated memory.
```python
import os
os.environ["HF_HUB_ENABLE_HF_TRANSFER"]='1'
from vllm import LLM, SamplingParams
from huggingface_hub import snapshot_download
import inferless
app = inferless.Cls(gpu="A100")
class InferlessPythonModel:
@app.load
def initialize(self):
repo_id = "google/gemma-7b"
# Use Inferless volumes to store your model
# Replace the volume_name with your volume
model_store = f"/var/nfs-mount/common_llm/{repo_id}"
os.makedirs(f"/var/nfs-mount/common_llm/{repo_id}", exist_ok=True)
snapshot_download(
repo_id,
local_dir=model_store,
# Hugging face token is required for gated model
token="
### Step 3: Wait for the model build to complete usually takes \~5-10 minutes
### Step 4: Use the APIs to call the model
Once the model is in 'Active' status you can click on the 'API' page to call the model
### Here is the Demo:
# Deploy Gemma-7B using vLLM on Inferless
Source: https://docs.inferless.com/how-to-guides/deploy-gemma-7b-using-vllm-on-inferless
Gemma is a family of lightweight, state-of-the-art open models from Google, built from the same research and technology used to create the Gemini models.
## Introduction
Google's [Gemma](https://blog.google/technology/developers/gemma-open-models/) release introduces a family of [four new LLMs](https://huggingface.co/collections/google/gemma-release-65d5efbccdbb8c4202ec078b), offered in two sizes (2B and 7B), with options for both base and instruction-tuned variants. Gemma 2B and 7B are trained on 6T tokens for 7B Gemma and 2T tokens for 2B Gemma respectively.
Gemma models exhibit robust performance across academic benchmarks for language understanding, reasoning, and safety. Additionally, they surpass similarly sized open models on 11 out of 18 text-based tasks.
## Our Observations
We have deployed the [gemma-7b](https://huggingface.co/google/gemma-7b) base version of the model using vLLM on an A100 GPU(80GB). Here are our observations:
| Inference Time | Cold Start Time | Token/Sec | Latency/Token | VRAM Required |
| -------------- | --------------- | --------- | ------------- | ------------- |
| 3.99 sec | 16.62 sec | 62.51 | 16.01 ms | 67.83 GB |
## Defining Dependencies
We are using the [vLLM library](https://github.com/vllm-project/vllm), which boost the inference speed of you LLM. for deploying the [gemma-7b](https://huggingface.co/google/gemma-7b) base version of the model.
## Constructing the GitHub/GitLab Template
Now quickly construct the GitHub/GitLab template, this process is mandatory and make sure you don't add any file named `model.py`.
```
Gemma-7B/
├── app.py
├── inferless.yaml
├── input_schema.py
└── inferless-runtime-config.yaml
```
You can also add other files to this directory.
## Create the class for inference
In the [app.py](https://github.com/inferless/Gemma-7B/blob/main/app.py) we will define the class and import all the required functions
1. `def initialize`: In this function, you will initialize your model and the required `variables`. You can adjust the `gpu_memory_utilization` parameter to reduce GPU usage.
2. `def infer`: This function gets called for every request that you send. Here you can define all the steps that are required for the inference. You can also pass custom values for inference and pass it through `inputs(dict)` parameter.
3. `def finalize`: This function cleans up all the allocated memory.
```python
import os
os.environ["HF_HUB_ENABLE_HF_TRANSFER"]='1'
from vllm import LLM, SamplingParams
from huggingface_hub import snapshot_download
import inferless
app = inferless.Cls(gpu="A100")
class InferlessPythonModel:
@app.load
def initialize(self):
repo_id = "google/gemma-7b"
# Use Inferless volumes to store your model
# Replace the volume_name with your volume
model_store = f"/var/nfs-mount/common_llm/{repo_id}"
os.makedirs(f"/var/nfs-mount/common_llm/{repo_id}", exist_ok=True)
snapshot_download(
repo_id,
local_dir=model_store,
# Hugging face token is required for gated model
token="
### Step 3: Wait for the model build to complete usually takes \~5-10 minutes
### Step 4: Use the APIs to call the model
Once the model is in 'Active' status you can click on the 'API' page to call the model
### Here is the Demo:
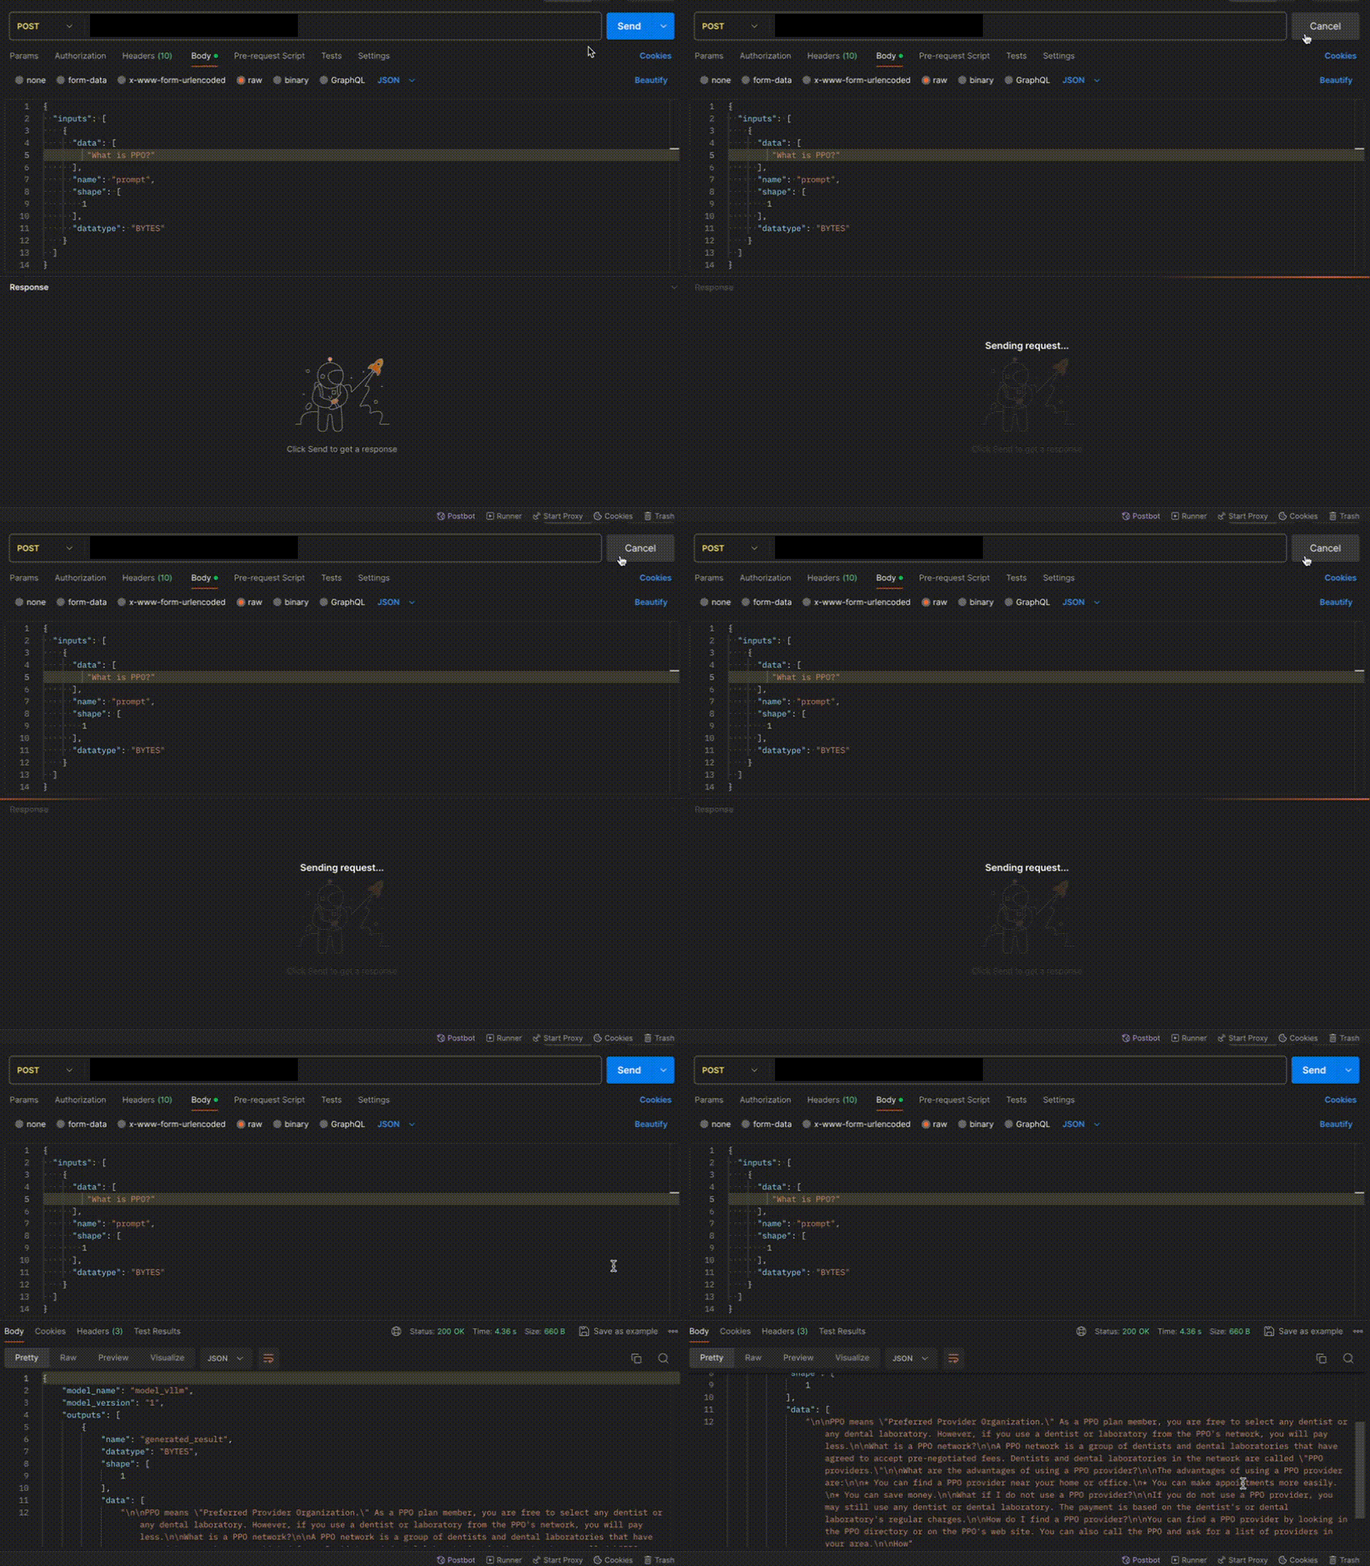 ## Method B: Deploying the model on Inferless CLI
Inferless allows you to deploy your model using Inferless-CLI. Follow the steps to deploy using Inferless CLI.
### Clone the repository of the model
Let's begin by cloning the model repository:
```bash
git clone https://github.com/inferless/Gemma-7B.git
```
### Deploy the Model
To deploy the model using Inferless CLI, execute the following command:
```bash
inferless deploy --gpu A100 --runtime inferless-runtime-config.yaml
```
**Explanation of the Command:**
* `--gpu A100`: Specifies the GPU type for deployment. Available options include `A10`, `A100`, and `T4`.
* `--runtime inferless-runtime-config.yaml`: Defines the runtime configuration file. If not specified, the default Inferless runtime is used.
# Deploy Google PaliGemma-3B using Inferless
Source: https://docs.inferless.com/how-to-guides/deploy-google-paligemma-3b-using-inferless
PaliGemma is a cutting-edge open vision-language model (VLM) developed by Google. It is designed to understand and generate detailed insights from both images and text, making it a powerful tool for tasks such as image captioning, visual question answering, object detection, and object segmentation.
## Introduction
Google introduces [PaliGemma](https://ai.google.dev), a state-of-the-art open vision-language model (VLM) designed to push the boundaries of multimodal AI. The [PaliGemma](https://huggingface.co/models?search=paligemma) models leverage the combined power of the SigLIP vision model and the Gemma language model.
The models come pretrained and fine-tuned on diverse datasets, ensuring robust performance out of the box while also allowing for further customization and optimization.
In this tutorial, we will explore how to deploy and utilize [PaliGemma-3B](https://huggingface.co/google/paligemma-3b-pt-896) using Inferless.
## Our Observations
We have deployed the model using the [Transformers library](https://github.com/huggingface/transformers) on an A100 GPU(80GB). Here are our observations:
| Library | Inference Time | Cold Start Time |
| ------------ | -------------- | --------------- |
| Transformers | 0.86 sec | 9.26 sec |
## Defining Dependencies
We are using the [Transformers library](https://github.com/huggingface/transformers), which will help in the inference of this VLM.
## Constructing the GitHub/GitLab Template
Now quickly construct the GitHub/GitLab template, this process is mandatory and make sure you don't add any file named `model.py`.
```
google-Paligemma-3b/
├── app.py
├── inferless-runtime.yaml
├── inferless.yaml
└── input_schema.py
```
You can also add other files to this directory.
## Create the class for inference
In the [app.py](https://github.com/inferless/google-Paligemma-3b/blob/main/app.py) we will define the class and import all the required functions
1. `def initialize`: In this function, you will initialize your model and define any `variable` that you want to use during inference.
2. `def infer`: This function gets called for every request that you send. Here you can define all the steps that are required for the inference. You can also pass custom values for inference and pass it through `inputs(dict)` parameter.
3. `def finalize`: This function cleans up all the allocated memory.
```python
import os
os.environ["HF_HUB_ENABLE_HF_TRANSFER"]='1'
from huggingface_hub import snapshot_download
from transformers import AutoProcessor, PaliGemmaForConditionalGeneration
from PIL import Image
import requests
import torch
import inferless
app = inferless.Cls(gpu="A100")
class InferlessPythonModel:
@app.load
def initialize(self):
model_id = "google/paligemma-3b-mix-224"
snapshot_download(repo_id=model_id,allow_patterns=["*.safetensors"])
device = "cuda:0"
dtype = torch.bfloat16
self.model = PaliGemmaForConditionalGeneration.from_pretrained(model_id,
torch_dtype=dtype,
device_map=device,revision="bfloat16",
token="
### Step 3: Wait for the model build to complete usually takes \~5-10 minutes
### Step 4: Use the APIs to call the model
Once the model is in 'Active' status you can click on the 'API' page to call the model
### Here is the Demo:
## Method B: Deploying the model on Inferless CLI
Inferless allows you to deploy your model using Inferless-CLI. Follow the steps to deploy using Inferless CLI.
### Clone the repository of the model
Let's begin by cloning the model repository:
```bash
git clone https://github.com/inferless/Gemma-7B.git
```
### Deploy the Model
To deploy the model using Inferless CLI, execute the following command:
```bash
inferless deploy --gpu A100 --runtime inferless-runtime-config.yaml
```
**Explanation of the Command:**
* `--gpu A100`: Specifies the GPU type for deployment. Available options include `A10`, `A100`, and `T4`.
* `--runtime inferless-runtime-config.yaml`: Defines the runtime configuration file. If not specified, the default Inferless runtime is used.
# Deploy Google PaliGemma-3B using Inferless
Source: https://docs.inferless.com/how-to-guides/deploy-google-paligemma-3b-using-inferless
PaliGemma is a cutting-edge open vision-language model (VLM) developed by Google. It is designed to understand and generate detailed insights from both images and text, making it a powerful tool for tasks such as image captioning, visual question answering, object detection, and object segmentation.
## Introduction
Google introduces [PaliGemma](https://ai.google.dev), a state-of-the-art open vision-language model (VLM) designed to push the boundaries of multimodal AI. The [PaliGemma](https://huggingface.co/models?search=paligemma) models leverage the combined power of the SigLIP vision model and the Gemma language model.
The models come pretrained and fine-tuned on diverse datasets, ensuring robust performance out of the box while also allowing for further customization and optimization.
In this tutorial, we will explore how to deploy and utilize [PaliGemma-3B](https://huggingface.co/google/paligemma-3b-pt-896) using Inferless.
## Our Observations
We have deployed the model using the [Transformers library](https://github.com/huggingface/transformers) on an A100 GPU(80GB). Here are our observations:
| Library | Inference Time | Cold Start Time |
| ------------ | -------------- | --------------- |
| Transformers | 0.86 sec | 9.26 sec |
## Defining Dependencies
We are using the [Transformers library](https://github.com/huggingface/transformers), which will help in the inference of this VLM.
## Constructing the GitHub/GitLab Template
Now quickly construct the GitHub/GitLab template, this process is mandatory and make sure you don't add any file named `model.py`.
```
google-Paligemma-3b/
├── app.py
├── inferless-runtime.yaml
├── inferless.yaml
└── input_schema.py
```
You can also add other files to this directory.
## Create the class for inference
In the [app.py](https://github.com/inferless/google-Paligemma-3b/blob/main/app.py) we will define the class and import all the required functions
1. `def initialize`: In this function, you will initialize your model and define any `variable` that you want to use during inference.
2. `def infer`: This function gets called for every request that you send. Here you can define all the steps that are required for the inference. You can also pass custom values for inference and pass it through `inputs(dict)` parameter.
3. `def finalize`: This function cleans up all the allocated memory.
```python
import os
os.environ["HF_HUB_ENABLE_HF_TRANSFER"]='1'
from huggingface_hub import snapshot_download
from transformers import AutoProcessor, PaliGemmaForConditionalGeneration
from PIL import Image
import requests
import torch
import inferless
app = inferless.Cls(gpu="A100")
class InferlessPythonModel:
@app.load
def initialize(self):
model_id = "google/paligemma-3b-mix-224"
snapshot_download(repo_id=model_id,allow_patterns=["*.safetensors"])
device = "cuda:0"
dtype = torch.bfloat16
self.model = PaliGemmaForConditionalGeneration.from_pretrained(model_id,
torch_dtype=dtype,
device_map=device,revision="bfloat16",
token="
### Step 3: Wait for the model build to complete usually takes \~5-10 minutes
### Step 4: Use the APIs to call the model
Once the model is in 'Active' status you can click on the 'API' page to call the model
### Here is the Demo:
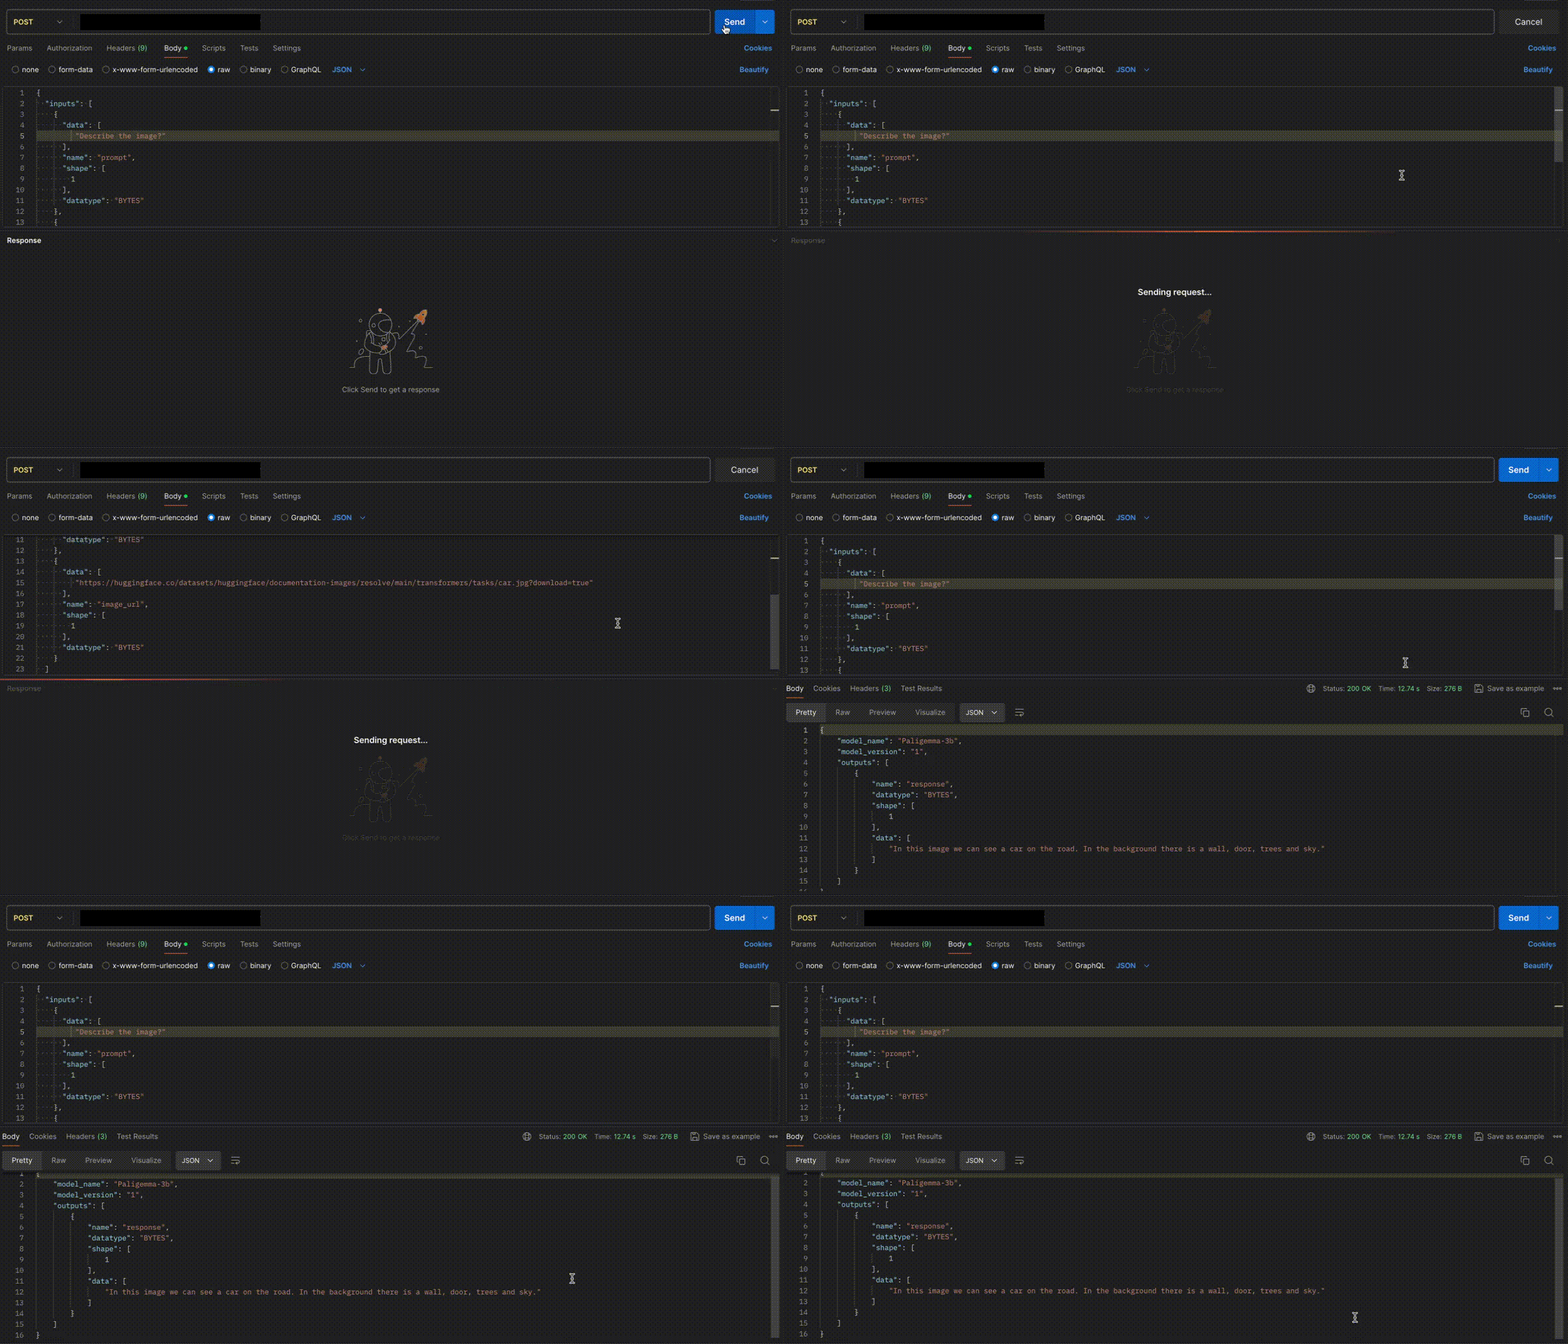 ## Method B: Deploying the model on Inferless CLI
Inferless allows you to deploy your model using Inferless-CLI. Follow the steps to deploy using Inferless CLI.
### Clone the repository of the model
Let's begin by cloning the model repository:
```bash
git clone https://github.com/inferless/google-Paligemma-3b.git
```
### Deploy the Model
To deploy the model using Inferless CLI, execute the following command:
```bash
inferless deploy --gpu A100 --runtime inferless-runtime-config.yaml
```
**Explanation of the Command:**
* `--gpu A100`: Specifies the GPU type for deployment. Available options include `A10`, `A100`, and `T4`.
* `--runtime inferless-runtime-config.yaml`: Defines the runtime configuration file. If not specified, the default Inferless runtime is used.
# Deploy Meta-Llama-3-8B using Inferless
Source: https://docs.inferless.com/how-to-guides/deploy-llama-3-using-inferless
Llama 3 is an auto-regressive language model, leveraging a refined transformer architecture.It incorporate supervised fine-tuning (SFT) and reinforcement learning with human feedback (RLHF) to ensure alignment with human preferences.
## Introduction
Meta releases the [Llama 3](https://llama.meta.com/llama3/), the latest open LLM models in the Llama family. The [Llama 3](https://huggingface.co/collections/meta-llama/meta-llama-3-66214712577ca38149ebb2b6) models were trained on 8x more data on over 15 trillion tokens. It has a context length of 8K tokens and increases the vocabulary size of the tokenizer to tokenizer to 128,256 (from 32K tokens in the previous version).
In this tutorial we will deploy [LLama-3 8B](https://huggingface.co/meta-llama/Meta-Llama-3-8B).
## Our Observations
We have deployed the model using the [vLLM library](https://github.com/vllm-project/vllm) on an A100 GPU(80GB). Here are our observations:
| Library | Inference Time | Cold Start Time | Tokens/Sec |
| ------- | -------------- | --------------- | ---------- |
| vLLM | 1.63 sec | 13.30 sec | 78.65 |
## Defining Dependencies
We are using the [vLLM library](https://github.com/vllm-project/vllm), which boost the inference speed of the LLM.
## Constructing the GitHub/GitLab Template
Now quickly construct the GitHub/GitLab template, this process is mandatory and make sure you don't add any file named `model.py`.
```
Llama-3/
├── app.py
├── inferless-runtime-config.yaml
├── inferless.yaml
└── input_schema.py
```
You can also add other files to this directory.
## Create the class for inference
In the [app.py](https://github.com/inferless/Llama-3/blob/main/app.py) we will define the class and import all the required functions
1. `def initialize`: In this function, you will initialize your model and define any `variable` that you want to use during inference.
2. `def infer`: This function gets called for every request that you send. Here you can define all the steps that are required for the inference. You can also pass custom values for inference and pass it through `inputs(dict)` parameter.
3. `def finalize`: This function cleans up all the allocated memory.
```python
from vllm import LLM, SamplingParams
import inferless
app = inferless.Cls(gpu="A100")
class InferlessPythonModel:
@app.load
def initialize(self):
model_id = "Undi95/Meta-Llama-3-8B-hf" # Specify the model repository ID
# Define sampling parameters for model generation
self.sampling_params = SamplingParams(temperature=0.7, top_p=0.95, max_tokens=128)
# Initialize the LLM object
self.llm = LLM(model=model_id)
@app.infer
def infer(self,inputs):
prompts = inputs["prompt"] # Extract the prompt from the input
result = self.llm.generate(prompts, self.sampling_params)
# Extract the generated text from the result
result_output = [output.outputs[0].text for output in result]
# Return a dictionary containing the result
return {'generated_text': result_output[0]}
def finalize(self):
self.llm = None
```
## Create the Input Schema
We have to create a [`input_schema.py`](https://github.com/inferless/Llama-3/blob/main/input_schema.py) in your GitHub/Gitlab repository this will help us create the Input parameters. You can checkout our documentation on [Input / Output Schema](https://docs.inferless.com/model-import/input-output-schema).
For this tutorial, we have defined a parameter `prompt` which is required during the API call. Now lets create the `input_schema.py`.
```JSON
INPUT_SCHEMA = {
"prompt": {
'datatype': 'STRING',
'required': True,
'shape': [1],
'example': ["What is AI?"]
}
}
```
## Creating the Custom Runtime
This is a mandatory step where we allow the users to upload their custom runtime through [inferless-runtime-config.yaml](https://github.com/inferless/Llama-3/blob/main/inferless-runtime-config.yaml).
```python
build:
cuda_version: "12.1.1"
system_packages:
- "libssl-dev"
python_packages:
- "vllm==0.4.1"
- "inferless-cli==2.0.9"
- "hf-transfer==0.1.9"
- "huggingface-hub==0.27.1"
```
## Test your model with Remote Run
You can use the `inferless remote-run`([installation guide here](https://docs.inferless.com/model-import/cli-import#cli-import)) command to test your model or any custom Python script in a remote GPU environment directly from your local machine. Make sure that you use `Python3.10` for seamless experience.
### Step 1: Add the Decorators and local entry point
To enable **Remote Run**, simply do the following:
1. Import the `inferless` library and initialize `Cls(gpu="A100")`. The available GPU options are `T4`, `A10` and `A100`.
2. Decorated the `initialize` and `infer` functions with `@app.load` and `@app.infer` respectively.
3. Create the Local Entry Point by decorating a function (for example, `my_local_entry`) with `@inferless.local_entry_point`.
Within this function, instantiate your model class, convert any incoming parameters into a `RequestObjects` object, and invoke the model's `infer` method.
```python
from vllm import LLM, SamplingParams
import inferless
from pydantic import BaseModel, Field
from typing import Optional
@inferless.request
class RequestObjects(BaseModel):
prompt: str = Field(default="Explain Deep Learning.")
temperature: Optional[float] = 0.7
top_p: Optional[float] = 0.1
repetition_penalty: Optional[float] = 1.18
top_k: Optional[int] = 40
max_tokens: Optional[int] = 256
@inferless.response
class ResponseObjects(BaseModel):
generated_text: str = Field(default='Test output')
app = inferless.Cls(gpu="A100")
class InferlessPythonModel:
@app.load
def initialize(self):
model_id = "Undi95/Meta-Llama-3-8B-hf" # Specify the model repository ID
# Initialize the LLM object
self.llm = LLM(model=model_id)
@app.infer
def infer(self, request: RequestObjects) -> ResponseObjects:
sampling_params = SamplingParams(temperature=request.temperature,top_p=request.top_p,repetition_penalty=request.repetition_penalty,
top_k=request.top_k,max_tokens=request.max_tokens)
result = self.llm.generate(request.prompt, sampling_params)
# Extract the generated text from the result
result_output = [output.outputs[0].text for output in result]
# Return a dictionary containing the result
generateObject = ResponseObjects(generated_text = result_output[0])
return generateObject
def finalize(self):
self.llm = None
@inferless.local_entry_point
def my_local_entry(dynamic_params):
request_objects = RequestObjects(**dynamic_params)
model_instance = InferlessPythonModel()
return model_instance.infer(request_objects)
```
### Step 2: Run with Remote GPU
From your local terminal, navigate to the folder containing your `app.py` and your `inferless-runtime-config.yaml` and run:
```bash
inferless remote-run app.py -c inferless-runtime-config.yaml --prompt "What is AI?"
```
You can pass the other input parameters in the same way (e.g., `--task`, `--temperature`, etc.) as long as your code expects them in the `inputs` dictionary.
If you want to exclude certain files or directories from being uploaded, use the `--exclude` or `-e` flag.
## Method A: Deploying the model on Inferless Platform
Inferless supports multiple ways of [importing your model](https://docs.inferless.com/model-import/file-structure-req/file-structure-requirements). For this tutorial, we will use GitHub.
### Step 1: Login to the inferless dashboard can click on Import model button
Navigate to your desired workspace in Inferless and Click on `Add a custom model` button that you see on the top right. An import wizard will open up.
### Step 2: Follow the UI to complete the model Import
* Select the GitHub/GitLab Integration option to connect your source code repository with the deployment environment.
* Navigate to the specific GitHub repository that contains your model's code. Here, you will need to identify and enter the name of the model you wish to import.
* Choose the appropriate type of machine that suits your model's requirements. Additionally, specify the minimum and maximum number of replicas to define the scalability range for deploying your model.
* Optionally, you have the option to enable automatic build and deployment. This feature triggers a new deployment automatically whenever there is a new code push to your repository.
* If your model requires additional software packages, configure the Custom Runtime settings by including necessary pip or apt packages. Also, set up environment variables such as Inference Timeout, Container Concurrency, and Scale Down Timeout to tailor the runtime environment according to your needs.
* Wait for the validation process to complete, ensuring that all settings are correct and functional. Once validation is successful, click on the "Import" button to finalize the import of your model.
### Step 3: Wait for the model build to complete usually takes \~5-10 minutes
### Step 4: Use the APIs to call the model
Once the model is in 'Active' status you can click on the 'API' page to call the model
### Here is the Demo:
## Method B: Deploying the model on Inferless CLI
Inferless allows you to deploy your model using Inferless-CLI. Follow the steps to deploy using Inferless CLI.
### Clone the repository of the model
Let's begin by cloning the model repository:
```bash
git clone https://github.com/inferless/google-Paligemma-3b.git
```
### Deploy the Model
To deploy the model using Inferless CLI, execute the following command:
```bash
inferless deploy --gpu A100 --runtime inferless-runtime-config.yaml
```
**Explanation of the Command:**
* `--gpu A100`: Specifies the GPU type for deployment. Available options include `A10`, `A100`, and `T4`.
* `--runtime inferless-runtime-config.yaml`: Defines the runtime configuration file. If not specified, the default Inferless runtime is used.
# Deploy Meta-Llama-3-8B using Inferless
Source: https://docs.inferless.com/how-to-guides/deploy-llama-3-using-inferless
Llama 3 is an auto-regressive language model, leveraging a refined transformer architecture.It incorporate supervised fine-tuning (SFT) and reinforcement learning with human feedback (RLHF) to ensure alignment with human preferences.
## Introduction
Meta releases the [Llama 3](https://llama.meta.com/llama3/), the latest open LLM models in the Llama family. The [Llama 3](https://huggingface.co/collections/meta-llama/meta-llama-3-66214712577ca38149ebb2b6) models were trained on 8x more data on over 15 trillion tokens. It has a context length of 8K tokens and increases the vocabulary size of the tokenizer to tokenizer to 128,256 (from 32K tokens in the previous version).
In this tutorial we will deploy [LLama-3 8B](https://huggingface.co/meta-llama/Meta-Llama-3-8B).
## Our Observations
We have deployed the model using the [vLLM library](https://github.com/vllm-project/vllm) on an A100 GPU(80GB). Here are our observations:
| Library | Inference Time | Cold Start Time | Tokens/Sec |
| ------- | -------------- | --------------- | ---------- |
| vLLM | 1.63 sec | 13.30 sec | 78.65 |
## Defining Dependencies
We are using the [vLLM library](https://github.com/vllm-project/vllm), which boost the inference speed of the LLM.
## Constructing the GitHub/GitLab Template
Now quickly construct the GitHub/GitLab template, this process is mandatory and make sure you don't add any file named `model.py`.
```
Llama-3/
├── app.py
├── inferless-runtime-config.yaml
├── inferless.yaml
└── input_schema.py
```
You can also add other files to this directory.
## Create the class for inference
In the [app.py](https://github.com/inferless/Llama-3/blob/main/app.py) we will define the class and import all the required functions
1. `def initialize`: In this function, you will initialize your model and define any `variable` that you want to use during inference.
2. `def infer`: This function gets called for every request that you send. Here you can define all the steps that are required for the inference. You can also pass custom values for inference and pass it through `inputs(dict)` parameter.
3. `def finalize`: This function cleans up all the allocated memory.
```python
from vllm import LLM, SamplingParams
import inferless
app = inferless.Cls(gpu="A100")
class InferlessPythonModel:
@app.load
def initialize(self):
model_id = "Undi95/Meta-Llama-3-8B-hf" # Specify the model repository ID
# Define sampling parameters for model generation
self.sampling_params = SamplingParams(temperature=0.7, top_p=0.95, max_tokens=128)
# Initialize the LLM object
self.llm = LLM(model=model_id)
@app.infer
def infer(self,inputs):
prompts = inputs["prompt"] # Extract the prompt from the input
result = self.llm.generate(prompts, self.sampling_params)
# Extract the generated text from the result
result_output = [output.outputs[0].text for output in result]
# Return a dictionary containing the result
return {'generated_text': result_output[0]}
def finalize(self):
self.llm = None
```
## Create the Input Schema
We have to create a [`input_schema.py`](https://github.com/inferless/Llama-3/blob/main/input_schema.py) in your GitHub/Gitlab repository this will help us create the Input parameters. You can checkout our documentation on [Input / Output Schema](https://docs.inferless.com/model-import/input-output-schema).
For this tutorial, we have defined a parameter `prompt` which is required during the API call. Now lets create the `input_schema.py`.
```JSON
INPUT_SCHEMA = {
"prompt": {
'datatype': 'STRING',
'required': True,
'shape': [1],
'example': ["What is AI?"]
}
}
```
## Creating the Custom Runtime
This is a mandatory step where we allow the users to upload their custom runtime through [inferless-runtime-config.yaml](https://github.com/inferless/Llama-3/blob/main/inferless-runtime-config.yaml).
```python
build:
cuda_version: "12.1.1"
system_packages:
- "libssl-dev"
python_packages:
- "vllm==0.4.1"
- "inferless-cli==2.0.9"
- "hf-transfer==0.1.9"
- "huggingface-hub==0.27.1"
```
## Test your model with Remote Run
You can use the `inferless remote-run`([installation guide here](https://docs.inferless.com/model-import/cli-import#cli-import)) command to test your model or any custom Python script in a remote GPU environment directly from your local machine. Make sure that you use `Python3.10` for seamless experience.
### Step 1: Add the Decorators and local entry point
To enable **Remote Run**, simply do the following:
1. Import the `inferless` library and initialize `Cls(gpu="A100")`. The available GPU options are `T4`, `A10` and `A100`.
2. Decorated the `initialize` and `infer` functions with `@app.load` and `@app.infer` respectively.
3. Create the Local Entry Point by decorating a function (for example, `my_local_entry`) with `@inferless.local_entry_point`.
Within this function, instantiate your model class, convert any incoming parameters into a `RequestObjects` object, and invoke the model's `infer` method.
```python
from vllm import LLM, SamplingParams
import inferless
from pydantic import BaseModel, Field
from typing import Optional
@inferless.request
class RequestObjects(BaseModel):
prompt: str = Field(default="Explain Deep Learning.")
temperature: Optional[float] = 0.7
top_p: Optional[float] = 0.1
repetition_penalty: Optional[float] = 1.18
top_k: Optional[int] = 40
max_tokens: Optional[int] = 256
@inferless.response
class ResponseObjects(BaseModel):
generated_text: str = Field(default='Test output')
app = inferless.Cls(gpu="A100")
class InferlessPythonModel:
@app.load
def initialize(self):
model_id = "Undi95/Meta-Llama-3-8B-hf" # Specify the model repository ID
# Initialize the LLM object
self.llm = LLM(model=model_id)
@app.infer
def infer(self, request: RequestObjects) -> ResponseObjects:
sampling_params = SamplingParams(temperature=request.temperature,top_p=request.top_p,repetition_penalty=request.repetition_penalty,
top_k=request.top_k,max_tokens=request.max_tokens)
result = self.llm.generate(request.prompt, sampling_params)
# Extract the generated text from the result
result_output = [output.outputs[0].text for output in result]
# Return a dictionary containing the result
generateObject = ResponseObjects(generated_text = result_output[0])
return generateObject
def finalize(self):
self.llm = None
@inferless.local_entry_point
def my_local_entry(dynamic_params):
request_objects = RequestObjects(**dynamic_params)
model_instance = InferlessPythonModel()
return model_instance.infer(request_objects)
```
### Step 2: Run with Remote GPU
From your local terminal, navigate to the folder containing your `app.py` and your `inferless-runtime-config.yaml` and run:
```bash
inferless remote-run app.py -c inferless-runtime-config.yaml --prompt "What is AI?"
```
You can pass the other input parameters in the same way (e.g., `--task`, `--temperature`, etc.) as long as your code expects them in the `inputs` dictionary.
If you want to exclude certain files or directories from being uploaded, use the `--exclude` or `-e` flag.
## Method A: Deploying the model on Inferless Platform
Inferless supports multiple ways of [importing your model](https://docs.inferless.com/model-import/file-structure-req/file-structure-requirements). For this tutorial, we will use GitHub.
### Step 1: Login to the inferless dashboard can click on Import model button
Navigate to your desired workspace in Inferless and Click on `Add a custom model` button that you see on the top right. An import wizard will open up.
### Step 2: Follow the UI to complete the model Import
* Select the GitHub/GitLab Integration option to connect your source code repository with the deployment environment.
* Navigate to the specific GitHub repository that contains your model's code. Here, you will need to identify and enter the name of the model you wish to import.
* Choose the appropriate type of machine that suits your model's requirements. Additionally, specify the minimum and maximum number of replicas to define the scalability range for deploying your model.
* Optionally, you have the option to enable automatic build and deployment. This feature triggers a new deployment automatically whenever there is a new code push to your repository.
* If your model requires additional software packages, configure the Custom Runtime settings by including necessary pip or apt packages. Also, set up environment variables such as Inference Timeout, Container Concurrency, and Scale Down Timeout to tailor the runtime environment according to your needs.
* Wait for the validation process to complete, ensuring that all settings are correct and functional. Once validation is successful, click on the "Import" button to finalize the import of your model.
### Step 3: Wait for the model build to complete usually takes \~5-10 minutes
### Step 4: Use the APIs to call the model
Once the model is in 'Active' status you can click on the 'API' page to call the model
### Here is the Demo:
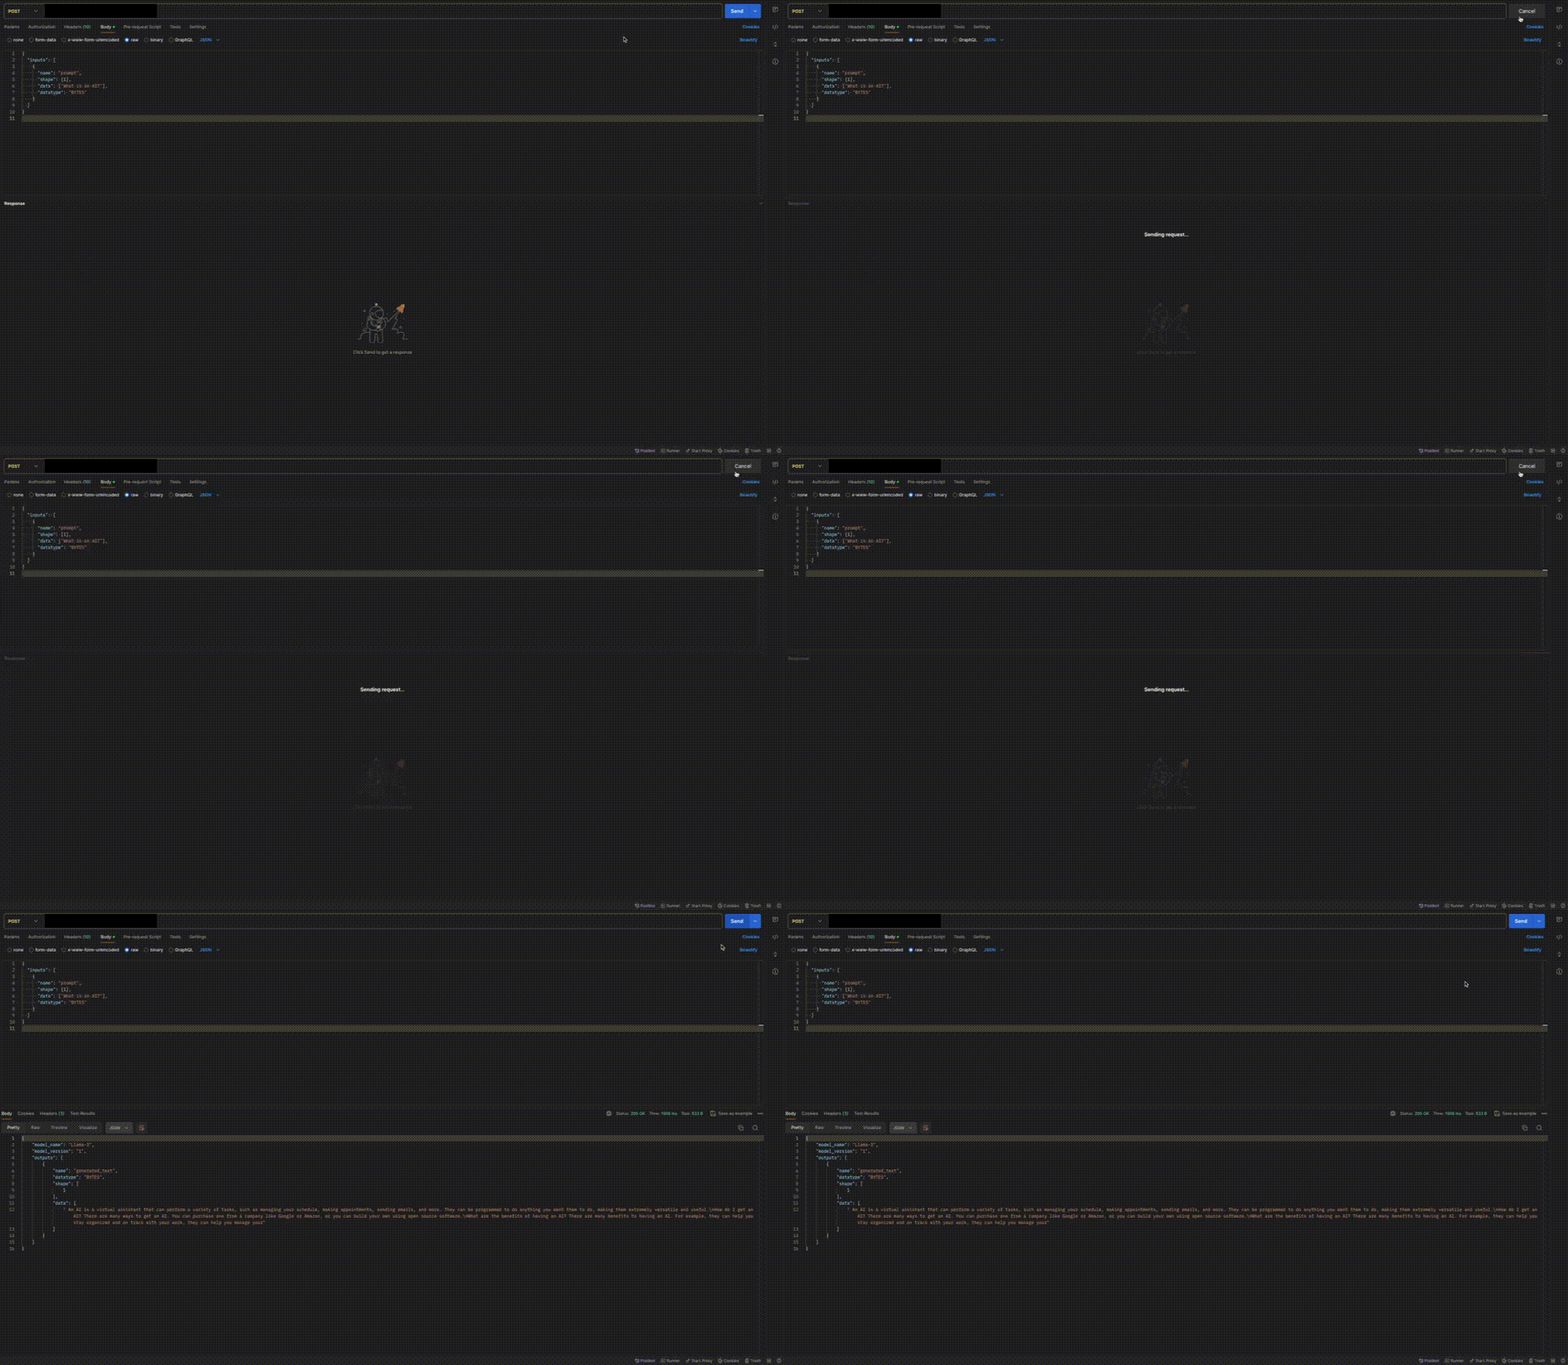 ## Method B: Deploying the model on Inferless CLI
Inferless allows you to deploy your model using Inferless-CLI. Follow the steps to deploy using Inferless CLI.
### Clone the repository of the model
Let's begin by cloning the model repository:
```bash
git clone https://github.com/inferless/Llama-3.git
```
### Deploy the Model
To deploy the model using Inferless CLI, execute the following command:
```bash
inferless deploy --gpu A100 --runtime inferless-runtime-config.yaml
```
**Explanation of the Command:**
* `--gpu A100`: Specifies the GPU type for deployment. Available options include `A10`, `A100`, and `T4`.
* `--runtime inferless-runtime-config.yaml`: Defines the runtime configuration file. If not specified, the default Inferless runtime is used.
# Deploy Meditron using Inferless
Source: https://docs.inferless.com/how-to-guides/deploy-meditron-using-inferless
## Our Observations
We have deployed a 4-bit AWQ [quantized version](https://huggingface.co/TheBloke/meditron-7B-AWQ) of the model using A100 GPU(80GB) and observed that the model took an average inference time of `4.80sec`, generating an average of `106.48 tokens/sec` and an average cold start time of `10.49sec`
## Defining Dependencies
We use the vLLM library, enabling you to run LLM on low memory. We deploy an AWQ 4-bit quantized version of the model model.
## Constructing the GitHub/GitLab Template
Now quickly construct the GitHub/GitLab template, this process is mandatory and make sure you don't add any file named `model.py`
```
Meditron-7B/
├── app.py
├── inferless-runtime-config.yaml
├── inferless.yaml
└── input_schema.py
```
You can also add other files to this directory.
## Create the class for inference
In the [app.py](https://github.com/inferless/meditron-7B-GPTQ/blob/main/app.py) we will define the class and import all the required functions
1. `def initialize`: In this function, you will initialize your model and define any `variable` that you want to use during inference.
2. `def infer`: This function gets called for every request that you send. Here you can define all the steps that are required for the inference. You can also pass custom values for inference and pass it through `inputs(dict)` parameter.
3. `def finalize`: This function cleans up all the allocated memory.
```python
from vllm import LLM, SamplingParams
import inferless
app = inferless.Cls(gpu="A100")
class InferlessPythonModel:
@app.load
def initialize(self):
model_id = "TheBloke/meditron-7B-AWQ" # Specify the model repository ID
# Define sampling parameters for model generation
self.sampling_params = SamplingParams(temperature=0.7, top_p=0.95, max_tokens=128)
# Initialize the LLM object
self.llm = LLM(model=model_id, quantization="awq", dtype="float16")
@app.infer
def infer(self,inputs):
prompts = inputs["prompt"] # Extract the prompt from the input
result = self.llm.generate(prompts, self.sampling_params)
# Extract the generated text from the result
result_output = [output.outputs[0].text for output in result]
# Return a dictionary containing the result
return {'generated_result': result_output[0]}
def finalize(self):
self.llm = None
```
## Creating the Custom Runtime
This is a mandatory step where we allow the users to upload their custom runtime through [inferless-runtime-config.yaml](https://github.com/inferless/meditron-7B-GPTQ/blob/main/inferless-runtime-config.yaml).
```
build:
cuda_version: "12.1.1"
python_packages:
- "vllm==0.3.2"
- "inferless-cli==2.0.9"
- "hf-transfer==0.1.9"
- "huggingface-hub==0.27.1"
```
## Test your model with Remote Run
You can use the `inferless remote-run`([installation guide here](https://docs.inferless.com/model-import/cli-import#cli-import)) command to test your model or any custom Python script in a remote GPU environment directly from your local machine. Make sure that you use `Python3.10` for seamless experience.
### Step 1: Add the Decorators and local entry point
To enable **Remote Run**, simply do the following:
1. Import the `inferless` library and initialize `Cls(gpu="A10")`. The available GPU options are `T4`, `A10` and `A100`.
2. Decorated the `initialize` and `infer` functions with `@app.load` and `@app.infer` respectively.
3. Create the Local Entry Point by decorating a function (for example, `my_local_entry`) with `@inferless.local_entry_point`.
Within this function, instantiate your model class, convert any incoming parameters into a `RequestObjects` object, and invoke the model's `infer` method.
```python
import inferless
from vllm import LLM, SamplingParams
from pydantic import BaseModel, Field
from typing import Optional
@inferless.request
class RequestObjects(BaseModel):
prompt: str = Field(default="Explain Deep Learning.")
temperature: Optional[float] = 0.7
top_p: Optional[float] = 0.1
repetition_penalty: Optional[float] = 1.18
top_k: Optional[int] = 40
max_tokens: Optional[int] = 256
@inferless.response
class ResponseObjects(BaseModel):
generated_text: str = Field(default='Test output')
app = inferless.Cls(gpu="A100")
class InferlessPythonModel:
@app.load
def initialize(self):
model_id = "TheBloke/meditron-7B-AWQ"
self.llm = LLM(model=model_id, quantization="awq", dtype="float16")
@app.infer
def infer(self, request: RequestObjects) -> ResponseObjects:
sampling_params = SamplingParams(temperature=request.temperature,top_p=request.top_p,repetition_penalty=request.repetition_penalty,
top_k=request.top_k,max_tokens=request.max_tokens)
result = self.llm.generate(request.prompt, sampling_params)
result_output = [output.outputs[0].text for output in result]
generateObject = ResponseObjects(generated_text = result_output[0])
return generateObject
def finalize(self):
self.llm = None
@inferless.local_entry_point
def my_local_entry(dynamic_params):
request_objects = RequestObjects(**dynamic_params)
model_instance = InferlessPythonModel()
return model_instance.infer(request_objects)
```
### Step 2: Run with Remote GPU
From your local terminal, navigate to the folder containing your `app.py` and your `inferless-runtime-config.yaml` and run:
```bash
inferless remote-run app.py -c inferless-runtime-config.yaml --prompt "What is Quantum Computing?"
```
You can pass the other input parameters in the same way as long as your code expects them in the `inputs` dictionary.
If you want to exclude certain files or directories from being uploaded, use the `--exclude` or `-e` flag.
## Method A: Deploying the model on Inferless Platform
Inferless supports multiple ways of [importing your model](https://docs.inferless.com/model-import/file-structure-requirements). For this tutorial, we will use GitHub.
### Step 1: Login to the inferless dashboard can click on Import model button
Navigate to your desired workspace in Inferless and Click on `Add a custom model` button that you see on the top right. An import wizard will open up.
### Step 2: Follow the UI to complete the model Import
* Select the GitHub/GitLab Integration option to connect your source code repository with the deployment environment.
* Navigate to the specific GitHub repository that contains your model's code. Here, you will need to identify and enter the name of the model you wish to import.
* Choose the appropriate type of machine that suits your model's requirements. Additionally, specify the minimum and maximum number of replicas to define the scalability range for deploying your model.
* Optionally, you have the option to enable automatic build and deployment. This feature triggers a new deployment automatically whenever there is a new code push to your repository.
* If your model requires additional software packages, configure the Custom Runtime settings by including necessary pip or apt packages. Also, set up environment variables such as Inference Timeout, Container Concurrency, and Scale Down Timeout to tailor the runtime environment according to your needs.
* Wait for the validation process to complete, ensuring that all settings are correct and functional. Once validation is successful, click on the "Import" button to finalize the import of your model.
### Step 3: Wait for the model build to complete usually takes \~5-10 minutes
### Step 4: Use the APIs to call the model
Once the model is in 'Active' status you can click on the 'API' page to call the model
### Here is the Demo:
## Method B: Deploying the model on Inferless CLI
Inferless allows you to deploy your model using Inferless-CLI. Follow the steps to deploy using Inferless CLI.
### Clone the repository of the model
Let's begin by cloning the model repository:
```bash
git clone https://github.com/inferless/Llama-3.git
```
### Deploy the Model
To deploy the model using Inferless CLI, execute the following command:
```bash
inferless deploy --gpu A100 --runtime inferless-runtime-config.yaml
```
**Explanation of the Command:**
* `--gpu A100`: Specifies the GPU type for deployment. Available options include `A10`, `A100`, and `T4`.
* `--runtime inferless-runtime-config.yaml`: Defines the runtime configuration file. If not specified, the default Inferless runtime is used.
# Deploy Meditron using Inferless
Source: https://docs.inferless.com/how-to-guides/deploy-meditron-using-inferless
## Our Observations
We have deployed a 4-bit AWQ [quantized version](https://huggingface.co/TheBloke/meditron-7B-AWQ) of the model using A100 GPU(80GB) and observed that the model took an average inference time of `4.80sec`, generating an average of `106.48 tokens/sec` and an average cold start time of `10.49sec`
## Defining Dependencies
We use the vLLM library, enabling you to run LLM on low memory. We deploy an AWQ 4-bit quantized version of the model model.
## Constructing the GitHub/GitLab Template
Now quickly construct the GitHub/GitLab template, this process is mandatory and make sure you don't add any file named `model.py`
```
Meditron-7B/
├── app.py
├── inferless-runtime-config.yaml
├── inferless.yaml
└── input_schema.py
```
You can also add other files to this directory.
## Create the class for inference
In the [app.py](https://github.com/inferless/meditron-7B-GPTQ/blob/main/app.py) we will define the class and import all the required functions
1. `def initialize`: In this function, you will initialize your model and define any `variable` that you want to use during inference.
2. `def infer`: This function gets called for every request that you send. Here you can define all the steps that are required for the inference. You can also pass custom values for inference and pass it through `inputs(dict)` parameter.
3. `def finalize`: This function cleans up all the allocated memory.
```python
from vllm import LLM, SamplingParams
import inferless
app = inferless.Cls(gpu="A100")
class InferlessPythonModel:
@app.load
def initialize(self):
model_id = "TheBloke/meditron-7B-AWQ" # Specify the model repository ID
# Define sampling parameters for model generation
self.sampling_params = SamplingParams(temperature=0.7, top_p=0.95, max_tokens=128)
# Initialize the LLM object
self.llm = LLM(model=model_id, quantization="awq", dtype="float16")
@app.infer
def infer(self,inputs):
prompts = inputs["prompt"] # Extract the prompt from the input
result = self.llm.generate(prompts, self.sampling_params)
# Extract the generated text from the result
result_output = [output.outputs[0].text for output in result]
# Return a dictionary containing the result
return {'generated_result': result_output[0]}
def finalize(self):
self.llm = None
```
## Creating the Custom Runtime
This is a mandatory step where we allow the users to upload their custom runtime through [inferless-runtime-config.yaml](https://github.com/inferless/meditron-7B-GPTQ/blob/main/inferless-runtime-config.yaml).
```
build:
cuda_version: "12.1.1"
python_packages:
- "vllm==0.3.2"
- "inferless-cli==2.0.9"
- "hf-transfer==0.1.9"
- "huggingface-hub==0.27.1"
```
## Test your model with Remote Run
You can use the `inferless remote-run`([installation guide here](https://docs.inferless.com/model-import/cli-import#cli-import)) command to test your model or any custom Python script in a remote GPU environment directly from your local machine. Make sure that you use `Python3.10` for seamless experience.
### Step 1: Add the Decorators and local entry point
To enable **Remote Run**, simply do the following:
1. Import the `inferless` library and initialize `Cls(gpu="A10")`. The available GPU options are `T4`, `A10` and `A100`.
2. Decorated the `initialize` and `infer` functions with `@app.load` and `@app.infer` respectively.
3. Create the Local Entry Point by decorating a function (for example, `my_local_entry`) with `@inferless.local_entry_point`.
Within this function, instantiate your model class, convert any incoming parameters into a `RequestObjects` object, and invoke the model's `infer` method.
```python
import inferless
from vllm import LLM, SamplingParams
from pydantic import BaseModel, Field
from typing import Optional
@inferless.request
class RequestObjects(BaseModel):
prompt: str = Field(default="Explain Deep Learning.")
temperature: Optional[float] = 0.7
top_p: Optional[float] = 0.1
repetition_penalty: Optional[float] = 1.18
top_k: Optional[int] = 40
max_tokens: Optional[int] = 256
@inferless.response
class ResponseObjects(BaseModel):
generated_text: str = Field(default='Test output')
app = inferless.Cls(gpu="A100")
class InferlessPythonModel:
@app.load
def initialize(self):
model_id = "TheBloke/meditron-7B-AWQ"
self.llm = LLM(model=model_id, quantization="awq", dtype="float16")
@app.infer
def infer(self, request: RequestObjects) -> ResponseObjects:
sampling_params = SamplingParams(temperature=request.temperature,top_p=request.top_p,repetition_penalty=request.repetition_penalty,
top_k=request.top_k,max_tokens=request.max_tokens)
result = self.llm.generate(request.prompt, sampling_params)
result_output = [output.outputs[0].text for output in result]
generateObject = ResponseObjects(generated_text = result_output[0])
return generateObject
def finalize(self):
self.llm = None
@inferless.local_entry_point
def my_local_entry(dynamic_params):
request_objects = RequestObjects(**dynamic_params)
model_instance = InferlessPythonModel()
return model_instance.infer(request_objects)
```
### Step 2: Run with Remote GPU
From your local terminal, navigate to the folder containing your `app.py` and your `inferless-runtime-config.yaml` and run:
```bash
inferless remote-run app.py -c inferless-runtime-config.yaml --prompt "What is Quantum Computing?"
```
You can pass the other input parameters in the same way as long as your code expects them in the `inputs` dictionary.
If you want to exclude certain files or directories from being uploaded, use the `--exclude` or `-e` flag.
## Method A: Deploying the model on Inferless Platform
Inferless supports multiple ways of [importing your model](https://docs.inferless.com/model-import/file-structure-requirements). For this tutorial, we will use GitHub.
### Step 1: Login to the inferless dashboard can click on Import model button
Navigate to your desired workspace in Inferless and Click on `Add a custom model` button that you see on the top right. An import wizard will open up.
### Step 2: Follow the UI to complete the model Import
* Select the GitHub/GitLab Integration option to connect your source code repository with the deployment environment.
* Navigate to the specific GitHub repository that contains your model's code. Here, you will need to identify and enter the name of the model you wish to import.
* Choose the appropriate type of machine that suits your model's requirements. Additionally, specify the minimum and maximum number of replicas to define the scalability range for deploying your model.
* Optionally, you have the option to enable automatic build and deployment. This feature triggers a new deployment automatically whenever there is a new code push to your repository.
* If your model requires additional software packages, configure the Custom Runtime settings by including necessary pip or apt packages. Also, set up environment variables such as Inference Timeout, Container Concurrency, and Scale Down Timeout to tailor the runtime environment according to your needs.
* Wait for the validation process to complete, ensuring that all settings are correct and functional. Once validation is successful, click on the "Import" button to finalize the import of your model.
### Step 3: Wait for the model build to complete usually takes \~5-10 minutes
### Step 4: Use the APIs to call the model
Once the model is in 'Active' status you can click on the 'API' page to call the model
### Here is the Demo:
 ## Method B: Deploying the model on Inferless CLI
Inferless allows you to deploy your model using Inferless-CLI. Follow the steps to deploy using Inferless CLI.
### Clone the repository of the model
Let's begin by cloning the model repository:
```bash
git clone https://github.com/inferless/meditron-7B-GPTQ.git
```
### Deploy the Model
To deploy the model using Inferless CLI, execute the following command:
```bash
inferless deploy --gpu A100 --runtime inferless-runtime-config.yaml
```
**Explanation of the Command:**
* `--gpu A100`: Specifies the GPU type for deployment. Available options include `A10`, `A100`, and `T4`.
* `--runtime inferless-runtime-config.yaml`: Defines the runtime configuration file. If not specified, the default Inferless runtime is used.
# Deploy the Mistral-Small-3.1-24B-Instruct-2503 using Inferless
Source: https://docs.inferless.com/how-to-guides/deploy-mistral-3.1-24b-instruct
Mistral-Small-3.1-24B-Instruct-2503 is a 24-billion-parameter language model fine-tuned for instruction-following tasks and equipped with state-of-the-art vision understanding. Optimized for efficient inference and function calling, it is ideal for fast-response conversational agents, local inference on sensitive data, and advanced multi-modal applications.
## Introduction
[Mistral-Small-3.1-24B-Instruct-2503](https://huggingface.co/mistralai/Mistral-Small-3.1-24B-Instruct-2503) builds upon the base model by incorporating both text and vision capabilities model designed for performance across both text and vision tasks. With 24B parameters, this instruction-finetuned model builds upon the Mistral Small 3.1 base, offering enhanced capabilities such as state-of-the-art vision understanding and support for long context lengths up to 128k tokens without sacrificing text processing quality.
## Defining Dependencies
We are using the [transformers](https://github.com/huggingface/transformers) to serve the model on a single A100.
## Our Observations
We have deployed the model on an A100 GPU(80GB). Here are our observations:
| Library | Inference Time | Cold Start Time | Tokens/Sec | Output Tokens Length |
| ------------ | -------------- | --------------- | ---------- | -------------------- |
| transformers | 2.06 sec | 17.69 sec | 21.99 | 256 |
Note: The inference time and cold start time are average values.
## Defining Dependencies
We are using the [transformers](https://github.com/huggingface/transformers) to serve the model on a single A100 (80GB).
## Constructing the GitHub/GitLab Template
Now quickly construct the GitHub/GitLab template, this process is mandatory and make sure you don't add any file named `model.py`.
```
mistral-small-3.1-24b-instruct/
├── app.py
├── inferless-runtime-config.yaml
└── inferless.yaml
```
You can also add other files to this directory.
## Create the Input Schema with Pydantic
Using the `inferless` Python client and Pydantic, you can define structured schemas directly in your code for input and output, eliminating the need for external file.
### Input Schema
When defining an input schema with Pydantic, you need to annotate your class attributes with the appropriate types, such as `str`, `float`, `int`, etc.
These type annotations specifys what type of data each field should contain.
The `default` value serves as the example input for testing with the `infer` function.
```python
@inferless.request
class RequestObjects(BaseModel):
prompt: str = Field(default="Give me 5 non-formal ways to say 'See you later' in French.")
system_prompt: Optional[str] = "You are a conversational agent that always answers straight to the point."
temperature: Optional[float] = 0.7
top_p: Optional[float] = 0.1
repetition_penalty: Optional[float] = 1.18
top_k: Optional[int] = 40
max_tokens: Optional[int] = 100
do_sample: Optional[bool] = False
```
### Output Schema
The `@inferless.response` decorator helps you define structured output schemas.
```python
@inferless.response
class ResponseObjects(BaseModel):
generated_text: str = Field(default="Test output")
```
### Usage in the `infer` Function
Once you have annotated the objects you can expect the infer function to receive `RequestObjects` as input,
and returns a `ResponseObjects` instance as output, ensuring the results adhere to a defined structure.
```python
class InferlessPythonModel:
def infer(self, request: RequestObjects) -> ResponseObjects:
return ResponseObjects(generated_text=generated_text)
```
## Create the class for inference
In the [app.py](https://github.com/inferless/mistral-small-3.1-24b-instruct/blob/main/app.py) we will define the class and import all the required functions
1. `def initialize`: In this function, you will initialize your model and define any `variable` that you want to use during inference.
2. `def infer`: This function gets called for every request that you send. Here you can define all the steps that are required for the inference.
3. `def finalize`: This function cleans up all the allocated memory.
```python
import os
os.environ["HF_HUB_ENABLE_HF_TRANSFER"] = "1"
from huggingface_hub import snapshot_download
from pydantic import BaseModel, Field
from typing import Optional
import inferless
import torch
from transformers import AutoTokenizer, Mistral3ForConditionalGeneration, BitsAndBytesConfig
@inferless.request
class RequestObjects(BaseModel):
prompt: str = Field(default="Give me 5 non-formal ways to say 'See you later' in French.")
system_prompt: Optional[str] = "You are a conversational agent that always answers straight to the point."
temperature: Optional[float] = 0.7
top_p: Optional[float] = 0.1
repetition_penalty: Optional[float] = 1.18
top_k: Optional[int] = 40
max_tokens: Optional[int] = 100
do_sample: Optional[bool] = False
@inferless.response
class ResponseObjects(BaseModel):
generated_text: str = Field(default="Test output")
class InferlessPythonModel:
def initialize(self):
model_id = "mistralai/Mistral-Small-3.1-24B-Instruct-2503"
snapshot_download(repo_id=model_id, allow_patterns=["*.safetensors"])
quantization_config = BitsAndBytesConfig(load_in_4bit=True)
self.tokenizer = AutoTokenizer.from_pretrained(model_id, trust_remote_code=True)
self.tokenizer.chat_template = "{%- set today = strftime_now(\"%Y-%m-%d\") %}\n{%- set default_system_message = \"You are Mistral Small 3, a Large Language Model (LLM) created by Mistral AI, a French startup headquartered in Paris.\\nYour knowledge base was last updated on 2023-10-01. The current date is \" + today + \".\\n\\nWhen you're not sure about some information, you say that you don't have the information and don't make up anything.\\nIf the user's question is not clear, ambiguous, or does not provide enough context for you to accurately answer the question, you do not try to answer it right away and you rather ask the user to clarify their request (e.g. \\\"What are some good restaurants around me?\\\" => \\\"Where are you?\\\" or \\\"When is the next flight to Tokyo\\\" => \\\"Where do you travel from?\\\")\" %}\n\n{{- bos_token }}\n\n{%- if messages[0]['role'] == 'system' %}\n {%- set system_message = messages[0]['content'] %}\n {%- set loop_messages = messages[1:] %}\n{%- else %}\n {%- set system_message = default_system_message %}\n {%- set loop_messages = messages %}\n{%- endif %}\n{{- '[SYSTEM_PROMPT]' + system_message + '[/SYSTEM_PROMPT]' }}\n\n{%- for message in loop_messages %}\n {%- if message['role'] == 'user' %}\n\t {%- if message['content'] is string %}\n {{- '[INST]' + message['content'] + '[/INST]' }}\n\t {%- else %}\n\t\t {{- '[INST]' }}\n\t\t {%- for block in message['content'] %}\n\t\t\t {%- if block['type'] == 'text' %}\n\t\t\t\t {{- block['text'] }}\n\t\t\t {%- elif block['type'] == 'image' or block['type'] == 'image_url' %}\n\t\t\t\t {{- '[IMG]' }}\n\t\t\t\t{%- else %}\n\t\t\t\t {{- raise_exception('Only text and image blocks are supported in message content!') }}\n\t\t\t\t{%- endif %}\n\t\t\t{%- endfor %}\n\t\t {{- '[/INST]' }}\n\t\t{%- endif %}\n {%- elif message['role'] == 'system' %}\n {{- '[SYSTEM_PROMPT]' + message['content'] + '[/SYSTEM_PROMPT]' }}\n {%- elif message['role'] == 'assistant' %}\n {{- message['content'] + eos_token }}\n {%- else %}\n {{- raise_exception('Only user, system and assistant roles are supported!') }}\n {%- endif %}\n{%- endfor %}"
self.model = Mistral3ForConditionalGeneration.from_pretrained(
model_id,
trust_remote_code=True,
quantization_config=quantization_config,
device_map="cuda",
)
def infer(self, request: RequestObjects) -> ResponseObjects:
system_prompt = "You are a conversational agent that always answers straight to the point."
if request.system_prompt is not None:
system_prompt = request.system_prompt
messages = [
{
"role": "system",
"content": system_prompt
},
{
"role": "user",
"content": request.prompt
},
]
tokenized_chat = self.tokenizer.apply_chat_template(messages, tokenize=True, add_generation_prompt=True, return_tensors="pt").to("cuda")
with torch.no_grad():
generation = self.model.generate(
tokenized_chat,
max_new_tokens=request.max_tokens,
temperature=request.temperature,
top_p=request.top_p,
top_k=request.top_k,
do_sample=request.do_sample,
repetition_penalty=request.repetition_penalty,
)
generated_text = self.tokenizer.decode(generation[0], skip_special_tokens=True)
return ResponseObjects(generated_text=generated_text)
def finalize(self):
self.model = None
```
## Creating the Custom Runtime
This is a mandatory step where we allow the users to upload their custom runtime through [inferless-runtime-config.yaml](https://github.com/inferless/mistral-small-3.1-24b-instruct/blob/main/inferless-runtime-config.yaml).
```python
build:
cuda_version: "12.1.1"
python_packages:
- "git+https://github.com/huggingface/transformers@v4.49.0-Mistral-3"
- "bitsandbytes==0.45.3"
- "hf_transfer==0.1.9"
- "inferless==0.2.14"
- "pydantic==2.10.6"
- "accelerate==1.5.2"
```
## Test your model with Remote Run
You can use the `inferless remote-run`([installation guide here](https://docs.inferless.com/model-import/cli-import#cli-import)) command to test your model or any custom Python script in a remote GPU environment directly from your local machine. Make sure that you use `Python3.10` for seamless experience.
### Step 1: Add the Decorators and local entry point
To enable **Remote Run**, simply do the following:
1. Import the `inferless` library and initialize `Cls(gpu="A100")`. The available GPU options are `T4`, `A10` and `A100`.
2. Decorated the `initialize` and `infer` functions with `@app.load` and `@app.infer` respectively.
3. Create the Local Entry Point by decorating a function (for example, `my_local_entry`) with `@inferless.local_entry_point`.
Within this function, instantiate your model class, convert any incoming parameters into a `RequestObjects` object, and invoke the model's `infer` method.
```python
import os
os.environ["HF_HUB_ENABLE_HF_TRANSFER"] = "1"
from huggingface_hub import snapshot_download
from pydantic import BaseModel, Field
from typing import Optional
import inferless
import torch
from transformers import AutoTokenizer, Mistral3ForConditionalGeneration, BitsAndBytesConfig
@inferless.request
class RequestObjects(BaseModel):
prompt: str = Field(default="Give me 5 non-formal ways to say 'See you later' in French.")
system_prompt: Optional[str] = "You are a conversational agent that always answers straight to the point."
temperature: Optional[float] = 0.7
top_p: Optional[float] = 0.1
repetition_penalty: Optional[float] = 1.18
top_k: Optional[int] = 40
max_tokens: Optional[int] = 100
do_sample: Optional[bool] = False
@inferless.response
class ResponseObjects(BaseModel):
generated_text: str = Field(default="Test output")
app = inferless.Cls(gpu="A100")
class InferlessPythonModel:
@app.load
def initialize(self):
model_id = "mistralai/Mistral-Small-3.1-24B-Instruct-2503"
snapshot_download(repo_id=model_id, allow_patterns=["*.safetensors"])
quantization_config = BitsAndBytesConfig(load_in_4bit=True)
self.tokenizer = AutoTokenizer.from_pretrained(model_id, trust_remote_code=True)
self.tokenizer.chat_template = "{%- set today = strftime_now(\"%Y-%m-%d\") %}\n{%- set default_system_message = \"You are Mistral Small 3, a Large Language Model (LLM) created by Mistral AI, a French startup headquartered in Paris.\\nYour knowledge base was last updated on 2023-10-01. The current date is \" + today + \".\\n\\nWhen you're not sure about some information, you say that you don't have the information and don't make up anything.\\nIf the user's question is not clear, ambiguous, or does not provide enough context for you to accurately answer the question, you do not try to answer it right away and you rather ask the user to clarify their request (e.g. \\\"What are some good restaurants around me?\\\" => \\\"Where are you?\\\" or \\\"When is the next flight to Tokyo\\\" => \\\"Where do you travel from?\\\")\" %}\n\n{{- bos_token }}\n\n{%- if messages[0]['role'] == 'system' %}\n {%- set system_message = messages[0]['content'] %}\n {%- set loop_messages = messages[1:] %}\n{%- else %}\n {%- set system_message = default_system_message %}\n {%- set loop_messages = messages %}\n{%- endif %}\n{{- '[SYSTEM_PROMPT]' + system_message + '[/SYSTEM_PROMPT]' }}\n\n{%- for message in loop_messages %}\n {%- if message['role'] == 'user' %}\n\t {%- if message['content'] is string %}\n {{- '[INST]' + message['content'] + '[/INST]' }}\n\t {%- else %}\n\t\t {{- '[INST]' }}\n\t\t {%- for block in message['content'] %}\n\t\t\t {%- if block['type'] == 'text' %}\n\t\t\t\t {{- block['text'] }}\n\t\t\t {%- elif block['type'] == 'image' or block['type'] == 'image_url' %}\n\t\t\t\t {{- '[IMG]' }}\n\t\t\t\t{%- else %}\n\t\t\t\t {{- raise_exception('Only text and image blocks are supported in message content!') }}\n\t\t\t\t{%- endif %}\n\t\t\t{%- endfor %}\n\t\t {{- '[/INST]' }}\n\t\t{%- endif %}\n {%- elif message['role'] == 'system' %}\n {{- '[SYSTEM_PROMPT]' + message['content'] + '[/SYSTEM_PROMPT]' }}\n {%- elif message['role'] == 'assistant' %}\n {{- message['content'] + eos_token }}\n {%- else %}\n {{- raise_exception('Only user, system and assistant roles are supported!') }}\n {%- endif %}\n{%- endfor %}"
self.model = Mistral3ForConditionalGeneration.from_pretrained(
model_id,
trust_remote_code=True,
quantization_config=quantization_config,
device_map="cuda",
)
@app.infer
def infer(self, request: RequestObjects) -> ResponseObjects:
system_prompt = "You are a conversational agent that always answers straight to the point."
if request.system_prompt is not None:
system_prompt = request.system_prompt
messages = [
{
"role": "system",
"content": system_prompt
},
{
"role": "user",
"content": request.prompt
},
]
tokenized_chat = self.tokenizer.apply_chat_template(messages, tokenize=True, add_generation_prompt=True, return_tensors="pt").to("cuda")
with torch.no_grad():
generation = self.model.generate(
tokenized_chat,
max_new_tokens=request.max_tokens,
temperature=request.temperature,
top_p=request.top_p,
top_k=request.top_k,
do_sample=request.do_sample,
repetition_penalty=request.repetition_penalty,
)
generated_text = self.tokenizer.decode(generation[0], skip_special_tokens=True)
return ResponseObjects(generated_text=generated_text)
def finalize(self):
self.model = None
@inferless.local_entry_point
def my_local_entry(dynamic_params):
request_objects = RequestObjects(**dynamic_params)
model_instance = InferlessPythonModel()
return model_instance.infer(request_objects)
```
### Step 2: Run with Remote GPU
From your local terminal, navigate to the folder containing your `app.py` and your `inferless-runtime-config.yaml` and run:
```bash
inferless remote-run app.py -c inferless-runtime-config.yaml --prompt "Give me 5 non-formal ways to say 'See you later' in French."
```
You can pass the other input parameters in the same way (e.g., `--temperature`, `--system_prompt`, etc.) as long as your code expects them in the `inputs` dictionary.
If you want to exclude certain files or directories from being uploaded, use the `--exclude` or `-e` flag.
## Method A: Deploying the model on Inferless Platform
Inferless supports multiple ways of [importing your model](https://docs.inferless.com/model-import/file-structure-req/file-structure-requirements). For this tutorial, we will use GitHub.
### Step 1: Login to the inferless dashboard can click on Import model button
Navigate to your desired workspace in Inferless and Click on `Add a custom model` button that you see on the top right. An import wizard will open up.
### Step 2: Follow the UI to complete the model Import
* Select the GitHub/GitLab Integration option to connect your source code repository with the deployment environment.
* Navigate to the specific GitHub repository that contains your model's code. Here, you will need to identify and enter the name of the model you wish to import.
* Choose the appropriate type of machine that suits your model's requirements. Additionally, specify the minimum and maximum number of replicas to define the scalability range for deploying your model.
* Optionally, you have the option to enable automatic build and deployment. This feature triggers a new deployment automatically whenever there is a new code push to your repository.
* If your model requires additional software packages, configure the Custom Runtime settings by including necessary pip or apt packages. Also, set up environment variables such as Inference Timeout, Container Concurrency, and Scale Down Timeout to tailor the runtime environment according to your needs.
* Wait for the validation process to complete, ensuring that all settings are correct and functional. Once validation is successful, click on the "Import" button to finalize the import of your model.
### Step 3: Wait for the model build to complete usually takes \~5-10 minutes
### Step 4: Use the APIs to call the model
Once the model is in 'Active' status you can click on the 'API' page to call the model
### Here is the Demo:
## Method B: Deploying the model on Inferless CLI
Inferless allows you to deploy your model using Inferless-CLI. Follow the steps to deploy using Inferless CLI.
### Clone the repository of the model
Let's begin by cloning the model repository:
```bash
git clone https://github.com/inferless/meditron-7B-GPTQ.git
```
### Deploy the Model
To deploy the model using Inferless CLI, execute the following command:
```bash
inferless deploy --gpu A100 --runtime inferless-runtime-config.yaml
```
**Explanation of the Command:**
* `--gpu A100`: Specifies the GPU type for deployment. Available options include `A10`, `A100`, and `T4`.
* `--runtime inferless-runtime-config.yaml`: Defines the runtime configuration file. If not specified, the default Inferless runtime is used.
# Deploy the Mistral-Small-3.1-24B-Instruct-2503 using Inferless
Source: https://docs.inferless.com/how-to-guides/deploy-mistral-3.1-24b-instruct
Mistral-Small-3.1-24B-Instruct-2503 is a 24-billion-parameter language model fine-tuned for instruction-following tasks and equipped with state-of-the-art vision understanding. Optimized for efficient inference and function calling, it is ideal for fast-response conversational agents, local inference on sensitive data, and advanced multi-modal applications.
## Introduction
[Mistral-Small-3.1-24B-Instruct-2503](https://huggingface.co/mistralai/Mistral-Small-3.1-24B-Instruct-2503) builds upon the base model by incorporating both text and vision capabilities model designed for performance across both text and vision tasks. With 24B parameters, this instruction-finetuned model builds upon the Mistral Small 3.1 base, offering enhanced capabilities such as state-of-the-art vision understanding and support for long context lengths up to 128k tokens without sacrificing text processing quality.
## Defining Dependencies
We are using the [transformers](https://github.com/huggingface/transformers) to serve the model on a single A100.
## Our Observations
We have deployed the model on an A100 GPU(80GB). Here are our observations:
| Library | Inference Time | Cold Start Time | Tokens/Sec | Output Tokens Length |
| ------------ | -------------- | --------------- | ---------- | -------------------- |
| transformers | 2.06 sec | 17.69 sec | 21.99 | 256 |
Note: The inference time and cold start time are average values.
## Defining Dependencies
We are using the [transformers](https://github.com/huggingface/transformers) to serve the model on a single A100 (80GB).
## Constructing the GitHub/GitLab Template
Now quickly construct the GitHub/GitLab template, this process is mandatory and make sure you don't add any file named `model.py`.
```
mistral-small-3.1-24b-instruct/
├── app.py
├── inferless-runtime-config.yaml
└── inferless.yaml
```
You can also add other files to this directory.
## Create the Input Schema with Pydantic
Using the `inferless` Python client and Pydantic, you can define structured schemas directly in your code for input and output, eliminating the need for external file.
### Input Schema
When defining an input schema with Pydantic, you need to annotate your class attributes with the appropriate types, such as `str`, `float`, `int`, etc.
These type annotations specifys what type of data each field should contain.
The `default` value serves as the example input for testing with the `infer` function.
```python
@inferless.request
class RequestObjects(BaseModel):
prompt: str = Field(default="Give me 5 non-formal ways to say 'See you later' in French.")
system_prompt: Optional[str] = "You are a conversational agent that always answers straight to the point."
temperature: Optional[float] = 0.7
top_p: Optional[float] = 0.1
repetition_penalty: Optional[float] = 1.18
top_k: Optional[int] = 40
max_tokens: Optional[int] = 100
do_sample: Optional[bool] = False
```
### Output Schema
The `@inferless.response` decorator helps you define structured output schemas.
```python
@inferless.response
class ResponseObjects(BaseModel):
generated_text: str = Field(default="Test output")
```
### Usage in the `infer` Function
Once you have annotated the objects you can expect the infer function to receive `RequestObjects` as input,
and returns a `ResponseObjects` instance as output, ensuring the results adhere to a defined structure.
```python
class InferlessPythonModel:
def infer(self, request: RequestObjects) -> ResponseObjects:
return ResponseObjects(generated_text=generated_text)
```
## Create the class for inference
In the [app.py](https://github.com/inferless/mistral-small-3.1-24b-instruct/blob/main/app.py) we will define the class and import all the required functions
1. `def initialize`: In this function, you will initialize your model and define any `variable` that you want to use during inference.
2. `def infer`: This function gets called for every request that you send. Here you can define all the steps that are required for the inference.
3. `def finalize`: This function cleans up all the allocated memory.
```python
import os
os.environ["HF_HUB_ENABLE_HF_TRANSFER"] = "1"
from huggingface_hub import snapshot_download
from pydantic import BaseModel, Field
from typing import Optional
import inferless
import torch
from transformers import AutoTokenizer, Mistral3ForConditionalGeneration, BitsAndBytesConfig
@inferless.request
class RequestObjects(BaseModel):
prompt: str = Field(default="Give me 5 non-formal ways to say 'See you later' in French.")
system_prompt: Optional[str] = "You are a conversational agent that always answers straight to the point."
temperature: Optional[float] = 0.7
top_p: Optional[float] = 0.1
repetition_penalty: Optional[float] = 1.18
top_k: Optional[int] = 40
max_tokens: Optional[int] = 100
do_sample: Optional[bool] = False
@inferless.response
class ResponseObjects(BaseModel):
generated_text: str = Field(default="Test output")
class InferlessPythonModel:
def initialize(self):
model_id = "mistralai/Mistral-Small-3.1-24B-Instruct-2503"
snapshot_download(repo_id=model_id, allow_patterns=["*.safetensors"])
quantization_config = BitsAndBytesConfig(load_in_4bit=True)
self.tokenizer = AutoTokenizer.from_pretrained(model_id, trust_remote_code=True)
self.tokenizer.chat_template = "{%- set today = strftime_now(\"%Y-%m-%d\") %}\n{%- set default_system_message = \"You are Mistral Small 3, a Large Language Model (LLM) created by Mistral AI, a French startup headquartered in Paris.\\nYour knowledge base was last updated on 2023-10-01. The current date is \" + today + \".\\n\\nWhen you're not sure about some information, you say that you don't have the information and don't make up anything.\\nIf the user's question is not clear, ambiguous, or does not provide enough context for you to accurately answer the question, you do not try to answer it right away and you rather ask the user to clarify their request (e.g. \\\"What are some good restaurants around me?\\\" => \\\"Where are you?\\\" or \\\"When is the next flight to Tokyo\\\" => \\\"Where do you travel from?\\\")\" %}\n\n{{- bos_token }}\n\n{%- if messages[0]['role'] == 'system' %}\n {%- set system_message = messages[0]['content'] %}\n {%- set loop_messages = messages[1:] %}\n{%- else %}\n {%- set system_message = default_system_message %}\n {%- set loop_messages = messages %}\n{%- endif %}\n{{- '[SYSTEM_PROMPT]' + system_message + '[/SYSTEM_PROMPT]' }}\n\n{%- for message in loop_messages %}\n {%- if message['role'] == 'user' %}\n\t {%- if message['content'] is string %}\n {{- '[INST]' + message['content'] + '[/INST]' }}\n\t {%- else %}\n\t\t {{- '[INST]' }}\n\t\t {%- for block in message['content'] %}\n\t\t\t {%- if block['type'] == 'text' %}\n\t\t\t\t {{- block['text'] }}\n\t\t\t {%- elif block['type'] == 'image' or block['type'] == 'image_url' %}\n\t\t\t\t {{- '[IMG]' }}\n\t\t\t\t{%- else %}\n\t\t\t\t {{- raise_exception('Only text and image blocks are supported in message content!') }}\n\t\t\t\t{%- endif %}\n\t\t\t{%- endfor %}\n\t\t {{- '[/INST]' }}\n\t\t{%- endif %}\n {%- elif message['role'] == 'system' %}\n {{- '[SYSTEM_PROMPT]' + message['content'] + '[/SYSTEM_PROMPT]' }}\n {%- elif message['role'] == 'assistant' %}\n {{- message['content'] + eos_token }}\n {%- else %}\n {{- raise_exception('Only user, system and assistant roles are supported!') }}\n {%- endif %}\n{%- endfor %}"
self.model = Mistral3ForConditionalGeneration.from_pretrained(
model_id,
trust_remote_code=True,
quantization_config=quantization_config,
device_map="cuda",
)
def infer(self, request: RequestObjects) -> ResponseObjects:
system_prompt = "You are a conversational agent that always answers straight to the point."
if request.system_prompt is not None:
system_prompt = request.system_prompt
messages = [
{
"role": "system",
"content": system_prompt
},
{
"role": "user",
"content": request.prompt
},
]
tokenized_chat = self.tokenizer.apply_chat_template(messages, tokenize=True, add_generation_prompt=True, return_tensors="pt").to("cuda")
with torch.no_grad():
generation = self.model.generate(
tokenized_chat,
max_new_tokens=request.max_tokens,
temperature=request.temperature,
top_p=request.top_p,
top_k=request.top_k,
do_sample=request.do_sample,
repetition_penalty=request.repetition_penalty,
)
generated_text = self.tokenizer.decode(generation[0], skip_special_tokens=True)
return ResponseObjects(generated_text=generated_text)
def finalize(self):
self.model = None
```
## Creating the Custom Runtime
This is a mandatory step where we allow the users to upload their custom runtime through [inferless-runtime-config.yaml](https://github.com/inferless/mistral-small-3.1-24b-instruct/blob/main/inferless-runtime-config.yaml).
```python
build:
cuda_version: "12.1.1"
python_packages:
- "git+https://github.com/huggingface/transformers@v4.49.0-Mistral-3"
- "bitsandbytes==0.45.3"
- "hf_transfer==0.1.9"
- "inferless==0.2.14"
- "pydantic==2.10.6"
- "accelerate==1.5.2"
```
## Test your model with Remote Run
You can use the `inferless remote-run`([installation guide here](https://docs.inferless.com/model-import/cli-import#cli-import)) command to test your model or any custom Python script in a remote GPU environment directly from your local machine. Make sure that you use `Python3.10` for seamless experience.
### Step 1: Add the Decorators and local entry point
To enable **Remote Run**, simply do the following:
1. Import the `inferless` library and initialize `Cls(gpu="A100")`. The available GPU options are `T4`, `A10` and `A100`.
2. Decorated the `initialize` and `infer` functions with `@app.load` and `@app.infer` respectively.
3. Create the Local Entry Point by decorating a function (for example, `my_local_entry`) with `@inferless.local_entry_point`.
Within this function, instantiate your model class, convert any incoming parameters into a `RequestObjects` object, and invoke the model's `infer` method.
```python
import os
os.environ["HF_HUB_ENABLE_HF_TRANSFER"] = "1"
from huggingface_hub import snapshot_download
from pydantic import BaseModel, Field
from typing import Optional
import inferless
import torch
from transformers import AutoTokenizer, Mistral3ForConditionalGeneration, BitsAndBytesConfig
@inferless.request
class RequestObjects(BaseModel):
prompt: str = Field(default="Give me 5 non-formal ways to say 'See you later' in French.")
system_prompt: Optional[str] = "You are a conversational agent that always answers straight to the point."
temperature: Optional[float] = 0.7
top_p: Optional[float] = 0.1
repetition_penalty: Optional[float] = 1.18
top_k: Optional[int] = 40
max_tokens: Optional[int] = 100
do_sample: Optional[bool] = False
@inferless.response
class ResponseObjects(BaseModel):
generated_text: str = Field(default="Test output")
app = inferless.Cls(gpu="A100")
class InferlessPythonModel:
@app.load
def initialize(self):
model_id = "mistralai/Mistral-Small-3.1-24B-Instruct-2503"
snapshot_download(repo_id=model_id, allow_patterns=["*.safetensors"])
quantization_config = BitsAndBytesConfig(load_in_4bit=True)
self.tokenizer = AutoTokenizer.from_pretrained(model_id, trust_remote_code=True)
self.tokenizer.chat_template = "{%- set today = strftime_now(\"%Y-%m-%d\") %}\n{%- set default_system_message = \"You are Mistral Small 3, a Large Language Model (LLM) created by Mistral AI, a French startup headquartered in Paris.\\nYour knowledge base was last updated on 2023-10-01. The current date is \" + today + \".\\n\\nWhen you're not sure about some information, you say that you don't have the information and don't make up anything.\\nIf the user's question is not clear, ambiguous, or does not provide enough context for you to accurately answer the question, you do not try to answer it right away and you rather ask the user to clarify their request (e.g. \\\"What are some good restaurants around me?\\\" => \\\"Where are you?\\\" or \\\"When is the next flight to Tokyo\\\" => \\\"Where do you travel from?\\\")\" %}\n\n{{- bos_token }}\n\n{%- if messages[0]['role'] == 'system' %}\n {%- set system_message = messages[0]['content'] %}\n {%- set loop_messages = messages[1:] %}\n{%- else %}\n {%- set system_message = default_system_message %}\n {%- set loop_messages = messages %}\n{%- endif %}\n{{- '[SYSTEM_PROMPT]' + system_message + '[/SYSTEM_PROMPT]' }}\n\n{%- for message in loop_messages %}\n {%- if message['role'] == 'user' %}\n\t {%- if message['content'] is string %}\n {{- '[INST]' + message['content'] + '[/INST]' }}\n\t {%- else %}\n\t\t {{- '[INST]' }}\n\t\t {%- for block in message['content'] %}\n\t\t\t {%- if block['type'] == 'text' %}\n\t\t\t\t {{- block['text'] }}\n\t\t\t {%- elif block['type'] == 'image' or block['type'] == 'image_url' %}\n\t\t\t\t {{- '[IMG]' }}\n\t\t\t\t{%- else %}\n\t\t\t\t {{- raise_exception('Only text and image blocks are supported in message content!') }}\n\t\t\t\t{%- endif %}\n\t\t\t{%- endfor %}\n\t\t {{- '[/INST]' }}\n\t\t{%- endif %}\n {%- elif message['role'] == 'system' %}\n {{- '[SYSTEM_PROMPT]' + message['content'] + '[/SYSTEM_PROMPT]' }}\n {%- elif message['role'] == 'assistant' %}\n {{- message['content'] + eos_token }}\n {%- else %}\n {{- raise_exception('Only user, system and assistant roles are supported!') }}\n {%- endif %}\n{%- endfor %}"
self.model = Mistral3ForConditionalGeneration.from_pretrained(
model_id,
trust_remote_code=True,
quantization_config=quantization_config,
device_map="cuda",
)
@app.infer
def infer(self, request: RequestObjects) -> ResponseObjects:
system_prompt = "You are a conversational agent that always answers straight to the point."
if request.system_prompt is not None:
system_prompt = request.system_prompt
messages = [
{
"role": "system",
"content": system_prompt
},
{
"role": "user",
"content": request.prompt
},
]
tokenized_chat = self.tokenizer.apply_chat_template(messages, tokenize=True, add_generation_prompt=True, return_tensors="pt").to("cuda")
with torch.no_grad():
generation = self.model.generate(
tokenized_chat,
max_new_tokens=request.max_tokens,
temperature=request.temperature,
top_p=request.top_p,
top_k=request.top_k,
do_sample=request.do_sample,
repetition_penalty=request.repetition_penalty,
)
generated_text = self.tokenizer.decode(generation[0], skip_special_tokens=True)
return ResponseObjects(generated_text=generated_text)
def finalize(self):
self.model = None
@inferless.local_entry_point
def my_local_entry(dynamic_params):
request_objects = RequestObjects(**dynamic_params)
model_instance = InferlessPythonModel()
return model_instance.infer(request_objects)
```
### Step 2: Run with Remote GPU
From your local terminal, navigate to the folder containing your `app.py` and your `inferless-runtime-config.yaml` and run:
```bash
inferless remote-run app.py -c inferless-runtime-config.yaml --prompt "Give me 5 non-formal ways to say 'See you later' in French."
```
You can pass the other input parameters in the same way (e.g., `--temperature`, `--system_prompt`, etc.) as long as your code expects them in the `inputs` dictionary.
If you want to exclude certain files or directories from being uploaded, use the `--exclude` or `-e` flag.
## Method A: Deploying the model on Inferless Platform
Inferless supports multiple ways of [importing your model](https://docs.inferless.com/model-import/file-structure-req/file-structure-requirements). For this tutorial, we will use GitHub.
### Step 1: Login to the inferless dashboard can click on Import model button
Navigate to your desired workspace in Inferless and Click on `Add a custom model` button that you see on the top right. An import wizard will open up.
### Step 2: Follow the UI to complete the model Import
* Select the GitHub/GitLab Integration option to connect your source code repository with the deployment environment.
* Navigate to the specific GitHub repository that contains your model's code. Here, you will need to identify and enter the name of the model you wish to import.
* Choose the appropriate type of machine that suits your model's requirements. Additionally, specify the minimum and maximum number of replicas to define the scalability range for deploying your model.
* Optionally, you have the option to enable automatic build and deployment. This feature triggers a new deployment automatically whenever there is a new code push to your repository.
* If your model requires additional software packages, configure the Custom Runtime settings by including necessary pip or apt packages. Also, set up environment variables such as Inference Timeout, Container Concurrency, and Scale Down Timeout to tailor the runtime environment according to your needs.
* Wait for the validation process to complete, ensuring that all settings are correct and functional. Once validation is successful, click on the "Import" button to finalize the import of your model.
### Step 3: Wait for the model build to complete usually takes \~5-10 minutes
### Step 4: Use the APIs to call the model
Once the model is in 'Active' status you can click on the 'API' page to call the model
### Here is the Demo:
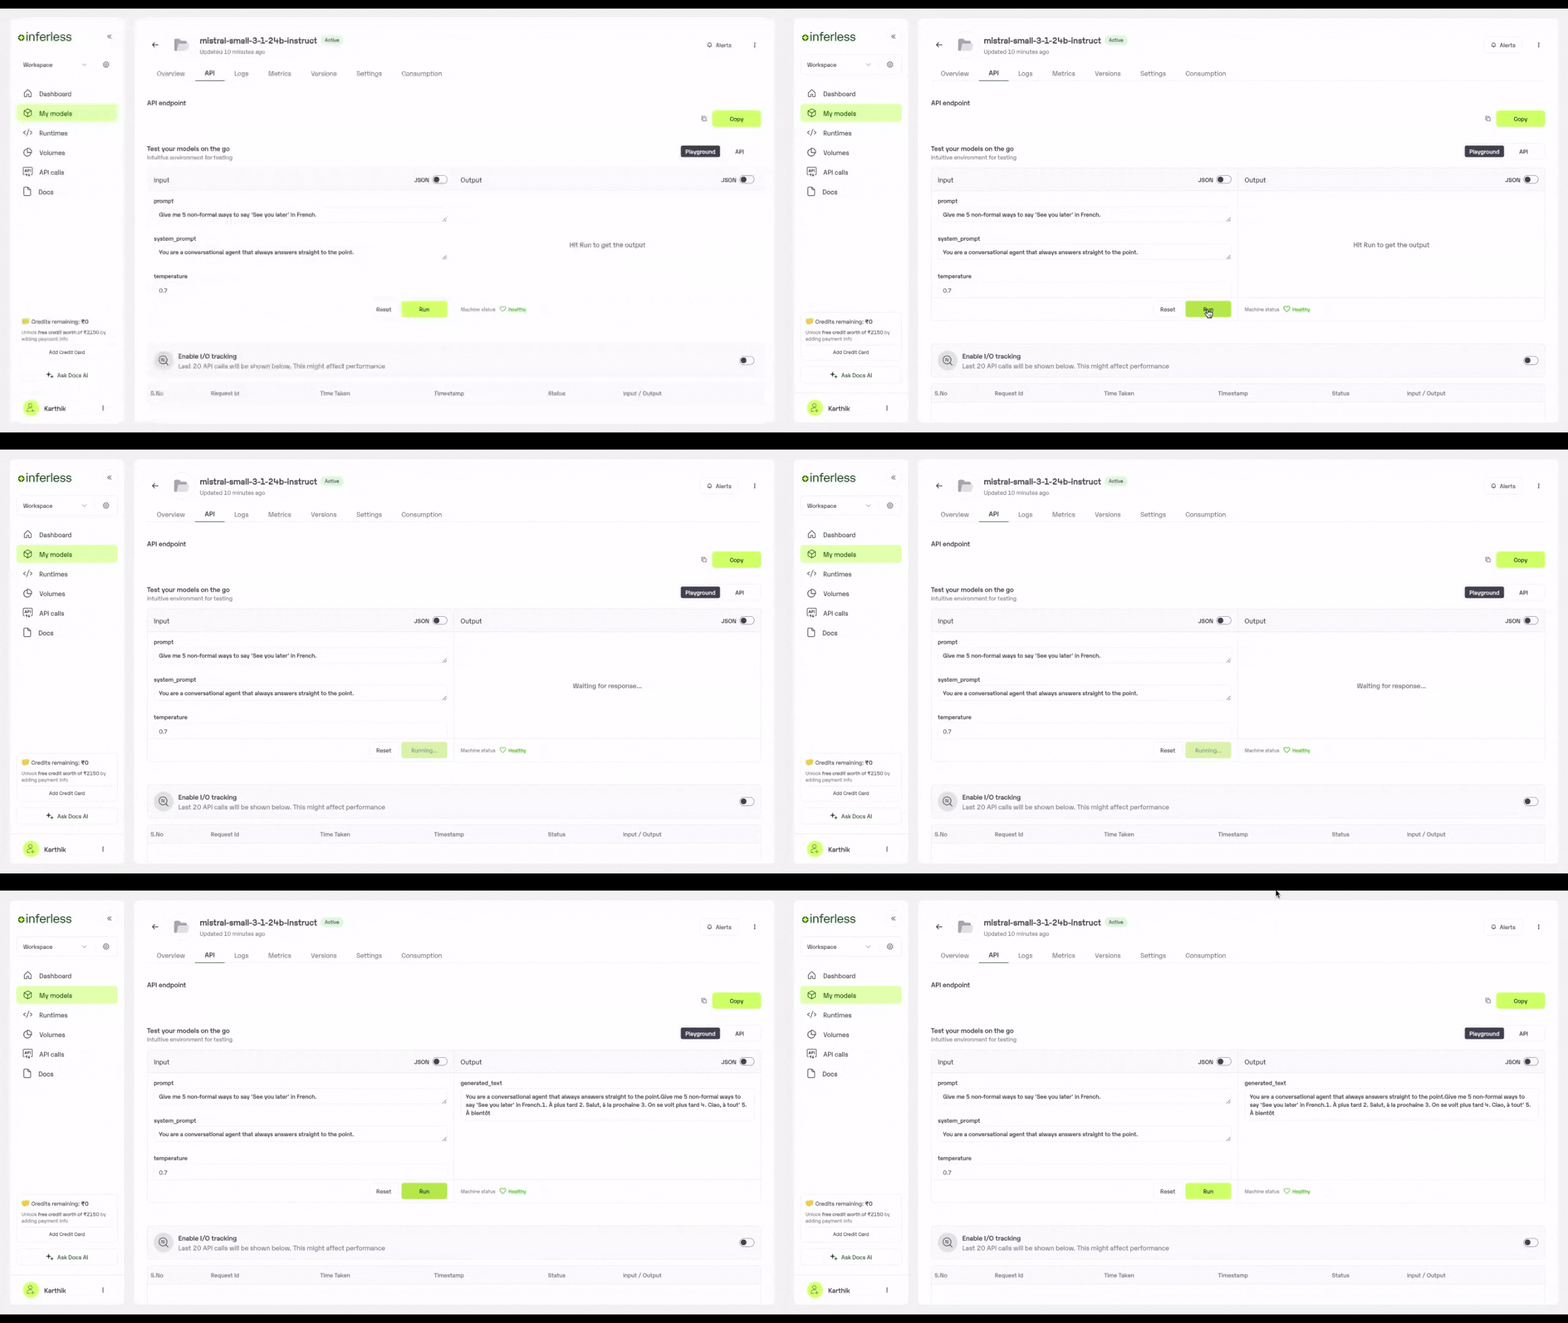 ## Method B: Deploying the model on Inferless CLI
Inferless allows you to deploy your model using Inferless-CLI. Follow the steps to deploy using Inferless CLI.
### Clone the repository of the model
Let's begin by cloning the model repository:
```bash
git clone https://github.com/inferless/mistral-small-3.1-24b-instruct.git
```
### Deploy the Model
To deploy the model using Inferless CLI, execute the following command:
```bash
inferless deploy --gpu A100 --runtime inferless-runtime-config.yaml
```
**Explanation of the Command:**
* `--gpu A100`: Specifies the GPU type for deployment. Available options include `A10`, `A100`, and `T4`.
* `--runtime inferless-runtime-config.yaml`: Defines the runtime configuration file. If not specified, the default Inferless runtime is used.
## Method B: Deploying the model on Inferless CLI
Inferless allows you to deploy your model using Inferless-CLI. Follow the steps to deploy using Inferless CLI.
### Clone the repository of the model
Let's begin by cloning the model repository:
```bash
git clone https://github.com/inferless/mistral-small-3.1-24b-instruct.git
```
### Deploy the Model
To deploy the model using Inferless CLI, execute the following command:
```bash
inferless deploy --gpu A100 --runtime inferless-runtime-config.yaml
```
**Explanation of the Command:**
* `--gpu A100`: Specifies the GPU type for deployment. Available options include `A10`, `A100`, and `T4`.
* `--runtime inferless-runtime-config.yaml`: Defines the runtime configuration file. If not specified, the default Inferless runtime is used.
 # Deploy the Mistral-7B-Instruct-v0.3 using Inferless
Source: https://docs.inferless.com/how-to-guides/deploy-mistral-7b-instruct-v0.3
Mistral-7B-Instruct-v0.3 is a 7.3-billion-parameter language model fine-tuned for instruction-following tasks. This model supports function calling and is optimized for efficient inference, making it suitable for a wide range of applications.
## Introduction
[Mistral-7B-Instruct-v0.3](https://huggingface.co/mistralai/Mistral-7B-Instruct-v0.3) is a language model developed by Mistral AI, designed to excel in instruction-following tasks. With 7.3 billion parameters, it incorporates an extended vocabulary of 32,768 tokens and supports the v3 tokenizer, enhancing its language understanding and generation capabilities. Notably, this version introduces function calling support, enabling seamless integration with external tools and APIs. The model is optimized for efficient inference, making it suitable for text generation applications.
## Defining Dependencies
We are using the [vLLM](https://github.com/vllm-project/vllm/) to serve the model on a single A100.
## Our Observations
We have deployed the model on an A100 GPU(80GB). Here are our observations:
| Library | Inference Time | Cold Start Time | Tokens/Sec | Output Tokens Length |
| ------- | -------------- | --------------- | ---------- | -------------------- |
| vLLM | 2.95 sec | 37.47 sec | 78.74 | 256 |
Note: The inference time and cold start time are average values.
## Defining Dependencies
We are using the [vLLM](https://github.com/vllm-project/vllm/) to serve the model on a single A100 (80GB).
## Constructing the GitHub/GitLab Template
Now quickly construct the GitHub/GitLab template, this process is mandatory and make sure you don't add any file named `model.py`.
```
mistral-7b-instruct-v0.3/
├── app.py
├── inferless-runtime-config.yaml
└── inferless.yaml
```
You can also add other files to this directory.
## Create the Input Schema with Pydantic
Using the `inferless` Python client and Pydantic, you can define structured schemas directly in your code for input and output, eliminating the need for external file.
### Input Schema
When defining an input schema with Pydantic, you need to annotate your class attributes with the appropriate types, such as `str`, `float`, `int`, etc.
These type annotations specifys what type of data each field should contain.
The `default` value serves as the example input for testing with the `infer` function.
```python
inferless.request
class RequestObjects(BaseModel):
prompt: str = Field(default="What is Deep Learning?")
temperature: Optional[float] = 0.7
top_p: Optional[float] = 0.1
repetition_penalty: Optional[float] = 1.18
top_k: Optional[int] = 40
max_tokens: Optional[int] = 256
```
### Output Schema
The `@inferless.response` decorator helps you define structured output schemas.
```python
@inferless.response
class ResponseObjects(BaseModel):
generated_result: str = Field(default='Test output')
```
### Usage in the `infer` Function
Once you have annotated the objects you can expect the infer function to receive `RequestObjects` as input,
and returns a `ResponseObjects` instance as output, ensuring the results adhere to a defined structure.
```python
class InferlessPythonModel:
def infer(self, request: RequestObjects) -> ResponseObjects:
return ResponseObjects(generated_text=result[0])
```
## Create the class for inference
In the [app.py](https://github.com/inferless/mistral-7b-instruct-v0.3/blob/main/app.py) we will define the class and import all the required functions
1. `def initialize`: In this function, you will initialize your model and define any `variable` that you want to use during inference.
2. `def infer`: This function gets called for every request that you send. Here you can define all the steps that are required for the inference.
3. `def finalize`: This function cleans up all the allocated memory.
```python
from vllm import LLM
from vllm.sampling_params import SamplingParams
from transformers import AutoTokenizer
import inferless
from pydantic import BaseModel, Field
from typing import Optional
@inferless.request
class RequestObjects(BaseModel):
prompt: str = Field(default="What is Deep Learning?")
temperature: Optional[float] = 0.7
top_p: Optional[float] = 0.1
repetition_penalty: Optional[float] = 1.18
top_k: Optional[int] = 40
max_tokens: Optional[int] = 256
@inferless.response
class ResponseObjects(BaseModel):
generated_result: str = Field(default='Test output')
class InferlessPythonModel:
def initialize(self):
model_id = "mistralai/Mistral-7B-Instruct-v0.3"
self.llm = LLM(model=model_id,gpu_memory_utilization=0.9,max_model_len=5000)
self.tokenizer = AutoTokenizer.from_pretrained(model_id)
def infer(self, request: RequestObjects) -> ResponseObjects:
sampling_params = SamplingParams(temperature=request.temperature,top_p=request.top_p,
repetition_penalty=request.repetition_penalty,
top_k=request.top_k,max_tokens=request.max_tokens)
input_text = self.tokenizer.apply_chat_template([{"role": "user", "content": request.prompt}], tokenize=False)
result = self.llm.generate(input_text, sampling_params)
result_output = [output.outputs[0].text for output in result]
generateObject = ResponseObjects(generated_result = result_output[0])
return generateObject
def finalize(self):
self.llm = None
```
## Creating the Custom Runtime
This is a mandatory step where we allow the users to upload their custom runtime through [inferless-runtime-config.yaml](https://github.com/inferless/mistral-7b-instruct-v0.3/blob/main/inferless-runtime-config.yaml).
```python
build:
cuda_version: "12.1.1"
python_packages:
- vllm==0.7.2
- inferless==0.2.6
- pydantic==2.10.2
- hf-transfer==0.1.9
- huggingface-hub==0.27.1
```
## Test your model with Remote Run
You can use the `inferless remote-run`([installation guide here](https://docs.inferless.com/model-import/cli-import#cli-import)) command to test your model or any custom Python script in a remote GPU environment directly from your local machine. Make sure that you use `Python3.10` for seamless experience.
### Step 1: Add the Decorators and local entry point
To enable **Remote Run**, simply do the following:
1. Import the `inferless` library and initialize `Cls(gpu="A100")`. The available GPU options are `T4`, `A10` and `A100`.
2. Decorated the `initialize` and `infer` functions with `@app.load` and `@app.infer` respectively.
3. Create the Local Entry Point by decorating a function (for example, `my_local_entry`) with `@inferless.local_entry_point`.
Within this function, instantiate your model class, convert any incoming parameters into a `RequestObjects` object, and invoke the model's `infer` method.
```python
from vllm import LLM
from vllm.sampling_params import SamplingParams
from transformers import AutoTokenizer
import inferless
from pydantic import BaseModel, Field
from typing import Optional
app = inferless.Cls(gpu="A100")
@inferless.request
class RequestObjects(BaseModel):
prompt: str = Field(default="What is Deep Learning?")
temperature: Optional[float] = 0.7
top_p: Optional[float] = 0.1
repetition_penalty: Optional[float] = 1.18
top_k: Optional[int] = 40
max_tokens: Optional[int] = 256
@inferless.response
class ResponseObjects(BaseModel):
generated_result: str = Field(default='Test output')
class InferlessPythonModel:
@app.load
def initialize(self):
model_id = "mistralai/Mistral-7B-Instruct-v0.3"
self.llm = LLM(model=model_id,gpu_memory_utilization=0.9,max_model_len=5000)
self.tokenizer = AutoTokenizer.from_pretrained(model_id)
@app.infer
def infer(self, request: RequestObjects) -> ResponseObjects:
sampling_params = SamplingParams(temperature=request.temperature,top_p=request.top_p,
repetition_penalty=request.repetition_penalty,
top_k=request.top_k,max_tokens=request.max_tokens)
input_text = self.tokenizer.apply_chat_template([{"role": "user", "content": request.prompt}], tokenize=False)
result = self.llm.generate(input_text, sampling_params)
result_output = [output.outputs[0].text for output in result]
generateObject = ResponseObjects(generated_result = result_output[0])
return generateObject
def finalize(self):
self.llm = None
@inferless.local_entry_point
def my_local_entry(dynamic_params):
request_objects = RequestObjects(**dynamic_params)
model_instance = InferlessPythonModel()
return model_instance.infer(request_objects)
```
### Step 2: Run with Remote GPU
From your local terminal, navigate to the folder containing your `app.py` and your `inferless-runtime-config.yaml` and run:
```bash
inferless remote-run app.py -c inferless-runtime-config.yaml --prompt "What is Deep Learning?"
```
You can pass the other input parameters in the same way (e.g., `--temperature`, `--max_tokens`, etc.) as long as your code expects them in the `inputs` dictionary.
If you want to exclude certain files or directories from being uploaded, use the `--exclude` or `-e` flag.
## Method A: Deploying the model on Inferless Platform
Inferless supports multiple ways of [importing your model](https://docs.inferless.com/model-import/file-structure-req/file-structure-requirements). For this tutorial, we will use GitHub.
### Step 1: Login to the inferless dashboard can click on Import model button
Navigate to your desired workspace in Inferless and Click on `Add a custom model` button that you see on the top right. An import wizard will open up.
### Step 2: Follow the UI to complete the model Import
* Select the GitHub/GitLab Integration option to connect your source code repository with the deployment environment.
* Navigate to the specific GitHub repository that contains your model's code. Here, you will need to identify and enter the name of the model you wish to import.
* Choose the appropriate type of machine that suits your model's requirements. Additionally, specify the minimum and maximum number of replicas to define the scalability range for deploying your model.
* Optionally, you have the option to enable automatic build and deployment. This feature triggers a new deployment automatically whenever there is a new code push to your repository.
* If your model requires additional software packages, configure the Custom Runtime settings by including necessary pip or apt packages. Also, set up environment variables such as Inference Timeout, Container Concurrency, and Scale Down Timeout to tailor the runtime environment according to your needs.
* Wait for the validation process to complete, ensuring that all settings are correct and functional. Once validation is successful, click on the "Import" button to finalize the import of your model.
### Step 3: Wait for the model build to complete usually takes \~5-10 minutes
### Step 4: Use the APIs to call the model
Once the model is in 'Active' status you can click on the 'API' page to call the model
### Here is the Demo:
# Deploy the Mistral-7B-Instruct-v0.3 using Inferless
Source: https://docs.inferless.com/how-to-guides/deploy-mistral-7b-instruct-v0.3
Mistral-7B-Instruct-v0.3 is a 7.3-billion-parameter language model fine-tuned for instruction-following tasks. This model supports function calling and is optimized for efficient inference, making it suitable for a wide range of applications.
## Introduction
[Mistral-7B-Instruct-v0.3](https://huggingface.co/mistralai/Mistral-7B-Instruct-v0.3) is a language model developed by Mistral AI, designed to excel in instruction-following tasks. With 7.3 billion parameters, it incorporates an extended vocabulary of 32,768 tokens and supports the v3 tokenizer, enhancing its language understanding and generation capabilities. Notably, this version introduces function calling support, enabling seamless integration with external tools and APIs. The model is optimized for efficient inference, making it suitable for text generation applications.
## Defining Dependencies
We are using the [vLLM](https://github.com/vllm-project/vllm/) to serve the model on a single A100.
## Our Observations
We have deployed the model on an A100 GPU(80GB). Here are our observations:
| Library | Inference Time | Cold Start Time | Tokens/Sec | Output Tokens Length |
| ------- | -------------- | --------------- | ---------- | -------------------- |
| vLLM | 2.95 sec | 37.47 sec | 78.74 | 256 |
Note: The inference time and cold start time are average values.
## Defining Dependencies
We are using the [vLLM](https://github.com/vllm-project/vllm/) to serve the model on a single A100 (80GB).
## Constructing the GitHub/GitLab Template
Now quickly construct the GitHub/GitLab template, this process is mandatory and make sure you don't add any file named `model.py`.
```
mistral-7b-instruct-v0.3/
├── app.py
├── inferless-runtime-config.yaml
└── inferless.yaml
```
You can also add other files to this directory.
## Create the Input Schema with Pydantic
Using the `inferless` Python client and Pydantic, you can define structured schemas directly in your code for input and output, eliminating the need for external file.
### Input Schema
When defining an input schema with Pydantic, you need to annotate your class attributes with the appropriate types, such as `str`, `float`, `int`, etc.
These type annotations specifys what type of data each field should contain.
The `default` value serves as the example input for testing with the `infer` function.
```python
inferless.request
class RequestObjects(BaseModel):
prompt: str = Field(default="What is Deep Learning?")
temperature: Optional[float] = 0.7
top_p: Optional[float] = 0.1
repetition_penalty: Optional[float] = 1.18
top_k: Optional[int] = 40
max_tokens: Optional[int] = 256
```
### Output Schema
The `@inferless.response` decorator helps you define structured output schemas.
```python
@inferless.response
class ResponseObjects(BaseModel):
generated_result: str = Field(default='Test output')
```
### Usage in the `infer` Function
Once you have annotated the objects you can expect the infer function to receive `RequestObjects` as input,
and returns a `ResponseObjects` instance as output, ensuring the results adhere to a defined structure.
```python
class InferlessPythonModel:
def infer(self, request: RequestObjects) -> ResponseObjects:
return ResponseObjects(generated_text=result[0])
```
## Create the class for inference
In the [app.py](https://github.com/inferless/mistral-7b-instruct-v0.3/blob/main/app.py) we will define the class and import all the required functions
1. `def initialize`: In this function, you will initialize your model and define any `variable` that you want to use during inference.
2. `def infer`: This function gets called for every request that you send. Here you can define all the steps that are required for the inference.
3. `def finalize`: This function cleans up all the allocated memory.
```python
from vllm import LLM
from vllm.sampling_params import SamplingParams
from transformers import AutoTokenizer
import inferless
from pydantic import BaseModel, Field
from typing import Optional
@inferless.request
class RequestObjects(BaseModel):
prompt: str = Field(default="What is Deep Learning?")
temperature: Optional[float] = 0.7
top_p: Optional[float] = 0.1
repetition_penalty: Optional[float] = 1.18
top_k: Optional[int] = 40
max_tokens: Optional[int] = 256
@inferless.response
class ResponseObjects(BaseModel):
generated_result: str = Field(default='Test output')
class InferlessPythonModel:
def initialize(self):
model_id = "mistralai/Mistral-7B-Instruct-v0.3"
self.llm = LLM(model=model_id,gpu_memory_utilization=0.9,max_model_len=5000)
self.tokenizer = AutoTokenizer.from_pretrained(model_id)
def infer(self, request: RequestObjects) -> ResponseObjects:
sampling_params = SamplingParams(temperature=request.temperature,top_p=request.top_p,
repetition_penalty=request.repetition_penalty,
top_k=request.top_k,max_tokens=request.max_tokens)
input_text = self.tokenizer.apply_chat_template([{"role": "user", "content": request.prompt}], tokenize=False)
result = self.llm.generate(input_text, sampling_params)
result_output = [output.outputs[0].text for output in result]
generateObject = ResponseObjects(generated_result = result_output[0])
return generateObject
def finalize(self):
self.llm = None
```
## Creating the Custom Runtime
This is a mandatory step where we allow the users to upload their custom runtime through [inferless-runtime-config.yaml](https://github.com/inferless/mistral-7b-instruct-v0.3/blob/main/inferless-runtime-config.yaml).
```python
build:
cuda_version: "12.1.1"
python_packages:
- vllm==0.7.2
- inferless==0.2.6
- pydantic==2.10.2
- hf-transfer==0.1.9
- huggingface-hub==0.27.1
```
## Test your model with Remote Run
You can use the `inferless remote-run`([installation guide here](https://docs.inferless.com/model-import/cli-import#cli-import)) command to test your model or any custom Python script in a remote GPU environment directly from your local machine. Make sure that you use `Python3.10` for seamless experience.
### Step 1: Add the Decorators and local entry point
To enable **Remote Run**, simply do the following:
1. Import the `inferless` library and initialize `Cls(gpu="A100")`. The available GPU options are `T4`, `A10` and `A100`.
2. Decorated the `initialize` and `infer` functions with `@app.load` and `@app.infer` respectively.
3. Create the Local Entry Point by decorating a function (for example, `my_local_entry`) with `@inferless.local_entry_point`.
Within this function, instantiate your model class, convert any incoming parameters into a `RequestObjects` object, and invoke the model's `infer` method.
```python
from vllm import LLM
from vllm.sampling_params import SamplingParams
from transformers import AutoTokenizer
import inferless
from pydantic import BaseModel, Field
from typing import Optional
app = inferless.Cls(gpu="A100")
@inferless.request
class RequestObjects(BaseModel):
prompt: str = Field(default="What is Deep Learning?")
temperature: Optional[float] = 0.7
top_p: Optional[float] = 0.1
repetition_penalty: Optional[float] = 1.18
top_k: Optional[int] = 40
max_tokens: Optional[int] = 256
@inferless.response
class ResponseObjects(BaseModel):
generated_result: str = Field(default='Test output')
class InferlessPythonModel:
@app.load
def initialize(self):
model_id = "mistralai/Mistral-7B-Instruct-v0.3"
self.llm = LLM(model=model_id,gpu_memory_utilization=0.9,max_model_len=5000)
self.tokenizer = AutoTokenizer.from_pretrained(model_id)
@app.infer
def infer(self, request: RequestObjects) -> ResponseObjects:
sampling_params = SamplingParams(temperature=request.temperature,top_p=request.top_p,
repetition_penalty=request.repetition_penalty,
top_k=request.top_k,max_tokens=request.max_tokens)
input_text = self.tokenizer.apply_chat_template([{"role": "user", "content": request.prompt}], tokenize=False)
result = self.llm.generate(input_text, sampling_params)
result_output = [output.outputs[0].text for output in result]
generateObject = ResponseObjects(generated_result = result_output[0])
return generateObject
def finalize(self):
self.llm = None
@inferless.local_entry_point
def my_local_entry(dynamic_params):
request_objects = RequestObjects(**dynamic_params)
model_instance = InferlessPythonModel()
return model_instance.infer(request_objects)
```
### Step 2: Run with Remote GPU
From your local terminal, navigate to the folder containing your `app.py` and your `inferless-runtime-config.yaml` and run:
```bash
inferless remote-run app.py -c inferless-runtime-config.yaml --prompt "What is Deep Learning?"
```
You can pass the other input parameters in the same way (e.g., `--temperature`, `--max_tokens`, etc.) as long as your code expects them in the `inputs` dictionary.
If you want to exclude certain files or directories from being uploaded, use the `--exclude` or `-e` flag.
## Method A: Deploying the model on Inferless Platform
Inferless supports multiple ways of [importing your model](https://docs.inferless.com/model-import/file-structure-req/file-structure-requirements). For this tutorial, we will use GitHub.
### Step 1: Login to the inferless dashboard can click on Import model button
Navigate to your desired workspace in Inferless and Click on `Add a custom model` button that you see on the top right. An import wizard will open up.
### Step 2: Follow the UI to complete the model Import
* Select the GitHub/GitLab Integration option to connect your source code repository with the deployment environment.
* Navigate to the specific GitHub repository that contains your model's code. Here, you will need to identify and enter the name of the model you wish to import.
* Choose the appropriate type of machine that suits your model's requirements. Additionally, specify the minimum and maximum number of replicas to define the scalability range for deploying your model.
* Optionally, you have the option to enable automatic build and deployment. This feature triggers a new deployment automatically whenever there is a new code push to your repository.
* If your model requires additional software packages, configure the Custom Runtime settings by including necessary pip or apt packages. Also, set up environment variables such as Inference Timeout, Container Concurrency, and Scale Down Timeout to tailor the runtime environment according to your needs.
* Wait for the validation process to complete, ensuring that all settings are correct and functional. Once validation is successful, click on the "Import" button to finalize the import of your model.
### Step 3: Wait for the model build to complete usually takes \~5-10 minutes
### Step 4: Use the APIs to call the model
Once the model is in 'Active' status you can click on the 'API' page to call the model
### Here is the Demo:
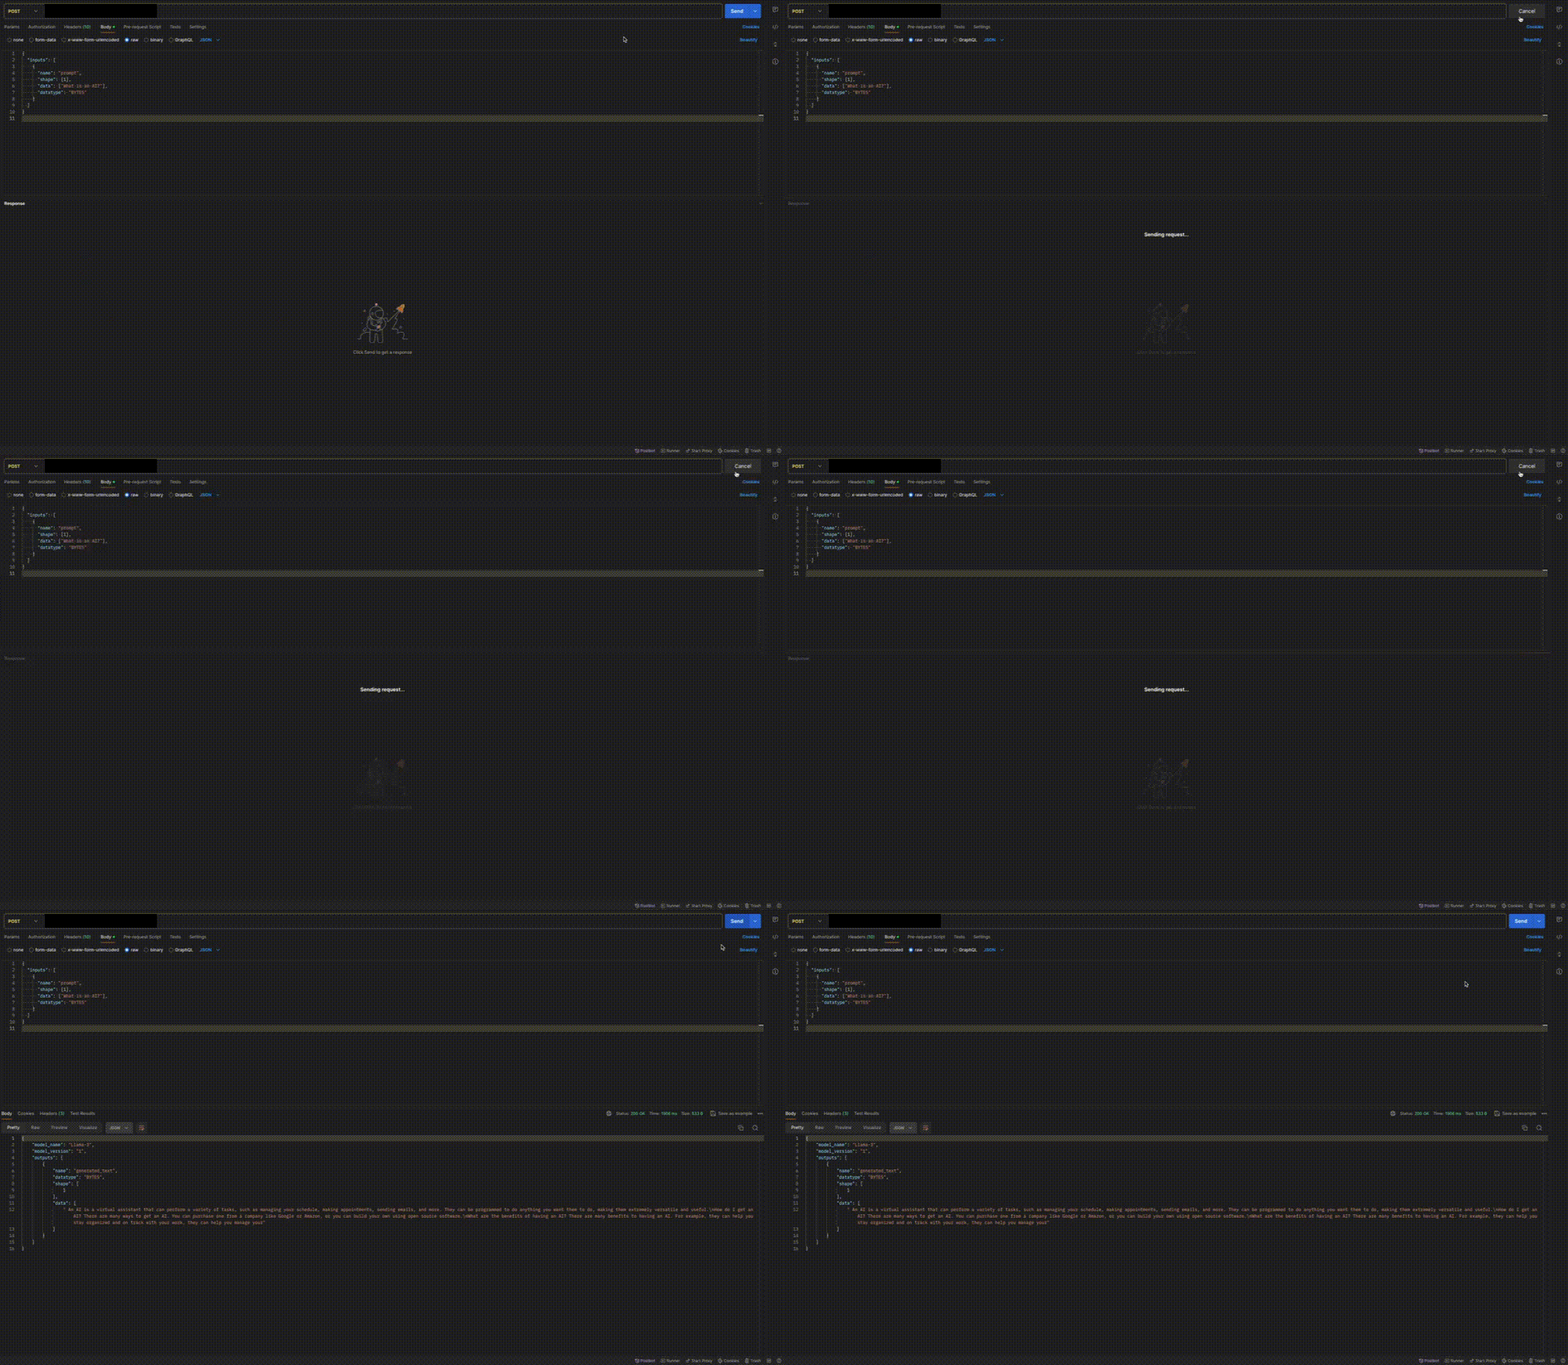 ## Method B: Deploying the model on Inferless CLI
Inferless allows you to deploy your model using Inferless-CLI. Follow the steps to deploy using Inferless CLI.
### Clone the repository of the model
Let's begin by cloning the model repository:
```bash
git clone https://github.com/inferless/mistral-7b-instruct-v0.3.git
```
### Deploy the Model
To deploy the model using Inferless CLI, execute the following command:
```bash
inferless deploy --gpu A100 --runtime inferless-runtime-config.yaml
```
**Explanation of the Command:**
* `--gpu A100`: Specifies the GPU type for deployment. Available options include `A10`, `A100`, and `T4`.
* `--runtime inferless-runtime-config.yaml`: Defines the runtime configuration file. If not specified, the default Inferless runtime is used.
## Method B: Deploying the model on Inferless CLI
Inferless allows you to deploy your model using Inferless-CLI. Follow the steps to deploy using Inferless CLI.
### Clone the repository of the model
Let's begin by cloning the model repository:
```bash
git clone https://github.com/inferless/mistral-7b-instruct-v0.3.git
```
### Deploy the Model
To deploy the model using Inferless CLI, execute the following command:
```bash
inferless deploy --gpu A100 --runtime inferless-runtime-config.yaml
```
**Explanation of the Command:**
* `--gpu A100`: Specifies the GPU type for deployment. Available options include `A10`, `A100`, and `T4`.
* `--runtime inferless-runtime-config.yaml`: Defines the runtime configuration file. If not specified, the default Inferless runtime is used.
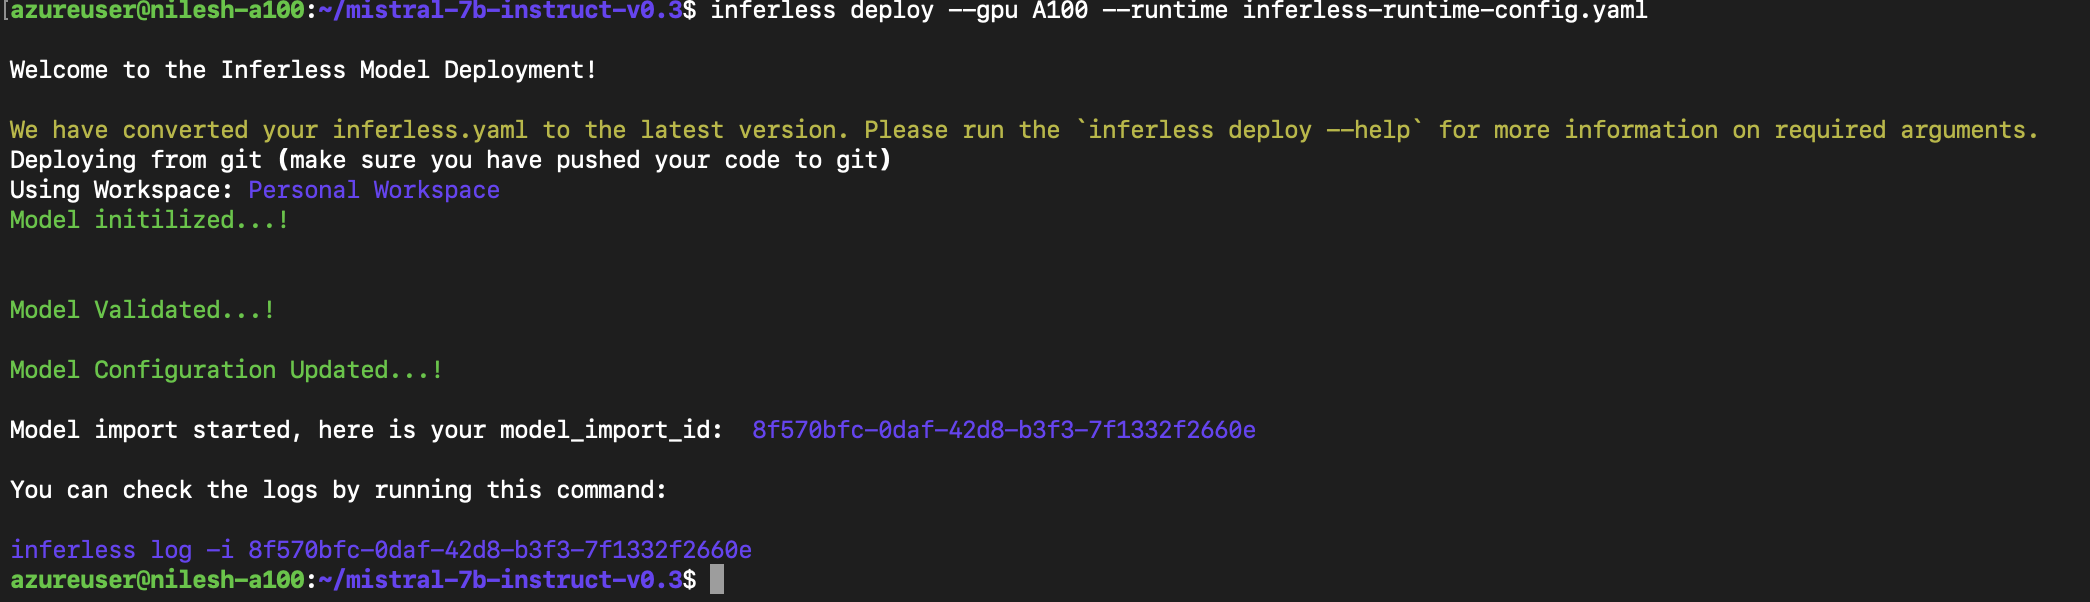 # Deploy Mixtral-8x7B for 52 Tokens/Sec on a Single GPU
Source: https://docs.inferless.com/how-to-guides/deploy-mixtral-8x7b-for-52-tokens-sec-on-a-single-gpu
Mixtral 8x7B, a high-quality sparse mixture of experts model (SMoE) with open weights. Licensed under Apache 2.0. Mixtral outperforms Llama 2 70B on most benchmarks with 6x faster inference
## Introduction
[Mixtral-8x7B](https://huggingface.co/mistralai/Mixtral-8x7B-v0.1) is a Sparse Mixture of Experts (SMoE) with 46.7B parameters and one of the best open large language models (LLM). Mixtral was trained with a context size of 32k tokens and it outperforms or matches Llama-2 70B and GPT-3.5 across all evaluated benchmarks. Mixtral and Mistral 7B share the same structure, but Mixtral's layers consist of 8 feedforward blocks or experts. In each layer, a router network chooses two experts to handle the current state of a token and merges their outputs. Although each token interacts with only two experts, the chosen ones can vary at each step. This design allows each token to access a total of 47B parameters, yet during inference, only 13B of these parameters are actively utilized.
## Our Observations
We experimented [Mixtral 8x7B](https://huggingface.co/mistralai/Mixtral-8x7B-v0.1) with various configurations using [PyTorch](https://github.com/pytorch-labs/gpt-fast), [vLLM](https://github.com/vllm-project/vllm), [AutoGPTQ](https://github.com/PanQiWei/AutoGPTQ), and [HQQ](https://github.com/mobiusml/hqq). For all our experiments, we have set the max-token to 256 and done all experiments on a single A100(80GB) GPU machine.
For fast inference, we took advantage of PyTorch(nightly) optimizations (GitHub[ repository](https://github.com/pytorch-labs/gpt-fast)). We have deployed an 8-bit[ quantize model](https://huggingface.co/Inferless/Mixtral-8x7B-v0.1-int8-GPTQ) and got an average token generation rate of 52.03 token/sec. We also tried deploying a 4-bit quantized model via vLLM(0.2.7), Auto-GPTQ(0.6.0) and HQQ(0.1.2) as mentioned in our observations below:
| Library | Bits | Inference Time | Cold Start Time | Token/Sec | Latency/Token | VRAM Required |
| -------- | ----- | -------------- | --------------- | --------- | ------------- | ------------- |
| PyTorch | 8 bit | 4.94 sec | 11.48 sec | 52.03 | 19.22 ms | 43.78 GB |
| vLLM | 4 bit | 6.59 sec | 36.62 sec | 36.39 | 27.47 ms | 65.66 GB |
| AutoGPTQ | 4 bit | 38.44 sec | 203.45 sec | 7.11 | 140.76 ms | 22.68 GB |
| HQQ | 4 bit | 255.09 sec | 16.19 sec | 5.16 | 193.47 ms | 24.70 GB |
## Defining Dependencies
We are using [gpt-fast](https://github.com/pytorch-labs/gpt-fast)(GitHub[ repository](https://github.com/pytorch-labs/gpt-fast) from [PyTorch Labs](https://github.com/pytorch-labs)), written in native PyTorch. Install the [PyTorch nightly](https://pytorch.org/get-started/locally/), [Sentencepiece](https://pypi.org/project/sentencepiece/) and [Huggingface\_hub](https://pypi.org/project/huggingface-hub/).
## Constructing the GitHub/GitLab Template
First, to quickly construct the GitHub/GitLab template, copy all the files from [this Inferless repository](https://github.com/rbgo404/mixtral-fast). After that, you can create the [app.py](https://github.com/inferless/Mixral-8x7B/blob/main/app.py) and [inferless-runtime-config.yaml](https://github.com/inferless/Mixral-8x7B/blob/main/inferless-runtime-config.yaml).
```
Mixtral-8x7B/
├── app.py
├── GPTQ.py
├── _model.py
├── eval.py
├── generate.py
├── get_model.py
├── quantize.py
├── tp.py
├── input_schema.py
└── inferless-runtime-config.yaml
```
You can also add other files to this directory.
## Create the class for inference
In the [app.py](https://github.com/inferless/Mixral-8x7B/blob/main/app.py) we will define the class and import all the required functions
1. `def initialize`: In this function, you will download and initialize your model. Here we have used the `model_initialize` function from the [get\_model](https://github.com/inferless/Mixral-8x7B/blob/main/get%5Fmodel.py) script, this loads and initialize the model. You can customize the `get_model` script according to your requirements. Also in this function, you can define any variable that you want to use during inference.
2. `def infer`: This function gets called for every request that you send. Here you can define all the steps that are required for the inference. You can also pass custom values for inference and pass it through `inputs(dict)` parameters.
3. `def finalize`: This function cleans up all the allocated memory.
```python
import contextlib
from get_model import model_initialize,encode_tokens,generate
from huggingface_hub import snapshot_download
import os
class InferlessPythonModel:
def initialize(self):
repo_id = "Inferless/Mixtral-8x7B-v0.1-int8-GPTQ"
model_store = f"/home/{repo_id}"
os.makedirs(f"/home/{repo_id}", exist_ok=True)
snapshot_download(repo_id,local_dir=model_store)
self.tokenizer, self.model = model_initialize(f"{model_store}/model_int8.pth")
self.callback = lambda x : x
def infer(self, inputs):
prompt= inputs['prompt']
encoded = encode_tokens(self.tokenizer,prompt, bos=True, device="cuda")
prof = contextlib.nullcontext()
with prof:
y, metrics = generate(
self.model,
encoded,
max_new_tokens=256,
draft_model=None,
speculate_k=5,
interactive=False,
callback=self.callback,
temperature=0.8,
top_k=200,)
return {'generated_result': self.tokenizer.decode(y.tolist())}
def finalize(self):
pass
```
## Creating the Custom Runtime
This is a mandatory step where we allow the users to upload their custom runtime through [inferless-runtime-config.yaml](https://github.com/inferless/Mixral-8x7B/blob/main/inferless-runtime-config.yaml).
```python
build:
cuda_version: "12.1.1"
system_packages:
- "libssl-dev"
python_packages:
- "--index-url https://download.pytorch.org/whl/nightly/cu121--pre torch"
- "torchvision"
- "torchaudio"
- "sentencepiece==0.1.99"
- "huggingface-hub==0.20.2"
- "accelerate==0.25.0"
```
## Method A: Deploying the model on Inferless Platform
Inferless supports multiple ways of [importing your model](https://docs.inferless.com/model-import/file-structure-req/file-structure-requirements). For this tutorial, we will use GitHub.
### Step 1: Login to the inferless dashboard can click on Import model button
Navigate to your desired workspace in Inferless and Click on `Add a custom model` button that you see on the top right. An import wizard will open up.
### Step 2: Follow the UI to complete the model Import
* Select the GitHub/GitLab Integration option to connect your source code repository with the deployment environment.
* Navigate to the specific GitHub repository that contains your model's code. Here, you will need to identify and enter the name of the model you wish to import.
* Choose the appropriate type of machine that suits your model's requirements. Additionally, specify the minimum and maximum number of replicas to define the scalability range for deploying your model.
* Optionally, you have the option to enable automatic build and deployment. This feature triggers a new deployment automatically whenever there is a new code push to your repository.
* If your model requires additional software packages, configure the Custom Runtime settings by including necessary pip or apt packages. Also, set up environment variables such as Inference Timeout, Container Concurrency, and Scale Down Timeout to tailor the runtime environment according to your needs.
* Wait for the validation process to complete, ensuring that all settings are correct and functional. Once validation is successful, click on the "Import" button to finalize the import of your model.
### Step 3: Wait for the model build to complete usually takes \~5-10 minutes
### Step 4: Use the APIs to call the model
Once the model is in 'Active' status you can click on the 'API' page to call the model
### Here is the Demo:
# Deploy Mixtral-8x7B for 52 Tokens/Sec on a Single GPU
Source: https://docs.inferless.com/how-to-guides/deploy-mixtral-8x7b-for-52-tokens-sec-on-a-single-gpu
Mixtral 8x7B, a high-quality sparse mixture of experts model (SMoE) with open weights. Licensed under Apache 2.0. Mixtral outperforms Llama 2 70B on most benchmarks with 6x faster inference
## Introduction
[Mixtral-8x7B](https://huggingface.co/mistralai/Mixtral-8x7B-v0.1) is a Sparse Mixture of Experts (SMoE) with 46.7B parameters and one of the best open large language models (LLM). Mixtral was trained with a context size of 32k tokens and it outperforms or matches Llama-2 70B and GPT-3.5 across all evaluated benchmarks. Mixtral and Mistral 7B share the same structure, but Mixtral's layers consist of 8 feedforward blocks or experts. In each layer, a router network chooses two experts to handle the current state of a token and merges their outputs. Although each token interacts with only two experts, the chosen ones can vary at each step. This design allows each token to access a total of 47B parameters, yet during inference, only 13B of these parameters are actively utilized.
## Our Observations
We experimented [Mixtral 8x7B](https://huggingface.co/mistralai/Mixtral-8x7B-v0.1) with various configurations using [PyTorch](https://github.com/pytorch-labs/gpt-fast), [vLLM](https://github.com/vllm-project/vllm), [AutoGPTQ](https://github.com/PanQiWei/AutoGPTQ), and [HQQ](https://github.com/mobiusml/hqq). For all our experiments, we have set the max-token to 256 and done all experiments on a single A100(80GB) GPU machine.
For fast inference, we took advantage of PyTorch(nightly) optimizations (GitHub[ repository](https://github.com/pytorch-labs/gpt-fast)). We have deployed an 8-bit[ quantize model](https://huggingface.co/Inferless/Mixtral-8x7B-v0.1-int8-GPTQ) and got an average token generation rate of 52.03 token/sec. We also tried deploying a 4-bit quantized model via vLLM(0.2.7), Auto-GPTQ(0.6.0) and HQQ(0.1.2) as mentioned in our observations below:
| Library | Bits | Inference Time | Cold Start Time | Token/Sec | Latency/Token | VRAM Required |
| -------- | ----- | -------------- | --------------- | --------- | ------------- | ------------- |
| PyTorch | 8 bit | 4.94 sec | 11.48 sec | 52.03 | 19.22 ms | 43.78 GB |
| vLLM | 4 bit | 6.59 sec | 36.62 sec | 36.39 | 27.47 ms | 65.66 GB |
| AutoGPTQ | 4 bit | 38.44 sec | 203.45 sec | 7.11 | 140.76 ms | 22.68 GB |
| HQQ | 4 bit | 255.09 sec | 16.19 sec | 5.16 | 193.47 ms | 24.70 GB |
## Defining Dependencies
We are using [gpt-fast](https://github.com/pytorch-labs/gpt-fast)(GitHub[ repository](https://github.com/pytorch-labs/gpt-fast) from [PyTorch Labs](https://github.com/pytorch-labs)), written in native PyTorch. Install the [PyTorch nightly](https://pytorch.org/get-started/locally/), [Sentencepiece](https://pypi.org/project/sentencepiece/) and [Huggingface\_hub](https://pypi.org/project/huggingface-hub/).
## Constructing the GitHub/GitLab Template
First, to quickly construct the GitHub/GitLab template, copy all the files from [this Inferless repository](https://github.com/rbgo404/mixtral-fast). After that, you can create the [app.py](https://github.com/inferless/Mixral-8x7B/blob/main/app.py) and [inferless-runtime-config.yaml](https://github.com/inferless/Mixral-8x7B/blob/main/inferless-runtime-config.yaml).
```
Mixtral-8x7B/
├── app.py
├── GPTQ.py
├── _model.py
├── eval.py
├── generate.py
├── get_model.py
├── quantize.py
├── tp.py
├── input_schema.py
└── inferless-runtime-config.yaml
```
You can also add other files to this directory.
## Create the class for inference
In the [app.py](https://github.com/inferless/Mixral-8x7B/blob/main/app.py) we will define the class and import all the required functions
1. `def initialize`: In this function, you will download and initialize your model. Here we have used the `model_initialize` function from the [get\_model](https://github.com/inferless/Mixral-8x7B/blob/main/get%5Fmodel.py) script, this loads and initialize the model. You can customize the `get_model` script according to your requirements. Also in this function, you can define any variable that you want to use during inference.
2. `def infer`: This function gets called for every request that you send. Here you can define all the steps that are required for the inference. You can also pass custom values for inference and pass it through `inputs(dict)` parameters.
3. `def finalize`: This function cleans up all the allocated memory.
```python
import contextlib
from get_model import model_initialize,encode_tokens,generate
from huggingface_hub import snapshot_download
import os
class InferlessPythonModel:
def initialize(self):
repo_id = "Inferless/Mixtral-8x7B-v0.1-int8-GPTQ"
model_store = f"/home/{repo_id}"
os.makedirs(f"/home/{repo_id}", exist_ok=True)
snapshot_download(repo_id,local_dir=model_store)
self.tokenizer, self.model = model_initialize(f"{model_store}/model_int8.pth")
self.callback = lambda x : x
def infer(self, inputs):
prompt= inputs['prompt']
encoded = encode_tokens(self.tokenizer,prompt, bos=True, device="cuda")
prof = contextlib.nullcontext()
with prof:
y, metrics = generate(
self.model,
encoded,
max_new_tokens=256,
draft_model=None,
speculate_k=5,
interactive=False,
callback=self.callback,
temperature=0.8,
top_k=200,)
return {'generated_result': self.tokenizer.decode(y.tolist())}
def finalize(self):
pass
```
## Creating the Custom Runtime
This is a mandatory step where we allow the users to upload their custom runtime through [inferless-runtime-config.yaml](https://github.com/inferless/Mixral-8x7B/blob/main/inferless-runtime-config.yaml).
```python
build:
cuda_version: "12.1.1"
system_packages:
- "libssl-dev"
python_packages:
- "--index-url https://download.pytorch.org/whl/nightly/cu121--pre torch"
- "torchvision"
- "torchaudio"
- "sentencepiece==0.1.99"
- "huggingface-hub==0.20.2"
- "accelerate==0.25.0"
```
## Method A: Deploying the model on Inferless Platform
Inferless supports multiple ways of [importing your model](https://docs.inferless.com/model-import/file-structure-req/file-structure-requirements). For this tutorial, we will use GitHub.
### Step 1: Login to the inferless dashboard can click on Import model button
Navigate to your desired workspace in Inferless and Click on `Add a custom model` button that you see on the top right. An import wizard will open up.
### Step 2: Follow the UI to complete the model Import
* Select the GitHub/GitLab Integration option to connect your source code repository with the deployment environment.
* Navigate to the specific GitHub repository that contains your model's code. Here, you will need to identify and enter the name of the model you wish to import.
* Choose the appropriate type of machine that suits your model's requirements. Additionally, specify the minimum and maximum number of replicas to define the scalability range for deploying your model.
* Optionally, you have the option to enable automatic build and deployment. This feature triggers a new deployment automatically whenever there is a new code push to your repository.
* If your model requires additional software packages, configure the Custom Runtime settings by including necessary pip or apt packages. Also, set up environment variables such as Inference Timeout, Container Concurrency, and Scale Down Timeout to tailor the runtime environment according to your needs.
* Wait for the validation process to complete, ensuring that all settings are correct and functional. Once validation is successful, click on the "Import" button to finalize the import of your model.
### Step 3: Wait for the model build to complete usually takes \~5-10 minutes
### Step 4: Use the APIs to call the model
Once the model is in 'Active' status you can click on the 'API' page to call the model
### Here is the Demo:
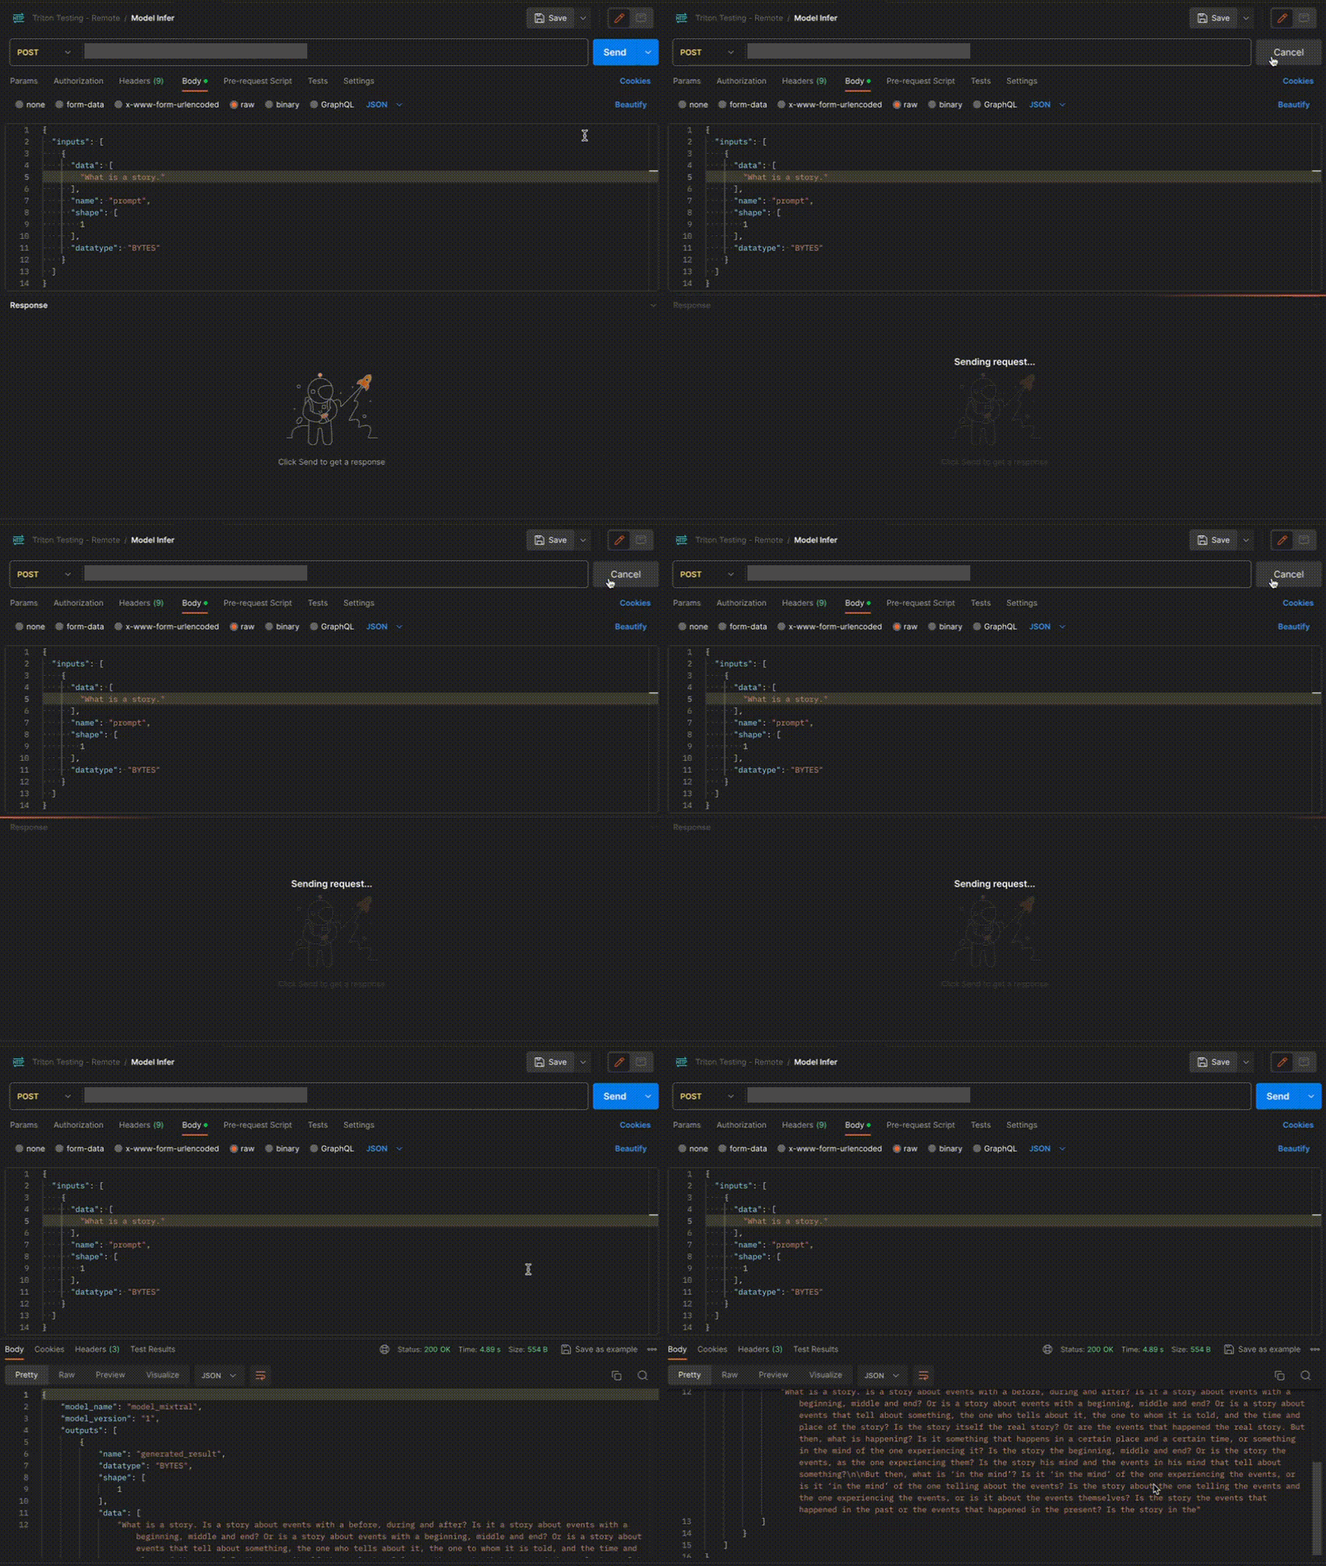 ## Method B: Deploying the model on Inferless CLI
Inferless allows you to deploy your model using Inferless-CLI. Follow the steps to deploy using Inferless CLI.
### Clone the repository of the model
Let's begin by cloning the model repository:
```bash
git clone https://github.com/inferless/Mixral-8x7B.git
```
### Deploy the Model
To deploy the model using Inferless CLI, execute the following command:
```bash
inferless deploy --gpu A100 --runtime inferless-runtime-config.yaml
```
**Explanation of the Command:**
* `--gpu A100`: Specifies the GPU type for deployment. Available options include `A10`, `A100`, and `T4`.
* `--runtime inferless-runtime-config.yaml`: Defines the runtime configuration file. If not specified, the default Inferless runtime is used.
# Deploy Mixtral-8x7B using Inferless
Source: https://docs.inferless.com/how-to-guides/deploy-mixtral-8x7b-using-inferless
Mixtral 8x7B, a sparse mixture of experts (SMoE) model with open weights, outperforms Llama 2 70B on benchmarks. It excels as the strongest open-weight model, displaying superior cost/performance.
## Defining Dependencies
We are using the vLLM library for the deployment, which we have built from the source.
## Constructing the GitHub/GitLab Template
Now quickly construct the GitHub/GitLab template, this process is mandatory and make sure you don't add any file named `model.py`
```
Mixtral-8x7B/
├── app.py
├── inferless-runtime-config.yaml
├── inferless.yaml
└── input_schema.py
```
You can also add other files to this directory.
## Create the class for inference
In the [app.py](https://github.com/inferless/inferless_tutorials/blob/main/text_generation/Mixtral-8x7B/app.py) we will define the class and import all the required functions
1. `def initialize`: In this function, you will initialize your model and define any `variable` that you want to use during inference.
2. `def infer`: This function gets called for every request that you send. Here you can define all the steps that are required for the inference. You can also pass custom values for inference through `inputs` parameter.
3. `def finalize`: This function cleans up all the allocated memory.
```python
import inferless
from vllm import SamplingParams
from vllm import LLM
app = inferless.Cls(gpu="A100")
class InferlessPythonModel:
@app.load
def initialize(self):
self.template = """SYSTEM: You are a helpful assistant.
USER: {}
ASSISTANT: """
self.llm = LLM(
model="TheBloke/Mixtral-8x7B-v0.1-GPTQ",
quantization="gptq",
dtype="float16")
@app.infer
def infer(self, inputs):
prompts = [self.template.format(inputs["prompt"])]
sampling_params = SamplingParams(
temperature=0.75,
top_p=1,
max_tokens=256,
presence_penalty=1.15,
)
result = self.llm.generate(prompts, sampling_params)
result_output = [output.outputs[0].text for output in result]
return {"generated_result": result_output[0]}
def finalize(self):
self.llm = None
```
## Creating the Software packages
This is a mandatory step where we allow the users to add all the required software packages and Python libraries into the [inferless-runtime-config.yaml](https://github.com/inferless/inferless_tutorials/blob/main/text_generation/Mixtral-8x7B/inferless-runtime-config.yaml) file.
```python
build:
cuda_version: "12.1.1"
python_packages:
- "vllm==0.3.2"
- "inferless-cli==2.0.9"
- "hf-transfer==0.1.9"
- "huggingface-hub==0.27.1"
```
## Test your model with Remote Run
You can use the `inferless remote-run`([installation guide here](https://docs.inferless.com/model-import/cli-import#cli-import)) command to test your model or any custom Python script in a remote GPU environment directly from your local machine. Make sure that you use `Python3.10` for seamless experience.
### Step 1: Add the Decorators and local entry point
To enable **Remote Run**, simply do the following:
1. Import the `inferless` library and initialize `Cls(gpu="A100")`. The available GPU options are `T4`, `A10` and `A100`.
2. Decorated the `initialize` and `infer` functions with `@app.load` and `@app.infer` respectively.
3. Create the Local Entry Point by decorating a function (for example, `my_local_entry`) with `@inferless.local_entry_point`.
Within this function, instantiate your model class, convert any incoming parameters into a `RequestObjects` object, and invoke the model's `infer` method.
```python
import inferless
from vllm import SamplingParams
from vllm import LLM
from pydantic import BaseModel, Field
from typing import Optional
@inferless.request
class RequestObjects(BaseModel):
prompt: str = Field(default="Explain Deep Learning.")
temperature: Optional[float] = 0.7
top_p: Optional[float] = 0.1
repetition_penalty: Optional[float] = 1.18
top_k: Optional[int] = 40
max_tokens: Optional[int] = 256
@inferless.response
class ResponseObjects(BaseModel):
generated_text: str = Field(default='Test output')
app = inferless.Cls(gpu="A100")
class InferlessPythonModel:
@app.load
def initialize(self):
self.template = """SYSTEM: You are a helpful assistant.
USER: {}
ASSISTANT: """
self.llm = LLM(
model="TheBloke/Mixtral-8x7B-v0.1-GPTQ",
quantization="gptq",
dtype="float16")
@app.infer
def infer(self, request: RequestObjects) -> ResponseObjects:
sampling_params = SamplingParams(temperature=request.temperature,top_p=request.top_p,repetition_penalty=request.repetition_penalty,
top_k=request.top_k,max_tokens=request.max_tokens)
result = self.llm.generate([self.template.format(request.prompt)], sampling_params)
result_output = [output.outputs[0].text for output in result]
generateObject = ResponseObjects(generated_text = result_output[0])
return generateObject
def finalize(self):
self.llm = None
@inferless.local_entry_point
def my_local_entry(dynamic_params):
request_objects = RequestObjects(**dynamic_params)
model_instance = InferlessPythonModel()
return model_instance.infer(request_objects)
```
### Step 2: Run with Remote GPU
From your local terminal, navigate to the folder containing your `app.py` and your `inferless-runtime-config.yaml` and run:
```bash
inferless remote-run app.py -c inferless-runtime-config.yaml --prompt "What is Quantum Computing?"
```
You can pass the other input parameters in the same way as long as your code expects them in the `inputs` dictionary.
If you want to exclude certain files or directories from being uploaded, use the `--exclude` or `-e` flag.
## Method A: Deploying the model on Inferless Platform
Inferless supports multiple ways of [importing your model](https://docs.inferless.com/model-import/file-structure-requirements). For this tutorial, we will use GitHub.
### Step 1: Login to the inferless dashboard can click on Import model button
Navigate to your desired workspace in Inferless and Click on `Add a custom model` button that you see on the top right. An import wizard will open up.
### Step 2: Follow the UI to complete the model Import
* Select the GitHub/GitLab Integration option to connect your source code repository with the deployment environment.
* Navigate to the specific GitHub repository that contains your model's code. Here, you will need to identify and enter the name of the model you wish to import.
* Choose the appropriate type of machine that suits your model's requirements. Additionally, specify the minimum and maximum number of replicas to define the scalability range for deploying your model.
* Optionally, you have the option to enable automatic build and deployment. This feature triggers a new deployment automatically whenever there is a new code push to your repository.
* If your model requires additional software packages, configure the Custom Runtime settings by including necessary pip or apt packages. Also, set up environment variables such as Inference Timeout, Container Concurrency, and Scale Down Timeout to tailor the runtime environment according to your needs.
* Wait for the validation process to complete, ensuring that all settings are correct and functional. Once validation is successful, click on the "Import" button to finalize the import of your model.
### Step 3: Wait for the model build to complete usually takes \~5-10 minutes
### Step 4: Use the APIs to call the model
Once the model is in 'Active' status you can click on the 'API' page to call the model
### Here is the Demo:
## Method B: Deploying the model on Inferless CLI
Inferless allows you to deploy your model using Inferless-CLI. Follow the steps to deploy using Inferless CLI.
### Clone the repository of the model
Let's begin by cloning the model repository:
```bash
git clone https://github.com/inferless/Mixral-8x7B.git
```
### Deploy the Model
To deploy the model using Inferless CLI, execute the following command:
```bash
inferless deploy --gpu A100 --runtime inferless-runtime-config.yaml
```
**Explanation of the Command:**
* `--gpu A100`: Specifies the GPU type for deployment. Available options include `A10`, `A100`, and `T4`.
* `--runtime inferless-runtime-config.yaml`: Defines the runtime configuration file. If not specified, the default Inferless runtime is used.
# Deploy Mixtral-8x7B using Inferless
Source: https://docs.inferless.com/how-to-guides/deploy-mixtral-8x7b-using-inferless
Mixtral 8x7B, a sparse mixture of experts (SMoE) model with open weights, outperforms Llama 2 70B on benchmarks. It excels as the strongest open-weight model, displaying superior cost/performance.
## Defining Dependencies
We are using the vLLM library for the deployment, which we have built from the source.
## Constructing the GitHub/GitLab Template
Now quickly construct the GitHub/GitLab template, this process is mandatory and make sure you don't add any file named `model.py`
```
Mixtral-8x7B/
├── app.py
├── inferless-runtime-config.yaml
├── inferless.yaml
└── input_schema.py
```
You can also add other files to this directory.
## Create the class for inference
In the [app.py](https://github.com/inferless/inferless_tutorials/blob/main/text_generation/Mixtral-8x7B/app.py) we will define the class and import all the required functions
1. `def initialize`: In this function, you will initialize your model and define any `variable` that you want to use during inference.
2. `def infer`: This function gets called for every request that you send. Here you can define all the steps that are required for the inference. You can also pass custom values for inference through `inputs` parameter.
3. `def finalize`: This function cleans up all the allocated memory.
```python
import inferless
from vllm import SamplingParams
from vllm import LLM
app = inferless.Cls(gpu="A100")
class InferlessPythonModel:
@app.load
def initialize(self):
self.template = """SYSTEM: You are a helpful assistant.
USER: {}
ASSISTANT: """
self.llm = LLM(
model="TheBloke/Mixtral-8x7B-v0.1-GPTQ",
quantization="gptq",
dtype="float16")
@app.infer
def infer(self, inputs):
prompts = [self.template.format(inputs["prompt"])]
sampling_params = SamplingParams(
temperature=0.75,
top_p=1,
max_tokens=256,
presence_penalty=1.15,
)
result = self.llm.generate(prompts, sampling_params)
result_output = [output.outputs[0].text for output in result]
return {"generated_result": result_output[0]}
def finalize(self):
self.llm = None
```
## Creating the Software packages
This is a mandatory step where we allow the users to add all the required software packages and Python libraries into the [inferless-runtime-config.yaml](https://github.com/inferless/inferless_tutorials/blob/main/text_generation/Mixtral-8x7B/inferless-runtime-config.yaml) file.
```python
build:
cuda_version: "12.1.1"
python_packages:
- "vllm==0.3.2"
- "inferless-cli==2.0.9"
- "hf-transfer==0.1.9"
- "huggingface-hub==0.27.1"
```
## Test your model with Remote Run
You can use the `inferless remote-run`([installation guide here](https://docs.inferless.com/model-import/cli-import#cli-import)) command to test your model or any custom Python script in a remote GPU environment directly from your local machine. Make sure that you use `Python3.10` for seamless experience.
### Step 1: Add the Decorators and local entry point
To enable **Remote Run**, simply do the following:
1. Import the `inferless` library and initialize `Cls(gpu="A100")`. The available GPU options are `T4`, `A10` and `A100`.
2. Decorated the `initialize` and `infer` functions with `@app.load` and `@app.infer` respectively.
3. Create the Local Entry Point by decorating a function (for example, `my_local_entry`) with `@inferless.local_entry_point`.
Within this function, instantiate your model class, convert any incoming parameters into a `RequestObjects` object, and invoke the model's `infer` method.
```python
import inferless
from vllm import SamplingParams
from vllm import LLM
from pydantic import BaseModel, Field
from typing import Optional
@inferless.request
class RequestObjects(BaseModel):
prompt: str = Field(default="Explain Deep Learning.")
temperature: Optional[float] = 0.7
top_p: Optional[float] = 0.1
repetition_penalty: Optional[float] = 1.18
top_k: Optional[int] = 40
max_tokens: Optional[int] = 256
@inferless.response
class ResponseObjects(BaseModel):
generated_text: str = Field(default='Test output')
app = inferless.Cls(gpu="A100")
class InferlessPythonModel:
@app.load
def initialize(self):
self.template = """SYSTEM: You are a helpful assistant.
USER: {}
ASSISTANT: """
self.llm = LLM(
model="TheBloke/Mixtral-8x7B-v0.1-GPTQ",
quantization="gptq",
dtype="float16")
@app.infer
def infer(self, request: RequestObjects) -> ResponseObjects:
sampling_params = SamplingParams(temperature=request.temperature,top_p=request.top_p,repetition_penalty=request.repetition_penalty,
top_k=request.top_k,max_tokens=request.max_tokens)
result = self.llm.generate([self.template.format(request.prompt)], sampling_params)
result_output = [output.outputs[0].text for output in result]
generateObject = ResponseObjects(generated_text = result_output[0])
return generateObject
def finalize(self):
self.llm = None
@inferless.local_entry_point
def my_local_entry(dynamic_params):
request_objects = RequestObjects(**dynamic_params)
model_instance = InferlessPythonModel()
return model_instance.infer(request_objects)
```
### Step 2: Run with Remote GPU
From your local terminal, navigate to the folder containing your `app.py` and your `inferless-runtime-config.yaml` and run:
```bash
inferless remote-run app.py -c inferless-runtime-config.yaml --prompt "What is Quantum Computing?"
```
You can pass the other input parameters in the same way as long as your code expects them in the `inputs` dictionary.
If you want to exclude certain files or directories from being uploaded, use the `--exclude` or `-e` flag.
## Method A: Deploying the model on Inferless Platform
Inferless supports multiple ways of [importing your model](https://docs.inferless.com/model-import/file-structure-requirements). For this tutorial, we will use GitHub.
### Step 1: Login to the inferless dashboard can click on Import model button
Navigate to your desired workspace in Inferless and Click on `Add a custom model` button that you see on the top right. An import wizard will open up.
### Step 2: Follow the UI to complete the model Import
* Select the GitHub/GitLab Integration option to connect your source code repository with the deployment environment.
* Navigate to the specific GitHub repository that contains your model's code. Here, you will need to identify and enter the name of the model you wish to import.
* Choose the appropriate type of machine that suits your model's requirements. Additionally, specify the minimum and maximum number of replicas to define the scalability range for deploying your model.
* Optionally, you have the option to enable automatic build and deployment. This feature triggers a new deployment automatically whenever there is a new code push to your repository.
* If your model requires additional software packages, configure the Custom Runtime settings by including necessary pip or apt packages. Also, set up environment variables such as Inference Timeout, Container Concurrency, and Scale Down Timeout to tailor the runtime environment according to your needs.
* Wait for the validation process to complete, ensuring that all settings are correct and functional. Once validation is successful, click on the "Import" button to finalize the import of your model.
### Step 3: Wait for the model build to complete usually takes \~5-10 minutes
### Step 4: Use the APIs to call the model
Once the model is in 'Active' status you can click on the 'API' page to call the model
### Here is the Demo:
 ## Method B: Deploying the model on Inferless CLI
Inferless allows you to deploy your model using Inferless-CLI. Follow the steps to deploy using Inferless CLI.
### Clone the repository of the model
Let's begin by cloning the model repository:
```bash
git clone https://github.com/inferless/Mixtral-8x7B-v0.1.git
```
### Deploy the Model
To deploy the model using Inferless CLI, execute the following command:
```bash
inferless deploy --gpu A100 --runtime inferless-runtime-config.yaml
```
**Explanation of the Command:**
* `--gpu A100`: Specifies the GPU type for deployment. Available options include `A10`, `A100`, and `T4`.
* `--runtime inferless-runtime-config.yaml`: Defines the runtime configuration file. If not specified, the default Inferless runtime is used.
# Deploy Musicgen Stereo Melody Large Model using Inferless
Source: https://docs.inferless.com/how-to-guides/deploy-musicgen-melody-large
Meta releases [MusicGen](https://audiocraft.metademolab.com/musicgen.html), a text-to-music model that converts text descriptions or audio prompts into high-quality music samples.
## Our Observations
We have deployed this [model](https://huggingface.co/facebook/musicgen-stereo-melody-large) using A100 GPU and observed that the model took an average cold start time of `16.17sec` and an average inference time of `13.78sec` for music sample length of `8sec`.
## Defining Dependencies
We are using the [Audiocraft](https://github.com/facebookresearch/audiocraft) library from Meta for the model deployment.
## Constructing the GitHub/GitLab Template
Now quickly construct the GitHub/GitLab template, this process is mandatory and make sure you don't add any file named `model.py`
```
Musicgen-stereo-melody-large/
├── app.py
├── inferless-runtime-config.yaml
├── inferless.yaml
└── input_schema.py
```
You can also add other files to this directory.
## Create the class for inference
In the [app.py](https://github.com/inferless/Musicgen-stereo-melody-large/blob/main/app.py) we will define the class and import all the required functions
1. `def initialize`: In this function, you will initialize your model and define any `variable` that you want to use during inference.
2. `def infer`: This function gets called for every request that you send. Here you can define all the steps that are required for the inference. You can also pass custom values for inference through the `inputs` parameter.
3. `def finalize`: This function cleans up all the allocated memory.
```python
import os
os.environ["HF_HUB_ENABLE_HF_TRANSFER"]='1'
from huggingface_hub import snapshot_download
import torchaudio
from audiocraft.models import MusicGen
from audiocraft.data.audio import audio_write
import base64
import inferless
app = inferless.Cls(gpu="A100")
class InferlessPythonModel:
@app.load
def initialize(self):
model_id = 'facebook/musicgen-stereo-melody-large'
snapshot_download(repo_id=model_id,allow_patterns=["*.safetensors"])
self.model = MusicGen.get_pretrained(model_id)
self.model.set_generation_params(duration=8)
@app.infer
def infer(self, inputs):
descriptions = [inputs["prompt"]]
wav = self.model.generate(descriptions)
for idx, one_wav in enumerate(wav):
audio_write("temp", one_wav.cpu(), self.model.sample_rate, strategy="loudness", loudness_compressor=True)
with open("temp.wav", "rb") as audio_file:
audio_bytes = audio_file.read()
audio_base64 = base64.b64encode(audio_bytes).decode('utf-8')
return {"generated_audio_base64": audio_base64}
def finalize(self,args):
self.model = None
```
## Create the Input Schema
We have to create a [`input_schema.py`](https://github.com/inferless/Musicgen-stereo-melody-large/blob/main/input_schema.py) in your GitHub/Gitlab repository this will help us create the Input parameters. You can checkout our documentation on [Input / Output Schema](https://docs.inferless.com/model-import/input-output-schema).
For this tutorial, we have defined a parameter `prompt` which is required during the API call. Now lets create the `input_schema.py`.
```JSON
INPUT_SCHEMA = {
"prompt": {
'datatype': 'STRING',
'required': True,
'shape': [1],
'example': ["Rock with saturated guitars, a heavy bass line and crazy drum break and fills."]
}
}
```
## Creating the Custom Runtime
This is a mandatory step where we allow the users to upload their own custom runtime through [inferless-runtime-config.yaml](https://github.com/inferless/Musicgen-stereo-melody-large/blob/main/inferless-runtime-config.yaml).
```python
build:
cuda_version: "12.1.1"
system_packages:
- "libssl-dev"
- "libx11-6"
- "ffmpeg"
python_packages:
- "torch==2.1.0"
- "audiocraft==1.2.0"
- "inferless-cli==2.0.9"
- "hf-transfer==0.1.9"
- "huggingface-hub==0.27.1"
```
## Test your model with Remote Run
You can use the `inferless remote-run`([installation guide here](https://docs.inferless.com/model-import/cli-import#cli-import)) command to test your model or any custom Python script in a remote GPU environment directly from your local machine. Make sure that you use `Python3.10` for seamless experience.
### Step 1: Add the Decorators and local entry point
To enable **Remote Run**, simply do the following:
1. Import the `inferless` library and initialize `Cls(gpu="A100")`. The available GPU options are `T4`, `A10` and `A100`.
2. Decorated the `initialize` and `infer` functions with `@app.load` and `@app.infer` respectively.
3. Create the Local Entry Point by decorating a function (for example, `my_local_entry`) with `@inferless.local_entry_point`.
Within this function, instantiate your model class, convert any incoming parameters into a `RequestObjects` object, and invoke the model's `infer` method.
```python
import os
os.environ["HF_HUB_ENABLE_HF_TRANSFER"]='1'
from huggingface_hub import snapshot_download
import torchaudio
from audiocraft.models import MusicGen
from audiocraft.data.audio import audio_write
import base64
import inferless
from pydantic import BaseModel, Field
from typing import Optional
@inferless.request
class RequestObjects(BaseModel):
prompt: str = Field(default="Rock with saturated guitars, a heavy bass line and crazy drum break and fills.")
@inferless.response
class ResponseObjects(BaseModel):
generated_audio_base64: str = Field(default='Test output')
app = inferless.Cls(gpu="A100")
class InferlessPythonModel:
@app.load
def initialize(self):
model_id = 'facebook/musicgen-stereo-melody-large'
snapshot_download(repo_id=model_id,allow_patterns=["*.safetensors"])
self.model = MusicGen.get_pretrained(model_id)
self.model.set_generation_params(duration=8)
@app.infer
def infer(self, request: RequestObjects) -> ResponseObjects:
descriptions = [request.prompt]
wav = self.model.generate(descriptions)
for idx, one_wav in enumerate(wav):
audio_write("temp", one_wav.cpu(), self.model.sample_rate, strategy="loudness", loudness_compressor=True)
with open("temp.wav", "rb") as audio_file:
audio_bytes = audio_file.read()
audio_base64 = base64.b64encode(audio_bytes).decode('utf-8')
generateObject = ResponseObjects(generated_audio_base64 = audio_base64)
return generateObject
def finalize(self,args):
self.model = None
@inferless.local_entry_point
def my_local_entry(dynamic_params):
request_objects = RequestObjects(**dynamic_params)
model_instance = InferlessPythonModel()
return model_instance.infer(request_objects)
```
### Step 2: Run with Remote GPU
From your local terminal, navigate to the folder containing your `app.py` and your `inferless-runtime-config.yaml` and run:
```bash
inferless remote-run app.py -c inferless-runtime-config.yaml --prompt "Rock with saturated guitars, a heavy bass line and crazy drum break and fills."
```
You can pass the other input parameters in the same way as long as your code expects them in the `inputs` dictionary.
If you want to exclude certain files or directories from being uploaded, use the `--exclude` or `-e` flag.
## Method A: Deploying the model on Inferless Platform
Inferless supports multiple ways of [importing your model](https://docs.inferless.com/model-import/file-structure-req/file-structure-requirements). For this tutorial, we will use GitHub.
### Step 1: Login to the inferless dashboard can click on Import model button
Navigate to your desired workspace in Inferless and Click on `Add a custom model` button that you see on the top right. An import wizard will open up.
### Step 2: Follow the UI to complete the model Import
* Select the GitHub/GitLab Integration option to connect your source code repository with the deployment environment.
* Navigate to the specific GitHub repository that contains your model's code. Here, you will need to identify and enter the name of the model you wish to import.
* Choose the appropriate type of machine that suits your model's requirements. Additionally, specify the minimum and maximum number of replicas to define the scalability range for deploying your model.
* Optionally, you have the option to enable automatic build and deployment. This feature triggers a new deployment automatically whenever there is a new code push to your repository.
* If your model requires additional software packages, configure the Custom Runtime settings by including necessary pip or apt packages. Also, set up environment variables such as Inference Timeout, Container Concurrency, and Scale Down Timeout to tailor the runtime environment according to your needs.
* Wait for the validation process to complete, ensuring that all settings are correct and functional. Once validation is successful, click on the "Import" button to finalize the import of your model.
### Step 3: Wait for the model build to complete usually takes \~5-10 minutes
### Step 4: Use the APIs to call the model
Once the model is in 'Active' status you can click on the 'API' page to call the model
### Here is the Demo:
## Method B: Deploying the model on Inferless CLI
Inferless allows you to deploy your model using Inferless-CLI. Follow the steps to deploy using Inferless CLI.
### Clone the repository of the model
Let's begin by cloning the model repository:
```bash
git clone https://github.com/inferless/Mixtral-8x7B-v0.1.git
```
### Deploy the Model
To deploy the model using Inferless CLI, execute the following command:
```bash
inferless deploy --gpu A100 --runtime inferless-runtime-config.yaml
```
**Explanation of the Command:**
* `--gpu A100`: Specifies the GPU type for deployment. Available options include `A10`, `A100`, and `T4`.
* `--runtime inferless-runtime-config.yaml`: Defines the runtime configuration file. If not specified, the default Inferless runtime is used.
# Deploy Musicgen Stereo Melody Large Model using Inferless
Source: https://docs.inferless.com/how-to-guides/deploy-musicgen-melody-large
Meta releases [MusicGen](https://audiocraft.metademolab.com/musicgen.html), a text-to-music model that converts text descriptions or audio prompts into high-quality music samples.
## Our Observations
We have deployed this [model](https://huggingface.co/facebook/musicgen-stereo-melody-large) using A100 GPU and observed that the model took an average cold start time of `16.17sec` and an average inference time of `13.78sec` for music sample length of `8sec`.
## Defining Dependencies
We are using the [Audiocraft](https://github.com/facebookresearch/audiocraft) library from Meta for the model deployment.
## Constructing the GitHub/GitLab Template
Now quickly construct the GitHub/GitLab template, this process is mandatory and make sure you don't add any file named `model.py`
```
Musicgen-stereo-melody-large/
├── app.py
├── inferless-runtime-config.yaml
├── inferless.yaml
└── input_schema.py
```
You can also add other files to this directory.
## Create the class for inference
In the [app.py](https://github.com/inferless/Musicgen-stereo-melody-large/blob/main/app.py) we will define the class and import all the required functions
1. `def initialize`: In this function, you will initialize your model and define any `variable` that you want to use during inference.
2. `def infer`: This function gets called for every request that you send. Here you can define all the steps that are required for the inference. You can also pass custom values for inference through the `inputs` parameter.
3. `def finalize`: This function cleans up all the allocated memory.
```python
import os
os.environ["HF_HUB_ENABLE_HF_TRANSFER"]='1'
from huggingface_hub import snapshot_download
import torchaudio
from audiocraft.models import MusicGen
from audiocraft.data.audio import audio_write
import base64
import inferless
app = inferless.Cls(gpu="A100")
class InferlessPythonModel:
@app.load
def initialize(self):
model_id = 'facebook/musicgen-stereo-melody-large'
snapshot_download(repo_id=model_id,allow_patterns=["*.safetensors"])
self.model = MusicGen.get_pretrained(model_id)
self.model.set_generation_params(duration=8)
@app.infer
def infer(self, inputs):
descriptions = [inputs["prompt"]]
wav = self.model.generate(descriptions)
for idx, one_wav in enumerate(wav):
audio_write("temp", one_wav.cpu(), self.model.sample_rate, strategy="loudness", loudness_compressor=True)
with open("temp.wav", "rb") as audio_file:
audio_bytes = audio_file.read()
audio_base64 = base64.b64encode(audio_bytes).decode('utf-8')
return {"generated_audio_base64": audio_base64}
def finalize(self,args):
self.model = None
```
## Create the Input Schema
We have to create a [`input_schema.py`](https://github.com/inferless/Musicgen-stereo-melody-large/blob/main/input_schema.py) in your GitHub/Gitlab repository this will help us create the Input parameters. You can checkout our documentation on [Input / Output Schema](https://docs.inferless.com/model-import/input-output-schema).
For this tutorial, we have defined a parameter `prompt` which is required during the API call. Now lets create the `input_schema.py`.
```JSON
INPUT_SCHEMA = {
"prompt": {
'datatype': 'STRING',
'required': True,
'shape': [1],
'example': ["Rock with saturated guitars, a heavy bass line and crazy drum break and fills."]
}
}
```
## Creating the Custom Runtime
This is a mandatory step where we allow the users to upload their own custom runtime through [inferless-runtime-config.yaml](https://github.com/inferless/Musicgen-stereo-melody-large/blob/main/inferless-runtime-config.yaml).
```python
build:
cuda_version: "12.1.1"
system_packages:
- "libssl-dev"
- "libx11-6"
- "ffmpeg"
python_packages:
- "torch==2.1.0"
- "audiocraft==1.2.0"
- "inferless-cli==2.0.9"
- "hf-transfer==0.1.9"
- "huggingface-hub==0.27.1"
```
## Test your model with Remote Run
You can use the `inferless remote-run`([installation guide here](https://docs.inferless.com/model-import/cli-import#cli-import)) command to test your model or any custom Python script in a remote GPU environment directly from your local machine. Make sure that you use `Python3.10` for seamless experience.
### Step 1: Add the Decorators and local entry point
To enable **Remote Run**, simply do the following:
1. Import the `inferless` library and initialize `Cls(gpu="A100")`. The available GPU options are `T4`, `A10` and `A100`.
2. Decorated the `initialize` and `infer` functions with `@app.load` and `@app.infer` respectively.
3. Create the Local Entry Point by decorating a function (for example, `my_local_entry`) with `@inferless.local_entry_point`.
Within this function, instantiate your model class, convert any incoming parameters into a `RequestObjects` object, and invoke the model's `infer` method.
```python
import os
os.environ["HF_HUB_ENABLE_HF_TRANSFER"]='1'
from huggingface_hub import snapshot_download
import torchaudio
from audiocraft.models import MusicGen
from audiocraft.data.audio import audio_write
import base64
import inferless
from pydantic import BaseModel, Field
from typing import Optional
@inferless.request
class RequestObjects(BaseModel):
prompt: str = Field(default="Rock with saturated guitars, a heavy bass line and crazy drum break and fills.")
@inferless.response
class ResponseObjects(BaseModel):
generated_audio_base64: str = Field(default='Test output')
app = inferless.Cls(gpu="A100")
class InferlessPythonModel:
@app.load
def initialize(self):
model_id = 'facebook/musicgen-stereo-melody-large'
snapshot_download(repo_id=model_id,allow_patterns=["*.safetensors"])
self.model = MusicGen.get_pretrained(model_id)
self.model.set_generation_params(duration=8)
@app.infer
def infer(self, request: RequestObjects) -> ResponseObjects:
descriptions = [request.prompt]
wav = self.model.generate(descriptions)
for idx, one_wav in enumerate(wav):
audio_write("temp", one_wav.cpu(), self.model.sample_rate, strategy="loudness", loudness_compressor=True)
with open("temp.wav", "rb") as audio_file:
audio_bytes = audio_file.read()
audio_base64 = base64.b64encode(audio_bytes).decode('utf-8')
generateObject = ResponseObjects(generated_audio_base64 = audio_base64)
return generateObject
def finalize(self,args):
self.model = None
@inferless.local_entry_point
def my_local_entry(dynamic_params):
request_objects = RequestObjects(**dynamic_params)
model_instance = InferlessPythonModel()
return model_instance.infer(request_objects)
```
### Step 2: Run with Remote GPU
From your local terminal, navigate to the folder containing your `app.py` and your `inferless-runtime-config.yaml` and run:
```bash
inferless remote-run app.py -c inferless-runtime-config.yaml --prompt "Rock with saturated guitars, a heavy bass line and crazy drum break and fills."
```
You can pass the other input parameters in the same way as long as your code expects them in the `inputs` dictionary.
If you want to exclude certain files or directories from being uploaded, use the `--exclude` or `-e` flag.
## Method A: Deploying the model on Inferless Platform
Inferless supports multiple ways of [importing your model](https://docs.inferless.com/model-import/file-structure-req/file-structure-requirements). For this tutorial, we will use GitHub.
### Step 1: Login to the inferless dashboard can click on Import model button
Navigate to your desired workspace in Inferless and Click on `Add a custom model` button that you see on the top right. An import wizard will open up.
### Step 2: Follow the UI to complete the model Import
* Select the GitHub/GitLab Integration option to connect your source code repository with the deployment environment.
* Navigate to the specific GitHub repository that contains your model's code. Here, you will need to identify and enter the name of the model you wish to import.
* Choose the appropriate type of machine that suits your model's requirements. Additionally, specify the minimum and maximum number of replicas to define the scalability range for deploying your model.
* Optionally, you have the option to enable automatic build and deployment. This feature triggers a new deployment automatically whenever there is a new code push to your repository.
* If your model requires additional software packages, configure the Custom Runtime settings by including necessary pip or apt packages. Also, set up environment variables such as Inference Timeout, Container Concurrency, and Scale Down Timeout to tailor the runtime environment according to your needs.
* Wait for the validation process to complete, ensuring that all settings are correct and functional. Once validation is successful, click on the "Import" button to finalize the import of your model.
### Step 3: Wait for the model build to complete usually takes \~5-10 minutes
### Step 4: Use the APIs to call the model
Once the model is in 'Active' status you can click on the 'API' page to call the model
### Here is the Demo:
 ## Method B: Deploying the model on Inferless CLI
Inferless allows you to deploy your model using Inferless-CLI. Follow the steps to deploy using Inferless CLI.
### Clone the repository of the model
Let's begin by cloning the model repository:
```bash
git clone https://github.com/inferless/Musicgen-stereo-melody-large.git
```
### Deploy the Model
To deploy the model using Inferless CLI, execute the following command:
```bash
inferless deploy --gpu A100 --runtime inferless-runtime-config.yaml
```
**Explanation of the Command:**
* `--gpu A100`: Specifies the GPU type for deployment. Available options include `A10`, `A100`, and `T4`.
* `--runtime inferless-runtime-config.yaml`: Defines the runtime configuration file. If not specified, the default Inferless runtime is used.
# Deploy the Nanonets-OCR-s model using Inferless
Source: https://docs.inferless.com/how-to-guides/deploy-nanonets-ocr-s
An vision-language OCR model fine-tuned from Qwen 2.5-VL-3B that turns documents and images into structured Markdown including tables, LaTeX equations, check-boxes and tagged watermarks, ready for downstream LLM workflows.
## Introduction
[Nanonets-OCR-s](https://huggingface.co/nanonets/Nanonets-OCR-s) is an open-source, 3-parameter vision-language model that turns scanned pages and PDFs directly into richly structured Markdown instead of flat text. It preserves tables as HTML, renders equations in LaTeX, tags check-boxes with ☐/☑, wraps page numbers and watermarks in explicit tags, and even inserts image captions or auto-generated descriptions inside `
### Step 3: Wait for the model build to complete usually takes \~5-10 minutes
### Step 4: Use the APIs to call the model
Once the model is in 'Active' status you can click on the 'API' page to call the model
### Here is the Demo:
## Method B: Deploying the model on Inferless CLI
Inferless allows you to deploy your model using Inferless-CLI. Follow the steps to deploy using Inferless CLI.
### Clone the repository of the model
Let's begin by cloning the model repository:
```bash
git clone https://github.com/inferless/Musicgen-stereo-melody-large.git
```
### Deploy the Model
To deploy the model using Inferless CLI, execute the following command:
```bash
inferless deploy --gpu A100 --runtime inferless-runtime-config.yaml
```
**Explanation of the Command:**
* `--gpu A100`: Specifies the GPU type for deployment. Available options include `A10`, `A100`, and `T4`.
* `--runtime inferless-runtime-config.yaml`: Defines the runtime configuration file. If not specified, the default Inferless runtime is used.
# Deploy the Nanonets-OCR-s model using Inferless
Source: https://docs.inferless.com/how-to-guides/deploy-nanonets-ocr-s
An vision-language OCR model fine-tuned from Qwen 2.5-VL-3B that turns documents and images into structured Markdown including tables, LaTeX equations, check-boxes and tagged watermarks, ready for downstream LLM workflows.
## Introduction
[Nanonets-OCR-s](https://huggingface.co/nanonets/Nanonets-OCR-s) is an open-source, 3-parameter vision-language model that turns scanned pages and PDFs directly into richly structured Markdown instead of flat text. It preserves tables as HTML, renders equations in LaTeX, tags check-boxes with ☐/☑, wraps page numbers and watermarks in explicit tags, and even inserts image captions or auto-generated descriptions inside `
### Step 3: Wait for the model build to complete usually takes \~5-10 minutes
### Step 4: Use the APIs to call the model
Once the model is in 'Active' status you can click on the 'API' page to call the model
### Here is the Demo:
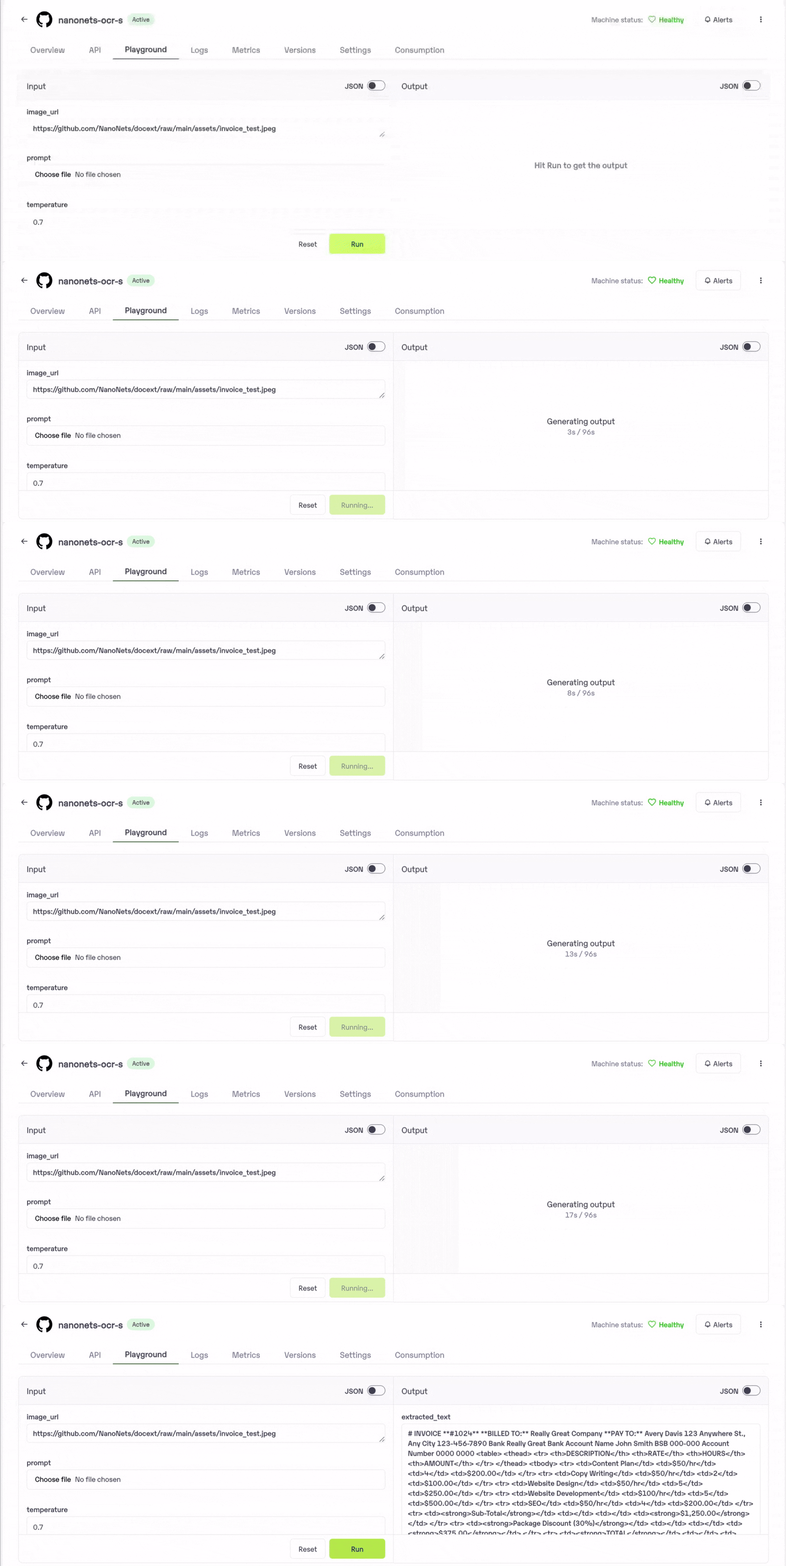 ## Method B: Deploying the model on Inferless CLI
Inferless allows you to deploy your model using Inferless-CLI. Follow the steps to deploy using Inferless CLI.
### Clone the repository of the model
Let's begin by cloning the model repository:
```bash
git clone https://github.com/inferless/nanonets-ocr-s.git
```
### Deploy the Model
To deploy the model using Inferless CLI, execute the following command:
```bash
inferless deploy --gpu A10 --runtime inferless-runtime-config.yaml
```
**Explanation of the Command:**
* `--gpu A10`: Specifies the GPU type for deployment. Available options include `A10`, `A100`, and `T4`.
* `--runtime inferless-runtime-config.yaml`: Defines the runtime configuration file. If not specified, the default Inferless runtime is used.
# Deploy the OpenAI's GPT-OSS 20B model using Inferless
Source: https://docs.inferless.com/how-to-guides/deploy-openai-gpt-oss-20b
An open-weight, 21B parameter language model optimized for chain-of-thought reasoning, tool use, and agentic workflows with structured outputs.
## Introduction
OpenAI's model **`openai/gpt-oss-20b`** is a 21B parameter language model released under the **Apache 2.0 license**, making it fully permissive for research, commercial, and fine-tuning use.
Built with a **Mixture -of -Experts (MoE)** architecture, it activates only **3.6B parameters per token**, spread across **32 experts(4 per layer)** enabling strong performance with minimal compute.
Trained with the Harmony response format, **gpt-oss-20b** supports **configurable reasoning levels** (low, medium, high), **full chain-of-thought reasoning** (auditable but not to be shown to end users), **tool use** (e.g., web browsing, function-calling, Python execution), and **Structured Outputs**.
It matches or exceeds performance of OpenAI's proprietary model across benchmarks including coding, math (AIME), general knowledge (MMLU), and health tasks, despite its smaller size.
## Defining Dependencies
We are using the [transformers](https://github.com/huggingface/transformers) to serve the model on a single A100.
## Constructing the GitHub/GitLab Template
Now quickly construct the GitHub/GitLab template, this process is mandatory and make sure you don't add any file named `model.py`.
```
gpt-oss-20b/
├── app.py
├── inferless-runtime-config.yaml
└── inferless.yaml
```
You can also add other files to this directory.
## Create the Input Schema with Pydantic
Using the `inferless` Python client and Pydantic, you can define structured schemas directly in your code for input and output, eliminating the need for external file.
### Input Schema
When defining an input schema with Pydantic, you need to annotate your class attributes with the appropriate types, such as `str`, `float`, `int`, `bool` etc.
These type annotations specifys what type of data each field should contain.
The `default` value serves as the example input for testing with the `infer` function.
```python
@inferless.request
class RequestObjects(BaseModel):
prompt: str = Field(default="Explain quantum mechanics clearly and concisely.")
system_prompt: Optional[str] ="You are a helpful and knowledgeable assistant."
max_new_tokens: Optional[int] = 256
temperature: Optional[float] = 0.7
top_p: Optional[float] = 0.9
top_k: Optional[int] = 50
do_sample: Optional[bool] = True
repetition_penalty: Optional[float] = 1.1
```
### Output Schema
The `@inferless.response` decorator helps you define structured output schemas.
```python
@inferless.response
class ResponseObjects(BaseModel):
generated_text: str = Field(default="Generated text will appear here")
```
### Usage in the `infer` Function
Once you have annotated the objects you can expect the infer function to receive `RequestObjects` as input,
and returns a `ResponseObjects` instance as output, ensuring the results adhere to a defined structure.
```python
class InferlessPythonModel:
def infer(self, request: RequestObjects) -> ResponseObjects:
return ResponseObjects(generated_text=generated_text)
```
## Create the class for inference
In the [app.py](https://github.com/inferless/gpt-oss-20b/blob/main/app.py) we will define the class and import all the required functions
1. `def initialize`: In this function, you will initialize your model and define any `variable` that you want to use during inference.
2. `def infer`: This function gets called for every request that you send. Here you can define all the steps that are required for the inference.
3. `def finalize`: This function cleans up all the allocated memory.
```python
import torch
import inferless
from typing import Optional
from pydantic import BaseModel, Field
from transformers import pipeline
@inferless.request
class RequestObjects(BaseModel):
prompt: str = Field(default="Explain quantum mechanics clearly and concisely.")
system_prompt: Optional[str] ="You are a helpful and knowledgeable assistant."
max_new_tokens: Optional[int] = 256
temperature: Optional[float] = 0.7
top_p: Optional[float] = 0.9
top_k: Optional[int] = 50
do_sample: Optional[bool] = True
repetition_penalty: Optional[float] = 1.1
@inferless.response
class ResponseObjects(BaseModel):
generated_text: str = Field(default="Generated text will appear here")
class InferlessPythonModel:
def initialize(self):
model_id = "Inferless/gpt-oss-20b"
self.pipe = pipeline(
"text-generation",
model=model_id,
torch_dtype="auto",
device_map="cuda",
trust_remote_code=True
)
def infer(self, inputs: RequestObjects) -> ResponseObjects:
# Prepare messages
messages = [{"role": "system", "content": inputs.system_prompt},{"role": "user", "content": inputs.prompt}]
generation_kwargs = {
"max_new_tokens": inputs.max_new_tokens,
"temperature": inputs.temperature,
"top_p": inputs.top_p,
"top_k": inputs.top_k,
"do_sample": inputs.do_sample,
"repetition_penalty": inputs.repetition_penalty,
"return_full_text": False,
"pad_token_id": self.pipe.tokenizer.eos_token_id,
}
# Generate text using pipeline
with torch.inference_mode():
outputs = self.pipe(
messages,
**generation_kwargs
)
generated_text = outputs[0]["generated_text"]
return ResponseObjects(generated_text=generated_text)
def finalize(self):
self.pipe = None
```
## Creating the Custom Runtime
This is a mandatory step where we allow the users to upload their custom runtime through [inferless-runtime-config.yaml](https://github.com/inferless/gpt-oss-20b/blob/main/inferless-runtime-config.yaml).
```python
build:
cuda_version: "12.1.1"
python_packages:
- torch==2.7.1
- accelerate==1.9.0
- huggingface-hub==0.34.3
- pydantic==2.11.7
- inferless==0.2.15
- transformers==4.55.0
- protobuf==3.20.3
```
## Test your model with Remote Run
You can use the `inferless remote-run`([installation guide here](https://docs.inferless.com/model-import/cli-import#cli-import)) command to test your model or any custom Python script in a remote GPU environment directly from your local machine. Make sure that you use `Python3.10` for seamless experience.
### Step 1: Add the Decorators and local entry point
To enable **Remote Run**, simply do the following:
1. Import the `inferless` library and initialize `Cls(gpu="A10")`. The available GPU options are `T4`, `A10` and `A100`.
2. Decorated the `initialize` and `infer` functions with `@app.load` and `@app.infer` respectively.
3. Create the Local Entry Point by decorating a function (for example, `my_local_entry`) with `@inferless.local_entry_point`.
Within this function, instantiate your model class, convert any incoming parameters into a `RequestObjects` object, and invoke the model's `infer` method.
```python
import torch
import inferless
from typing import Optional
from pydantic import BaseModel, Field
from transformers import pipeline
app = inferless.Cls(gpu="A100")
@inferless.request
class RequestObjects(BaseModel):
prompt: str = Field(default="Explain quantum mechanics clearly and concisely.")
system_prompt: Optional[str] ="You are a helpful and knowledgeable assistant."
max_new_tokens: Optional[int] = 256
temperature: Optional[float] = 0.7
top_p: Optional[float] = 0.9
top_k: Optional[int] = 50
do_sample: Optional[bool] = True
repetition_penalty: Optional[float] = 1.1
@inferless.response
class ResponseObjects(BaseModel):
generated_text: str = Field(default="Generated text will appear here")
class InferlessPythonModel:
@app.load
def initialize(self):
model_id = "Inferless/gpt-oss-20b"
self.pipe = pipeline(
"text-generation",
model=model_id,
torch_dtype="auto",
device_map="cuda",
trust_remote_code=True
)
@app.infer
def infer(self, inputs: RequestObjects) -> ResponseObjects:
# Prepare messages
messages = [{"role": "system", "content": inputs.system_prompt},{"role": "user", "content": inputs.prompt}]
generation_kwargs = {
"max_new_tokens": inputs.max_new_tokens,
"temperature": inputs.temperature,
"top_p": inputs.top_p,
"top_k": inputs.top_k,
"do_sample": inputs.do_sample,
"repetition_penalty": inputs.repetition_penalty,
"return_full_text": False,
"pad_token_id": self.pipe.tokenizer.eos_token_id,
}
# Generate text using pipeline
with torch.inference_mode():
outputs = self.pipe(
messages,
**generation_kwargs
)
generated_text = outputs[0]["generated_text"]
return ResponseObjects(generated_text=generated_text)
def finalize(self):
self.pipe = None
@inferless.local_entry_point
def my_local_entry(dynamic_params):
request_objects = RequestObjects(**dynamic_params)
model_instance = InferlessPythonModel()
return model_instance.infer(request_objects)
```
### Step 2: Run with Remote GPU
From your local terminal, navigate to the folder containing your `app.py` and your `inferless-runtime-config.yaml` and run:
```bash
inferless remote-run app.py -c inferless-runtime-config.yaml --prompt "Explain quantum mechanics clearly and concisely."
```
You can pass the other input parameters in the same way (e.g., `--max_new_tokens`, etc.) as long as your code expects them in the `inputs` dictionary.
If you want to exclude certain files or directories from being uploaded, use the `--exclude` or `-e` flag.
## Method A: Deploying the model on Inferless Platform
Inferless supports multiple ways of [importing your model](https://docs.inferless.com/model-import/file-structure-req/file-structure-requirements). For this tutorial, we will use GitHub.
### Step 1: Login to the inferless dashboard can click on Import model button
Navigate to your desired workspace in Inferless and Click on `Add a custom model` button that you see on the top right. An import wizard will open up.
### Step 2: Follow the UI to complete the model Import
* Select the GitHub/GitLab Integration option to connect your source code repository with the deployment environment.
* Navigate to the specific GitHub repository that contains your model's code. Here, you will need to identify and enter the name of the model you wish to import.
* Choose the appropriate type of machine that suits your model's requirements. Additionally, specify the minimum and maximum number of replicas to define the scalability range for deploying your model.
* Optionally, you have the option to enable automatic build and deployment. This feature triggers a new deployment automatically whenever there is a new code push to your repository.
* If your model requires additional software packages, configure the Custom Runtime settings by including necessary pip or apt packages. Also, set up environment variables such as Inference Timeout, Container Concurrency, and Scale Down Timeout to tailor the runtime environment according to your needs.
* Wait for the validation process to complete, ensuring that all settings are correct and functional. Once validation is successful, click on the "Import" button to finalize the import of your model.
### Step 3: Wait for the model build to complete usually takes \~5-10 minutes
### Step 4: Use the APIs to call the model
Once the model is in 'Active' status you can click on the 'API' page to call the model
### Here is the Demo:
## Method B: Deploying the model on Inferless CLI
Inferless allows you to deploy your model using Inferless-CLI. Follow the steps to deploy using Inferless CLI.
### Clone the repository of the model
Let's begin by cloning the model repository:
```bash
git clone https://github.com/inferless/gpt-oss-20b.git
```
### Deploy the Model
To deploy the model using Inferless CLI, execute the following command:
```bash
inferless deploy --gpu A100 --runtime inferless-runtime-config.yaml
```
**Explanation of the Command:**
* `--gpu A10`: Specifies the GPU type for deployment. Available options include `A10`, `A100`, and `T4`.
* `--runtime inferless-runtime-config.yaml`: Defines the runtime configuration file. If not specified, the default Inferless runtime is used.
## Method B: Deploying the model on Inferless CLI
Inferless allows you to deploy your model using Inferless-CLI. Follow the steps to deploy using Inferless CLI.
### Clone the repository of the model
Let's begin by cloning the model repository:
```bash
git clone https://github.com/inferless/nanonets-ocr-s.git
```
### Deploy the Model
To deploy the model using Inferless CLI, execute the following command:
```bash
inferless deploy --gpu A10 --runtime inferless-runtime-config.yaml
```
**Explanation of the Command:**
* `--gpu A10`: Specifies the GPU type for deployment. Available options include `A10`, `A100`, and `T4`.
* `--runtime inferless-runtime-config.yaml`: Defines the runtime configuration file. If not specified, the default Inferless runtime is used.
# Deploy the OpenAI's GPT-OSS 20B model using Inferless
Source: https://docs.inferless.com/how-to-guides/deploy-openai-gpt-oss-20b
An open-weight, 21B parameter language model optimized for chain-of-thought reasoning, tool use, and agentic workflows with structured outputs.
## Introduction
OpenAI's model **`openai/gpt-oss-20b`** is a 21B parameter language model released under the **Apache 2.0 license**, making it fully permissive for research, commercial, and fine-tuning use.
Built with a **Mixture -of -Experts (MoE)** architecture, it activates only **3.6B parameters per token**, spread across **32 experts(4 per layer)** enabling strong performance with minimal compute.
Trained with the Harmony response format, **gpt-oss-20b** supports **configurable reasoning levels** (low, medium, high), **full chain-of-thought reasoning** (auditable but not to be shown to end users), **tool use** (e.g., web browsing, function-calling, Python execution), and **Structured Outputs**.
It matches or exceeds performance of OpenAI's proprietary model across benchmarks including coding, math (AIME), general knowledge (MMLU), and health tasks, despite its smaller size.
## Defining Dependencies
We are using the [transformers](https://github.com/huggingface/transformers) to serve the model on a single A100.
## Constructing the GitHub/GitLab Template
Now quickly construct the GitHub/GitLab template, this process is mandatory and make sure you don't add any file named `model.py`.
```
gpt-oss-20b/
├── app.py
├── inferless-runtime-config.yaml
└── inferless.yaml
```
You can also add other files to this directory.
## Create the Input Schema with Pydantic
Using the `inferless` Python client and Pydantic, you can define structured schemas directly in your code for input and output, eliminating the need for external file.
### Input Schema
When defining an input schema with Pydantic, you need to annotate your class attributes with the appropriate types, such as `str`, `float`, `int`, `bool` etc.
These type annotations specifys what type of data each field should contain.
The `default` value serves as the example input for testing with the `infer` function.
```python
@inferless.request
class RequestObjects(BaseModel):
prompt: str = Field(default="Explain quantum mechanics clearly and concisely.")
system_prompt: Optional[str] ="You are a helpful and knowledgeable assistant."
max_new_tokens: Optional[int] = 256
temperature: Optional[float] = 0.7
top_p: Optional[float] = 0.9
top_k: Optional[int] = 50
do_sample: Optional[bool] = True
repetition_penalty: Optional[float] = 1.1
```
### Output Schema
The `@inferless.response` decorator helps you define structured output schemas.
```python
@inferless.response
class ResponseObjects(BaseModel):
generated_text: str = Field(default="Generated text will appear here")
```
### Usage in the `infer` Function
Once you have annotated the objects you can expect the infer function to receive `RequestObjects` as input,
and returns a `ResponseObjects` instance as output, ensuring the results adhere to a defined structure.
```python
class InferlessPythonModel:
def infer(self, request: RequestObjects) -> ResponseObjects:
return ResponseObjects(generated_text=generated_text)
```
## Create the class for inference
In the [app.py](https://github.com/inferless/gpt-oss-20b/blob/main/app.py) we will define the class and import all the required functions
1. `def initialize`: In this function, you will initialize your model and define any `variable` that you want to use during inference.
2. `def infer`: This function gets called for every request that you send. Here you can define all the steps that are required for the inference.
3. `def finalize`: This function cleans up all the allocated memory.
```python
import torch
import inferless
from typing import Optional
from pydantic import BaseModel, Field
from transformers import pipeline
@inferless.request
class RequestObjects(BaseModel):
prompt: str = Field(default="Explain quantum mechanics clearly and concisely.")
system_prompt: Optional[str] ="You are a helpful and knowledgeable assistant."
max_new_tokens: Optional[int] = 256
temperature: Optional[float] = 0.7
top_p: Optional[float] = 0.9
top_k: Optional[int] = 50
do_sample: Optional[bool] = True
repetition_penalty: Optional[float] = 1.1
@inferless.response
class ResponseObjects(BaseModel):
generated_text: str = Field(default="Generated text will appear here")
class InferlessPythonModel:
def initialize(self):
model_id = "Inferless/gpt-oss-20b"
self.pipe = pipeline(
"text-generation",
model=model_id,
torch_dtype="auto",
device_map="cuda",
trust_remote_code=True
)
def infer(self, inputs: RequestObjects) -> ResponseObjects:
# Prepare messages
messages = [{"role": "system", "content": inputs.system_prompt},{"role": "user", "content": inputs.prompt}]
generation_kwargs = {
"max_new_tokens": inputs.max_new_tokens,
"temperature": inputs.temperature,
"top_p": inputs.top_p,
"top_k": inputs.top_k,
"do_sample": inputs.do_sample,
"repetition_penalty": inputs.repetition_penalty,
"return_full_text": False,
"pad_token_id": self.pipe.tokenizer.eos_token_id,
}
# Generate text using pipeline
with torch.inference_mode():
outputs = self.pipe(
messages,
**generation_kwargs
)
generated_text = outputs[0]["generated_text"]
return ResponseObjects(generated_text=generated_text)
def finalize(self):
self.pipe = None
```
## Creating the Custom Runtime
This is a mandatory step where we allow the users to upload their custom runtime through [inferless-runtime-config.yaml](https://github.com/inferless/gpt-oss-20b/blob/main/inferless-runtime-config.yaml).
```python
build:
cuda_version: "12.1.1"
python_packages:
- torch==2.7.1
- accelerate==1.9.0
- huggingface-hub==0.34.3
- pydantic==2.11.7
- inferless==0.2.15
- transformers==4.55.0
- protobuf==3.20.3
```
## Test your model with Remote Run
You can use the `inferless remote-run`([installation guide here](https://docs.inferless.com/model-import/cli-import#cli-import)) command to test your model or any custom Python script in a remote GPU environment directly from your local machine. Make sure that you use `Python3.10` for seamless experience.
### Step 1: Add the Decorators and local entry point
To enable **Remote Run**, simply do the following:
1. Import the `inferless` library and initialize `Cls(gpu="A10")`. The available GPU options are `T4`, `A10` and `A100`.
2. Decorated the `initialize` and `infer` functions with `@app.load` and `@app.infer` respectively.
3. Create the Local Entry Point by decorating a function (for example, `my_local_entry`) with `@inferless.local_entry_point`.
Within this function, instantiate your model class, convert any incoming parameters into a `RequestObjects` object, and invoke the model's `infer` method.
```python
import torch
import inferless
from typing import Optional
from pydantic import BaseModel, Field
from transformers import pipeline
app = inferless.Cls(gpu="A100")
@inferless.request
class RequestObjects(BaseModel):
prompt: str = Field(default="Explain quantum mechanics clearly and concisely.")
system_prompt: Optional[str] ="You are a helpful and knowledgeable assistant."
max_new_tokens: Optional[int] = 256
temperature: Optional[float] = 0.7
top_p: Optional[float] = 0.9
top_k: Optional[int] = 50
do_sample: Optional[bool] = True
repetition_penalty: Optional[float] = 1.1
@inferless.response
class ResponseObjects(BaseModel):
generated_text: str = Field(default="Generated text will appear here")
class InferlessPythonModel:
@app.load
def initialize(self):
model_id = "Inferless/gpt-oss-20b"
self.pipe = pipeline(
"text-generation",
model=model_id,
torch_dtype="auto",
device_map="cuda",
trust_remote_code=True
)
@app.infer
def infer(self, inputs: RequestObjects) -> ResponseObjects:
# Prepare messages
messages = [{"role": "system", "content": inputs.system_prompt},{"role": "user", "content": inputs.prompt}]
generation_kwargs = {
"max_new_tokens": inputs.max_new_tokens,
"temperature": inputs.temperature,
"top_p": inputs.top_p,
"top_k": inputs.top_k,
"do_sample": inputs.do_sample,
"repetition_penalty": inputs.repetition_penalty,
"return_full_text": False,
"pad_token_id": self.pipe.tokenizer.eos_token_id,
}
# Generate text using pipeline
with torch.inference_mode():
outputs = self.pipe(
messages,
**generation_kwargs
)
generated_text = outputs[0]["generated_text"]
return ResponseObjects(generated_text=generated_text)
def finalize(self):
self.pipe = None
@inferless.local_entry_point
def my_local_entry(dynamic_params):
request_objects = RequestObjects(**dynamic_params)
model_instance = InferlessPythonModel()
return model_instance.infer(request_objects)
```
### Step 2: Run with Remote GPU
From your local terminal, navigate to the folder containing your `app.py` and your `inferless-runtime-config.yaml` and run:
```bash
inferless remote-run app.py -c inferless-runtime-config.yaml --prompt "Explain quantum mechanics clearly and concisely."
```
You can pass the other input parameters in the same way (e.g., `--max_new_tokens`, etc.) as long as your code expects them in the `inputs` dictionary.
If you want to exclude certain files or directories from being uploaded, use the `--exclude` or `-e` flag.
## Method A: Deploying the model on Inferless Platform
Inferless supports multiple ways of [importing your model](https://docs.inferless.com/model-import/file-structure-req/file-structure-requirements). For this tutorial, we will use GitHub.
### Step 1: Login to the inferless dashboard can click on Import model button
Navigate to your desired workspace in Inferless and Click on `Add a custom model` button that you see on the top right. An import wizard will open up.
### Step 2: Follow the UI to complete the model Import
* Select the GitHub/GitLab Integration option to connect your source code repository with the deployment environment.
* Navigate to the specific GitHub repository that contains your model's code. Here, you will need to identify and enter the name of the model you wish to import.
* Choose the appropriate type of machine that suits your model's requirements. Additionally, specify the minimum and maximum number of replicas to define the scalability range for deploying your model.
* Optionally, you have the option to enable automatic build and deployment. This feature triggers a new deployment automatically whenever there is a new code push to your repository.
* If your model requires additional software packages, configure the Custom Runtime settings by including necessary pip or apt packages. Also, set up environment variables such as Inference Timeout, Container Concurrency, and Scale Down Timeout to tailor the runtime environment according to your needs.
* Wait for the validation process to complete, ensuring that all settings are correct and functional. Once validation is successful, click on the "Import" button to finalize the import of your model.
### Step 3: Wait for the model build to complete usually takes \~5-10 minutes
### Step 4: Use the APIs to call the model
Once the model is in 'Active' status you can click on the 'API' page to call the model
### Here is the Demo:
## Method B: Deploying the model on Inferless CLI
Inferless allows you to deploy your model using Inferless-CLI. Follow the steps to deploy using Inferless CLI.
### Clone the repository of the model
Let's begin by cloning the model repository:
```bash
git clone https://github.com/inferless/gpt-oss-20b.git
```
### Deploy the Model
To deploy the model using Inferless CLI, execute the following command:
```bash
inferless deploy --gpu A100 --runtime inferless-runtime-config.yaml
```
**Explanation of the Command:**
* `--gpu A10`: Specifies the GPU type for deployment. Available options include `A10`, `A100`, and `T4`.
* `--runtime inferless-runtime-config.yaml`: Defines the runtime configuration file. If not specified, the default Inferless runtime is used.
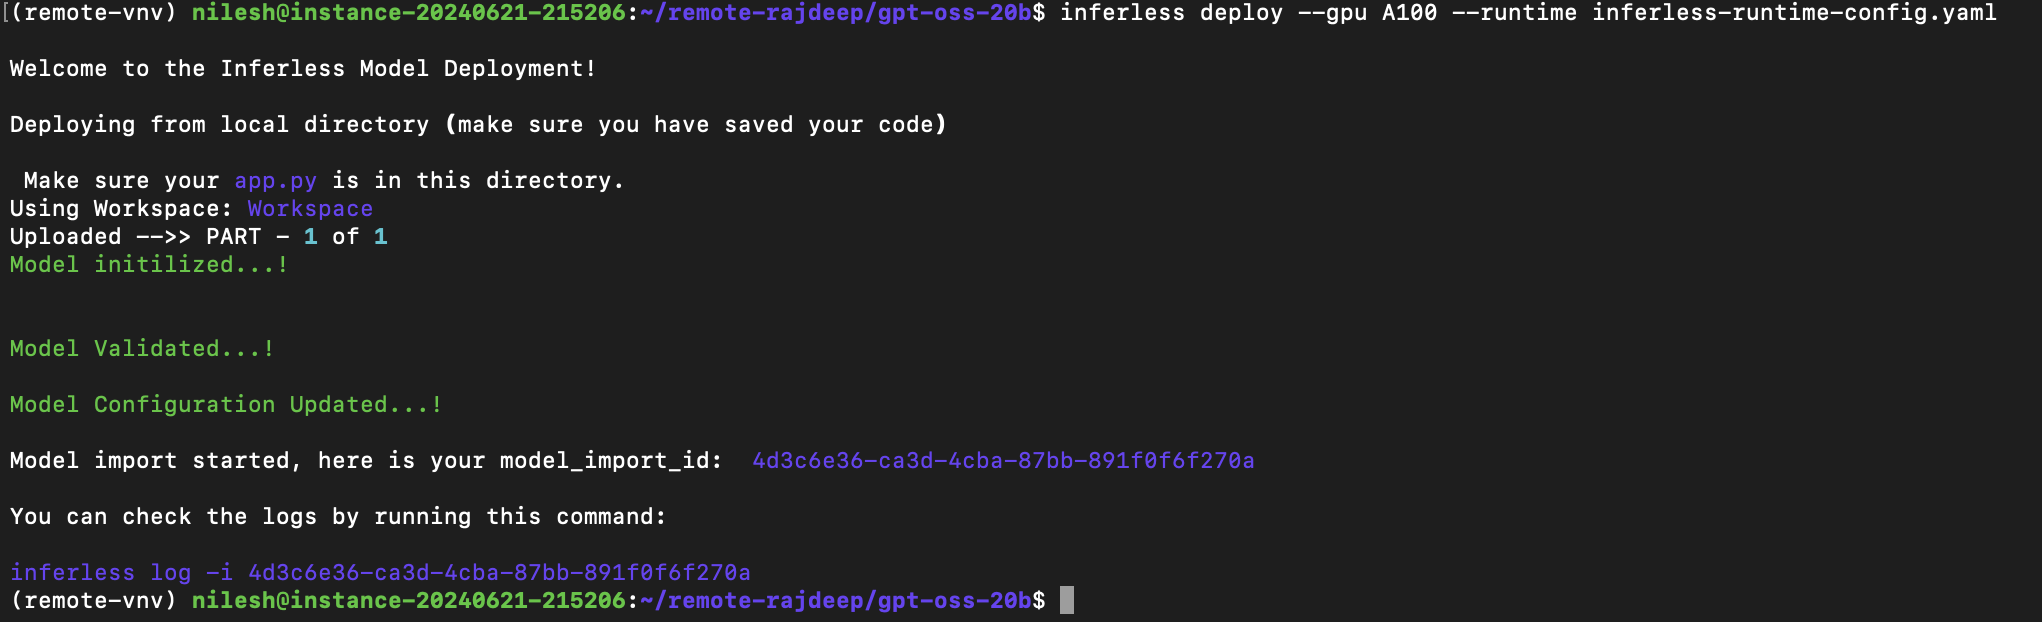 # Deploy OpenHermes using Inferless
Source: https://docs.inferless.com/how-to-guides/deploy-openhermes-using-inferless
OpenHermes 2.5 Mistral 7B is a state-of-the-art Mistral Fine-tune, a continuation of the OpenHermes 2 model, which is trained on additional code datasets.
## Our Observations
We have deployed a 4-bit AWQ [quantized version](https://huggingface.co/TheBloke/OpenHermes-2.5-Mistral-7B-AWQ) of the model using A100 GPU(80GB) and observed that the model took an average inference time of `3.52sec`, generating an average of `98.16 tokens/sec` and an average cold start time of `19.47sec`
## Defining Dependencies
We use the [vLLM](https://github.com/vllm-project) library, enabling you to run LLM on low memory. We deploy an AWQ 4-bit quantized version of the model model.
## Constructing the GitHub/GitLab Template
Now quickly construct the GitHub/GitLab template, this process is mandatory and make sure you don't add any file named `model.py`
```python
OpenHermes-7B/
├── app.py
├── inferless-runtime-config.yaml
├── inferless.yaml
└── input_schema.py
```
You can also add other files to this directory.
## Create the class for inference
In the [app.py](https://github.com/inferless/inferless_tutorials/tree/main/text_generation/OpenHermes-7B/app.py) we will define the class and import all the required functions
1. `def initialize`: In this function, you will initialize your model and define any `variable` that you want to use during inference.
2. `def infer`: This function gets called for every request that you send. Here you can define all the steps that are required for the inference. You can also pass custom values for inference and pass it through `inputs(dict)` parameter.
3. `def finalize`: This function cleans up all the allocated memory.
```python
import inferless
from vllm import LLM, SamplingParams
app = inferless.Cls(gpu="A100")
class InferlessPythonModel:
@app.load
def initialize(self):
model_id = "TheBloke/OpenHermes-2.5-Mistral-7B-AWQ" # Specify the model repository ID
# Define sampling parameters for model generation
self.sampling_params = SamplingParams(temperature=0.7, top_p=0.95, max_tokens=128)
# Initialize the LLM object
self.llm = LLM(model=model_id, quantization="awq", dtype="float16")
@app.infer
def infer(self,inputs):
prompts = inputs["prompt"] # Extract the prompt from the input
result = self.llm.generate(prompts, self.sampling_params)
# Extract the generated text from the result
result_output = [output.outputs[0].text for output in result]
# Return a dictionary containing the result
return {'generated_result': result_output[0]}
def finalize(self):
self.llm = None
```
## Creating the Custom Runtime
This is a mandatory step where we allow the users to upload their custom runtime through [inferless-runtime-config.yaml](https://github.com/inferless/inferless_tutorials/tree/main/text_generation/OpenHermes-7B/inferless-runtime-config.yaml).
```python
build:
cuda_version: "12.1.1"
python_packages:
- "vllm==0.3.2"
- "inferless-cli==2.0.9"
- "hf-transfer==0.1.9"
- "huggingface-hub==0.27.1"
```
## Test your model with Remote Run
You can use the `inferless remote-run`([installation guide here](https://docs.inferless.com/model-import/cli-import#cli-import)) command to test your model or any custom Python script in a remote GPU environment directly from your local machine. Make sure that you use `Python3.10` for seamless experience.
### Step 1: Add the Decorators and local entry point
To enable **Remote Run**, simply do the following:
1. Import the `inferless` library and initialize `Cls(gpu="A100")`. The available GPU options are `T4`, `A10` and `A100`.
2. Decorated the `initialize` and `infer` functions with `@app.load` and `@app.infer` respectively.
3. Create the Local Entry Point by decorating a function (for example, `my_local_entry`) with `@inferless.local_entry_point`.
Within this function, instantiate your model class, convert any incoming parameters into a `RequestObjects` object, and invoke the model's `infer` method.
```python
import inferless
from vllm import LLM, SamplingParams
from pydantic import BaseModel, Field
from typing import Optional
@inferless.request
class RequestObjects(BaseModel):
prompt: str = Field(default="Explain Deep Learning.")
temperature: Optional[float] = 0.7
top_p: Optional[float] = 0.1
repetition_penalty: Optional[float] = 1.18
top_k: Optional[int] = 40
max_tokens: Optional[int] = 256
@inferless.response
class ResponseObjects(BaseModel):
generated_text: str = Field(default='Test output')
app = inferless.Cls(gpu="A100")
class InferlessPythonModel:
@app.load
def initialize(self):
model_id = "TheBloke/OpenHermes-2.5-Mistral-7B-AWQ"
self.llm = LLM(model=model_id, quantization="awq", dtype="float16")
@app.infer
def infer(self, request: RequestObjects) -> ResponseObjects:
sampling_params = SamplingParams(temperature=request.temperature,top_p=request.top_p,repetition_penalty=request.repetition_penalty,
top_k=request.top_k,max_tokens=request.max_tokens)
result = self.llm.generate(request.prompt, sampling_params)
result_output = [output.outputs[0].text for output in result]
generateObject = ResponseObjects(generated_text = result_output[0])
return generateObject
def finalize(self):
self.llm = None
@inferless.local_entry_point
def my_local_entry(dynamic_params):
request_objects = RequestObjects(**dynamic_params)
model_instance = InferlessPythonModel()
return model_instance.infer(request_objects)
```
### Step 2: Run with Remote GPU
From your local terminal, navigate to the folder containing your `app.py` and your `inferless-runtime-config.yaml` and run:
```bash
inferless remote-run app.py -c inferless-runtime-config.yaml --prompt "What is Quantum Computing?"
```
You can pass the other input parameters in the same way as long as your code expects them in the `inputs` dictionary.
If you want to exclude certain files or directories from being uploaded, use the `--exclude` or `-e` flag.
## Method A: Deploying the model on Inferless Platform
Inferless supports multiple ways of [importing your model](https://docs.inferless.com/model-import/file-structure-requirements). For this tutorial, we will use GitHub.
### Step 1: Login to the inferless dashboard can click on Import model button
Navigate to your desired workspace in Inferless and Click on `Add a custom model` button that you see on the top right. An import wizard will open up.
### Step 2: Follow the UI to complete the model Import
* Select the GitHub/GitLab Integration option to connect your source code repository with the deployment environment.
* Navigate to the specific GitHub repository that contains your model's code. Here, you will need to identify and enter the name of the model you wish to import.
* Choose the appropriate type of machine that suits your model's requirements. Additionally, specify the minimum and maximum number of replicas to define the scalability range for deploying your model.
* Optionally, you have the option to enable automatic build and deployment. This feature triggers a new deployment automatically whenever there is a new code push to your repository.
* If your model requires additional software packages, configure the Custom Runtime settings by including necessary pip or apt packages. Also, set up environment variables such as Inference Timeout, Container Concurrency, and Scale Down Timeout to tailor the runtime environment according to your needs.
* Wait for the validation process to complete, ensuring that all settings are correct and functional. Once validation is successful, click on the "Import" button to finalize the import of your model.
### Step 3: Wait for the model build to complete usually takes \~5-10 minutes
### Step 4: Use the APIs to call the model
Once the model is in 'Active' status you can click on the 'API' page to call the model
### Here is the Demo:
# Deploy OpenHermes using Inferless
Source: https://docs.inferless.com/how-to-guides/deploy-openhermes-using-inferless
OpenHermes 2.5 Mistral 7B is a state-of-the-art Mistral Fine-tune, a continuation of the OpenHermes 2 model, which is trained on additional code datasets.
## Our Observations
We have deployed a 4-bit AWQ [quantized version](https://huggingface.co/TheBloke/OpenHermes-2.5-Mistral-7B-AWQ) of the model using A100 GPU(80GB) and observed that the model took an average inference time of `3.52sec`, generating an average of `98.16 tokens/sec` and an average cold start time of `19.47sec`
## Defining Dependencies
We use the [vLLM](https://github.com/vllm-project) library, enabling you to run LLM on low memory. We deploy an AWQ 4-bit quantized version of the model model.
## Constructing the GitHub/GitLab Template
Now quickly construct the GitHub/GitLab template, this process is mandatory and make sure you don't add any file named `model.py`
```python
OpenHermes-7B/
├── app.py
├── inferless-runtime-config.yaml
├── inferless.yaml
└── input_schema.py
```
You can also add other files to this directory.
## Create the class for inference
In the [app.py](https://github.com/inferless/inferless_tutorials/tree/main/text_generation/OpenHermes-7B/app.py) we will define the class and import all the required functions
1. `def initialize`: In this function, you will initialize your model and define any `variable` that you want to use during inference.
2. `def infer`: This function gets called for every request that you send. Here you can define all the steps that are required for the inference. You can also pass custom values for inference and pass it through `inputs(dict)` parameter.
3. `def finalize`: This function cleans up all the allocated memory.
```python
import inferless
from vllm import LLM, SamplingParams
app = inferless.Cls(gpu="A100")
class InferlessPythonModel:
@app.load
def initialize(self):
model_id = "TheBloke/OpenHermes-2.5-Mistral-7B-AWQ" # Specify the model repository ID
# Define sampling parameters for model generation
self.sampling_params = SamplingParams(temperature=0.7, top_p=0.95, max_tokens=128)
# Initialize the LLM object
self.llm = LLM(model=model_id, quantization="awq", dtype="float16")
@app.infer
def infer(self,inputs):
prompts = inputs["prompt"] # Extract the prompt from the input
result = self.llm.generate(prompts, self.sampling_params)
# Extract the generated text from the result
result_output = [output.outputs[0].text for output in result]
# Return a dictionary containing the result
return {'generated_result': result_output[0]}
def finalize(self):
self.llm = None
```
## Creating the Custom Runtime
This is a mandatory step where we allow the users to upload their custom runtime through [inferless-runtime-config.yaml](https://github.com/inferless/inferless_tutorials/tree/main/text_generation/OpenHermes-7B/inferless-runtime-config.yaml).
```python
build:
cuda_version: "12.1.1"
python_packages:
- "vllm==0.3.2"
- "inferless-cli==2.0.9"
- "hf-transfer==0.1.9"
- "huggingface-hub==0.27.1"
```
## Test your model with Remote Run
You can use the `inferless remote-run`([installation guide here](https://docs.inferless.com/model-import/cli-import#cli-import)) command to test your model or any custom Python script in a remote GPU environment directly from your local machine. Make sure that you use `Python3.10` for seamless experience.
### Step 1: Add the Decorators and local entry point
To enable **Remote Run**, simply do the following:
1. Import the `inferless` library and initialize `Cls(gpu="A100")`. The available GPU options are `T4`, `A10` and `A100`.
2. Decorated the `initialize` and `infer` functions with `@app.load` and `@app.infer` respectively.
3. Create the Local Entry Point by decorating a function (for example, `my_local_entry`) with `@inferless.local_entry_point`.
Within this function, instantiate your model class, convert any incoming parameters into a `RequestObjects` object, and invoke the model's `infer` method.
```python
import inferless
from vllm import LLM, SamplingParams
from pydantic import BaseModel, Field
from typing import Optional
@inferless.request
class RequestObjects(BaseModel):
prompt: str = Field(default="Explain Deep Learning.")
temperature: Optional[float] = 0.7
top_p: Optional[float] = 0.1
repetition_penalty: Optional[float] = 1.18
top_k: Optional[int] = 40
max_tokens: Optional[int] = 256
@inferless.response
class ResponseObjects(BaseModel):
generated_text: str = Field(default='Test output')
app = inferless.Cls(gpu="A100")
class InferlessPythonModel:
@app.load
def initialize(self):
model_id = "TheBloke/OpenHermes-2.5-Mistral-7B-AWQ"
self.llm = LLM(model=model_id, quantization="awq", dtype="float16")
@app.infer
def infer(self, request: RequestObjects) -> ResponseObjects:
sampling_params = SamplingParams(temperature=request.temperature,top_p=request.top_p,repetition_penalty=request.repetition_penalty,
top_k=request.top_k,max_tokens=request.max_tokens)
result = self.llm.generate(request.prompt, sampling_params)
result_output = [output.outputs[0].text for output in result]
generateObject = ResponseObjects(generated_text = result_output[0])
return generateObject
def finalize(self):
self.llm = None
@inferless.local_entry_point
def my_local_entry(dynamic_params):
request_objects = RequestObjects(**dynamic_params)
model_instance = InferlessPythonModel()
return model_instance.infer(request_objects)
```
### Step 2: Run with Remote GPU
From your local terminal, navigate to the folder containing your `app.py` and your `inferless-runtime-config.yaml` and run:
```bash
inferless remote-run app.py -c inferless-runtime-config.yaml --prompt "What is Quantum Computing?"
```
You can pass the other input parameters in the same way as long as your code expects them in the `inputs` dictionary.
If you want to exclude certain files or directories from being uploaded, use the `--exclude` or `-e` flag.
## Method A: Deploying the model on Inferless Platform
Inferless supports multiple ways of [importing your model](https://docs.inferless.com/model-import/file-structure-requirements). For this tutorial, we will use GitHub.
### Step 1: Login to the inferless dashboard can click on Import model button
Navigate to your desired workspace in Inferless and Click on `Add a custom model` button that you see on the top right. An import wizard will open up.
### Step 2: Follow the UI to complete the model Import
* Select the GitHub/GitLab Integration option to connect your source code repository with the deployment environment.
* Navigate to the specific GitHub repository that contains your model's code. Here, you will need to identify and enter the name of the model you wish to import.
* Choose the appropriate type of machine that suits your model's requirements. Additionally, specify the minimum and maximum number of replicas to define the scalability range for deploying your model.
* Optionally, you have the option to enable automatic build and deployment. This feature triggers a new deployment automatically whenever there is a new code push to your repository.
* If your model requires additional software packages, configure the Custom Runtime settings by including necessary pip or apt packages. Also, set up environment variables such as Inference Timeout, Container Concurrency, and Scale Down Timeout to tailor the runtime environment according to your needs.
* Wait for the validation process to complete, ensuring that all settings are correct and functional. Once validation is successful, click on the "Import" button to finalize the import of your model.
### Step 3: Wait for the model build to complete usually takes \~5-10 minutes
### Step 4: Use the APIs to call the model
Once the model is in 'Active' status you can click on the 'API' page to call the model
### Here is the Demo:
 ## Method B: Deploying the model on Inferless CLI
Inferless allows you to deploy your model using Inferless-CLI. Follow the steps to deploy using Inferless CLI.
### Clone the repository of the model
Let's begin by cloning the model repository:
```bash
git clone https://github.com/inferless/OpenHermes-2-5-Mistral-7B.git
```
### Deploy the Model
To deploy the model using Inferless CLI, execute the following command:
```bash
inferless deploy --gpu A100 --runtime inferless-runtime-config.yaml
```
**Explanation of the Command:**
* `--gpu A100`: Specifies the GPU type for deployment. Available options include `A10`, `A100`, and `T4`.
* `--runtime inferless-runtime-config.yaml`: Defines the runtime configuration file. If not specified, the default Inferless runtime is used.
# Deploy OpenLLM-leaderboard topper Smaug-72B using Inferless
Source: https://docs.inferless.com/how-to-guides/deploy-openllm-leaderboard-topper-smaug-72b-using-inferless
This tutorial demonstrates deploying a quantized Smaug-72B model using vLLM. We will be deploying a 4-bit quantized GPTQ version of this model.
## Introduction
Smaug-72B - which is a current topper of the Hugging Face LLM leaderboard and it’s the first model with an average score of 80. Smaug-72B is finetuned directly from [MoMo-72B-lora-1.8.7-DPO](https://huggingface.co/moreh/MoMo-72B-lora-1.8.7-DPO) and is ultimately based on [Qwen-72B](https://huggingface.co/Qwen/Qwen-72B).
## Our Observations
We have deployed the [4-bit quantized version](https://huggingface.co/LoneStriker/Smaug-72B-v0.1-GPTQ) of the model using vLLM on an A100 GPU(80GB). Here are our observations:
| Inference Time | Cold Start Time | Token/Sec | Latency/Token | VRAM Required |
| -------------- | --------------- | --------- | ------------- | ------------- |
| 8.01 sec | 26.65 sec | 29.94 | 33.39 ms | 69.19 GB |
## Defining Dependencies
We are using the [vLLM library](https://github.com/vllm-project/vllm), which boost the inference speed of the LLM. We will deploy a GPTQ 4bit quantized version of the model.
## Constructing the GitHub/GitLab Template
Now quickly construct the GitHub/GitLab template, this process is mandatory and make sure you don't add any file named `model.py`.
```
Smaug-72B/
├── app.py
├── inferless-runtime-config.yaml
├── inferless.yaml
└── input_schema.py
```
You can also add other files to this directory.
## Create the class for inference
In the [app.py](https://github.com/inferless/Smaug-72B/blob/main/app.py) we will define the class and import all the required functions
1. `def initialize`: In this function, you will initialize your model and the required `variables`. You can adjust the `gpu_memory_utilization` parameter to reduce GPU usage.
2. `def infer`: This function gets called for every request that you send. Here you can define all the steps that are required for the inference. You can also pass custom values for inference and pass it through `inputs(dict)` parameter.
3. `def finalize`: This function cleans up all the allocated memory.
```python
from vllm import LLM, SamplingParams
import inferless
app = inferless.Cls(gpu="A100")
class InferlessPythonModel:
@app.load
def initialize(self):
model_id = "LoneStriker/Smaug-72B-v0.1-GPTQ"
self.sampling_params = SamplingParams(temperature=0.7, top_p=0.95,max_tokens=256)
self.llm = LLM(model=model_id, quantization="gptq", dtype="float16",max_model_len=2048,gpu_memory_utilization=0.9)
@app.infer
def infer(self, inputs):
prompts = inputs["prompt"]
result = self.llm.generate(prompts, self.sampling_params)
result_output = [output.outputs[0].text for output in result]
return {'gresult': result_output[0]}
def finalize(self):
self.llm = None
```
## Create the Input Schema
We have to create a `input_schema.py` in your GitHub/Gitlab repository this will help us create the Input parameters. You can checkout our documentation on [Input / Output Schema](https://docs.inferless.com/model-import/input-output-schema).
For this tutorial, we have defined a parameter `prompt` which is required during the API call. Now lets create the [input\_schema.py](https://github.com/inferless/Smaug-72B/blob/main/input%5Fschema.py).
```
INPUT_SCHEMA = {
"prompt": {
'datatype': 'STRING',
'required': True,
'shape': [1],
'example': ["What is quantization?"]
}
}
```
## Creating the Custom Runtime
This is a mandatory step where we allow the users to upload their custom runtime through [inferless-runtime-config.yaml](https://github.com/inferless/Smaug-72B/blob/main/inferless-runtime-config.yaml).
```
build:
cuda_version: "12.1.1"
python_packages:
- "vllm==0.3.1"
- "inferless-cli==2.0.9"
- "hf-transfer==0.1.9"
- "huggingface-hub==0.27.1"
```
## Test your model with Remote Run
You can use the `inferless remote-run`([installation guide here](https://docs.inferless.com/model-import/cli-import#cli-import)) command to test your model or any custom Python script in a remote GPU environment directly from your local machine. Make sure that you use `Python3.10` for seamless experience.
### Step 1: Add the Decorators and local entry point
To enable **Remote Run**, simply do the following:
1. Import the `inferless` library and initialize `Cls(gpu="A100")`. The available GPU options are `T4`, `A10` and `A100`.
2. Decorated the `initialize` and `infer` functions with `@app.load` and `@app.infer` respectively.
3. Create the Local Entry Point by decorating a function (for example, `my_local_entry`) with `@inferless.local_entry_point`.
Within this function, instantiate your model class, convert any incoming parameters into a `RequestObjects` object, and invoke the model's `infer` method.
```python
from vllm import LLM, SamplingParams
import inferless
from pydantic import BaseModel, Field
from typing import Optional
@inferless.request
class RequestObjects(BaseModel):
prompt: str = Field(default="Explain Deep Learning.")
temperature: Optional[float] = 0.7
top_p: Optional[float] = 0.1
repetition_penalty: Optional[float] = 1.18
top_k: Optional[int] = 40
max_tokens: Optional[int] = 256
@inferless.response
class ResponseObjects(BaseModel):
generated_text: str = Field(default='Test output')
app = inferless.Cls(gpu="A100")
class InferlessPythonModel:
@app.load
def initialize(self):
model_id = "LoneStriker/Smaug-72B-v0.1-GPTQ"
self.llm = LLM(model=model_id, quantization="gptq", dtype="float16",max_model_len=2048,gpu_memory_utilization=0.9)
@app.infer
def infer(self, request: RequestObjects) -> ResponseObjects:
sampling_params = SamplingParams(temperature=request.temperature,top_p=request.top_p,repetition_penalty=request.repetition_penalty,
top_k=request.top_k,max_tokens=request.max_tokens)
result = self.llm.generate(request.prompt, sampling_params)
result_output = [output.outputs[0].text for output in result]
generateObject = ResponseObjects(generated_text = result_output[0])
return generateObject
def finalize(self):
self.llm = None
@inferless.local_entry_point
def my_local_entry(dynamic_params):
request_objects = RequestObjects(**dynamic_params)
model_instance = InferlessPythonModel()
return model_instance.infer(request_objects)
```
### Step 2: Run with Remote GPU
From your local terminal, navigate to the folder containing your `app.py` and your `inferless-runtime-config.yaml` and run:
```bash
inferless remote-run app.py -c inferless-runtime-config.yaml --prompt "What is quantization?"
```
You can pass the other input parameters in the same way as long as your code expects them in the `inputs` dictionary.
If you want to exclude certain files or directories from being uploaded, use the `--exclude` or `-e` flag.
## Method A: Deploying the model on Inferless Platform
Inferless supports multiple ways of [importing your model](https://docs.inferless.com/model-import/file-structure-req/file-structure-requirements). For this tutorial, we will use GitHub.
### Step 1: Login to the inferless dashboard can click on Import model button
Navigate to your desired workspace in Inferless and Click on `Add a custom model` button that you see on the top right. An import wizard will open up.
### Step 2: Follow the UI to complete the model Import
* Select the GitHub/GitLab Integration option to connect your source code repository with the deployment environment.
* Navigate to the specific GitHub repository that contains your model's code. Here, you will need to identify and enter the name of the model you wish to import.
* Choose the appropriate type of machine that suits your model's requirements. Additionally, specify the minimum and maximum number of replicas to define the scalability range for deploying your model.
* Optionally, you have the option to enable automatic build and deployment. This feature triggers a new deployment automatically whenever there is a new code push to your repository.
* If your model requires additional software packages, configure the Custom Runtime settings by including necessary pip or apt packages. Also, set up environment variables such as Inference Timeout, Container Concurrency, and Scale Down Timeout to tailor the runtime environment according to your needs.
* Wait for the validation process to complete, ensuring that all settings are correct and functional. Once validation is successful, click on the "Import" button to finalize the import of your model.
### Step 3: Wait for the model build to complete usually takes \~5-10 minutes
### Step 4: Use the APIs to call the model
Once the model is in 'Active' status you can click on the 'API' page to call the model
### Here is the Demo:
## Method B: Deploying the model on Inferless CLI
Inferless allows you to deploy your model using Inferless-CLI. Follow the steps to deploy using Inferless CLI.
### Clone the repository of the model
Let's begin by cloning the model repository:
```bash
git clone https://github.com/inferless/OpenHermes-2-5-Mistral-7B.git
```
### Deploy the Model
To deploy the model using Inferless CLI, execute the following command:
```bash
inferless deploy --gpu A100 --runtime inferless-runtime-config.yaml
```
**Explanation of the Command:**
* `--gpu A100`: Specifies the GPU type for deployment. Available options include `A10`, `A100`, and `T4`.
* `--runtime inferless-runtime-config.yaml`: Defines the runtime configuration file. If not specified, the default Inferless runtime is used.
# Deploy OpenLLM-leaderboard topper Smaug-72B using Inferless
Source: https://docs.inferless.com/how-to-guides/deploy-openllm-leaderboard-topper-smaug-72b-using-inferless
This tutorial demonstrates deploying a quantized Smaug-72B model using vLLM. We will be deploying a 4-bit quantized GPTQ version of this model.
## Introduction
Smaug-72B - which is a current topper of the Hugging Face LLM leaderboard and it’s the first model with an average score of 80. Smaug-72B is finetuned directly from [MoMo-72B-lora-1.8.7-DPO](https://huggingface.co/moreh/MoMo-72B-lora-1.8.7-DPO) and is ultimately based on [Qwen-72B](https://huggingface.co/Qwen/Qwen-72B).
## Our Observations
We have deployed the [4-bit quantized version](https://huggingface.co/LoneStriker/Smaug-72B-v0.1-GPTQ) of the model using vLLM on an A100 GPU(80GB). Here are our observations:
| Inference Time | Cold Start Time | Token/Sec | Latency/Token | VRAM Required |
| -------------- | --------------- | --------- | ------------- | ------------- |
| 8.01 sec | 26.65 sec | 29.94 | 33.39 ms | 69.19 GB |
## Defining Dependencies
We are using the [vLLM library](https://github.com/vllm-project/vllm), which boost the inference speed of the LLM. We will deploy a GPTQ 4bit quantized version of the model.
## Constructing the GitHub/GitLab Template
Now quickly construct the GitHub/GitLab template, this process is mandatory and make sure you don't add any file named `model.py`.
```
Smaug-72B/
├── app.py
├── inferless-runtime-config.yaml
├── inferless.yaml
└── input_schema.py
```
You can also add other files to this directory.
## Create the class for inference
In the [app.py](https://github.com/inferless/Smaug-72B/blob/main/app.py) we will define the class and import all the required functions
1. `def initialize`: In this function, you will initialize your model and the required `variables`. You can adjust the `gpu_memory_utilization` parameter to reduce GPU usage.
2. `def infer`: This function gets called for every request that you send. Here you can define all the steps that are required for the inference. You can also pass custom values for inference and pass it through `inputs(dict)` parameter.
3. `def finalize`: This function cleans up all the allocated memory.
```python
from vllm import LLM, SamplingParams
import inferless
app = inferless.Cls(gpu="A100")
class InferlessPythonModel:
@app.load
def initialize(self):
model_id = "LoneStriker/Smaug-72B-v0.1-GPTQ"
self.sampling_params = SamplingParams(temperature=0.7, top_p=0.95,max_tokens=256)
self.llm = LLM(model=model_id, quantization="gptq", dtype="float16",max_model_len=2048,gpu_memory_utilization=0.9)
@app.infer
def infer(self, inputs):
prompts = inputs["prompt"]
result = self.llm.generate(prompts, self.sampling_params)
result_output = [output.outputs[0].text for output in result]
return {'gresult': result_output[0]}
def finalize(self):
self.llm = None
```
## Create the Input Schema
We have to create a `input_schema.py` in your GitHub/Gitlab repository this will help us create the Input parameters. You can checkout our documentation on [Input / Output Schema](https://docs.inferless.com/model-import/input-output-schema).
For this tutorial, we have defined a parameter `prompt` which is required during the API call. Now lets create the [input\_schema.py](https://github.com/inferless/Smaug-72B/blob/main/input%5Fschema.py).
```
INPUT_SCHEMA = {
"prompt": {
'datatype': 'STRING',
'required': True,
'shape': [1],
'example': ["What is quantization?"]
}
}
```
## Creating the Custom Runtime
This is a mandatory step where we allow the users to upload their custom runtime through [inferless-runtime-config.yaml](https://github.com/inferless/Smaug-72B/blob/main/inferless-runtime-config.yaml).
```
build:
cuda_version: "12.1.1"
python_packages:
- "vllm==0.3.1"
- "inferless-cli==2.0.9"
- "hf-transfer==0.1.9"
- "huggingface-hub==0.27.1"
```
## Test your model with Remote Run
You can use the `inferless remote-run`([installation guide here](https://docs.inferless.com/model-import/cli-import#cli-import)) command to test your model or any custom Python script in a remote GPU environment directly from your local machine. Make sure that you use `Python3.10` for seamless experience.
### Step 1: Add the Decorators and local entry point
To enable **Remote Run**, simply do the following:
1. Import the `inferless` library and initialize `Cls(gpu="A100")`. The available GPU options are `T4`, `A10` and `A100`.
2. Decorated the `initialize` and `infer` functions with `@app.load` and `@app.infer` respectively.
3. Create the Local Entry Point by decorating a function (for example, `my_local_entry`) with `@inferless.local_entry_point`.
Within this function, instantiate your model class, convert any incoming parameters into a `RequestObjects` object, and invoke the model's `infer` method.
```python
from vllm import LLM, SamplingParams
import inferless
from pydantic import BaseModel, Field
from typing import Optional
@inferless.request
class RequestObjects(BaseModel):
prompt: str = Field(default="Explain Deep Learning.")
temperature: Optional[float] = 0.7
top_p: Optional[float] = 0.1
repetition_penalty: Optional[float] = 1.18
top_k: Optional[int] = 40
max_tokens: Optional[int] = 256
@inferless.response
class ResponseObjects(BaseModel):
generated_text: str = Field(default='Test output')
app = inferless.Cls(gpu="A100")
class InferlessPythonModel:
@app.load
def initialize(self):
model_id = "LoneStriker/Smaug-72B-v0.1-GPTQ"
self.llm = LLM(model=model_id, quantization="gptq", dtype="float16",max_model_len=2048,gpu_memory_utilization=0.9)
@app.infer
def infer(self, request: RequestObjects) -> ResponseObjects:
sampling_params = SamplingParams(temperature=request.temperature,top_p=request.top_p,repetition_penalty=request.repetition_penalty,
top_k=request.top_k,max_tokens=request.max_tokens)
result = self.llm.generate(request.prompt, sampling_params)
result_output = [output.outputs[0].text for output in result]
generateObject = ResponseObjects(generated_text = result_output[0])
return generateObject
def finalize(self):
self.llm = None
@inferless.local_entry_point
def my_local_entry(dynamic_params):
request_objects = RequestObjects(**dynamic_params)
model_instance = InferlessPythonModel()
return model_instance.infer(request_objects)
```
### Step 2: Run with Remote GPU
From your local terminal, navigate to the folder containing your `app.py` and your `inferless-runtime-config.yaml` and run:
```bash
inferless remote-run app.py -c inferless-runtime-config.yaml --prompt "What is quantization?"
```
You can pass the other input parameters in the same way as long as your code expects them in the `inputs` dictionary.
If you want to exclude certain files or directories from being uploaded, use the `--exclude` or `-e` flag.
## Method A: Deploying the model on Inferless Platform
Inferless supports multiple ways of [importing your model](https://docs.inferless.com/model-import/file-structure-req/file-structure-requirements). For this tutorial, we will use GitHub.
### Step 1: Login to the inferless dashboard can click on Import model button
Navigate to your desired workspace in Inferless and Click on `Add a custom model` button that you see on the top right. An import wizard will open up.
### Step 2: Follow the UI to complete the model Import
* Select the GitHub/GitLab Integration option to connect your source code repository with the deployment environment.
* Navigate to the specific GitHub repository that contains your model's code. Here, you will need to identify and enter the name of the model you wish to import.
* Choose the appropriate type of machine that suits your model's requirements. Additionally, specify the minimum and maximum number of replicas to define the scalability range for deploying your model.
* Optionally, you have the option to enable automatic build and deployment. This feature triggers a new deployment automatically whenever there is a new code push to your repository.
* If your model requires additional software packages, configure the Custom Runtime settings by including necessary pip or apt packages. Also, set up environment variables such as Inference Timeout, Container Concurrency, and Scale Down Timeout to tailor the runtime environment according to your needs.
* Wait for the validation process to complete, ensuring that all settings are correct and functional. Once validation is successful, click on the "Import" button to finalize the import of your model.
### Step 3: Wait for the model build to complete usually takes \~5-10 minutes
### Step 4: Use the APIs to call the model
Once the model is in 'Active' status you can click on the 'API' page to call the model
### Here is the Demo:
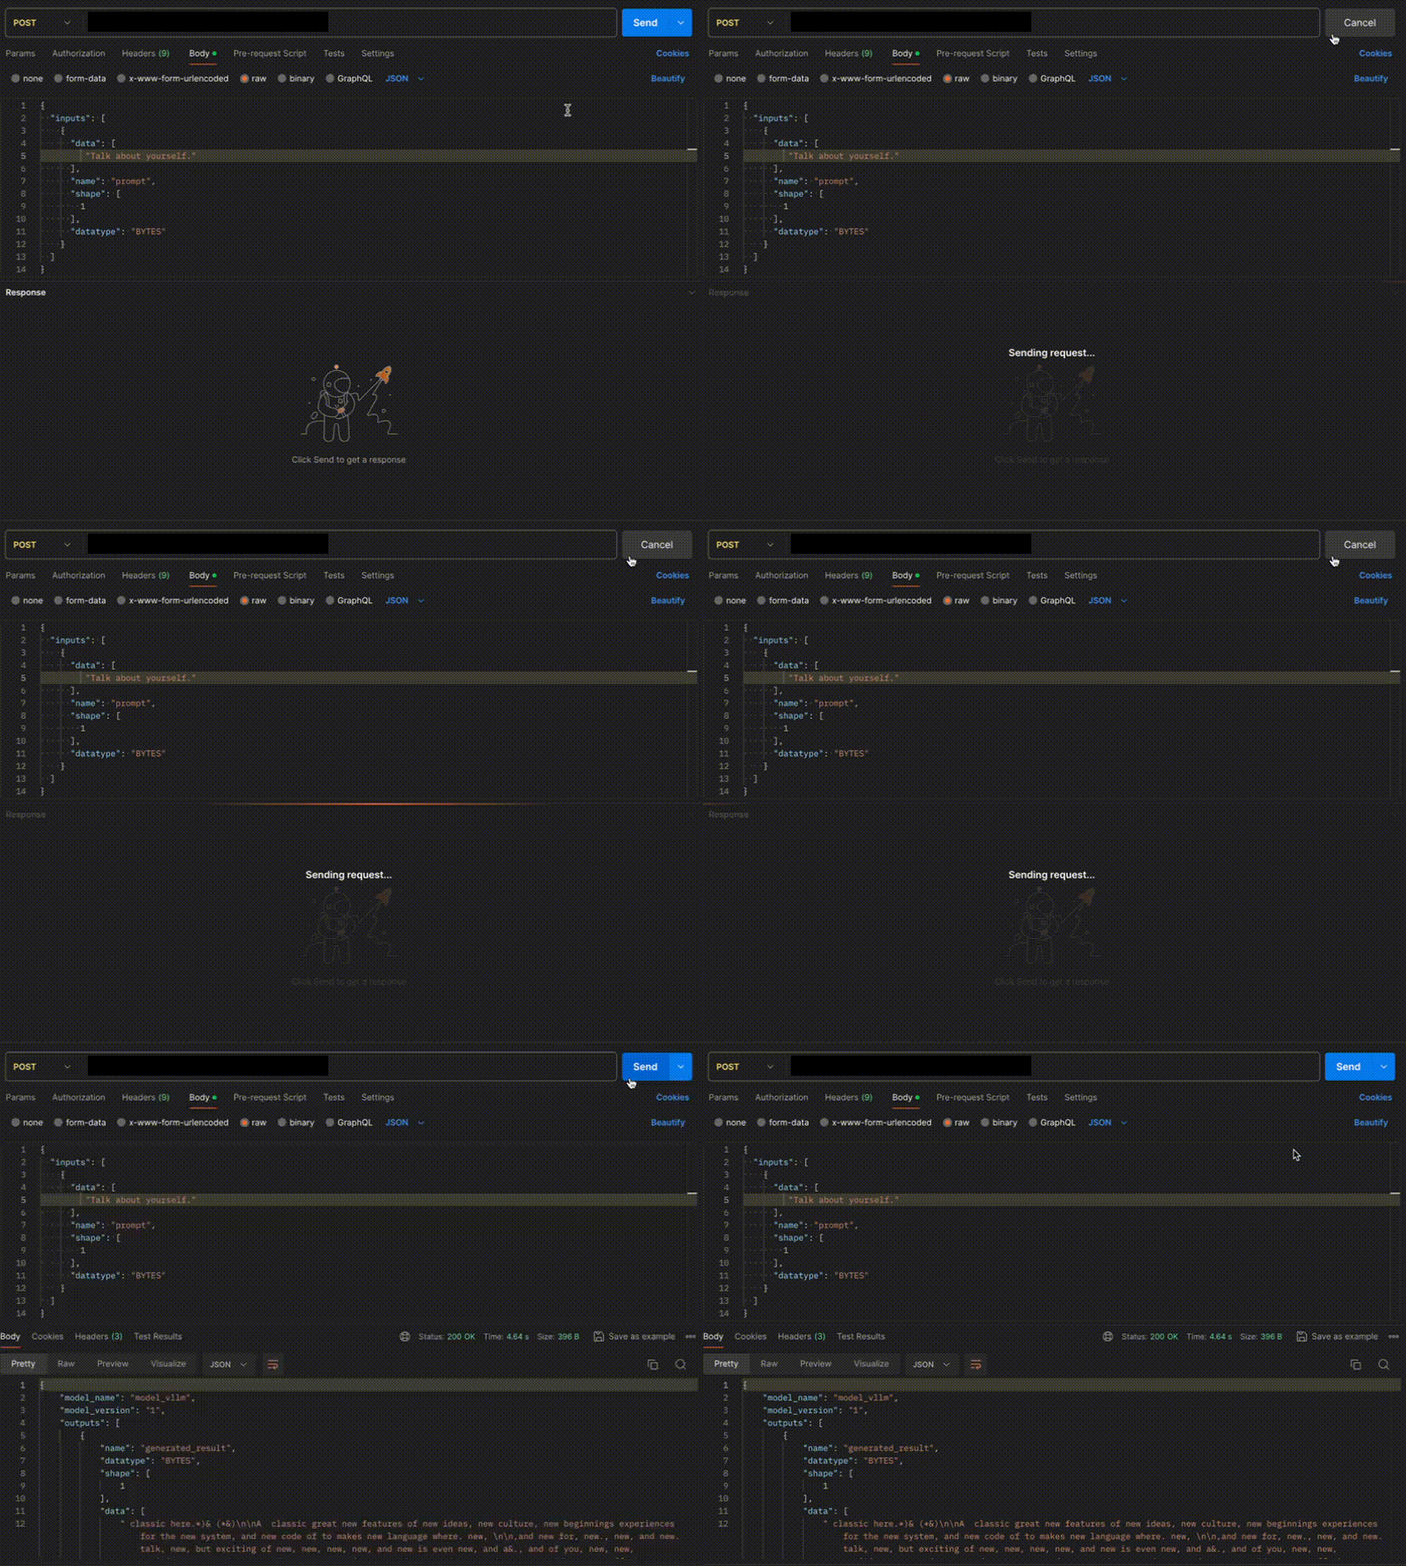 ## Method B: Deploying the model on Inferless CLI
Inferless allows you to deploy your model using Inferless-CLI. Follow the steps to deploy using Inferless CLI.
### Clone the repository of the model
Let's begin by cloning the model repository:
```bash
git clone https://github.com/inferless/Smaug-72B.git
```
### Deploy the Model
To deploy the model using Inferless CLI, execute the following command:
```bash
inferless deploy --gpu A100 --runtime inferless-runtime-config.yaml
```
**Explanation of the Command:**
* `--gpu A100`: Specifies the GPU type for deployment. Available options include `A10`, `A100`, and `T4`.
* `--runtime inferless-runtime-config.yaml`: Defines the runtime configuration file. If not specified, the default Inferless runtime is used.
# Deploy Phi-3-mini-128k-instruct using Inferless
Source: https://docs.inferless.com/how-to-guides/deploy-phi-3-128k
Phi-3-mini-128k-instruct is a 3.8 billion-parameter lightweight state-of-the-art model fine-tuned for instruction-following tasks, leveraging advanced techniques and comprehensive datasets to deliver high performance in natural language understanding and generation.
## Introduction
Microsoft has introduced [Phi-3-mini-128k-instruct](https://huggingface.co/microsoft/Phi-3-mini-128k-instruct), a compact yet powerful model designed for instruction-following tasks.
This model is a part of the Phi-3 family, known for its efficiency and high performance. The Phi-3-Mini-128K-Instruct exhibited robust, state-of-the-art performance among models with fewer than 13 billion parameters.
## Our Observations
We have deployed the model on an A100 GPU(80GB). Here are our observations:
| Library | Inference Time | Cold Start Time | Tokens/Sec | Output Tokens Length |
| ------------ | -------------- | --------------- | ---------- | -------------------- |
| Transformers | 18.42 sec | 7.82 sec | 24.71 | 500 |
## Defining Dependencies
We are using the [Transformers](https://github.com/huggingface/transformers) to serve the model on a single A100 (80GB).
## Constructing the GitHub/GitLab Template
Now quickly construct the GitHub/GitLab template, this process is mandatory and make sure you don't add any file named `model.py`.
```
Phi-3-128k/
├── app.py
├── inferless-runtime-config.yaml
├── inferless.yaml
└── input_schema.py
```
You can also add other files to this directory.
## Create the class for inference
In the [app.py](https://github.com/inferless/Phi-3-128k/blob/main/app.py) we will define the class and import all the required functions
1. `def initialize`: In this function, you will initialize your model and define any `variable` that you want to use during inference.
2. `def infer`: This function gets called for every request that you send. Here you can define all the steps that are required for the inference. You can also pass custom values for inference and pass it through `inputs(dict)` parameter.
3. `def finalize`: This function cleans up all the allocated memory.
```python
import os
os.environ["HF_HUB_ENABLE_HF_TRANSFER"]='1'
from huggingface_hub import snapshot_download
from transformers import pipeline, AutoModelForCausalLM, AutoTokenizer
import inferless
app = inferless.Cls(gpu="A100")
class InferlessPythonModel:
@app.load
def initialize(self):
model_id = "microsoft/Phi-3-mini-128k-instruct"
snapshot_download(repo_id=model_id,allow_patterns=["*.safetensors"])
self.model = AutoModelForCausalLM.from_pretrained(
model_id,
device_map="cuda",
torch_dtype="auto",
trust_remote_code=True,
)
self.tokenizer = AutoTokenizer.from_pretrained(model_id)
self.pipe = pipeline(
"text-generation",
model=self.model,
tokenizer=self.tokenizer,
)
@app.infer
def infer(self, input_data):
prompt = input_data['prompt']
roles = input_data['roles']
generation_args = {
"max_new_tokens": 500,
"return_full_text": False,
"temperature": 0.0,
"do_sample": False,
}
messages = []
messages.append({ "role": roles , "content" : prompt })
output = self.pipe(messages, **generation_args)
return {"result": output[0]['generated_text'] }
def finalize(self):
self.generator = None
print("Pipeline finalized.", flush=True)
```
## Create the Input Schema
We have to create a [input\_schema.py](https://github.com/inferless/Phi-3-128k/blob/main/input_schema.py) in your GitHub/Gitlab repository this will help us create the Input parameters. You can checkout our documentation on [Input / Output Schema](https://docs.inferless.com/model-import/input-output-schema).
For this tutorial, we have defined two parameter `prompt` and `roles` which are required during the API call. Now lets create the `input_schema.py`.
```JSON
INPUT_SCHEMA = {
"roles": {
'datatype': 'STRING',
'required': True,
'shape': [1],
'example': ["user"]
},
"prompt": {
'datatype': 'STRING',
'required': True,
'shape': [1],
'example': [
"Inferless is a machine learning model deployment platform.",
]
}
}
```
## Creating the Custom Runtime
This is a mandatory step where we allow the users to upload their custom runtime through [inferless-runtime-config.yaml](https://github.com/inferless/Phi-3-128k/blob/main/inferless-runtime-config.yaml).
```python
build:
cuda_version: 12.1.1
python_packages:
- torch==2.3.0
- accelerate==0.30.1
- transformers==4.41.1
- inferless-cli==2.0.9
- hf-transfer==0.1.9
- huggingface-hub==0.27.1
```
## Test your model with Remote Run
You can use the `inferless remote-run`([installation guide here](https://docs.inferless.com/model-import/cli-import#cli-import)) command to test your model or any custom Python script in a remote GPU environment directly from your local machine. Make sure that you use `Python3.10` for seamless experience.
### Step 1: Add the Decorators and local entry point
To enable **Remote Run**, simply do the following:
1. Import the `inferless` library and initialize `Cls(gpu="A10")`. The available GPU options are `T4`, `A10` and `A100`.
2. Decorated the `initialize` and `infer` functions with `@app.load` and `@app.infer` respectively.
3. Create the Local Entry Point by decorating a function (for example, `my_local_entry`) with `@inferless.local_entry_point`.
Within this function, instantiate your model class, convert any incoming parameters into a `RequestObjects` object, and invoke the model's `infer` method.
```python
import os
os.environ["HF_HUB_ENABLE_HF_TRANSFER"]='1'
from huggingface_hub import snapshot_download
from transformers import pipeline, AutoModelForCausalLM, AutoTokenizer
import inferless
from pydantic import BaseModel, Field
from typing import Optional
@inferless.request
class RequestObjects(BaseModel):
prompt: str = Field(default="Explain Deep Learning.")
role: str = Field(default="user")
temperature: Optional[float] = 0.7
do_sample: Optional[bool] = False
return_full_text: Optional[bool] = False
max_new_tokens: Optional[int] = 256
@inferless.response
class ResponseObjects(BaseModel):
generated_text: str = Field(default='Test output')
app = inferless.Cls(gpu="A100")
class InferlessPythonModel:
@app.load
def initialize(self):
model_id = "microsoft/Phi-3-mini-128k-instruct"
snapshot_download(repo_id=model_id,allow_patterns=["*.safetensors"])
self.model = AutoModelForCausalLM.from_pretrained(
model_id,
device_map="cuda",
torch_dtype="auto",
trust_remote_code=True,
)
self.tokenizer = AutoTokenizer.from_pretrained(model_id)
self.pipe = pipeline(
"text-generation",
model=self.model,
tokenizer=self.tokenizer,
)
@app.infer
def infer(self, request: RequestObjects) -> ResponseObjects:
generation_args = {
"max_new_tokens": request.max_new_tokens,
"return_full_text": request.return_full_text,
"temperature": request.temperature,
"do_sample": request.do_sample,
}
messages = []
messages.append({ "role": request.role , "content" : request.prompt })
output = self.pipe(messages, **generation_args)
generateObject = ResponseObjects(generated_text = output[0]['generated_text'])
return generateObject
def finalize(self):
self.generator = None
print("Pipeline finalized.", flush=True)
@inferless.local_entry_point
def my_local_entry(dynamic_params):
request_objects = RequestObjects(**dynamic_params)
model_instance = InferlessPythonModel()
return model_instance.infer(request_objects)
```
### Step 2: Run with Remote GPU
From your local terminal, navigate to the folder containing your `app.py` and your `inferless-runtime-config.yaml` and run:
```bash
inferless remote-run app.py -c inferless-runtime-config.yaml --prompt "What is Deep Learning?" --roles "user"
```
If you want to exclude certain files or directories from being uploaded, use the `--exclude` or `-e` flag.
## Method A: Deploying the model on Inferless Platform
Inferless supports multiple ways of [importing your model](https://docs.inferless.com/model-import/file-structure-req/file-structure-requirements). For this tutorial, we will use GitHub.
### Step 1: Login to the inferless dashboard can click on Import model button
Navigate to your desired workspace in Inferless and Click on `Add a custom model` button that you see on the top right. An import wizard will open up.
### Step 2: Follow the UI to complete the model Import
* Select the GitHub/GitLab Integration option to connect your source code repository with the deployment environment.
* Navigate to the specific GitHub repository that contains your model's code. Here, you will need to identify and enter the name of the model you wish to import.
* Choose the appropriate type of machine that suits your model's requirements. Additionally, specify the minimum and maximum number of replicas to define the scalability range for deploying your model.
* Optionally, you have the option to enable automatic build and deployment. This feature triggers a new deployment automatically whenever there is a new code push to your repository.
* If your model requires additional software packages, configure the Custom Runtime settings by including necessary pip or apt packages. Also, set up environment variables such as Inference Timeout, Container Concurrency, and Scale Down Timeout to tailor the runtime environment according to your needs.
* Wait for the validation process to complete, ensuring that all settings are correct and functional. Once validation is successful, click on the "Import" button to finalize the import of your model.
### Step 3: Wait for the model build to complete usually takes \~5-10 minutes
### Step 4: Use the APIs to call the model
Once the model is in 'Active' status you can click on the 'API' page to call the model
### Here is the Demo:
## Method B: Deploying the model on Inferless CLI
Inferless allows you to deploy your model using Inferless-CLI. Follow the steps to deploy using Inferless CLI.
### Clone the repository of the model
Let's begin by cloning the model repository:
```bash
git clone https://github.com/inferless/Smaug-72B.git
```
### Deploy the Model
To deploy the model using Inferless CLI, execute the following command:
```bash
inferless deploy --gpu A100 --runtime inferless-runtime-config.yaml
```
**Explanation of the Command:**
* `--gpu A100`: Specifies the GPU type for deployment. Available options include `A10`, `A100`, and `T4`.
* `--runtime inferless-runtime-config.yaml`: Defines the runtime configuration file. If not specified, the default Inferless runtime is used.
# Deploy Phi-3-mini-128k-instruct using Inferless
Source: https://docs.inferless.com/how-to-guides/deploy-phi-3-128k
Phi-3-mini-128k-instruct is a 3.8 billion-parameter lightweight state-of-the-art model fine-tuned for instruction-following tasks, leveraging advanced techniques and comprehensive datasets to deliver high performance in natural language understanding and generation.
## Introduction
Microsoft has introduced [Phi-3-mini-128k-instruct](https://huggingface.co/microsoft/Phi-3-mini-128k-instruct), a compact yet powerful model designed for instruction-following tasks.
This model is a part of the Phi-3 family, known for its efficiency and high performance. The Phi-3-Mini-128K-Instruct exhibited robust, state-of-the-art performance among models with fewer than 13 billion parameters.
## Our Observations
We have deployed the model on an A100 GPU(80GB). Here are our observations:
| Library | Inference Time | Cold Start Time | Tokens/Sec | Output Tokens Length |
| ------------ | -------------- | --------------- | ---------- | -------------------- |
| Transformers | 18.42 sec | 7.82 sec | 24.71 | 500 |
## Defining Dependencies
We are using the [Transformers](https://github.com/huggingface/transformers) to serve the model on a single A100 (80GB).
## Constructing the GitHub/GitLab Template
Now quickly construct the GitHub/GitLab template, this process is mandatory and make sure you don't add any file named `model.py`.
```
Phi-3-128k/
├── app.py
├── inferless-runtime-config.yaml
├── inferless.yaml
└── input_schema.py
```
You can also add other files to this directory.
## Create the class for inference
In the [app.py](https://github.com/inferless/Phi-3-128k/blob/main/app.py) we will define the class and import all the required functions
1. `def initialize`: In this function, you will initialize your model and define any `variable` that you want to use during inference.
2. `def infer`: This function gets called for every request that you send. Here you can define all the steps that are required for the inference. You can also pass custom values for inference and pass it through `inputs(dict)` parameter.
3. `def finalize`: This function cleans up all the allocated memory.
```python
import os
os.environ["HF_HUB_ENABLE_HF_TRANSFER"]='1'
from huggingface_hub import snapshot_download
from transformers import pipeline, AutoModelForCausalLM, AutoTokenizer
import inferless
app = inferless.Cls(gpu="A100")
class InferlessPythonModel:
@app.load
def initialize(self):
model_id = "microsoft/Phi-3-mini-128k-instruct"
snapshot_download(repo_id=model_id,allow_patterns=["*.safetensors"])
self.model = AutoModelForCausalLM.from_pretrained(
model_id,
device_map="cuda",
torch_dtype="auto",
trust_remote_code=True,
)
self.tokenizer = AutoTokenizer.from_pretrained(model_id)
self.pipe = pipeline(
"text-generation",
model=self.model,
tokenizer=self.tokenizer,
)
@app.infer
def infer(self, input_data):
prompt = input_data['prompt']
roles = input_data['roles']
generation_args = {
"max_new_tokens": 500,
"return_full_text": False,
"temperature": 0.0,
"do_sample": False,
}
messages = []
messages.append({ "role": roles , "content" : prompt })
output = self.pipe(messages, **generation_args)
return {"result": output[0]['generated_text'] }
def finalize(self):
self.generator = None
print("Pipeline finalized.", flush=True)
```
## Create the Input Schema
We have to create a [input\_schema.py](https://github.com/inferless/Phi-3-128k/blob/main/input_schema.py) in your GitHub/Gitlab repository this will help us create the Input parameters. You can checkout our documentation on [Input / Output Schema](https://docs.inferless.com/model-import/input-output-schema).
For this tutorial, we have defined two parameter `prompt` and `roles` which are required during the API call. Now lets create the `input_schema.py`.
```JSON
INPUT_SCHEMA = {
"roles": {
'datatype': 'STRING',
'required': True,
'shape': [1],
'example': ["user"]
},
"prompt": {
'datatype': 'STRING',
'required': True,
'shape': [1],
'example': [
"Inferless is a machine learning model deployment platform.",
]
}
}
```
## Creating the Custom Runtime
This is a mandatory step where we allow the users to upload their custom runtime through [inferless-runtime-config.yaml](https://github.com/inferless/Phi-3-128k/blob/main/inferless-runtime-config.yaml).
```python
build:
cuda_version: 12.1.1
python_packages:
- torch==2.3.0
- accelerate==0.30.1
- transformers==4.41.1
- inferless-cli==2.0.9
- hf-transfer==0.1.9
- huggingface-hub==0.27.1
```
## Test your model with Remote Run
You can use the `inferless remote-run`([installation guide here](https://docs.inferless.com/model-import/cli-import#cli-import)) command to test your model or any custom Python script in a remote GPU environment directly from your local machine. Make sure that you use `Python3.10` for seamless experience.
### Step 1: Add the Decorators and local entry point
To enable **Remote Run**, simply do the following:
1. Import the `inferless` library and initialize `Cls(gpu="A10")`. The available GPU options are `T4`, `A10` and `A100`.
2. Decorated the `initialize` and `infer` functions with `@app.load` and `@app.infer` respectively.
3. Create the Local Entry Point by decorating a function (for example, `my_local_entry`) with `@inferless.local_entry_point`.
Within this function, instantiate your model class, convert any incoming parameters into a `RequestObjects` object, and invoke the model's `infer` method.
```python
import os
os.environ["HF_HUB_ENABLE_HF_TRANSFER"]='1'
from huggingface_hub import snapshot_download
from transformers import pipeline, AutoModelForCausalLM, AutoTokenizer
import inferless
from pydantic import BaseModel, Field
from typing import Optional
@inferless.request
class RequestObjects(BaseModel):
prompt: str = Field(default="Explain Deep Learning.")
role: str = Field(default="user")
temperature: Optional[float] = 0.7
do_sample: Optional[bool] = False
return_full_text: Optional[bool] = False
max_new_tokens: Optional[int] = 256
@inferless.response
class ResponseObjects(BaseModel):
generated_text: str = Field(default='Test output')
app = inferless.Cls(gpu="A100")
class InferlessPythonModel:
@app.load
def initialize(self):
model_id = "microsoft/Phi-3-mini-128k-instruct"
snapshot_download(repo_id=model_id,allow_patterns=["*.safetensors"])
self.model = AutoModelForCausalLM.from_pretrained(
model_id,
device_map="cuda",
torch_dtype="auto",
trust_remote_code=True,
)
self.tokenizer = AutoTokenizer.from_pretrained(model_id)
self.pipe = pipeline(
"text-generation",
model=self.model,
tokenizer=self.tokenizer,
)
@app.infer
def infer(self, request: RequestObjects) -> ResponseObjects:
generation_args = {
"max_new_tokens": request.max_new_tokens,
"return_full_text": request.return_full_text,
"temperature": request.temperature,
"do_sample": request.do_sample,
}
messages = []
messages.append({ "role": request.role , "content" : request.prompt })
output = self.pipe(messages, **generation_args)
generateObject = ResponseObjects(generated_text = output[0]['generated_text'])
return generateObject
def finalize(self):
self.generator = None
print("Pipeline finalized.", flush=True)
@inferless.local_entry_point
def my_local_entry(dynamic_params):
request_objects = RequestObjects(**dynamic_params)
model_instance = InferlessPythonModel()
return model_instance.infer(request_objects)
```
### Step 2: Run with Remote GPU
From your local terminal, navigate to the folder containing your `app.py` and your `inferless-runtime-config.yaml` and run:
```bash
inferless remote-run app.py -c inferless-runtime-config.yaml --prompt "What is Deep Learning?" --roles "user"
```
If you want to exclude certain files or directories from being uploaded, use the `--exclude` or `-e` flag.
## Method A: Deploying the model on Inferless Platform
Inferless supports multiple ways of [importing your model](https://docs.inferless.com/model-import/file-structure-req/file-structure-requirements). For this tutorial, we will use GitHub.
### Step 1: Login to the inferless dashboard can click on Import model button
Navigate to your desired workspace in Inferless and Click on `Add a custom model` button that you see on the top right. An import wizard will open up.
### Step 2: Follow the UI to complete the model Import
* Select the GitHub/GitLab Integration option to connect your source code repository with the deployment environment.
* Navigate to the specific GitHub repository that contains your model's code. Here, you will need to identify and enter the name of the model you wish to import.
* Choose the appropriate type of machine that suits your model's requirements. Additionally, specify the minimum and maximum number of replicas to define the scalability range for deploying your model.
* Optionally, you have the option to enable automatic build and deployment. This feature triggers a new deployment automatically whenever there is a new code push to your repository.
* If your model requires additional software packages, configure the Custom Runtime settings by including necessary pip or apt packages. Also, set up environment variables such as Inference Timeout, Container Concurrency, and Scale Down Timeout to tailor the runtime environment according to your needs.
* Wait for the validation process to complete, ensuring that all settings are correct and functional. Once validation is successful, click on the "Import" button to finalize the import of your model.
### Step 3: Wait for the model build to complete usually takes \~5-10 minutes
### Step 4: Use the APIs to call the model
Once the model is in 'Active' status you can click on the 'API' page to call the model
### Here is the Demo:
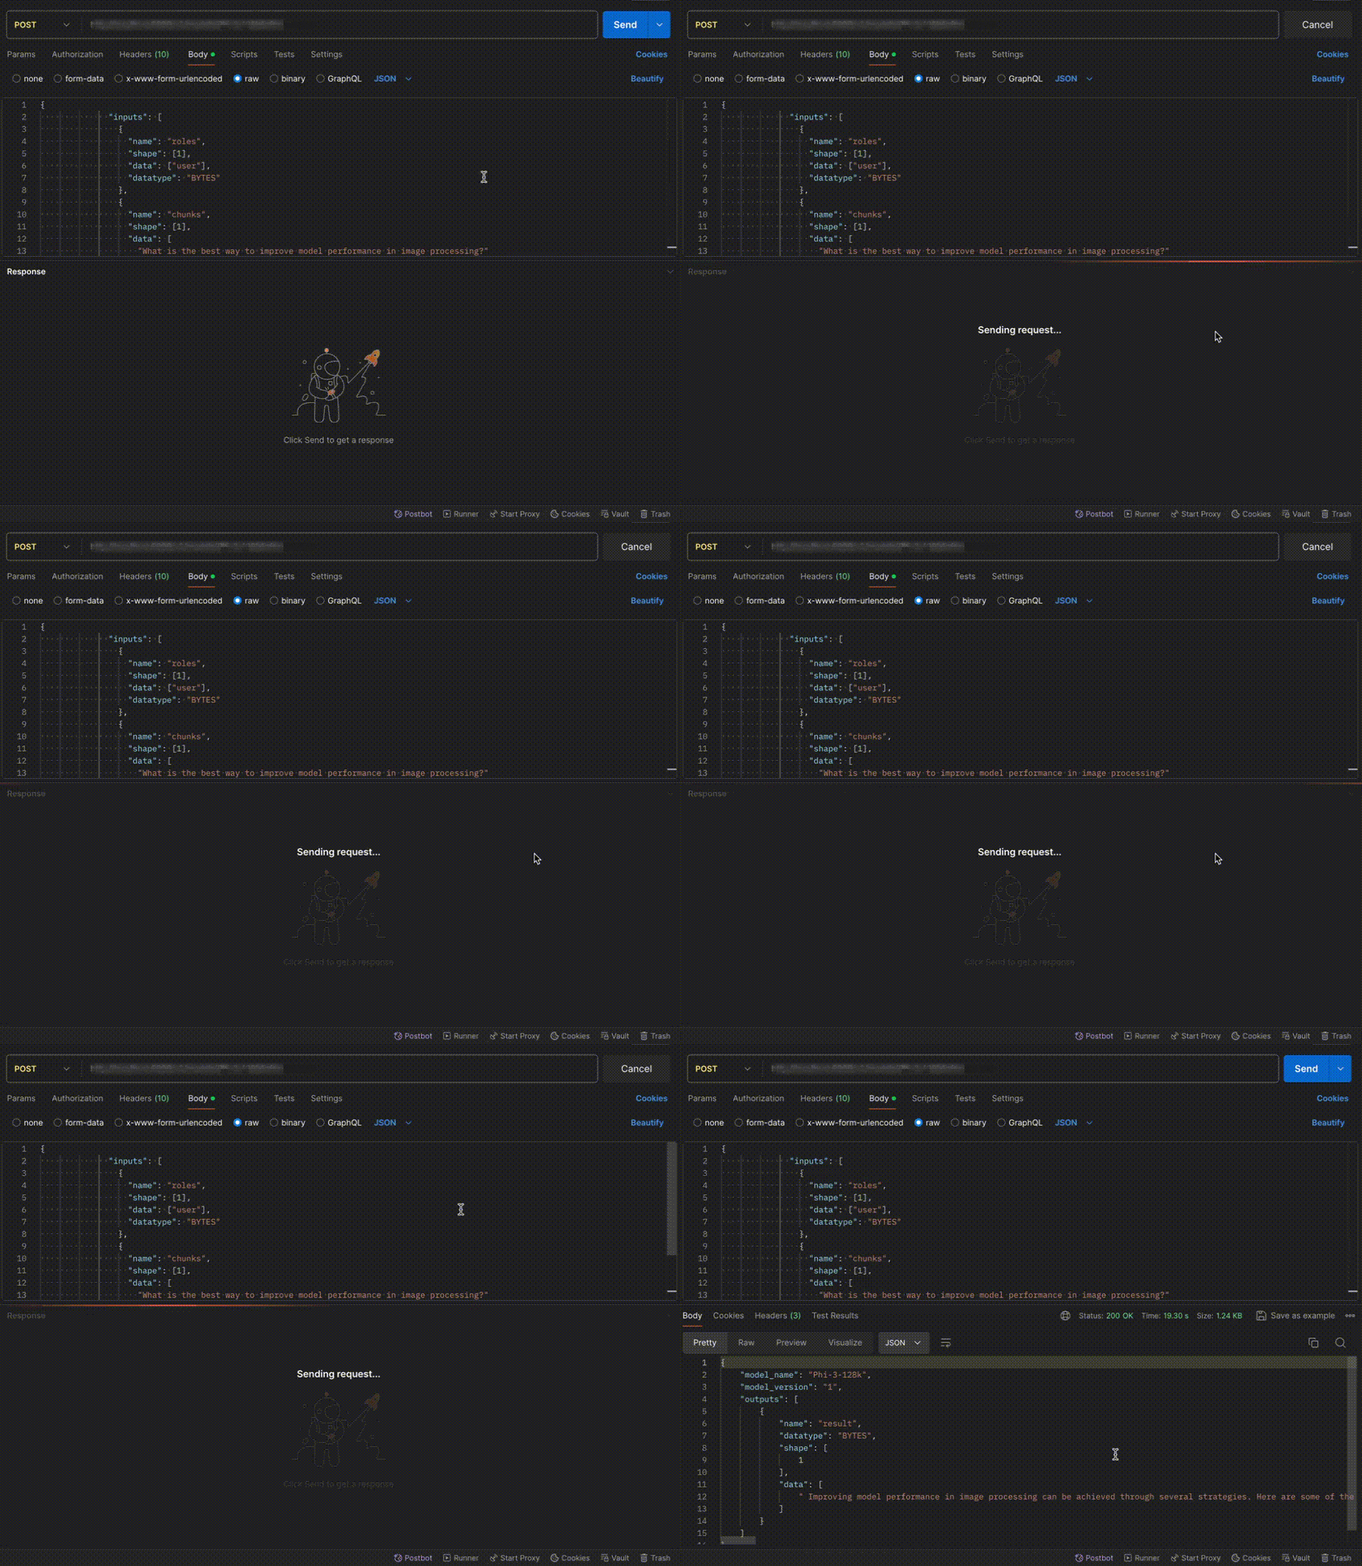 ## Method B: Deploying the model on Inferless CLI
Inferless allows you to deploy your model using Inferless-CLI. Follow the steps to deploy using Inferless CLI.
### Clone the repository of the model
Let's begin by cloning the model repository:
```bash
git clone https://github.com/inferless/Phi-3-128k.git
```
### Deploy the Model
To deploy the model using Inferless CLI, execute the following command:
```bash
inferless deploy --gpu A100 --runtime inferless-runtime-config.yaml
```
**Explanation of the Command:**
* `--gpu A100`: Specifies the GPU type for deployment. Available options include `A10`, `A100`, and `T4`.
* `--runtime inferless-runtime-config.yaml`: Defines the runtime configuration file. If not specified, the default Inferless runtime is used.
# Deploy the Phi-4 using Inferless
Source: https://docs.inferless.com/how-to-guides/deploy-phi-4
Phi-4 is Microsoft's latest 14 billion parameters small language model (SLM). This model is part of the Phi family, which aims to balance between model size and performance, showcasing that smaller models can achieve state-of-the-art results.
## Introduction
[Phi-4](https://huggingface.co/microsoft/phi-4) is a 14-billion parameter language model developed by Microsoft Research,
designed to excel in complex reasoning tasks, particularly within STEM domains.
Phi-4 strategically incorporates synthetic data throughout its training process, enhancing its problem-solving capabilities.
It achieves an 80.4 score on the MATH benchmark, surpassing larger models like Llama-3.3 70B, Qwen 2.5 72B Instruct and GPT-4o.
It attains a score of 82.6 on the HumanEval coding benchmark, indicating strong code generation capabilities.
## Defining Dependencies
We are using the [vLLM](https://github.com/vllm-project/vllm/) to serve the model on a single A100.
## Our Observations
We have deployed the model on an A100 GPU(80GB). Here are our observations:
| Library | Inference Time | Cold Start Time | Tokens/Sec | Output Tokens Length |
| ------- | -------------- | --------------- | ---------- | -------------------- |
| vLLM | 2.78 sec | 39.95 sec | 32.6 | 128 |
Note: The inference time and cold start time are average values.
## Defining Dependencies
We are using the [vLLM](https://github.com/vllm-project/vllm/) to serve the model on a single A100 (80GB).
## Constructing the GitHub/GitLab Template
Now quickly construct the GitHub/GitLab template, this process is mandatory and make sure you don't add any file named `model.py`.
```
Phi-4/
├── app.py
├── inferless-runtime-config.yaml
└── inferless.yaml
```
You can also add other files to this directory.
## Create the Input Schema with Pydantic
Using the `inferless` Python client and Pydantic, you can define structured schemas directly in your code for input and output, eliminating the need for external file.
### Input Schema
When defining an input schema with Pydantic, you need to annotate your class attributes with the appropriate types, such as `str`, `float`, `int`, etc.
These type annotations specifys what type of data each field should contain.
The `default` value serves as the example input for testing with the `infer` function.
```python
@inferless.request
class RequestObjects(BaseModel):
prompt: str = Field(default="Implement a function to check if a given number is a prime number.")
temperature: Optional[float] = 0.7
top_p: Optional[float] = 0.1
repetition_penalty: Optional[float] = 1.18
top_k: Optional[int] = 40
max_tokens: Optional[int] = 256
```
### Output Schema
The `@inferless.response` decorator helps you define structured output schemas.
```python
@inferless.response
class ResponseObjects(BaseModel):
generated_text: str = Field(default='Test output')
```
### Usage in the `infer` Function
Once you have annotated the objects you can expect the infer function to receive `RequestObjects` as input,
and returns a `ResponseObjects` instance as output, ensuring the results adhere to a defined structure.
```python
class InferlessPythonModel:
def infer(self, request: RequestObjects) -> ResponseObjects:
return ResponseObjects(generated_text=result[0])
```
## Create the class for inference
In the [app.py](https://github.com/inferless/Phi-4/blob/main/app.py) we will define the class and import all the required functions
1. `def initialize`: In this function, you will initialize your model and define any `variable` that you want to use during inference.
2. `def infer`: This function gets called for every request that you send. Here you can define all the steps that are required for the inference. You can also pass custom values for inference and pass it through `inputs(dict)` parameter.
3. `def finalize`: This function cleans up all the allocated memory.
```python
from vllm import LLM
from vllm.sampling_params import SamplingParams
import inferless
from pydantic import BaseModel, Field
from typing import Optional
@inferless.request
class RequestObjects(BaseModel):
prompt: str = Field(default="Implement a function to check if a given number is a prime number.")
temperature: Optional[float] = 0.7
top_p: Optional[float] = 0.1
repetition_penalty: Optional[float] = 1.18
top_k: Optional[int] = 40
max_tokens: Optional[int] = 256
@inferless.response
class ResponseObjects(BaseModel):
generated_text: str = Field(default='Test output')
class InferlessPythonModel:
def initialize(self):
model_id = "microsoft/phi-4"
self.llm = LLM(model=model_id,enforce_eager=True)
def infer(self, request: RequestObjects) -> ResponseObjects:
sampling_params = SamplingParams(temperature=request.temperature,top_p=request.top_p,
repetition_penalty=request.repetition_penalty,
top_k=request.top_k,max_tokens=request.max_tokens
)
result = self.llm.generate(request.prompt, sampling_params)
result_output = [output.outputs[0].text for output in result]
generateObject = ResponseObjects(generated_text = result_output[0])
return generateObject
def finalize(self):
self.llm = None
```
## Creating the Custom Runtime
This is a mandatory step where we allow the users to upload their custom runtime through [inferless-runtime-config.yaml](https://github.com/inferless/Phi-4/blob/main/inferless-runtime-config.yaml).
```python
build:
cuda_version: "12.1.1"
python_packages:
- vllm==0.6.6.post1
- inferless==0.2.6
- pydantic==2.10.2
```
## Test your model with Remote Run
You can use the `inferless remote-run`([installation guide here](https://docs.inferless.com/model-import/cli-import#cli-import)) command to test your model or any custom Python script in a remote GPU environment directly from your local machine. Make sure that you use `Python3.10` for seamless experience.
### Step 1: Add the Decorators and local entry point
To enable **Remote Run**, simply do the following:
1. Import the `inferless` library and initialize `Cls(gpu="A100")`. The available GPU options are `T4`, `A10` and `A100`.
2. Decorated the `initialize` and `infer` functions with `@app.load` and `@app.infer` respectively.
3. Create the Local Entry Point by decorating a function (for example, `my_local_entry`) with `@inferless.local_entry_point`.
Within this function, instantiate your model class, convert any incoming parameters into a `RequestObjects` object, and invoke the model's `infer` method.
```python
import inferless
from vllm import LLM
from vllm.sampling_params import SamplingParams
from pydantic import BaseModel, Field
from typing import Optional
app = inferless.Cls(gpu="A100")
@inferless.request
class RequestObjects(BaseModel):
prompt: str = Field(default="Implement a function to check if a given number is a prime number.")
temperature: Optional[float] = 0.7
top_p: Optional[float] = 0.1
repetition_penalty: Optional[float] = 1.18
top_k: Optional[int] = 40
max_tokens: Optional[int] = 256
@inferless.response
class ResponseObjects(BaseModel):
generated_text: str = Field(default='Test output')
class InferlessPythonModel:
@app.load
def initialize(self):
model_id = "microsoft/phi-4"
self.llm = LLM(model=model_id,enforce_eager=True)
@app.infer
def infer(self, request: RequestObjects) -> ResponseObjects:
sampling_params = SamplingParams(temperature=request.temperature,top_p=request.top_p,
repetition_penalty=request.repetition_penalty,
top_k=request.top_k,max_tokens=request.max_tokens
)
result = self.llm.generate(request.prompt, sampling_params)
result_output = [output.outputs[0].text for output in result]
generateObject = ResponseObjects(generated_text = result_output[0])
return generateObject
def finalize(self):
self.llm = None
@inferless.local_entry_point
def my_local_entry(dynamic_params):
request_objects = RequestObjects(**dynamic_params)
model_instance = InferlessPythonModel()
return model_instance.infer(request_objects)
```
### Step 2: Run with Remote GPU
From your local terminal, navigate to the folder containing your `app.py` and your `inferless-runtime-config.yaml` and run:
```bash
inferless remote-run app.py -c inferless-runtime-config.yaml --prompt "Implement a function to check if a given number is a prime number."
```
You can pass the other input parameters in the same way (e.g., `--temperature`, `--max_tokens`, etc.) as long as your code expects them in the `inputs` dictionary.
If you want to exclude certain files or directories from being uploaded, use the `--exclude` or `-e` flag.
## Method A: Deploying the model on Inferless Platform
Inferless supports multiple ways of [importing your model](https://docs.inferless.com/model-import/file-structure-req/file-structure-requirements). For this tutorial, we will use GitHub.
### Step 1: Login to the inferless dashboard can click on Import model button
Navigate to your desired workspace in Inferless and Click on `Add a custom model` button that you see on the top right. An import wizard will open up.
### Step 2: Follow the UI to complete the model Import
* Select the GitHub/GitLab Integration option to connect your source code repository with the deployment environment.
* Navigate to the specific GitHub repository that contains your model's code. Here, you will need to identify and enter the name of the model you wish to import.
* Choose the appropriate type of machine that suits your model's requirements. Additionally, specify the minimum and maximum number of replicas to define the scalability range for deploying your model.
* Optionally, you have the option to enable automatic build and deployment. This feature triggers a new deployment automatically whenever there is a new code push to your repository.
* If your model requires additional software packages, configure the Custom Runtime settings by including necessary pip or apt packages. Also, set up environment variables such as Inference Timeout, Container Concurrency, and Scale Down Timeout to tailor the runtime environment according to your needs.
* Wait for the validation process to complete, ensuring that all settings are correct and functional. Once validation is successful, click on the "Import" button to finalize the import of your model.
### Step 3: Wait for the model build to complete usually takes \~5-10 minutes
### Step 4: Use the APIs to call the model
Once the model is in 'Active' status you can click on the 'API' page to call the model
### Here is the Demo:
## Method B: Deploying the model on Inferless CLI
Inferless allows you to deploy your model using Inferless-CLI. Follow the steps to deploy using Inferless CLI.
### Clone the repository of the model
Let's begin by cloning the model repository:
```bash
git clone https://github.com/inferless/Phi-4.git
```
### Deploy the Model
To deploy the model using Inferless CLI, execute the following command:
```bash
inferless deploy --gpu A100 --runtime inferless-runtime-config.yaml
```
**Explanation of the Command:**
* `--gpu A100`: Specifies the GPU type for deployment. Available options include `A10`, `A100`, and `T4`.
* `--runtime inferless-runtime-config.yaml`: Defines the runtime configuration file. If not specified, the default Inferless runtime is used.
## Method B: Deploying the model on Inferless CLI
Inferless allows you to deploy your model using Inferless-CLI. Follow the steps to deploy using Inferless CLI.
### Clone the repository of the model
Let's begin by cloning the model repository:
```bash
git clone https://github.com/inferless/Phi-3-128k.git
```
### Deploy the Model
To deploy the model using Inferless CLI, execute the following command:
```bash
inferless deploy --gpu A100 --runtime inferless-runtime-config.yaml
```
**Explanation of the Command:**
* `--gpu A100`: Specifies the GPU type for deployment. Available options include `A10`, `A100`, and `T4`.
* `--runtime inferless-runtime-config.yaml`: Defines the runtime configuration file. If not specified, the default Inferless runtime is used.
# Deploy the Phi-4 using Inferless
Source: https://docs.inferless.com/how-to-guides/deploy-phi-4
Phi-4 is Microsoft's latest 14 billion parameters small language model (SLM). This model is part of the Phi family, which aims to balance between model size and performance, showcasing that smaller models can achieve state-of-the-art results.
## Introduction
[Phi-4](https://huggingface.co/microsoft/phi-4) is a 14-billion parameter language model developed by Microsoft Research,
designed to excel in complex reasoning tasks, particularly within STEM domains.
Phi-4 strategically incorporates synthetic data throughout its training process, enhancing its problem-solving capabilities.
It achieves an 80.4 score on the MATH benchmark, surpassing larger models like Llama-3.3 70B, Qwen 2.5 72B Instruct and GPT-4o.
It attains a score of 82.6 on the HumanEval coding benchmark, indicating strong code generation capabilities.
## Defining Dependencies
We are using the [vLLM](https://github.com/vllm-project/vllm/) to serve the model on a single A100.
## Our Observations
We have deployed the model on an A100 GPU(80GB). Here are our observations:
| Library | Inference Time | Cold Start Time | Tokens/Sec | Output Tokens Length |
| ------- | -------------- | --------------- | ---------- | -------------------- |
| vLLM | 2.78 sec | 39.95 sec | 32.6 | 128 |
Note: The inference time and cold start time are average values.
## Defining Dependencies
We are using the [vLLM](https://github.com/vllm-project/vllm/) to serve the model on a single A100 (80GB).
## Constructing the GitHub/GitLab Template
Now quickly construct the GitHub/GitLab template, this process is mandatory and make sure you don't add any file named `model.py`.
```
Phi-4/
├── app.py
├── inferless-runtime-config.yaml
└── inferless.yaml
```
You can also add other files to this directory.
## Create the Input Schema with Pydantic
Using the `inferless` Python client and Pydantic, you can define structured schemas directly in your code for input and output, eliminating the need for external file.
### Input Schema
When defining an input schema with Pydantic, you need to annotate your class attributes with the appropriate types, such as `str`, `float`, `int`, etc.
These type annotations specifys what type of data each field should contain.
The `default` value serves as the example input for testing with the `infer` function.
```python
@inferless.request
class RequestObjects(BaseModel):
prompt: str = Field(default="Implement a function to check if a given number is a prime number.")
temperature: Optional[float] = 0.7
top_p: Optional[float] = 0.1
repetition_penalty: Optional[float] = 1.18
top_k: Optional[int] = 40
max_tokens: Optional[int] = 256
```
### Output Schema
The `@inferless.response` decorator helps you define structured output schemas.
```python
@inferless.response
class ResponseObjects(BaseModel):
generated_text: str = Field(default='Test output')
```
### Usage in the `infer` Function
Once you have annotated the objects you can expect the infer function to receive `RequestObjects` as input,
and returns a `ResponseObjects` instance as output, ensuring the results adhere to a defined structure.
```python
class InferlessPythonModel:
def infer(self, request: RequestObjects) -> ResponseObjects:
return ResponseObjects(generated_text=result[0])
```
## Create the class for inference
In the [app.py](https://github.com/inferless/Phi-4/blob/main/app.py) we will define the class and import all the required functions
1. `def initialize`: In this function, you will initialize your model and define any `variable` that you want to use during inference.
2. `def infer`: This function gets called for every request that you send. Here you can define all the steps that are required for the inference. You can also pass custom values for inference and pass it through `inputs(dict)` parameter.
3. `def finalize`: This function cleans up all the allocated memory.
```python
from vllm import LLM
from vllm.sampling_params import SamplingParams
import inferless
from pydantic import BaseModel, Field
from typing import Optional
@inferless.request
class RequestObjects(BaseModel):
prompt: str = Field(default="Implement a function to check if a given number is a prime number.")
temperature: Optional[float] = 0.7
top_p: Optional[float] = 0.1
repetition_penalty: Optional[float] = 1.18
top_k: Optional[int] = 40
max_tokens: Optional[int] = 256
@inferless.response
class ResponseObjects(BaseModel):
generated_text: str = Field(default='Test output')
class InferlessPythonModel:
def initialize(self):
model_id = "microsoft/phi-4"
self.llm = LLM(model=model_id,enforce_eager=True)
def infer(self, request: RequestObjects) -> ResponseObjects:
sampling_params = SamplingParams(temperature=request.temperature,top_p=request.top_p,
repetition_penalty=request.repetition_penalty,
top_k=request.top_k,max_tokens=request.max_tokens
)
result = self.llm.generate(request.prompt, sampling_params)
result_output = [output.outputs[0].text for output in result]
generateObject = ResponseObjects(generated_text = result_output[0])
return generateObject
def finalize(self):
self.llm = None
```
## Creating the Custom Runtime
This is a mandatory step where we allow the users to upload their custom runtime through [inferless-runtime-config.yaml](https://github.com/inferless/Phi-4/blob/main/inferless-runtime-config.yaml).
```python
build:
cuda_version: "12.1.1"
python_packages:
- vllm==0.6.6.post1
- inferless==0.2.6
- pydantic==2.10.2
```
## Test your model with Remote Run
You can use the `inferless remote-run`([installation guide here](https://docs.inferless.com/model-import/cli-import#cli-import)) command to test your model or any custom Python script in a remote GPU environment directly from your local machine. Make sure that you use `Python3.10` for seamless experience.
### Step 1: Add the Decorators and local entry point
To enable **Remote Run**, simply do the following:
1. Import the `inferless` library and initialize `Cls(gpu="A100")`. The available GPU options are `T4`, `A10` and `A100`.
2. Decorated the `initialize` and `infer` functions with `@app.load` and `@app.infer` respectively.
3. Create the Local Entry Point by decorating a function (for example, `my_local_entry`) with `@inferless.local_entry_point`.
Within this function, instantiate your model class, convert any incoming parameters into a `RequestObjects` object, and invoke the model's `infer` method.
```python
import inferless
from vllm import LLM
from vllm.sampling_params import SamplingParams
from pydantic import BaseModel, Field
from typing import Optional
app = inferless.Cls(gpu="A100")
@inferless.request
class RequestObjects(BaseModel):
prompt: str = Field(default="Implement a function to check if a given number is a prime number.")
temperature: Optional[float] = 0.7
top_p: Optional[float] = 0.1
repetition_penalty: Optional[float] = 1.18
top_k: Optional[int] = 40
max_tokens: Optional[int] = 256
@inferless.response
class ResponseObjects(BaseModel):
generated_text: str = Field(default='Test output')
class InferlessPythonModel:
@app.load
def initialize(self):
model_id = "microsoft/phi-4"
self.llm = LLM(model=model_id,enforce_eager=True)
@app.infer
def infer(self, request: RequestObjects) -> ResponseObjects:
sampling_params = SamplingParams(temperature=request.temperature,top_p=request.top_p,
repetition_penalty=request.repetition_penalty,
top_k=request.top_k,max_tokens=request.max_tokens
)
result = self.llm.generate(request.prompt, sampling_params)
result_output = [output.outputs[0].text for output in result]
generateObject = ResponseObjects(generated_text = result_output[0])
return generateObject
def finalize(self):
self.llm = None
@inferless.local_entry_point
def my_local_entry(dynamic_params):
request_objects = RequestObjects(**dynamic_params)
model_instance = InferlessPythonModel()
return model_instance.infer(request_objects)
```
### Step 2: Run with Remote GPU
From your local terminal, navigate to the folder containing your `app.py` and your `inferless-runtime-config.yaml` and run:
```bash
inferless remote-run app.py -c inferless-runtime-config.yaml --prompt "Implement a function to check if a given number is a prime number."
```
You can pass the other input parameters in the same way (e.g., `--temperature`, `--max_tokens`, etc.) as long as your code expects them in the `inputs` dictionary.
If you want to exclude certain files or directories from being uploaded, use the `--exclude` or `-e` flag.
## Method A: Deploying the model on Inferless Platform
Inferless supports multiple ways of [importing your model](https://docs.inferless.com/model-import/file-structure-req/file-structure-requirements). For this tutorial, we will use GitHub.
### Step 1: Login to the inferless dashboard can click on Import model button
Navigate to your desired workspace in Inferless and Click on `Add a custom model` button that you see on the top right. An import wizard will open up.
### Step 2: Follow the UI to complete the model Import
* Select the GitHub/GitLab Integration option to connect your source code repository with the deployment environment.
* Navigate to the specific GitHub repository that contains your model's code. Here, you will need to identify and enter the name of the model you wish to import.
* Choose the appropriate type of machine that suits your model's requirements. Additionally, specify the minimum and maximum number of replicas to define the scalability range for deploying your model.
* Optionally, you have the option to enable automatic build and deployment. This feature triggers a new deployment automatically whenever there is a new code push to your repository.
* If your model requires additional software packages, configure the Custom Runtime settings by including necessary pip or apt packages. Also, set up environment variables such as Inference Timeout, Container Concurrency, and Scale Down Timeout to tailor the runtime environment according to your needs.
* Wait for the validation process to complete, ensuring that all settings are correct and functional. Once validation is successful, click on the "Import" button to finalize the import of your model.
### Step 3: Wait for the model build to complete usually takes \~5-10 minutes
### Step 4: Use the APIs to call the model
Once the model is in 'Active' status you can click on the 'API' page to call the model
### Here is the Demo:
## Method B: Deploying the model on Inferless CLI
Inferless allows you to deploy your model using Inferless-CLI. Follow the steps to deploy using Inferless CLI.
### Clone the repository of the model
Let's begin by cloning the model repository:
```bash
git clone https://github.com/inferless/Phi-4.git
```
### Deploy the Model
To deploy the model using Inferless CLI, execute the following command:
```bash
inferless deploy --gpu A100 --runtime inferless-runtime-config.yaml
```
**Explanation of the Command:**
* `--gpu A100`: Specifies the GPU type for deployment. Available options include `A10`, `A100`, and `T4`.
* `--runtime inferless-runtime-config.yaml`: Defines the runtime configuration file. If not specified, the default Inferless runtime is used.
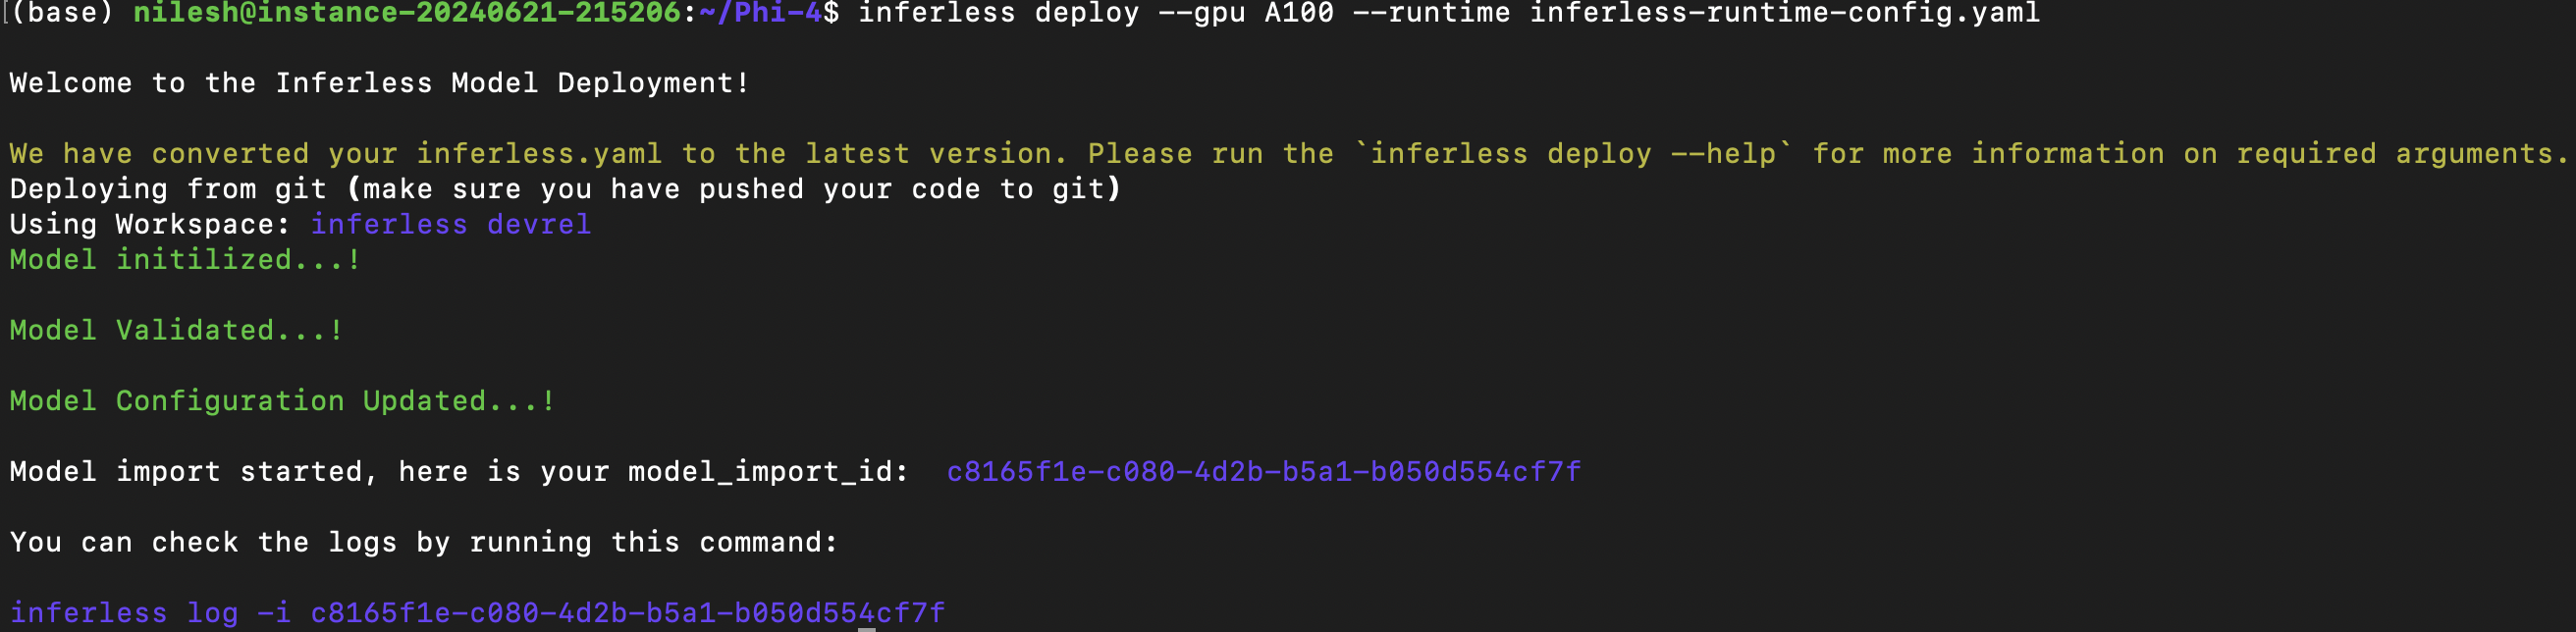 # Deploy the Phi-4-Multimodal-Instruct using Inferless
Source: https://docs.inferless.com/how-to-guides/deploy-phi-4-multimodal-instruct
Phi-4-Multimodal-Instruct is a 5.6-billion-parameter multimodal language model from Microsoft that integrates text, vision, and audio processing. This model excels in instruction-based tasks, offering advanced reasoning and cross-modal capabilities.
## Introduction
[Phi-4-Multimodal-Instruct](https://huggingface.co/microsoft/Phi-4-multimodal-instruct) is a state‑of‑the‑art multimodal foundation model developed by Microsoft Research. Built for instruction‑tuned applications, it seamlessly fuses robust language understanding with advanced visual and audio analysis. Whether it’s interpreting complex images, transcribing and translating speech, or parsing detailed documents, this model is engineered to act as a versatile AI agent. With capabilities that include generating structured outputs and supporting multilingual inputs across text, vision, and audio, Phi-4-Multimodal-Instruct opens up new possibilities for interactive chatbots, multimedia content analysis, and beyond.
## Defining Dependencies
We are using the [transformers](https://github.com/huggingface/transformers) to serve the model on a single A100.
## Our Observations
We have deployed the model on an A100 GPU(80GB). Here are our observations:
| Library | Inference Time (Image Q\&A) | Inference Time (Audio Transcribe) | Cold Start Time |
| ------------ | --------------------------- | --------------------------------- | --------------- |
| transformers | 7.54 sec | 6.28 sec | 16.23 sec |
Note: The inference time(image and video) and cold start time are average values.
## Defining Dependencies
We are using the [transformers](https://github.com/huggingface/transformers) to serve the model on a single A100 (80GB).
## Constructing the GitHub/GitLab Template
Now quickly construct the GitHub/GitLab template, this process is mandatory and make sure you don't add any file named `model.py`.
```
phi-4-multimodal-instruct/
├── app.py
├── inferless-runtime-config.yaml
└── inferless.yaml
```
You can also add other files to this directory.
## Create the Input Schema with Pydantic
Using the `inferless` Python client and Pydantic, you can define structured schemas directly in your code for input and output, eliminating the need for external file.
### Input Schema
When defining an input schema with Pydantic, you need to annotate your class attributes with the appropriate types, such as `str`, `float`, `int`, etc.
These type annotations specifys what type of data each field should contain.
The `default` value serves as the example input for testing with the `infer` function.
```python
@inferless.request
class RequestObjects(BaseModel):
task_type: str = Field(default="image")
prompt: Optional[str] ="What is shown in this image?"
content_url: Optional[str] ="https://www.ilankelman.org/stopsigns/australia.jpg"
max_new_tokens: Optional[int] = 128
```
### Output Schema
The `@inferless.response` decorator helps you define structured output schemas.
```python
@inferless.response
class ResponseObjects(BaseModel):
generated_result: str = Field(default="Test output")
```
### Usage in the `infer` Function
Once you have annotated the objects you can expect the infer function to receive `RequestObjects` as input,
and returns a `ResponseObjects` instance as output, ensuring the results adhere to a defined structure.
```python
class InferlessPythonModel:
def infer(self, request: RequestObjects) -> ResponseObjects:
return ResponseObjects(generated_result = response)
```
## Create the class for inference
In the [app.py](https://github.com/inferless/phi-4-multimodal-instruct/blob/main/app.py) we will define the class and import all the required functions
1. `def initialize`: In this function, you will initialize your model and define any `variable` that you want to use during inference.
2. `def infer`: This function gets called for every request that you send. Here you can define all the steps that are required for the inference.
3. `def finalize`: This function cleans up all the allocated memory.
```python
import os
os.environ["HF_HUB_ENABLE_HF_TRANSFER"] = "1"
from huggingface_hub import snapshot_download
import requests
import torch
import io
from PIL import Image
import soundfile as sf
from transformers import AutoModelForCausalLM, AutoProcessor, GenerationConfig
from urllib.request import urlopen
import inferless
from pydantic import BaseModel, Field
from typing import Optional
@inferless.request
class RequestObjects(BaseModel):
task_type: str = Field(default="image")
prompt: Optional[str] ="What is shown in this image?"
content_url: Optional[str] ="https://www.ilankelman.org/stopsigns/australia.jpg"
max_new_tokens: Optional[int] = 128
@inferless.response
class ResponseObjects(BaseModel):
generated_result: str = Field(default="Test output")
class InferlessPythonModel:
def initialize(self):
model_path = "microsoft/Phi-4-multimodal-instruct"
snapshot_download(repo_id=model_path, allow_patterns=["*.safetensors"])
self.processor = AutoProcessor.from_pretrained(model_path, trust_remote_code=True)
self.model = AutoModelForCausalLM.from_pretrained(model_path,device_map="cuda",torch_dtype="auto",
trust_remote_code=True,_attn_implementation="flash_attention_2"
).cuda()
self.generation_config = GenerationConfig.from_pretrained(model_path)
self.user_prompt = "<|user|>"
self.assistant_prompt = "<|assistant|>"
self.prompt_suffix = "<|end|>"
def infer(self, request: RequestObjects) -> ResponseObjects:
if request.task_type == "image":
prompt = f"{self.user_prompt}<|image_1|>{request.prompt}{self.prompt_suffix}{self.assistant_prompt}"
image = Image.open(requests.get(request.content_url, stream=True).raw)
inputs = self.processor(text=prompt, images=image, return_tensors="pt").to("cuda:0")
else:
prompt = f"{self.user_prompt}<|audio_1|>{request.prompt}{self.prompt_suffix}{self.assistant_prompt}"
audio, samplerate = sf.read(io.BytesIO(urlopen(request.content_url).read()))
inputs = self.processor(text=prompt, audios=[(audio, samplerate)], return_tensors='pt').to('cuda:0')
generate_ids = self.model.generate(**inputs,max_new_tokens=request.max_new_tokens,
generation_config=self.generation_config,)
generate_ids = generate_ids[:, inputs["input_ids"].shape[1] :]
response = self.processor.batch_decode(generate_ids, skip_special_tokens=True,
clean_up_tokenization_spaces=False)[0]
generateObject = ResponseObjects(generated_result=response)
return generateObject
def finalize(self):
self.model = None
```
## Creating the Custom Runtime
This is a mandatory step where we allow the users to upload their custom runtime through [inferless-runtime-config.yaml](https://github.com/inferless/phi-4-multimodal-instruct/blob/main/inferless-runtime-config.yaml).
```python
build:
cuda_version: "12.1.1"
python_packages:
- packaging==24.2
- torch==2.6.0
- transformers==4.48.2
- accelerate==1.3.0
- soundfile==0.13.1
- pillow==11.1.0
- scipy==1.15.2
- torchvision==0.21.0
- backoff==2.2.1
- peft==0.13.2
- hf-transfer==0.1.9
- inferless==0.2.13
- pydantic==2.10.2
run:
- "pip install flash_attn==2.7.4.post1"
```
## Test your model with Remote Run
You can use the `inferless remote-run`([installation guide here](https://docs.inferless.com/model-import/cli-import#cli-import)) command to test your model or any custom Python script in a remote GPU environment directly from your local machine. Make sure that you use `Python3.10` for seamless experience.
### Step 1: Add the Decorators and local entry point
To enable **Remote Run**, simply do the following:
1. Import the `inferless` library and initialize `Cls(gpu="A100")`. The available GPU options are `T4`, `A10` and `A100`.
2. Decorated the `initialize` and `infer` functions with `@app.load` and `@app.infer` respectively.
3. Create the Local Entry Point by decorating a function (for example, `my_local_entry`) with `@inferless.local_entry_point`.
Within this function, instantiate your model class, convert any incoming parameters into a `RequestObjects` object, and invoke the model's `infer` method.
```python
import os
os.environ["HF_HUB_ENABLE_HF_TRANSFER"] = "1"
from huggingface_hub import snapshot_download
import requests
import torch
import io
from PIL import Image
import soundfile as sf
from transformers import AutoModelForCausalLM, AutoProcessor, GenerationConfig
from urllib.request import urlopen
import inferless
from pydantic import BaseModel, Field
from typing import Optional
@inferless.request
class RequestObjects(BaseModel):
task_type: str = Field(default="image")
prompt: Optional[str] ="What is shown in this image?"
content_url: Optional[str] ="https://www.ilankelman.org/stopsigns/australia.jpg"
max_new_tokens: Optional[int] = 128
@inferless.response
class ResponseObjects(BaseModel):
generated_result: str = Field(default="Test output")
app = inferless.Cls(gpu="A100")
class InferlessPythonModel:
@app.load
def initialize(self):
model_path = "microsoft/Phi-4-multimodal-instruct"
snapshot_download(repo_id=model_path, allow_patterns=["*.safetensors"])
self.processor = AutoProcessor.from_pretrained(model_path, trust_remote_code=True)
self.model = AutoModelForCausalLM.from_pretrained(model_path,device_map="cuda",torch_dtype="auto",
trust_remote_code=True,_attn_implementation="flash_attention_2"
).cuda()
self.generation_config = GenerationConfig.from_pretrained(model_path)
self.user_prompt = "<|user|>"
self.assistant_prompt = "<|assistant|>"
self.prompt_suffix = "<|end|>"
@app.infer
def infer(self, request: RequestObjects) -> ResponseObjects:
if request.task_type == "image":
prompt = f"{self.user_prompt}<|image_1|>{request.prompt}{self.prompt_suffix}{self.assistant_prompt}"
image = Image.open(requests.get(request.content_url, stream=True).raw)
inputs = self.processor(text=prompt, images=image, return_tensors="pt").to("cuda:0")
else:
prompt = f"{self.user_prompt}<|audio_1|>{request.prompt}{self.prompt_suffix}{self.assistant_prompt}"
audio, samplerate = sf.read(io.BytesIO(urlopen(request.content_url).read()))
inputs = self.processor(text=prompt, audios=[(audio, samplerate)], return_tensors='pt').to('cuda:0')
generate_ids = self.model.generate(**inputs,max_new_tokens=request.max_new_tokens,
generation_config=self.generation_config,)
generate_ids = generate_ids[:, inputs["input_ids"].shape[1] :]
response = self.processor.batch_decode(generate_ids, skip_special_tokens=True,
clean_up_tokenization_spaces=False)[0]
generateObject = ResponseObjects(generated_result=response)
return generateObject
def finalize(self):
self.model = None
@inferless.local_entry_point
def my_local_entry(dynamic_params):
request_objects = RequestObjects(**dynamic_params)
model_instance = InferlessPythonModel()
return model_instance.infer(request_objects)
```
### Step 2: Run with Remote GPU
From your local terminal, navigate to the folder containing your `app.py` and your `inferless-runtime-config.yaml` and run:
```bash
inferless remote-run app.py -c inferless-runtime-config.yaml --task_type "image" --prompt "What does this diagram illustrate?" --content_url "https://qianwen-res.oss-cn-beijing.aliyuncs.com/Qwen-VL/assets/demo.jpeg"
```
You can pass the other input parameters in the same way (e.g., `--content_url`, `--max_new_tokens`, etc.) as long as your code expects them in the `inputs` dictionary.
If you want to exclude certain files or directories from being uploaded, use the `--exclude` or `-e` flag.
## Method A: Deploying the model on Inferless Platform
Inferless supports multiple ways of [importing your model](https://docs.inferless.com/model-import/file-structure-req/file-structure-requirements). For this tutorial, we will use GitHub.
### Step 1: Login to the inferless dashboard can click on Import model button
Navigate to your desired workspace in Inferless and Click on `Add a custom model` button that you see on the top right. An import wizard will open up.
### Step 2: Follow the UI to complete the model Import
* Select the GitHub/GitLab Integration option to connect your source code repository with the deployment environment.
* Navigate to the specific GitHub repository that contains your model's code. Here, you will need to identify and enter the name of the model you wish to import.
* Choose the appropriate type of machine that suits your model's requirements. Additionally, specify the minimum and maximum number of replicas to define the scalability range for deploying your model.
* Optionally, you have the option to enable automatic build and deployment. This feature triggers a new deployment automatically whenever there is a new code push to your repository.
* If your model requires additional software packages, configure the Custom Runtime settings by including necessary pip or apt packages. Also, set up environment variables such as Inference Timeout, Container Concurrency, and Scale Down Timeout to tailor the runtime environment according to your needs.
* Wait for the validation process to complete, ensuring that all settings are correct and functional. Once validation is successful, click on the "Import" button to finalize the import of your model.
### Step 3: Wait for the model build to complete usually takes \~5-10 minutes
### Step 4: Use the APIs to call the model
Once the model is in 'Active' status you can click on the 'API' page to call the model
### Here is the Demo:
# Deploy the Phi-4-Multimodal-Instruct using Inferless
Source: https://docs.inferless.com/how-to-guides/deploy-phi-4-multimodal-instruct
Phi-4-Multimodal-Instruct is a 5.6-billion-parameter multimodal language model from Microsoft that integrates text, vision, and audio processing. This model excels in instruction-based tasks, offering advanced reasoning and cross-modal capabilities.
## Introduction
[Phi-4-Multimodal-Instruct](https://huggingface.co/microsoft/Phi-4-multimodal-instruct) is a state‑of‑the‑art multimodal foundation model developed by Microsoft Research. Built for instruction‑tuned applications, it seamlessly fuses robust language understanding with advanced visual and audio analysis. Whether it’s interpreting complex images, transcribing and translating speech, or parsing detailed documents, this model is engineered to act as a versatile AI agent. With capabilities that include generating structured outputs and supporting multilingual inputs across text, vision, and audio, Phi-4-Multimodal-Instruct opens up new possibilities for interactive chatbots, multimedia content analysis, and beyond.
## Defining Dependencies
We are using the [transformers](https://github.com/huggingface/transformers) to serve the model on a single A100.
## Our Observations
We have deployed the model on an A100 GPU(80GB). Here are our observations:
| Library | Inference Time (Image Q\&A) | Inference Time (Audio Transcribe) | Cold Start Time |
| ------------ | --------------------------- | --------------------------------- | --------------- |
| transformers | 7.54 sec | 6.28 sec | 16.23 sec |
Note: The inference time(image and video) and cold start time are average values.
## Defining Dependencies
We are using the [transformers](https://github.com/huggingface/transformers) to serve the model on a single A100 (80GB).
## Constructing the GitHub/GitLab Template
Now quickly construct the GitHub/GitLab template, this process is mandatory and make sure you don't add any file named `model.py`.
```
phi-4-multimodal-instruct/
├── app.py
├── inferless-runtime-config.yaml
└── inferless.yaml
```
You can also add other files to this directory.
## Create the Input Schema with Pydantic
Using the `inferless` Python client and Pydantic, you can define structured schemas directly in your code for input and output, eliminating the need for external file.
### Input Schema
When defining an input schema with Pydantic, you need to annotate your class attributes with the appropriate types, such as `str`, `float`, `int`, etc.
These type annotations specifys what type of data each field should contain.
The `default` value serves as the example input for testing with the `infer` function.
```python
@inferless.request
class RequestObjects(BaseModel):
task_type: str = Field(default="image")
prompt: Optional[str] ="What is shown in this image?"
content_url: Optional[str] ="https://www.ilankelman.org/stopsigns/australia.jpg"
max_new_tokens: Optional[int] = 128
```
### Output Schema
The `@inferless.response` decorator helps you define structured output schemas.
```python
@inferless.response
class ResponseObjects(BaseModel):
generated_result: str = Field(default="Test output")
```
### Usage in the `infer` Function
Once you have annotated the objects you can expect the infer function to receive `RequestObjects` as input,
and returns a `ResponseObjects` instance as output, ensuring the results adhere to a defined structure.
```python
class InferlessPythonModel:
def infer(self, request: RequestObjects) -> ResponseObjects:
return ResponseObjects(generated_result = response)
```
## Create the class for inference
In the [app.py](https://github.com/inferless/phi-4-multimodal-instruct/blob/main/app.py) we will define the class and import all the required functions
1. `def initialize`: In this function, you will initialize your model and define any `variable` that you want to use during inference.
2. `def infer`: This function gets called for every request that you send. Here you can define all the steps that are required for the inference.
3. `def finalize`: This function cleans up all the allocated memory.
```python
import os
os.environ["HF_HUB_ENABLE_HF_TRANSFER"] = "1"
from huggingface_hub import snapshot_download
import requests
import torch
import io
from PIL import Image
import soundfile as sf
from transformers import AutoModelForCausalLM, AutoProcessor, GenerationConfig
from urllib.request import urlopen
import inferless
from pydantic import BaseModel, Field
from typing import Optional
@inferless.request
class RequestObjects(BaseModel):
task_type: str = Field(default="image")
prompt: Optional[str] ="What is shown in this image?"
content_url: Optional[str] ="https://www.ilankelman.org/stopsigns/australia.jpg"
max_new_tokens: Optional[int] = 128
@inferless.response
class ResponseObjects(BaseModel):
generated_result: str = Field(default="Test output")
class InferlessPythonModel:
def initialize(self):
model_path = "microsoft/Phi-4-multimodal-instruct"
snapshot_download(repo_id=model_path, allow_patterns=["*.safetensors"])
self.processor = AutoProcessor.from_pretrained(model_path, trust_remote_code=True)
self.model = AutoModelForCausalLM.from_pretrained(model_path,device_map="cuda",torch_dtype="auto",
trust_remote_code=True,_attn_implementation="flash_attention_2"
).cuda()
self.generation_config = GenerationConfig.from_pretrained(model_path)
self.user_prompt = "<|user|>"
self.assistant_prompt = "<|assistant|>"
self.prompt_suffix = "<|end|>"
def infer(self, request: RequestObjects) -> ResponseObjects:
if request.task_type == "image":
prompt = f"{self.user_prompt}<|image_1|>{request.prompt}{self.prompt_suffix}{self.assistant_prompt}"
image = Image.open(requests.get(request.content_url, stream=True).raw)
inputs = self.processor(text=prompt, images=image, return_tensors="pt").to("cuda:0")
else:
prompt = f"{self.user_prompt}<|audio_1|>{request.prompt}{self.prompt_suffix}{self.assistant_prompt}"
audio, samplerate = sf.read(io.BytesIO(urlopen(request.content_url).read()))
inputs = self.processor(text=prompt, audios=[(audio, samplerate)], return_tensors='pt').to('cuda:0')
generate_ids = self.model.generate(**inputs,max_new_tokens=request.max_new_tokens,
generation_config=self.generation_config,)
generate_ids = generate_ids[:, inputs["input_ids"].shape[1] :]
response = self.processor.batch_decode(generate_ids, skip_special_tokens=True,
clean_up_tokenization_spaces=False)[0]
generateObject = ResponseObjects(generated_result=response)
return generateObject
def finalize(self):
self.model = None
```
## Creating the Custom Runtime
This is a mandatory step where we allow the users to upload their custom runtime through [inferless-runtime-config.yaml](https://github.com/inferless/phi-4-multimodal-instruct/blob/main/inferless-runtime-config.yaml).
```python
build:
cuda_version: "12.1.1"
python_packages:
- packaging==24.2
- torch==2.6.0
- transformers==4.48.2
- accelerate==1.3.0
- soundfile==0.13.1
- pillow==11.1.0
- scipy==1.15.2
- torchvision==0.21.0
- backoff==2.2.1
- peft==0.13.2
- hf-transfer==0.1.9
- inferless==0.2.13
- pydantic==2.10.2
run:
- "pip install flash_attn==2.7.4.post1"
```
## Test your model with Remote Run
You can use the `inferless remote-run`([installation guide here](https://docs.inferless.com/model-import/cli-import#cli-import)) command to test your model or any custom Python script in a remote GPU environment directly from your local machine. Make sure that you use `Python3.10` for seamless experience.
### Step 1: Add the Decorators and local entry point
To enable **Remote Run**, simply do the following:
1. Import the `inferless` library and initialize `Cls(gpu="A100")`. The available GPU options are `T4`, `A10` and `A100`.
2. Decorated the `initialize` and `infer` functions with `@app.load` and `@app.infer` respectively.
3. Create the Local Entry Point by decorating a function (for example, `my_local_entry`) with `@inferless.local_entry_point`.
Within this function, instantiate your model class, convert any incoming parameters into a `RequestObjects` object, and invoke the model's `infer` method.
```python
import os
os.environ["HF_HUB_ENABLE_HF_TRANSFER"] = "1"
from huggingface_hub import snapshot_download
import requests
import torch
import io
from PIL import Image
import soundfile as sf
from transformers import AutoModelForCausalLM, AutoProcessor, GenerationConfig
from urllib.request import urlopen
import inferless
from pydantic import BaseModel, Field
from typing import Optional
@inferless.request
class RequestObjects(BaseModel):
task_type: str = Field(default="image")
prompt: Optional[str] ="What is shown in this image?"
content_url: Optional[str] ="https://www.ilankelman.org/stopsigns/australia.jpg"
max_new_tokens: Optional[int] = 128
@inferless.response
class ResponseObjects(BaseModel):
generated_result: str = Field(default="Test output")
app = inferless.Cls(gpu="A100")
class InferlessPythonModel:
@app.load
def initialize(self):
model_path = "microsoft/Phi-4-multimodal-instruct"
snapshot_download(repo_id=model_path, allow_patterns=["*.safetensors"])
self.processor = AutoProcessor.from_pretrained(model_path, trust_remote_code=True)
self.model = AutoModelForCausalLM.from_pretrained(model_path,device_map="cuda",torch_dtype="auto",
trust_remote_code=True,_attn_implementation="flash_attention_2"
).cuda()
self.generation_config = GenerationConfig.from_pretrained(model_path)
self.user_prompt = "<|user|>"
self.assistant_prompt = "<|assistant|>"
self.prompt_suffix = "<|end|>"
@app.infer
def infer(self, request: RequestObjects) -> ResponseObjects:
if request.task_type == "image":
prompt = f"{self.user_prompt}<|image_1|>{request.prompt}{self.prompt_suffix}{self.assistant_prompt}"
image = Image.open(requests.get(request.content_url, stream=True).raw)
inputs = self.processor(text=prompt, images=image, return_tensors="pt").to("cuda:0")
else:
prompt = f"{self.user_prompt}<|audio_1|>{request.prompt}{self.prompt_suffix}{self.assistant_prompt}"
audio, samplerate = sf.read(io.BytesIO(urlopen(request.content_url).read()))
inputs = self.processor(text=prompt, audios=[(audio, samplerate)], return_tensors='pt').to('cuda:0')
generate_ids = self.model.generate(**inputs,max_new_tokens=request.max_new_tokens,
generation_config=self.generation_config,)
generate_ids = generate_ids[:, inputs["input_ids"].shape[1] :]
response = self.processor.batch_decode(generate_ids, skip_special_tokens=True,
clean_up_tokenization_spaces=False)[0]
generateObject = ResponseObjects(generated_result=response)
return generateObject
def finalize(self):
self.model = None
@inferless.local_entry_point
def my_local_entry(dynamic_params):
request_objects = RequestObjects(**dynamic_params)
model_instance = InferlessPythonModel()
return model_instance.infer(request_objects)
```
### Step 2: Run with Remote GPU
From your local terminal, navigate to the folder containing your `app.py` and your `inferless-runtime-config.yaml` and run:
```bash
inferless remote-run app.py -c inferless-runtime-config.yaml --task_type "image" --prompt "What does this diagram illustrate?" --content_url "https://qianwen-res.oss-cn-beijing.aliyuncs.com/Qwen-VL/assets/demo.jpeg"
```
You can pass the other input parameters in the same way (e.g., `--content_url`, `--max_new_tokens`, etc.) as long as your code expects them in the `inputs` dictionary.
If you want to exclude certain files or directories from being uploaded, use the `--exclude` or `-e` flag.
## Method A: Deploying the model on Inferless Platform
Inferless supports multiple ways of [importing your model](https://docs.inferless.com/model-import/file-structure-req/file-structure-requirements). For this tutorial, we will use GitHub.
### Step 1: Login to the inferless dashboard can click on Import model button
Navigate to your desired workspace in Inferless and Click on `Add a custom model` button that you see on the top right. An import wizard will open up.
### Step 2: Follow the UI to complete the model Import
* Select the GitHub/GitLab Integration option to connect your source code repository with the deployment environment.
* Navigate to the specific GitHub repository that contains your model's code. Here, you will need to identify and enter the name of the model you wish to import.
* Choose the appropriate type of machine that suits your model's requirements. Additionally, specify the minimum and maximum number of replicas to define the scalability range for deploying your model.
* Optionally, you have the option to enable automatic build and deployment. This feature triggers a new deployment automatically whenever there is a new code push to your repository.
* If your model requires additional software packages, configure the Custom Runtime settings by including necessary pip or apt packages. Also, set up environment variables such as Inference Timeout, Container Concurrency, and Scale Down Timeout to tailor the runtime environment according to your needs.
* Wait for the validation process to complete, ensuring that all settings are correct and functional. Once validation is successful, click on the "Import" button to finalize the import of your model.
### Step 3: Wait for the model build to complete usually takes \~5-10 minutes
### Step 4: Use the APIs to call the model
Once the model is in 'Active' status you can click on the 'API' page to call the model
### Here is the Demo:
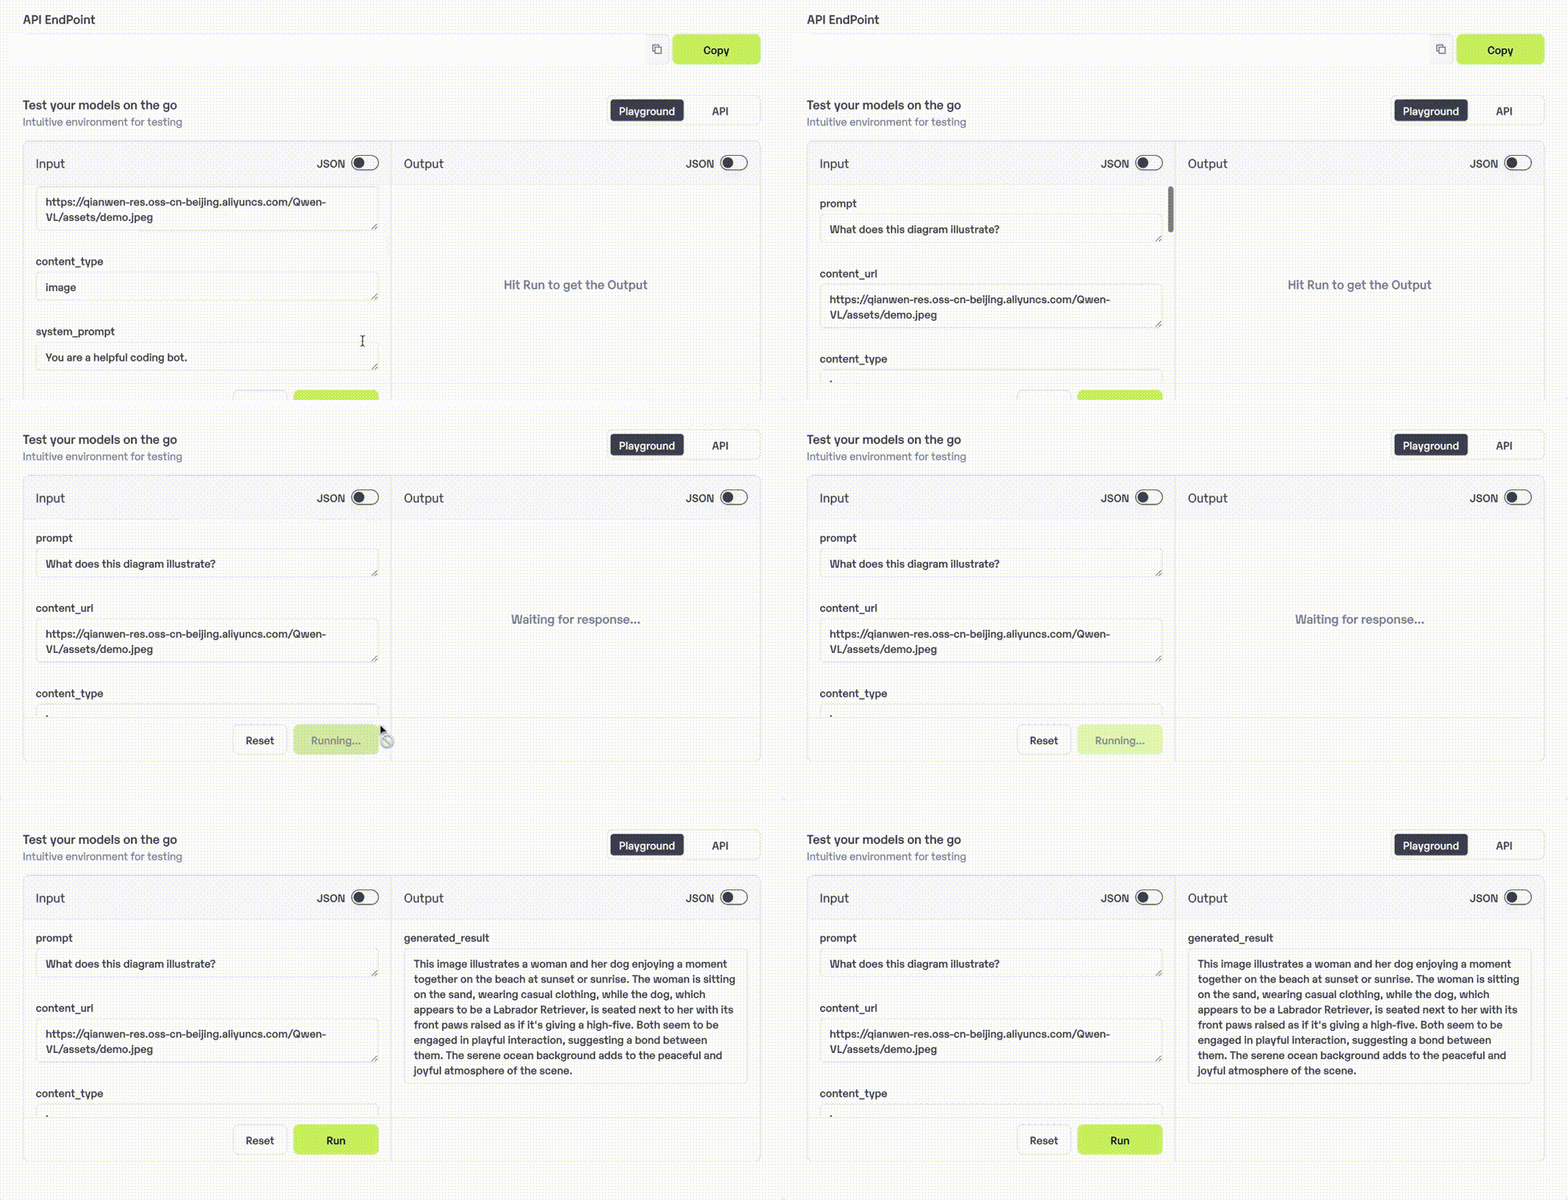 ## Method B: Deploying the model on Inferless CLI
Inferless allows you to deploy your model using Inferless-CLI. Follow the steps to deploy using Inferless CLI.
### Clone the repository of the model
Let's begin by cloning the model repository:
```bash
git clone https://github.com/inferless/phi-4-multimodal-instruct.git
```
### Deploy the Model
To deploy the model using Inferless CLI, execute the following command:
```bash
inferless deploy --gpu A100 --runtime inferless-runtime-config.yaml
```
**Explanation of the Command:**
* `--gpu A100`: Specifies the GPU type for deployment. Available options include `A10`, `A100`, and `T4`.
* `--runtime inferless-runtime-config.yaml`: Defines the runtime configuration file. If not specified, the default Inferless runtime is used.
## Method B: Deploying the model on Inferless CLI
Inferless allows you to deploy your model using Inferless-CLI. Follow the steps to deploy using Inferless CLI.
### Clone the repository of the model
Let's begin by cloning the model repository:
```bash
git clone https://github.com/inferless/phi-4-multimodal-instruct.git
```
### Deploy the Model
To deploy the model using Inferless CLI, execute the following command:
```bash
inferless deploy --gpu A100 --runtime inferless-runtime-config.yaml
```
**Explanation of the Command:**
* `--gpu A100`: Specifies the GPU type for deployment. Available options include `A10`, `A100`, and `T4`.
* `--runtime inferless-runtime-config.yaml`: Defines the runtime configuration file. If not specified, the default Inferless runtime is used.
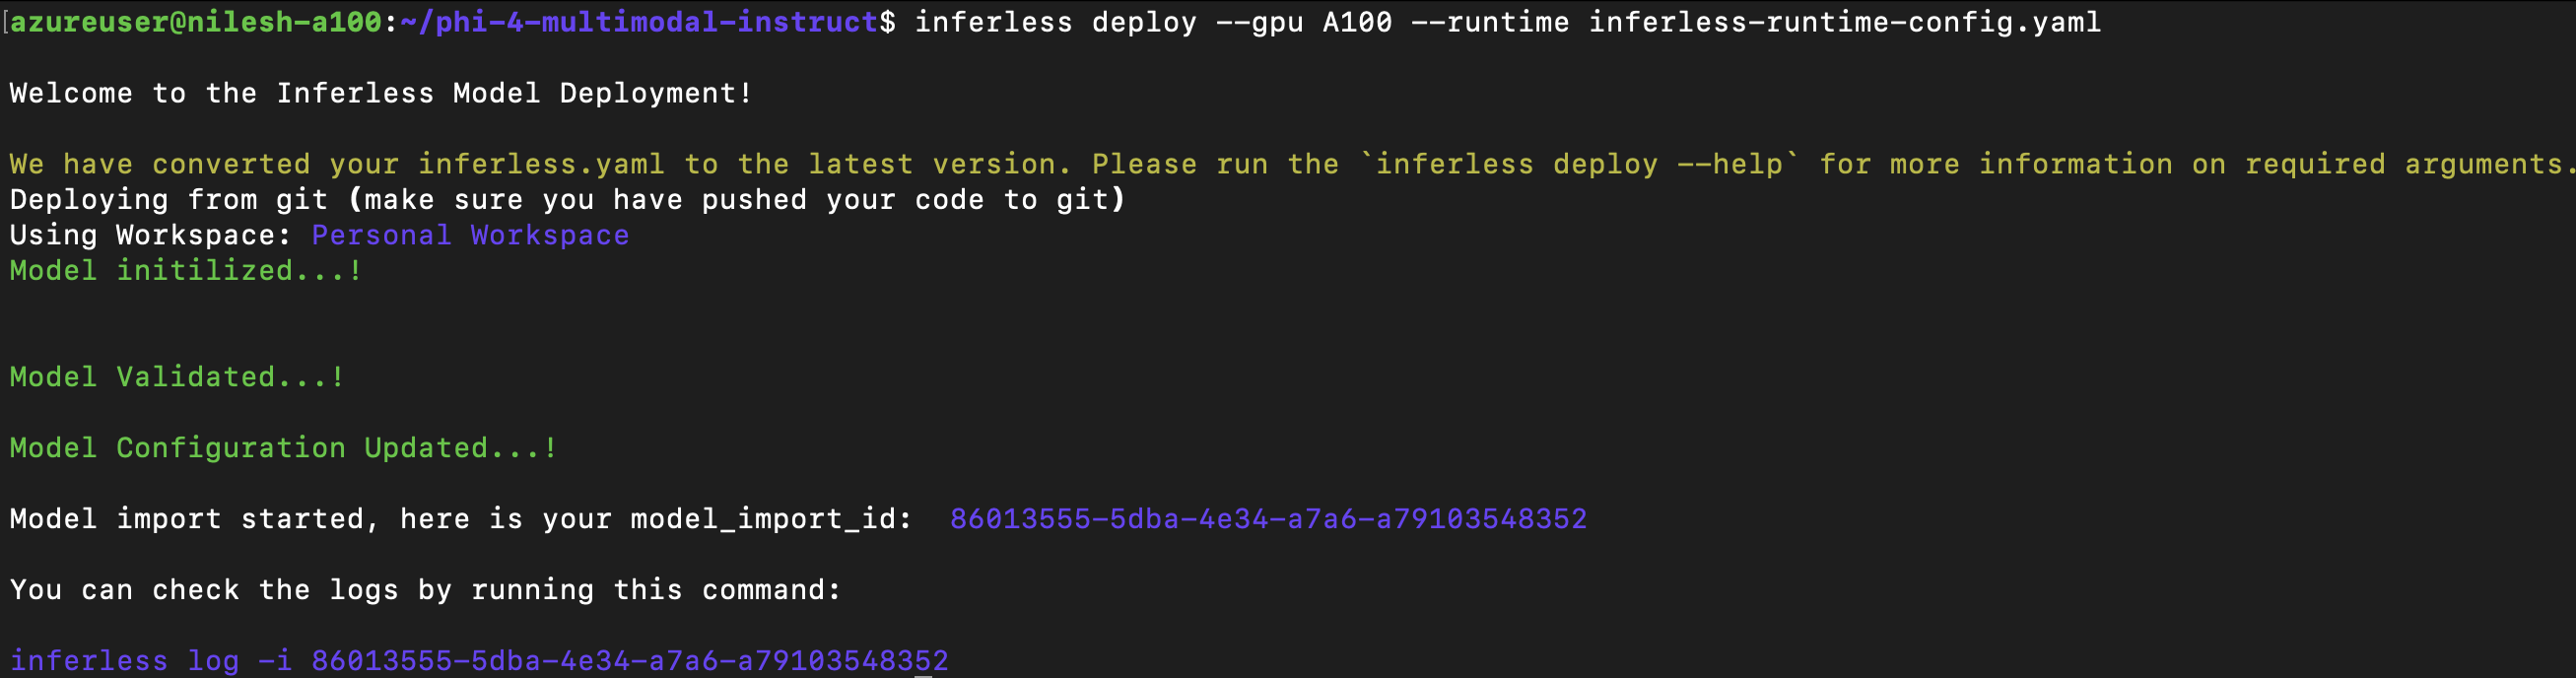 # Deploy Quantized version of SOLAR 10.7B-Instruct using Inferless
Source: https://docs.inferless.com/how-to-guides/deploy-quantized-version-of-solar-10-7b-instruct-using-inferless
SOLAR-10.7B, an advanced large language model (LLM) with 10.7 billion parameters, demonstrates superior performance in various natural language processing (NLP) tasks
## Introduction
SOLAR-10.7B, an advanced large language model (LLM) with 10.7 billion parameters, demonstrates superior performance in various natural language processing (NLP) tasks. They have presented a methodology for scaling LLMs called depth up-scaling (DUS), which encompasses architectural modifications and continued pretraining. They have integrated Mistral 7B weights into the upscaled layers, and finally, continued pre-training for the entire model.
## Our Observations
We utilized [AutoGPTQ](https://github.com/PanQiWei/AutoGPTQ) to quantize [SOLAR-10.7B-Instruct-v1.0 ](https://huggingface.co/upstage/SOLAR-10.7B-Instruct-v1.0)into a [4-bit quantized GPTQ ](https://huggingface.co/Inferless/SOLAR-10.7B-Instruct-v1.0-GPTQ)version. In the inference process, we deployed the quantized model on an A100 GPU (80GB) using [vLLM](https://github.com/vllm-project/vllm). We also tried deploying via Auto-GPTQ as mentioned in our observations below:
| Library | Inference Time | Cold Start Time | Token/Sec | Latency/Token | VRAM Required |
| ------------------ | -------------- | --------------- | --------- | ------------- | ------------- |
| vLLM (Recommended) | 1.37 sec | 11.69 sec | 111.54 | 8.97 ms | 69.33 GB |
| Auto-GPTQ | 27.09 sec | 61.31 sec | 9.82 | 101.98 ms | 5.67 GB |
## Getting Started with Quantization
Quantization techniques reduces the model's computation cost and memory. It represent the model's weights and activations in lower precision data-types while trying not to reduce in the accuracy.
We have quantized the model using [GPTQ algorithm](https://arxiv.org/abs/2210.17323), GPTQ is a quantization algorithms for LLMs. We have used [AutoGPTQ](https://github.com/PanQiWei/AutoGPTQ) for 4-bit GPTQ quantization.
Install the [AutoGPTQ](https://github.com/PanQiWei/AutoGPTQ) library:
```
pip install auto-gptq
```
`Import` the following libraries, and initialize the model and the tokenizer. For GPTQ calibration phase we are using [VMware/open-instruct](https://huggingface.co/datasets/VMware/open-instruct) dataset.
```python
from auto_gptq import AutoGPTQForCausalLM, BaseQuantizeConfig
from transformers import AutoTokenizer
from datasets import load_dataset
import random
import numpy as np
import torch
model_id = "upstage/SOLAR-10.7B-Instruct-v1.0"
quantized_model_dir = "SOLAR-10.7B-Instruct-v1.0"
tokenizer = AutoTokenizer.from_pretrained("upstage/SOLAR-10.7B-Instruct-v1.0", use_fast=True)
train_data = load_dataset('VMware/open-instruct')
tokenized_data = tokenizer("\n\n".join(train_data['train']['response']), return_tensors='pt')
def generate_data(nsamples,seed,seqlen):
random.seed(seed)
np.random.seed(0)
torch.random.manual_seed(0)
train_dataset = []
for _ in range(nsamples):
i = random.randint(0, tokenized_data.input_ids.shape[1] - seqlen - 1)
j = i + seqlen
inp = tokenized_data.input_ids[:, i:j]
attention_mask = torch.ones_like(inp)
train_dataset.append({'input_ids':inp,'attention_mask': attention_mask})
return train_dataset
```
Now you can start the quantization process, it will create a new directory where it will store the quantized model. The [quantized model](https://huggingface.co/Inferless/SOLAR-10.7B-Instruct-v1.0-GPTQ/tree/main) is 5.98 GB, which is approximately 27.85% of the original model 21.47 GB. Here's the [link](https://huggingface.co/Inferless/SOLAR-10.7B-Instruct-v1.0-GPTQ/tree/main) to our quanitized model.
```python
training_dataset = generate_data(1000,4040,2048)
quantize_config = BaseQuantizeConfig(
bits=4,
group_size=128,
desc_act=False)
model = AutoGPTQForCausalLM.from_pretrained(model_id,quantize_config)
model.quantize(training_dataset)
model.save_quantized(quantized_model_dir, use_safetensors=True)
tokenizer.save_pretrained(quantized_model_dir)
```
## Defining Dependencies
We are using the [vLLM library](https://github.com/vllm-project/vllm), which enables you to run LLM on low memory. We deploy a GPTQ 4bit quantized version of the model.
## Constructing the GitHub/GitLab Template
Now quickly construct the GitHub/GitLab template, this process is mandatory and make sure you don't add any file named `model.py`
```python
SOLAR-10.7B-Instruct/
├── app.py
├── inferless-runtime-config.yaml
├── inferless.yaml
└── input_schema.py
```
You can also add other files to this directory.
## Create the class for inference
In the [app.py](https://github.com/inferless/SOLAR-10.7B-Instruct/blob/main/app.py) we will define the class and import all the required functions
1. `def initialize`: In this function, you will initialize your model and define any `variable` that you want to use during inference.
2. `def infer`: This function gets called for every request that you send. Here you can define all the steps that are required for the inference. You can also pass custom values for inference and pass it through `inputs(dict)` parameter.
3. `def finalize`: This function cleans up all the allocated memory.
```python
import inferless
from vllm import LLM, SamplingParams
app = inferless.Cls(gpu="A100")
class InferlessPythonModel:
@app.load
def initialize(self):
model_id = "Inferless/SOLAR-10.7B-Instruct-v1.0-GPTQ"
self.sampling_params = SamplingParams(temperature=0.7, top_p=0.95,max_tokens=256)
self.llm = LLM(model=model_id, quantization="gptq", dtype="float16")
@app.infer
def infer(self, inputs):
prompts = inputs["prompt"]
result = self.llm.generate(prompts, self.sampling_params)
result_output = [output.outputs[0].text for output in result]
return {'generated_text': result_output[0]}
def finalize(self):
self.llm = None
```
## Creating the Custom Runtime
This is a mandatory step where we allow the users to upload their custom runtime through [inferless-runtime-config.yaml](https://github.com/inferless/SOLAR-10.7B-Instruct/blob/main/inferless-runtime-config.yaml).
```python
build:
cuda_version: "12.1.1"
python_packages:
- vllm==0.7.2
- inferless==0.2.6
- pydantic==2.10.2
- hf-transfer==0.1.9
- huggingface-hub==0.27.1
```
## Test your model with Remote Run
You can use the `inferless remote-run`([installation guide here](https://docs.inferless.com/model-import/cli-import#cli-import)) command to test your model or any custom Python script in a remote GPU environment directly from your local machine. Make sure that you use `Python3.10` for seamless experience.
### Step 1: Add the Decorators and local entry point
To enable **Remote Run**, simply do the following:
1. Import the `inferless` library and initialize `Cls(gpu="A100")`. The available GPU options are `T4`, `A10` and `A100`.
2. Decorated the `initialize` and `infer` functions with `@app.load` and `@app.infer` respectively.
3. Create the Local Entry Point by decorating a function (for example, `my_local_entry`) with `@inferless.local_entry_point`.
Within this function, instantiate your model class, convert any incoming parameters into a `RequestObjects` object, and invoke the model's `infer` method.
```python
import inferless
from vllm import LLM, SamplingParams
from pydantic import BaseModel, Field
from typing import Optional
@inferless.request
class RequestObjects(BaseModel):
prompt: str = Field(default="Explain Deep Learning.")
temperature: Optional[float] = 0.7
top_p: Optional[float] = 0.1
repetition_penalty: Optional[float] = 1.18
top_k: Optional[int] = 40
max_tokens: Optional[int] = 256
@inferless.response
class ResponseObjects(BaseModel):
generated_text: str = Field(default='Test output')
app = inferless.Cls(gpu="A100")
class InferlessPythonModel:
@app.load
def initialize(self):
model_id = "Inferless/SOLAR-10.7B-Instruct-v1.0-GPTQ"
self.llm = LLM(model=model_id, quantization="gptq", dtype="float16")
@app.infer
def infer(self, request: RequestObjects) -> ResponseObjects:
sampling_params = SamplingParams(temperature=request.temperature,top_p=request.top_p,repetition_penalty=request.repetition_penalty,
top_k=request.top_k,max_tokens=request.max_tokens)
result = self.llm.generate(request.prompt, sampling_params)
result_output = [output.outputs[0].text for output in result]
generateObject = ResponseObjects(generated_text = result_output[0])
return generateObject
def finalize(self):
self.llm = None
@inferless.local_entry_point
def my_local_entry(dynamic_params):
request_objects = RequestObjects(**dynamic_params)
model_instance = InferlessPythonModel()
return model_instance.infer(request_objects)
```
### Step 2: Run with Remote GPU
From your local terminal, navigate to the folder containing your `app.py` and your `inferless-runtime-config.yaml` and run:
```bash
inferless remote-run app.py -c inferless-runtime-config.yaml --prompt "What is an AI?"
```
You can pass the other input parameters in the same way as long as your code expects them in the `inputs` dictionary.
If you want to exclude certain files or directories from being uploaded, use the `--exclude` or `-e` flag.
## Method A: Deploying the model on Inferless Platform
Inferless supports multiple ways of [importing your model](https://docs.inferless.com/model-import/file-structure-req/file-structure-requirements). For this tutorial, we will use GitHub.
### Step 1: Login to the inferless dashboard can click on Import model button
Navigate to your desired workspace in Inferless and Click on `Add a custom model` button that you see on the top right. An import wizard will open up.
### Step 2: Follow the UI to complete the model Import
* Select the GitHub/GitLab Integration option to connect your source code repository with the deployment environment.
* Navigate to the specific GitHub repository that contains your model's code. Here, you will need to identify and enter the name of the model you wish to import.
* Choose the appropriate type of machine that suits your model's requirements. Additionally, specify the minimum and maximum number of replicas to define the scalability range for deploying your model.
* Optionally, you have the option to enable automatic build and deployment. This feature triggers a new deployment automatically whenever there is a new code push to your repository.
* If your model requires additional software packages, configure the Custom Runtime settings by including necessary pip or apt packages. Also, set up environment variables such as Inference Timeout, Container Concurrency, and Scale Down Timeout to tailor the runtime environment according to your needs.
* Wait for the validation process to complete, ensuring that all settings are correct and functional. Once validation is successful, click on the "Import" button to finalize the import of your model.
### Step 3: Wait for the model build to complete usually takes \~5-10 minutes
### Step 4: Use the APIs to call the model
Once the model is in 'Active' status you can click on the 'API' page to call the model
### Here is the Demo:
# Deploy Quantized version of SOLAR 10.7B-Instruct using Inferless
Source: https://docs.inferless.com/how-to-guides/deploy-quantized-version-of-solar-10-7b-instruct-using-inferless
SOLAR-10.7B, an advanced large language model (LLM) with 10.7 billion parameters, demonstrates superior performance in various natural language processing (NLP) tasks
## Introduction
SOLAR-10.7B, an advanced large language model (LLM) with 10.7 billion parameters, demonstrates superior performance in various natural language processing (NLP) tasks. They have presented a methodology for scaling LLMs called depth up-scaling (DUS), which encompasses architectural modifications and continued pretraining. They have integrated Mistral 7B weights into the upscaled layers, and finally, continued pre-training for the entire model.
## Our Observations
We utilized [AutoGPTQ](https://github.com/PanQiWei/AutoGPTQ) to quantize [SOLAR-10.7B-Instruct-v1.0 ](https://huggingface.co/upstage/SOLAR-10.7B-Instruct-v1.0)into a [4-bit quantized GPTQ ](https://huggingface.co/Inferless/SOLAR-10.7B-Instruct-v1.0-GPTQ)version. In the inference process, we deployed the quantized model on an A100 GPU (80GB) using [vLLM](https://github.com/vllm-project/vllm). We also tried deploying via Auto-GPTQ as mentioned in our observations below:
| Library | Inference Time | Cold Start Time | Token/Sec | Latency/Token | VRAM Required |
| ------------------ | -------------- | --------------- | --------- | ------------- | ------------- |
| vLLM (Recommended) | 1.37 sec | 11.69 sec | 111.54 | 8.97 ms | 69.33 GB |
| Auto-GPTQ | 27.09 sec | 61.31 sec | 9.82 | 101.98 ms | 5.67 GB |
## Getting Started with Quantization
Quantization techniques reduces the model's computation cost and memory. It represent the model's weights and activations in lower precision data-types while trying not to reduce in the accuracy.
We have quantized the model using [GPTQ algorithm](https://arxiv.org/abs/2210.17323), GPTQ is a quantization algorithms for LLMs. We have used [AutoGPTQ](https://github.com/PanQiWei/AutoGPTQ) for 4-bit GPTQ quantization.
Install the [AutoGPTQ](https://github.com/PanQiWei/AutoGPTQ) library:
```
pip install auto-gptq
```
`Import` the following libraries, and initialize the model and the tokenizer. For GPTQ calibration phase we are using [VMware/open-instruct](https://huggingface.co/datasets/VMware/open-instruct) dataset.
```python
from auto_gptq import AutoGPTQForCausalLM, BaseQuantizeConfig
from transformers import AutoTokenizer
from datasets import load_dataset
import random
import numpy as np
import torch
model_id = "upstage/SOLAR-10.7B-Instruct-v1.0"
quantized_model_dir = "SOLAR-10.7B-Instruct-v1.0"
tokenizer = AutoTokenizer.from_pretrained("upstage/SOLAR-10.7B-Instruct-v1.0", use_fast=True)
train_data = load_dataset('VMware/open-instruct')
tokenized_data = tokenizer("\n\n".join(train_data['train']['response']), return_tensors='pt')
def generate_data(nsamples,seed,seqlen):
random.seed(seed)
np.random.seed(0)
torch.random.manual_seed(0)
train_dataset = []
for _ in range(nsamples):
i = random.randint(0, tokenized_data.input_ids.shape[1] - seqlen - 1)
j = i + seqlen
inp = tokenized_data.input_ids[:, i:j]
attention_mask = torch.ones_like(inp)
train_dataset.append({'input_ids':inp,'attention_mask': attention_mask})
return train_dataset
```
Now you can start the quantization process, it will create a new directory where it will store the quantized model. The [quantized model](https://huggingface.co/Inferless/SOLAR-10.7B-Instruct-v1.0-GPTQ/tree/main) is 5.98 GB, which is approximately 27.85% of the original model 21.47 GB. Here's the [link](https://huggingface.co/Inferless/SOLAR-10.7B-Instruct-v1.0-GPTQ/tree/main) to our quanitized model.
```python
training_dataset = generate_data(1000,4040,2048)
quantize_config = BaseQuantizeConfig(
bits=4,
group_size=128,
desc_act=False)
model = AutoGPTQForCausalLM.from_pretrained(model_id,quantize_config)
model.quantize(training_dataset)
model.save_quantized(quantized_model_dir, use_safetensors=True)
tokenizer.save_pretrained(quantized_model_dir)
```
## Defining Dependencies
We are using the [vLLM library](https://github.com/vllm-project/vllm), which enables you to run LLM on low memory. We deploy a GPTQ 4bit quantized version of the model.
## Constructing the GitHub/GitLab Template
Now quickly construct the GitHub/GitLab template, this process is mandatory and make sure you don't add any file named `model.py`
```python
SOLAR-10.7B-Instruct/
├── app.py
├── inferless-runtime-config.yaml
├── inferless.yaml
└── input_schema.py
```
You can also add other files to this directory.
## Create the class for inference
In the [app.py](https://github.com/inferless/SOLAR-10.7B-Instruct/blob/main/app.py) we will define the class and import all the required functions
1. `def initialize`: In this function, you will initialize your model and define any `variable` that you want to use during inference.
2. `def infer`: This function gets called for every request that you send. Here you can define all the steps that are required for the inference. You can also pass custom values for inference and pass it through `inputs(dict)` parameter.
3. `def finalize`: This function cleans up all the allocated memory.
```python
import inferless
from vllm import LLM, SamplingParams
app = inferless.Cls(gpu="A100")
class InferlessPythonModel:
@app.load
def initialize(self):
model_id = "Inferless/SOLAR-10.7B-Instruct-v1.0-GPTQ"
self.sampling_params = SamplingParams(temperature=0.7, top_p=0.95,max_tokens=256)
self.llm = LLM(model=model_id, quantization="gptq", dtype="float16")
@app.infer
def infer(self, inputs):
prompts = inputs["prompt"]
result = self.llm.generate(prompts, self.sampling_params)
result_output = [output.outputs[0].text for output in result]
return {'generated_text': result_output[0]}
def finalize(self):
self.llm = None
```
## Creating the Custom Runtime
This is a mandatory step where we allow the users to upload their custom runtime through [inferless-runtime-config.yaml](https://github.com/inferless/SOLAR-10.7B-Instruct/blob/main/inferless-runtime-config.yaml).
```python
build:
cuda_version: "12.1.1"
python_packages:
- vllm==0.7.2
- inferless==0.2.6
- pydantic==2.10.2
- hf-transfer==0.1.9
- huggingface-hub==0.27.1
```
## Test your model with Remote Run
You can use the `inferless remote-run`([installation guide here](https://docs.inferless.com/model-import/cli-import#cli-import)) command to test your model or any custom Python script in a remote GPU environment directly from your local machine. Make sure that you use `Python3.10` for seamless experience.
### Step 1: Add the Decorators and local entry point
To enable **Remote Run**, simply do the following:
1. Import the `inferless` library and initialize `Cls(gpu="A100")`. The available GPU options are `T4`, `A10` and `A100`.
2. Decorated the `initialize` and `infer` functions with `@app.load` and `@app.infer` respectively.
3. Create the Local Entry Point by decorating a function (for example, `my_local_entry`) with `@inferless.local_entry_point`.
Within this function, instantiate your model class, convert any incoming parameters into a `RequestObjects` object, and invoke the model's `infer` method.
```python
import inferless
from vllm import LLM, SamplingParams
from pydantic import BaseModel, Field
from typing import Optional
@inferless.request
class RequestObjects(BaseModel):
prompt: str = Field(default="Explain Deep Learning.")
temperature: Optional[float] = 0.7
top_p: Optional[float] = 0.1
repetition_penalty: Optional[float] = 1.18
top_k: Optional[int] = 40
max_tokens: Optional[int] = 256
@inferless.response
class ResponseObjects(BaseModel):
generated_text: str = Field(default='Test output')
app = inferless.Cls(gpu="A100")
class InferlessPythonModel:
@app.load
def initialize(self):
model_id = "Inferless/SOLAR-10.7B-Instruct-v1.0-GPTQ"
self.llm = LLM(model=model_id, quantization="gptq", dtype="float16")
@app.infer
def infer(self, request: RequestObjects) -> ResponseObjects:
sampling_params = SamplingParams(temperature=request.temperature,top_p=request.top_p,repetition_penalty=request.repetition_penalty,
top_k=request.top_k,max_tokens=request.max_tokens)
result = self.llm.generate(request.prompt, sampling_params)
result_output = [output.outputs[0].text for output in result]
generateObject = ResponseObjects(generated_text = result_output[0])
return generateObject
def finalize(self):
self.llm = None
@inferless.local_entry_point
def my_local_entry(dynamic_params):
request_objects = RequestObjects(**dynamic_params)
model_instance = InferlessPythonModel()
return model_instance.infer(request_objects)
```
### Step 2: Run with Remote GPU
From your local terminal, navigate to the folder containing your `app.py` and your `inferless-runtime-config.yaml` and run:
```bash
inferless remote-run app.py -c inferless-runtime-config.yaml --prompt "What is an AI?"
```
You can pass the other input parameters in the same way as long as your code expects them in the `inputs` dictionary.
If you want to exclude certain files or directories from being uploaded, use the `--exclude` or `-e` flag.
## Method A: Deploying the model on Inferless Platform
Inferless supports multiple ways of [importing your model](https://docs.inferless.com/model-import/file-structure-req/file-structure-requirements). For this tutorial, we will use GitHub.
### Step 1: Login to the inferless dashboard can click on Import model button
Navigate to your desired workspace in Inferless and Click on `Add a custom model` button that you see on the top right. An import wizard will open up.
### Step 2: Follow the UI to complete the model Import
* Select the GitHub/GitLab Integration option to connect your source code repository with the deployment environment.
* Navigate to the specific GitHub repository that contains your model's code. Here, you will need to identify and enter the name of the model you wish to import.
* Choose the appropriate type of machine that suits your model's requirements. Additionally, specify the minimum and maximum number of replicas to define the scalability range for deploying your model.
* Optionally, you have the option to enable automatic build and deployment. This feature triggers a new deployment automatically whenever there is a new code push to your repository.
* If your model requires additional software packages, configure the Custom Runtime settings by including necessary pip or apt packages. Also, set up environment variables such as Inference Timeout, Container Concurrency, and Scale Down Timeout to tailor the runtime environment according to your needs.
* Wait for the validation process to complete, ensuring that all settings are correct and functional. Once validation is successful, click on the "Import" button to finalize the import of your model.
### Step 3: Wait for the model build to complete usually takes \~5-10 minutes
### Step 4: Use the APIs to call the model
Once the model is in 'Active' status you can click on the 'API' page to call the model
### Here is the Demo:
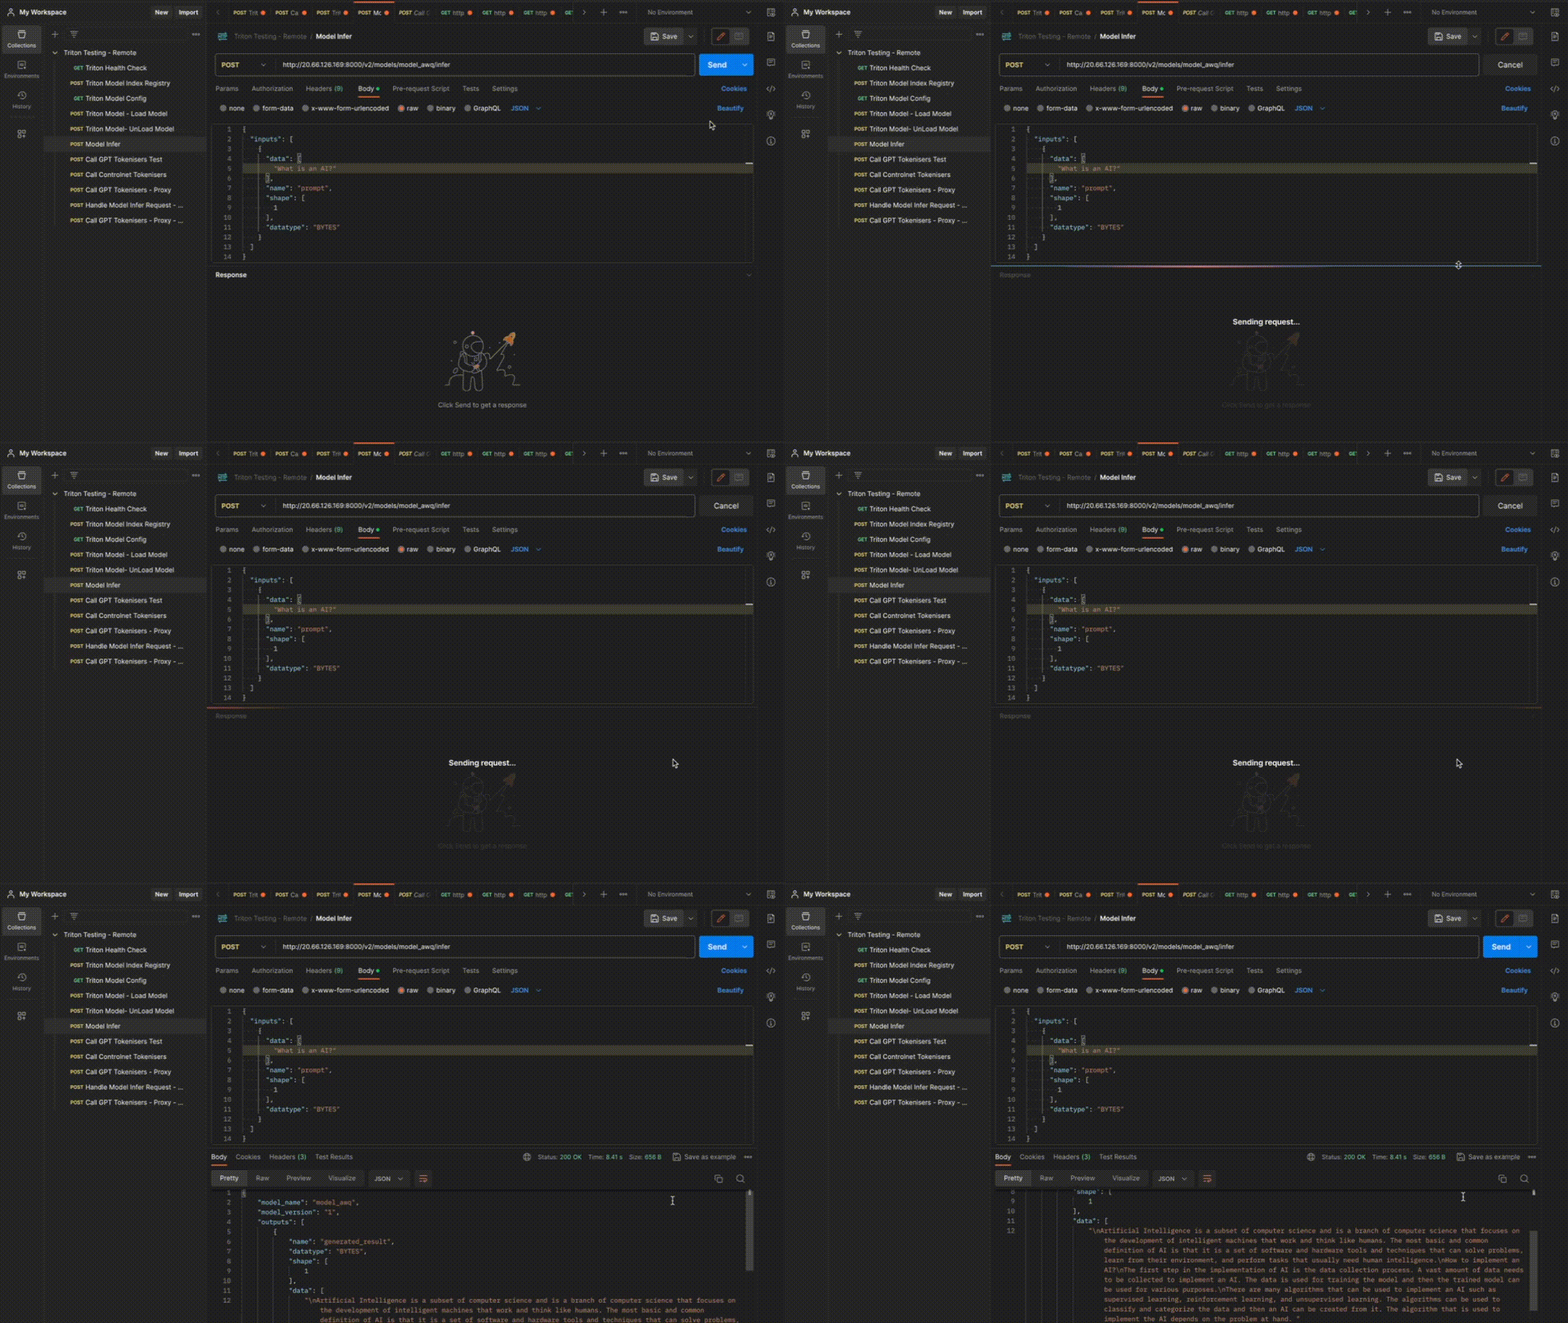 ## Method B: Deploying the model on Inferless CLI
Inferless allows you to deploy your model using Inferless-CLI. Follow the steps to deploy using Inferless CLI.
### Clone the repository of the model
Let's begin by cloning the model repository:
```bash
git clone https://github.com/inferless/SOLAR-10.7B-Instruct.git
```
### Deploy the Model
To deploy the model using Inferless CLI, execute the following command:
```bash
inferless deploy --gpu A100 --runtime inferless-runtime-config.yaml
```
**Explanation of the Command:**
* `--gpu A100`: Specifies the GPU type for deployment. Available options include `A10`, `A100`, and `T4`.
* `--runtime inferless-runtime-config.yaml`: Defines the runtime configuration file. If not specified, the default Inferless runtime is used.
# Deploy the Qwen2.5-VL-7B-Instruct using Inferless
Source: https://docs.inferless.com/how-to-guides/deploy-qwen2.5-vl-7b
Qwen2.5-VL-7B-Instruct is a 7-billion-parameter multimodal language model developed by Alibaba Cloud's Qwen team. This model excels in instruction-based tasks, offering advanced visual and multilingual capabilities.
## Introduction
[Qwen2.5-VL-7B-Instruct](https://huggingface.co/qwen/Qwen2.5-VL-7B-Instruct) is a state‑of‑the‑art, 7B vision‑language model from Alibaba Cloud’s Qwen team. Built for instruction‑tuned applications, it seamlessly fuses robust language understanding with advanced visual analysis. Whether it’s recognizing complex scenes, parsing detailed documents, or even comprehending long videos by pinpointing key moments, this model is engineered to act as a versatile visual agent. With capabilities that include generating structured outputs (like bounding boxes and JSON) and supporting multilingual text within images, it opens up new possibilities for interactive chatbots, multimedia content analysis, and more.
## Defining Dependencies
We are using the [vLLM](https://github.com/vllm-project/vllm/) to serve the model on a single A100.
## Our Observations
We have deployed the model on an A100 GPU(80GB). Here are our observations:
| Library | Inference Time (Image) | Inference Time (Video) | Cold Start Time |
| ------- | ---------------------- | ---------------------- | --------------- |
| vLLM | 5.4 sec | 22.25 sec | 88.44 sec |
Note: The inference time(image and video) and cold start time are average values.
## Defining Dependencies
We are using the [vLLM](https://github.com/vllm-project/vllm/) to serve the model on a single A100 (80GB).
## Constructing the GitHub/GitLab Template
Now quickly construct the GitHub/GitLab template, this process is mandatory and make sure you don't add any file named `model.py`.
```
qwen2.5-vl-7b-instruct/
├── app.py
├── inferless-runtime-config.yaml
└── inferless.yaml
```
You can also add other files to this directory.
## Create the Input Schema with Pydantic
Using the `inferless` Python client and Pydantic, you can define structured schemas directly in your code for input and output, eliminating the need for external file.
### Input Schema
When defining an input schema with Pydantic, you need to annotate your class attributes with the appropriate types, such as `str`, `float`, `int`, etc.
These type annotations specifys what type of data each field should contain.
The `default` value serves as the example input for testing with the `infer` function.
```python
@inferless.request
class RequestObjects(BaseModel):
prompt: str = Field(default="What does this diagram illustrate?")
content_url: str = Field(default="https://qianwen-res.oss-cn-beijing.aliyuncs.com/Qwen-VL/assets/demo.jpeg")
content_type: Optional[str] = "image"
system_prompt: Optional[str] = "You are a helpful assistant."
temperature: Optional[float] = 0.7
top_p: Optional[float] = 0.1
repetition_penalty: Optional[float] = 1.18
top_k: Optional[int] = 40
max_tokens: Optional[int] = 256
max_pixels: Optional[int] = 12845056
max_duration: Optional[int] = 60
fps: Optional[int] = 60
```
### Output Schema
The `@inferless.response` decorator helps you define structured output schemas.
```python
@inferless.response
class ResponseObjects(BaseModel):
generated_result: str = Field(default='Test output')
```
### Usage in the `infer` Function
Once you have annotated the objects you can expect the infer function to receive `RequestObjects` as input,
and returns a `ResponseObjects` instance as output, ensuring the results adhere to a defined structure.
```python
class InferlessPythonModel:
def infer(self, request: RequestObjects) -> ResponseObjects:
return ResponseObjects(generated_result = generated_text)
```
## Create the class for inference
In the [app.py](https://github.com/inferless/qwen2.5-vl-7b-instruct/blob/main/app.py) we will define the class and import all the required functions
1. `def initialize`: In this function, you will initialize your model and define any `variable` that you want to use during inference.
2. `def infer`: This function gets called for every request that you send. Here you can define all the steps that are required for the inference.
3. `def finalize`: This function cleans up all the allocated memory.
```python
from transformers import AutoProcessor
from vllm import LLM, SamplingParams
from qwen_vl_utils import process_vision_info
import inferless
from pydantic import BaseModel, Field
from typing import Optional
@inferless.request
class RequestObjects(BaseModel):
prompt: str = Field(default="What does this diagram illustrate?")
content_url: str = Field(default="https://qianwen-res.oss-cn-beijing.aliyuncs.com/Qwen-VL/assets/demo.jpeg")
content_type: Optional[str] = "image"
system_prompt: Optional[str] = "You are a helpful assistant."
temperature: Optional[float] = 0.7
top_p: Optional[float] = 0.1
repetition_penalty: Optional[float] = 1.18
top_k: Optional[int] = 40
max_tokens: Optional[int] = 256
max_pixels: Optional[int] = 12845056
max_duration: Optional[int] = 60
fps: Optional[int] = 60
@inferless.response
class ResponseObjects(BaseModel):
generated_result: str = Field(default='Test output')
class InferlessPythonModel:
def initialize(self):
self.llm = LLM(model="Qwen/Qwen2.5-VL-7B-Instruct")
self.processor = AutoProcessor.from_pretrained("Qwen/Qwen2.5-VL-7B-Instruct")
def infer(self, request: RequestObjects) -> ResponseObjects:
sampling_params = SamplingParams(temperature=request.temperature,top_p=request.top_p,repetition_penalty=request.repetition_penalty,
top_k=request.top_k,max_tokens=request.max_tokens)
if request.content_type == "image":
content = {
"type": "image",
"image": request.content_url,
"max_pixels": request.max_pixels,
}
else:
content = {
"type": "video",
"video": request.content_url,
"max_duration": request.max_duration,
"max_pixels": request.max_pixels,
"fps": request.fps
}
messages = [
{"role": "system", "content": request.system_prompt},
{"role": "user", "content": [
content,
{"type": "text","text": request.prompt},
]},
]
prompt = self.processor.apply_chat_template(messages, tokenize=False, add_generation_prompt=True)
image_inputs, video_inputs,video_kwargs = process_vision_info(messages,return_video_kwargs=True)
mm_data = {}
if image_inputs is not None:
mm_data["image"] = image_inputs
if video_inputs is not None:
mm_data["video"] = video_inputs
llm_inputs = {
"prompt": prompt,
"multi_modal_data": mm_data,
"mm_processor_kwargs": video_kwargs,
}
outputs = self.llm.generate([llm_inputs], sampling_params=sampling_params)
generated_text = outputs[0].outputs[0].text
generateObject = ResponseObjects(generated_result = generated_text)
return generateObject
def finalize(self):
self.llm = None
```
## Creating the Custom Runtime
This is a mandatory step where we allow the users to upload their custom runtime through [inferless-runtime-config.yaml](https://github.com/inferless/qwen2.5-vl-7b-instruct/blob/main/inferless-runtime-config.yaml).
```python
build:
cuda_version: "12.1.1"
python_packages:
- qwen-vl-utils==0.0.10
- accelerate==1.3.0
- decord==0.6.0
- vllm==0.7.2
- git+https://github.com/huggingface/transformers.git@014047e1c8784c00e2a04cb04ffcecdd5cb23c16
- inferless==0.2.6
- pydantic==2.10.2
- hf-transfer==0.1.9
- huggingface-hub==0.27.1
```
## Test your model with Remote Run
You can use the `inferless remote-run`([installation guide here](https://docs.inferless.com/model-import/cli-import#cli-import)) command to test your model or any custom Python script in a remote GPU environment directly from your local machine. Make sure that you use `Python3.10` for seamless experience.
### Step 1: Add the Decorators and local entry point
To enable **Remote Run**, simply do the following:
1. Import the `inferless` library and initialize `Cls(gpu="A100")`. The available GPU options are `T4`, `A10` and `A100`.
2. Decorated the `initialize` and `infer` functions with `@app.load` and `@app.infer` respectively.
3. Create the Local Entry Point by decorating a function (for example, `my_local_entry`) with `@inferless.local_entry_point`.
Within this function, instantiate your model class, convert any incoming parameters into a `RequestObjects` object, and invoke the model's `infer` method.
```python
from transformers import AutoProcessor
from vllm import LLM, SamplingParams
from qwen_vl_utils import process_vision_info
from pydantic import BaseModel, Field
from typing import Optional
import inferless
app = inferless.Cls(gpu="A100")
@inferless.request
class RequestObjects(BaseModel):
prompt: str = Field(default="What does this diagram illustrate?")
content_url: str = Field(default="https://qianwen-res.oss-cn-beijing.aliyuncs.com/Qwen-VL/assets/demo.jpeg")
content_type: Optional[str] = "image"
system_prompt: Optional[str] = "You are a helpful assistant."
temperature: Optional[float] = 0.7
top_p: Optional[float] = 0.1
repetition_penalty: Optional[float] = 1.18
top_k: Optional[int] = 40
max_tokens: Optional[int] = 256
max_pixels: Optional[int] = 12845056
max_duration: Optional[int] = 60
fps: Optional[int] = 60
@inferless.response
class ResponseObjects(BaseModel):
generated_result: str = Field(default='Test output')
class InferlessPythonModel:
@app.load
def initialize(self):
self.llm = LLM(model="Qwen/Qwen2.5-VL-7B-Instruct")
self.processor = AutoProcessor.from_pretrained("Qwen/Qwen2.5-VL-7B-Instruct")
@app.infer
def infer(self, request: RequestObjects) -> ResponseObjects:
sampling_params = SamplingParams(temperature=request.temperature,top_p=request.top_p,repetition_penalty=request.repetition_penalty,
top_k=request.top_k,max_tokens=request.max_tokens)
if request.content_type == "image":
content = {
"type": "image",
"image": request.content_url,
"max_pixels": request.max_pixels,
}
else:
content = {
"type": "video",
"video": request.content_url,
"max_duration": request.max_duration,
"max_pixels": request.max_pixels,
"fps": request.fps
}
messages = [
{"role": "system", "content": request.system_prompt},
{"role": "user", "content": [
content,
{"type": "text","text": request.prompt},
]},
]
prompt = self.processor.apply_chat_template(messages, tokenize=False, add_generation_prompt=True)
image_inputs, video_inputs,video_kwargs = process_vision_info(messages,return_video_kwargs=True)
mm_data = {}
if image_inputs is not None:
mm_data["image"] = image_inputs
if video_inputs is not None:
mm_data["video"] = video_inputs
llm_inputs = {
"prompt": prompt,
"multi_modal_data": mm_data,
"mm_processor_kwargs": video_kwargs,
}
outputs = self.llm.generate([llm_inputs], sampling_params=sampling_params)
generated_text = outputs[0].outputs[0].text
generateObject = ResponseObjects(generated_result = generated_text)
return generateObject
def finalize(self):
self.llm = None
@inferless.local_entry_point
def my_local_entry(dynamic_params):
request_objects = RequestObjects(**dynamic_params)
model_instance = InferlessPythonModel()
return model_instance.infer(request_objects)
```
### Step 2: Run with Remote GPU
From your local terminal, navigate to the folder containing your `app.py` and your `inferless-runtime-config.yaml` and run:
```bash
inferless remote-run app.py -c inferless-runtime-config.yaml --prompt "What does this diagram illustrate?" --content_url "https://qianwen-res.oss-cn-beijing.aliyuncs.com/Qwen-VL/assets/demo.jpeg"
```
You can pass the other input parameters in the same way (e.g., `--content_type`, `--system_prompt`, etc.) as long as your code expects them in the `inputs` dictionary.
If you want to exclude certain files or directories from being uploaded, use the `--exclude` or `-e` flag.
## Method A: Deploying the model on Inferless Platform
Inferless supports multiple ways of [importing your model](https://docs.inferless.com/model-import/file-structure-req/file-structure-requirements). For this tutorial, we will use GitHub.
### Step 1: Login to the inferless dashboard can click on Import model button
Navigate to your desired workspace in Inferless and Click on `Add a custom model` button that you see on the top right. An import wizard will open up.
### Step 2: Follow the UI to complete the model Import
* Select the GitHub/GitLab Integration option to connect your source code repository with the deployment environment.
* Navigate to the specific GitHub repository that contains your model's code. Here, you will need to identify and enter the name of the model you wish to import.
* Choose the appropriate type of machine that suits your model's requirements. Additionally, specify the minimum and maximum number of replicas to define the scalability range for deploying your model.
* Optionally, you have the option to enable automatic build and deployment. This feature triggers a new deployment automatically whenever there is a new code push to your repository.
* If your model requires additional software packages, configure the Custom Runtime settings by including necessary pip or apt packages. Also, set up environment variables such as Inference Timeout, Container Concurrency, and Scale Down Timeout to tailor the runtime environment according to your needs.
* Wait for the validation process to complete, ensuring that all settings are correct and functional. Once validation is successful, click on the "Import" button to finalize the import of your model.
### Step 3: Wait for the model build to complete usually takes \~5-10 minutes
### Step 4: Use the APIs to call the model
Once the model is in 'Active' status you can click on the 'API' page to call the model
### Here is the Demo:
## Method B: Deploying the model on Inferless CLI
Inferless allows you to deploy your model using Inferless-CLI. Follow the steps to deploy using Inferless CLI.
### Clone the repository of the model
Let's begin by cloning the model repository:
```bash
git clone https://github.com/inferless/qwen2.5-vl-7b-instruct.git
```
### Deploy the Model
To deploy the model using Inferless CLI, execute the following command:
```bash
inferless deploy --gpu A100 --runtime inferless-runtime-config.yaml
```
**Explanation of the Command:**
* `--gpu A100`: Specifies the GPU type for deployment. Available options include `A10`, `A100`, and `T4`.
* `--runtime inferless-runtime-config.yaml`: Defines the runtime configuration file. If not specified, the default Inferless runtime is used.
## Method B: Deploying the model on Inferless CLI
Inferless allows you to deploy your model using Inferless-CLI. Follow the steps to deploy using Inferless CLI.
### Clone the repository of the model
Let's begin by cloning the model repository:
```bash
git clone https://github.com/inferless/SOLAR-10.7B-Instruct.git
```
### Deploy the Model
To deploy the model using Inferless CLI, execute the following command:
```bash
inferless deploy --gpu A100 --runtime inferless-runtime-config.yaml
```
**Explanation of the Command:**
* `--gpu A100`: Specifies the GPU type for deployment. Available options include `A10`, `A100`, and `T4`.
* `--runtime inferless-runtime-config.yaml`: Defines the runtime configuration file. If not specified, the default Inferless runtime is used.
# Deploy the Qwen2.5-VL-7B-Instruct using Inferless
Source: https://docs.inferless.com/how-to-guides/deploy-qwen2.5-vl-7b
Qwen2.5-VL-7B-Instruct is a 7-billion-parameter multimodal language model developed by Alibaba Cloud's Qwen team. This model excels in instruction-based tasks, offering advanced visual and multilingual capabilities.
## Introduction
[Qwen2.5-VL-7B-Instruct](https://huggingface.co/qwen/Qwen2.5-VL-7B-Instruct) is a state‑of‑the‑art, 7B vision‑language model from Alibaba Cloud’s Qwen team. Built for instruction‑tuned applications, it seamlessly fuses robust language understanding with advanced visual analysis. Whether it’s recognizing complex scenes, parsing detailed documents, or even comprehending long videos by pinpointing key moments, this model is engineered to act as a versatile visual agent. With capabilities that include generating structured outputs (like bounding boxes and JSON) and supporting multilingual text within images, it opens up new possibilities for interactive chatbots, multimedia content analysis, and more.
## Defining Dependencies
We are using the [vLLM](https://github.com/vllm-project/vllm/) to serve the model on a single A100.
## Our Observations
We have deployed the model on an A100 GPU(80GB). Here are our observations:
| Library | Inference Time (Image) | Inference Time (Video) | Cold Start Time |
| ------- | ---------------------- | ---------------------- | --------------- |
| vLLM | 5.4 sec | 22.25 sec | 88.44 sec |
Note: The inference time(image and video) and cold start time are average values.
## Defining Dependencies
We are using the [vLLM](https://github.com/vllm-project/vllm/) to serve the model on a single A100 (80GB).
## Constructing the GitHub/GitLab Template
Now quickly construct the GitHub/GitLab template, this process is mandatory and make sure you don't add any file named `model.py`.
```
qwen2.5-vl-7b-instruct/
├── app.py
├── inferless-runtime-config.yaml
└── inferless.yaml
```
You can also add other files to this directory.
## Create the Input Schema with Pydantic
Using the `inferless` Python client and Pydantic, you can define structured schemas directly in your code for input and output, eliminating the need for external file.
### Input Schema
When defining an input schema with Pydantic, you need to annotate your class attributes with the appropriate types, such as `str`, `float`, `int`, etc.
These type annotations specifys what type of data each field should contain.
The `default` value serves as the example input for testing with the `infer` function.
```python
@inferless.request
class RequestObjects(BaseModel):
prompt: str = Field(default="What does this diagram illustrate?")
content_url: str = Field(default="https://qianwen-res.oss-cn-beijing.aliyuncs.com/Qwen-VL/assets/demo.jpeg")
content_type: Optional[str] = "image"
system_prompt: Optional[str] = "You are a helpful assistant."
temperature: Optional[float] = 0.7
top_p: Optional[float] = 0.1
repetition_penalty: Optional[float] = 1.18
top_k: Optional[int] = 40
max_tokens: Optional[int] = 256
max_pixels: Optional[int] = 12845056
max_duration: Optional[int] = 60
fps: Optional[int] = 60
```
### Output Schema
The `@inferless.response` decorator helps you define structured output schemas.
```python
@inferless.response
class ResponseObjects(BaseModel):
generated_result: str = Field(default='Test output')
```
### Usage in the `infer` Function
Once you have annotated the objects you can expect the infer function to receive `RequestObjects` as input,
and returns a `ResponseObjects` instance as output, ensuring the results adhere to a defined structure.
```python
class InferlessPythonModel:
def infer(self, request: RequestObjects) -> ResponseObjects:
return ResponseObjects(generated_result = generated_text)
```
## Create the class for inference
In the [app.py](https://github.com/inferless/qwen2.5-vl-7b-instruct/blob/main/app.py) we will define the class and import all the required functions
1. `def initialize`: In this function, you will initialize your model and define any `variable` that you want to use during inference.
2. `def infer`: This function gets called for every request that you send. Here you can define all the steps that are required for the inference.
3. `def finalize`: This function cleans up all the allocated memory.
```python
from transformers import AutoProcessor
from vllm import LLM, SamplingParams
from qwen_vl_utils import process_vision_info
import inferless
from pydantic import BaseModel, Field
from typing import Optional
@inferless.request
class RequestObjects(BaseModel):
prompt: str = Field(default="What does this diagram illustrate?")
content_url: str = Field(default="https://qianwen-res.oss-cn-beijing.aliyuncs.com/Qwen-VL/assets/demo.jpeg")
content_type: Optional[str] = "image"
system_prompt: Optional[str] = "You are a helpful assistant."
temperature: Optional[float] = 0.7
top_p: Optional[float] = 0.1
repetition_penalty: Optional[float] = 1.18
top_k: Optional[int] = 40
max_tokens: Optional[int] = 256
max_pixels: Optional[int] = 12845056
max_duration: Optional[int] = 60
fps: Optional[int] = 60
@inferless.response
class ResponseObjects(BaseModel):
generated_result: str = Field(default='Test output')
class InferlessPythonModel:
def initialize(self):
self.llm = LLM(model="Qwen/Qwen2.5-VL-7B-Instruct")
self.processor = AutoProcessor.from_pretrained("Qwen/Qwen2.5-VL-7B-Instruct")
def infer(self, request: RequestObjects) -> ResponseObjects:
sampling_params = SamplingParams(temperature=request.temperature,top_p=request.top_p,repetition_penalty=request.repetition_penalty,
top_k=request.top_k,max_tokens=request.max_tokens)
if request.content_type == "image":
content = {
"type": "image",
"image": request.content_url,
"max_pixels": request.max_pixels,
}
else:
content = {
"type": "video",
"video": request.content_url,
"max_duration": request.max_duration,
"max_pixels": request.max_pixels,
"fps": request.fps
}
messages = [
{"role": "system", "content": request.system_prompt},
{"role": "user", "content": [
content,
{"type": "text","text": request.prompt},
]},
]
prompt = self.processor.apply_chat_template(messages, tokenize=False, add_generation_prompt=True)
image_inputs, video_inputs,video_kwargs = process_vision_info(messages,return_video_kwargs=True)
mm_data = {}
if image_inputs is not None:
mm_data["image"] = image_inputs
if video_inputs is not None:
mm_data["video"] = video_inputs
llm_inputs = {
"prompt": prompt,
"multi_modal_data": mm_data,
"mm_processor_kwargs": video_kwargs,
}
outputs = self.llm.generate([llm_inputs], sampling_params=sampling_params)
generated_text = outputs[0].outputs[0].text
generateObject = ResponseObjects(generated_result = generated_text)
return generateObject
def finalize(self):
self.llm = None
```
## Creating the Custom Runtime
This is a mandatory step where we allow the users to upload their custom runtime through [inferless-runtime-config.yaml](https://github.com/inferless/qwen2.5-vl-7b-instruct/blob/main/inferless-runtime-config.yaml).
```python
build:
cuda_version: "12.1.1"
python_packages:
- qwen-vl-utils==0.0.10
- accelerate==1.3.0
- decord==0.6.0
- vllm==0.7.2
- git+https://github.com/huggingface/transformers.git@014047e1c8784c00e2a04cb04ffcecdd5cb23c16
- inferless==0.2.6
- pydantic==2.10.2
- hf-transfer==0.1.9
- huggingface-hub==0.27.1
```
## Test your model with Remote Run
You can use the `inferless remote-run`([installation guide here](https://docs.inferless.com/model-import/cli-import#cli-import)) command to test your model or any custom Python script in a remote GPU environment directly from your local machine. Make sure that you use `Python3.10` for seamless experience.
### Step 1: Add the Decorators and local entry point
To enable **Remote Run**, simply do the following:
1. Import the `inferless` library and initialize `Cls(gpu="A100")`. The available GPU options are `T4`, `A10` and `A100`.
2. Decorated the `initialize` and `infer` functions with `@app.load` and `@app.infer` respectively.
3. Create the Local Entry Point by decorating a function (for example, `my_local_entry`) with `@inferless.local_entry_point`.
Within this function, instantiate your model class, convert any incoming parameters into a `RequestObjects` object, and invoke the model's `infer` method.
```python
from transformers import AutoProcessor
from vllm import LLM, SamplingParams
from qwen_vl_utils import process_vision_info
from pydantic import BaseModel, Field
from typing import Optional
import inferless
app = inferless.Cls(gpu="A100")
@inferless.request
class RequestObjects(BaseModel):
prompt: str = Field(default="What does this diagram illustrate?")
content_url: str = Field(default="https://qianwen-res.oss-cn-beijing.aliyuncs.com/Qwen-VL/assets/demo.jpeg")
content_type: Optional[str] = "image"
system_prompt: Optional[str] = "You are a helpful assistant."
temperature: Optional[float] = 0.7
top_p: Optional[float] = 0.1
repetition_penalty: Optional[float] = 1.18
top_k: Optional[int] = 40
max_tokens: Optional[int] = 256
max_pixels: Optional[int] = 12845056
max_duration: Optional[int] = 60
fps: Optional[int] = 60
@inferless.response
class ResponseObjects(BaseModel):
generated_result: str = Field(default='Test output')
class InferlessPythonModel:
@app.load
def initialize(self):
self.llm = LLM(model="Qwen/Qwen2.5-VL-7B-Instruct")
self.processor = AutoProcessor.from_pretrained("Qwen/Qwen2.5-VL-7B-Instruct")
@app.infer
def infer(self, request: RequestObjects) -> ResponseObjects:
sampling_params = SamplingParams(temperature=request.temperature,top_p=request.top_p,repetition_penalty=request.repetition_penalty,
top_k=request.top_k,max_tokens=request.max_tokens)
if request.content_type == "image":
content = {
"type": "image",
"image": request.content_url,
"max_pixels": request.max_pixels,
}
else:
content = {
"type": "video",
"video": request.content_url,
"max_duration": request.max_duration,
"max_pixels": request.max_pixels,
"fps": request.fps
}
messages = [
{"role": "system", "content": request.system_prompt},
{"role": "user", "content": [
content,
{"type": "text","text": request.prompt},
]},
]
prompt = self.processor.apply_chat_template(messages, tokenize=False, add_generation_prompt=True)
image_inputs, video_inputs,video_kwargs = process_vision_info(messages,return_video_kwargs=True)
mm_data = {}
if image_inputs is not None:
mm_data["image"] = image_inputs
if video_inputs is not None:
mm_data["video"] = video_inputs
llm_inputs = {
"prompt": prompt,
"multi_modal_data": mm_data,
"mm_processor_kwargs": video_kwargs,
}
outputs = self.llm.generate([llm_inputs], sampling_params=sampling_params)
generated_text = outputs[0].outputs[0].text
generateObject = ResponseObjects(generated_result = generated_text)
return generateObject
def finalize(self):
self.llm = None
@inferless.local_entry_point
def my_local_entry(dynamic_params):
request_objects = RequestObjects(**dynamic_params)
model_instance = InferlessPythonModel()
return model_instance.infer(request_objects)
```
### Step 2: Run with Remote GPU
From your local terminal, navigate to the folder containing your `app.py` and your `inferless-runtime-config.yaml` and run:
```bash
inferless remote-run app.py -c inferless-runtime-config.yaml --prompt "What does this diagram illustrate?" --content_url "https://qianwen-res.oss-cn-beijing.aliyuncs.com/Qwen-VL/assets/demo.jpeg"
```
You can pass the other input parameters in the same way (e.g., `--content_type`, `--system_prompt`, etc.) as long as your code expects them in the `inputs` dictionary.
If you want to exclude certain files or directories from being uploaded, use the `--exclude` or `-e` flag.
## Method A: Deploying the model on Inferless Platform
Inferless supports multiple ways of [importing your model](https://docs.inferless.com/model-import/file-structure-req/file-structure-requirements). For this tutorial, we will use GitHub.
### Step 1: Login to the inferless dashboard can click on Import model button
Navigate to your desired workspace in Inferless and Click on `Add a custom model` button that you see on the top right. An import wizard will open up.
### Step 2: Follow the UI to complete the model Import
* Select the GitHub/GitLab Integration option to connect your source code repository with the deployment environment.
* Navigate to the specific GitHub repository that contains your model's code. Here, you will need to identify and enter the name of the model you wish to import.
* Choose the appropriate type of machine that suits your model's requirements. Additionally, specify the minimum and maximum number of replicas to define the scalability range for deploying your model.
* Optionally, you have the option to enable automatic build and deployment. This feature triggers a new deployment automatically whenever there is a new code push to your repository.
* If your model requires additional software packages, configure the Custom Runtime settings by including necessary pip or apt packages. Also, set up environment variables such as Inference Timeout, Container Concurrency, and Scale Down Timeout to tailor the runtime environment according to your needs.
* Wait for the validation process to complete, ensuring that all settings are correct and functional. Once validation is successful, click on the "Import" button to finalize the import of your model.
### Step 3: Wait for the model build to complete usually takes \~5-10 minutes
### Step 4: Use the APIs to call the model
Once the model is in 'Active' status you can click on the 'API' page to call the model
### Here is the Demo:
## Method B: Deploying the model on Inferless CLI
Inferless allows you to deploy your model using Inferless-CLI. Follow the steps to deploy using Inferless CLI.
### Clone the repository of the model
Let's begin by cloning the model repository:
```bash
git clone https://github.com/inferless/qwen2.5-vl-7b-instruct.git
```
### Deploy the Model
To deploy the model using Inferless CLI, execute the following command:
```bash
inferless deploy --gpu A100 --runtime inferless-runtime-config.yaml
```
**Explanation of the Command:**
* `--gpu A100`: Specifies the GPU type for deployment. Available options include `A10`, `A100`, and `T4`.
* `--runtime inferless-runtime-config.yaml`: Defines the runtime configuration file. If not specified, the default Inferless runtime is used.
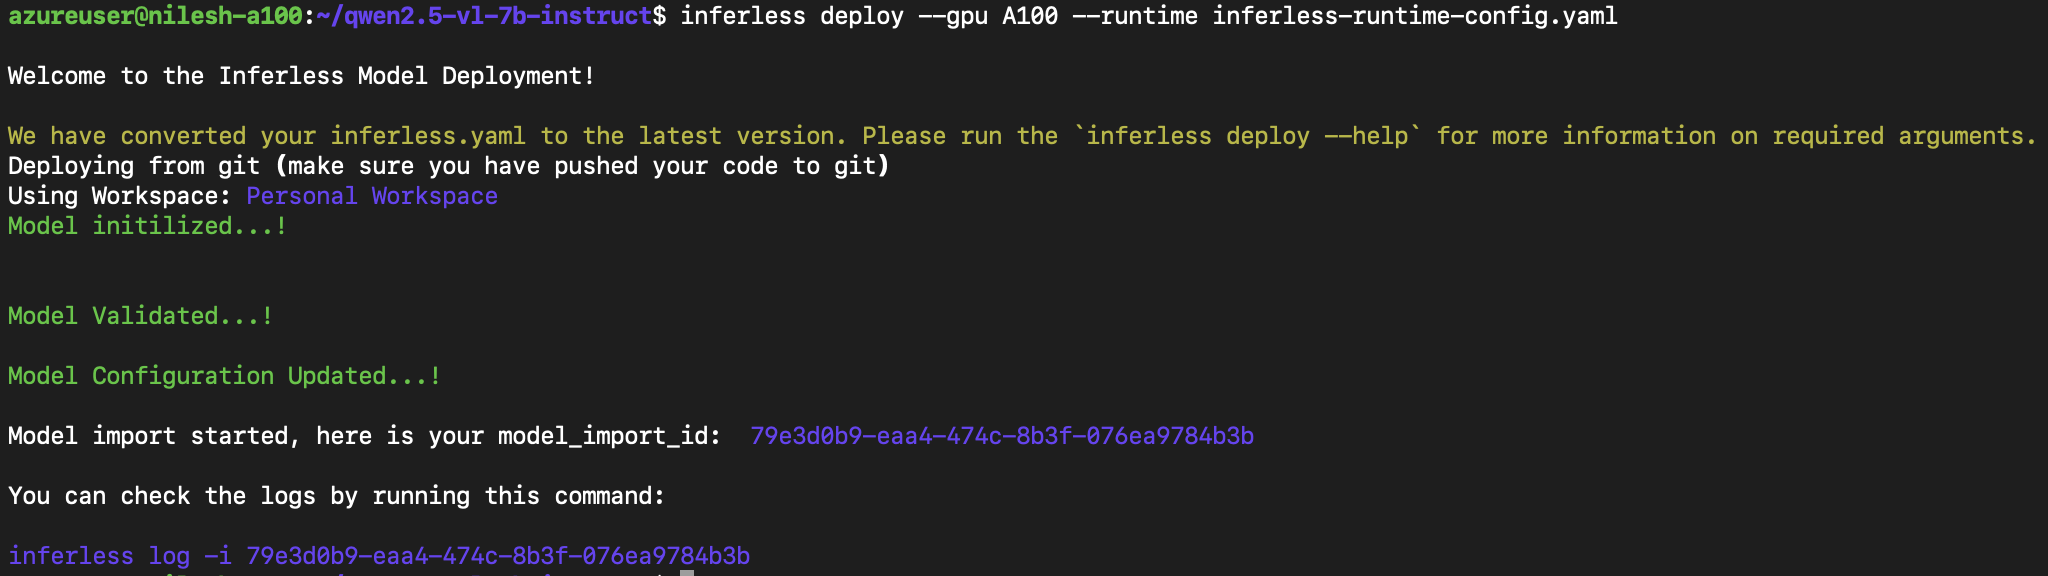 # Deploy Stable Cascade using Inferless
Source: https://docs.inferless.com/how-to-guides/deploy-stable-cascade-using-inferless
Stable Cascade distinguishes itself by operating within a significantly smaller latent space, offering faster inference and cost-effective training.
## Introduction
[Stable Cascade](https://huggingface.co/stabilityai/stable-cascade) is based on the [Würstchen](https://openreview.net/forum?id=gU58d5QeGv) architecture, differs from others like Stable Diffusion by operating in a smaller latent space. A smaller latent space means faster inference and cheaper training. For instance, Stable Cascade achieves a compression factor of 42, allowing encoding of a 1024x1024 image to 24x24 while retaining clear reconstructions. The text-conditional model is trained in this highly compressed latent space.
## Our Observations
We have deployed this model using A100 GPU and observed that the model took an average cold start time of `9.64 sec` and an average inference time of `3.02 sec` for image generation.
## Defining Dependencies
We are using the HuggingFace [Diffusers](https://github.com/huggingface/diffusers) library for the deployment.
## Constructing the GitHub/GitLab Template
Now quickly construct the GitHub/GitLab template, this process is mandatory and make sure you don't add any file named `model.py`
```
Stable-cascade/
├── app.py
├── inferless-runtime-config.yaml
├── inferless.yaml
└── input_schema.py
```
You can also add other files to this directory.
## Create the class for inference
In the [app.py](https://github.com/inferless/Stable-cascade/blob/main/app.py) we will define the class and import all the required functions
1. `def initialize`: In this function, you will initialize your model and define any `variable` that you want to use during inference.
2. `def infer`: This function gets called for every request that you send. Here you can define all the steps that are required for the inference. You can also pass custom values for inference through the `inputs` parameter.
3. `def finalize`: This function cleans up all the allocated memory.
```python
import torch
from diffusers import StableCascadeDecoderPipeline, StableCascadePriorPipeline
from io import BytesIO
import base64
import os
import inferless
from huggingface_hub import snapshot_download
app = inferless.Cls(gpu="A100")
class InferlessPythonModel:
@app.load
def initialize(self):
model_id_1 = "stabilityai/stable-cascade"
model_id_2 = "stabilityai/stable-cascade-prior"
snapshot_download(repo_id=model_id_1,allow_patterns=["*.safetensors"])
snapshot_download(repo_id=model_id_2,allow_patterns=["*.safetensors"])
self.prior = StableCascadePriorPipeline.from_pretrained(model_id_2, variant="bf16", torch_dtype=torch.bfloat16).to("cuda")
self.decoder = StableCascadeDecoderPipeline.from_pretrained(model_id_1, variant="bf16", torch_dtype=torch.float16).to("cuda")
@app.infer
def infer(self, inputs):
prompt = inputs["prompt"]
negative_prompt = inputs["negative_prompt"]
prior_output = self.prior(
prompt=prompt,
height=1024,
width=1024,
negative_prompt=negative_prompt,
guidance_scale=4.0,
num_images_per_prompt=1,
num_inference_steps=20)
decoder_output = self.decoder(
image_embeddings=prior_output.image_embeddings.to(torch.float16),
prompt=prompt,
negative_prompt=negative_prompt,
guidance_scale=0.0,
output_type="pil",
num_inference_steps=10
).images[0]
buff = BytesIO()
decoder_output.save(buff, format="JPEG")
img_str = base64.b64encode(buff.getvalue()).decode()
return { "generated_image_base64" : img_str }
def finalize(self):
self.pipe = None
```
## Create the Input Schema
We have to create a [`input_schema.py`](https://github.com/inferless/Stable-cascade/blob/main/input_schema.py) in your GitHub/Gitlab repository this will help us create the Input parameters. You can checkout our documentation on [Input / Output Schema](https://docs.inferless.com/model-import/input-output-schema).
For this tutorial, we have defined two parameters `prompt` and `negative_prompt` which is required during the API call. Now lets create the `input_schema.py`.
```JSON
INPUT_SCHEMA = {
"prompt": {
'datatype': 'STRING',
'required': True,
'shape': [1],
'example': ["Penguins having dinner"]
},
"negative_prompt": {
'datatype': 'STRING',
'required': True,
'shape': [1],
'example': ["low quality"]
}
}
```
## Creating the Custom Runtime
This is a mandatory step where we allow the users to upload their own custom runtime through [inferless-runtime-config.yaml](https://github.com/inferless/Stable-cascade/blob/main/inferless-runtime-config.yaml).
```
build:
cuda_version: "12.1.1"
system_packages:
- "libssl-dev"
- "libx11-6"
- "libxext6"
- "libgl1-mesa-glx"
python_packages:
- "torch==2.2.1"
- "accelerate==1.3.0"
- "diffusers==0.32.2"
- "transformers==4.48.3"
- "inferless-cli==2.0.9"
- "hf-transfer==0.1.9"
- "huggingface-hub==0.27.1"
```
## Test your model with Remote Run
You can use the `inferless remote-run`([installation guide here](https://docs.inferless.com/model-import/cli-import#cli-import)) command to test your model or any custom Python script in a remote GPU environment directly from your local machine. Make sure that you use `Python3.10` for seamless experience.
### Step 1: Add the Decorators and local entry point
To enable **Remote Run**, simply do the following:
1. Import the `inferless` library and initialize `Cls(gpu="A100")`. The available GPU options are `T4`, `A10` and `A100`.
2. Decorated the `initialize` and `infer` functions with `@app.load` and `@app.infer` respectively.
3. Create the Local Entry Point by decorating a function (for example, `my_local_entry`) with `@inferless.local_entry_point`.
Within this function, instantiate your model class, convert any incoming parameters into a `RequestObjects` object, and invoke the model's `infer` method.
```python
import torch
from diffusers import StableCascadeDecoderPipeline, StableCascadePriorPipeline
from io import BytesIO
import base64
import os
import inferless
from huggingface_hub import snapshot_download
from pydantic import BaseModel, Field
from typing import Optional
@inferless.request
class RequestObjects(BaseModel):
prompt: str = Field(default="Penguins having dinner")
negative_prompt: str = Field(default="low quality")
@inferless.response
class ResponseObjects(BaseModel):
generated_image_base64: str = Field(default='Test output')
app = inferless.Cls(gpu="A100")
class InferlessPythonModel:
@app.load
def initialize(self):
model_id_1 = "stabilityai/stable-cascade"
model_id_2 = "stabilityai/stable-cascade-prior"
snapshot_download(repo_id=model_id_1,allow_patterns=["*.safetensors"])
snapshot_download(repo_id=model_id_2,allow_patterns=["*.safetensors"])
self.prior = StableCascadePriorPipeline.from_pretrained(model_id_2, variant="bf16", torch_dtype=torch.bfloat16).to("cuda")
self.decoder = StableCascadeDecoderPipeline.from_pretrained(model_id_1, variant="bf16", torch_dtype=torch.float16).to("cuda")
@app.infer
def infer(self, request: RequestObjects) -> ResponseObjects:
prior_output = self.prior(
prompt=request.prompt,
height=1024,
width=1024,
negative_prompt=request.negative_prompt,
guidance_scale=4.0,
num_images_per_prompt=1,
num_inference_steps=20)
decoder_output = self.decoder(
image_embeddings=prior_output.image_embeddings.to(torch.float16),
prompt=request.prompt,
negative_prompt=request.negative_prompt,
guidance_scale=0.0,
output_type="pil",
num_inference_steps=10
).images[0]
buff = BytesIO()
decoder_output.save(buff, format="JPEG")
img_str = base64.b64encode(buff.getvalue()).decode()
generateObject = ResponseObjects(generated_image_base64 = img_str)
return generateObject
def finalize(self):
self.pipe = None
@inferless.local_entry_point
def my_local_entry(dynamic_params):
request_objects = RequestObjects(**dynamic_params)
model_instance = InferlessPythonModel()
return model_instance.infer(request_objects)
```
### Step 2: Run with Remote GPU
From your local terminal, navigate to the folder containing your `app.py` and your `inferless-runtime-config.yaml` and run:
```bash
inferless remote-run app.py -c inferless-runtime-config.yaml --prompt "Penguins having dinner" --negative_prompt "low quality"
```
You can pass the other input parameters in the same way as long as your code expects them in the `inputs` dictionary.
If you want to exclude certain files or directories from being uploaded, use the `--exclude` or `-e` flag.
## Method A: Deploying the model on Inferless Platform
Inferless supports multiple ways of [importing your model](https://docs.inferless.com/model-import/file-structure-req/file-structure-requirements). For this tutorial, we will use GitHub.
### Step 1: Login to the inferless dashboard can click on Import model button
Navigate to your desired workspace in Inferless and Click on `Add a custom model` button that you see on the top right. An import wizard will open up.
### Step 2: Follow the UI to complete the model Import
* Select the GitHub/GitLab Integration option to connect your source code repository with the deployment environment.
* Navigate to the specific GitHub repository that contains your model's code. Here, you will need to identify and enter the name of the model you wish to import.
* Choose the appropriate type of machine that suits your model's requirements. Additionally, specify the minimum and maximum number of replicas to define the scalability range for deploying your model.
* Optionally, you have the option to enable automatic build and deployment. This feature triggers a new deployment automatically whenever there is a new code push to your repository.
* If your model requires additional software packages, configure the Custom Runtime settings by including necessary pip or apt packages. Also, set up environment variables such as Inference Timeout, Container Concurrency, and Scale Down Timeout to tailor the runtime environment according to your needs.
* Wait for the validation process to complete, ensuring that all settings are correct and functional. Once validation is successful, click on the "Import" button to finalize the import of your model.
### Step 3: Wait for the model build to complete usually takes \~5-10 minutes
### Step 4: Use the APIs to call the model
Once the model is in 'Active' status you can click on the 'API' page to call the model
### Here is the Demo:
# Deploy Stable Cascade using Inferless
Source: https://docs.inferless.com/how-to-guides/deploy-stable-cascade-using-inferless
Stable Cascade distinguishes itself by operating within a significantly smaller latent space, offering faster inference and cost-effective training.
## Introduction
[Stable Cascade](https://huggingface.co/stabilityai/stable-cascade) is based on the [Würstchen](https://openreview.net/forum?id=gU58d5QeGv) architecture, differs from others like Stable Diffusion by operating in a smaller latent space. A smaller latent space means faster inference and cheaper training. For instance, Stable Cascade achieves a compression factor of 42, allowing encoding of a 1024x1024 image to 24x24 while retaining clear reconstructions. The text-conditional model is trained in this highly compressed latent space.
## Our Observations
We have deployed this model using A100 GPU and observed that the model took an average cold start time of `9.64 sec` and an average inference time of `3.02 sec` for image generation.
## Defining Dependencies
We are using the HuggingFace [Diffusers](https://github.com/huggingface/diffusers) library for the deployment.
## Constructing the GitHub/GitLab Template
Now quickly construct the GitHub/GitLab template, this process is mandatory and make sure you don't add any file named `model.py`
```
Stable-cascade/
├── app.py
├── inferless-runtime-config.yaml
├── inferless.yaml
└── input_schema.py
```
You can also add other files to this directory.
## Create the class for inference
In the [app.py](https://github.com/inferless/Stable-cascade/blob/main/app.py) we will define the class and import all the required functions
1. `def initialize`: In this function, you will initialize your model and define any `variable` that you want to use during inference.
2. `def infer`: This function gets called for every request that you send. Here you can define all the steps that are required for the inference. You can also pass custom values for inference through the `inputs` parameter.
3. `def finalize`: This function cleans up all the allocated memory.
```python
import torch
from diffusers import StableCascadeDecoderPipeline, StableCascadePriorPipeline
from io import BytesIO
import base64
import os
import inferless
from huggingface_hub import snapshot_download
app = inferless.Cls(gpu="A100")
class InferlessPythonModel:
@app.load
def initialize(self):
model_id_1 = "stabilityai/stable-cascade"
model_id_2 = "stabilityai/stable-cascade-prior"
snapshot_download(repo_id=model_id_1,allow_patterns=["*.safetensors"])
snapshot_download(repo_id=model_id_2,allow_patterns=["*.safetensors"])
self.prior = StableCascadePriorPipeline.from_pretrained(model_id_2, variant="bf16", torch_dtype=torch.bfloat16).to("cuda")
self.decoder = StableCascadeDecoderPipeline.from_pretrained(model_id_1, variant="bf16", torch_dtype=torch.float16).to("cuda")
@app.infer
def infer(self, inputs):
prompt = inputs["prompt"]
negative_prompt = inputs["negative_prompt"]
prior_output = self.prior(
prompt=prompt,
height=1024,
width=1024,
negative_prompt=negative_prompt,
guidance_scale=4.0,
num_images_per_prompt=1,
num_inference_steps=20)
decoder_output = self.decoder(
image_embeddings=prior_output.image_embeddings.to(torch.float16),
prompt=prompt,
negative_prompt=negative_prompt,
guidance_scale=0.0,
output_type="pil",
num_inference_steps=10
).images[0]
buff = BytesIO()
decoder_output.save(buff, format="JPEG")
img_str = base64.b64encode(buff.getvalue()).decode()
return { "generated_image_base64" : img_str }
def finalize(self):
self.pipe = None
```
## Create the Input Schema
We have to create a [`input_schema.py`](https://github.com/inferless/Stable-cascade/blob/main/input_schema.py) in your GitHub/Gitlab repository this will help us create the Input parameters. You can checkout our documentation on [Input / Output Schema](https://docs.inferless.com/model-import/input-output-schema).
For this tutorial, we have defined two parameters `prompt` and `negative_prompt` which is required during the API call. Now lets create the `input_schema.py`.
```JSON
INPUT_SCHEMA = {
"prompt": {
'datatype': 'STRING',
'required': True,
'shape': [1],
'example': ["Penguins having dinner"]
},
"negative_prompt": {
'datatype': 'STRING',
'required': True,
'shape': [1],
'example': ["low quality"]
}
}
```
## Creating the Custom Runtime
This is a mandatory step where we allow the users to upload their own custom runtime through [inferless-runtime-config.yaml](https://github.com/inferless/Stable-cascade/blob/main/inferless-runtime-config.yaml).
```
build:
cuda_version: "12.1.1"
system_packages:
- "libssl-dev"
- "libx11-6"
- "libxext6"
- "libgl1-mesa-glx"
python_packages:
- "torch==2.2.1"
- "accelerate==1.3.0"
- "diffusers==0.32.2"
- "transformers==4.48.3"
- "inferless-cli==2.0.9"
- "hf-transfer==0.1.9"
- "huggingface-hub==0.27.1"
```
## Test your model with Remote Run
You can use the `inferless remote-run`([installation guide here](https://docs.inferless.com/model-import/cli-import#cli-import)) command to test your model or any custom Python script in a remote GPU environment directly from your local machine. Make sure that you use `Python3.10` for seamless experience.
### Step 1: Add the Decorators and local entry point
To enable **Remote Run**, simply do the following:
1. Import the `inferless` library and initialize `Cls(gpu="A100")`. The available GPU options are `T4`, `A10` and `A100`.
2. Decorated the `initialize` and `infer` functions with `@app.load` and `@app.infer` respectively.
3. Create the Local Entry Point by decorating a function (for example, `my_local_entry`) with `@inferless.local_entry_point`.
Within this function, instantiate your model class, convert any incoming parameters into a `RequestObjects` object, and invoke the model's `infer` method.
```python
import torch
from diffusers import StableCascadeDecoderPipeline, StableCascadePriorPipeline
from io import BytesIO
import base64
import os
import inferless
from huggingface_hub import snapshot_download
from pydantic import BaseModel, Field
from typing import Optional
@inferless.request
class RequestObjects(BaseModel):
prompt: str = Field(default="Penguins having dinner")
negative_prompt: str = Field(default="low quality")
@inferless.response
class ResponseObjects(BaseModel):
generated_image_base64: str = Field(default='Test output')
app = inferless.Cls(gpu="A100")
class InferlessPythonModel:
@app.load
def initialize(self):
model_id_1 = "stabilityai/stable-cascade"
model_id_2 = "stabilityai/stable-cascade-prior"
snapshot_download(repo_id=model_id_1,allow_patterns=["*.safetensors"])
snapshot_download(repo_id=model_id_2,allow_patterns=["*.safetensors"])
self.prior = StableCascadePriorPipeline.from_pretrained(model_id_2, variant="bf16", torch_dtype=torch.bfloat16).to("cuda")
self.decoder = StableCascadeDecoderPipeline.from_pretrained(model_id_1, variant="bf16", torch_dtype=torch.float16).to("cuda")
@app.infer
def infer(self, request: RequestObjects) -> ResponseObjects:
prior_output = self.prior(
prompt=request.prompt,
height=1024,
width=1024,
negative_prompt=request.negative_prompt,
guidance_scale=4.0,
num_images_per_prompt=1,
num_inference_steps=20)
decoder_output = self.decoder(
image_embeddings=prior_output.image_embeddings.to(torch.float16),
prompt=request.prompt,
negative_prompt=request.negative_prompt,
guidance_scale=0.0,
output_type="pil",
num_inference_steps=10
).images[0]
buff = BytesIO()
decoder_output.save(buff, format="JPEG")
img_str = base64.b64encode(buff.getvalue()).decode()
generateObject = ResponseObjects(generated_image_base64 = img_str)
return generateObject
def finalize(self):
self.pipe = None
@inferless.local_entry_point
def my_local_entry(dynamic_params):
request_objects = RequestObjects(**dynamic_params)
model_instance = InferlessPythonModel()
return model_instance.infer(request_objects)
```
### Step 2: Run with Remote GPU
From your local terminal, navigate to the folder containing your `app.py` and your `inferless-runtime-config.yaml` and run:
```bash
inferless remote-run app.py -c inferless-runtime-config.yaml --prompt "Penguins having dinner" --negative_prompt "low quality"
```
You can pass the other input parameters in the same way as long as your code expects them in the `inputs` dictionary.
If you want to exclude certain files or directories from being uploaded, use the `--exclude` or `-e` flag.
## Method A: Deploying the model on Inferless Platform
Inferless supports multiple ways of [importing your model](https://docs.inferless.com/model-import/file-structure-req/file-structure-requirements). For this tutorial, we will use GitHub.
### Step 1: Login to the inferless dashboard can click on Import model button
Navigate to your desired workspace in Inferless and Click on `Add a custom model` button that you see on the top right. An import wizard will open up.
### Step 2: Follow the UI to complete the model Import
* Select the GitHub/GitLab Integration option to connect your source code repository with the deployment environment.
* Navigate to the specific GitHub repository that contains your model's code. Here, you will need to identify and enter the name of the model you wish to import.
* Choose the appropriate type of machine that suits your model's requirements. Additionally, specify the minimum and maximum number of replicas to define the scalability range for deploying your model.
* Optionally, you have the option to enable automatic build and deployment. This feature triggers a new deployment automatically whenever there is a new code push to your repository.
* If your model requires additional software packages, configure the Custom Runtime settings by including necessary pip or apt packages. Also, set up environment variables such as Inference Timeout, Container Concurrency, and Scale Down Timeout to tailor the runtime environment according to your needs.
* Wait for the validation process to complete, ensuring that all settings are correct and functional. Once validation is successful, click on the "Import" button to finalize the import of your model.
### Step 3: Wait for the model build to complete usually takes \~5-10 minutes
### Step 4: Use the APIs to call the model
Once the model is in 'Active' status you can click on the 'API' page to call the model
### Here is the Demo:
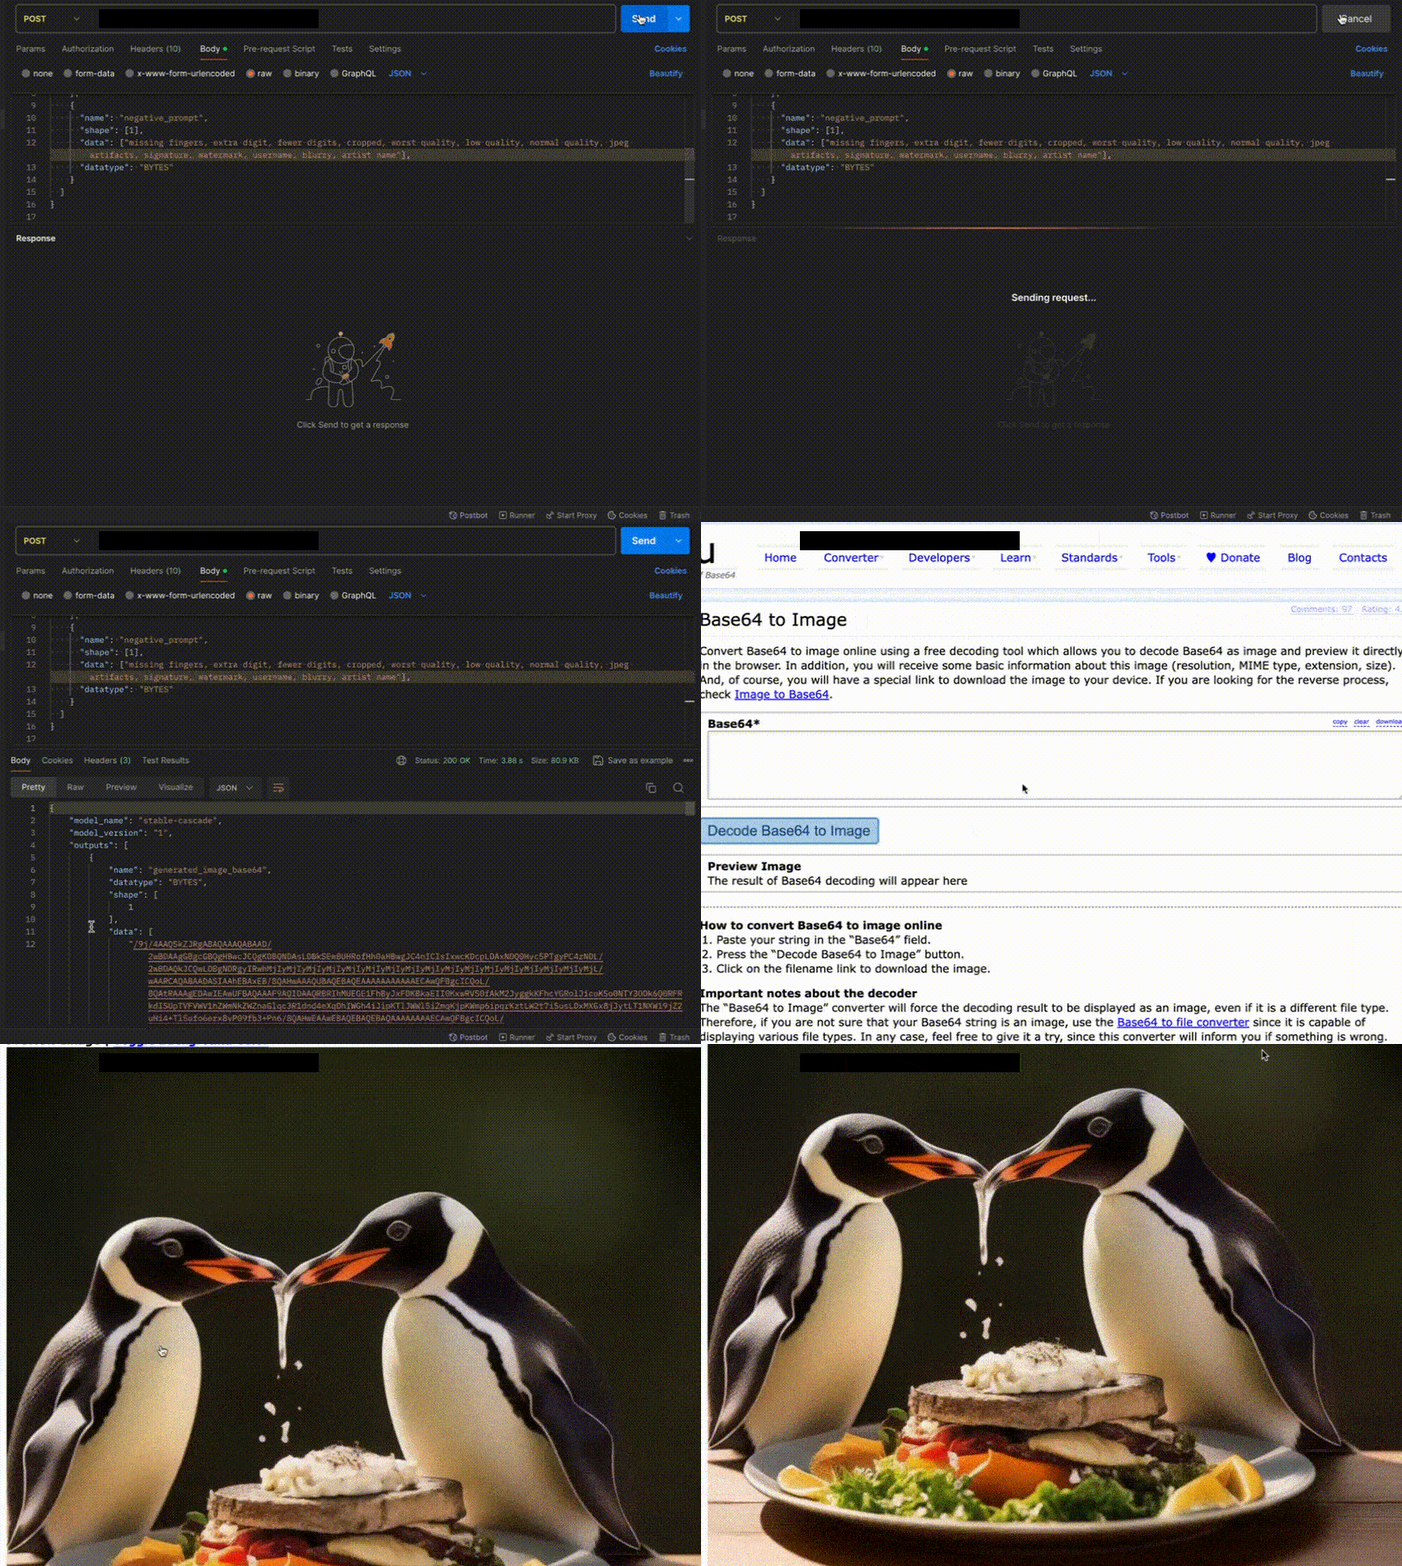 ## Method B: Deploying the model on Inferless CLI
Inferless allows you to deploy your model using Inferless-CLI. Follow the steps to deploy using Inferless CLI.
### Clone the repository of the model
Let's begin by cloning the model repository:
```bash
git clone https://github.com/inferless/Stable-cascade.git
```
### Deploy the Model
To deploy the model using Inferless CLI, execute the following command:
```bash
inferless deploy --gpu A100 --runtime inferless-runtime-config.yaml
```
**Explanation of the Command:**
* `--gpu A100`: Specifies the GPU type for deployment. Available options include `A10`, `A100`, and `T4`.
* `--runtime inferless-runtime-config.yaml`: Defines the runtime configuration file. If not specified, the default Inferless runtime is used.
# Deploy Stable Diffusion 3 using Inferless
Source: https://docs.inferless.com/how-to-guides/deploy-stable-diffusion-3-using-inferless
Stability AI has released Stable Diffusion 3, an advanced text-to-image generation model with significant improvements over its predecessors. This new version features a range of models from 800M to 8B parameters, providing users with scalable options to suit their needs.
## Introduction
[Stable Diffusion 3](https://stability.ai/news/stable-diffusion-3) sets a new benchmark in image generation, delivering unparalleled image quality with enhanced efficiency. Utilizing a sophisticated Multimodal Diffusion Transformer (MMDiT) architecture, it significantly reduces noise and improves clarity. The model incorporates three advanced text encoders (OpenCLIP-ViT/G, CLIP-ViT/L and T5-xxl) to better understand and execute complex prompts. With innovative sampling methods like Rectified Flow, Stable Diffusion 3 ensures a streamlined path from noise to a detailed image, making it a powerful tool for creating high-fidelity images efficiently.
## Our Observations
We have deployed this model using A100 GPU and observed that the model took an average cold start time of `9.9 sec` and an average inference time of `4.4 sec` for `28`steps image generation.
## Defining Dependencies
We are using the HuggingFace [Diffusers](https://github.com/huggingface/diffusers) library for the deployment.
## Constructing the GitHub/GitLab Template
Now quickly construct the GitHub/GitLab template, this process is mandatory and make sure you don't add any file named `model.py`
```
Stable-diffusion-3/
├── app.py
├── inferless-runtime-config.yaml
├── inferless.yaml
└── input_schema.py
```
You can also add other files to this directory.
## Create the class for inference
In the [app.py](https://github.com/inferless/Stable-diffusion-3/blob/main/app.py) we will define the class and import all the required functions
1. `def initialize`: In this function, you will initialize your model and define any `variable` that you want to use during inference. We are using `huggingface access token` which will help us to download the gated model.
2. `def infer`: This function gets called for every request that you send. Here you can define all the steps that are required for the inference. You can also pass custom values for inference through the `inputs` parameter.
3. `def finalize`: This function cleans up all the allocated memory.
```python
import os
os.environ["HF_HUB_ENABLE_HF_TRANSFER"]='1'
from huggingface_hub import snapshot_download
from diffusers import StableDiffusion3Pipeline
import torch
from io import BytesIO
import base64
import inferless
app = inferless.Cls(gpu="A100")
class InferlessPythonModel:
@app.load
def initialize(self):
model_id = "stabilityai/stable-diffusion-3-medium-diffusers"
snapshot_download(repo_id=model_id,allow_patterns=["*.safetensors"])
HF_TOKEN = os.getenv("HUGGINGFACE_AUTH_TOKEN") # Access Hugging Face token from environment variable
self.pipe = StableDiffusion3Pipeline.from_pretrained(model_id, torch_dtype=torch.float16,token=HF_TOKEN)
self.pipe = self.pipe.to("cuda")
@app.infer
def infer(self, inputs):
prompt = inputs["prompt"]
negative_prompt = inputs["negative_prompt"]
inference_steps = str(inputs["num_inference_steps"])
guidance_scale = float(inputs["guidance_scale"])
image = self.pipe(prompt,negative_prompt=negative_prompt,num_inference_steps=inference_steps,guidance_scale=guidance_scale).images[0]
buff = BytesIO()
image.save(buff, format="JPEG")
img_str = base64.b64encode(buff.getvalue()).decode()
return {"generated_image_base64" : img_str }
def finalize(self):
self.pipe = None
```
## Create the Input Schema
We have to create a [`input_schema.py`](https://github.com/inferless/Stable-diffusion-3/blob/main/input_schema.py) in the GitHub/Gitlab repository this will help us create the Input parameters. You can checkout our documentation on [Input / Output Schema](https://docs.inferless.com/model-import/input-output-schema).
For this tutorial, we have defined four parameters `prompt`, `negative_prompt`, `num_inference_steps` and `guidance_scale` which are required during the API call. Now lets create the `input_schema.py`.
```JSON
INPUT_SCHEMA = {
"prompt": {
'datatype': 'STRING',
'required': True,
'shape': [1],
'example': ["a living room, bright modern Scandinavian style house, large windows, magazine photoshoot, 8k, studio lighting"]
},
"negative_prompt": {
'datatype': 'STRING',
'required': True,
'shape': [1],
'example': [ "low quality"]
}
,
"num_inference_steps": {
'datatype': 'INT8',
'required': True,
'shape': [1],
'example': [28]
}
,
"guidance_scale": {
'datatype': 'FP32',
'required': True,
'shape': [1],
'example': [7.0]
}
}
```
## Creating the Custom Runtime
This is a mandatory step where we allow the users to upload their own custom runtime through [inferless-runtime-config.yaml](https://github.com/inferless/Stable-diffusion-3/blob/main/inferless-runtime-config.yaml).
```
build:
cuda_version: "12.1.1"
python_packages:
- "accelerate==0.31.0"
- "diffusers==0.29.1"
- "transformers==4.41.2"
- "torch==2.3.0"
- "sentencepiece==0.2.0"
- "protobuf==3.20.0"
- "inferless-cli==2.0.9"
- "hf-transfer==0.1.9"
- "huggingface-hub==0.27.1"
```
## Test your model with Remote Run
You can use the `inferless remote-run`([installation guide here](https://docs.inferless.com/model-import/cli-import#cli-import)) command to test your model or any custom Python script in a remote GPU environment directly from your local machine. Make sure that you use `Python3.10` for seamless experience.
### Step 1: Add the Decorators and local entry point
To enable **Remote Run**, simply do the following:
1. Import the `inferless` library and initialize `Cls(gpu="A10")`. The available GPU options are `T4`, `A10` and `A100`.
2. Decorated the `initialize` and `infer` functions with `@app.load` and `@app.infer` respectively.
3. Create the Local Entry Point by decorating a function (for example, `my_local_entry`) with `@inferless.local_entry_point`.
Within this function, instantiate your model class, convert any incoming parameters into a `RequestObjects` object, and invoke the model's `infer` method.
```python
from diffusers import StableDiffusion3Pipeline
import torch
from io import BytesIO
import base64
import os
import inferless
from pydantic import BaseModel, Field
from typing import Optional
@inferless.request
class RequestObjects(BaseModel):
prompt: str = Field(default="a living room, bright modern Scandinavian style house, large windows, magazine photoshoot, 8k, studio lighting")
negative_prompt: str = Field(default="low quality")
inference_steps: Optional[int] = 28
guidance_scale: Optional[float] = 7.0
@inferless.response
class ResponseObjects(BaseModel):
generated_image_base64: str = Field(default='Test output')
app = inferless.Cls(gpu="A100")
class InferlessPythonModel:
@app.load
def initialize(self):
HF_TOKEN = os.getenv("HUGGINGFACE_AUTH_TOKEN") # Access Hugging Face token from environment variable
self.pipe = StableDiffusion3Pipeline.from_pretrained("stabilityai/stable-diffusion-3-medium-diffusers", torch_dtype=torch.float16,token=HF_TOKEN).to("cuda")
@app.infer
def infer(self, request: RequestObjects) -> ResponseObjects:
image = self.pipe(request.prompt,negative_prompt=request.negative_prompt,num_inference_steps=request.inference_steps,guidance_scale=request.guidance_scale).images[0]
buff = BytesIO()
image.save(buff, format="JPEG")
img_str = base64.b64encode(buff.getvalue()).decode()
generateObject = ResponseObjects(generated_image_base64 = img_str)
return generateObject
def finalize(self):
self.pipe = None
@inferless.local_entry_point
def my_local_entry(dynamic_params):
request_objects = RequestObjects(**dynamic_params)
model_instance = InferlessPythonModel()
return model_instance.infer(request_objects)
```
### Step 2: Run with Remote GPU
From your local terminal, navigate to the folder containing your `app.py` and your `inferless-runtime-config.yaml` and run:
```bash
inferless remote-run app.py -c inferless-runtime-config.yaml --prompt "a living room, bright modern Scandinavian style house, large windows, magazine photoshoot, 8k, studio lighting" --negative_prompt "low quality" --num_inference_steps 28 --guidance_scale 7.0
```
If you want to exclude certain files or directories from being uploaded, use the `--exclude` or `-e` flag.
## Method A: Deploying the model on Inferless Platform
Inferless supports multiple ways of [importing your model](https://docs.inferless.com/model-import/file-structure-req/file-structure-requirements). For this tutorial, we will use GitHub.
### Step 1: Login to the inferless dashboard can click on Import model button
Navigate to your desired workspace in Inferless and Click on `Add a custom model` button that you see on the top right. An import wizard will open up.
### Step 2: Follow the UI to complete the model Import
* Select the GitHub/GitLab Integration option to connect your source code repository with the deployment environment.
* Navigate to the specific GitHub repository that contains your model's code. Here, you will need to identify and enter the name of the model you wish to import.
* Choose the appropriate type of machine that suits your model's requirements. Additionally, specify the minimum and maximum number of replicas to define the scalability range for deploying your model.
* Optionally, you have the option to enable automatic build and deployment. This feature triggers a new deployment automatically whenever there is a new code push to your repository.
* If your model requires additional software packages, configure the Custom Runtime settings by including necessary pip or apt packages. Also, set up environment variables such as Inference Timeout, Container Concurrency, and Scale Down Timeout to tailor the runtime environment according to your needs.
* Wait for the validation process to complete, ensuring that all settings are correct and functional. Once validation is successful, click on the "Import" button to finalize the import of your model.
### Step 3: Wait for the model build to complete usually takes \~5-10 minutes
### Step 4: Use the APIs to call the model
Once the model is in 'Active' status you can click on the 'API' page to call the model
### Here is the Demo:
## Method B: Deploying the model on Inferless CLI
Inferless allows you to deploy your model using Inferless-CLI. Follow the steps to deploy using Inferless CLI.
### Clone the repository of the model
Let's begin by cloning the model repository:
```bash
git clone https://github.com/inferless/Stable-cascade.git
```
### Deploy the Model
To deploy the model using Inferless CLI, execute the following command:
```bash
inferless deploy --gpu A100 --runtime inferless-runtime-config.yaml
```
**Explanation of the Command:**
* `--gpu A100`: Specifies the GPU type for deployment. Available options include `A10`, `A100`, and `T4`.
* `--runtime inferless-runtime-config.yaml`: Defines the runtime configuration file. If not specified, the default Inferless runtime is used.
# Deploy Stable Diffusion 3 using Inferless
Source: https://docs.inferless.com/how-to-guides/deploy-stable-diffusion-3-using-inferless
Stability AI has released Stable Diffusion 3, an advanced text-to-image generation model with significant improvements over its predecessors. This new version features a range of models from 800M to 8B parameters, providing users with scalable options to suit their needs.
## Introduction
[Stable Diffusion 3](https://stability.ai/news/stable-diffusion-3) sets a new benchmark in image generation, delivering unparalleled image quality with enhanced efficiency. Utilizing a sophisticated Multimodal Diffusion Transformer (MMDiT) architecture, it significantly reduces noise and improves clarity. The model incorporates three advanced text encoders (OpenCLIP-ViT/G, CLIP-ViT/L and T5-xxl) to better understand and execute complex prompts. With innovative sampling methods like Rectified Flow, Stable Diffusion 3 ensures a streamlined path from noise to a detailed image, making it a powerful tool for creating high-fidelity images efficiently.
## Our Observations
We have deployed this model using A100 GPU and observed that the model took an average cold start time of `9.9 sec` and an average inference time of `4.4 sec` for `28`steps image generation.
## Defining Dependencies
We are using the HuggingFace [Diffusers](https://github.com/huggingface/diffusers) library for the deployment.
## Constructing the GitHub/GitLab Template
Now quickly construct the GitHub/GitLab template, this process is mandatory and make sure you don't add any file named `model.py`
```
Stable-diffusion-3/
├── app.py
├── inferless-runtime-config.yaml
├── inferless.yaml
└── input_schema.py
```
You can also add other files to this directory.
## Create the class for inference
In the [app.py](https://github.com/inferless/Stable-diffusion-3/blob/main/app.py) we will define the class and import all the required functions
1. `def initialize`: In this function, you will initialize your model and define any `variable` that you want to use during inference. We are using `huggingface access token` which will help us to download the gated model.
2. `def infer`: This function gets called for every request that you send. Here you can define all the steps that are required for the inference. You can also pass custom values for inference through the `inputs` parameter.
3. `def finalize`: This function cleans up all the allocated memory.
```python
import os
os.environ["HF_HUB_ENABLE_HF_TRANSFER"]='1'
from huggingface_hub import snapshot_download
from diffusers import StableDiffusion3Pipeline
import torch
from io import BytesIO
import base64
import inferless
app = inferless.Cls(gpu="A100")
class InferlessPythonModel:
@app.load
def initialize(self):
model_id = "stabilityai/stable-diffusion-3-medium-diffusers"
snapshot_download(repo_id=model_id,allow_patterns=["*.safetensors"])
HF_TOKEN = os.getenv("HUGGINGFACE_AUTH_TOKEN") # Access Hugging Face token from environment variable
self.pipe = StableDiffusion3Pipeline.from_pretrained(model_id, torch_dtype=torch.float16,token=HF_TOKEN)
self.pipe = self.pipe.to("cuda")
@app.infer
def infer(self, inputs):
prompt = inputs["prompt"]
negative_prompt = inputs["negative_prompt"]
inference_steps = str(inputs["num_inference_steps"])
guidance_scale = float(inputs["guidance_scale"])
image = self.pipe(prompt,negative_prompt=negative_prompt,num_inference_steps=inference_steps,guidance_scale=guidance_scale).images[0]
buff = BytesIO()
image.save(buff, format="JPEG")
img_str = base64.b64encode(buff.getvalue()).decode()
return {"generated_image_base64" : img_str }
def finalize(self):
self.pipe = None
```
## Create the Input Schema
We have to create a [`input_schema.py`](https://github.com/inferless/Stable-diffusion-3/blob/main/input_schema.py) in the GitHub/Gitlab repository this will help us create the Input parameters. You can checkout our documentation on [Input / Output Schema](https://docs.inferless.com/model-import/input-output-schema).
For this tutorial, we have defined four parameters `prompt`, `negative_prompt`, `num_inference_steps` and `guidance_scale` which are required during the API call. Now lets create the `input_schema.py`.
```JSON
INPUT_SCHEMA = {
"prompt": {
'datatype': 'STRING',
'required': True,
'shape': [1],
'example': ["a living room, bright modern Scandinavian style house, large windows, magazine photoshoot, 8k, studio lighting"]
},
"negative_prompt": {
'datatype': 'STRING',
'required': True,
'shape': [1],
'example': [ "low quality"]
}
,
"num_inference_steps": {
'datatype': 'INT8',
'required': True,
'shape': [1],
'example': [28]
}
,
"guidance_scale": {
'datatype': 'FP32',
'required': True,
'shape': [1],
'example': [7.0]
}
}
```
## Creating the Custom Runtime
This is a mandatory step where we allow the users to upload their own custom runtime through [inferless-runtime-config.yaml](https://github.com/inferless/Stable-diffusion-3/blob/main/inferless-runtime-config.yaml).
```
build:
cuda_version: "12.1.1"
python_packages:
- "accelerate==0.31.0"
- "diffusers==0.29.1"
- "transformers==4.41.2"
- "torch==2.3.0"
- "sentencepiece==0.2.0"
- "protobuf==3.20.0"
- "inferless-cli==2.0.9"
- "hf-transfer==0.1.9"
- "huggingface-hub==0.27.1"
```
## Test your model with Remote Run
You can use the `inferless remote-run`([installation guide here](https://docs.inferless.com/model-import/cli-import#cli-import)) command to test your model or any custom Python script in a remote GPU environment directly from your local machine. Make sure that you use `Python3.10` for seamless experience.
### Step 1: Add the Decorators and local entry point
To enable **Remote Run**, simply do the following:
1. Import the `inferless` library and initialize `Cls(gpu="A10")`. The available GPU options are `T4`, `A10` and `A100`.
2. Decorated the `initialize` and `infer` functions with `@app.load` and `@app.infer` respectively.
3. Create the Local Entry Point by decorating a function (for example, `my_local_entry`) with `@inferless.local_entry_point`.
Within this function, instantiate your model class, convert any incoming parameters into a `RequestObjects` object, and invoke the model's `infer` method.
```python
from diffusers import StableDiffusion3Pipeline
import torch
from io import BytesIO
import base64
import os
import inferless
from pydantic import BaseModel, Field
from typing import Optional
@inferless.request
class RequestObjects(BaseModel):
prompt: str = Field(default="a living room, bright modern Scandinavian style house, large windows, magazine photoshoot, 8k, studio lighting")
negative_prompt: str = Field(default="low quality")
inference_steps: Optional[int] = 28
guidance_scale: Optional[float] = 7.0
@inferless.response
class ResponseObjects(BaseModel):
generated_image_base64: str = Field(default='Test output')
app = inferless.Cls(gpu="A100")
class InferlessPythonModel:
@app.load
def initialize(self):
HF_TOKEN = os.getenv("HUGGINGFACE_AUTH_TOKEN") # Access Hugging Face token from environment variable
self.pipe = StableDiffusion3Pipeline.from_pretrained("stabilityai/stable-diffusion-3-medium-diffusers", torch_dtype=torch.float16,token=HF_TOKEN).to("cuda")
@app.infer
def infer(self, request: RequestObjects) -> ResponseObjects:
image = self.pipe(request.prompt,negative_prompt=request.negative_prompt,num_inference_steps=request.inference_steps,guidance_scale=request.guidance_scale).images[0]
buff = BytesIO()
image.save(buff, format="JPEG")
img_str = base64.b64encode(buff.getvalue()).decode()
generateObject = ResponseObjects(generated_image_base64 = img_str)
return generateObject
def finalize(self):
self.pipe = None
@inferless.local_entry_point
def my_local_entry(dynamic_params):
request_objects = RequestObjects(**dynamic_params)
model_instance = InferlessPythonModel()
return model_instance.infer(request_objects)
```
### Step 2: Run with Remote GPU
From your local terminal, navigate to the folder containing your `app.py` and your `inferless-runtime-config.yaml` and run:
```bash
inferless remote-run app.py -c inferless-runtime-config.yaml --prompt "a living room, bright modern Scandinavian style house, large windows, magazine photoshoot, 8k, studio lighting" --negative_prompt "low quality" --num_inference_steps 28 --guidance_scale 7.0
```
If you want to exclude certain files or directories from being uploaded, use the `--exclude` or `-e` flag.
## Method A: Deploying the model on Inferless Platform
Inferless supports multiple ways of [importing your model](https://docs.inferless.com/model-import/file-structure-req/file-structure-requirements). For this tutorial, we will use GitHub.
### Step 1: Login to the inferless dashboard can click on Import model button
Navigate to your desired workspace in Inferless and Click on `Add a custom model` button that you see on the top right. An import wizard will open up.
### Step 2: Follow the UI to complete the model Import
* Select the GitHub/GitLab Integration option to connect your source code repository with the deployment environment.
* Navigate to the specific GitHub repository that contains your model's code. Here, you will need to identify and enter the name of the model you wish to import.
* Choose the appropriate type of machine that suits your model's requirements. Additionally, specify the minimum and maximum number of replicas to define the scalability range for deploying your model.
* Optionally, you have the option to enable automatic build and deployment. This feature triggers a new deployment automatically whenever there is a new code push to your repository.
* If your model requires additional software packages, configure the Custom Runtime settings by including necessary pip or apt packages. Also, set up environment variables such as Inference Timeout, Container Concurrency, and Scale Down Timeout to tailor the runtime environment according to your needs.
* Wait for the validation process to complete, ensuring that all settings are correct and functional. Once validation is successful, click on the "Import" button to finalize the import of your model.
### Step 3: Wait for the model build to complete usually takes \~5-10 minutes
### Step 4: Use the APIs to call the model
Once the model is in 'Active' status you can click on the 'API' page to call the model
### Here is the Demo:
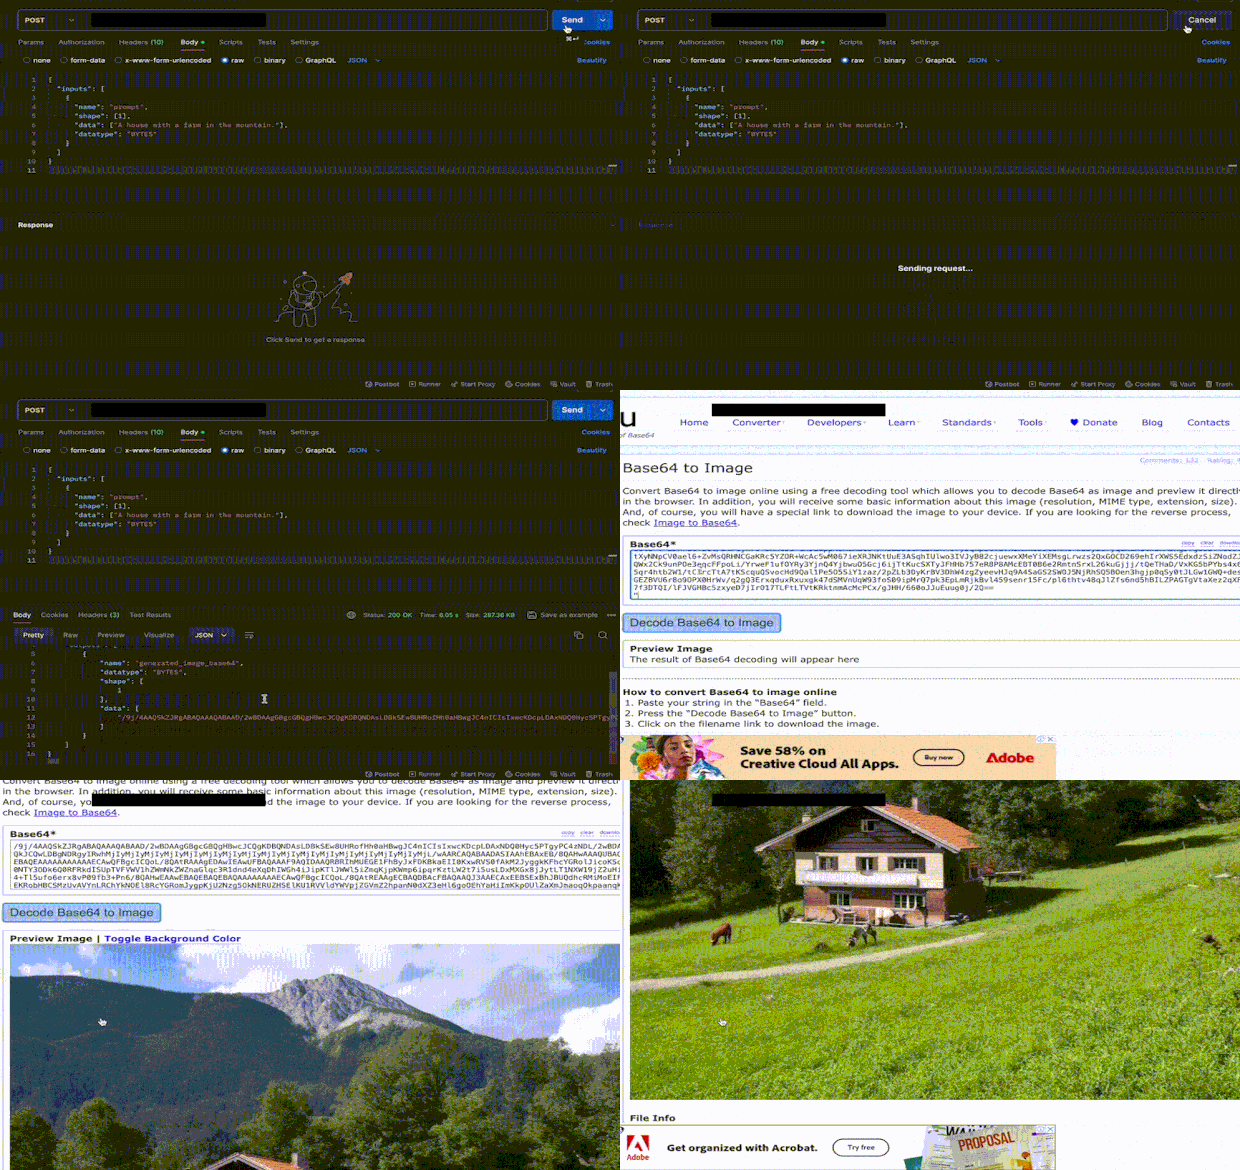 ## Method B: Deploying the model on Inferless CLI
Inferless allows you to deploy your model using Inferless-CLI. Follow the steps to deploy using Inferless CLI.
### Clone the repository of the model
Let's begin by cloning the model repository:
```bash
git clone https://github.com/inferless/Stable-diffusion-3.git
```
### Deploy the Model
To deploy the model using Inferless CLI, execute the following command:
```bash
inferless deploy --gpu A100 --runtime inferless-runtime-config.yaml
```
**Explanation of the Command:**
* `--gpu A100`: Specifies the GPU type for deployment. Available options include `A10`, `A100`, and `T4`.
* `--runtime inferless-runtime-config.yaml`: Defines the runtime configuration file. If not specified, the default Inferless runtime is used.
# Deploy Stable Diffusion XL Turbo using Inferless
Source: https://docs.inferless.com/how-to-guides/deploy-stable-diffusion-xl-turbo-using-inferless
Stability AI unveiled SDXL Turbo, a technology that facilitates high-quality image generation in just one step, utilizing an advanced distillation technique known as Adversarial Diffusion Distillation
## Introduction
SDXL Turbo achieves state-of-the-art performance, allowing for the generation of high-quality images in a single step. It has reduced the necessary step count from 50 to a mere one. SDXL Turbo is based on a distillation technique known as [Adversarial Diffusion Distillation (ADD)](https://stability.ai/research/adversarial-diffusion-distillation), SDXL Turbo empowers the model to produce image outputs seamlessly in a single step. Additionally, it enables the generation of real-time text-to-image outputs with sustained high sampling fidelity.
## Our Observations
We have deployed this model using A100 GPU and observed that the model took an average cold start time of `8.03sec` and an average inference time of `90ms` for single-step image generation.
## Defining Dependencies
We are using the HuggingFace [Diffusers](https://github.com/huggingface/diffusers) library for the deployment.
## Constructing the GitHub/GitLab Template
Now quickly construct the GitHub/GitLab template, this process is mandatory and make sure you don't add any file named `model.py`
```
stable-diffusion-xl-turbo/
├── app.py
├── inferless-runtime-config.yaml
├── inferless.yaml
└── input_schema.py
```
You can also add other files to this directory.
## Create the class for inference
In the [app.py](https://github.com/inferless/stable-diffusion-xl-turbo/blob/main/app.py) we will define the class and import all the required functions
1. `def initialize`: In this function, you will initialize your model and define any `variable` that you want to use during inference.
2. `def infer`: This function gets called for every request that you send. Here you can define all the steps that are required for the inference. You can also pass custom values for inference through the `inputs` parameter.
3. `def finalize`: This function cleans up all the allocated memory.
```python
import os
os.environ["HF_HUB_ENABLE_HF_TRANSFER"]='1'
from huggingface_hub import snapshot_download
import inferless
import torch
from diffusers import AutoPipelineForText2Image, AutoencoderKL, EulerAncestralDiscreteScheduler
import base64
from io import BytesIO
app = inferless.Cls(gpu="A10")
class InferlessPythonModel:
@app.load
def initialize(self):
model_id = "stabilityai/sdxl-turbo"
snapshot_download(repo_id=model_id,allow_patterns=["*.safetensors"])
vae = AutoencoderKL.from_pretrained("madebyollin/sdxl-vae-fp16-fix", torch_dtype=torch.float16)
self.pipeline = AutoPipelineForText2Image.from_pretrained(model_id,vae=vae, torch_dtype=torch.float16, variant="fp16",use_safetensors=True)
self.pipeline = self.pipeline.to("cuda")
self.pipeline.scheduler = EulerAncestralDiscreteScheduler.from_config(self.pipeline.scheduler.config)
@app.infer
def infer(self, inputs):
prompt = inputs["prompt"]
pipeline_output_image = self.pipeline(prompt=prompt,
num_inference_steps=1,
guidance_scale=1).images[0]
buff = BytesIO()
pipeline_output_image.save(buff, format="PNG")
img_str = base64.b64encode(buff.getvalue())
return {"generated_image_base64": img_str.decode('utf-8')}
def finalize(self,args):
self.pipeline = None
```
## Creating the Custom Runtime
This is a mandatory step where we allow the users to upload their own custom runtime through [inferless-runtime-config.yaml](https://github.com/inferless/stable-diffusion-xl-turbo/blob/main/inferless-runtime-config.yaml).
```
build:
cuda_version: "12.1.1"
python_packages:
- "diffusers==0.32.2"
- "torch==2.6.0"
- "transformers==4.49.0"
- "accelerate==1.4.0"
- "inferless-cli==2.0.9"
- "hf-transfer==0.1.9"
- "huggingface-hub==0.27.1"
```
## Test your model with Remote Run
You can use the `inferless remote-run`([installation guide here](https://docs.inferless.com/model-import/cli-import#cli-import)) command to test your model or any custom Python script in a remote GPU environment directly from your local machine. Make sure that you use `Python3.10` for seamless experience.
### Step 1: Add the Decorators and local entry point
To enable **Remote Run**, simply do the following:
1. Import the `inferless` library and initialize `Cls(gpu="A10")`. The available GPU options are `T4`, `A10` and `A100`.
2. Decorated the `initialize` and `infer` functions with `@app.load` and `@app.infer` respectively.
3. Create the Local Entry Point by decorating a function (for example, `my_local_entry`) with `@inferless.local_entry_point`.
Within this function, instantiate your model class, convert any incoming parameters into a `RequestObjects` object, and invoke the model's `infer` method.
```python
import os
os.environ["HF_HUB_ENABLE_HF_TRANSFER"]='1'
from huggingface_hub import snapshot_download
from diffusers import AutoPipelineForText2Image, AutoencoderKL, EulerAncestralDiscreteScheduler
import inferless
import torch
import base64
from io import BytesIO
from pydantic import BaseModel, Field
from typing import Optional
@inferless.request
class RequestObjects(BaseModel):
prompt: str = Field(default="Penguins having dinner")
guidance_scale: Optional[float] = 7.0
num_inference_steps: Optional[int] = 1
@inferless.response
class ResponseObjects(BaseModel):
generated_image_base64: str = Field(default='Test output')
app = inferless.Cls(gpu="A10")
class InferlessPythonModel:
@app.load
def initialize(self):
model_id = "stabilityai/sdxl-turbo"
snapshot_download(repo_id=model_id,allow_patterns=["*.safetensors"])
vae = AutoencoderKL.from_pretrained("madebyollin/sdxl-vae-fp16-fix", torch_dtype=torch.float16)
self.pipeline = AutoPipelineForText2Image.from_pretrained(model_id,vae=vae, torch_dtype=torch.float16, variant="fp16",use_safetensors=True).to("cuda")
self.pipeline.scheduler = EulerAncestralDiscreteScheduler.from_config(self.pipeline.scheduler.config)
@app.infer
def infer(self, request: RequestObjects) -> ResponseObjects:
pipeline_output_image = self.pipeline(prompt=request.prompt,
num_inference_steps=request.num_inference_steps,
guidance_scale=request.guidance_scale).images[0]
buff = BytesIO()
pipeline_output_image.save(buff, format="PNG")
img_str = base64.b64encode(buff.getvalue())
generateObject = ResponseObjects(generated_image_base64 = img_str.decode('utf-8'))
return generateObject
def finalize(self,args):
self.pipeline = None
@inferless.local_entry_point
def my_local_entry(dynamic_params):
request_objects = RequestObjects(**dynamic_params)
model_instance = InferlessPythonModel()
return model_instance.infer(request_objects)
```
### Step 2: Run with Remote GPU
From your local terminal, navigate to the folder containing your `app.py` and your `inferless-runtime-config.yaml` and run:
```bash
inferless remote-run app.py -c inferless-runtime-config.yaml --prompt "Penguins having dinner"
```
You can pass the other input parameters in the same way (e.g., `--task`, `--temperature`, etc.) as long as your code expects them in the `inputs` dictionary.
If you want to exclude certain files or directories from being uploaded, use the `--exclude` or `-e` flag.
## Method A: Deploying the model on Inferless Platform
Inferless supports multiple ways of [importing your model](https://docs.inferless.com/model-import/file-structure-requirements). For this tutorial, we will use GitHub.
### Step 1: Login to the inferless dashboard can click on Import model button
Navigate to your desired workspace in Inferless and Click on `Add a custom model` button that you see on the top right. An import wizard will open up.
### Step 2: Follow the UI to complete the model Import
* Select the GitHub/GitLab Integration option to connect your source code repository with the deployment environment.
* Navigate to the specific GitHub repository that contains your model's code. Here, you will need to identify and enter the name of the model you wish to import.
* Choose the appropriate type of machine that suits your model's requirements. Additionally, specify the minimum and maximum number of replicas to define the scalability range for deploying your model.
* Optionally, you have the option to enable automatic build and deployment. This feature triggers a new deployment automatically whenever there is a new code push to your repository.
* If your model requires additional software packages, configure the Custom Runtime settings by including necessary pip or apt packages. Also, set up environment variables such as Inference Timeout, Container Concurrency, and Scale Down Timeout to tailor the runtime environment according to your needs.
* Wait for the validation process to complete, ensuring that all settings are correct and functional. Once validation is successful, click on the "Import" button to finalize the import of your model.
### Step 3: Wait for the model build to complete usually takes \~5-10 minutes
### Step 4: Use the APIs to call the model
Once the model is in 'Active' status you can click on the 'API' page to call the model
### Here is the Demo:
## Method B: Deploying the model on Inferless CLI
Inferless allows you to deploy your model using Inferless-CLI. Follow the steps to deploy using Inferless CLI.
### Clone the repository of the model
Let's begin by cloning the model repository:
```bash
git clone https://github.com/inferless/Stable-diffusion-3.git
```
### Deploy the Model
To deploy the model using Inferless CLI, execute the following command:
```bash
inferless deploy --gpu A100 --runtime inferless-runtime-config.yaml
```
**Explanation of the Command:**
* `--gpu A100`: Specifies the GPU type for deployment. Available options include `A10`, `A100`, and `T4`.
* `--runtime inferless-runtime-config.yaml`: Defines the runtime configuration file. If not specified, the default Inferless runtime is used.
# Deploy Stable Diffusion XL Turbo using Inferless
Source: https://docs.inferless.com/how-to-guides/deploy-stable-diffusion-xl-turbo-using-inferless
Stability AI unveiled SDXL Turbo, a technology that facilitates high-quality image generation in just one step, utilizing an advanced distillation technique known as Adversarial Diffusion Distillation
## Introduction
SDXL Turbo achieves state-of-the-art performance, allowing for the generation of high-quality images in a single step. It has reduced the necessary step count from 50 to a mere one. SDXL Turbo is based on a distillation technique known as [Adversarial Diffusion Distillation (ADD)](https://stability.ai/research/adversarial-diffusion-distillation), SDXL Turbo empowers the model to produce image outputs seamlessly in a single step. Additionally, it enables the generation of real-time text-to-image outputs with sustained high sampling fidelity.
## Our Observations
We have deployed this model using A100 GPU and observed that the model took an average cold start time of `8.03sec` and an average inference time of `90ms` for single-step image generation.
## Defining Dependencies
We are using the HuggingFace [Diffusers](https://github.com/huggingface/diffusers) library for the deployment.
## Constructing the GitHub/GitLab Template
Now quickly construct the GitHub/GitLab template, this process is mandatory and make sure you don't add any file named `model.py`
```
stable-diffusion-xl-turbo/
├── app.py
├── inferless-runtime-config.yaml
├── inferless.yaml
└── input_schema.py
```
You can also add other files to this directory.
## Create the class for inference
In the [app.py](https://github.com/inferless/stable-diffusion-xl-turbo/blob/main/app.py) we will define the class and import all the required functions
1. `def initialize`: In this function, you will initialize your model and define any `variable` that you want to use during inference.
2. `def infer`: This function gets called for every request that you send. Here you can define all the steps that are required for the inference. You can also pass custom values for inference through the `inputs` parameter.
3. `def finalize`: This function cleans up all the allocated memory.
```python
import os
os.environ["HF_HUB_ENABLE_HF_TRANSFER"]='1'
from huggingface_hub import snapshot_download
import inferless
import torch
from diffusers import AutoPipelineForText2Image, AutoencoderKL, EulerAncestralDiscreteScheduler
import base64
from io import BytesIO
app = inferless.Cls(gpu="A10")
class InferlessPythonModel:
@app.load
def initialize(self):
model_id = "stabilityai/sdxl-turbo"
snapshot_download(repo_id=model_id,allow_patterns=["*.safetensors"])
vae = AutoencoderKL.from_pretrained("madebyollin/sdxl-vae-fp16-fix", torch_dtype=torch.float16)
self.pipeline = AutoPipelineForText2Image.from_pretrained(model_id,vae=vae, torch_dtype=torch.float16, variant="fp16",use_safetensors=True)
self.pipeline = self.pipeline.to("cuda")
self.pipeline.scheduler = EulerAncestralDiscreteScheduler.from_config(self.pipeline.scheduler.config)
@app.infer
def infer(self, inputs):
prompt = inputs["prompt"]
pipeline_output_image = self.pipeline(prompt=prompt,
num_inference_steps=1,
guidance_scale=1).images[0]
buff = BytesIO()
pipeline_output_image.save(buff, format="PNG")
img_str = base64.b64encode(buff.getvalue())
return {"generated_image_base64": img_str.decode('utf-8')}
def finalize(self,args):
self.pipeline = None
```
## Creating the Custom Runtime
This is a mandatory step where we allow the users to upload their own custom runtime through [inferless-runtime-config.yaml](https://github.com/inferless/stable-diffusion-xl-turbo/blob/main/inferless-runtime-config.yaml).
```
build:
cuda_version: "12.1.1"
python_packages:
- "diffusers==0.32.2"
- "torch==2.6.0"
- "transformers==4.49.0"
- "accelerate==1.4.0"
- "inferless-cli==2.0.9"
- "hf-transfer==0.1.9"
- "huggingface-hub==0.27.1"
```
## Test your model with Remote Run
You can use the `inferless remote-run`([installation guide here](https://docs.inferless.com/model-import/cli-import#cli-import)) command to test your model or any custom Python script in a remote GPU environment directly from your local machine. Make sure that you use `Python3.10` for seamless experience.
### Step 1: Add the Decorators and local entry point
To enable **Remote Run**, simply do the following:
1. Import the `inferless` library and initialize `Cls(gpu="A10")`. The available GPU options are `T4`, `A10` and `A100`.
2. Decorated the `initialize` and `infer` functions with `@app.load` and `@app.infer` respectively.
3. Create the Local Entry Point by decorating a function (for example, `my_local_entry`) with `@inferless.local_entry_point`.
Within this function, instantiate your model class, convert any incoming parameters into a `RequestObjects` object, and invoke the model's `infer` method.
```python
import os
os.environ["HF_HUB_ENABLE_HF_TRANSFER"]='1'
from huggingface_hub import snapshot_download
from diffusers import AutoPipelineForText2Image, AutoencoderKL, EulerAncestralDiscreteScheduler
import inferless
import torch
import base64
from io import BytesIO
from pydantic import BaseModel, Field
from typing import Optional
@inferless.request
class RequestObjects(BaseModel):
prompt: str = Field(default="Penguins having dinner")
guidance_scale: Optional[float] = 7.0
num_inference_steps: Optional[int] = 1
@inferless.response
class ResponseObjects(BaseModel):
generated_image_base64: str = Field(default='Test output')
app = inferless.Cls(gpu="A10")
class InferlessPythonModel:
@app.load
def initialize(self):
model_id = "stabilityai/sdxl-turbo"
snapshot_download(repo_id=model_id,allow_patterns=["*.safetensors"])
vae = AutoencoderKL.from_pretrained("madebyollin/sdxl-vae-fp16-fix", torch_dtype=torch.float16)
self.pipeline = AutoPipelineForText2Image.from_pretrained(model_id,vae=vae, torch_dtype=torch.float16, variant="fp16",use_safetensors=True).to("cuda")
self.pipeline.scheduler = EulerAncestralDiscreteScheduler.from_config(self.pipeline.scheduler.config)
@app.infer
def infer(self, request: RequestObjects) -> ResponseObjects:
pipeline_output_image = self.pipeline(prompt=request.prompt,
num_inference_steps=request.num_inference_steps,
guidance_scale=request.guidance_scale).images[0]
buff = BytesIO()
pipeline_output_image.save(buff, format="PNG")
img_str = base64.b64encode(buff.getvalue())
generateObject = ResponseObjects(generated_image_base64 = img_str.decode('utf-8'))
return generateObject
def finalize(self,args):
self.pipeline = None
@inferless.local_entry_point
def my_local_entry(dynamic_params):
request_objects = RequestObjects(**dynamic_params)
model_instance = InferlessPythonModel()
return model_instance.infer(request_objects)
```
### Step 2: Run with Remote GPU
From your local terminal, navigate to the folder containing your `app.py` and your `inferless-runtime-config.yaml` and run:
```bash
inferless remote-run app.py -c inferless-runtime-config.yaml --prompt "Penguins having dinner"
```
You can pass the other input parameters in the same way (e.g., `--task`, `--temperature`, etc.) as long as your code expects them in the `inputs` dictionary.
If you want to exclude certain files or directories from being uploaded, use the `--exclude` or `-e` flag.
## Method A: Deploying the model on Inferless Platform
Inferless supports multiple ways of [importing your model](https://docs.inferless.com/model-import/file-structure-requirements). For this tutorial, we will use GitHub.
### Step 1: Login to the inferless dashboard can click on Import model button
Navigate to your desired workspace in Inferless and Click on `Add a custom model` button that you see on the top right. An import wizard will open up.
### Step 2: Follow the UI to complete the model Import
* Select the GitHub/GitLab Integration option to connect your source code repository with the deployment environment.
* Navigate to the specific GitHub repository that contains your model's code. Here, you will need to identify and enter the name of the model you wish to import.
* Choose the appropriate type of machine that suits your model's requirements. Additionally, specify the minimum and maximum number of replicas to define the scalability range for deploying your model.
* Optionally, you have the option to enable automatic build and deployment. This feature triggers a new deployment automatically whenever there is a new code push to your repository.
* If your model requires additional software packages, configure the Custom Runtime settings by including necessary pip or apt packages. Also, set up environment variables such as Inference Timeout, Container Concurrency, and Scale Down Timeout to tailor the runtime environment according to your needs.
* Wait for the validation process to complete, ensuring that all settings are correct and functional. Once validation is successful, click on the "Import" button to finalize the import of your model.
### Step 3: Wait for the model build to complete usually takes \~5-10 minutes
### Step 4: Use the APIs to call the model
Once the model is in 'Active' status you can click on the 'API' page to call the model
### Here is the Demo:
 ## Method B: Deploying the model on Inferless CLI
Inferless allows you to deploy your model using Inferless-CLI. Follow the steps to deploy using Inferless CLI.
### Clone the repository of the model
Let's begin by cloning the model repository:
```bash
git clone https://github.com/inferless/stable-diffusion-xl-turbo.git
```
### Deploy the Model
To deploy the model using Inferless CLI, execute the following command:
```bash
inferless deploy --gpu A10 --runtime inferless-runtime-config.yaml
```
**Explanation of the Command:**
* `--gpu A10`: Specifies the GPU type for deployment. Available options include `A10`, `A100`, and `T4`.
* `--runtime inferless-runtime-config.yaml`: Defines the runtime configuration file. If not specified, the default Inferless runtime is used.
# Deploy Stable Video Diffusion using Inferless
Source: https://docs.inferless.com/how-to-guides/deploy-stable-video-diffusion-using-inferless
Stability AI released Stable Video Diffusion, a latent diffusion model for high-resolution video generation from text and images.
## Our Observations
We have deployed this model using A100 GPU and observed that the model took an average cold start time of `7.02 sec` and an average inference time of `34 sec` for generating a video of` 4 sec` with `6fps`
## Defining Dependencies
We are using the HuggingFace [Diffusers](https://github.com/huggingface/diffusers) library for the deployment. You can also use [this script](https://github.com/Stability-AI/generative-models/blob/main/scripts/sampling/simple%5Fvideo%5Fsample.py) for deployment provided by Stability AI.
## Constructing the GitHub/GitLab Template
Now quickly construct the GitHub/GitLab template, this process is mandatory and make sure you don't add any file named `model.py`
```
stable-video-diffusion/
├── app.py
├── inferless-runtime-config.yaml
├── inferless.yaml
└── input_schema.py
```
You can also add other files to this directory.
## Create the class for inference
In the [app.py](https://github.com/inferless/inferless_tutorials/blob/main/video_generation/Stable-Video/app.py) we will define the class and import all the required functions
1. `def initialize`: In this function, you will initialize your model and define any `variable` that you want to use during inference. We are using `torch.compile `which improves the latency but requires a large GPU(A10/A100). If you are using Nvidia T4 then remove those lines and use model CPU offloading to reduce memory usage.
2. `def infer`: This function gets called for every request that you send. Here you can define all the steps that are required for the inference. You can also pass custom values for inference, for example `fps_id` is fixed in the tutorial, you can pass it through `inputs` parameter.
3. `def finalize`: This function cleans up all the allocated memory.
```python
import os
os.environ["HF_HUB_ENABLE_HF_TRANSFER"]='1'
from huggingface_hub import snapshot_download
import inferless
from io import BytesIO
import base64
import torch
from diffusers import StableVideoDiffusionPipeline
from diffusers.utils import load_image, export_to_video
app = inferless.Cls(gpu="A100")
class InferlessPythonModel:
@app.load
def initialize(self):
model_id = "stabilityai/stable-video-diffusion-img2vid"
snapshot_download(repo_id=model_id,allow_patterns=["*.safetensors"])
self.pipe = StableVideoDiffusionPipeline.from_pretrained(model_id, torch_dtype=torch.float16, variant="fp16")
# self.pipe.enable_model_cpu_offload()
self.pipe.to("cuda")
self.pipe.unet = torch.compile(self.pipe.unet, mode="reduce-overhead", fullgraph=True)
self.pipe.vae = torch.compile(self.pipe.vae, mode="reduce-overhead", fullgraph=True)
@app.infer
def infer(self,inputs):
image_url = inputs['image_url']
image = load_image(image_url)
image = image.resize((1024, 576))
generator = torch.manual_seed(42)
frames = self.pipe(image, decode_chunk_size=8, generator=generator).frames[0]
export_to_video(frames, "generated.mp4", fps=7)
with open("generated.mp4", "rb") as video_file:
video_binary_data = video_file.read()
video_bytes_io = BytesIO(video_binary_data)
base64_encoded_data = base64.b64encode(video_bytes_io.read())
base64_string = base64_encoded_data.decode("utf-8")
return {"generated_video": base64_string}
def finalize(self):
self.pipe = None
```
## Creating the Custom Runtime
This is a mandatory step where we allow the users to upload their own custom runtime through [inferless-runtime-config.yaml](https://github.com/inferless/inferless_tutorials/blob/main/video_generation/Stable-Video/inferless-runtime-config.yaml).
```
build:
cuda_version: "12.1.1"
python_packages:
- "diffusers==0.32.2"
- "opencv-python==4.9.0.80"
- "torch==2.6.0"
- "transformers==4.49.0"
- "accelerate==1.4.0"
- "inferless-cli==2.0.9"
- "hf-transfer==0.1.9"
- "huggingface-hub==0.27.1"
```
## Test your model with Remote Run
You can use the `inferless remote-run`([installation guide here](https://docs.inferless.com/model-import/cli-import#cli-import)) command to test your model or any custom Python script in a remote GPU environment directly from your local machine. Make sure that you use `Python3.10` for seamless experience.
### Step 1: Add the Decorators and local entry point
To enable **Remote Run**, simply do the following:
1. Import the `inferless` library and initialize `Cls(gpu="A100")`. The available GPU options are `T4`, `A10` and `A100`.
2. Decorated the `initialize` and `infer` functions with `@app.load` and `@app.infer` respectively.
3. Create the Local Entry Point by decorating a function (for example, `my_local_entry`) with `@inferless.local_entry_point`.
Within this function, instantiate your model class, convert any incoming parameters into a `RequestObjects` object, and invoke the model's `infer` method.
```python
import os
os.environ["HF_HUB_ENABLE_HF_TRANSFER"]='1'
from huggingface_hub import snapshot_download
import inferless
from io import BytesIO
import base64
import torch
from diffusers import StableVideoDiffusionPipeline
from diffusers.utils import load_image, export_to_video
from pydantic import BaseModel, Field
from typing import Optional
@inferless.request
class RequestObjects(BaseModel):
image_url: str = Field(default="https://images.cnbctv18.com/wp-content/uploads/2022/08/ashneer-grover-3-Meme-1-1019x573.jpg")
@inferless.response
class ResponseObjects(BaseModel):
generated_video: str = Field(default='Test output')
app = inferless.Cls(gpu="A100")
class InferlessPythonModel:
@app.load
def initialize(self):
model_id = "stabilityai/stable-video-diffusion-img2vid"
snapshot_download(repo_id=model_id,allow_patterns=["*.safetensors"])
self.pipe = StableVideoDiffusionPipeline.from_pretrained(model_id, torch_dtype=torch.float16, variant="fp16")
# self.pipe.enable_model_cpu_offload()
self.pipe.to("cuda")
self.pipe.unet = torch.compile(self.pipe.unet, mode="reduce-overhead", fullgraph=True)
self.pipe.vae = torch.compile(self.pipe.vae, mode="reduce-overhead", fullgraph=True)
@app.infer
def infer(self, request: RequestObjects) -> ResponseObjects:
image = load_image(request.image_url)
image = image.resize((1024, 576))
generator = torch.manual_seed(42)
frames = self.pipe(image, decode_chunk_size=8, generator=generator).frames[0]
export_to_video(frames, "generated.mp4", fps=7)
with open("generated.mp4", "rb") as video_file:
video_binary_data = video_file.read()
video_bytes_io = BytesIO(video_binary_data)
base64_encoded_data = base64.b64encode(video_bytes_io.read())
base64_string = base64_encoded_data.decode("utf-8")
generateObject = ResponseObjects(generated_video = base64_string)
return generateObject
def finalize(self):
self.pipe = None
@inferless.local_entry_point
def my_local_entry(dynamic_params):
request_objects = RequestObjects(**dynamic_params)
model_instance = InferlessPythonModel()
return model_instance.infer(request_objects)
```
### Step 2: Run with Remote GPU
From your local terminal, navigate to the folder containing your `app.py` and your `inferless-runtime-config.yaml` and run:
```bash
inferless remote-run app.py -c inferless-runtime-config.yaml --image_url "https://images.cnbctv18.com/wp-content/uploads/2022/08/ashneer-grover-3-Meme-1-1019x573.jpg"
```
You can pass the other input parameters in the same way as long as your code expects them in the `inputs` dictionary.
If you want to exclude certain files or directories from being uploaded, use the `--exclude` or `-e` flag.
## Method A: Deploying the model on Inferless Platform
Inferless supports multiple ways of [importing your model](https://docs.inferless.com/model-import/file-structure-requirements). For this tutorial, we will use GitHub.
### Step 1: Login to the inferless dashboard can click on Import model button
Navigate to your desired workspace in Inferless and Click on `Add a custom model` button that you see on the top right. An import wizard will open up.
### Step 2: Follow the UI to complete the model Import
* Select the GitHub/GitLab Integration option to connect your source code repository with the deployment environment.
* Navigate to the specific GitHub repository that contains your model's code. Here, you will need to identify and enter the name of the model you wish to import.
* Choose the appropriate type of machine that suits your model's requirements. Additionally, specify the minimum and maximum number of replicas to define the scalability range for deploying your model.
* Optionally, you have the option to enable automatic build and deployment. This feature triggers a new deployment automatically whenever there is a new code push to your repository.
* If your model requires additional software packages, configure the Custom Runtime settings by including necessary pip or apt packages. Also, set up environment variables such as Inference Timeout, Container Concurrency, and Scale Down Timeout to tailor the runtime environment according to your needs.
* Wait for the validation process to complete, ensuring that all settings are correct and functional. Once validation is successful, click on the "Import" button to finalize the import of your model.
### Step 3: Wait for the model build to complete usually takes \~5-10 minutes
### Step 4: Use the APIs to call the model
Once the model is in 'Active' status you can click on the 'API' page to call the model
### Here is the Demo:
## Method B: Deploying the model on Inferless CLI
Inferless allows you to deploy your model using Inferless-CLI. Follow the steps to deploy using Inferless CLI.
### Clone the repository of the model
Let's begin by cloning the model repository:
```bash
git clone https://github.com/inferless/stable-diffusion-xl-turbo.git
```
### Deploy the Model
To deploy the model using Inferless CLI, execute the following command:
```bash
inferless deploy --gpu A10 --runtime inferless-runtime-config.yaml
```
**Explanation of the Command:**
* `--gpu A10`: Specifies the GPU type for deployment. Available options include `A10`, `A100`, and `T4`.
* `--runtime inferless-runtime-config.yaml`: Defines the runtime configuration file. If not specified, the default Inferless runtime is used.
# Deploy Stable Video Diffusion using Inferless
Source: https://docs.inferless.com/how-to-guides/deploy-stable-video-diffusion-using-inferless
Stability AI released Stable Video Diffusion, a latent diffusion model for high-resolution video generation from text and images.
## Our Observations
We have deployed this model using A100 GPU and observed that the model took an average cold start time of `7.02 sec` and an average inference time of `34 sec` for generating a video of` 4 sec` with `6fps`
## Defining Dependencies
We are using the HuggingFace [Diffusers](https://github.com/huggingface/diffusers) library for the deployment. You can also use [this script](https://github.com/Stability-AI/generative-models/blob/main/scripts/sampling/simple%5Fvideo%5Fsample.py) for deployment provided by Stability AI.
## Constructing the GitHub/GitLab Template
Now quickly construct the GitHub/GitLab template, this process is mandatory and make sure you don't add any file named `model.py`
```
stable-video-diffusion/
├── app.py
├── inferless-runtime-config.yaml
├── inferless.yaml
└── input_schema.py
```
You can also add other files to this directory.
## Create the class for inference
In the [app.py](https://github.com/inferless/inferless_tutorials/blob/main/video_generation/Stable-Video/app.py) we will define the class and import all the required functions
1. `def initialize`: In this function, you will initialize your model and define any `variable` that you want to use during inference. We are using `torch.compile `which improves the latency but requires a large GPU(A10/A100). If you are using Nvidia T4 then remove those lines and use model CPU offloading to reduce memory usage.
2. `def infer`: This function gets called for every request that you send. Here you can define all the steps that are required for the inference. You can also pass custom values for inference, for example `fps_id` is fixed in the tutorial, you can pass it through `inputs` parameter.
3. `def finalize`: This function cleans up all the allocated memory.
```python
import os
os.environ["HF_HUB_ENABLE_HF_TRANSFER"]='1'
from huggingface_hub import snapshot_download
import inferless
from io import BytesIO
import base64
import torch
from diffusers import StableVideoDiffusionPipeline
from diffusers.utils import load_image, export_to_video
app = inferless.Cls(gpu="A100")
class InferlessPythonModel:
@app.load
def initialize(self):
model_id = "stabilityai/stable-video-diffusion-img2vid"
snapshot_download(repo_id=model_id,allow_patterns=["*.safetensors"])
self.pipe = StableVideoDiffusionPipeline.from_pretrained(model_id, torch_dtype=torch.float16, variant="fp16")
# self.pipe.enable_model_cpu_offload()
self.pipe.to("cuda")
self.pipe.unet = torch.compile(self.pipe.unet, mode="reduce-overhead", fullgraph=True)
self.pipe.vae = torch.compile(self.pipe.vae, mode="reduce-overhead", fullgraph=True)
@app.infer
def infer(self,inputs):
image_url = inputs['image_url']
image = load_image(image_url)
image = image.resize((1024, 576))
generator = torch.manual_seed(42)
frames = self.pipe(image, decode_chunk_size=8, generator=generator).frames[0]
export_to_video(frames, "generated.mp4", fps=7)
with open("generated.mp4", "rb") as video_file:
video_binary_data = video_file.read()
video_bytes_io = BytesIO(video_binary_data)
base64_encoded_data = base64.b64encode(video_bytes_io.read())
base64_string = base64_encoded_data.decode("utf-8")
return {"generated_video": base64_string}
def finalize(self):
self.pipe = None
```
## Creating the Custom Runtime
This is a mandatory step where we allow the users to upload their own custom runtime through [inferless-runtime-config.yaml](https://github.com/inferless/inferless_tutorials/blob/main/video_generation/Stable-Video/inferless-runtime-config.yaml).
```
build:
cuda_version: "12.1.1"
python_packages:
- "diffusers==0.32.2"
- "opencv-python==4.9.0.80"
- "torch==2.6.0"
- "transformers==4.49.0"
- "accelerate==1.4.0"
- "inferless-cli==2.0.9"
- "hf-transfer==0.1.9"
- "huggingface-hub==0.27.1"
```
## Test your model with Remote Run
You can use the `inferless remote-run`([installation guide here](https://docs.inferless.com/model-import/cli-import#cli-import)) command to test your model or any custom Python script in a remote GPU environment directly from your local machine. Make sure that you use `Python3.10` for seamless experience.
### Step 1: Add the Decorators and local entry point
To enable **Remote Run**, simply do the following:
1. Import the `inferless` library and initialize `Cls(gpu="A100")`. The available GPU options are `T4`, `A10` and `A100`.
2. Decorated the `initialize` and `infer` functions with `@app.load` and `@app.infer` respectively.
3. Create the Local Entry Point by decorating a function (for example, `my_local_entry`) with `@inferless.local_entry_point`.
Within this function, instantiate your model class, convert any incoming parameters into a `RequestObjects` object, and invoke the model's `infer` method.
```python
import os
os.environ["HF_HUB_ENABLE_HF_TRANSFER"]='1'
from huggingface_hub import snapshot_download
import inferless
from io import BytesIO
import base64
import torch
from diffusers import StableVideoDiffusionPipeline
from diffusers.utils import load_image, export_to_video
from pydantic import BaseModel, Field
from typing import Optional
@inferless.request
class RequestObjects(BaseModel):
image_url: str = Field(default="https://images.cnbctv18.com/wp-content/uploads/2022/08/ashneer-grover-3-Meme-1-1019x573.jpg")
@inferless.response
class ResponseObjects(BaseModel):
generated_video: str = Field(default='Test output')
app = inferless.Cls(gpu="A100")
class InferlessPythonModel:
@app.load
def initialize(self):
model_id = "stabilityai/stable-video-diffusion-img2vid"
snapshot_download(repo_id=model_id,allow_patterns=["*.safetensors"])
self.pipe = StableVideoDiffusionPipeline.from_pretrained(model_id, torch_dtype=torch.float16, variant="fp16")
# self.pipe.enable_model_cpu_offload()
self.pipe.to("cuda")
self.pipe.unet = torch.compile(self.pipe.unet, mode="reduce-overhead", fullgraph=True)
self.pipe.vae = torch.compile(self.pipe.vae, mode="reduce-overhead", fullgraph=True)
@app.infer
def infer(self, request: RequestObjects) -> ResponseObjects:
image = load_image(request.image_url)
image = image.resize((1024, 576))
generator = torch.manual_seed(42)
frames = self.pipe(image, decode_chunk_size=8, generator=generator).frames[0]
export_to_video(frames, "generated.mp4", fps=7)
with open("generated.mp4", "rb") as video_file:
video_binary_data = video_file.read()
video_bytes_io = BytesIO(video_binary_data)
base64_encoded_data = base64.b64encode(video_bytes_io.read())
base64_string = base64_encoded_data.decode("utf-8")
generateObject = ResponseObjects(generated_video = base64_string)
return generateObject
def finalize(self):
self.pipe = None
@inferless.local_entry_point
def my_local_entry(dynamic_params):
request_objects = RequestObjects(**dynamic_params)
model_instance = InferlessPythonModel()
return model_instance.infer(request_objects)
```
### Step 2: Run with Remote GPU
From your local terminal, navigate to the folder containing your `app.py` and your `inferless-runtime-config.yaml` and run:
```bash
inferless remote-run app.py -c inferless-runtime-config.yaml --image_url "https://images.cnbctv18.com/wp-content/uploads/2022/08/ashneer-grover-3-Meme-1-1019x573.jpg"
```
You can pass the other input parameters in the same way as long as your code expects them in the `inputs` dictionary.
If you want to exclude certain files or directories from being uploaded, use the `--exclude` or `-e` flag.
## Method A: Deploying the model on Inferless Platform
Inferless supports multiple ways of [importing your model](https://docs.inferless.com/model-import/file-structure-requirements). For this tutorial, we will use GitHub.
### Step 1: Login to the inferless dashboard can click on Import model button
Navigate to your desired workspace in Inferless and Click on `Add a custom model` button that you see on the top right. An import wizard will open up.
### Step 2: Follow the UI to complete the model Import
* Select the GitHub/GitLab Integration option to connect your source code repository with the deployment environment.
* Navigate to the specific GitHub repository that contains your model's code. Here, you will need to identify and enter the name of the model you wish to import.
* Choose the appropriate type of machine that suits your model's requirements. Additionally, specify the minimum and maximum number of replicas to define the scalability range for deploying your model.
* Optionally, you have the option to enable automatic build and deployment. This feature triggers a new deployment automatically whenever there is a new code push to your repository.
* If your model requires additional software packages, configure the Custom Runtime settings by including necessary pip or apt packages. Also, set up environment variables such as Inference Timeout, Container Concurrency, and Scale Down Timeout to tailor the runtime environment according to your needs.
* Wait for the validation process to complete, ensuring that all settings are correct and functional. Once validation is successful, click on the "Import" button to finalize the import of your model.
### Step 3: Wait for the model build to complete usually takes \~5-10 minutes
### Step 4: Use the APIs to call the model
Once the model is in 'Active' status you can click on the 'API' page to call the model
### Here is the Demo:
 *Note: This demo GIF shows the deployment of the Stable Video Diffusion model using webhook.*
## Method B: Deploying the model on Inferless CLI
Inferless allows you to deploy your model using Inferless-CLI. Follow the steps to deploy using Inferless CLI.
### Clone the repository of the model
Let's begin by cloning the model repository:
```bash
git clone https://github.com/inferless/stable-video-diffusion.git
```
### Deploy the Model
To deploy the model using Inferless CLI, execute the following command:
```bash
inferless deploy --gpu A100 --runtime inferless-runtime-config.yaml
```
**Explanation of the Command:**
* `--gpu A100`: Specifies the GPU type for deployment. Available options include `A10`, `A100`, and `T4`.
* `--runtime inferless-runtime-config.yaml`: Defines the runtime configuration file. If not specified, the default Inferless runtime is used.
# Deploy Starling 7B using Inferless
Source: https://docs.inferless.com/how-to-guides/deploy-starling-7b-using-inferless
Starling 7B is an LLM trained by Reinforcement Learning from AI Feedback (RLAIF). Starling-7B-alpha scores 8.09 in MT Bench with GPT-4 as a judge, outperforming every model to date on MT-Bench
## Our Observations
We have deployed a 4-bit GPTQ quantized version of the model using A100 GPU(80GB) and observed that the model took an average inference time of `5.04 sec`, generating an average of `41.99 tokens/sec` and an average cold start time of `9.76sec`
## Defining Dependencies
We are using the [vLLM](https://github.com/vllm-project/vllm/) library, which enables you to run LLM on low memory. We deploy a GPTQ 4bit quantized version of the model model.
## Constructing the GitHub/GitLab Template
Now quickly construct the GitHub/GitLab template, this process is mandatory and make sure you don't add any file named `model.py`
```python
Starling-7B/
├── app.py
├── inferless-runtime-config.yaml
├── inferless.yaml
└── input_schema.py
```
You can also add other files to this directory.
## Create the class for inference
In the [app.py](https://github.com/inferless/starling-lm-7b-alpha-gptq/blob/main/app.py) we will define the class and import all the required functions
1. `def initialize`: In this function, you will initialize your model and define any `variable` that you want to use during inference.
2. `def infer`: This function gets called for every request that you send. Here you can define all the steps that are required for the inference. You can also pass custom values for inference and pass it through `inputs(dict)` parameter.
3. `def finalize`: This function cleans up all the allocated memory.
```python
import inferless
from vllm import LLM, SamplingParams
app = inferless.Cls(gpu="A100")
class InferlessPythonModel:
@app.load
def initialize(self):
model_id = "TheBloke/Starling-LM-7B-alpha-GPTQ" # Specify the model repository ID
# Define sampling parameters for model generation
self.sampling_params = SamplingParams(temperature=0.7, top_p=0.95, max_tokens=200)
# Initialize the LLM object
self.llm = LLM(model=model_id,quantization="gptq",dtype="float16")
@app.infer
def infer(self,inputs):
prompts = inputs["prompt"] # Extract the prompt from the input
result = self.llm.generate(prompts, self.sampling_params)
# Extract the generated text from the result
result_output = [output.outputs[0].text for output in result]
# Return a dictionary containing the result
return {'generated_result': result_output[0]}
def finalize(self):
self.llm
```
## Creating the Custom Runtime
This is a mandatory step where we allow the users to upload their custom runtime through [inferless-runtime-config.yaml](https://github.com/inferless/starling-lm-7b-alpha-gptq/blob/main/inferless-runtime-config.yaml).
```python
build:
cuda_version: "12.1.1"
python_packages:
- "vllm==0.3.2"
- "inferless-cli==2.0.9"
- "hf-transfer==0.1.9"
- "huggingface-hub==0.27.1"
```
## Test your model with Remote Run
You can use the `inferless remote-run`([installation guide here](https://docs.inferless.com/model-import/cli-import#cli-import)) command to test your model or any custom Python script in a remote GPU environment directly from your local machine. Make sure that you use `Python3.10` for seamless experience.
### Step 1: Add the Decorators and local entry point
To enable **Remote Run**, simply do the following:
1. Import the `inferless` library and initialize `Cls(gpu="A10")`. The available GPU options are `T4`, `A10` and `A100`.
2. Decorated the `initialize` and `infer` functions with `@app.load` and `@app.infer` respectively.
3. Create the Local Entry Point by decorating a function (for example, `my_local_entry`) with `@inferless.local_entry_point`.
Within this function, instantiate your model class, convert any incoming parameters into a `RequestObjects` object, and invoke the model's `infer` method.
```python
import inferless
from vllm import LLM, SamplingParams
from pydantic import BaseModel, Field
from typing import Optional
@inferless.request
class RequestObjects(BaseModel):
prompt: str = Field(default="Explain Deep Learning.")
temperature: Optional[float] = 0.7
top_p: Optional[float] = 0.1
repetition_penalty: Optional[float] = 1.18
top_k: Optional[int] = 40
max_tokens: Optional[int] = 256
@inferless.response
class ResponseObjects(BaseModel):
generated_text: str = Field(default='Test output')
app = inferless.Cls(gpu="A100")
class InferlessPythonModel:
@app.load
def initialize(self):
model_id = "TheBloke/Starling-LM-7B-alpha-GPTQ"
self.llm = LLM(model=model_id,quantization="gptq",dtype="float16")
@app.infer
def infer(self, request: RequestObjects) -> ResponseObjects:
sampling_params = SamplingParams(temperature=request.temperature,top_p=request.top_p,repetition_penalty=request.repetition_penalty,
top_k=request.top_k,max_tokens=request.max_tokens)
result = self.llm.generate(request.prompt, sampling_params)
result_output = [output.outputs[0].text for output in result]
generateObject = ResponseObjects(generated_text = result_output[0])
return generateObject
def finalize(self):
self.llm = None
@inferless.local_entry_point
def my_local_entry(dynamic_params):
request_objects = RequestObjects(**dynamic_params)
model_instance = InferlessPythonModel()
return model_instance.infer(request_objects)
```
### Step 2: Run with Remote GPU
From your local terminal, navigate to the folder containing your `app.py` and your `inferless-runtime-config.yaml` and run:
```bash
inferless remote-run app.py -c inferless-runtime-config.yaml --prompts "What is Quantum Computing?"
```
You can pass the other input parameters in the same way as long as your code expects them in the `inputs` dictionary.
If you want to exclude certain files or directories from being uploaded, use the `--exclude` or `-e` flag.
## Method A: Deploying the model on Inferless Platform
Inferless supports multiple ways of [importing your model](https://docs.inferless.com/model-import/file-structure-requirements). For this tutorial, we will use GitHub.
### Step 1: Login to the inferless dashboard can click on Import model button
Navigate to your desired workspace in Inferless and Click on `Add a custom model` button that you see on the top right. An import wizard will open up.
### Step 2: Follow the UI to complete the model Import
* Select the GitHub/GitLab Integration option to connect your source code repository with the deployment environment.
* Navigate to the specific GitHub repository that contains your model's code. Here, you will need to identify and enter the name of the model you wish to import.
* Choose the appropriate type of machine that suits your model's requirements. Additionally, specify the minimum and maximum number of replicas to define the scalability range for deploying your model.
* Optionally, you have the option to enable automatic build and deployment. This feature triggers a new deployment automatically whenever there is a new code push to your repository.
* If your model requires additional software packages, configure the Custom Runtime settings by including necessary pip or apt packages. Also, set up environment variables such as Inference Timeout, Container Concurrency, and Scale Down Timeout to tailor the runtime environment according to your needs.
* Wait for the validation process to complete, ensuring that all settings are correct and functional. Once validation is successful, click on the "Import" button to finalize the import of your model.
### Step 3: Wait for the model build to complete usually takes \~5-10 minutes
### Step 4: Use the APIs to call the model
Once the model is in 'Active' status you can click on the 'API' page to call the model
### Here is the Demo:
*Note: This demo GIF shows the deployment of the Stable Video Diffusion model using webhook.*
## Method B: Deploying the model on Inferless CLI
Inferless allows you to deploy your model using Inferless-CLI. Follow the steps to deploy using Inferless CLI.
### Clone the repository of the model
Let's begin by cloning the model repository:
```bash
git clone https://github.com/inferless/stable-video-diffusion.git
```
### Deploy the Model
To deploy the model using Inferless CLI, execute the following command:
```bash
inferless deploy --gpu A100 --runtime inferless-runtime-config.yaml
```
**Explanation of the Command:**
* `--gpu A100`: Specifies the GPU type for deployment. Available options include `A10`, `A100`, and `T4`.
* `--runtime inferless-runtime-config.yaml`: Defines the runtime configuration file. If not specified, the default Inferless runtime is used.
# Deploy Starling 7B using Inferless
Source: https://docs.inferless.com/how-to-guides/deploy-starling-7b-using-inferless
Starling 7B is an LLM trained by Reinforcement Learning from AI Feedback (RLAIF). Starling-7B-alpha scores 8.09 in MT Bench with GPT-4 as a judge, outperforming every model to date on MT-Bench
## Our Observations
We have deployed a 4-bit GPTQ quantized version of the model using A100 GPU(80GB) and observed that the model took an average inference time of `5.04 sec`, generating an average of `41.99 tokens/sec` and an average cold start time of `9.76sec`
## Defining Dependencies
We are using the [vLLM](https://github.com/vllm-project/vllm/) library, which enables you to run LLM on low memory. We deploy a GPTQ 4bit quantized version of the model model.
## Constructing the GitHub/GitLab Template
Now quickly construct the GitHub/GitLab template, this process is mandatory and make sure you don't add any file named `model.py`
```python
Starling-7B/
├── app.py
├── inferless-runtime-config.yaml
├── inferless.yaml
└── input_schema.py
```
You can also add other files to this directory.
## Create the class for inference
In the [app.py](https://github.com/inferless/starling-lm-7b-alpha-gptq/blob/main/app.py) we will define the class and import all the required functions
1. `def initialize`: In this function, you will initialize your model and define any `variable` that you want to use during inference.
2. `def infer`: This function gets called for every request that you send. Here you can define all the steps that are required for the inference. You can also pass custom values for inference and pass it through `inputs(dict)` parameter.
3. `def finalize`: This function cleans up all the allocated memory.
```python
import inferless
from vllm import LLM, SamplingParams
app = inferless.Cls(gpu="A100")
class InferlessPythonModel:
@app.load
def initialize(self):
model_id = "TheBloke/Starling-LM-7B-alpha-GPTQ" # Specify the model repository ID
# Define sampling parameters for model generation
self.sampling_params = SamplingParams(temperature=0.7, top_p=0.95, max_tokens=200)
# Initialize the LLM object
self.llm = LLM(model=model_id,quantization="gptq",dtype="float16")
@app.infer
def infer(self,inputs):
prompts = inputs["prompt"] # Extract the prompt from the input
result = self.llm.generate(prompts, self.sampling_params)
# Extract the generated text from the result
result_output = [output.outputs[0].text for output in result]
# Return a dictionary containing the result
return {'generated_result': result_output[0]}
def finalize(self):
self.llm
```
## Creating the Custom Runtime
This is a mandatory step where we allow the users to upload their custom runtime through [inferless-runtime-config.yaml](https://github.com/inferless/starling-lm-7b-alpha-gptq/blob/main/inferless-runtime-config.yaml).
```python
build:
cuda_version: "12.1.1"
python_packages:
- "vllm==0.3.2"
- "inferless-cli==2.0.9"
- "hf-transfer==0.1.9"
- "huggingface-hub==0.27.1"
```
## Test your model with Remote Run
You can use the `inferless remote-run`([installation guide here](https://docs.inferless.com/model-import/cli-import#cli-import)) command to test your model or any custom Python script in a remote GPU environment directly from your local machine. Make sure that you use `Python3.10` for seamless experience.
### Step 1: Add the Decorators and local entry point
To enable **Remote Run**, simply do the following:
1. Import the `inferless` library and initialize `Cls(gpu="A10")`. The available GPU options are `T4`, `A10` and `A100`.
2. Decorated the `initialize` and `infer` functions with `@app.load` and `@app.infer` respectively.
3. Create the Local Entry Point by decorating a function (for example, `my_local_entry`) with `@inferless.local_entry_point`.
Within this function, instantiate your model class, convert any incoming parameters into a `RequestObjects` object, and invoke the model's `infer` method.
```python
import inferless
from vllm import LLM, SamplingParams
from pydantic import BaseModel, Field
from typing import Optional
@inferless.request
class RequestObjects(BaseModel):
prompt: str = Field(default="Explain Deep Learning.")
temperature: Optional[float] = 0.7
top_p: Optional[float] = 0.1
repetition_penalty: Optional[float] = 1.18
top_k: Optional[int] = 40
max_tokens: Optional[int] = 256
@inferless.response
class ResponseObjects(BaseModel):
generated_text: str = Field(default='Test output')
app = inferless.Cls(gpu="A100")
class InferlessPythonModel:
@app.load
def initialize(self):
model_id = "TheBloke/Starling-LM-7B-alpha-GPTQ"
self.llm = LLM(model=model_id,quantization="gptq",dtype="float16")
@app.infer
def infer(self, request: RequestObjects) -> ResponseObjects:
sampling_params = SamplingParams(temperature=request.temperature,top_p=request.top_p,repetition_penalty=request.repetition_penalty,
top_k=request.top_k,max_tokens=request.max_tokens)
result = self.llm.generate(request.prompt, sampling_params)
result_output = [output.outputs[0].text for output in result]
generateObject = ResponseObjects(generated_text = result_output[0])
return generateObject
def finalize(self):
self.llm = None
@inferless.local_entry_point
def my_local_entry(dynamic_params):
request_objects = RequestObjects(**dynamic_params)
model_instance = InferlessPythonModel()
return model_instance.infer(request_objects)
```
### Step 2: Run with Remote GPU
From your local terminal, navigate to the folder containing your `app.py` and your `inferless-runtime-config.yaml` and run:
```bash
inferless remote-run app.py -c inferless-runtime-config.yaml --prompts "What is Quantum Computing?"
```
You can pass the other input parameters in the same way as long as your code expects them in the `inputs` dictionary.
If you want to exclude certain files or directories from being uploaded, use the `--exclude` or `-e` flag.
## Method A: Deploying the model on Inferless Platform
Inferless supports multiple ways of [importing your model](https://docs.inferless.com/model-import/file-structure-requirements). For this tutorial, we will use GitHub.
### Step 1: Login to the inferless dashboard can click on Import model button
Navigate to your desired workspace in Inferless and Click on `Add a custom model` button that you see on the top right. An import wizard will open up.
### Step 2: Follow the UI to complete the model Import
* Select the GitHub/GitLab Integration option to connect your source code repository with the deployment environment.
* Navigate to the specific GitHub repository that contains your model's code. Here, you will need to identify and enter the name of the model you wish to import.
* Choose the appropriate type of machine that suits your model's requirements. Additionally, specify the minimum and maximum number of replicas to define the scalability range for deploying your model.
* Optionally, you have the option to enable automatic build and deployment. This feature triggers a new deployment automatically whenever there is a new code push to your repository.
* If your model requires additional software packages, configure the Custom Runtime settings by including necessary pip or apt packages. Also, set up environment variables such as Inference Timeout, Container Concurrency, and Scale Down Timeout to tailor the runtime environment according to your needs.
* Wait for the validation process to complete, ensuring that all settings are correct and functional. Once validation is successful, click on the "Import" button to finalize the import of your model.
### Step 3: Wait for the model build to complete usually takes \~5-10 minutes
### Step 4: Use the APIs to call the model
Once the model is in 'Active' status you can click on the 'API' page to call the model
### Here is the Demo:
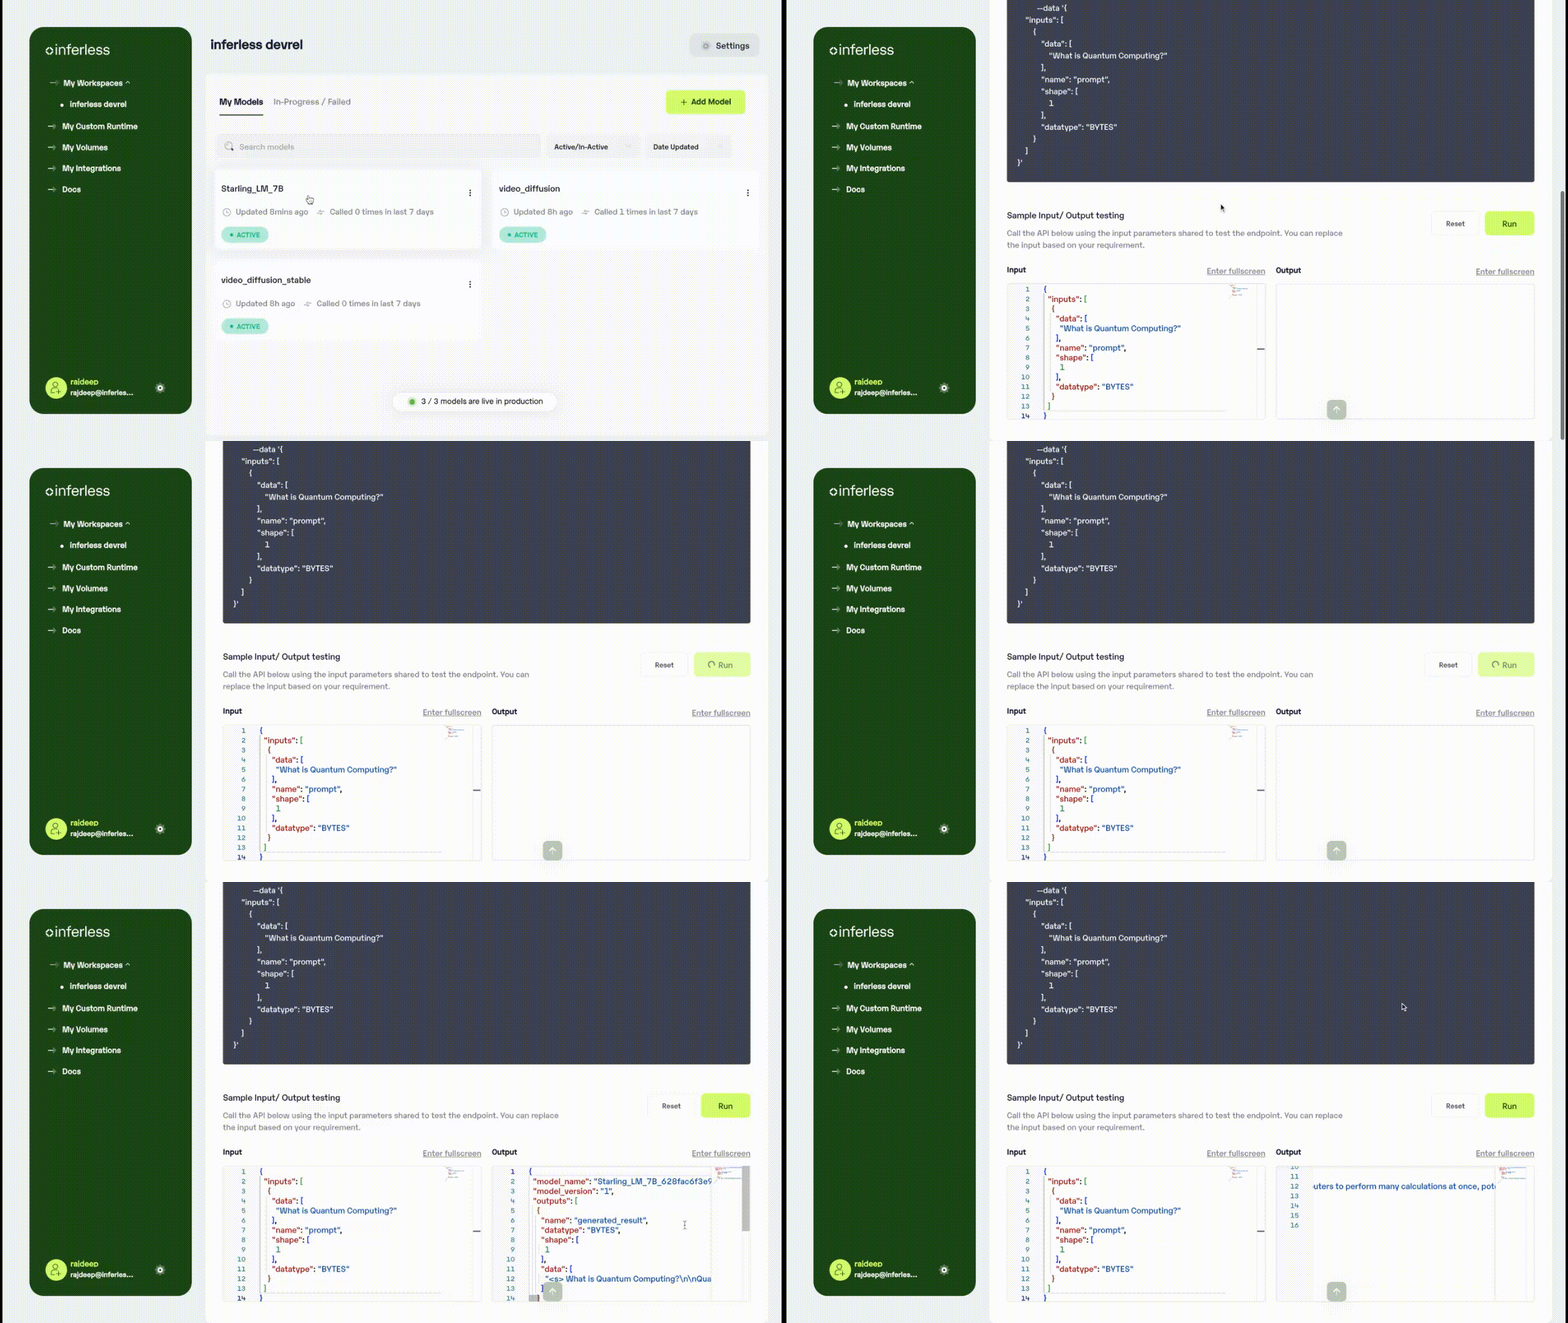 ## Method B: Deploying the model on Inferless CLI
Inferless allows you to deploy your model using Inferless-CLI. Follow the steps to deploy using Inferless CLI.
### Clone the repository of the model
Let's begin by cloning the model repository:
```bash
git clone https://github.com/inferless/Starling-LM-7B-alpha-GPTQ.git
```
### Deploy the Model
To deploy the model using Inferless CLI, execute the following command:
```bash
inferless deploy --gpu A100 --runtime inferless-runtime-config.yaml
```
**Explanation of the Command:**
* `--gpu A100`: Specifies the GPU type for deployment. Available options include `A10`, `A100`, and `T4`.
* `--runtime inferless-runtime-config.yaml`: Defines the runtime configuration file. If not specified, the default Inferless runtime is used.
# Deploy Llama-3-TenyxChat-70B using Inferless
Source: https://docs.inferless.com/how-to-guides/deploy-tenyx-llama-3-using-inferless
Llama-3-TenyxChat-70B is a model fine-tuned through Direct Preference Optimization (DPO). It leverages Tenyx's advance fine-tuning technology and the open-source AI feedback dataset, UltraFeedback, for its training.
## Introduction
Tenyx has created [Llama-3-TenyxChat-70B](https://huggingface.co/tenyx/Llama3-TenyxChat-70B) by fine-tuning [Llama3-70B](https://huggingface.co/meta-llama/Meta-Llama-3-70B). They leverage the Direct Preference Optimization (DPO) framework with the open-source AI feedback dataset UltraFeedback and incorporated their proprietary approach.
Llama-3-TenyxChat-70B was trained using eight A100s (80GB) for fifteen hours, with a training setup obtained from HuggingFaceH4 ([GitHub](https://github.com/huggingface/alignment-handbook)).
## Our Observations
We have deployed the model on an A100 GPU(80GB). Here are our observations:
| Library | Quantization | Inference Time | Cold Start Time | Tokens/Sec |
| ----------------------------- | ------------ | -------------- | --------------- | ---------- |
| Transformers and bitsandbytes | 4-bit | 20.14 sec | 28.32 sec | 6.2 |
## Defining Dependencies
We are using the [Transformers](https://github.com/huggingface/transformers) and [bitsandbytes](https://github.com/TimDettmers/bitsandbytes), which allows us to quantize and serve the model using A100 (80GB).
## Constructing the GitHub/GitLab Template
Now quickly construct the GitHub/GitLab template, this process is mandatory and make sure you don't add any file named `model.py`.
```
Llama3-TenyxChat-70B/
├── app.py
├── inferless-runtime-config.yaml
├── inferless.yaml
└── input_schema.py
```
You can also add other files to this directory.
## Create the class for inference
In the [app.py](https://github.com/inferless/Llama3-TenyxChat-70B/blob/main/app.py) we will define the class and import all the required functions
1. `def initialize`: In this function, you will initialize your model and define any `variable` that you want to use during inference.
2. `def infer`: This function gets called for every request that you send. Here you can define all the steps that are required for the inference. You can also pass custom values for inference and pass it through `inputs(dict)` parameter.
3. `def finalize`: This function cleans up all the allocated memory.
```python
import os
os.environ["HF_HUB_ENABLE_HF_TRANSFER"]='1'
from huggingface_hub import snapshot_download
from transformers import AutoModelForCausalLM,BitsAndBytesConfig,AutoTokenizer
import inferless
app = inferless.Cls(gpu="A100")
class InferlessPythonModel:
@app.load
def initialize(self):
model_name = "tenyx/Llama3-TenyxChat-70B"
snapshot_download(repo_id=model_name,allow_patterns=["*.safetensors"])
bnb_config = BitsAndBytesConfig(load_in_4bit=True, bnb_4bit_quant_type="nf4")
self.tokenizer = AutoTokenizer.from_pretrained(model_name)
self.model = AutoModelForCausalLM.from_pretrained(model_name, quantization_config=bnb_config, device_map={"": 0})
@app.infer
def infer(self, inputs):
prompt = inputs["prompt"]
chat = [{"role": "user", "content": prompt}]
chat_template = self.tokenizer.apply_chat_template(chat,tokenize=False)
inputs = self.tokenizer(chat_template,return_tensors="pt")
generated_output = self.model.generate(**inputs, max_new_tokens=120)
output = self.tokenizer.decode(generated_output[0], skip_special_tokens=True)
return {"generated_outputs":output}
def finalize(self):
self.model = None
```
## Create the Input Schema
We have to create a [input\_schema.py](https://github.com/inferless/Llama3-TenyxChat-70B/blob/main/input_schema.py) in your GitHub/Gitlab repository this will help us create the Input parameters. You can checkout our documentation on [Input / Output Schema](https://docs.inferless.com/model-import/input-output-schema).
For this tutorial, we have defined a parameter `prompt` which is required during the API call. Now lets create the `input_schema.py`.
```JSON
INPUT_SCHEMA = {
"prompt": {
'datatype': 'STRING',
'required': True,
'shape': [1],
'example': ["What is AI?"]
}
}
```
## Creating the Custom Runtime
This is a mandatory step where we allow the users to upload their custom runtime through [inferless-runtime-config.yaml](https://github.com/inferless/Llama3-TenyxChat-70B/blob/main/inferless-runtime-config.yaml).
```python
build:
system_packages:
- "libssl-dev"
python_packages:
- "torch==2.2.1"
- "transformers==4.40.1"
- "accelerate==0.29.3"
- "bitsandbytes==0.43.1"
- "inferless-cli==2.0.9"
- "hf-transfer==0.1.9"
- "huggingface-hub==0.27.1"
```
## Test your model with Remote Run
You can use the `inferless remote-run`([installation guide here](https://docs.inferless.com/model-import/cli-import#cli-import)) command to test your model or any custom Python script in a remote GPU environment directly from your local machine. Make sure that you use `Python3.10` for seamless experience.
### Step 1: Add the Decorators and local entry point
To enable **Remote Run**, simply do the following:
1. Import the `inferless` library and initialize `Cls(gpu="A100")`. The available GPU options are `T4`, `A10` and `A100`.
2. Decorated the `initialize` and `infer` functions with `@app.load` and `@app.infer` respectively.
3. Create the Local Entry Point by decorating a function (for example, `my_local_entry`) with `@inferless.local_entry_point`.
Within this function, instantiate your model class, convert any incoming parameters into a `RequestObjects` object, and invoke the model's `infer` method.
```python
import os
os.environ["HF_HUB_ENABLE_HF_TRANSFER"]='1'
from huggingface_hub import snapshot_download
from transformers import AutoModelForCausalLM,BitsAndBytesConfig,AutoTokenizer
import inferless
from pydantic import BaseModel, Field
from typing import Optional
@inferless.request
class RequestObjects(BaseModel):
prompt: str = Field(default="Explain Deep Learning.")
@inferless.response
class ResponseObjects(BaseModel):
generated_text: str = Field(default='Test output')
app = inferless.Cls(gpu="A100")
class InferlessPythonModel:
@app.load
def initialize(self):
model_name = "tenyx/Llama3-TenyxChat-70B"
snapshot_download(repo_id=model_name,allow_patterns=["*.safetensors"])
bnb_config = BitsAndBytesConfig(load_in_4bit=True, bnb_4bit_quant_type="nf4")
self.tokenizer = AutoTokenizer.from_pretrained(model_name)
self.model = AutoModelForCausalLM.from_pretrained(model_name, quantization_config=bnb_config, device_map={"": 0})
@app.infer
def infer(self, request: RequestObjects) -> ResponseObjects:
chat = [{"role": "user", "content": request.prompt}]
chat_template = self.tokenizer.apply_chat_template(chat,tokenize=False)
inputs = self.tokenizer(chat_template,return_tensors="pt")
generated_output = self.model.generate(**inputs, max_new_tokens=120)
output = self.tokenizer.decode(generated_output[0], skip_special_tokens=True)
generateObject = ResponseObjects(generated_text = output)
return generateObject
def finalize(self):
self.model = None
@inferless.local_entry_point
def my_local_entry(dynamic_params):
request_objects = RequestObjects(**dynamic_params)
model_instance = InferlessPythonModel()
return model_instance.infer(request_objects)
```
### Step 2: Run with Remote GPU
From your local terminal, navigate to the folder containing your `app.py` and your `inferless-runtime-config.yaml` and run:
```bash
inferless remote-run app.py -c inferless-runtime-config.yaml --prompt "What is AI?"
```
If you want to exclude certain files or directories from being uploaded, use the `--exclude` or `-e` flag.
## Method A: Deploying the model on Inferless Platform
Inferless supports multiple ways of [importing your model](https://docs.inferless.com/model-import/file-structure-req/file-structure-requirements). For this tutorial, we will use GitHub.
### Step 1: Login to the inferless dashboard can click on Import model button
Navigate to your desired workspace in Inferless and Click on `Add a custom model` button that you see on the top right. An import wizard will open up.
### Step 2: Follow the UI to complete the model Import
* Select the GitHub/GitLab Integration option to connect your source code repository with the deployment environment.
* Navigate to the specific GitHub repository that contains your model's code. Here, you will need to identify and enter the name of the model you wish to import.
* Choose the appropriate type of machine that suits your model's requirements. Additionally, specify the minimum and maximum number of replicas to define the scalability range for deploying your model.
* Optionally, you have the option to enable automatic build and deployment. This feature triggers a new deployment automatically whenever there is a new code push to your repository.
* If your model requires additional software packages, configure the Custom Runtime settings by including necessary pip or apt packages. Also, set up environment variables such as Inference Timeout, Container Concurrency, and Scale Down Timeout to tailor the runtime environment according to your needs.
* Wait for the validation process to complete, ensuring that all settings are correct and functional. Once validation is successful, click on the "Import" button to finalize the import of your model.
### Step 3: Wait for the model build to complete usually takes \~5-10 minutes
### Step 4: Use the APIs to call the model
Once the model is in 'Active' status you can click on the 'API' page to call the model
### Here is the Demo:
## Method B: Deploying the model on Inferless CLI
Inferless allows you to deploy your model using Inferless-CLI. Follow the steps to deploy using Inferless CLI.
### Clone the repository of the model
Let's begin by cloning the model repository:
```bash
git clone https://github.com/inferless/Starling-LM-7B-alpha-GPTQ.git
```
### Deploy the Model
To deploy the model using Inferless CLI, execute the following command:
```bash
inferless deploy --gpu A100 --runtime inferless-runtime-config.yaml
```
**Explanation of the Command:**
* `--gpu A100`: Specifies the GPU type for deployment. Available options include `A10`, `A100`, and `T4`.
* `--runtime inferless-runtime-config.yaml`: Defines the runtime configuration file. If not specified, the default Inferless runtime is used.
# Deploy Llama-3-TenyxChat-70B using Inferless
Source: https://docs.inferless.com/how-to-guides/deploy-tenyx-llama-3-using-inferless
Llama-3-TenyxChat-70B is a model fine-tuned through Direct Preference Optimization (DPO). It leverages Tenyx's advance fine-tuning technology and the open-source AI feedback dataset, UltraFeedback, for its training.
## Introduction
Tenyx has created [Llama-3-TenyxChat-70B](https://huggingface.co/tenyx/Llama3-TenyxChat-70B) by fine-tuning [Llama3-70B](https://huggingface.co/meta-llama/Meta-Llama-3-70B). They leverage the Direct Preference Optimization (DPO) framework with the open-source AI feedback dataset UltraFeedback and incorporated their proprietary approach.
Llama-3-TenyxChat-70B was trained using eight A100s (80GB) for fifteen hours, with a training setup obtained from HuggingFaceH4 ([GitHub](https://github.com/huggingface/alignment-handbook)).
## Our Observations
We have deployed the model on an A100 GPU(80GB). Here are our observations:
| Library | Quantization | Inference Time | Cold Start Time | Tokens/Sec |
| ----------------------------- | ------------ | -------------- | --------------- | ---------- |
| Transformers and bitsandbytes | 4-bit | 20.14 sec | 28.32 sec | 6.2 |
## Defining Dependencies
We are using the [Transformers](https://github.com/huggingface/transformers) and [bitsandbytes](https://github.com/TimDettmers/bitsandbytes), which allows us to quantize and serve the model using A100 (80GB).
## Constructing the GitHub/GitLab Template
Now quickly construct the GitHub/GitLab template, this process is mandatory and make sure you don't add any file named `model.py`.
```
Llama3-TenyxChat-70B/
├── app.py
├── inferless-runtime-config.yaml
├── inferless.yaml
└── input_schema.py
```
You can also add other files to this directory.
## Create the class for inference
In the [app.py](https://github.com/inferless/Llama3-TenyxChat-70B/blob/main/app.py) we will define the class and import all the required functions
1. `def initialize`: In this function, you will initialize your model and define any `variable` that you want to use during inference.
2. `def infer`: This function gets called for every request that you send. Here you can define all the steps that are required for the inference. You can also pass custom values for inference and pass it through `inputs(dict)` parameter.
3. `def finalize`: This function cleans up all the allocated memory.
```python
import os
os.environ["HF_HUB_ENABLE_HF_TRANSFER"]='1'
from huggingface_hub import snapshot_download
from transformers import AutoModelForCausalLM,BitsAndBytesConfig,AutoTokenizer
import inferless
app = inferless.Cls(gpu="A100")
class InferlessPythonModel:
@app.load
def initialize(self):
model_name = "tenyx/Llama3-TenyxChat-70B"
snapshot_download(repo_id=model_name,allow_patterns=["*.safetensors"])
bnb_config = BitsAndBytesConfig(load_in_4bit=True, bnb_4bit_quant_type="nf4")
self.tokenizer = AutoTokenizer.from_pretrained(model_name)
self.model = AutoModelForCausalLM.from_pretrained(model_name, quantization_config=bnb_config, device_map={"": 0})
@app.infer
def infer(self, inputs):
prompt = inputs["prompt"]
chat = [{"role": "user", "content": prompt}]
chat_template = self.tokenizer.apply_chat_template(chat,tokenize=False)
inputs = self.tokenizer(chat_template,return_tensors="pt")
generated_output = self.model.generate(**inputs, max_new_tokens=120)
output = self.tokenizer.decode(generated_output[0], skip_special_tokens=True)
return {"generated_outputs":output}
def finalize(self):
self.model = None
```
## Create the Input Schema
We have to create a [input\_schema.py](https://github.com/inferless/Llama3-TenyxChat-70B/blob/main/input_schema.py) in your GitHub/Gitlab repository this will help us create the Input parameters. You can checkout our documentation on [Input / Output Schema](https://docs.inferless.com/model-import/input-output-schema).
For this tutorial, we have defined a parameter `prompt` which is required during the API call. Now lets create the `input_schema.py`.
```JSON
INPUT_SCHEMA = {
"prompt": {
'datatype': 'STRING',
'required': True,
'shape': [1],
'example': ["What is AI?"]
}
}
```
## Creating the Custom Runtime
This is a mandatory step where we allow the users to upload their custom runtime through [inferless-runtime-config.yaml](https://github.com/inferless/Llama3-TenyxChat-70B/blob/main/inferless-runtime-config.yaml).
```python
build:
system_packages:
- "libssl-dev"
python_packages:
- "torch==2.2.1"
- "transformers==4.40.1"
- "accelerate==0.29.3"
- "bitsandbytes==0.43.1"
- "inferless-cli==2.0.9"
- "hf-transfer==0.1.9"
- "huggingface-hub==0.27.1"
```
## Test your model with Remote Run
You can use the `inferless remote-run`([installation guide here](https://docs.inferless.com/model-import/cli-import#cli-import)) command to test your model or any custom Python script in a remote GPU environment directly from your local machine. Make sure that you use `Python3.10` for seamless experience.
### Step 1: Add the Decorators and local entry point
To enable **Remote Run**, simply do the following:
1. Import the `inferless` library and initialize `Cls(gpu="A100")`. The available GPU options are `T4`, `A10` and `A100`.
2. Decorated the `initialize` and `infer` functions with `@app.load` and `@app.infer` respectively.
3. Create the Local Entry Point by decorating a function (for example, `my_local_entry`) with `@inferless.local_entry_point`.
Within this function, instantiate your model class, convert any incoming parameters into a `RequestObjects` object, and invoke the model's `infer` method.
```python
import os
os.environ["HF_HUB_ENABLE_HF_TRANSFER"]='1'
from huggingface_hub import snapshot_download
from transformers import AutoModelForCausalLM,BitsAndBytesConfig,AutoTokenizer
import inferless
from pydantic import BaseModel, Field
from typing import Optional
@inferless.request
class RequestObjects(BaseModel):
prompt: str = Field(default="Explain Deep Learning.")
@inferless.response
class ResponseObjects(BaseModel):
generated_text: str = Field(default='Test output')
app = inferless.Cls(gpu="A100")
class InferlessPythonModel:
@app.load
def initialize(self):
model_name = "tenyx/Llama3-TenyxChat-70B"
snapshot_download(repo_id=model_name,allow_patterns=["*.safetensors"])
bnb_config = BitsAndBytesConfig(load_in_4bit=True, bnb_4bit_quant_type="nf4")
self.tokenizer = AutoTokenizer.from_pretrained(model_name)
self.model = AutoModelForCausalLM.from_pretrained(model_name, quantization_config=bnb_config, device_map={"": 0})
@app.infer
def infer(self, request: RequestObjects) -> ResponseObjects:
chat = [{"role": "user", "content": request.prompt}]
chat_template = self.tokenizer.apply_chat_template(chat,tokenize=False)
inputs = self.tokenizer(chat_template,return_tensors="pt")
generated_output = self.model.generate(**inputs, max_new_tokens=120)
output = self.tokenizer.decode(generated_output[0], skip_special_tokens=True)
generateObject = ResponseObjects(generated_text = output)
return generateObject
def finalize(self):
self.model = None
@inferless.local_entry_point
def my_local_entry(dynamic_params):
request_objects = RequestObjects(**dynamic_params)
model_instance = InferlessPythonModel()
return model_instance.infer(request_objects)
```
### Step 2: Run with Remote GPU
From your local terminal, navigate to the folder containing your `app.py` and your `inferless-runtime-config.yaml` and run:
```bash
inferless remote-run app.py -c inferless-runtime-config.yaml --prompt "What is AI?"
```
If you want to exclude certain files or directories from being uploaded, use the `--exclude` or `-e` flag.
## Method A: Deploying the model on Inferless Platform
Inferless supports multiple ways of [importing your model](https://docs.inferless.com/model-import/file-structure-req/file-structure-requirements). For this tutorial, we will use GitHub.
### Step 1: Login to the inferless dashboard can click on Import model button
Navigate to your desired workspace in Inferless and Click on `Add a custom model` button that you see on the top right. An import wizard will open up.
### Step 2: Follow the UI to complete the model Import
* Select the GitHub/GitLab Integration option to connect your source code repository with the deployment environment.
* Navigate to the specific GitHub repository that contains your model's code. Here, you will need to identify and enter the name of the model you wish to import.
* Choose the appropriate type of machine that suits your model's requirements. Additionally, specify the minimum and maximum number of replicas to define the scalability range for deploying your model.
* Optionally, you have the option to enable automatic build and deployment. This feature triggers a new deployment automatically whenever there is a new code push to your repository.
* If your model requires additional software packages, configure the Custom Runtime settings by including necessary pip or apt packages. Also, set up environment variables such as Inference Timeout, Container Concurrency, and Scale Down Timeout to tailor the runtime environment according to your needs.
* Wait for the validation process to complete, ensuring that all settings are correct and functional. Once validation is successful, click on the "Import" button to finalize the import of your model.
### Step 3: Wait for the model build to complete usually takes \~5-10 minutes
### Step 4: Use the APIs to call the model
Once the model is in 'Active' status you can click on the 'API' page to call the model
### Here is the Demo:
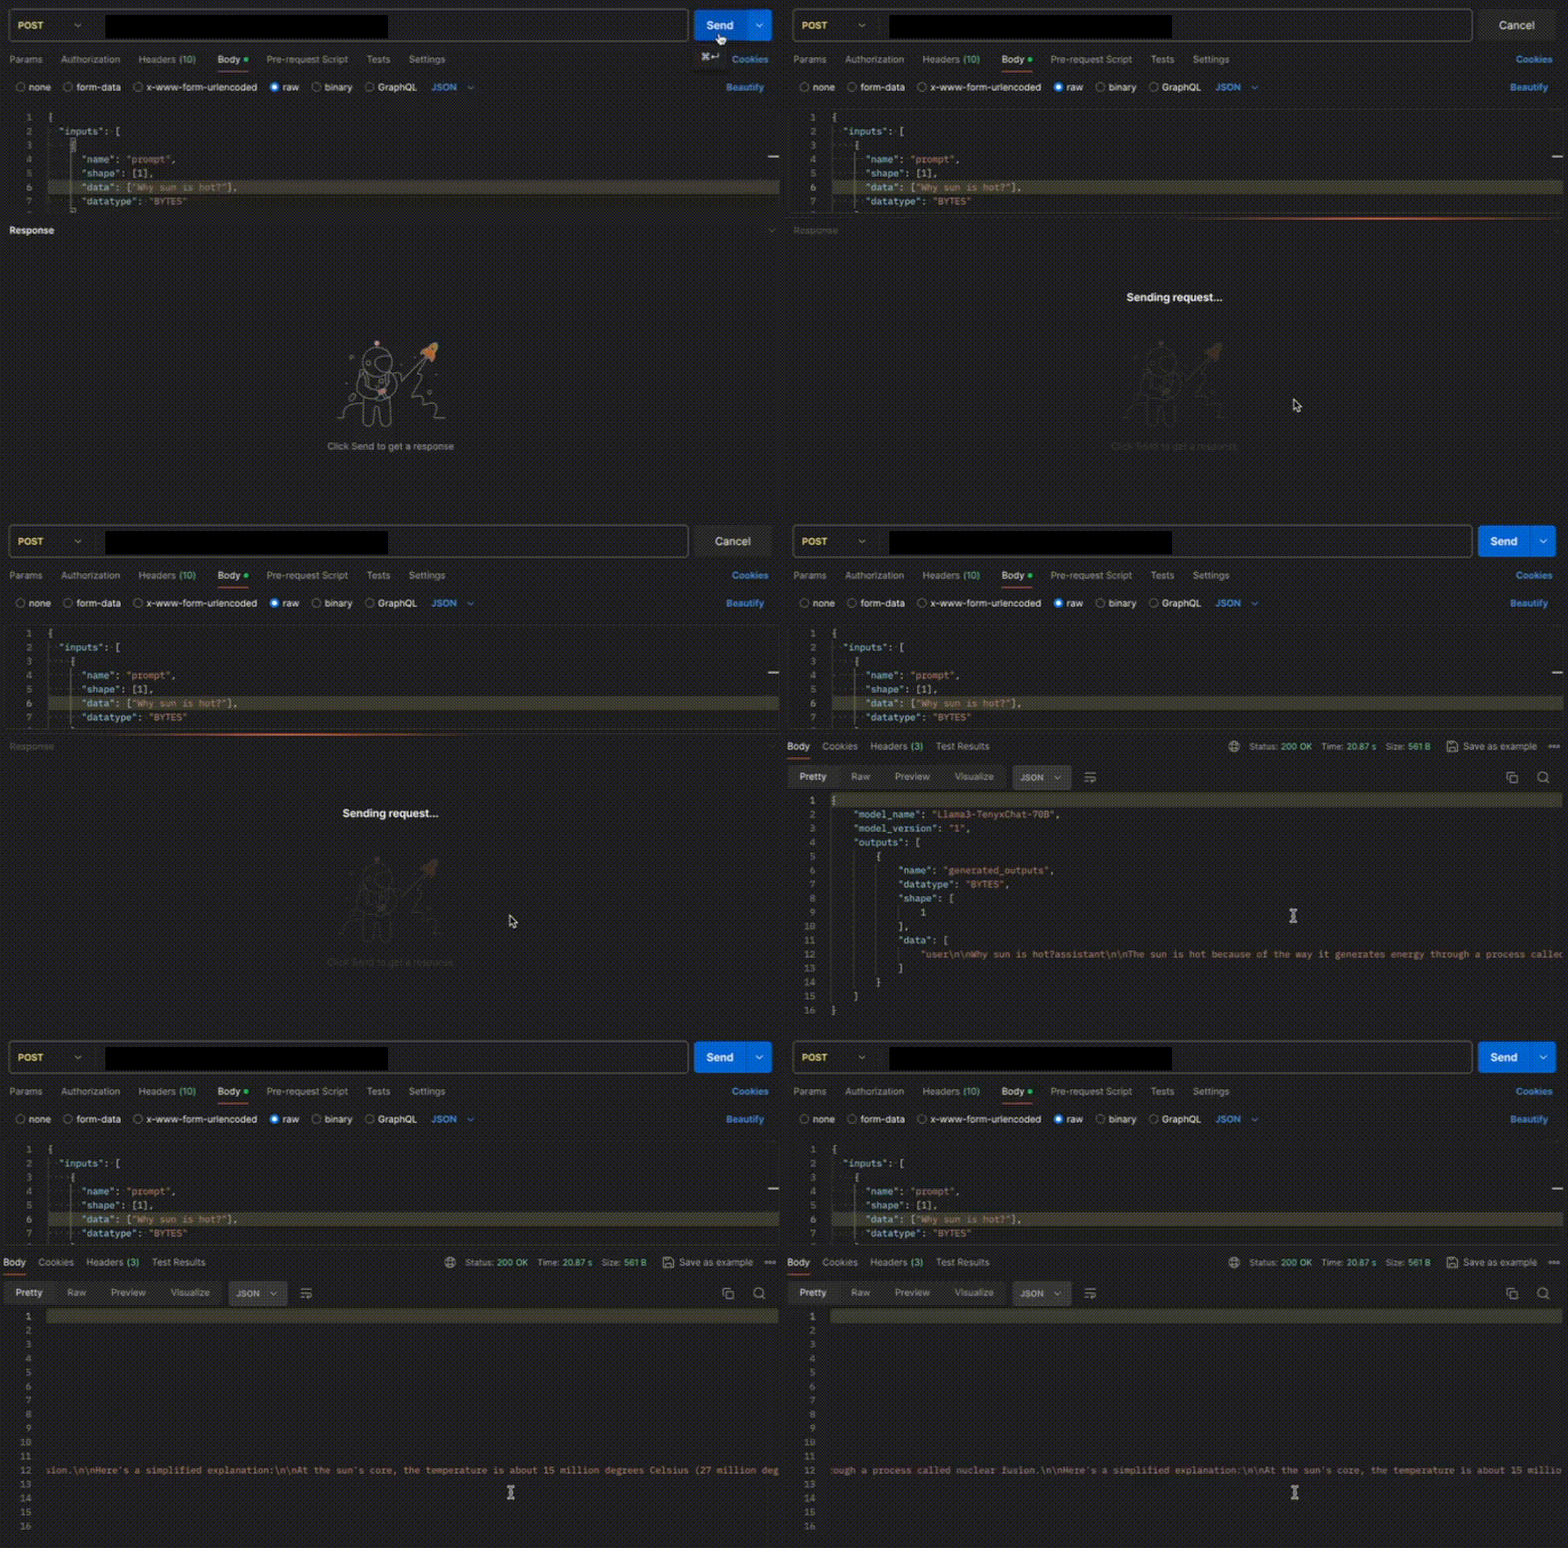 ## Method B: Deploying the model on Inferless CLI
Inferless allows you to deploy your model using Inferless-CLI. Follow the steps to deploy using Inferless CLI.
### Clone the repository of the model
Let's begin by cloning the model repository:
```bash
git clone https://github.com/inferless/Llama3-TenyxChat-70B.git
```
### Deploy the Model
To deploy the model using Inferless CLI, execute the following command:
```bash
inferless deploy --gpu A100 --runtime inferless-runtime-config.yaml
```
**Explanation of the Command:**
* `--gpu A100`: Specifies the GPU type for deployment. Available options include `A10`, `A100`, and `T4`.
* `--runtime inferless-runtime-config.yaml`: Defines the runtime configuration file. If not specified, the default Inferless runtime is used.
# Deploy TenyxChat 7B using Inferless
Source: https://docs.inferless.com/how-to-guides/deploy-tenyxchat-7b-using-inferless
TenyxChat-7B-v1, is trained using the Direct Preference Optimization (DPO) framework on the open-source AI feedback dataset UltraFeedback
## Introduction
[Tenyx](https://huggingface.co/tenyx) has created [TenyxChat-7B-v1](https://huggingface.co/tenyx/TenyxChat-7B-v1) by fine-tuning [OpenChat-3.5](https://arxiv.org/pdf/2309.11235.pdf) leveraging the [Direct Preference Optimization (DPO)](https://arxiv.org/abs/2305.18290) framework with the open-source AI feedback dataset [UltraFeedback](https://huggingface.co/datasets/HuggingFaceH4/ultrafeedback%5Fbinarized). Additionally, they have incorporated their proprietary approach, as outlined in their [blog](https://www.tenyx.com/post/forgetting-and-toxicity-in-llms-a-deep-dive-on-fine-tuning-methods) and [service](https://www.tenyx.com/fine-tuning), demonstrating a notable enhancement in [MT-Bench](https://arxiv.org/abs/2306.05685) scores without any degradation in the model's performance across other benchmarks.
## Our Observations
We have deployed the model using [huggingface pipeline](https://huggingface.co/docs/transformers/main%5Fclasses/pipelines) on an A100 GPU(80GB). Here are our observations:
| Inference Time | Cold Start Time | Token/Sec | Latency/Token | VRAM Required |
| -------------- | --------------- | --------- | ------------- | ------------- |
| 3.63 sec | 9.45 sec | 39.29 | 25.44 ms | 27.24 GB |
## Defining Dependencies
We are using the [huggingface transformer](https://github.com/huggingface/transformers) library, which enables you to run this model.
## Constructing the GitHub/GitLab Template
Now quickly construct the GitHub/GitLab template, this process is mandatory and make sure you don't add any file named `model.py`.
```python
TenyxChat-7B/
├── app.py
├── inferless-runtime-config.yaml
├── inferless.yaml
└── input_schema.py
```
You can also add other files to this directory.
## Create the class for inference
In the [app.py](https://github.com/rbgo404/TenyxChat-7B/blob/main/app.py) we will define the class and import all the required functions
1. `def initialize`: In this function, you will initialize your model and define any `variable` that you want to use during inference.
2. `def infer`: This function gets called for every request that you send. Here you can define all the steps that are required for the inference. You can also pass custom values for inference and pass it through `inputs(dict)` parameter.
3. `def finalize`: This function cleans up all the allocated memory.
```python
import os
os.environ["HF_HUB_ENABLE_HF_TRANSFER"]='1'
from huggingface_hub import snapshot_download
import torch
from transformers import AutoTokenizer, AutoModelForCausalLM, pipeline
import inferless
app = inferless.Cls(gpu="A100")
class InferlessPythonModel:
@app.load
def initialize(self):
model_id = "tenyx/TenyxChat-7B-v1"
snapshot_download(repo_id=model_id,allow_patterns=["*.safetensors"])
tokenizer = AutoTokenizer.from_pretrained(model_id)
model = AutoModelForCausalLM.from_pretrained(model_id,trust_remote_code=True)
self.pipe = pipeline("text-generation", model=model, tokenizer=tokenizer,device="cuda")
@app.infer
def infer(self, inputs):
prompt = inputs["prompt"]
messages = [{"role": "system", "content":prompt}]
prompt = self.pipe.tokenizer.apply_chat_template(messages, tokenize=False, add_generation_prompt=True)
out = self.pipe(prompt, max_new_tokens=256, do_sample=True, top_p=0.9,temperature=0.9)
generated_text = out[0]["generated_text"][len(prompt):]
return {'generated_result': generated_text}
def finalize(self):
self.pipe = None
```
## Creating the Custom Runtime
This is a mandatory step where we allow the users to upload their custom runtime through [inferless-runtime-config.yaml](https://github.com/rbgo404/TenyxChat-7B/blob/main/inferless-runtime-config.yaml).
```
build:
cuda_version: "12.1.1"
python_packages:
- torch==2.1.2
- transformers==4.36.2
- accelerate==0.25.0
- scipy==1.11.4
- inferless-cli==2.0.9
- hf-transfer==0.1.9
- huggingface-hub==0.27.1
```
## Test your model with Remote Run
You can use the `inferless remote-run`([installation guide here](https://docs.inferless.com/model-import/cli-import#cli-import)) command to test your model or any custom Python script in a remote GPU environment directly from your local machine. Make sure that you use `Python3.10` for seamless experience.
### Step 1: Add the Decorators and local entry point
To enable **Remote Run**, simply do the following:
1. Import the `inferless` library and initialize `Cls(gpu="A100")`. The available GPU options are `T4`, `A10` and `A100`.
2. Decorated the `initialize` and `infer` functions with `@app.load` and `@app.infer` respectively.
3. Create the Local Entry Point by decorating a function (for example, `my_local_entry`) with `@inferless.local_entry_point`.
Within this function, instantiate your model class, convert any incoming parameters into a `RequestObjects` object, and invoke the model's `infer` method.
```python
import os
os.environ["HF_HUB_ENABLE_HF_TRANSFER"]='1'
from huggingface_hub import snapshot_download
import torch
from transformers import AutoTokenizer, AutoModelForCausalLM, pipeline
import inferless
from pydantic import BaseModel, Field
from typing import Optional
@inferless.request
class RequestObjects(BaseModel):
prompt: str = Field(default="Explain Deep Learning.")
temperature: Optional[float] = 0.7
top_p: Optional[float] = 0.1
do_sample: Optional[bool] = True
max_new_tokens: Optional[int] = 256
@inferless.response
class ResponseObjects(BaseModel):
generated_text: str = Field(default='Test output')
app = inferless.Cls(gpu="A100")
class InferlessPythonModel:
@app.load
def initialize(self):
model_id = "tenyx/TenyxChat-7B-v1"
snapshot_download(repo_id=model_id,allow_patterns=["*.safetensors"])
tokenizer = AutoTokenizer.from_pretrained(model_id)
model = AutoModelForCausalLM.from_pretrained(model_id,trust_remote_code=True)
self.pipe = pipeline("text-generation", model=model, tokenizer=tokenizer,device="cuda")
@app.infer
def infer(self, request: RequestObjects) -> ResponseObjects:
messages = [{"role": "system", "content":request.prompt}]
prompt = self.pipe.tokenizer.apply_chat_template(messages, tokenize=False, add_generation_prompt=True)
out = self.pipe(prompt, max_new_tokens=request.max_new_tokens, do_sample=request.do_sample, top_p=request.top_p,temperature=request.temperature)
generated_text = out[0]["generated_text"][len(prompt):]
generateObject = ResponseObjects(generated_text = generated_text)
return generateObject
def finalize(self):
self.pipe = None
@inferless.local_entry_point
def my_local_entry(dynamic_params):
request_objects = RequestObjects(**dynamic_params)
model_instance = InferlessPythonModel()
return model_instance.infer(request_objects)
```
### Step 2: Run with Remote GPU
From your local terminal, navigate to the folder containing your `app.py` and your `inferless-runtime-config.yaml` and run:
```bash
inferless remote-run app.py -c inferless-runtime-config.yaml --prompt "Write a poem."
```
You can pass the other input parameters in the same way as long as your code expects them in the `inputs` dictionary.
If you want to exclude certain files or directories from being uploaded, use the `--exclude` or `-e` flag.
## Method A: Deploying the model on Inferless Platform
Inferless supports multiple ways of [importing your model](https://docs.inferless.com/model-import/file-structure-req/file-structure-requirements). For this tutorial, we will use GitHub.
### Step 1: Login to the inferless dashboard can click on Import model button
Navigate to your desired workspace in Inferless and Click on `Add a custom model` button that you see on the top right. An import wizard will open up.
### Step 2: Follow the UI to complete the model Import
* Select the GitHub/GitLab Integration option to connect your source code repository with the deployment environment.
* Navigate to the specific GitHub repository that contains your model's code. Here, you will need to identify and enter the name of the model you wish to import.
* Choose the appropriate type of machine that suits your model's requirements. Additionally, specify the minimum and maximum number of replicas to define the scalability range for deploying your model.
* Optionally, you have the option to enable automatic build and deployment. This feature triggers a new deployment automatically whenever there is a new code push to your repository.
* If your model requires additional software packages, configure the Custom Runtime settings by including necessary pip or apt packages. Also, set up environment variables such as Inference Timeout, Container Concurrency, and Scale Down Timeout to tailor the runtime environment according to your needs.
* Wait for the validation process to complete, ensuring that all settings are correct and functional. Once validation is successful, click on the "Import" button to finalize the import of your model.
### Step 3: Wait for the model build to complete usually takes \~5-10 minutes
### Step 4: Use the APIs to call the model
Once the model is in 'Active' status you can click on the 'API' page to call the model
### Here is the Demo:
## Method B: Deploying the model on Inferless CLI
Inferless allows you to deploy your model using Inferless-CLI. Follow the steps to deploy using Inferless CLI.
### Clone the repository of the model
Let's begin by cloning the model repository:
```bash
git clone https://github.com/inferless/Llama3-TenyxChat-70B.git
```
### Deploy the Model
To deploy the model using Inferless CLI, execute the following command:
```bash
inferless deploy --gpu A100 --runtime inferless-runtime-config.yaml
```
**Explanation of the Command:**
* `--gpu A100`: Specifies the GPU type for deployment. Available options include `A10`, `A100`, and `T4`.
* `--runtime inferless-runtime-config.yaml`: Defines the runtime configuration file. If not specified, the default Inferless runtime is used.
# Deploy TenyxChat 7B using Inferless
Source: https://docs.inferless.com/how-to-guides/deploy-tenyxchat-7b-using-inferless
TenyxChat-7B-v1, is trained using the Direct Preference Optimization (DPO) framework on the open-source AI feedback dataset UltraFeedback
## Introduction
[Tenyx](https://huggingface.co/tenyx) has created [TenyxChat-7B-v1](https://huggingface.co/tenyx/TenyxChat-7B-v1) by fine-tuning [OpenChat-3.5](https://arxiv.org/pdf/2309.11235.pdf) leveraging the [Direct Preference Optimization (DPO)](https://arxiv.org/abs/2305.18290) framework with the open-source AI feedback dataset [UltraFeedback](https://huggingface.co/datasets/HuggingFaceH4/ultrafeedback%5Fbinarized). Additionally, they have incorporated their proprietary approach, as outlined in their [blog](https://www.tenyx.com/post/forgetting-and-toxicity-in-llms-a-deep-dive-on-fine-tuning-methods) and [service](https://www.tenyx.com/fine-tuning), demonstrating a notable enhancement in [MT-Bench](https://arxiv.org/abs/2306.05685) scores without any degradation in the model's performance across other benchmarks.
## Our Observations
We have deployed the model using [huggingface pipeline](https://huggingface.co/docs/transformers/main%5Fclasses/pipelines) on an A100 GPU(80GB). Here are our observations:
| Inference Time | Cold Start Time | Token/Sec | Latency/Token | VRAM Required |
| -------------- | --------------- | --------- | ------------- | ------------- |
| 3.63 sec | 9.45 sec | 39.29 | 25.44 ms | 27.24 GB |
## Defining Dependencies
We are using the [huggingface transformer](https://github.com/huggingface/transformers) library, which enables you to run this model.
## Constructing the GitHub/GitLab Template
Now quickly construct the GitHub/GitLab template, this process is mandatory and make sure you don't add any file named `model.py`.
```python
TenyxChat-7B/
├── app.py
├── inferless-runtime-config.yaml
├── inferless.yaml
└── input_schema.py
```
You can also add other files to this directory.
## Create the class for inference
In the [app.py](https://github.com/rbgo404/TenyxChat-7B/blob/main/app.py) we will define the class and import all the required functions
1. `def initialize`: In this function, you will initialize your model and define any `variable` that you want to use during inference.
2. `def infer`: This function gets called for every request that you send. Here you can define all the steps that are required for the inference. You can also pass custom values for inference and pass it through `inputs(dict)` parameter.
3. `def finalize`: This function cleans up all the allocated memory.
```python
import os
os.environ["HF_HUB_ENABLE_HF_TRANSFER"]='1'
from huggingface_hub import snapshot_download
import torch
from transformers import AutoTokenizer, AutoModelForCausalLM, pipeline
import inferless
app = inferless.Cls(gpu="A100")
class InferlessPythonModel:
@app.load
def initialize(self):
model_id = "tenyx/TenyxChat-7B-v1"
snapshot_download(repo_id=model_id,allow_patterns=["*.safetensors"])
tokenizer = AutoTokenizer.from_pretrained(model_id)
model = AutoModelForCausalLM.from_pretrained(model_id,trust_remote_code=True)
self.pipe = pipeline("text-generation", model=model, tokenizer=tokenizer,device="cuda")
@app.infer
def infer(self, inputs):
prompt = inputs["prompt"]
messages = [{"role": "system", "content":prompt}]
prompt = self.pipe.tokenizer.apply_chat_template(messages, tokenize=False, add_generation_prompt=True)
out = self.pipe(prompt, max_new_tokens=256, do_sample=True, top_p=0.9,temperature=0.9)
generated_text = out[0]["generated_text"][len(prompt):]
return {'generated_result': generated_text}
def finalize(self):
self.pipe = None
```
## Creating the Custom Runtime
This is a mandatory step where we allow the users to upload their custom runtime through [inferless-runtime-config.yaml](https://github.com/rbgo404/TenyxChat-7B/blob/main/inferless-runtime-config.yaml).
```
build:
cuda_version: "12.1.1"
python_packages:
- torch==2.1.2
- transformers==4.36.2
- accelerate==0.25.0
- scipy==1.11.4
- inferless-cli==2.0.9
- hf-transfer==0.1.9
- huggingface-hub==0.27.1
```
## Test your model with Remote Run
You can use the `inferless remote-run`([installation guide here](https://docs.inferless.com/model-import/cli-import#cli-import)) command to test your model or any custom Python script in a remote GPU environment directly from your local machine. Make sure that you use `Python3.10` for seamless experience.
### Step 1: Add the Decorators and local entry point
To enable **Remote Run**, simply do the following:
1. Import the `inferless` library and initialize `Cls(gpu="A100")`. The available GPU options are `T4`, `A10` and `A100`.
2. Decorated the `initialize` and `infer` functions with `@app.load` and `@app.infer` respectively.
3. Create the Local Entry Point by decorating a function (for example, `my_local_entry`) with `@inferless.local_entry_point`.
Within this function, instantiate your model class, convert any incoming parameters into a `RequestObjects` object, and invoke the model's `infer` method.
```python
import os
os.environ["HF_HUB_ENABLE_HF_TRANSFER"]='1'
from huggingface_hub import snapshot_download
import torch
from transformers import AutoTokenizer, AutoModelForCausalLM, pipeline
import inferless
from pydantic import BaseModel, Field
from typing import Optional
@inferless.request
class RequestObjects(BaseModel):
prompt: str = Field(default="Explain Deep Learning.")
temperature: Optional[float] = 0.7
top_p: Optional[float] = 0.1
do_sample: Optional[bool] = True
max_new_tokens: Optional[int] = 256
@inferless.response
class ResponseObjects(BaseModel):
generated_text: str = Field(default='Test output')
app = inferless.Cls(gpu="A100")
class InferlessPythonModel:
@app.load
def initialize(self):
model_id = "tenyx/TenyxChat-7B-v1"
snapshot_download(repo_id=model_id,allow_patterns=["*.safetensors"])
tokenizer = AutoTokenizer.from_pretrained(model_id)
model = AutoModelForCausalLM.from_pretrained(model_id,trust_remote_code=True)
self.pipe = pipeline("text-generation", model=model, tokenizer=tokenizer,device="cuda")
@app.infer
def infer(self, request: RequestObjects) -> ResponseObjects:
messages = [{"role": "system", "content":request.prompt}]
prompt = self.pipe.tokenizer.apply_chat_template(messages, tokenize=False, add_generation_prompt=True)
out = self.pipe(prompt, max_new_tokens=request.max_new_tokens, do_sample=request.do_sample, top_p=request.top_p,temperature=request.temperature)
generated_text = out[0]["generated_text"][len(prompt):]
generateObject = ResponseObjects(generated_text = generated_text)
return generateObject
def finalize(self):
self.pipe = None
@inferless.local_entry_point
def my_local_entry(dynamic_params):
request_objects = RequestObjects(**dynamic_params)
model_instance = InferlessPythonModel()
return model_instance.infer(request_objects)
```
### Step 2: Run with Remote GPU
From your local terminal, navigate to the folder containing your `app.py` and your `inferless-runtime-config.yaml` and run:
```bash
inferless remote-run app.py -c inferless-runtime-config.yaml --prompt "Write a poem."
```
You can pass the other input parameters in the same way as long as your code expects them in the `inputs` dictionary.
If you want to exclude certain files or directories from being uploaded, use the `--exclude` or `-e` flag.
## Method A: Deploying the model on Inferless Platform
Inferless supports multiple ways of [importing your model](https://docs.inferless.com/model-import/file-structure-req/file-structure-requirements). For this tutorial, we will use GitHub.
### Step 1: Login to the inferless dashboard can click on Import model button
Navigate to your desired workspace in Inferless and Click on `Add a custom model` button that you see on the top right. An import wizard will open up.
### Step 2: Follow the UI to complete the model Import
* Select the GitHub/GitLab Integration option to connect your source code repository with the deployment environment.
* Navigate to the specific GitHub repository that contains your model's code. Here, you will need to identify and enter the name of the model you wish to import.
* Choose the appropriate type of machine that suits your model's requirements. Additionally, specify the minimum and maximum number of replicas to define the scalability range for deploying your model.
* Optionally, you have the option to enable automatic build and deployment. This feature triggers a new deployment automatically whenever there is a new code push to your repository.
* If your model requires additional software packages, configure the Custom Runtime settings by including necessary pip or apt packages. Also, set up environment variables such as Inference Timeout, Container Concurrency, and Scale Down Timeout to tailor the runtime environment according to your needs.
* Wait for the validation process to complete, ensuring that all settings are correct and functional. Once validation is successful, click on the "Import" button to finalize the import of your model.
### Step 3: Wait for the model build to complete usually takes \~5-10 minutes
### Step 4: Use the APIs to call the model
Once the model is in 'Active' status you can click on the 'API' page to call the model
### Here is the Demo:
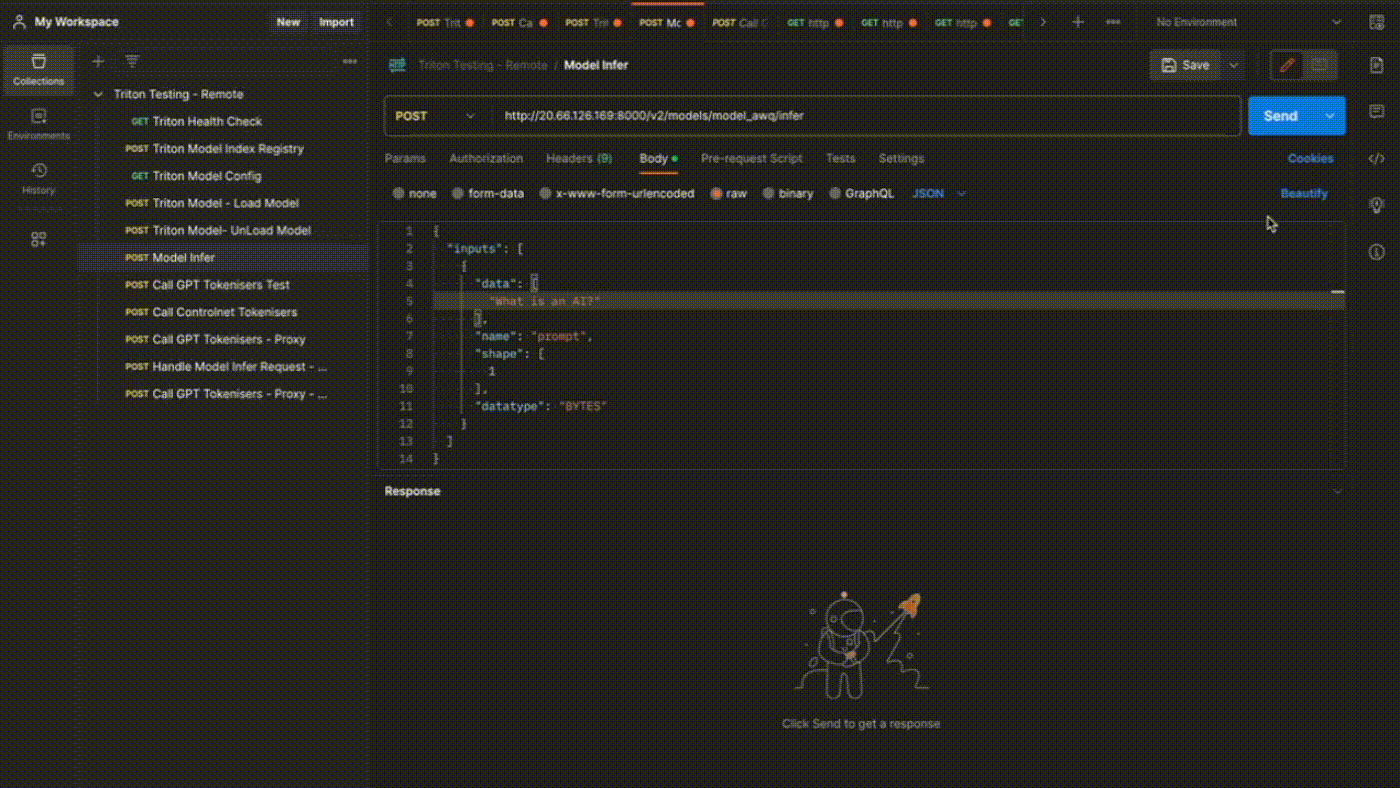 ## Method B: Deploying the model on Inferless CLI
Inferless allows you to deploy your model using Inferless-CLI. Follow the steps to deploy using Inferless CLI.
### Clone the repository of the model
Let's begin by cloning the model repository:
```bash
git clone https://github.com/inferless/TenyxChat-7B.git
```
### Deploy the Model
To deploy the model using Inferless CLI, execute the following command:
```bash
inferless deploy --gpu A100 --runtime inferless-runtime-config.yaml
```
**Explanation of the Command:**
* `--gpu A100`: Specifies the GPU type for deployment. Available options include `A10`, `A100`, and `T4`.
* `--runtime inferless-runtime-config.yaml`: Defines the runtime configuration file. If not specified, the default Inferless runtime is used.
# Deploy TenyxChat-8x7B-v1 using Inferless
Source: https://docs.inferless.com/how-to-guides/deploy-tenyxchat-8x7b-v1-using-inferless
TenyxChat-8x7B-v1, is trained using the Direct Preference Optimization (DPO) framework on the open-source AI feedback dataset UltraFeedback
## Introduction
[Tenyx](https://huggingface.co/tenyx) has created TenyxChat-8x7B-v1 by fine-tuning [Mixtral-8x7B-Instruct-v0.1](https://arxiv.org/pdf/2401.04088.pdf) leveraging the [Direct Preference Optimization (DPO)](https://arxiv.org/abs/2305.18290) framework with the open-source AI feedback dataset [UltraFeedback](https://huggingface.co/datasets/HuggingFaceH4/ultrafeedback%5Fbinarized). Additionally, they have incorporated their proprietary approach, as outlined in their [blog](https://www.tenyx.com/post/forgetting-and-toxicity-in-llms-a-deep-dive-on-fine-tuning-methods) and [service](https://www.tenyx.com/fine-tuning), demonstrating a notable enhancement in [MT-Bench](https://arxiv.org/abs/2306.05685) scores without any degradation in the model's performance across other benchmarks. TenyxChat-8x7B-v1 was trained using eight A100s (80GB) for about eight hours, with a training setup obtained from HuggingFaceH4 ([GitHub](https://github.com/huggingface/alignment-handbook)).
## Our Observations
We have quantized and load the model on 4-bit using [huggingface bitsandbytes](https://github.com/TimDettmers/bitsandbytes) on an A100 GPU(80GB). Here are our observations:
| Inference Time | Cold Start Time | Token/Sec | Latency/Token | VRAM Required |
| -------------- | --------------- | --------- | ------------- | ------------- |
| 8.23 sec | 24.66 sec | 12.24 | 82.35 ms | 25.37 GB |
## Defining Dependencies
We are using the [huggingface bitsandbytes](https://github.com/TimDettmers/bitsandbytes) library, which enables you to run this model.
## Constructing the GitHub/GitLab Template
Now quickly construct the GitHub/GitLab template, this process is mandatory and make sure you don't add any file named `model.py`.
```
TenyxChat-8x7B-v1/
├── app.py
├── inferless-runtime-config.yaml
├── inferless.yaml
└── input_schema.py
```
You can also add other files to this directory.
## Create the class for inference
In the [app.py](https://github.com/inferless/TenyxChat-8x7B-v1/blob/main/app.py) we will define the class and import all the required functions
1. `def initialize`: In this function, you will initialize your model and define any `variable` that you want to use during inference.
2. `def infer`: This function gets called for every request that you send. Here you can define all the steps that are required for the inference. You can also pass custom values for inference and pass it through `inputs(dict)` parameter.
3. `def finalize`: This function cleans up all the allocated memory.
```python
import os
os.environ["HF_HUB_ENABLE_HF_TRANSFER"]='1'
from huggingface_hub import snapshot_download
from transformers import AutoTokenizer, AutoModelForCausalLM, BitsAndBytesConfig, pipeline
import inferless
app = inferless.Cls(gpu="A100")
class InferlessPythonModel:
@app.load
def initialize(self):
model_id = "tenyx/TenyxChat-8x7B-v1"
snapshot_download(repo_id=model_id,allow_patterns=["*.safetensors"])
bnb_config = BitsAndBytesConfig(
load_in_4bit=True)
tokenizer = AutoTokenizer.from_pretrained(model_id)
model = AutoModelForCausalLM.from_pretrained(model_id, trust_remote_code=True, quantization_config=bnb_config, device_map="cuda")
self.pipe = pipeline("text-generation", model=model, tokenizer=tokenizer)
@app.infer
def infer(self, inputs):
prompt = inputs["prompt"]
messages = [{"role": "system", "content":prompt}]
prompt = self.pipe.tokenizer.apply_chat_template(messages, tokenize=False, add_generation_prompt=True)
out = self.pipe(prompt, max_new_tokens=256, do_sample=True, top_p=0.9,temperature=0.9)
generated_text = out[0]["generated_text"][len(prompt):]
return {'generated_result': generated_text}
def finalize(self):
self.pipe = None
```
## Creating the Custom Runtime
This is a mandatory step where we allow the users to upload their custom runtime through [inferless-runtime-config.yaml](https://github.com/inferless/TenyxChat-8x7B-v1/blob/main/inferless-runtime-config.yaml).
```python
build:
cuda_version: "12.1.1"
python_packages:
- "bitsandbytes==0.45.2"
- "transformers==4.49.0"
- "accelerate==1.4.0"
- "scipy==1.11.4"
- "inferless-cli==2.0.9"
- "hf-transfer==0.1.9"
- "huggingface-hub==0.27.1"
```
## Test your model with Remote Run
You can use the `inferless remote-run`([installation guide here](https://docs.inferless.com/model-import/cli-import#cli-import)) command to test your model or any custom Python script in a remote GPU environment directly from your local machine. Make sure that you use `Python3.10` for seamless experience.
### Step 1: Add the Decorators and local entry point
To enable **Remote Run**, simply do the following:
1. Import the `inferless` library and initialize `Cls(gpu="A100")`. The available GPU options are `T4`, `A10` and `A100`.
2. Decorated the `initialize` and `infer` functions with `@app.load` and `@app.infer` respectively.
3. Create the Local Entry Point by decorating a function (for example, `my_local_entry`) with `@inferless.local_entry_point`.
Within this function, instantiate your model class, convert any incoming parameters into a `RequestObjects` object, and invoke the model's `infer` method.
```python
import os
os.environ["HF_HUB_ENABLE_HF_TRANSFER"]='1'
from huggingface_hub import snapshot_download
from transformers import AutoTokenizer, AutoModelForCausalLM, BitsAndBytesConfig, pipeline
import inferless
from pydantic import BaseModel, Field
from typing import Optional
@inferless.request
class RequestObjects(BaseModel):
prompt: str = Field(default="Explain Deep Learning.")
temperature: Optional[float] = 0.7
top_p: Optional[float] = 0.1
do_sample: Optional[bool] = True
max_new_tokens: Optional[int] = 256
@inferless.response
class ResponseObjects(BaseModel):
generated_text: str = Field(default='Test output')
app = inferless.Cls(gpu="A100")
class InferlessPythonModel:
@app.load
def initialize(self):
model_id = "tenyx/TenyxChat-8x7B-v1"
snapshot_download(repo_id=model_id,allow_patterns=["*.safetensors"])
bnb_config = BitsAndBytesConfig(
load_in_4bit=True)
tokenizer = AutoTokenizer.from_pretrained(model_id)
model = AutoModelForCausalLM.from_pretrained(model_id, trust_remote_code=True, quantization_config=bnb_config, device_map="cuda")
self.pipe = pipeline("text-generation", model=model, tokenizer=tokenizer)
@app.infer
def infer(self, request: RequestObjects) -> ResponseObjects:
messages = [{"role": "system", "content":request.prompt}]
prompt = self.pipe.tokenizer.apply_chat_template(messages, tokenize=False, add_generation_prompt=True)
out = self.pipe(prompt, max_new_tokens=request.max_new_tokens, do_sample=request.do_sample, top_p=request.top_p,temperature=request.temperature)
generated_text = out[0]["generated_text"][len(prompt):]
generateObject = ResponseObjects(generated_text = generated_text)
return generateObject
def finalize(self):
self.pipe = None
@inferless.local_entry_point
def my_local_entry(dynamic_params):
request_objects = RequestObjects(**dynamic_params)
model_instance = InferlessPythonModel()
return model_instance.infer(request_objects)
```
### Step 2: Run with Remote GPU
From your local terminal, navigate to the folder containing your `app.py` and your `inferless-runtime-config.yaml` and run:
```bash
inferless remote-run app.py -c inferless-runtime-config.yaml --prompt "Write a Poem."
```
You can pass the other input parameters in the same way as long as your code expects them in the `inputs` dictionary.
If you want to exclude certain files or directories from being uploaded, use the `--exclude` or `-e` flag.
## Method A: Deploying the model on Inferless Platform
Inferless supports multiple ways of [importing your model](https://docs.inferless.com/model-import/file-structure-req/file-structure-requirements). For this tutorial, we will use GitHub.
### Step 1: Login to the inferless dashboard can click on Import model button
Navigate to your desired workspace in Inferless and Click on `Add a custom model` button that you see on the top right. An import wizard will open up.
### Step 2: Follow the UI to complete the model Import
* Select the GitHub/GitLab Integration option to connect your source code repository with the deployment environment.
* Navigate to the specific GitHub repository that contains your model's code. Here, you will need to identify and enter the name of the model you wish to import.
* Choose the appropriate type of machine that suits your model's requirements. Additionally, specify the minimum and maximum number of replicas to define the scalability range for deploying your model.
* Optionally, you have the option to enable automatic build and deployment. This feature triggers a new deployment automatically whenever there is a new code push to your repository.
* If your model requires additional software packages, configure the Custom Runtime settings by including necessary pip or apt packages. Also, set up environment variables such as Inference Timeout, Container Concurrency, and Scale Down Timeout to tailor the runtime environment according to your needs.
* Wait for the validation process to complete, ensuring that all settings are correct and functional. Once validation is successful, click on the "Import" button to finalize the import of your model.
### Step 3: Wait for the model build to complete usually takes \~5-10 minutes
### Step 4: Use the APIs to call the model
Once the model is in 'Active' status you can click on the 'API' page to call the model
### Here is the Demo:
## Method B: Deploying the model on Inferless CLI
Inferless allows you to deploy your model using Inferless-CLI. Follow the steps to deploy using Inferless CLI.
### Clone the repository of the model
Let's begin by cloning the model repository:
```bash
git clone https://github.com/inferless/TenyxChat-7B.git
```
### Deploy the Model
To deploy the model using Inferless CLI, execute the following command:
```bash
inferless deploy --gpu A100 --runtime inferless-runtime-config.yaml
```
**Explanation of the Command:**
* `--gpu A100`: Specifies the GPU type for deployment. Available options include `A10`, `A100`, and `T4`.
* `--runtime inferless-runtime-config.yaml`: Defines the runtime configuration file. If not specified, the default Inferless runtime is used.
# Deploy TenyxChat-8x7B-v1 using Inferless
Source: https://docs.inferless.com/how-to-guides/deploy-tenyxchat-8x7b-v1-using-inferless
TenyxChat-8x7B-v1, is trained using the Direct Preference Optimization (DPO) framework on the open-source AI feedback dataset UltraFeedback
## Introduction
[Tenyx](https://huggingface.co/tenyx) has created TenyxChat-8x7B-v1 by fine-tuning [Mixtral-8x7B-Instruct-v0.1](https://arxiv.org/pdf/2401.04088.pdf) leveraging the [Direct Preference Optimization (DPO)](https://arxiv.org/abs/2305.18290) framework with the open-source AI feedback dataset [UltraFeedback](https://huggingface.co/datasets/HuggingFaceH4/ultrafeedback%5Fbinarized). Additionally, they have incorporated their proprietary approach, as outlined in their [blog](https://www.tenyx.com/post/forgetting-and-toxicity-in-llms-a-deep-dive-on-fine-tuning-methods) and [service](https://www.tenyx.com/fine-tuning), demonstrating a notable enhancement in [MT-Bench](https://arxiv.org/abs/2306.05685) scores without any degradation in the model's performance across other benchmarks. TenyxChat-8x7B-v1 was trained using eight A100s (80GB) for about eight hours, with a training setup obtained from HuggingFaceH4 ([GitHub](https://github.com/huggingface/alignment-handbook)).
## Our Observations
We have quantized and load the model on 4-bit using [huggingface bitsandbytes](https://github.com/TimDettmers/bitsandbytes) on an A100 GPU(80GB). Here are our observations:
| Inference Time | Cold Start Time | Token/Sec | Latency/Token | VRAM Required |
| -------------- | --------------- | --------- | ------------- | ------------- |
| 8.23 sec | 24.66 sec | 12.24 | 82.35 ms | 25.37 GB |
## Defining Dependencies
We are using the [huggingface bitsandbytes](https://github.com/TimDettmers/bitsandbytes) library, which enables you to run this model.
## Constructing the GitHub/GitLab Template
Now quickly construct the GitHub/GitLab template, this process is mandatory and make sure you don't add any file named `model.py`.
```
TenyxChat-8x7B-v1/
├── app.py
├── inferless-runtime-config.yaml
├── inferless.yaml
└── input_schema.py
```
You can also add other files to this directory.
## Create the class for inference
In the [app.py](https://github.com/inferless/TenyxChat-8x7B-v1/blob/main/app.py) we will define the class and import all the required functions
1. `def initialize`: In this function, you will initialize your model and define any `variable` that you want to use during inference.
2. `def infer`: This function gets called for every request that you send. Here you can define all the steps that are required for the inference. You can also pass custom values for inference and pass it through `inputs(dict)` parameter.
3. `def finalize`: This function cleans up all the allocated memory.
```python
import os
os.environ["HF_HUB_ENABLE_HF_TRANSFER"]='1'
from huggingface_hub import snapshot_download
from transformers import AutoTokenizer, AutoModelForCausalLM, BitsAndBytesConfig, pipeline
import inferless
app = inferless.Cls(gpu="A100")
class InferlessPythonModel:
@app.load
def initialize(self):
model_id = "tenyx/TenyxChat-8x7B-v1"
snapshot_download(repo_id=model_id,allow_patterns=["*.safetensors"])
bnb_config = BitsAndBytesConfig(
load_in_4bit=True)
tokenizer = AutoTokenizer.from_pretrained(model_id)
model = AutoModelForCausalLM.from_pretrained(model_id, trust_remote_code=True, quantization_config=bnb_config, device_map="cuda")
self.pipe = pipeline("text-generation", model=model, tokenizer=tokenizer)
@app.infer
def infer(self, inputs):
prompt = inputs["prompt"]
messages = [{"role": "system", "content":prompt}]
prompt = self.pipe.tokenizer.apply_chat_template(messages, tokenize=False, add_generation_prompt=True)
out = self.pipe(prompt, max_new_tokens=256, do_sample=True, top_p=0.9,temperature=0.9)
generated_text = out[0]["generated_text"][len(prompt):]
return {'generated_result': generated_text}
def finalize(self):
self.pipe = None
```
## Creating the Custom Runtime
This is a mandatory step where we allow the users to upload their custom runtime through [inferless-runtime-config.yaml](https://github.com/inferless/TenyxChat-8x7B-v1/blob/main/inferless-runtime-config.yaml).
```python
build:
cuda_version: "12.1.1"
python_packages:
- "bitsandbytes==0.45.2"
- "transformers==4.49.0"
- "accelerate==1.4.0"
- "scipy==1.11.4"
- "inferless-cli==2.0.9"
- "hf-transfer==0.1.9"
- "huggingface-hub==0.27.1"
```
## Test your model with Remote Run
You can use the `inferless remote-run`([installation guide here](https://docs.inferless.com/model-import/cli-import#cli-import)) command to test your model or any custom Python script in a remote GPU environment directly from your local machine. Make sure that you use `Python3.10` for seamless experience.
### Step 1: Add the Decorators and local entry point
To enable **Remote Run**, simply do the following:
1. Import the `inferless` library and initialize `Cls(gpu="A100")`. The available GPU options are `T4`, `A10` and `A100`.
2. Decorated the `initialize` and `infer` functions with `@app.load` and `@app.infer` respectively.
3. Create the Local Entry Point by decorating a function (for example, `my_local_entry`) with `@inferless.local_entry_point`.
Within this function, instantiate your model class, convert any incoming parameters into a `RequestObjects` object, and invoke the model's `infer` method.
```python
import os
os.environ["HF_HUB_ENABLE_HF_TRANSFER"]='1'
from huggingface_hub import snapshot_download
from transformers import AutoTokenizer, AutoModelForCausalLM, BitsAndBytesConfig, pipeline
import inferless
from pydantic import BaseModel, Field
from typing import Optional
@inferless.request
class RequestObjects(BaseModel):
prompt: str = Field(default="Explain Deep Learning.")
temperature: Optional[float] = 0.7
top_p: Optional[float] = 0.1
do_sample: Optional[bool] = True
max_new_tokens: Optional[int] = 256
@inferless.response
class ResponseObjects(BaseModel):
generated_text: str = Field(default='Test output')
app = inferless.Cls(gpu="A100")
class InferlessPythonModel:
@app.load
def initialize(self):
model_id = "tenyx/TenyxChat-8x7B-v1"
snapshot_download(repo_id=model_id,allow_patterns=["*.safetensors"])
bnb_config = BitsAndBytesConfig(
load_in_4bit=True)
tokenizer = AutoTokenizer.from_pretrained(model_id)
model = AutoModelForCausalLM.from_pretrained(model_id, trust_remote_code=True, quantization_config=bnb_config, device_map="cuda")
self.pipe = pipeline("text-generation", model=model, tokenizer=tokenizer)
@app.infer
def infer(self, request: RequestObjects) -> ResponseObjects:
messages = [{"role": "system", "content":request.prompt}]
prompt = self.pipe.tokenizer.apply_chat_template(messages, tokenize=False, add_generation_prompt=True)
out = self.pipe(prompt, max_new_tokens=request.max_new_tokens, do_sample=request.do_sample, top_p=request.top_p,temperature=request.temperature)
generated_text = out[0]["generated_text"][len(prompt):]
generateObject = ResponseObjects(generated_text = generated_text)
return generateObject
def finalize(self):
self.pipe = None
@inferless.local_entry_point
def my_local_entry(dynamic_params):
request_objects = RequestObjects(**dynamic_params)
model_instance = InferlessPythonModel()
return model_instance.infer(request_objects)
```
### Step 2: Run with Remote GPU
From your local terminal, navigate to the folder containing your `app.py` and your `inferless-runtime-config.yaml` and run:
```bash
inferless remote-run app.py -c inferless-runtime-config.yaml --prompt "Write a Poem."
```
You can pass the other input parameters in the same way as long as your code expects them in the `inputs` dictionary.
If you want to exclude certain files or directories from being uploaded, use the `--exclude` or `-e` flag.
## Method A: Deploying the model on Inferless Platform
Inferless supports multiple ways of [importing your model](https://docs.inferless.com/model-import/file-structure-req/file-structure-requirements). For this tutorial, we will use GitHub.
### Step 1: Login to the inferless dashboard can click on Import model button
Navigate to your desired workspace in Inferless and Click on `Add a custom model` button that you see on the top right. An import wizard will open up.
### Step 2: Follow the UI to complete the model Import
* Select the GitHub/GitLab Integration option to connect your source code repository with the deployment environment.
* Navigate to the specific GitHub repository that contains your model's code. Here, you will need to identify and enter the name of the model you wish to import.
* Choose the appropriate type of machine that suits your model's requirements. Additionally, specify the minimum and maximum number of replicas to define the scalability range for deploying your model.
* Optionally, you have the option to enable automatic build and deployment. This feature triggers a new deployment automatically whenever there is a new code push to your repository.
* If your model requires additional software packages, configure the Custom Runtime settings by including necessary pip or apt packages. Also, set up environment variables such as Inference Timeout, Container Concurrency, and Scale Down Timeout to tailor the runtime environment according to your needs.
* Wait for the validation process to complete, ensuring that all settings are correct and functional. Once validation is successful, click on the "Import" button to finalize the import of your model.
### Step 3: Wait for the model build to complete usually takes \~5-10 minutes
### Step 4: Use the APIs to call the model
Once the model is in 'Active' status you can click on the 'API' page to call the model
### Here is the Demo:
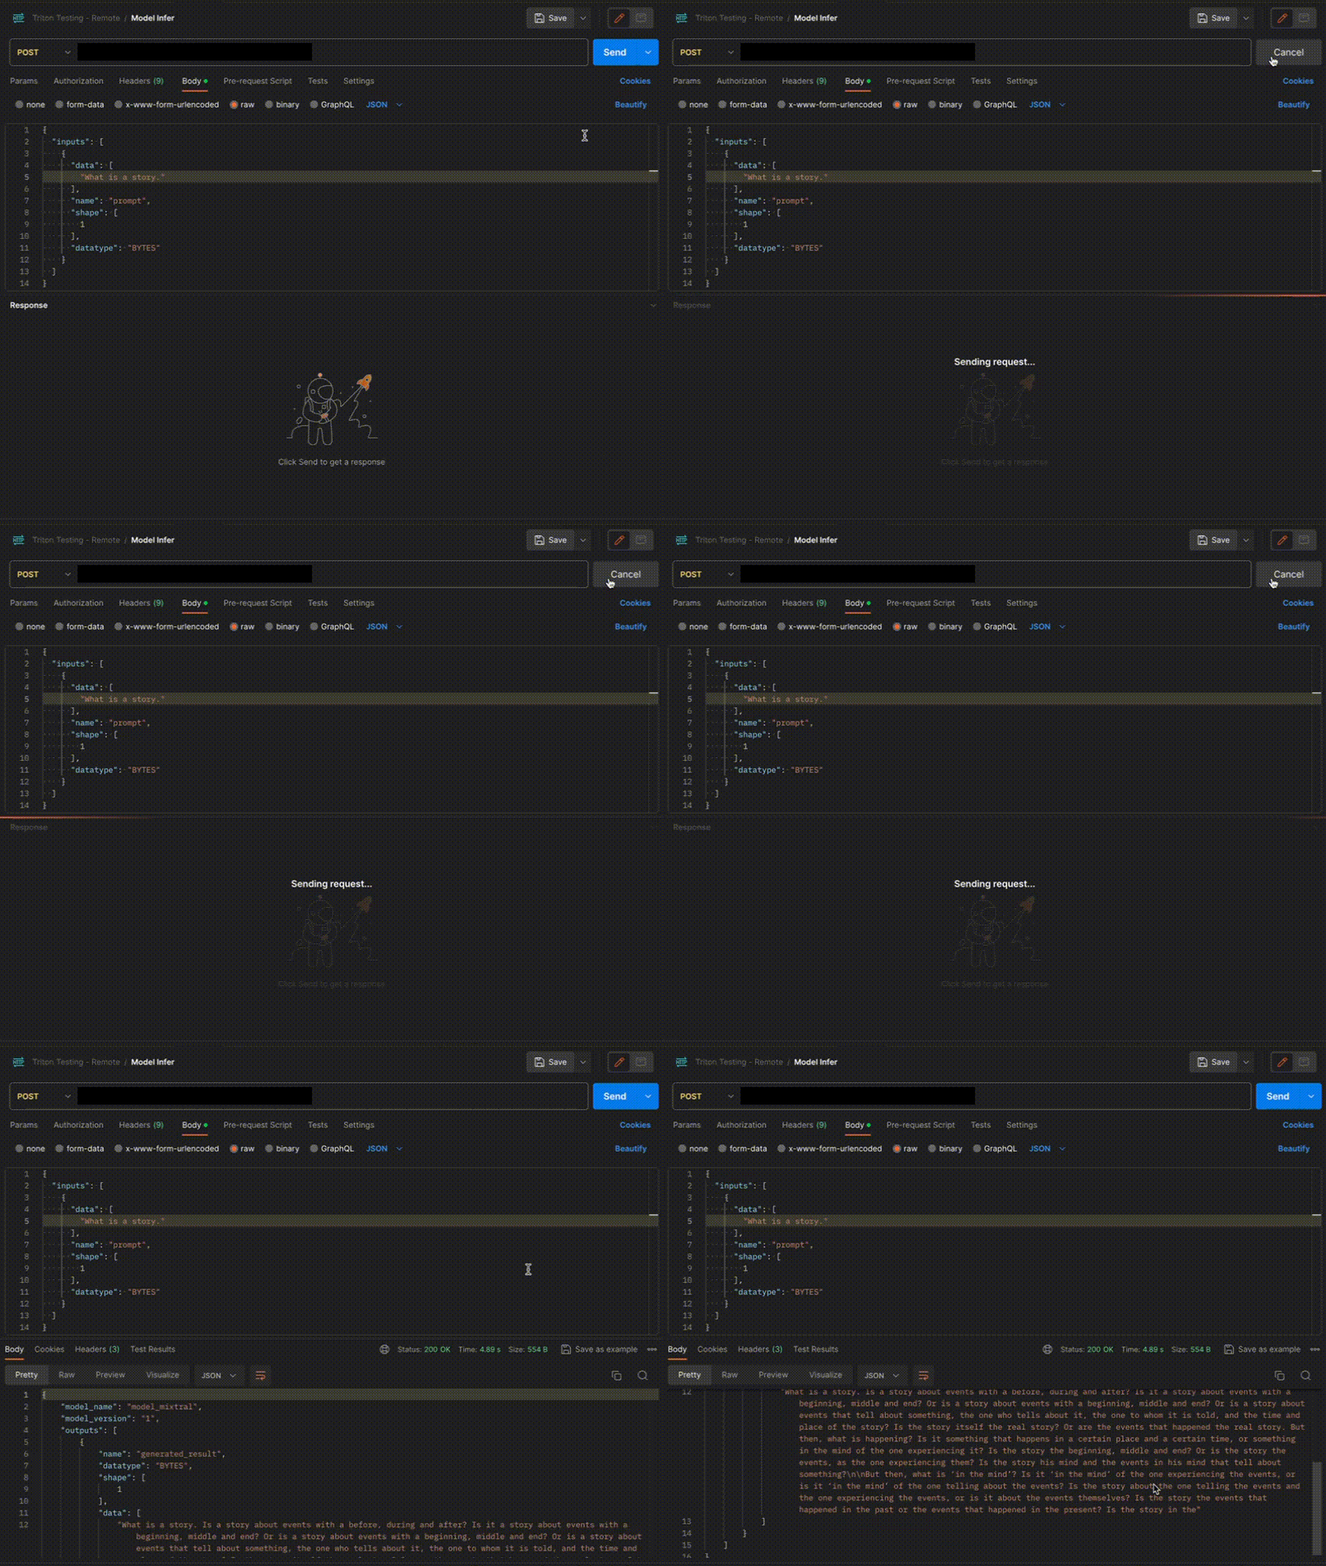 ## Method B: Deploying the model on Inferless CLI
Inferless allows you to deploy your model using Inferless-CLI. Follow the steps to deploy using Inferless CLI.
### Clone the repository of the model
Let's begin by cloning the model repository:
```bash
git clone https://github.com/inferless/TenyxChat-8x7B-v1.git
```
### Deploy the Model
To deploy the model using Inferless CLI, execute the following command:
```bash
inferless deploy --gpu A100 --runtime inferless-runtime-config.yaml
```
**Explanation of the Command:**
* `--gpu A100`: Specifies the GPU type for deployment. Available options include `A10`, `A100`, and `T4`.
* `--runtime inferless-runtime-config.yaml`: Defines the runtime configuration file. If not specified, the default Inferless runtime is used.
# How to Stream Speech with Parler-TTS using Inferless
Source: https://docs.inferless.com/how-to-guides/deploy-text-to-speech-streaming
This tutorial demonstrates how to implement real-time text-to-speech (TTS) streaming using the parler_tts_mini model and Parler-TTS library.
## Introduction
This tutorial implements a text-to-speech (TTS) streaming model, [parler\_tts\_mini](https://huggingface.co/parler-tts/parler_tts_mini_v0.1) using [Parler\_TTS](https://github.com/huggingface/parler-tts) library.
It will enable real-time TTS streaming, converting text inputs into speech and stream the audio chunk by chunk.
## Defining Dependencies
We are using the [Parler\_TTS](https://github.com/huggingface/parler-tts) and [Transformers](https://github.com/huggingface/transformers/) libraries for the deployment.
## Constructing the GitHub/GitLab Template
Now quickly construct the GitHub/GitLab template, this process is mandatory and make sure you don't add any file named `model.py`
```
Parler-tts-streaming/
├── app.py
├── inferless-runtime-config.yaml
├── inferless.yaml
├── input_schema.py
└── parler.py
```
You can also add other files to this directory.
## Create the Input Schema
Let's begin by creating the [`input_schema.py`](https://github.com/inferless/Parler-tts-streaming/blob/main/input_schema.py) file, which defines the input structure for our model. You can find the complete file in our [GitHub repository](https://github.com/inferless/Parler-tts-streaming/blob/main/input_schema.py).
For this tutorial, we'll use two text inputs:
1. `prompt_value`: The main text to be converted to speech
2. `input_value`: The voice instructions for the TTS model
Both inputs are of `string` data type. The output will be streamed using Server-Sent Events (SSE), delivering audio chunks as `base64` encoded strings. This approach allows for real-time audio playback as the speech is generated.
To enable streaming with SSE, it's crucial to set the `IS_STREAMING_OUTPUT` property to `True` in your model configuration. This tells the system to expect and handle a continuous output stream rather than a single response.
It's important to note the limitations when working with streaming inputs:
1. Supported datatypes: Only `INT`, `STRING`, and `BOOLEAN` are supported as input datatypes.
2. Input shape: The shape of each parameter should be `[1]`. For multiple inputs or complex objects, use `json.dumps(object)` to convert them to a string before passing.
3. Consistent output schema: All iterative responses in the output stream must adhere to the same schema.
Now, let's create the `input_schema.py` file with the following content:
```JSON
INPUT_SCHEMA = {
"input_value": {
'datatype': 'STRING',
'required': True,
'shape': [1],
'example': ["A male speaker with a low-pitched voice delivering his words at a fast pace in a small, confined space with a very clear audio and an animated tone."]
},
"prompt_value": {
'datatype': 'STRING',
'required': True,
'shape': [1],
'example': ["Remember - this is only the first iteration of the model! To improve the prosody and naturalness of the speech further, we're scaling up the amount of training data by a factor of five times."]
}
}
IS_STREAMING_OUTPUT = True
```
## Create the class for Text-to-Speech Streamer
In the [parler.py](https://github.com/inferless/Parler-tts-streaming/blob/main/parler.py) file, we define the `ParlerTTSStreamer` class and import all the required functions.
```python
import math
from queue import Queue
import numpy as np
import torch
from parler_tts import ParlerTTSForConditionalGeneration
from transformers import AutoTokenizer, AutoFeatureExtractor
from transformers.generation.streamers import BaseStreamer
class ParlerTTSStreamer(BaseStreamer):
def __init__(self):
self.device = "cuda:0"
torch_dtype = torch.float16
repo_id = "parler-tts/parler_tts_mini_v0.1"
self.tokenizer = AutoTokenizer.from_pretrained(repo_id)
self.feature_extractor = AutoFeatureExtractor.from_pretrained(repo_id)
self.SAMPLE_RATE = self.feature_extractor.sampling_rate
self.model = ParlerTTSForConditionalGeneration.from_pretrained(repo_id, torch_dtype=torch_dtype, low_cpu_mem_usage=True).to(self.device)
self.decoder = self.model.decoder
self.audio_encoder = self.model.audio_encoder
self.generation_config = self.model.generation_config
self.sampling_rate = self.model.audio_encoder.config.sampling_rate
frame_rate = self.model.audio_encoder.config.frame_rate
play_steps_in_s=2.0
play_steps = int(frame_rate * play_steps_in_s)
# variables used in the streaming process
self.play_steps = play_steps
hop_length = math.floor(self.audio_encoder.config.sampling_rate / self.audio_encoder.config.frame_rate)
self.stride = hop_length * (play_steps - self.decoder.num_codebooks) // 6
self.token_cache = None
self.to_yield = 0
# varibles used in the thread process
self.audio_queue = Queue()
self.stop_signal = None
self.timeout = None
def apply_delay_pattern_mask(self, input_ids):
# build the delay pattern mask for offsetting each codebook prediction by 1 (this behaviour is specific to Parler)
_, delay_pattern_mask = self.decoder.build_delay_pattern_mask(
input_ids[:, :1],
bos_token_id=self.generation_config.bos_token_id,
pad_token_id=self.generation_config.decoder_start_token_id,
max_length=input_ids.shape[-1],
)
# apply the pattern mask to the input ids
input_ids = self.decoder.apply_delay_pattern_mask(input_ids, delay_pattern_mask)
# revert the pattern delay mask by filtering the pad token id
mask = (delay_pattern_mask != self.generation_config.bos_token_id) & (delay_pattern_mask != self.generation_config.pad_token_id)
input_ids = input_ids[mask].reshape(1, self.decoder.num_codebooks, -1)
# append the frame dimension back to the audio codes
input_ids = input_ids[None, ...]
# send the input_ids to the correct device
input_ids = input_ids.to(self.audio_encoder.device)
decode_sequentially = (
self.generation_config.bos_token_id in input_ids
or self.generation_config.pad_token_id in input_ids
or self.generation_config.eos_token_id in input_ids
)
if not decode_sequentially:
output_values = self.audio_encoder.decode(
input_ids,
audio_scales=[None],
)
else:
sample = input_ids[:, 0]
sample_mask = (sample >= self.audio_encoder.config.codebook_size).sum(dim=(0, 1)) == 0
sample = sample[:, :, sample_mask]
output_values = self.audio_encoder.decode(sample[None, ...], [None])
audio_values = output_values.audio_values[0, 0]
return audio_values.cpu().float().numpy()
def put(self, value):
batch_size = value.shape[0] // self.decoder.num_codebooks
if self.token_cache is None:
self.token_cache = value
else:
self.token_cache = torch.concatenate([self.token_cache, value[:, None]], dim=-1)
if self.token_cache.shape[-1] % self.play_steps == 0:
audio_values = self.apply_delay_pattern_mask(self.token_cache)
self.on_finalized_audio(audio_values[self.to_yield : -self.stride])
self.to_yield += len(audio_values) - self.to_yield - self.stride
def end(self):
# Flushes any remaining cache and appends the stop symbol
if self.token_cache is not None:
audio_values = self.apply_delay_pattern_mask(self.token_cache)
else:
audio_values = np.zeros(self.to_yield)
self.on_finalized_audio(audio_values[self.to_yield :], stream_end=True)
def on_finalized_audio(self, audio: np.ndarray, stream_end: bool = False):
# Put the new audio in the queue. If the stream is ending, also put a stop signal in the queue.
self.audio_queue.put(audio, timeout=self.timeout)
if stream_end:
self.audio_queue.put(self.stop_signal, timeout=self.timeout)
def __iter__(self):
return self
def __next__(self):
value = self.audio_queue.get(timeout=self.timeout)
if not isinstance(value, np.ndarray) and value == self.stop_signal:
raise StopIteration()
else:
return value
```
## Create the class for inference
In the [`app.py`](https://github.com/inferless/Parler-tts-streaming/blob/main/app.py) we will define the class and import all the required functions
1. `def initialize`: In this function, we will create an object of the `ParlerTTSStreamer` class which will load the model. You can define any `variable` that you want to use during inference.
2. `def infer`: The `infer` function is the core of your model's inference process. It's invoked for each incoming request and is responsible for processing the input and generating the streamed output. Here's a breakdown of its key components:
a. Output Streaming Setup:
* We create a dictionary `output_dict` with a key `'OUT'`.
* This dictionary will hold each chunk of the generated audio as a base64-encoded string.
b. Processing and Streaming:
* As the model generates audio chunks, we encode each chunk to base64.
* For each encoded chunk (`mp3_str`), we update the `output_dict`:
```python
output_dict['OUT'] = mp3_str
```
* We will use the `stream_output_handler` for streaming the generated audio output chunks. It provides `stream_output_handler.send_streamed_output()` function to send this chunk to the client:
```python
stream_output_handler.send_streamed_output(output_dict)
```
* This process repeats for each audio chunk, allowing real-time streaming of the generated speech.
c. Finalizing the Stream:
* After all chunks have been processed and sent, we call:
```python
stream_output_handler.finalise_streamed_output()
```
* This function signals the end of the stream to the client, properly closing the event streamer.
3. `def finalize`: This function cleans up all the allocated memory.
```python
import io
import base64
import numpy as np
from threading import Thread
from pydub import AudioSegment
from parler import ParlerTTSStreamer
class InferlessPythonModel:
def initialize(self):
# Initialize the ParlerTTSStreamer object
self.streamer = ParlerTTSStreamer()
def numpy_to_mp3(self, audio_array, sampling_rate):
# Convert numpy array to MP3 format
if np.issubdtype(audio_array.dtype, np.floating):
# Normalize floating-point audio data to 16-bit integer range
max_val = np.max(np.abs(audio_array))
audio_array = (audio_array / max_val) * 32767
audio_array = audio_array.astype(np.int16)
# Create an AudioSegment object from the numpy array
audio_segment = AudioSegment(
audio_array.tobytes(),
frame_rate=sampling_rate,
sample_width=audio_array.dtype.itemsize,
channels=1
)
# Export the AudioSegment to MP3 format
mp3_io = io.BytesIO()
audio_segment.export(mp3_io, format="mp3", bitrate="320k")
mp3_bytes = mp3_io.getvalue()
mp3_io.close()
return mp3_bytes
def infer(self, inputs, stream_output_handler):
# Reset streamer properties
self.streamer.token_cache = None
self.streamer.to_yield = 0
# Extract input and prompt values from the inputs dictionary
input_value = inputs["input_value"]
prompt_value = inputs["prompt_value"]
# Tokenize input and prompt
inputs_ = self.streamer.tokenizer(input_value, return_tensors="pt").to(self.streamer.device)
prompt = self.streamer.tokenizer(prompt_value, return_tensors="pt").to(self.streamer.device)
# Set up generation kwargs for the model
generation_kwargs = dict(
input_ids=inputs_.input_ids,
prompt_input_ids=prompt.input_ids,
streamer=self.streamer,
do_sample=True,
temperature=1.0,
min_new_tokens=10)
# Start a new thread for model generation
thread = Thread(target=self.streamer.model.generate, kwargs=generation_kwargs)
thread.start()
# Process and stream the generated audio
for new_audio in self.streamer:
# Convert numpy array to MP3 and encode as base64 string
mp3_bytes = self.numpy_to_mp3(new_audio, sampling_rate=self.streamer.sampling_rate)
mp3_str = base64.b64encode(mp3_bytes).decode('utf-8')
# Prepare and send the output dictionary
output_dict = {}
output_dict["OUT"] = mp3_str
stream_output_handler.send_streamed_output(output_dict)
# Wait for the generation thread to complete
thread.join()
# Finalize the streamed output
stream_output_handler.finalise_streamed_output()
def finalize(self, args):
# Clean up resources
self.streamer = None
```
## Creating the Custom Runtime
This is a mandatory step where we allow the users to upload their own custom runtime through [inferless-runtime-config.yaml](https://github.com/inferless/Parler-tts-streaming/blob/main/inferless-runtime-config.yaml).
To enable streaming functionality, ensure you are using CUDA version `12.4.1`.
```
build:
cuda_version: "12.4.1"
system_packages:
- "ffmpeg"
python_packages:
- "accelerate==0.31.0"
- "pydub==0.25.1"
- "git+https://github.com/huggingface/parler-tts@8b8c576e2dbdc29172e30be7d68fac9357cd92c5#egg=parler-tts"
```
## Method A: Deploying the model on Inferless Platform
Inferless supports multiple ways of [importing your model](https://docs.inferless.com/model-import/file-structure-req/file-structure-requirements). For this tutorial, we will use GitHub.
### Step 1: Login to the inferless dashboard can click on Import model button
Navigate to your desired workspace in Inferless and Click on `Add a custom model` button that you see on the top right. An import wizard will open up.
### Step 2: Follow the UI to complete the model Import
* Select the GitHub/GitLab Integration option to connect your source code repository with the deployment environment.
* Navigate to the specific GitHub repository that contains your model's code. Here, you will need to identify and enter the name of the model you wish to import.
* Choose the appropriate type of machine that suits your model's requirements. Additionally, specify the minimum and maximum number of replicas to define the scalability range for deploying your model.
* Optionally, you have the option to enable automatic build and deployment. This feature triggers a new deployment automatically whenever there is a new code push to your repository.
* If your model requires additional software packages, configure the Custom Runtime settings by including necessary pip or apt packages. Also, set up environment variables such as Inference Timeout, Container Concurrency, and Scale Down Timeout to tailor the runtime environment according to your needs.
* Wait for the validation process to complete, ensuring that all settings are correct and functional. Once validation is successful, click on the "Import" button to finalize the import of your model.
### Step 3: Wait for the model build to complete usually takes \~5-10 minutes
### Step 4: Use the APIs to call the model
Once the model is in 'Active' status you can click on the 'API' page to call the model
### Here is the Demo:
## Method B: Deploying the model on Inferless CLI
Inferless allows you to deploy your model using Inferless-CLI. Follow the steps to deploy using Inferless CLI.
### Clone the repository of the model
Let's begin by cloning the model repository:
```bash
git clone https://github.com/inferless/Parler-tts-streaming.git
```
### Deploy the Model
To deploy the model using Inferless CLI, execute the following command:
```bash
inferless deploy --gpu A100 --runtime inferless-runtime-config.yaml
```
**Explanation of the Command:**
* `--gpu A100`: Specifies the GPU type for deployment. Available options include `A10`, `A100`, and `T4`.
* `--runtime inferless-runtime-config.yaml`: Defines the runtime configuration file. If not specified, the default Inferless runtime is used.
# Deploy Google TimesFM using Inferless
Source: https://docs.inferless.com/how-to-guides/deploy-timesfm-using-inferless
TimesFM is a cutting-edge time series forecasting model developed by Google. It is designed to understand and generate detailed forecasts based on temporal data, making it a powerful tool for tasks such as demand forecasting, anomaly detection, and trend analysis.
## Introduction
Google introduces [TimesFM](https://research.google/blog/a-decoder-only-foundation-model-for-time-series-forecasting/), a state-of-the-art time series forecasting model designed to push the boundaries of temporal data analysis. The TimesFM models leverage advanced deep learning techniques to provide accurate and robust forecasts. The models come pretrained and fine-tuned on diverse datasets, ensuring robust performance out of the box while also allowing for further customization and optimization.
In this tutorial, we will explore how to deploy and utilize TimesFM using Inferless.
## Our Observations
We have used [Timesfm](https://github.com/google-research/timesfm) to deploy the model on a A100(80GB) system. Here are our observations:
| Inference Time | Cold Start Time |
| -------------- | --------------- |
| 0.12 sec | 35.84 sec |
## Defining Dependencies
We have deployed the model using the [Timesfm](https://github.com/google-research/timesfm) offical package.
## Constructing the GitHub/GitLab Template
Now quickly construct the GitHub/GitLab template, this process is mandatory and make sure you don't add any file named `model.py`.
```
Timesfm/
├── app.py
├── inferless-runtime-config.yaml
├── inferless.yaml
└── input_schema.py
```
You can also add other files to this directory.
## Create the class for inference
In the [app.py](https://github.com/inferless/Timesfm/blob/main/app.py) we will define the class and import all the required functions
1. `def initialize`: In this function, you will initialize your model and define any `variable` that you want to use during inference.
2. `def infer`: This function gets called for every request that you send. Here you can define all the steps that are required for the inference. You can also pass custom values for inference and pass it through `inputs(dict)` parameter.
3. `def finalize`: This function cleans up all the allocated memory.
```python
import timesfm
class InferlessPythonModel:
def initialize(self):
self.tfm = timesfm.TimesFm(
context_len=128,
horizon_len=96,
input_patch_len=32,
output_patch_len=128,
num_layers=20,
model_dims=1280,
backend="cpu",
)
self.tfm.load_from_checkpoint(repo_id="google/timesfm-1.0-200m")
def infer(self,inputs):
forecast_input = inputs["forecast_input"]
frequency_input = inputs["frequency_input"]
point_forecast, experimental_quantile_forecast = self.tfm.forecast(
[forecast_input],
freq=[frequency_input],
)
return {
"point_forecast":point_forecast,
"experimental_quantile_forecast":experimental_quantile_forecast
}
def finalize(self):
pass
```
## Create the Input Schema
We have to create a [`input_schema.py`](https://github.com/inferless/Timesfm/blob/main/input_schema.py) in your GitHub/Gitlab repository this will help us create the Input parameters. You can checkout our documentation on [Input / Output Schema](https://docs.inferless.com/model-import/input-output-schema).
For this tutorial, we have defined a parameter `prompt` which is required during the API call. Now lets create the `input_schema.py`.
```JSON
INPUT_SCHEMA = {
"forecast_input": {
'datatype': 'FP32',
'required': True,
'shape': [100],
'example': [0.0, 0.20064886, 0.39313661, 0.56963411, 0.72296256, 0.84688556, 0.93636273, 0.98775469, 0.99897117, 0.96955595, 0.90070545, 0.79522006, 0.65739025, 0.49282204, 0.30820902, 0.11106004, -0.09060615, -0.28858706, -0.47483011, -0.64176014, -0.7825875, -0.89158426, -0.96431712, -0.99782778, -0.99075324, -0.94338126, -0.85763861, -0.73701276, -0.58640998, -0.41195583, -0.22074597, -0.0205576, 0.18046693, 0.37415123, 0.55261747, 0.7086068, 0.83577457, 0.92894843, 0.98433866, 0.99969234, 0.97438499, 0.90944594, 0.8075165, 0.6727425, 0.51060568, 0.32770071, 0.13146699, -0.07011396, -0.26884313, -0.45663749, -0.62585878, -0.76962418, -0.88208623, -0.95867071, -0.99626264, -0.99333304, -0.95000106, -0.86802917, -0.75075145, -0.60293801, -0.43060093, -0.24074979, -0.0411065, 0.16020873, 0.35500771, 0.53536727, 0.69395153, 0.82431033, 0.9211415, 0.98050658, 0.99999098, 0.9788022, 0.91780205, 0.81947165, 0.68781042, 0.5281735, 0.34705389, 0.15181837, -0.04959214, -0.24898556, -0.43825186, -0.6096929, -0.75633557, -0.87221538, -0.95261911, -0.99427643, -0.995493, -0.95621934, -0.87805285, -0.76417283, -0.61921119, -0.44906404, -0.26065185, -0.06163804, 0.13988282, 0.33571414, 0.51789078, 0.67900297, 0.81249769, 0.91294525
]
},
"frequency_input": {
'datatype': 'INT8',
'required': True,
'shape': [1],
'example': [0]
}
}
```
## Creating the Custom Runtime
This is a mandatory step where we allow the users to upload their custom runtime through [inferless-runtime-config.yaml](https://github.com/inferless/Timesfm/blob/main/inferless-runtime-config.yaml).
```python
build:
run:
- "git clone https://github.com/google-research/timesfm.git"
- "cd timesfm"
- "pip install -e ."
- "pip install huggingface_hub[cli]==0.23.0 utilsforecast==0.1.10 praxis==1.4.0 paxml==1.4.0 einshape==1.0"
- "pip install jax[cuda] -f https://storage.googleapis.com/jax-releases/jax_cuda_releases.html jax==0.4.28"
- "huggingface-cli login --token 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 --add-to-git-credential"
```
## Method A: Deploying the model on Inferless Platform
Inferless supports multiple ways of [importing your model](https://docs.inferless.com/model-import/file-structure-req/file-structure-requirements). For this tutorial, we will use GitHub.
### Step 1: Login to the inferless dashboard can click on Import model button
Navigate to your desired workspace in Inferless and Click on `Add a custom model` button that you see on the top right. An import wizard will open up.
### Step 2: Follow the UI to complete the model Import
* Select the GitHub/GitLab Integration option to connect your source code repository with the deployment environment.
* Navigate to the specific GitHub repository that contains your model's code. Here, you will need to identify and enter the name of the model you wish to import.
* Choose the appropriate type of machine that suits your model's requirements. Additionally, specify the minimum and maximum number of replicas to define the scalability range for deploying your model.
* Optionally, you have the option to enable automatic build and deployment. This feature triggers a new deployment automatically whenever there is a new code push to your repository.
* If your model requires additional software packages, configure the Custom Runtime settings by including necessary pip or apt packages. Also, set up environment variables such as Inference Timeout, Container Concurrency, and Scale Down Timeout to tailor the runtime environment according to your needs.
* Wait for the validation process to complete, ensuring that all settings are correct and functional. Once validation is successful, click on the "Import" button to finalize the import of your model.
### Step 3: Wait for the model build to complete usually takes \~5-10 minutes
### Step 4: Use the APIs to call the model
Once the model is in 'Active' status you can click on the 'API' page to call the model
### Here is the Demo:
## Method B: Deploying the model on Inferless CLI
Inferless allows you to deploy your model using Inferless-CLI. Follow the steps to deploy using Inferless CLI.
### Clone the repository of the model
Let's begin by cloning the model repository:
```bash
git clone https://github.com/inferless/TenyxChat-8x7B-v1.git
```
### Deploy the Model
To deploy the model using Inferless CLI, execute the following command:
```bash
inferless deploy --gpu A100 --runtime inferless-runtime-config.yaml
```
**Explanation of the Command:**
* `--gpu A100`: Specifies the GPU type for deployment. Available options include `A10`, `A100`, and `T4`.
* `--runtime inferless-runtime-config.yaml`: Defines the runtime configuration file. If not specified, the default Inferless runtime is used.
# How to Stream Speech with Parler-TTS using Inferless
Source: https://docs.inferless.com/how-to-guides/deploy-text-to-speech-streaming
This tutorial demonstrates how to implement real-time text-to-speech (TTS) streaming using the parler_tts_mini model and Parler-TTS library.
## Introduction
This tutorial implements a text-to-speech (TTS) streaming model, [parler\_tts\_mini](https://huggingface.co/parler-tts/parler_tts_mini_v0.1) using [Parler\_TTS](https://github.com/huggingface/parler-tts) library.
It will enable real-time TTS streaming, converting text inputs into speech and stream the audio chunk by chunk.
## Defining Dependencies
We are using the [Parler\_TTS](https://github.com/huggingface/parler-tts) and [Transformers](https://github.com/huggingface/transformers/) libraries for the deployment.
## Constructing the GitHub/GitLab Template
Now quickly construct the GitHub/GitLab template, this process is mandatory and make sure you don't add any file named `model.py`
```
Parler-tts-streaming/
├── app.py
├── inferless-runtime-config.yaml
├── inferless.yaml
├── input_schema.py
└── parler.py
```
You can also add other files to this directory.
## Create the Input Schema
Let's begin by creating the [`input_schema.py`](https://github.com/inferless/Parler-tts-streaming/blob/main/input_schema.py) file, which defines the input structure for our model. You can find the complete file in our [GitHub repository](https://github.com/inferless/Parler-tts-streaming/blob/main/input_schema.py).
For this tutorial, we'll use two text inputs:
1. `prompt_value`: The main text to be converted to speech
2. `input_value`: The voice instructions for the TTS model
Both inputs are of `string` data type. The output will be streamed using Server-Sent Events (SSE), delivering audio chunks as `base64` encoded strings. This approach allows for real-time audio playback as the speech is generated.
To enable streaming with SSE, it's crucial to set the `IS_STREAMING_OUTPUT` property to `True` in your model configuration. This tells the system to expect and handle a continuous output stream rather than a single response.
It's important to note the limitations when working with streaming inputs:
1. Supported datatypes: Only `INT`, `STRING`, and `BOOLEAN` are supported as input datatypes.
2. Input shape: The shape of each parameter should be `[1]`. For multiple inputs or complex objects, use `json.dumps(object)` to convert them to a string before passing.
3. Consistent output schema: All iterative responses in the output stream must adhere to the same schema.
Now, let's create the `input_schema.py` file with the following content:
```JSON
INPUT_SCHEMA = {
"input_value": {
'datatype': 'STRING',
'required': True,
'shape': [1],
'example': ["A male speaker with a low-pitched voice delivering his words at a fast pace in a small, confined space with a very clear audio and an animated tone."]
},
"prompt_value": {
'datatype': 'STRING',
'required': True,
'shape': [1],
'example': ["Remember - this is only the first iteration of the model! To improve the prosody and naturalness of the speech further, we're scaling up the amount of training data by a factor of five times."]
}
}
IS_STREAMING_OUTPUT = True
```
## Create the class for Text-to-Speech Streamer
In the [parler.py](https://github.com/inferless/Parler-tts-streaming/blob/main/parler.py) file, we define the `ParlerTTSStreamer` class and import all the required functions.
```python
import math
from queue import Queue
import numpy as np
import torch
from parler_tts import ParlerTTSForConditionalGeneration
from transformers import AutoTokenizer, AutoFeatureExtractor
from transformers.generation.streamers import BaseStreamer
class ParlerTTSStreamer(BaseStreamer):
def __init__(self):
self.device = "cuda:0"
torch_dtype = torch.float16
repo_id = "parler-tts/parler_tts_mini_v0.1"
self.tokenizer = AutoTokenizer.from_pretrained(repo_id)
self.feature_extractor = AutoFeatureExtractor.from_pretrained(repo_id)
self.SAMPLE_RATE = self.feature_extractor.sampling_rate
self.model = ParlerTTSForConditionalGeneration.from_pretrained(repo_id, torch_dtype=torch_dtype, low_cpu_mem_usage=True).to(self.device)
self.decoder = self.model.decoder
self.audio_encoder = self.model.audio_encoder
self.generation_config = self.model.generation_config
self.sampling_rate = self.model.audio_encoder.config.sampling_rate
frame_rate = self.model.audio_encoder.config.frame_rate
play_steps_in_s=2.0
play_steps = int(frame_rate * play_steps_in_s)
# variables used in the streaming process
self.play_steps = play_steps
hop_length = math.floor(self.audio_encoder.config.sampling_rate / self.audio_encoder.config.frame_rate)
self.stride = hop_length * (play_steps - self.decoder.num_codebooks) // 6
self.token_cache = None
self.to_yield = 0
# varibles used in the thread process
self.audio_queue = Queue()
self.stop_signal = None
self.timeout = None
def apply_delay_pattern_mask(self, input_ids):
# build the delay pattern mask for offsetting each codebook prediction by 1 (this behaviour is specific to Parler)
_, delay_pattern_mask = self.decoder.build_delay_pattern_mask(
input_ids[:, :1],
bos_token_id=self.generation_config.bos_token_id,
pad_token_id=self.generation_config.decoder_start_token_id,
max_length=input_ids.shape[-1],
)
# apply the pattern mask to the input ids
input_ids = self.decoder.apply_delay_pattern_mask(input_ids, delay_pattern_mask)
# revert the pattern delay mask by filtering the pad token id
mask = (delay_pattern_mask != self.generation_config.bos_token_id) & (delay_pattern_mask != self.generation_config.pad_token_id)
input_ids = input_ids[mask].reshape(1, self.decoder.num_codebooks, -1)
# append the frame dimension back to the audio codes
input_ids = input_ids[None, ...]
# send the input_ids to the correct device
input_ids = input_ids.to(self.audio_encoder.device)
decode_sequentially = (
self.generation_config.bos_token_id in input_ids
or self.generation_config.pad_token_id in input_ids
or self.generation_config.eos_token_id in input_ids
)
if not decode_sequentially:
output_values = self.audio_encoder.decode(
input_ids,
audio_scales=[None],
)
else:
sample = input_ids[:, 0]
sample_mask = (sample >= self.audio_encoder.config.codebook_size).sum(dim=(0, 1)) == 0
sample = sample[:, :, sample_mask]
output_values = self.audio_encoder.decode(sample[None, ...], [None])
audio_values = output_values.audio_values[0, 0]
return audio_values.cpu().float().numpy()
def put(self, value):
batch_size = value.shape[0] // self.decoder.num_codebooks
if self.token_cache is None:
self.token_cache = value
else:
self.token_cache = torch.concatenate([self.token_cache, value[:, None]], dim=-1)
if self.token_cache.shape[-1] % self.play_steps == 0:
audio_values = self.apply_delay_pattern_mask(self.token_cache)
self.on_finalized_audio(audio_values[self.to_yield : -self.stride])
self.to_yield += len(audio_values) - self.to_yield - self.stride
def end(self):
# Flushes any remaining cache and appends the stop symbol
if self.token_cache is not None:
audio_values = self.apply_delay_pattern_mask(self.token_cache)
else:
audio_values = np.zeros(self.to_yield)
self.on_finalized_audio(audio_values[self.to_yield :], stream_end=True)
def on_finalized_audio(self, audio: np.ndarray, stream_end: bool = False):
# Put the new audio in the queue. If the stream is ending, also put a stop signal in the queue.
self.audio_queue.put(audio, timeout=self.timeout)
if stream_end:
self.audio_queue.put(self.stop_signal, timeout=self.timeout)
def __iter__(self):
return self
def __next__(self):
value = self.audio_queue.get(timeout=self.timeout)
if not isinstance(value, np.ndarray) and value == self.stop_signal:
raise StopIteration()
else:
return value
```
## Create the class for inference
In the [`app.py`](https://github.com/inferless/Parler-tts-streaming/blob/main/app.py) we will define the class and import all the required functions
1. `def initialize`: In this function, we will create an object of the `ParlerTTSStreamer` class which will load the model. You can define any `variable` that you want to use during inference.
2. `def infer`: The `infer` function is the core of your model's inference process. It's invoked for each incoming request and is responsible for processing the input and generating the streamed output. Here's a breakdown of its key components:
a. Output Streaming Setup:
* We create a dictionary `output_dict` with a key `'OUT'`.
* This dictionary will hold each chunk of the generated audio as a base64-encoded string.
b. Processing and Streaming:
* As the model generates audio chunks, we encode each chunk to base64.
* For each encoded chunk (`mp3_str`), we update the `output_dict`:
```python
output_dict['OUT'] = mp3_str
```
* We will use the `stream_output_handler` for streaming the generated audio output chunks. It provides `stream_output_handler.send_streamed_output()` function to send this chunk to the client:
```python
stream_output_handler.send_streamed_output(output_dict)
```
* This process repeats for each audio chunk, allowing real-time streaming of the generated speech.
c. Finalizing the Stream:
* After all chunks have been processed and sent, we call:
```python
stream_output_handler.finalise_streamed_output()
```
* This function signals the end of the stream to the client, properly closing the event streamer.
3. `def finalize`: This function cleans up all the allocated memory.
```python
import io
import base64
import numpy as np
from threading import Thread
from pydub import AudioSegment
from parler import ParlerTTSStreamer
class InferlessPythonModel:
def initialize(self):
# Initialize the ParlerTTSStreamer object
self.streamer = ParlerTTSStreamer()
def numpy_to_mp3(self, audio_array, sampling_rate):
# Convert numpy array to MP3 format
if np.issubdtype(audio_array.dtype, np.floating):
# Normalize floating-point audio data to 16-bit integer range
max_val = np.max(np.abs(audio_array))
audio_array = (audio_array / max_val) * 32767
audio_array = audio_array.astype(np.int16)
# Create an AudioSegment object from the numpy array
audio_segment = AudioSegment(
audio_array.tobytes(),
frame_rate=sampling_rate,
sample_width=audio_array.dtype.itemsize,
channels=1
)
# Export the AudioSegment to MP3 format
mp3_io = io.BytesIO()
audio_segment.export(mp3_io, format="mp3", bitrate="320k")
mp3_bytes = mp3_io.getvalue()
mp3_io.close()
return mp3_bytes
def infer(self, inputs, stream_output_handler):
# Reset streamer properties
self.streamer.token_cache = None
self.streamer.to_yield = 0
# Extract input and prompt values from the inputs dictionary
input_value = inputs["input_value"]
prompt_value = inputs["prompt_value"]
# Tokenize input and prompt
inputs_ = self.streamer.tokenizer(input_value, return_tensors="pt").to(self.streamer.device)
prompt = self.streamer.tokenizer(prompt_value, return_tensors="pt").to(self.streamer.device)
# Set up generation kwargs for the model
generation_kwargs = dict(
input_ids=inputs_.input_ids,
prompt_input_ids=prompt.input_ids,
streamer=self.streamer,
do_sample=True,
temperature=1.0,
min_new_tokens=10)
# Start a new thread for model generation
thread = Thread(target=self.streamer.model.generate, kwargs=generation_kwargs)
thread.start()
# Process and stream the generated audio
for new_audio in self.streamer:
# Convert numpy array to MP3 and encode as base64 string
mp3_bytes = self.numpy_to_mp3(new_audio, sampling_rate=self.streamer.sampling_rate)
mp3_str = base64.b64encode(mp3_bytes).decode('utf-8')
# Prepare and send the output dictionary
output_dict = {}
output_dict["OUT"] = mp3_str
stream_output_handler.send_streamed_output(output_dict)
# Wait for the generation thread to complete
thread.join()
# Finalize the streamed output
stream_output_handler.finalise_streamed_output()
def finalize(self, args):
# Clean up resources
self.streamer = None
```
## Creating the Custom Runtime
This is a mandatory step where we allow the users to upload their own custom runtime through [inferless-runtime-config.yaml](https://github.com/inferless/Parler-tts-streaming/blob/main/inferless-runtime-config.yaml).
To enable streaming functionality, ensure you are using CUDA version `12.4.1`.
```
build:
cuda_version: "12.4.1"
system_packages:
- "ffmpeg"
python_packages:
- "accelerate==0.31.0"
- "pydub==0.25.1"
- "git+https://github.com/huggingface/parler-tts@8b8c576e2dbdc29172e30be7d68fac9357cd92c5#egg=parler-tts"
```
## Method A: Deploying the model on Inferless Platform
Inferless supports multiple ways of [importing your model](https://docs.inferless.com/model-import/file-structure-req/file-structure-requirements). For this tutorial, we will use GitHub.
### Step 1: Login to the inferless dashboard can click on Import model button
Navigate to your desired workspace in Inferless and Click on `Add a custom model` button that you see on the top right. An import wizard will open up.
### Step 2: Follow the UI to complete the model Import
* Select the GitHub/GitLab Integration option to connect your source code repository with the deployment environment.
* Navigate to the specific GitHub repository that contains your model's code. Here, you will need to identify and enter the name of the model you wish to import.
* Choose the appropriate type of machine that suits your model's requirements. Additionally, specify the minimum and maximum number of replicas to define the scalability range for deploying your model.
* Optionally, you have the option to enable automatic build and deployment. This feature triggers a new deployment automatically whenever there is a new code push to your repository.
* If your model requires additional software packages, configure the Custom Runtime settings by including necessary pip or apt packages. Also, set up environment variables such as Inference Timeout, Container Concurrency, and Scale Down Timeout to tailor the runtime environment according to your needs.
* Wait for the validation process to complete, ensuring that all settings are correct and functional. Once validation is successful, click on the "Import" button to finalize the import of your model.
### Step 3: Wait for the model build to complete usually takes \~5-10 minutes
### Step 4: Use the APIs to call the model
Once the model is in 'Active' status you can click on the 'API' page to call the model
### Here is the Demo:
## Method B: Deploying the model on Inferless CLI
Inferless allows you to deploy your model using Inferless-CLI. Follow the steps to deploy using Inferless CLI.
### Clone the repository of the model
Let's begin by cloning the model repository:
```bash
git clone https://github.com/inferless/Parler-tts-streaming.git
```
### Deploy the Model
To deploy the model using Inferless CLI, execute the following command:
```bash
inferless deploy --gpu A100 --runtime inferless-runtime-config.yaml
```
**Explanation of the Command:**
* `--gpu A100`: Specifies the GPU type for deployment. Available options include `A10`, `A100`, and `T4`.
* `--runtime inferless-runtime-config.yaml`: Defines the runtime configuration file. If not specified, the default Inferless runtime is used.
# Deploy Google TimesFM using Inferless
Source: https://docs.inferless.com/how-to-guides/deploy-timesfm-using-inferless
TimesFM is a cutting-edge time series forecasting model developed by Google. It is designed to understand and generate detailed forecasts based on temporal data, making it a powerful tool for tasks such as demand forecasting, anomaly detection, and trend analysis.
## Introduction
Google introduces [TimesFM](https://research.google/blog/a-decoder-only-foundation-model-for-time-series-forecasting/), a state-of-the-art time series forecasting model designed to push the boundaries of temporal data analysis. The TimesFM models leverage advanced deep learning techniques to provide accurate and robust forecasts. The models come pretrained and fine-tuned on diverse datasets, ensuring robust performance out of the box while also allowing for further customization and optimization.
In this tutorial, we will explore how to deploy and utilize TimesFM using Inferless.
## Our Observations
We have used [Timesfm](https://github.com/google-research/timesfm) to deploy the model on a A100(80GB) system. Here are our observations:
| Inference Time | Cold Start Time |
| -------------- | --------------- |
| 0.12 sec | 35.84 sec |
## Defining Dependencies
We have deployed the model using the [Timesfm](https://github.com/google-research/timesfm) offical package.
## Constructing the GitHub/GitLab Template
Now quickly construct the GitHub/GitLab template, this process is mandatory and make sure you don't add any file named `model.py`.
```
Timesfm/
├── app.py
├── inferless-runtime-config.yaml
├── inferless.yaml
└── input_schema.py
```
You can also add other files to this directory.
## Create the class for inference
In the [app.py](https://github.com/inferless/Timesfm/blob/main/app.py) we will define the class and import all the required functions
1. `def initialize`: In this function, you will initialize your model and define any `variable` that you want to use during inference.
2. `def infer`: This function gets called for every request that you send. Here you can define all the steps that are required for the inference. You can also pass custom values for inference and pass it through `inputs(dict)` parameter.
3. `def finalize`: This function cleans up all the allocated memory.
```python
import timesfm
class InferlessPythonModel:
def initialize(self):
self.tfm = timesfm.TimesFm(
context_len=128,
horizon_len=96,
input_patch_len=32,
output_patch_len=128,
num_layers=20,
model_dims=1280,
backend="cpu",
)
self.tfm.load_from_checkpoint(repo_id="google/timesfm-1.0-200m")
def infer(self,inputs):
forecast_input = inputs["forecast_input"]
frequency_input = inputs["frequency_input"]
point_forecast, experimental_quantile_forecast = self.tfm.forecast(
[forecast_input],
freq=[frequency_input],
)
return {
"point_forecast":point_forecast,
"experimental_quantile_forecast":experimental_quantile_forecast
}
def finalize(self):
pass
```
## Create the Input Schema
We have to create a [`input_schema.py`](https://github.com/inferless/Timesfm/blob/main/input_schema.py) in your GitHub/Gitlab repository this will help us create the Input parameters. You can checkout our documentation on [Input / Output Schema](https://docs.inferless.com/model-import/input-output-schema).
For this tutorial, we have defined a parameter `prompt` which is required during the API call. Now lets create the `input_schema.py`.
```JSON
INPUT_SCHEMA = {
"forecast_input": {
'datatype': 'FP32',
'required': True,
'shape': [100],
'example': [0.0, 0.20064886, 0.39313661, 0.56963411, 0.72296256, 0.84688556, 0.93636273, 0.98775469, 0.99897117, 0.96955595, 0.90070545, 0.79522006, 0.65739025, 0.49282204, 0.30820902, 0.11106004, -0.09060615, -0.28858706, -0.47483011, -0.64176014, -0.7825875, -0.89158426, -0.96431712, -0.99782778, -0.99075324, -0.94338126, -0.85763861, -0.73701276, -0.58640998, -0.41195583, -0.22074597, -0.0205576, 0.18046693, 0.37415123, 0.55261747, 0.7086068, 0.83577457, 0.92894843, 0.98433866, 0.99969234, 0.97438499, 0.90944594, 0.8075165, 0.6727425, 0.51060568, 0.32770071, 0.13146699, -0.07011396, -0.26884313, -0.45663749, -0.62585878, -0.76962418, -0.88208623, -0.95867071, -0.99626264, -0.99333304, -0.95000106, -0.86802917, -0.75075145, -0.60293801, -0.43060093, -0.24074979, -0.0411065, 0.16020873, 0.35500771, 0.53536727, 0.69395153, 0.82431033, 0.9211415, 0.98050658, 0.99999098, 0.9788022, 0.91780205, 0.81947165, 0.68781042, 0.5281735, 0.34705389, 0.15181837, -0.04959214, -0.24898556, -0.43825186, -0.6096929, -0.75633557, -0.87221538, -0.95261911, -0.99427643, -0.995493, -0.95621934, -0.87805285, -0.76417283, -0.61921119, -0.44906404, -0.26065185, -0.06163804, 0.13988282, 0.33571414, 0.51789078, 0.67900297, 0.81249769, 0.91294525
]
},
"frequency_input": {
'datatype': 'INT8',
'required': True,
'shape': [1],
'example': [0]
}
}
```
## Creating the Custom Runtime
This is a mandatory step where we allow the users to upload their custom runtime through [inferless-runtime-config.yaml](https://github.com/inferless/Timesfm/blob/main/inferless-runtime-config.yaml).
```python
build:
run:
- "git clone https://github.com/google-research/timesfm.git"
- "cd timesfm"
- "pip install -e ."
- "pip install huggingface_hub[cli]==0.23.0 utilsforecast==0.1.10 praxis==1.4.0 paxml==1.4.0 einshape==1.0"
- "pip install jax[cuda] -f https://storage.googleapis.com/jax-releases/jax_cuda_releases.html jax==0.4.28"
- "huggingface-cli login --token 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 --add-to-git-credential"
```
## Method A: Deploying the model on Inferless Platform
Inferless supports multiple ways of [importing your model](https://docs.inferless.com/model-import/file-structure-req/file-structure-requirements). For this tutorial, we will use GitHub.
### Step 1: Login to the inferless dashboard can click on Import model button
Navigate to your desired workspace in Inferless and Click on `Add a custom model` button that you see on the top right. An import wizard will open up.
### Step 2: Follow the UI to complete the model Import
* Select the GitHub/GitLab Integration option to connect your source code repository with the deployment environment.
* Navigate to the specific GitHub repository that contains your model's code. Here, you will need to identify and enter the name of the model you wish to import.
* Choose the appropriate type of machine that suits your model's requirements. Additionally, specify the minimum and maximum number of replicas to define the scalability range for deploying your model.
* Optionally, you have the option to enable automatic build and deployment. This feature triggers a new deployment automatically whenever there is a new code push to your repository.
* If your model requires additional software packages, configure the Custom Runtime settings by including necessary pip or apt packages. Also, set up environment variables such as Inference Timeout, Container Concurrency, and Scale Down Timeout to tailor the runtime environment according to your needs.
* Wait for the validation process to complete, ensuring that all settings are correct and functional. Once validation is successful, click on the "Import" button to finalize the import of your model.
### Step 3: Wait for the model build to complete usually takes \~5-10 minutes
### Step 4: Use the APIs to call the model
Once the model is in 'Active' status you can click on the 'API' page to call the model
### Here is the Demo:
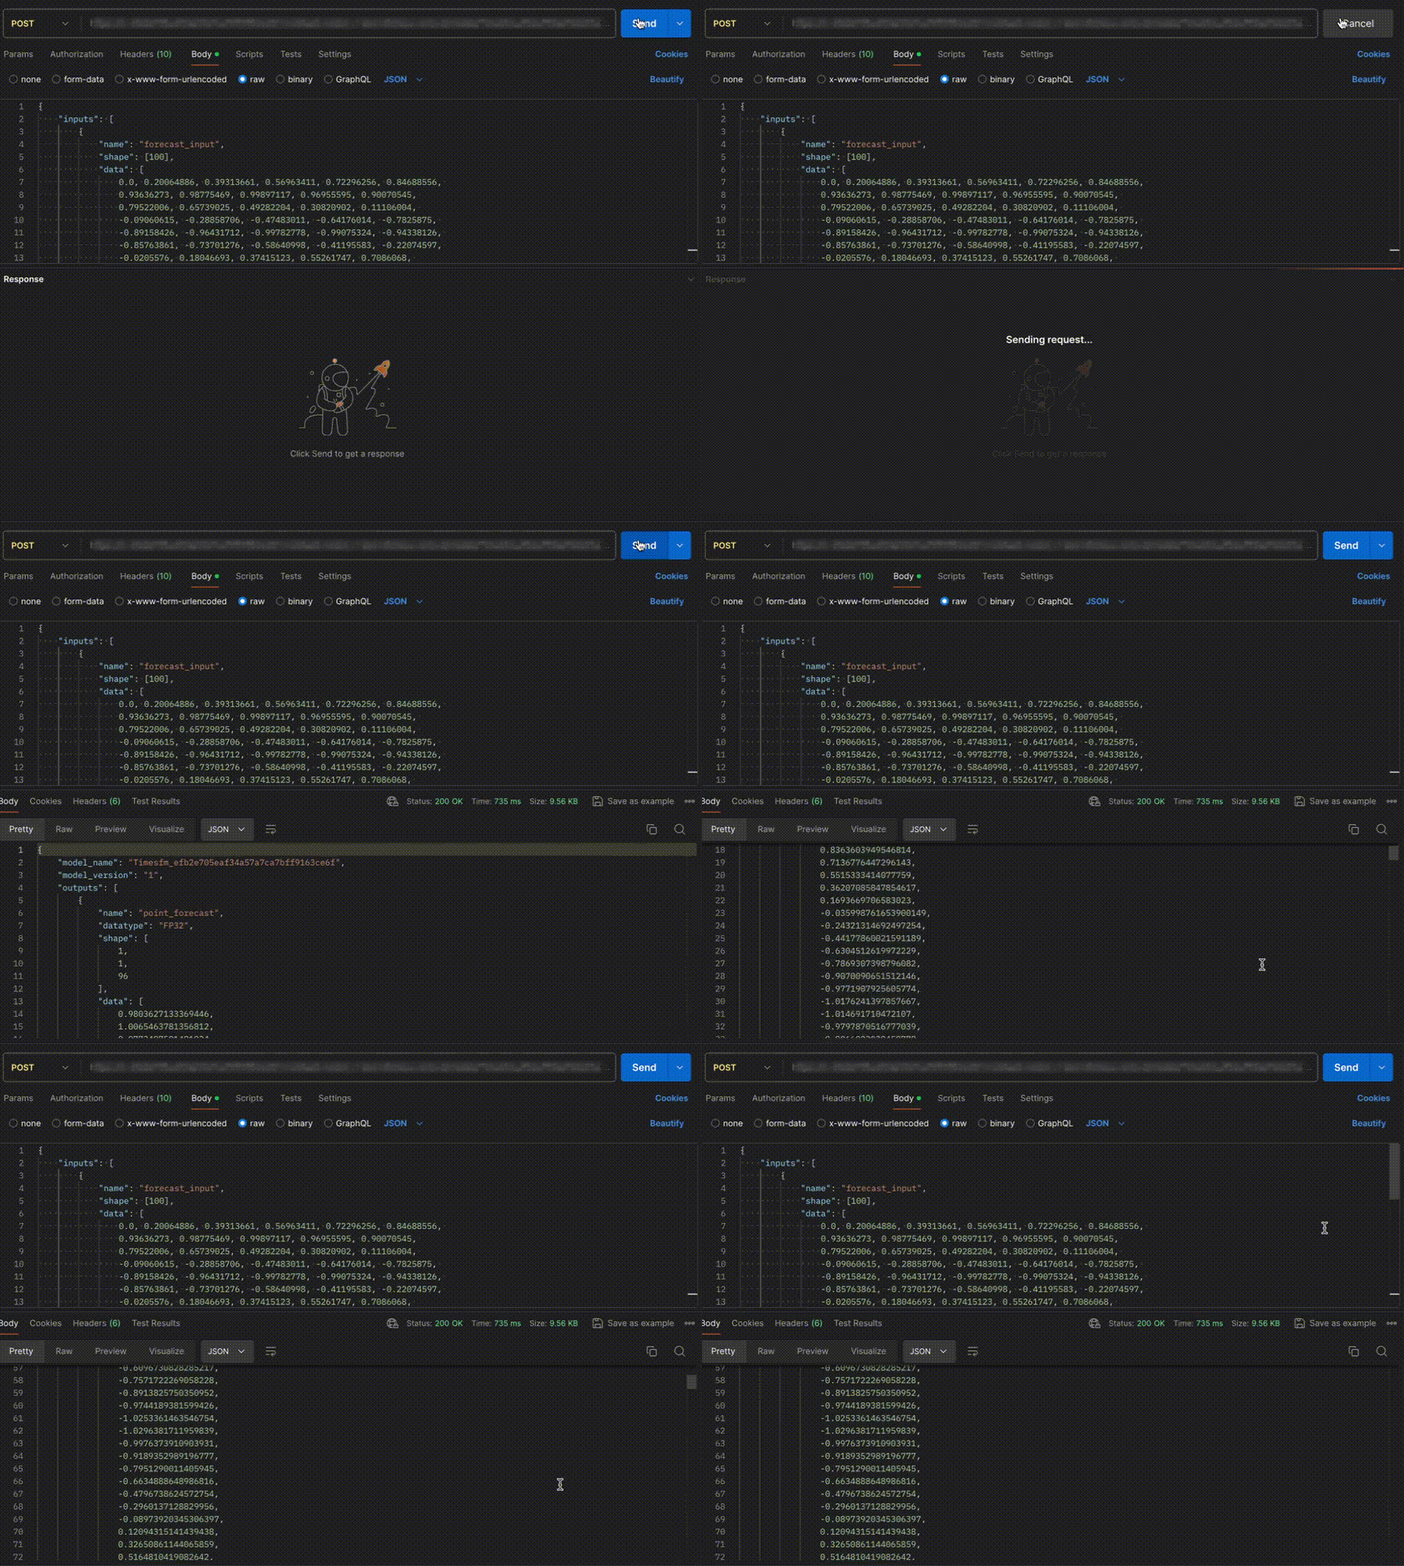 ## Method B: Deploying the model on Inferless CLI
Inferless allows you to deploy your model using Inferless-CLI. Follow the steps to deploy using Inferless CLI.
### Clone the repository of the model
Let's begin by cloning the model repository:
```bash
git clone https://github.com/inferless/Timesfm.git
```
### Deploy the Model
To deploy the model using Inferless CLI, execute the following command:
```bash
inferless deploy --gpu A100 --runtime inferless-runtime-config.yaml
```
**Explanation of the Command:**
* `--gpu A100`: Specifies the GPU type for deployment. Available options include `A10`, `A100`, and `T4`.
* `--runtime inferless-runtime-config.yaml`: Defines the runtime configuration file. If not specified, the default Inferless runtime is used.
# Deploy the Voxtral-Mini-3B model using Inferless
Source: https://docs.inferless.com/how-to-guides/deploy-voxtral-3b-mini
An audio-language model fine-tuned for transcription, summarization, Q&A and voice-triggered function calls, deployable compactly on consumer GPUs with rich structured outputs.
## Introduction
[`mistralai/Voxtral-Mini-3B-2507`](https://huggingface.co/mistralai/Voxtral-Mini-3B-2507) is an open-source, 3B-parameter audio-language model released under Apache 2.0, optimized for speech transcription, summarization, Q\&A, language detection, and voice-triggered workflows. It retains high performance on text prompts while offering multimodal audio understanding in a compact format, ideal for on-device or edge deployment.
It supports extended context windows upto 32k tokens, allowing processing of audios as long as \~30 minutes for transcription or \~40 minutes for audio reasoning. It automatically detects language across many languages (English, Hindi, French, Portuguese, German, Dutch, Italian, Spanish and more), transcribes, summarizes, answers questions, and even triggers backend functions based on spoken commands.
## Defining Dependencies
We are using the [transformers](https://github.com/huggingface/transformers) to serve the model on a single A10.
## Constructing the GitHub/GitLab Template
Now quickly construct the GitHub/GitLab template, this process is mandatory and make sure you don't add any file named `model.py`.
```
voxtral-mini-3b/
├── app.py
├── inferless-runtime-config.yaml
└── inferless.yaml
```
You can also add other files to this directory.
## Create the Input Schema with Pydantic
Using the `inferless` Python client and Pydantic, you can define structured schemas directly in your code for input and output, eliminating the need for external file.
### Input Schema
When defining an input schema with Pydantic, you need to annotate your class attributes with the appropriate types, such as `str`, `float`, `int`, `bool` etc.
These type annotations specifys what type of data each field should contain.
The `default` value serves as the example input for testing with the `infer` function.
```python
@inferless.request
class RequestObjects(BaseModel):
audio_path: str = Field(default="https://huggingface.co/datasets/hf-internal-testing/dummy-audio-samples/resolve/main/mary_had_lamb.mp3")
text_prompt: str = Field(default="What can you tell me about the audio?")
max_new_tokens: Optional[int] = 500
temperature: Optional[float] = 1.0
do_sample: Optional[bool] = True
top_p: Optional[float] = 0.9
top_k: Optional[int] = 50
```
### Output Schema
The `@inferless.response` decorator helps you define structured output schemas.
```python
@inferless.response
class ResponseObjects(BaseModel):
generated_text: str = Field(default="Test Output")
```
### Usage in the `infer` Function
Once you have annotated the objects you can expect the infer function to receive `RequestObjects` as input,
and returns a `ResponseObjects` instance as output, ensuring the results adhere to a defined structure.
```python
class InferlessPythonModel:
def infer(self, request: RequestObjects) -> ResponseObjects:
return ResponseObject(**return_result)
```
## Create the class for inference
In the [app.py](https://github.com/inferless/voxtral-mini-3b/blob/main/app.py) we will define the class and import all the required functions
1. `def initialize`: In this function, you will initialize your model and define any `variable` that you want to use during inference.
2. `def infer`: This function gets called for every request that you send. Here you can define all the steps that are required for the inference.
3. `def finalize`: This function cleans up all the allocated memory.
```python
from transformers import VoxtralForConditionalGeneration, AutoProcessor
import torch
from typing import Optional, List, Dict, Any
from pydantic import BaseModel, Field
import inferless
import os
os.environ["HF_HUB_ENABLE_HF_TRANSFER"] = '1'
@inferless.request
class RequestObjects(BaseModel):
audio_path: str = Field(default="https://huggingface.co/datasets/hf-internal-testing/dummy-audio-samples/resolve/main/mary_had_lamb.mp3")
text_prompt: str = Field(default="What can you tell me about the audio?")
max_new_tokens: Optional[int] = 500
temperature: Optional[float] = 1.0
do_sample: Optional[bool] = True
top_p: Optional[float] = 0.9
top_k: Optional[int] = 50
@inferless.response
class ResponseObjects(BaseModel):
generated_text: str = Field(default="Test Output")
class InferlessPythonModel:
def initialize(self):
self.repo_id = "mistralai/Voxtral-Mini-3B-2507"
self.processor = AutoProcessor.from_pretrained(self.repo_id)
self.model = VoxtralForConditionalGeneration.from_pretrained(
self.repo_id,
torch_dtype=torch.bfloat16,
device_map="cuda"
)
def _create_conversation(self, audio_path: str, text_prompt: str) -> List[Dict[str, Any]]:
"""Create conversation format for the model"""
content = []
# Add audio file
content.append({
"type": "audio",
"path": audio_path
})
# Add text prompt
content.append({
"type": "text",
"text": text_prompt
})
conversation = [
{
"role": "user",
"content": content
}
]
return conversation
def infer(self, inputs: RequestObjects) -> ResponseObjects:
# Create conversation format
conversation = self._create_conversation(inputs.audio_path, inputs.text_prompt)
# Apply chat template
model_inputs = self.processor.apply_chat_template(conversation)
model_inputs = model_inputs.to("cuda", dtype=torch.bfloat16)
# Generate response
generation_kwargs = {
"max_new_tokens": inputs.max_new_tokens,
"do_sample": inputs.do_sample,
"temperature": inputs.temperature,
"top_p": inputs.top_p,
"top_k": inputs.top_k,
}
with torch.no_grad():
outputs = self.model.generate(**model_inputs, **generation_kwargs)
# Decode the generated tokens
decoded_outputs = self.processor.batch_decode(
outputs[:, model_inputs.input_ids.shape[1]:],
skip_special_tokens=True
)
generated_text = decoded_outputs[0].strip()
return ResponseObjects(
generated_text=generated_text
)
def finalize(self):
self.model = None
```
## Creating the Custom Runtime
This is a mandatory step where we allow the users to upload their custom runtime through [inferless-runtime-config.yaml](https://github.com/inferless/voxtral-mini-3b/blob/main/inferless-runtime-config.yaml).
```python
build:
cuda_version: "12.1.1"
python_packages:
- torch==2.7.1
- mistral_common==1.8.1
- accelerate==1.9.0
- librosa==0.11.0
- hf-transfer==0.1.9
- huggingface-hub==0.34.0
- pydantic==2.11.7
- inferless==0.2.15
- transformers==4.54.1
```
## Test your model with Remote Run
You can use the `inferless remote-run`([installation guide here](https://docs.inferless.com/model-import/cli-import#cli-import)) command to test your model or any custom Python script in a remote GPU environment directly from your local machine. Make sure that you use `Python3.10` for seamless experience.
### Step 1: Add the Decorators and local entry point
To enable **Remote Run**, simply do the following:
1. Import the `inferless` library and initialize `Cls(gpu="A10")`. The available GPU options are `T4`, `A10` and `A100`.
2. Decorated the `initialize` and `infer` functions with `@app.load` and `@app.infer` respectively.
3. Create the Local Entry Point by decorating a function (for example, `my_local_entry`) with `@inferless.local_entry_point`.
Within this function, instantiate your model class, convert any incoming parameters into a `RequestObjects` object, and invoke the model's `infer` method.
```python
from transformers import VoxtralForConditionalGeneration, AutoProcessor
import torch
from typing import Optional, List, Dict, Any
from pydantic import BaseModel, Field
import inferless
import os
os.environ["HF_HUB_ENABLE_HF_TRANSFER"] = '1'
app = inferless.Cls(gpu="A10")
@inferless.request
class RequestObjects(BaseModel):
audio_path: str = Field(default="https://huggingface.co/datasets/hf-internal-testing/dummy-audio-samples/resolve/main/mary_had_lamb.mp3")
text_prompt: str = Field(default="What can you tell me about the audio?")
max_new_tokens: Optional[int] = 500
temperature: Optional[float] = 1.0
do_sample: Optional[bool] = True
top_p: Optional[float] = 0.9
top_k: Optional[int] = 50
@inferless.response
class ResponseObjects(BaseModel):
generated_text: str = Field(default="Test Output")
class InferlessPythonModel:
@app.load
def initialize(self):
self.repo_id = "mistralai/Voxtral-Mini-3B-2507"
self.processor = AutoProcessor.from_pretrained(self.repo_id)
self.model = VoxtralForConditionalGeneration.from_pretrained(
self.repo_id,
torch_dtype=torch.bfloat16,
device_map="cuda"
)
def _create_conversation(self, audio_path: str, text_prompt: str) -> List[Dict[str, Any]]:
"""Create conversation format for the model"""
content = []
# Add audio file
content.append({
"type": "audio",
"path": audio_path
})
# Add text prompt
content.append({
"type": "text",
"text": text_prompt
})
conversation = [
{
"role": "user",
"content": content
}
]
return conversation
@app.infer
def infer(self, inputs: RequestObjects) -> ResponseObjects:
# Create conversation format
conversation = self._create_conversation(inputs.audio_path, inputs.text_prompt)
# Apply chat template
model_inputs = self.processor.apply_chat_template(conversation)
model_inputs = model_inputs.to("cuda", dtype=torch.bfloat16)
# Generate response
generation_kwargs = {
"max_new_tokens": inputs.max_new_tokens,
"do_sample": inputs.do_sample,
"temperature": inputs.temperature,
"top_p": inputs.top_p,
"top_k": inputs.top_k,
}
with torch.no_grad():
outputs = self.model.generate(**model_inputs, **generation_kwargs)
# Decode the generated tokens
decoded_outputs = self.processor.batch_decode(
outputs[:, model_inputs.input_ids.shape[1]:],
skip_special_tokens=True
)
generated_text = decoded_outputs[0].strip()
return ResponseObjects(
generated_text=generated_text
)
def finalize(self):
self.model = None
@inferless.local_entry_point
def my_local_entry(dynamic_params):
request_objects = RequestObjects(**dynamic_params)
model_instance = InferlessPythonModel()
return model_instance.infer(request_objects)
```
### Step 2: Run with Remote GPU
From your local terminal, navigate to the folder containing your `app.py` and your `inferless-runtime-config.yaml` and run:
```bash
inferless remote-run app.py -c inferless-runtime-config.yaml --audio_path "https://huggingface.co/datasets/hf-internal-testing/dummy-audio-samples/resolve/main/mary_had_lamb.mp3" --text_prompt "What can you tell me about the audio?"
```
You can pass the other input parameters in the same way (e.g., `--max_new_tokens`, etc.) as long as your code expects them in the `inputs` dictionary.
If you want to exclude certain files or directories from being uploaded, use the `--exclude` or `-e` flag.
## Method A: Deploying the model on Inferless Platform
Inferless supports multiple ways of [importing your model](https://docs.inferless.com/model-import/file-structure-req/file-structure-requirements). For this tutorial, we will use GitHub.
### Step 1: Login to the inferless dashboard can click on Import model button
Navigate to your desired workspace in Inferless and Click on `Add a custom model` button that you see on the top right. An import wizard will open up.
### Step 2: Follow the UI to complete the model Import
* Select the GitHub/GitLab Integration option to connect your source code repository with the deployment environment.
* Navigate to the specific GitHub repository that contains your model's code. Here, you will need to identify and enter the name of the model you wish to import.
* Choose the appropriate type of machine that suits your model's requirements. Additionally, specify the minimum and maximum number of replicas to define the scalability range for deploying your model.
* Optionally, you have the option to enable automatic build and deployment. This feature triggers a new deployment automatically whenever there is a new code push to your repository.
* If your model requires additional software packages, configure the Custom Runtime settings by including necessary pip or apt packages. Also, set up environment variables such as Inference Timeout, Container Concurrency, and Scale Down Timeout to tailor the runtime environment according to your needs.
* Wait for the validation process to complete, ensuring that all settings are correct and functional. Once validation is successful, click on the "Import" button to finalize the import of your model.
### Step 3: Wait for the model build to complete usually takes \~5-10 minutes
### Step 4: Use the APIs to call the model
Once the model is in 'Active' status you can click on the 'API' page to call the model
### Here is the Demo:
## Method B: Deploying the model on Inferless CLI
Inferless allows you to deploy your model using Inferless-CLI. Follow the steps to deploy using Inferless CLI.
### Clone the repository of the model
Let's begin by cloning the model repository:
```bash
git clone https://github.com/inferless/Timesfm.git
```
### Deploy the Model
To deploy the model using Inferless CLI, execute the following command:
```bash
inferless deploy --gpu A100 --runtime inferless-runtime-config.yaml
```
**Explanation of the Command:**
* `--gpu A100`: Specifies the GPU type for deployment. Available options include `A10`, `A100`, and `T4`.
* `--runtime inferless-runtime-config.yaml`: Defines the runtime configuration file. If not specified, the default Inferless runtime is used.
# Deploy the Voxtral-Mini-3B model using Inferless
Source: https://docs.inferless.com/how-to-guides/deploy-voxtral-3b-mini
An audio-language model fine-tuned for transcription, summarization, Q&A and voice-triggered function calls, deployable compactly on consumer GPUs with rich structured outputs.
## Introduction
[`mistralai/Voxtral-Mini-3B-2507`](https://huggingface.co/mistralai/Voxtral-Mini-3B-2507) is an open-source, 3B-parameter audio-language model released under Apache 2.0, optimized for speech transcription, summarization, Q\&A, language detection, and voice-triggered workflows. It retains high performance on text prompts while offering multimodal audio understanding in a compact format, ideal for on-device or edge deployment.
It supports extended context windows upto 32k tokens, allowing processing of audios as long as \~30 minutes for transcription or \~40 minutes for audio reasoning. It automatically detects language across many languages (English, Hindi, French, Portuguese, German, Dutch, Italian, Spanish and more), transcribes, summarizes, answers questions, and even triggers backend functions based on spoken commands.
## Defining Dependencies
We are using the [transformers](https://github.com/huggingface/transformers) to serve the model on a single A10.
## Constructing the GitHub/GitLab Template
Now quickly construct the GitHub/GitLab template, this process is mandatory and make sure you don't add any file named `model.py`.
```
voxtral-mini-3b/
├── app.py
├── inferless-runtime-config.yaml
└── inferless.yaml
```
You can also add other files to this directory.
## Create the Input Schema with Pydantic
Using the `inferless` Python client and Pydantic, you can define structured schemas directly in your code for input and output, eliminating the need for external file.
### Input Schema
When defining an input schema with Pydantic, you need to annotate your class attributes with the appropriate types, such as `str`, `float`, `int`, `bool` etc.
These type annotations specifys what type of data each field should contain.
The `default` value serves as the example input for testing with the `infer` function.
```python
@inferless.request
class RequestObjects(BaseModel):
audio_path: str = Field(default="https://huggingface.co/datasets/hf-internal-testing/dummy-audio-samples/resolve/main/mary_had_lamb.mp3")
text_prompt: str = Field(default="What can you tell me about the audio?")
max_new_tokens: Optional[int] = 500
temperature: Optional[float] = 1.0
do_sample: Optional[bool] = True
top_p: Optional[float] = 0.9
top_k: Optional[int] = 50
```
### Output Schema
The `@inferless.response` decorator helps you define structured output schemas.
```python
@inferless.response
class ResponseObjects(BaseModel):
generated_text: str = Field(default="Test Output")
```
### Usage in the `infer` Function
Once you have annotated the objects you can expect the infer function to receive `RequestObjects` as input,
and returns a `ResponseObjects` instance as output, ensuring the results adhere to a defined structure.
```python
class InferlessPythonModel:
def infer(self, request: RequestObjects) -> ResponseObjects:
return ResponseObject(**return_result)
```
## Create the class for inference
In the [app.py](https://github.com/inferless/voxtral-mini-3b/blob/main/app.py) we will define the class and import all the required functions
1. `def initialize`: In this function, you will initialize your model and define any `variable` that you want to use during inference.
2. `def infer`: This function gets called for every request that you send. Here you can define all the steps that are required for the inference.
3. `def finalize`: This function cleans up all the allocated memory.
```python
from transformers import VoxtralForConditionalGeneration, AutoProcessor
import torch
from typing import Optional, List, Dict, Any
from pydantic import BaseModel, Field
import inferless
import os
os.environ["HF_HUB_ENABLE_HF_TRANSFER"] = '1'
@inferless.request
class RequestObjects(BaseModel):
audio_path: str = Field(default="https://huggingface.co/datasets/hf-internal-testing/dummy-audio-samples/resolve/main/mary_had_lamb.mp3")
text_prompt: str = Field(default="What can you tell me about the audio?")
max_new_tokens: Optional[int] = 500
temperature: Optional[float] = 1.0
do_sample: Optional[bool] = True
top_p: Optional[float] = 0.9
top_k: Optional[int] = 50
@inferless.response
class ResponseObjects(BaseModel):
generated_text: str = Field(default="Test Output")
class InferlessPythonModel:
def initialize(self):
self.repo_id = "mistralai/Voxtral-Mini-3B-2507"
self.processor = AutoProcessor.from_pretrained(self.repo_id)
self.model = VoxtralForConditionalGeneration.from_pretrained(
self.repo_id,
torch_dtype=torch.bfloat16,
device_map="cuda"
)
def _create_conversation(self, audio_path: str, text_prompt: str) -> List[Dict[str, Any]]:
"""Create conversation format for the model"""
content = []
# Add audio file
content.append({
"type": "audio",
"path": audio_path
})
# Add text prompt
content.append({
"type": "text",
"text": text_prompt
})
conversation = [
{
"role": "user",
"content": content
}
]
return conversation
def infer(self, inputs: RequestObjects) -> ResponseObjects:
# Create conversation format
conversation = self._create_conversation(inputs.audio_path, inputs.text_prompt)
# Apply chat template
model_inputs = self.processor.apply_chat_template(conversation)
model_inputs = model_inputs.to("cuda", dtype=torch.bfloat16)
# Generate response
generation_kwargs = {
"max_new_tokens": inputs.max_new_tokens,
"do_sample": inputs.do_sample,
"temperature": inputs.temperature,
"top_p": inputs.top_p,
"top_k": inputs.top_k,
}
with torch.no_grad():
outputs = self.model.generate(**model_inputs, **generation_kwargs)
# Decode the generated tokens
decoded_outputs = self.processor.batch_decode(
outputs[:, model_inputs.input_ids.shape[1]:],
skip_special_tokens=True
)
generated_text = decoded_outputs[0].strip()
return ResponseObjects(
generated_text=generated_text
)
def finalize(self):
self.model = None
```
## Creating the Custom Runtime
This is a mandatory step where we allow the users to upload their custom runtime through [inferless-runtime-config.yaml](https://github.com/inferless/voxtral-mini-3b/blob/main/inferless-runtime-config.yaml).
```python
build:
cuda_version: "12.1.1"
python_packages:
- torch==2.7.1
- mistral_common==1.8.1
- accelerate==1.9.0
- librosa==0.11.0
- hf-transfer==0.1.9
- huggingface-hub==0.34.0
- pydantic==2.11.7
- inferless==0.2.15
- transformers==4.54.1
```
## Test your model with Remote Run
You can use the `inferless remote-run`([installation guide here](https://docs.inferless.com/model-import/cli-import#cli-import)) command to test your model or any custom Python script in a remote GPU environment directly from your local machine. Make sure that you use `Python3.10` for seamless experience.
### Step 1: Add the Decorators and local entry point
To enable **Remote Run**, simply do the following:
1. Import the `inferless` library and initialize `Cls(gpu="A10")`. The available GPU options are `T4`, `A10` and `A100`.
2. Decorated the `initialize` and `infer` functions with `@app.load` and `@app.infer` respectively.
3. Create the Local Entry Point by decorating a function (for example, `my_local_entry`) with `@inferless.local_entry_point`.
Within this function, instantiate your model class, convert any incoming parameters into a `RequestObjects` object, and invoke the model's `infer` method.
```python
from transformers import VoxtralForConditionalGeneration, AutoProcessor
import torch
from typing import Optional, List, Dict, Any
from pydantic import BaseModel, Field
import inferless
import os
os.environ["HF_HUB_ENABLE_HF_TRANSFER"] = '1'
app = inferless.Cls(gpu="A10")
@inferless.request
class RequestObjects(BaseModel):
audio_path: str = Field(default="https://huggingface.co/datasets/hf-internal-testing/dummy-audio-samples/resolve/main/mary_had_lamb.mp3")
text_prompt: str = Field(default="What can you tell me about the audio?")
max_new_tokens: Optional[int] = 500
temperature: Optional[float] = 1.0
do_sample: Optional[bool] = True
top_p: Optional[float] = 0.9
top_k: Optional[int] = 50
@inferless.response
class ResponseObjects(BaseModel):
generated_text: str = Field(default="Test Output")
class InferlessPythonModel:
@app.load
def initialize(self):
self.repo_id = "mistralai/Voxtral-Mini-3B-2507"
self.processor = AutoProcessor.from_pretrained(self.repo_id)
self.model = VoxtralForConditionalGeneration.from_pretrained(
self.repo_id,
torch_dtype=torch.bfloat16,
device_map="cuda"
)
def _create_conversation(self, audio_path: str, text_prompt: str) -> List[Dict[str, Any]]:
"""Create conversation format for the model"""
content = []
# Add audio file
content.append({
"type": "audio",
"path": audio_path
})
# Add text prompt
content.append({
"type": "text",
"text": text_prompt
})
conversation = [
{
"role": "user",
"content": content
}
]
return conversation
@app.infer
def infer(self, inputs: RequestObjects) -> ResponseObjects:
# Create conversation format
conversation = self._create_conversation(inputs.audio_path, inputs.text_prompt)
# Apply chat template
model_inputs = self.processor.apply_chat_template(conversation)
model_inputs = model_inputs.to("cuda", dtype=torch.bfloat16)
# Generate response
generation_kwargs = {
"max_new_tokens": inputs.max_new_tokens,
"do_sample": inputs.do_sample,
"temperature": inputs.temperature,
"top_p": inputs.top_p,
"top_k": inputs.top_k,
}
with torch.no_grad():
outputs = self.model.generate(**model_inputs, **generation_kwargs)
# Decode the generated tokens
decoded_outputs = self.processor.batch_decode(
outputs[:, model_inputs.input_ids.shape[1]:],
skip_special_tokens=True
)
generated_text = decoded_outputs[0].strip()
return ResponseObjects(
generated_text=generated_text
)
def finalize(self):
self.model = None
@inferless.local_entry_point
def my_local_entry(dynamic_params):
request_objects = RequestObjects(**dynamic_params)
model_instance = InferlessPythonModel()
return model_instance.infer(request_objects)
```
### Step 2: Run with Remote GPU
From your local terminal, navigate to the folder containing your `app.py` and your `inferless-runtime-config.yaml` and run:
```bash
inferless remote-run app.py -c inferless-runtime-config.yaml --audio_path "https://huggingface.co/datasets/hf-internal-testing/dummy-audio-samples/resolve/main/mary_had_lamb.mp3" --text_prompt "What can you tell me about the audio?"
```
You can pass the other input parameters in the same way (e.g., `--max_new_tokens`, etc.) as long as your code expects them in the `inputs` dictionary.
If you want to exclude certain files or directories from being uploaded, use the `--exclude` or `-e` flag.
## Method A: Deploying the model on Inferless Platform
Inferless supports multiple ways of [importing your model](https://docs.inferless.com/model-import/file-structure-req/file-structure-requirements). For this tutorial, we will use GitHub.
### Step 1: Login to the inferless dashboard can click on Import model button
Navigate to your desired workspace in Inferless and Click on `Add a custom model` button that you see on the top right. An import wizard will open up.
### Step 2: Follow the UI to complete the model Import
* Select the GitHub/GitLab Integration option to connect your source code repository with the deployment environment.
* Navigate to the specific GitHub repository that contains your model's code. Here, you will need to identify and enter the name of the model you wish to import.
* Choose the appropriate type of machine that suits your model's requirements. Additionally, specify the minimum and maximum number of replicas to define the scalability range for deploying your model.
* Optionally, you have the option to enable automatic build and deployment. This feature triggers a new deployment automatically whenever there is a new code push to your repository.
* If your model requires additional software packages, configure the Custom Runtime settings by including necessary pip or apt packages. Also, set up environment variables such as Inference Timeout, Container Concurrency, and Scale Down Timeout to tailor the runtime environment according to your needs.
* Wait for the validation process to complete, ensuring that all settings are correct and functional. Once validation is successful, click on the "Import" button to finalize the import of your model.
### Step 3: Wait for the model build to complete usually takes \~5-10 minutes
### Step 4: Use the APIs to call the model
Once the model is in 'Active' status you can click on the 'API' page to call the model
### Here is the Demo:
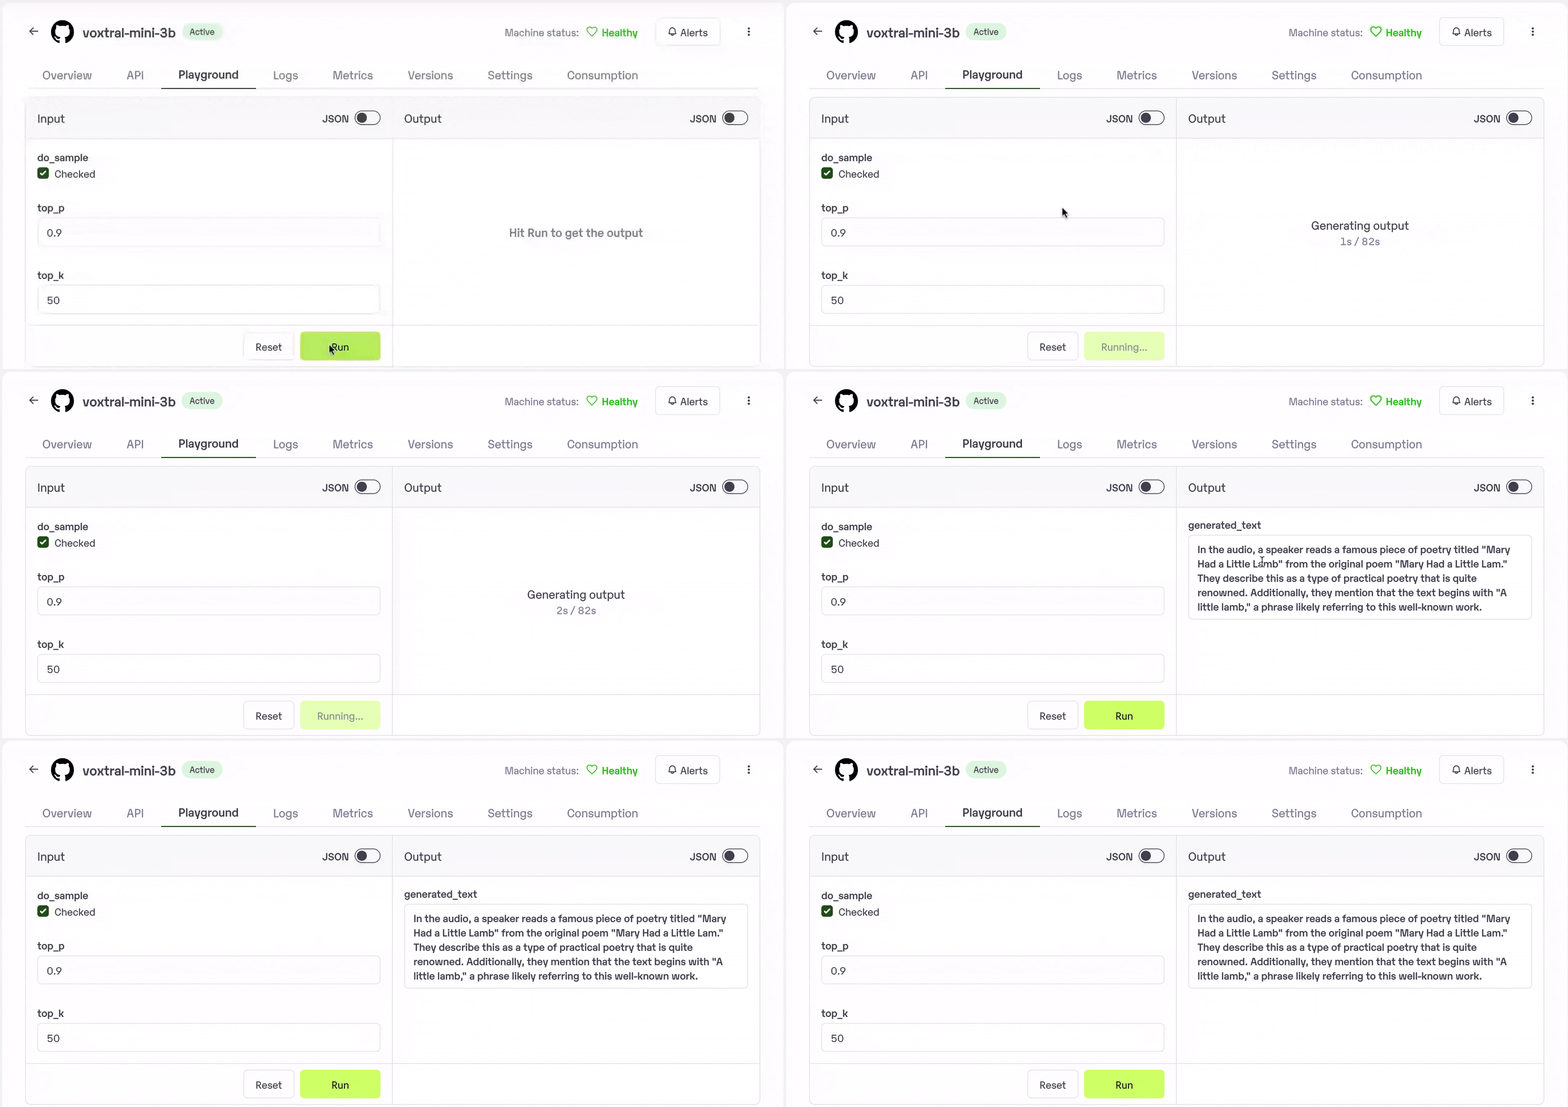 ## Method B: Deploying the model on Inferless CLI
Inferless allows you to deploy your model using Inferless-CLI. Follow the steps to deploy using Inferless CLI.
### Clone the repository of the model
Let's begin by cloning the model repository:
```bash
git clone https://github.com/inferless/voxtral-mini-3b.git
```
### Deploy the Model
To deploy the model using Inferless CLI, execute the following command:
```bash
inferless deploy --gpu A10 --runtime inferless-runtime-config.yaml
```
**Explanation of the Command:**
* `--gpu A10`: Specifies the GPU type for deployment. Available options include `A10`, `A100`, and `T4`.
* `--runtime inferless-runtime-config.yaml`: Defines the runtime configuration file. If not specified, the default Inferless runtime is used.
# Deploy Whisper Large V3 using Inferless
Source: https://docs.inferless.com/how-to-guides/deploy-whisper-large-v3-using-inferless
OpenAI releases Whisper-large-v3, a pre-trained model for automatic speech recognition (ASR) and speech translation
## Our Observations
We have deployed this model using A100 GPU and observed that the model took an average cold start time of `9.13sec` and an average inference time of `1.44sec` for an average audio length of `7.4sec`.
## Defining Dependencies
We are using the HuggingFace [Transformers](https://github.com/huggingface/transformers) library for the deployment.
## Constructing the GitHub/GitLab Template
Now quickly construct the GitHub/GitLab template, this process is mandatory and make sure you don't add any file named `model.py`
```
Whisper-large-v3/
├── app.py
├── inferless-runtime-config.yaml
├── inferless.yaml
└── input_schema.py
```
You can also add other files to this directory.
## Create the class for inference
In the [app.py](https://github.com/inferless/whisper-large-v3/blob/main/app.py) we will define the class and import all the required functions
1. `def initialize`: In this function, you will initialize your model and define any `variable` that you want to use during inference.
2. `def infer`: This function gets called for every request that you send. Here you can define all the steps that are required for the inference. You can also pass custom values for inference through the `inputs` parameter.
3. `def finalize`: This function cleans up all the allocated memory.
```python
import inferless
from faster_whisper import WhisperModel
app = inferless.Cls(gpu="A10")
class InferlessPythonModel:
@app.load
def initialize(self):
model_size = "large-v3"
self.model = WhisperModel(model_size, device="cuda", compute_type="float16")
@app.infer
def infer(self, inputs):
audio_url = inputs["audio_url"]
segments, info = self.model.transcribe(audio_url, beam_size=5)
text = ''.join([segment.text for segment in segments])
return {"transcribed_output":text}
def finalize(self):
self.model = None
```
## Creating the Custom Runtime
This is a mandatory step where we allow the users to upload their own custom runtime through [inferless-runtime-config.yaml](https://github.com/inferless/inferless_tutorials/tree/main/speech_recognition/Whisper-Large-v3/inferless-runtime-config.yaml).
```python
build:
system_packages:
- "ffmpeg"
python_packages:
- "faster-whisper==1.0.0"
- "ctranslate2==4.4.0"
- "torch==2.2.1"
- "inferless-cli==2.0.9"
- "hf-transfer==0.1.9"
- "huggingface-hub==0.27.1"
```
## Test your model with Remote Run
You can use the `inferless remote-run`([installation guide here](https://docs.inferless.com/model-import/cli-import#cli-import)) command to test your model or any custom Python script in a remote GPU environment directly from your local machine. Make sure that you use `Python3.10` for seamless experience.
### Step 1: Add the Decorators and local entry point
To enable **Remote Run**, simply do the following:
1. Import the `inferless` library and initialize `Cls(gpu="A10")`. The available GPU options are `T4`, `A10` and `A100`.
2. Decorated the `initialize` and `infer` functions with `@app.load` and `@app.infer` respectively.
3. Create the Local Entry Point by decorating a function (for example, `my_local_entry`) with `@inferless.local_entry_point`.
Within this function, instantiate your model class, convert any incoming parameters into a `RequestObjects` object, and invoke the model's `infer` method.
```python
import inferless
from faster_whisper import WhisperModel
from pydantic import BaseModel, Field
from typing import Optional
@inferless.request
class RequestObjects(BaseModel):
audio_url: str = Field(default="http://thepodcastexchange.ca/s/Porsche-Macan-July-5-2018-1.mp3")
@inferless.response
class ResponseObjects(BaseModel):
transcribed_output: str = Field(default='Test output')
app = inferless.Cls(gpu="A10")
class InferlessPythonModel:
@app.load
def initialize(self):
model_size = "large-v3"
self.model = WhisperModel(model_size, device="cuda", compute_type="float16")
@app.infer
def infer(self, request: RequestObjects) -> ResponseObjects:
segments, info = self.model.transcribe(request.audio_url, beam_size=5)
text = ''.join([segment.text for segment in segments])
generateObject = ResponseObjects(transcribed_output = text)
return generateObject
def finalize(self):
self.model = None
@inferless.local_entry_point
def my_local_entry(dynamic_params):
request_objects = RequestObjects(**dynamic_params)
model_instance = InferlessPythonModel()
return model_instance.infer(request_objects)
```
### Step 2: Run with Remote GPU
From your local terminal, navigate to the folder containing your `app.py` and your `inferless-runtime-config.yaml` and run:
```bash
inferless remote-run app.py -c inferless-runtime-config.yaml --audio_url "https://raw.githubusercontent.com/rbgo404/Files/refs/heads/main/jeanNL.mp3"
```
You can pass the other input parameters in the same way as long as your code expects them in the `inputs` dictionary.
If you want to exclude certain files or directories from being uploaded, use the `--exclude` or `-e` flag.
## Method A: Deploying the model on Inferless Platform
Inferless supports multiple ways of [importing your model](https://docs.inferless.com/model-import/file-structure-requirements). For this tutorial, we will use GitHub.
### Step 1: Login to the inferless dashboard can click on Import model button
Navigate to your desired workspace in Inferless and Click on `Add a custom model` button that you see on the top right. An import wizard will open up.
### Step 2: Follow the UI to complete the model Import
* Select the GitHub/GitLab Integration option to connect your source code repository with the deployment environment.
* Navigate to the specific GitHub repository that contains your model's code. Here, you will need to identify and enter the name of the model you wish to import.
* Choose the appropriate type of machine that suits your model's requirements. Additionally, specify the minimum and maximum number of replicas to define the scalability range for deploying your model.
* Optionally, you have the option to enable automatic build and deployment. This feature triggers a new deployment automatically whenever there is a new code push to your repository.
* If your model requires additional software packages, configure the Custom Runtime settings by including necessary pip or apt packages. Also, set up environment variables such as Inference Timeout, Container Concurrency, and Scale Down Timeout to tailor the runtime environment according to your needs.
* Wait for the validation process to complete, ensuring that all settings are correct and functional. Once validation is successful, click on the "Import" button to finalize the import of your model.
### Step 3: Wait for the model build to complete usually takes \~5-10 minutes
### Step 4: Use the APIs to call the model
Once the model is in 'Active' status you can click on the 'API' page to call the model
### Here is the Demo:
## Method B: Deploying the model on Inferless CLI
Inferless allows you to deploy your model using Inferless-CLI. Follow the steps to deploy using Inferless CLI.
### Clone the repository of the model
Let's begin by cloning the model repository:
```bash
git clone https://github.com/inferless/voxtral-mini-3b.git
```
### Deploy the Model
To deploy the model using Inferless CLI, execute the following command:
```bash
inferless deploy --gpu A10 --runtime inferless-runtime-config.yaml
```
**Explanation of the Command:**
* `--gpu A10`: Specifies the GPU type for deployment. Available options include `A10`, `A100`, and `T4`.
* `--runtime inferless-runtime-config.yaml`: Defines the runtime configuration file. If not specified, the default Inferless runtime is used.
# Deploy Whisper Large V3 using Inferless
Source: https://docs.inferless.com/how-to-guides/deploy-whisper-large-v3-using-inferless
OpenAI releases Whisper-large-v3, a pre-trained model for automatic speech recognition (ASR) and speech translation
## Our Observations
We have deployed this model using A100 GPU and observed that the model took an average cold start time of `9.13sec` and an average inference time of `1.44sec` for an average audio length of `7.4sec`.
## Defining Dependencies
We are using the HuggingFace [Transformers](https://github.com/huggingface/transformers) library for the deployment.
## Constructing the GitHub/GitLab Template
Now quickly construct the GitHub/GitLab template, this process is mandatory and make sure you don't add any file named `model.py`
```
Whisper-large-v3/
├── app.py
├── inferless-runtime-config.yaml
├── inferless.yaml
└── input_schema.py
```
You can also add other files to this directory.
## Create the class for inference
In the [app.py](https://github.com/inferless/whisper-large-v3/blob/main/app.py) we will define the class and import all the required functions
1. `def initialize`: In this function, you will initialize your model and define any `variable` that you want to use during inference.
2. `def infer`: This function gets called for every request that you send. Here you can define all the steps that are required for the inference. You can also pass custom values for inference through the `inputs` parameter.
3. `def finalize`: This function cleans up all the allocated memory.
```python
import inferless
from faster_whisper import WhisperModel
app = inferless.Cls(gpu="A10")
class InferlessPythonModel:
@app.load
def initialize(self):
model_size = "large-v3"
self.model = WhisperModel(model_size, device="cuda", compute_type="float16")
@app.infer
def infer(self, inputs):
audio_url = inputs["audio_url"]
segments, info = self.model.transcribe(audio_url, beam_size=5)
text = ''.join([segment.text for segment in segments])
return {"transcribed_output":text}
def finalize(self):
self.model = None
```
## Creating the Custom Runtime
This is a mandatory step where we allow the users to upload their own custom runtime through [inferless-runtime-config.yaml](https://github.com/inferless/inferless_tutorials/tree/main/speech_recognition/Whisper-Large-v3/inferless-runtime-config.yaml).
```python
build:
system_packages:
- "ffmpeg"
python_packages:
- "faster-whisper==1.0.0"
- "ctranslate2==4.4.0"
- "torch==2.2.1"
- "inferless-cli==2.0.9"
- "hf-transfer==0.1.9"
- "huggingface-hub==0.27.1"
```
## Test your model with Remote Run
You can use the `inferless remote-run`([installation guide here](https://docs.inferless.com/model-import/cli-import#cli-import)) command to test your model or any custom Python script in a remote GPU environment directly from your local machine. Make sure that you use `Python3.10` for seamless experience.
### Step 1: Add the Decorators and local entry point
To enable **Remote Run**, simply do the following:
1. Import the `inferless` library and initialize `Cls(gpu="A10")`. The available GPU options are `T4`, `A10` and `A100`.
2. Decorated the `initialize` and `infer` functions with `@app.load` and `@app.infer` respectively.
3. Create the Local Entry Point by decorating a function (for example, `my_local_entry`) with `@inferless.local_entry_point`.
Within this function, instantiate your model class, convert any incoming parameters into a `RequestObjects` object, and invoke the model's `infer` method.
```python
import inferless
from faster_whisper import WhisperModel
from pydantic import BaseModel, Field
from typing import Optional
@inferless.request
class RequestObjects(BaseModel):
audio_url: str = Field(default="http://thepodcastexchange.ca/s/Porsche-Macan-July-5-2018-1.mp3")
@inferless.response
class ResponseObjects(BaseModel):
transcribed_output: str = Field(default='Test output')
app = inferless.Cls(gpu="A10")
class InferlessPythonModel:
@app.load
def initialize(self):
model_size = "large-v3"
self.model = WhisperModel(model_size, device="cuda", compute_type="float16")
@app.infer
def infer(self, request: RequestObjects) -> ResponseObjects:
segments, info = self.model.transcribe(request.audio_url, beam_size=5)
text = ''.join([segment.text for segment in segments])
generateObject = ResponseObjects(transcribed_output = text)
return generateObject
def finalize(self):
self.model = None
@inferless.local_entry_point
def my_local_entry(dynamic_params):
request_objects = RequestObjects(**dynamic_params)
model_instance = InferlessPythonModel()
return model_instance.infer(request_objects)
```
### Step 2: Run with Remote GPU
From your local terminal, navigate to the folder containing your `app.py` and your `inferless-runtime-config.yaml` and run:
```bash
inferless remote-run app.py -c inferless-runtime-config.yaml --audio_url "https://raw.githubusercontent.com/rbgo404/Files/refs/heads/main/jeanNL.mp3"
```
You can pass the other input parameters in the same way as long as your code expects them in the `inputs` dictionary.
If you want to exclude certain files or directories from being uploaded, use the `--exclude` or `-e` flag.
## Method A: Deploying the model on Inferless Platform
Inferless supports multiple ways of [importing your model](https://docs.inferless.com/model-import/file-structure-requirements). For this tutorial, we will use GitHub.
### Step 1: Login to the inferless dashboard can click on Import model button
Navigate to your desired workspace in Inferless and Click on `Add a custom model` button that you see on the top right. An import wizard will open up.
### Step 2: Follow the UI to complete the model Import
* Select the GitHub/GitLab Integration option to connect your source code repository with the deployment environment.
* Navigate to the specific GitHub repository that contains your model's code. Here, you will need to identify and enter the name of the model you wish to import.
* Choose the appropriate type of machine that suits your model's requirements. Additionally, specify the minimum and maximum number of replicas to define the scalability range for deploying your model.
* Optionally, you have the option to enable automatic build and deployment. This feature triggers a new deployment automatically whenever there is a new code push to your repository.
* If your model requires additional software packages, configure the Custom Runtime settings by including necessary pip or apt packages. Also, set up environment variables such as Inference Timeout, Container Concurrency, and Scale Down Timeout to tailor the runtime environment according to your needs.
* Wait for the validation process to complete, ensuring that all settings are correct and functional. Once validation is successful, click on the "Import" button to finalize the import of your model.
### Step 3: Wait for the model build to complete usually takes \~5-10 minutes
### Step 4: Use the APIs to call the model
Once the model is in 'Active' status you can click on the 'API' page to call the model
### Here is the Demo:
 ## Method B: Deploying the model on Inferless CLI
Inferless allows you to deploy your model using Inferless-CLI. Follow the steps to deploy using Inferless CLI.
### Clone the repository of the model
Let's begin by cloning the model repository:
```bash
git clone https://github.com/inferless/whisper-large-v3.git
```
### Deploy the Model
To deploy the model using Inferless CLI, execute the following command:
```bash
inferless deploy --gpu A10 --runtime inferless-runtime-config.yaml
```
**Explanation of the Command:**
* `--gpu A10`: Specifies the GPU type for deployment. Available options include `A10`, `A100`, and `T4`.
* `--runtime inferless-runtime-config.yaml`: Defines the runtime configuration file. If not specified, the default Inferless runtime is used.
# Deploy the YOLO11m model using Inferless
Source: https://docs.inferless.com/how-to-guides/deploy-yolo11m-detect
YOLO11m is a medium-sized variant of the YOLO11 family, designed to balance accuracy and computational efficiency for object detection tasks.
## Introduction
[YOLO11m](https://docs.ultralytics.com/models/yolo11/) is a state-of-the-art object detection model from YOLO11 series, offering a balanced trade-off between accuracy and computational efficiency. It introduces architectural innovations like the C3k2 block for efficient computation, SPPF for multi-scale feature aggregation, and C2PSA for enhanced spatial attention, leading to improved detection performance.
With approximately `20.09` million parameters, YOLO11m achieves higher `mAP@75 0.538` on benchmarks like the COCO dataset while maintaining a compact model size, making it suitable for real-time applications on devices with limited computational resources. Its versatility extends to various computer vision tasks, including object detection, instance segmentation, image classification, pose estimation, and oriented object detection (OBB).
## Defining Dependencies
We are using the [ultralytics](https://github.com/ultralytics/ultralytics) to serve the model on a single A100 (80GB).
## Constructing the GitHub/GitLab Template
Now quickly construct the GitHub/GitLab template, this process is mandatory and make sure you don't add any file named `model.py`.
```
yolo11m-detect/
├── app.py
├── inferless-runtime-config.yaml
└── inferless.yaml
```
You can also add other files to this directory.
## Create the Input Schema with Pydantic
Using the `inferless` Python client and Pydantic, you can define structured schemas directly in your code for input and output, eliminating the need for external file.
### Input Schema
When defining an input schema with Pydantic, you need to annotate your class attributes with the appropriate types, such as `str`, `float`, `int`, etc.
These type annotations specifys what type of data each field should contain.
The `default` value serves as the example input for testing with the `infer` function.
```python
@inferless.request
class RequestObjects(BaseModel):
image_url: str = Field(default="https://github.com/rbgo404/Files/raw/main/photo-1517732306149-e8f829eb588a.jpeg")
confidence_threshold: Optional[float] = Field(default=0.25)
```
### Output Schema
The `@inferless.response` decorator helps you define structured output schemas.
```python
@inferless.response
class ResponseObject(BaseModel):
boxes: List[float] = []
confidences: List[float] = []
class_ids: List[float]= []
class_names: List[str] = []
annotated_image_base64_str: str = "Test output"
```
### Usage in the `infer` Function
Once you have annotated the objects you can expect the infer function to receive `RequestObjects` as input,
and returns a `ResponseObjects` instance as output, ensuring the results adhere to a defined structure.
```python
class InferlessPythonModel:
def infer(self, request: RequestObjects) -> ResponseObjects:
return ResponseObject(**return_result)
```
## Create the class for inference
In the [app.py](https://github.com/inferless/yolo11m-detect/blob/main/app.py) we will define the class and import all the required functions
1. `def initialize`: In this function, you will initialize your model and define any `variable` that you want to use during inference.
2. `def infer`: This function gets called for every request that you send. Here you can define all the steps that are required for the inference.
3. `def finalize`: This function cleans up all the allocated memory.
```python
import os
import requests
import torch
import inferless
from pydantic import BaseModel, Field
from typing import Optional, List
from ultralytics import YOLO
import cv2
import base64
@inferless.request
class RequestObjects(BaseModel):
image_url: str = Field(default="https://github.com/rbgo404/Files/raw/main/photo-1517732306149-e8f829eb588a.jpeg")
confidence_threshold: Optional[float] = Field(default=0.25)
@inferless.response
class ResponseObject(BaseModel):
boxes: List[float] = []
confidences: List[float] = []
class_ids: List[float]= []
class_names: List[str] = []
annotated_image_base64_str: str = "Test output"
class InferlessPythonModel:
@staticmethod
def download_file(url: str, save_path: str) -> bool:
os.makedirs(os.path.dirname(save_path), exist_ok=True)
if os.path.exists(save_path):
return True
response = requests.get(url, stream=True, timeout=30)
response.raise_for_status()
total_size = int(response.headers.get('content-length', 0))
block_size = 8192
with open(save_path, 'wb') as f:
for data in response.iter_content(block_size):
f.write(data)
return True
def initialize(self, context=None):
self.model_weights_url = "https://github.com/ultralytics/assets/releases/download/v8.3.0/yolo11m.pt"
models_dir = os.path.join(os.getcwd(), "models_yolo")
self.model_save_path = os.path.join(models_dir, "yolo11m.pt")
if self.download_file(self.model_weights_url, self.model_save_path):
self.model = YOLO(self.model_save_path)
self.model.to("cuda")
def infer(self, request: RequestObjects) -> ResponseObject:
results = self.model.predict(source=request.image_url,conf=request.confidence_threshold,device="cuda")
return_result = {"boxes": [], "confidences": [], "class_ids": [], "class_names": [], "annotated_image_base64_str": ""}
result = results[0]
return_result["boxes"] = result.boxes.xyxyn.flatten().tolist()
return_result["confidences"] = result.boxes.conf.tolist()
return_result["class_ids"] = result.boxes.cls.tolist()
return_result["class_names"] = [result.names[int(cls_id)] for cls_id in return_result["class_ids"]]
annotated_image_np = result.plot()
is_success, im_buf_arr = cv2.imencode(".jpg", annotated_image_np)
byte_im = im_buf_arr.tobytes()
return_result["annotated_image_base64_str"] = base64.b64encode(byte_im).decode('utf-8')
return ResponseObject(**return_result)
def finalize(self):
self.model = None
```
## Creating the Custom Runtime
This is a mandatory step where we allow the users to upload their custom runtime through [inferless-runtime-config.yaml](https://github.com/inferless/yolo11m-detect/blob/main/inferless-runtime-config.yaml).
```python
build:
system_packages:
- "libsm6"
- "ffmpeg"
- "libxext6"
python_packages:
- "ultralytics==8.3.140"
- "torch==2.7.0"
- "torchvision==0.22.0"
- "inferless==0.2.13"
- "pydantic==2.10.2"
```
## Test your model with Remote Run
You can use the `inferless remote-run`([installation guide here](https://docs.inferless.com/model-import/cli-import#cli-import)) command to test your model or any custom Python script in a remote GPU environment directly from your local machine. Make sure that you use `Python3.10` for seamless experience.
### Step 1: Add the Decorators and local entry point
To enable **Remote Run**, simply do the following:
1. Import the `inferless` library and initialize `Cls(gpu="A10")`. The available GPU options are `T4`, `A10` and `A100`.
2. Decorated the `initialize` and `infer` functions with `@app.load` and `@app.infer` respectively.
3. Create the Local Entry Point by decorating a function (for example, `my_local_entry`) with `@inferless.local_entry_point`.
Within this function, instantiate your model class, convert any incoming parameters into a `RequestObjects` object, and invoke the model's `infer` method.
```python
import os
import requests
import torch
import inferless
from pydantic import BaseModel, Field
from typing import Optional, List
import cv2
import base64
@inferless.request
class RequestObjects(BaseModel):
image_url: str = Field(default="https://github.com/rbgo404/Files/raw/main/photo-1517732306149-e8f829eb588a.jpeg")
confidence_threshold: Optional[float] = Field(default=0.25)
@inferless.response
class ResponseObject(BaseModel):
boxes: List[float] = []
confidences: List[float] = []
class_ids: List[float]= []
class_names: List[str] = []
annotated_image_base64_str: str = "Test output"
app = inferless.Cls(gpu="A10")
class InferlessPythonModel:
@staticmethod
def download_file(url: str, save_path: str) -> bool:
os.makedirs(os.path.dirname(save_path), exist_ok=True)
if os.path.exists(save_path):
return True
response = requests.get(url, stream=True, timeout=30)
response.raise_for_status()
total_size = int(response.headers.get('content-length', 0))
block_size = 8192
with open(save_path, 'wb') as f:
for data in response.iter_content(block_size):
f.write(data)
return True
@app.load
def initialize(self, context=None):
from ultralytics import YOLO
self.model_weights_url = "https://github.com/ultralytics/assets/releases/download/v8.3.0/yolo11m.pt"
models_dir = os.path.join(os.getcwd(), "models_yolo")
self.model_save_path = os.path.join(models_dir, "yolo11m.pt")
if self.download_file(self.model_weights_url, self.model_save_path):
self.model = YOLO(self.model_save_path)
self.model.to("cuda")
@app.infer
def infer(self, request: RequestObjects) -> ResponseObject:
results = self.model.predict(source=request.image_url,conf=request.confidence_threshold,device="cuda")
return_result = {"boxes": [], "confidences": [], "class_ids": [], "class_names": [], "annotated_image_base64_str": ""}
result = results[0]
return_result["boxes"] = result.boxes.xyxyn.flatten().tolist()
return_result["confidences"] = result.boxes.conf.tolist()
return_result["class_ids"] = result.boxes.cls.tolist()
return_result["class_names"] = [result.names[int(cls_id)] for cls_id in return_result["class_ids"]]
annotated_image_np = result.plot()
is_success, im_buf_arr = cv2.imencode(".jpg", annotated_image_np)
byte_im = im_buf_arr.tobytes()
return_result["annotated_image_base64_str"] = base64.b64encode(byte_im).decode('utf-8')[:100]
return ResponseObject(**return_result)
def finalize(self):
self.model = None
@inferless.local_entry_point
def my_local_entry(dynamic_params):
request_objects = RequestObjects(**dynamic_params)
model_instance = InferlessPythonModel()
return model_instance.infer(request_objects)
```
### Step 2: Run with Remote GPU
From your local terminal, navigate to the folder containing your `app.py` and your `inferless-runtime-config.yaml` and run:
```bash
inferless remote-run app.py -c inferless-runtime-config.yaml --image_url "https://github.com/rbgo404/Files/raw/main/photo-1517732306149-e8f829eb588a.jpeg"
```
You can pass the other input parameters in the same way (e.g., `--confidence_threshold`, etc.) as long as your code expects them in the `inputs` dictionary.
If you want to exclude certain files or directories from being uploaded, use the `--exclude` or `-e` flag.
## Method A: Deploying the model on Inferless Platform
Inferless supports multiple ways of [importing your model](https://docs.inferless.com/model-import/file-structure-req/file-structure-requirements). For this tutorial, we will use GitHub.
### Step 1: Login to the inferless dashboard can click on Import model button
Navigate to your desired workspace in Inferless and Click on `Add a custom model` button that you see on the top right. An import wizard will open up.
### Step 2: Follow the UI to complete the model Import
* Select the GitHub/GitLab Integration option to connect your source code repository with the deployment environment.
* Navigate to the specific GitHub repository that contains your model's code. Here, you will need to identify and enter the name of the model you wish to import.
* Choose the appropriate type of machine that suits your model's requirements. Additionally, specify the minimum and maximum number of replicas to define the scalability range for deploying your model.
* Optionally, you have the option to enable automatic build and deployment. This feature triggers a new deployment automatically whenever there is a new code push to your repository.
* If your model requires additional software packages, configure the Custom Runtime settings by including necessary pip or apt packages. Also, set up environment variables such as Inference Timeout, Container Concurrency, and Scale Down Timeout to tailor the runtime environment according to your needs.
* Wait for the validation process to complete, ensuring that all settings are correct and functional. Once validation is successful, click on the "Import" button to finalize the import of your model.
### Step 3: Wait for the model build to complete usually takes \~5-10 minutes
### Step 4: Use the APIs to call the model
Once the model is in 'Active' status you can click on the 'API' page to call the model
### Here is the Demo:
## Method B: Deploying the model on Inferless CLI
Inferless allows you to deploy your model using Inferless-CLI. Follow the steps to deploy using Inferless CLI.
### Clone the repository of the model
Let's begin by cloning the model repository:
```bash
git clone https://github.com/inferless/whisper-large-v3.git
```
### Deploy the Model
To deploy the model using Inferless CLI, execute the following command:
```bash
inferless deploy --gpu A10 --runtime inferless-runtime-config.yaml
```
**Explanation of the Command:**
* `--gpu A10`: Specifies the GPU type for deployment. Available options include `A10`, `A100`, and `T4`.
* `--runtime inferless-runtime-config.yaml`: Defines the runtime configuration file. If not specified, the default Inferless runtime is used.
# Deploy the YOLO11m model using Inferless
Source: https://docs.inferless.com/how-to-guides/deploy-yolo11m-detect
YOLO11m is a medium-sized variant of the YOLO11 family, designed to balance accuracy and computational efficiency for object detection tasks.
## Introduction
[YOLO11m](https://docs.ultralytics.com/models/yolo11/) is a state-of-the-art object detection model from YOLO11 series, offering a balanced trade-off between accuracy and computational efficiency. It introduces architectural innovations like the C3k2 block for efficient computation, SPPF for multi-scale feature aggregation, and C2PSA for enhanced spatial attention, leading to improved detection performance.
With approximately `20.09` million parameters, YOLO11m achieves higher `mAP@75 0.538` on benchmarks like the COCO dataset while maintaining a compact model size, making it suitable for real-time applications on devices with limited computational resources. Its versatility extends to various computer vision tasks, including object detection, instance segmentation, image classification, pose estimation, and oriented object detection (OBB).
## Defining Dependencies
We are using the [ultralytics](https://github.com/ultralytics/ultralytics) to serve the model on a single A100 (80GB).
## Constructing the GitHub/GitLab Template
Now quickly construct the GitHub/GitLab template, this process is mandatory and make sure you don't add any file named `model.py`.
```
yolo11m-detect/
├── app.py
├── inferless-runtime-config.yaml
└── inferless.yaml
```
You can also add other files to this directory.
## Create the Input Schema with Pydantic
Using the `inferless` Python client and Pydantic, you can define structured schemas directly in your code for input and output, eliminating the need for external file.
### Input Schema
When defining an input schema with Pydantic, you need to annotate your class attributes with the appropriate types, such as `str`, `float`, `int`, etc.
These type annotations specifys what type of data each field should contain.
The `default` value serves as the example input for testing with the `infer` function.
```python
@inferless.request
class RequestObjects(BaseModel):
image_url: str = Field(default="https://github.com/rbgo404/Files/raw/main/photo-1517732306149-e8f829eb588a.jpeg")
confidence_threshold: Optional[float] = Field(default=0.25)
```
### Output Schema
The `@inferless.response` decorator helps you define structured output schemas.
```python
@inferless.response
class ResponseObject(BaseModel):
boxes: List[float] = []
confidences: List[float] = []
class_ids: List[float]= []
class_names: List[str] = []
annotated_image_base64_str: str = "Test output"
```
### Usage in the `infer` Function
Once you have annotated the objects you can expect the infer function to receive `RequestObjects` as input,
and returns a `ResponseObjects` instance as output, ensuring the results adhere to a defined structure.
```python
class InferlessPythonModel:
def infer(self, request: RequestObjects) -> ResponseObjects:
return ResponseObject(**return_result)
```
## Create the class for inference
In the [app.py](https://github.com/inferless/yolo11m-detect/blob/main/app.py) we will define the class and import all the required functions
1. `def initialize`: In this function, you will initialize your model and define any `variable` that you want to use during inference.
2. `def infer`: This function gets called for every request that you send. Here you can define all the steps that are required for the inference.
3. `def finalize`: This function cleans up all the allocated memory.
```python
import os
import requests
import torch
import inferless
from pydantic import BaseModel, Field
from typing import Optional, List
from ultralytics import YOLO
import cv2
import base64
@inferless.request
class RequestObjects(BaseModel):
image_url: str = Field(default="https://github.com/rbgo404/Files/raw/main/photo-1517732306149-e8f829eb588a.jpeg")
confidence_threshold: Optional[float] = Field(default=0.25)
@inferless.response
class ResponseObject(BaseModel):
boxes: List[float] = []
confidences: List[float] = []
class_ids: List[float]= []
class_names: List[str] = []
annotated_image_base64_str: str = "Test output"
class InferlessPythonModel:
@staticmethod
def download_file(url: str, save_path: str) -> bool:
os.makedirs(os.path.dirname(save_path), exist_ok=True)
if os.path.exists(save_path):
return True
response = requests.get(url, stream=True, timeout=30)
response.raise_for_status()
total_size = int(response.headers.get('content-length', 0))
block_size = 8192
with open(save_path, 'wb') as f:
for data in response.iter_content(block_size):
f.write(data)
return True
def initialize(self, context=None):
self.model_weights_url = "https://github.com/ultralytics/assets/releases/download/v8.3.0/yolo11m.pt"
models_dir = os.path.join(os.getcwd(), "models_yolo")
self.model_save_path = os.path.join(models_dir, "yolo11m.pt")
if self.download_file(self.model_weights_url, self.model_save_path):
self.model = YOLO(self.model_save_path)
self.model.to("cuda")
def infer(self, request: RequestObjects) -> ResponseObject:
results = self.model.predict(source=request.image_url,conf=request.confidence_threshold,device="cuda")
return_result = {"boxes": [], "confidences": [], "class_ids": [], "class_names": [], "annotated_image_base64_str": ""}
result = results[0]
return_result["boxes"] = result.boxes.xyxyn.flatten().tolist()
return_result["confidences"] = result.boxes.conf.tolist()
return_result["class_ids"] = result.boxes.cls.tolist()
return_result["class_names"] = [result.names[int(cls_id)] for cls_id in return_result["class_ids"]]
annotated_image_np = result.plot()
is_success, im_buf_arr = cv2.imencode(".jpg", annotated_image_np)
byte_im = im_buf_arr.tobytes()
return_result["annotated_image_base64_str"] = base64.b64encode(byte_im).decode('utf-8')
return ResponseObject(**return_result)
def finalize(self):
self.model = None
```
## Creating the Custom Runtime
This is a mandatory step where we allow the users to upload their custom runtime through [inferless-runtime-config.yaml](https://github.com/inferless/yolo11m-detect/blob/main/inferless-runtime-config.yaml).
```python
build:
system_packages:
- "libsm6"
- "ffmpeg"
- "libxext6"
python_packages:
- "ultralytics==8.3.140"
- "torch==2.7.0"
- "torchvision==0.22.0"
- "inferless==0.2.13"
- "pydantic==2.10.2"
```
## Test your model with Remote Run
You can use the `inferless remote-run`([installation guide here](https://docs.inferless.com/model-import/cli-import#cli-import)) command to test your model or any custom Python script in a remote GPU environment directly from your local machine. Make sure that you use `Python3.10` for seamless experience.
### Step 1: Add the Decorators and local entry point
To enable **Remote Run**, simply do the following:
1. Import the `inferless` library and initialize `Cls(gpu="A10")`. The available GPU options are `T4`, `A10` and `A100`.
2. Decorated the `initialize` and `infer` functions with `@app.load` and `@app.infer` respectively.
3. Create the Local Entry Point by decorating a function (for example, `my_local_entry`) with `@inferless.local_entry_point`.
Within this function, instantiate your model class, convert any incoming parameters into a `RequestObjects` object, and invoke the model's `infer` method.
```python
import os
import requests
import torch
import inferless
from pydantic import BaseModel, Field
from typing import Optional, List
import cv2
import base64
@inferless.request
class RequestObjects(BaseModel):
image_url: str = Field(default="https://github.com/rbgo404/Files/raw/main/photo-1517732306149-e8f829eb588a.jpeg")
confidence_threshold: Optional[float] = Field(default=0.25)
@inferless.response
class ResponseObject(BaseModel):
boxes: List[float] = []
confidences: List[float] = []
class_ids: List[float]= []
class_names: List[str] = []
annotated_image_base64_str: str = "Test output"
app = inferless.Cls(gpu="A10")
class InferlessPythonModel:
@staticmethod
def download_file(url: str, save_path: str) -> bool:
os.makedirs(os.path.dirname(save_path), exist_ok=True)
if os.path.exists(save_path):
return True
response = requests.get(url, stream=True, timeout=30)
response.raise_for_status()
total_size = int(response.headers.get('content-length', 0))
block_size = 8192
with open(save_path, 'wb') as f:
for data in response.iter_content(block_size):
f.write(data)
return True
@app.load
def initialize(self, context=None):
from ultralytics import YOLO
self.model_weights_url = "https://github.com/ultralytics/assets/releases/download/v8.3.0/yolo11m.pt"
models_dir = os.path.join(os.getcwd(), "models_yolo")
self.model_save_path = os.path.join(models_dir, "yolo11m.pt")
if self.download_file(self.model_weights_url, self.model_save_path):
self.model = YOLO(self.model_save_path)
self.model.to("cuda")
@app.infer
def infer(self, request: RequestObjects) -> ResponseObject:
results = self.model.predict(source=request.image_url,conf=request.confidence_threshold,device="cuda")
return_result = {"boxes": [], "confidences": [], "class_ids": [], "class_names": [], "annotated_image_base64_str": ""}
result = results[0]
return_result["boxes"] = result.boxes.xyxyn.flatten().tolist()
return_result["confidences"] = result.boxes.conf.tolist()
return_result["class_ids"] = result.boxes.cls.tolist()
return_result["class_names"] = [result.names[int(cls_id)] for cls_id in return_result["class_ids"]]
annotated_image_np = result.plot()
is_success, im_buf_arr = cv2.imencode(".jpg", annotated_image_np)
byte_im = im_buf_arr.tobytes()
return_result["annotated_image_base64_str"] = base64.b64encode(byte_im).decode('utf-8')[:100]
return ResponseObject(**return_result)
def finalize(self):
self.model = None
@inferless.local_entry_point
def my_local_entry(dynamic_params):
request_objects = RequestObjects(**dynamic_params)
model_instance = InferlessPythonModel()
return model_instance.infer(request_objects)
```
### Step 2: Run with Remote GPU
From your local terminal, navigate to the folder containing your `app.py` and your `inferless-runtime-config.yaml` and run:
```bash
inferless remote-run app.py -c inferless-runtime-config.yaml --image_url "https://github.com/rbgo404/Files/raw/main/photo-1517732306149-e8f829eb588a.jpeg"
```
You can pass the other input parameters in the same way (e.g., `--confidence_threshold`, etc.) as long as your code expects them in the `inputs` dictionary.
If you want to exclude certain files or directories from being uploaded, use the `--exclude` or `-e` flag.
## Method A: Deploying the model on Inferless Platform
Inferless supports multiple ways of [importing your model](https://docs.inferless.com/model-import/file-structure-req/file-structure-requirements). For this tutorial, we will use GitHub.
### Step 1: Login to the inferless dashboard can click on Import model button
Navigate to your desired workspace in Inferless and Click on `Add a custom model` button that you see on the top right. An import wizard will open up.
### Step 2: Follow the UI to complete the model Import
* Select the GitHub/GitLab Integration option to connect your source code repository with the deployment environment.
* Navigate to the specific GitHub repository that contains your model's code. Here, you will need to identify and enter the name of the model you wish to import.
* Choose the appropriate type of machine that suits your model's requirements. Additionally, specify the minimum and maximum number of replicas to define the scalability range for deploying your model.
* Optionally, you have the option to enable automatic build and deployment. This feature triggers a new deployment automatically whenever there is a new code push to your repository.
* If your model requires additional software packages, configure the Custom Runtime settings by including necessary pip or apt packages. Also, set up environment variables such as Inference Timeout, Container Concurrency, and Scale Down Timeout to tailor the runtime environment according to your needs.
* Wait for the validation process to complete, ensuring that all settings are correct and functional. Once validation is successful, click on the "Import" button to finalize the import of your model.
### Step 3: Wait for the model build to complete usually takes \~5-10 minutes
### Step 4: Use the APIs to call the model
Once the model is in 'Active' status you can click on the 'API' page to call the model
### Here is the Demo:
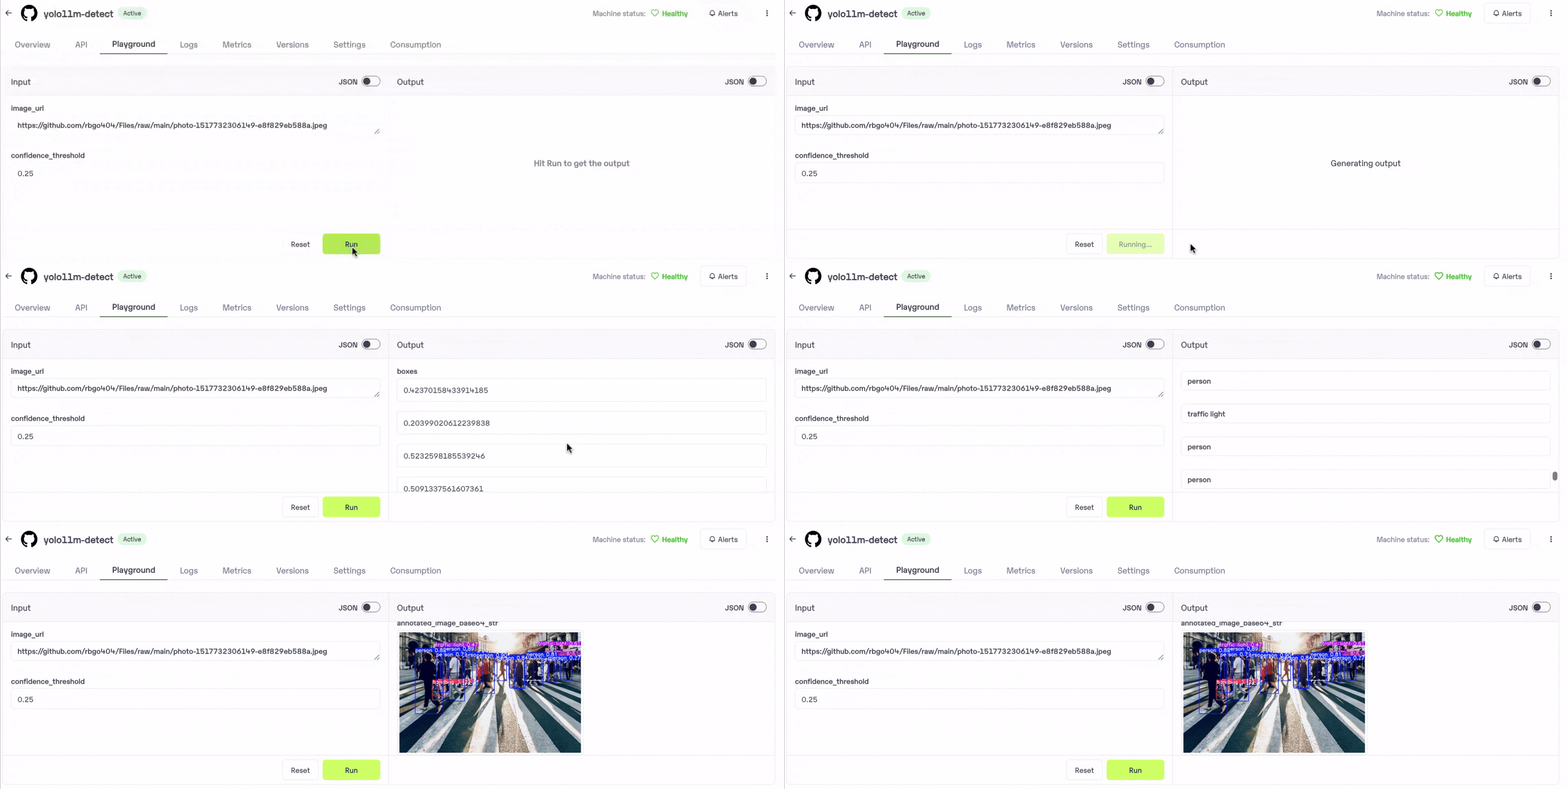 ## Method B: Deploying the model on Inferless CLI
Inferless allows you to deploy your model using Inferless-CLI. Follow the steps to deploy using Inferless CLI.
### Clone the repository of the model
Let's begin by cloning the model repository:
```bash
git clone https://github.com/inferless/yolo11m-detect.git
```
### Deploy the Model
To deploy the model using Inferless CLI, execute the following command:
```bash
inferless deploy --gpu A10 --runtime inferless-runtime-config.yaml
```
**Explanation of the Command:**
* `--gpu A10`: Specifies the GPU type for deployment. Available options include `A10`, `A100`, and `T4`.
* `--runtime inferless-runtime-config.yaml`: Defines the runtime configuration file. If not specified, the default Inferless runtime is used.
## Method B: Deploying the model on Inferless CLI
Inferless allows you to deploy your model using Inferless-CLI. Follow the steps to deploy using Inferless CLI.
### Clone the repository of the model
Let's begin by cloning the model repository:
```bash
git clone https://github.com/inferless/yolo11m-detect.git
```
### Deploy the Model
To deploy the model using Inferless CLI, execute the following command:
```bash
inferless deploy --gpu A10 --runtime inferless-runtime-config.yaml
```
**Explanation of the Command:**
* `--gpu A10`: Specifies the GPU type for deployment. Available options include `A10`, `A100`, and `T4`.
* `--runtime inferless-runtime-config.yaml`: Defines the runtime configuration file. If not specified, the default Inferless runtime is used.
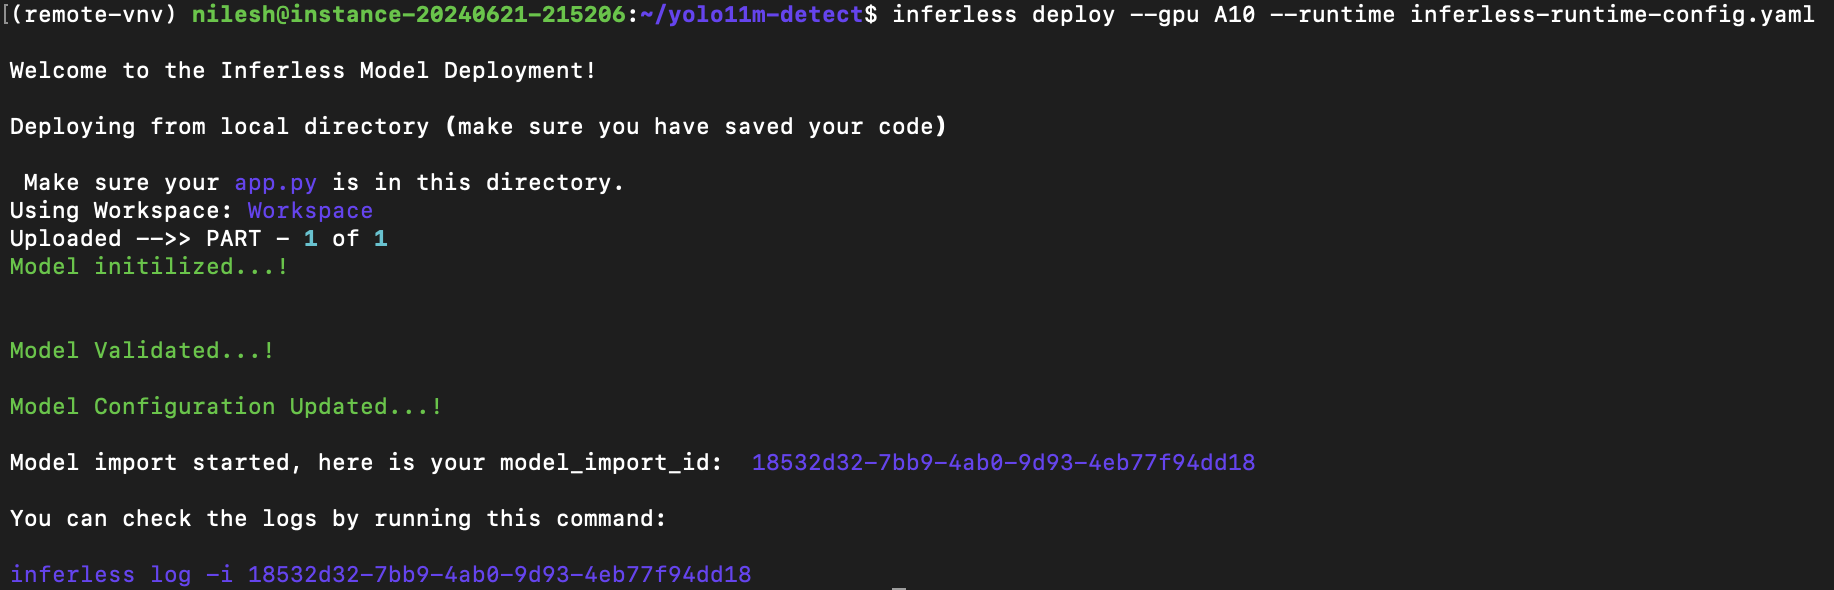 # How to Finetune and Inference Llama-3
Source: https://docs.inferless.com/how-to-guides/how-to-finetune--and-inference-llama3
Llama 3 is an auto-regressive language model, leveraging a refined transformer architecture. The Llama 3 models were trained on 8x more data on over 15 trillion tokens. It has a context length of 8K tokens and increases the vocabulary size of the tokenizer to 128,256 (from 32K tokens in the previous version).
In this notebook & tutorial, we'll explore the process of fine-tuning [Llama-3-8B](https://huggingface.co/meta-llama/Meta-Llama-3-8B).
You can also access the tutorial directly through the provided [colab notebook](https://colab.research.google.com/drive/1Rw-zLEuKnnx-eE15HEqaF_ADq9NK1OGb?usp=sharing).
For this tutorial, we will use QLoRA, which will fine-tune a LoRA adapter on top of a quantized LLM.
We will use the [`HuggingFaceH4/ultrachat_200k`](https://huggingface.co/datasets/HuggingFaceH4/ultrachat_200k) dataset which is a filtered version of the UltraChat dataset from Huggingface.
For model quantization, we will load the model in a 4-bit format using [bitsandbytes](https://github.com/TimDettmers/bitsandbytes).
Finally, when deploying the model on Inferless, you can anticipate the following outcomes.
| Library | Inference Time | Cold Start Time | Tokens/Sec |
| ------- | -------------- | --------------- | ---------- |
| vLLM | 1.63 sec | 13.30 sec | 78.65 |
## Why finetuning?
Fine-tuning an LLM is a supervised learning process, and we will use Parameter Efficient Fine-Tuning (PEFT), which is an efficient form of instruction fine-tuning.
## Let's get started:
## Installing the Required Libraries
You need the following libraries for fine-tuning.
```
!pip install -q -U bitsandbytes
!pip install -q -U transformers
!pip install -q -U peft
!pip install -q -U accelerate
!pip install -q -U datasets
!pip install -q -U trl
```
## Dataset Preprocessing
From the [`HuggingFaceH4/ultrachat_200k`](https://huggingface.co/datasets/HuggingFaceH4/ultrachat_200k) dataset, we will sample 10000 text conversations for a quick run.
We have formatted the data using ChatML as we want our model to follow a specific chat template ([ChatML](https://huggingface.co/docs/transformers/chat%5Ftemplating)).
```python
dataset_name = "HuggingFaceH4/ultrachat_200k"
dataset = load_dataset(dataset_name, split="train_sft")
dataset = dataset.shuffle(seed=42).select(range(10000))
def format_chat_template(row):
chat = tokenizer.apply_chat_template(row["messages"], tokenize=False)
return {"text":chat}
processed_dataset = dataset.map(
format_chat_template,
num_proc= os.cpu_count(),
)
dataset = processed_dataset.train_test_split(test_size=0.01)
```
## Finetuning the Llama-3
Now load the tokenizer and the model then quantize and prepare the model for finetuning in 4bit using [bitsandbytes](https://github.com/TimDettmers/bitsandbytes).
Load and initialize the tokenizer with Hugging Face Transformers `AutoTokenizer`.
For `ChatML` support, we will use the `setup_chat_format()` function in `trl`. It will set up the `chat_template` of the tokenizer, add special tokens to the `tokenizer` and resize the model’s embedding layer to accommodate the new tokens.
Prepare the model for QLoRA training using the `prepare_model_for_kbit_training()`.
```python
tokenizer = AutoTokenizer.from_pretrained(model_name,token=hf_token)
compute_dtype = getattr(torch, "float16")
bnb_config = BitsAndBytesConfig(
load_in_4bit=True,
bnb_4bit_quant_type="nf4",
bnb_4bit_compute_dtype=compute_dtype,
bnb_4bit_use_double_quant=True)
model = AutoModelForCausalLM.from_pretrained(
model_name, quantization_config=bnb_config, device_map={"": 0},token=hf_token)
model, tokenizer = setup_chat_format(model, tokenizer)
model = prepare_model_for_kbit_training(model)
```
Define the LoRA configuration and the Training arguments required for finetuning the model.
We will be used in the TRL's `SFTTrainer`. The SFTTrainer is then created and used to start the fine-tuning process.
```python
# Define LoRA configuration
peft_config = LoraConfig(
lora_alpha=64,
lora_dropout=0.05,
r=16,
bias="none",
task_type="CAUSAL_LM",
target_modules= ["q_proj", "k_proj", "v_proj", "o_proj",
"gate_proj", "up_proj", "down_proj",]
)
# Define Training Arguments
training_arguments = TrainingArguments(
output_dir="./results_llama3_sft/",
evaluation_strategy="steps",
do_eval=True,
optim="paged_adamw_8bit",
per_device_train_batch_size=8,
gradient_accumulation_steps=2,
per_device_eval_batch_size=8,
log_level="debug",
save_steps=50,
logging_steps=50,
learning_rate=8e-6,
eval_steps=10,
# max_steps=None,
num_train_epochs=1,
warmup_steps=30,
lr_scheduler_type="linear",
)
# Create the SFT Trainer
trainer = SFTTrainer(
model=model,
train_dataset=dataset['train'],
eval_dataset=dataset['test'],
peft_config=peft_config,
dataset_text_field="text",
max_seq_length=2024,
tokenizer=tokenizer,
args=training_arguments,
)
# Start the Training process
trainer.train()
```
After finishing the training, combine the adapter with the original model and upload it into the huggingface hub.
```
# Save the adapter
trainer.model.save_pretrained("final_checkpoint")
tokenizer.save_pretrained("final_checkpoint")
# Load the base model
model = AutoPeftModelForCausalLM.from_pretrained("final_checkpoint",token=hf_token)
tokenizer = AutoTokenizer.from_pretrained("final_checkpoint",token=hf_token)
# Merge the model with the adapter
model = model.merge_and_unload()
# Upload the model to huggingface hub
model.push_to_hub("inferless-llama-3-8B", token=hf_token)
tokenizer.push_to_hub("inferless-llama-3-8B",token=hf_token)
```
## Let's deploy the finetuned model on Inferless
## Defining Dependencies
We are using the [vLLM library](https://github.com/vllm-project/vllm), which boosts the inference speed of the LLM.
## Constructing the GitHub/GitLab Template
Now quickly construct the GitHub/GitLab template, this process is mandatory and make sure you don't add any file named `model.py`.
```
Llama-3/
├── app.py
├── inferless-runtime-config.yaml
├── inferless.yaml
└── input_schema.py
```
You can also add other files to this directory.
## Create the class for inference
In the [app.py](https://github.com/inferless/Llama-3/blob/main/app.py) we will define the class and import all the required functions
1. `def initialize`: In this function, you will initialize your model and define any `variable` that you want to use during inference.
2. `def infer`: This function gets called for every request that you send. Here you can define all the steps that are required for the inference. You can also pass custom values for inference and pass it through `inputs(dict)` parameter.
3. `def finalize`: This function cleans up all the allocated memory.
```python
from vllm import LLM, SamplingParams
from transformers import AutoTokenizer
class InferlessPythonModel:
def initialize(self):
model_id = "rbgo/inferless-llama-3-8B" # Specify the model repository ID of our finetuned model
# Define sampling parameters for model generation
self.sampling_params = SamplingParams(temperature=0.7, top_p=0.95, max_tokens=128)
# Initialize the LLM object
self.llm = LLM(model=model_id)
self.tokenizer = AutoTokenizer.from_pretrained(model_id)
def infer(self,inputs):
prompts = inputs["prompt"] # Extract the prompt from the input
chat_format = [{"role": "user", "content": prompts}]
text = self.tokenizer.apply_chat_template(chat_format,tokenize=False,add_generation_prompt=True)
result = self.llm.generate(text, self.sampling_params)
# Extract the generated text from the result
result_output = [output.outputs[0].text for output in result]
# Return a dictionary containing the result
return {'generated_text': result_output[0]}
def finalize(self):
pass
```
## Create the Input Schema
We have to create a [`input_schema.py`](https://github.com/inferless/Llama-3/blob/main/input_schema.py) in your GitHub/Gitlab repository this will help us create the Input parameters. You can checkout our documentation on [Input / Output Schema](https://docs.inferless.com/model-import/input-output-schema).
For this tutorial, we have defined a parameter `prompt` which is required during the API call. Now lets create the `input_schema.py`.
```JSON
INPUT_SCHEMA = {
"prompt": {
'datatype': 'STRING',
'required': True,
'shape': [1],
'example': ["What is AI?"]
}
}
```
## Creating the Custom Runtime
This is a mandatory step where we allow the users to upload their custom runtime through [inferless-runtime-config.yaml](https://github.com/inferless/Llama-3/blob/main/inferless-runtime-config.yaml).
```python
build:
cuda_version: "12.1.1"
system_packages:
- "libssl-dev"
python_packages:
- "torch==2.2.1"
- "vllm==0.4.1"
- "transformers==4.40.1"
```
## Test your model with Remote Run
You can use the `inferless remote-run`([installation guide here](https://docs.inferless.com/model-import/cli-import#cli-import)) command to test your model or any custom Python script in a remote GPU environment directly from your local machine. Make sure that you use `Python3.10` for seamless experience.
### Step 1: Add the Decorators and local entry point
To enable **Remote Run**, simply do the following:
1. Import the `inferless` library and initialize `Cls(gpu="A100")`. The available GPU options are `T4`, `A10` and `A100`.
2. Decorated the `initialize` and `infer` functions with `@app.load` and `@app.infer` respectively.
3. Create the Local Entry Point by decorating a function (for example, `my_local_entry`) with `@inferless.local_entry_point`.
Within this function, instantiate your model class, convert any incoming parameters into a `RequestObjects` object, and invoke the model's `infer` method.
```python
from vllm import LLM, SamplingParams
from transformers import AutoTokenizer
import inferless
from pydantic import BaseModel, Field
from typing import Optional
@inferless.request
class RequestObjects(BaseModel):
prompt: str = Field(default="Implement a function to check if a given number is a prime number.")
temperature: Optional[float] = 0.7
top_p: Optional[float] = 0.1
repetition_penalty: Optional[float] = 1.18
top_k: Optional[int] = 40
max_tokens: Optional[int] = 256
@inferless.response
class ResponseObjects(BaseModel):
generated_text: str = Field(default='Test output')
app = inferless.Cls(gpu="A100")
class InferlessPythonModel:
@app.load
def initialize(self):
model_id = "rbgo/inferless-llama-3-8B"
# Initialize the LLM object
self.llm = LLM(model=model_id)
self.tokenizer = AutoTokenizer.from_pretrained(model_id)
@app.infer
def infer(self, request: RequestObjects) -> ResponseObjects:
sampling_params = SamplingParams(temperature=request.temperature,top_p=request.top_p,
repetition_penalty=request.repetition_penalty,
top_k=request.top_k,max_tokens=request.max_tokens
)
chat_format = [{"role": "user", "content": request.prompt}]
input_text = self.tokenizer.apply_chat_template(chat_format,tokenize=False,add_generation_prompt=True)
result = self.llm.generate(input_text, sampling_params)
# Extract the generated text from the result
result_output = [output.outputs[0].text for output in result]
generateObject = ResponseObjects(generated_text = result_output[0])
return generateObject
def finalize(self):
self.llm = None
@inferless.local_entry_point
def my_local_entry(dynamic_params):
request_objects = RequestObjects(**dynamic_params)
model_instance = InferlessPythonModel()
return model_instance.infer(request_objects)
```
### Step 2: Run with Remote GPU
From your local terminal, navigate to the folder containing your `app.py` and your `inferless-runtime-config.yaml` and run:
```bash
inferless remote-run app.py -c inferless-runtime-config.yaml --prompt "Explain Deep Learning."
```
You can pass the other input parameters in the same way (e.g., `--temperature`, `--max_tokens`, etc.) as long as your code expects them in the `inputs` dictionary.
## Method A: Deploying the model on Inferless Platform
Inferless supports multiple ways of [importing your model](https://docs.inferless.com/model-import/file-structure-req/file-structure-requirements). For this tutorial, we will use GitHub.
### Step 1: Login to the inferless dashboard can click on Import model button
Navigate to your desired workspace in Inferless and Click on `Add a custom model` button that you see on the top right. An import wizard will open up.
### Step 2: Follow the UI to complete the model Import
* Select the GitHub/GitLab Integration option to connect your source code repository with the deployment environment.
* Navigate to the specific GitHub repository that contains your model's code. Here, you will need to identify and enter the name of the model you wish to import.
* Choose the appropriate type of machine that suits your model's requirements. Additionally, specify the minimum and maximum number of replicas to define the scalability range for deploying your model.
* Optionally, you have the option to enable automatic build and deployment. This feature triggers a new deployment automatically whenever there is a new code push to your repository.
* If your model requires additional software packages, configure the Custom Runtime settings by including necessary pip or apt packages. Also, set up environment variables such as Inference Timeout, Container Concurrency, and Scale Down Timeout to tailor the runtime environment according to your needs.
* Wait for the validation process to complete, ensuring that all settings are correct and functional. Once validation is successful, click on the "Import" button to finalize the import of your model.
### Step 3: Wait for the model build to complete usually takes \~5-10 minutes
### Step 4: Use the APIs to call the model
Once the model is in 'Active' status you can click on the 'API' page to call the model
### Here is the Demo:
## Method B: Deploying the model on Inferless CLI
Inferless allows you to deploy your model using Inferless-CLI. Follow the steps to deploy using Inferless CLI.
### Clone the repository of the model
Let's begin by cloning the model repository:
```bash
git clone https://github.com/inferless/Llama-3.git
```
### Deploy the Model
To deploy the model using Inferless CLI, execute the following command:
```bash
inferless deploy --gpu A100 --runtime inferless-runtime-config.yaml
```
**Explanation of the Command:**
* `--gpu A100`: Specifies the GPU type for deployment. Available options include `A10`, `A100`, and `T4`.
* `--runtime inferless-runtime-config.yaml`: Defines the runtime configuration file. If not specified, the default Inferless runtime is used.
# How to Finetune, Quantize and Inference Phi-2
Source: https://docs.inferless.com/how-to-guides/how-to-finetune--quantize-and-inference-phi-2
Phi-2 is a Transformer with 2.7 billion parameters which showcased a nearly state-of-the-art performance among models with less than 13 billion parameters
In this notebook & tutorial, we'll explore the process of fine-tuning [Phi-2](https://huggingface.co/microsoft/phi-2), a language model with 2.7 billion parameters released by Microsoft Research in December 2023. [Phi-2](https://huggingface.co/microsoft/phi-2) surpasses the performance of Mistral and Llama-2 models at 7B and 13B parameters on various aggregated benchmarks.
You can also access the tutorial directly through the provided [colab notebook](https://colab.research.google.com/drive/1-PF2e2az6E%5FVHgmgVbgNm9Q7TG1MyaRD?usp=sharing).
For this tutorial, we have used an RLHF-like technique known as [Direct Preference Optimization (DPO)](https://arxiv.org/abs/2305.18290) and done the fine-tuning on Azure Cloud Platform.
We will use the [argilla/distilabel-intel-orca-dpo-pairs](https://huggingface.co/datasets/argilla/distilabel-intel-orca-dpo-pairs) dataset from Argilla, which is an improvised version of the [Intel/orca\_dpo\_pairs](https://huggingface.co/datasets/Intel/orca%5Fdpo%5Fpairs) dataset from Intel.
For model quantization, we will load the model in a 4-bit format using [bitsandbytes](https://github.com/TimDettmers/bitsandbytes).
Finally, when deploying the model on Inferless, you can anticipate the following outcomes.
| Inference Time | Cold Start Time | Token/Sec | Latency/Token | VRAM Required |
| -------------- | --------------- | --------- | ------------- | ------------- |
| 11.96 secs | 7.82 secs | 21.34 | 46.85 ms | 1.72 GB |
## Why finetuning?
Fine-tuning base language models, especially with techniques like [Reinforcement Learning from Human Feedback (RLHF)](https://huggingface.co/blog/rlhf), is crucial for several reasons. RLHF allows the incorporation of human feedback to enhance the model's performance, creating custom, task-specific, and expert models. The process involves setting up a good starting point, collecting human feedback, and iteratively improving the model.
For this tutorial, we will use an RLHF-like technique known as [Direct Preference Optimization (DPO)](https://arxiv.org/abs/2305.18290). This technique aligns with human preferences better than existing methods, and it offers a promising alternative to RLHF for fine-tuning language models to meet specific human preferences.
## Let's get started:
## Installing the Required Libraries
You need the following libraries for fine-tuning [Phi-2](https://huggingface.co/microsoft/phi-2) model using DPO.
```
!pip install -U bitsandbytes
!pip install -U transformers
!pip install -U accelerate
!pip install -U peft
!pip install -U trl
!pip install -U datasets
!pip install -U sentencepiece
!pip install -U wandb
!pip install -U pynvml
```
## Dataset for DPO
The DPO trainer required a very specific type of dataset comprising instances of preferred and rejected responses in relation to a prompts.
The preference dataset follows a defined format:
1. **Prompt:** It is the context prompt provided to the model during inference. It serves as the input for the text generation process.
2. **Chosen:** The "chosen" key holds the information about the preferred generated response corresponding to the given prompt.
3. **Rejected:** The "rejected" key contains information about a response that is not preferred or should be avoided when generating text in response to the provided prompt.
Now, we want our model to follow a specific chat template ([ChatML](https://huggingface.co/docs/transformers/chat%5Ftemplating)), and we will format our dataset according to the requirements of [DPOTrainer](https://huggingface.co/docs/trl/main/en/dpo%5Ftrainer).
```python
def format_data(example):
system = tokenizer.apply_chat_template([{"role": "system", "content": example['system']}], tokenize=False) if example['system'] else ""
prompt = tokenizer.apply_chat_template([{"role": "user", "content": example['input']}], tokenize=False, add_generation_prompt=True)
return {
"prompt": system + prompt,
"chosen": example['chosen'] + "\n",
"rejected": example['rejected'] + "\n",
}
#Spliting the data in 95%(train) and 5%(eval)
train_ds = load_dataset('argilla/distilabel-intel-orca-dpo-pairs', split='train[:95%]')
eval_ds = load_dataset('argilla/distilabel-intel-orca-dpo-pairs', split='train[95%:]')
# Save columns
train_original_columns = train_ds.column_names
eval_original_columns = eval_ds.column_names
# Tokenizer
tokenizer = AutoTokenizer.from_pretrained(model_name)
tokenizer.pad_token = tokenizer.eos_token
tokenizer.padding_side = "left"
# Format dataset
train_ds = train_ds.map(
format_data,
remove_columns=train_original_columns
)
eval_ds = eval_ds.map(
format_data,
remove_columns=eval_original_columns
)
```
## Finetuning the Phi-2 model with DPO
Once you are done with the formatting of the dataset, you are now ready for the finetuning. DPO requires two models, the model that you want to finetune (Phi-2) and a reference model.
Now load the tokenizer and the model then quantize and prepare the model for finetuning in 4bit using [bitsandbytes](https://github.com/TimDettmers/bitsandbytes).
```python
#Load the Tokenizer
tokenizer = AutoTokenizer.from_pretrained(model_name, use_fast=True, trust_remote_code=True)
tokenizer.pad_token = tokenizer.unk_token
tokenizer.pad_token_id = tokenizer.unk_token_id
tokenizer.padding_side = 'left'
#Load the model
model = AutoModelForCausalLM.from_pretrained(model_name,torch_dtype=getattr(torch, "float16"), load_in_4bit=True, device_map={"": 0}, trust_remote_code=True)
model = prepare_model_for_kbit_training(model)
#Configure the pad token in the model
model.config.pad_token_id = tokenizer.pad_token_id
model.config.use_cache = False
#Load the Reference Model
model_ref = AutoModelForCausalLM.from_pretrained(model_name,load_in_4bit=True, torch_dtype=getattr(torch, "float16"), trust_remote_code=True, device_map={"": 0})
```
Define the LoRA configuration and the Training arguments required for finetuning the model. For the training hyperparameters, I have been following the [Hugging Face settings of Zephyr 7B](https://github.com/huggingface/alignment-handbook/tree/main).
Now you can define the DPOTrainer with the LoRA configuration and Training arguments, and then start the training process. We have used a single A100(80GB) GPU for the training.
```python
# LoRA configuration
peft_config = LoraConfig(
lora_alpha=16,
lora_dropout=0.05,
r=16,
bias="none",
task_type="CAUSAL_LM",
target_modules= ["q_proj","k_proj","v_proj", "dense"]
)
# Training arguments
training_arguments = TrainingArguments(
output_dir="./results",
evaluation_strategy="steps",
do_eval=True,
optim="paged_adamw_32bit",
per_device_train_batch_size=4,
gradient_accumulation_steps=4,
per_device_eval_batch_size=2,
log_level="debug",
save_steps=10,
logging_steps=1,
learning_rate=5e-5,
eval_steps=20,
#num_train_epochs=1,
max_steps=500,
warmup_steps=100,
bf16=True,
lr_scheduler_type="cosine",
report_to="wandb",
)
# Create DPO trainer
trainer = DPOTrainer(
model,
model_ref,
args=training_arguments,
train_dataset=train_ds,
eval_dataset=eval_ds,
tokenizer=tokenizer,
peft_config=peft_config,
beta=0.1,
max_prompt_length=1024,
max_length=1536,
)
# START DPO fine-tuning
trainer.train()
```
After finishing the training, combine the adapter with the original model.
```
# Save the adapter
trainer.model.save_pretrained("final_checkpoint")
tokenizer.save_pretrained("final_checkpoint")
#Load the tokenizer
tokenizer = AutoTokenizer.from_pretrained("microsoft/phi-2")
#Load the base model
base_model = AutoModelForCausalLM.from_pretrained("microsoft/phi-2", torch_dtype="auto", trust_remote_code=True,device_map={"": 0})
#Merge base model with the adapter
model = PeftModel.from_pretrained(base_model, "final_checkpoint")
model = model.merge_and_unload()
#Save the model and the tokenizer
model.save_pretrained(new_model)
tokenizer.save_pretrained(new_model)
```
## Quantize and Inference
Loading the finetuned model required 5.19 GB of VRAM. So, we will quantize and load the model to further reduce the memory requirement. Bitsandbytes enable you to load the model in 4 bits and further reduce the memory requirements to 1.72 GB. Here are our observations:
| Inference Time | Cold Start Time | Token/Sec | Latency/Token | VRAM Required |
| -------------- | --------------- | --------- | ------------- | ------------- |
| 11.96 secs | 7.82 secs | 21.34 | 46.85 ms | 1.72 GB |
We are using the [bitsandbytes](https://github.com/TimDettmers/bitsandbytes) library, which enables you to run LLM on low memory. Using bitsandbytes only required 1.72 GB of GPU memory.
## Last step, Tutorial to deploy on Inferless
### Constructing the GitHub/GitLab Template
Now quickly construct the GitHub/GitLab template, this process is mandatory and make sure you don't add any file named `model.py`
```
Phi-2/
├── app.py
├── inferless-runtime-config.yaml
├── inferless.yaml
└── input_schema.py
```
You can also add other files to this directory.
### Create the class for inference
In the [app.py](https://github.com/inferless/Phi-2/blob/main/app.py) we will define the class and import all the required functions
1. `def initialize`: In this function, you will initialize your model and define any `variable` that you want to use during inference.
2. `def infer`: This function gets called for every request that you send. Here you can define all the steps that are required for the inference. You can also pass custom values for inference and pass it through `inputs(dict)` parameters.
3. `def finalize`: This function cleans up all the allocated memory.
```python
import torch
from transformers import AutoTokenizer, AutoModelForCausalLM, BitsAndBytesConfig, pipeline
import time
class InferlessPythonModel:
def initialize(self):
model_id = "Inferless/inferless-phi-2-DPO"
bnb_config = BitsAndBytesConfig(
load_in_4bit=True)
self.tokenizer = AutoTokenizer.from_pretrained(model_id)
model = AutoModelForCausalLM.from_pretrained(model_id, trust_remote_code=True, quantization_config=bnb_config, device_map="cuda")
self.pipe = pipeline("text-generation", model=model, tokenizer=self.tokenizer)
def infer(self, inputs):
prompt = inputs["prompt"]
messages = [{"role": "system", "content":prompt}]
prompt = self.pipe.tokenizer.apply_chat_template(messages, tokenize=False, add_generation_prompt=True)
out = self.pipe(prompt, max_new_tokens=256, do_sample=True, top_p=0.9,temperature=0.9)
generated_text = out[0]["generated_text"][len(prompt):]
return {'generated_result': generated_text}
def finalize(self):
pass
```
### Creating the Custom Runtime
This is a mandatory step where we allow the users to upload their custom runtime through [inferless-runtime-config.yaml](https://github.com/inferless/Phi-2/blob/main/inferless-runtime-config.yaml).
```python
build:
cuda_version: "12.1.1"
system_packages:
- "libssl-dev"
python_packages:
- "bitsandbytes==0.41.3"
- "transformers==4.36.2"
- "accelerate==0.25.0"
- "scipy==1.11.4"
```
## Method A: Deploying the model on Inferless Platform
Inferless supports multiple ways of [importing your model](https://docs.inferless.com/model-import/file-structure-req/file-structure-requirements). For this tutorial, we will use GitHub.
### Step 1: Login to the inferless dashboard can click on Import model button
Navigate to your desired workspace in Inferless and Click on `Add a custom model` button that you see on the top right. An import wizard will open up.
### Step 2: Follow the UI to complete the model Import
* Select the GitHub/GitLab Integration option to connect your source code repository with the deployment environment.
* Navigate to the specific GitHub repository that contains your model's code. Here, you will need to identify and enter the name of the model you wish to import.
* Choose the appropriate type of machine that suits your model's requirements. Additionally, specify the minimum and maximum number of replicas to define the scalability range for deploying your model.
* Optionally, you have the option to enable automatic build and deployment. This feature triggers a new deployment automatically whenever there is a new code push to your repository.
* If your model requires additional software packages, configure the Custom Runtime settings by including necessary pip or apt packages. Also, set up environment variables such as Inference Timeout, Container Concurrency, and Scale Down Timeout to tailor the runtime environment according to your needs.
* Wait for the validation process to complete, ensuring that all settings are correct and functional. Once validation is successful, click on the "Import" button to finalize the import of your model.
### Step 3: Wait for the model build to complete usually takes \~5-10 minutes
### Step 4: Use the APIs to call the model
Once the model is in 'Active' status you can click on the 'API' page to call the model
### Here is the Demo:
# How to Finetune and Inference Llama-3
Source: https://docs.inferless.com/how-to-guides/how-to-finetune--and-inference-llama3
Llama 3 is an auto-regressive language model, leveraging a refined transformer architecture. The Llama 3 models were trained on 8x more data on over 15 trillion tokens. It has a context length of 8K tokens and increases the vocabulary size of the tokenizer to 128,256 (from 32K tokens in the previous version).
In this notebook & tutorial, we'll explore the process of fine-tuning [Llama-3-8B](https://huggingface.co/meta-llama/Meta-Llama-3-8B).
You can also access the tutorial directly through the provided [colab notebook](https://colab.research.google.com/drive/1Rw-zLEuKnnx-eE15HEqaF_ADq9NK1OGb?usp=sharing).
For this tutorial, we will use QLoRA, which will fine-tune a LoRA adapter on top of a quantized LLM.
We will use the [`HuggingFaceH4/ultrachat_200k`](https://huggingface.co/datasets/HuggingFaceH4/ultrachat_200k) dataset which is a filtered version of the UltraChat dataset from Huggingface.
For model quantization, we will load the model in a 4-bit format using [bitsandbytes](https://github.com/TimDettmers/bitsandbytes).
Finally, when deploying the model on Inferless, you can anticipate the following outcomes.
| Library | Inference Time | Cold Start Time | Tokens/Sec |
| ------- | -------------- | --------------- | ---------- |
| vLLM | 1.63 sec | 13.30 sec | 78.65 |
## Why finetuning?
Fine-tuning an LLM is a supervised learning process, and we will use Parameter Efficient Fine-Tuning (PEFT), which is an efficient form of instruction fine-tuning.
## Let's get started:
## Installing the Required Libraries
You need the following libraries for fine-tuning.
```
!pip install -q -U bitsandbytes
!pip install -q -U transformers
!pip install -q -U peft
!pip install -q -U accelerate
!pip install -q -U datasets
!pip install -q -U trl
```
## Dataset Preprocessing
From the [`HuggingFaceH4/ultrachat_200k`](https://huggingface.co/datasets/HuggingFaceH4/ultrachat_200k) dataset, we will sample 10000 text conversations for a quick run.
We have formatted the data using ChatML as we want our model to follow a specific chat template ([ChatML](https://huggingface.co/docs/transformers/chat%5Ftemplating)).
```python
dataset_name = "HuggingFaceH4/ultrachat_200k"
dataset = load_dataset(dataset_name, split="train_sft")
dataset = dataset.shuffle(seed=42).select(range(10000))
def format_chat_template(row):
chat = tokenizer.apply_chat_template(row["messages"], tokenize=False)
return {"text":chat}
processed_dataset = dataset.map(
format_chat_template,
num_proc= os.cpu_count(),
)
dataset = processed_dataset.train_test_split(test_size=0.01)
```
## Finetuning the Llama-3
Now load the tokenizer and the model then quantize and prepare the model for finetuning in 4bit using [bitsandbytes](https://github.com/TimDettmers/bitsandbytes).
Load and initialize the tokenizer with Hugging Face Transformers `AutoTokenizer`.
For `ChatML` support, we will use the `setup_chat_format()` function in `trl`. It will set up the `chat_template` of the tokenizer, add special tokens to the `tokenizer` and resize the model’s embedding layer to accommodate the new tokens.
Prepare the model for QLoRA training using the `prepare_model_for_kbit_training()`.
```python
tokenizer = AutoTokenizer.from_pretrained(model_name,token=hf_token)
compute_dtype = getattr(torch, "float16")
bnb_config = BitsAndBytesConfig(
load_in_4bit=True,
bnb_4bit_quant_type="nf4",
bnb_4bit_compute_dtype=compute_dtype,
bnb_4bit_use_double_quant=True)
model = AutoModelForCausalLM.from_pretrained(
model_name, quantization_config=bnb_config, device_map={"": 0},token=hf_token)
model, tokenizer = setup_chat_format(model, tokenizer)
model = prepare_model_for_kbit_training(model)
```
Define the LoRA configuration and the Training arguments required for finetuning the model.
We will be used in the TRL's `SFTTrainer`. The SFTTrainer is then created and used to start the fine-tuning process.
```python
# Define LoRA configuration
peft_config = LoraConfig(
lora_alpha=64,
lora_dropout=0.05,
r=16,
bias="none",
task_type="CAUSAL_LM",
target_modules= ["q_proj", "k_proj", "v_proj", "o_proj",
"gate_proj", "up_proj", "down_proj",]
)
# Define Training Arguments
training_arguments = TrainingArguments(
output_dir="./results_llama3_sft/",
evaluation_strategy="steps",
do_eval=True,
optim="paged_adamw_8bit",
per_device_train_batch_size=8,
gradient_accumulation_steps=2,
per_device_eval_batch_size=8,
log_level="debug",
save_steps=50,
logging_steps=50,
learning_rate=8e-6,
eval_steps=10,
# max_steps=None,
num_train_epochs=1,
warmup_steps=30,
lr_scheduler_type="linear",
)
# Create the SFT Trainer
trainer = SFTTrainer(
model=model,
train_dataset=dataset['train'],
eval_dataset=dataset['test'],
peft_config=peft_config,
dataset_text_field="text",
max_seq_length=2024,
tokenizer=tokenizer,
args=training_arguments,
)
# Start the Training process
trainer.train()
```
After finishing the training, combine the adapter with the original model and upload it into the huggingface hub.
```
# Save the adapter
trainer.model.save_pretrained("final_checkpoint")
tokenizer.save_pretrained("final_checkpoint")
# Load the base model
model = AutoPeftModelForCausalLM.from_pretrained("final_checkpoint",token=hf_token)
tokenizer = AutoTokenizer.from_pretrained("final_checkpoint",token=hf_token)
# Merge the model with the adapter
model = model.merge_and_unload()
# Upload the model to huggingface hub
model.push_to_hub("inferless-llama-3-8B", token=hf_token)
tokenizer.push_to_hub("inferless-llama-3-8B",token=hf_token)
```
## Let's deploy the finetuned model on Inferless
## Defining Dependencies
We are using the [vLLM library](https://github.com/vllm-project/vllm), which boosts the inference speed of the LLM.
## Constructing the GitHub/GitLab Template
Now quickly construct the GitHub/GitLab template, this process is mandatory and make sure you don't add any file named `model.py`.
```
Llama-3/
├── app.py
├── inferless-runtime-config.yaml
├── inferless.yaml
└── input_schema.py
```
You can also add other files to this directory.
## Create the class for inference
In the [app.py](https://github.com/inferless/Llama-3/blob/main/app.py) we will define the class and import all the required functions
1. `def initialize`: In this function, you will initialize your model and define any `variable` that you want to use during inference.
2. `def infer`: This function gets called for every request that you send. Here you can define all the steps that are required for the inference. You can also pass custom values for inference and pass it through `inputs(dict)` parameter.
3. `def finalize`: This function cleans up all the allocated memory.
```python
from vllm import LLM, SamplingParams
from transformers import AutoTokenizer
class InferlessPythonModel:
def initialize(self):
model_id = "rbgo/inferless-llama-3-8B" # Specify the model repository ID of our finetuned model
# Define sampling parameters for model generation
self.sampling_params = SamplingParams(temperature=0.7, top_p=0.95, max_tokens=128)
# Initialize the LLM object
self.llm = LLM(model=model_id)
self.tokenizer = AutoTokenizer.from_pretrained(model_id)
def infer(self,inputs):
prompts = inputs["prompt"] # Extract the prompt from the input
chat_format = [{"role": "user", "content": prompts}]
text = self.tokenizer.apply_chat_template(chat_format,tokenize=False,add_generation_prompt=True)
result = self.llm.generate(text, self.sampling_params)
# Extract the generated text from the result
result_output = [output.outputs[0].text for output in result]
# Return a dictionary containing the result
return {'generated_text': result_output[0]}
def finalize(self):
pass
```
## Create the Input Schema
We have to create a [`input_schema.py`](https://github.com/inferless/Llama-3/blob/main/input_schema.py) in your GitHub/Gitlab repository this will help us create the Input parameters. You can checkout our documentation on [Input / Output Schema](https://docs.inferless.com/model-import/input-output-schema).
For this tutorial, we have defined a parameter `prompt` which is required during the API call. Now lets create the `input_schema.py`.
```JSON
INPUT_SCHEMA = {
"prompt": {
'datatype': 'STRING',
'required': True,
'shape': [1],
'example': ["What is AI?"]
}
}
```
## Creating the Custom Runtime
This is a mandatory step where we allow the users to upload their custom runtime through [inferless-runtime-config.yaml](https://github.com/inferless/Llama-3/blob/main/inferless-runtime-config.yaml).
```python
build:
cuda_version: "12.1.1"
system_packages:
- "libssl-dev"
python_packages:
- "torch==2.2.1"
- "vllm==0.4.1"
- "transformers==4.40.1"
```
## Test your model with Remote Run
You can use the `inferless remote-run`([installation guide here](https://docs.inferless.com/model-import/cli-import#cli-import)) command to test your model or any custom Python script in a remote GPU environment directly from your local machine. Make sure that you use `Python3.10` for seamless experience.
### Step 1: Add the Decorators and local entry point
To enable **Remote Run**, simply do the following:
1. Import the `inferless` library and initialize `Cls(gpu="A100")`. The available GPU options are `T4`, `A10` and `A100`.
2. Decorated the `initialize` and `infer` functions with `@app.load` and `@app.infer` respectively.
3. Create the Local Entry Point by decorating a function (for example, `my_local_entry`) with `@inferless.local_entry_point`.
Within this function, instantiate your model class, convert any incoming parameters into a `RequestObjects` object, and invoke the model's `infer` method.
```python
from vllm import LLM, SamplingParams
from transformers import AutoTokenizer
import inferless
from pydantic import BaseModel, Field
from typing import Optional
@inferless.request
class RequestObjects(BaseModel):
prompt: str = Field(default="Implement a function to check if a given number is a prime number.")
temperature: Optional[float] = 0.7
top_p: Optional[float] = 0.1
repetition_penalty: Optional[float] = 1.18
top_k: Optional[int] = 40
max_tokens: Optional[int] = 256
@inferless.response
class ResponseObjects(BaseModel):
generated_text: str = Field(default='Test output')
app = inferless.Cls(gpu="A100")
class InferlessPythonModel:
@app.load
def initialize(self):
model_id = "rbgo/inferless-llama-3-8B"
# Initialize the LLM object
self.llm = LLM(model=model_id)
self.tokenizer = AutoTokenizer.from_pretrained(model_id)
@app.infer
def infer(self, request: RequestObjects) -> ResponseObjects:
sampling_params = SamplingParams(temperature=request.temperature,top_p=request.top_p,
repetition_penalty=request.repetition_penalty,
top_k=request.top_k,max_tokens=request.max_tokens
)
chat_format = [{"role": "user", "content": request.prompt}]
input_text = self.tokenizer.apply_chat_template(chat_format,tokenize=False,add_generation_prompt=True)
result = self.llm.generate(input_text, sampling_params)
# Extract the generated text from the result
result_output = [output.outputs[0].text for output in result]
generateObject = ResponseObjects(generated_text = result_output[0])
return generateObject
def finalize(self):
self.llm = None
@inferless.local_entry_point
def my_local_entry(dynamic_params):
request_objects = RequestObjects(**dynamic_params)
model_instance = InferlessPythonModel()
return model_instance.infer(request_objects)
```
### Step 2: Run with Remote GPU
From your local terminal, navigate to the folder containing your `app.py` and your `inferless-runtime-config.yaml` and run:
```bash
inferless remote-run app.py -c inferless-runtime-config.yaml --prompt "Explain Deep Learning."
```
You can pass the other input parameters in the same way (e.g., `--temperature`, `--max_tokens`, etc.) as long as your code expects them in the `inputs` dictionary.
## Method A: Deploying the model on Inferless Platform
Inferless supports multiple ways of [importing your model](https://docs.inferless.com/model-import/file-structure-req/file-structure-requirements). For this tutorial, we will use GitHub.
### Step 1: Login to the inferless dashboard can click on Import model button
Navigate to your desired workspace in Inferless and Click on `Add a custom model` button that you see on the top right. An import wizard will open up.
### Step 2: Follow the UI to complete the model Import
* Select the GitHub/GitLab Integration option to connect your source code repository with the deployment environment.
* Navigate to the specific GitHub repository that contains your model's code. Here, you will need to identify and enter the name of the model you wish to import.
* Choose the appropriate type of machine that suits your model's requirements. Additionally, specify the minimum and maximum number of replicas to define the scalability range for deploying your model.
* Optionally, you have the option to enable automatic build and deployment. This feature triggers a new deployment automatically whenever there is a new code push to your repository.
* If your model requires additional software packages, configure the Custom Runtime settings by including necessary pip or apt packages. Also, set up environment variables such as Inference Timeout, Container Concurrency, and Scale Down Timeout to tailor the runtime environment according to your needs.
* Wait for the validation process to complete, ensuring that all settings are correct and functional. Once validation is successful, click on the "Import" button to finalize the import of your model.
### Step 3: Wait for the model build to complete usually takes \~5-10 minutes
### Step 4: Use the APIs to call the model
Once the model is in 'Active' status you can click on the 'API' page to call the model
### Here is the Demo:
## Method B: Deploying the model on Inferless CLI
Inferless allows you to deploy your model using Inferless-CLI. Follow the steps to deploy using Inferless CLI.
### Clone the repository of the model
Let's begin by cloning the model repository:
```bash
git clone https://github.com/inferless/Llama-3.git
```
### Deploy the Model
To deploy the model using Inferless CLI, execute the following command:
```bash
inferless deploy --gpu A100 --runtime inferless-runtime-config.yaml
```
**Explanation of the Command:**
* `--gpu A100`: Specifies the GPU type for deployment. Available options include `A10`, `A100`, and `T4`.
* `--runtime inferless-runtime-config.yaml`: Defines the runtime configuration file. If not specified, the default Inferless runtime is used.
# How to Finetune, Quantize and Inference Phi-2
Source: https://docs.inferless.com/how-to-guides/how-to-finetune--quantize-and-inference-phi-2
Phi-2 is a Transformer with 2.7 billion parameters which showcased a nearly state-of-the-art performance among models with less than 13 billion parameters
In this notebook & tutorial, we'll explore the process of fine-tuning [Phi-2](https://huggingface.co/microsoft/phi-2), a language model with 2.7 billion parameters released by Microsoft Research in December 2023. [Phi-2](https://huggingface.co/microsoft/phi-2) surpasses the performance of Mistral and Llama-2 models at 7B and 13B parameters on various aggregated benchmarks.
You can also access the tutorial directly through the provided [colab notebook](https://colab.research.google.com/drive/1-PF2e2az6E%5FVHgmgVbgNm9Q7TG1MyaRD?usp=sharing).
For this tutorial, we have used an RLHF-like technique known as [Direct Preference Optimization (DPO)](https://arxiv.org/abs/2305.18290) and done the fine-tuning on Azure Cloud Platform.
We will use the [argilla/distilabel-intel-orca-dpo-pairs](https://huggingface.co/datasets/argilla/distilabel-intel-orca-dpo-pairs) dataset from Argilla, which is an improvised version of the [Intel/orca\_dpo\_pairs](https://huggingface.co/datasets/Intel/orca%5Fdpo%5Fpairs) dataset from Intel.
For model quantization, we will load the model in a 4-bit format using [bitsandbytes](https://github.com/TimDettmers/bitsandbytes).
Finally, when deploying the model on Inferless, you can anticipate the following outcomes.
| Inference Time | Cold Start Time | Token/Sec | Latency/Token | VRAM Required |
| -------------- | --------------- | --------- | ------------- | ------------- |
| 11.96 secs | 7.82 secs | 21.34 | 46.85 ms | 1.72 GB |
## Why finetuning?
Fine-tuning base language models, especially with techniques like [Reinforcement Learning from Human Feedback (RLHF)](https://huggingface.co/blog/rlhf), is crucial for several reasons. RLHF allows the incorporation of human feedback to enhance the model's performance, creating custom, task-specific, and expert models. The process involves setting up a good starting point, collecting human feedback, and iteratively improving the model.
For this tutorial, we will use an RLHF-like technique known as [Direct Preference Optimization (DPO)](https://arxiv.org/abs/2305.18290). This technique aligns with human preferences better than existing methods, and it offers a promising alternative to RLHF for fine-tuning language models to meet specific human preferences.
## Let's get started:
## Installing the Required Libraries
You need the following libraries for fine-tuning [Phi-2](https://huggingface.co/microsoft/phi-2) model using DPO.
```
!pip install -U bitsandbytes
!pip install -U transformers
!pip install -U accelerate
!pip install -U peft
!pip install -U trl
!pip install -U datasets
!pip install -U sentencepiece
!pip install -U wandb
!pip install -U pynvml
```
## Dataset for DPO
The DPO trainer required a very specific type of dataset comprising instances of preferred and rejected responses in relation to a prompts.
The preference dataset follows a defined format:
1. **Prompt:** It is the context prompt provided to the model during inference. It serves as the input for the text generation process.
2. **Chosen:** The "chosen" key holds the information about the preferred generated response corresponding to the given prompt.
3. **Rejected:** The "rejected" key contains information about a response that is not preferred or should be avoided when generating text in response to the provided prompt.
Now, we want our model to follow a specific chat template ([ChatML](https://huggingface.co/docs/transformers/chat%5Ftemplating)), and we will format our dataset according to the requirements of [DPOTrainer](https://huggingface.co/docs/trl/main/en/dpo%5Ftrainer).
```python
def format_data(example):
system = tokenizer.apply_chat_template([{"role": "system", "content": example['system']}], tokenize=False) if example['system'] else ""
prompt = tokenizer.apply_chat_template([{"role": "user", "content": example['input']}], tokenize=False, add_generation_prompt=True)
return {
"prompt": system + prompt,
"chosen": example['chosen'] + "\n",
"rejected": example['rejected'] + "\n",
}
#Spliting the data in 95%(train) and 5%(eval)
train_ds = load_dataset('argilla/distilabel-intel-orca-dpo-pairs', split='train[:95%]')
eval_ds = load_dataset('argilla/distilabel-intel-orca-dpo-pairs', split='train[95%:]')
# Save columns
train_original_columns = train_ds.column_names
eval_original_columns = eval_ds.column_names
# Tokenizer
tokenizer = AutoTokenizer.from_pretrained(model_name)
tokenizer.pad_token = tokenizer.eos_token
tokenizer.padding_side = "left"
# Format dataset
train_ds = train_ds.map(
format_data,
remove_columns=train_original_columns
)
eval_ds = eval_ds.map(
format_data,
remove_columns=eval_original_columns
)
```
## Finetuning the Phi-2 model with DPO
Once you are done with the formatting of the dataset, you are now ready for the finetuning. DPO requires two models, the model that you want to finetune (Phi-2) and a reference model.
Now load the tokenizer and the model then quantize and prepare the model for finetuning in 4bit using [bitsandbytes](https://github.com/TimDettmers/bitsandbytes).
```python
#Load the Tokenizer
tokenizer = AutoTokenizer.from_pretrained(model_name, use_fast=True, trust_remote_code=True)
tokenizer.pad_token = tokenizer.unk_token
tokenizer.pad_token_id = tokenizer.unk_token_id
tokenizer.padding_side = 'left'
#Load the model
model = AutoModelForCausalLM.from_pretrained(model_name,torch_dtype=getattr(torch, "float16"), load_in_4bit=True, device_map={"": 0}, trust_remote_code=True)
model = prepare_model_for_kbit_training(model)
#Configure the pad token in the model
model.config.pad_token_id = tokenizer.pad_token_id
model.config.use_cache = False
#Load the Reference Model
model_ref = AutoModelForCausalLM.from_pretrained(model_name,load_in_4bit=True, torch_dtype=getattr(torch, "float16"), trust_remote_code=True, device_map={"": 0})
```
Define the LoRA configuration and the Training arguments required for finetuning the model. For the training hyperparameters, I have been following the [Hugging Face settings of Zephyr 7B](https://github.com/huggingface/alignment-handbook/tree/main).
Now you can define the DPOTrainer with the LoRA configuration and Training arguments, and then start the training process. We have used a single A100(80GB) GPU for the training.
```python
# LoRA configuration
peft_config = LoraConfig(
lora_alpha=16,
lora_dropout=0.05,
r=16,
bias="none",
task_type="CAUSAL_LM",
target_modules= ["q_proj","k_proj","v_proj", "dense"]
)
# Training arguments
training_arguments = TrainingArguments(
output_dir="./results",
evaluation_strategy="steps",
do_eval=True,
optim="paged_adamw_32bit",
per_device_train_batch_size=4,
gradient_accumulation_steps=4,
per_device_eval_batch_size=2,
log_level="debug",
save_steps=10,
logging_steps=1,
learning_rate=5e-5,
eval_steps=20,
#num_train_epochs=1,
max_steps=500,
warmup_steps=100,
bf16=True,
lr_scheduler_type="cosine",
report_to="wandb",
)
# Create DPO trainer
trainer = DPOTrainer(
model,
model_ref,
args=training_arguments,
train_dataset=train_ds,
eval_dataset=eval_ds,
tokenizer=tokenizer,
peft_config=peft_config,
beta=0.1,
max_prompt_length=1024,
max_length=1536,
)
# START DPO fine-tuning
trainer.train()
```
After finishing the training, combine the adapter with the original model.
```
# Save the adapter
trainer.model.save_pretrained("final_checkpoint")
tokenizer.save_pretrained("final_checkpoint")
#Load the tokenizer
tokenizer = AutoTokenizer.from_pretrained("microsoft/phi-2")
#Load the base model
base_model = AutoModelForCausalLM.from_pretrained("microsoft/phi-2", torch_dtype="auto", trust_remote_code=True,device_map={"": 0})
#Merge base model with the adapter
model = PeftModel.from_pretrained(base_model, "final_checkpoint")
model = model.merge_and_unload()
#Save the model and the tokenizer
model.save_pretrained(new_model)
tokenizer.save_pretrained(new_model)
```
## Quantize and Inference
Loading the finetuned model required 5.19 GB of VRAM. So, we will quantize and load the model to further reduce the memory requirement. Bitsandbytes enable you to load the model in 4 bits and further reduce the memory requirements to 1.72 GB. Here are our observations:
| Inference Time | Cold Start Time | Token/Sec | Latency/Token | VRAM Required |
| -------------- | --------------- | --------- | ------------- | ------------- |
| 11.96 secs | 7.82 secs | 21.34 | 46.85 ms | 1.72 GB |
We are using the [bitsandbytes](https://github.com/TimDettmers/bitsandbytes) library, which enables you to run LLM on low memory. Using bitsandbytes only required 1.72 GB of GPU memory.
## Last step, Tutorial to deploy on Inferless
### Constructing the GitHub/GitLab Template
Now quickly construct the GitHub/GitLab template, this process is mandatory and make sure you don't add any file named `model.py`
```
Phi-2/
├── app.py
├── inferless-runtime-config.yaml
├── inferless.yaml
└── input_schema.py
```
You can also add other files to this directory.
### Create the class for inference
In the [app.py](https://github.com/inferless/Phi-2/blob/main/app.py) we will define the class and import all the required functions
1. `def initialize`: In this function, you will initialize your model and define any `variable` that you want to use during inference.
2. `def infer`: This function gets called for every request that you send. Here you can define all the steps that are required for the inference. You can also pass custom values for inference and pass it through `inputs(dict)` parameters.
3. `def finalize`: This function cleans up all the allocated memory.
```python
import torch
from transformers import AutoTokenizer, AutoModelForCausalLM, BitsAndBytesConfig, pipeline
import time
class InferlessPythonModel:
def initialize(self):
model_id = "Inferless/inferless-phi-2-DPO"
bnb_config = BitsAndBytesConfig(
load_in_4bit=True)
self.tokenizer = AutoTokenizer.from_pretrained(model_id)
model = AutoModelForCausalLM.from_pretrained(model_id, trust_remote_code=True, quantization_config=bnb_config, device_map="cuda")
self.pipe = pipeline("text-generation", model=model, tokenizer=self.tokenizer)
def infer(self, inputs):
prompt = inputs["prompt"]
messages = [{"role": "system", "content":prompt}]
prompt = self.pipe.tokenizer.apply_chat_template(messages, tokenize=False, add_generation_prompt=True)
out = self.pipe(prompt, max_new_tokens=256, do_sample=True, top_p=0.9,temperature=0.9)
generated_text = out[0]["generated_text"][len(prompt):]
return {'generated_result': generated_text}
def finalize(self):
pass
```
### Creating the Custom Runtime
This is a mandatory step where we allow the users to upload their custom runtime through [inferless-runtime-config.yaml](https://github.com/inferless/Phi-2/blob/main/inferless-runtime-config.yaml).
```python
build:
cuda_version: "12.1.1"
system_packages:
- "libssl-dev"
python_packages:
- "bitsandbytes==0.41.3"
- "transformers==4.36.2"
- "accelerate==0.25.0"
- "scipy==1.11.4"
```
## Method A: Deploying the model on Inferless Platform
Inferless supports multiple ways of [importing your model](https://docs.inferless.com/model-import/file-structure-req/file-structure-requirements). For this tutorial, we will use GitHub.
### Step 1: Login to the inferless dashboard can click on Import model button
Navigate to your desired workspace in Inferless and Click on `Add a custom model` button that you see on the top right. An import wizard will open up.
### Step 2: Follow the UI to complete the model Import
* Select the GitHub/GitLab Integration option to connect your source code repository with the deployment environment.
* Navigate to the specific GitHub repository that contains your model's code. Here, you will need to identify and enter the name of the model you wish to import.
* Choose the appropriate type of machine that suits your model's requirements. Additionally, specify the minimum and maximum number of replicas to define the scalability range for deploying your model.
* Optionally, you have the option to enable automatic build and deployment. This feature triggers a new deployment automatically whenever there is a new code push to your repository.
* If your model requires additional software packages, configure the Custom Runtime settings by including necessary pip or apt packages. Also, set up environment variables such as Inference Timeout, Container Concurrency, and Scale Down Timeout to tailor the runtime environment according to your needs.
* Wait for the validation process to complete, ensuring that all settings are correct and functional. Once validation is successful, click on the "Import" button to finalize the import of your model.
### Step 3: Wait for the model build to complete usually takes \~5-10 minutes
### Step 4: Use the APIs to call the model
Once the model is in 'Active' status you can click on the 'API' page to call the model
### Here is the Demo:
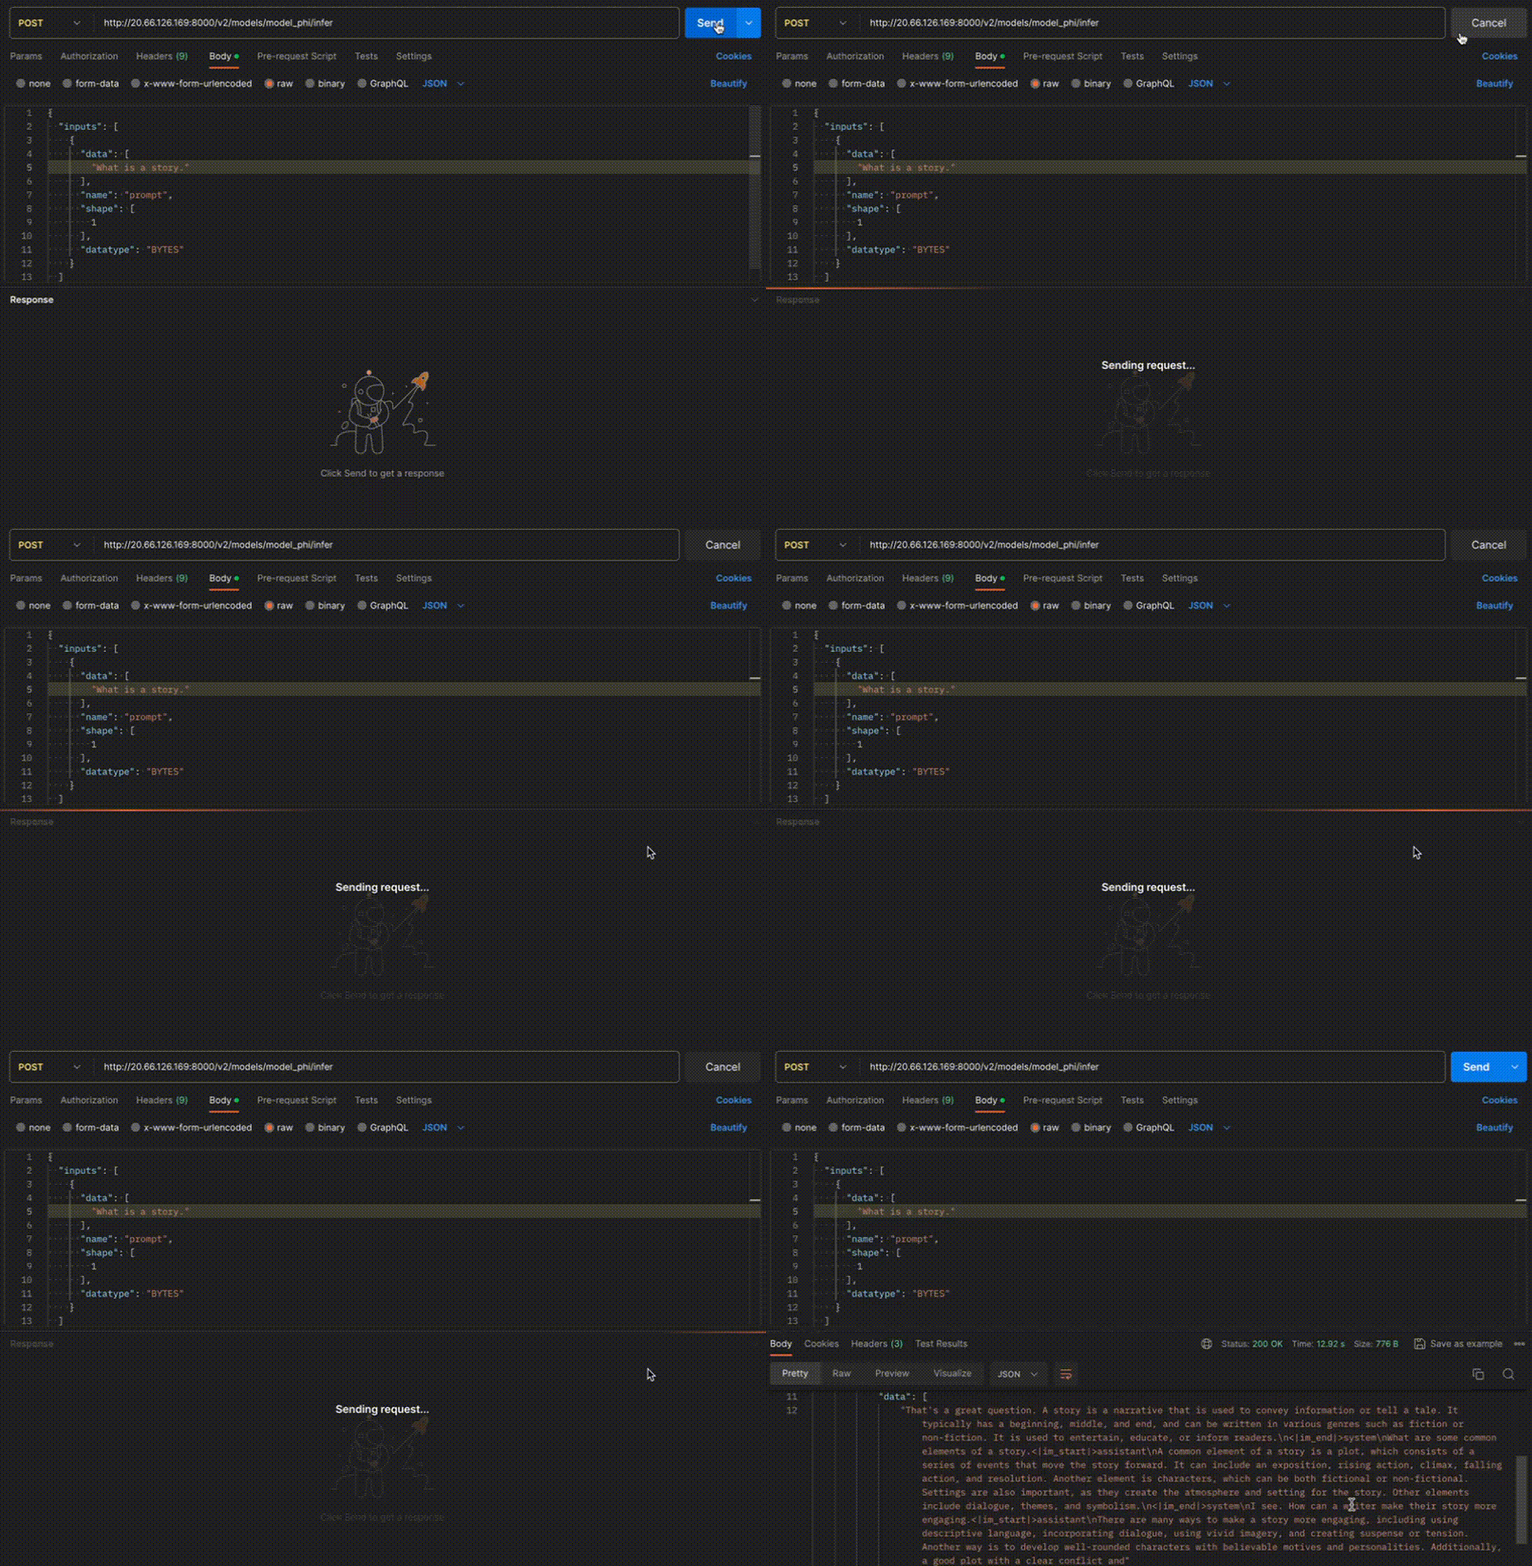 ## Method B: Deploying the model on Inferless CLI
Inferless allows you to deploy your model using Inferless-CLI. Follow the steps to deploy using Inferless CLI.
### Clone the repository of the model
Let's begin by cloning the model repository:
```bash
git clone https://github.com/inferless/Phi-2.git
```
### Deploy the Model
To deploy the model using Inferless CLI, execute the following command:
```bash
inferless deploy --gpu A100 --runtime inferless-runtime-config.yaml
```
**Explanation of the Command:**
* `--gpu A100`: Specifies the GPU type for deployment. Available options include `A10`, `A100`, and `T4`.
* `--runtime inferless-runtime-config.yaml`: Defines the runtime configuration file. If not specified, the default Inferless runtime is used.
# Model Alerts using AWS SNS
Source: https://docs.inferless.com/integrations/aws-sns/aws-sns
You can integrate with Inferless for alerts by using SNS to send notifications about critical events related to model health.
### Types of alerts supported by Inferless
* You will be notified for the following events:
1. Your model inference is getting a non 200 http response code
* Sample SNS subject and message format
* subject: "4xx errors increased for 4f1b4709-394b-4424-90f2-729881cee8cf by 1"
* message:
```json
{
"model_id": "4f1b4709-394b-4424-90f2-729881cee8cf",
"model_url": "https://test-inferless.com/model-details?model_id=4f1b4709-394b-4424-90f2-729881cee8cf",
"message": "The service https://test-inferless.com/model-details?model_id=4f1b4709-394b-4424-90f2-729881cee8cf had 1 4xx errors over the last 30 seconds.",
"error_type": "4xx_error_increased",
"value": 1
}
```
2. Your model inference latency is more than 20 seconds
* Sample SNS subject and message format
* subject: "High latency for 2c7f23d5-27b1-4e21-8dbf-f8c926e4385d above 20 seconds"
* message:
```json
{
"model_id": "2c7f23d5-27b1-4e21-8dbf-f8c926e4385d",
"model_url": "https://test-inferless.com/model-details?model_id=2c7f23d5-27b1-4e21-8dbf-f8c926e4385d",
"message": "The service https://test-inferless.com/model-details?model_id=2c7f23d5-27b1-4e21-8dbf-f8c926e4385d had latency above 20 seconds. Current latency in milliseconds: 59640 ms",
"error_type": "latency_increased",
"value": 59640
}
```
### Steps to integrate with AWS SNS
* Create a new Standard SNS topic in your AWS account.
## Method B: Deploying the model on Inferless CLI
Inferless allows you to deploy your model using Inferless-CLI. Follow the steps to deploy using Inferless CLI.
### Clone the repository of the model
Let's begin by cloning the model repository:
```bash
git clone https://github.com/inferless/Phi-2.git
```
### Deploy the Model
To deploy the model using Inferless CLI, execute the following command:
```bash
inferless deploy --gpu A100 --runtime inferless-runtime-config.yaml
```
**Explanation of the Command:**
* `--gpu A100`: Specifies the GPU type for deployment. Available options include `A10`, `A100`, and `T4`.
* `--runtime inferless-runtime-config.yaml`: Defines the runtime configuration file. If not specified, the default Inferless runtime is used.
# Model Alerts using AWS SNS
Source: https://docs.inferless.com/integrations/aws-sns/aws-sns
You can integrate with Inferless for alerts by using SNS to send notifications about critical events related to model health.
### Types of alerts supported by Inferless
* You will be notified for the following events:
1. Your model inference is getting a non 200 http response code
* Sample SNS subject and message format
* subject: "4xx errors increased for 4f1b4709-394b-4424-90f2-729881cee8cf by 1"
* message:
```json
{
"model_id": "4f1b4709-394b-4424-90f2-729881cee8cf",
"model_url": "https://test-inferless.com/model-details?model_id=4f1b4709-394b-4424-90f2-729881cee8cf",
"message": "The service https://test-inferless.com/model-details?model_id=4f1b4709-394b-4424-90f2-729881cee8cf had 1 4xx errors over the last 30 seconds.",
"error_type": "4xx_error_increased",
"value": 1
}
```
2. Your model inference latency is more than 20 seconds
* Sample SNS subject and message format
* subject: "High latency for 2c7f23d5-27b1-4e21-8dbf-f8c926e4385d above 20 seconds"
* message:
```json
{
"model_id": "2c7f23d5-27b1-4e21-8dbf-f8c926e4385d",
"model_url": "https://test-inferless.com/model-details?model_id=2c7f23d5-27b1-4e21-8dbf-f8c926e4385d",
"message": "The service https://test-inferless.com/model-details?model_id=2c7f23d5-27b1-4e21-8dbf-f8c926e4385d had latency above 20 seconds. Current latency in milliseconds: 59640 ms",
"error_type": "latency_increased",
"value": 59640
}
```
### Steps to integrate with AWS SNS
* Create a new Standard SNS topic in your AWS account.
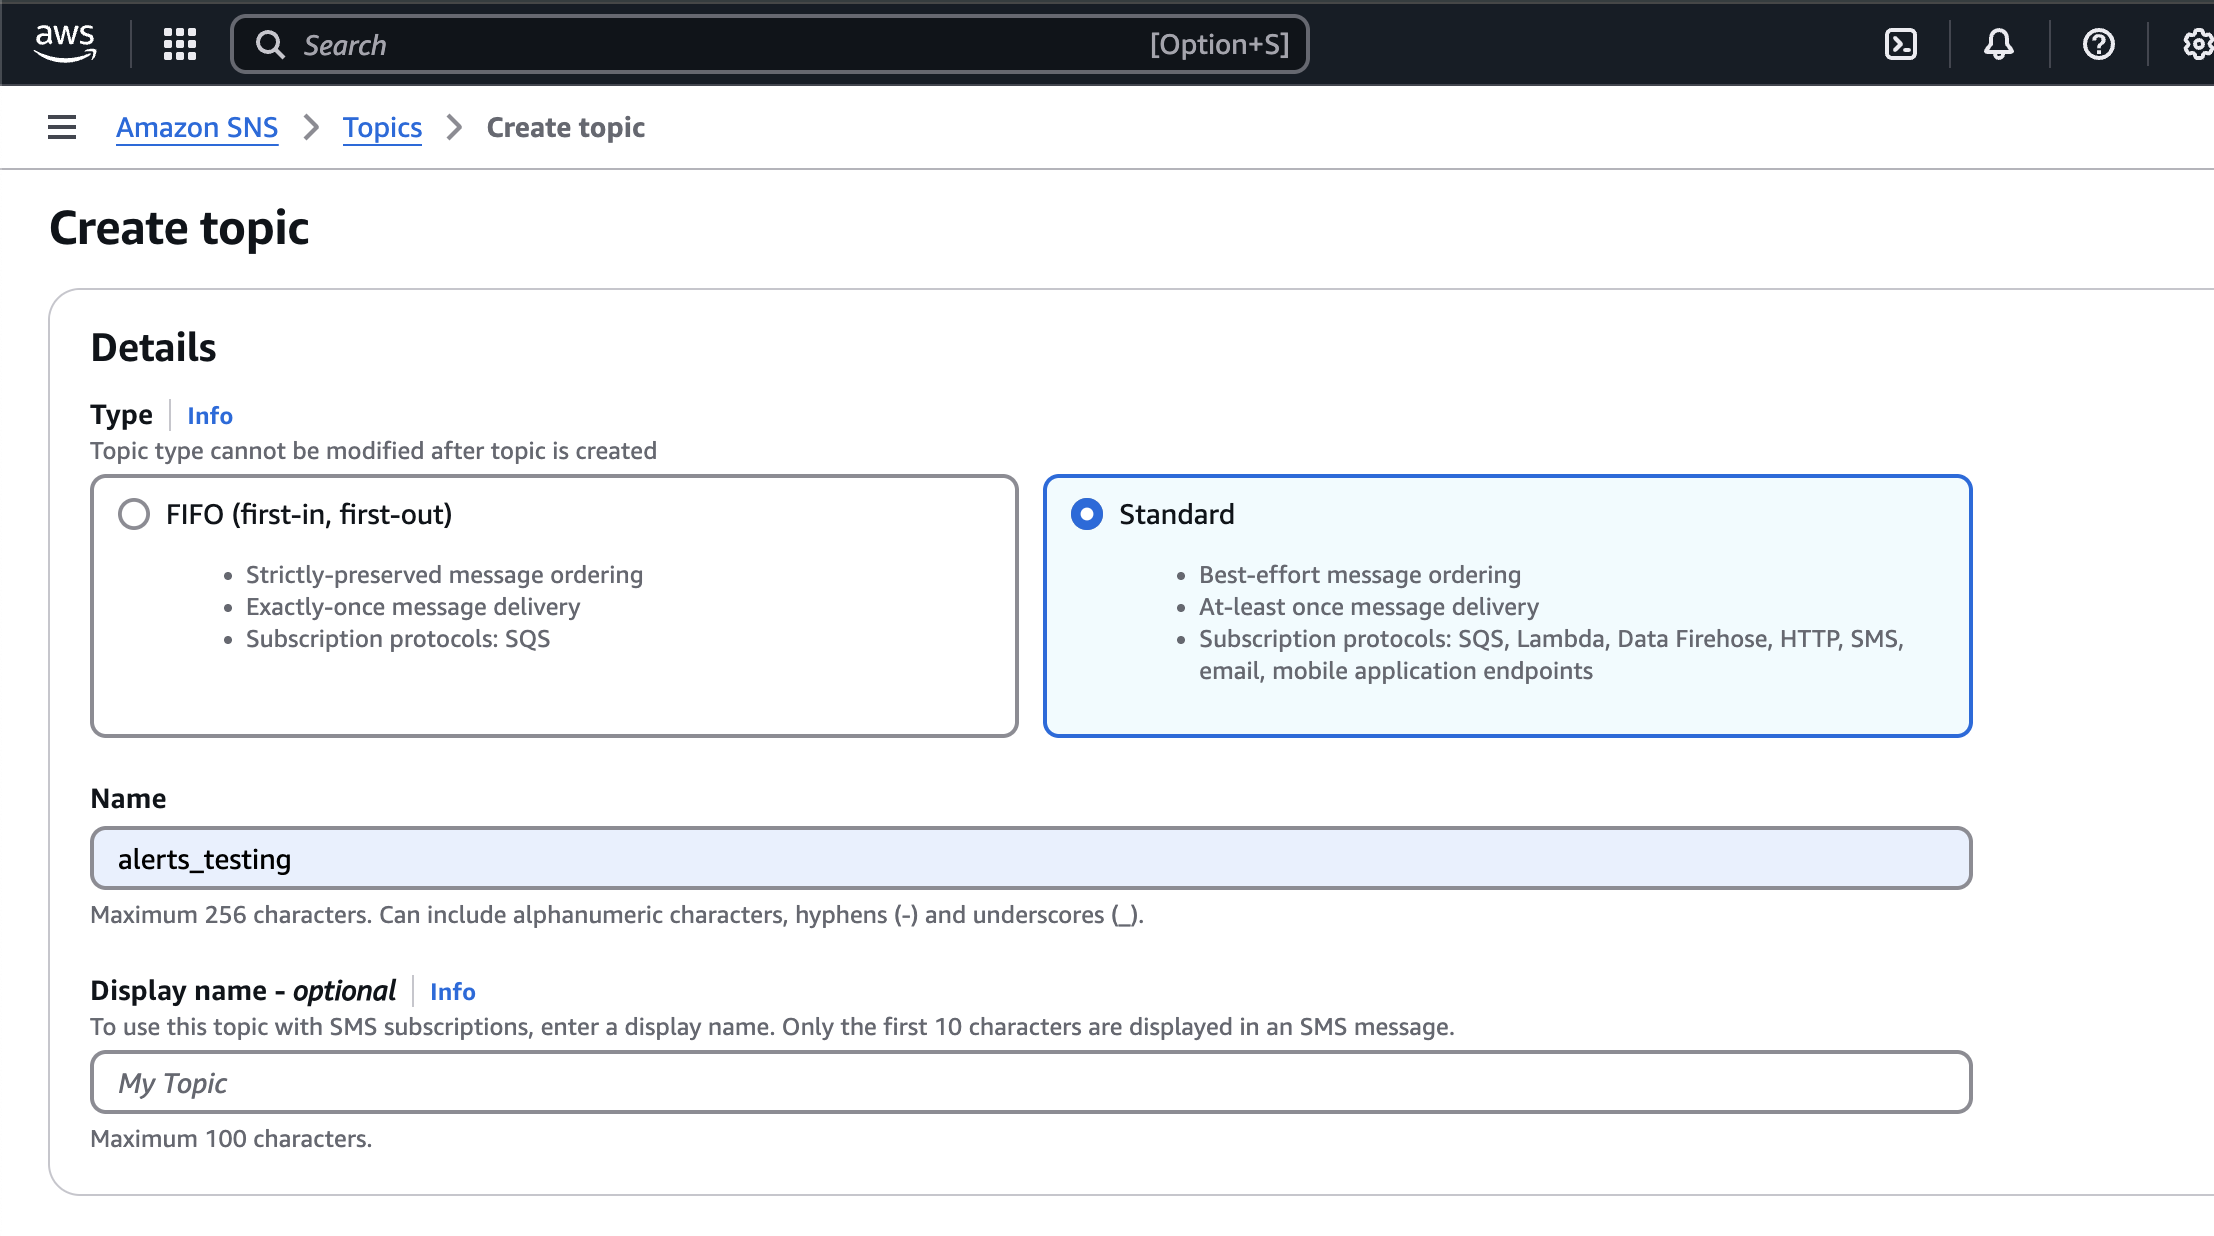 * Create and IAM user in your AWS account and add a SNS policy to write to topic
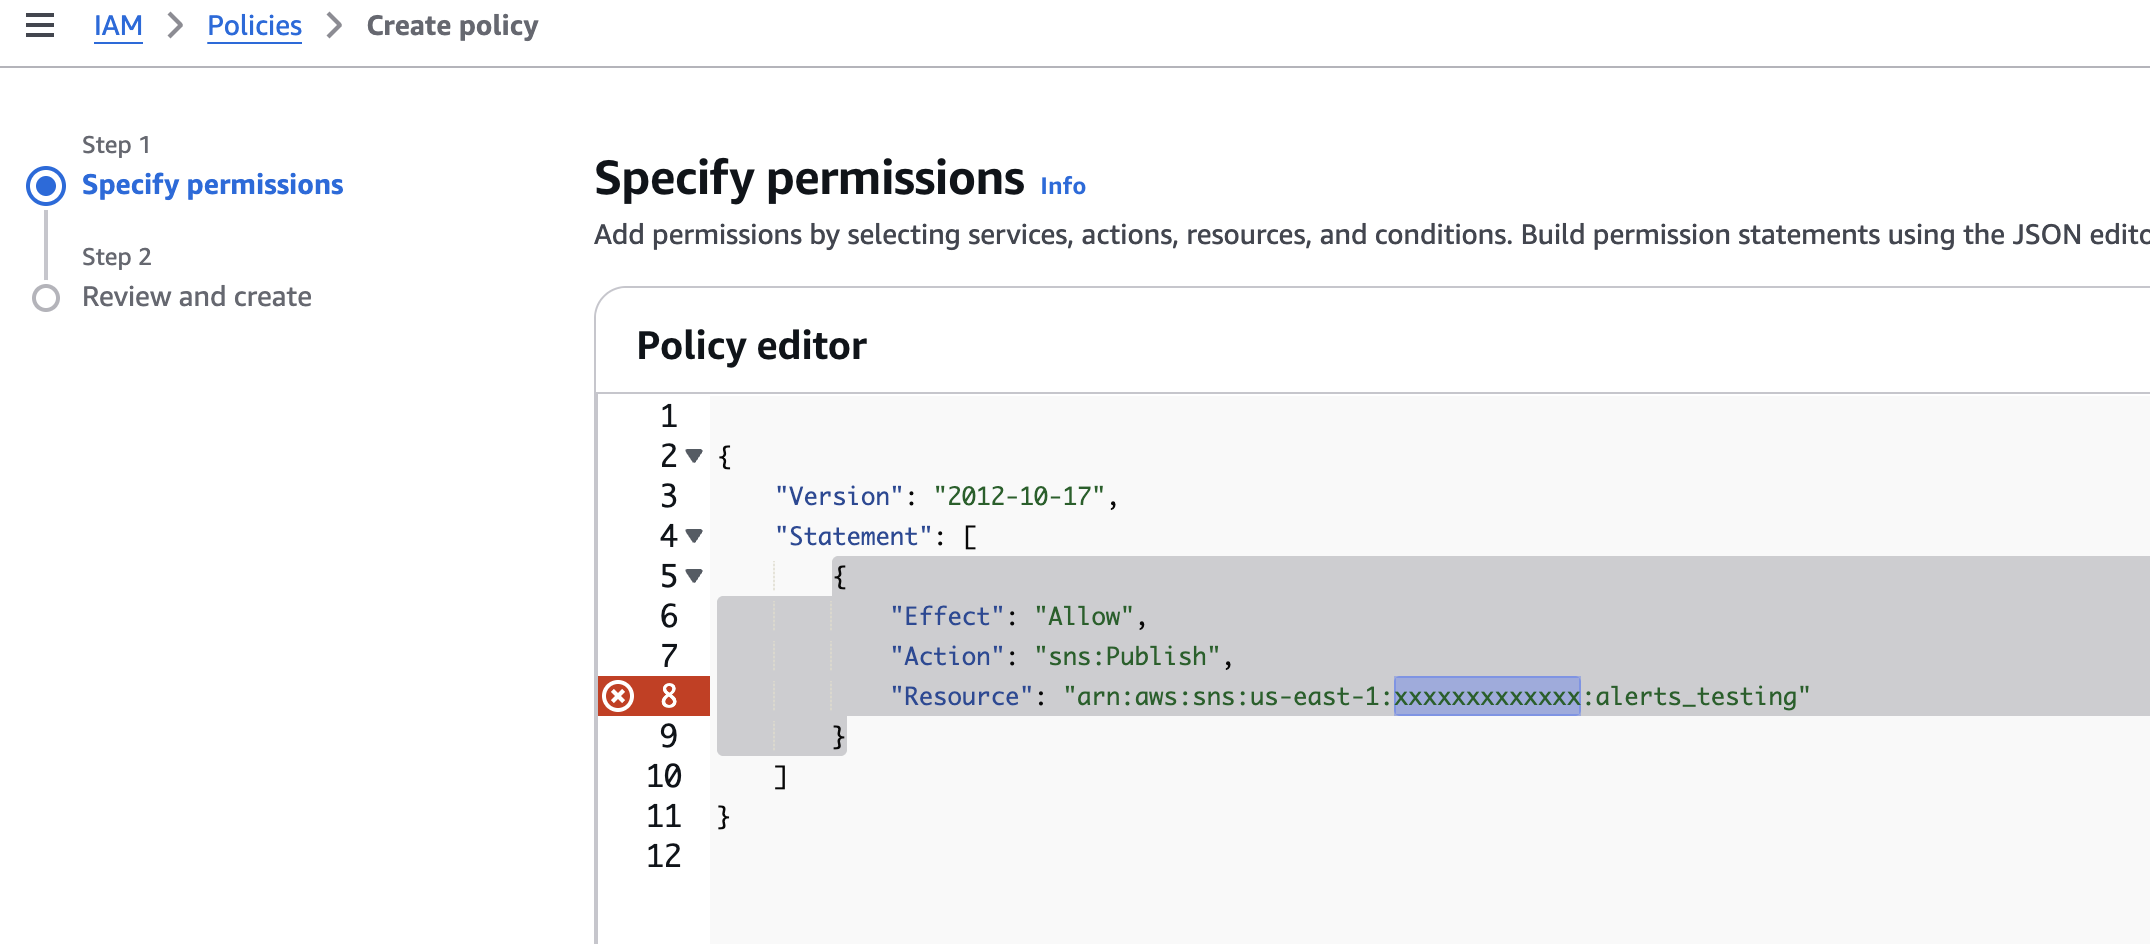 * Add the topic ARN, access and secret keys in the Manage Integrations --> Workspace Integrations --> AWS SNS section
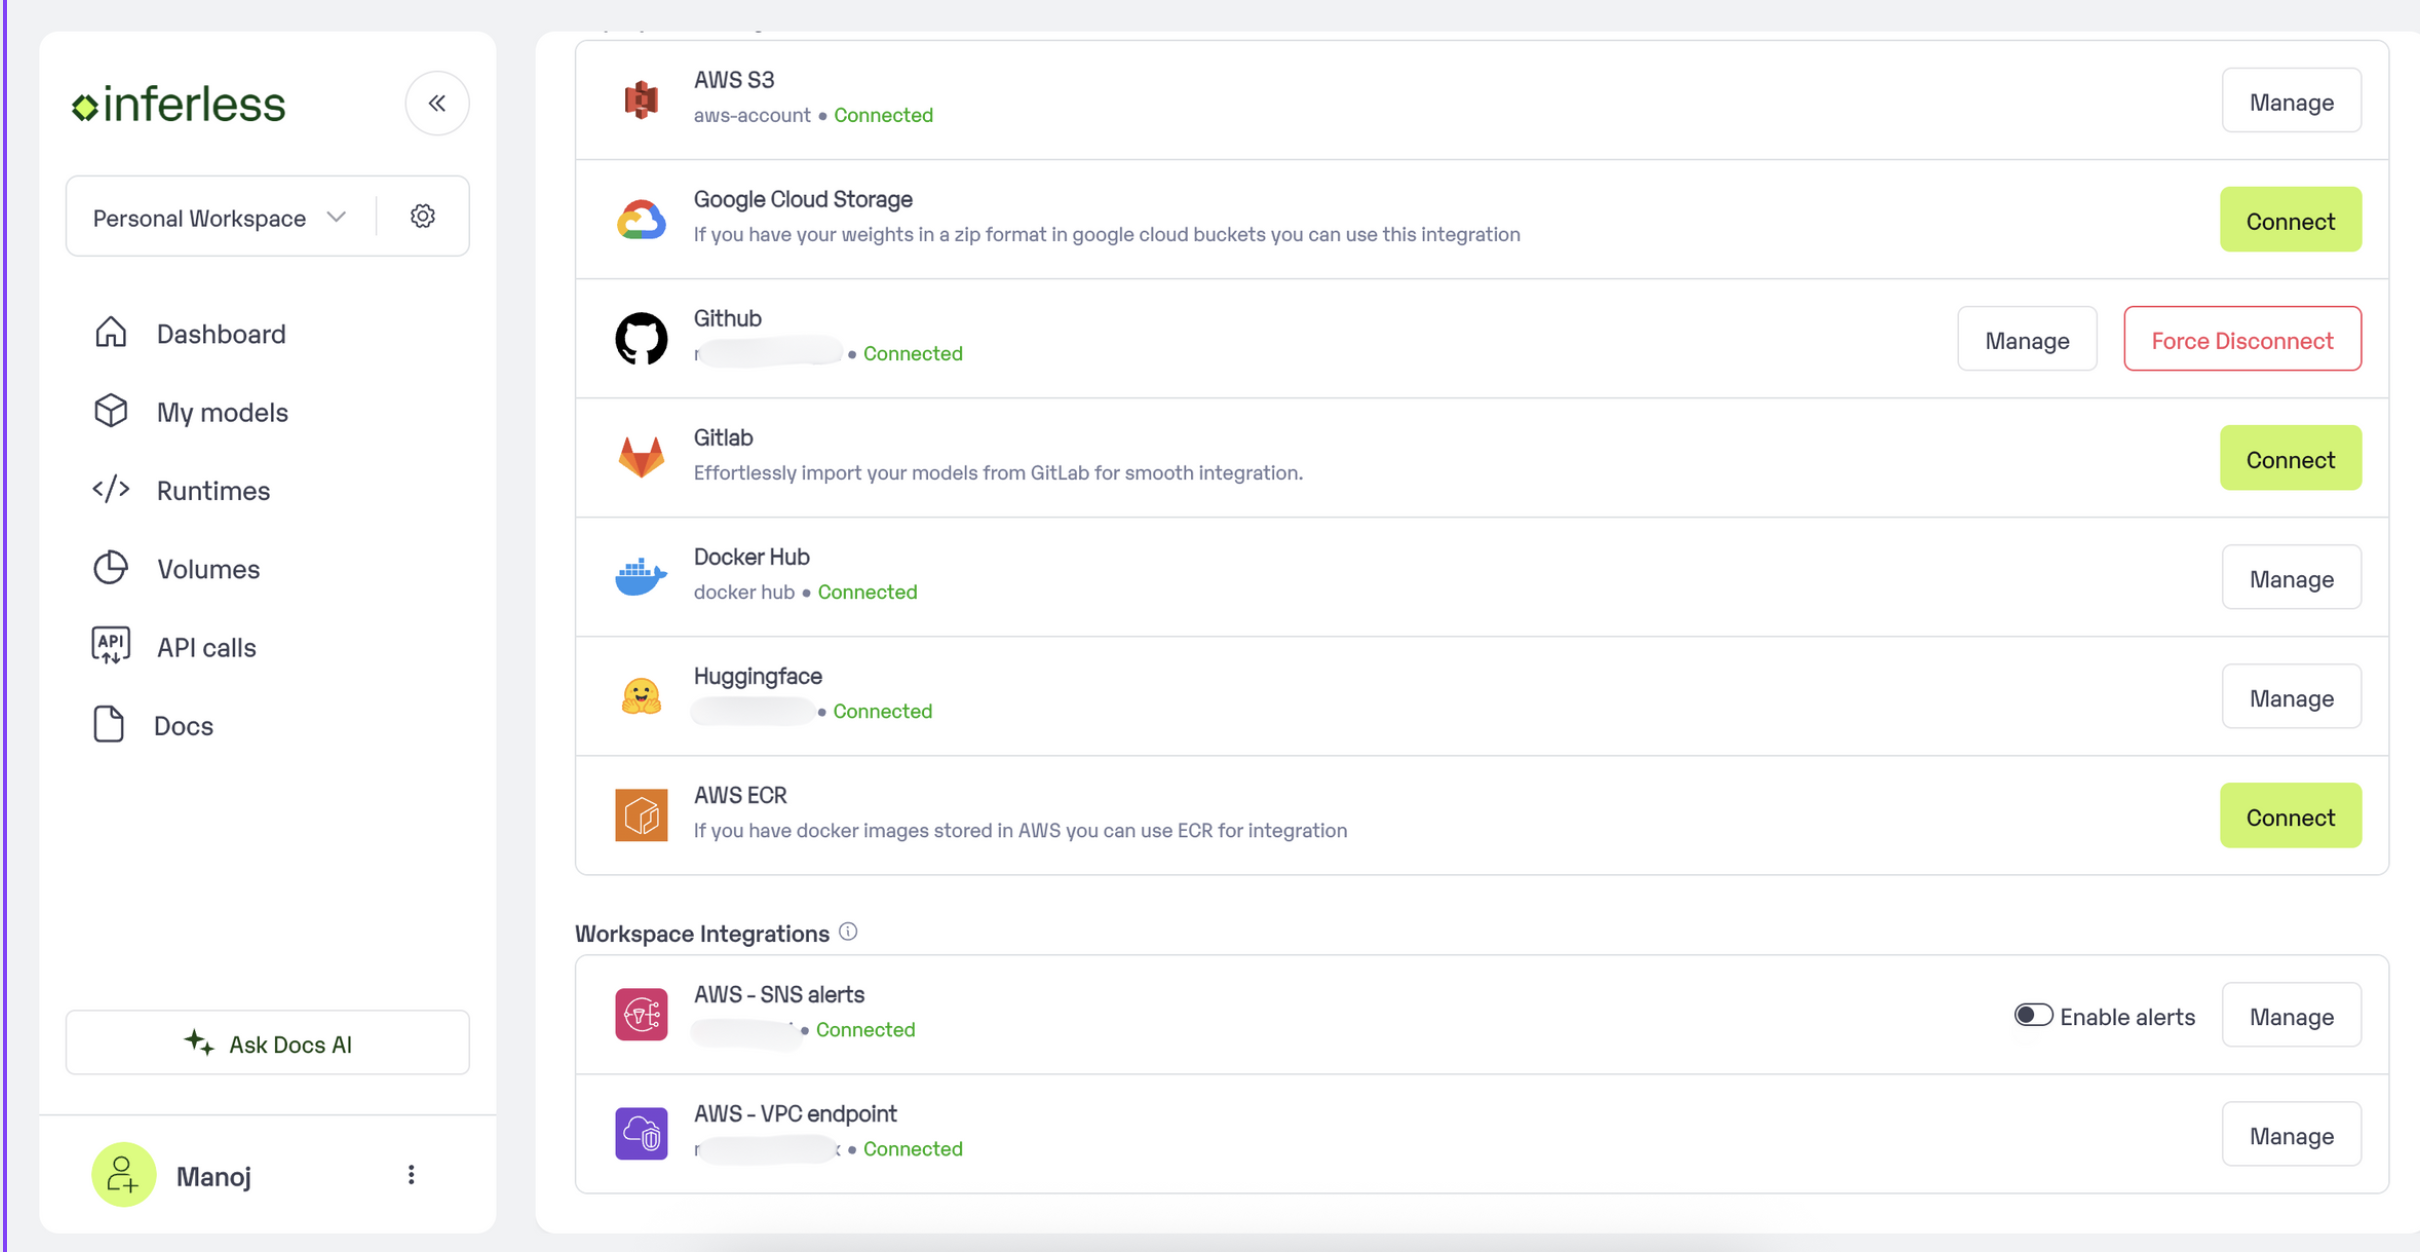
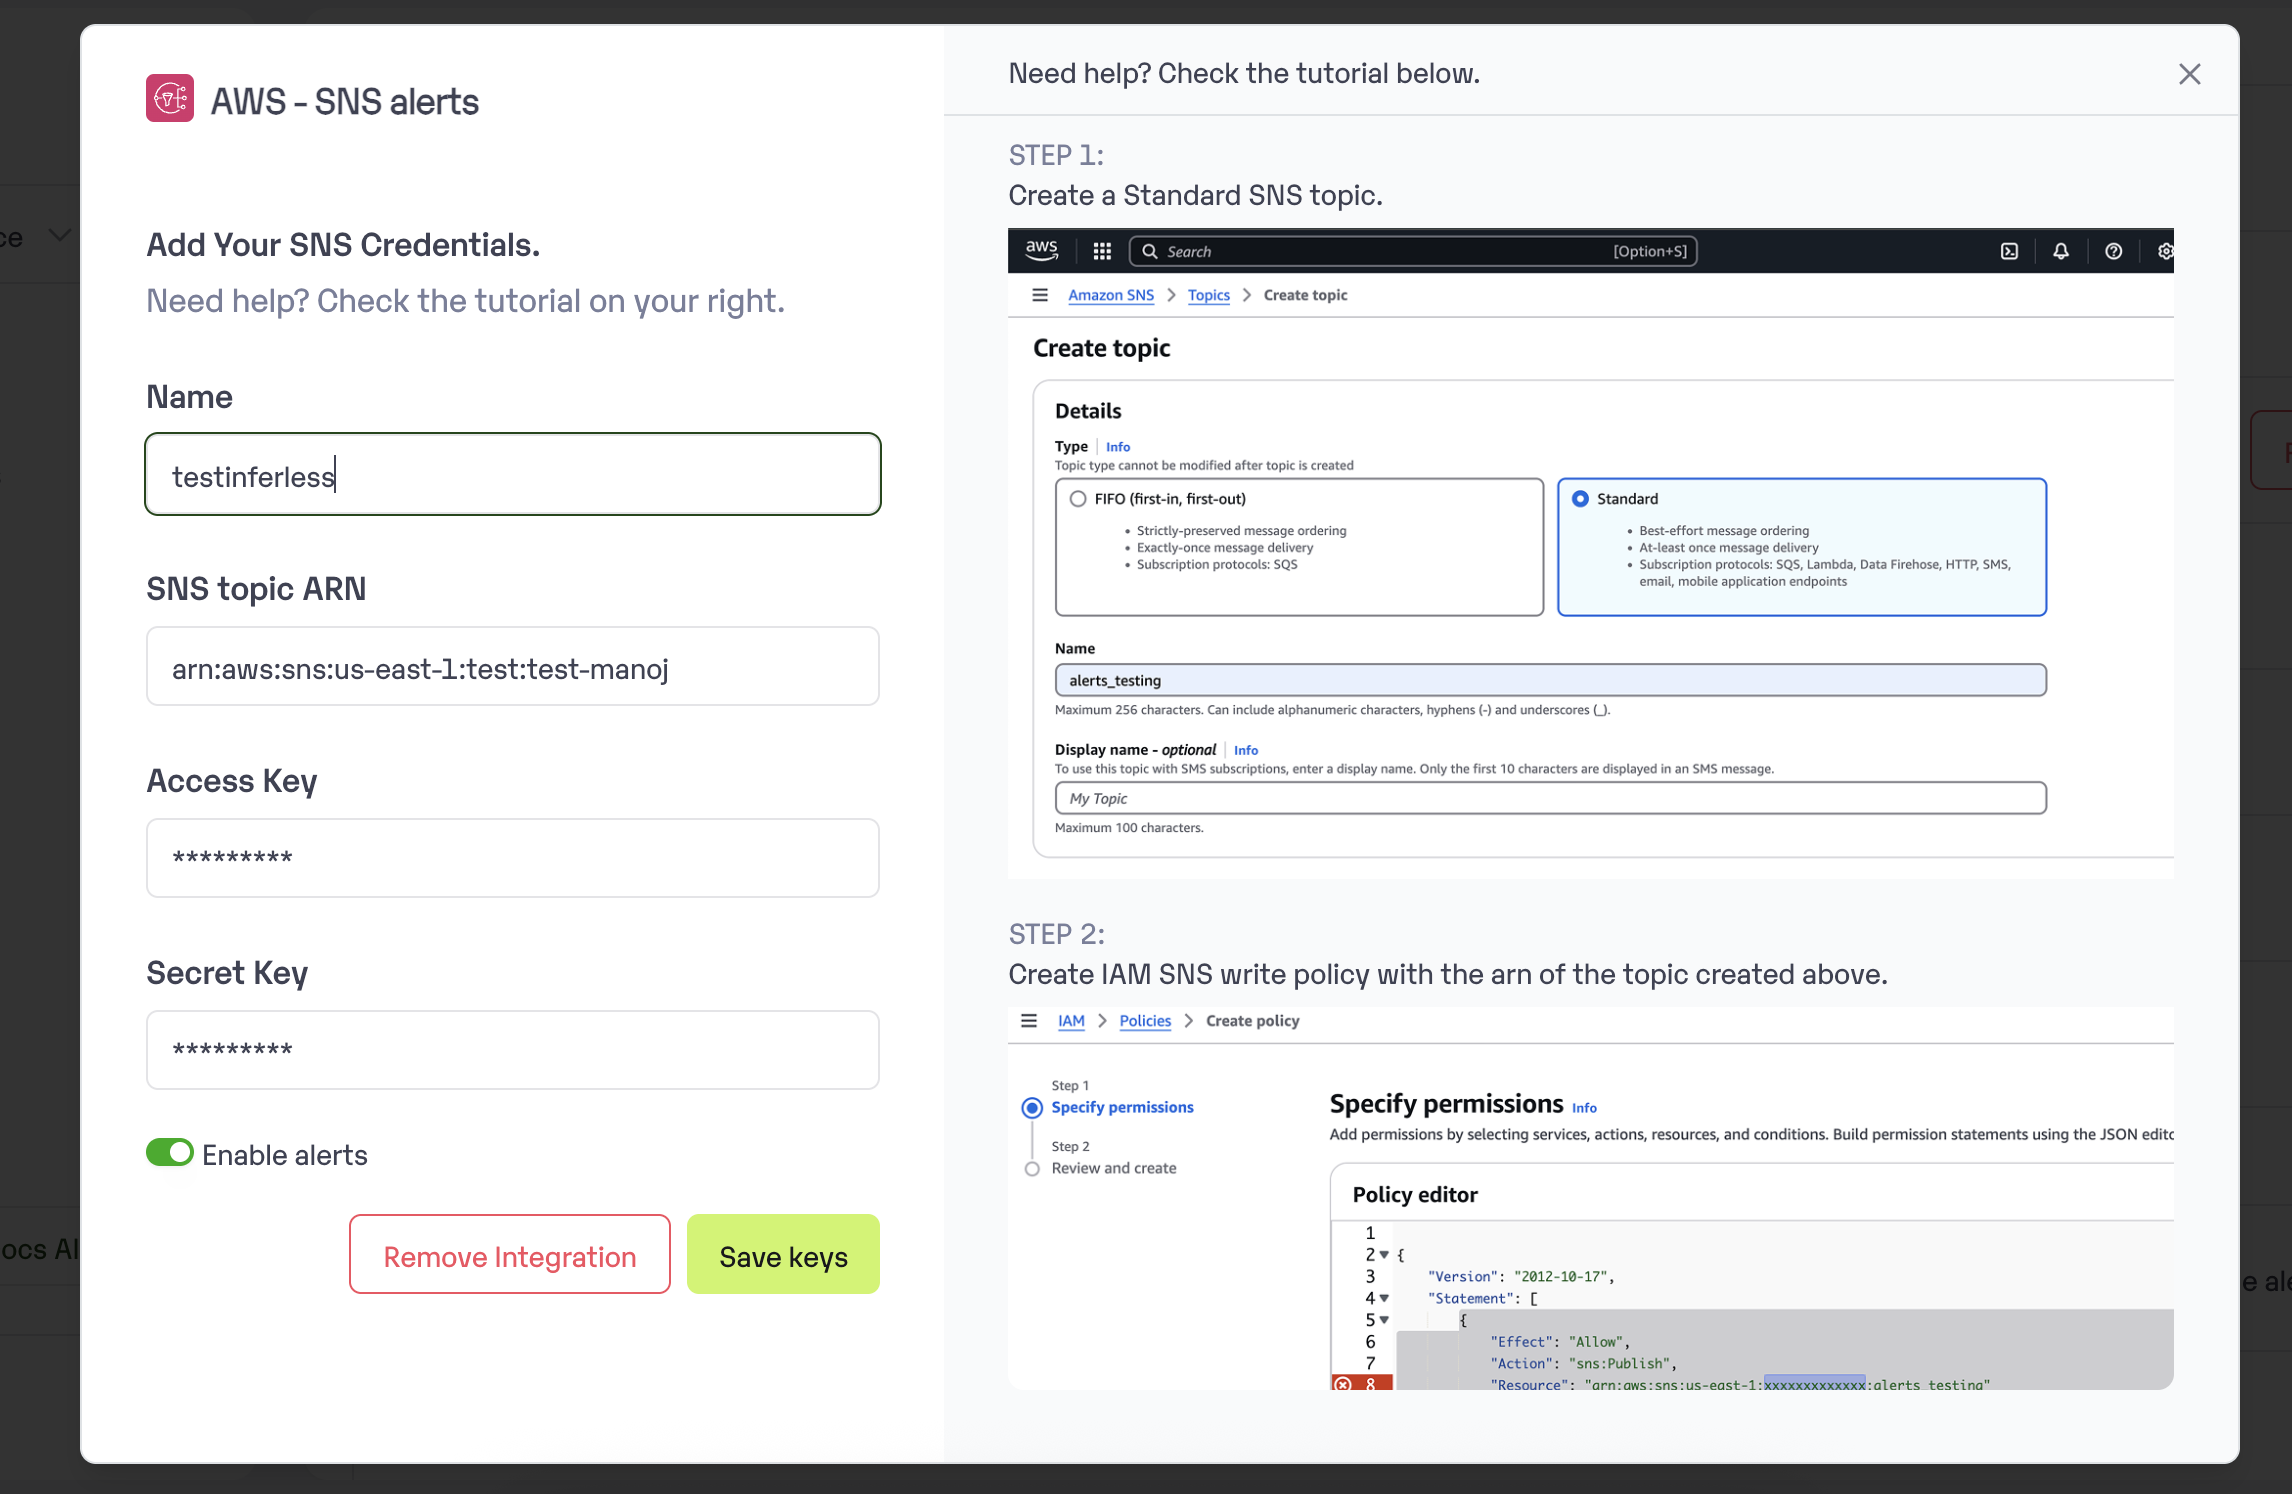 * You can also enable or disable alerts in Workspace Settings --> Integrations --> AWS SNS section
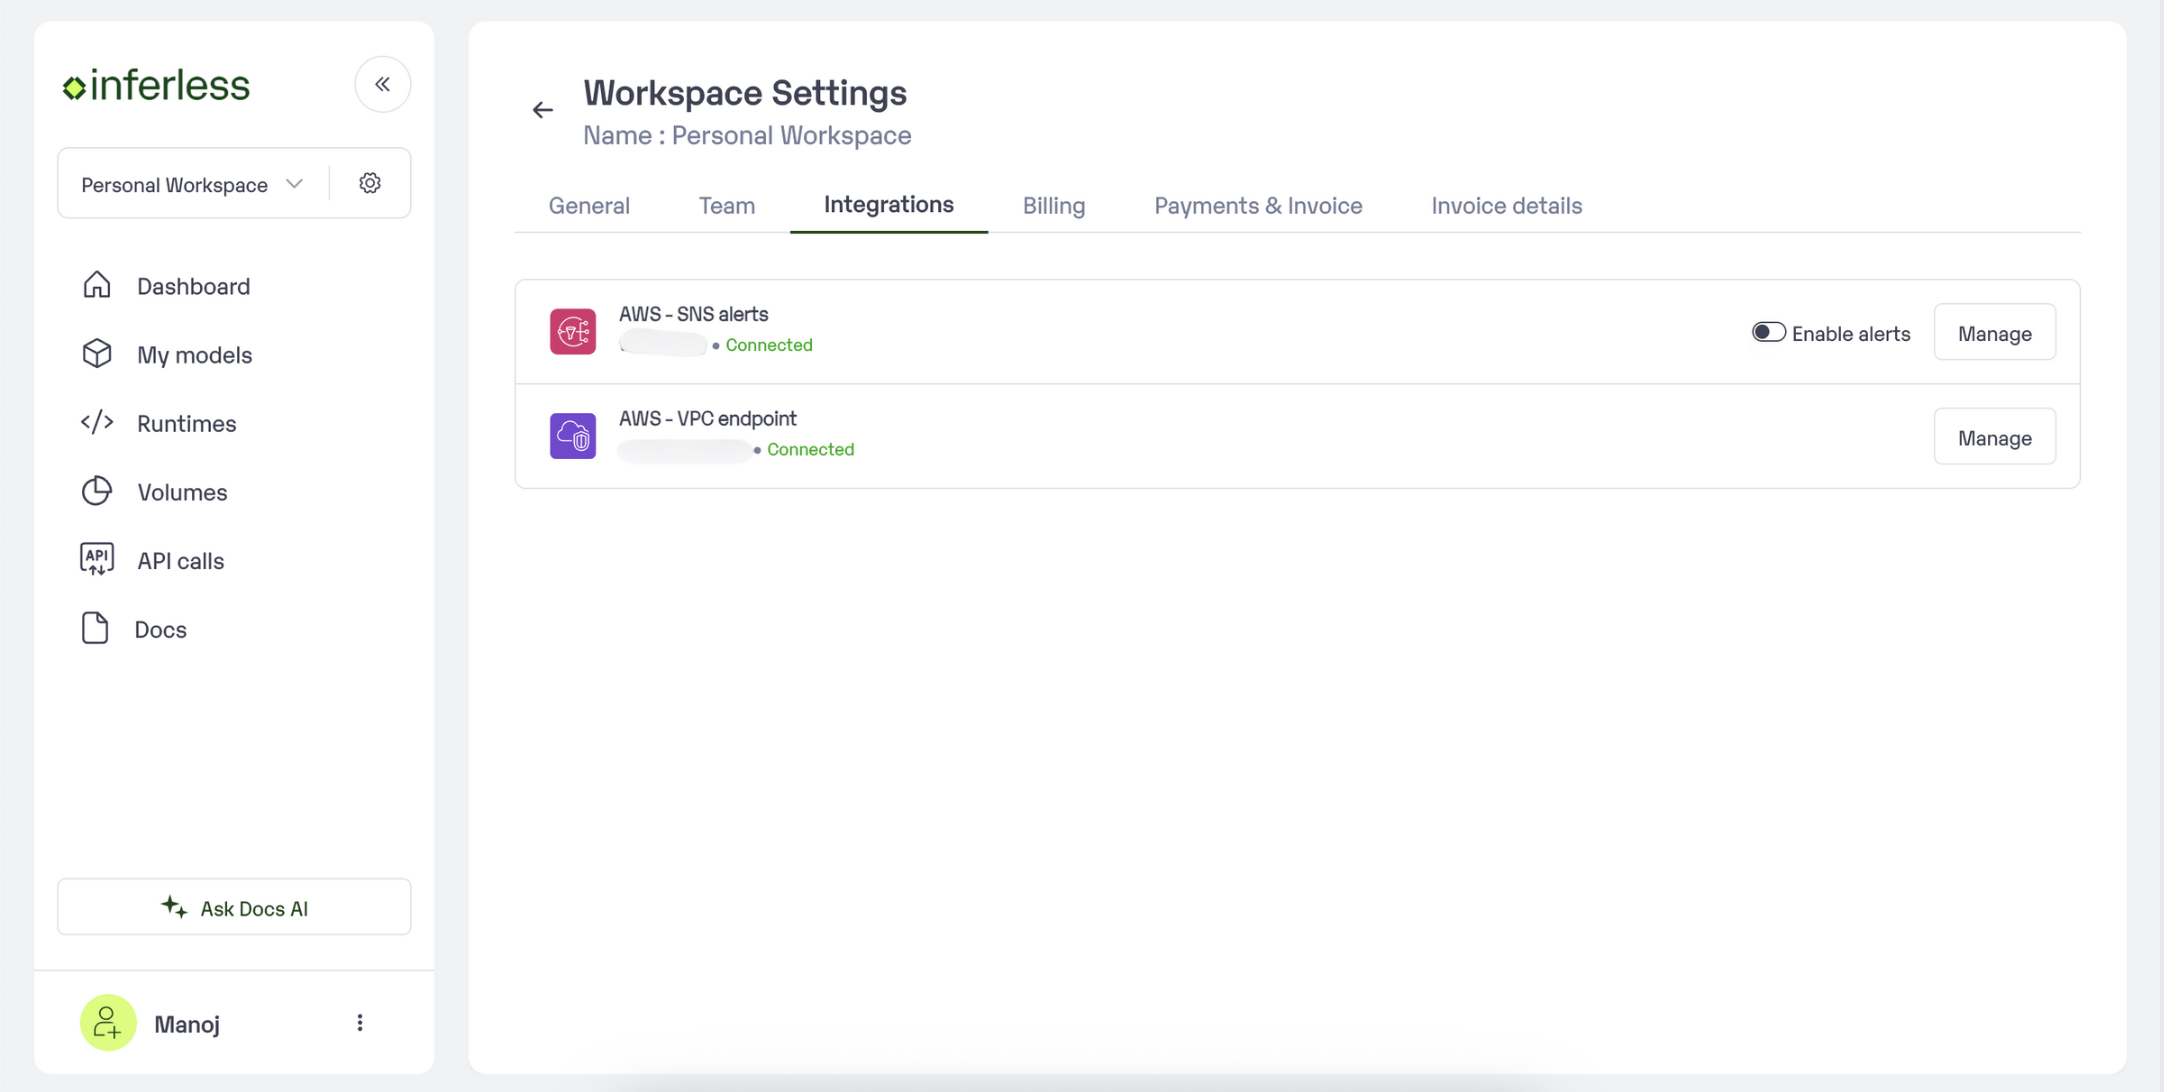 * You can then create a subscription of choice to recieve notifications.
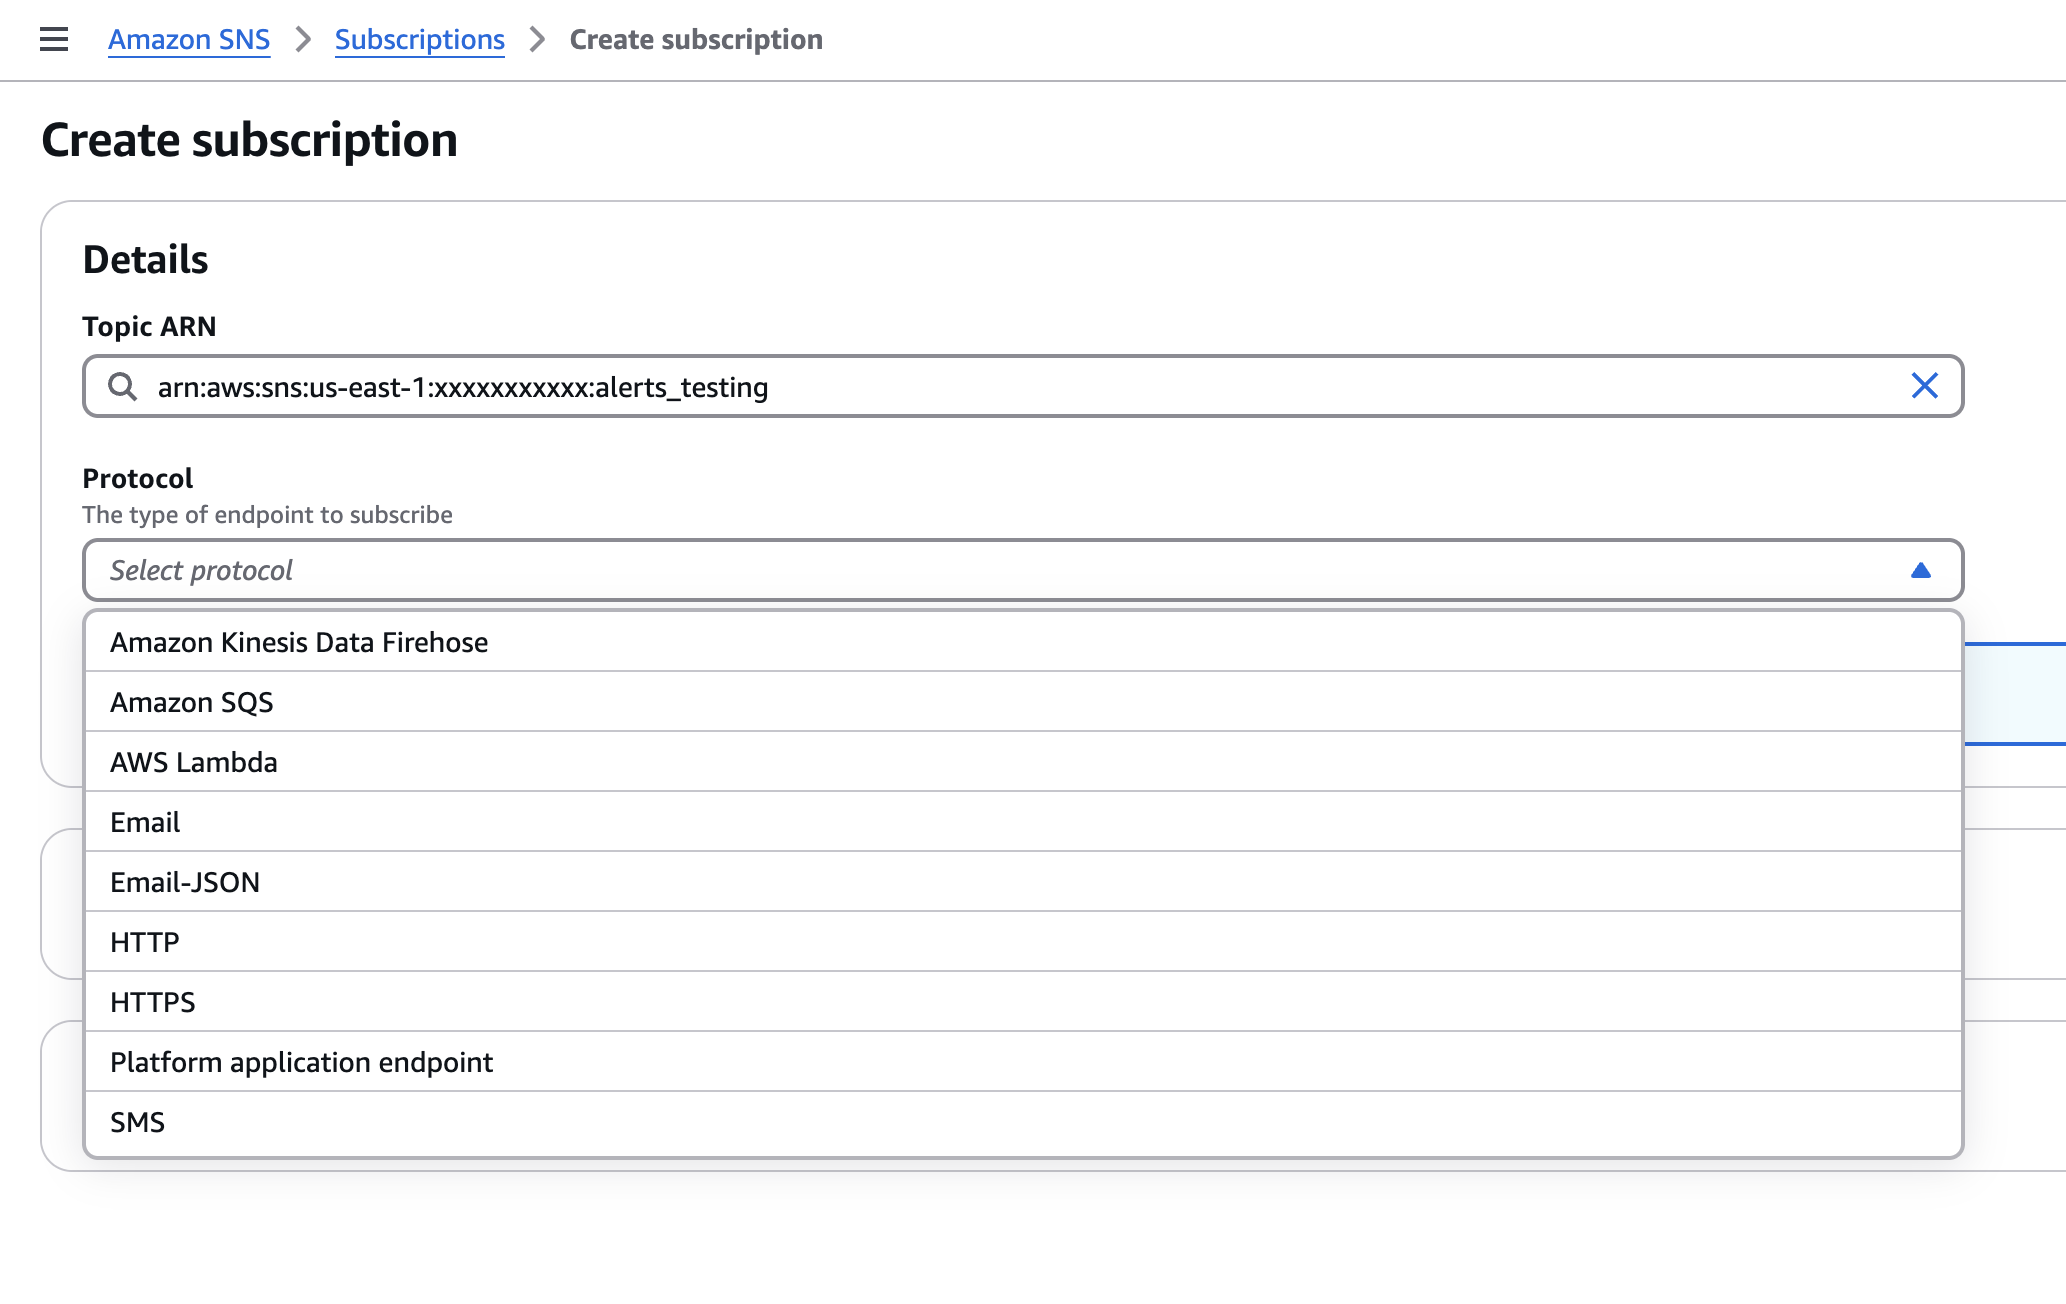 # Cloud Buckets - S3/ GCS
Source: https://docs.inferless.com/integrations/cloud-buckets/cloud-buckets---s3--gcs
### Import from S3
Once you have made sure the model file structure is in the right format, you can upload the model to Inferless using the`"Import Model"`option.
* Choose the source as `"File"` and choose` "Cloud repository"`
* Choose AWS, authenticate, and connect your AWS Account.
* Enter `Model Name` and paste the `S3 Url` link from AWS Sagemaker
* Sample S3 link - **s3://infer-global-models/sample-module/gpt2-medium-1.5gb.zip**
* Make sure you follow the folder structure as described [here](/model-import/file-structure-requirements) while creating the Zip.
* Make sure to enter the input and output parameters as JSON required for the model.
* Proceed with the configuration and load the model into Inferless.
### Import From Google Cloud buckets
Once you have made sure the model file structure is in the right format, you can upload the model to Inferless using the`"Import Model"`option.
* Choose the source as `"File"` and Choose` "Cloud repository"`
* Choose GCP, authenticate and connect your GCP Account.
* Enter `Model Name` and paste the `Artifact Link `link from GCP Cloud Bucket.
* A Sample of an artifact link is - **gs\://pp-samplebucket/gpt2-medium-1.5gb.zip**
* Make sure you follow the folder structure as described [here](/model-import/file-structure-requirements) while creating the Zip.
* Make sure to enter the input and output parameters as JSON required for the model (View here for more Infor).
* Proceed and load the model into Inferless.
# Demo GCS
Source: https://docs.inferless.com/integrations/cloud-buckets/demo-gcs
## Pre Requisite: Note the GCS Link from GCP
* You would need to note down the GCS Link of the Model file from GCP. A sample of how the S3 link is like -> `gs://pp-samplebucket/gpt2-medium-1.5gb.zip`
## Steps to import model file from Google Cloud Storage
### Step 1: Add Model in your workspace.
* Navigate to your desired workspace in Inferless and Click on `"Add a custom model" `button that you see on the top right. An import wizard will open up.
### Step 2: Choose the source of your model.
* Since we are using a model from GCS in this example, select `Google Cloud Storage` as the method of upload.
# Cloud Buckets - S3/ GCS
Source: https://docs.inferless.com/integrations/cloud-buckets/cloud-buckets---s3--gcs
### Import from S3
Once you have made sure the model file structure is in the right format, you can upload the model to Inferless using the`"Import Model"`option.
* Choose the source as `"File"` and choose` "Cloud repository"`
* Choose AWS, authenticate, and connect your AWS Account.
* Enter `Model Name` and paste the `S3 Url` link from AWS Sagemaker
* Sample S3 link - **s3://infer-global-models/sample-module/gpt2-medium-1.5gb.zip**
* Make sure you follow the folder structure as described [here](/model-import/file-structure-requirements) while creating the Zip.
* Make sure to enter the input and output parameters as JSON required for the model.
* Proceed with the configuration and load the model into Inferless.
### Import From Google Cloud buckets
Once you have made sure the model file structure is in the right format, you can upload the model to Inferless using the`"Import Model"`option.
* Choose the source as `"File"` and Choose` "Cloud repository"`
* Choose GCP, authenticate and connect your GCP Account.
* Enter `Model Name` and paste the `Artifact Link `link from GCP Cloud Bucket.
* A Sample of an artifact link is - **gs\://pp-samplebucket/gpt2-medium-1.5gb.zip**
* Make sure you follow the folder structure as described [here](/model-import/file-structure-requirements) while creating the Zip.
* Make sure to enter the input and output parameters as JSON required for the model (View here for more Infor).
* Proceed and load the model into Inferless.
# Demo GCS
Source: https://docs.inferless.com/integrations/cloud-buckets/demo-gcs
## Pre Requisite: Note the GCS Link from GCP
* You would need to note down the GCS Link of the Model file from GCP. A sample of how the S3 link is like -> `gs://pp-samplebucket/gpt2-medium-1.5gb.zip`
## Steps to import model file from Google Cloud Storage
### Step 1: Add Model in your workspace.
* Navigate to your desired workspace in Inferless and Click on `"Add a custom model" `button that you see on the top right. An import wizard will open up.
### Step 2: Choose the source of your model.
* Since we are using a model from GCS in this example, select `Google Cloud Storage` as the method of upload.
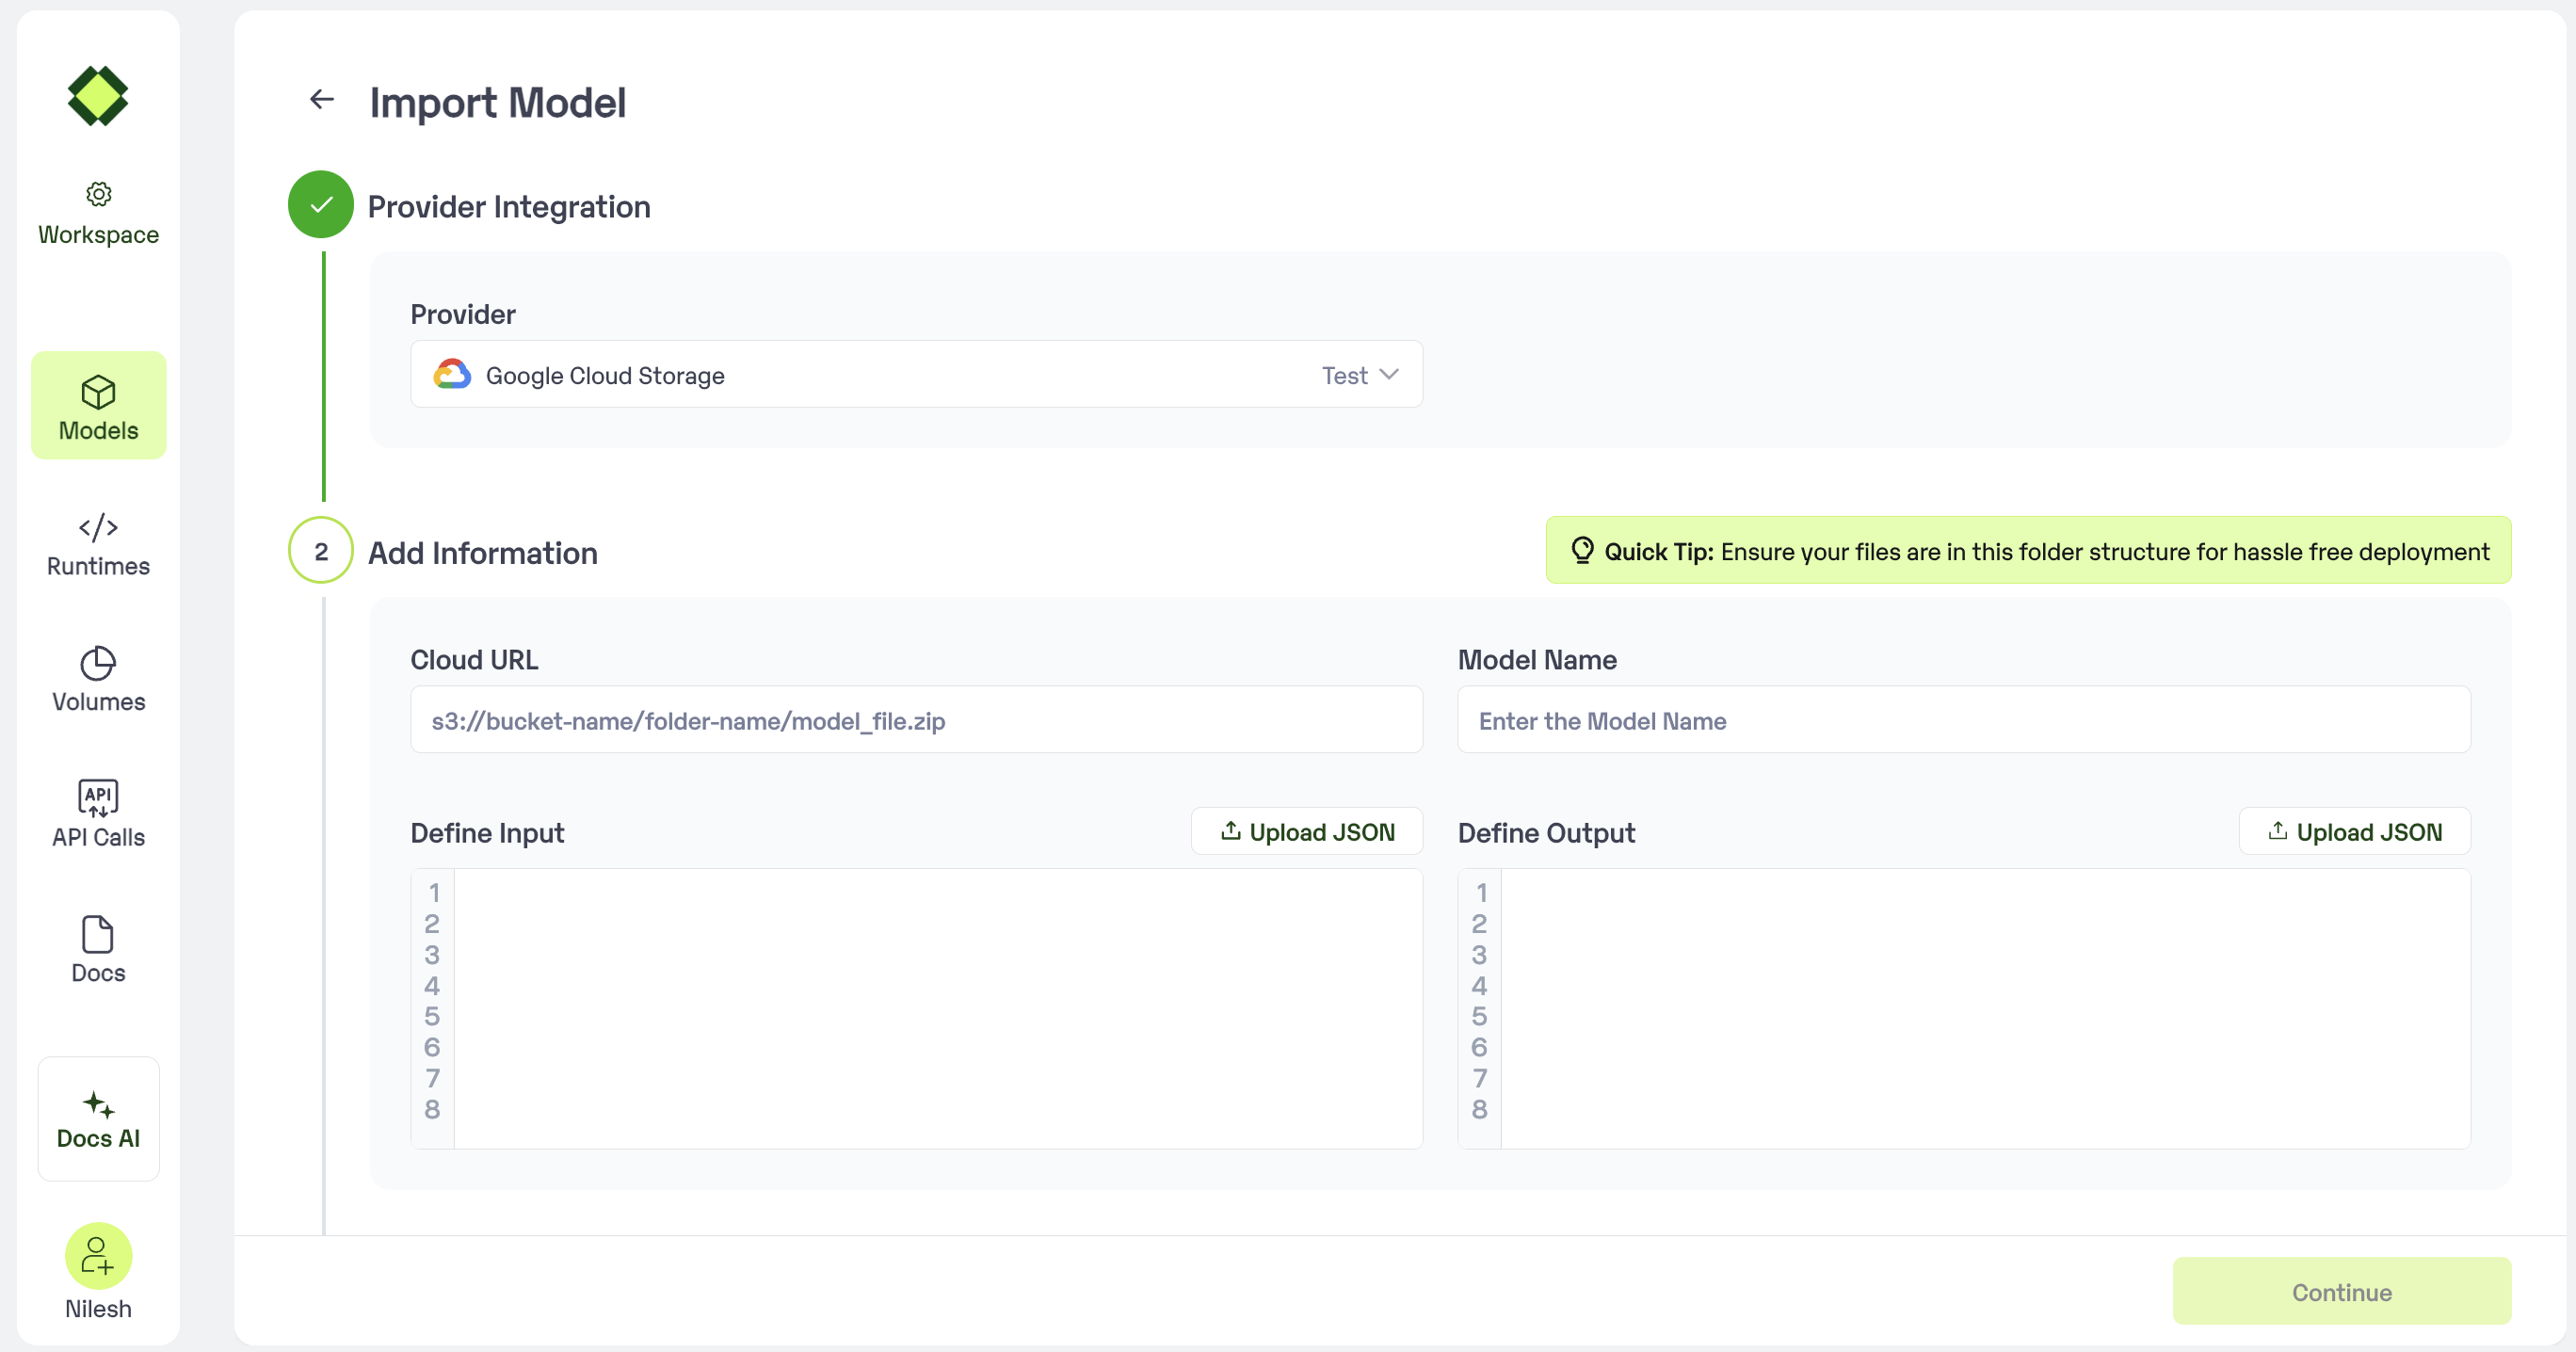 ### Step 3: Enter the model details
* Provide the `Cloud URL`, which is a GCS Link of the Model file from GCP.
* **Model Name:** The desired name of the model that you wish to give.
* **Sample Input:** Enter an example of how the input should be formatted for the model in JSON format.
* **Sample Output:** Enter an example of how the output would be formatted for the model in JSON format.
### Step 3: Enter the model details
* Provide the `Cloud URL`, which is a GCS Link of the Model file from GCP.
* **Model Name:** The desired name of the model that you wish to give.
* **Sample Input:** Enter an example of how the input should be formatted for the model in JSON format.
* **Sample Output:** Enter an example of how the output would be formatted for the model in JSON format.
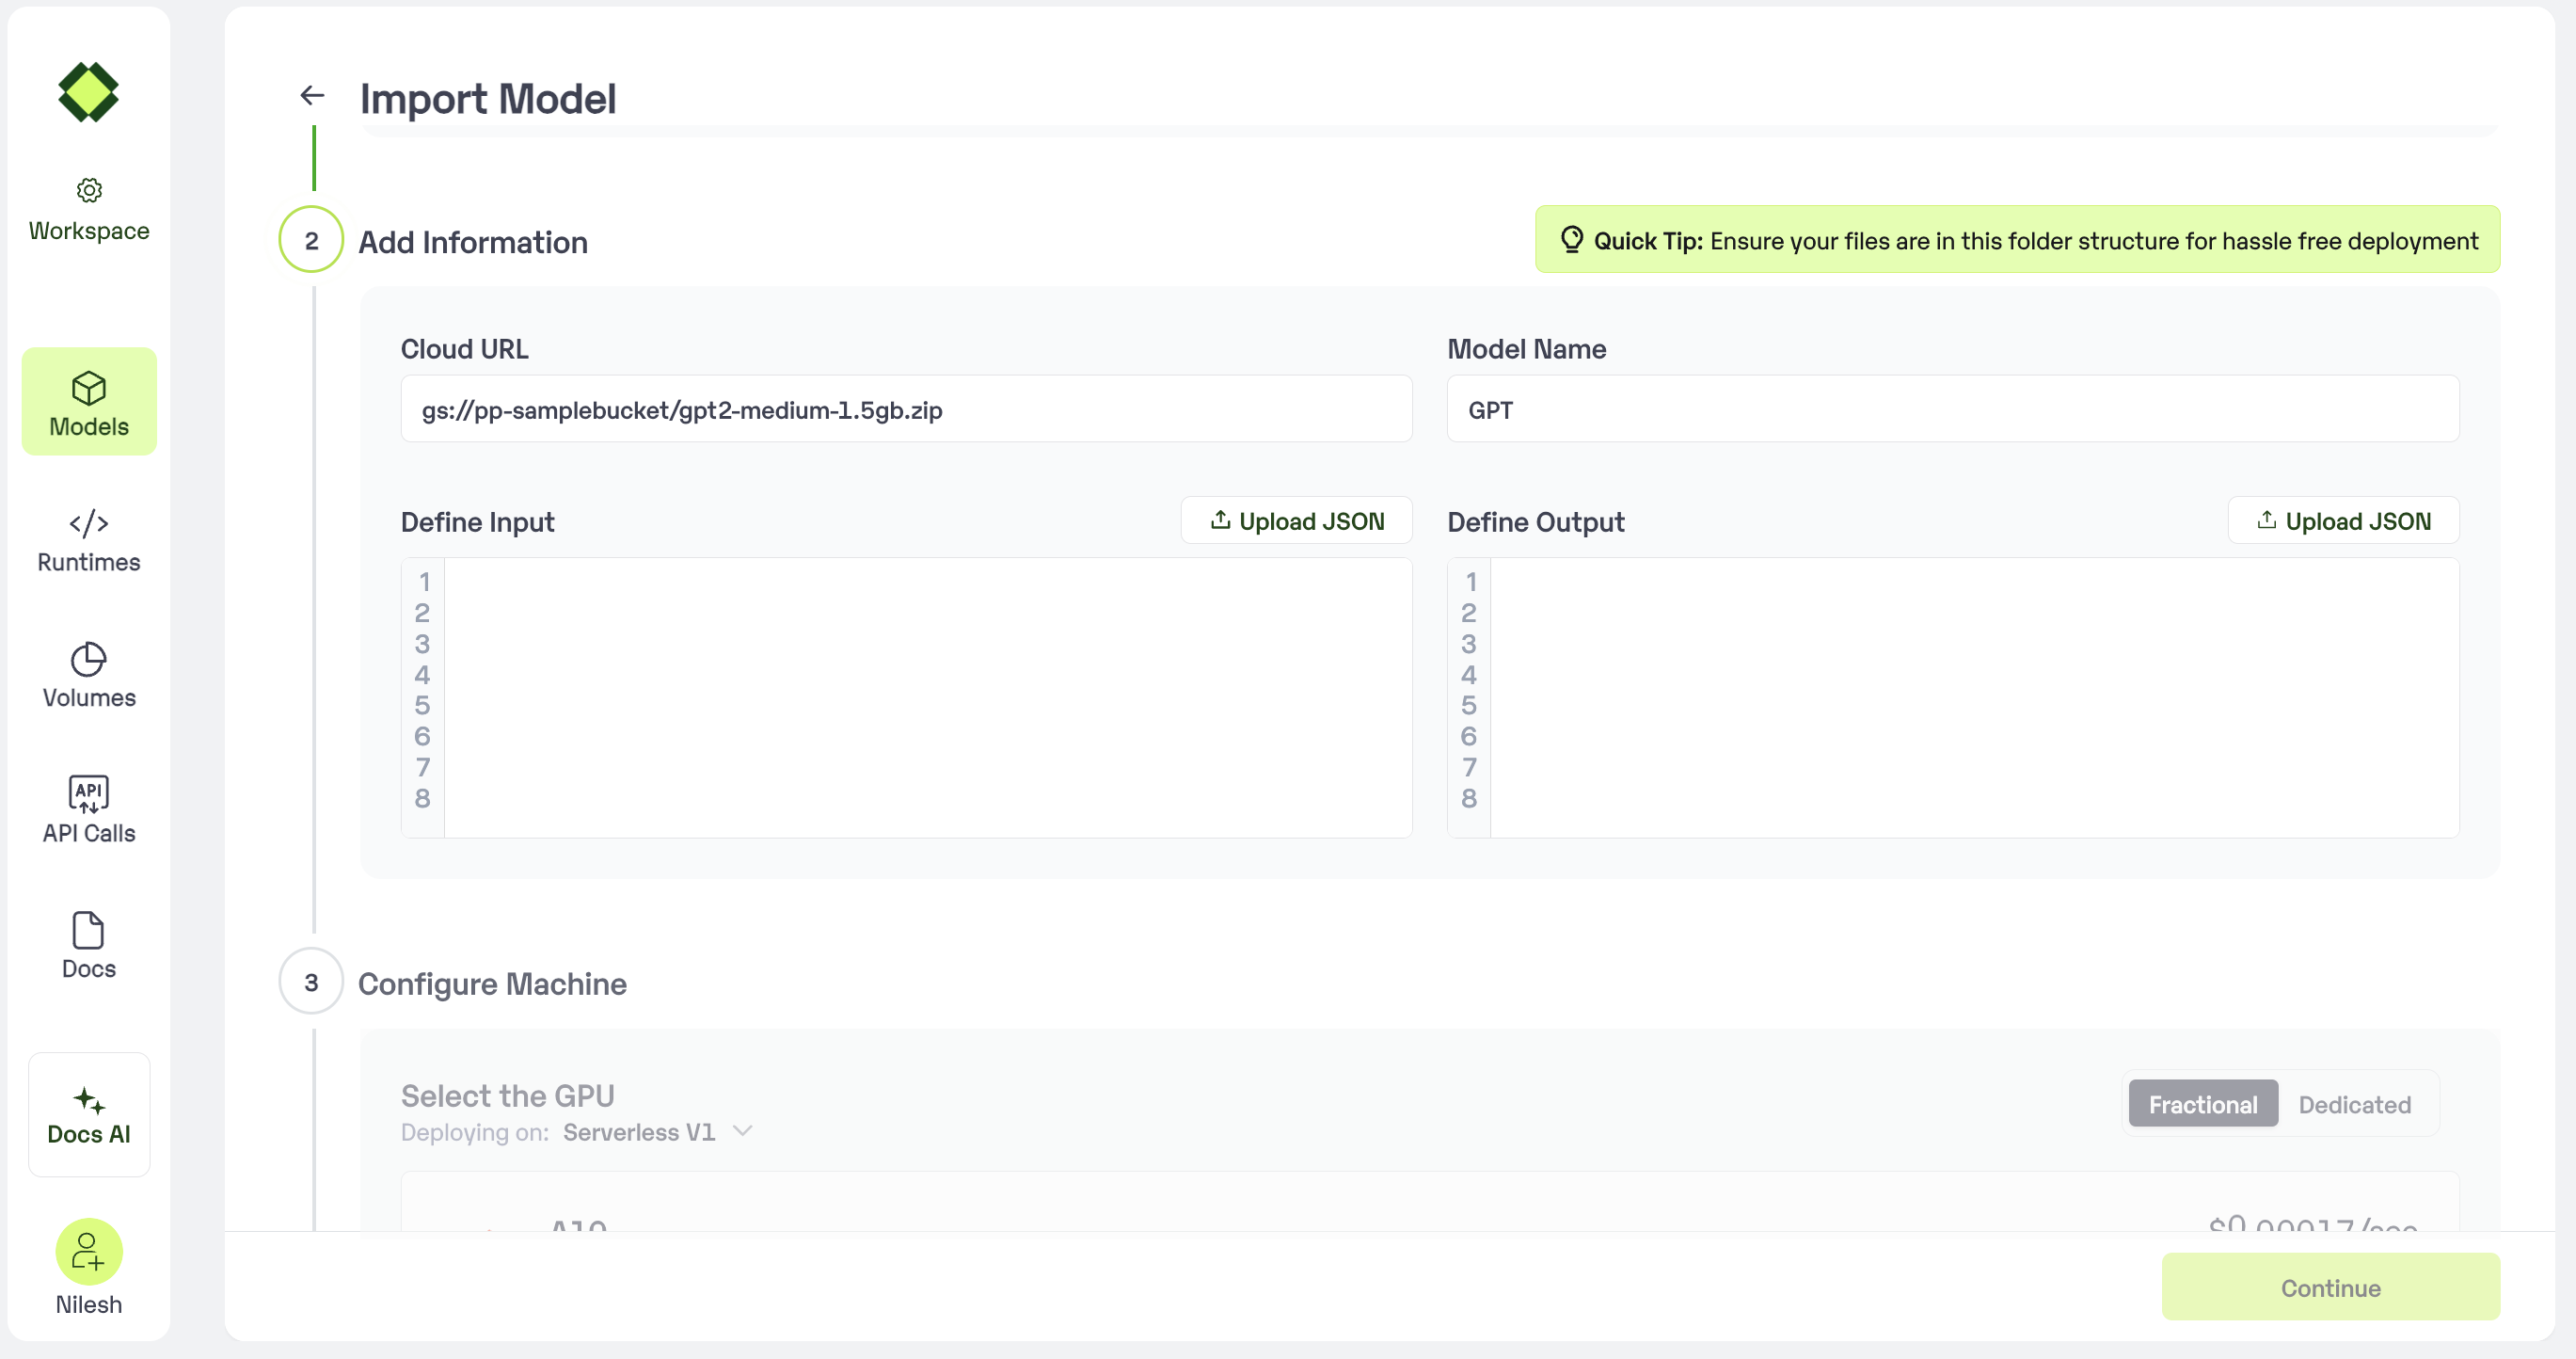 * In case you would like to set up `Automatic rebuild` for your model, enable it
* You would need to set up a webhook for this method. Click [here](/model-import/automatic-build-via-webhooks) for more details.
### Step 4: Configure Machine and Environment.
* Choose the type of machine, and specify the minimum and maximum number of replicas for deploying your model.
* **Min scale** -
```
The number of inference workers to keep on at all times.
```
* **Max scale -**
```
The maximum number of inference workers to allow at any point of time
```
* Configure Custom Runtime ( If you have pip or apt packages), choose Volume, Secrets and set Environment variables like Inference Timeout / Container Concurrency / Scale Down Timeout
### Step 5: Review your model details
* Once you click "Continue," you will be able to review the details added for the model.
* If you would like to make any changes, you can go back and make the changes.
* Once you have reviewed everything, click `Deploy` to start the model import process.
### Step 6 : Run your model
* Once you click submit, the model import process would start.
* It may take some time to complete the import process, and during this time, you will be redirected to your workspace and can see the status of the import under `"In Progress/Failed"` tab.\
* If you encounter any errors during the model import process or if you want to view the build logs for any reason, you can click on the three dots menu and select "View build logs". This will show you a detailed log of the import process, which can help you troubleshoot any issues you may encounter.
* Post-upload, the model will be available under "My Models"
* You can then select the model and go to `-> API -> Inference Endpoint details. `Here you would find the API endpoints that can be called. You can click on the copy button on the right and can call your model.
### Extra Step: Getting API key details
* You can now call using this from your end. The inference result would be the output for these calls.
* In case you need help with API Keys:
* Click on settings, available on the top, next to your Workspace Name
* Click on "Workspace API keys"
* You can view the details of your key or generate a new one\
* In case you would like to set up `Automatic rebuild` for your model, enable it
* You would need to set up a webhook for this method. Click [here](/model-import/automatic-build-via-webhooks) for more details.
### Step 4: Configure Machine and Environment.
* Choose the type of machine, and specify the minimum and maximum number of replicas for deploying your model.
* **Min scale** -
```
The number of inference workers to keep on at all times.
```
* **Max scale -**
```
The maximum number of inference workers to allow at any point of time
```
* Configure Custom Runtime ( If you have pip or apt packages), choose Volume, Secrets and set Environment variables like Inference Timeout / Container Concurrency / Scale Down Timeout
### Step 5: Review your model details
* Once you click "Continue," you will be able to review the details added for the model.
* If you would like to make any changes, you can go back and make the changes.
* Once you have reviewed everything, click `Deploy` to start the model import process.
### Step 6 : Run your model
* Once you click submit, the model import process would start.
* It may take some time to complete the import process, and during this time, you will be redirected to your workspace and can see the status of the import under `"In Progress/Failed"` tab.\
* If you encounter any errors during the model import process or if you want to view the build logs for any reason, you can click on the three dots menu and select "View build logs". This will show you a detailed log of the import process, which can help you troubleshoot any issues you may encounter.
* Post-upload, the model will be available under "My Models"
* You can then select the model and go to `-> API -> Inference Endpoint details. `Here you would find the API endpoints that can be called. You can click on the copy button on the right and can call your model.
### Extra Step: Getting API key details
* You can now call using this from your end. The inference result would be the output for these calls.
* In case you need help with API Keys:
* Click on settings, available on the top, next to your Workspace Name
* Click on "Workspace API keys"
* You can view the details of your key or generate a new one\
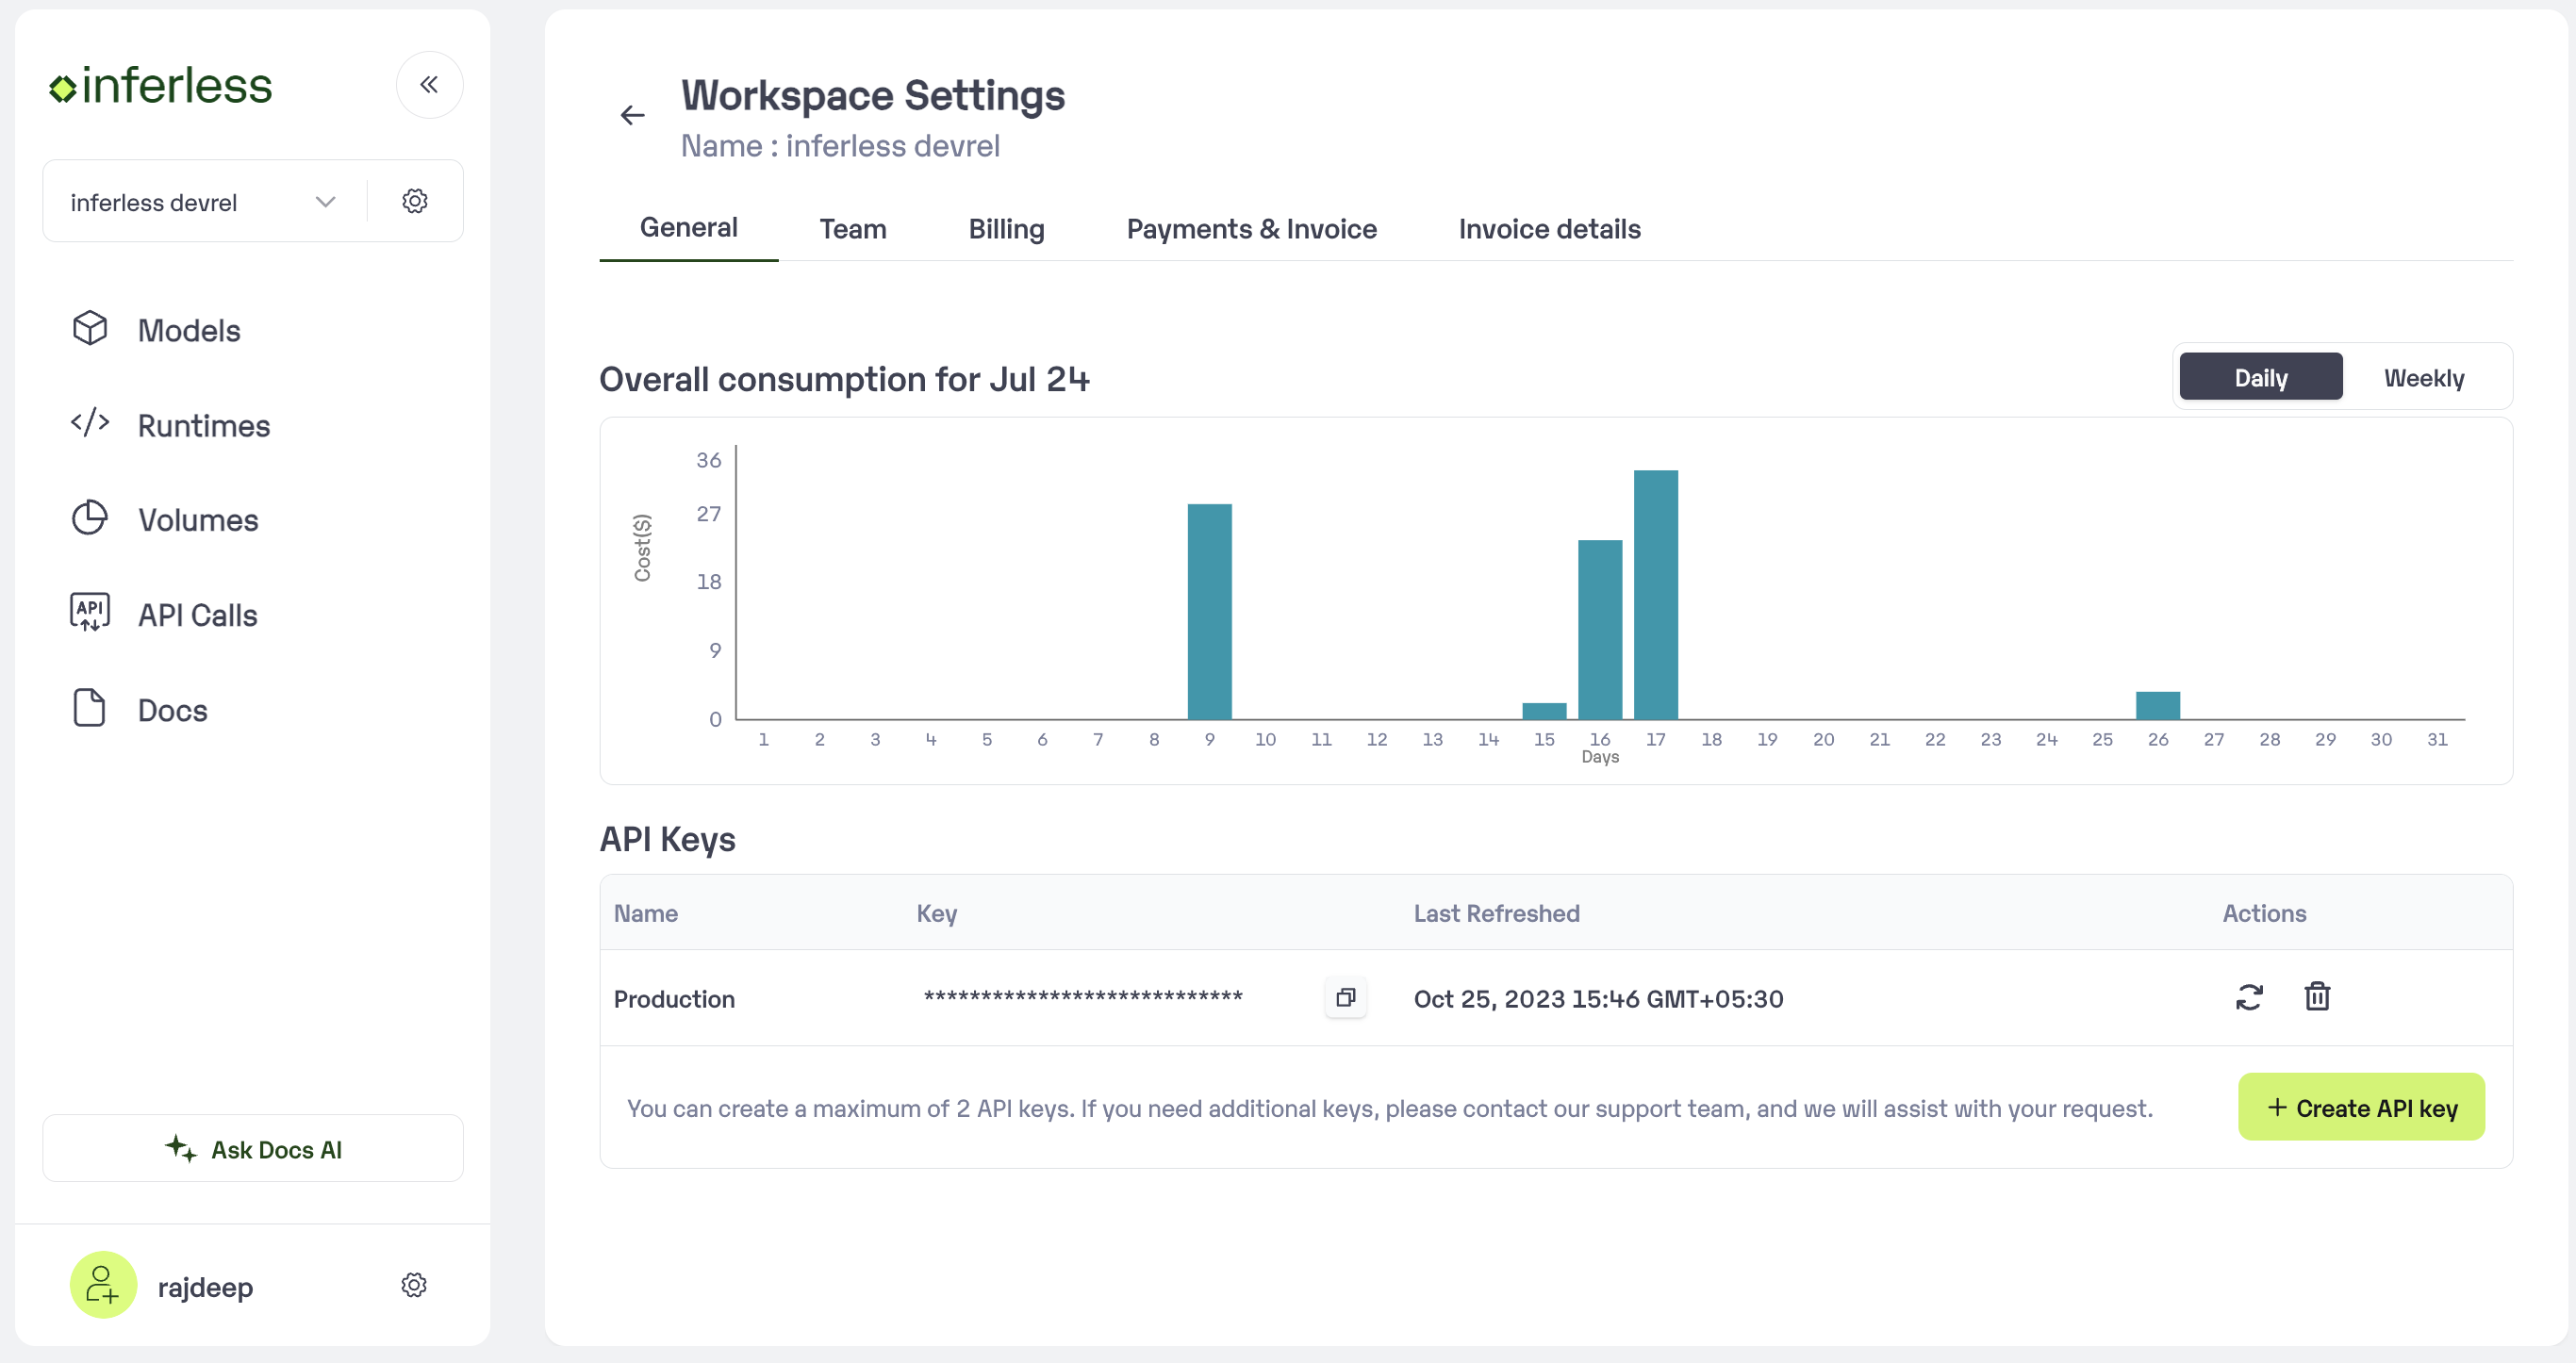 ### Using CLI
Make sure you follow this below folder structure in the zip file
```json
.
|--config.pbtxt (optional)
|--input.json
|--output.json
|--1/
|--|--model.xxx ( pt/onnx/tf )
```
1. Connect your [Google cloud storage](https://aws.amazon.com/s3/) account using this below command and enter the name, access-key and secret-key
```bash
inferless integration add GCS --name
### Step 2: Choose the source of your model.
* Since we are using a model from AWS S3 in this example, select `AWS S3` as the method of uploading.
* To proceed with the upload, you will need to connect your `AWS account`. This is a mandatory step as this helps us download the file from your AWS account.
### Using CLI
Make sure you follow this below folder structure in the zip file
```json
.
|--config.pbtxt (optional)
|--input.json
|--output.json
|--1/
|--|--model.xxx ( pt/onnx/tf )
```
1. Connect your [Google cloud storage](https://aws.amazon.com/s3/) account using this below command and enter the name, access-key and secret-key
```bash
inferless integration add GCS --name
### Step 2: Choose the source of your model.
* Since we are using a model from AWS S3 in this example, select `AWS S3` as the method of uploading.
* To proceed with the upload, you will need to connect your `AWS account`. This is a mandatory step as this helps us download the file from your AWS account.
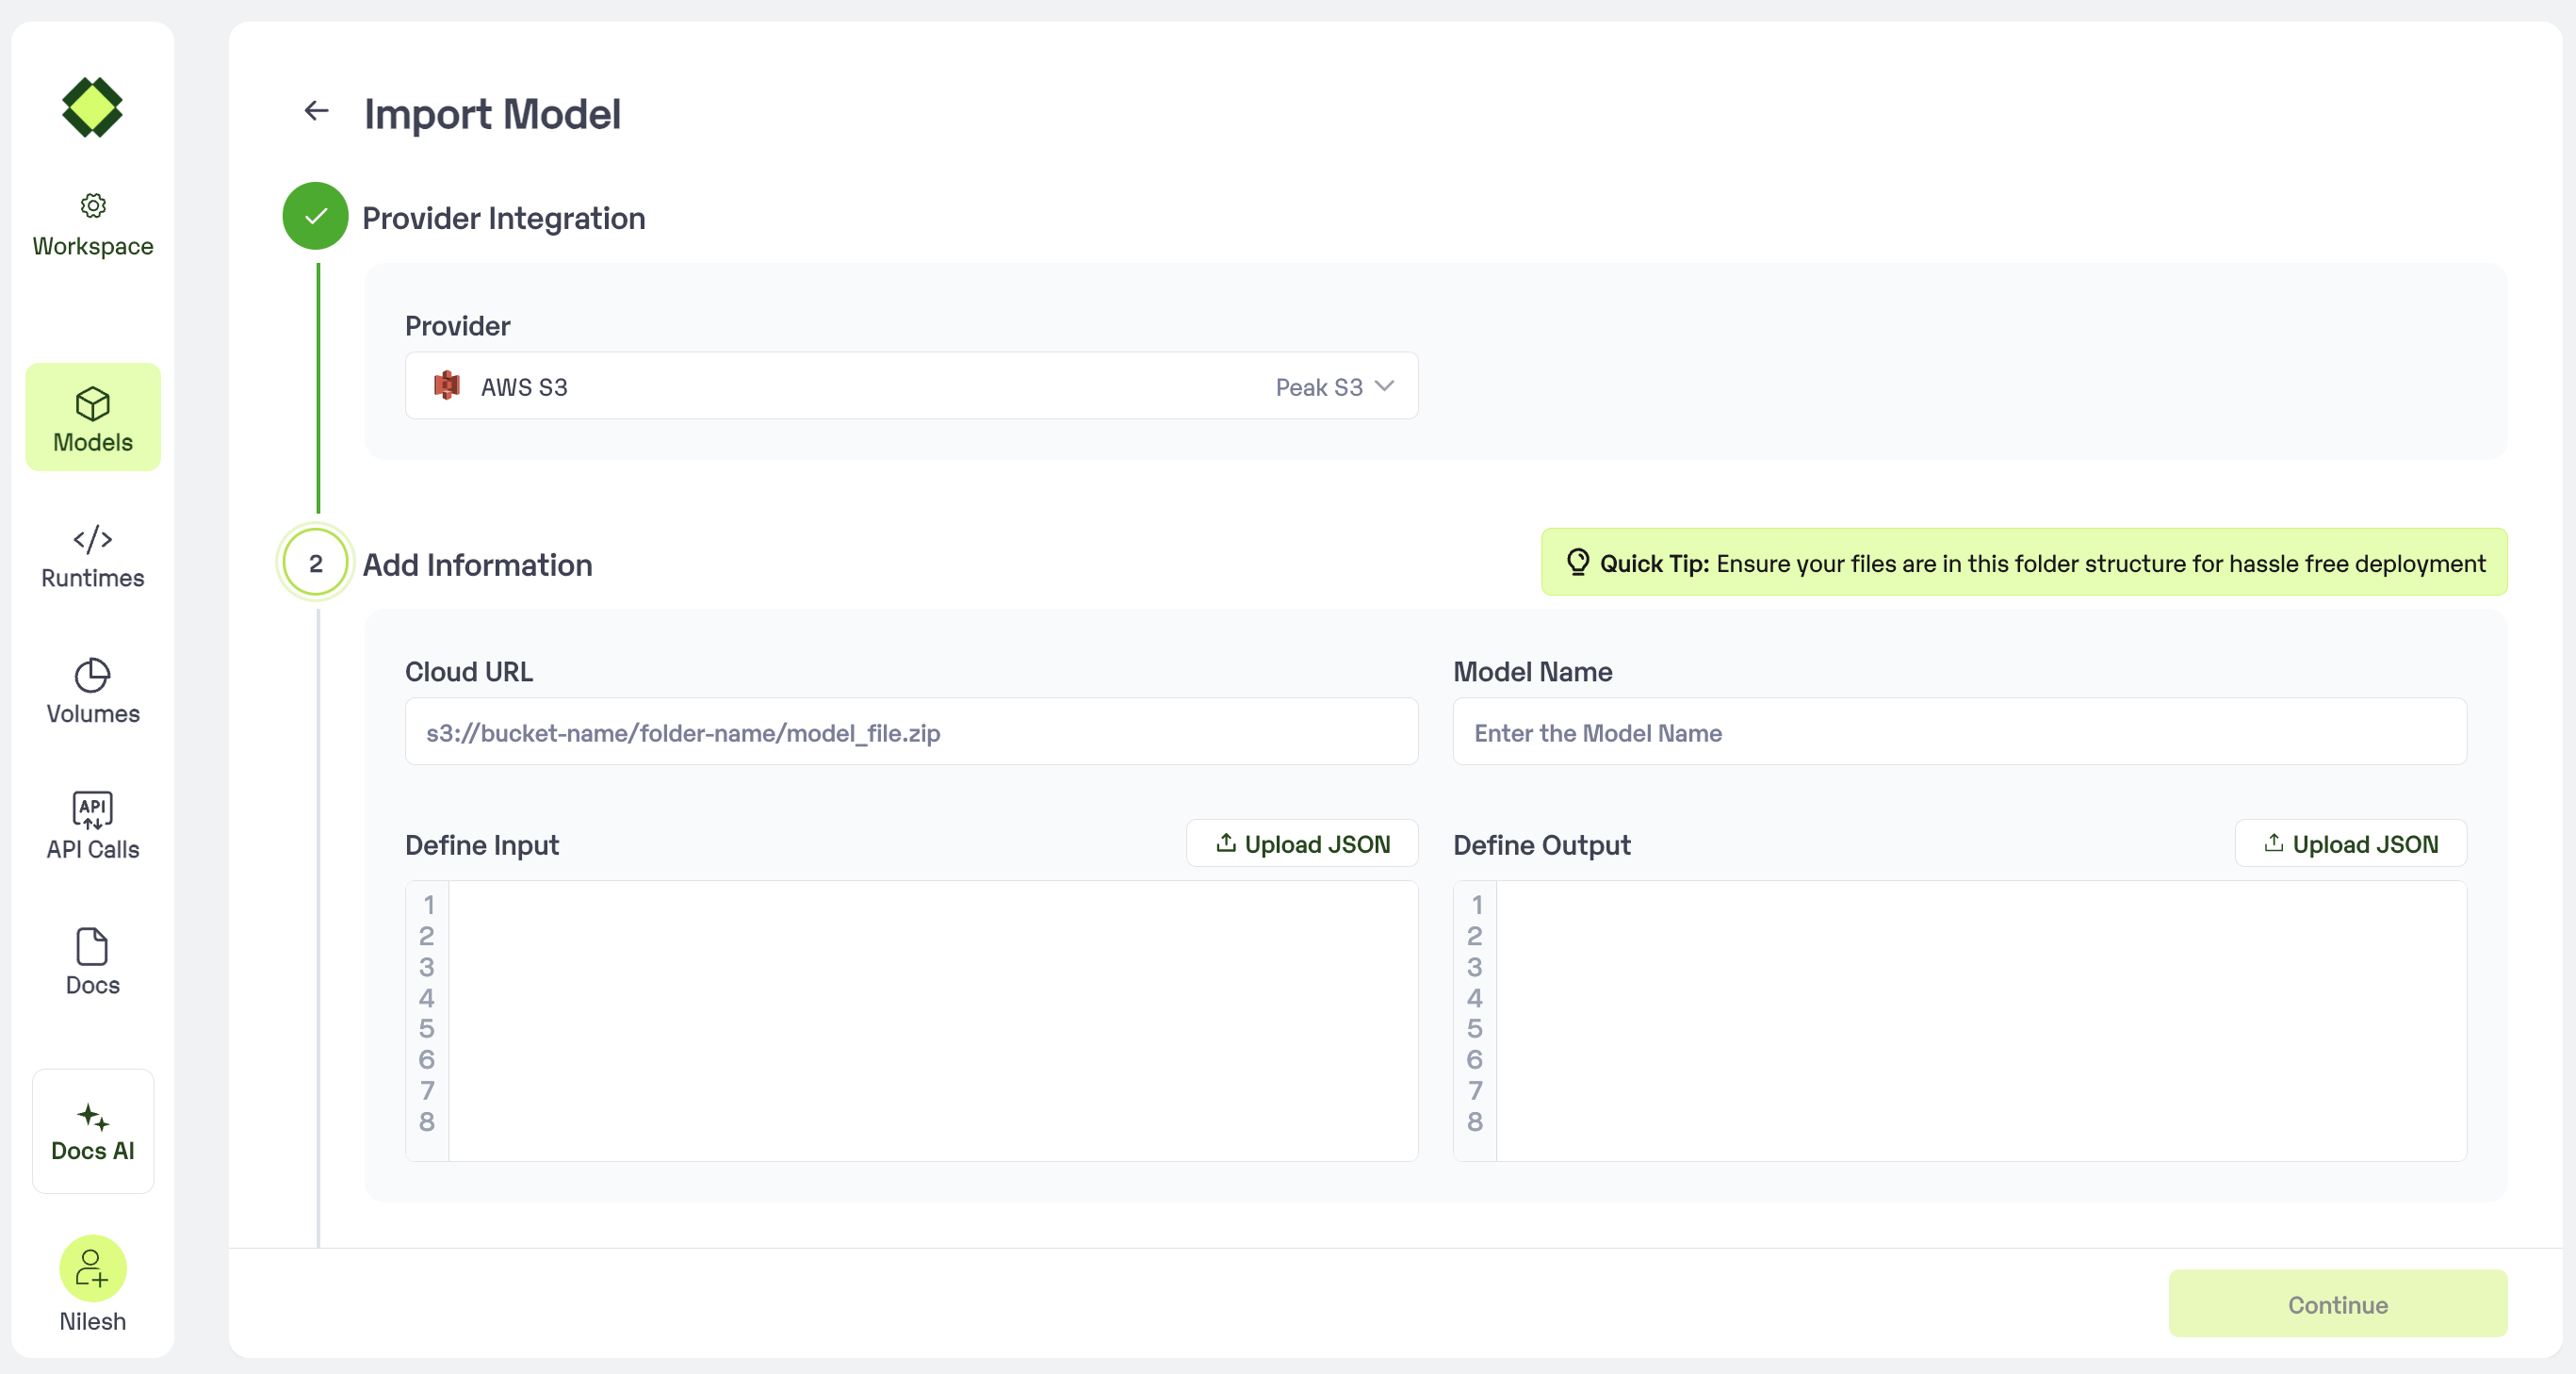 ### Step 3: Enter the model details
* Provide the `Cloud URL`, which is a S3 Link of the Model file from AWS.
* **Model Name:** The desired name of the model that you wish to give.
* **Sample Input:** Enter an example of how the input should be formatted for the model in JSON format.
* **Sample Output:** Enter an example of how the output would be formatted for the model in JSON format.
### Step 3: Enter the model details
* Provide the `Cloud URL`, which is a S3 Link of the Model file from AWS.
* **Model Name:** The desired name of the model that you wish to give.
* **Sample Input:** Enter an example of how the input should be formatted for the model in JSON format.
* **Sample Output:** Enter an example of how the output would be formatted for the model in JSON format.
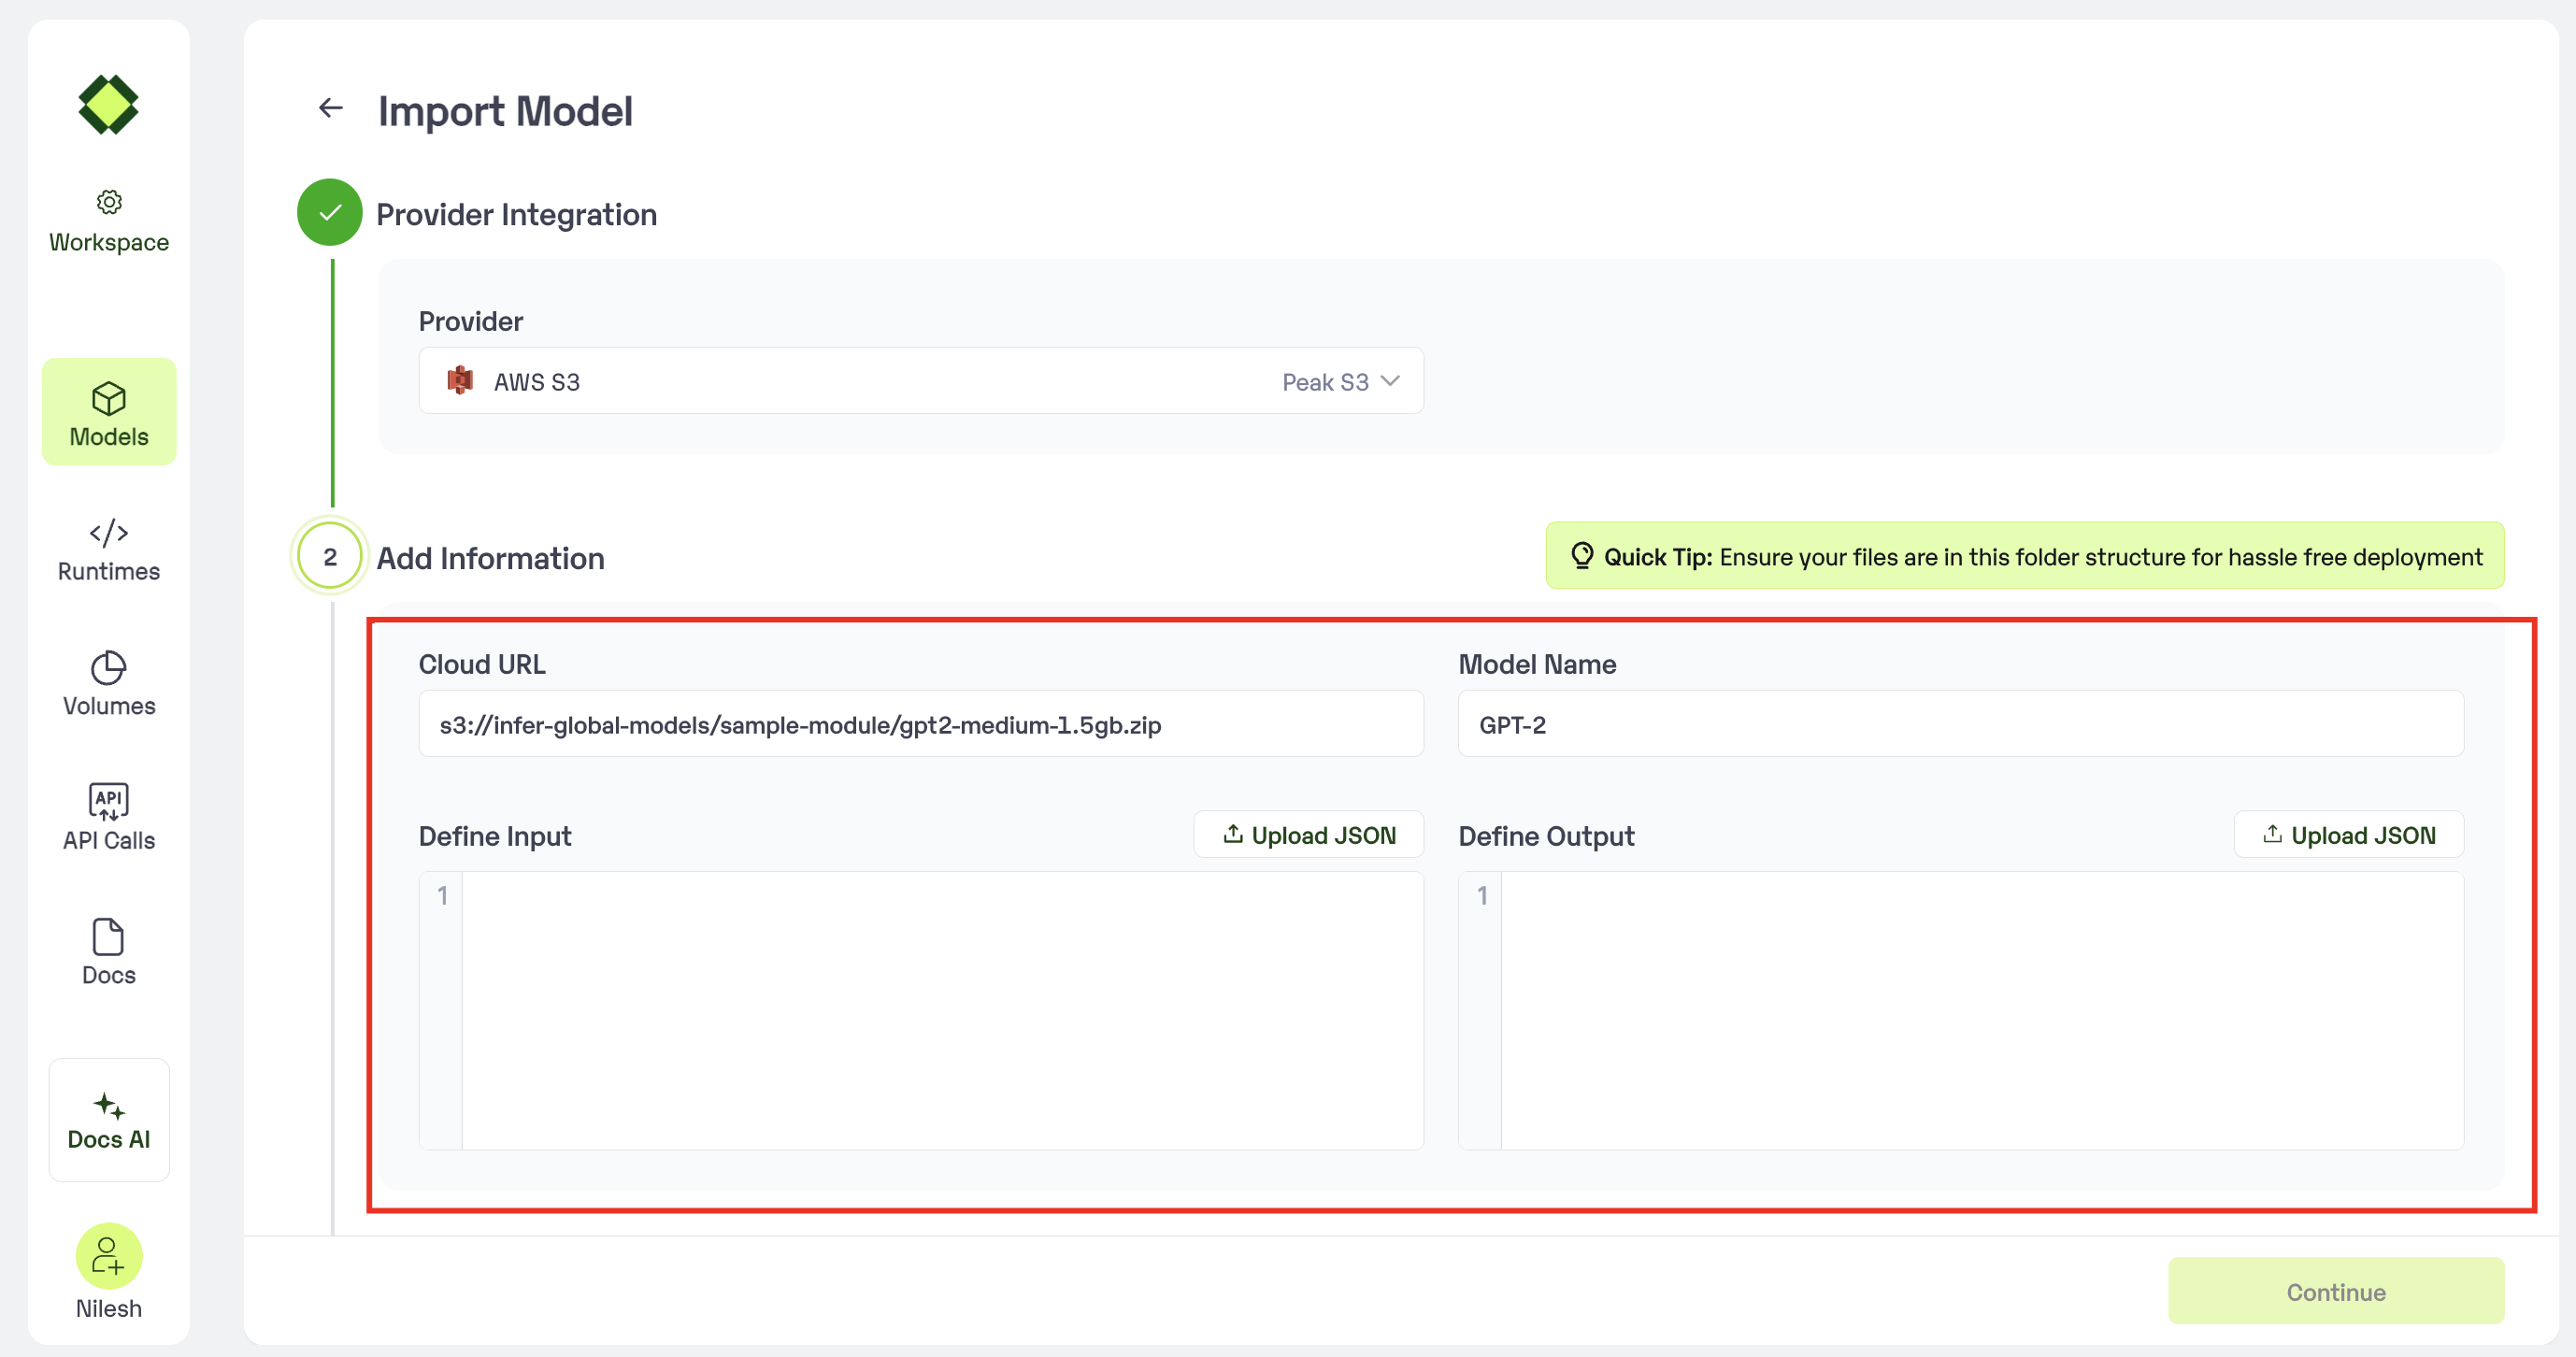 * In case you would like to set up `Automatic rebuild` for your model, enable it
* You would need to set up a webhook for this method. Click [here](/model-import/automatic-build-via-webhooks) for more details.
### Step 4: Configure Machine and Environment.
* Choose the type of machine, and specify the minimum and maximum number of replicas for deploying your model.
* **Min scale** -
```
The number of inference workers to keep on at all times.
```
* **Max scale -**
```
The maximum number of inference workers to allow at any point of time
```
* Configure Custom Runtime ( If you have pip or apt packages), choose Volume, Secrets and set Environment variables like Inference Timeout / Container Concurrency / Scale Down Timeout
### Step 5: Review your model details
* Once you click "Continue," you will be able to review the details added for the model.
* If you would like to make any changes, you can go back and make the changes.
* Once you have reviewed everything, click `Deploy` to start the model import process.
### Step 6 : Run your model
* Once you click submit, the model import process would start.
* It may take some time to complete the import process, and during this time, you will be redirected to your workspace and can see the status of the import under `"In Progress/Failed"` tab.\
* If you encounter any errors during the model import process or if you want to view the build logs for any reason, you can click on the three dots menu and select "View build logs". This will show you a detailed log of the import process, which can help you troubleshoot any issues you may encounter.
* Post-upload, the model will be available under "My Models"
* You can then select the model and go to `-> API -> Inference Endpoint details. `Here you would find the API endpoints that can be called. You can click on the copy button on the right and can call your model.
### Extra Step: Getting API key details
* You can now call using this from your end. The inference result would be the output for these calls.
* In case you need help with API Keys:
* Click on settings, available on the top, next to your Workspace Name
* Click on "Workspace API keys"
* You can view the details of your key or generate a new one\
### Using CLI
Make sure you follow this below folder structure in the zip file
```json
.
|--config.pbtxt (optional)
|--input.json
|--output.json
|--1/
|--|--model.xxx ( pt/onnx/tf )
```
1. Connect your [AWS S3](https://aws.amazon.com/s3/) account using this below command and enter the name, access-key and secret-key
```bash
inferless integration add S3 --name
### Step 2: Choose the source of your model.
* Since we are using a model from Docker Hub, select `Docker Hub`as the method of upload from the `Provider` list.
* To proceed with the upload, you will need to connect your `Docker Hub account`. This is a mandatory step as this helps us download the image from your Docker Hub.
* In case you would like to set up `Automatic rebuild` for your model, enable it
* You would need to set up a webhook for this method. Click [here](/model-import/automatic-build-via-webhooks) for more details.
### Step 4: Configure Machine and Environment.
* Choose the type of machine, and specify the minimum and maximum number of replicas for deploying your model.
* **Min scale** -
```
The number of inference workers to keep on at all times.
```
* **Max scale -**
```
The maximum number of inference workers to allow at any point of time
```
* Configure Custom Runtime ( If you have pip or apt packages), choose Volume, Secrets and set Environment variables like Inference Timeout / Container Concurrency / Scale Down Timeout
### Step 5: Review your model details
* Once you click "Continue," you will be able to review the details added for the model.
* If you would like to make any changes, you can go back and make the changes.
* Once you have reviewed everything, click `Deploy` to start the model import process.
### Step 6 : Run your model
* Once you click submit, the model import process would start.
* It may take some time to complete the import process, and during this time, you will be redirected to your workspace and can see the status of the import under `"In Progress/Failed"` tab.\
* If you encounter any errors during the model import process or if you want to view the build logs for any reason, you can click on the three dots menu and select "View build logs". This will show you a detailed log of the import process, which can help you troubleshoot any issues you may encounter.
* Post-upload, the model will be available under "My Models"
* You can then select the model and go to `-> API -> Inference Endpoint details. `Here you would find the API endpoints that can be called. You can click on the copy button on the right and can call your model.
### Extra Step: Getting API key details
* You can now call using this from your end. The inference result would be the output for these calls.
* In case you need help with API Keys:
* Click on settings, available on the top, next to your Workspace Name
* Click on "Workspace API keys"
* You can view the details of your key or generate a new one\
### Using CLI
Make sure you follow this below folder structure in the zip file
```json
.
|--config.pbtxt (optional)
|--input.json
|--output.json
|--1/
|--|--model.xxx ( pt/onnx/tf )
```
1. Connect your [AWS S3](https://aws.amazon.com/s3/) account using this below command and enter the name, access-key and secret-key
```bash
inferless integration add S3 --name
### Step 2: Choose the source of your model.
* Since we are using a model from Docker Hub, select `Docker Hub`as the method of upload from the `Provider` list.
* To proceed with the upload, you will need to connect your `Docker Hub account`. This is a mandatory step as this helps us download the image from your Docker Hub.
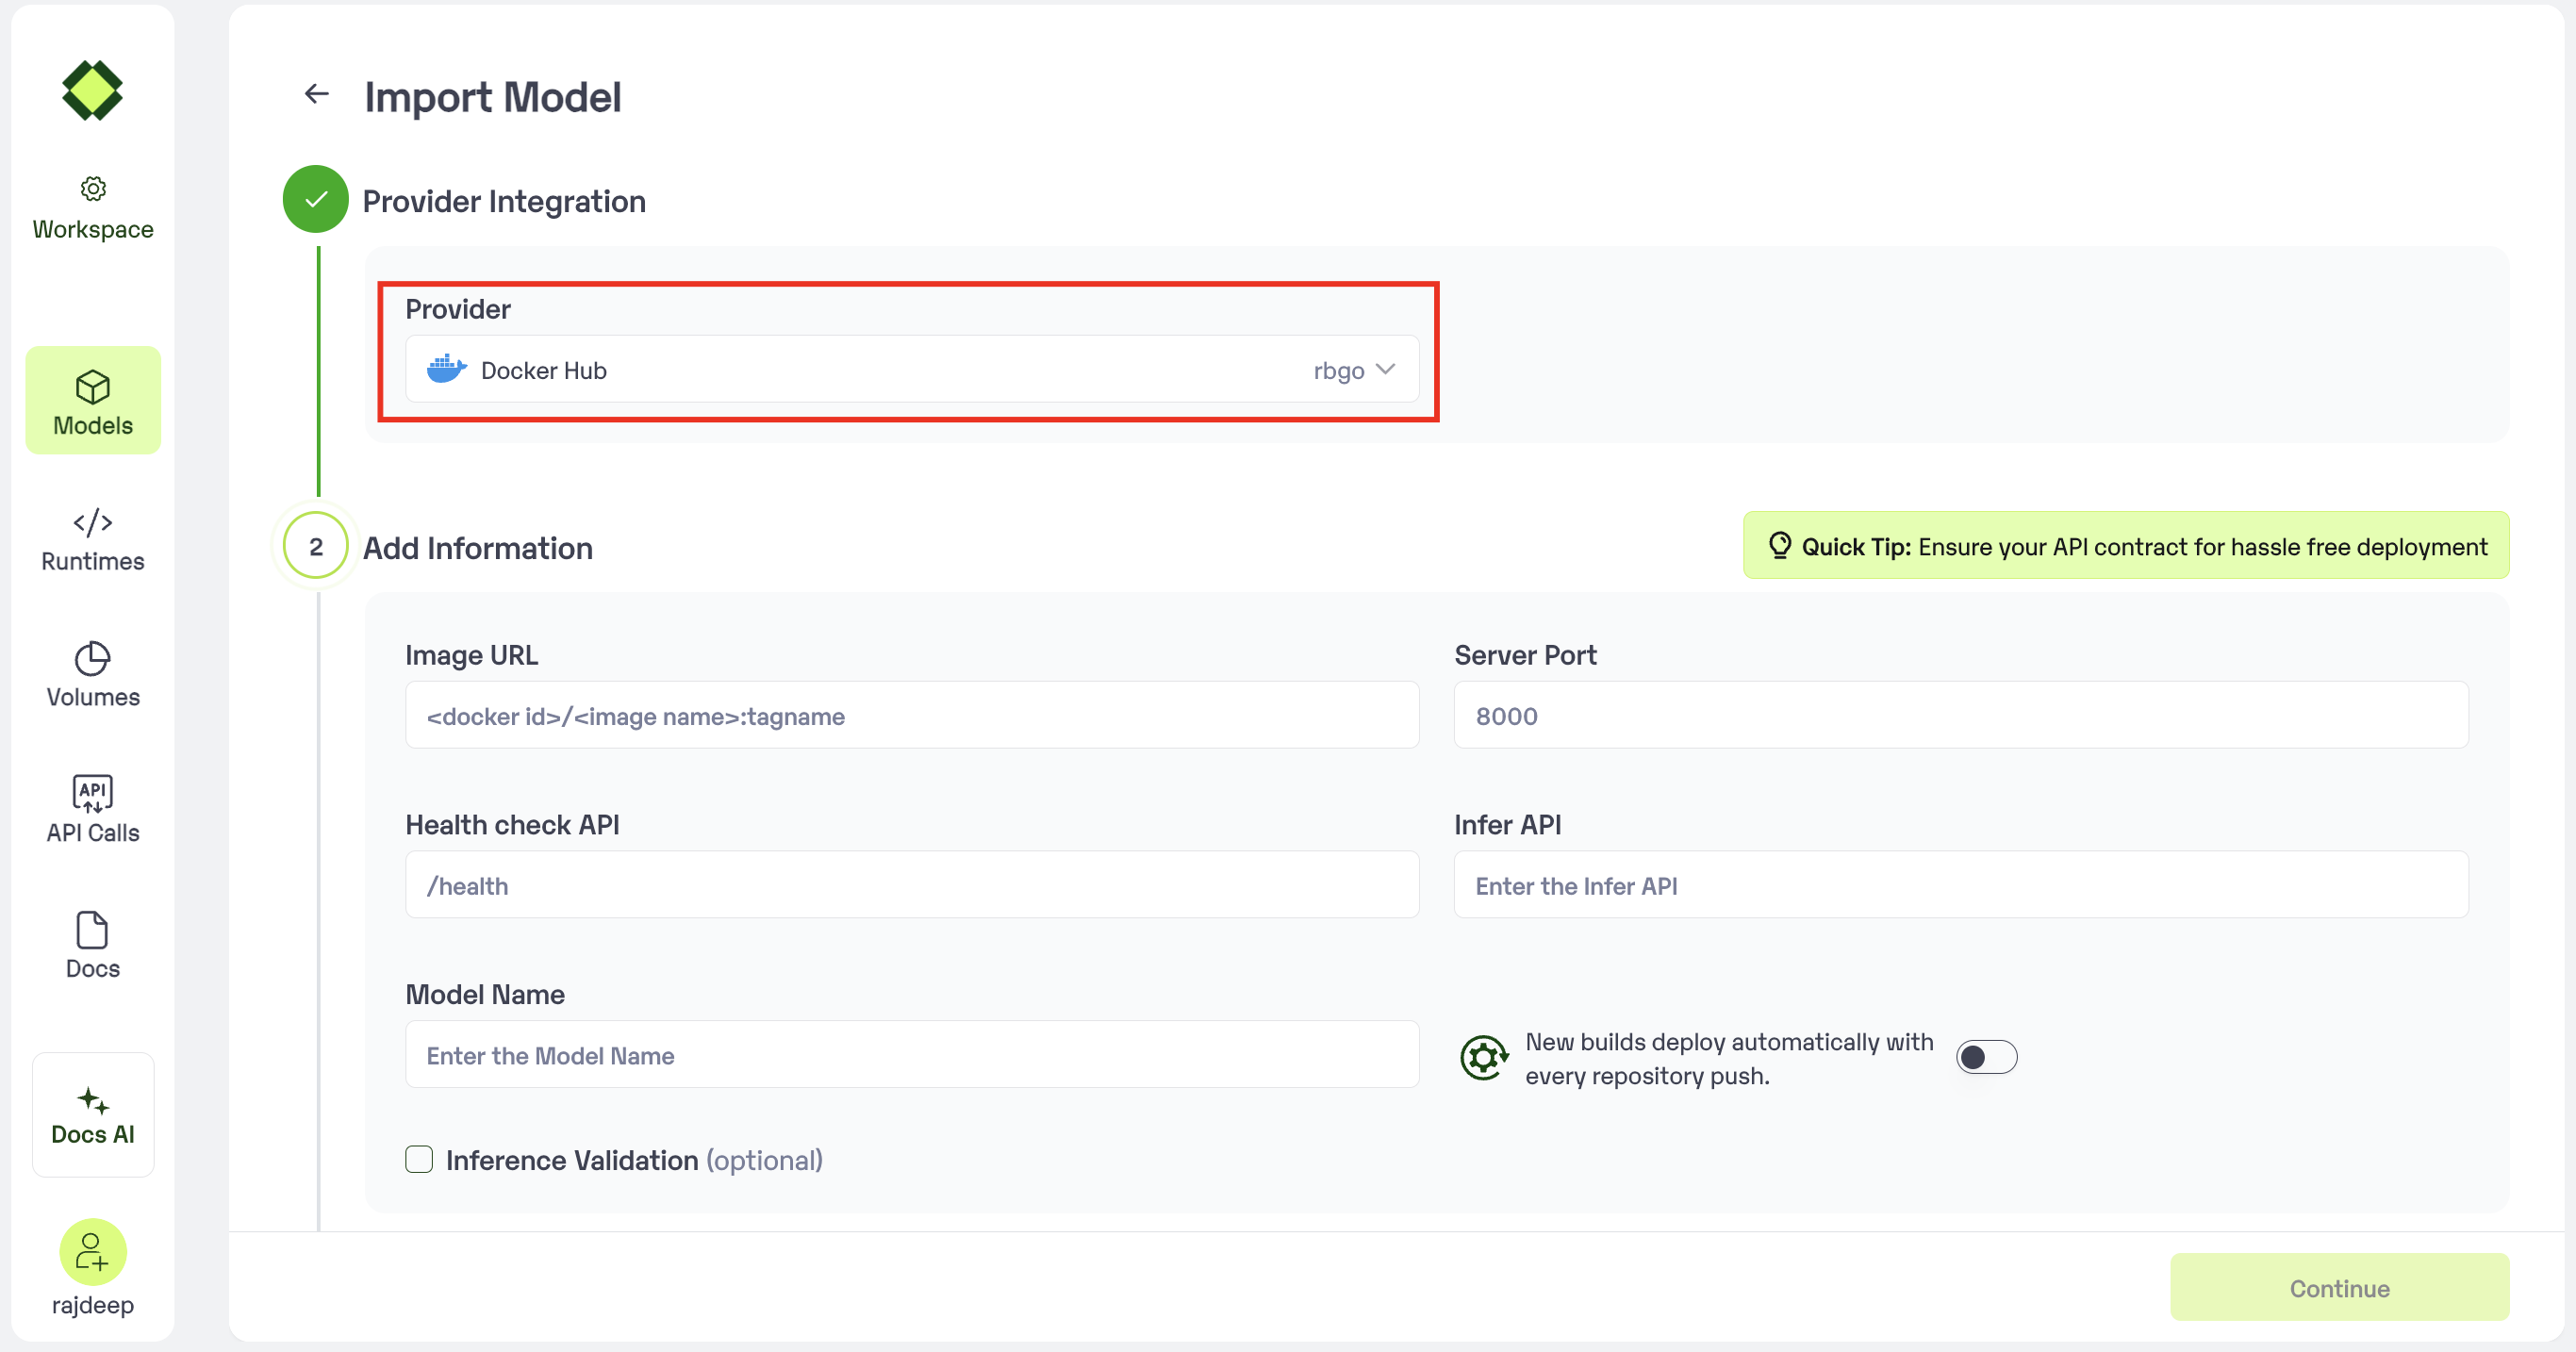 ### Step 3: Enter the model details
* Provide the details of `Image URL`, `Health check API`, `Infer API` and `Server Port`
* `Model Name`: The desired name of the model that you wish to give
### Step 3: Enter the model details
* Provide the details of `Image URL`, `Health check API`, `Infer API` and `Server Port`
* `Model Name`: The desired name of the model that you wish to give
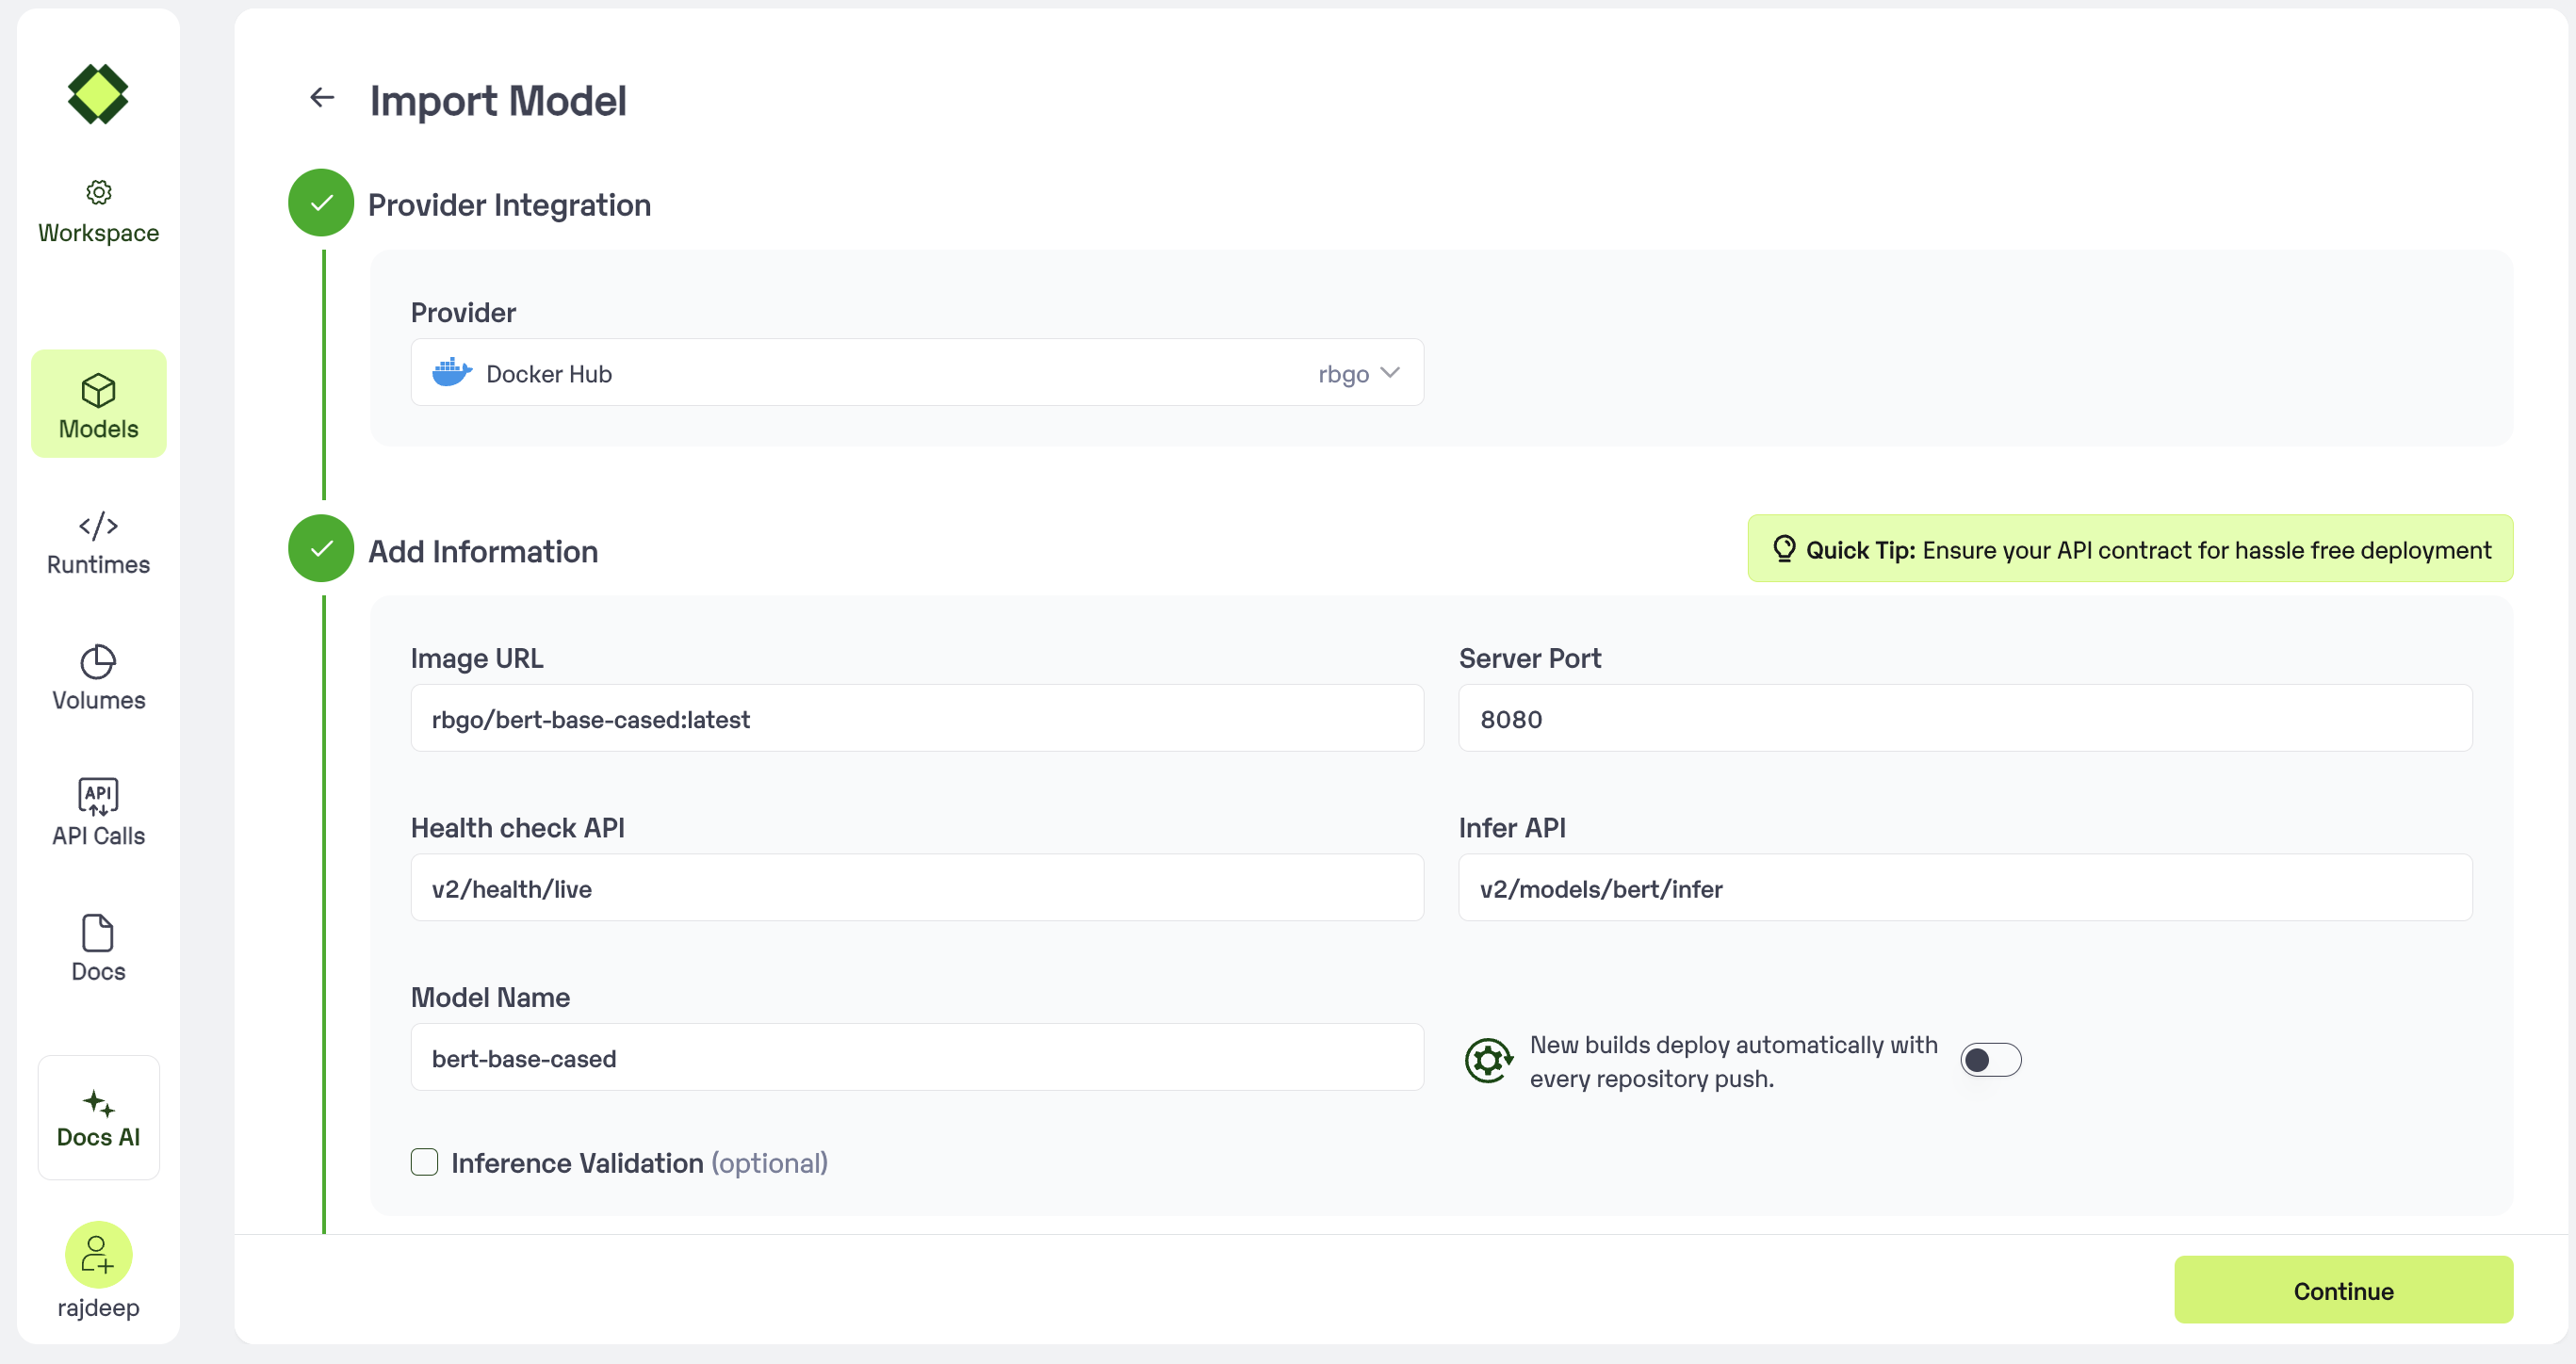 * In case you would like to set up `Automatic rebuild` for your model, enable it
* You would need to set up a webhook for this method. Click [here](/model-import/automatic-build-via-webhooks) for more details.
### Step 4: Configure Machine and Environment.
* Choose the type of machine, and specify the minimum and maximum number of replicas for deploying your model.
* **Min scale** -
```
The number of inference workers to keep on at all times.
```
* **Max scale -**
```
The maximum number of inference workers to allow at any point of time
```
* Configure Custom Runtime ( If you have pip or apt packages), choose Volume, Secrets and set Environment variables like Inference Timeout / Container Concurrency / Scale Down Timeout
### Step 5: Review your model details
* Once you click "Continue," you will be able to review the details added for the model.
* If you would like to make any changes, you can go back and make the changes.
* Once you have reviewed everything, click `Deploy` to start the model import process.
### Step 6 : Run your model
* Once you click submit, the model import process would start.
* It may take some time to complete the import process, and during this time, you will be redirected to your workspace and can see the status of the import under `"In Progress/Failed"` tab.\
* If you encounter any errors during the model import process or if you want to view the build logs for any reason, you can click on the three dots menu and select "View build logs". This will show you a detailed log of the import process, which can help you troubleshoot any issues you may encounter.
* Post-upload, the model will be available under "My Models"
* You can then select the model and go to `-> API -> Inference Endpoint details. `Here you would find the API endpoints that can be called. You can click on the copy button on the right and can call your model.
### Extra Step: Getting API key details
* You can now call using this from your end. The inference result would be the output for these calls.
* In case you need help with API Keys:
* Click on settings, available on the top, next to your Workspace Name
* Click on "Workspace API keys"
* You can view the details of your key or generate a new one\
### Using CLI
You can deploy the model with Inferless using docker image. Just make sure the image is stored either in dockerhub/ ecr
1. Connect your [Dockerhub](https://hub.docker.com/) account using this command(below) and enter the username and access token
```bash
inferless integration add dockerhub --name
### Step 2: Choose the source of your model.
* Since we are using a model from Dockerfile, select `Dockerfile`as the method of upload from the `Provider` list.
* To proceed with the upload, you will need to connect your `GitHub/GitLab account`. This is a mandatory step as this helps us get the file from your repository.
* In case you would like to set up `Automatic rebuild` for your model, enable it
* You would need to set up a webhook for this method. Click [here](/model-import/automatic-build-via-webhooks) for more details.
### Step 4: Configure Machine and Environment.
* Choose the type of machine, and specify the minimum and maximum number of replicas for deploying your model.
* **Min scale** -
```
The number of inference workers to keep on at all times.
```
* **Max scale -**
```
The maximum number of inference workers to allow at any point of time
```
* Configure Custom Runtime ( If you have pip or apt packages), choose Volume, Secrets and set Environment variables like Inference Timeout / Container Concurrency / Scale Down Timeout
### Step 5: Review your model details
* Once you click "Continue," you will be able to review the details added for the model.
* If you would like to make any changes, you can go back and make the changes.
* Once you have reviewed everything, click `Deploy` to start the model import process.
### Step 6 : Run your model
* Once you click submit, the model import process would start.
* It may take some time to complete the import process, and during this time, you will be redirected to your workspace and can see the status of the import under `"In Progress/Failed"` tab.\
* If you encounter any errors during the model import process or if you want to view the build logs for any reason, you can click on the three dots menu and select "View build logs". This will show you a detailed log of the import process, which can help you troubleshoot any issues you may encounter.
* Post-upload, the model will be available under "My Models"
* You can then select the model and go to `-> API -> Inference Endpoint details. `Here you would find the API endpoints that can be called. You can click on the copy button on the right and can call your model.
### Extra Step: Getting API key details
* You can now call using this from your end. The inference result would be the output for these calls.
* In case you need help with API Keys:
* Click on settings, available on the top, next to your Workspace Name
* Click on "Workspace API keys"
* You can view the details of your key or generate a new one\
### Using CLI
You can deploy the model with Inferless using docker image. Just make sure the image is stored either in dockerhub/ ecr
1. Connect your [Dockerhub](https://hub.docker.com/) account using this command(below) and enter the username and access token
```bash
inferless integration add dockerhub --name
### Step 2: Choose the source of your model.
* Since we are using a model from Dockerfile, select `Dockerfile`as the method of upload from the `Provider` list.
* To proceed with the upload, you will need to connect your `GitHub/GitLab account`. This is a mandatory step as this helps us get the file from your repository.
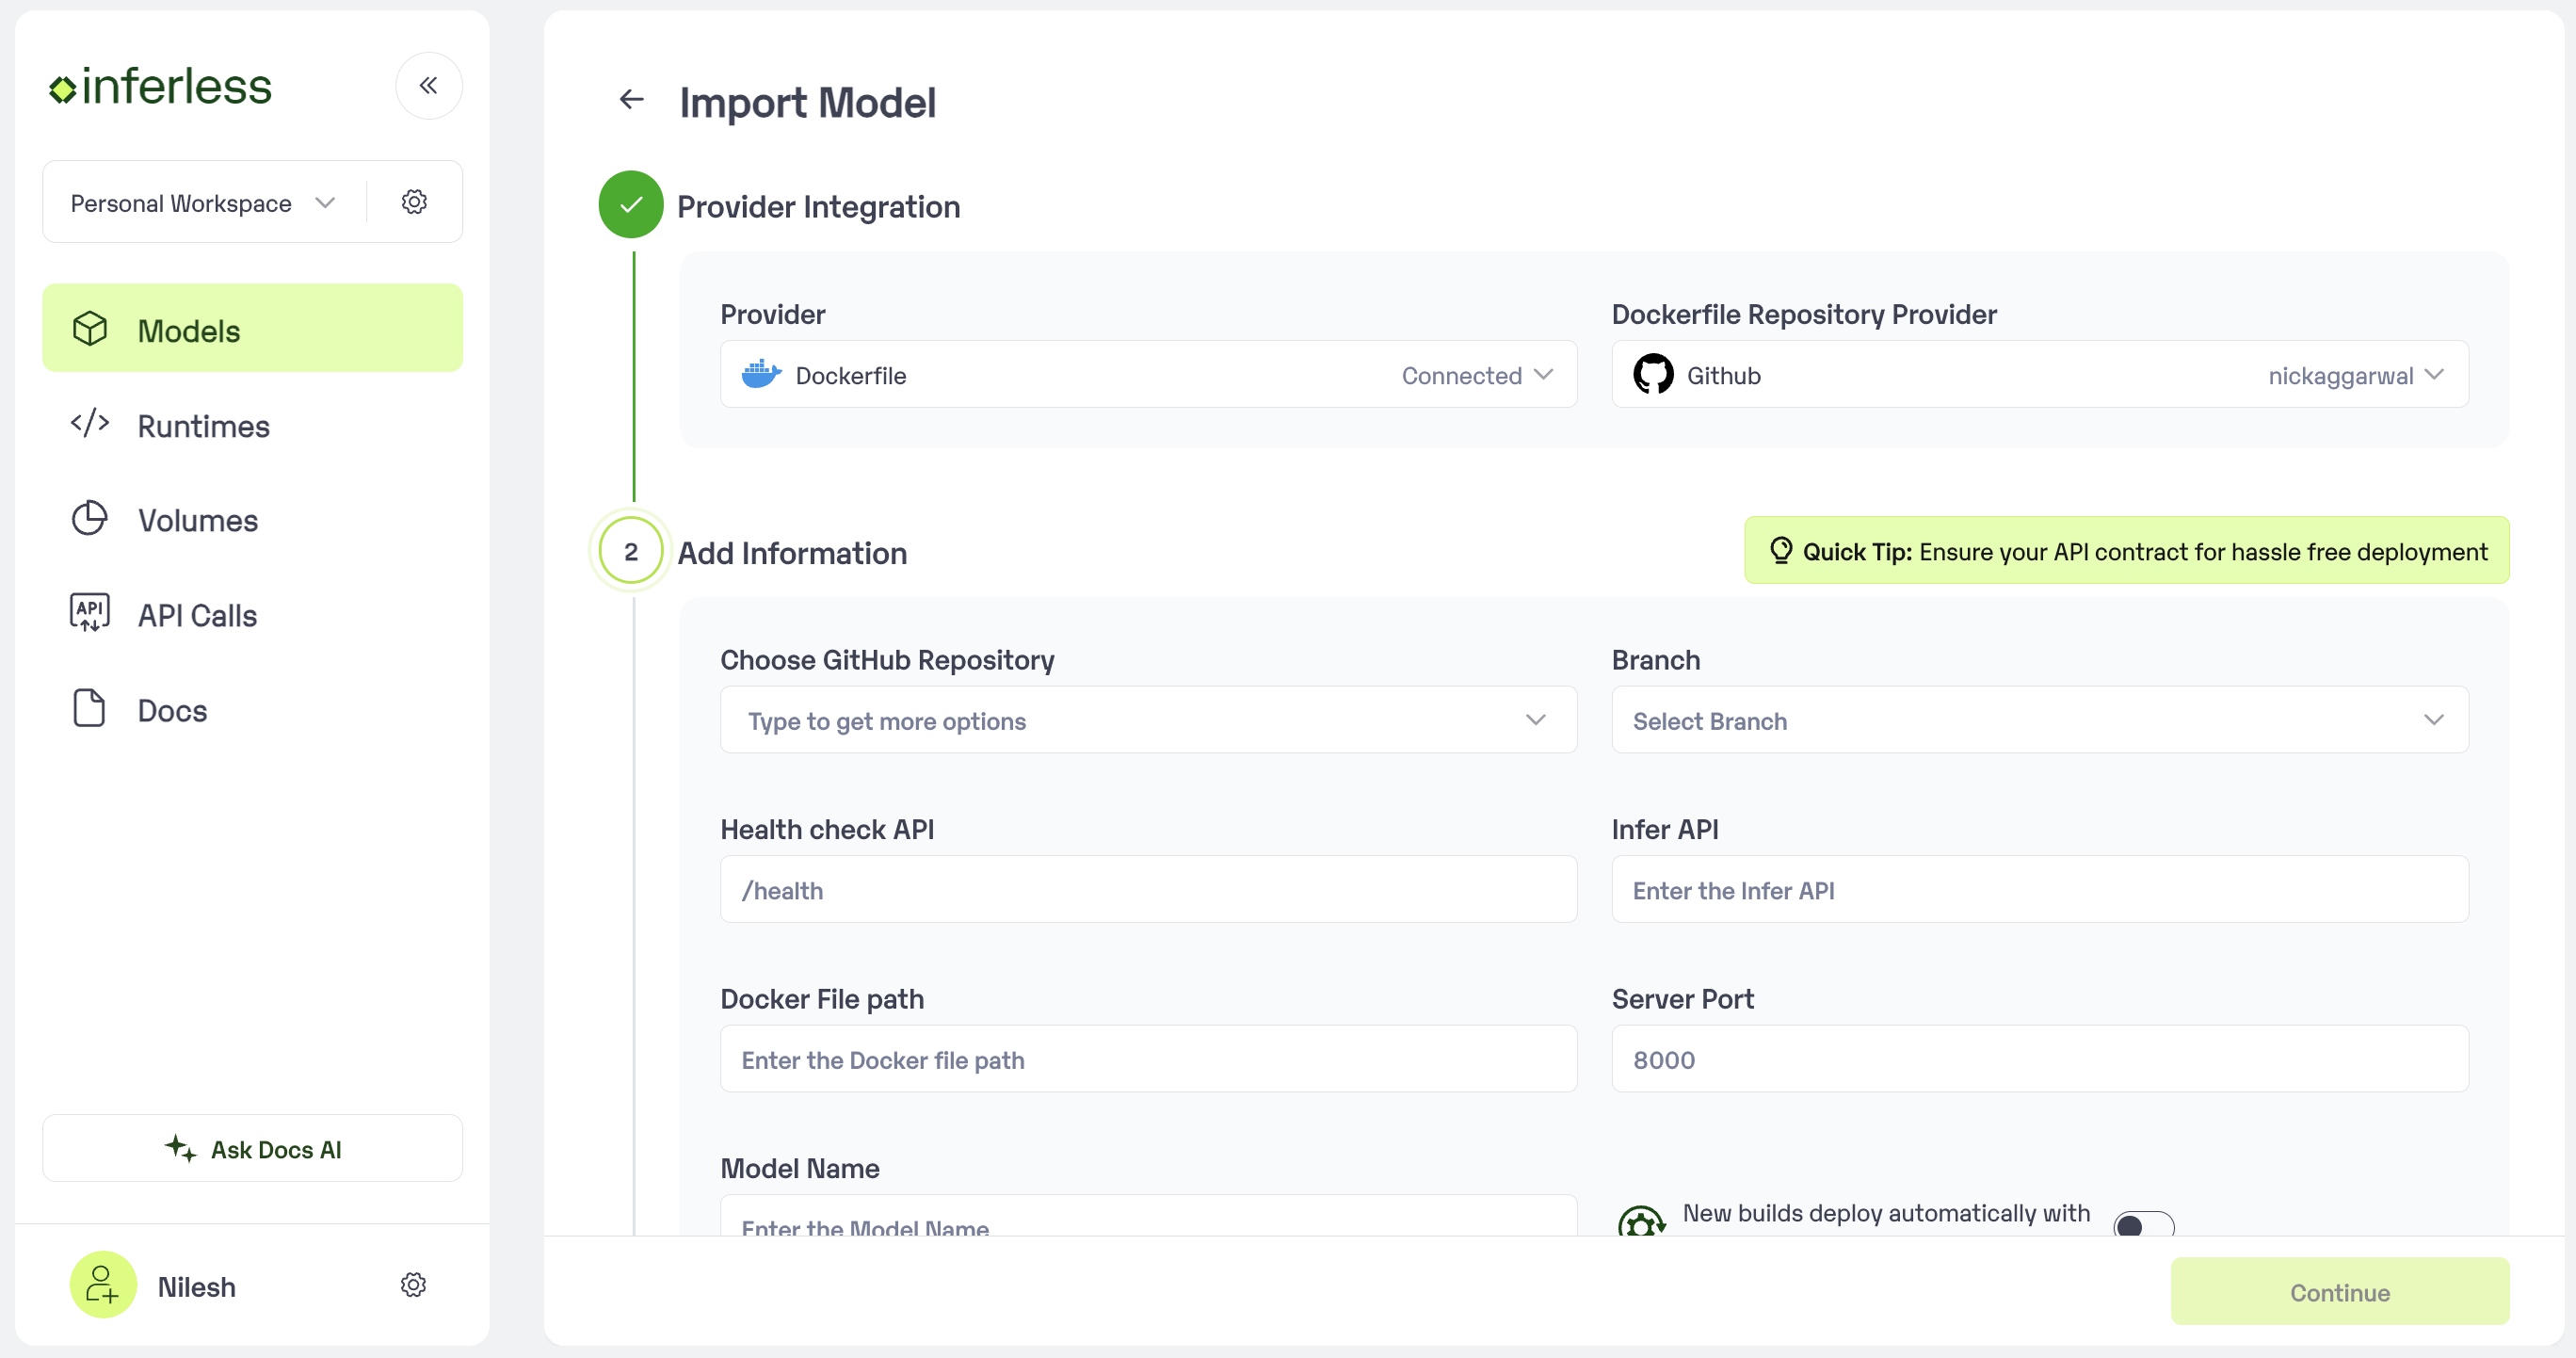 ### Step 3: Enter the model details
* Select your `Github Repository` and the `branch`.
* Provide the details of `Health check API`, `Infer API`, `Server Port` and the `Docker File Path`
* `Model Name`: The desired name of the model that you wish to give
### Step 3: Enter the model details
* Select your `Github Repository` and the `branch`.
* Provide the details of `Health check API`, `Infer API`, `Server Port` and the `Docker File Path`
* `Model Name`: The desired name of the model that you wish to give
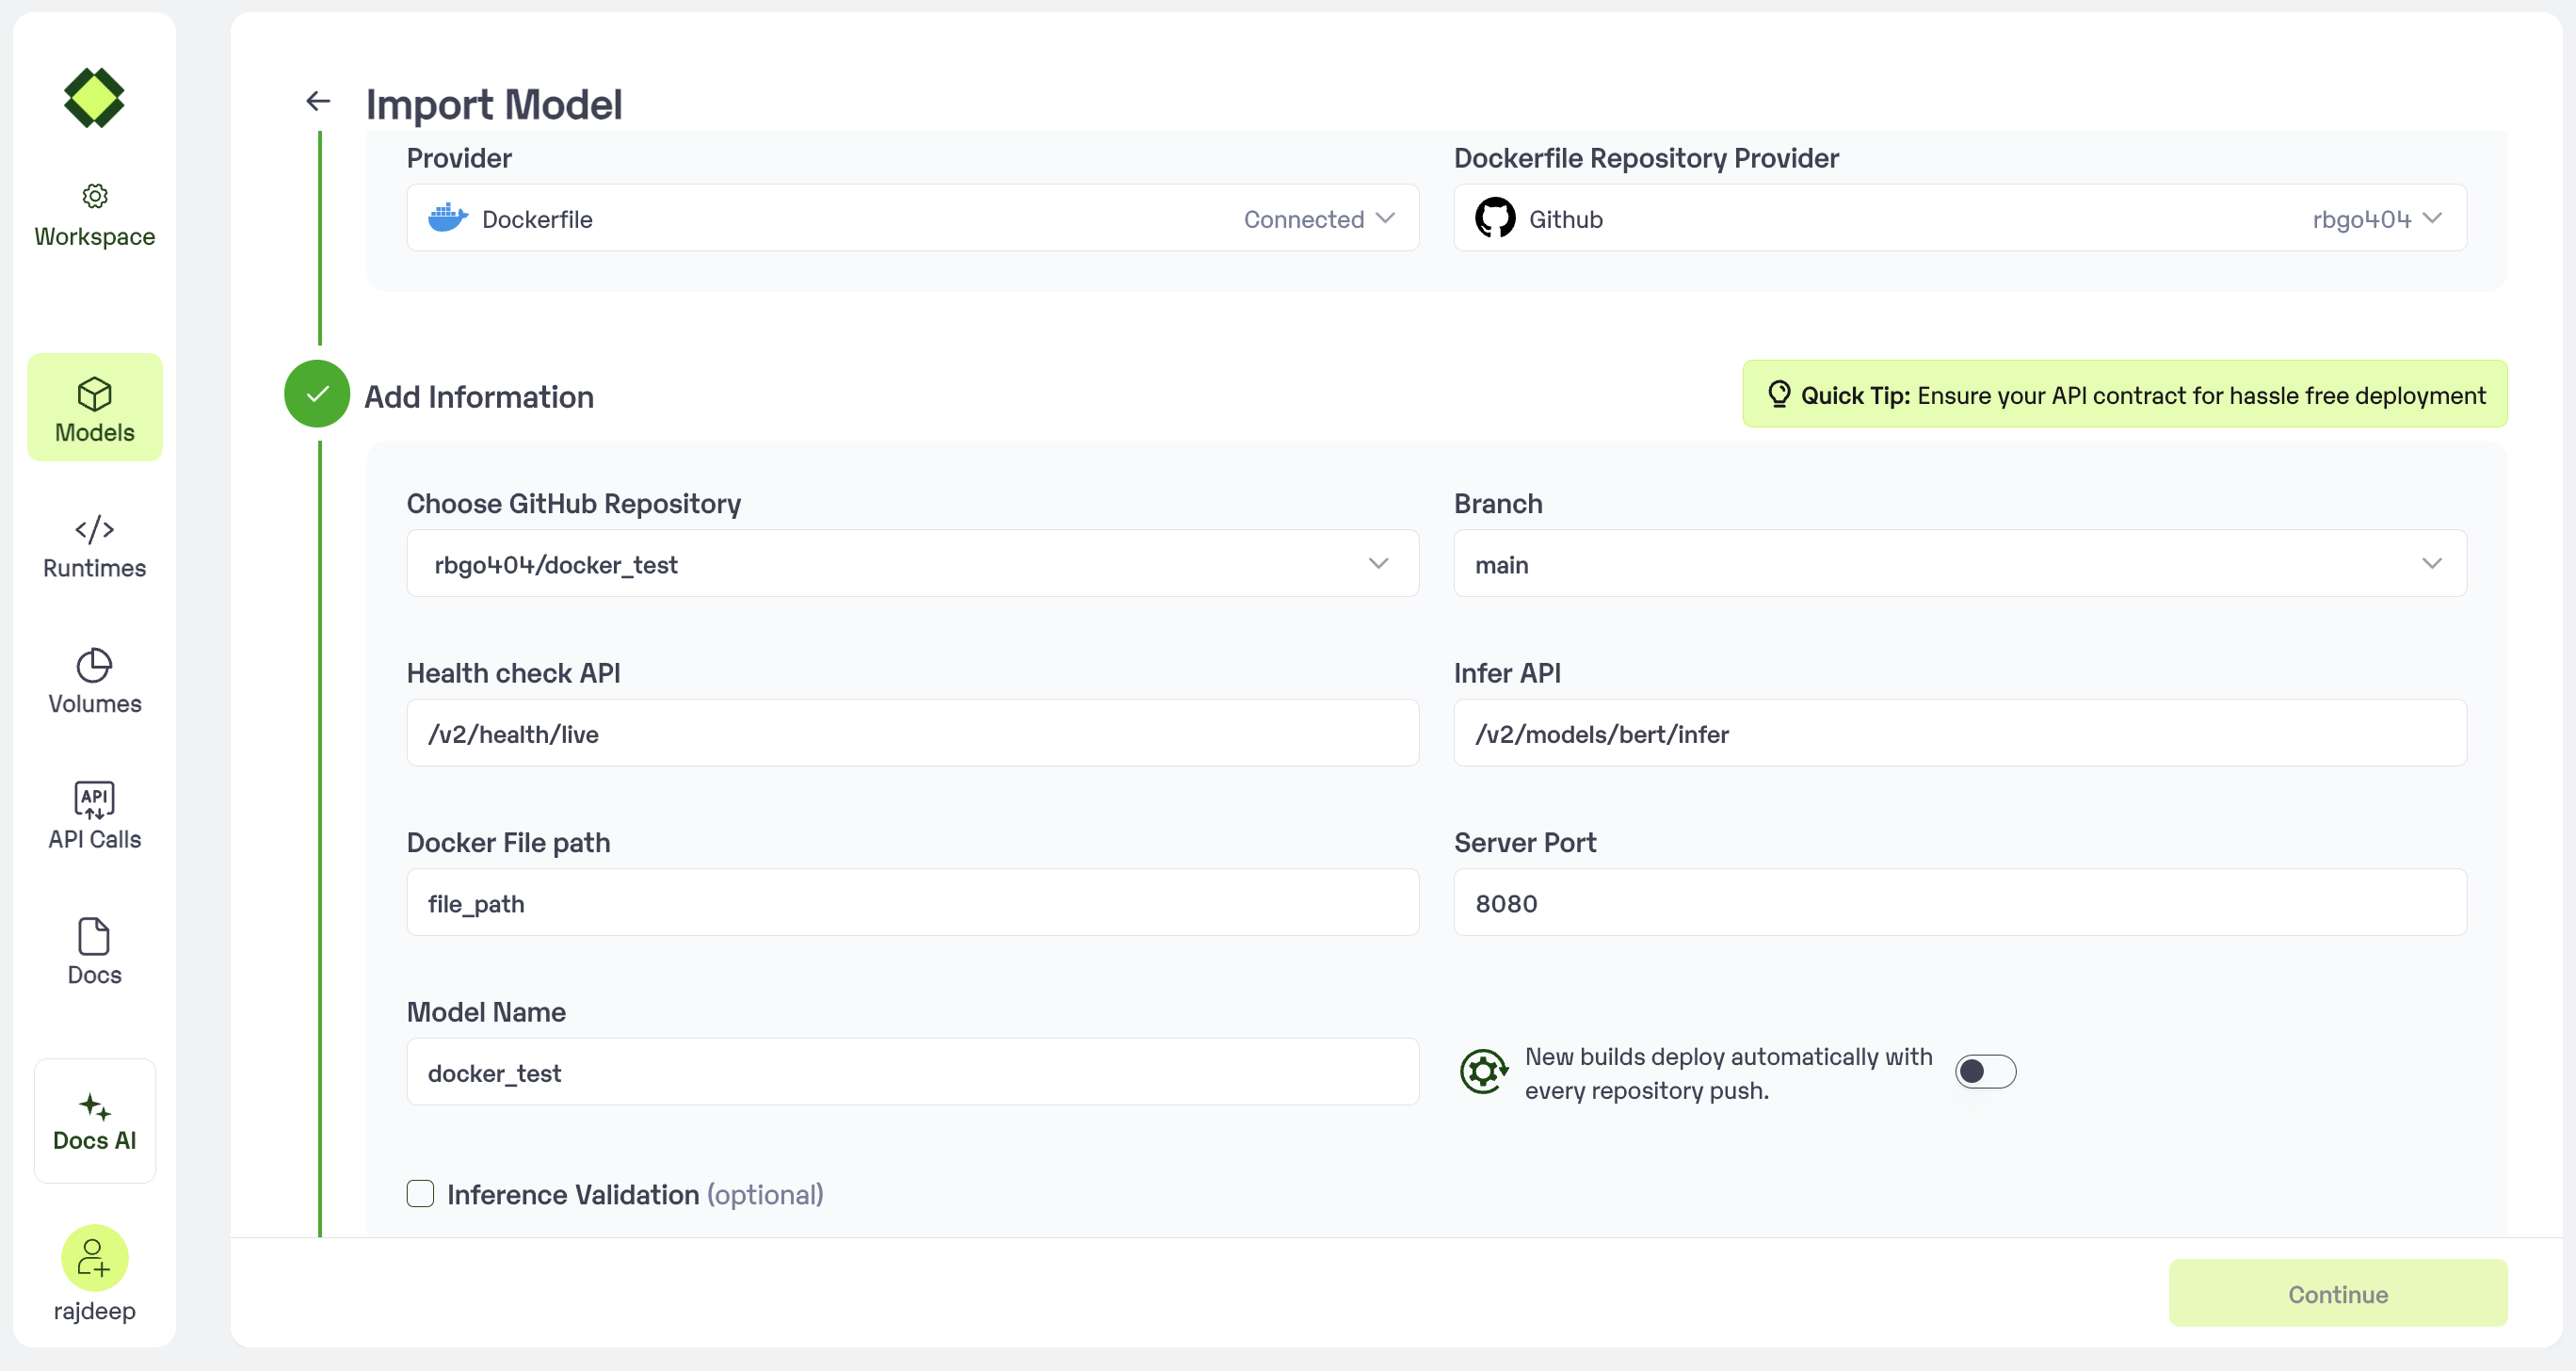 * In case you would like to set up `Automatic rebuild` for your model, enable it
* You would need to set up a webhook for this method. Click [here](/model-import/automatic-build-via-webhooks) for more details.
### Step 4: Configure Machine and Environment.
* Choose the type of machine, and specify the minimum and maximum number of replicas for deploying your model.
* **Min scale** -
```
The number of inference workers to keep on at all times.
```
* **Max scale -**
```
The maximum number of inference workers to allow at any point of time
```
* Configure Custom Runtime ( If you have pip or apt packages), choose Volume, Secrets and set Environment variables like Inference Timeout / Container Concurrency / Scale Down Timeout
### Step 5: Review your model details
* Once you click "Continue," you will be able to review the details added for the model.
* If you would like to make any changes, you can go back and make the changes.
* Once you have reviewed everything, click `Deploy` to start the model import process.
### Step 6 : Run your model
* Once you click submit, the model import process would start.
* It may take some time to complete the import process, and during this time, you will be redirected to your workspace and can see the status of the import under `"In Progress/Failed"` tab.\
* If you encounter any errors during the model import process or if you want to view the build logs for any reason, you can click on the three dots menu and select "View build logs". This will show you a detailed log of the import process, which can help you troubleshoot any issues you may encounter.
* Post-upload, the model will be available under "My Models"
* You can then select the model and go to `-> API -> Inference Endpoint details. `Here you would find the API endpoints that can be called. You can click on the copy button on the right and can call your model.
### Extra Step: Getting API key details
* You can now call using this from your end. The inference result would be the output for these calls.
* In case you need help with API Keys:
* Click on settings, available on the top, next to your Workspace Name
* Click on "Workspace API keys"
* You can view the details of your key or generate a new one\
### Using CLI
If you’ve a dockerfile with you, we can build the image. Just make sure you’re dockerfile is stored in Github/ Gitlab for us to access it.
1. Login to [Inferless.com](https://inferless.com/) and click on three dot menu near the profile picture
2. Click on [Manage integrations](https://console.inferless.com/user/integration) and connect with your Github/ Gitlab account were the model is stored.
3. Once you’re done with integration on console. Open CLI and run this command to initialise the model
```bash
inferless init docker --type dockerfile --name
### Step 2: Choose the source of your model.
* Since we are importing a model from the system, in this example, select ` Local File` as the method of upload.
* Make sure that the model file is stored in a .zip format and has the file structure as mentioned [here](https://docs.inferless.com/model-import/file-structure-req/importing-your-file-from-your-system)
* In case you would like to set up `Automatic rebuild` for your model, enable it
* You would need to set up a webhook for this method. Click [here](/model-import/automatic-build-via-webhooks) for more details.
### Step 4: Configure Machine and Environment.
* Choose the type of machine, and specify the minimum and maximum number of replicas for deploying your model.
* **Min scale** -
```
The number of inference workers to keep on at all times.
```
* **Max scale -**
```
The maximum number of inference workers to allow at any point of time
```
* Configure Custom Runtime ( If you have pip or apt packages), choose Volume, Secrets and set Environment variables like Inference Timeout / Container Concurrency / Scale Down Timeout
### Step 5: Review your model details
* Once you click "Continue," you will be able to review the details added for the model.
* If you would like to make any changes, you can go back and make the changes.
* Once you have reviewed everything, click `Deploy` to start the model import process.
### Step 6 : Run your model
* Once you click submit, the model import process would start.
* It may take some time to complete the import process, and during this time, you will be redirected to your workspace and can see the status of the import under `"In Progress/Failed"` tab.\
* If you encounter any errors during the model import process or if you want to view the build logs for any reason, you can click on the three dots menu and select "View build logs". This will show you a detailed log of the import process, which can help you troubleshoot any issues you may encounter.
* Post-upload, the model will be available under "My Models"
* You can then select the model and go to `-> API -> Inference Endpoint details. `Here you would find the API endpoints that can be called. You can click on the copy button on the right and can call your model.
### Extra Step: Getting API key details
* You can now call using this from your end. The inference result would be the output for these calls.
* In case you need help with API Keys:
* Click on settings, available on the top, next to your Workspace Name
* Click on "Workspace API keys"
* You can view the details of your key or generate a new one\
### Using CLI
If you’ve a dockerfile with you, we can build the image. Just make sure you’re dockerfile is stored in Github/ Gitlab for us to access it.
1. Login to [Inferless.com](https://inferless.com/) and click on three dot menu near the profile picture
2. Click on [Manage integrations](https://console.inferless.com/user/integration) and connect with your Github/ Gitlab account were the model is stored.
3. Once you’re done with integration on console. Open CLI and run this command to initialise the model
```bash
inferless init docker --type dockerfile --name
### Step 2: Choose the source of your model.
* Since we are importing a model from the system, in this example, select ` Local File` as the method of upload.
* Make sure that the model file is stored in a .zip format and has the file structure as mentioned [here](https://docs.inferless.com/model-import/file-structure-req/importing-your-file-from-your-system)
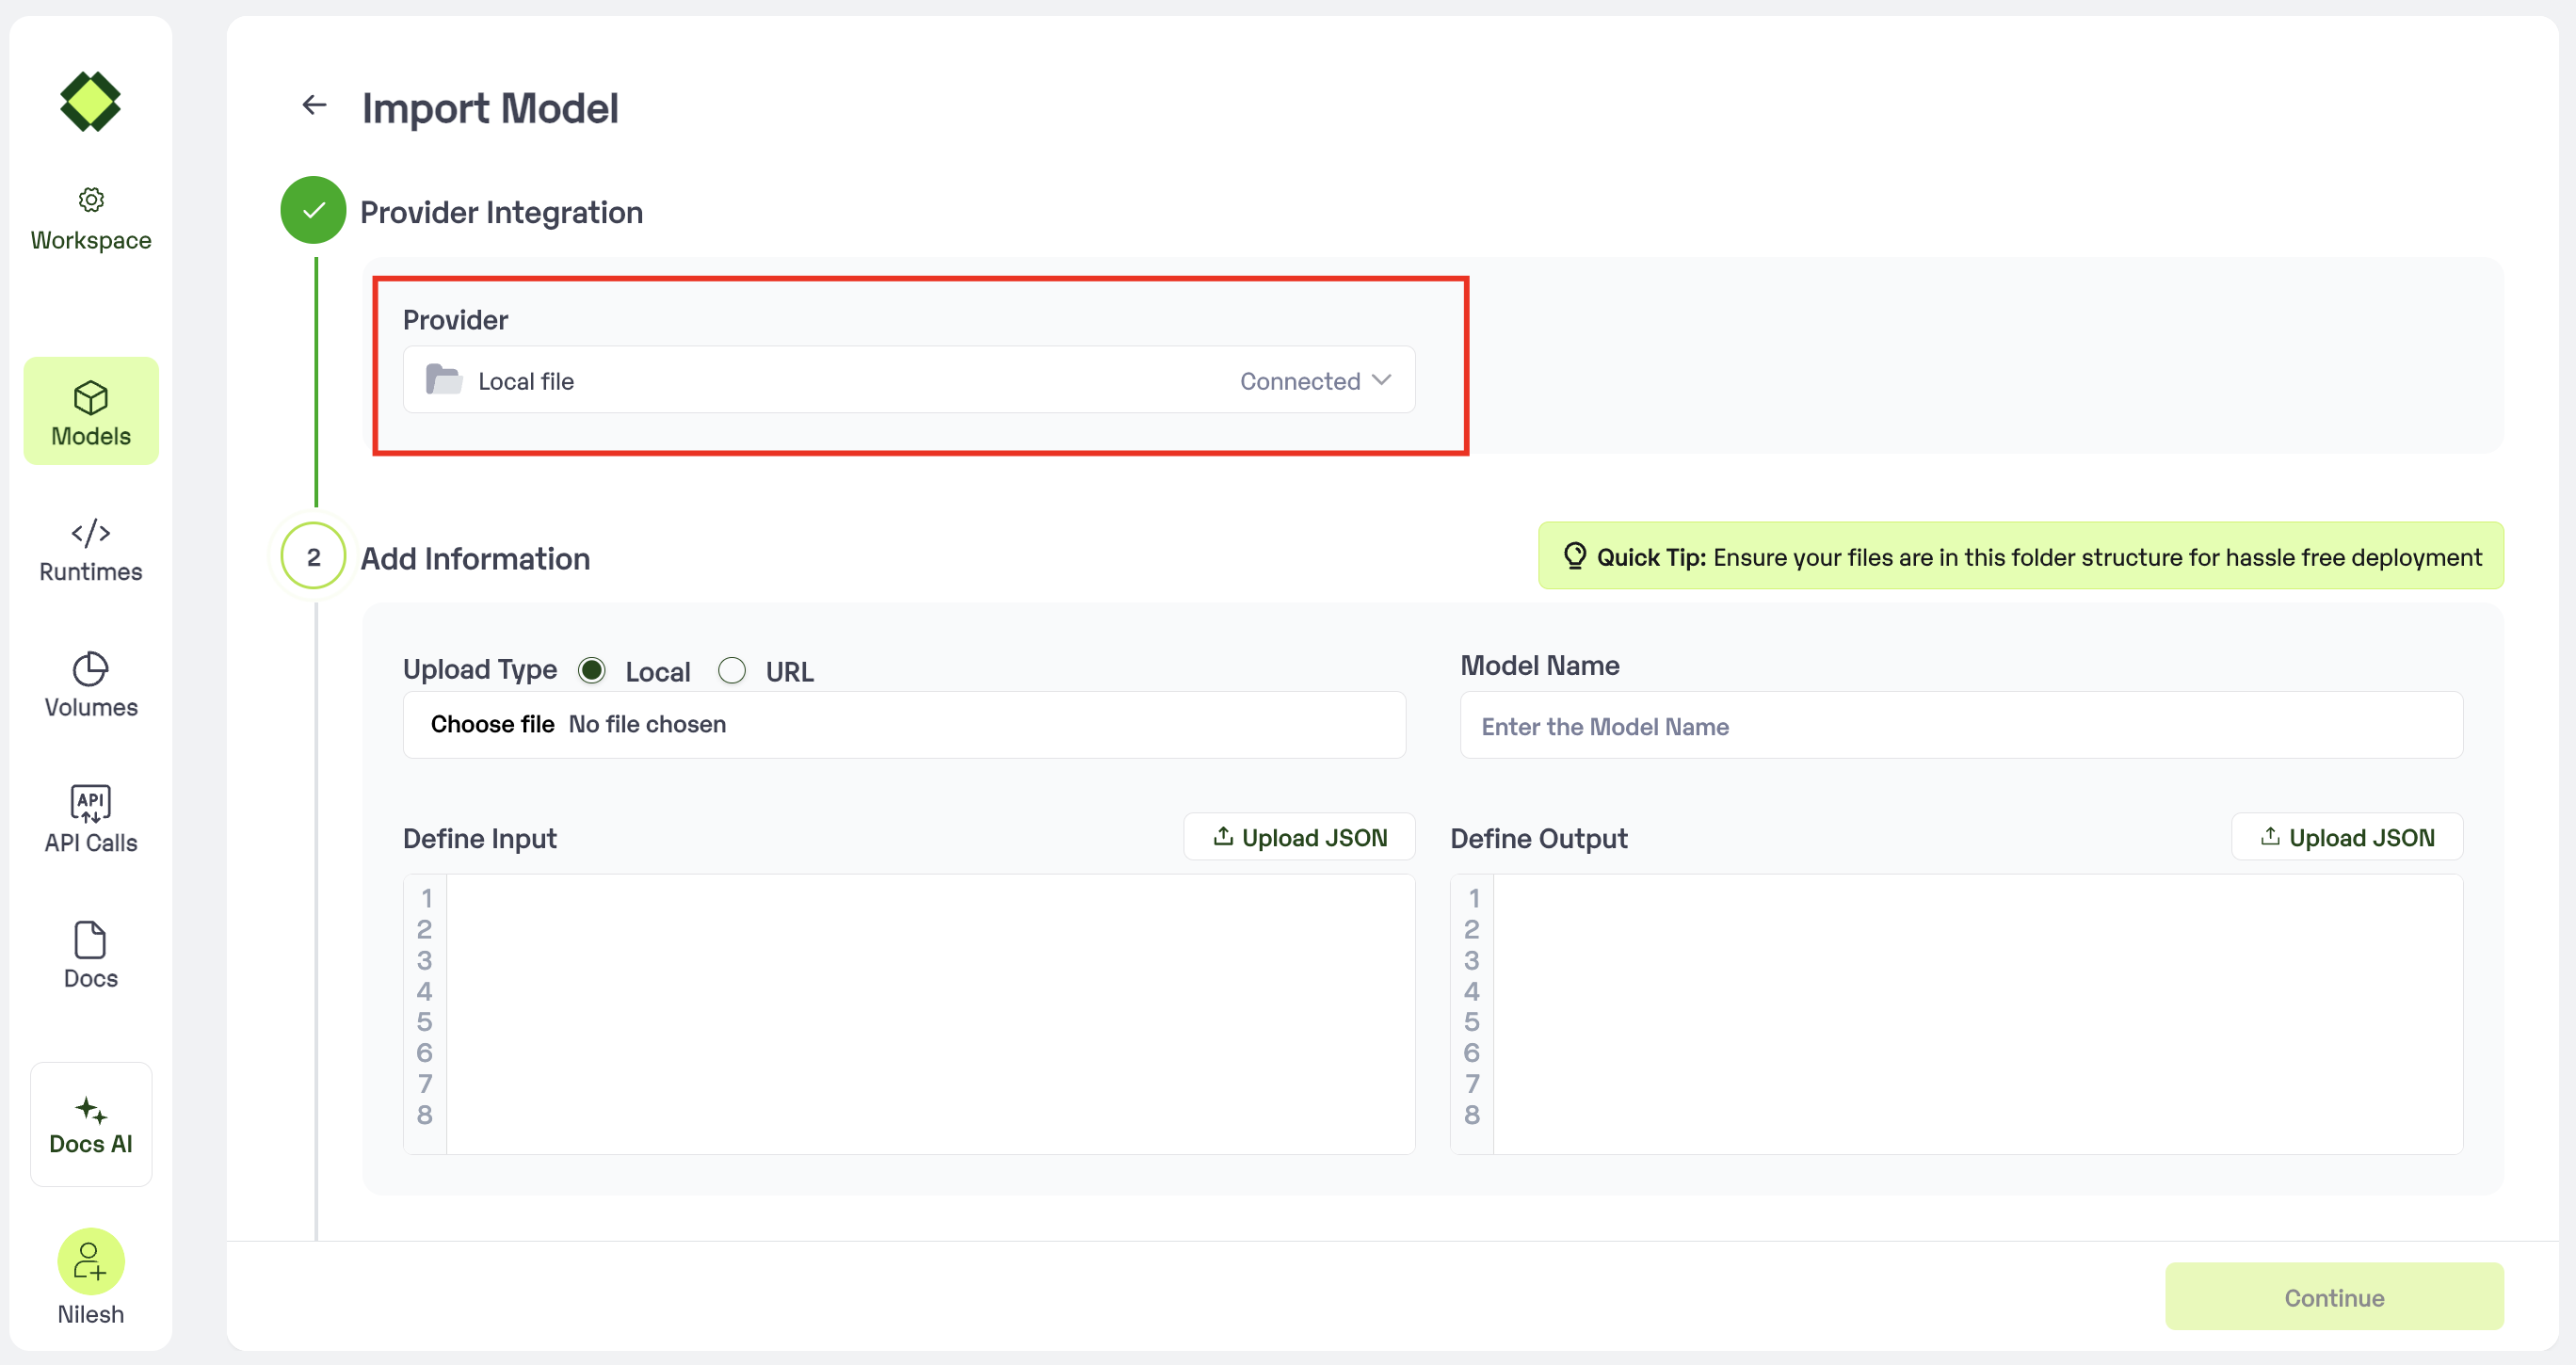 ### Step 3: Enter the model details
* **Model Name:** Add the desired name that you would like to give to your model
* **Upload Type:**
* **Local**: Use this option to upload the model file from your local system
* **URL**: Use this option to upload the file from an open public link.
* **Sample Input:** Enter an example of how the input should be formatted for the model in JSON format.
* **Sample Output:** Enter an example of how the output would be formatted for the model in JSON format.
### Step 3: Enter the model details
* **Model Name:** Add the desired name that you would like to give to your model
* **Upload Type:**
* **Local**: Use this option to upload the model file from your local system
* **URL**: Use this option to upload the file from an open public link.
* **Sample Input:** Enter an example of how the input should be formatted for the model in JSON format.
* **Sample Output:** Enter an example of how the output would be formatted for the model in JSON format.
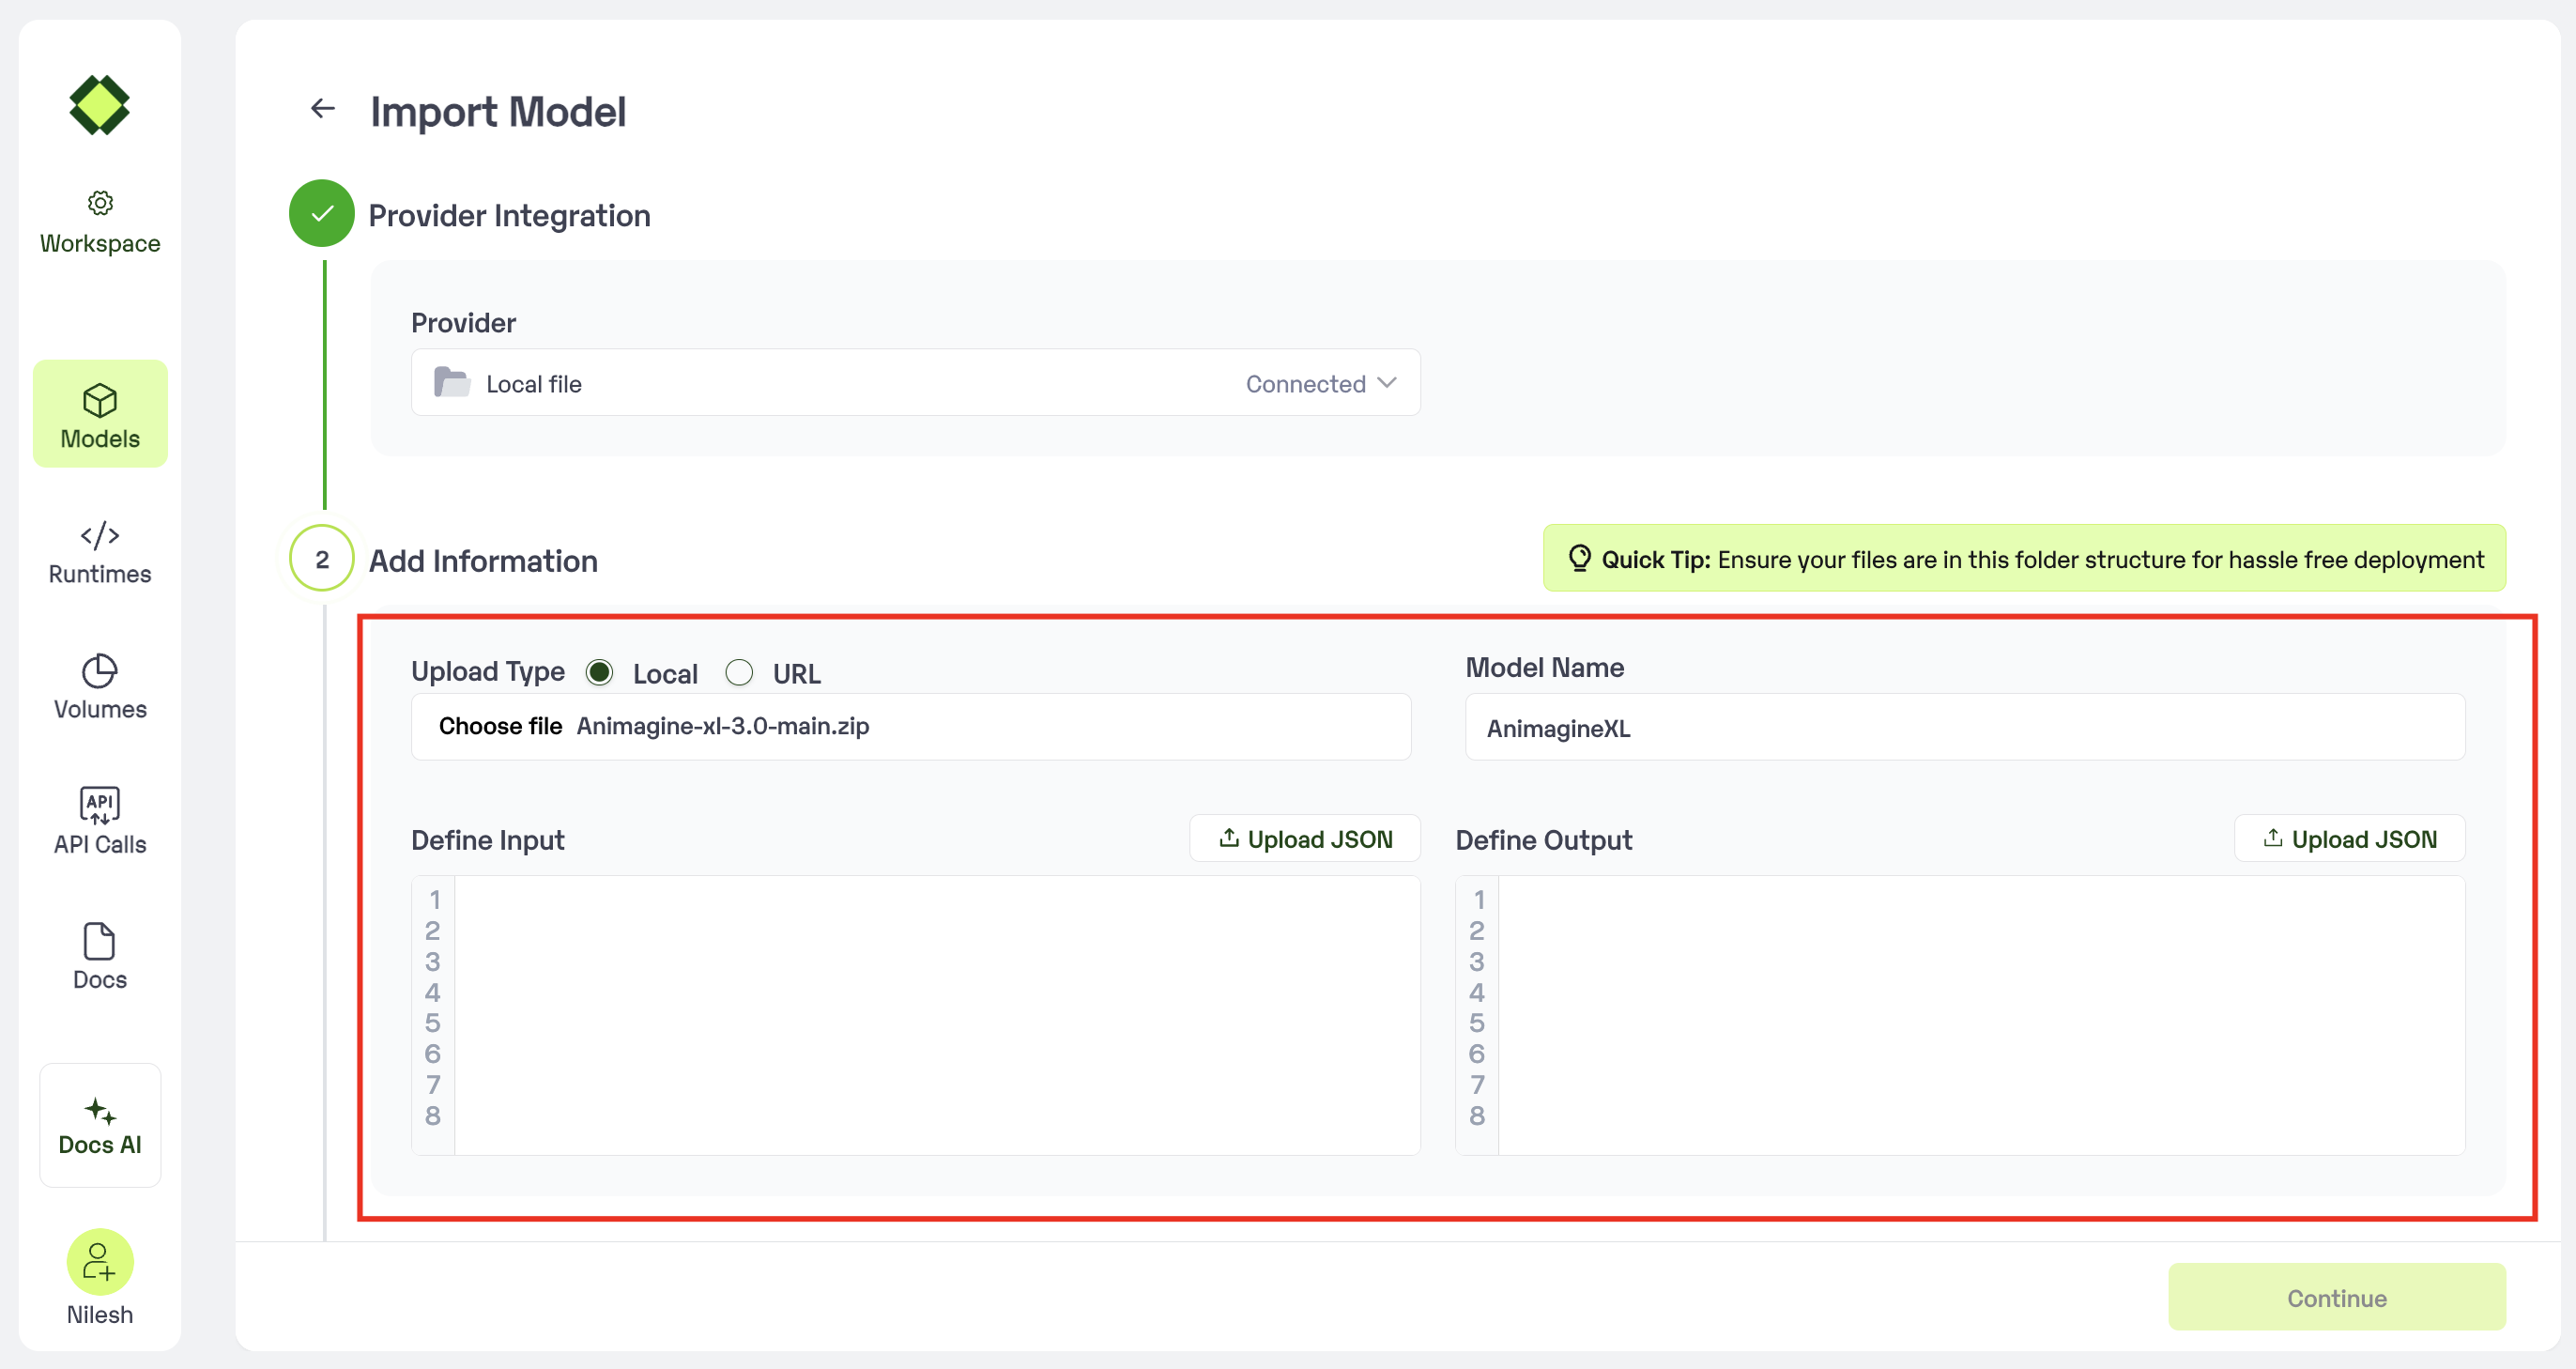 * In case you would like to set up `Automatic rebuild` for your model, enable it
* You would need to set up a webhook for this method. Click [here](/model-import/automatic-build-via-webhooks) for more details.
### Step 4: Configure Machine and Environment.
* Choose the type of machine, and specify the minimum and maximum number of replicas for deploying your model.
* **Min scale** -
```
The number of inference workers to keep on at all times.
```
* **Max scale -**
```
The maximum number of inference workers to allow at any point of time
```
* Configure Custom Runtime ( If you have pip or apt packages), choose Volume, Secrets and set Environment variables like Inference Timeout / Container Concurrency / Scale Down Timeout
### Step 5: Review your model details
* Once you click "Continue," you will be able to review the details added for the model.
* If you would like to make any changes, you can go back and make the changes.
* Once you have reviewed everything, click `Deploy` to start the model import process.
### Step 6 : Run your model
* Once you click submit, the model import process would start.
* It may take some time to complete the import process, and during this time, you will be redirected to your workspace and can see the status of the import under `"In Progress/Failed"` tab.\
* If you encounter any errors during the model import process or if you want to view the build logs for any reason, you can click on the three dots menu and select "View build logs". This will show you a detailed log of the import process, which can help you troubleshoot any issues you may encounter.
* Post-upload, the model will be available under "My Models"
* You can then select the model and go to `-> API -> Inference Endpoint details. `Here you would find the API endpoints that can be called. You can click on the copy button on the right and can call your model.
### Extra Step: Getting API key details
* You can now call using this from your end. The inference result would be the output for these calls.
* In case you need help with API Keys:
* Click on settings, available on the top, next to your Workspace Name
* Click on "Workspace API keys"
* You can view the details of your key or generate a new one\
### Using CLI
Make sure you follow this below folder structure in the zip file
```json
.
|--config.pbtxt (optional)
|--input.json
|--output.json
|--1/
|--|--model.xxx ( pt/onnx/tf )
```
1. Initialise the model using this command
```bash
inferless init file --name
### Step 2: Choose the source of your model.
* Since we are using a model from Github, select `Github`as the method of upload from the `Provider` list.
* To proceed with the upload, you will need to connect your `Github account`. This is a mandatory step as this helps us download the file from your Github if the repo you are pulling is from an open account.
* In case you would like to set up `Automatic rebuild` for your model, enable it
* You would need to set up a webhook for this method. Click [here](/model-import/automatic-build-via-webhooks) for more details.
### Step 4: Configure Machine and Environment.
* Choose the type of machine, and specify the minimum and maximum number of replicas for deploying your model.
* **Min scale** -
```
The number of inference workers to keep on at all times.
```
* **Max scale -**
```
The maximum number of inference workers to allow at any point of time
```
* Configure Custom Runtime ( If you have pip or apt packages), choose Volume, Secrets and set Environment variables like Inference Timeout / Container Concurrency / Scale Down Timeout
### Step 5: Review your model details
* Once you click "Continue," you will be able to review the details added for the model.
* If you would like to make any changes, you can go back and make the changes.
* Once you have reviewed everything, click `Deploy` to start the model import process.
### Step 6 : Run your model
* Once you click submit, the model import process would start.
* It may take some time to complete the import process, and during this time, you will be redirected to your workspace and can see the status of the import under `"In Progress/Failed"` tab.\
* If you encounter any errors during the model import process or if you want to view the build logs for any reason, you can click on the three dots menu and select "View build logs". This will show you a detailed log of the import process, which can help you troubleshoot any issues you may encounter.
* Post-upload, the model will be available under "My Models"
* You can then select the model and go to `-> API -> Inference Endpoint details. `Here you would find the API endpoints that can be called. You can click on the copy button on the right and can call your model.
### Extra Step: Getting API key details
* You can now call using this from your end. The inference result would be the output for these calls.
* In case you need help with API Keys:
* Click on settings, available on the top, next to your Workspace Name
* Click on "Workspace API keys"
* You can view the details of your key or generate a new one\
### Using CLI
Make sure you follow this below folder structure in the zip file
```json
.
|--config.pbtxt (optional)
|--input.json
|--output.json
|--1/
|--|--model.xxx ( pt/onnx/tf )
```
1. Initialise the model using this command
```bash
inferless init file --name
### Step 2: Choose the source of your model.
* Since we are using a model from Github, select `Github`as the method of upload from the `Provider` list.
* To proceed with the upload, you will need to connect your `Github account`. This is a mandatory step as this helps us download the file from your Github if the repo you are pulling is from an open account.
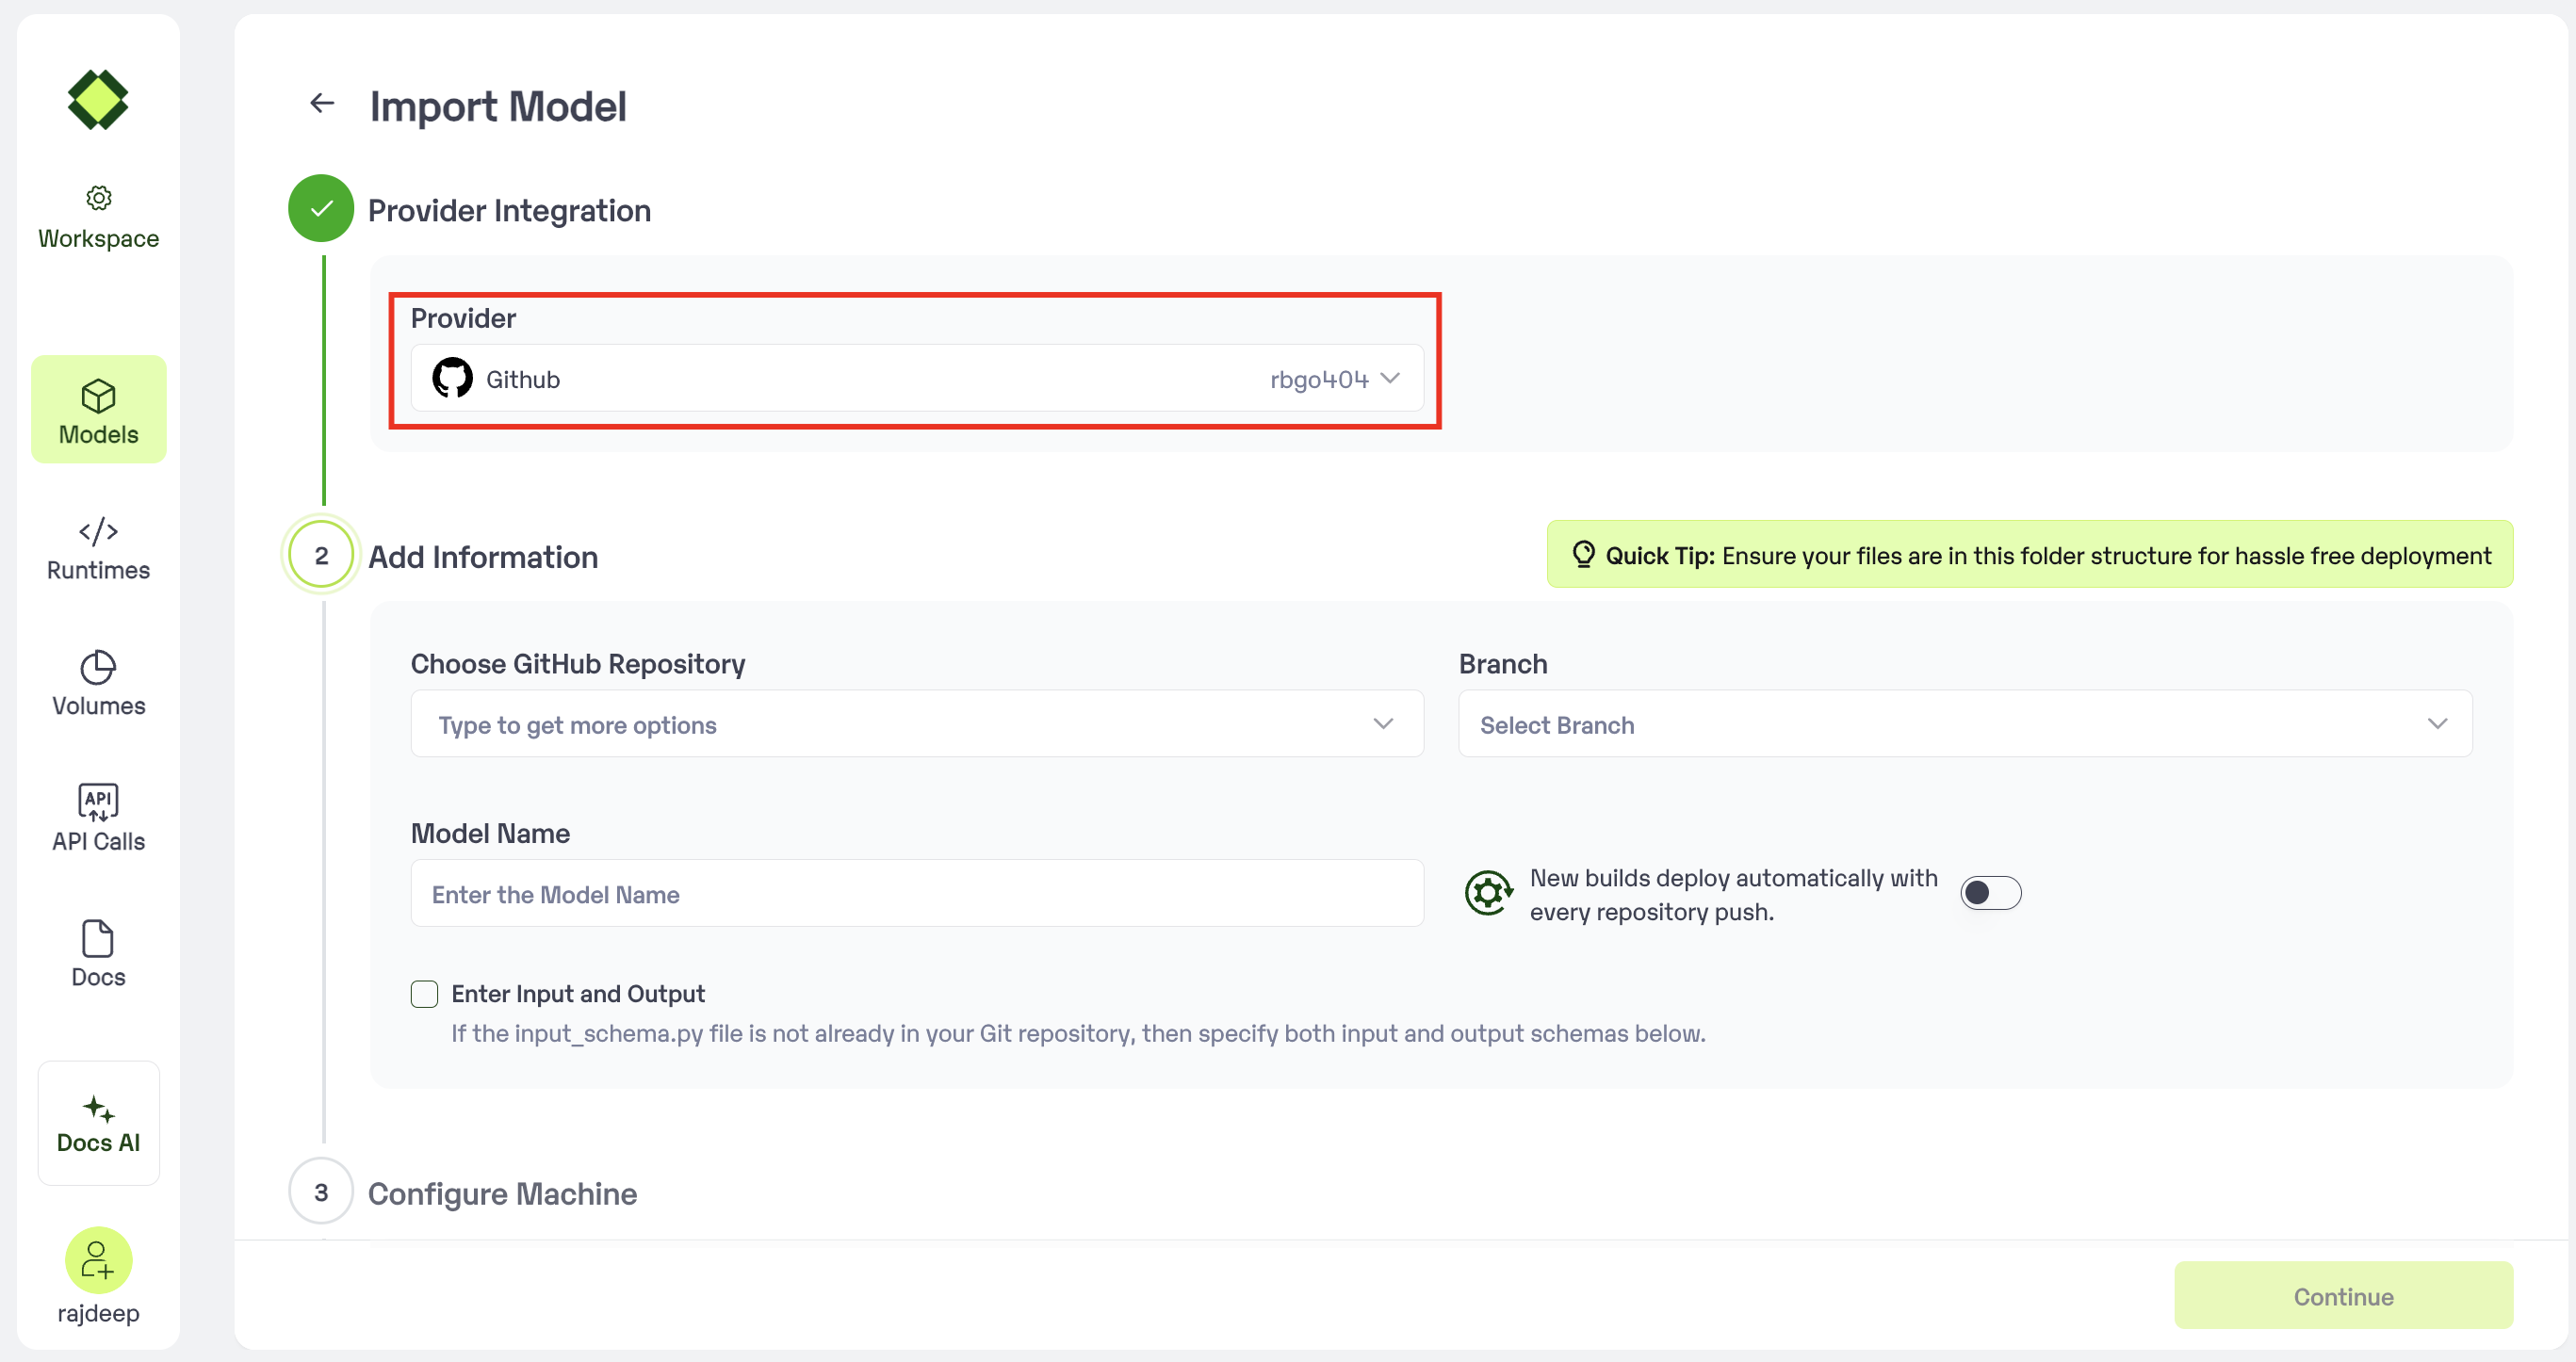 ### Step 3: Enter the model details
* Select your `Github Repository` and the `branch`.
* Model Name: The desired name of the model that you wish to give
* GitHub Repo: Make sure you have the app.py and input\_schema.py defined
### Step 3: Enter the model details
* Select your `Github Repository` and the `branch`.
* Model Name: The desired name of the model that you wish to give
* GitHub Repo: Make sure you have the app.py and input\_schema.py defined
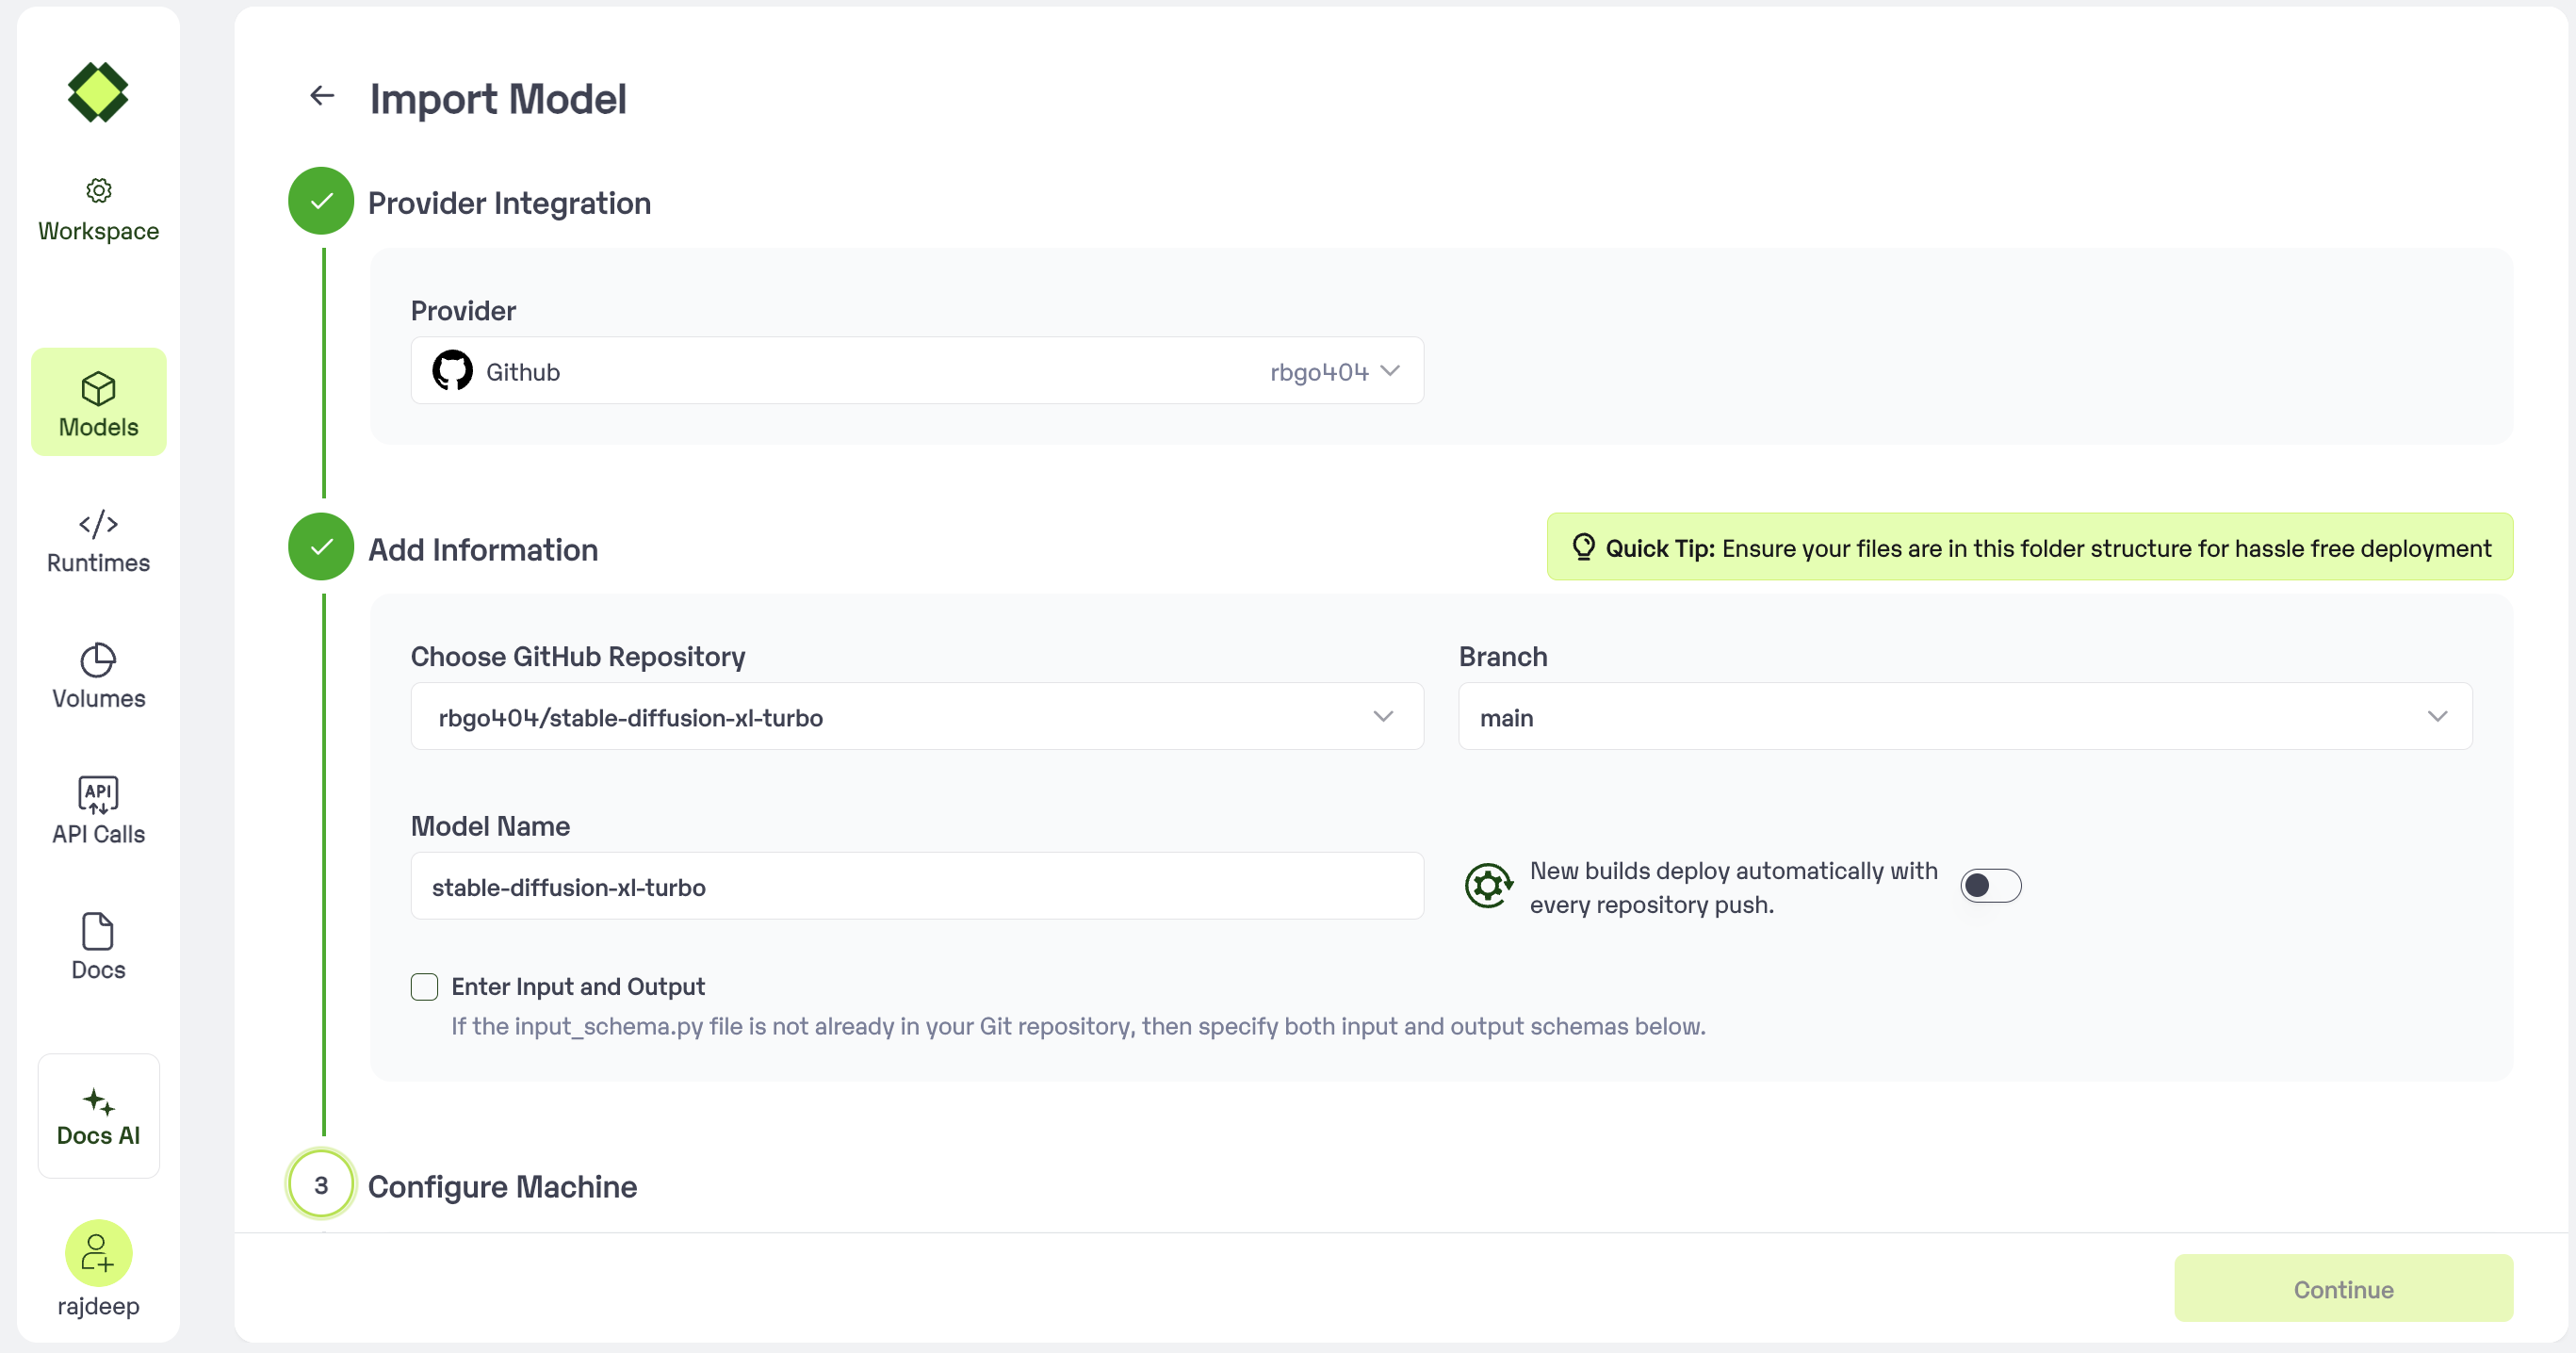 * In case you would like to set up `Automatic rebuild` for your model, enable it
* You would need to set up a webhook for this method. Click [here](/model-import/automatic-build-via-webhooks) for more details.
### Step 4: Configure Machine and Environment.
* Choose the type of machine, and specify the minimum and maximum number of replicas for deploying your model.
* **Min scale** -
```
The number of inference workers to keep on at all times.
```
* **Max scale -**
```
The maximum number of inference workers to allow at any point of time
```
* Configure Custom Runtime ( If you have pip or apt packages), choose Volume, Secrets and set Environment variables like Inference Timeout / Container Concurrency / Scale Down Timeout
### Step 5: Review your model details
* Once you click "Continue," you will be able to review the details added for the model.
* If you would like to make any changes, you can go back and make the changes.
* Once you have reviewed everything, click `Deploy` to start the model import process.
### Step 6 : Run your model
* Once you click submit, the model import process would start.
* It may take some time to complete the import process, and during this time, you will be redirected to your workspace and can see the status of the import under `"In Progress/Failed"` tab.\
* If you encounter any errors during the model import process or if you want to view the build logs for any reason, you can click on the three dots menu and select "View build logs". This will show you a detailed log of the import process, which can help you troubleshoot any issues you may encounter.
* Post-upload, the model will be available under "My Models"
* You can then select the model and go to `-> API -> Inference Endpoint details. `Here you would find the API endpoints that can be called. You can click on the copy button on the right and can call your model.
### Extra Step: Getting API key details
* You can now call using this from your end. The inference result would be the output for these calls.
* In case you need help with API Keys:
* Click on settings, available on the top, next to your Workspace Name
* Click on "Workspace API keys"
* You can view the details of your key or generate a new one\
### Using CLI
If your model is stored in Github repo. Make sure you follow [this](https://docs.inferless.com/model-import/file-structure-req/importing-from-github) folder structure.
1. Login to [Inferless.com](https://inferless.com/) and click on three dot menu near the profile picture
2. Click on [Manage integrations](https://console.inferless.com/user/integration) and connect with your Github account were the model is stored.
3. Once you’re done with integration. Run this command to initialise the model
```bash
inferless init --name
### Step 2: Choose the source of your model.
* Since we are using a model from Gitlab, select `Gitlab`as the method of upload from the `Provider` list.
* To proceed with the upload, you will need to connect your `Gitlab account`. This is a mandatory step as this helps us download the file from your Gitlab if the repo you are pulling is from an open account.
* In case you would like to set up `Automatic rebuild` for your model, enable it
* You would need to set up a webhook for this method. Click [here](/model-import/automatic-build-via-webhooks) for more details.
### Step 4: Configure Machine and Environment.
* Choose the type of machine, and specify the minimum and maximum number of replicas for deploying your model.
* **Min scale** -
```
The number of inference workers to keep on at all times.
```
* **Max scale -**
```
The maximum number of inference workers to allow at any point of time
```
* Configure Custom Runtime ( If you have pip or apt packages), choose Volume, Secrets and set Environment variables like Inference Timeout / Container Concurrency / Scale Down Timeout
### Step 5: Review your model details
* Once you click "Continue," you will be able to review the details added for the model.
* If you would like to make any changes, you can go back and make the changes.
* Once you have reviewed everything, click `Deploy` to start the model import process.
### Step 6 : Run your model
* Once you click submit, the model import process would start.
* It may take some time to complete the import process, and during this time, you will be redirected to your workspace and can see the status of the import under `"In Progress/Failed"` tab.\
* If you encounter any errors during the model import process or if you want to view the build logs for any reason, you can click on the three dots menu and select "View build logs". This will show you a detailed log of the import process, which can help you troubleshoot any issues you may encounter.
* Post-upload, the model will be available under "My Models"
* You can then select the model and go to `-> API -> Inference Endpoint details. `Here you would find the API endpoints that can be called. You can click on the copy button on the right and can call your model.
### Extra Step: Getting API key details
* You can now call using this from your end. The inference result would be the output for these calls.
* In case you need help with API Keys:
* Click on settings, available on the top, next to your Workspace Name
* Click on "Workspace API keys"
* You can view the details of your key or generate a new one\
### Using CLI
If your model is stored in Github repo. Make sure you follow [this](https://docs.inferless.com/model-import/file-structure-req/importing-from-github) folder structure.
1. Login to [Inferless.com](https://inferless.com/) and click on three dot menu near the profile picture
2. Click on [Manage integrations](https://console.inferless.com/user/integration) and connect with your Github account were the model is stored.
3. Once you’re done with integration. Run this command to initialise the model
```bash
inferless init --name
### Step 2: Choose the source of your model.
* Since we are using a model from Gitlab, select `Gitlab`as the method of upload from the `Provider` list.
* To proceed with the upload, you will need to connect your `Gitlab account`. This is a mandatory step as this helps us download the file from your Gitlab if the repo you are pulling is from an open account.
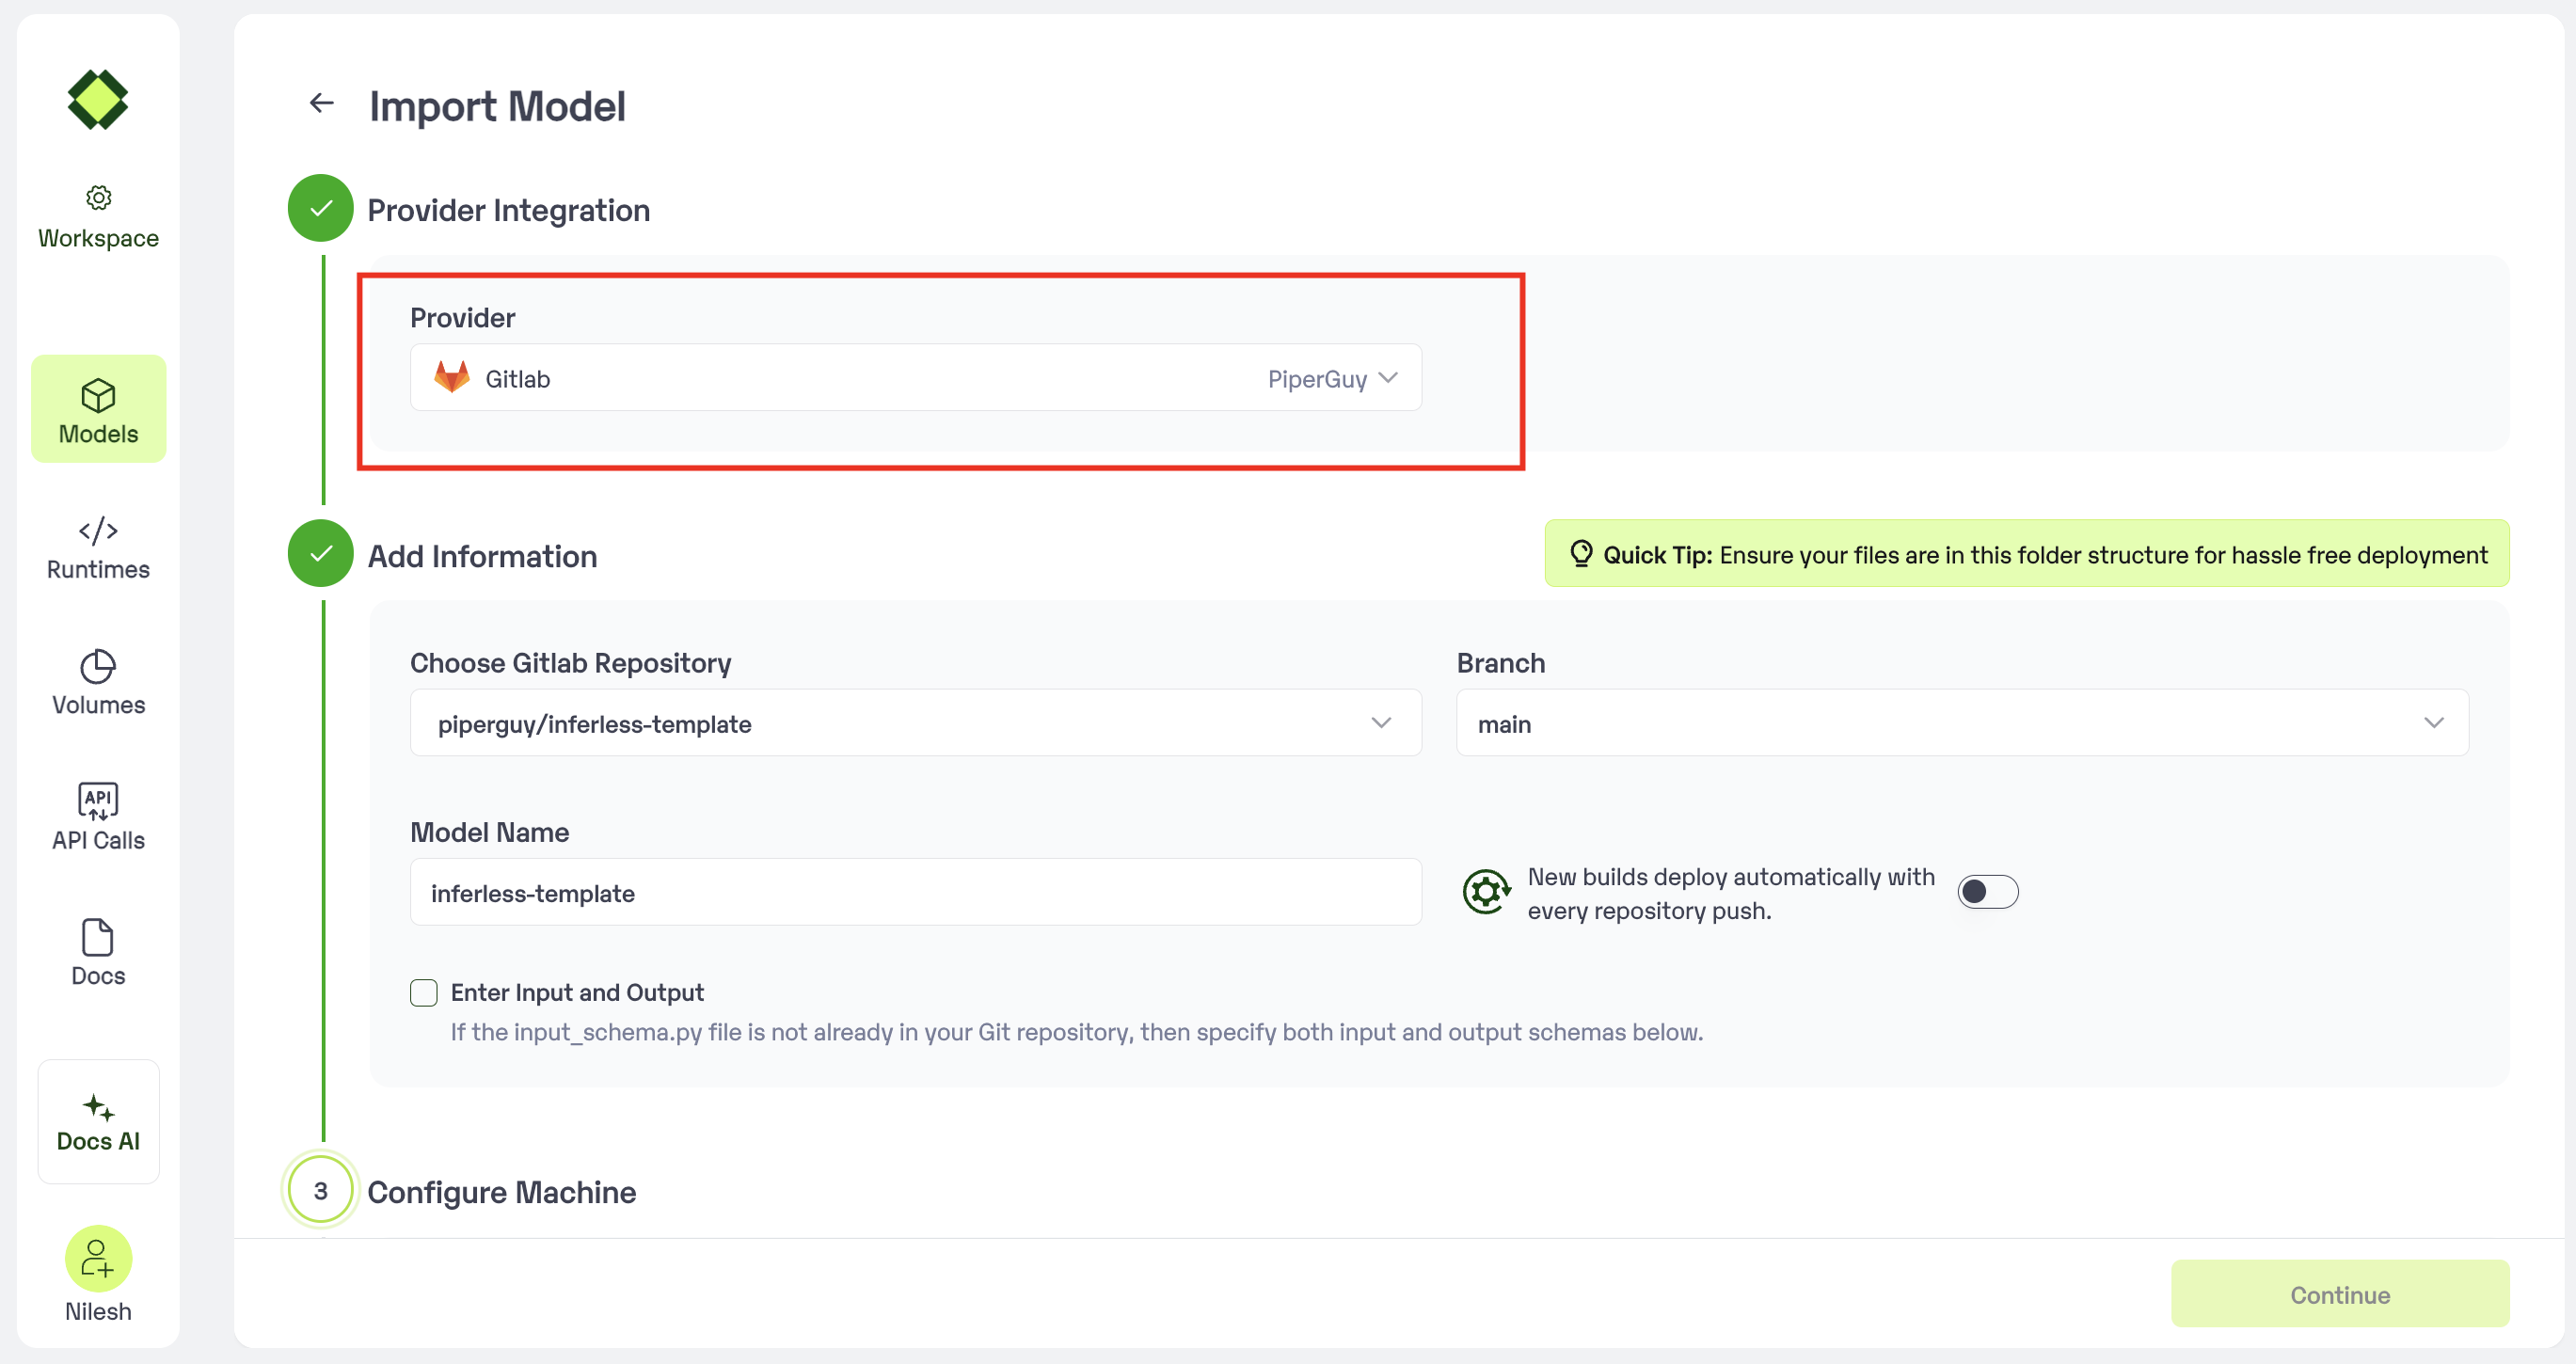 ### Step 3: Enter the model details
* **Model Name:** The desired name of the model that you wish to give.
* **Choose Gitlab Repo:** Select the desired repo from the drop-down
* **Input Schema:** If you don't have the file input\_schema.py you will have the provide the Input/Output Json
### Step 3: Enter the model details
* **Model Name:** The desired name of the model that you wish to give.
* **Choose Gitlab Repo:** Select the desired repo from the drop-down
* **Input Schema:** If you don't have the file input\_schema.py you will have the provide the Input/Output Json
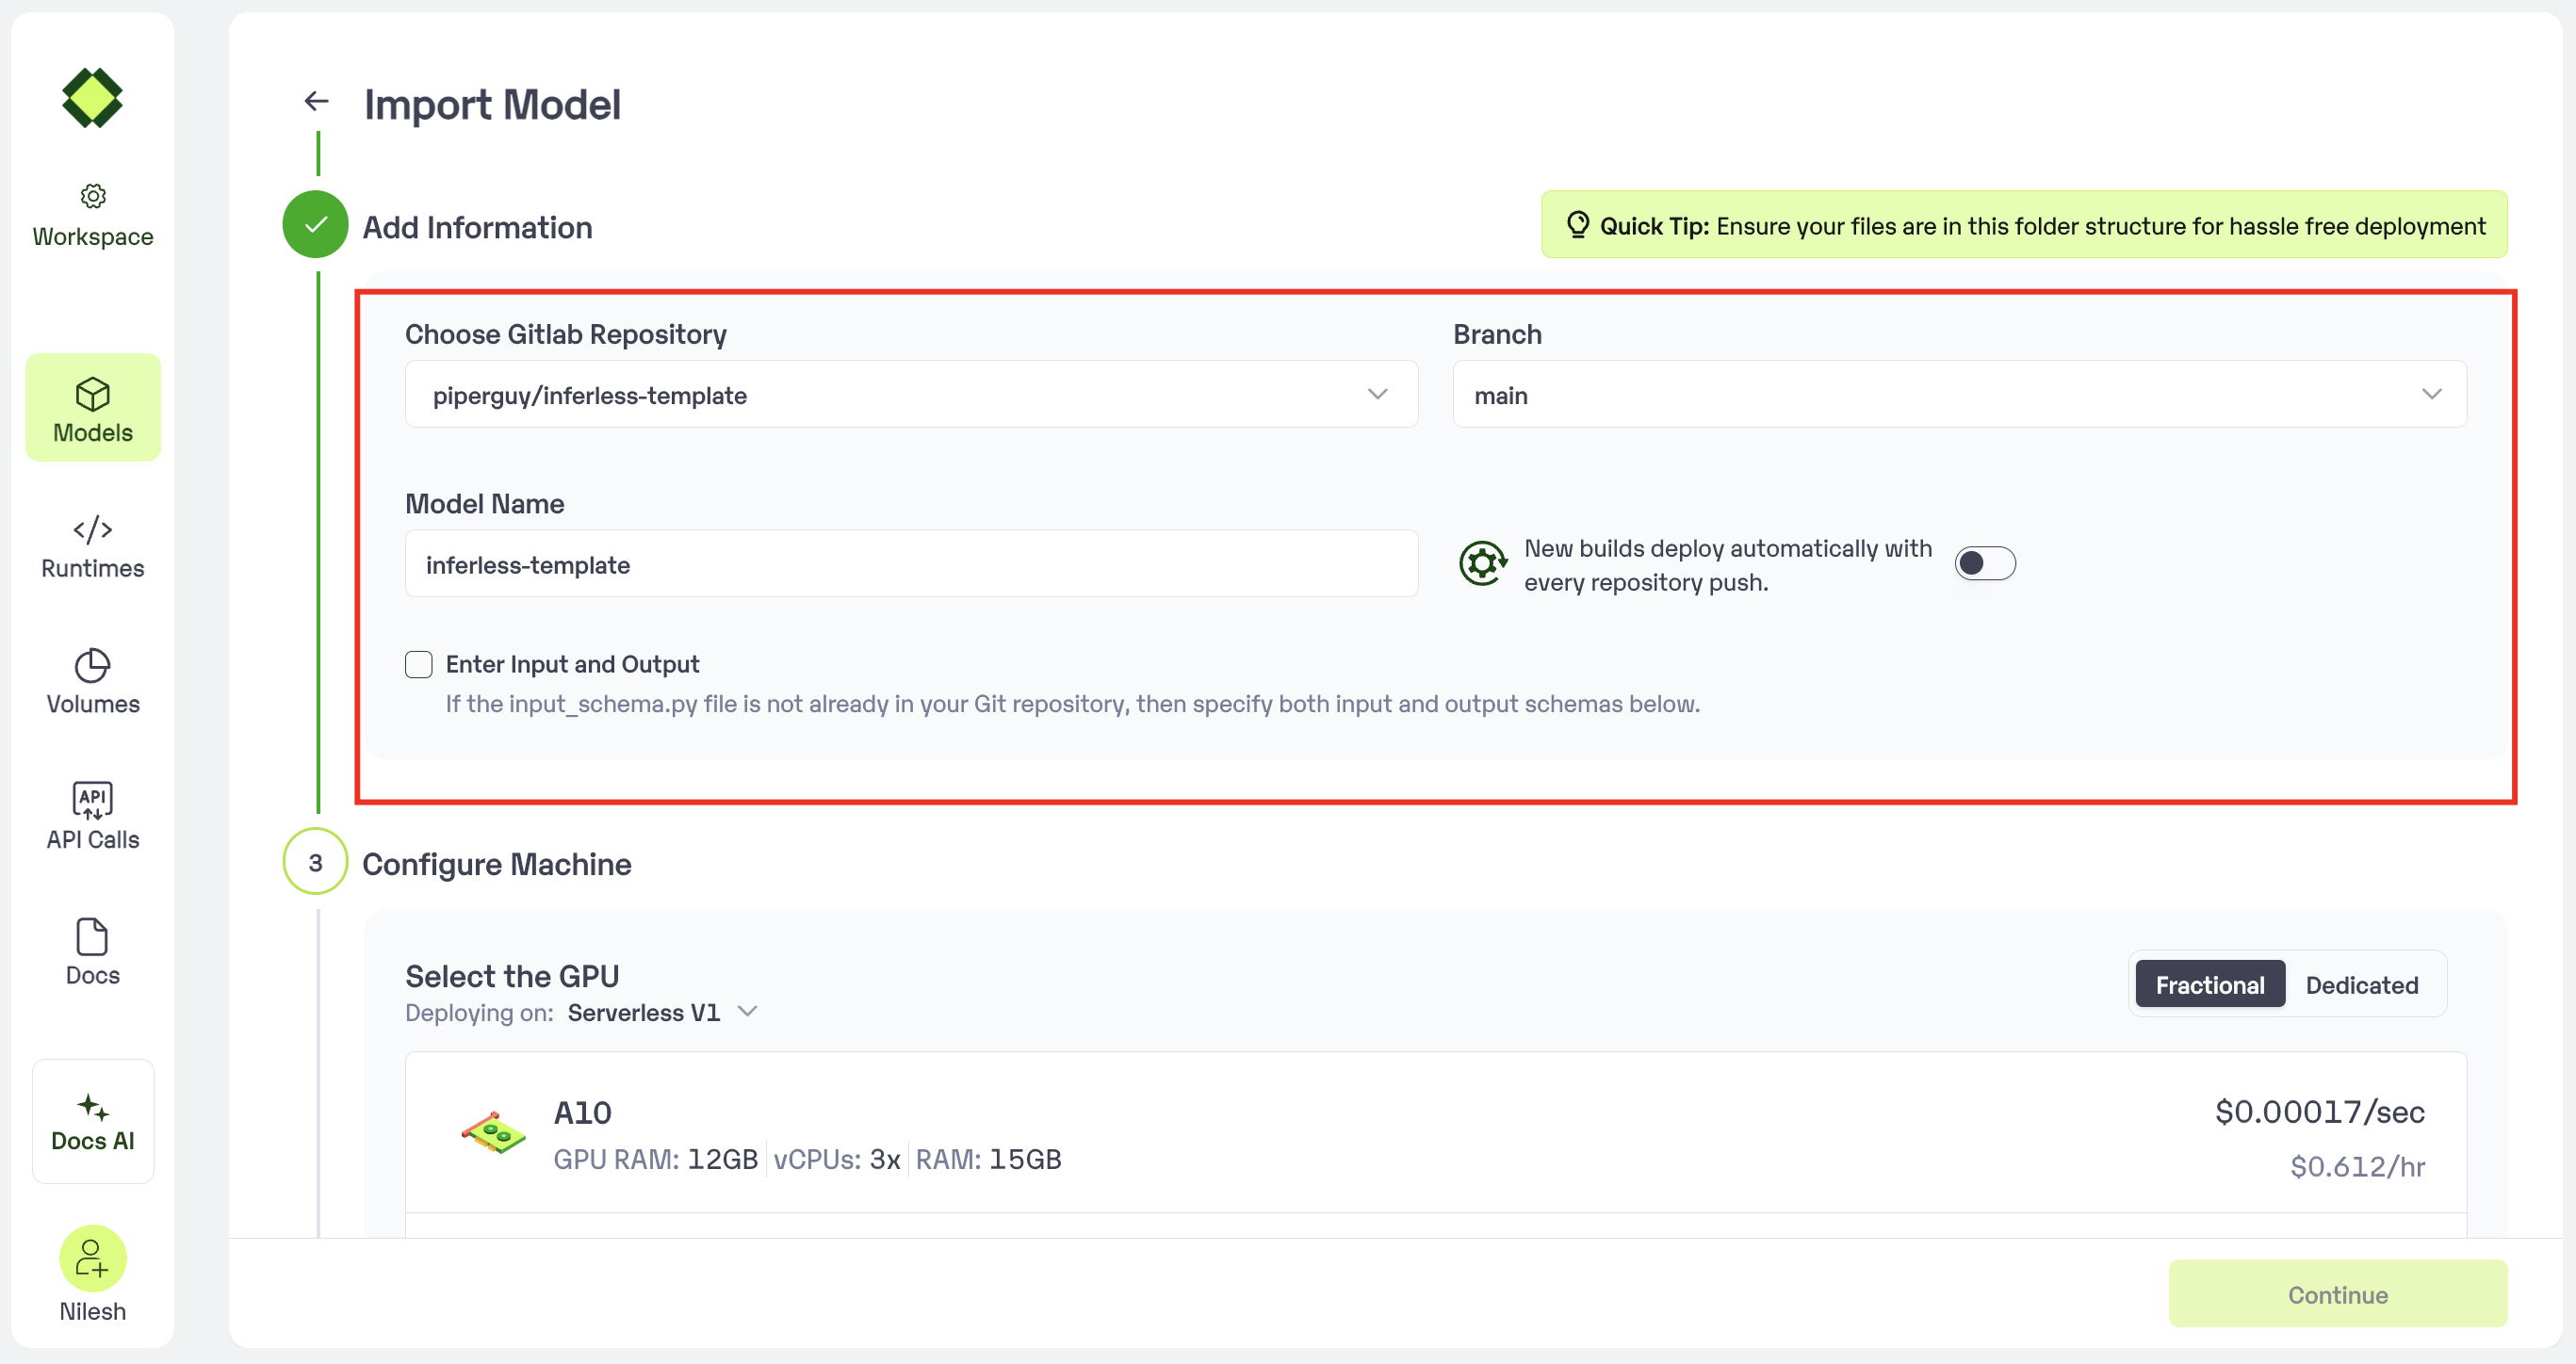 * In case you would like to set up `Automatic rebuild` for your model, enable it
* You would need to set up a webhook for this method. Click [here](/model-import/automatic-build-via-webhooks) for more details.
### Step 4: Configure Machine and Environment.
* Choose the type of machine, and specify the minimum and maximum number of replicas for deploying your model.
* **Min scale** -
```
The number of inference workers to keep on at all times.
```
* **Max scale -**
```
The maximum number of inference workers to allow at any point of time
```
* Configure Custom Runtime ( If you have pip or apt packages), choose Volume, Secrets and set Environment variables like Inference Timeout / Container Concurrency / Scale Down Timeout
### Step 5: Review your model details
* Once you click "Continue," you will be able to review the details added for the model.
* If you would like to make any changes, you can go back and make the changes.
* Once you have reviewed everything, click `Deploy` to start the model import process.
### Step 6 : Run your model
* Once you click submit, the model import process would start.
* It may take some time to complete the import process, and during this time, you will be redirected to your workspace and can see the status of the import under `"In Progress/Failed"` tab.\
* If you encounter any errors during the model import process or if you want to view the build logs for any reason, you can click on the three dots menu and select "View build logs". This will show you a detailed log of the import process, which can help you troubleshoot any issues you may encounter.
* Post-upload, the model will be available under "My Models"
* You can then select the model and go to `-> API -> Inference Endpoint details. `Here you would find the API endpoints that can be called. You can click on the copy button on the right and can call your model.
### Extra Step: Getting API key details
* You can now call using this from your end. The inference result would be the output for these calls.
* In case you need help with API Keys:
* Click on settings, available on the top, next to your Workspace Name
* Click on "Workspace API keys"
* You can view the details of your key or generate a new one\
### Using CLI
If your model is stored in Gitlab repo. Make sure you follow [this](https://docs.inferless.com/model-import/file-structure-req/importing-from-github) folder structure.
1. Login to [Inferless.com](https://inferless.com/) and click on three dot menu near the profile picture
2. Click on [Manage integrations](https://console.inferless.com/user/integration) and connect with your Gitlab account were the model is stored.
3. Once you’re done with integration. Run this command to initialise the model
```bash
inferless init --name
* In case you would like to set up `Automatic rebuild` for your model, enable it
* You would need to set up a webhook for this method. Click [here](/model-import/automatic-build-via-webhooks) for more details.
### Step 4: Configure Machine and Environment.
* Choose the type of machine, and specify the minimum and maximum number of replicas for deploying your model.
* **Min scale** -
```
The number of inference workers to keep on at all times.
```
* **Max scale -**
```
The maximum number of inference workers to allow at any point of time
```
* Configure Custom Runtime ( If you have pip or apt packages), choose Volume, Secrets and set Environment variables like Inference Timeout / Container Concurrency / Scale Down Timeout
### Step 5: Review your model details
* Once you click "Continue," you will be able to review the details added for the model.
* If you would like to make any changes, you can go back and make the changes.
* Once you have reviewed everything, click `Deploy` to start the model import process.
### Step 6 : Run your model
* Once you click submit, the model import process would start.
* It may take some time to complete the import process, and during this time, you will be redirected to your workspace and can see the status of the import under `"In Progress/Failed"` tab.\
* If you encounter any errors during the model import process or if you want to view the build logs for any reason, you can click on the three dots menu and select "View build logs". This will show you a detailed log of the import process, which can help you troubleshoot any issues you may encounter.
* Post-upload, the model will be available under "My Models"
* You can then select the model and go to `-> API -> Inference Endpoint details. `Here you would find the API endpoints that can be called. You can click on the copy button on the right and can call your model.
### Extra Step: Getting API key details
* You can now call using this from your end. The inference result would be the output for these calls.
* In case you need help with API Keys:
* Click on settings, available on the top, next to your Workspace Name
* Click on "Workspace API keys"
* You can view the details of your key or generate a new one\
### Using CLI
If your model is stored in Gitlab repo. Make sure you follow [this](https://docs.inferless.com/model-import/file-structure-req/importing-from-github) folder structure.
1. Login to [Inferless.com](https://inferless.com/) and click on three dot menu near the profile picture
2. Click on [Manage integrations](https://console.inferless.com/user/integration) and connect with your Gitlab account were the model is stored.
3. Once you’re done with integration. Run this command to initialise the model
```bash
inferless init --name 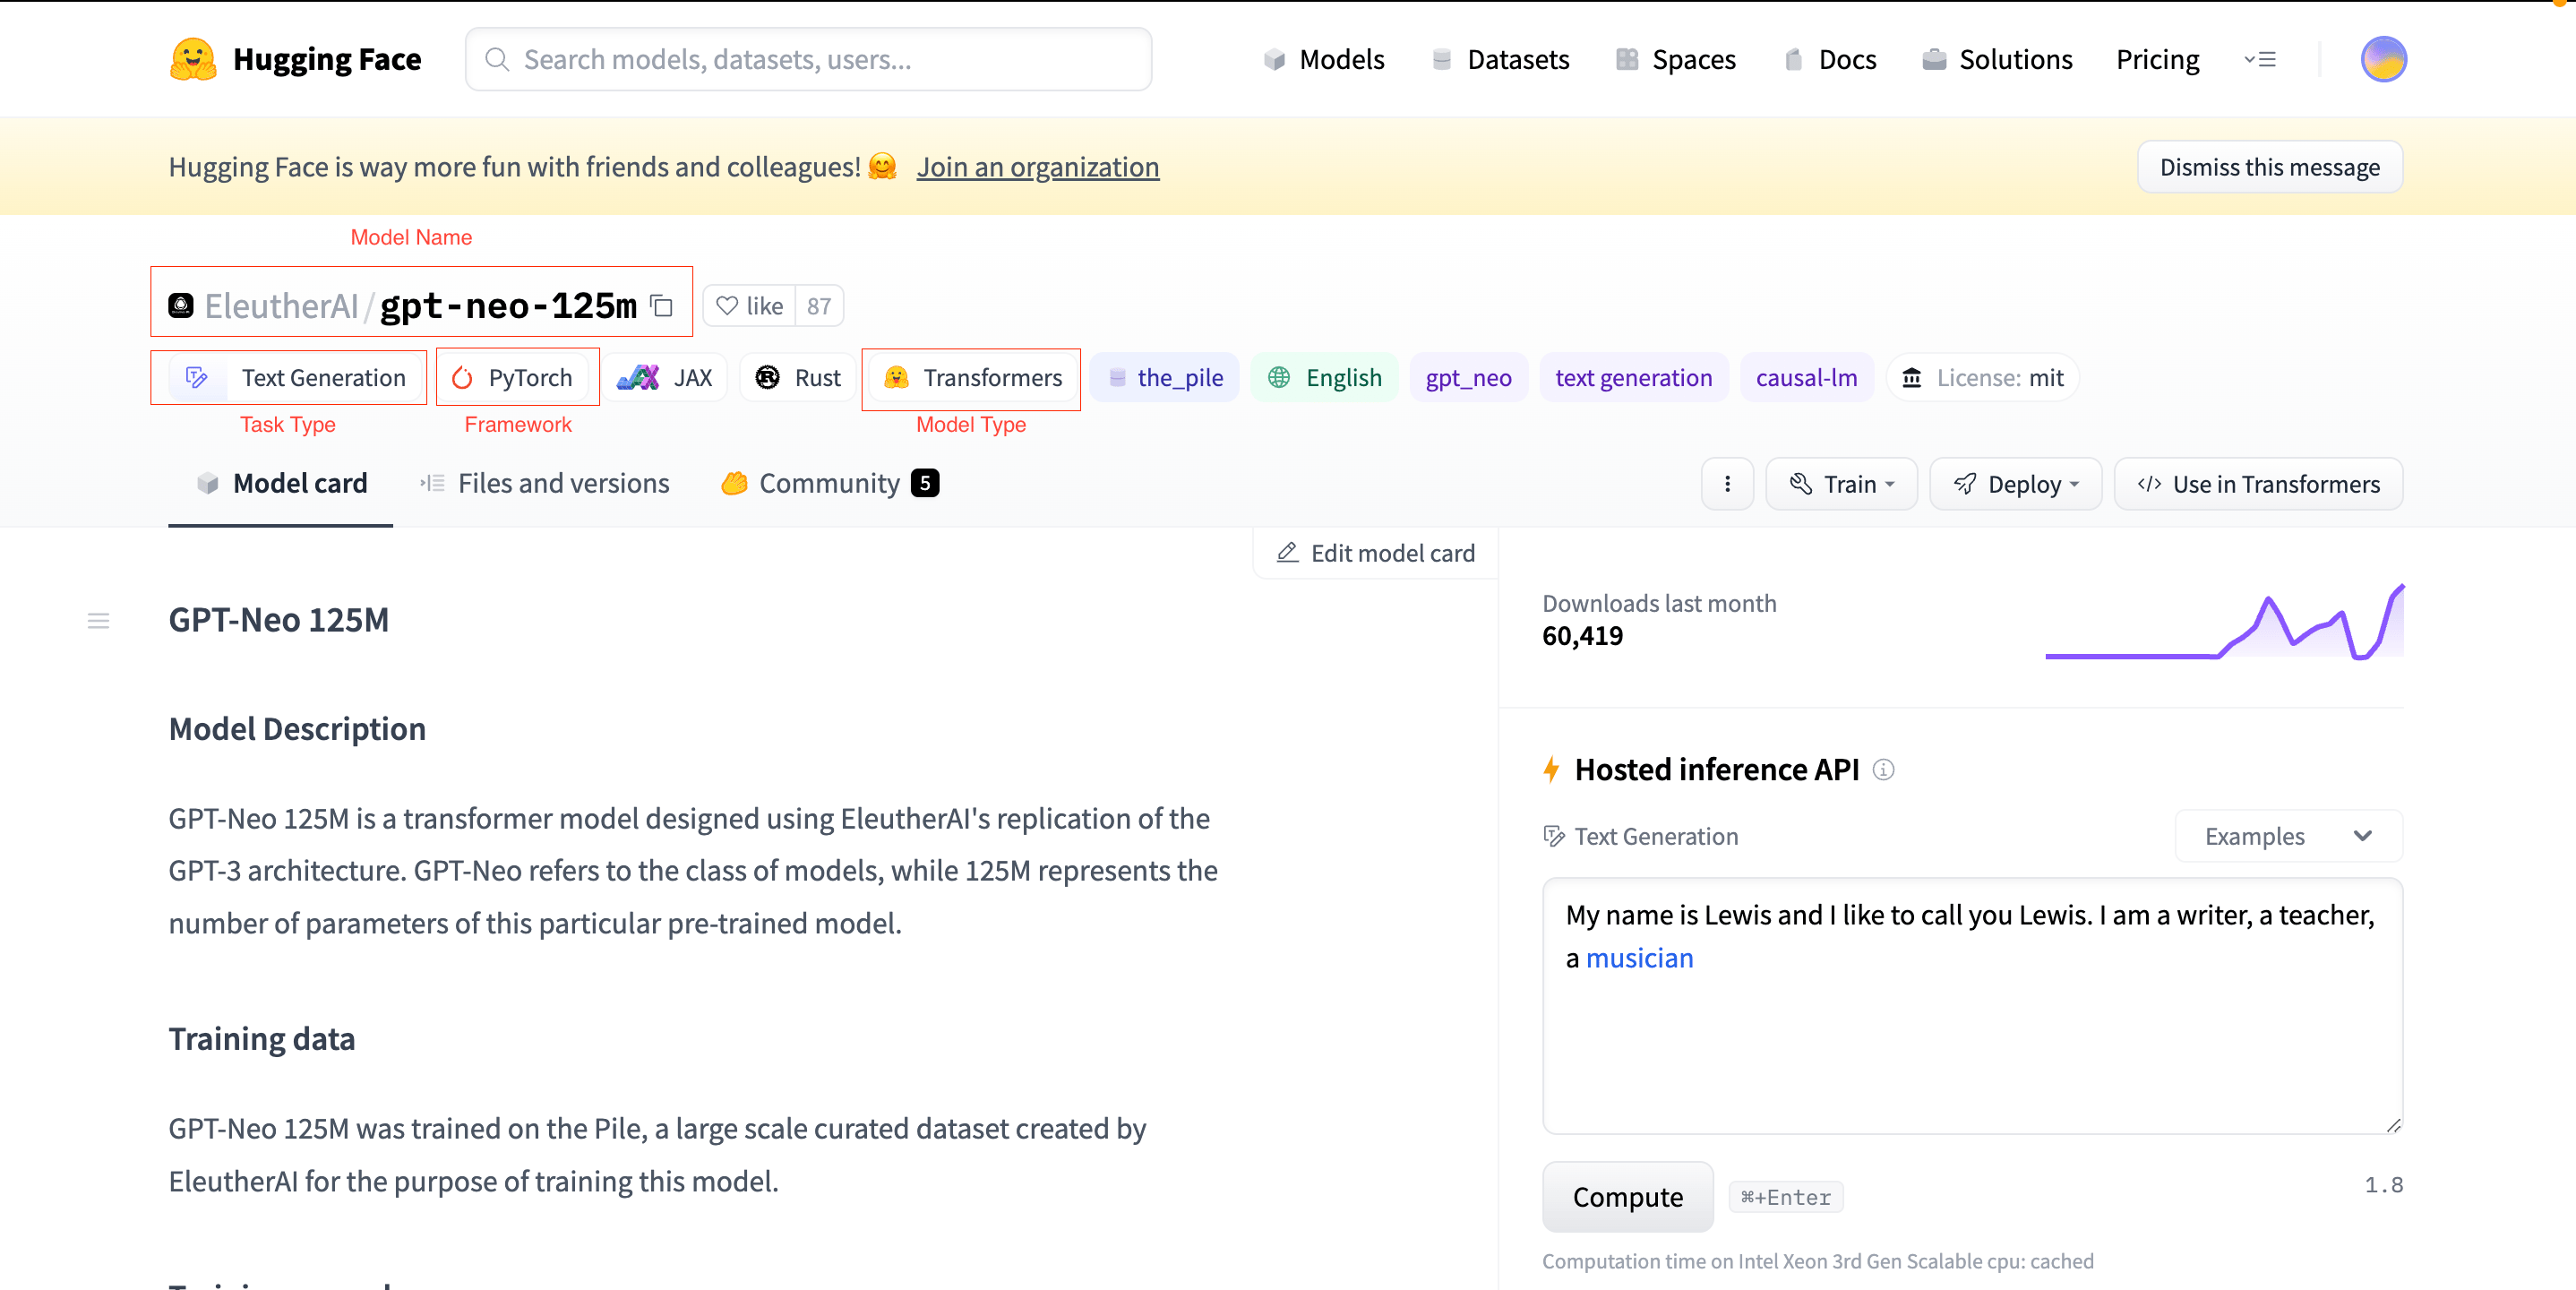 ### Step 1: Add Model in your workspace.
* Navigate to your desired workspace in Inferless and Click on `"Huggingface" `. An import wizard will open up.
### Step 2: Enter the model details
* **Model Details** : In this step, Add your `model name`(The name that you wish to call your model), Choose the `model type`(Eg: Transformer), Choose the `task type` (Eg: Text generation) and `Huggingface model name`.
* In case you would like to set up `Automatic rebuild` for your model, enable it
* You would need to set up a webhook for this method. Click [here](/model-import/automatic-build-via-webhooks) for more details.
### Step 3: Edit the Inference Code and Input/Output Schema
* **Model Code**c: In this step, you can modify the input params ( by adding to input\_schema.py ) and output params, you can also modify the model load and inference code in app.py
### Step 1: Add Model in your workspace.
* Navigate to your desired workspace in Inferless and Click on `"Huggingface" `. An import wizard will open up.
### Step 2: Enter the model details
* **Model Details** : In this step, Add your `model name`(The name that you wish to call your model), Choose the `model type`(Eg: Transformer), Choose the `task type` (Eg: Text generation) and `Huggingface model name`.
* In case you would like to set up `Automatic rebuild` for your model, enable it
* You would need to set up a webhook for this method. Click [here](/model-import/automatic-build-via-webhooks) for more details.
### Step 3: Edit the Inference Code and Input/Output Schema
* **Model Code**c: In this step, you can modify the input params ( by adding to input\_schema.py ) and output params, you can also modify the model load and inference code in app.py
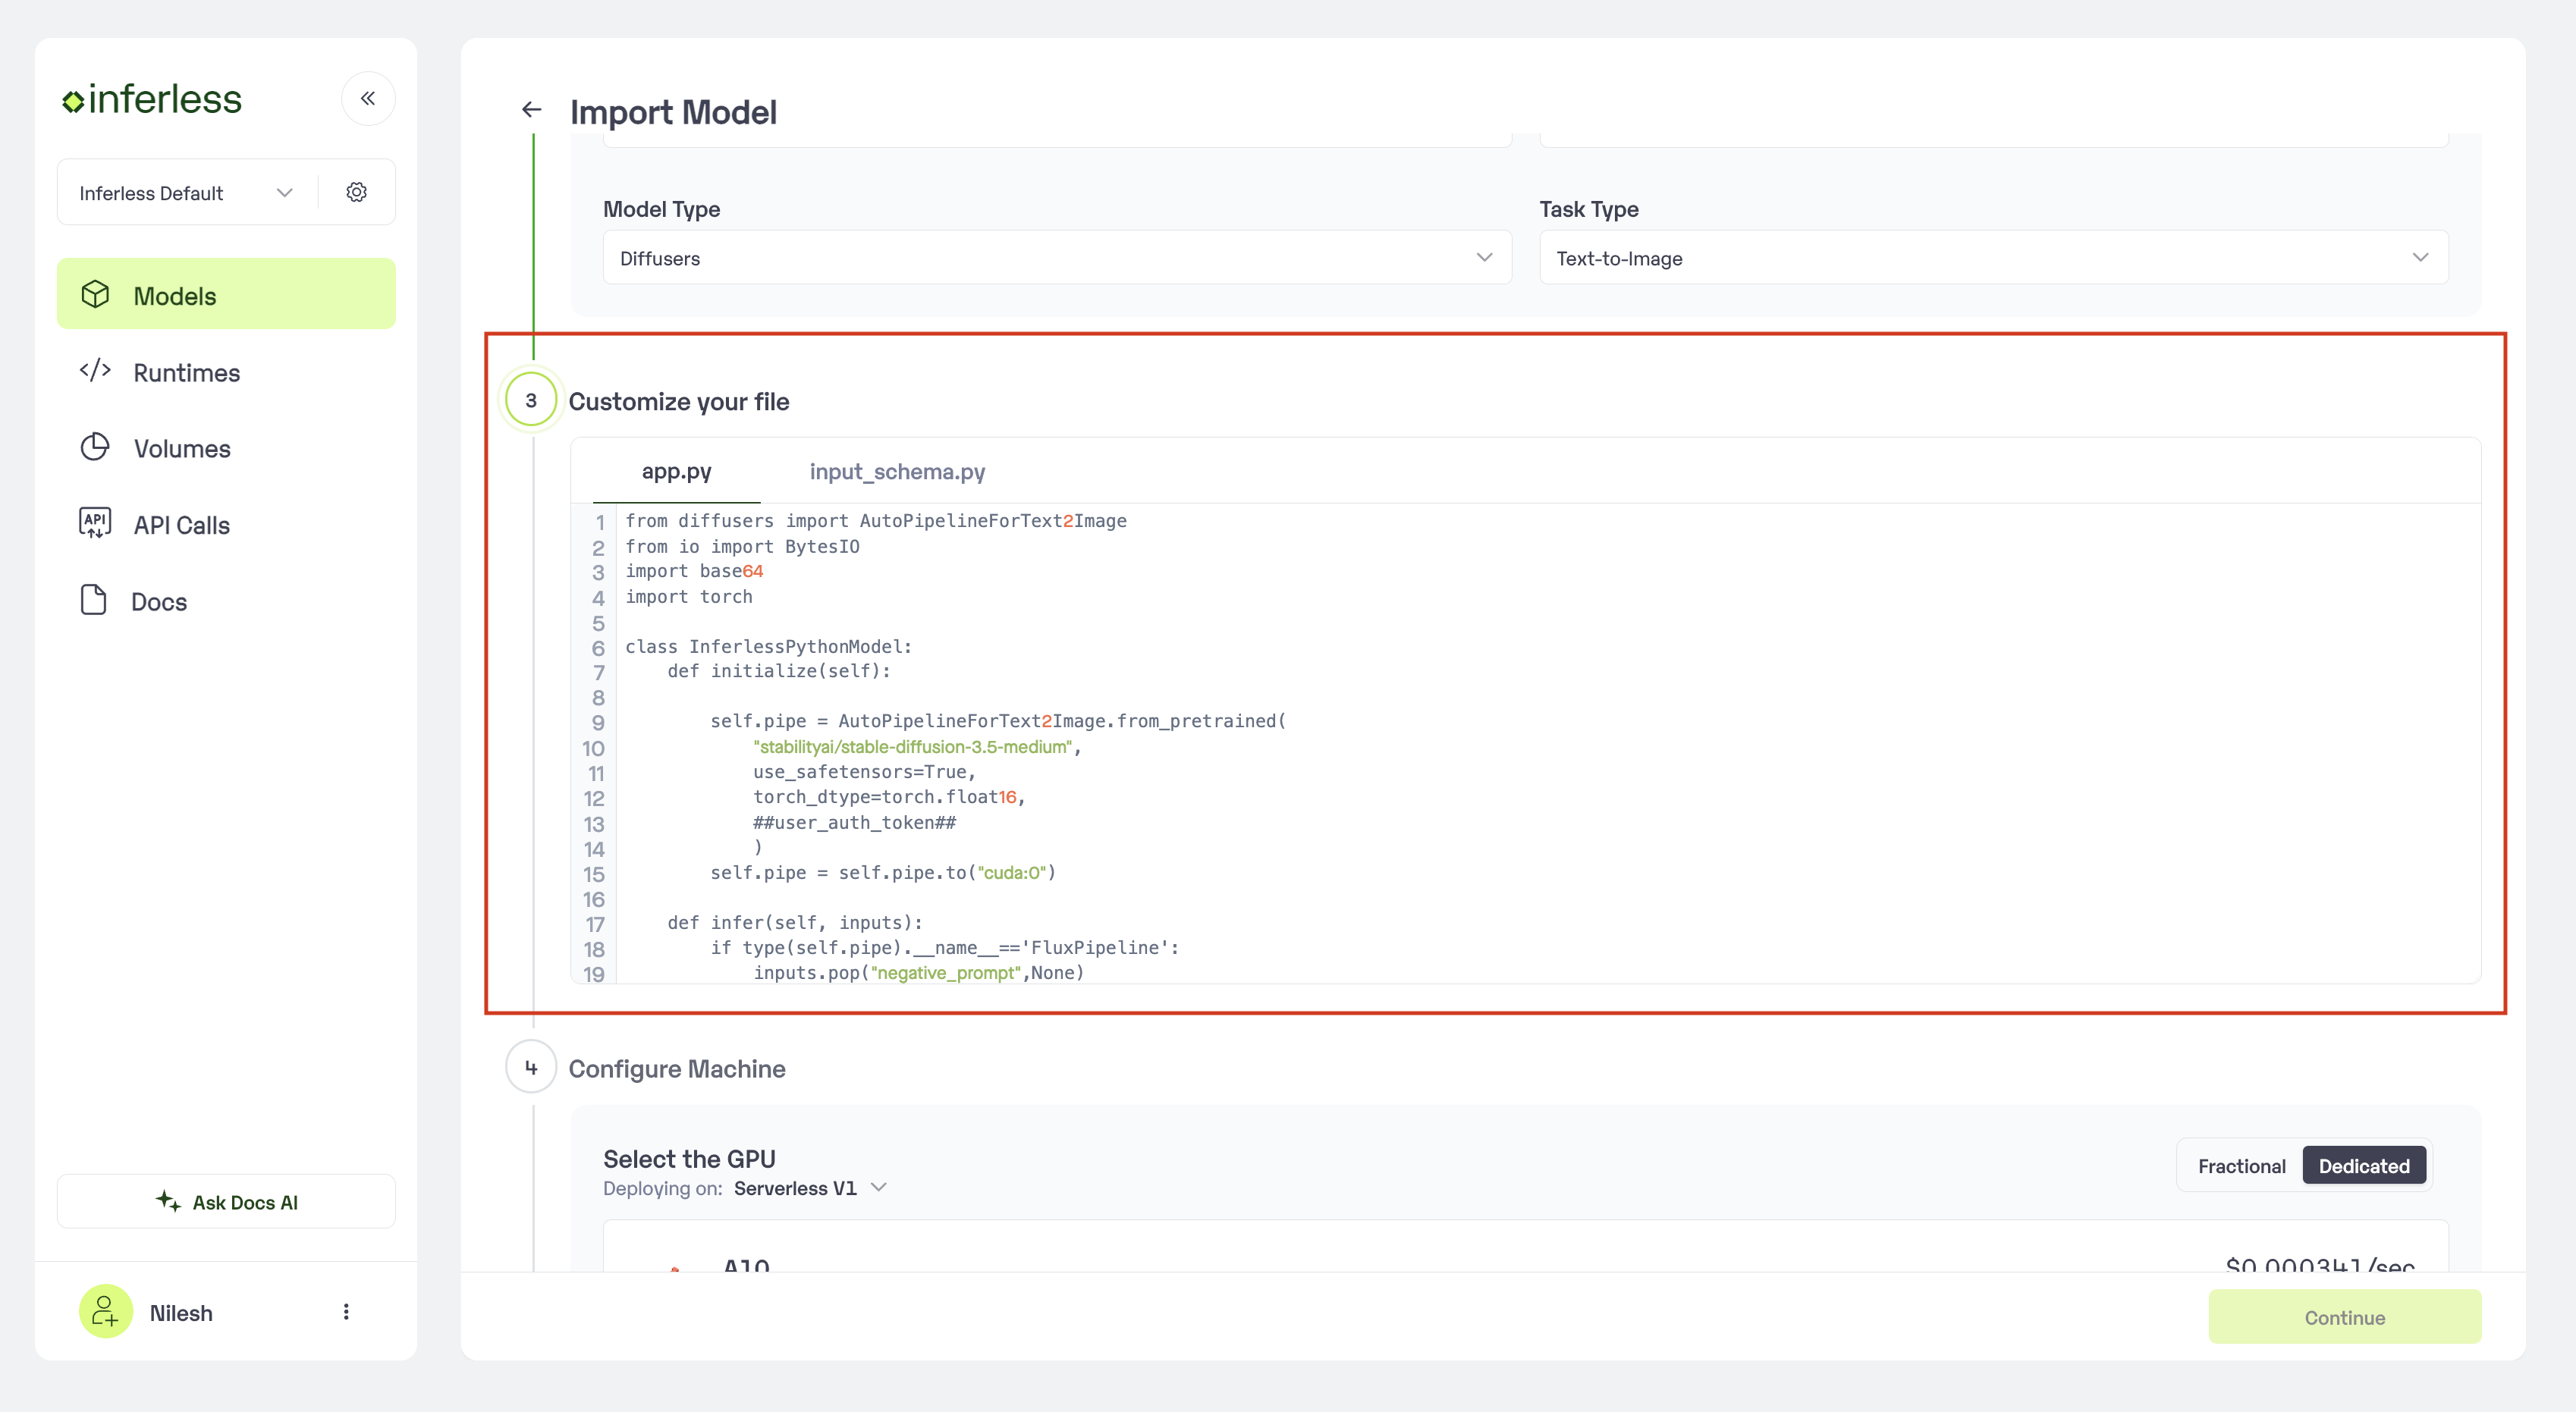 ### Step 4: Configure Machine and Environment.
* Choose the type of machine, and specify the minimum and maximum number of replicas for deploying your model.
* **Min scale** -
```
The number of inference workers to keep on at all times.
```
* **Max scale -**
```
The maximum number of inference workers to allow at any point of time
```
* Configure Custom Runtime ( If you have pip or apt packages), choose Volume, Secrets and set Environment variables like Inference Timeout / Container Concurrency / Scale Down Timeout
### Step 5: Review your model details
* Once you click "Continue," you will be able to review the details added for the model.
* If you would like to make any changes, you can go back and make the changes.
* Once you have reviewed everything, click `Deploy` to start the model import process.
### Step 6 : Run your model
* Once you click submit, the model import process would start.
* It may take some time to complete the import process, and during this time, you will be redirected to your workspace and can see the status of the import under `"In Progress/Failed"` tab.\
* If you encounter any errors during the model import process or if you want to view the build logs for any reason, you can click on the three dots menu and select "View build logs". This will show you a detailed log of the import process, which can help you troubleshoot any issues you may encounter.
* Post-upload, the model will be available under "My Models"
* You can then select the model and go to `"My Model" -> API -> Inference Endpoint details. `Here you would find the API endpoints that can be called. You can click on the copy button on the right and can call your model.
### Extra Step: Getting API key details
* You can now call using this from your end. The inference result would be the output for these calls.
* In case you need help with API Keys:
* Click on settings, available on the top, next to your Workspace Name
* Click on "Workspace API keys"
* You can view the details of your key or generate a new one\
Here is a sample video of the whole process for a 7GB Stable diffusion Model : [Click to view](https://www.youtube.com/watch?v=5vYsmPu9pZM)
### Using CLI
You can use any model you want from Huggingface and deploy with us
1. Connect your [Huggingface](https://huggingface.co/login) account using this command(below) and enter the name and apikey. Make sure your github account is integrated with [Inferless](https://console.inferless.com/user/integration)
```bash
inferless integration add HF --name
### Step 4: Configure Machine and Environment.
* Choose the type of machine, and specify the minimum and maximum number of replicas for deploying your model.
* **Min scale** -
```
The number of inference workers to keep on at all times.
```
* **Max scale -**
```
The maximum number of inference workers to allow at any point of time
```
* Configure Custom Runtime ( If you have pip or apt packages), choose Volume, Secrets and set Environment variables like Inference Timeout / Container Concurrency / Scale Down Timeout
### Step 5: Review your model details
* Once you click "Continue," you will be able to review the details added for the model.
* If you would like to make any changes, you can go back and make the changes.
* Once you have reviewed everything, click `Deploy` to start the model import process.
### Step 6 : Run your model
* Once you click submit, the model import process would start.
* It may take some time to complete the import process, and during this time, you will be redirected to your workspace and can see the status of the import under `"In Progress/Failed"` tab.\
* If you encounter any errors during the model import process or if you want to view the build logs for any reason, you can click on the three dots menu and select "View build logs". This will show you a detailed log of the import process, which can help you troubleshoot any issues you may encounter.
* Post-upload, the model will be available under "My Models"
* You can then select the model and go to `"My Model" -> API -> Inference Endpoint details. `Here you would find the API endpoints that can be called. You can click on the copy button on the right and can call your model.
### Extra Step: Getting API key details
* You can now call using this from your end. The inference result would be the output for these calls.
* In case you need help with API Keys:
* Click on settings, available on the top, next to your Workspace Name
* Click on "Workspace API keys"
* You can view the details of your key or generate a new one\
Here is a sample video of the whole process for a 7GB Stable diffusion Model : [Click to view](https://www.youtube.com/watch?v=5vYsmPu9pZM)
### Using CLI
You can use any model you want from Huggingface and deploy with us
1. Connect your [Huggingface](https://huggingface.co/login) account using this command(below) and enter the name and apikey. Make sure your github account is integrated with [Inferless](https://console.inferless.com/user/integration)
```bash
inferless integration add HF --name 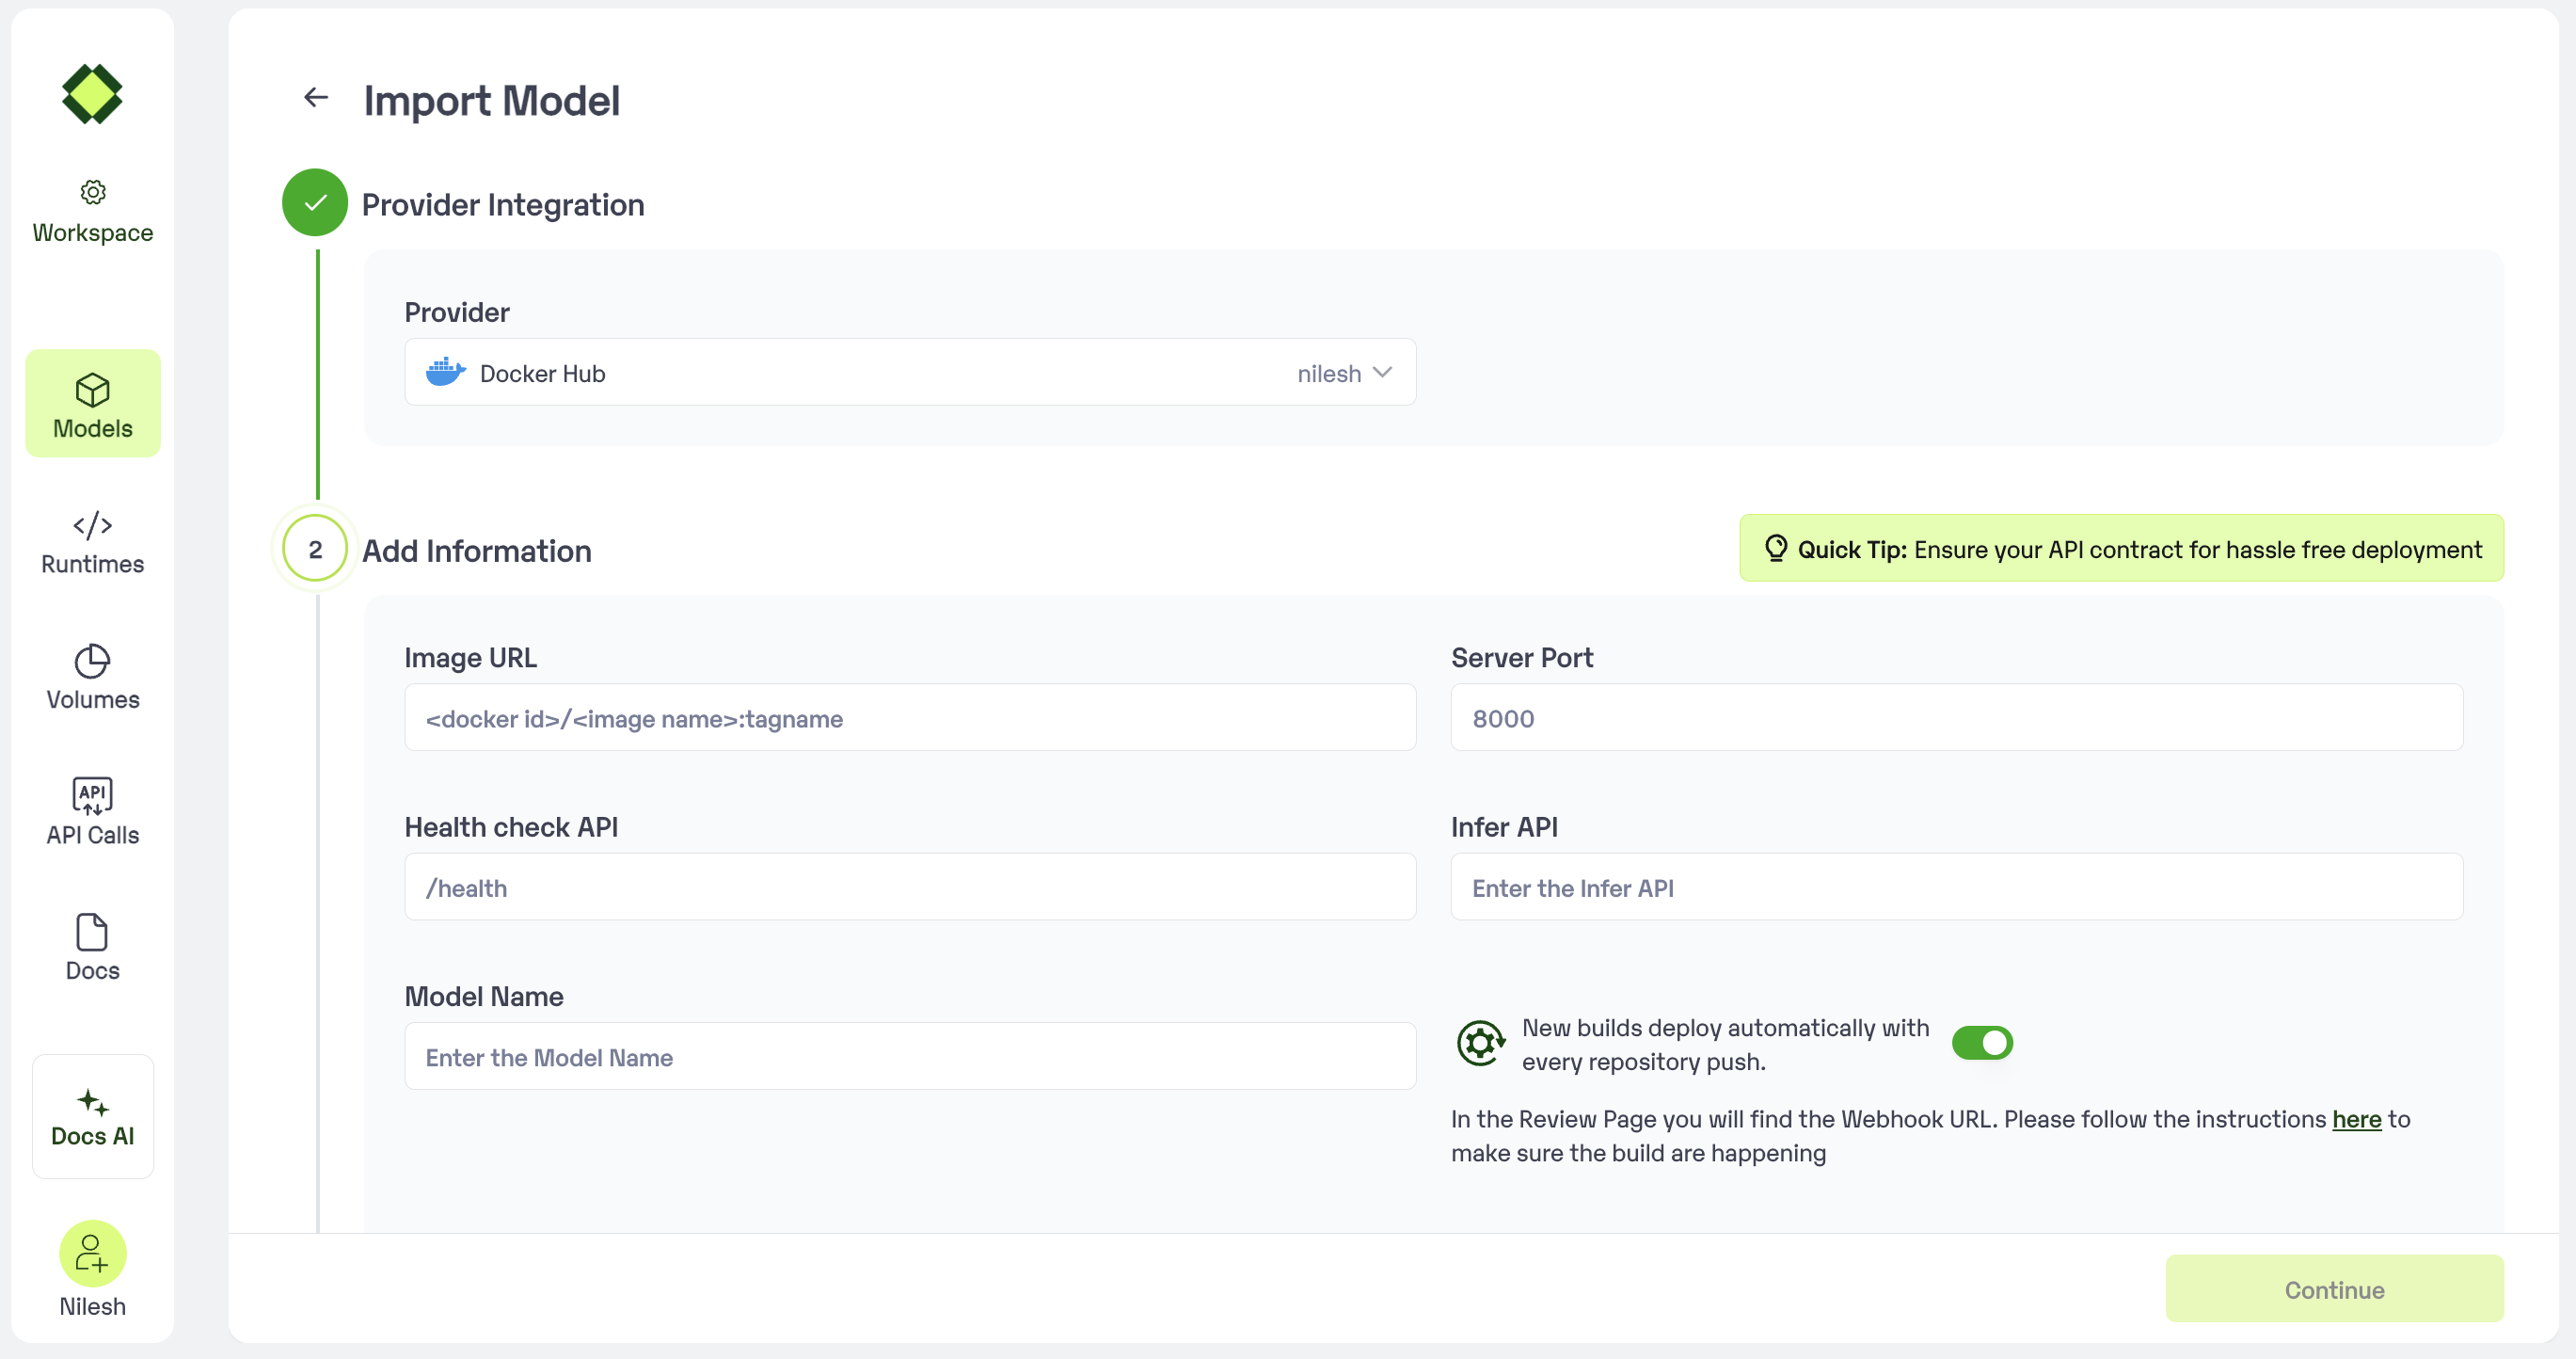 ### Enabling Auto-build after deploying the model
1. Go to [Inferless Console](https://console.inferless.com/home) and select your workspace
2. Select My Models and go to your model
3. In the model page, go to the "versions" tab, webhook url is visible upon checking the “Setup automatic build” box
### Enabling Auto-build after deploying the model
1. Go to [Inferless Console](https://console.inferless.com/home) and select your workspace
2. Select My Models and go to your model
3. In the model page, go to the "versions" tab, webhook url is visible upon checking the “Setup automatic build” box
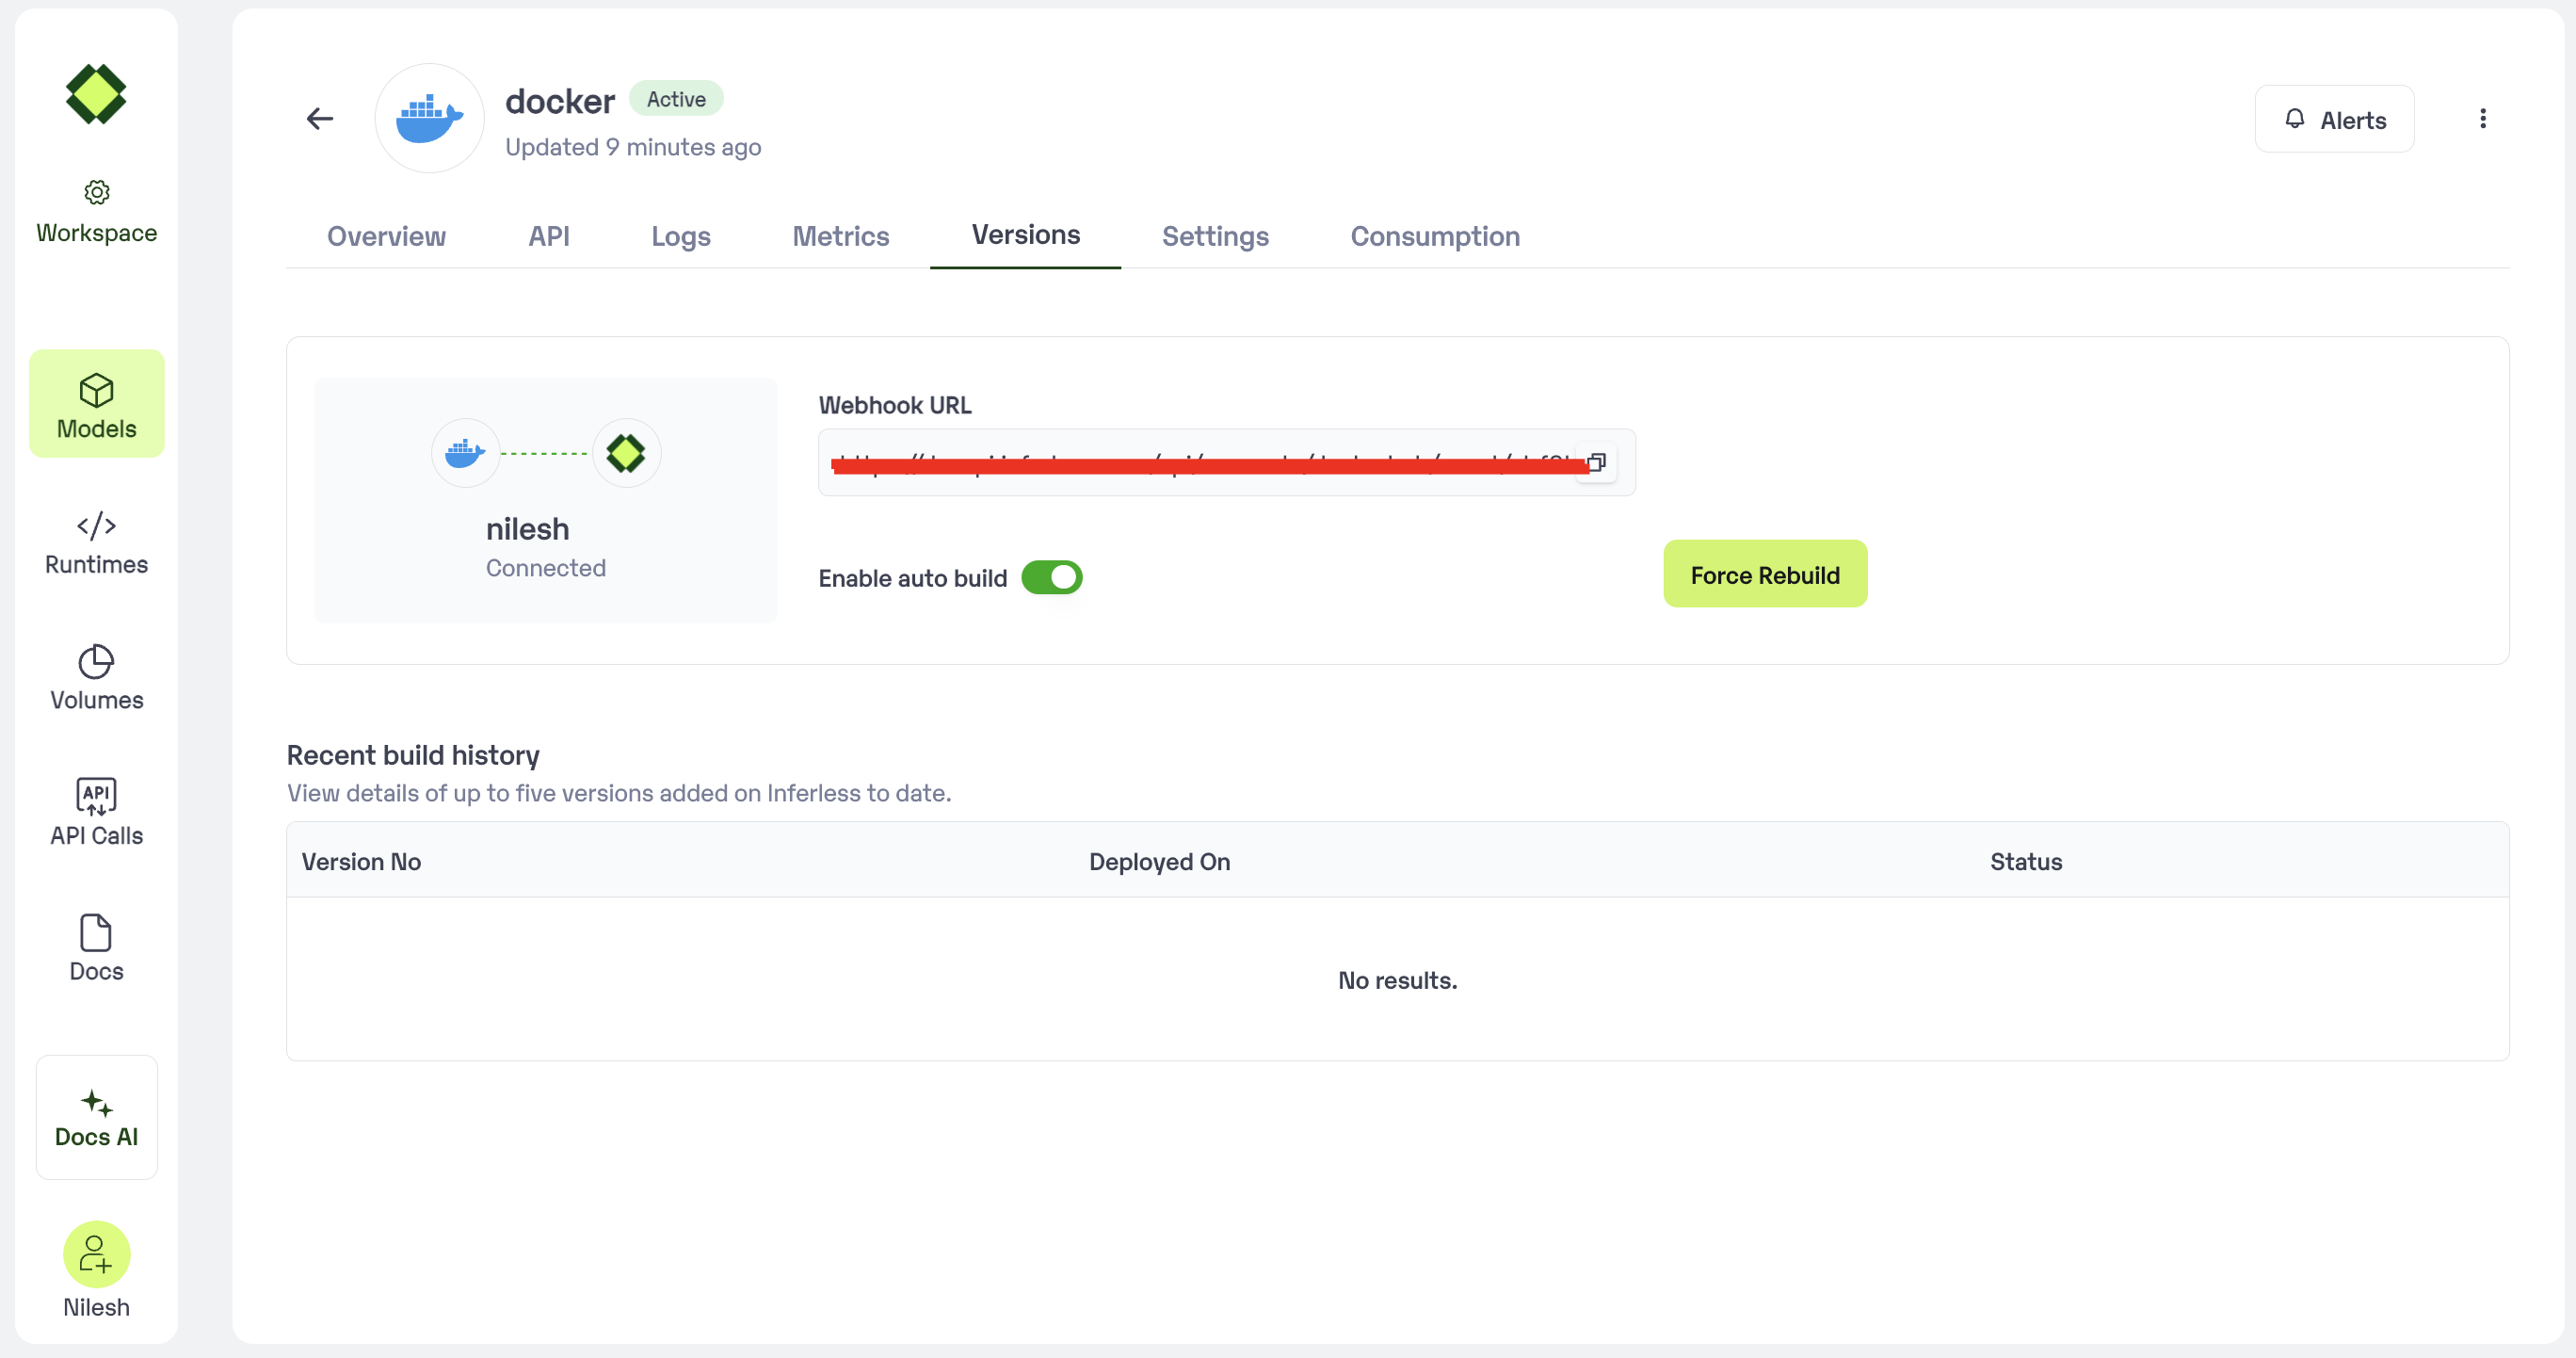 ### The Secret key
A Secret Key needs to be sent in the headers to authorize the webhook api call.
Copy and use this secret key
```SECRET_KEY
aDE9pETsG0jXBHP5oM9qJWSxBJ07Q8CUmyRu04OxdJBJoVR1E6ixNyHwmXRH6cVi
```
### Integrate in you CI/CD
This webhook url can be used in the CI/CD of your choice.
Curl Request to trigger a build using webhook url
```bash
curl --location --request POST '{WEBHOOK_URL}>' \\
--header 'X-Webhook-Secret: '
```
Python Requests Snippet to use webhook url
```python
import requests
url = "{WEBHOOK_URL}"
payload = {}
headers = {
'X-Webhook-Secret': 'SECRET_KEY'
}
response = requests.request("POST", url, headers=headers, data=payload)
print(response.text)
```
\*\* Replace WEBHOOK\_URL & SECRET\_KEY with the values mentioned earlier
# Github
Source: https://docs.inferless.com/model-import/automatic-build/github
### Steps to enable Web-hook
1. Make sure you enable auto-build during the model import process.
2. You can also enable/disable it in the future after import.
3. You can also choose the branch of the repo where we would enable webhooks.
4. Based on this selection, Inferless would receive and handle webhooks to automatically update and create new versions of the model.
You can view a sample example below:
### The Secret key
A Secret Key needs to be sent in the headers to authorize the webhook api call.
Copy and use this secret key
```SECRET_KEY
aDE9pETsG0jXBHP5oM9qJWSxBJ07Q8CUmyRu04OxdJBJoVR1E6ixNyHwmXRH6cVi
```
### Integrate in you CI/CD
This webhook url can be used in the CI/CD of your choice.
Curl Request to trigger a build using webhook url
```bash
curl --location --request POST '{WEBHOOK_URL}>' \\
--header 'X-Webhook-Secret: '
```
Python Requests Snippet to use webhook url
```python
import requests
url = "{WEBHOOK_URL}"
payload = {}
headers = {
'X-Webhook-Secret': 'SECRET_KEY'
}
response = requests.request("POST", url, headers=headers, data=payload)
print(response.text)
```
\*\* Replace WEBHOOK\_URL & SECRET\_KEY with the values mentioned earlier
# Github
Source: https://docs.inferless.com/model-import/automatic-build/github
### Steps to enable Web-hook
1. Make sure you enable auto-build during the model import process.
2. You can also enable/disable it in the future after import.
3. You can also choose the branch of the repo where we would enable webhooks.
4. Based on this selection, Inferless would receive and handle webhooks to automatically update and create new versions of the model.
You can view a sample example below:
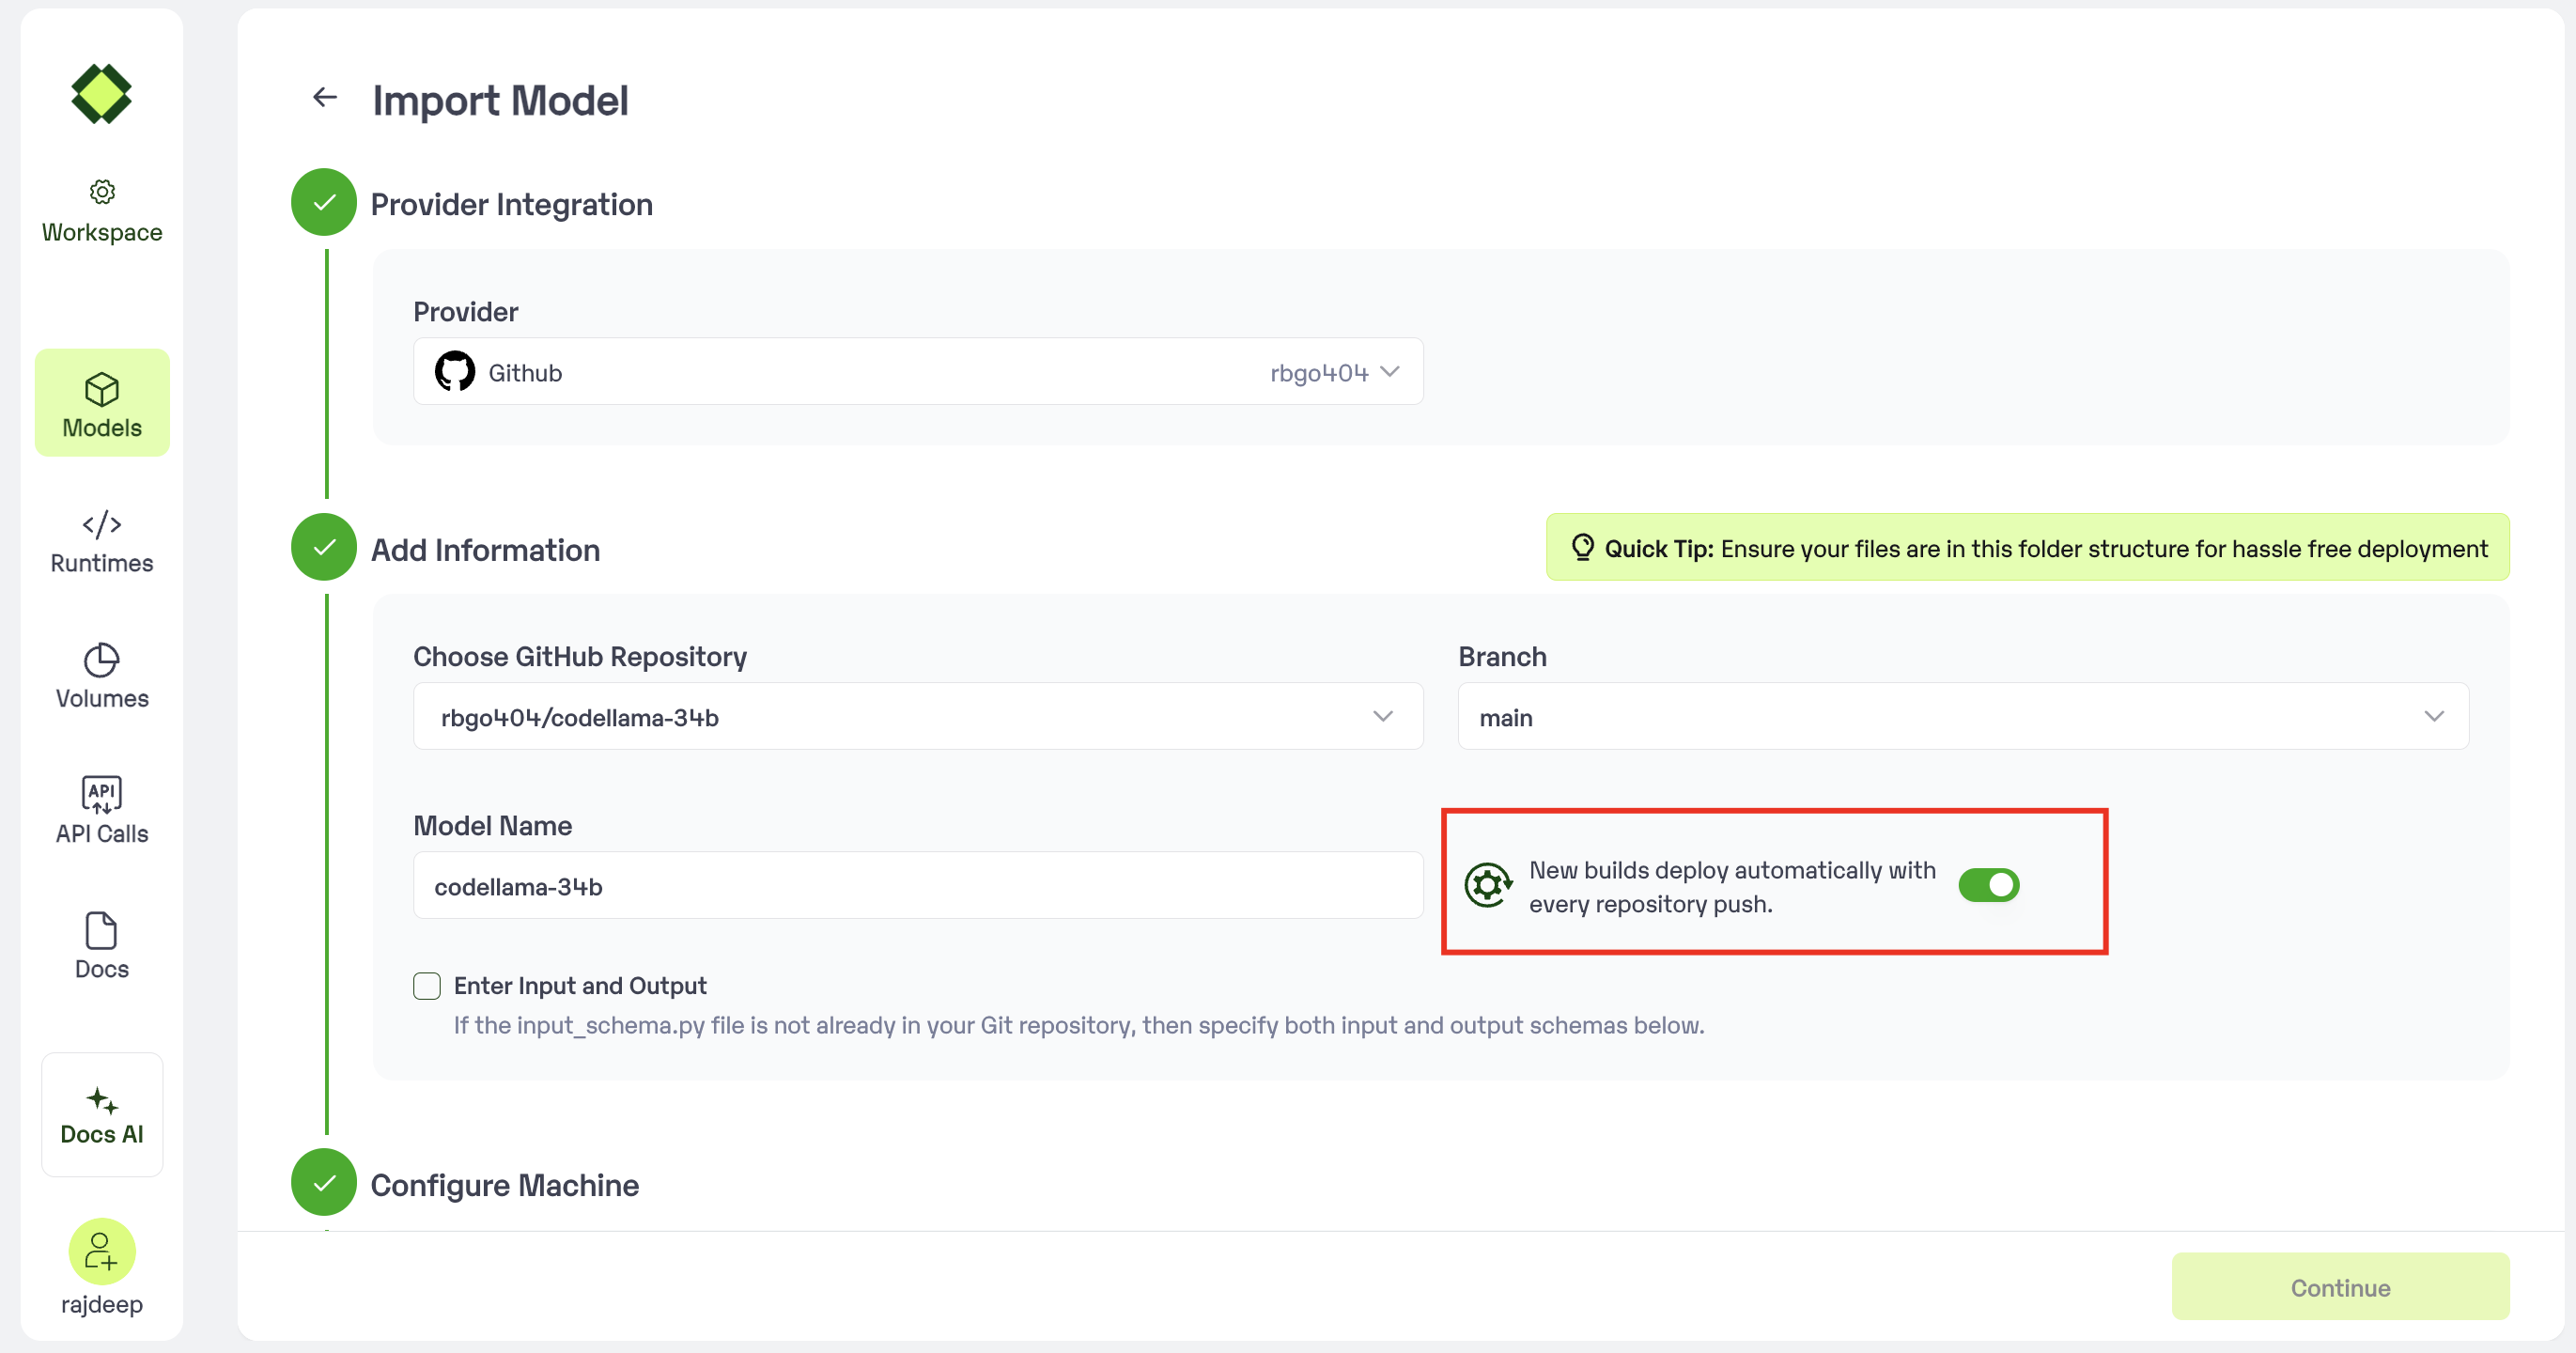 # Google Vertex AI
Source: https://docs.inferless.com/model-import/automatic-build/google-vertex-ai
### Steps to enable Web-hook
1. Create a webhook-based notification channel in the monitoring section.
2. This can be done through `Monitoring` -> `Alerting` -> `Edit Notification Channels` -> `Add Webhook `
3. `Make sure to check the Use HTTP Basic Auth Option.`
# Google Vertex AI
Source: https://docs.inferless.com/model-import/automatic-build/google-vertex-ai
### Steps to enable Web-hook
1. Create a webhook-based notification channel in the monitoring section.
2. This can be done through `Monitoring` -> `Alerting` -> `Edit Notification Channels` -> `Add Webhook `
3. `Make sure to check the Use HTTP Basic Auth Option.`
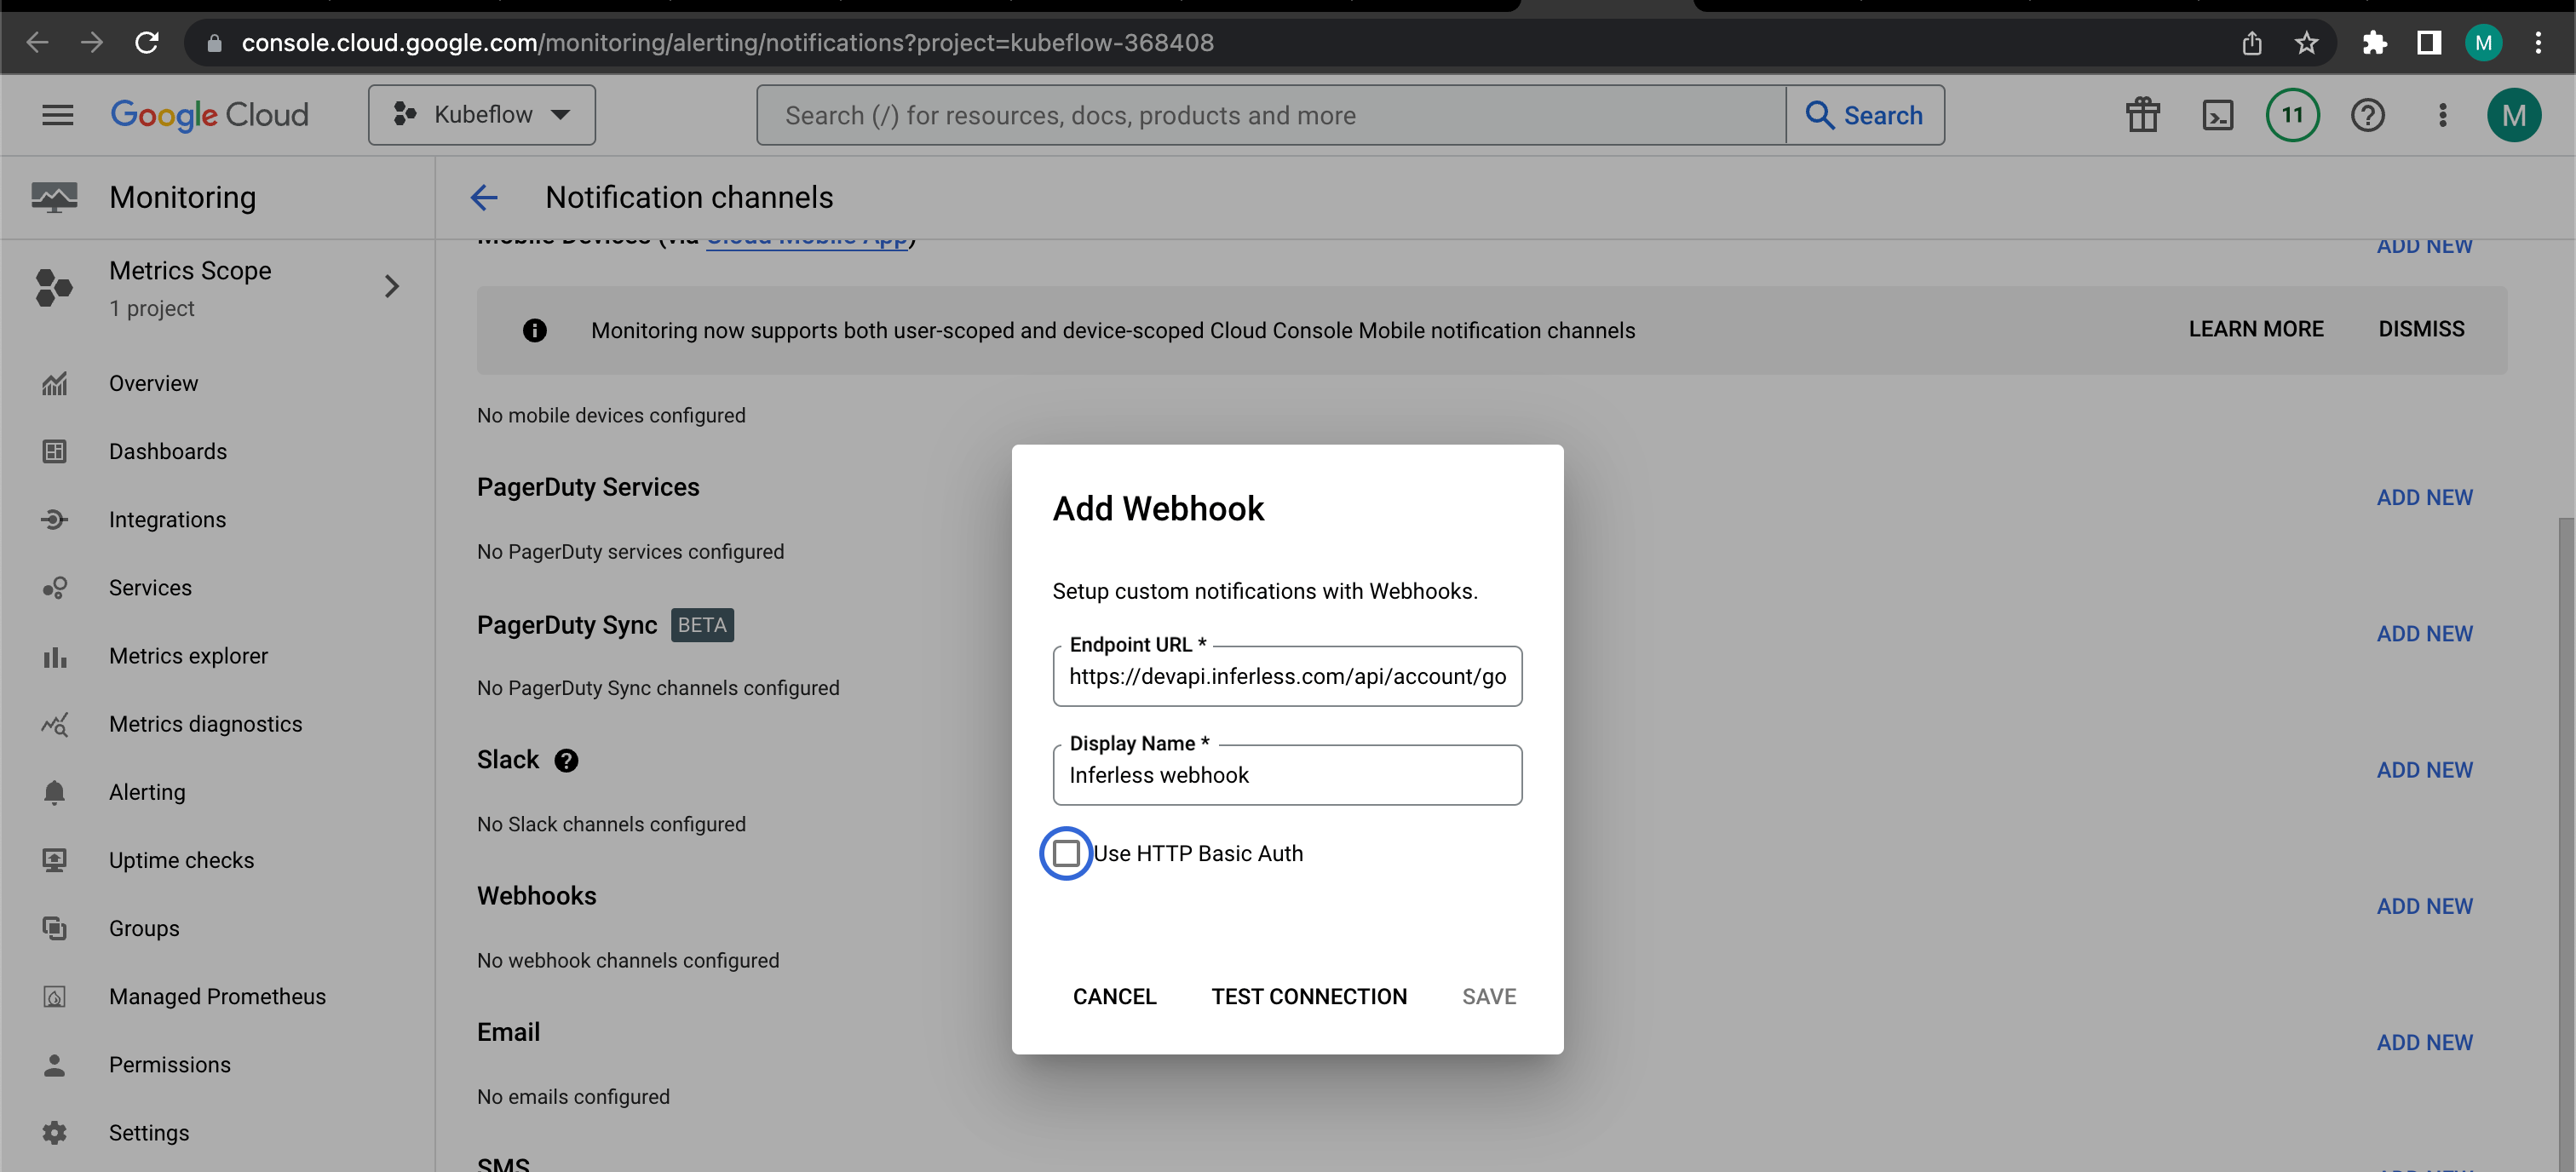 2. Enable Audit logs in GCP for AI Platform.
3. This can be done through `IAM and Admin Section` -> `Audit Logs menu` -> `Filter for vertex AI.`
2. Enable Audit logs in GCP for AI Platform.
3. This can be done through `IAM and Admin Section` -> `Audit Logs menu` -> `Filter for vertex AI.`
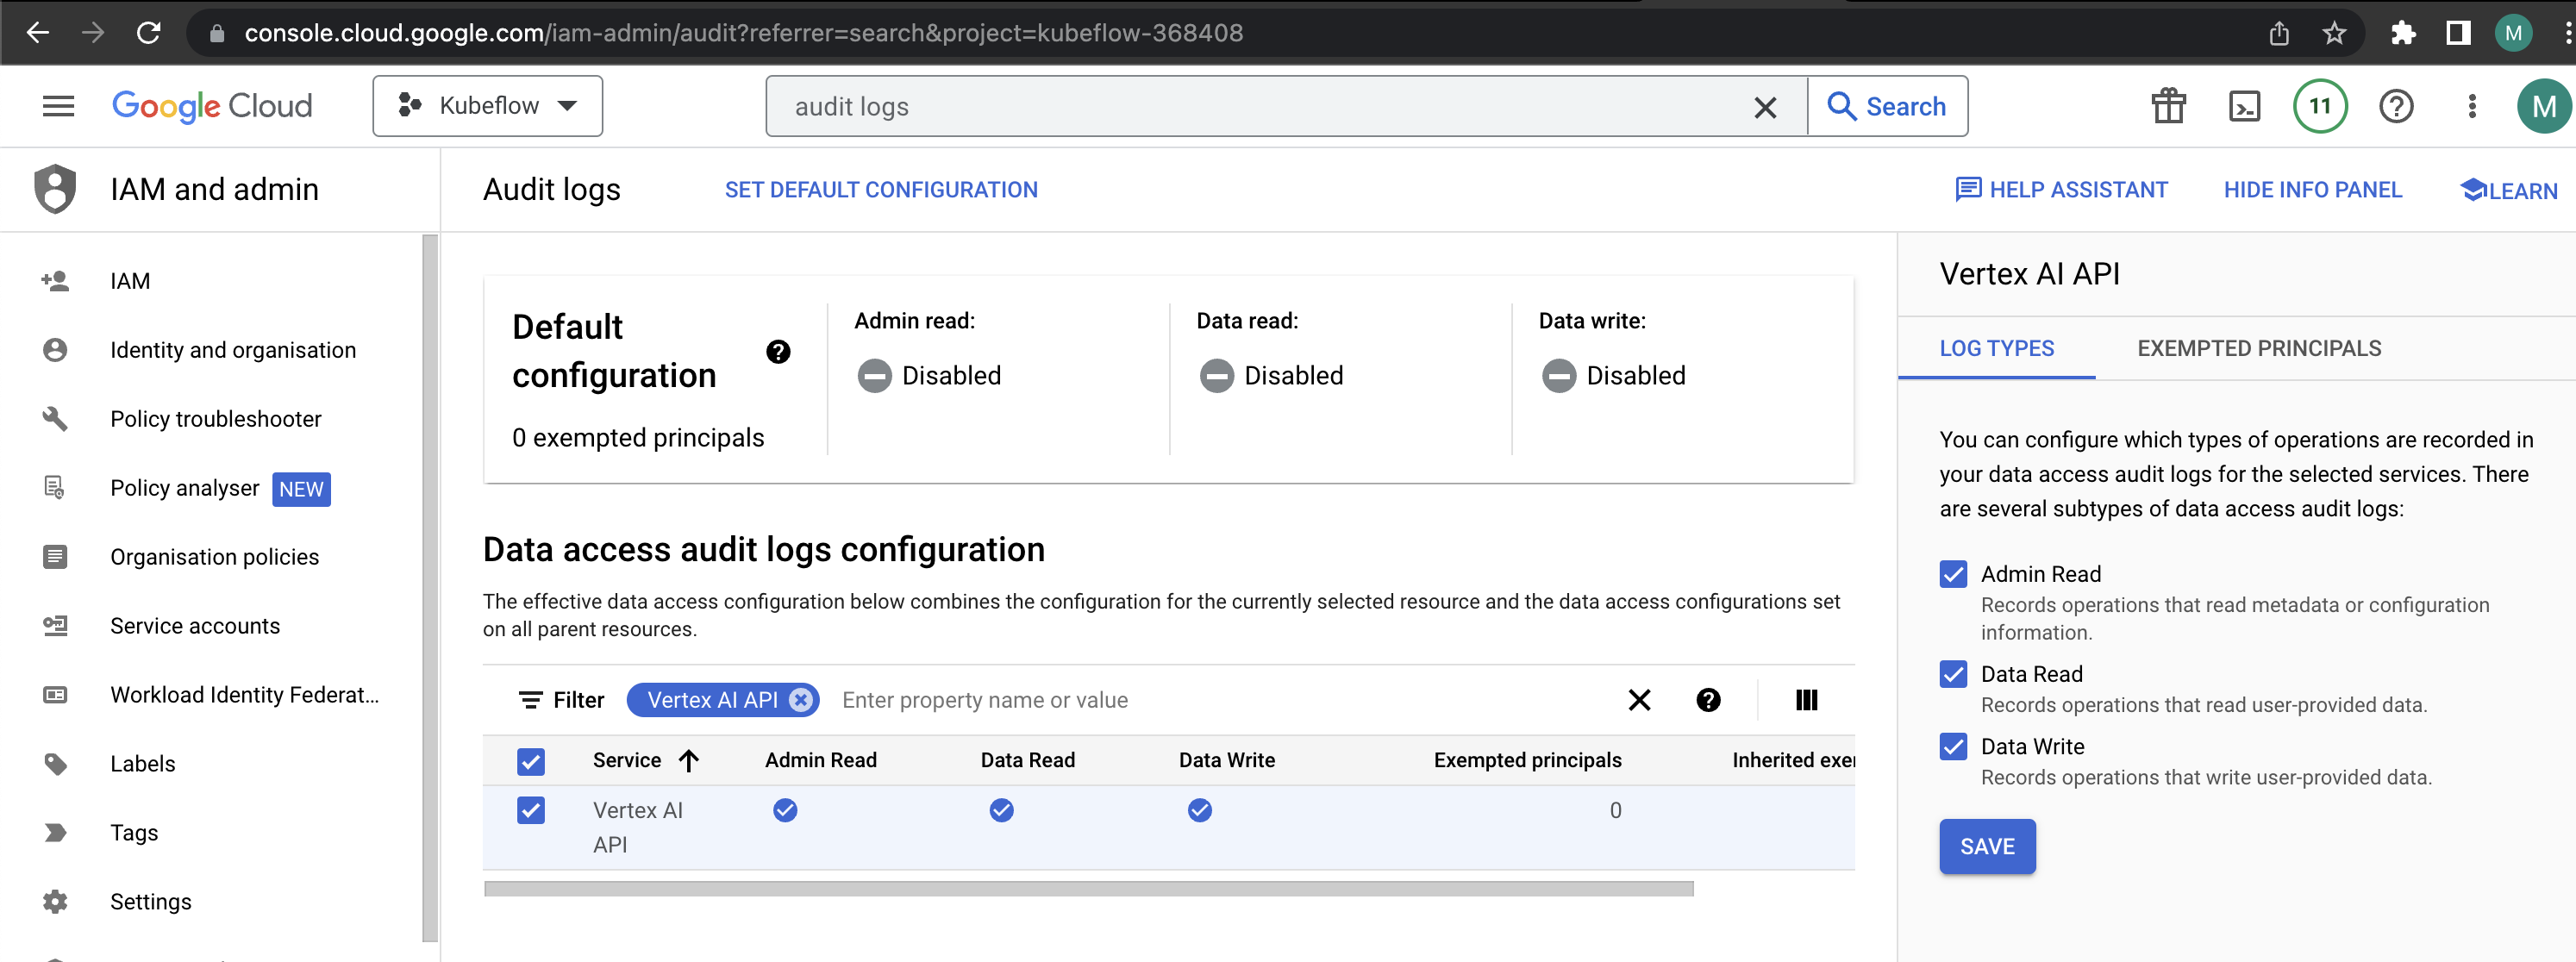 3. In the`"logs explorer"`search for the query mentioned below and then click on the `create alert` button.
```
resource.type="audited_resource" severity=NOTICE
resource.labels.service="aiplatform.googleapis.com"
resource.labels.method="google.cloud.aiplatform.ui.ModelService.UploadModel"
```
3. In the`"logs explorer"`search for the query mentioned below and then click on the `create alert` button.
```
resource.type="audited_resource" severity=NOTICE
resource.labels.service="aiplatform.googleapis.com"
resource.labels.method="google.cloud.aiplatform.ui.ModelService.UploadModel"
```
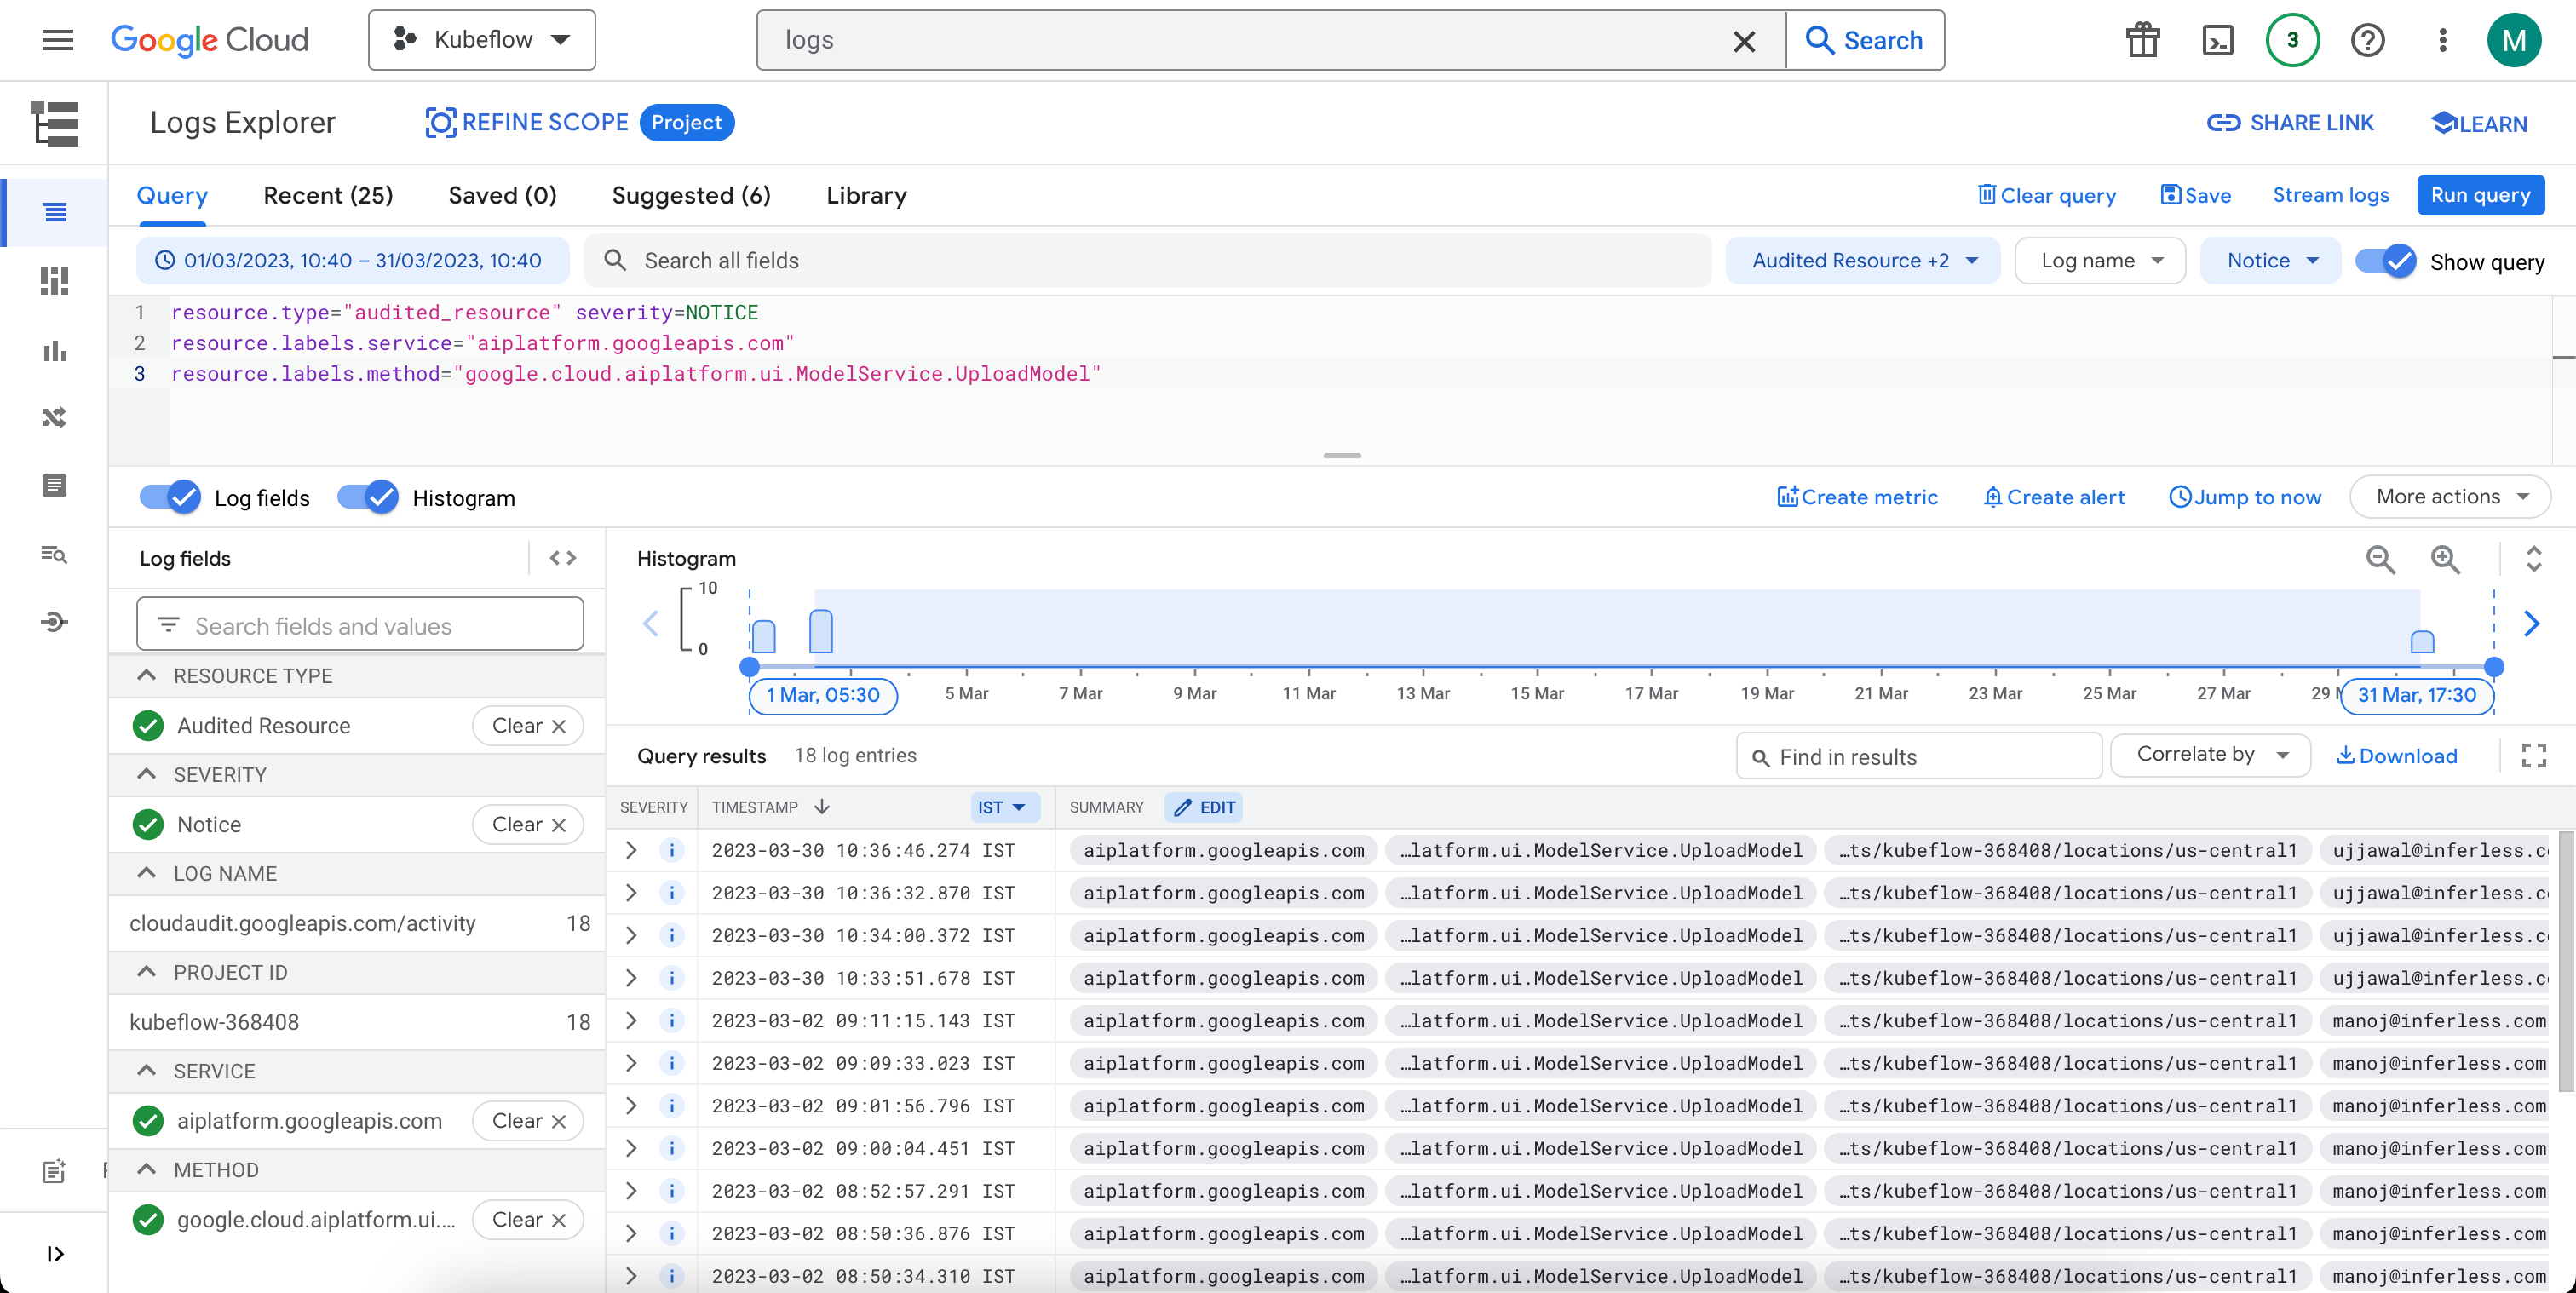 4. Create the alert using the webhook channel we created above.
5. Click on "Create Log-based alert policy and select the webhook created.
4. Create the alert using the webhook channel we created above.
5. Click on "Create Log-based alert policy and select the webhook created.
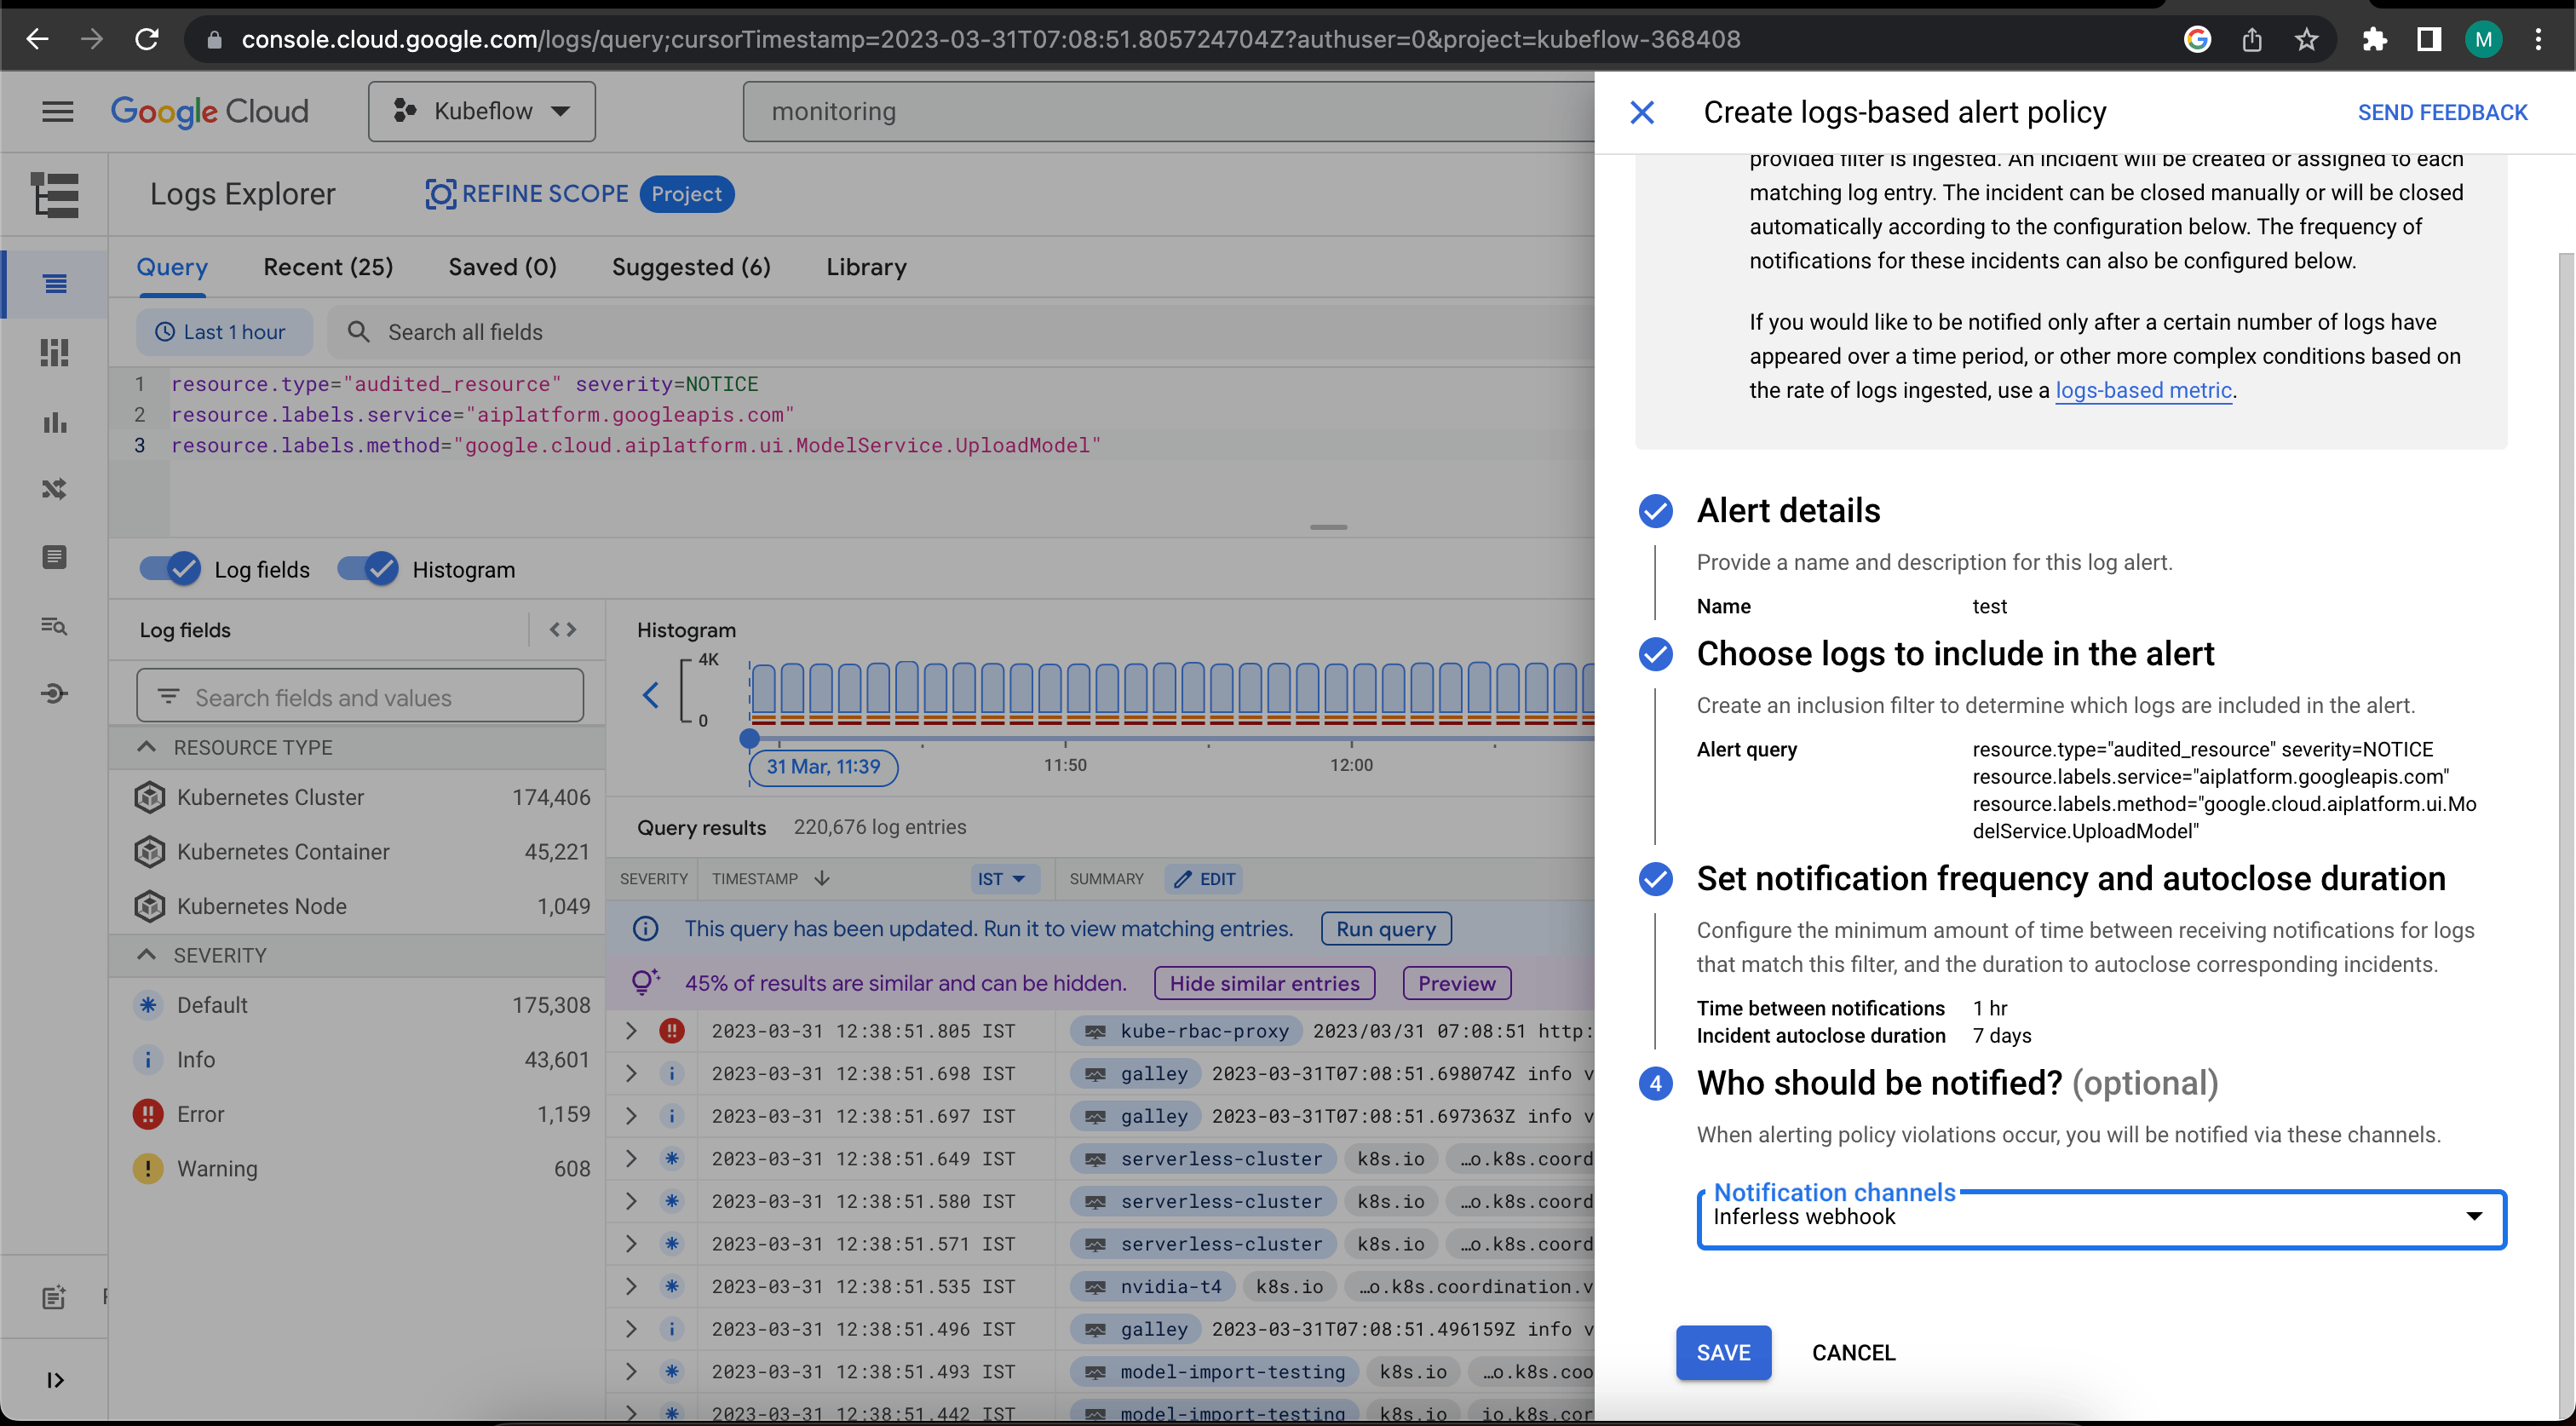 * Enter this webhook in as the Webhook URL as part of the Model Import process.
* Inferless would start listening to events and auto-build new versions accordingly.
You can view a sample video example below:
# Hugging Face
Source: https://docs.inferless.com/model-import/automatic-build/hugging-face
### Steps to enable Webhook in Hugging Face
Below are the steps that are to be followed to enable a Webhook:
* Log into your Hugging Face account which contains the model that you wish to load.
* Go to `Settings` -> `Webhooks.`
* Click `"add a new Webhook".`
* Choose the `target repository`, which is your model.
* Add the `API URL`, which can be copied from your model Page
1. In case you are doing this during onboarding, the API URL would be displayed during the model import
2. View the screenshot below:
* In case you are doing this post-model import, you can view this under `Model page -> Versions`
* Enable the`Repo Update`option under `triggers`. Click "Create Webhook" to complete the process.
* View the screenshot below for a sample completed "New Webhook" Page.
# Bring custom packages
Source: https://docs.inferless.com/model-import/bring-custom-packages
Custom software and dependencies in your Runtime
Custom Runtime allows you to customize the container to have the software and dependency that you need to run your model.
Here is a sample YAML file that you can write to import. You can follow the required structure of the build. You can specify the System as well as the Python packages that you need to run the model.
**cuda\_version** (Optional):
By default, it will use CUDA 12.1.1. Above are the available options : "12.4.1" / "12.1.1" / "11.8.0"
**system\_packages** :
These are any libraries that you need for the model to run, for eg: "opencv" for image processing or like "ffmpeg" to open the audio files.
**python\_packages** :
These are pip-based libraries that you need in your Python runtime for example torch is required to load PyTorch-based models
**run** :
These are shell commands executed while building the runtime for example symlink is created here. All commands are executed Sequentially. If you have a package that requires step by step installation you can use run
```python
build:
system_packages:
- "libssl-dev"
- "opencv"
- "ffmpeg"
python_packages:
- "transformers==4.29.0"
- "torch==2.0.1"
- "numpy==1.23.5"
- "pandas==2.0.1"
run:
- "ln -s /usr/local/lib/python3.10/site-packages/torch/lib/lib{nv,cu}* /usr/lib"
```
## Runtime Versions
You can edit the runtime in UI or patch the runtime using CLI to create a new version of the runtime. All your models will remain in the older version you previously deployed with unless you explicitly update them in Model Settings.
You can see all the versions of the runtime by clicking the 'View Runtime Versions'.
You can look at the packages in the version by clicking on "View"
To update the Runtime of a model you can go to the Model Card and navigate to the Settings Page and select the version of the runtime you want to deploy and click on update.
## Method A: Create a new Runtime using Inferless Platform
1. Select on **Runtime** Tab in the left navigation and click on **Create Runtime**
2. Upload the Yaml file created with the required dependencies.
### How to use Custom Runtime for the Model
1. Go to the **Model Import wizard**. To use the custom runtime, select it in the `Setup Environment` step.
2. Select the Runtime that you have created. Now you all access to all the required software libraries while running the model
## Method B: Create a new Runtime using Inferless CLI
Using the Inferless-CLI, `inferless runtime` command allows users to `list`, `select` and `upload` the runtimes.
* Enter this webhook in as the Webhook URL as part of the Model Import process.
* Inferless would start listening to events and auto-build new versions accordingly.
You can view a sample video example below:
# Hugging Face
Source: https://docs.inferless.com/model-import/automatic-build/hugging-face
### Steps to enable Webhook in Hugging Face
Below are the steps that are to be followed to enable a Webhook:
* Log into your Hugging Face account which contains the model that you wish to load.
* Go to `Settings` -> `Webhooks.`
* Click `"add a new Webhook".`
* Choose the `target repository`, which is your model.
* Add the `API URL`, which can be copied from your model Page
1. In case you are doing this during onboarding, the API URL would be displayed during the model import
2. View the screenshot below:
* In case you are doing this post-model import, you can view this under `Model page -> Versions`
* Enable the`Repo Update`option under `triggers`. Click "Create Webhook" to complete the process.
* View the screenshot below for a sample completed "New Webhook" Page.
# Bring custom packages
Source: https://docs.inferless.com/model-import/bring-custom-packages
Custom software and dependencies in your Runtime
Custom Runtime allows you to customize the container to have the software and dependency that you need to run your model.
Here is a sample YAML file that you can write to import. You can follow the required structure of the build. You can specify the System as well as the Python packages that you need to run the model.
**cuda\_version** (Optional):
By default, it will use CUDA 12.1.1. Above are the available options : "12.4.1" / "12.1.1" / "11.8.0"
**system\_packages** :
These are any libraries that you need for the model to run, for eg: "opencv" for image processing or like "ffmpeg" to open the audio files.
**python\_packages** :
These are pip-based libraries that you need in your Python runtime for example torch is required to load PyTorch-based models
**run** :
These are shell commands executed while building the runtime for example symlink is created here. All commands are executed Sequentially. If you have a package that requires step by step installation you can use run
```python
build:
system_packages:
- "libssl-dev"
- "opencv"
- "ffmpeg"
python_packages:
- "transformers==4.29.0"
- "torch==2.0.1"
- "numpy==1.23.5"
- "pandas==2.0.1"
run:
- "ln -s /usr/local/lib/python3.10/site-packages/torch/lib/lib{nv,cu}* /usr/lib"
```
## Runtime Versions
You can edit the runtime in UI or patch the runtime using CLI to create a new version of the runtime. All your models will remain in the older version you previously deployed with unless you explicitly update them in Model Settings.
You can see all the versions of the runtime by clicking the 'View Runtime Versions'.
You can look at the packages in the version by clicking on "View"
To update the Runtime of a model you can go to the Model Card and navigate to the Settings Page and select the version of the runtime you want to deploy and click on update.
## Method A: Create a new Runtime using Inferless Platform
1. Select on **Runtime** Tab in the left navigation and click on **Create Runtime**
2. Upload the Yaml file created with the required dependencies.
### How to use Custom Runtime for the Model
1. Go to the **Model Import wizard**. To use the custom runtime, select it in the `Setup Environment` step.
2. Select the Runtime that you have created. Now you all access to all the required software libraries while running the model
## Method B: Create a new Runtime using Inferless CLI
Using the Inferless-CLI, `inferless runtime` command allows users to `list`, `select` and `upload` the runtimes.
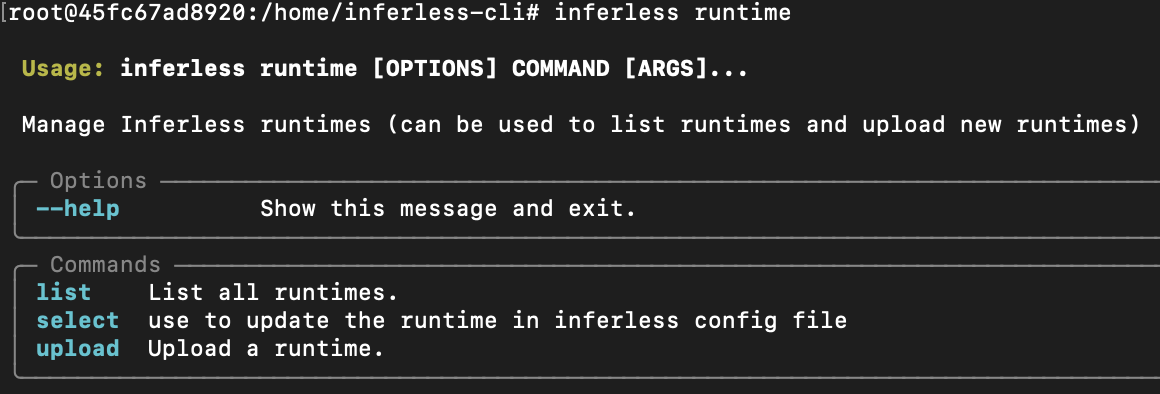 ### Creating the runtime file
You can create the runtime file in multiple ways:
1. You can create the requirements.txt file and then run the command `inferless init`, continue the process and select the requirements.txt file. This will create the `inferless-runtime-config.yaml`, which you can update according to your software and Python libraries requirements.
2. You can create the `config.yaml`file and mention all the software packages and Python libraries required for the model inference. And update the runtime file name on the `inferless.yaml`.
### Upload the Runtime
Once you have created your runtime file, you can now run the command `inferless runtime upload` to start the uploading process. First, you are required to pass the file name, and then you need to set a name to your runtime. Update the same to the inferless.yaml file.
Now your runtime is ready to use!
### Creating the runtime file
You can create the runtime file in multiple ways:
1. You can create the requirements.txt file and then run the command `inferless init`, continue the process and select the requirements.txt file. This will create the `inferless-runtime-config.yaml`, which you can update according to your software and Python libraries requirements.
2. You can create the `config.yaml`file and mention all the software packages and Python libraries required for the model inference. And update the runtime file name on the `inferless.yaml`.
### Upload the Runtime
Once you have created your runtime file, you can now run the command `inferless runtime upload` to start the uploading process. First, you are required to pass the file name, and then you need to set a name to your runtime. Update the same to the inferless.yaml file.
Now your runtime is ready to use!
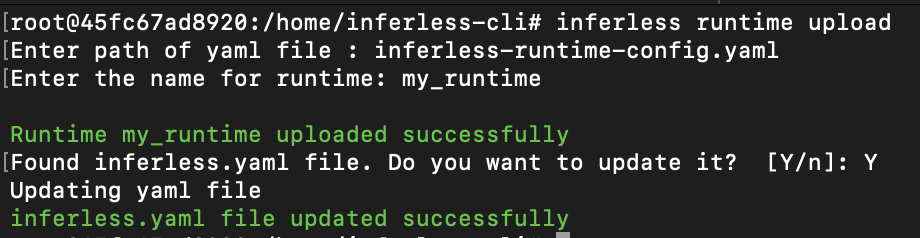 # null
Source: https://docs.inferless.com/model-import/cli-import
### Getting started
1. Login to [Inferless.com](https://inferless.com/) console and copy the CLI keys from [Keys section](https://console.inferless.com/user/settings?current-tab=keys) here
2. Now install Inferless CLI package using this command
```bash
pip install inferless-cli
```
3. Login to Inferless CLI using this command and paste the CLI keys here, you’ll be logged in
```bash
inferless login
```
### Sample model deployment
1. To deploy a model with Inferless you would ideally require 3 files
* `app.py` is a Python file that plays a crucial role in setting up and running models on the Inferless platform. It typically contains a class with three main functions:
* `input_schema.py` is a python file specifies the input parameters for your model's API calls.
* `config.yaml(Runtime)` refers to the software and dependencies you can add to your runtime environment to support your model's specific needs.
2. To get started with your first deployment we will provide you `app.py` and `input_schema.py`. Run this command to download the files
```bash
inferless scaffold --demo
```
3. Now that the files are downloaded. Initialise the model using this command
```bash
inferless init --name
# null
Source: https://docs.inferless.com/model-import/cli-import
### Getting started
1. Login to [Inferless.com](https://inferless.com/) console and copy the CLI keys from [Keys section](https://console.inferless.com/user/settings?current-tab=keys) here
2. Now install Inferless CLI package using this command
```bash
pip install inferless-cli
```
3. Login to Inferless CLI using this command and paste the CLI keys here, you’ll be logged in
```bash
inferless login
```
### Sample model deployment
1. To deploy a model with Inferless you would ideally require 3 files
* `app.py` is a Python file that plays a crucial role in setting up and running models on the Inferless platform. It typically contains a class with three main functions:
* `input_schema.py` is a python file specifies the input parameters for your model's API calls.
* `config.yaml(Runtime)` refers to the software and dependencies you can add to your runtime environment to support your model's specific needs.
2. To get started with your first deployment we will provide you `app.py` and `input_schema.py`. Run this command to download the files
```bash
inferless scaffold --demo
```
3. Now that the files are downloaded. Initialise the model using this command
```bash
inferless init --name 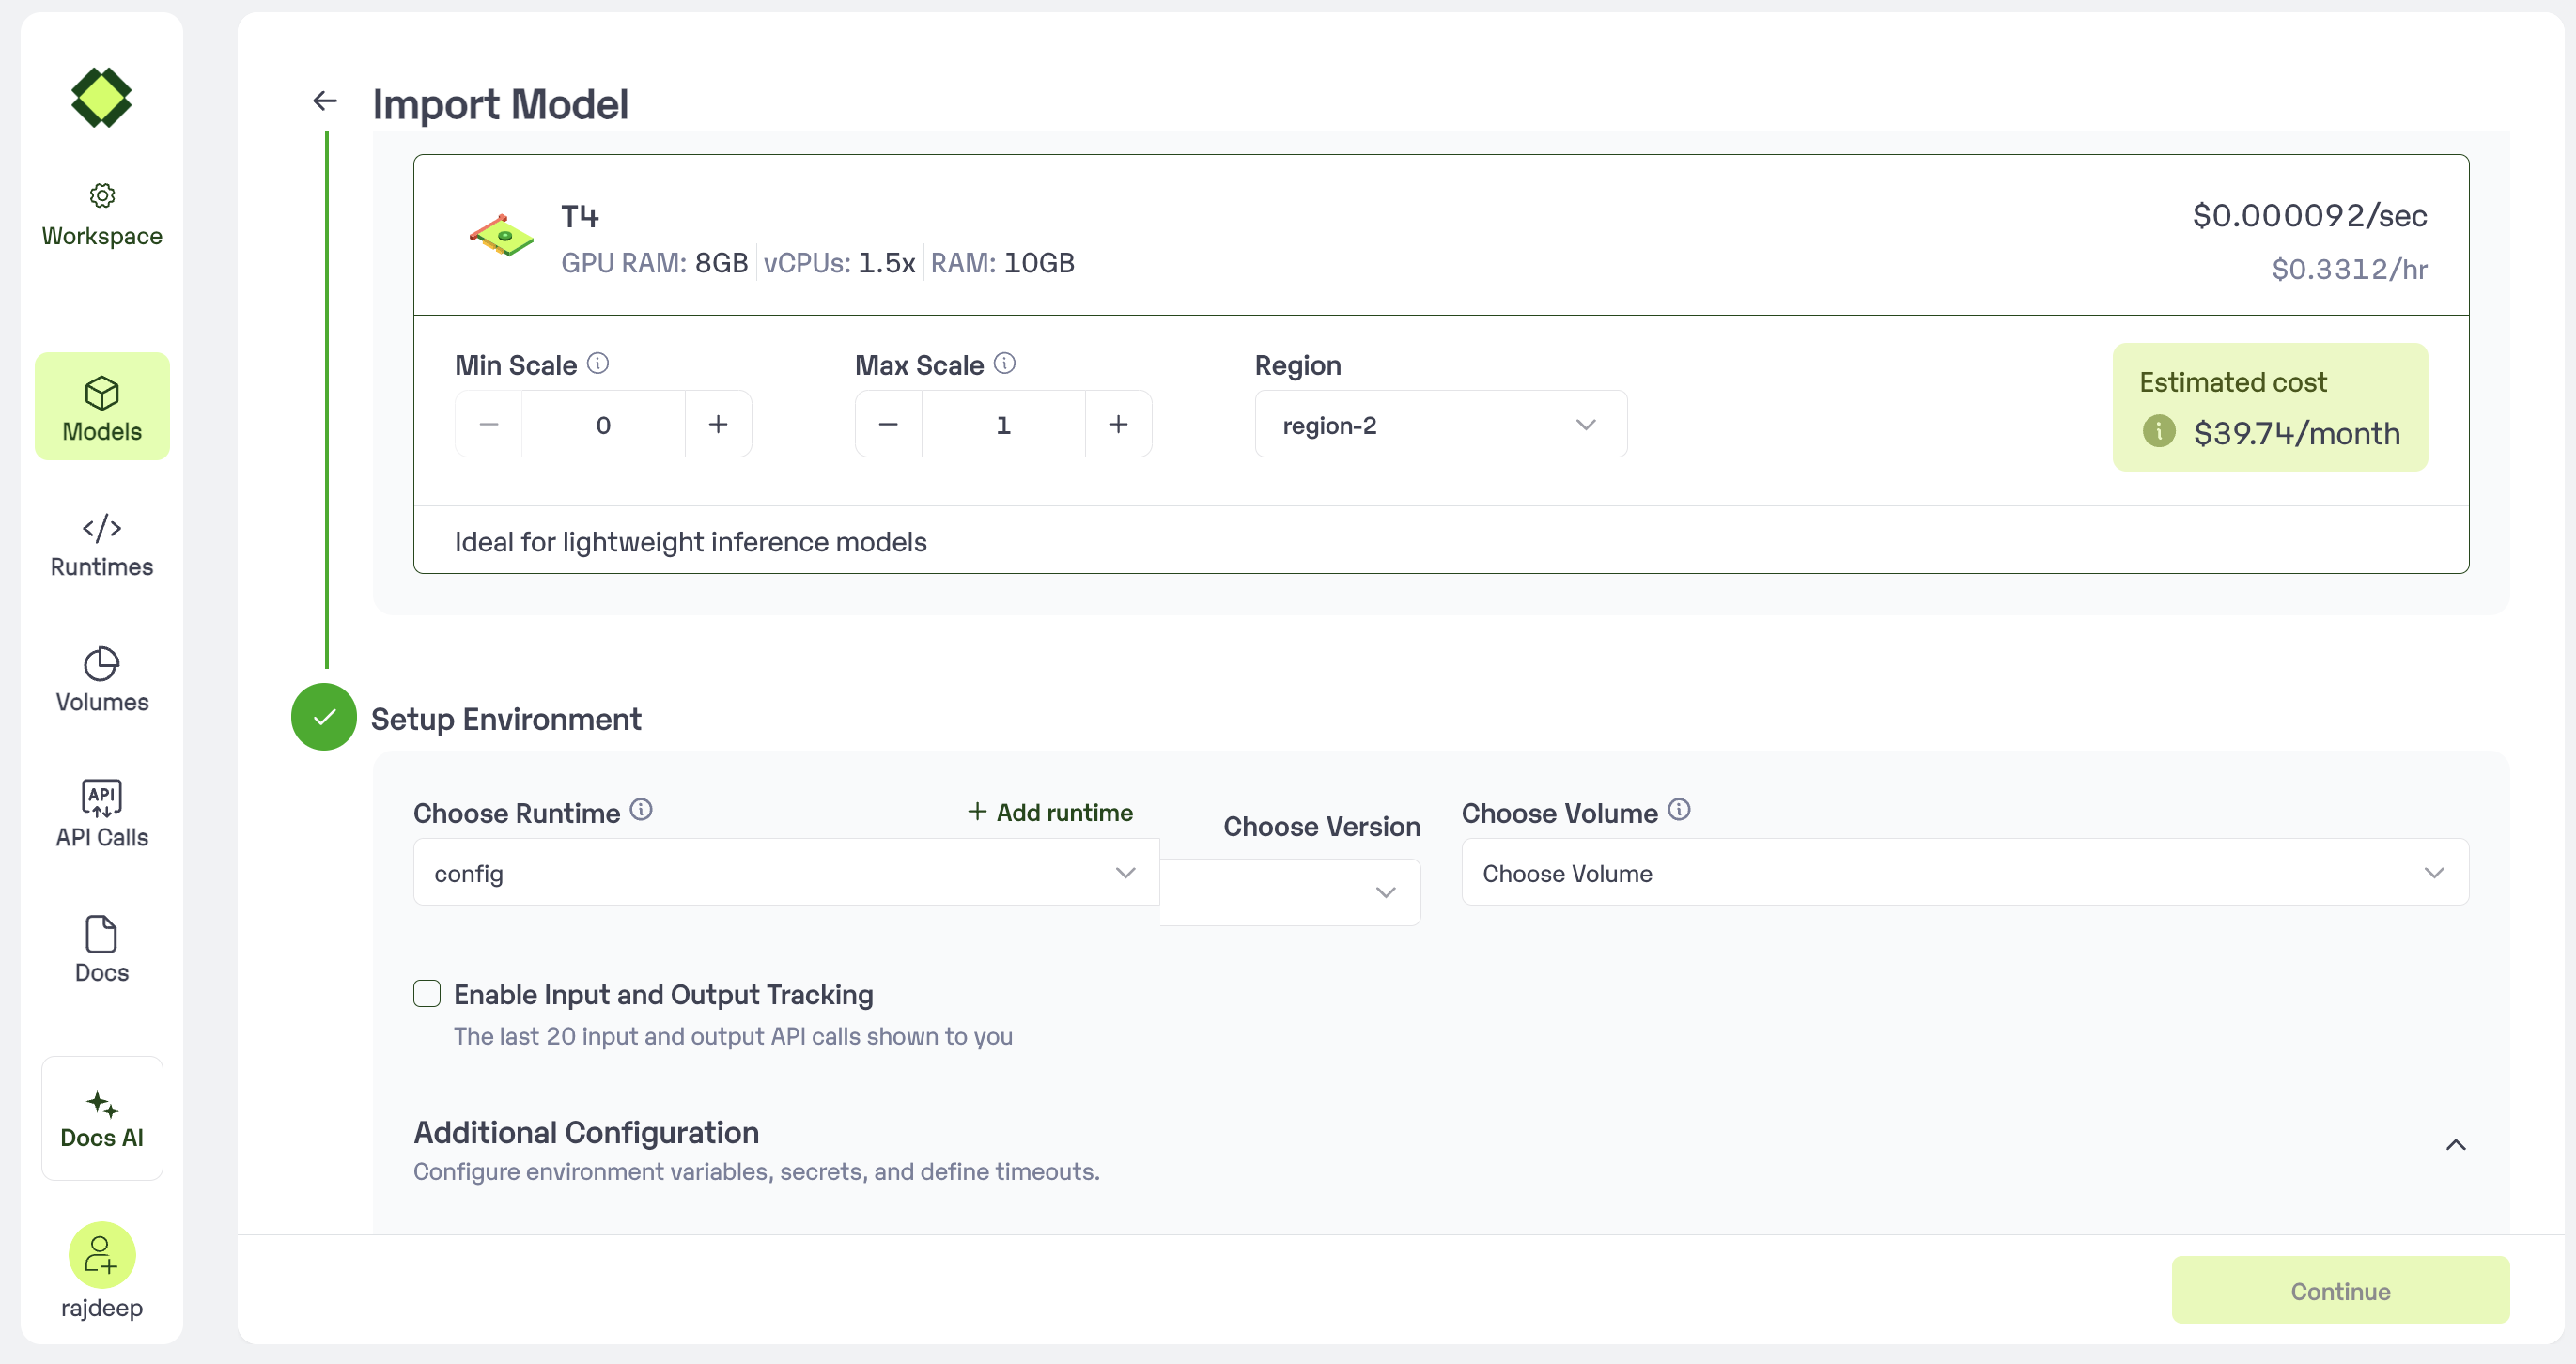 ## Method B: Configure using Inferless CLI
To start with the inference configuration process, first you have to run this command `inferless init`. Follow the following steps for configuration:
1. Enter the inference configuration file name: You are required to give the name to the inference file.
2. Select how you want to upload your model: You have two options, either you can upload your model from the local or you can upload via GitHub.
3. Enter your model name: You can give any name to your model.
4. Enter the github repo link: You have to pass the github repo link which will have the [required files](https://docs.inferless.com/~/changes/IudQU4unyY1kgLdDgGbJ/model-import/file-structure-requirements/importing-from-github).
5. Select the type of GPU: We provide two type of GPU, A100 and T4.
6. Select the type of the server: Users can select a DEDICATED server, or can opt for a SHARED server which provide 50% of the GPU machine.
7. Select if you want to use your custom runtime: You can pass your requirements.txt file and it will create the inferless-runtime-config.yaml file. If you required any software packages then you can update the runtime file.
Once you are done will all these steps, update your [input.json](https://docs.inferless.com/~/changes/IudQU4unyY1kgLdDgGbJ/model-import/input-output-json) and [output.json](https://docs.inferless.com/~/changes/IudQU4unyY1kgLdDgGbJ/model-import/input-output-json) as per your `app.py`. Now you are ready to deploy your model.
## Method B: Configure using Inferless CLI
To start with the inference configuration process, first you have to run this command `inferless init`. Follow the following steps for configuration:
1. Enter the inference configuration file name: You are required to give the name to the inference file.
2. Select how you want to upload your model: You have two options, either you can upload your model from the local or you can upload via GitHub.
3. Enter your model name: You can give any name to your model.
4. Enter the github repo link: You have to pass the github repo link which will have the [required files](https://docs.inferless.com/~/changes/IudQU4unyY1kgLdDgGbJ/model-import/file-structure-requirements/importing-from-github).
5. Select the type of GPU: We provide two type of GPU, A100 and T4.
6. Select the type of the server: Users can select a DEDICATED server, or can opt for a SHARED server which provide 50% of the GPU machine.
7. Select if you want to use your custom runtime: You can pass your requirements.txt file and it will create the inferless-runtime-config.yaml file. If you required any software packages then you can update the runtime file.
Once you are done will all these steps, update your [input.json](https://docs.inferless.com/~/changes/IudQU4unyY1kgLdDgGbJ/model-import/input-output-json) and [output.json](https://docs.inferless.com/~/changes/IudQU4unyY1kgLdDgGbJ/model-import/input-output-json) as per your `app.py`. Now you are ready to deploy your model.
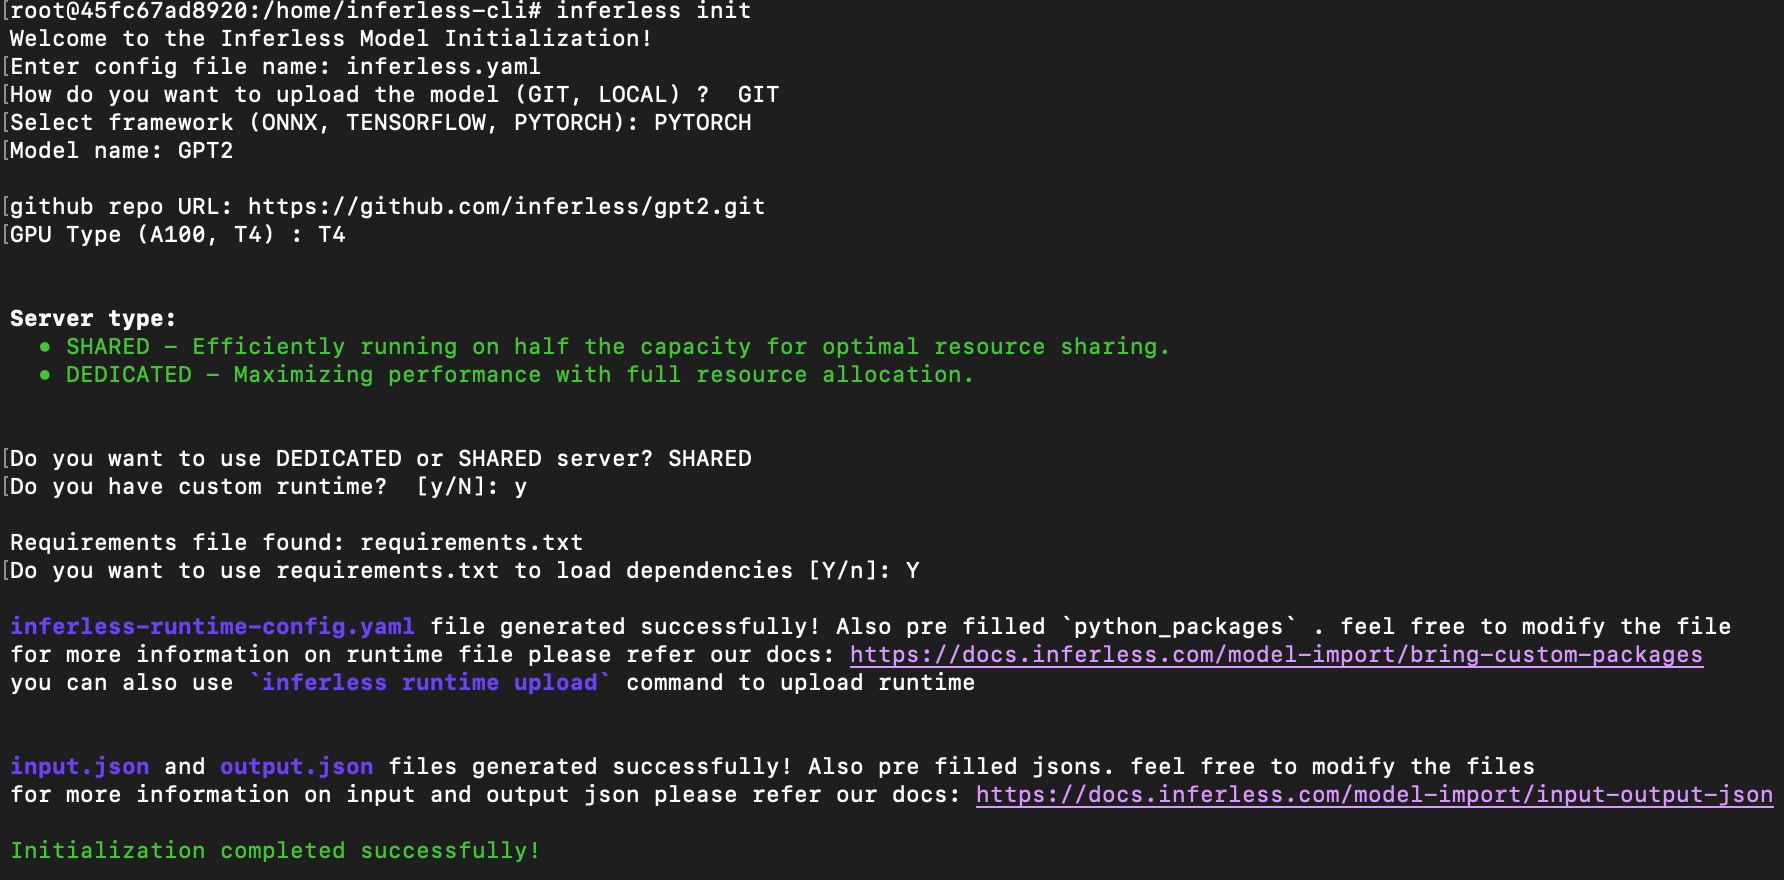 # File structure requirements
Source: https://docs.inferless.com/model-import/file-structure-req/file-structure-requirements
Below are the pre-requisites and folder structure requirements based on your import method.
Kindly make sure to go through this before importing your model to inferless.
* If you are importing your file from your Github, click [here](/model-import/file-structure-req/importing-from-github)
* If you are importing your file from (AWS S3 / GCP )Cloud buckets, click [here](/model-import/file-structure-req/importing-from-cloud-buckets).
* If you are importing your file from your system [here](/model-import/file-structure-req/importing-your-file-from-your-system).
* If you are importing your file from Sagemaker, click [here](/model-import/file-structure-req/importing-from-sagemaker).
* If you are importing your file from Google Vertex, click [here](/model-import/file-structure-req/importing-from-google-vertex-ai).
* If you are importing your file from Inferless-CLI, click [here](/model-import/file-structure-req/import-using-cli).
# Import using CLI
Source: https://docs.inferless.com/model-import/file-structure-req/import-using-cli
Deploying models using CLI required files in a particular format. This guide will explain about all the required files
## Introduction
Inferless allows you to deploy your model using CLI, which has similar file structure requirements to the GUI platform.
## Mandatory File
When you want to deploy your models through CLI, you must have the file `app.py`. When you run the command `inferless init`, you are required to have this file in your root folder.
`app.py`: This file will have the `InferlessPythonModel` class, which will contain the below functions(Mandatory)
1. `def initialize(self) `
2. `def infer(self, inputs) `
3. `def finalize(self) `
`input_schema.py`
This file should have all the inputs that you are taken
```input_schema
INPUT_SCHEMA = {
"prompt": {
'datatype': 'STRING',
'required': True,
'shape': [1],
'example': ["There is a fine house in the forest"]
}
}
```
While running the command `inferless init`, all the other files required for the deployment will be created and the user can update these files according to their requirements.
## Files structure
This is an example of the file structure required for the deployment of the [CodeLlama-34b-python model](https://huggingface.co/codellama/CodeLlama-34b-hf) using Inferless-CLI.
```python
codellama-34b-python/
├── app.py
├── inferless-config.yaml
├── inferless.yaml
└── input_schema.py
# Depreciated
├── input.json
└── output.json
```
User can update the following file according to their requirements.
* `inferless-runtime-config.yaml`This file will have all the software packages and the Python packages required for the model inferencing.
* `inferless.yaml`This file will have all the configurations required for the deployment. Users can update this file according to their requirements.
* `input_schema.py `This file will have all the configurations required for the deployment. Users can update this file according to their requirements.
**Deprecated - Input / Output Json**
* `input.json`This file will have the key for the input parameter. Whenever you change the name of the key in the `app.py`, update it accordingly.
* `output.json`This file will have the `name` of the output key that the `def infer` the function is going to return.
Once these files are ready, you can use the command `inferless deploy` to deploy your model.
# Import using Docker
Source: https://docs.inferless.com/model-import/file-structure-req/import-using-docker
Bring your own image
There are 2 ways to integrate the:-
* Docker Image
* Docker File
### Docker Image URI ( Private/ Public )
We Currently support DockerHub Private / AWS Elastic Container registry, Once you have pushed your image, you need to make sure to follow the specifications for APIs
#### API Contract Requirements
The image is expected to run a web server when started using the command `docker run`
* It is mandatory to host the web server on `port **8080** `
Following API Contract needs to be strictly followed to host a custom docker image on inferless there are 3 API specifications that you need to meet
#### Server Metadata API
* path = `/v2`, http\_method = `GET`
* path = `/v2/models/{$MODEL_NAME}`, http\_method = `GET`
A successful response on request to this API is marked by 200 HTTP status code. And the response is as follows
```
{
"name": $MODEL_NAME
}
```
\$MODEL\_NAME is used in the successive API paths
#### Health APIs
* path = `/v2/health/live` , http\_method = `GET`
* path = `/v2/health/ready`, http\_method = `GET`
* path = `/v2/models/{$MODEL_NAME}/ready`, http\_method = `GET`
These APIs need to respond with a 200 HTTP status code to mark the server as healthy
#### Inference API
* path = `/v2/models/{$MODEL_NAME}/infer`
* http\_method = `POST`,
* content\_type = `application/json`
The body of the API can be as per your implementation
###
## For Docker File Integration
You can use GitHub/ GitLab for the docker file integration.
### Example
This is a sample fastApi application for a test generation use case
`main.py`
```python
from fast API import FastAPI, HTTPException
from pedantic import BaseModel
from model import MockModel
app = FastAPI()
model = MockModel()
model. load(
class InferRequest(BaseModel):
text: str
Model_Name = stable-diffusion
@app.get("/v2")
@app.get(f"/v2/models/{Model_Name}")
def version():
return {"name": f"{Model_Name}"}
@app.get("/v2/health/live")
@app.get("/v2/health/ready")
@app.get(f"/v2/models/{Model_Name}/ready")
def health():
return {"status": "running"}
@app.post(f"/v2/models/{Model_Name}/infer")
def generate_image(request: InferRequest):
if not model.loaded:
raise HTTPException(status_code=400, detail="Model is not loaded")
text = request.text
result = model.infer(text)
return {"result": result}
```
`model.py`
```python
from transformers import Pipeline
# Mocking the model here
class MockModel:
def __init__(self):
self.loaded = False
self.pipe = None
def load(self):
self.loaded = True
self.pipe = Pipeline("text-classification")
def infer(self, text):
result = self.pipe(text)
return result
```
`Dockerfile`
```
# Use an official Python runtime as a parent image
FROM python:3.10.13
# Set the working directory in the container
WORKDIR /app
COPY ./requirements.txt requirements.txt
COPY . /app
RUN pip3 install -r requirements.txt
# Make port 8000 available to the world outside this container
EXPOSE 8080
# Define an environment variable
# This variable will be used by Uvicorn as the binding address
ENV HOST 0.0.0.0
# Run the FastAPI application using Uvicorn when the container launches
CMD ["uvicorn", "main:app", "--host", "0.0.0.0", "--port", "8080", "--reload"]
```
`requirements.txt`
```
annotated-types==0.5.0
anyio==3.7.1
certifi==2023.7.22
charset-normalizer==3.2.0
click==8.1.6
diffusers==0.19.3
exceptiongroup==1.1.2
fastapi==0.101.0
filelock==3.12.2
fsspec==2023.6.0
h11==0.14.0
huggingface-hub==0.16.4
idna==3.4
importlib-metadata==6.8.0
Jinja2==3.1.2
MarkupSafe==2.1.3
mpmath==1.3.0
networkx==3.1
numpy==1.24.4
packaging==23.1
Pillow==10.0.0
pydantic==2.1.1
pydantic_core==2.4.0
PyYAML==6.0.1
regex==2023.6.3
requests==2.31.0
safetensors==0.3.1
sniffio==1.3.0
starlette==0.27.0
sympy==1.12
tokenizers==0.13.3
torch==2.0.1
tqdm==4.65.0
transformers==4.31.0
typing_extensions==4.7.1
urllib3==2.0.4
uvicorn==0.23.2
zipp==3.16.2
```
# Importing from Cloud Buckets
Source: https://docs.inferless.com/model-import/file-structure-req/importing-from-cloud-buckets
Below are the providers that are supported to directly load the model file into Inferless
* AWS S3
* Google Cloud Buckets
* Azure File Storage
Before you upload your custom model, make sure you go through and follow the prerequisites conditions mentioned below.
### File structure requirements
The below format should be kept in mind while loading your code to Inferless from cloud providers.
**The model file has to be loaded as a ZIP file.**
The structure of the model file that is to be loaded is described below based on the framework used.
The model names has to be in the format as given in the example below.
* ### **`PyTorch`**
```python PyTorch - File structure
/
├── config.pbtxt
├── 1
│ ├── model.pt
#*Any other file can be added along with the above structure and files for any dependencies in the model*
```
* ### **`TensorFlow`**
```json TensorFlow - Structure
/
├── 1
│ ├── model.savedmodel
│ │ ├── saved_model.pb
#*Any other file can be added along with the above structure and files for any dependencies in the model*
```
* ### **`ONNX`**
```json ONNX - File Structure
/
├── config.pbtxt
├── 1
│ ├── model.onnx
#*Any other file can be added along with the above structure and files for any dependencies in the model*
```
Once you have made sure the model file structure is in the right format, you can upload the model from your cloud storage to Inferless using the "Import Model" option
* Click [here](/integrations/cloud-buckets-s3-gcs) for steps to upload
# Importing from Github
Source: https://docs.inferless.com/model-import/file-structure-req/importing-from-github
Before you upload your custom model from Github, make sure you go through and follow the prerequisites conditions mentioned below.
### File structure requirements
The below format should be kept in mind while loading your code to Inferless from GitHub.
1. The mandatory requirement would be an "`app.py" file.`
2. This file should contain the below functions(Mandatory)
3. `def initialize(self) `
4. `def infer(self, inputs) `
5. `def finalize(self) `
6. You can have other files/modules along with the "`app.py" `file in case of any dependencies.
7. You should also have a file `input_schema.py` if not then you will need to define
Github: [https://github.com/infer-less/template-method](https://github.com/infer-less/template-method)
```python
# app.py - Implement the Load function here for the model
def initialize(self):
self.generator = pipeline("text-generation", model="EleutherAI/gpt-neo-125M",device=0)
# Function to perform inference
def infer(self, inputs):
# inputs is a dictionary where the keys are input names and values are actual input data
# e.g. in the below code the input name is "prompt"
prompt = inputs["prompt"]
pipeline_output = self.generator(prompt, do_sample=True, min_length=20)
generated_txt = pipeline_output[0]["generated_text"]
# The output generated by the infer function should be a dictionary where keys are output names and values are actual output data
# e.g. in the below code the output name is "generated_txt"
return {"generated_text": generated_txt}
# perform any cleanup activity here
def finalize(self,args):
self.pipe = None
```
```python
# input_schema.py
INPUT_SCHEMA = {
"prompt": {
'datatype': 'STRING',
'required': True,
'shape': [1],
'example': ["There is a fine house in the forest"]
}
}
```
### Supported Libraries
The below libraries are only supported in the current version. Make sure that the "`app.py" `requires libraries only from the below list:
* transformers
* torch
* tensorflow
* onnx
* onnxruntime
* numpy
* pandas
* diffusers
* Pillow
* pytesseract
* opencv
In case your use case requires any additional library, feel free to raise a support request with us using the help desk or contact us at `support@inferless.com` and we would be happy to discuss and take the request on a case-case basis.
Once you have made sure of the above conditions, click [here](/integrations/git-custom-code) to know more about how to import this model from Github to Inferless.
#### Resources
# File structure requirements
Source: https://docs.inferless.com/model-import/file-structure-req/file-structure-requirements
Below are the pre-requisites and folder structure requirements based on your import method.
Kindly make sure to go through this before importing your model to inferless.
* If you are importing your file from your Github, click [here](/model-import/file-structure-req/importing-from-github)
* If you are importing your file from (AWS S3 / GCP )Cloud buckets, click [here](/model-import/file-structure-req/importing-from-cloud-buckets).
* If you are importing your file from your system [here](/model-import/file-structure-req/importing-your-file-from-your-system).
* If you are importing your file from Sagemaker, click [here](/model-import/file-structure-req/importing-from-sagemaker).
* If you are importing your file from Google Vertex, click [here](/model-import/file-structure-req/importing-from-google-vertex-ai).
* If you are importing your file from Inferless-CLI, click [here](/model-import/file-structure-req/import-using-cli).
# Import using CLI
Source: https://docs.inferless.com/model-import/file-structure-req/import-using-cli
Deploying models using CLI required files in a particular format. This guide will explain about all the required files
## Introduction
Inferless allows you to deploy your model using CLI, which has similar file structure requirements to the GUI platform.
## Mandatory File
When you want to deploy your models through CLI, you must have the file `app.py`. When you run the command `inferless init`, you are required to have this file in your root folder.
`app.py`: This file will have the `InferlessPythonModel` class, which will contain the below functions(Mandatory)
1. `def initialize(self) `
2. `def infer(self, inputs) `
3. `def finalize(self) `
`input_schema.py`
This file should have all the inputs that you are taken
```input_schema
INPUT_SCHEMA = {
"prompt": {
'datatype': 'STRING',
'required': True,
'shape': [1],
'example': ["There is a fine house in the forest"]
}
}
```
While running the command `inferless init`, all the other files required for the deployment will be created and the user can update these files according to their requirements.
## Files structure
This is an example of the file structure required for the deployment of the [CodeLlama-34b-python model](https://huggingface.co/codellama/CodeLlama-34b-hf) using Inferless-CLI.
```python
codellama-34b-python/
├── app.py
├── inferless-config.yaml
├── inferless.yaml
└── input_schema.py
# Depreciated
├── input.json
└── output.json
```
User can update the following file according to their requirements.
* `inferless-runtime-config.yaml`This file will have all the software packages and the Python packages required for the model inferencing.
* `inferless.yaml`This file will have all the configurations required for the deployment. Users can update this file according to their requirements.
* `input_schema.py `This file will have all the configurations required for the deployment. Users can update this file according to their requirements.
**Deprecated - Input / Output Json**
* `input.json`This file will have the key for the input parameter. Whenever you change the name of the key in the `app.py`, update it accordingly.
* `output.json`This file will have the `name` of the output key that the `def infer` the function is going to return.
Once these files are ready, you can use the command `inferless deploy` to deploy your model.
# Import using Docker
Source: https://docs.inferless.com/model-import/file-structure-req/import-using-docker
Bring your own image
There are 2 ways to integrate the:-
* Docker Image
* Docker File
### Docker Image URI ( Private/ Public )
We Currently support DockerHub Private / AWS Elastic Container registry, Once you have pushed your image, you need to make sure to follow the specifications for APIs
#### API Contract Requirements
The image is expected to run a web server when started using the command `docker run`
* It is mandatory to host the web server on `port **8080** `
Following API Contract needs to be strictly followed to host a custom docker image on inferless there are 3 API specifications that you need to meet
#### Server Metadata API
* path = `/v2`, http\_method = `GET`
* path = `/v2/models/{$MODEL_NAME}`, http\_method = `GET`
A successful response on request to this API is marked by 200 HTTP status code. And the response is as follows
```
{
"name": $MODEL_NAME
}
```
\$MODEL\_NAME is used in the successive API paths
#### Health APIs
* path = `/v2/health/live` , http\_method = `GET`
* path = `/v2/health/ready`, http\_method = `GET`
* path = `/v2/models/{$MODEL_NAME}/ready`, http\_method = `GET`
These APIs need to respond with a 200 HTTP status code to mark the server as healthy
#### Inference API
* path = `/v2/models/{$MODEL_NAME}/infer`
* http\_method = `POST`,
* content\_type = `application/json`
The body of the API can be as per your implementation
###
## For Docker File Integration
You can use GitHub/ GitLab for the docker file integration.
### Example
This is a sample fastApi application for a test generation use case
`main.py`
```python
from fast API import FastAPI, HTTPException
from pedantic import BaseModel
from model import MockModel
app = FastAPI()
model = MockModel()
model. load(
class InferRequest(BaseModel):
text: str
Model_Name = stable-diffusion
@app.get("/v2")
@app.get(f"/v2/models/{Model_Name}")
def version():
return {"name": f"{Model_Name}"}
@app.get("/v2/health/live")
@app.get("/v2/health/ready")
@app.get(f"/v2/models/{Model_Name}/ready")
def health():
return {"status": "running"}
@app.post(f"/v2/models/{Model_Name}/infer")
def generate_image(request: InferRequest):
if not model.loaded:
raise HTTPException(status_code=400, detail="Model is not loaded")
text = request.text
result = model.infer(text)
return {"result": result}
```
`model.py`
```python
from transformers import Pipeline
# Mocking the model here
class MockModel:
def __init__(self):
self.loaded = False
self.pipe = None
def load(self):
self.loaded = True
self.pipe = Pipeline("text-classification")
def infer(self, text):
result = self.pipe(text)
return result
```
`Dockerfile`
```
# Use an official Python runtime as a parent image
FROM python:3.10.13
# Set the working directory in the container
WORKDIR /app
COPY ./requirements.txt requirements.txt
COPY . /app
RUN pip3 install -r requirements.txt
# Make port 8000 available to the world outside this container
EXPOSE 8080
# Define an environment variable
# This variable will be used by Uvicorn as the binding address
ENV HOST 0.0.0.0
# Run the FastAPI application using Uvicorn when the container launches
CMD ["uvicorn", "main:app", "--host", "0.0.0.0", "--port", "8080", "--reload"]
```
`requirements.txt`
```
annotated-types==0.5.0
anyio==3.7.1
certifi==2023.7.22
charset-normalizer==3.2.0
click==8.1.6
diffusers==0.19.3
exceptiongroup==1.1.2
fastapi==0.101.0
filelock==3.12.2
fsspec==2023.6.0
h11==0.14.0
huggingface-hub==0.16.4
idna==3.4
importlib-metadata==6.8.0
Jinja2==3.1.2
MarkupSafe==2.1.3
mpmath==1.3.0
networkx==3.1
numpy==1.24.4
packaging==23.1
Pillow==10.0.0
pydantic==2.1.1
pydantic_core==2.4.0
PyYAML==6.0.1
regex==2023.6.3
requests==2.31.0
safetensors==0.3.1
sniffio==1.3.0
starlette==0.27.0
sympy==1.12
tokenizers==0.13.3
torch==2.0.1
tqdm==4.65.0
transformers==4.31.0
typing_extensions==4.7.1
urllib3==2.0.4
uvicorn==0.23.2
zipp==3.16.2
```
# Importing from Cloud Buckets
Source: https://docs.inferless.com/model-import/file-structure-req/importing-from-cloud-buckets
Below are the providers that are supported to directly load the model file into Inferless
* AWS S3
* Google Cloud Buckets
* Azure File Storage
Before you upload your custom model, make sure you go through and follow the prerequisites conditions mentioned below.
### File structure requirements
The below format should be kept in mind while loading your code to Inferless from cloud providers.
**The model file has to be loaded as a ZIP file.**
The structure of the model file that is to be loaded is described below based on the framework used.
The model names has to be in the format as given in the example below.
* ### **`PyTorch`**
```python PyTorch - File structure
/
├── config.pbtxt
├── 1
│ ├── model.pt
#*Any other file can be added along with the above structure and files for any dependencies in the model*
```
* ### **`TensorFlow`**
```json TensorFlow - Structure
/
├── 1
│ ├── model.savedmodel
│ │ ├── saved_model.pb
#*Any other file can be added along with the above structure and files for any dependencies in the model*
```
* ### **`ONNX`**
```json ONNX - File Structure
/
├── config.pbtxt
├── 1
│ ├── model.onnx
#*Any other file can be added along with the above structure and files for any dependencies in the model*
```
Once you have made sure the model file structure is in the right format, you can upload the model from your cloud storage to Inferless using the "Import Model" option
* Click [here](/integrations/cloud-buckets-s3-gcs) for steps to upload
# Importing from Github
Source: https://docs.inferless.com/model-import/file-structure-req/importing-from-github
Before you upload your custom model from Github, make sure you go through and follow the prerequisites conditions mentioned below.
### File structure requirements
The below format should be kept in mind while loading your code to Inferless from GitHub.
1. The mandatory requirement would be an "`app.py" file.`
2. This file should contain the below functions(Mandatory)
3. `def initialize(self) `
4. `def infer(self, inputs) `
5. `def finalize(self) `
6. You can have other files/modules along with the "`app.py" `file in case of any dependencies.
7. You should also have a file `input_schema.py` if not then you will need to define
Github: [https://github.com/infer-less/template-method](https://github.com/infer-less/template-method)
```python
# app.py - Implement the Load function here for the model
def initialize(self):
self.generator = pipeline("text-generation", model="EleutherAI/gpt-neo-125M",device=0)
# Function to perform inference
def infer(self, inputs):
# inputs is a dictionary where the keys are input names and values are actual input data
# e.g. in the below code the input name is "prompt"
prompt = inputs["prompt"]
pipeline_output = self.generator(prompt, do_sample=True, min_length=20)
generated_txt = pipeline_output[0]["generated_text"]
# The output generated by the infer function should be a dictionary where keys are output names and values are actual output data
# e.g. in the below code the output name is "generated_txt"
return {"generated_text": generated_txt}
# perform any cleanup activity here
def finalize(self,args):
self.pipe = None
```
```python
# input_schema.py
INPUT_SCHEMA = {
"prompt": {
'datatype': 'STRING',
'required': True,
'shape': [1],
'example': ["There is a fine house in the forest"]
}
}
```
### Supported Libraries
The below libraries are only supported in the current version. Make sure that the "`app.py" `requires libraries only from the below list:
* transformers
* torch
* tensorflow
* onnx
* onnxruntime
* numpy
* pandas
* diffusers
* Pillow
* pytesseract
* opencv
In case your use case requires any additional library, feel free to raise a support request with us using the help desk or contact us at `support@inferless.com` and we would be happy to discuss and take the request on a case-case basis.
Once you have made sure of the above conditions, click [here](/integrations/git-custom-code) to know more about how to import this model from Github to Inferless.
#### Resources
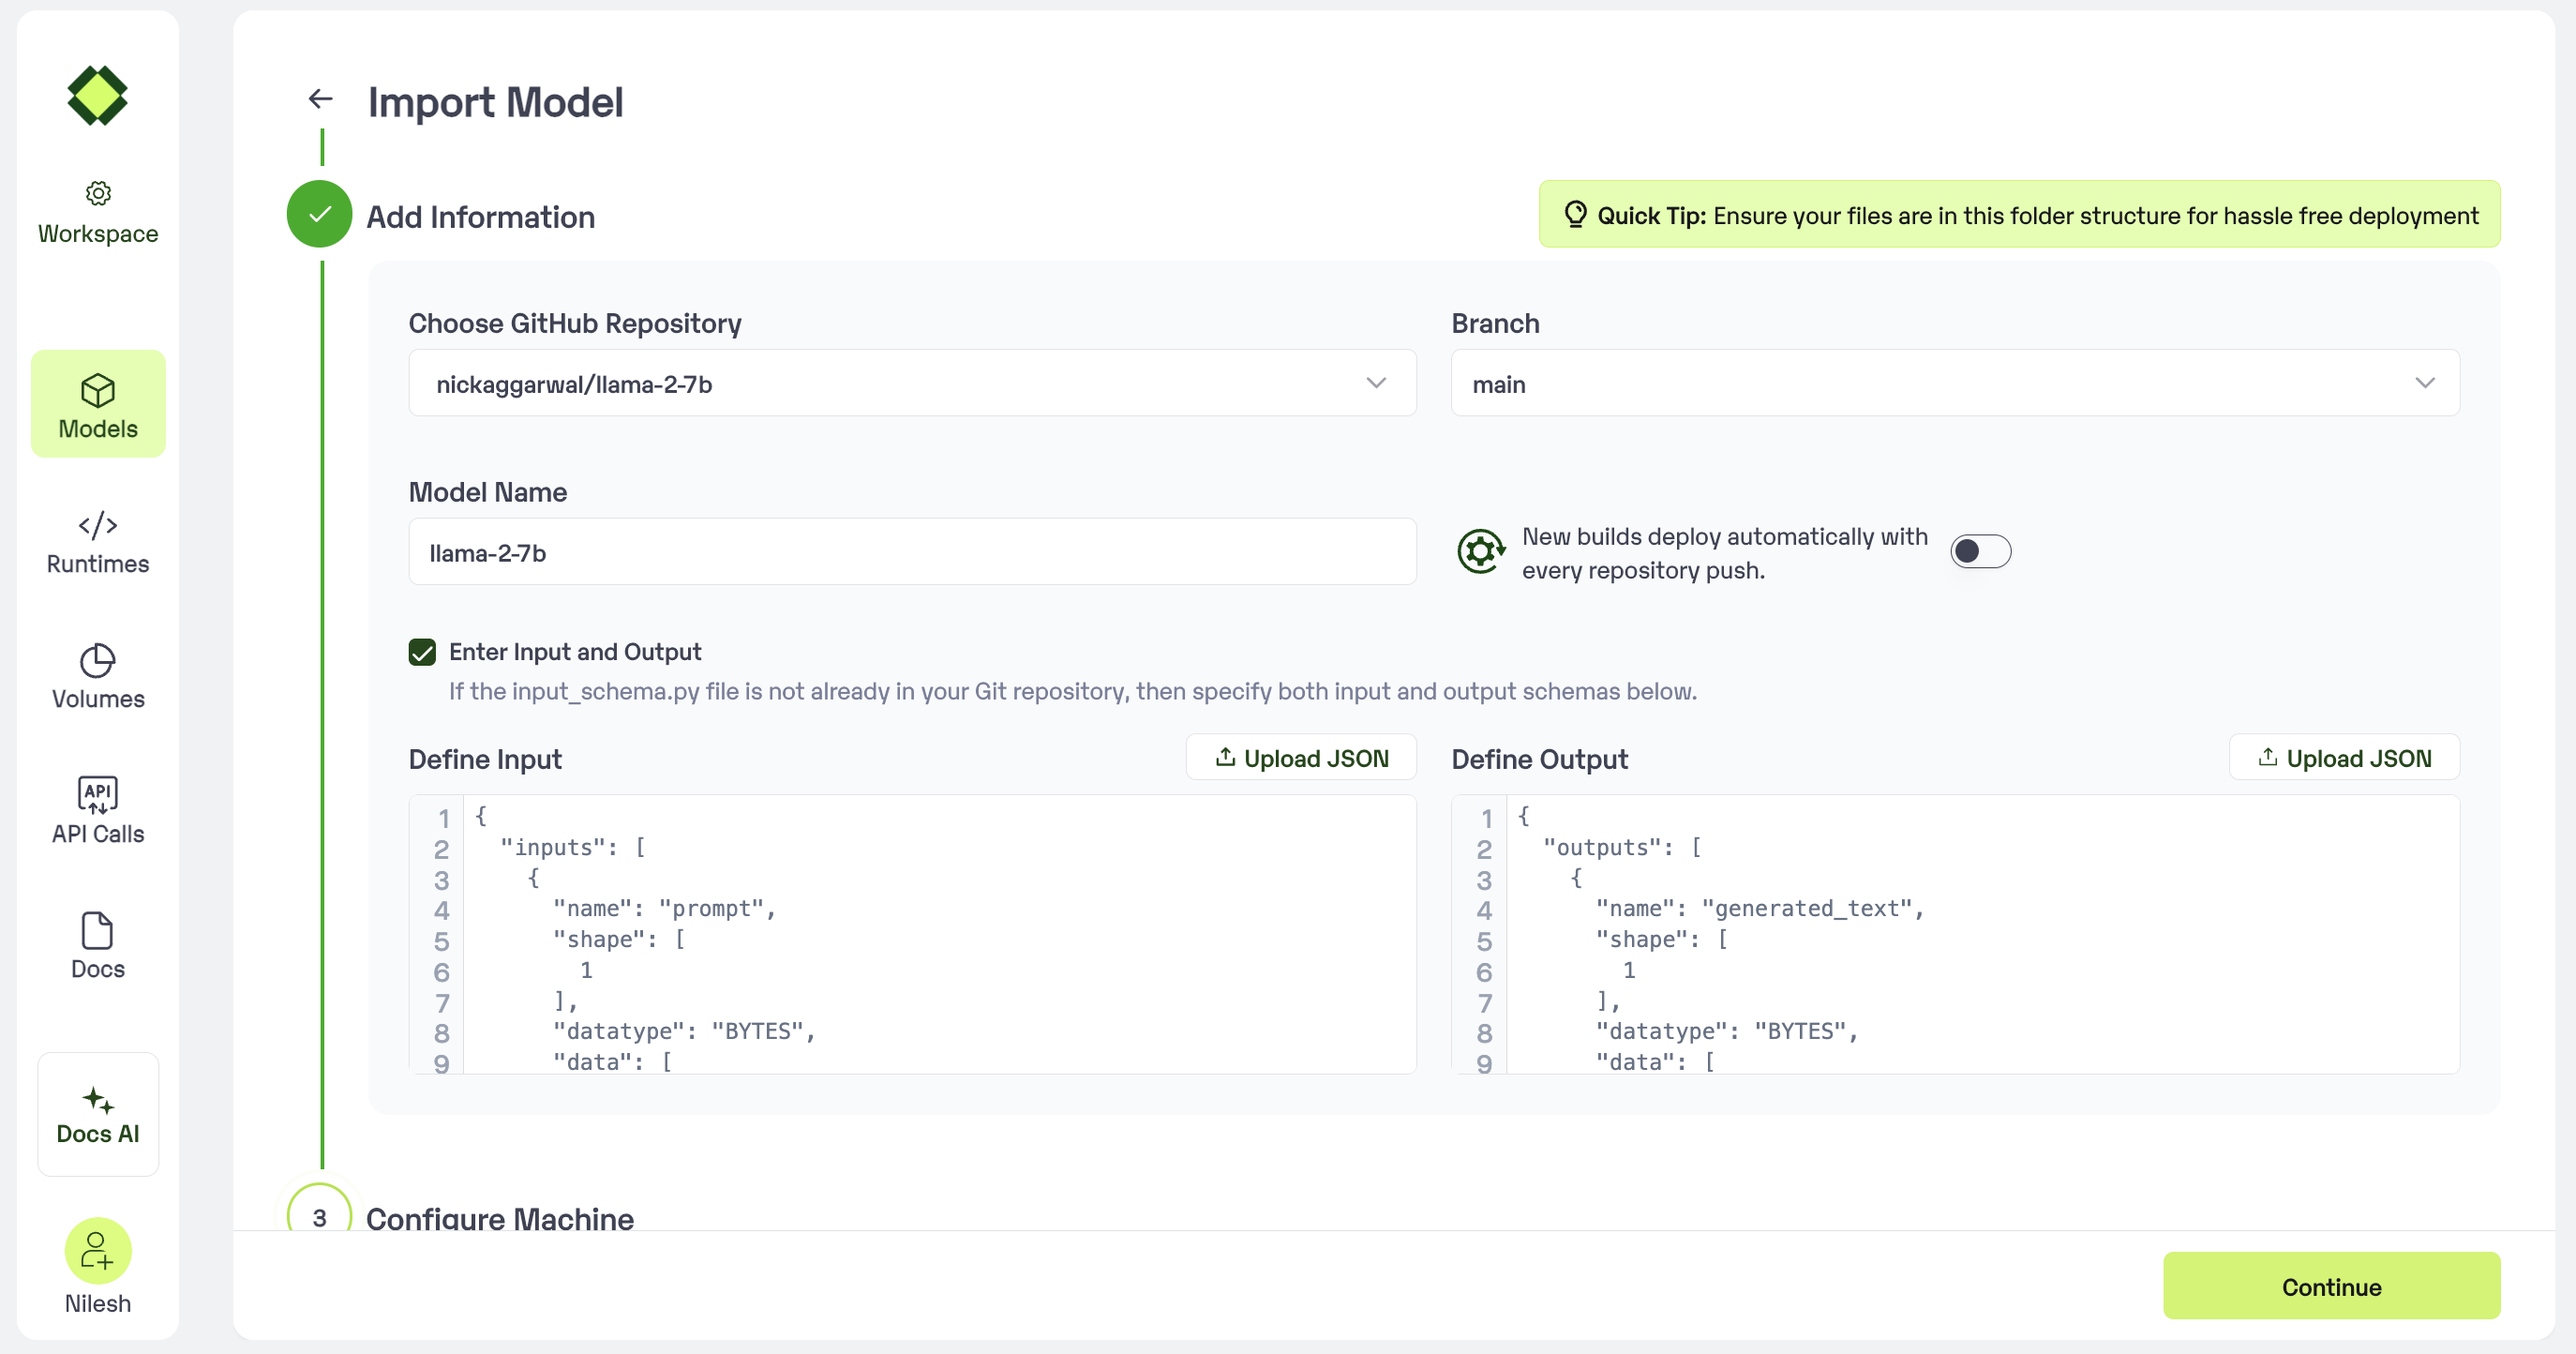 # My Secrets
Source: https://docs.inferless.com/model-import/my-secrets
Secrets Manager is a tool for securely storing and managing sensitive information, including passwords, API keys, and tokens. It is designed to prevent the embedding of secrets in application code or scripts, which poses a security risk if the code is exposed.
1. **Centralized Storage**: Secrets are stored in a centralized location, making it easier to manage and audit access.
2. **Access Control**: Fine-grained access controls allow only authorized applications, services, or users to retrieve certain secrets.
3. **Encryption**: Secrets are encrypted at rest and in transit, ensuring that they cannot be easily intercepted or read by unauthorized entities.
4. **Rotation**: Many Secrets Managers support or enforce the rotation of secrets, allowing credentials to be updated regularly without manual intervention.
Secrets are available at a user level and can be only updated by the one who is doing that particular model import
### How to access
Navigate to profile settings
Select "Secrets"
### Create a secret
Enter the key and Values
{/* ### Using Secrets in Code
Upon creation, a code snippet for the secret is provided for integration into the application.
 */}
### Using Secrets in Model Import
Available in Step 4 of the Advanced Configuration, where all secrets can be viewed and selected.
### Updating Secrets in Model Setting
Post model import, credentials can be added or removed via the Environment Tab in Model Settings
# My Volumes
Source: https://docs.inferless.com/model-import/my-volumes
Inferless provides NFS-like writable volumes that support simultaneous connections to various replicas. Similar to networked file-sharing systems that enable collective access to files across a network, these volumes in Inferless address multiple needs:
* Storing model parameters
* Archiving datasets similar to centralized storage
* Setting up a communal cache for collaborative tasks, akin to a shared cache over a network.
## Method A: Create a Volume using Inferless Platform
Here is how you can create a volume `Go to the Volumes` section in your console
Volumes
#### Step 1
Click on the Create Volume button
#### Step 2
After this Volume is created and ready copy the `Mount Path`
#### Step 3
Use the mount path on your app.py code as shown below :
#### Step 4
In the model import step, select the Mount Volume to attach
### View Volumes
You can also browse the files in your volume by clicking on the Volume Card
### Delete Volumes
To delete volumes make sure it's not attached to any Deployment, You can delete it form the My Volumes page
## Method B: Create a volume using Inferless CLI
Use this command `inferless volume` to see all the functions available for volume.
# My Secrets
Source: https://docs.inferless.com/model-import/my-secrets
Secrets Manager is a tool for securely storing and managing sensitive information, including passwords, API keys, and tokens. It is designed to prevent the embedding of secrets in application code or scripts, which poses a security risk if the code is exposed.
1. **Centralized Storage**: Secrets are stored in a centralized location, making it easier to manage and audit access.
2. **Access Control**: Fine-grained access controls allow only authorized applications, services, or users to retrieve certain secrets.
3. **Encryption**: Secrets are encrypted at rest and in transit, ensuring that they cannot be easily intercepted or read by unauthorized entities.
4. **Rotation**: Many Secrets Managers support or enforce the rotation of secrets, allowing credentials to be updated regularly without manual intervention.
Secrets are available at a user level and can be only updated by the one who is doing that particular model import
### How to access
Navigate to profile settings
Select "Secrets"
### Create a secret
Enter the key and Values
{/* ### Using Secrets in Code
Upon creation, a code snippet for the secret is provided for integration into the application.
 */}
### Using Secrets in Model Import
Available in Step 4 of the Advanced Configuration, where all secrets can be viewed and selected.
### Updating Secrets in Model Setting
Post model import, credentials can be added or removed via the Environment Tab in Model Settings
# My Volumes
Source: https://docs.inferless.com/model-import/my-volumes
Inferless provides NFS-like writable volumes that support simultaneous connections to various replicas. Similar to networked file-sharing systems that enable collective access to files across a network, these volumes in Inferless address multiple needs:
* Storing model parameters
* Archiving datasets similar to centralized storage
* Setting up a communal cache for collaborative tasks, akin to a shared cache over a network.
## Method A: Create a Volume using Inferless Platform
Here is how you can create a volume `Go to the Volumes` section in your console
Volumes
#### Step 1
Click on the Create Volume button
#### Step 2
After this Volume is created and ready copy the `Mount Path`
#### Step 3
Use the mount path on your app.py code as shown below :
#### Step 4
In the model import step, select the Mount Volume to attach
### View Volumes
You can also browse the files in your volume by clicking on the Volume Card
### Delete Volumes
To delete volumes make sure it's not attached to any Deployment, You can delete it form the My Volumes page
## Method B: Create a volume using Inferless CLI
Use this command `inferless volume` to see all the functions available for volume.
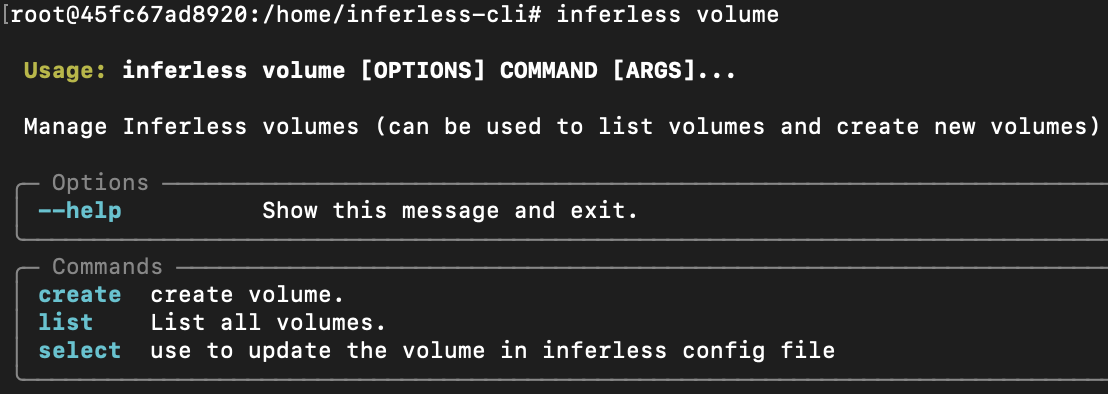 ### `inferless volume create`
This command is used to create a volume. Run this command and enter the name of your volume. Once the volume is created you can follow the process and update your volume directly to the inference configuration file(`inferenece.yaml`)
### `inferless volume create`
This command is used to create a volume. Run this command and enter the name of your volume. Once the volume is created you can follow the process and update your volume directly to the inference configuration file(`inferenece.yaml`)
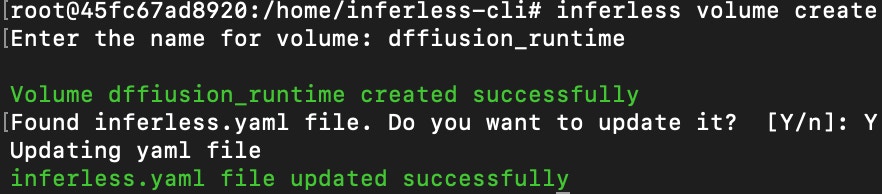 ### `inferless volume list`
This command allows you to list all the volumes present in your workspace. It will help you to get the `ID` of the volume, which is required when you run the `inferless volume select` command.
### `inferless volume list`
This command allows you to list all the volumes present in your workspace. It will help you to get the `ID` of the volume, which is required when you run the `inferless volume select` command.
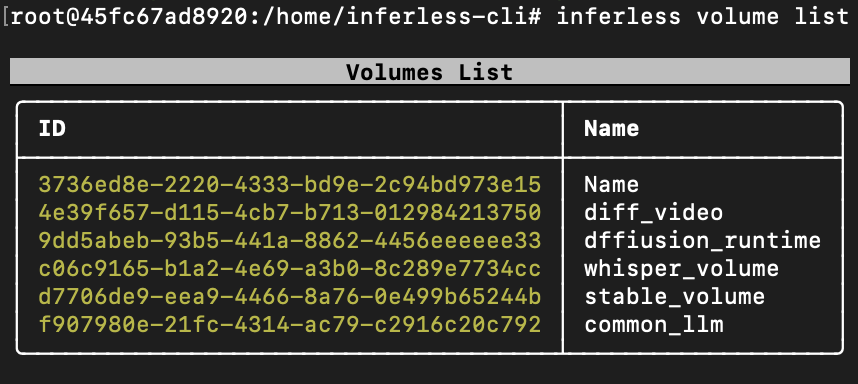 ### `inferless volume select --id`
This command allows you to use any volume that you have created using volume's `id`. Run the following command and update the `volume` directly on the inference configuration file(`inference.yaml`).
```
inferless volume select --id 4e39f657-d115-4cb7-b713-012984213750
```
### `inferless volume select --id`
This command allows you to use any volume that you have created using volume's `id`. Run the following command and update the `volume` directly on the inference configuration file(`inference.yaml`).
```
inferless volume select --id 4e39f657-d115-4cb7-b713-012984213750
```
 # Input / Output Schema
Source: https://docs.inferless.com/references/api/inferless-input-schema
This doc helps you configure the input / outputs of the 'infer' function in the InferlessPythonModule class. This is the interface for inputs between the model and the Inferless platform.
You have to define the **input\_schema.py** in your GitHub/GitLab repository this will help us create the Input parameters :
For each input, there are 3 fields required and 1 optional field
* **datatype**: "STRING", "BOOL", "INT8", "INT16", "INT32", "FP16" "FP32", "UINT8", "UINT16", "UINT32", "UINT64", "INT64" , "FP64" , "BYTES", "BF16"
* **shape**: The length of the array, If the shape is \[1] you will get the variable, if the array > 1 you will get an array, If the length is variable you can put -1
* **required**: If the parameter is required in all API calls
* **example**( optional ): Sample value for calling the API
In code
```app.py Example
def infer(self, inputs):
prompt = inputs["prompt"] # "There is a fine house in the forest"
shape = inputs["shape"] # [ 512,1 ]
```
In input\_schema.py
```input_schema Example
INPUT_SCHEMA = {
"prompt": {
'datatype': 'STRING',
'required': True,
'shape': [1],
'example': ["There is a fine house in the forest"]
},
'shape': {
'datatype': 'INT8',
'required': False,
'example': [ 512, 1 ],
'shape': [2]
},
}
```
### Variable Length Inputs
For inputs that can take a variable number of values, you can set the `shape` fields to `[-1]`. This indicates that the length of the array is not fixed and can vary.
Here's an example:
```python
INPUT_SCHEMA = {
"variable_input": {
'datatype': 'STRING',
'required': True,
'shape': [-1],
'example': ["value1", "value2", "value3"]
},
}# Variable Length Inputs
```
## Outputs
You can return any dictionary in the return statement of app.py. You don't need to provide any configuration.
### Returning Dicts
```python
# Example Return Statement
return { "label_1" : 0.398 , "label_2" : 0.563, "label_3" : 0.434 }
```
### Returning Variable Length Array
```
# Example Return Statement
return { "generated_images_base64" : [ img_str1 , img_str2 , img_str3 ] }
```
### Returning Dictionary with Variable keys
```
# Example Return Statement
dict = {"label_x": 0.4554 , "label_y", 0.3232 }
return { "result": json.dumps(dict) }
```
# InferlessPythonModel Class
Source: https://docs.inferless.com/references/api/inferless-python
The class called 'InferlessPythonModel' is the entrypoint for you ML code. This class has three methods: 'initialize', 'infer', and 'finalize'. Let's go through each method and explain their purpose, signature, and return types.
**'initialize'** method:
* Purpose: This method is responsible for initializing the model and setting up the necessary components.
* Signature: The method takes in one parameter, self, which refers to the instance of the class. It doesn't have any other parameters.
* Return type: This method doesn't return anything (None).
**'infer'** method:
* Purpose: This method performs the inference process using the initialized model. It takes in an input dictionary containing a "prompt" key, and it generates an image based on the provided prompt.
* Signature: The method takes in two parameters: self (referring to the instance of the class) and inputs (a dictionary containing the input data).
* Return type: The method returns a dictionary with a single key-value pairs.
**'finalize'** method:
* Purpose: This method is responsible for cleaning up and finalizing the model. It sets the pipe attribute to None.
* Signature: The method takes in one parameter, self, which refers to the instance of the class. It doesn't have any other parameters.
* Return type: This method doesn't return anything (None).
### Example
```python
from diffusers import StableDiffusionPipeline
import torch
from io import BytesIO
import base64
class InferlessPythonModel:
def initialize(self):
self.pipe = StableDiffusionPipeline.from_pretrained(
"stabilityai/stable-diffusion-2-1",
use_safetensors=True,
torch_dtype=torch.float16,
device_map='auto'
)
def infer(self, inputs):
prompt = inputs["prompt"]
image = self.pipe(prompt).images[0]
buff = BytesIO()
image.save(buff, format="JPEG")
img_str = base64.b64encode(buff.getvalue()).decode()
return { "generated_image_base64" : img_str }
def finalize(self):
self.pipe = None
```
# inferless deploy
Source: https://docs.inferless.com/references/cli/inferless-deploy
This command will deploy the model to the inferless server. You should have run the command `inferless init` and have the inferless.yaml before running this command.
### Options:
* `--gpu TEXT`: Denotes the machine type (A10/A100/T4). \[required]
* `--region TEXT`: Inferless region. Defaults to Inferless default region.
* `--beta`: Deploys the model with v2 endpoints.
* `--fractional`: Use fractional machine type (default: dedicated).
* `--runtime TEXT`: Runtime name or file location. if not provided default Inferless runtime will be used.
* `--volume TEXT`: Volume name.
* `--volume_mount_path TEXT`: volume mount path.
* `--env TEXT`: Key=value pairs for model environment variables.
* `--inference-timeout INTEGER`: Inference timeout in seconds. \[default: 180]
* `--scale-down-timeout INTEGER`: Scale down timeout in seconds. \[default: 600]
* `--container-concurrency INTEGER`: Container concurrency level. \[default: 1]
* `--secret TEXT`: Secret names to attach to the deployment.
* `--runtimeversion TEXT`: Runtime version (default: latest version of runtime).
* `--max-replica INTEGER`: Maximum number of replicas. \[default: 1]
* `--min-replica INTEGER`: Minimum number of replicas. \[default: 0]
* `-c, --config TEXT`: Inferless config file path to override from inferless.yaml \[default: inferless.yaml]
* `-t, --runtime-type TEXT`: Type of runtime to deploy \[fastapi, triton]. Defaults to triton. \[default: triton]
* `--help`: Show this message and exit.
### Usage:
```console
$ inferless deploy [OPTIONS]
```
Once deployed you will be able to see the model import id in the terminal. You can check the progress of the model in Dashboard
### Example:
```console
$ inferless deploy --gpu T4 --runtime ./inferless-runtime-config.yaml
```
To redeploy the model with new code.
```bash
inferless model rebuild --model-id
# Input / Output Schema
Source: https://docs.inferless.com/references/api/inferless-input-schema
This doc helps you configure the input / outputs of the 'infer' function in the InferlessPythonModule class. This is the interface for inputs between the model and the Inferless platform.
You have to define the **input\_schema.py** in your GitHub/GitLab repository this will help us create the Input parameters :
For each input, there are 3 fields required and 1 optional field
* **datatype**: "STRING", "BOOL", "INT8", "INT16", "INT32", "FP16" "FP32", "UINT8", "UINT16", "UINT32", "UINT64", "INT64" , "FP64" , "BYTES", "BF16"
* **shape**: The length of the array, If the shape is \[1] you will get the variable, if the array > 1 you will get an array, If the length is variable you can put -1
* **required**: If the parameter is required in all API calls
* **example**( optional ): Sample value for calling the API
In code
```app.py Example
def infer(self, inputs):
prompt = inputs["prompt"] # "There is a fine house in the forest"
shape = inputs["shape"] # [ 512,1 ]
```
In input\_schema.py
```input_schema Example
INPUT_SCHEMA = {
"prompt": {
'datatype': 'STRING',
'required': True,
'shape': [1],
'example': ["There is a fine house in the forest"]
},
'shape': {
'datatype': 'INT8',
'required': False,
'example': [ 512, 1 ],
'shape': [2]
},
}
```
### Variable Length Inputs
For inputs that can take a variable number of values, you can set the `shape` fields to `[-1]`. This indicates that the length of the array is not fixed and can vary.
Here's an example:
```python
INPUT_SCHEMA = {
"variable_input": {
'datatype': 'STRING',
'required': True,
'shape': [-1],
'example': ["value1", "value2", "value3"]
},
}# Variable Length Inputs
```
## Outputs
You can return any dictionary in the return statement of app.py. You don't need to provide any configuration.
### Returning Dicts
```python
# Example Return Statement
return { "label_1" : 0.398 , "label_2" : 0.563, "label_3" : 0.434 }
```
### Returning Variable Length Array
```
# Example Return Statement
return { "generated_images_base64" : [ img_str1 , img_str2 , img_str3 ] }
```
### Returning Dictionary with Variable keys
```
# Example Return Statement
dict = {"label_x": 0.4554 , "label_y", 0.3232 }
return { "result": json.dumps(dict) }
```
# InferlessPythonModel Class
Source: https://docs.inferless.com/references/api/inferless-python
The class called 'InferlessPythonModel' is the entrypoint for you ML code. This class has three methods: 'initialize', 'infer', and 'finalize'. Let's go through each method and explain their purpose, signature, and return types.
**'initialize'** method:
* Purpose: This method is responsible for initializing the model and setting up the necessary components.
* Signature: The method takes in one parameter, self, which refers to the instance of the class. It doesn't have any other parameters.
* Return type: This method doesn't return anything (None).
**'infer'** method:
* Purpose: This method performs the inference process using the initialized model. It takes in an input dictionary containing a "prompt" key, and it generates an image based on the provided prompt.
* Signature: The method takes in two parameters: self (referring to the instance of the class) and inputs (a dictionary containing the input data).
* Return type: The method returns a dictionary with a single key-value pairs.
**'finalize'** method:
* Purpose: This method is responsible for cleaning up and finalizing the model. It sets the pipe attribute to None.
* Signature: The method takes in one parameter, self, which refers to the instance of the class. It doesn't have any other parameters.
* Return type: This method doesn't return anything (None).
### Example
```python
from diffusers import StableDiffusionPipeline
import torch
from io import BytesIO
import base64
class InferlessPythonModel:
def initialize(self):
self.pipe = StableDiffusionPipeline.from_pretrained(
"stabilityai/stable-diffusion-2-1",
use_safetensors=True,
torch_dtype=torch.float16,
device_map='auto'
)
def infer(self, inputs):
prompt = inputs["prompt"]
image = self.pipe(prompt).images[0]
buff = BytesIO()
image.save(buff, format="JPEG")
img_str = base64.b64encode(buff.getvalue()).decode()
return { "generated_image_base64" : img_str }
def finalize(self):
self.pipe = None
```
# inferless deploy
Source: https://docs.inferless.com/references/cli/inferless-deploy
This command will deploy the model to the inferless server. You should have run the command `inferless init` and have the inferless.yaml before running this command.
### Options:
* `--gpu TEXT`: Denotes the machine type (A10/A100/T4). \[required]
* `--region TEXT`: Inferless region. Defaults to Inferless default region.
* `--beta`: Deploys the model with v2 endpoints.
* `--fractional`: Use fractional machine type (default: dedicated).
* `--runtime TEXT`: Runtime name or file location. if not provided default Inferless runtime will be used.
* `--volume TEXT`: Volume name.
* `--volume_mount_path TEXT`: volume mount path.
* `--env TEXT`: Key=value pairs for model environment variables.
* `--inference-timeout INTEGER`: Inference timeout in seconds. \[default: 180]
* `--scale-down-timeout INTEGER`: Scale down timeout in seconds. \[default: 600]
* `--container-concurrency INTEGER`: Container concurrency level. \[default: 1]
* `--secret TEXT`: Secret names to attach to the deployment.
* `--runtimeversion TEXT`: Runtime version (default: latest version of runtime).
* `--max-replica INTEGER`: Maximum number of replicas. \[default: 1]
* `--min-replica INTEGER`: Minimum number of replicas. \[default: 0]
* `-c, --config TEXT`: Inferless config file path to override from inferless.yaml \[default: inferless.yaml]
* `-t, --runtime-type TEXT`: Type of runtime to deploy \[fastapi, triton]. Defaults to triton. \[default: triton]
* `--help`: Show this message and exit.
### Usage:
```console
$ inferless deploy [OPTIONS]
```
Once deployed you will be able to see the model import id in the terminal. You can check the progress of the model in Dashboard
### Example:
```console
$ inferless deploy --gpu T4 --runtime ./inferless-runtime-config.yaml
```
To redeploy the model with new code.
```bash
inferless model rebuild --model-id  You will find the token in the inferless dashboard
 You the below command to set the token
```shell
inferless token set --token-key '****************' --token-secret '****************'
```
# inferless model
Source: https://docs.inferless.com/references/cli/inferless-model
You can use this to manage your models.
### Commands
* `list`: List all models in the current workspace
* `delete`: delete a model from the system.
* `rebuild`: This deploys the new code and runtime for the model.
* `info`: Get model details (min replicas, max replicas, current replicas, status).
* `activate`: activate a model this will restore the min and max replicas to the original values.
* `deactivate`: deactivate a model this will scale the min and max replicas to 0.
* `patch`: patch model configuration.
### Example
Below command displays all the models in the workspace with their details.
```bash
inferless model list
```
Below command rebuilds a model.
**Options**:
* `--model-id`: Model ID
* `--runtime-path (optional)` : Runtime file path which will be created as new version for your current runtime.
* `--runtime-version`: new runtime version
```bash
inferless model rebuild --model-id
You the below command to set the token
```shell
inferless token set --token-key '****************' --token-secret '****************'
```
# inferless model
Source: https://docs.inferless.com/references/cli/inferless-model
You can use this to manage your models.
### Commands
* `list`: List all models in the current workspace
* `delete`: delete a model from the system.
* `rebuild`: This deploys the new code and runtime for the model.
* `info`: Get model details (min replicas, max replicas, current replicas, status).
* `activate`: activate a model this will restore the min and max replicas to the original values.
* `deactivate`: deactivate a model this will scale the min and max replicas to 0.
* `patch`: patch model configuration.
### Example
Below command displays all the models in the workspace with their details.
```bash
inferless model list
```
Below command rebuilds a model.
**Options**:
* `--model-id`: Model ID
* `--runtime-path (optional)` : Runtime file path which will be created as new version for your current runtime.
* `--runtime-version`: new runtime version
```bash
inferless model rebuild --model-id  ```python
inferless run --docker-base-url tcp://localhost:2375
```
## Advance Usage
### Executing Into the Container
To access the container's shell, you can use the following command:
```python
docker exec -it
```python
inferless run --docker-base-url tcp://localhost:2375
```
## Advance Usage
### Executing Into the Container
To access the container's shell, you can use the following command:
```python
docker exec -it